After I finished my Scarecrow Girl statue, I was motivated to make some more as gifts for my fellow Wars of Ozz game masters. Those would be Buck Surdu, Chris Palmer, Greg Priebe, and Dave Wood. As we are collaborating on a massive “Ozzaganza” game at Cold Wars, I thought that was worth a go.
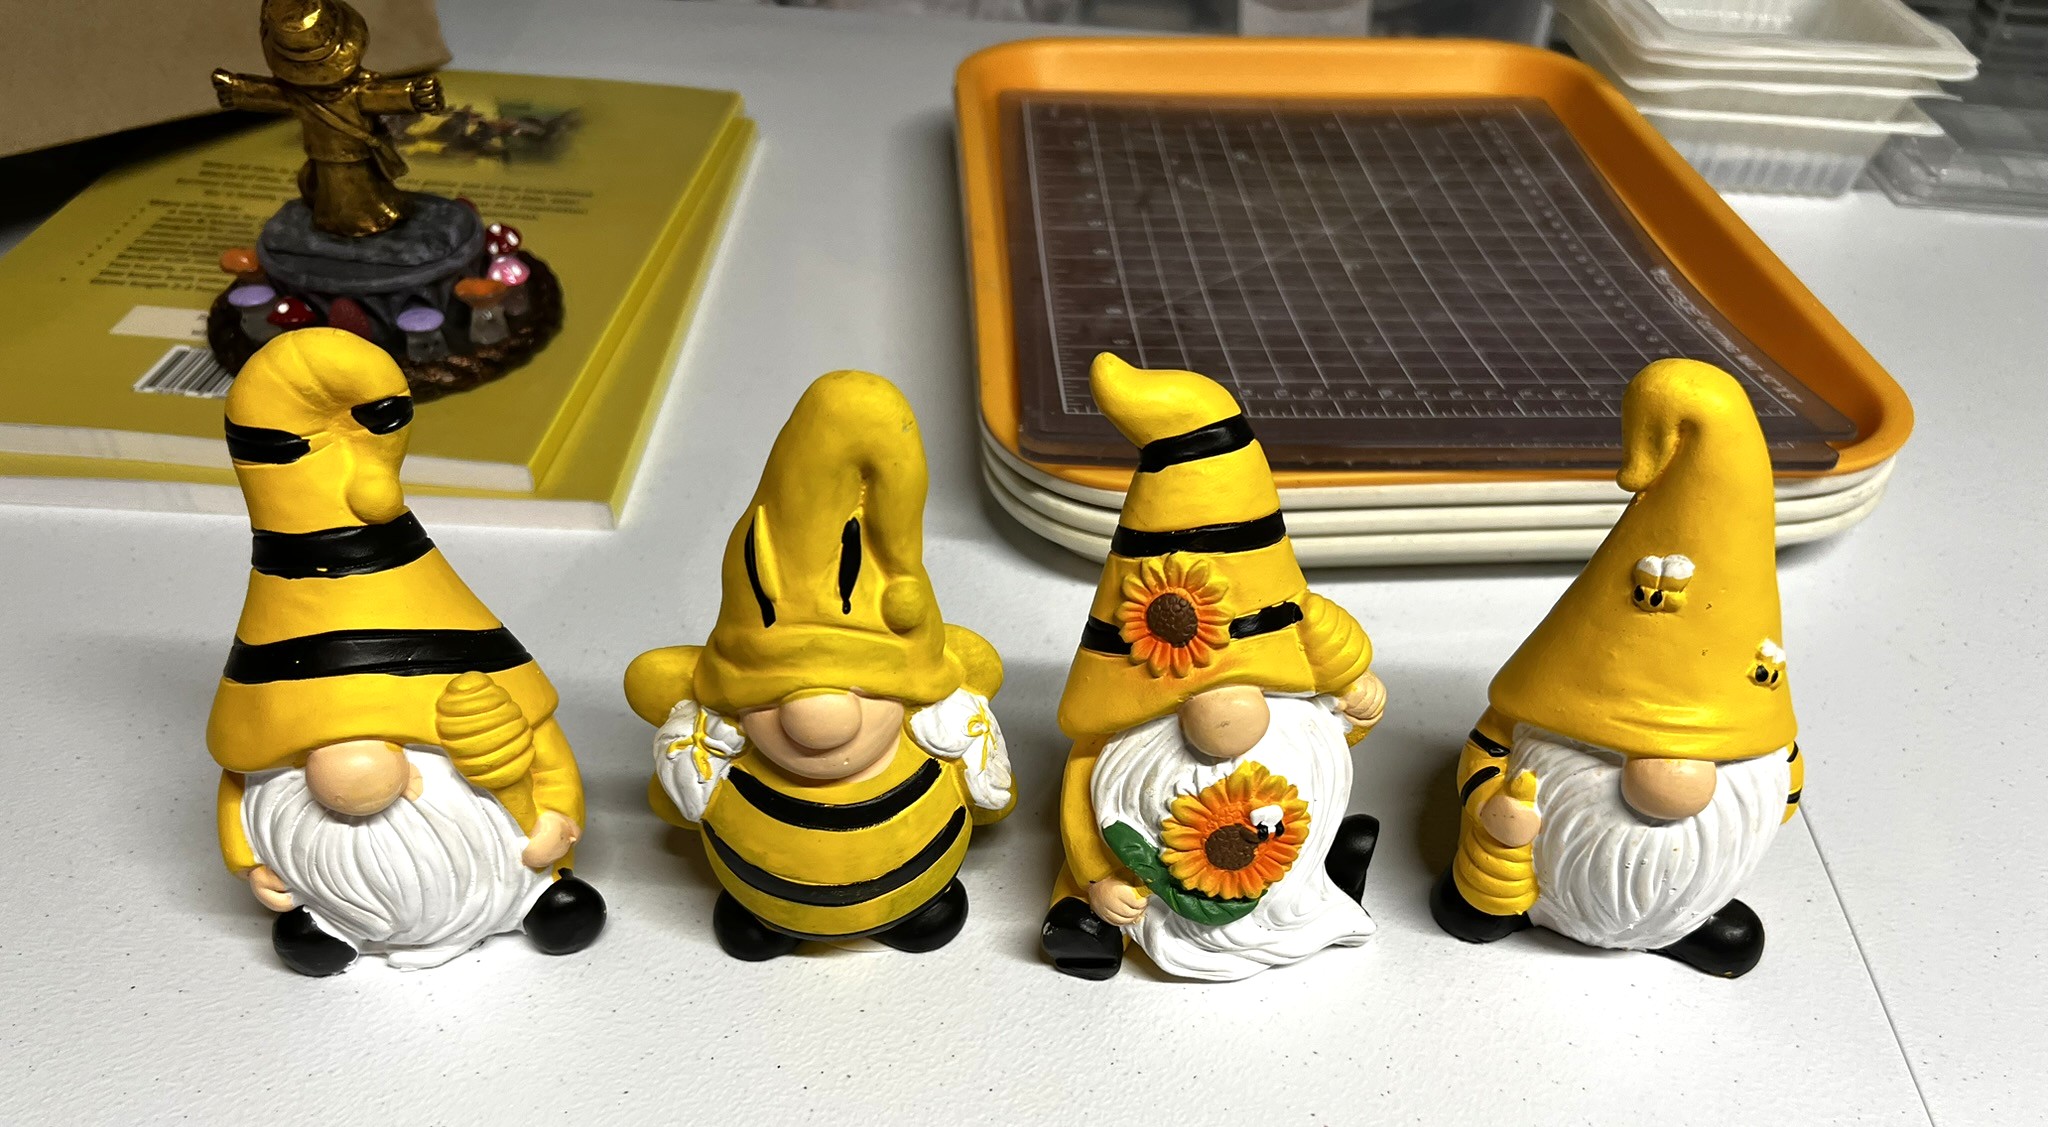
As it turned out, I could not reasonably source another scarecrow girl, so I hit my local Dollar store to see what I could find – and there were some beekeeper gnome statues. As in Ozz there are “Nomes”, I got 4 (at $1.25 each). These were prepainted as you see, and made out of plaster of Paris I believe.
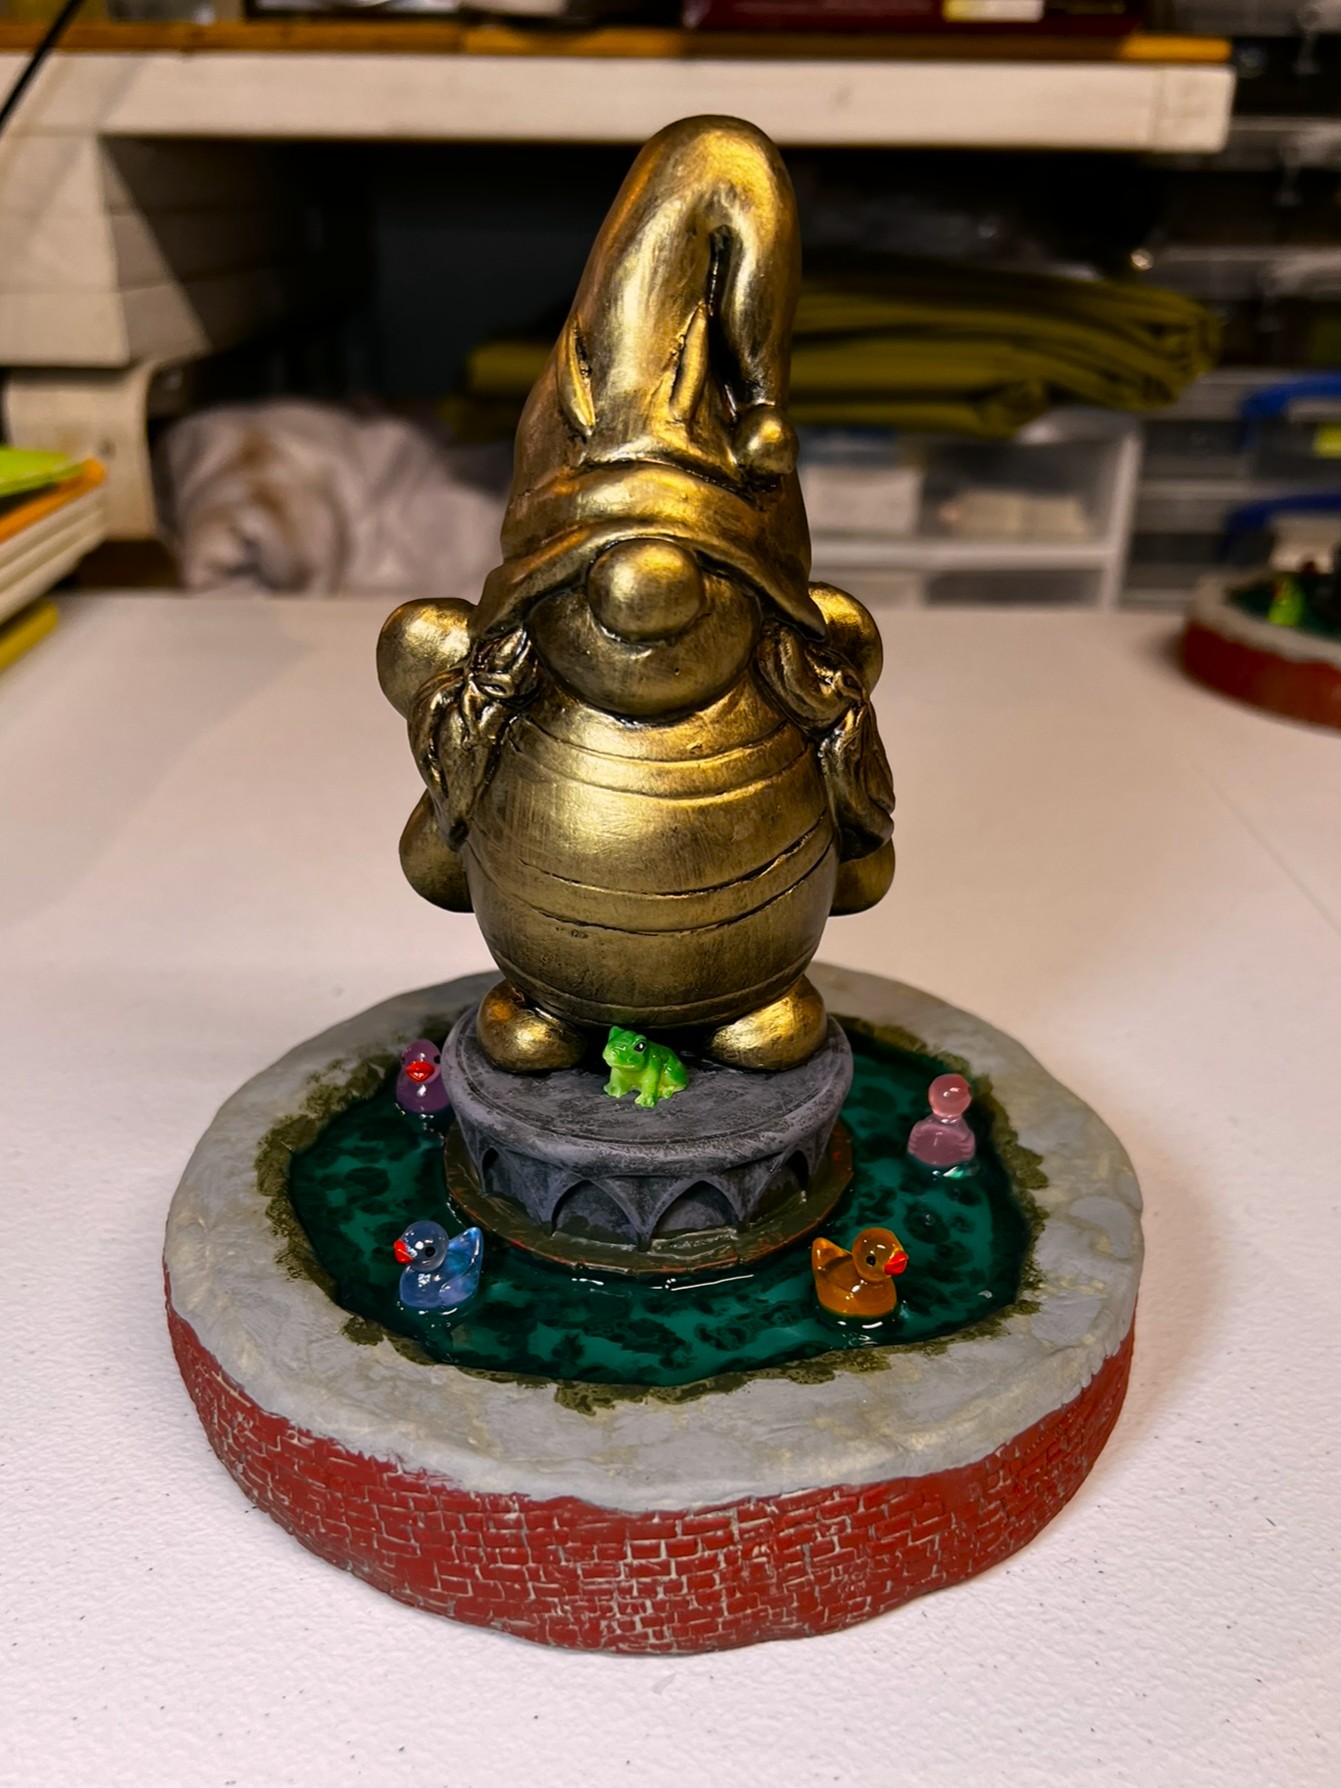
The Nomes as purchased from the Dollar Store. My Scarecrow Girl statue is in the background.
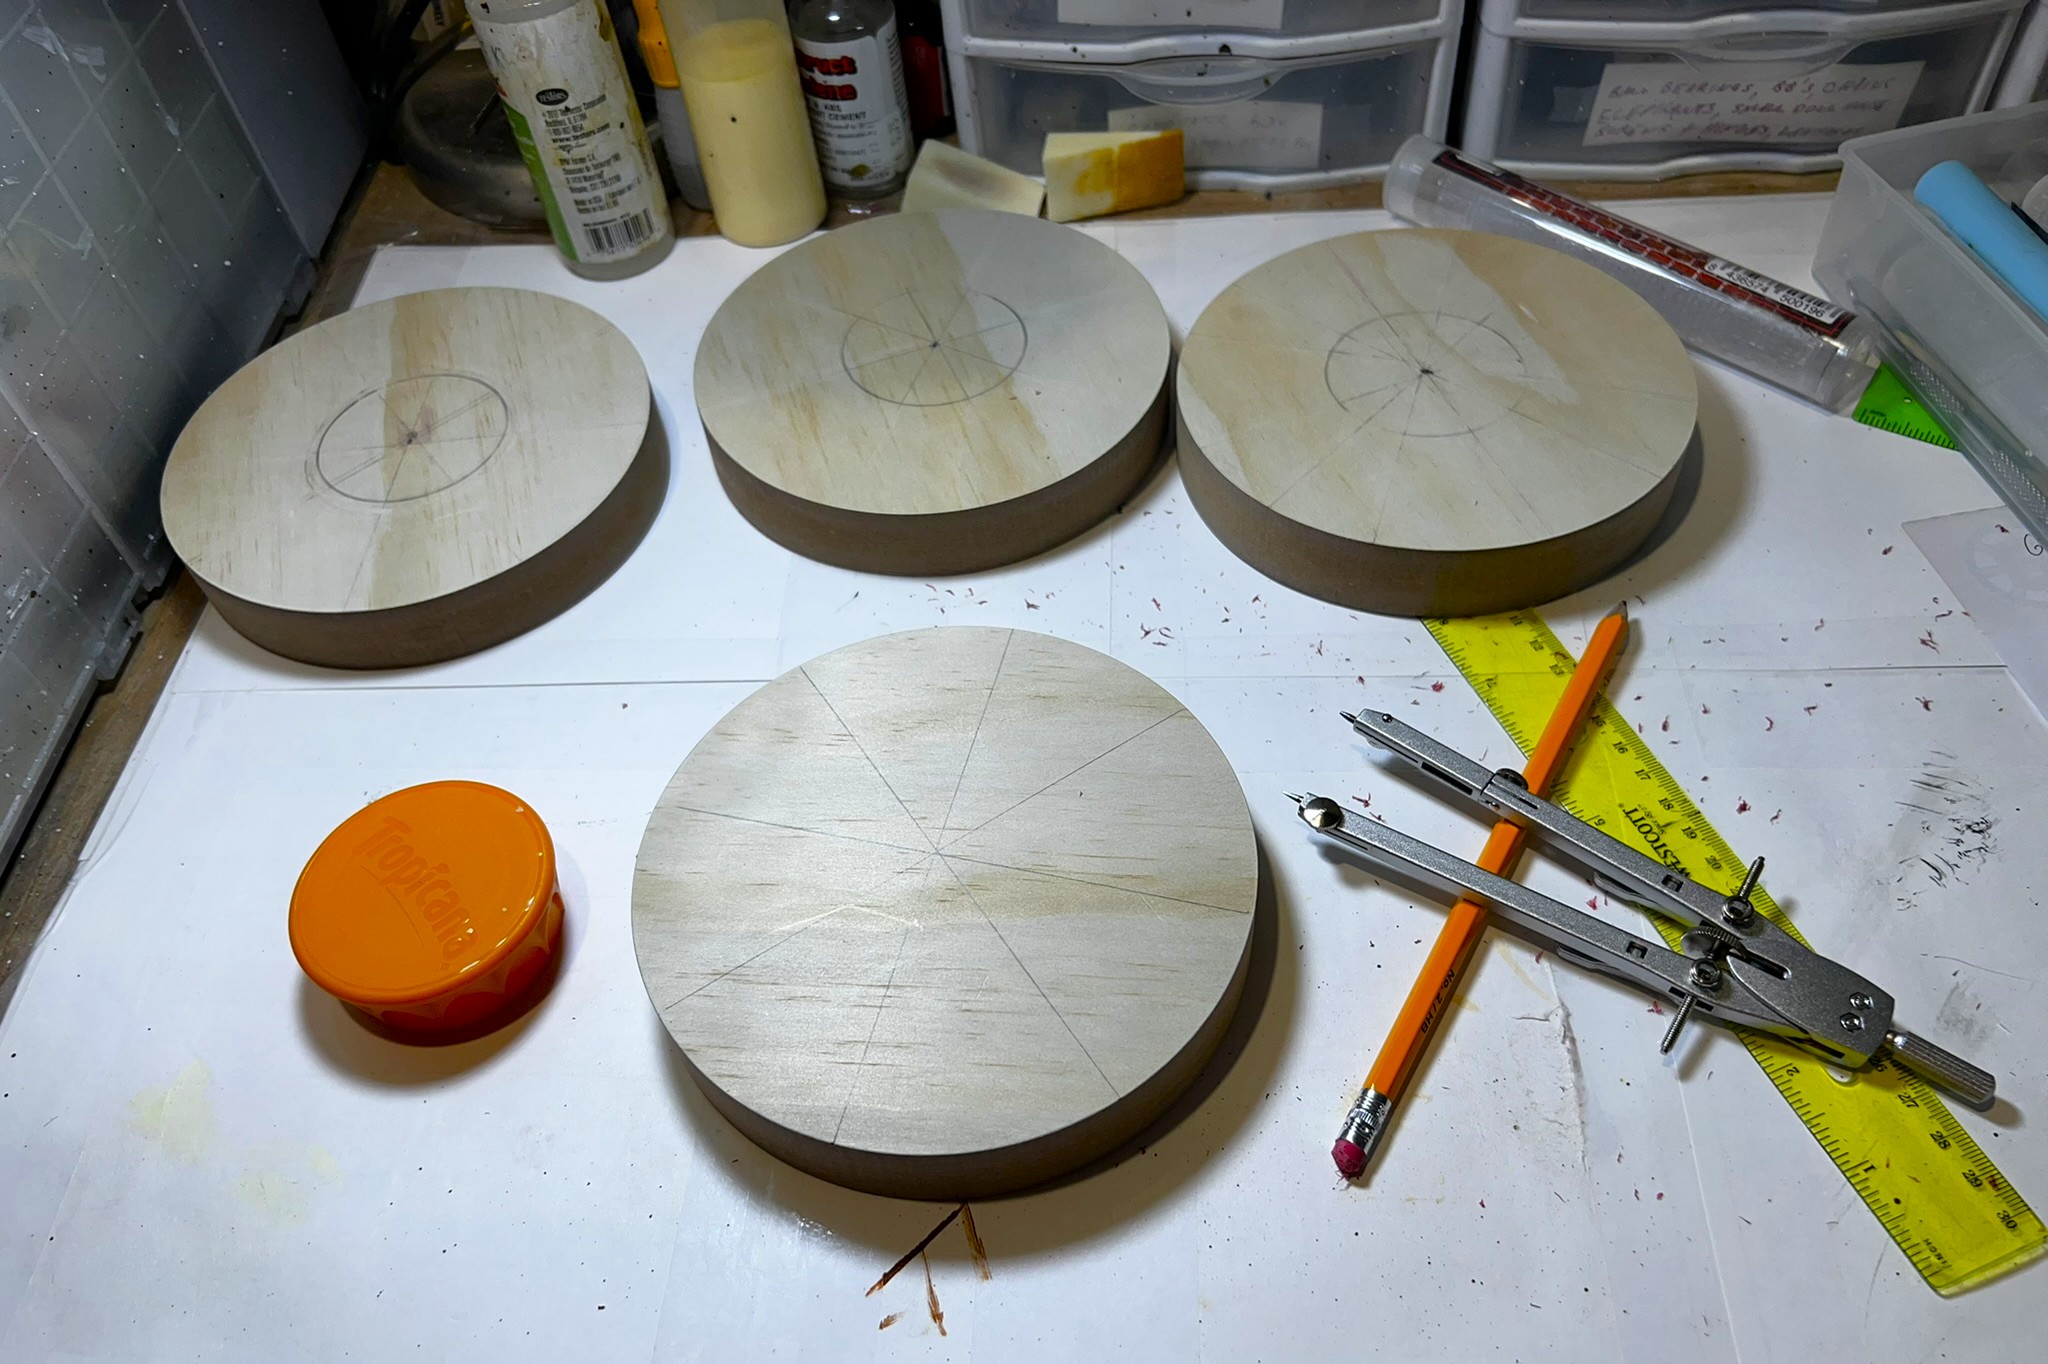
As for bases, I found a packet of 6″ wooden disks on Amazon. As these were much bigger than my previous build’s base, I chose to make a statue/fountain combination for these. Luckily I still had some more Tropicana Orange Juice lids to use as plinths.
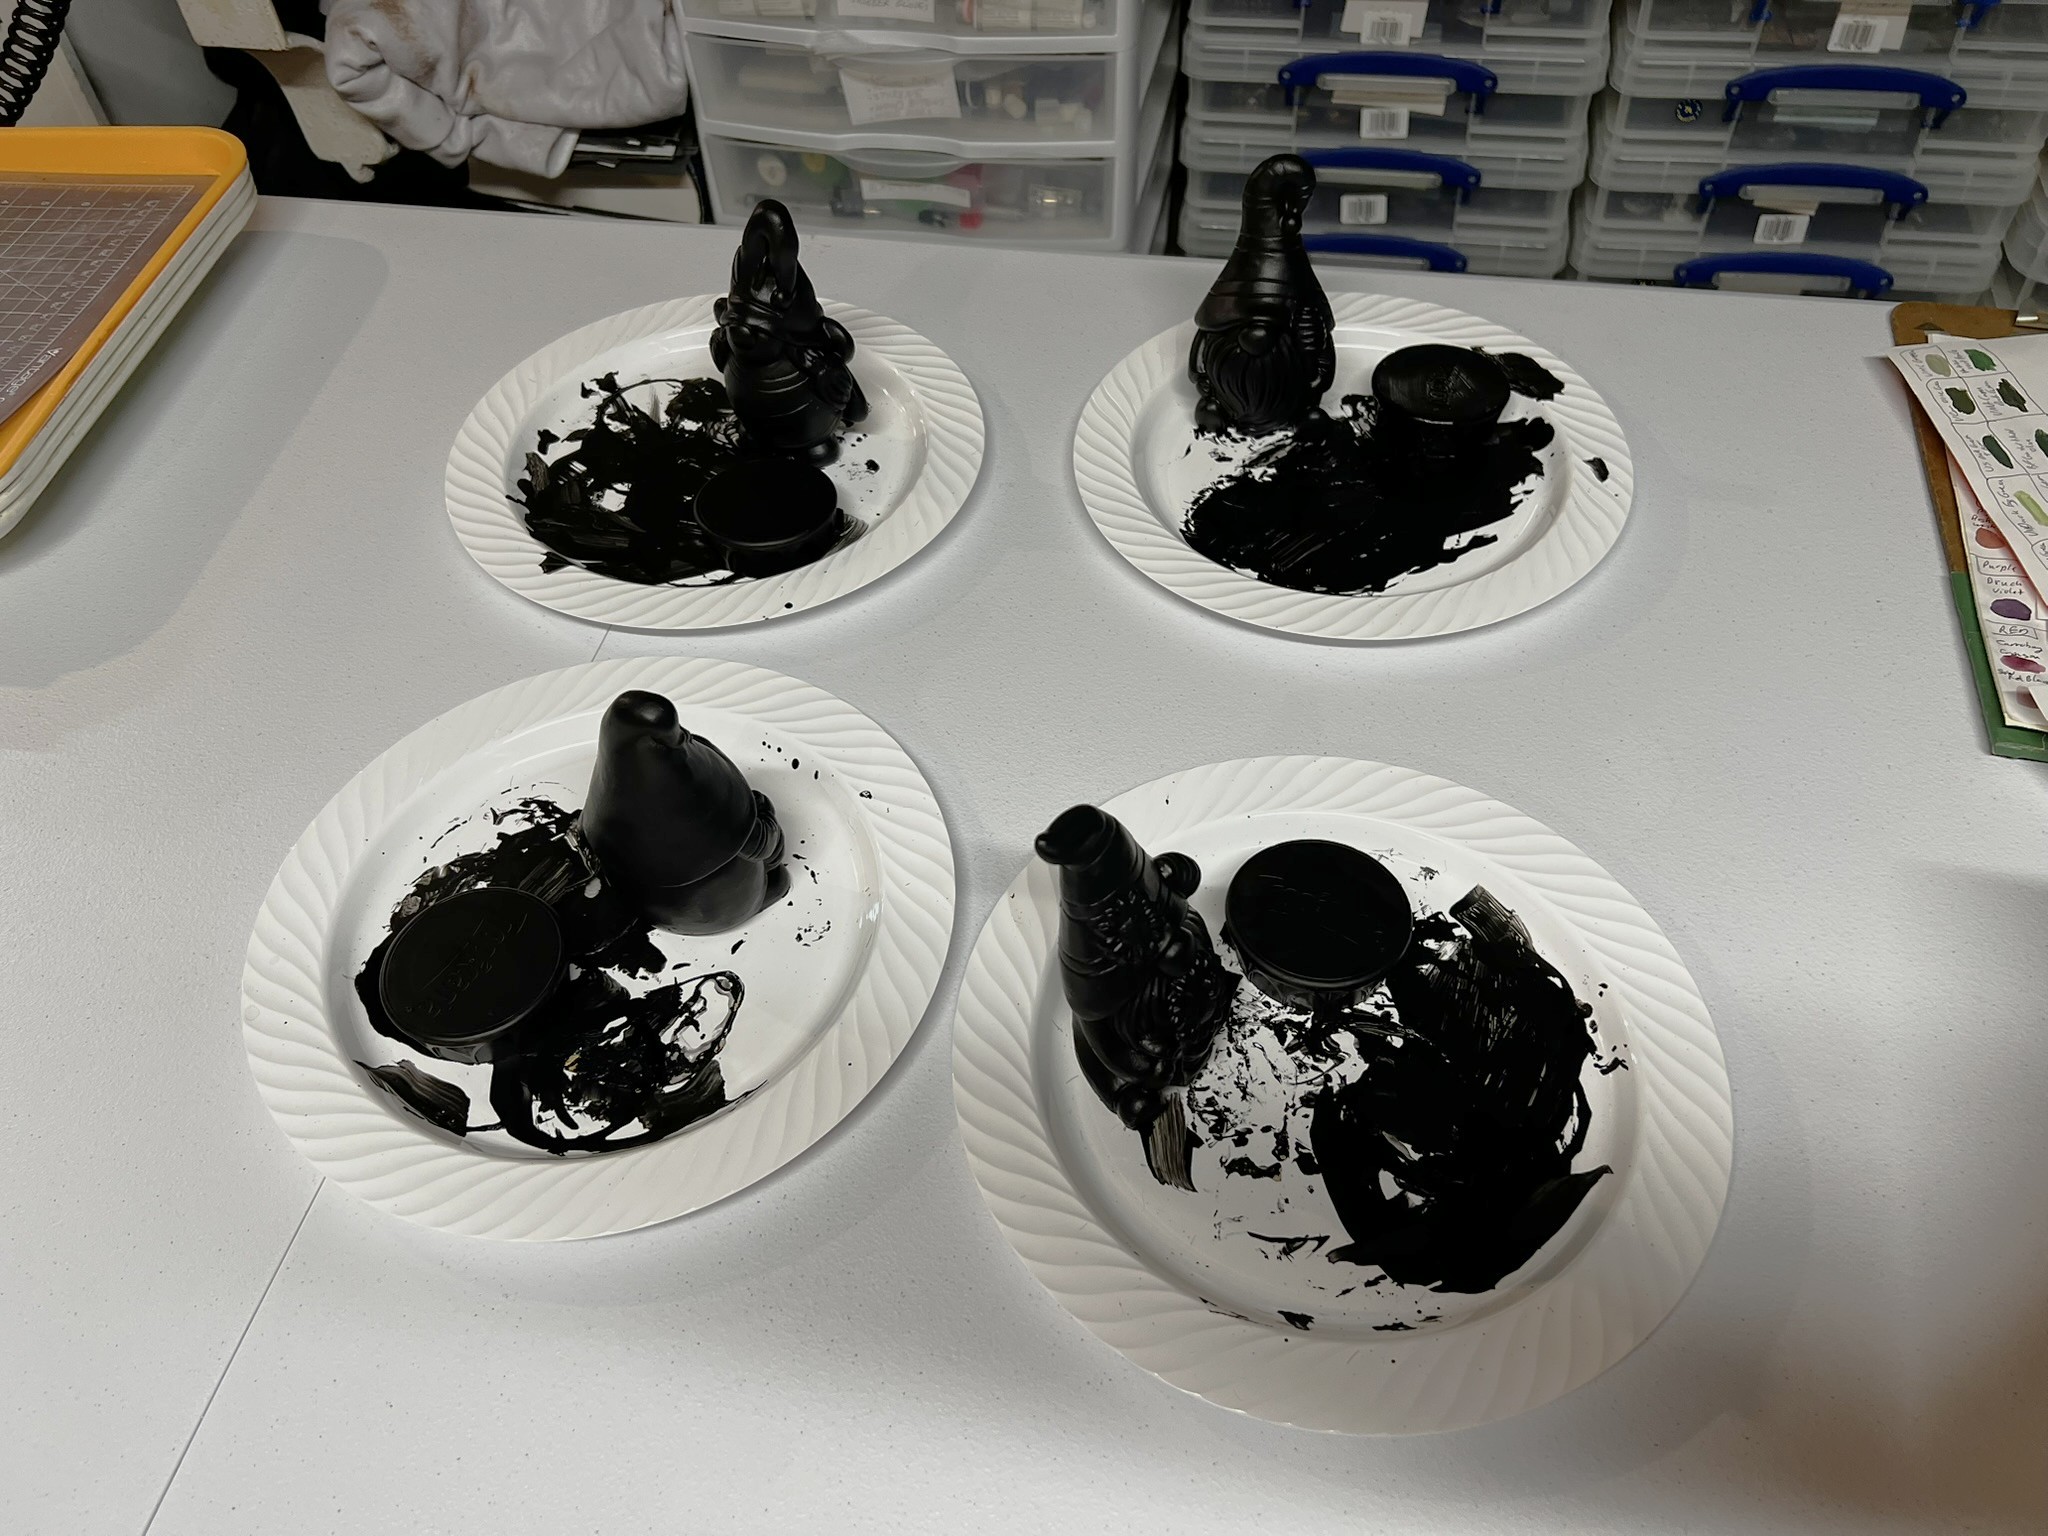
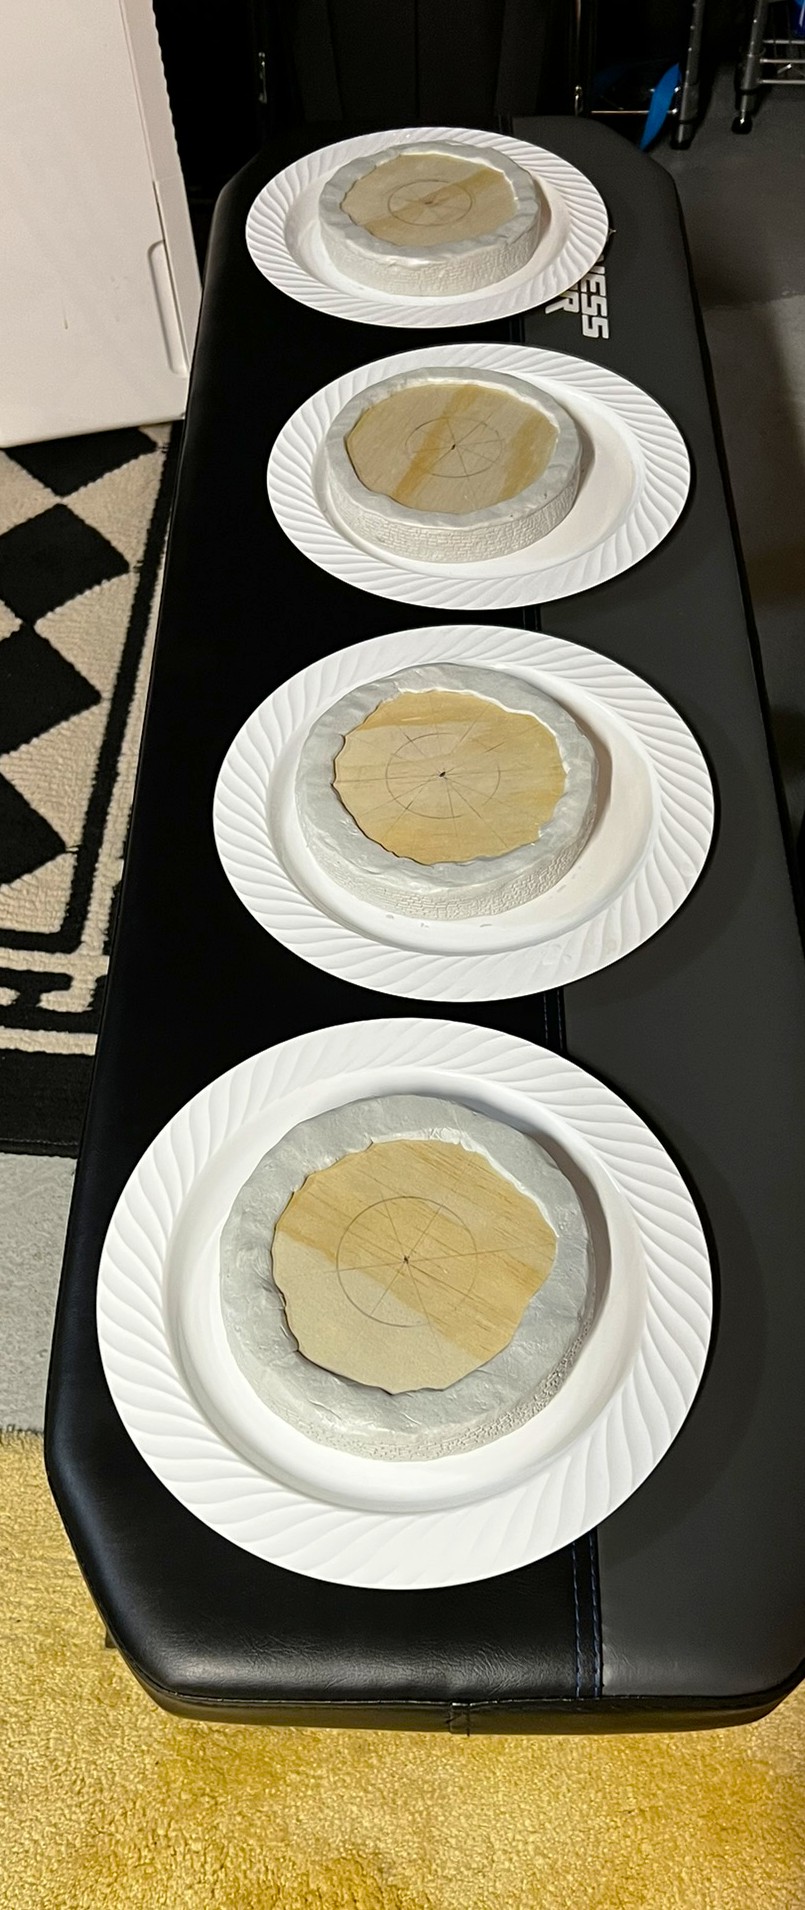
Nomes and plinths primed.Getting the disk centers just right with a Tropicana orange juice lid, a ruler, and a compass.
Applied Apoxie Sculpt and used Green Stuff World Dutch Brick roller on outside rims, while leaving the top to look like a concrete rim.
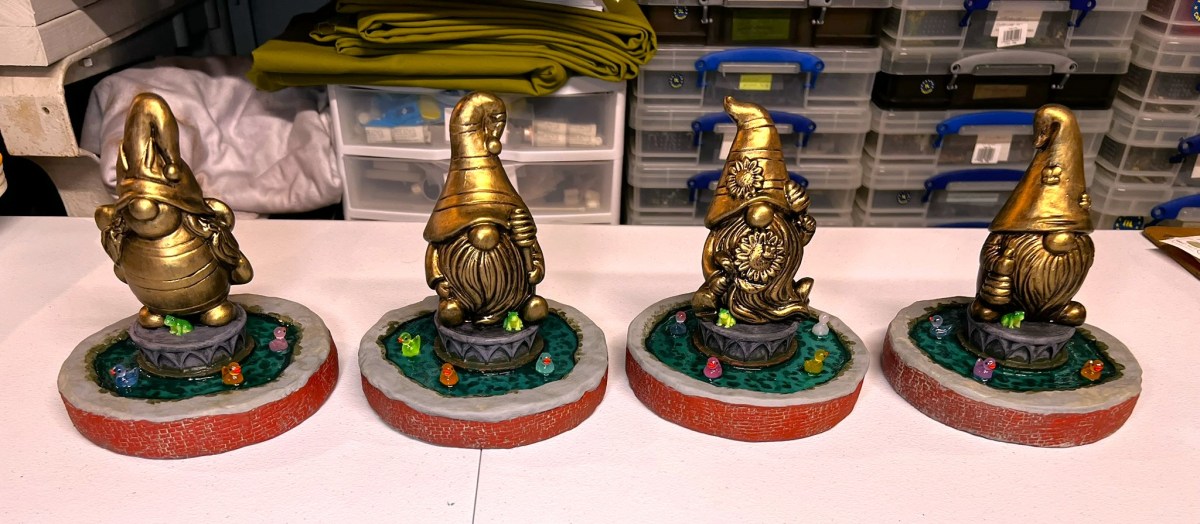
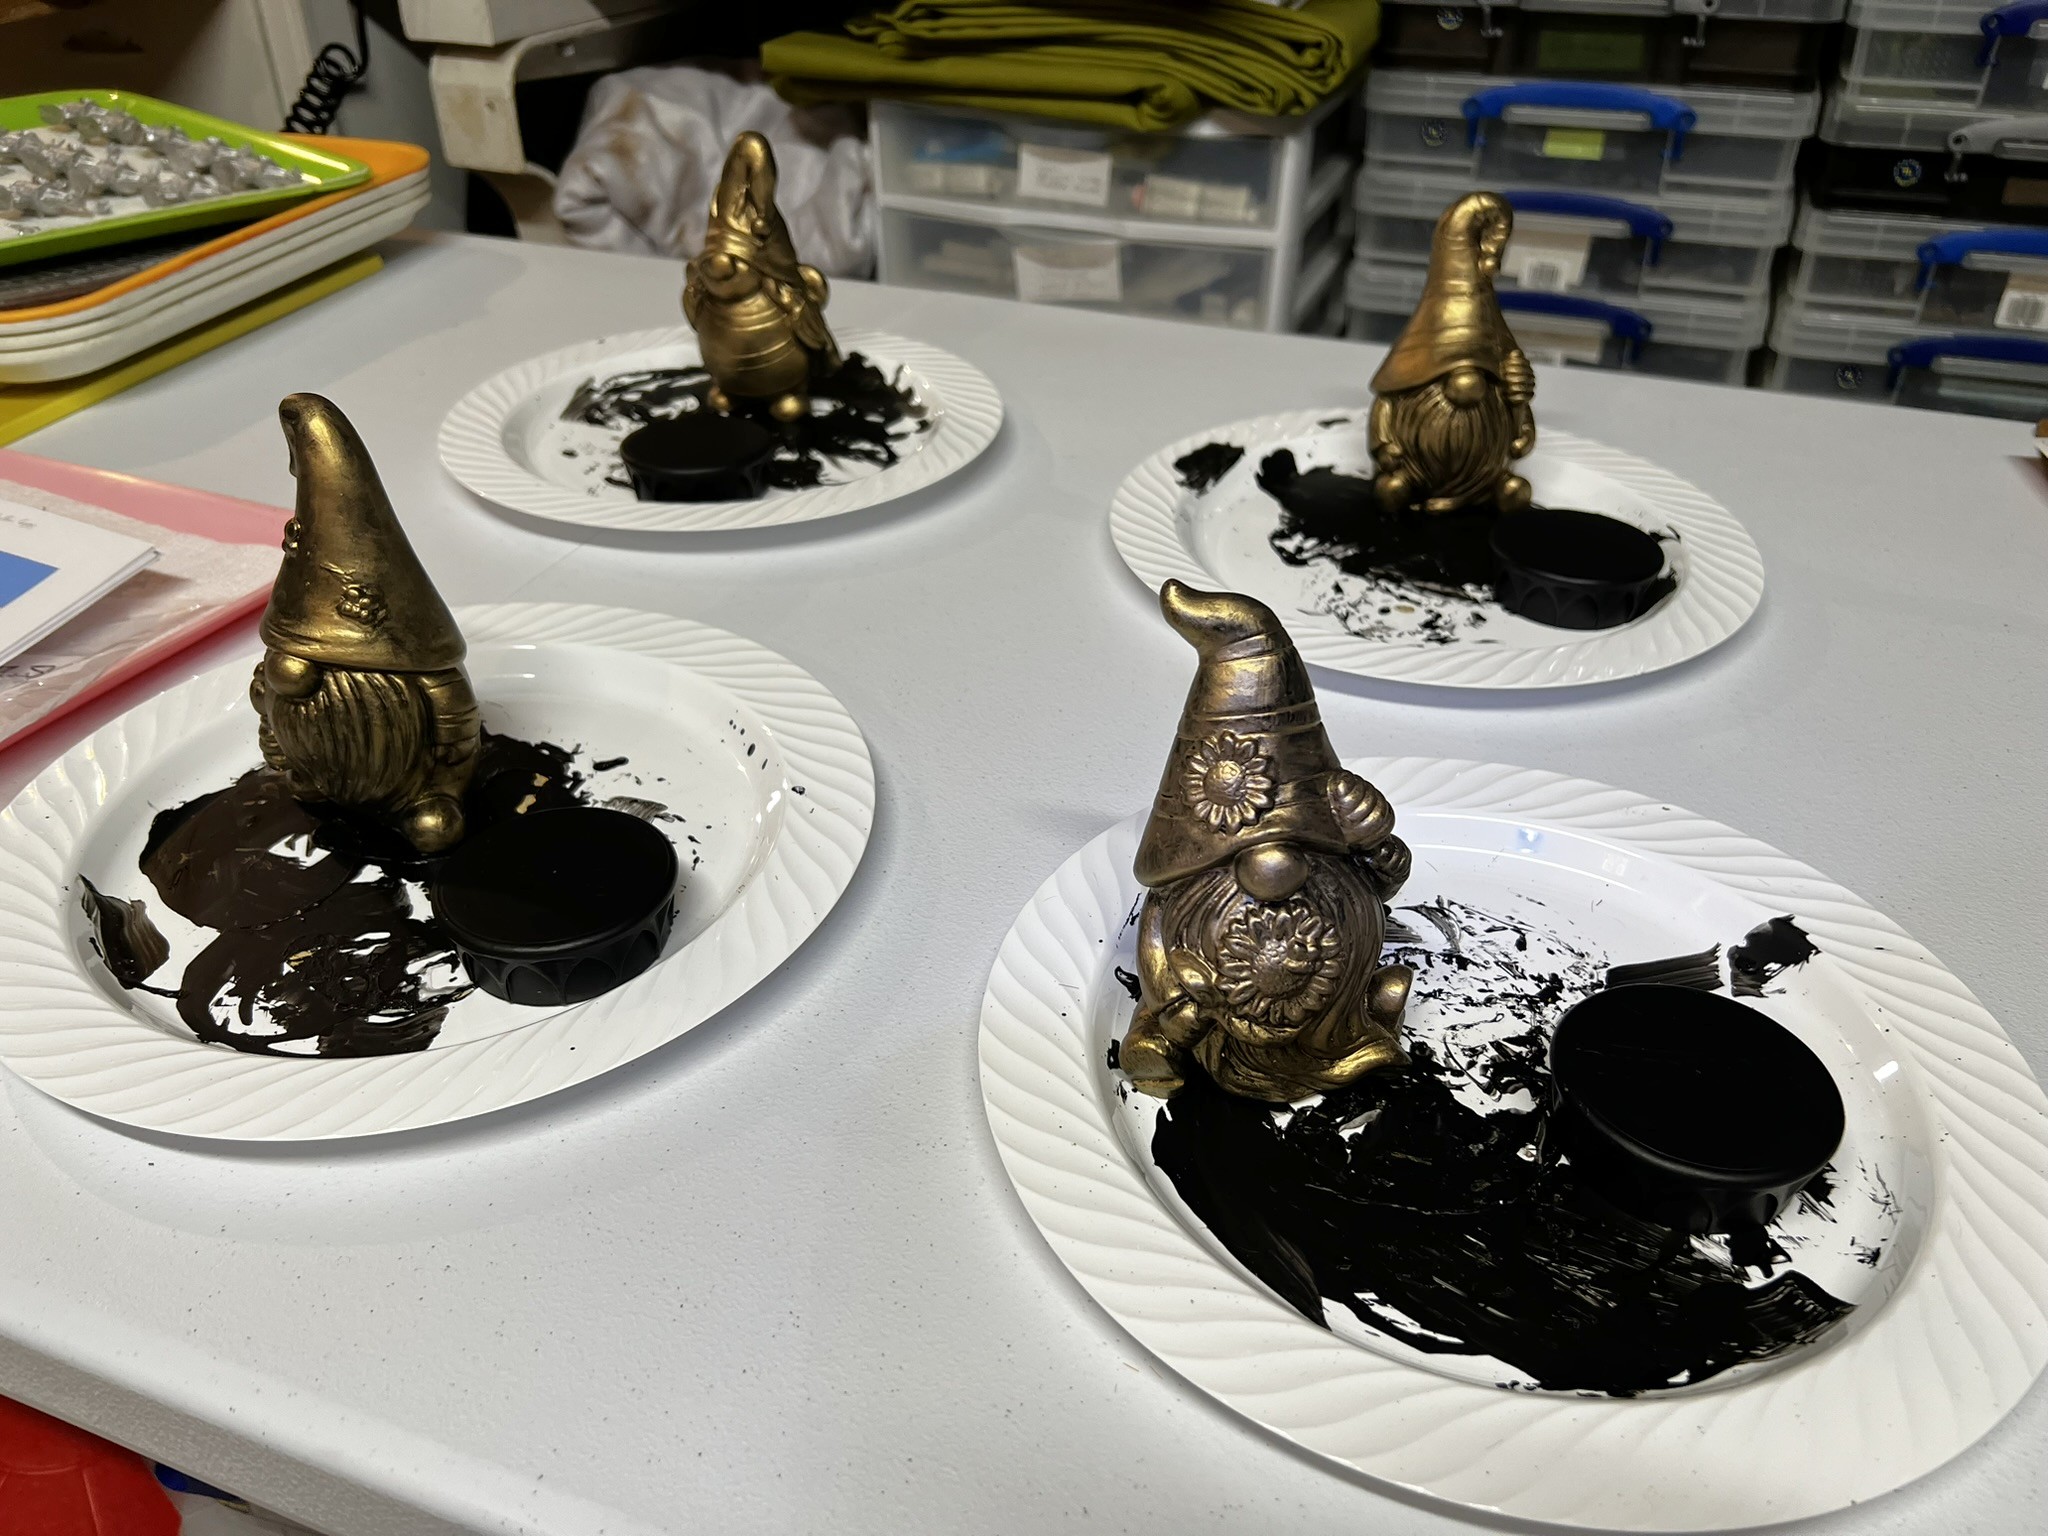
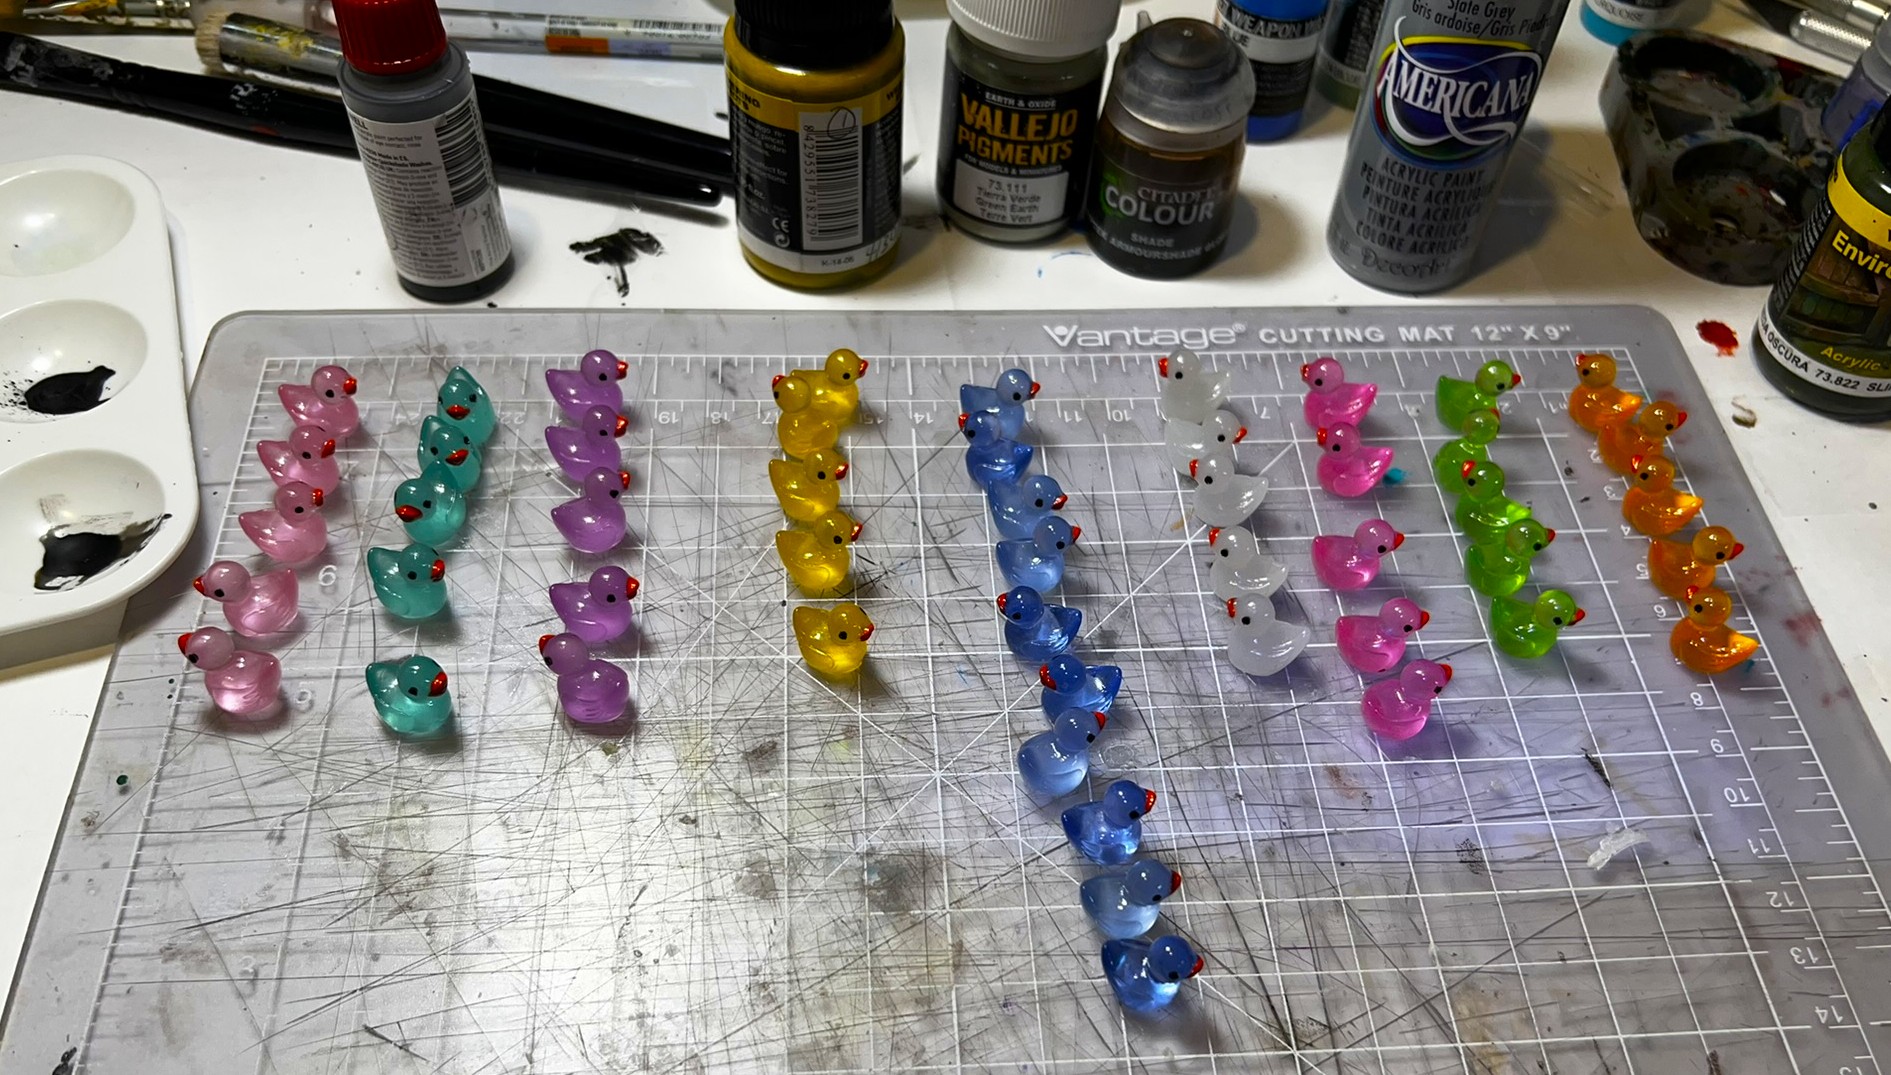
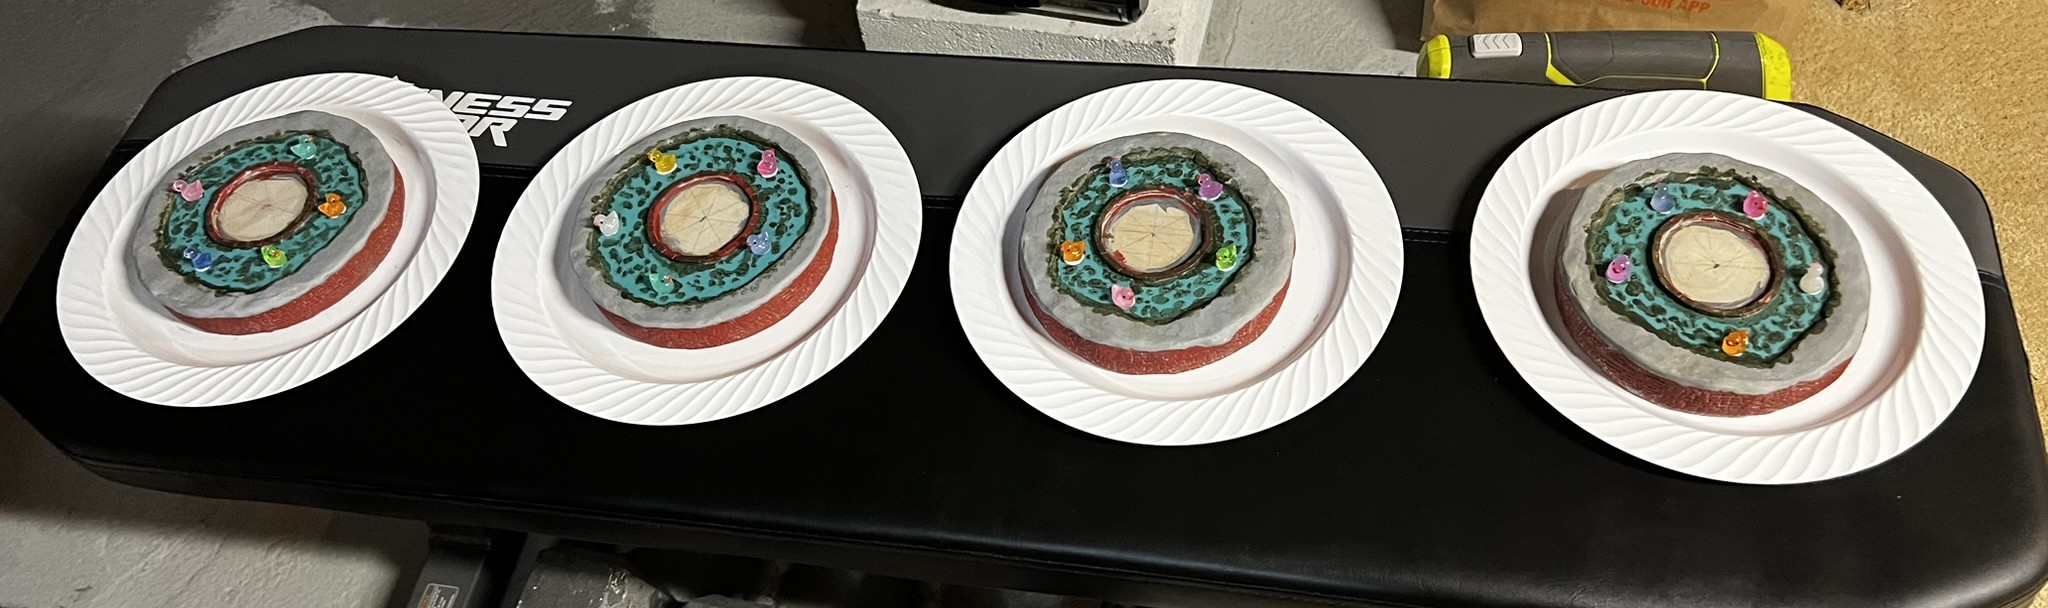
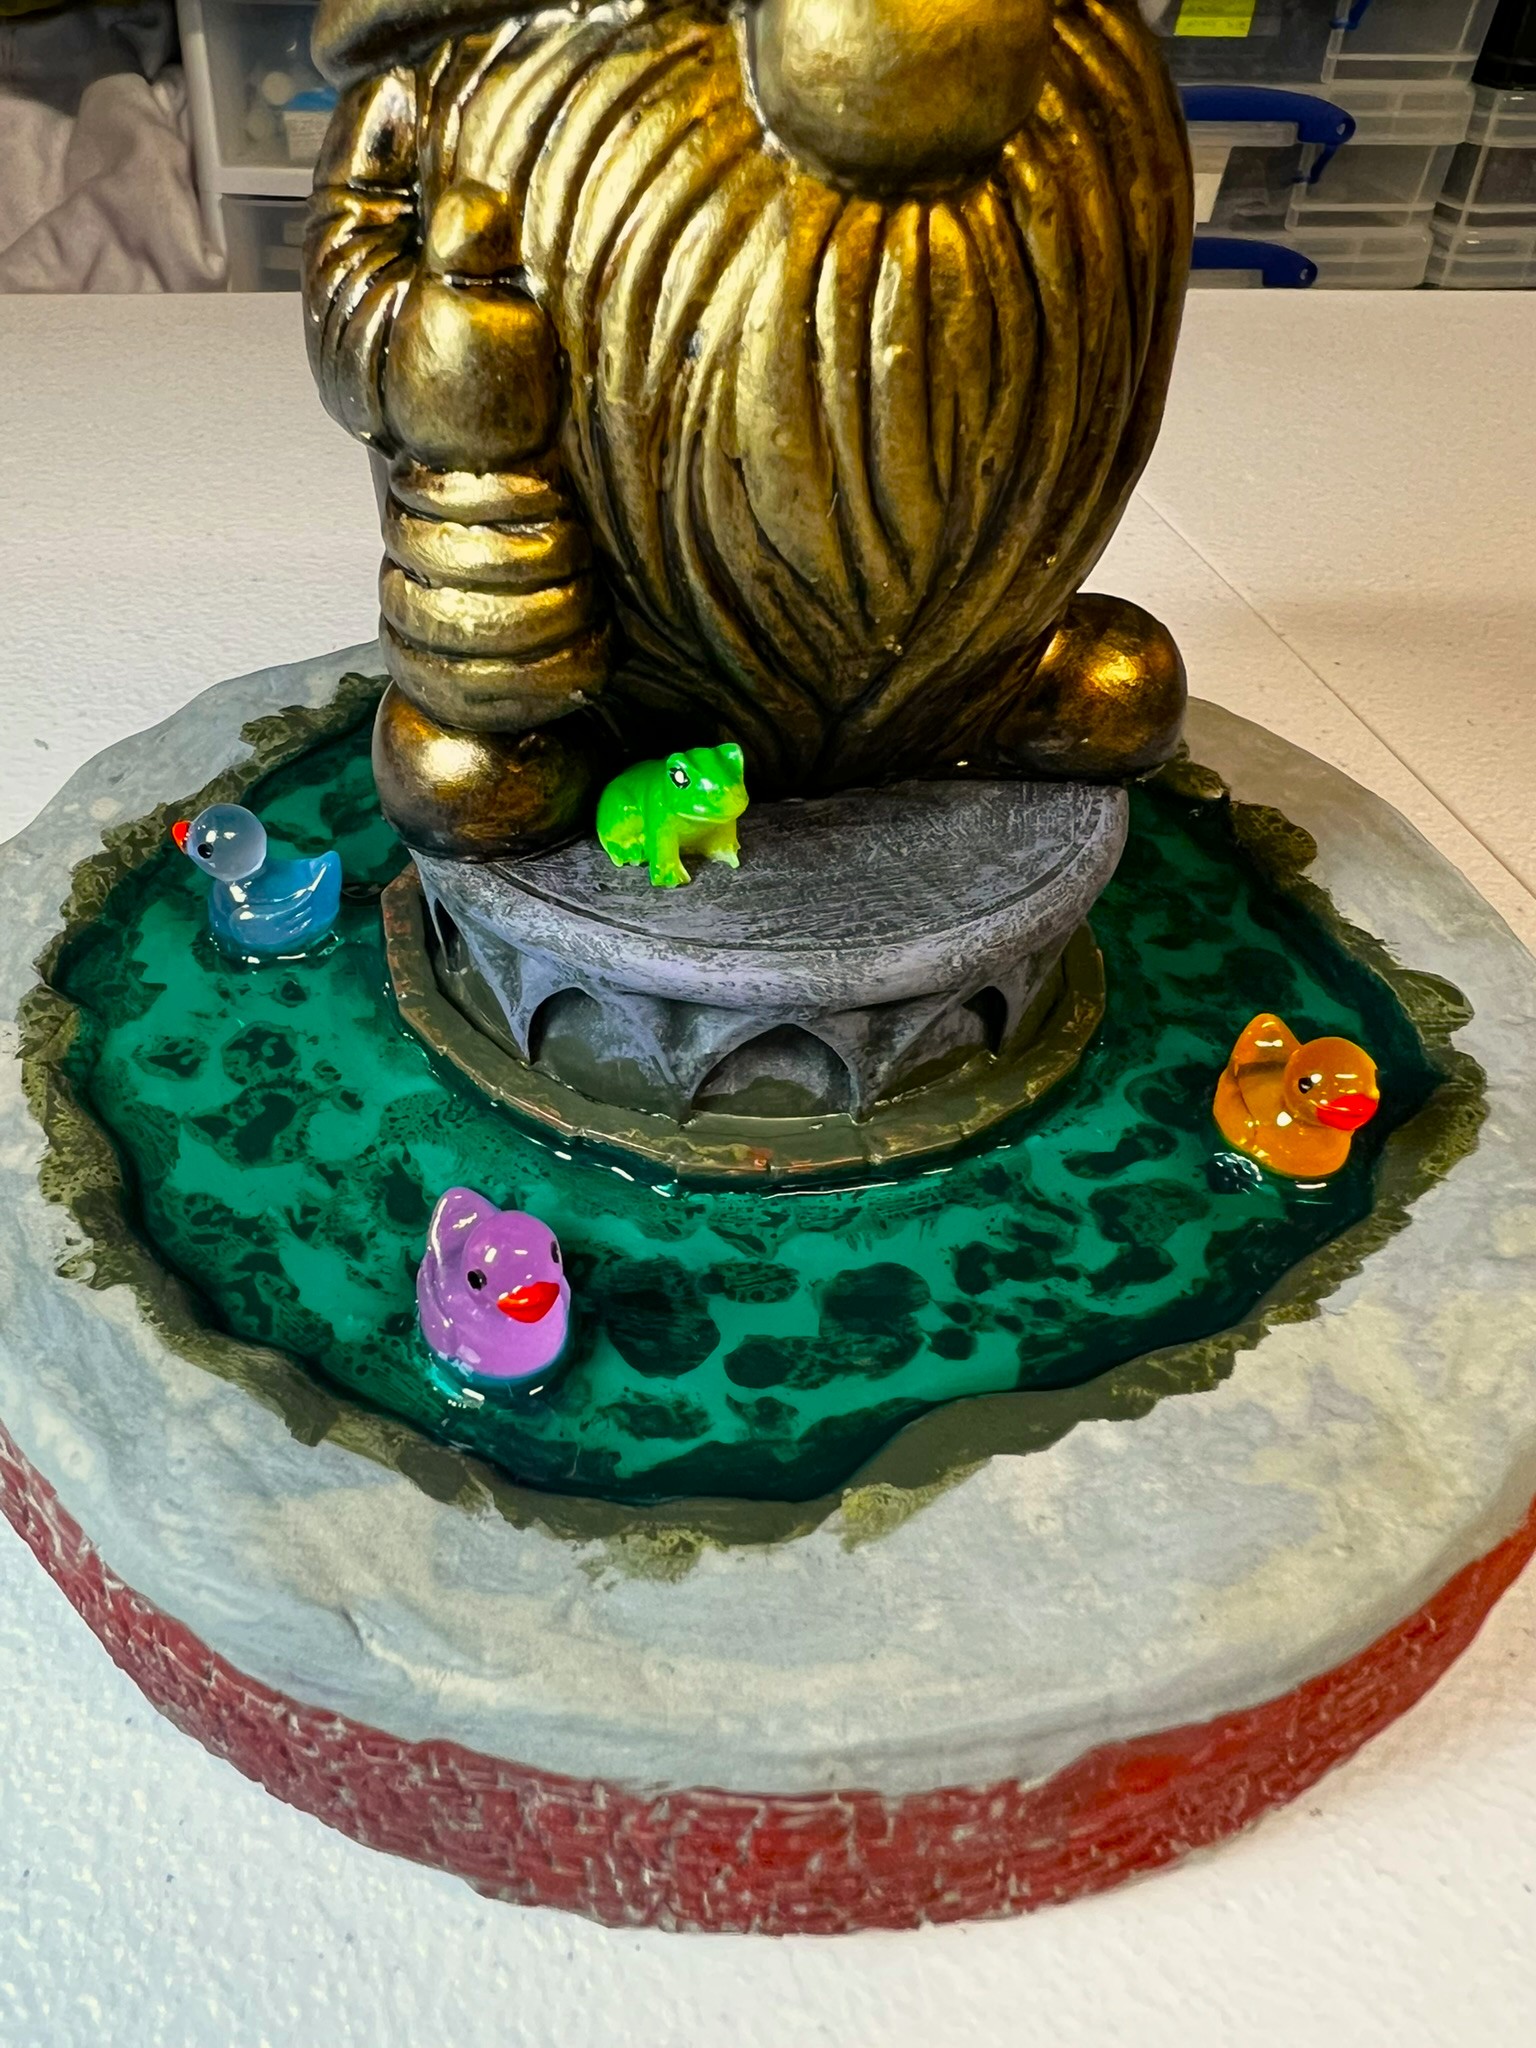
Laid little tiny Juweela 1:32 terracotta bricks in two courses with PVA to surround the orange juice lid plinths. The bricks would be painted red.Used bronze paint to change the Nomes to statues.Painted the fountain bottom blue using a mix of colors. Then stippled Vallejo “Slime Green” around the structures and on the fountain’s bottom.Got my ducks in a row! The set comes with multiple colored ducks that actually will glow in the dark.Dry brushed the plinths to resemble aged granite, then added a dark wash to the Nomes. Mounted the Nomes on the plinths and added a tiny frog.Mounted 5 ducks with PVA to each fountain, and then let dry. After that, I added the still water blended with inks to the fountains.The brick rims got a treatment of pigments to fill in and give a better look to the mortar. The Nomes and plinths then were set into the middle and I filled the little gap with PVA. Later I would reapply the slime to the water’s edge and hide any remaining gaps, and varnish the brick rim.
That would finish the project. Now…
Eye Candy
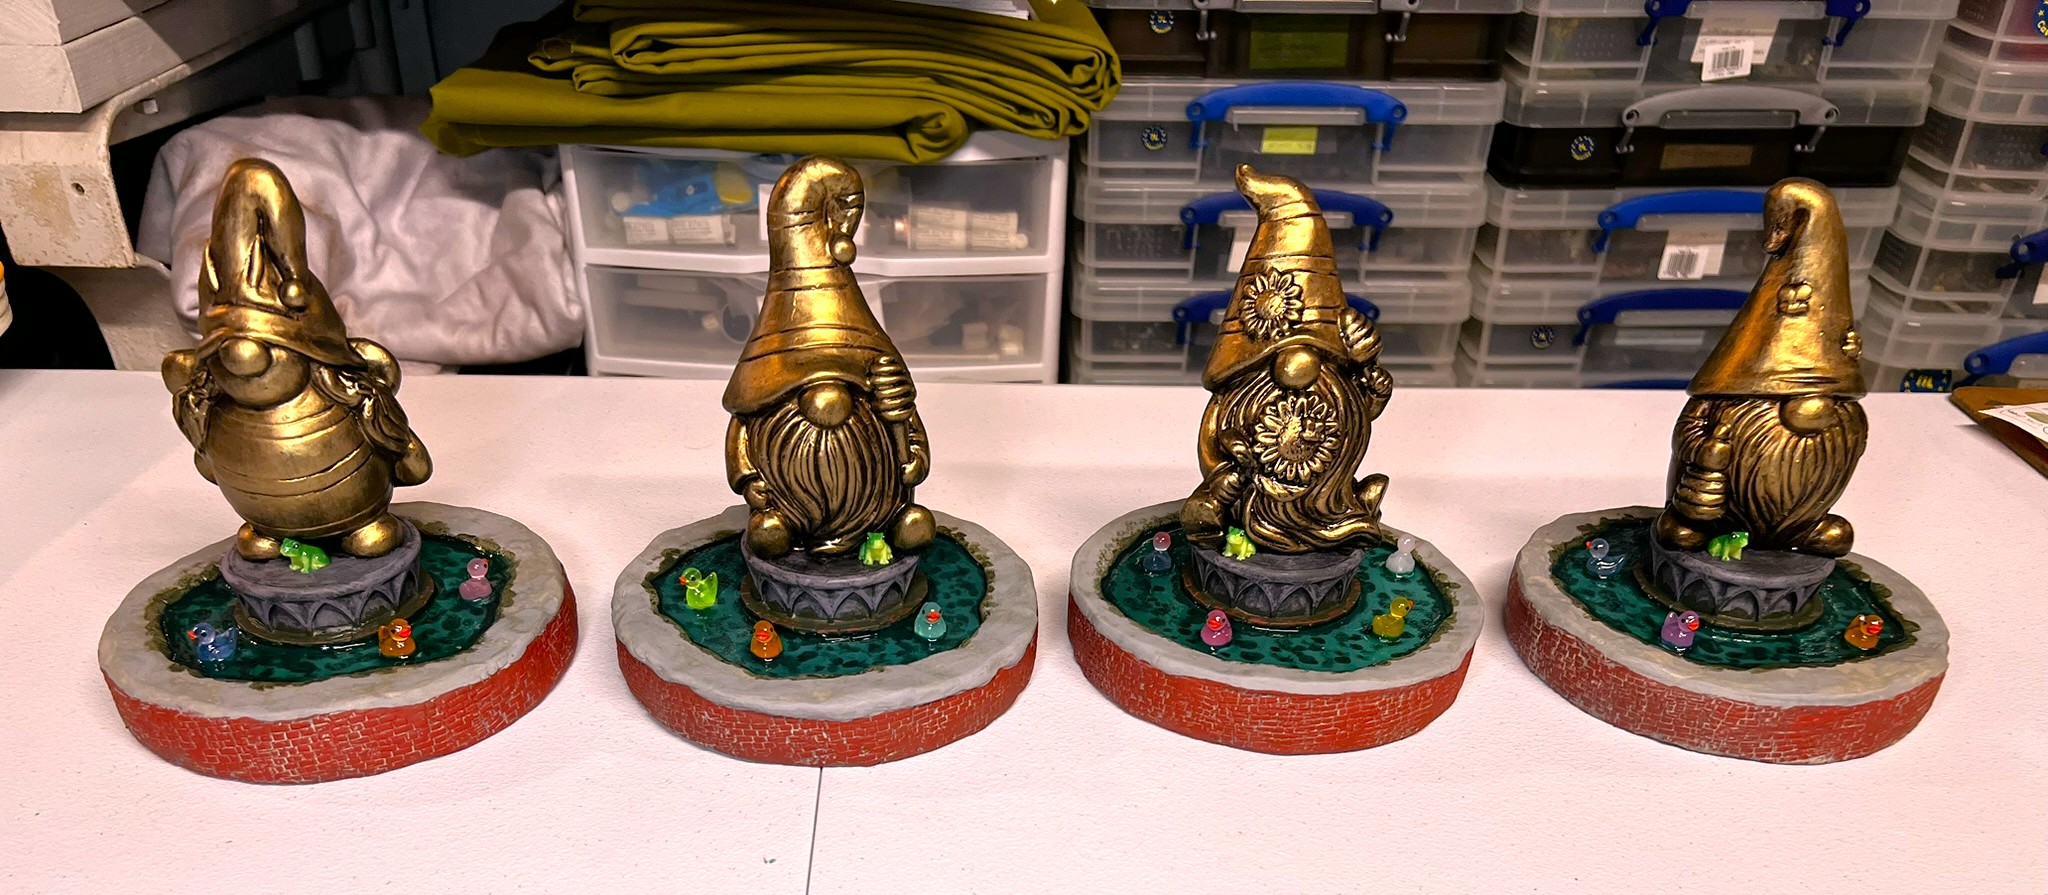
I was able to to present three of these at Cold Barrage in Havre de Grace Maryland to Greg Priebe, Chris Palmer and Buck Surdu. The fourth will go to Dave Wood at Cold Wars and take prominent places of the Ozzaganza tabletop.
Next up (hopefully shortly) the only figures that I finished for February…
Final Note
Want to learn more about Ozz? If you want to check out the excellent Wars of Ozz figures’ range, there are two places to get them. You can also get the rules there. (I make no money from this.) The game rules and the figures are available from the next two places:
Below you’ll see the list of paints and the like that I used on this project. They are more useful for me when I need to recreate a color scheme in the future. They might not be as useful for you. In any case, that’s why I post them.
Miscellaneous details and references for those interested in that sort of thing:
For my earlier posts on Wars of Ozz games, view this page. It includes figures, units, and other related projects.
PAINTS, INKS, GLAZES, SHADES, WASHES, PIGMENTS, FLOCKING, GLUES AND MORE THAT I USED ON THESE NOME BEEKEEPER STATUES/ “OZZCARS”:
On the last time that I posted, I shared my Scarecrow Girl statue that I cobbled together. After Christmas, I was able to add even more to my scatter terrain with a myriad of pieces. In the case of this post, I’ll share how I built out and painted up desert/cactus pieces and some oases. I also did a bit of tree build and rehab work that I will share here.
It’s all for my Wars of Ozz games. I needed some more desert pieces – especially now as I have significant numbers of desert units from both the Whim Whim and Temujican factions. I did previously use some cacti from Hobby Lobby in my Mesoamerican games.
Two Christmas gifts from my Mom – cacti and trees (both kinds the types for model railroads or dioramas) – brought me an opportunity to go further. On a side note, she says I’m tough to get a gift for – to which I say I really don’t need any at my age – but I do appreciate her a lot and it was very thoughtful (she’s probably reading this too!). In any case they will outlast golf balls for sure…
The cacti were great for building some scatter terrain. Additionally, I needed to make objective markers for one of my desert games – and oases seemed appropriate for that purpose. Lastly, my deciduous and evergreen tree collection (which is mostly second-hand from a flea market) needed an upgrade badly as they were looking like victims of Agent Orange defoliant. So, Mom’s tree gift of three Hobby Lobby trees was another scatter terrain opportunity. I’ll discuss the cacti scatter bases first, then the oases build, and lastly the trees.
Cacti Bases
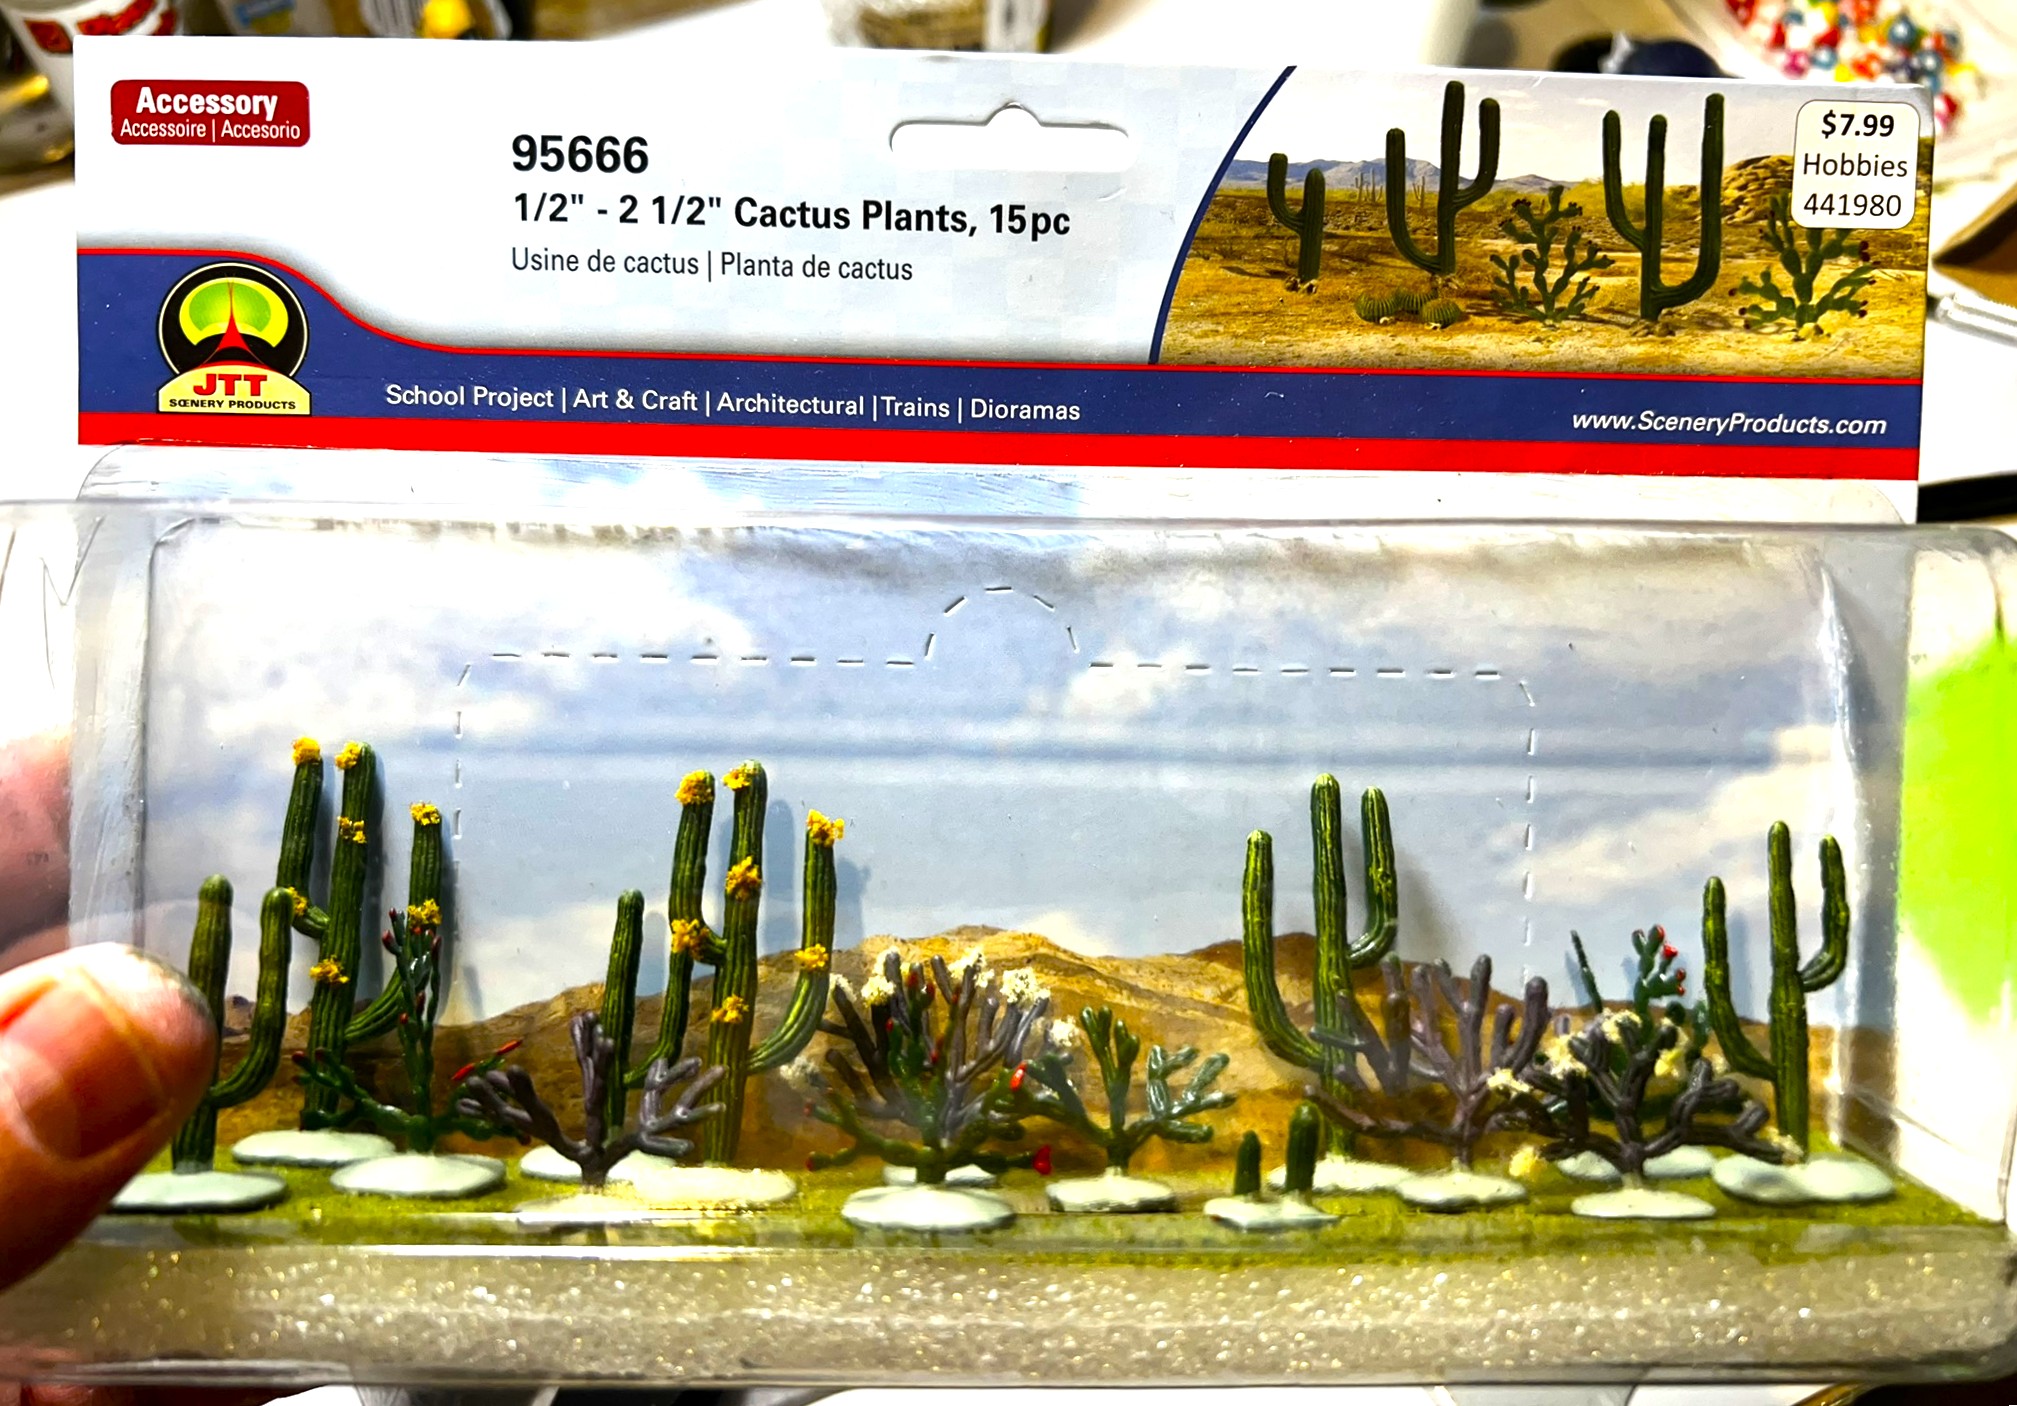
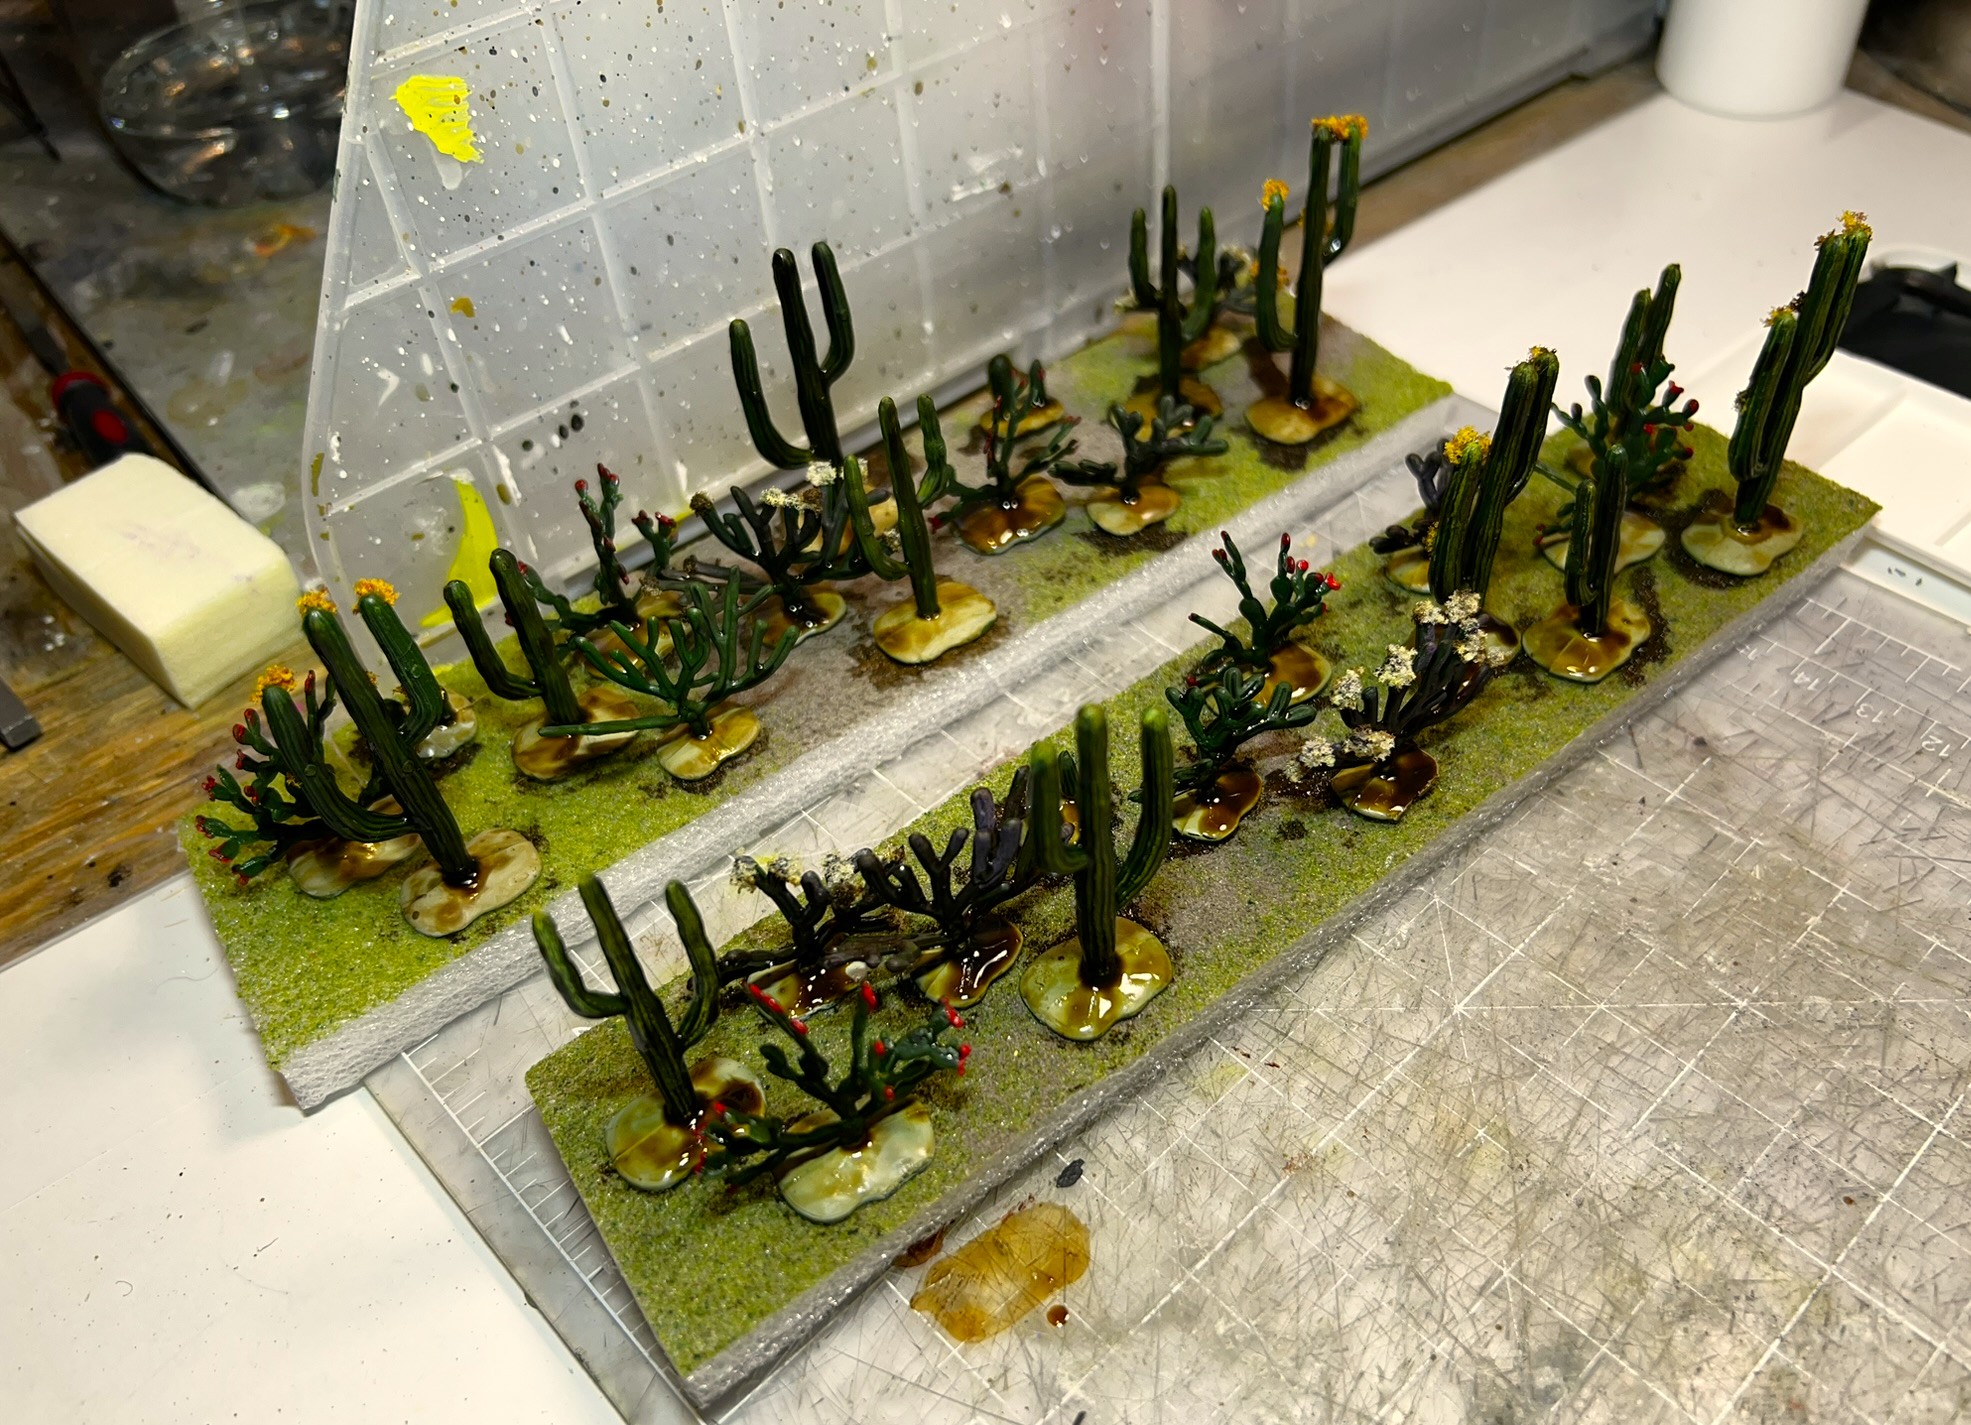
Cactus plants from JTT Scenery – I had two packages of 15 cacti.
The cacti are from JTT, and are plastic, and hence, they have that glossy look. I used a wash to knock off the glossy appearance and to give some depth to the plants’ striations. This was easy to do as the plants are set in the package into a styrofoam base. That base holds them loosely enough for applying a sepia wash and removing the cacti and bushes afterwards was simple.
After applying a sepia wash. The mounting styrofoam made this easy.
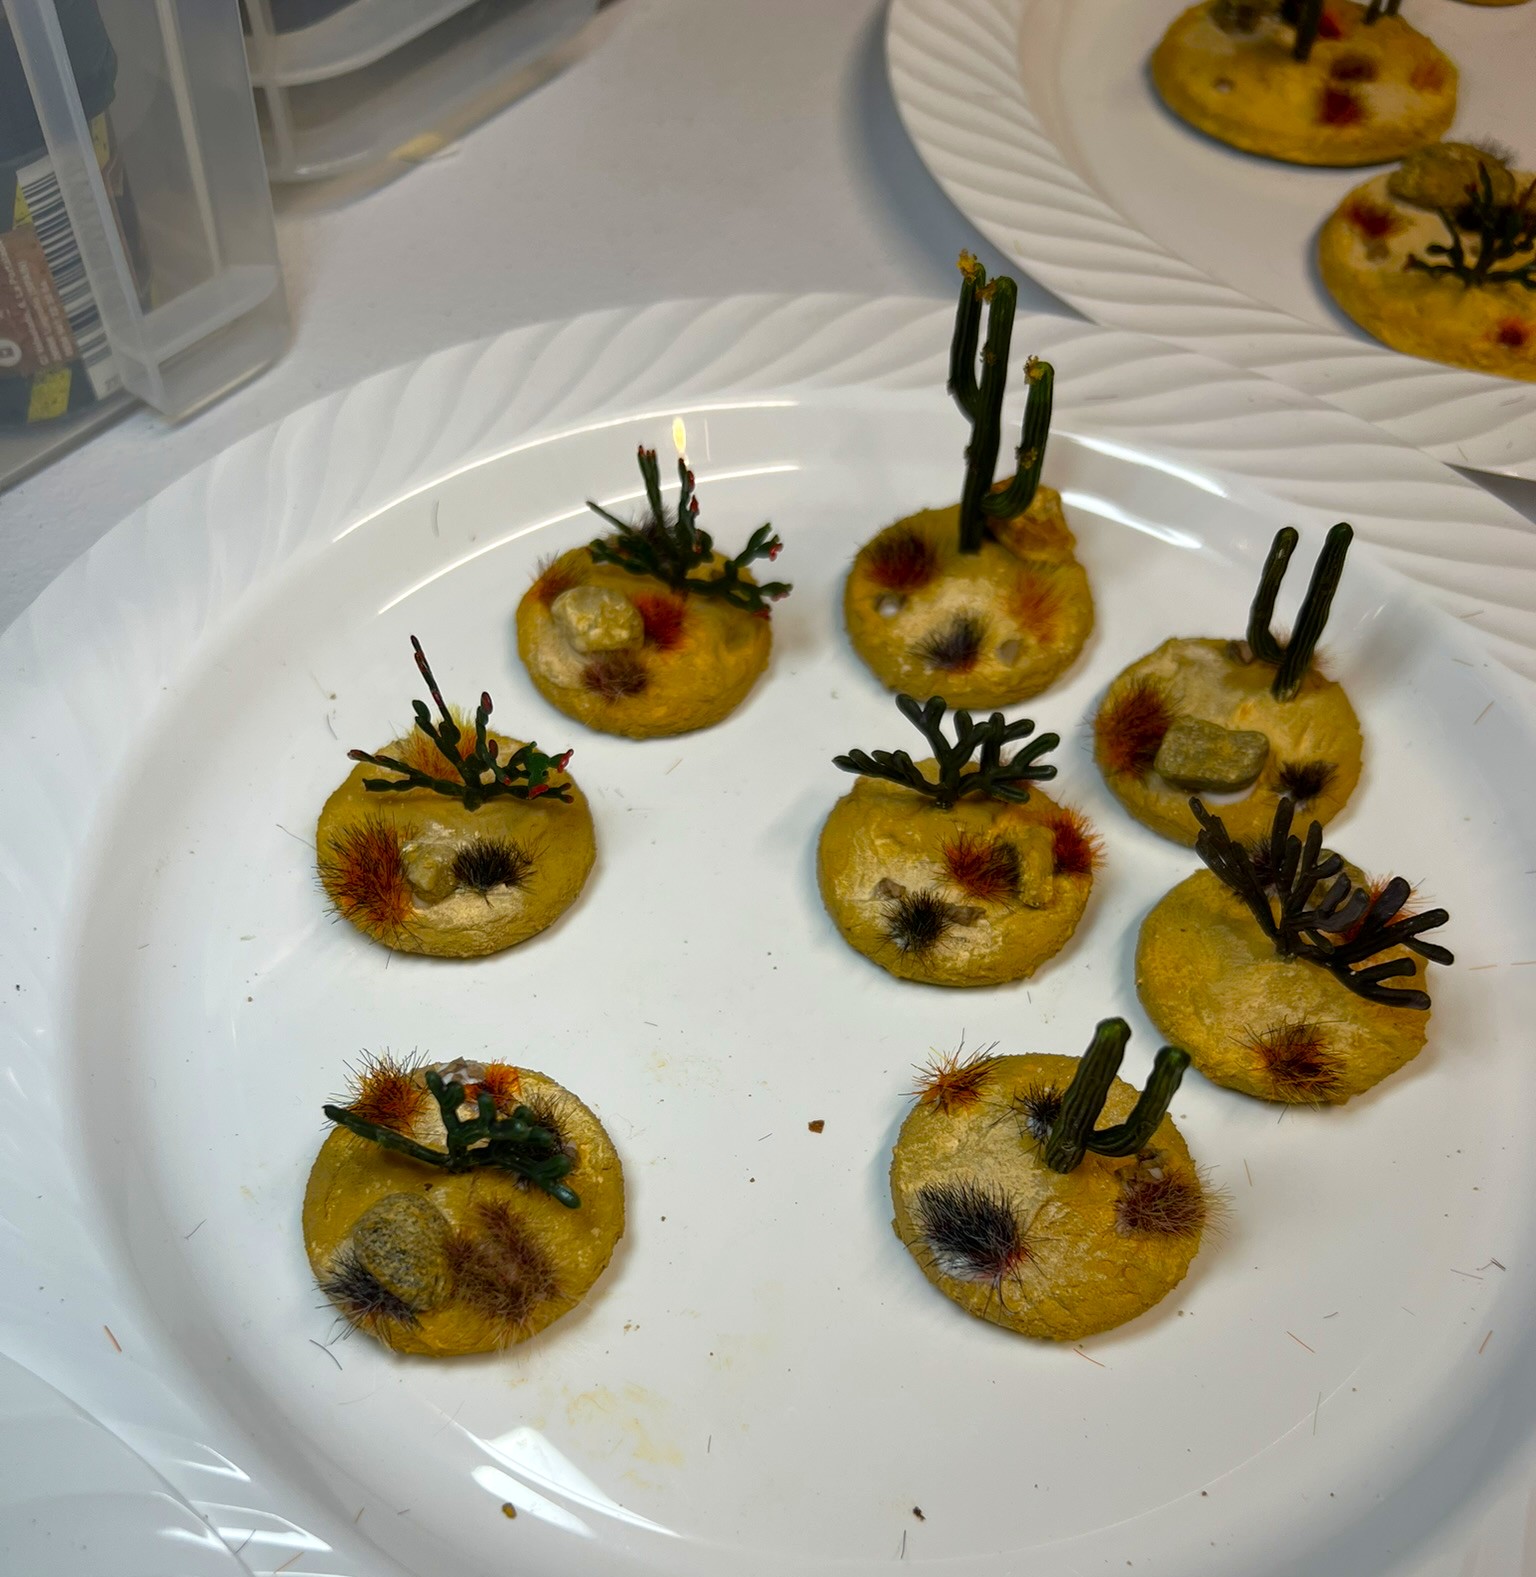
As for bases for the plants, I decided it was a good opportunity to clear out a bunch of different plastic and wooden bases from my collection. One was even the same as I used on the Scarecrow Girl statue. You can see them below – I ended up with 20 bases. All of them got appropriately-sized steel washers underneath.
Some of the bases I used – well 19/20 anyways! The other one was a wooden scratch-built base that needed a purpose.
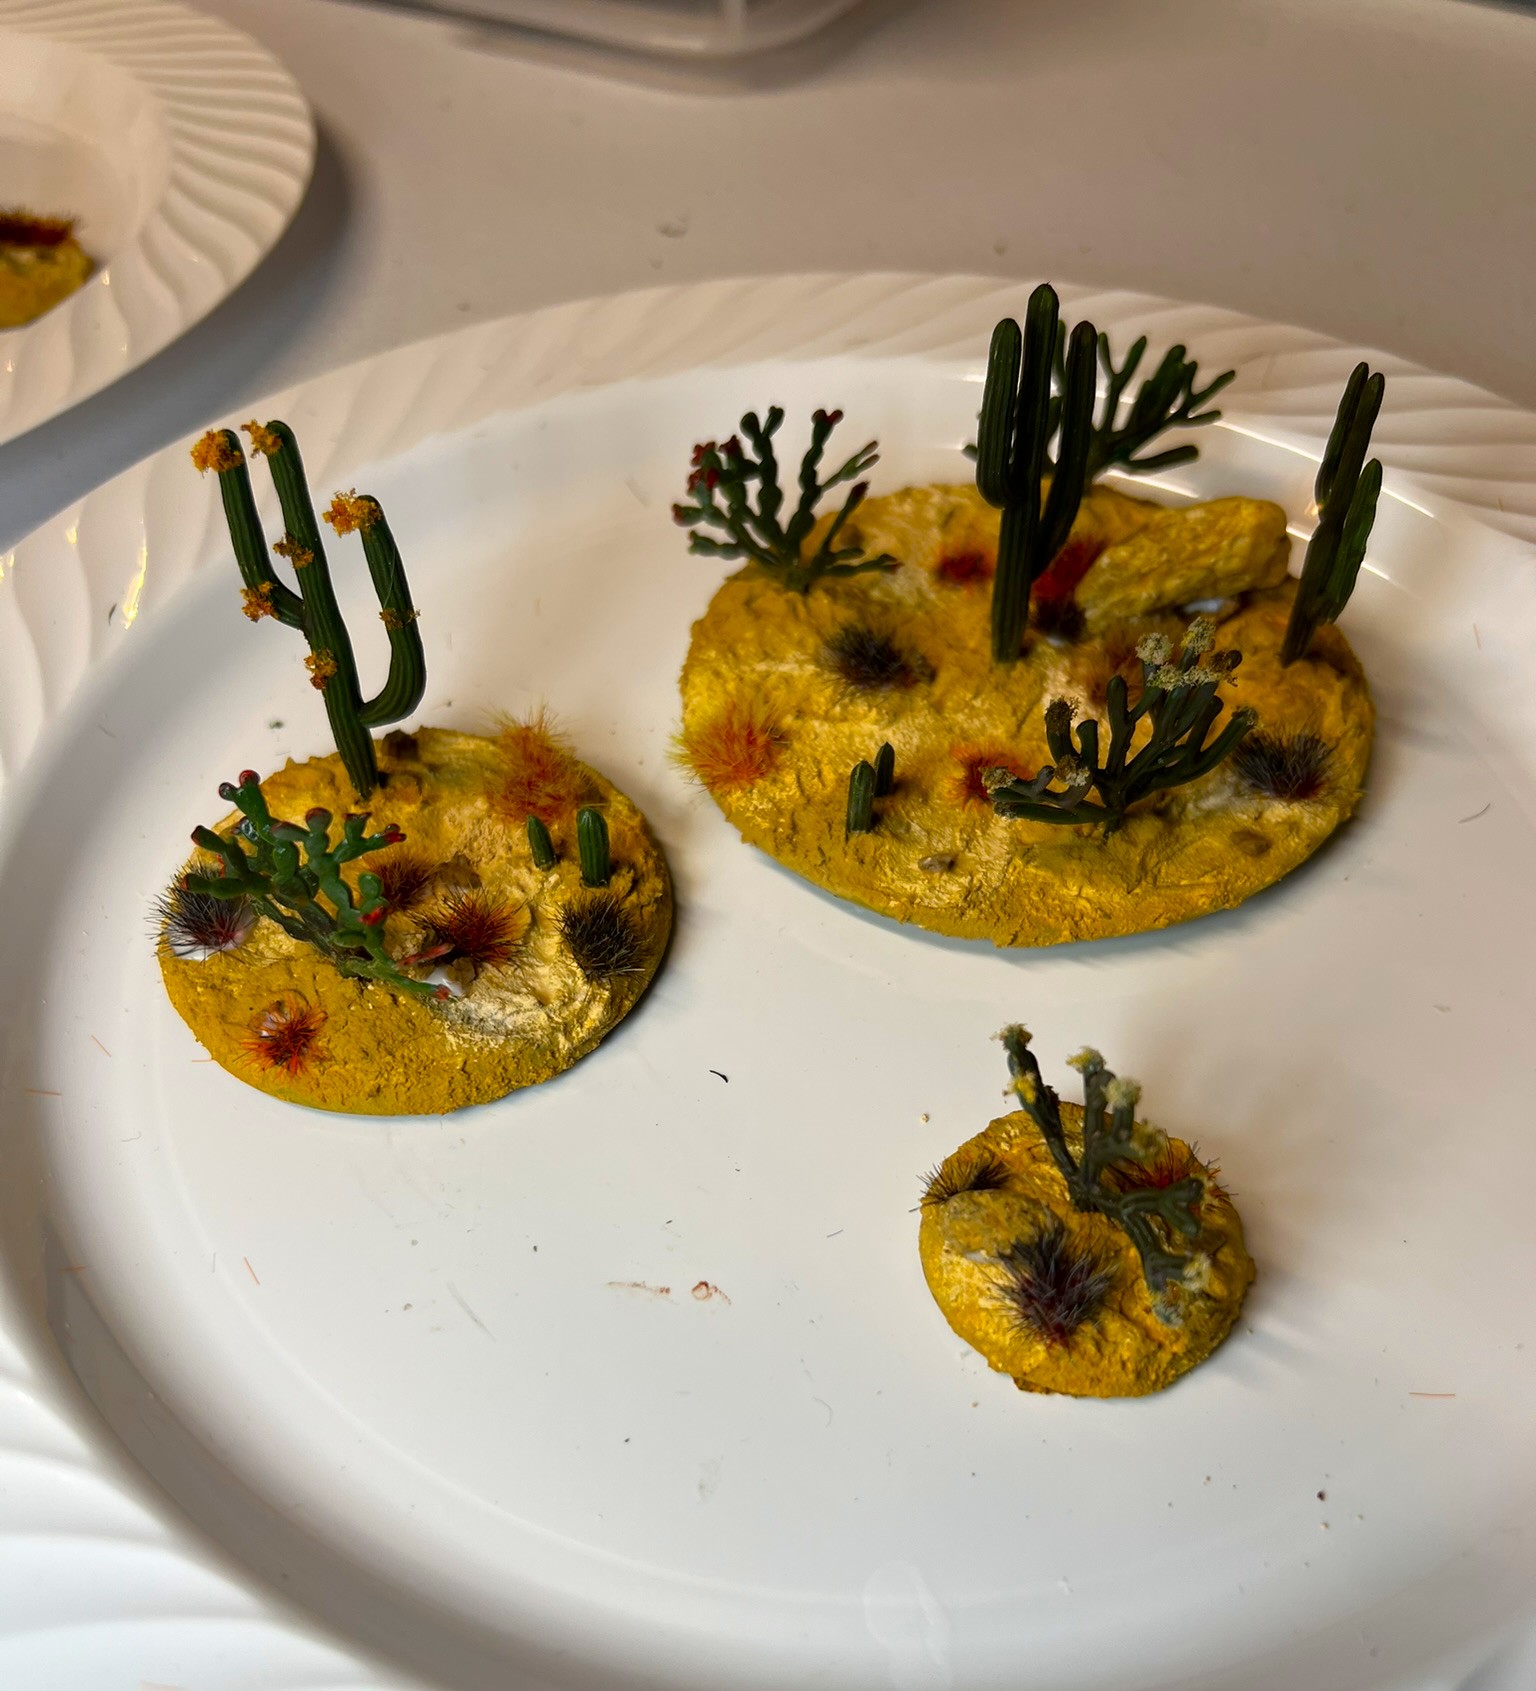
I glued the plants to the base, then added the AK basing paste, let that dry, then added pigments. When that was set, I added flocking to match my Whim Whim and Temujican unit basing schemes.
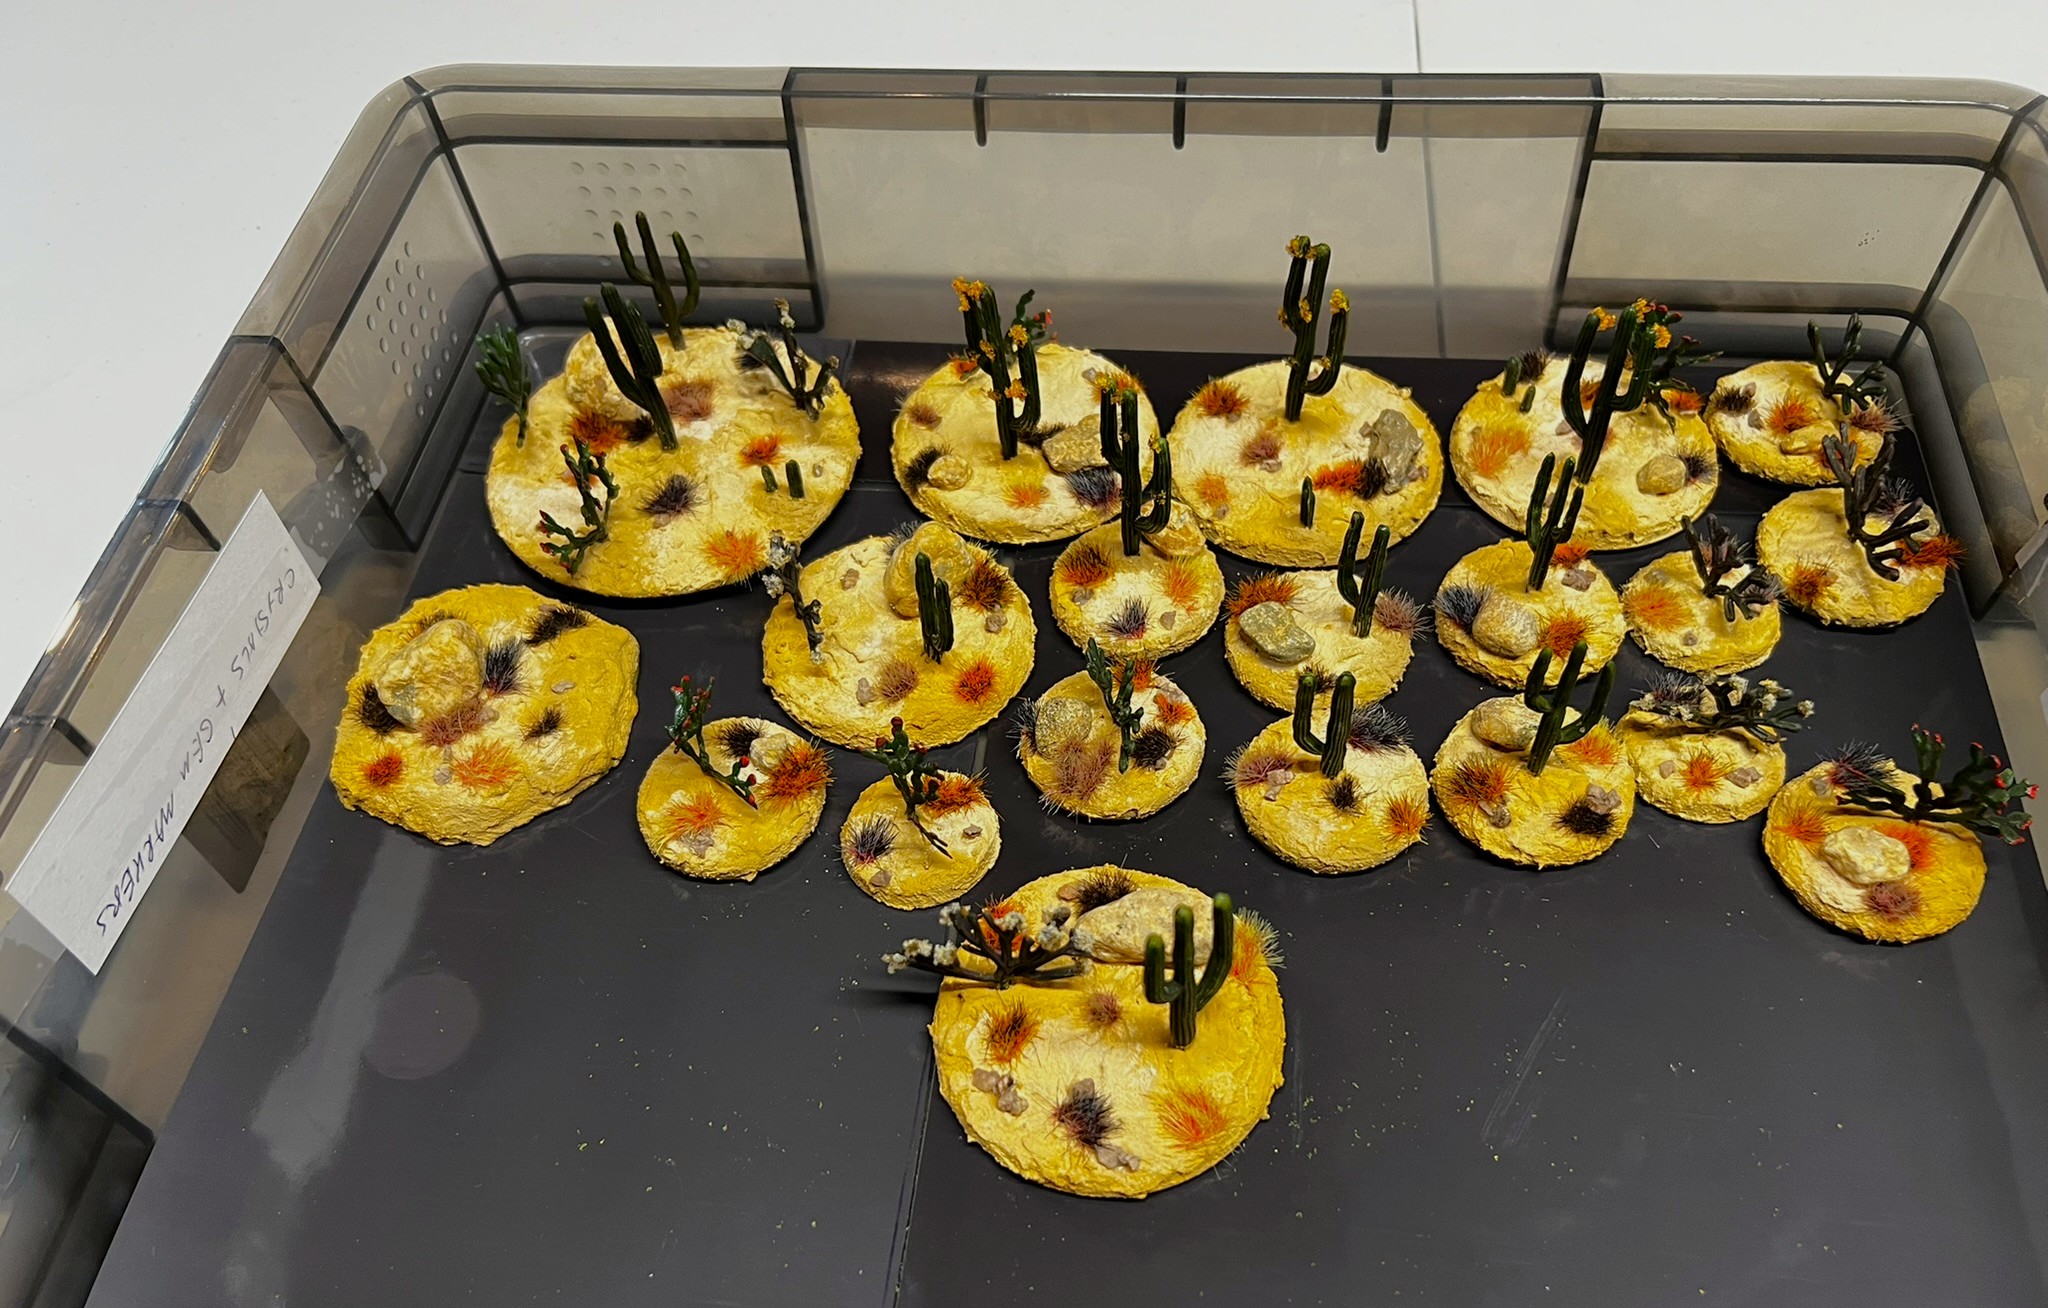
When I sent my mother these pictures on my phone, she thought they were cookies! Below you can see all 20 of them in a Really Useful Box.
Oases
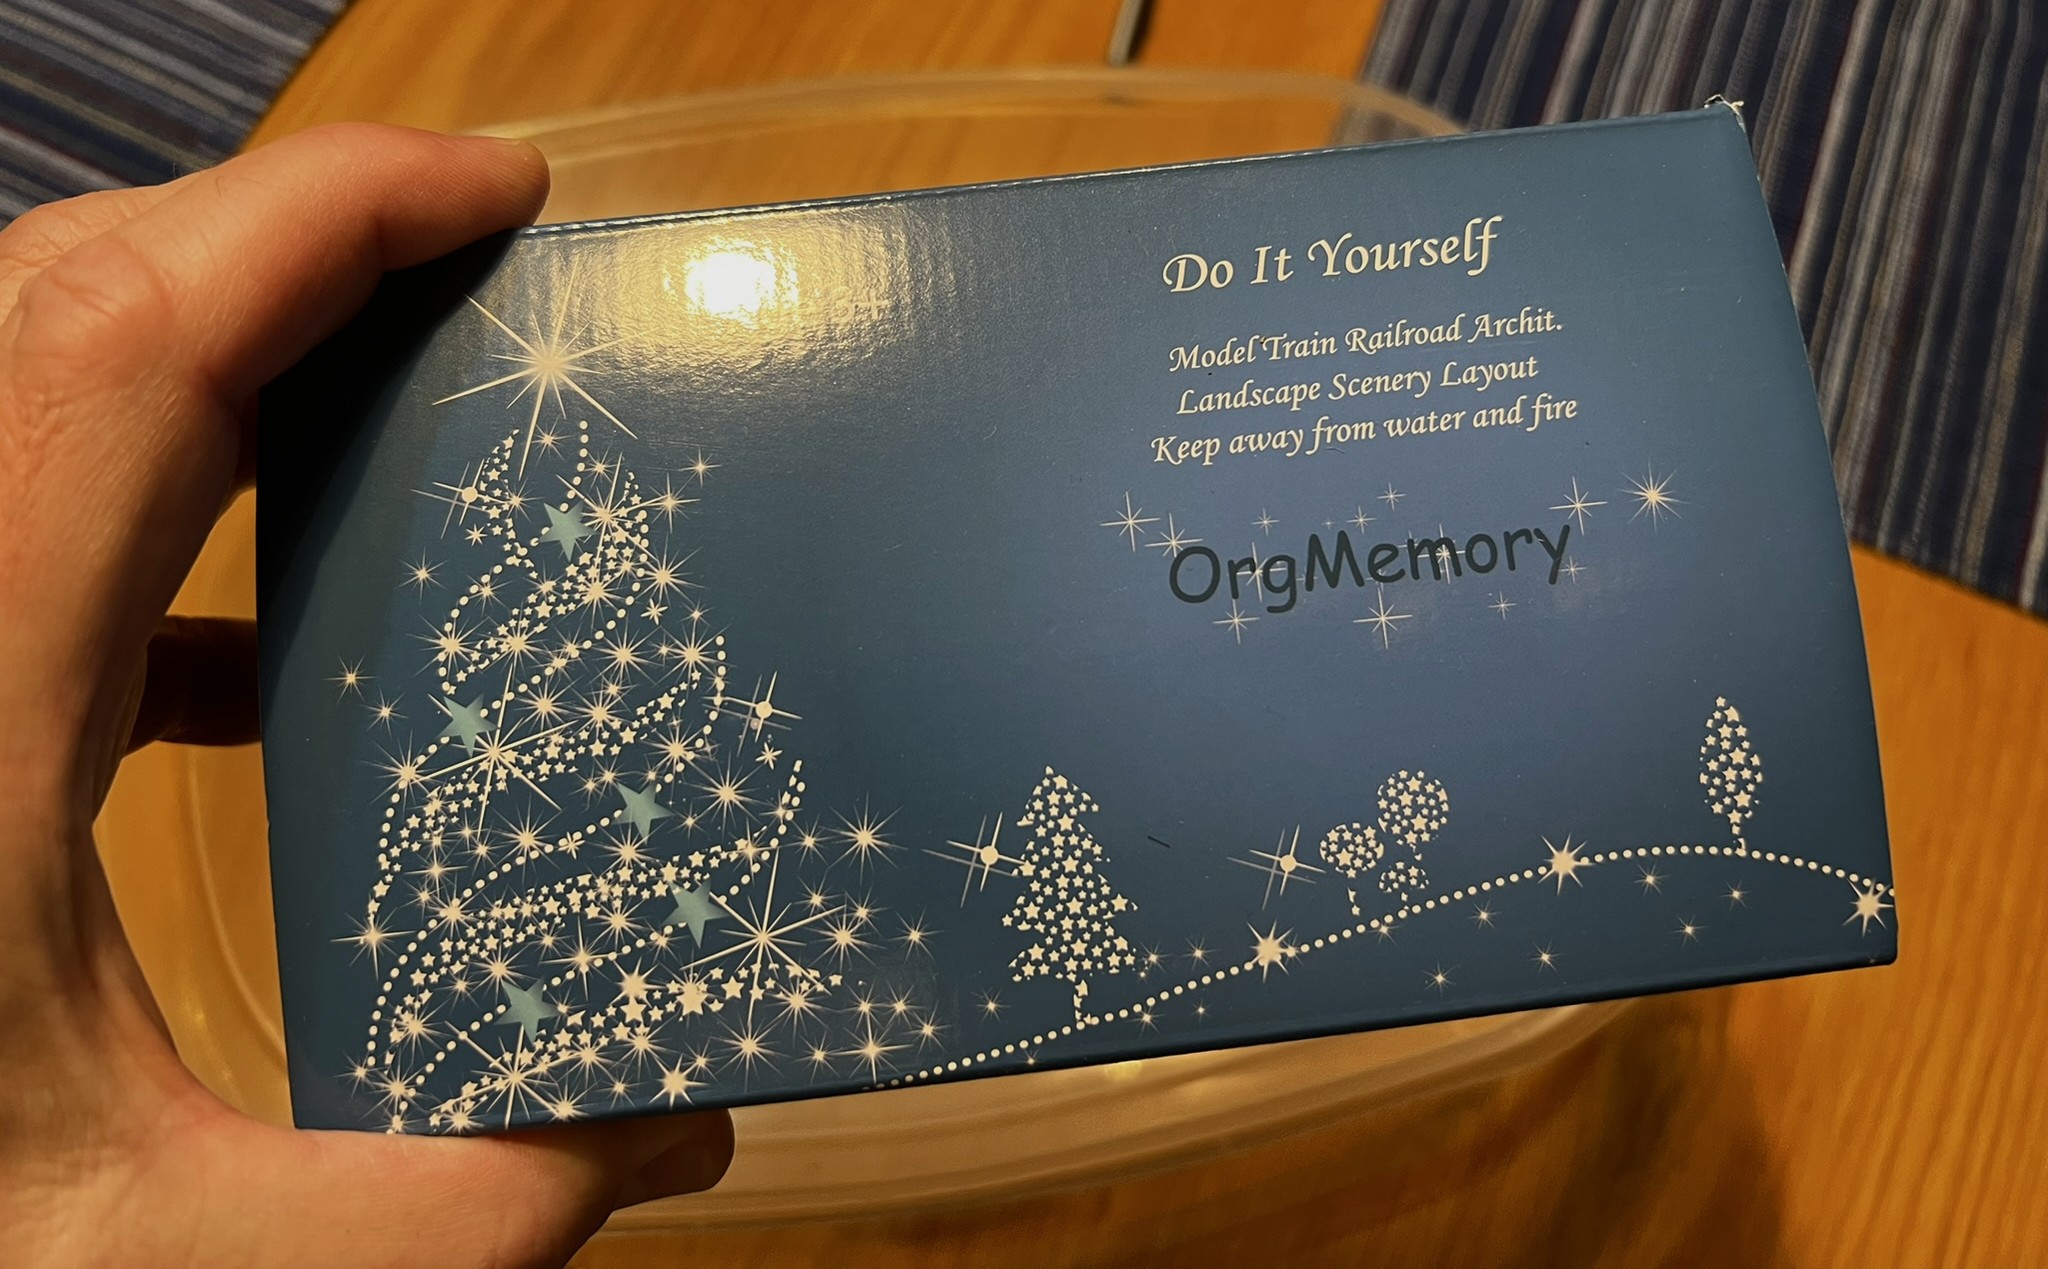
Some of you may remember that for my Conquistador/Maya game, I built some sandy scrub-like terrain pieces, that had a few palm trees. These did not look like an oasis to me – so I decided to make some that did. I found some model landscape palm trees on Amazon from OrgMemory.
The OrgMemory palm tree box.
The plastic palm trees would need (similar to the previous situation with the cacti), a sepia wash. To ensure that a sepia wash would adhere properly, I washed all of the palms in soap and water and let them dry. This would also let me figure out what sizes would be best to use on this scratch-build.
A mass of trees ready to wash……and drying. Now I needed somewhere to put them and to determine the appropriate mix of types and sizes. The little prongs on the bottoms of the trees would help later with mounting on the oases.
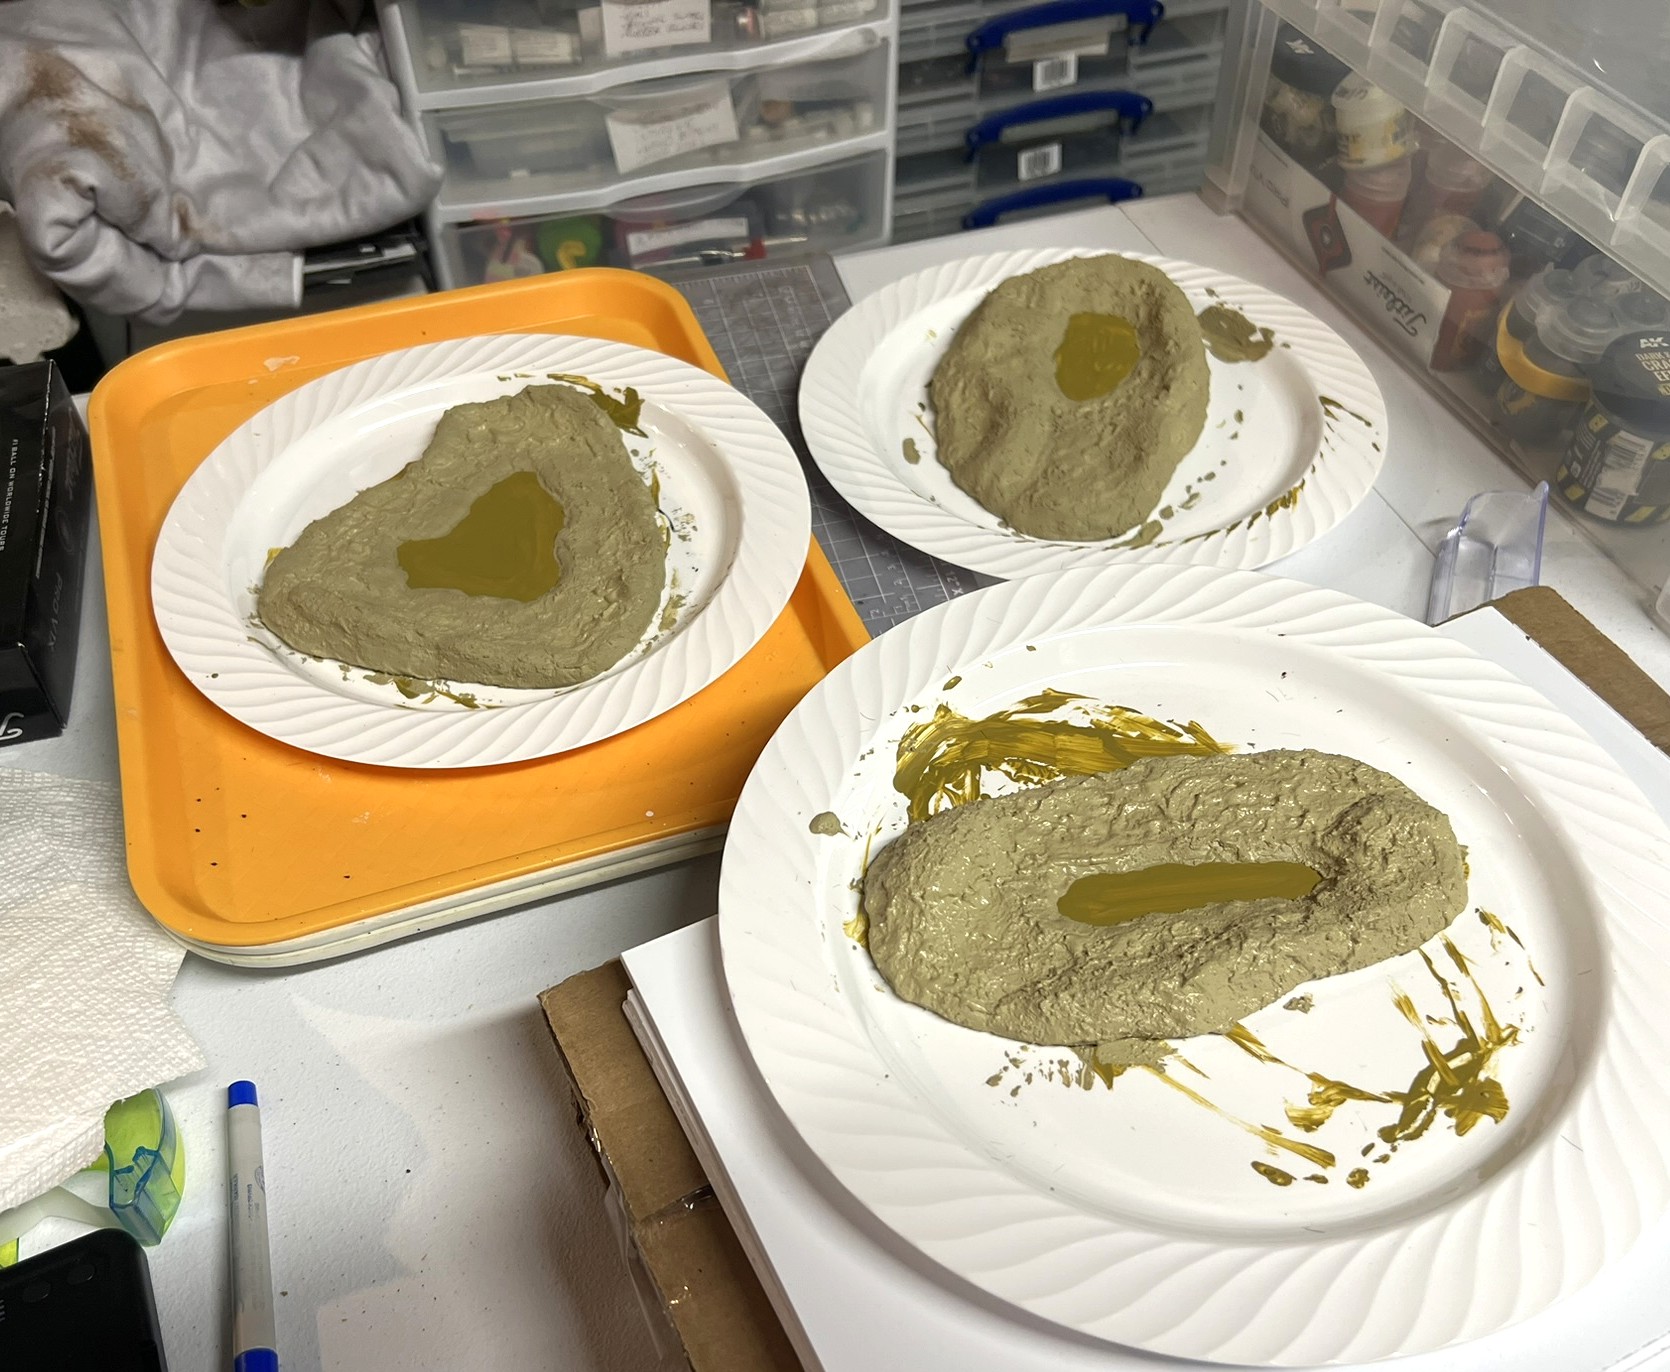
While the palm trees dried, I used my scroll saw cut up four polystyrene sheets into random shapes for the oases’ bases (that rhymes?). Apoxie Sculpt was applied on the sheets to create the shapes of the terrain. In the end, I only used three of the four sheets. I’ll save the other for later use.
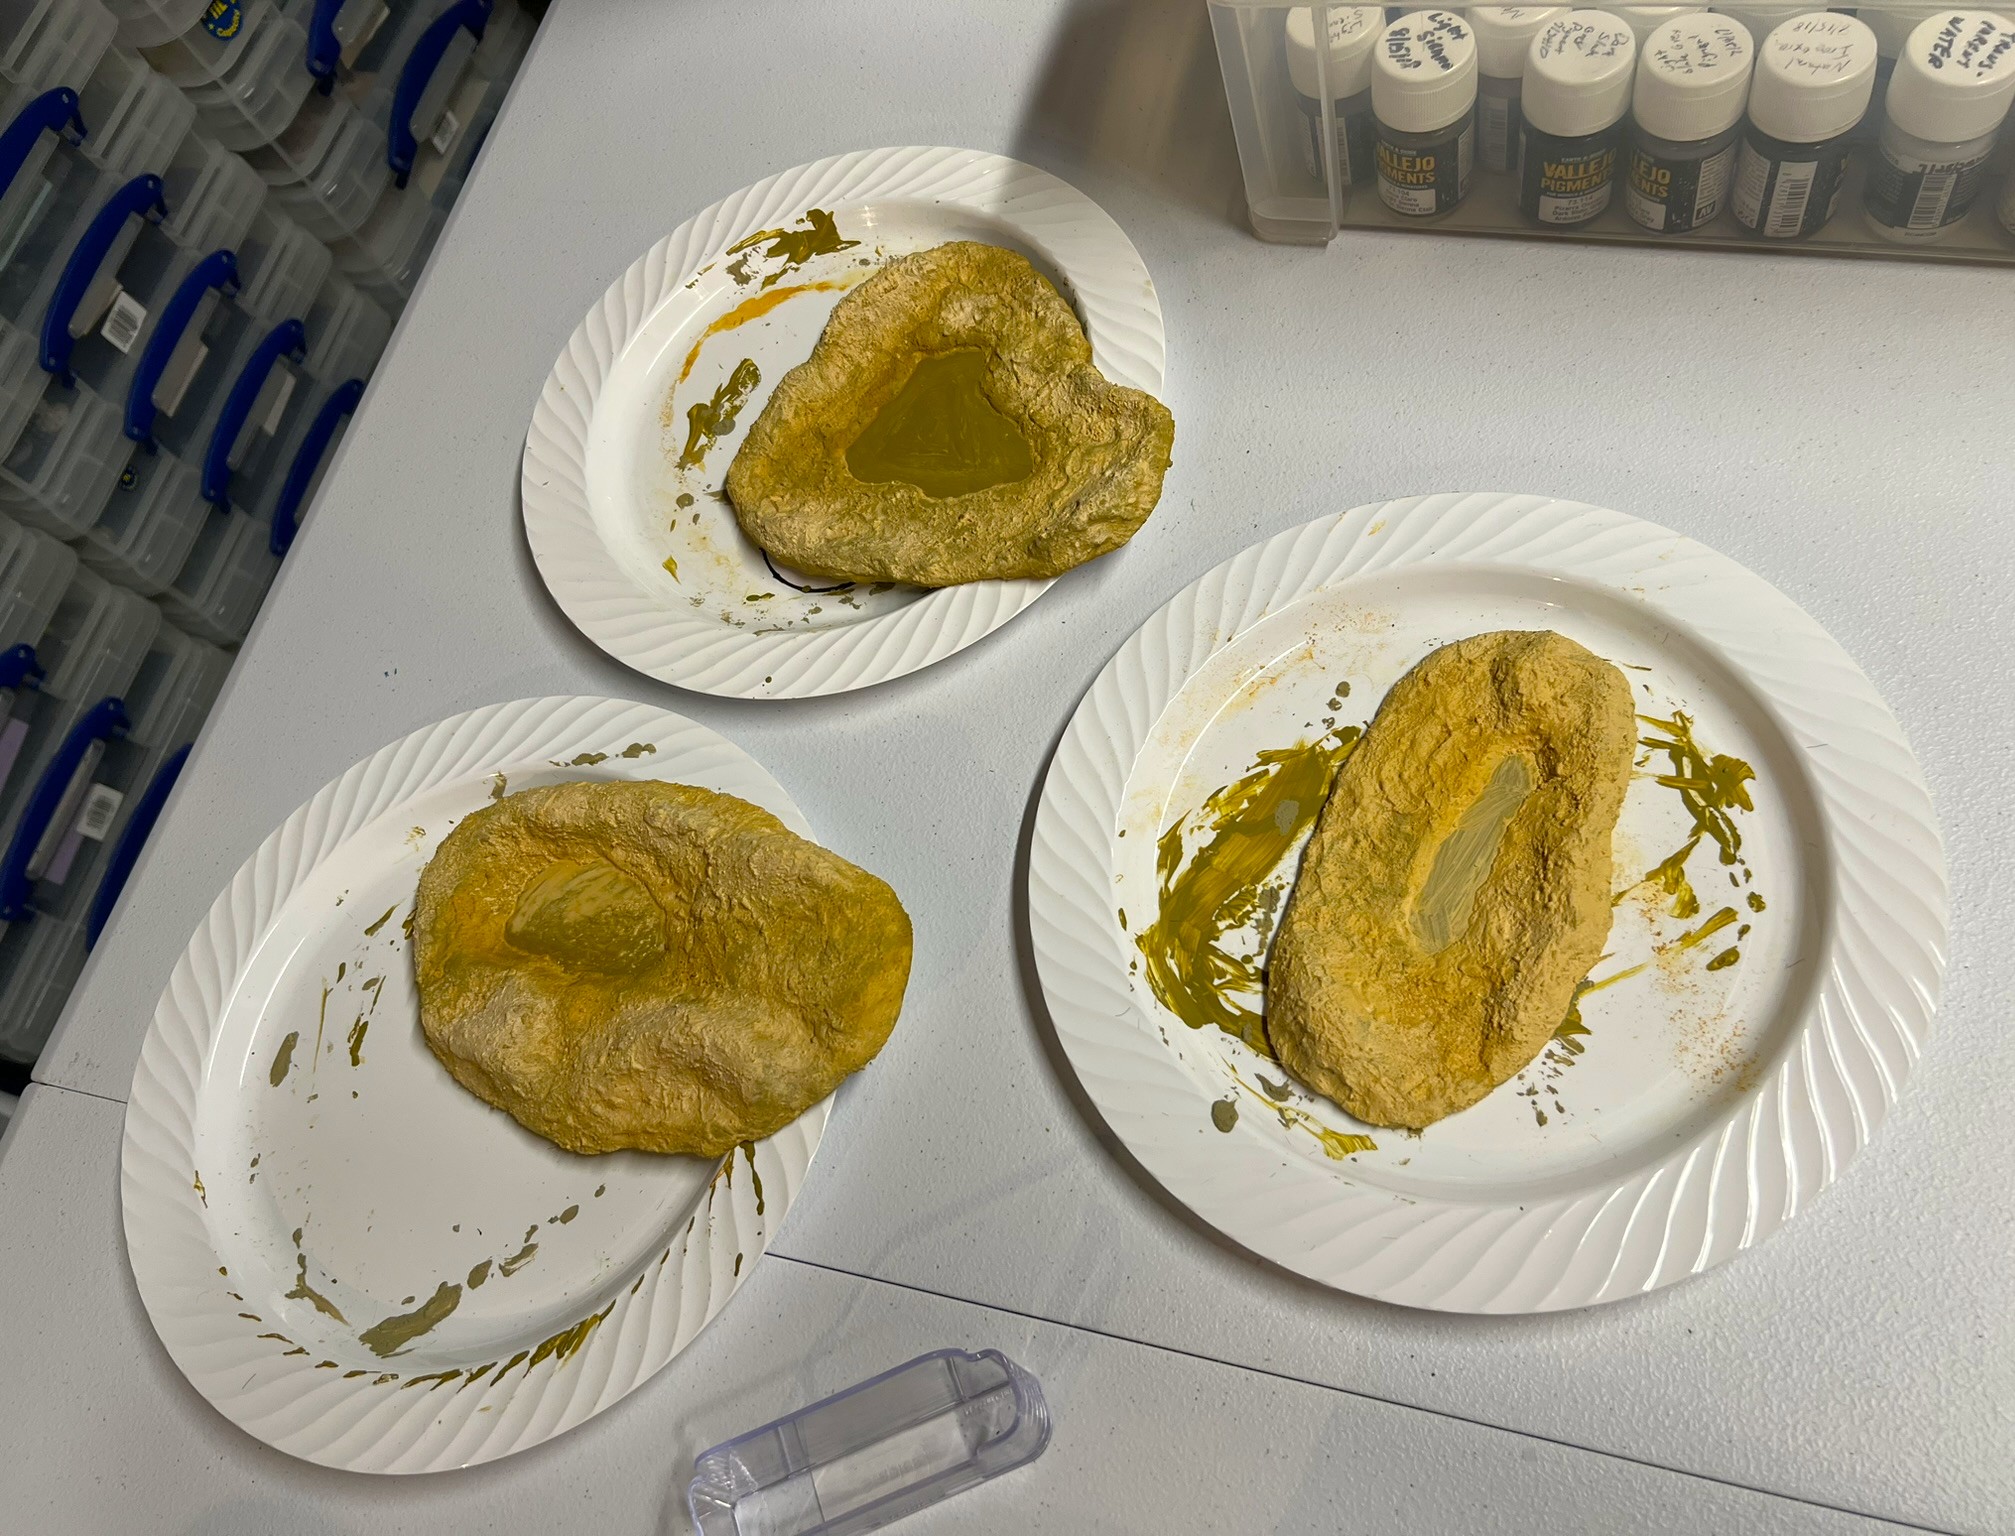
The polystyrene sheets cut into shapes for the oases.The Apoxie Sculpt setting up and hardening as shaped on the three oases. It cures in 24 hours.Once the Apoxie Sculpt had cured, I primed all three with a light yellow primer – and let that cure before adding the desert paste.Here you see the AK dry desert paste applied and starting to dry.Once dry, I added three different pigments (similar to my desert bases and scatter terrain), and let the pigments set.The next step was to paint the bottom of the water holes a distinct turquoise in anticipation of adding the Vallejo Still Water product later. I wanted the water to really stand out color-wise.
Once all the flocking was in I added the Vallejo Still Water in – mixed with some Secret Weapon Washes blue ink.
I then mixed and matched the palm trees to see what worked. The cured Apoxie Sculpt was pliable enough – yet strong enough – such that I was able to use an awl to make the holes for the trees’ prongs you saw above to set in the oases. This allows them to be removable, which is a plus, while the holes stay strong for reinsertion of the trees.
Completed!
Lastly, here is a video of them and a brief description by yours truly:
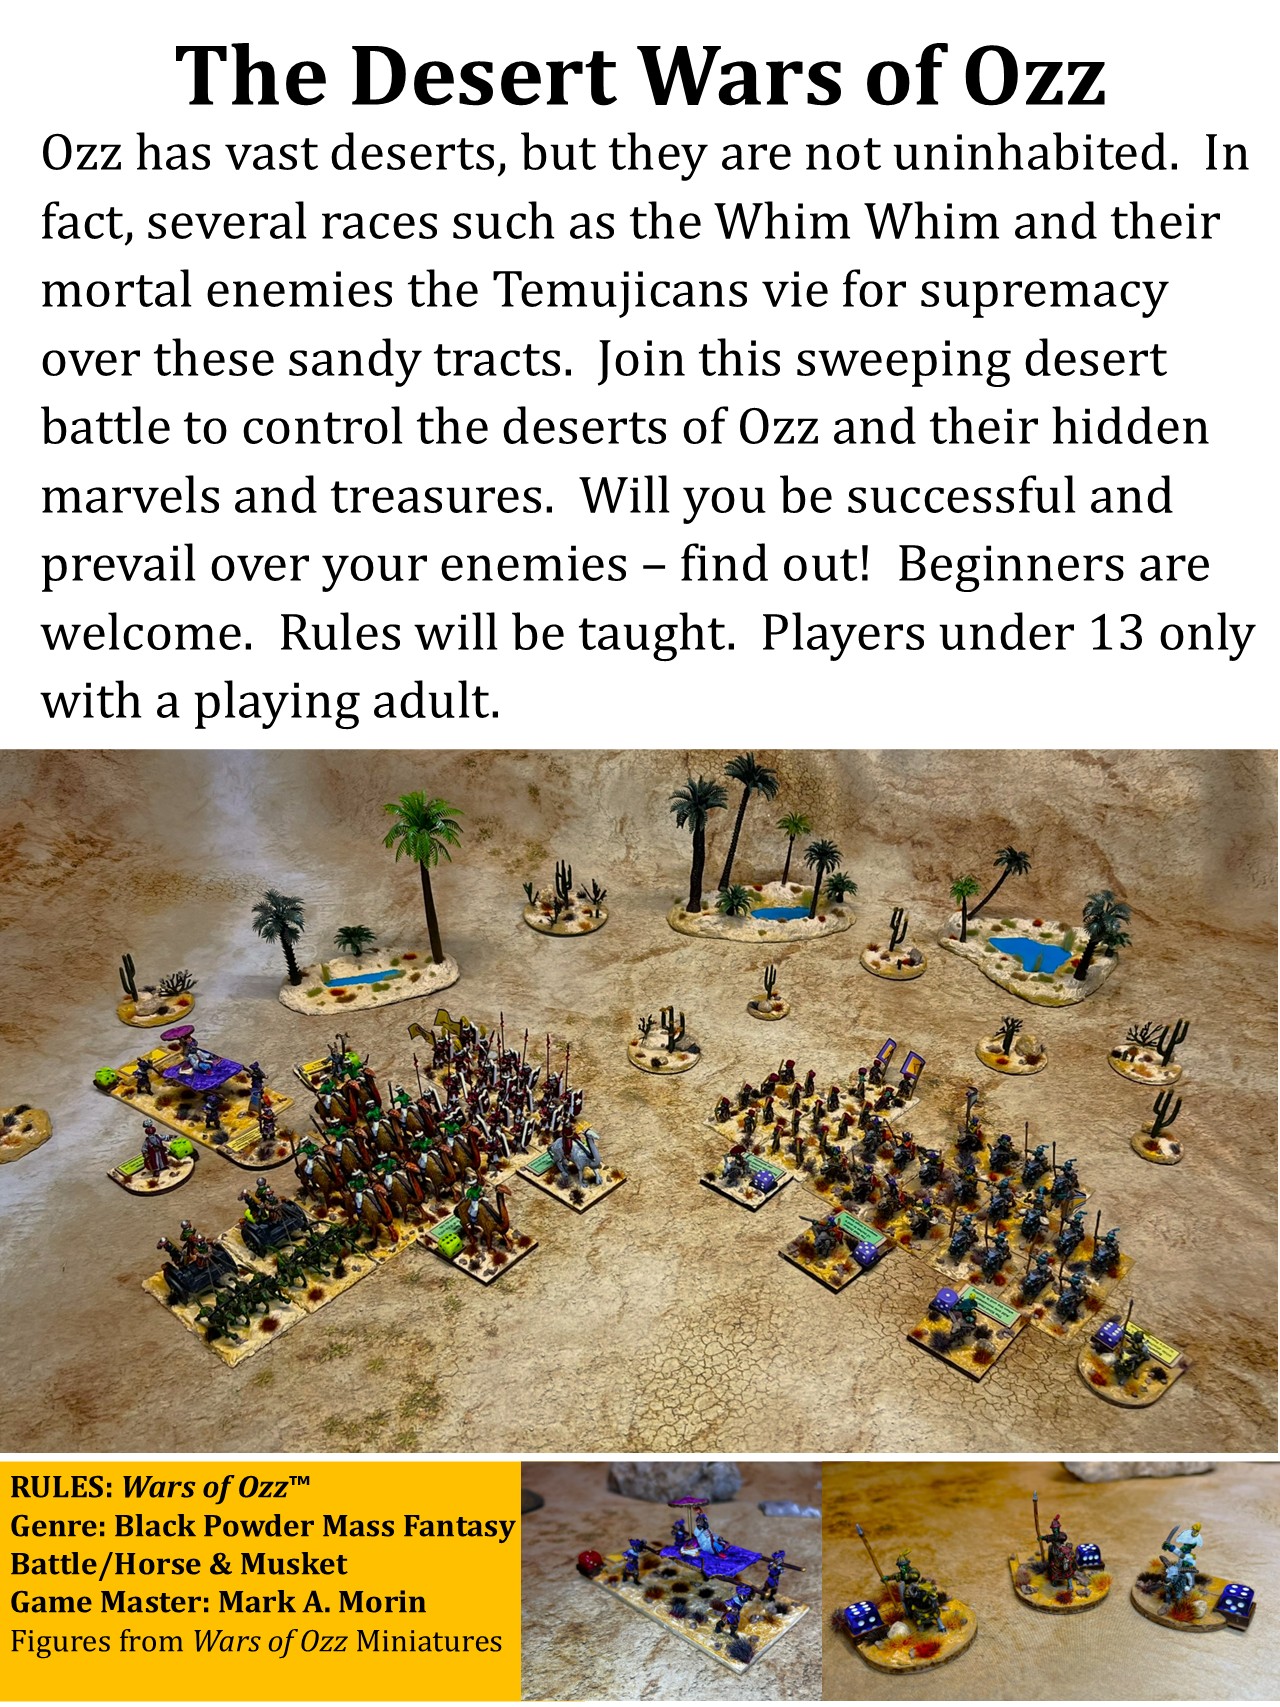
These three oases are the objective markers for my game, “The Desert Wars of Ozz“. The flyer for that game is below. You can see the some of the cactus bases and the oases – though they lost some color on the flyer being in the back.
“The Desert Wars of Ozz” game flyer.
I will be running this game (or a similar one) at multiple gaming conventions this year.
Tree Builds and Rehabilitation
My tree collection that I have used for years was in need of rehabilitation. The other gift from Mom was a JTT product that you see below:
The tree package.
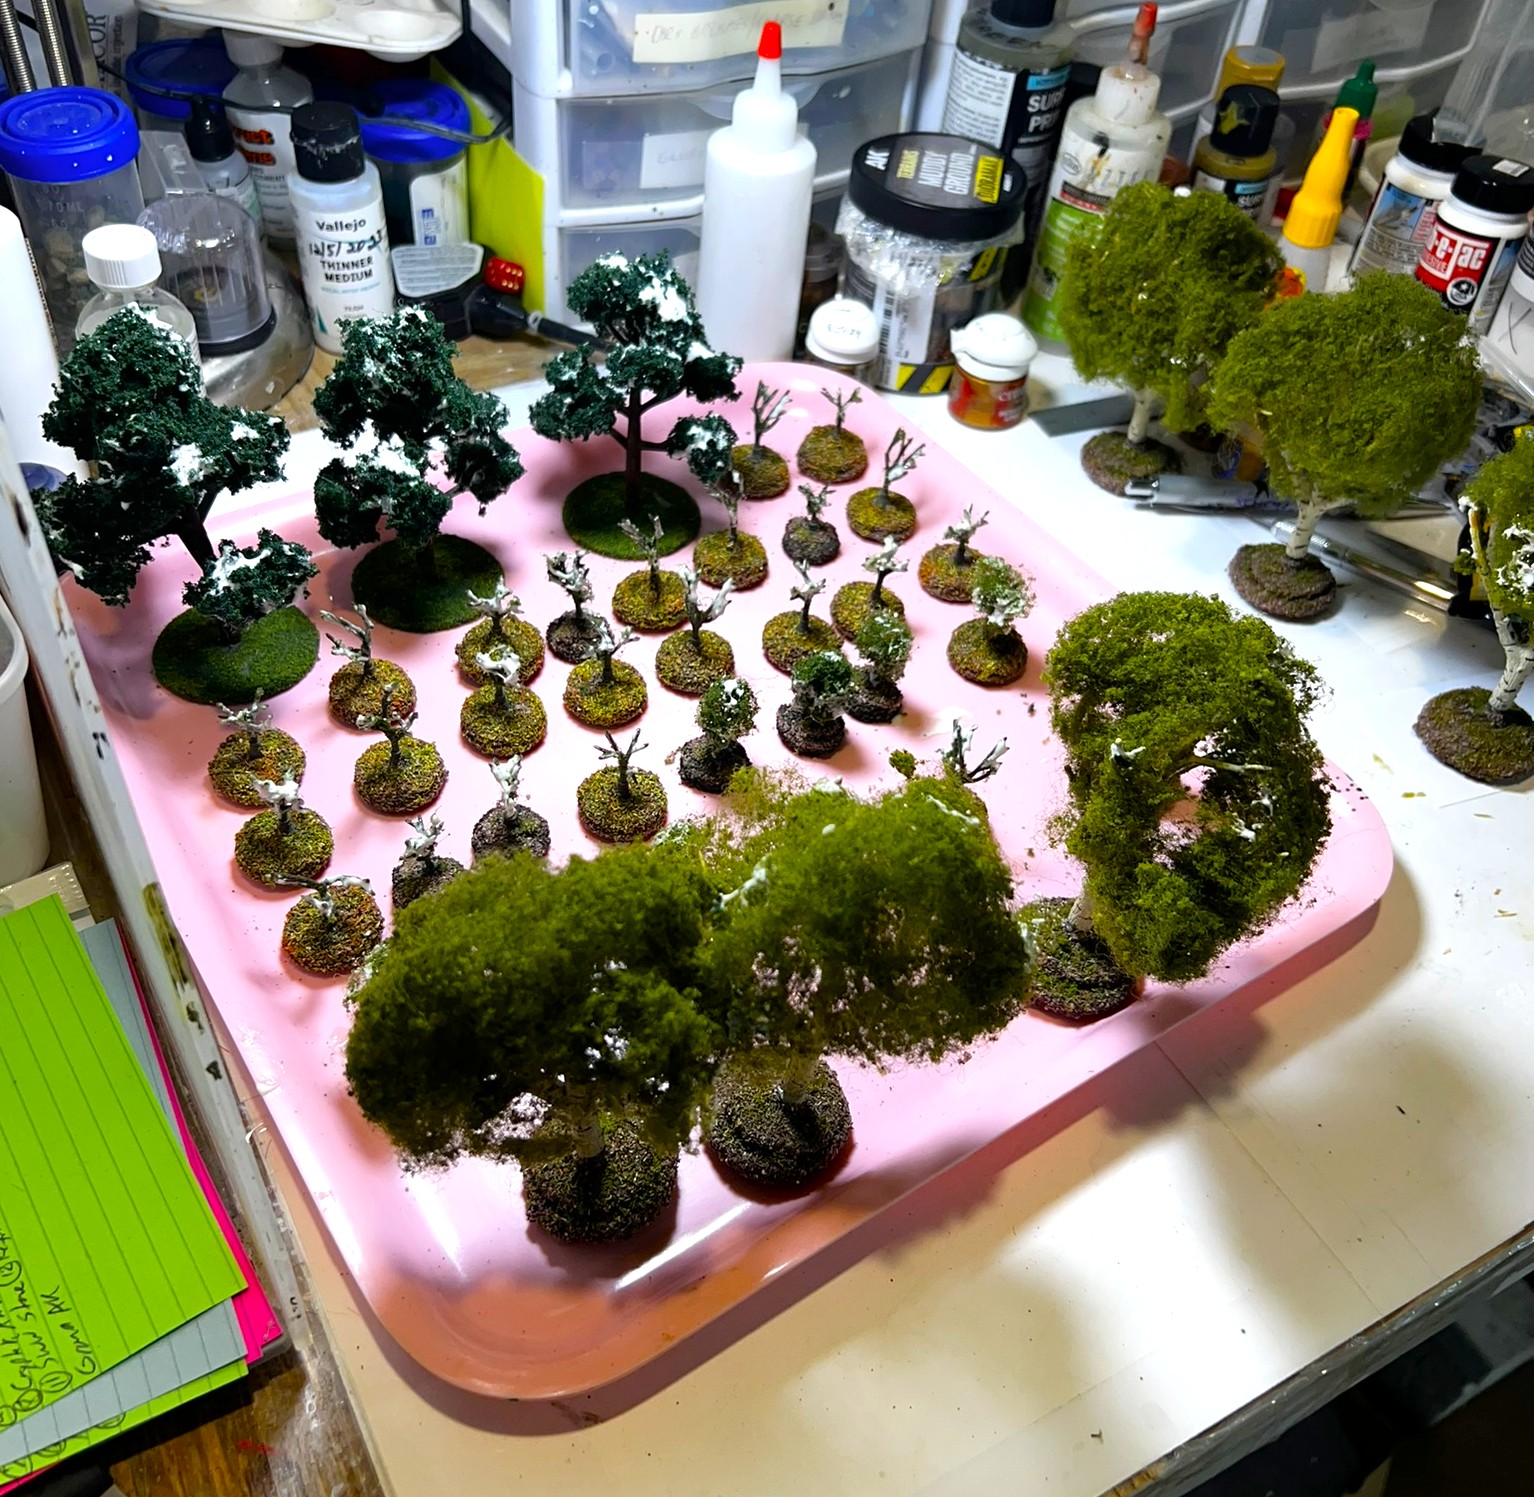
These were nice trees, but the foliage was a bit stringy in places. Plus I needed to wash the plastic limbs and trunks down with sepia and a darker wash. I assembled and mounted these three on large 2″ steel washers. Then I went to my tree collection and stripped off the stringier foliage on the older trees I already had. I applied Woodland Scenics Hob-E-Tac to the older trees and the newer ones. After the glue had turned clear, I used Woodland Scenics Light and Medium Green clump foliage to finish them off. There were 32 trees in all.
The stripped trees with the three new ones in the back – all with Hob-E-Tac drying.The post-makeover trees.
As trees are just so essential to a tabletop, I was happy to have these in better shape for my games going forward.
That wraps up part 2 of this mini-series on terrain. I think I got a lot done here and it was fun. The cactus bases and the oases also qualify for Dave Stone’s annual “Paint What You Got Challenge”. Please, check it out – Dave is a great guy and runs this every year between Christmas and the end of February.
If you have any suggestions or feedback, as always, let me know in the comment section.
And part 3 (the last one) in this series will be coming soon…
Final Note
Want to learn more about Ozz? Well, if you do want to check out the excellent Wars of Ozz figures’ range – there are two places to get them and to get the rules (and I make no money from this). The game rules and the figures are available from the next two places:
Below you’ll see the list of paints and the like that I used on these – and they are more useful for me when I need to recreate a color scheme in the future than maybe you – but in any case that’s why I post them.
Miscellaneous details and references for those interested in that sort of thing:
For all of my earlier posts on Wars of Ozz games, figures, units, and other related projects – please see this page.
PAINTS, INKS, GLAZES, SHADES, WASHES, PIGMENTS, FLOCKING, GLUES AND MORE THAT I USED ON THE CACTUS SCATTER TERRAIN BASES:
2 packages of Cacti/desert bushes from JTT Scenery (SKU 95666)
Homemade wooden hex base
1½” wooden disks from Michael’s
Games Workshops 3½” Plastic bases
Games Workshops 2½” Plastic bases
Unknown 1¼” Plastic bases
Unknown 1½” Plastic bases
Unknown 2¼” Plastic bases
War Games Accessories Steel Bases (FOW1)
Citadel “Seraphim Sepia” (shade/wash)
Vallejo Surface Primer “German Dark Yellow”
PVA Glue
AK Terrains Diorama Series “Sandy Desert” (texture/basing paste)
Several upcoming wargame conventions are looming on my horizon, so I needed to get going on adding some new terrain and game markers for my Wars of Ozz games. I will be posting about these three parts for ease of reading. I have been (as you will see) very engaged with multiple terrain projects. Luckily, I was able to get all of them completed in early January after finishing my brigade of Pollywomps. At Christmas, I received several cool gifts that would be useful to convert or build as terrain pieces. This post will cover the first one I finished, a Scarecrow Girl statue.
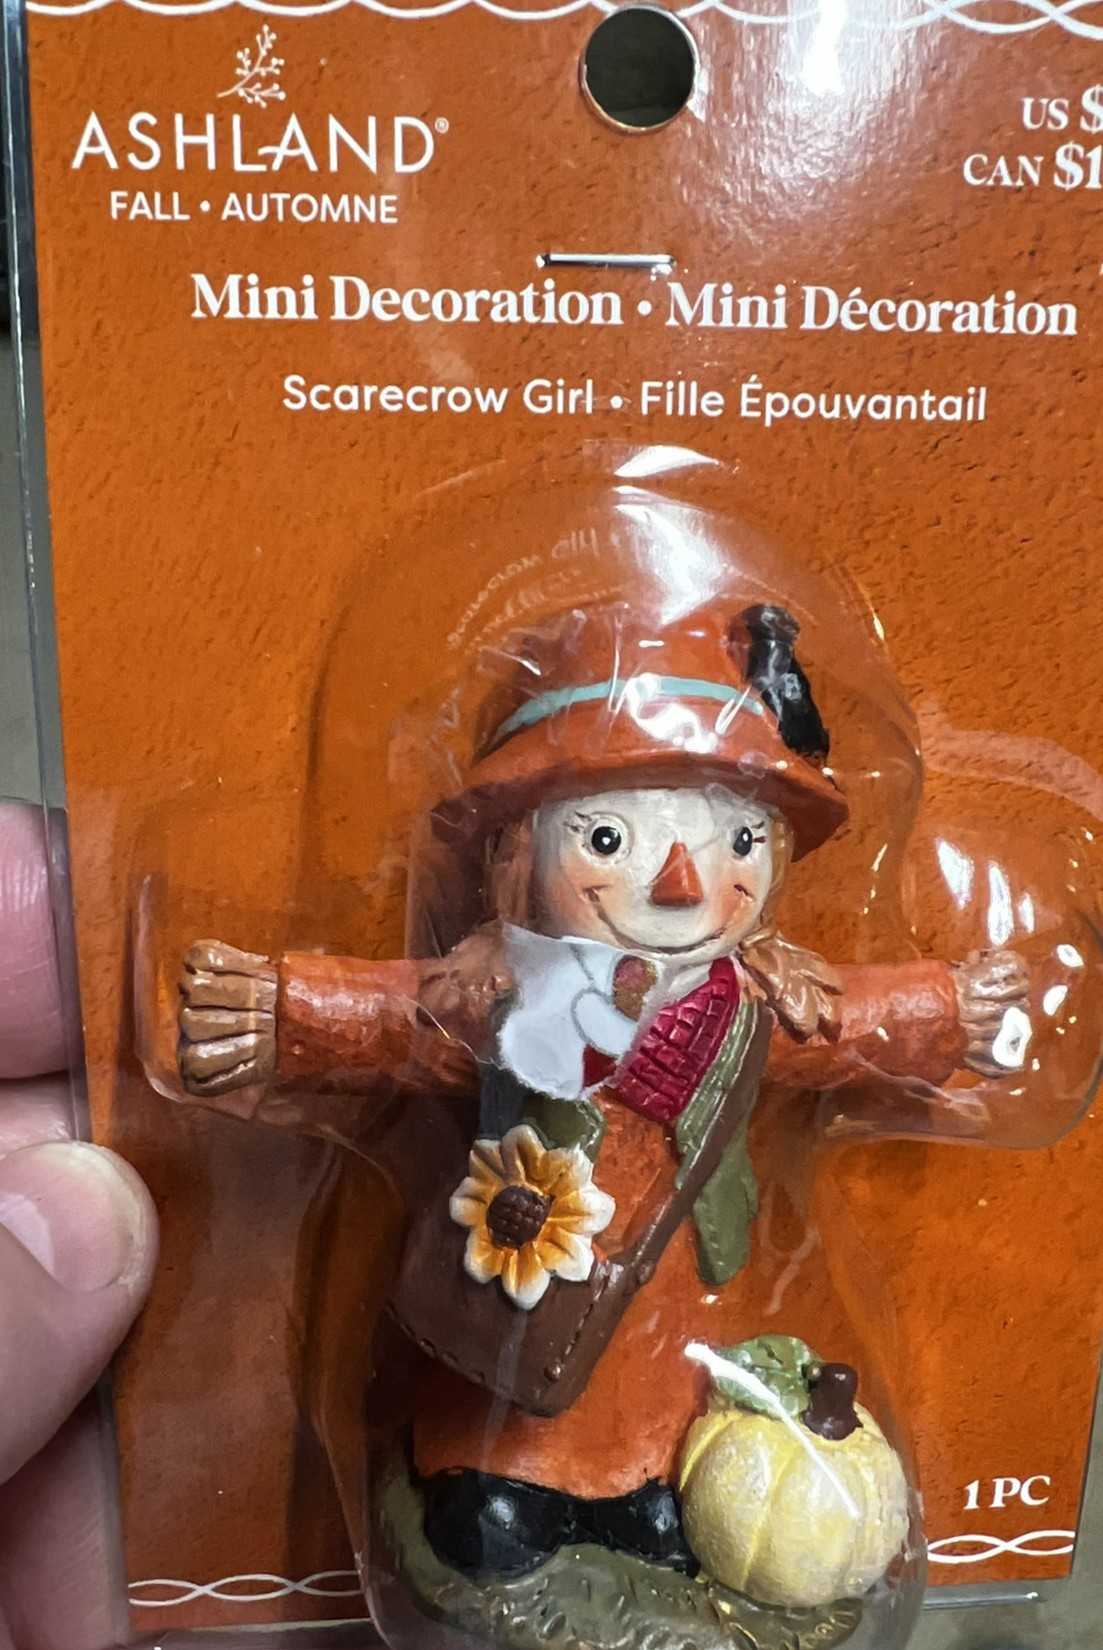
My wife Lynn saw a 3″ tall resin figurine of a scarecrow girl at the Dollar Store – and got it for me. It was factory-painted. When I saw it, ideas in my brain began to churn. I thought with the statue’s size she would make a nice centerpiece as a statue. I’ll share how I worked on it and then some shots of the finished product.
WIP Shots of the Project
The figurine in its package with wrapping paper shard still attached!
My plan was to build the terrain piece as a metal statue on a granite plinth. I had various plastic bases that I had not been using – and I selected one that was not originally even designed as a base for figures. It was probably came from something household-like that I assembled years ago and came as an extra piece. I saved it as I thought someday I could use it. I sanded off its shiny surface for better primer adhesion. Also, I had saved a plastic lid from a Tropicana orange juice bottle that had a nice shapes on its outside surface. Lastly, I added a heavy large steel fender washer underneath the plastic base for stability and adhesion to a magnetic sheet in a storage box.
The Tropicana lid, steel fender washer, sanded and repurposed base, and the Scarecrow Girl shown here at the start.
The steel washer was glued to the underside of the plastic base. I primed the lid and base all black, except where I was to glue the lid to the base, and let that cure. Then I affixed the lid to the base with PVA and let that set up.
Primed lid and base that would serve as the plinth
For the figure, I just overlaid the factory paint with gold paint in a dry-brushing fashion. Then I built out the Scarecrow Girl’s base with enough green stuff that it would cover the “Tropicana” logo. to do that, I had cut a piece of card stock to determine the size and shape that I would need to obscure the logo. After gluing that card stock to the statue, it was a lot easier to shape the green stuff perfectly.
Primed plinth and statue with enlarged base
I washed the statue down with a metal wash to give better definition. and added another dry-brush application of gold.
Statue after adding the dark wash and more gold. I also painted the green stuff as granite to match what I wanted for the plinth.
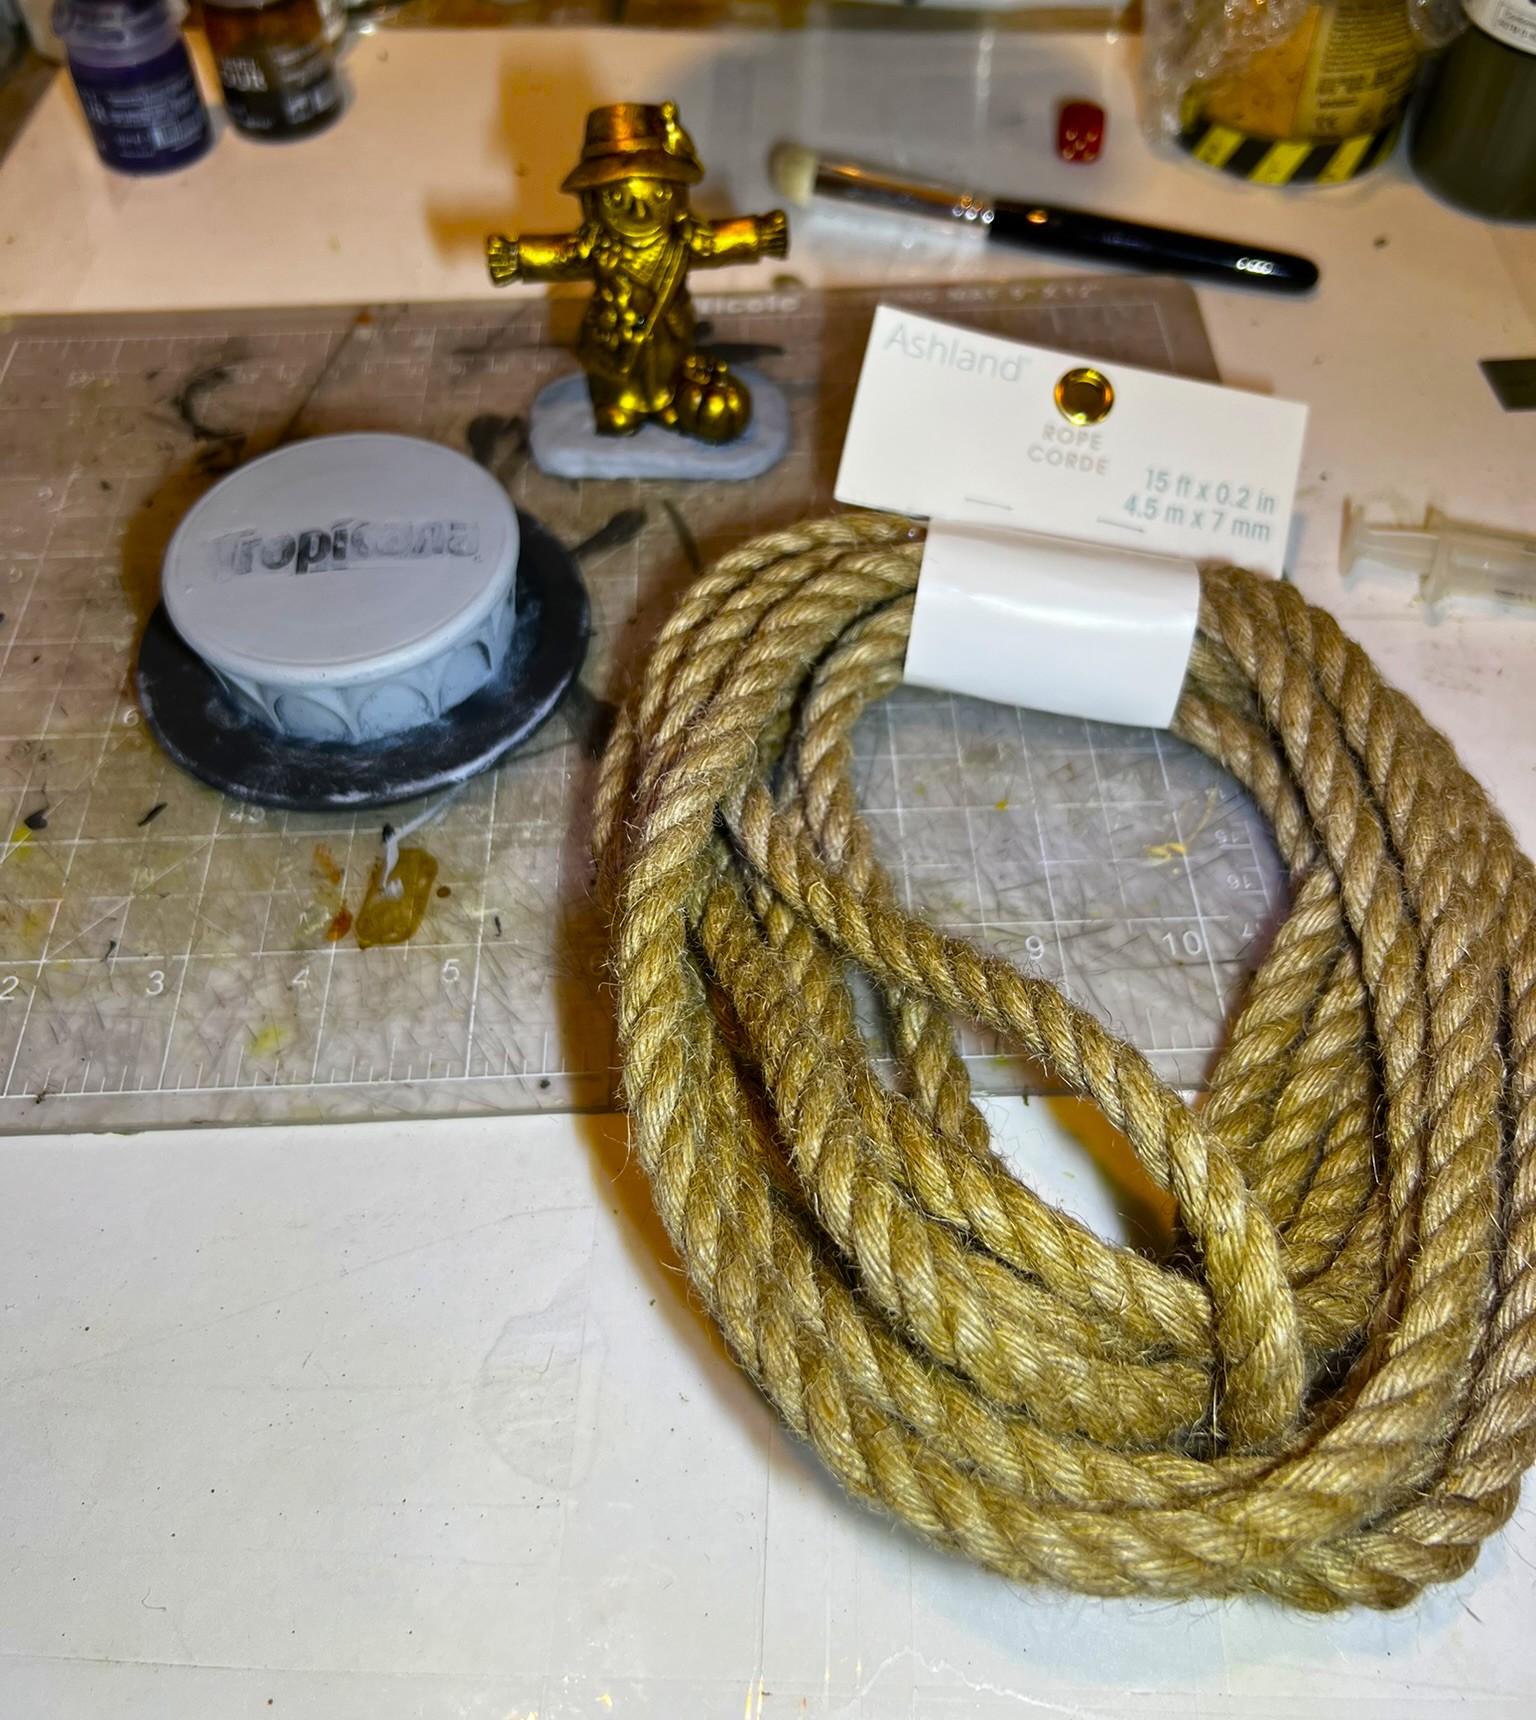
Then, I started to dry-bush the plinth to look like stone, but I saw that it had a small gap underneath. The steel washer was just thick enough to make the plinth seem to hover over the ground. I visited Michael’s store for inspiration, and saw a rope for decorative hobby projects – and voila – solution!
The plinth , statue, and rope
I cut the rope such that it would be the same circumference as the plinth. I then massively saturated the rope and where it touched the plinth with PVA glue. I drove the ends of the rope together where they met with a combination of toothpicks and small-gauge steel needles, and let it dry – hoping that approach would work.
The plinth and rope with the PVA drying
It worked well as you can see below. All I needed to do was remove the needles and clip off the toothpicks flush with the rope.
Fry and before removing toothpicks
I had also tried to use toothpicks underneath as “bridges” to hold the rope ends together. PVA is great here as the rope and toothpicks are porous enough to make great bonds.
Underneath view of the plinth showing the steel washer thickness that caused the gap. You can also see the toothpicks used both in the rope and as bridges.
Then I glued the statue to the plinth. Having previously applied the card stock that the green stuff rested on to the underside of the statue – I got a great bond to the plinth with PVA.
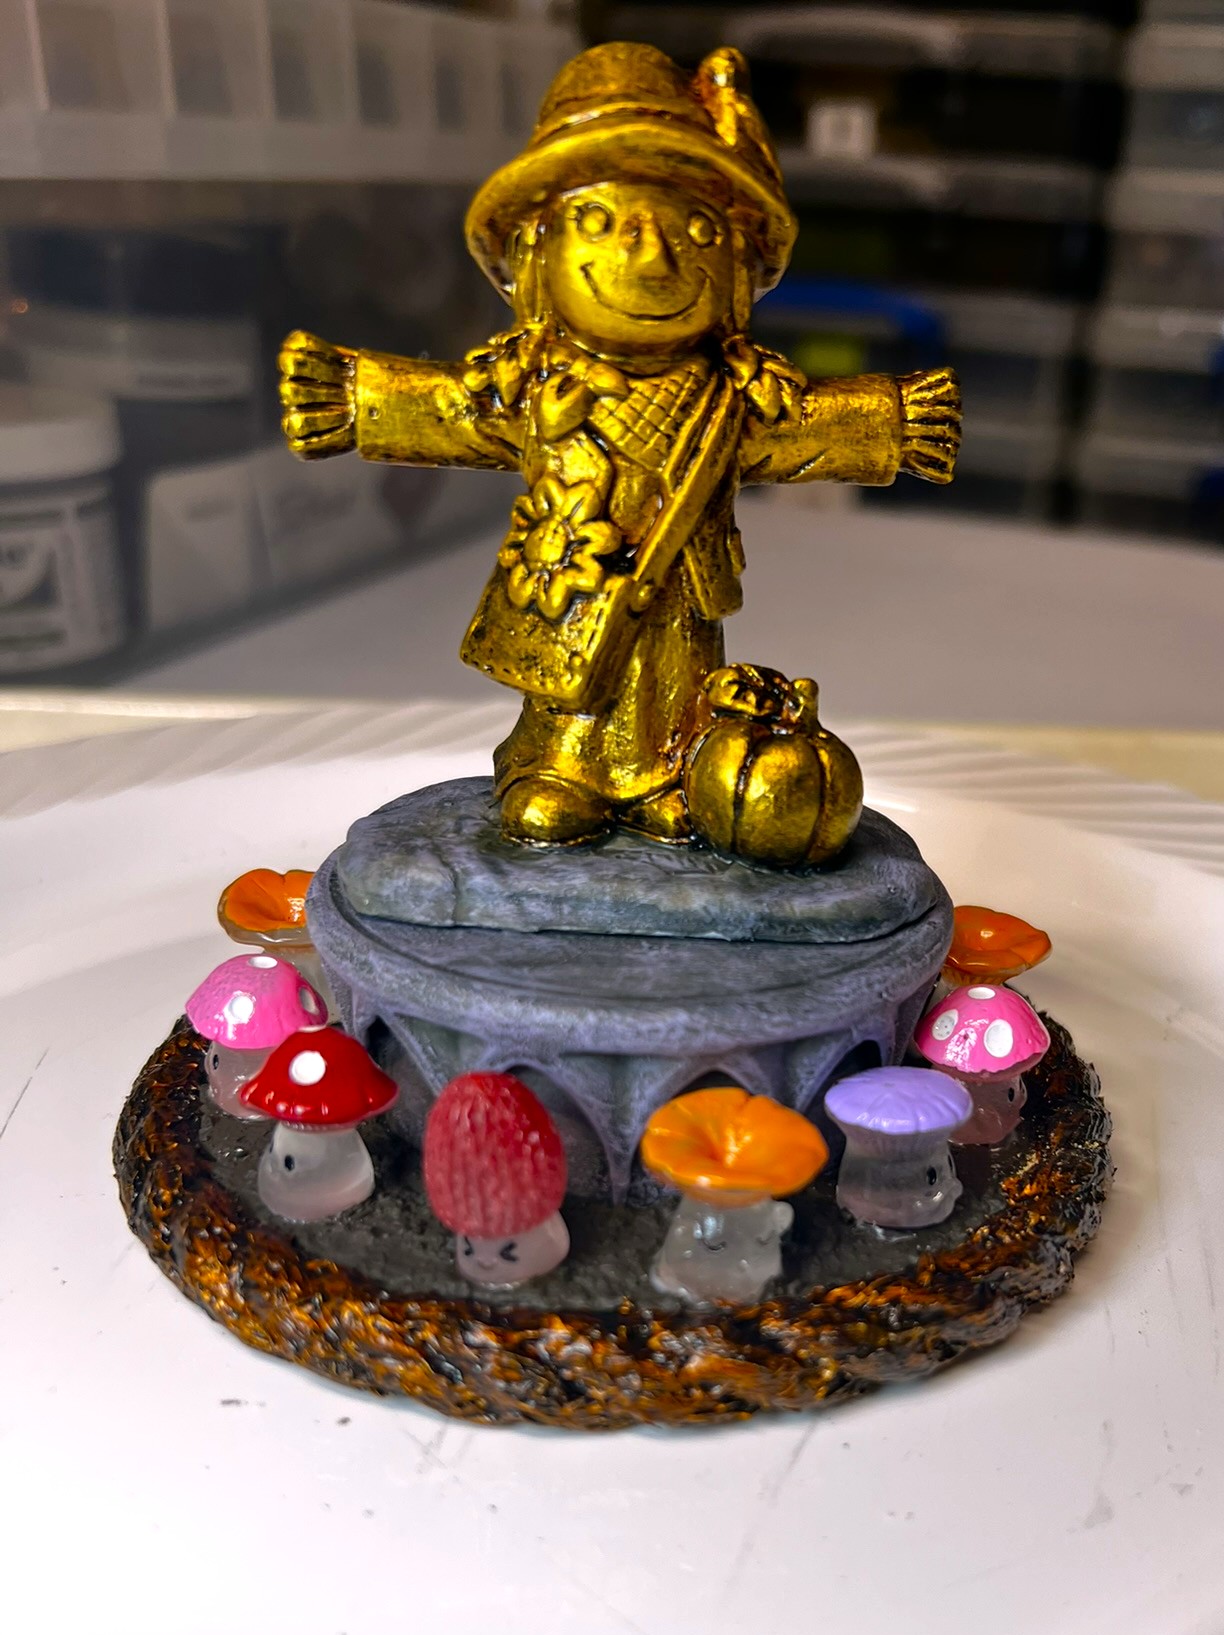
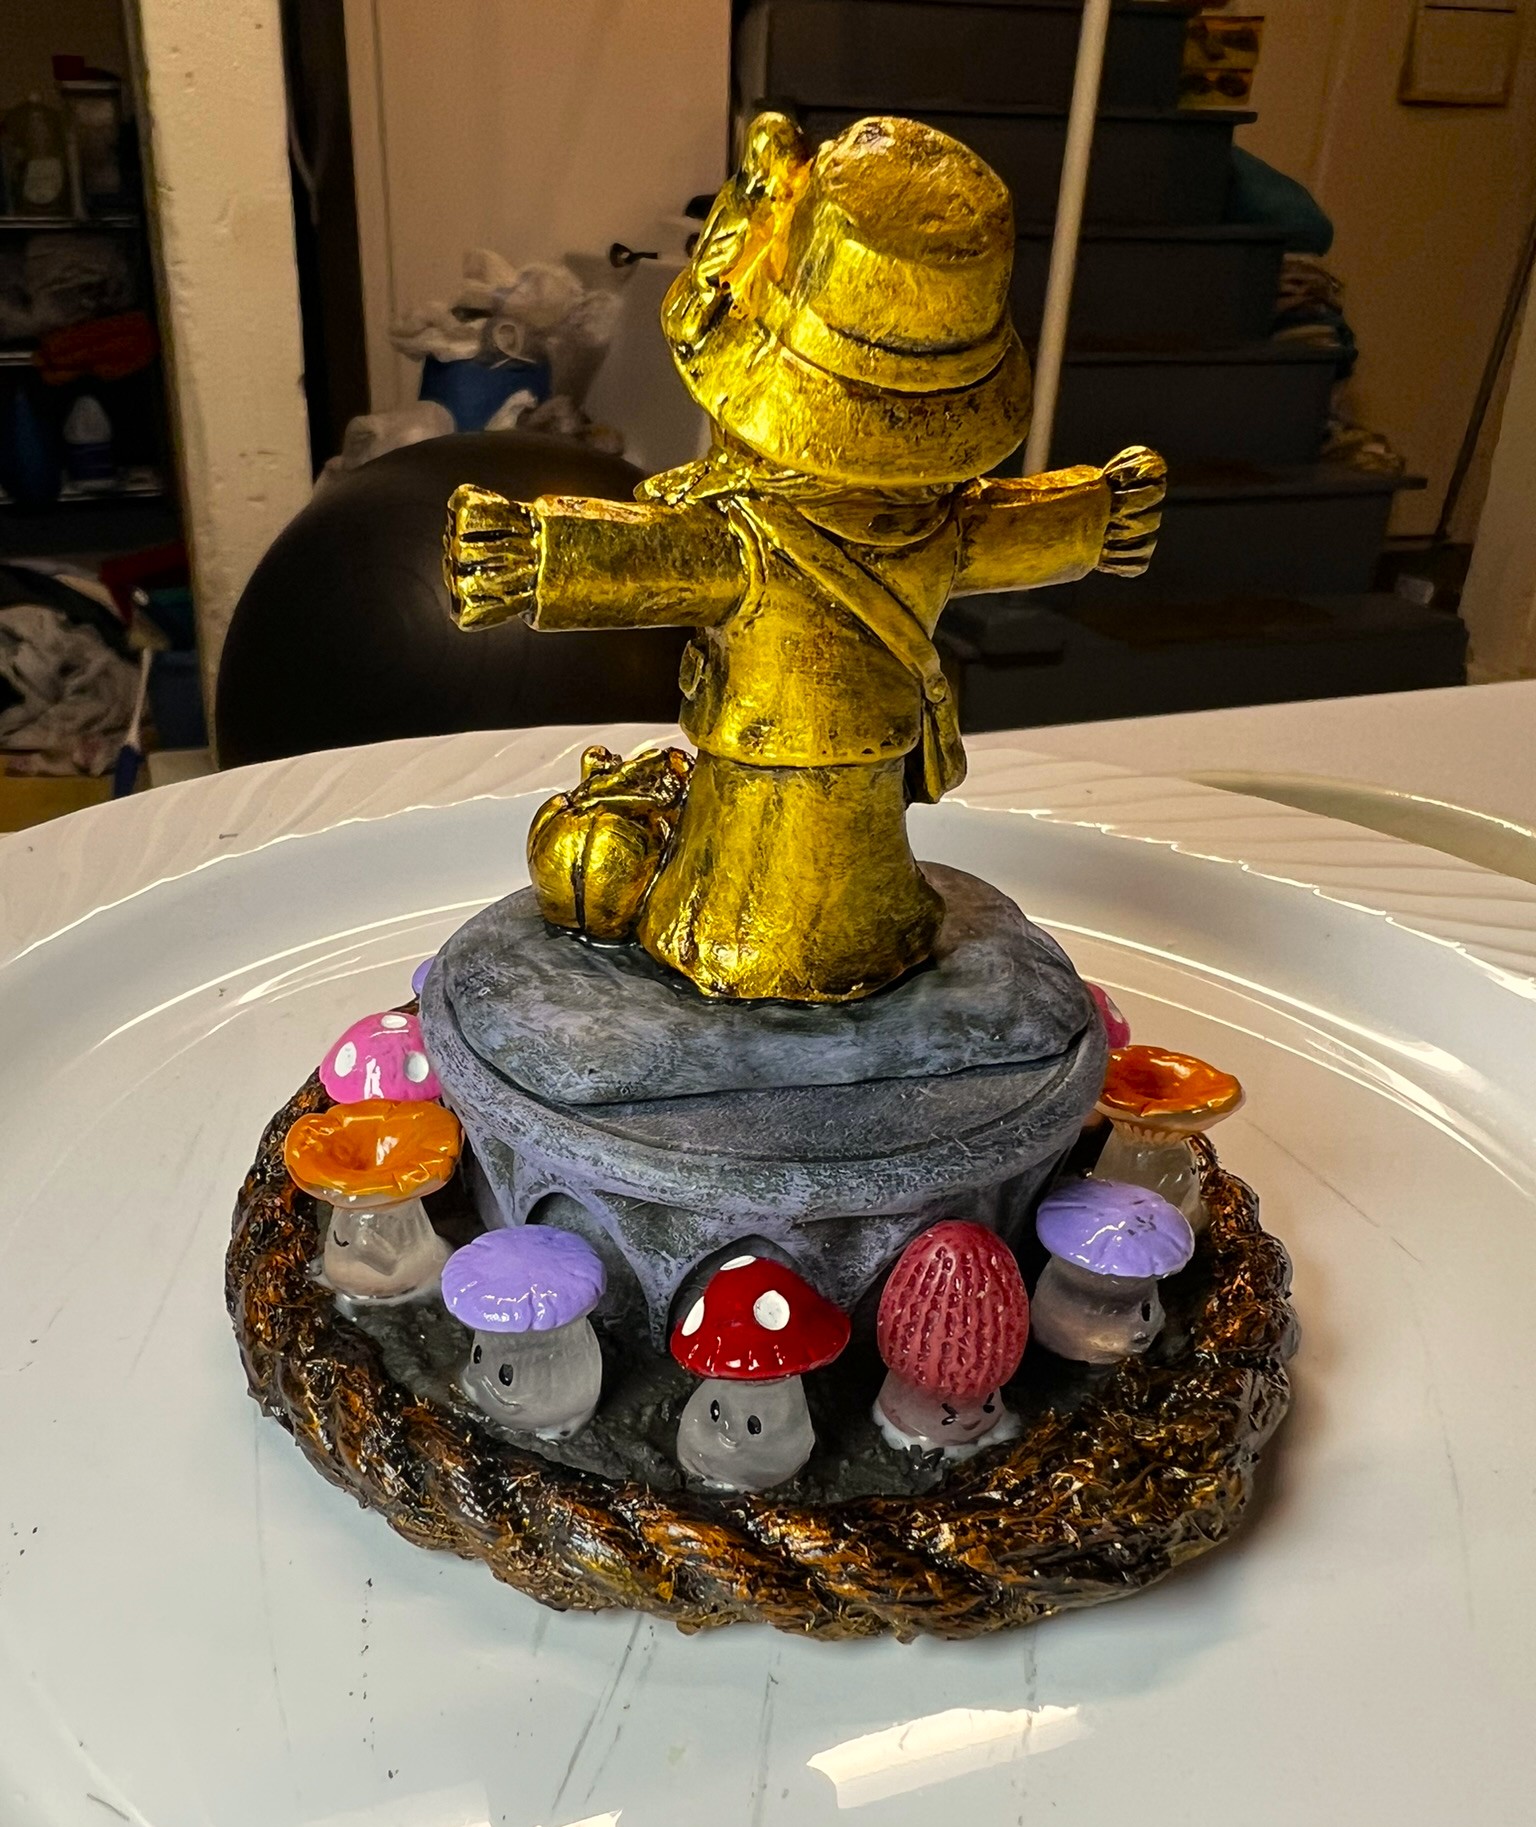
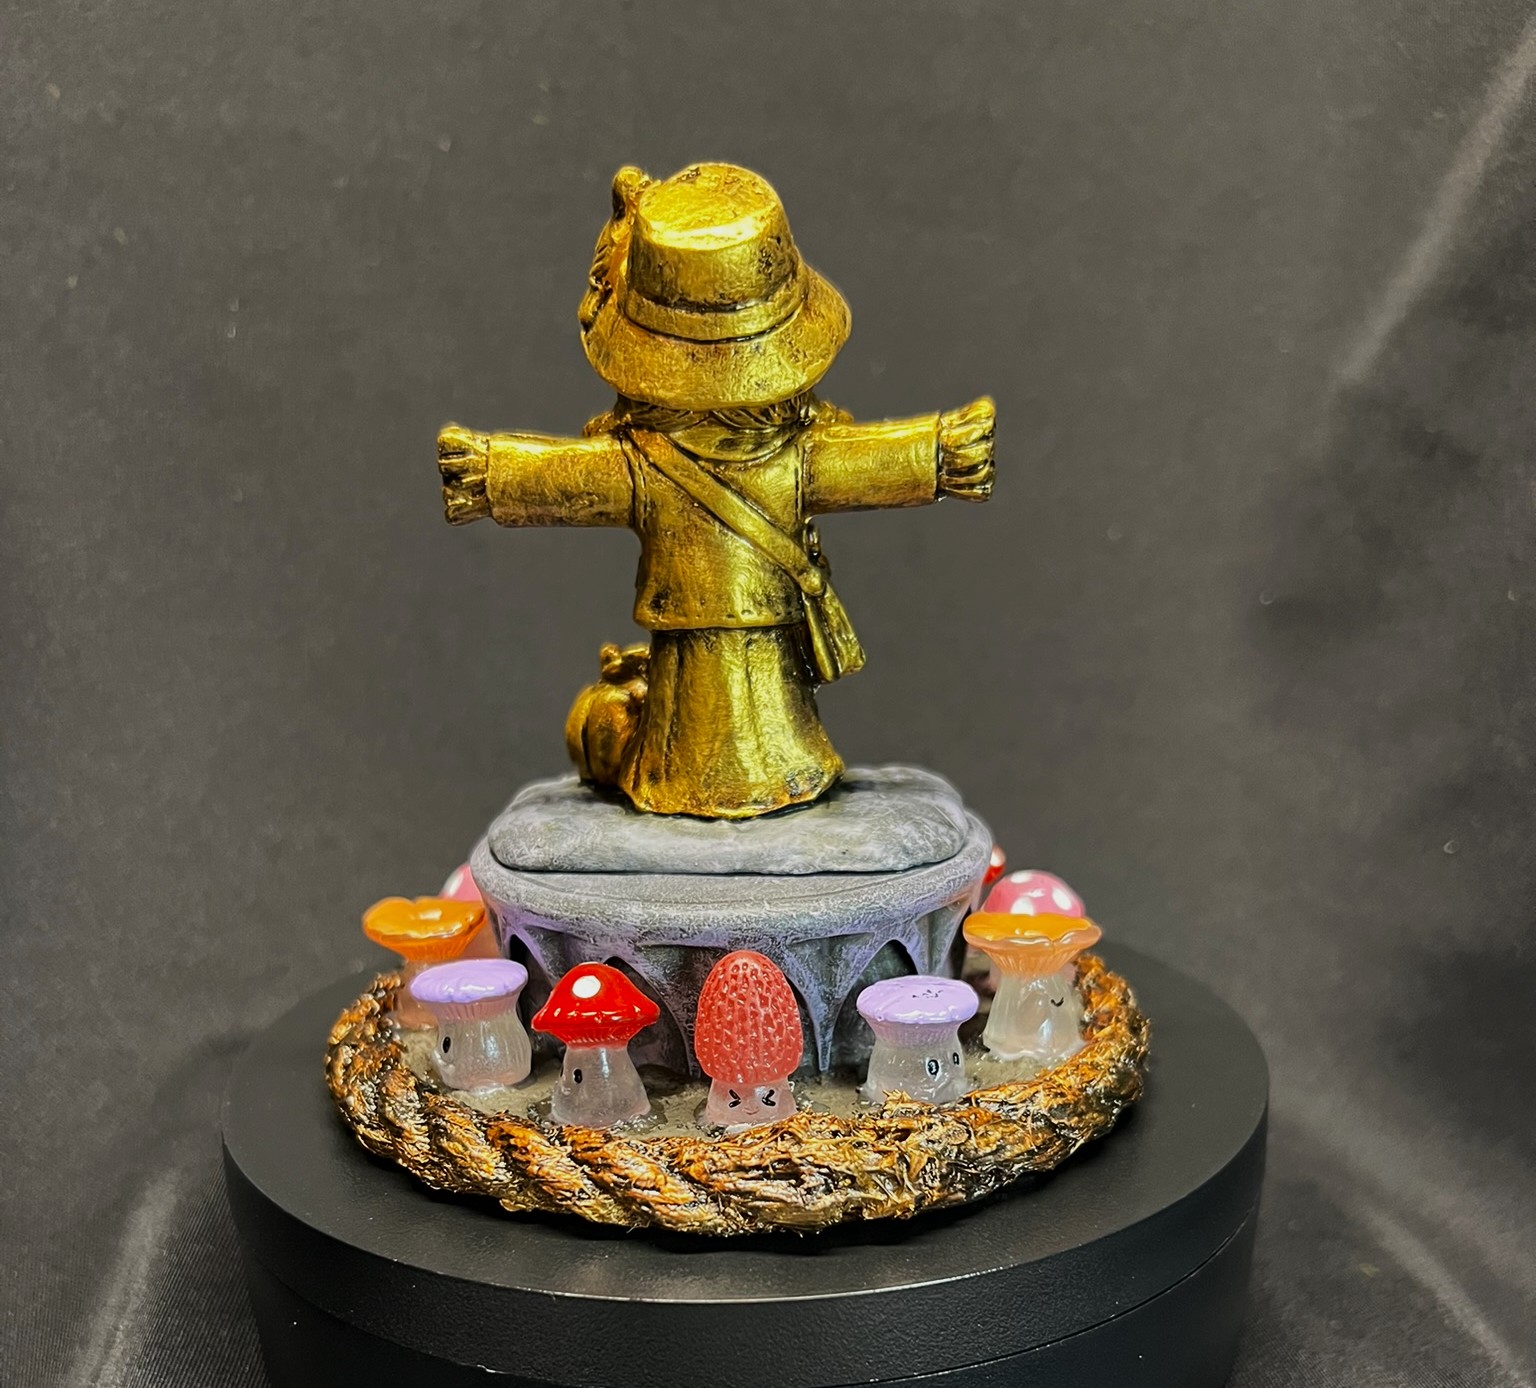
I used a different (darker) metallic gold color on the rope to simulate it as part of the entire work, then applied a dark wash. Lastly, I decided that there would be a “garden of guardian mushrooms” protecting here around the plinth. I did not paint them as this would allow me to treat the little guys as either carved or anthropomorphic!
Finished Scarecrow girl with little miushrooms’s glue drying (front)……and back
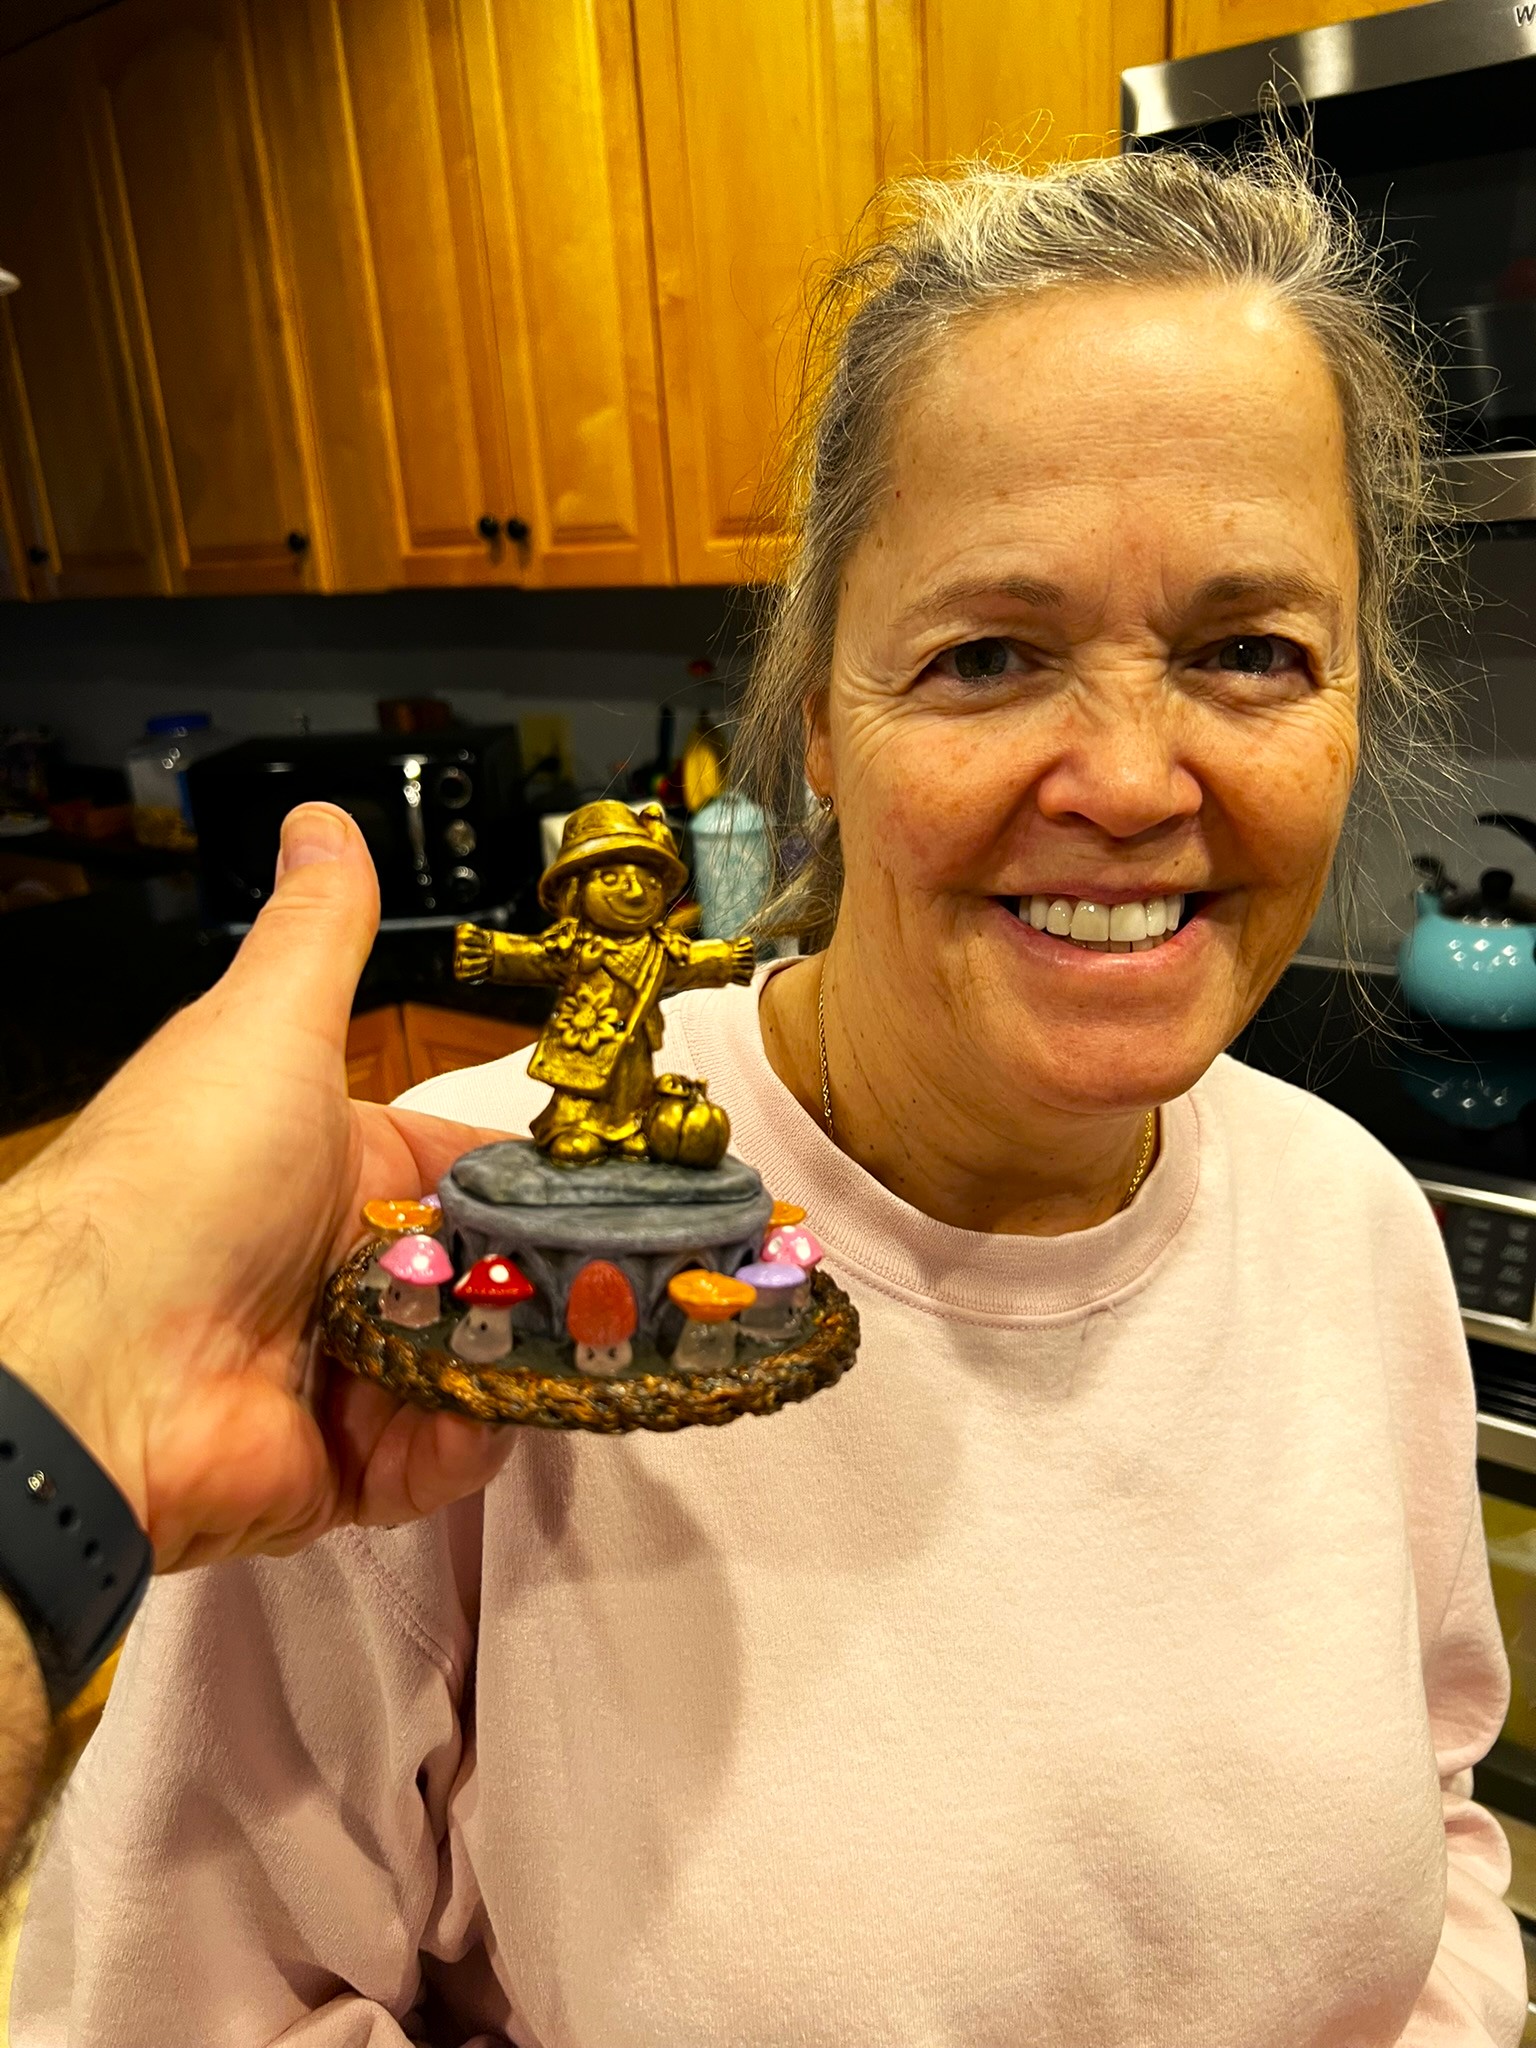
I of course had to show my lovely bride how much I appreciated her gift and what I had done with it! I think she liked it.
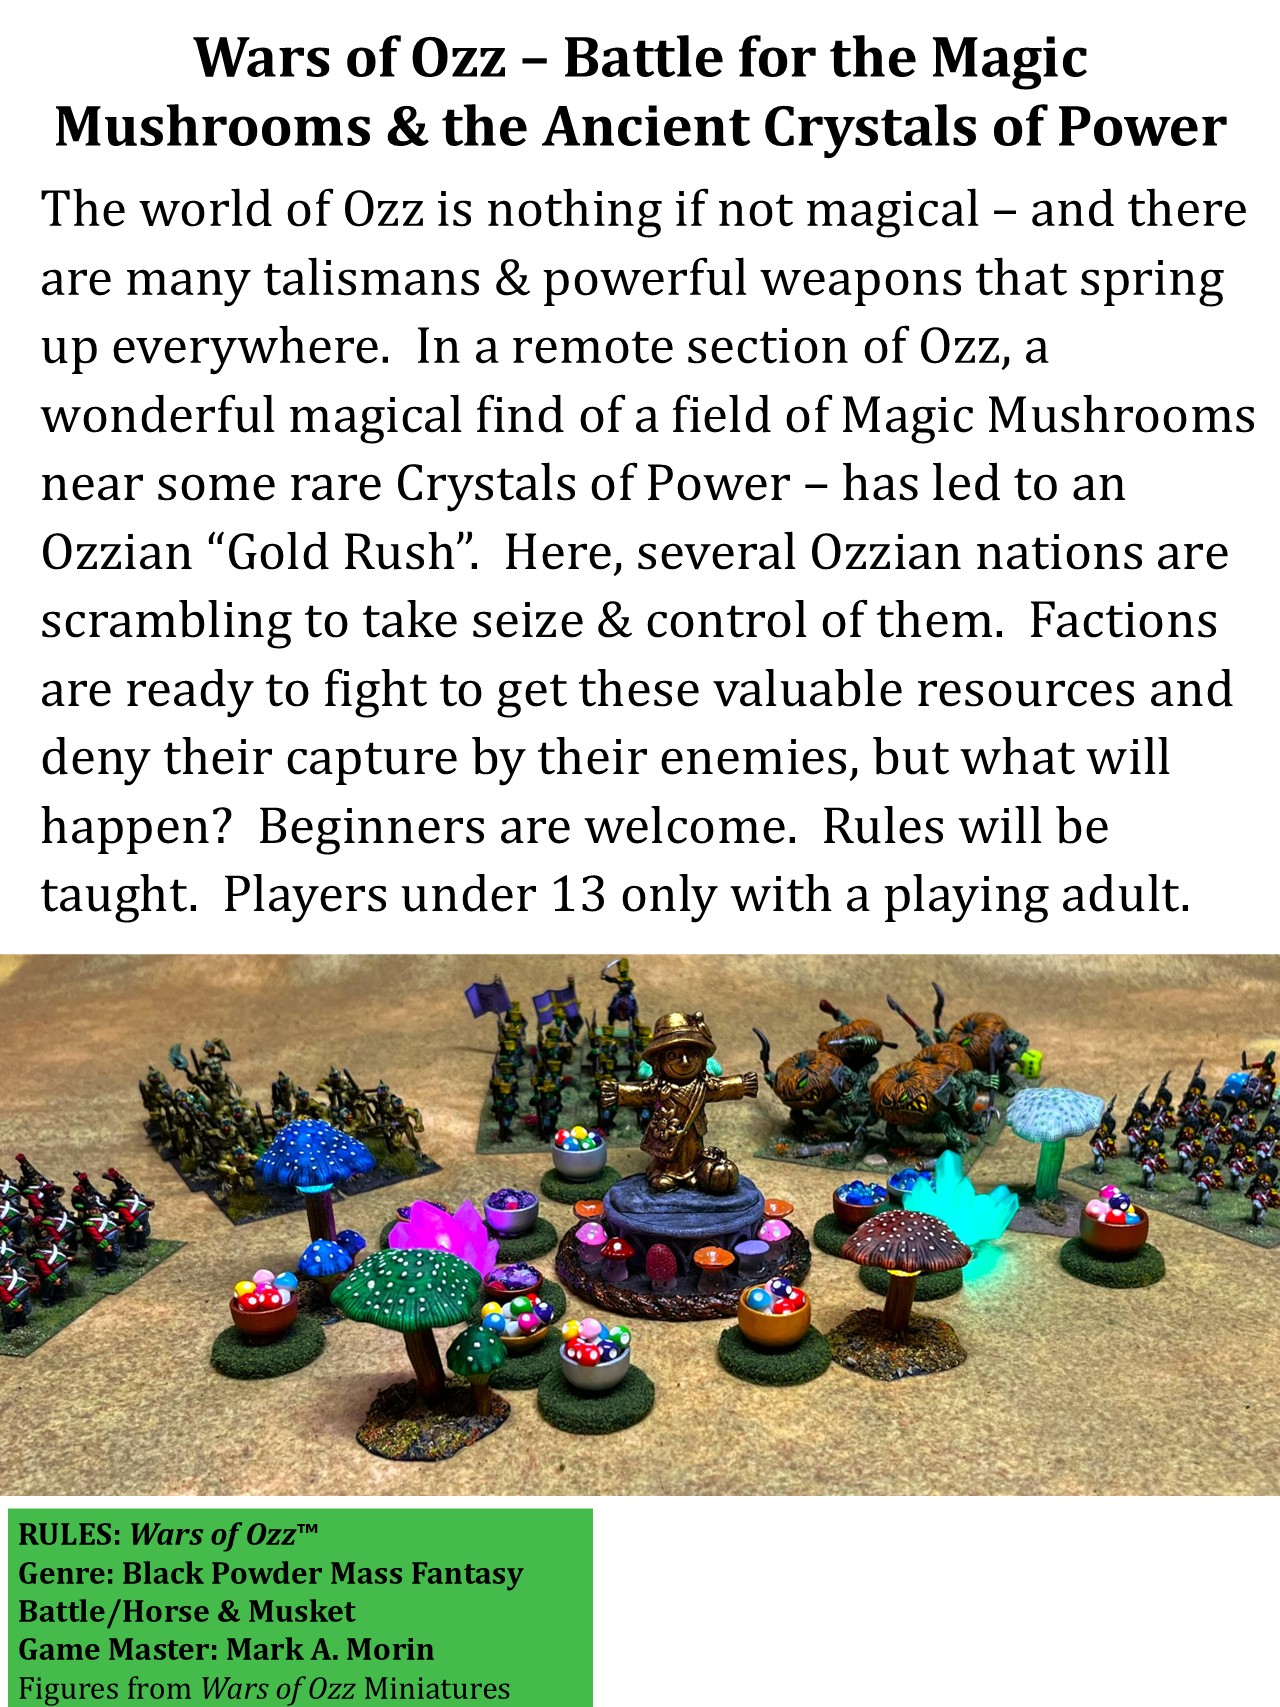
In the video I mention that I did not have a game for it – well, I decided that she will be the centerpiece on the tabletop for my “Wars of Ozz – Battle for the Magic Mushrooms & the Ancient Crystals of Power” game, described as follows:
The world of Ozz is nothing if not magical – and there are many talismans & powerful weapons that spring up everywhere. In a remote section of Ozz, a wonderful magical find of a field of Magic Mushrooms near some rare Crystals of Power – has led to an Ozzian “Gold Rush”. Here, several Ozzian nations are scrambling to take seize & control of them. Factions have teamed up & are ready to fight to get these valuable resources and deny their capture by their enemies, but what will happen?
Here is the flyer for that game – and you can see some game markers that will be fully shared in part 3 of this series.
Game Flyer
Thanks for looking – this was a fun change of pace. It also qualifies for Dave Stone’s annual “Paint What You Got Challenge”. It’s a fun and global challenge to paint up figures between Christmas and the end of February, check it out!
I’d be interested in hearing your feedback on this – thanks in advance for any sharing!
And part 2 in this series will be coming soon…
Final Note
While this figure is NOT official, if you do want to check out the excellent Wars of Ozz figures’ range – there are two places to get them and to get the rules (and I make no money from this). The game rules and the figures are available from the next two places:
Below you’ll see the list of paints and the like that I used on these – and they are more useful for me when I need to recreate a color scheme in the future than maybe you – but in any case that’s why I post them.
Miscellaneous details and references for those interested in that sort of thing:
For all of my earlier posts on Wars of Ozz games, figures, units, and other related projects – please see this page.
PAINTS, INKS, GLAZES, SHADES, WASHES, PIGMENTS, FLOCKING, GLUES AND MORE THAT I USED ON THIS SCARECROW GIRL STATUE:
Ashland “Scarecrow Girl Mini Decoration” statue
Black plastic disk
Plastic Tropicana Orange Juice lid
2″ Square War Games Accessories Steel Bases (21)
PVA Glue
Card stock
Green stuff
Ashland 7mm Rope Cord
Vallejo Surface Primer “German Panzer Grey”
Citadel “Liberator Gold”
Citadel “Retributor Armour”
Citadel “Cryptek Armourshade” (wash)
Americana “Slate Gray”
Toothpicks
Secret Weapon Washes “Stone”
Citadel “Slaneesh Grey”
AK Terrains Diorama Series “Muddy Ground” (texture/basing paste)
Now that is a pithy title! Indeed, October saw me having a number of projects happening – almost simultaneously – in preparation for the HMGS Fall In! convention this week. It was nearly overwhelming, especially given that I was also involved in multiple golf tournaments as a player and as an organizer/committee member, plus a number of big events that were nice – but I’ll spare you those details for now.
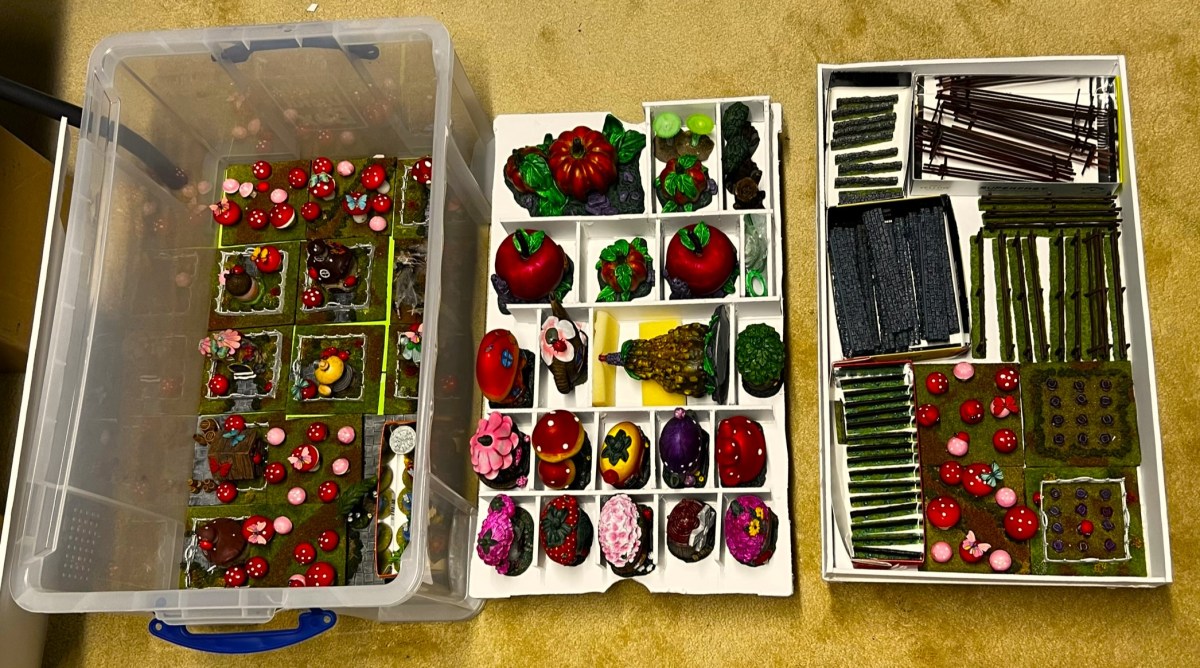
So much terrain!
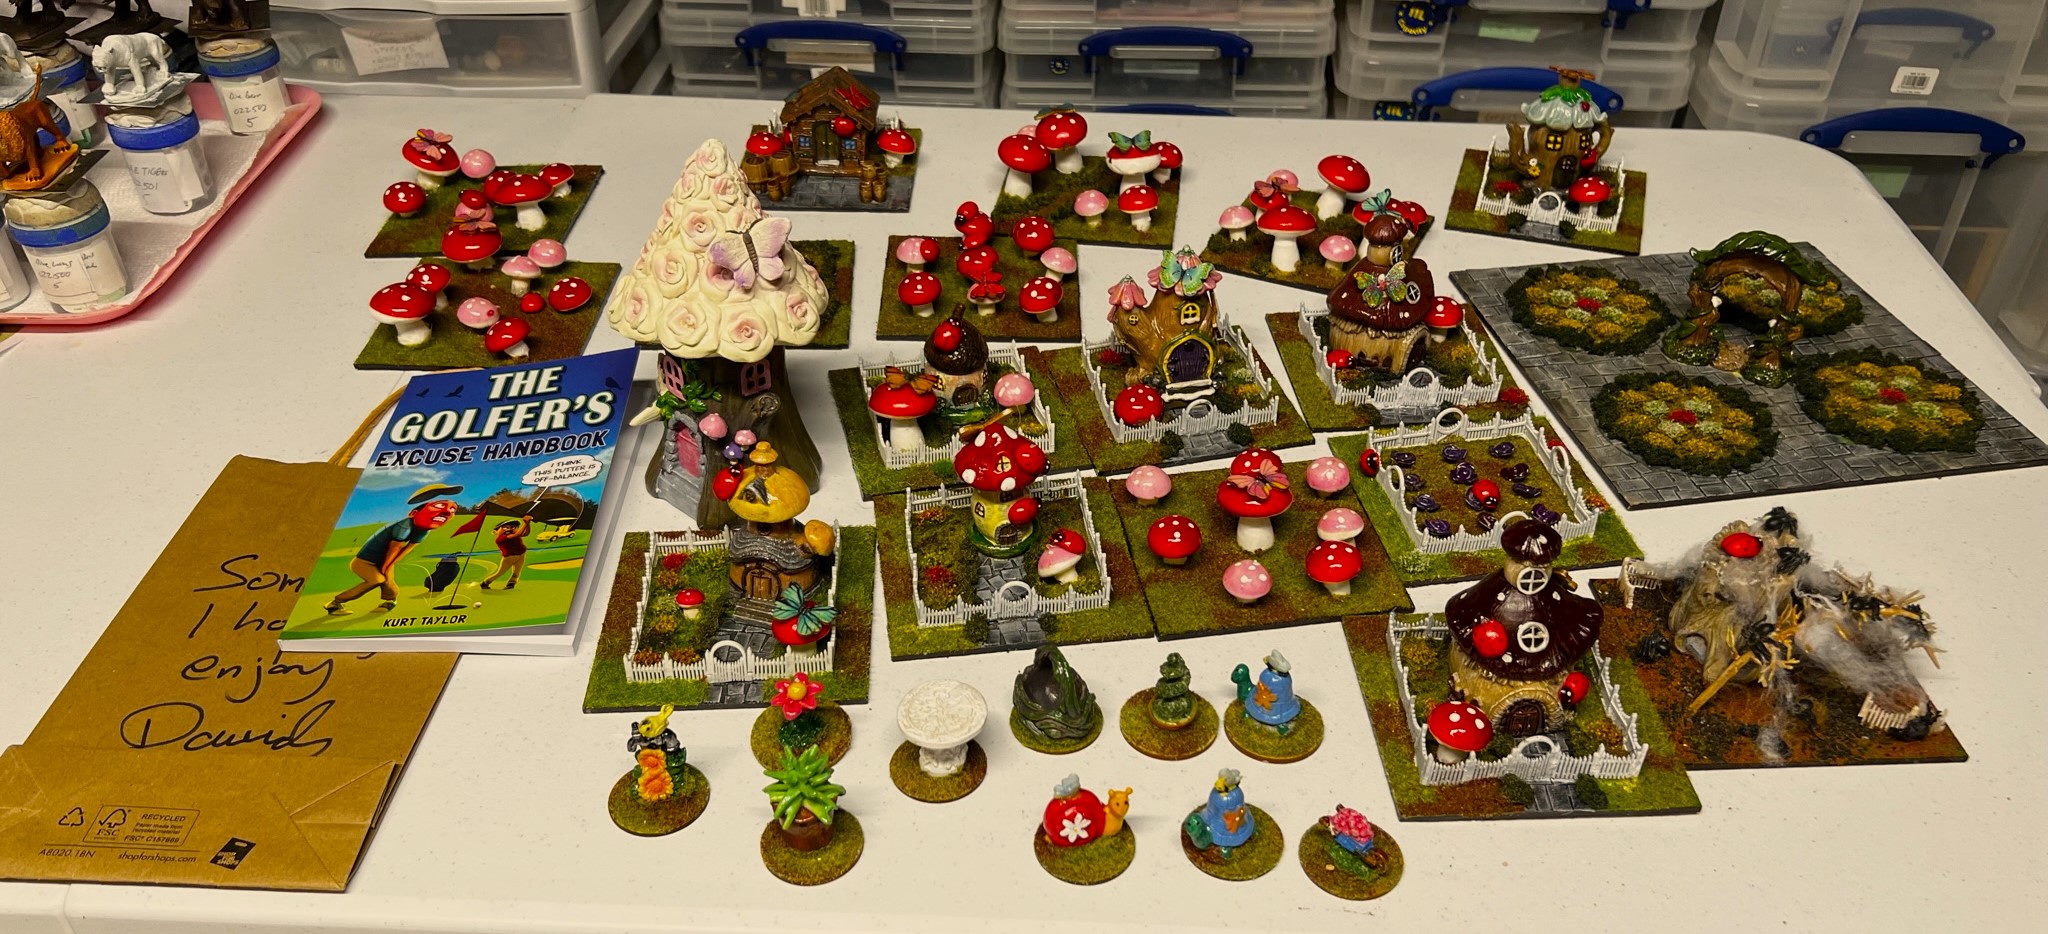
I had been previously gifted a good number of some wonderful Acheson resin buildings from Russ Dunaway that were perfect for the Great Land of Harvest or the world of the Wars of Ozz. Also, as I mentioned here last month, I received a wonderful gift of some new terrain from Dave in Australia. His blog is Guru PIGS blog and it was a collection from his Mouse Metropolis project. I also got a gift of couple of glowing Mushrooms from Buck Surdu that I also loved! Also my purchase of some walls and fences from Pendraken showed up. Add to this at this point I had around 26 Fairy-style prepainted resin buildings I had gotten from the Dollar Tree store – including a tall one from Dave/Guru. Something had to be done – I could neither store, use, or transport all of this goodness effectively. Plus some of the Pendraken stuff and some of my own stone walls and fences needed an upgrade. Add to this, I got a new brigade of Impkins for Ozz from Buck – more on that shortly – let’s stay on terrain for the moment.
Aussie Dave’s Mouse Metropolis giftBuck’s cool glowing mushrooms – and an appropriate cozy he got for me at an HMGS South convention in Florida.All the terrain I had – minus walls and fences…
My first solution to this issue was to share the bounty. I shipped off half of the Acheson resin buildings and half of my fairy buildings to my Tennessee buddy (and former West Point roommate) Dave Wood for use in his Wars of Ozz games. My next step was to finish the resin buildings, fences, and walls so that I could craft a storage and transport solution for them. I also wanted to repaint/upgrade my remaining haphazardly prepainted Dollar Tree buildings. So on to what I managed to do with all of that…
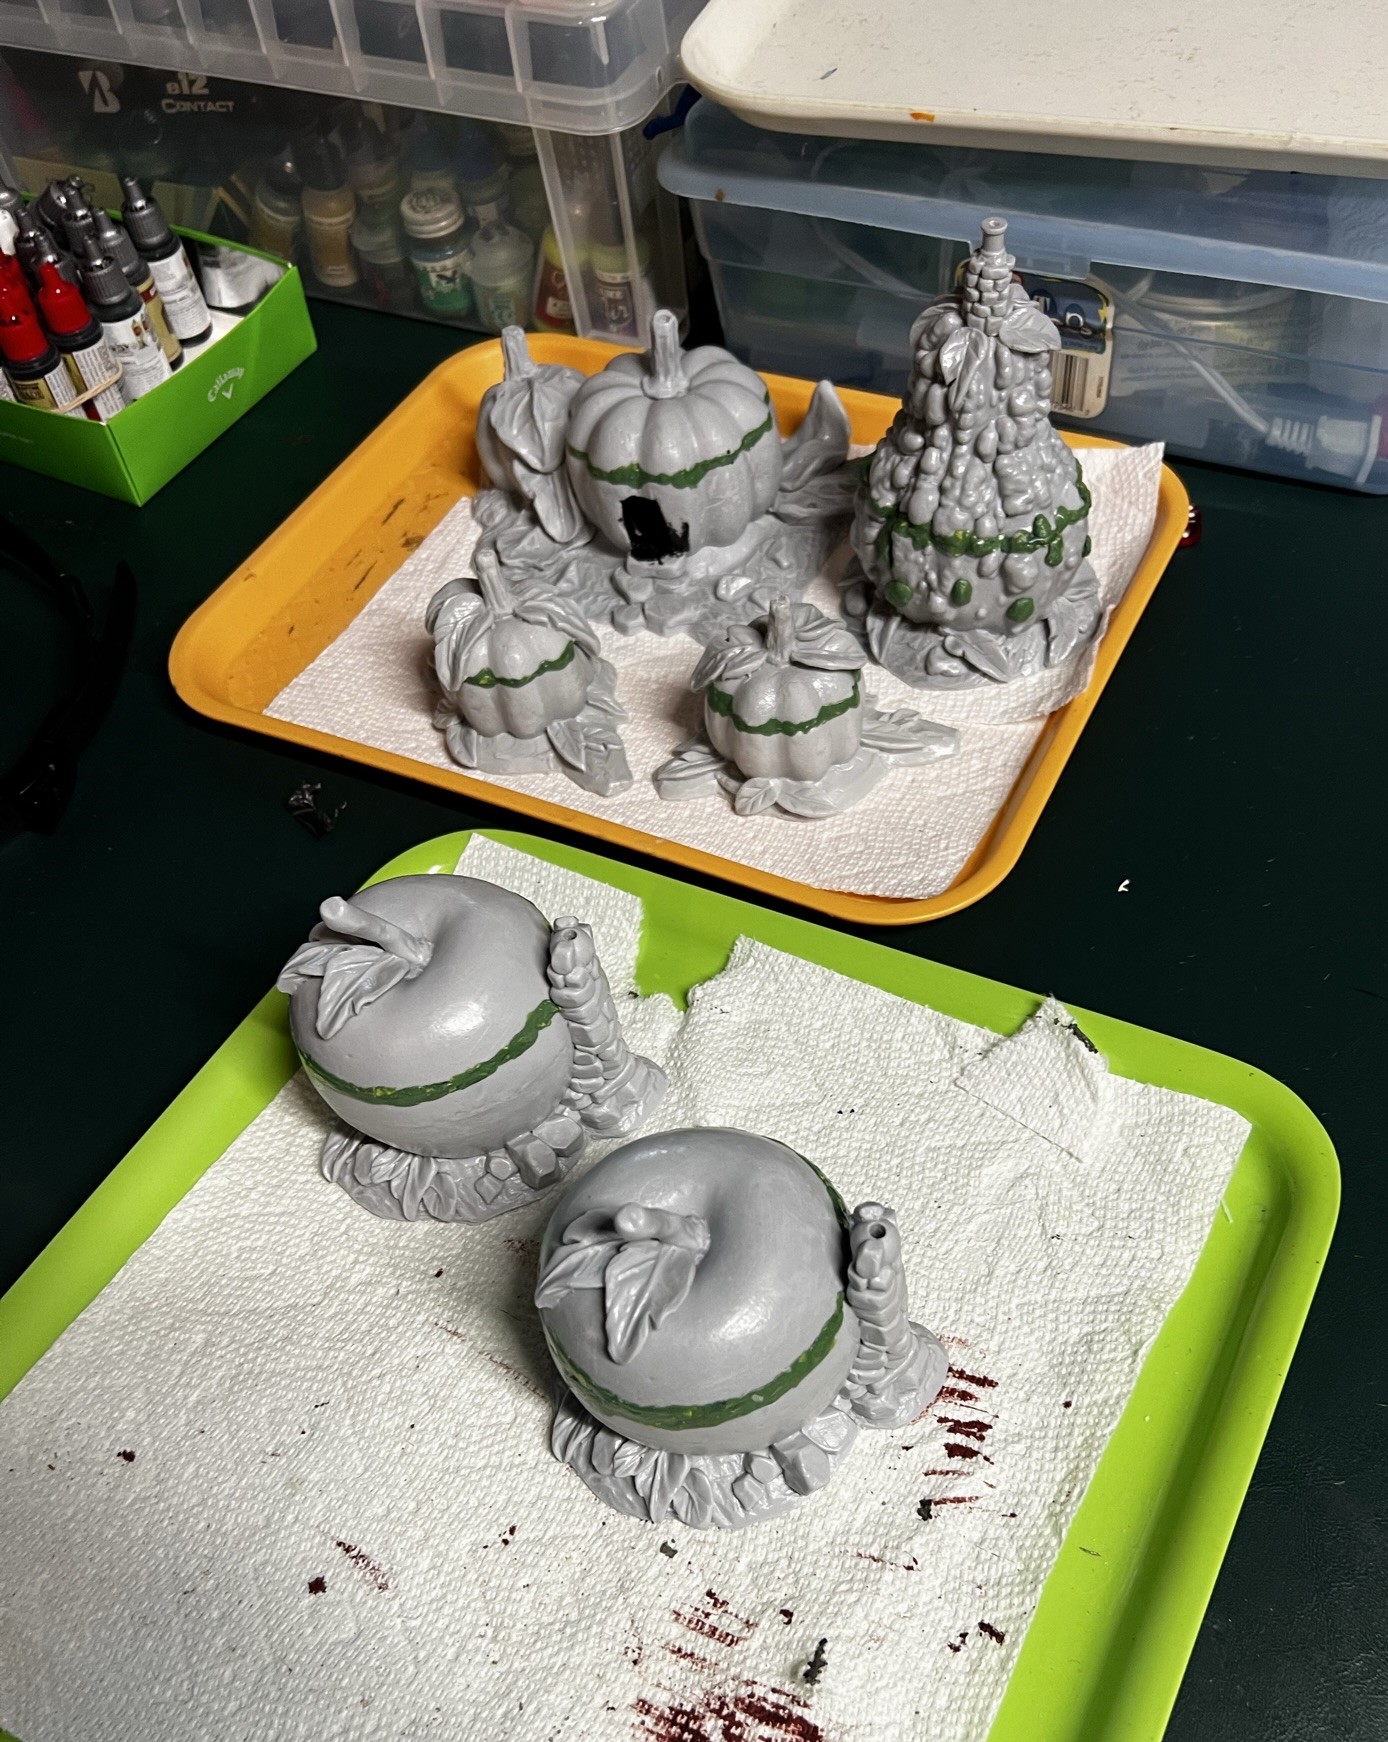
Here are some of the Acheson buildings that I kept. I also kept a tall gourd building that is not shown here. I decided to assemble them and attach the roofs permanently.
After a LOT of scuffing and sandpapering the surfaces of the resin buildings (for proper primer adhesion), I assembled them with green stuff. You can see the gourd building here left of the black Sharpie pen.Here are all of the ones that I kept – here assembled and awaiting a priming – which I did twice. The buildings are nice, but resin is so fickle.
As shown above, the priming took a couple coats (plus some more touch up) as resin is, well, resin. I tried to minimize the lines where the roofs met the model bottoms – but they still showed up a bit. Still as tabletop terrain, it think its ok, especially as the roofs won’t come off.
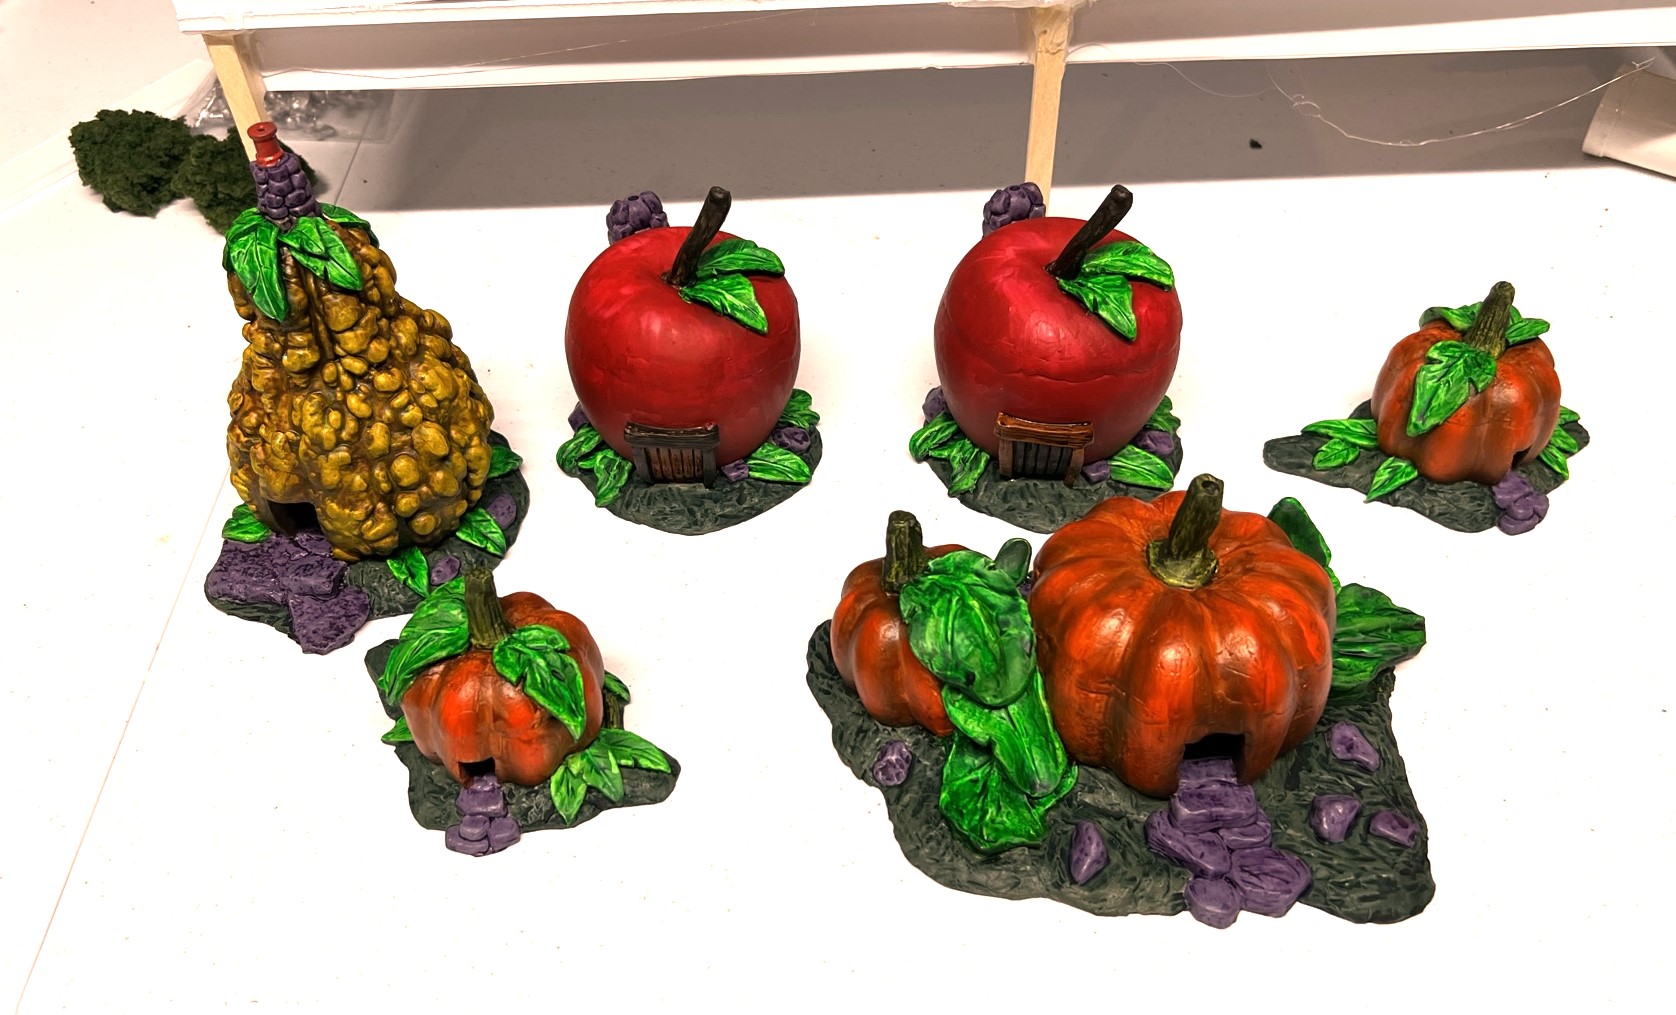
Here below are how they came out after painting:
Three pumpkin buildings.The two apple buildingsA tall gourd building.All of the resin – done!
Then I had some Pendraken MDF snakerail fences to assemble and paint
28mm snakerail fences.
I also got some plastic walls and plastic fences from Pendraken that I flocked and gave some minor washes to in order to make them look a bit better. I also repeated this process with some older used 3″ walls and fences that I already had that were in desperate need of an upgrade. Next, I repainted my remaining 13 Dollar Tree Store Fairy buildings (to varying degrees depending on what could be done).
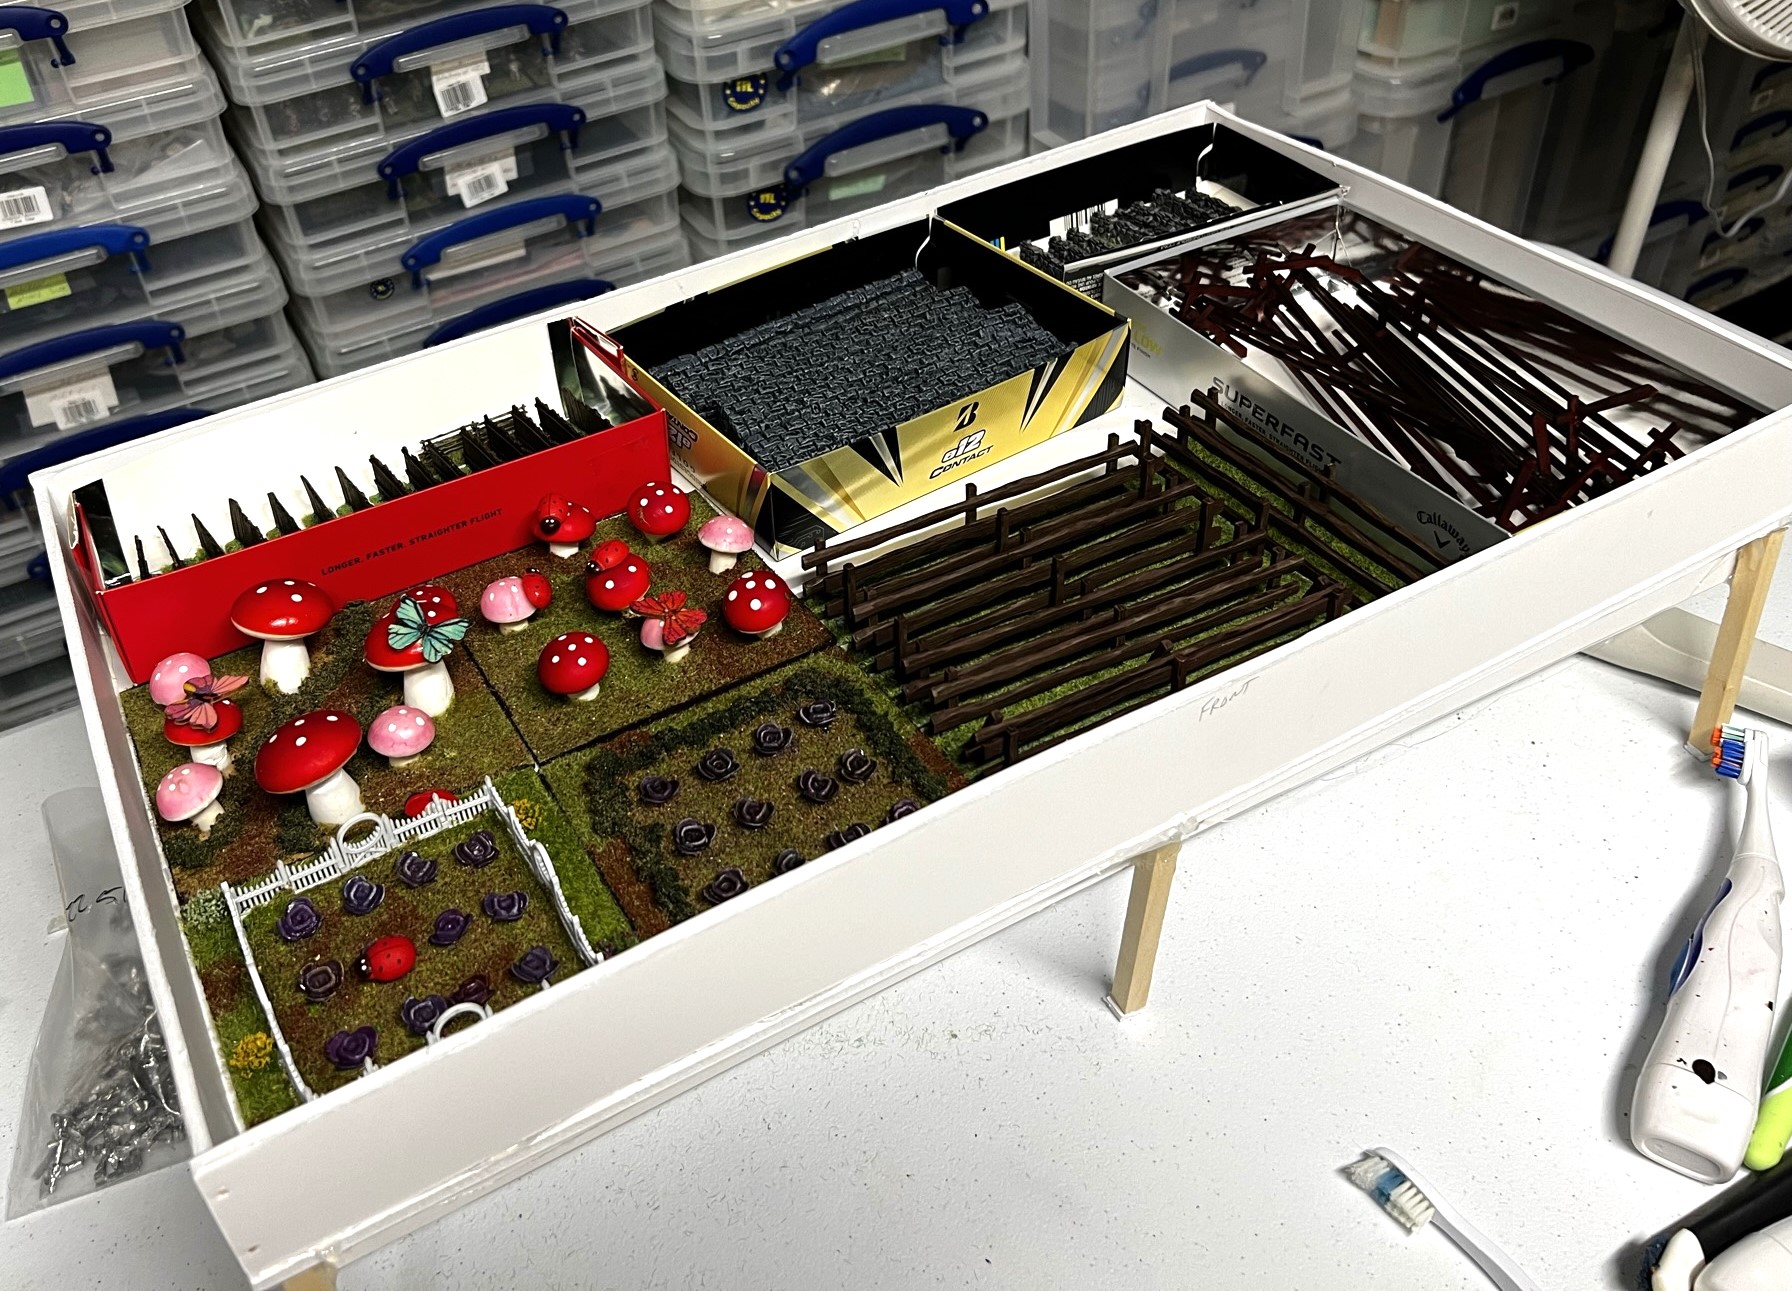
Now, I was ready for a storage solution. I went with a 64-liter Really Useful Box, and built and installed three custom-made levels to transport and store all of this goodness. Serially, I mocked up each level on sheets of foam board, and used hot glue and toothpicks to secure walls of foam board on each level. The underneath supports were square wooden dowels. I also incorporated empty golf ball boxes for storage on the top level. (very useful too). It’s maybe good I lose golf balls from time to time…
The bottom level was easy – as I only needed to fit the Mouse Metropolis pieces down there. Then it was on to the middle layer – where all the taller pieces like the bigger buildings would be housed.
The middle level as constructed.Mocking up the top level. Here you can see some of the fences and walls that I upgraded with washes and flocking.The top level as completed.
Below you’ll see all three levels and how compact it all is in the 64-L box – which weighs about 5-7 pounds full.
All three levels separate……and all three layers safely stored.
As terrain was the order of the day for my Fall In preparation, I also ordered two Cigar Box Battles 4′ x 6′ + Grassland Battle Mats as I needed a bigger tabletop area. The terrain will go on this mat for my upcoming game of The Wars of Ozz – the scenario is The Battle for Toto – but I have upgraded it as well. Herebelow are some shots as a sneak preview of what I will start with at Fall In.
Overview of my approximately 12′ x 4″ battlefield for “The Battle for Toto”.A view from the attackers’ side.A view of the town the Munchkins are defending – which holds Toto. But where?
The terrain gifts that I got were not the only ones I got. Buck Surdu had painted up an entire brigade of Impkins – and asked our little group on our group text if there was any interest. I of course jumped at the chance to get some wonderful Buck Surdu originals! In the discussion, it came out from someone that they reminded somebody of “creepy fighting baby dolls”. I suggested to Greg Priebe, that sounded like an 80’s metal band – and could he put that into AI somehow? He could, and without further ado, and with a bit of hilarity, here is the CFBD’s in concert:
The Creepy Fighting Baby Dolls
Ah Greg, they definitely make me laugh! A band worthy of IRO for sure down under – at least image-wise!
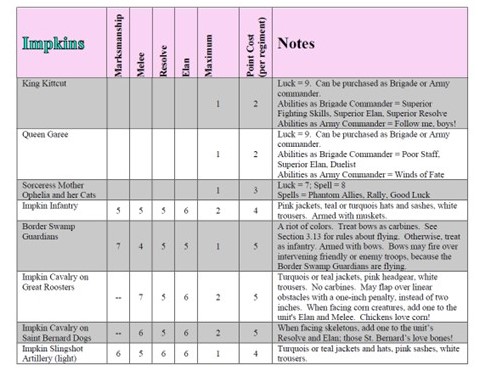
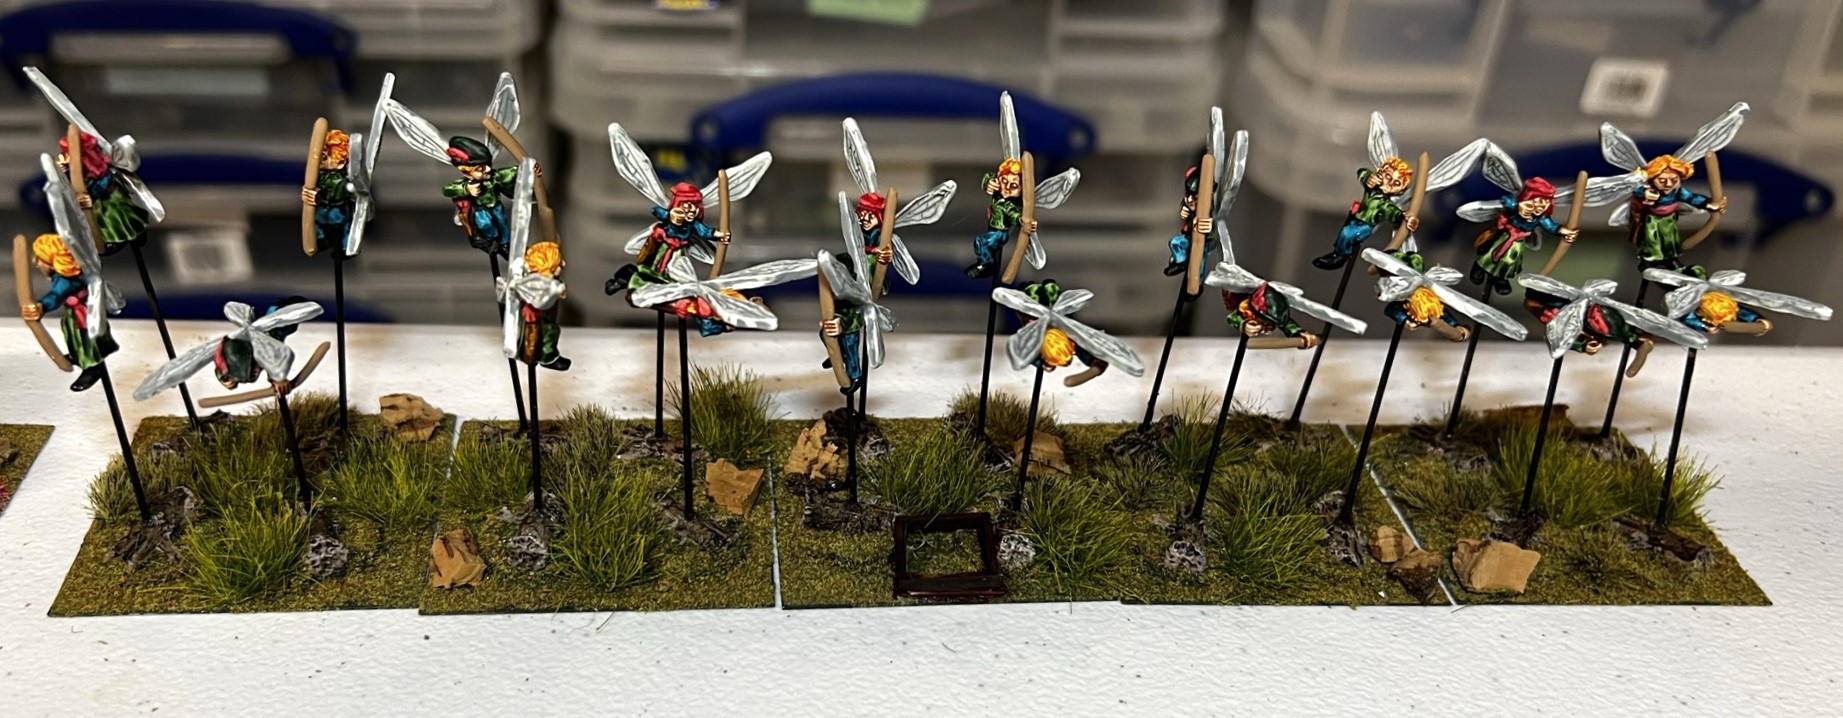
Anyways, in the midst of all else that I had happening in October, this VERY complete brigade arrived in the mail in two packages. The painting was fantastic – Buck’s painting work is always amazing. There were two regiments of infantry, two of cavalry (one riding roosters, and one riding St. Bernard dogs), one Border Swamp Guardian Fairy (flying) regiment with bows, a cool slingshot light artillery battery, two leaders, and a sorceress:
There was minor damage to the units in the mail, and most was easy to fix with some glue. The biggest challenges were twofold. One, I wanted to add some flocking to the bases for tabletop differentiation – and two, I wanted to upgrade the slingshot unit. By upgrade, I mean that the base was not magnetized for the placement of crew, and the trees supporting the slingshot had lost their foliage (see below). I was inspired by – again – IRO, who recently had a cool post about making model trees. He had advised me about the right glue to use and more – so I used that information as best as possible.
Without further ado, here is my….
Gift of Impkins
The first shipment came – and I was excited – the base with the slingshot and the fairies came second.
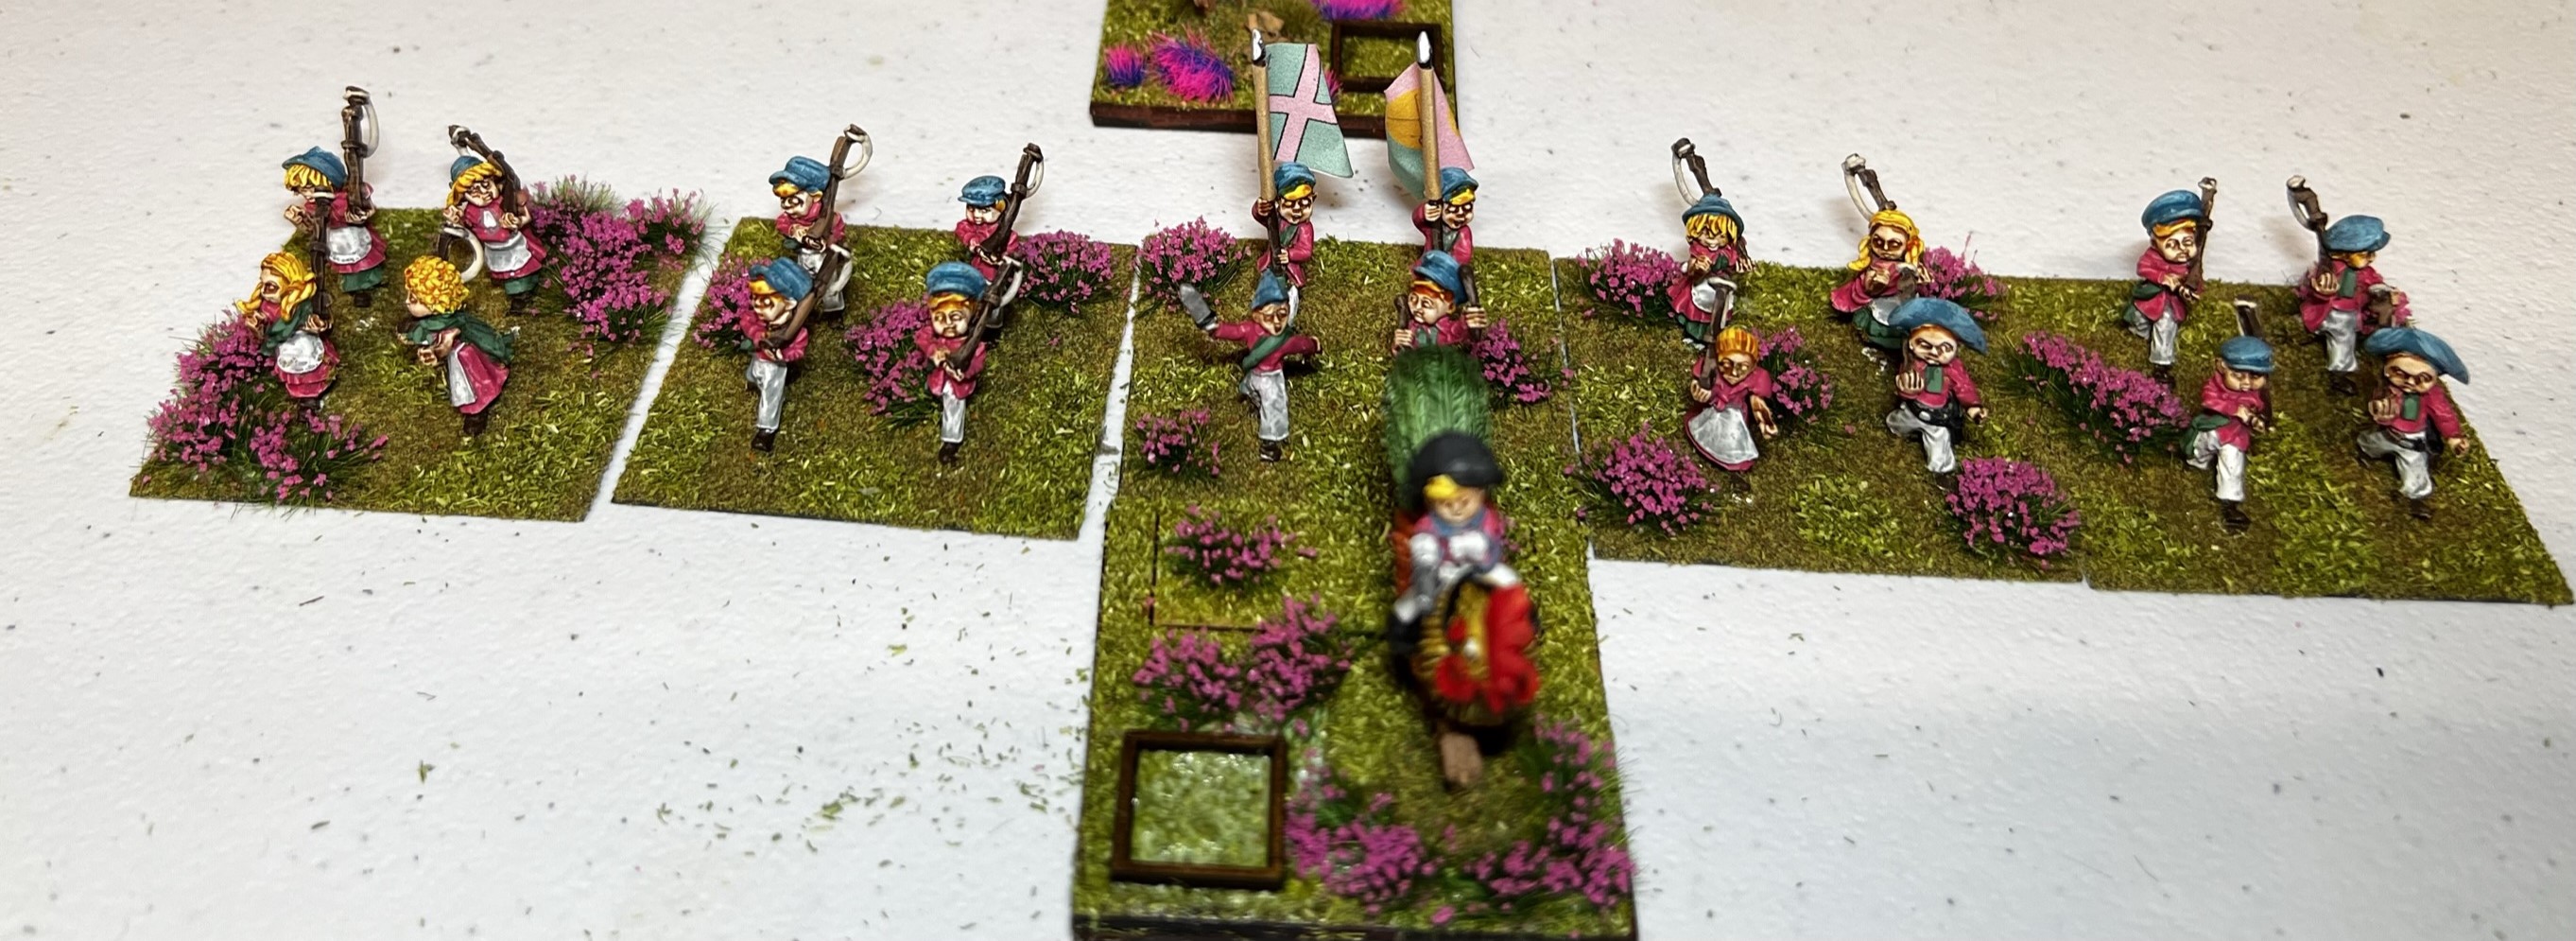
The two infantry units looked a bit similar – even though one has a rooster-mounted commander and the other one on a St. Bernard. So in addition to adding a Pendraken 12mm dice frame, I added different flocking:
The Swamp Guardian Fairy (flying) regiment was really cool. I mainly had to drill out some of the wires that came loose and reattach a few wings.
There were two cavalry regiments:
I think those will be easy to differentiate!
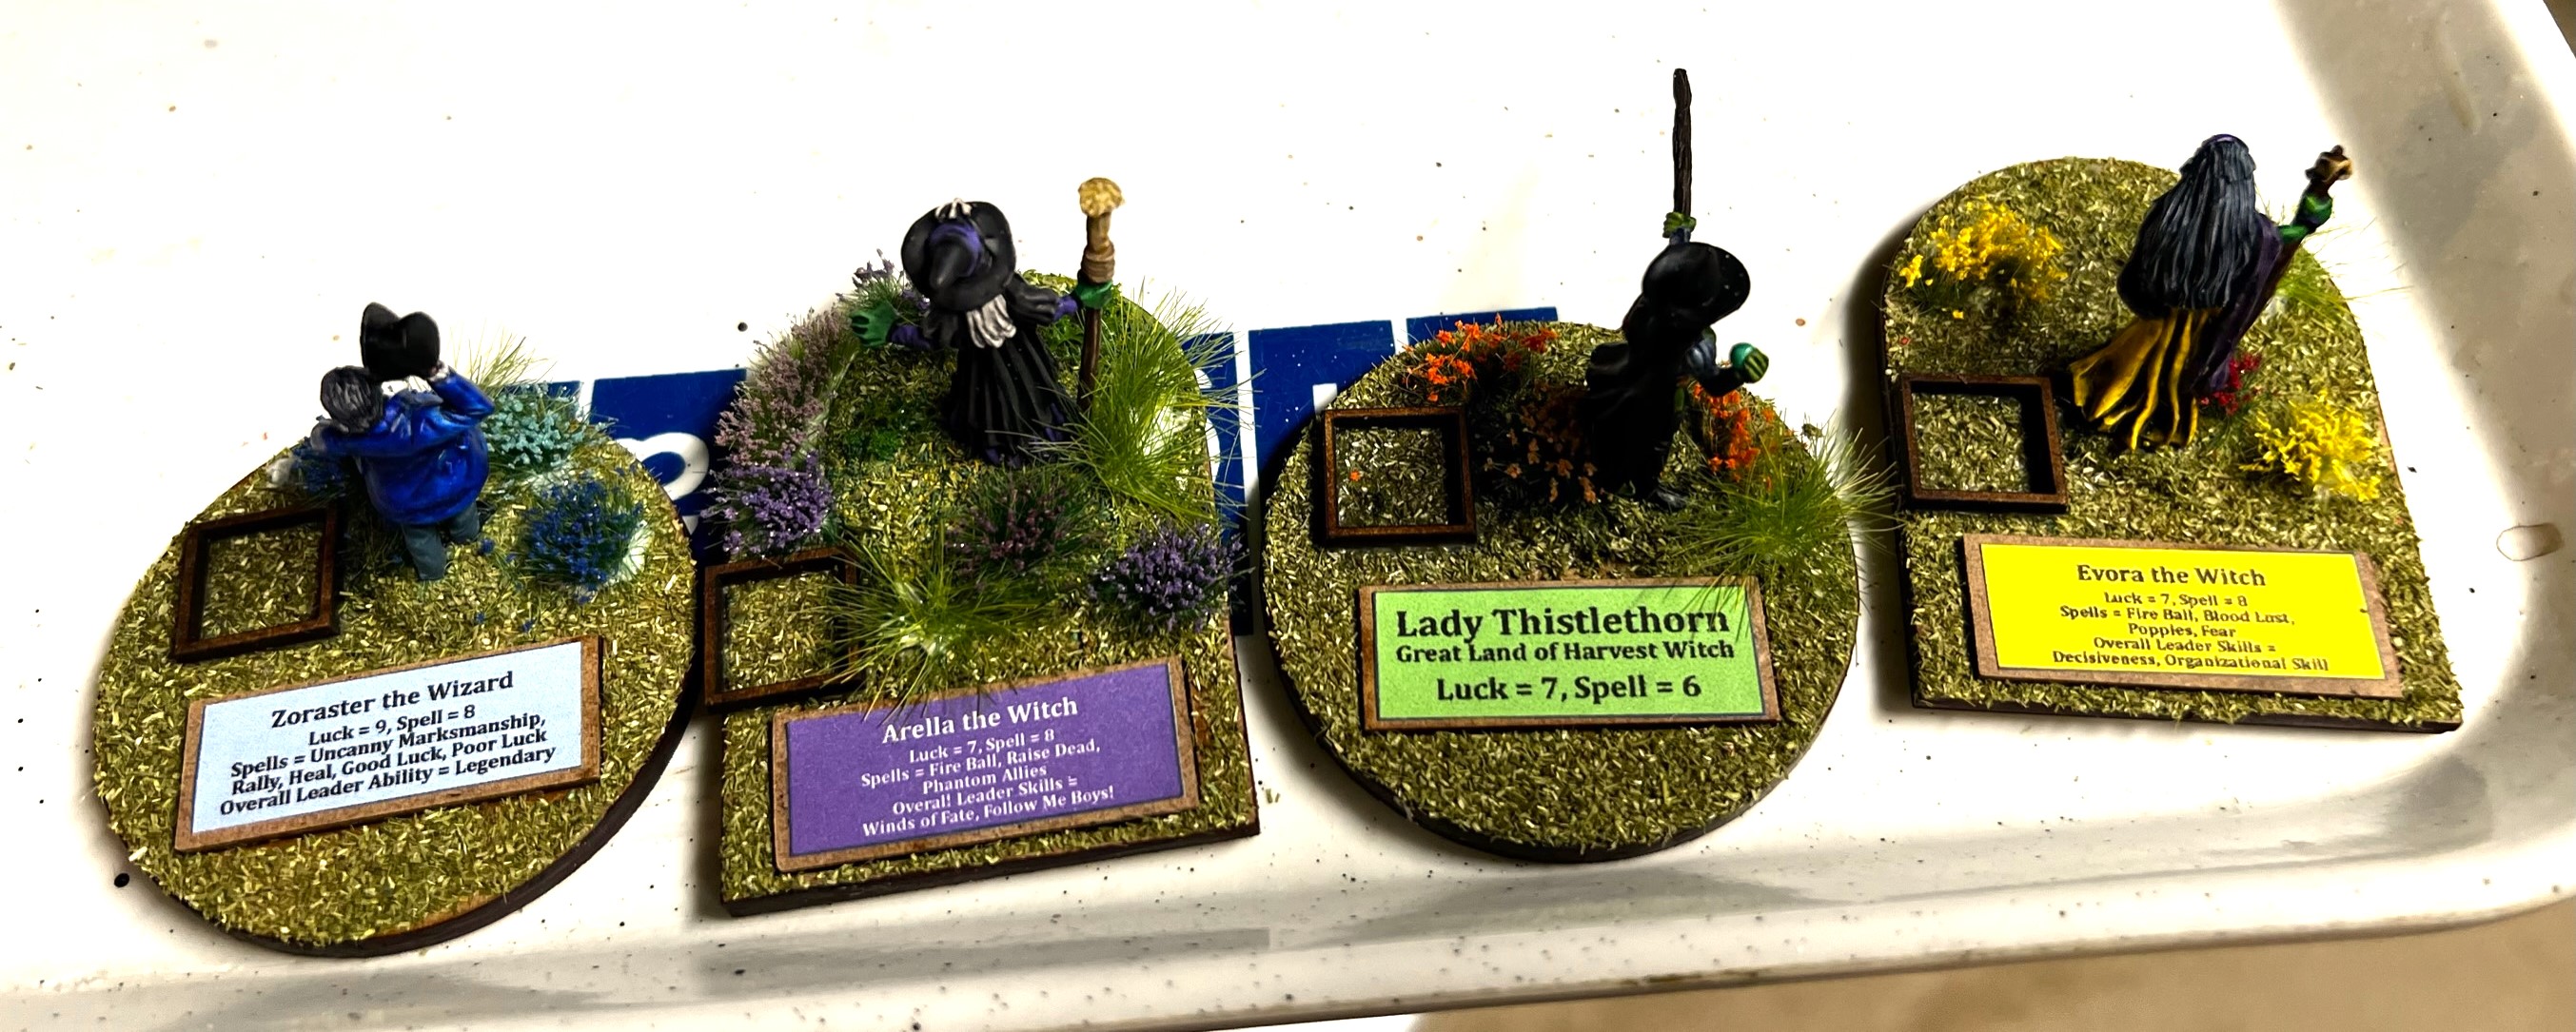
There were the three individuals – King Kittcut, Queen Garee, and Sorceress Mother Ophelia and her Cats. I based all three on MDF bases and printed out placards for them.
Queen Gare, King Kittcut, and in the back Sorceress Mother Ophelia and her Cats on the MDF bases. Buck’s painting on all of these is phenomenal.
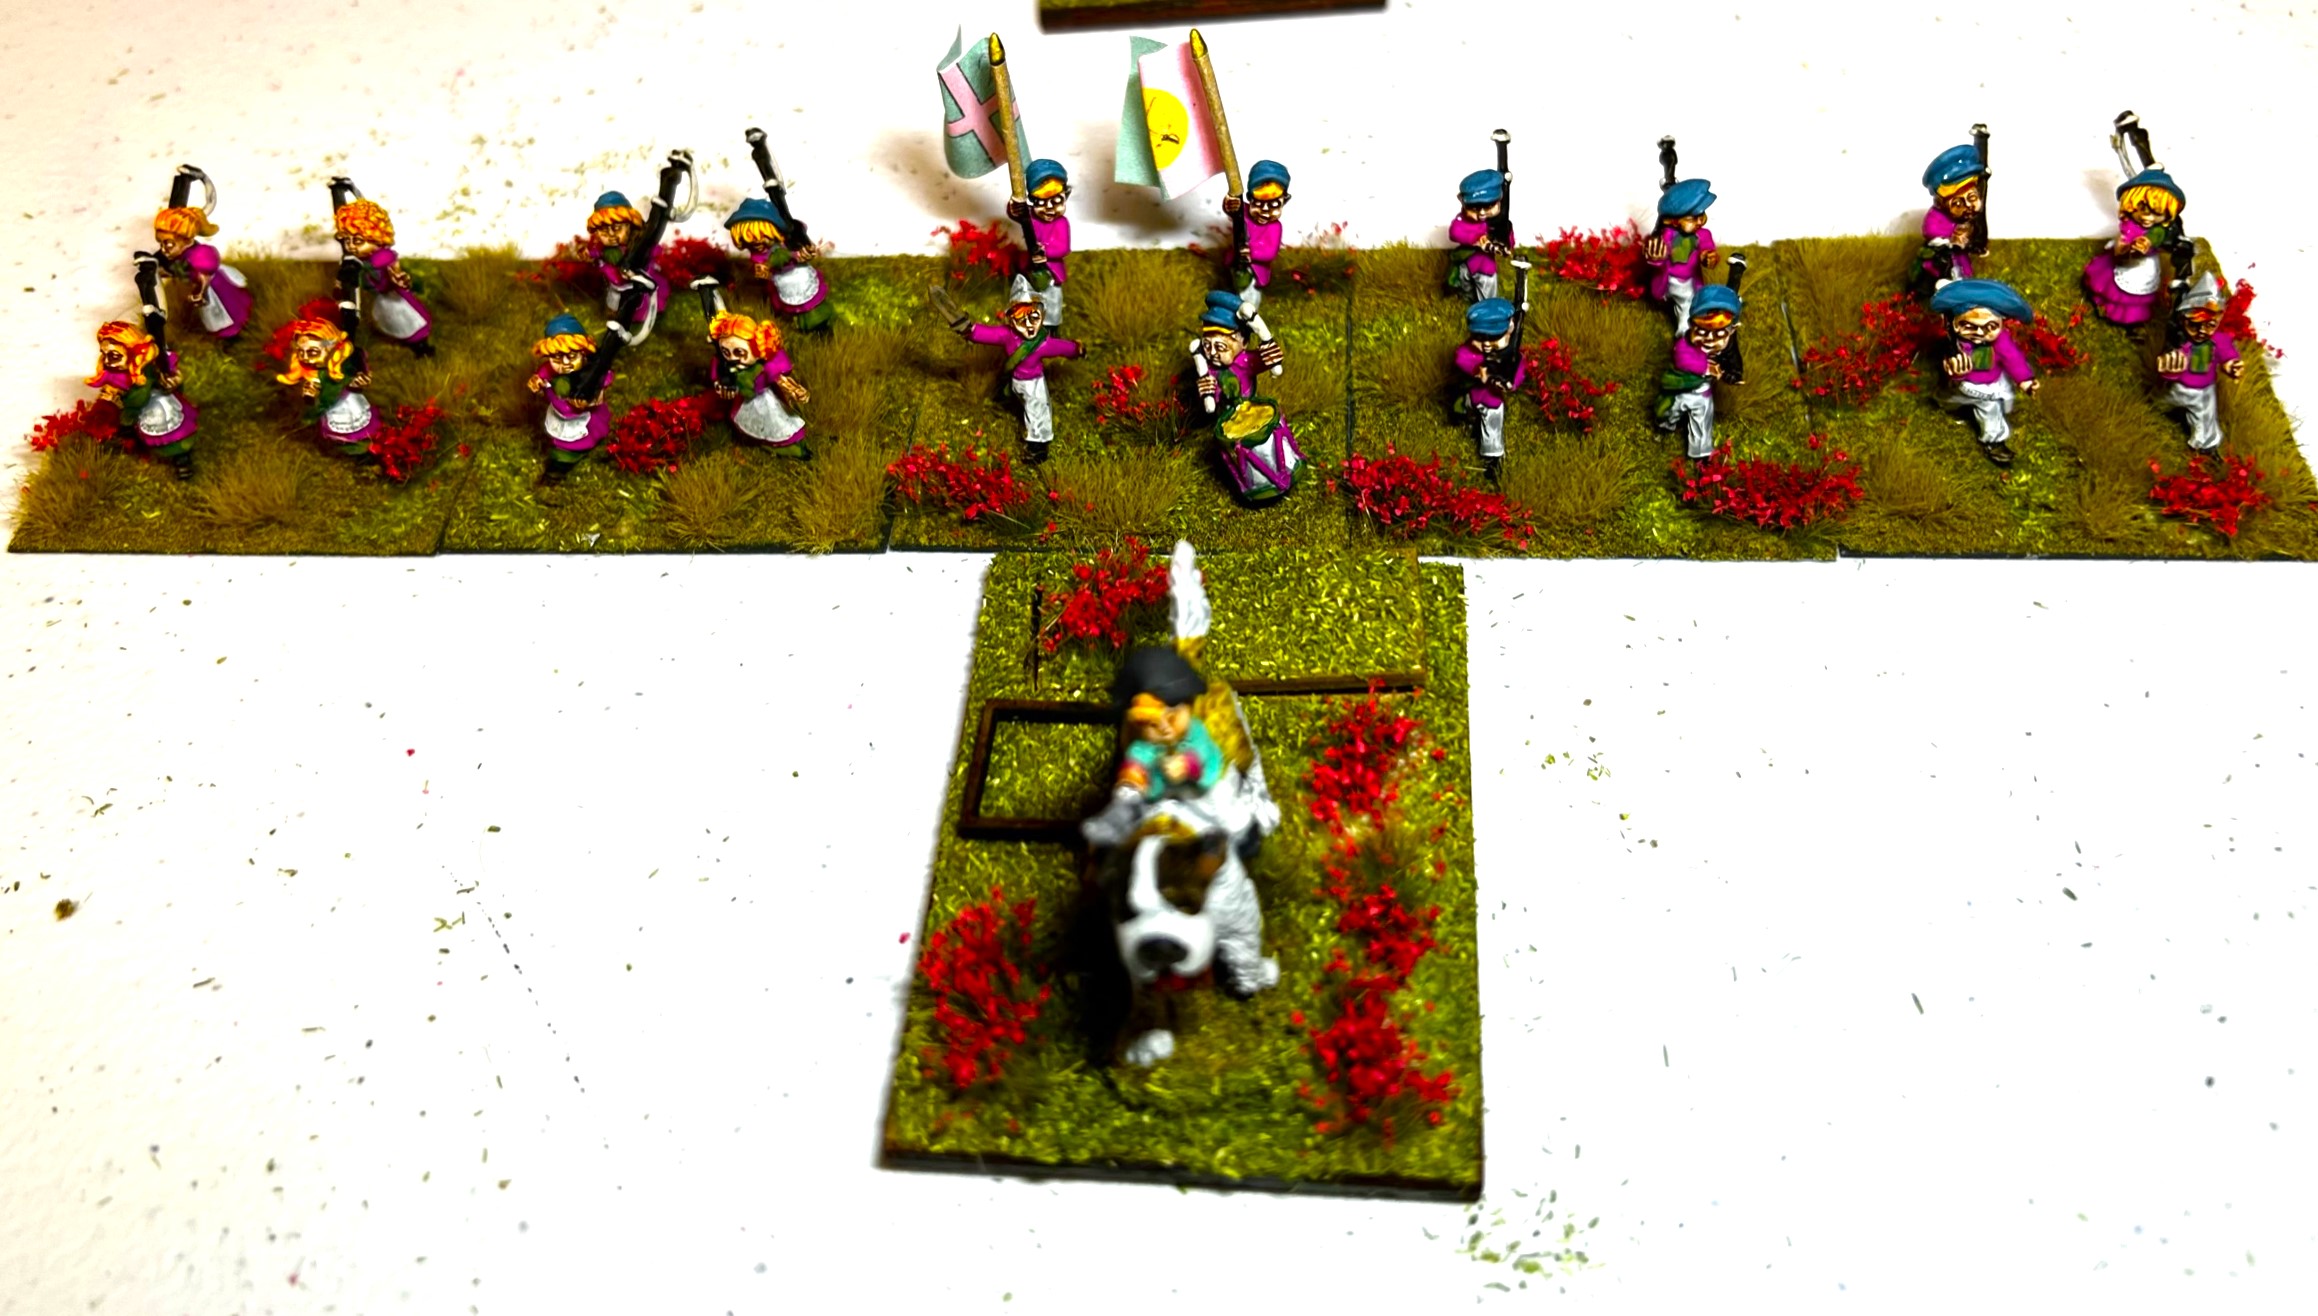
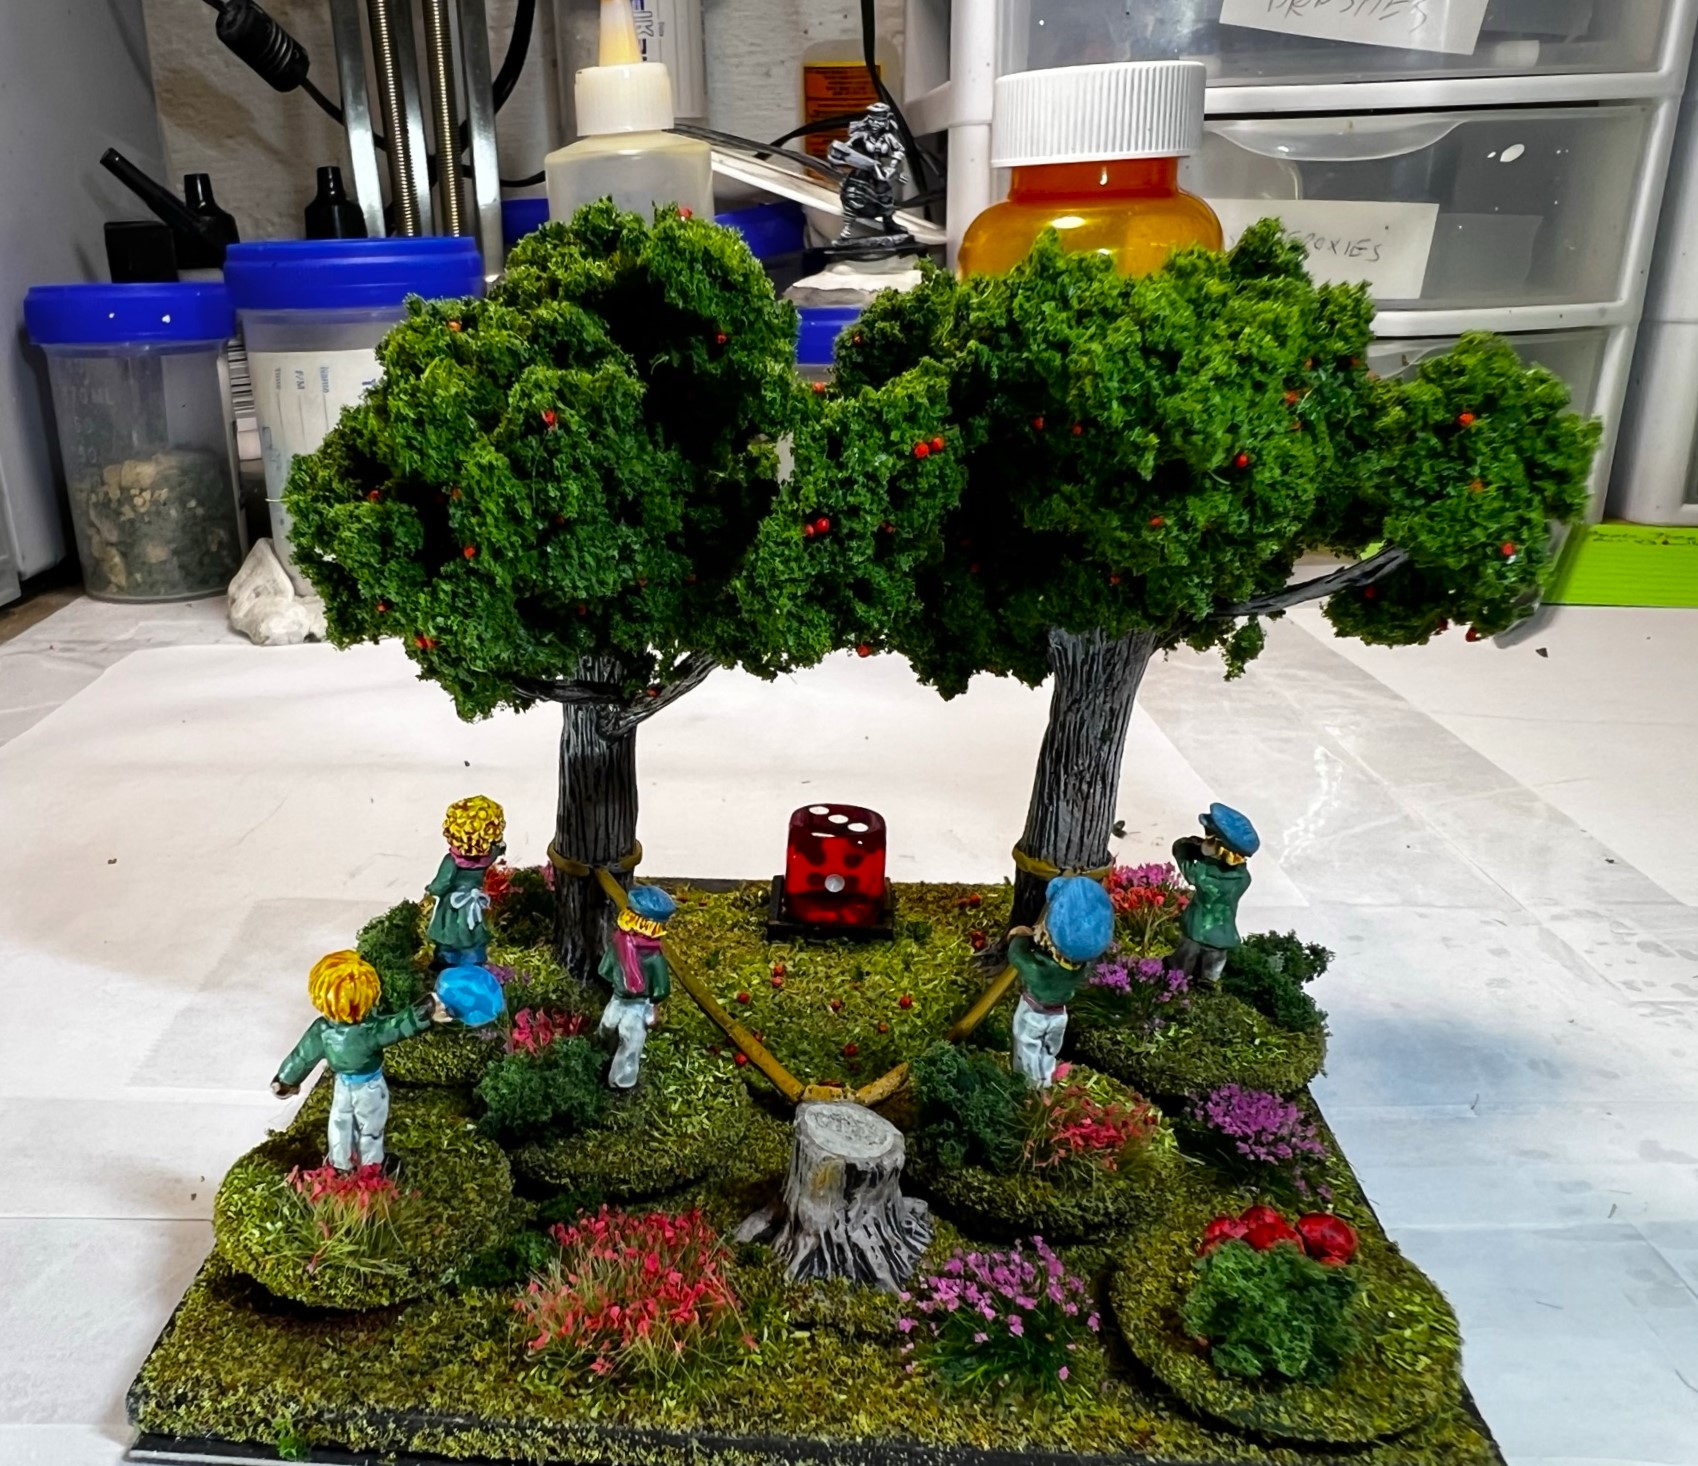
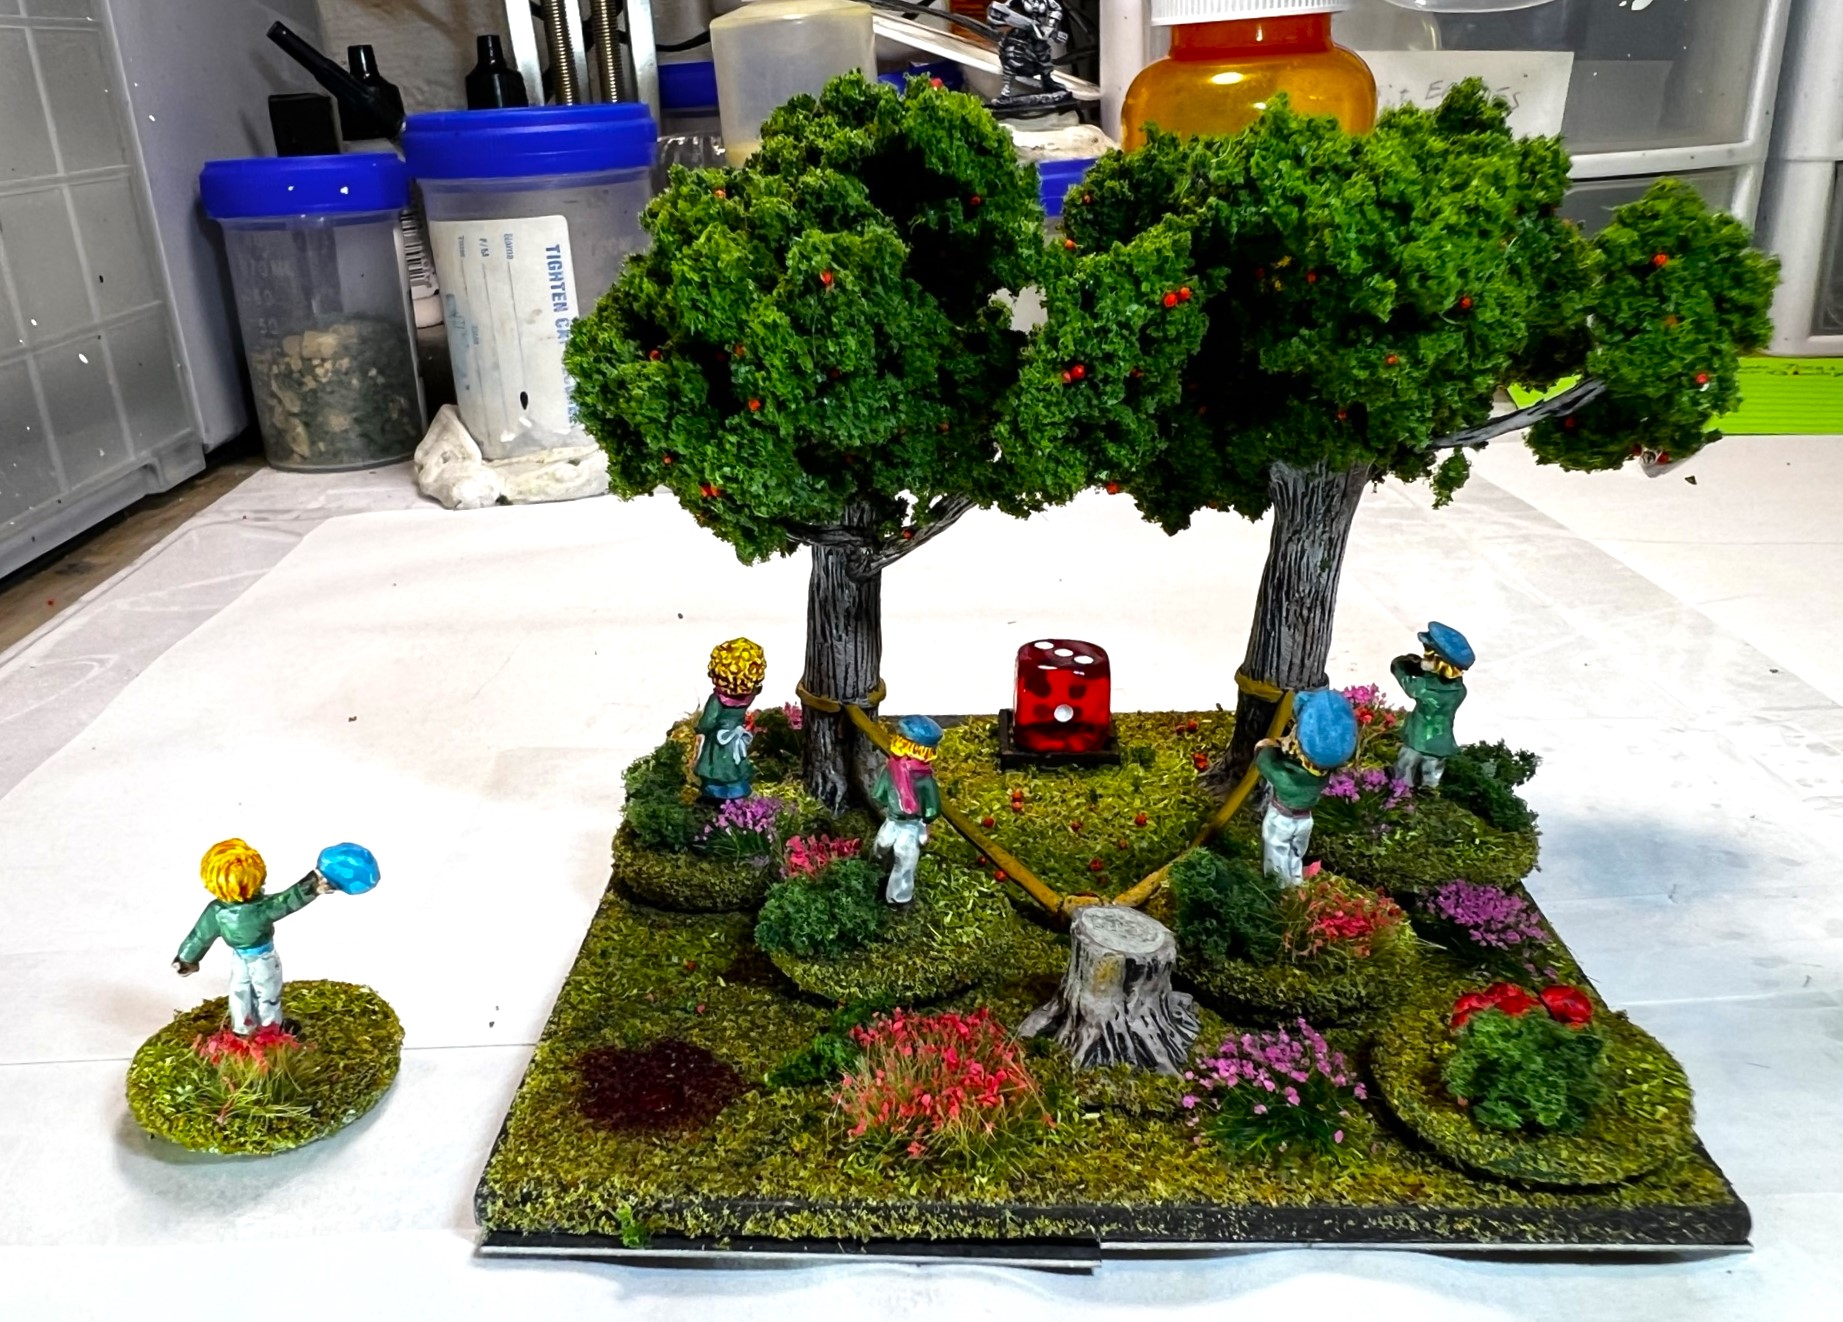
This leaves the Impkin “Artillery”. It’s a slingshot firing apples – that moves on the battlefield- somehow. So how, I don’t know, it just acts like a light artillery piece – so suspend belief – it’s Ozz! Anyways, I magnetized the base for the crew, and added some blood stains under the figures for when they are casualties. I also redid the foliage per IRO’s suggestions and added some Woodland Scenics apples for effect. It was fun and a bit messy, but good preparation for a subsequent project I hope to blog about soon – Savage Apple Trees (to come soon)
Here is the Impkin artillery base shorn of the foliage on the trees. I drilled out the base, added magnets for the crew and flocking. The dice square glue is shown drying here.After finishing up the re-foliage and the apples – voila! I was very happy.Side view.Rear view.The figures – once removed as casualties – display a blood stain on the grass.
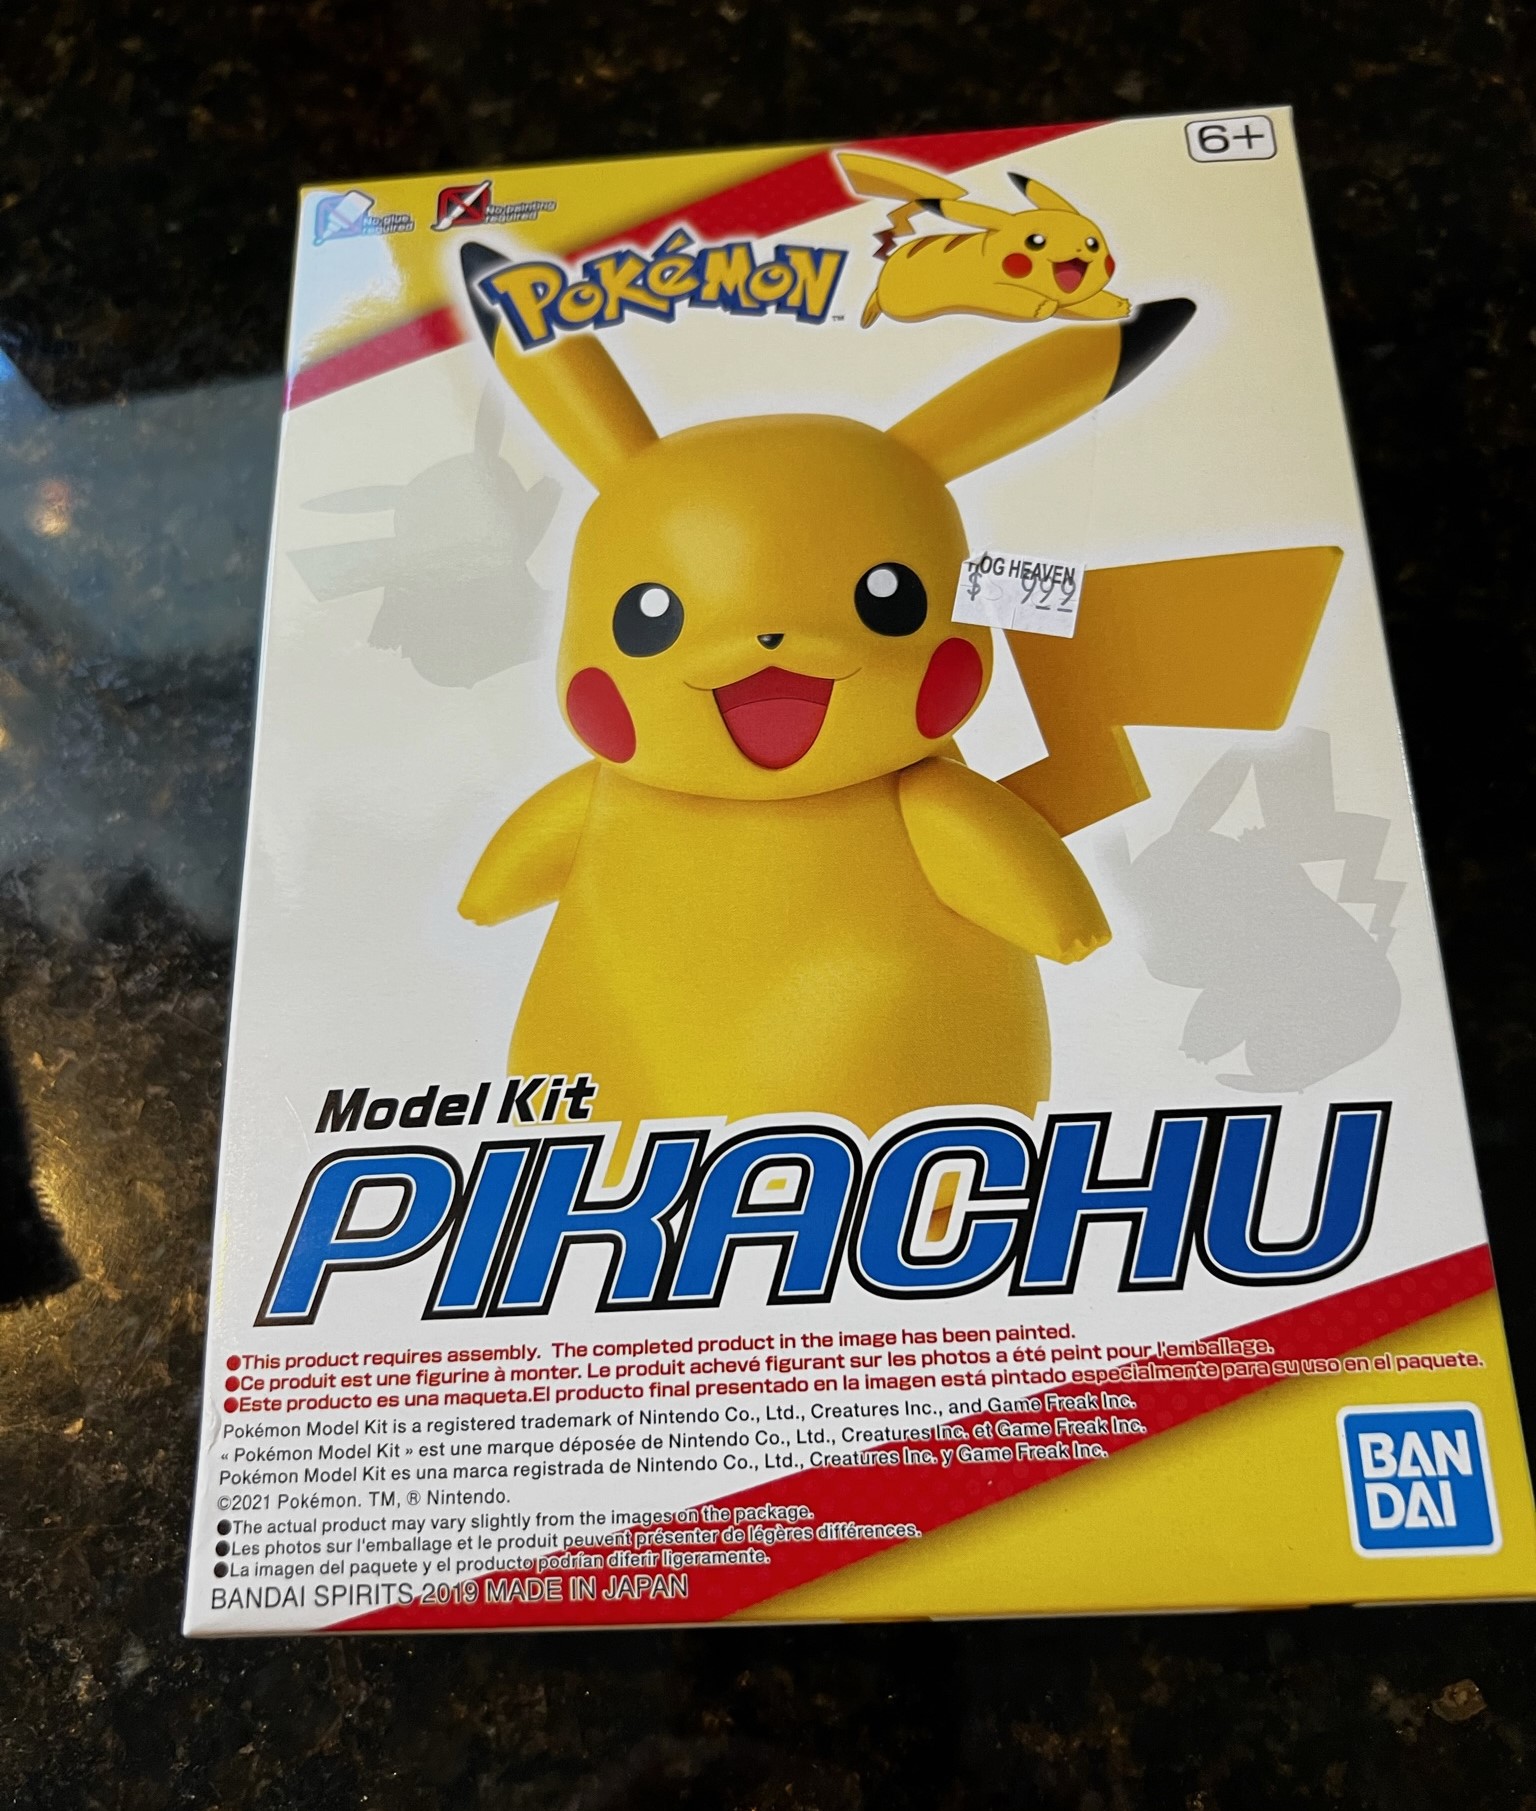
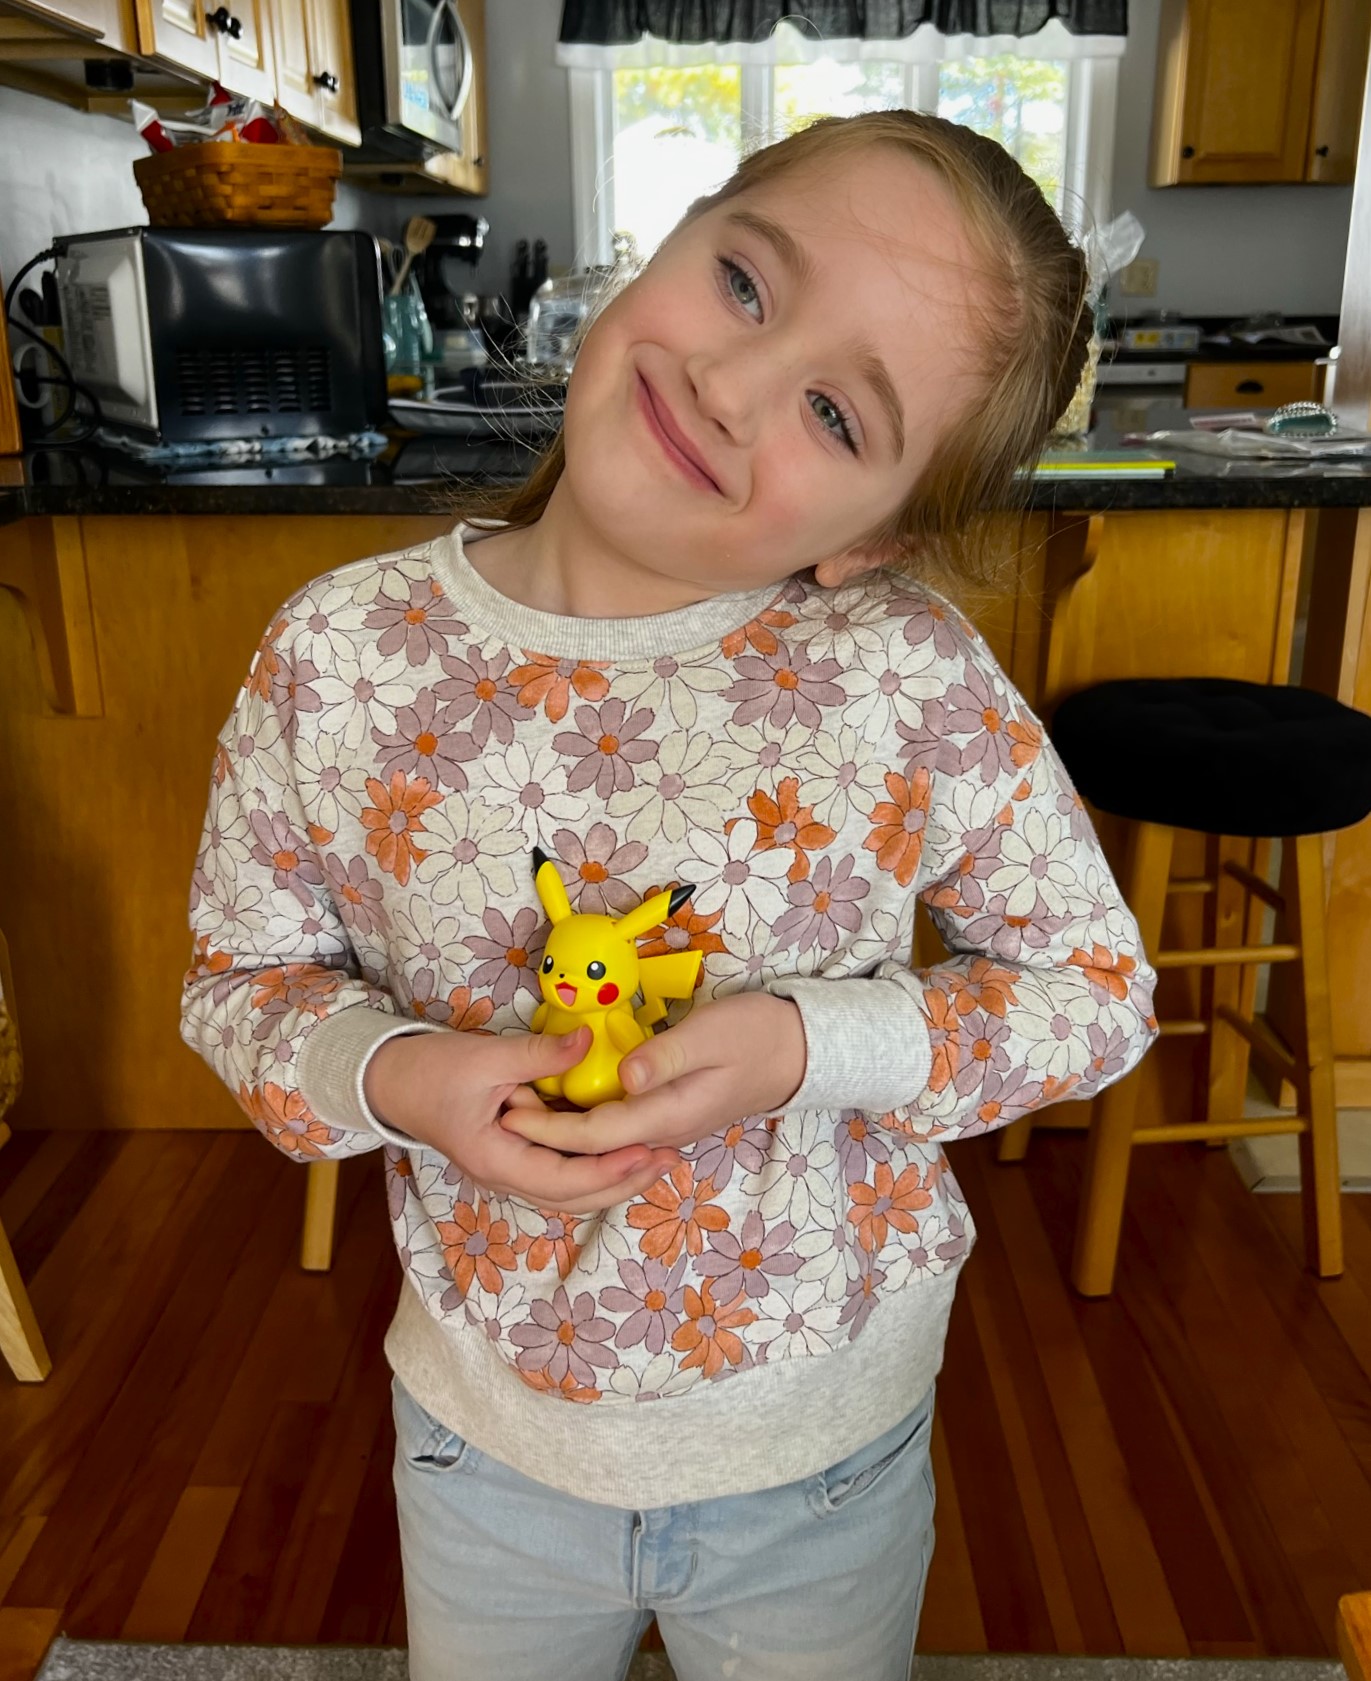
Gifts also went from me! One more model that I worked on was a Pokemon Pikachu model that I assembled together with my 6-year old (nearly 7) grandaughter. It was fun, but the tail broke off easily. No worries, Papa repaired it and affixed to two points on the model such that it should not twist off again. She loves it, and it was a fun modeling experience for her.
The model.Love this kid!Guess who she was for Halloween?
Sending Guru Dave the Wars of Ozz & Wars of Orcs and Dwarves rulebooks, and a Mark 1 Sphere Tank Down Under
I did want to reciprocate Dave’s great selfless terrain gift – and I knew he loves rule books. So unbeknownst to Guru Dave, I sent him the rulebooks for both the Wars of Ozz and Wars of Orcs and Dwarves. As he was into Xenos Rampant, I also sent him a cast of my Mark 1 Sphere Tank Down that he could use there. You can read about his reactions in his post here.
Much thanks to Russ Dunaway, to Dave (Guru), to Buck Surdu , to Greg Priebe, to IRO, and to Chris Comeau for all that you did to make this all work! I appreciate you allso very much.
As I finish this post, I am about to pack for Fall In, with all the Ozz stuff you see. I do have a couple more units to post about once I have gotten back, as well as an October golf roundup. I’m sure that I will have a Fall In! post as well to do. My apologies to those whose blogs I am behind in catching up on – I will get there. I hope that this post was enjoyable for you and that maybe I can meet some of you at Fall In!
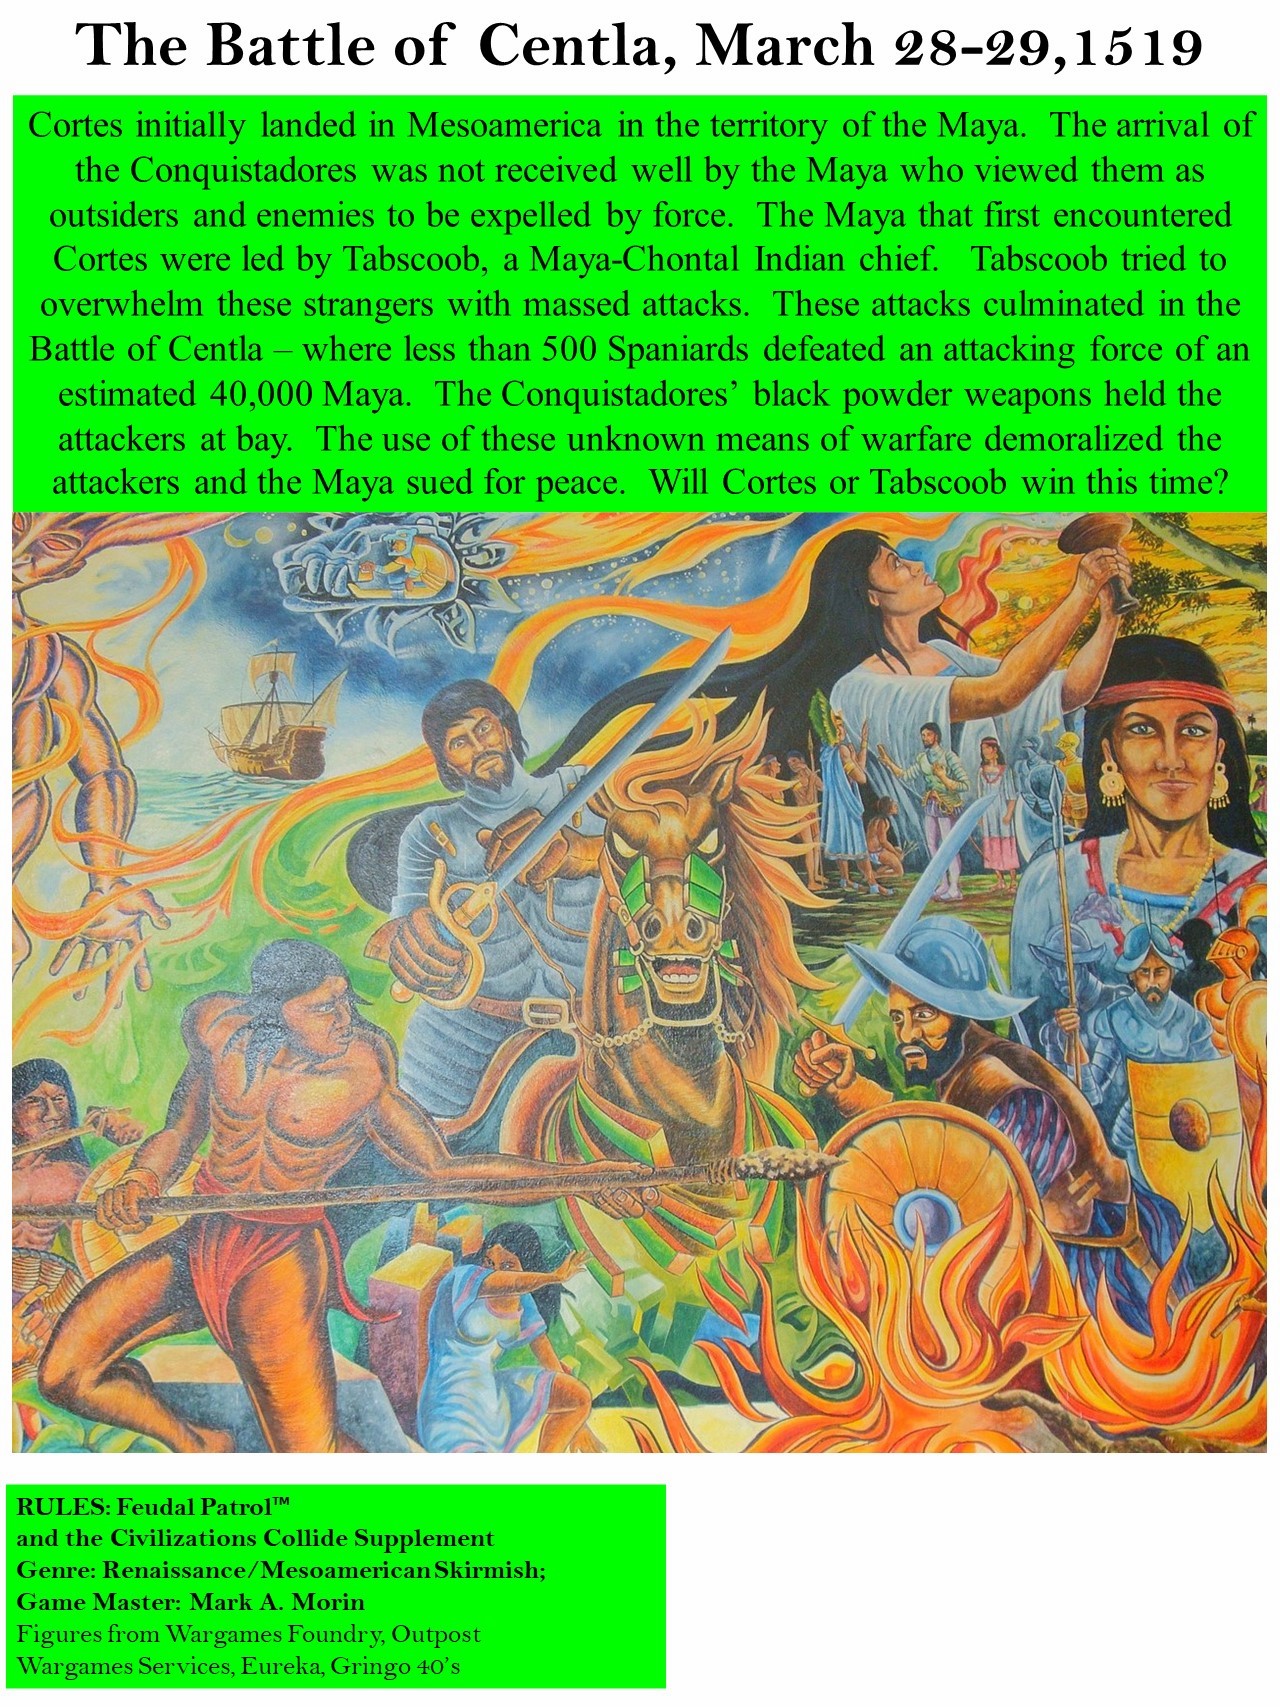
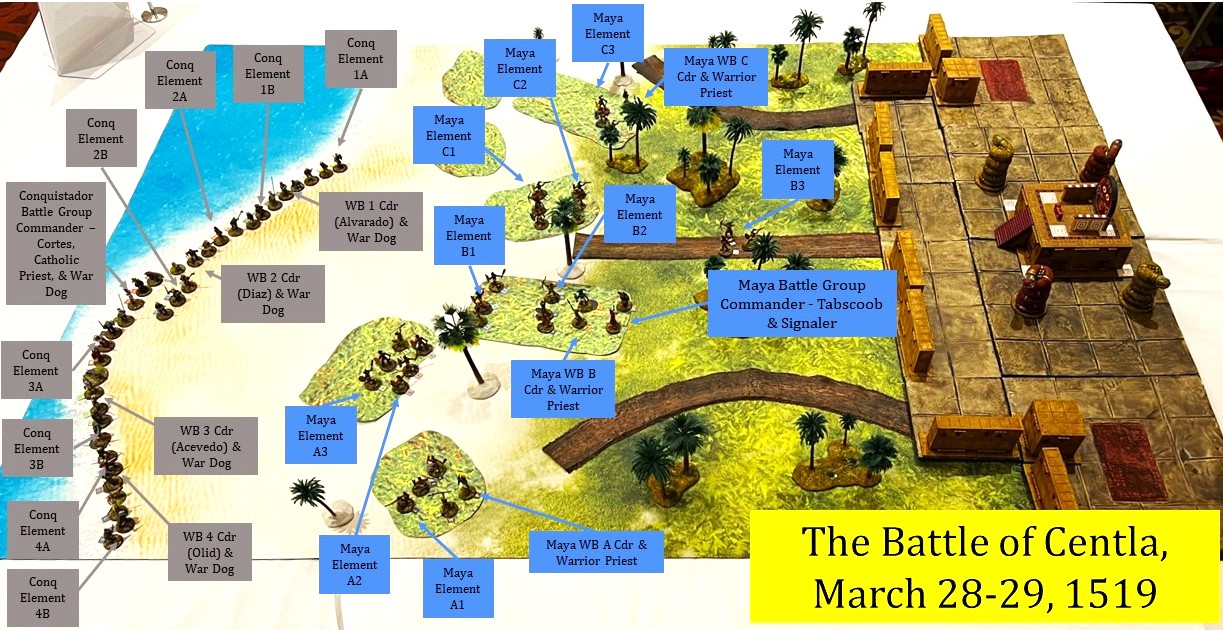
The scenario involves a beach area with a jungle nearby and a Maya city. The Conquistadors start on the beach and try to move inland. You can see a description of the game in my recent TotalCon 37 recap post. Below is a set up of the battle – note the seven printed green card stock areas at the juncture between the jungle and the beach near the ends of the jungle paths. These areas I described as being easy to cross (no movement penalty) but providing a degree of concealment and cover – basically a scrub-type area.
I used these card stock pieces in lieu of the 7 scatter terrain jungle bases that I ordered from our blogger friend Dave Stone of Wargames Terrain Workshop in the UK back at the turn of the year. I even sized my card stock pieces to match the ones that I ordered from Dave.
Dave built them post-haste – and sent them to me via the Royal Mail on January 11th – so we both thought I’d get them in time to prepare for the February 23rd TotalCon37 convention. Unfortunately, a combination of a cyber attack on the Royal Mail and labor strikes in the UK combined and conspired to keep them from arriving at my home until Wednesday February 22nd – one day before the convention. As I wanted to detail them for the game, and I did not have enough time to give them the justice I wanted with less than a day’s preparation, I decided to work on them after TotalCon 37 so that they’d be ready for Cold Wars. I want to say that Dave was great in following up with me and this situation was definitely not his fault. The seven bases that I bought were as follows:
I started them on February 27th and worked on them alongside some Winkie cavalry (that I will post about next). All of the 7 bases came unpainted with a very generous supply of different plastic foliage on sprues – which allowed me to customize them. The bases themselves were resin with multiple small conical prongs with which to attach the plants. Dave recommended attaching them with green stuff – but I went with Apoxie Sculpt as I had some mixed already for a box handle I needed to repair.
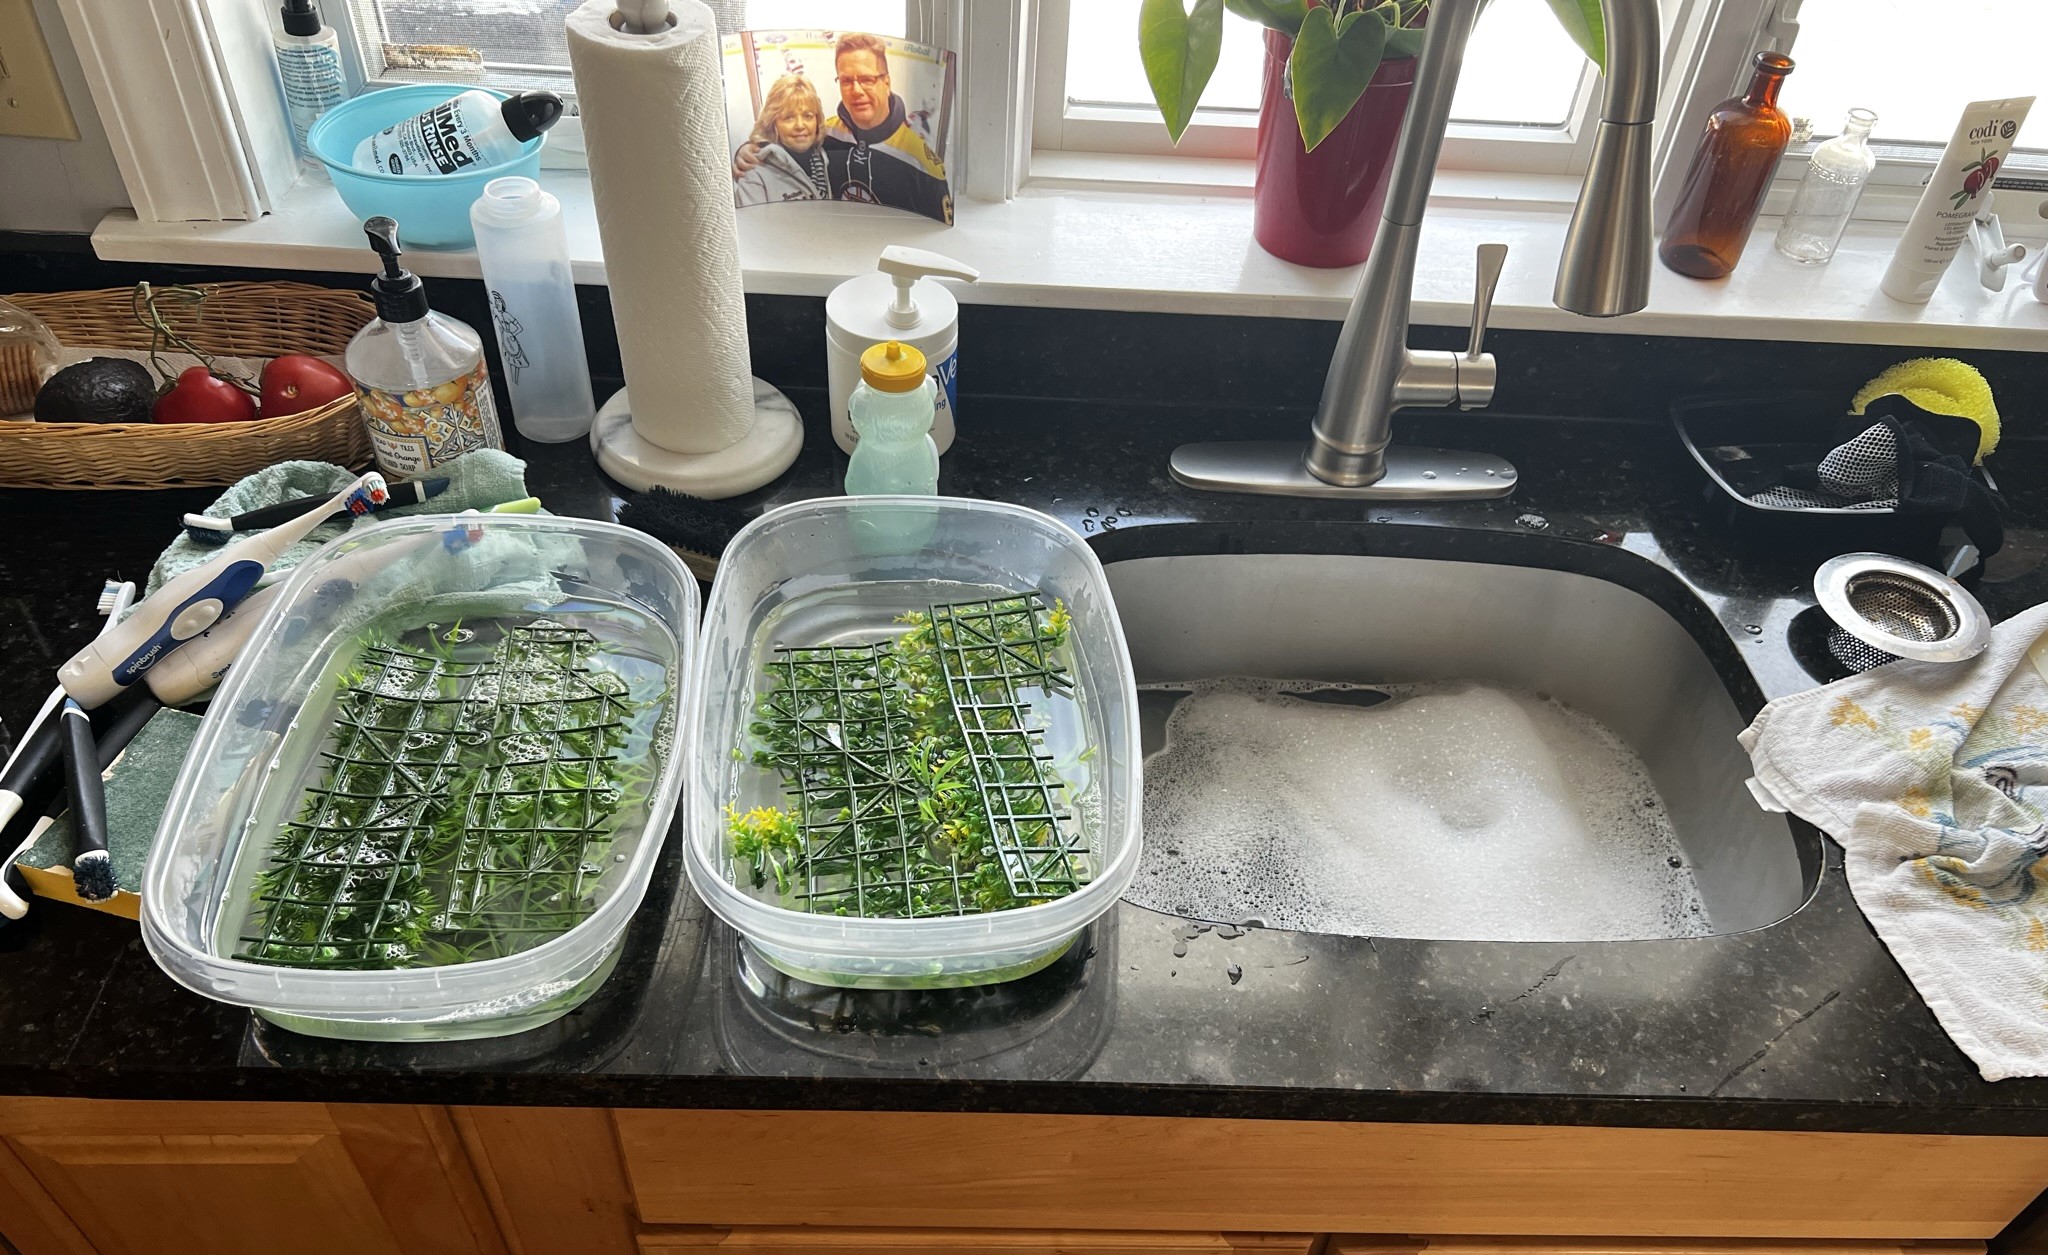
The first steps were to wash the resin and the foliage so that paints and washes would adhere properly.
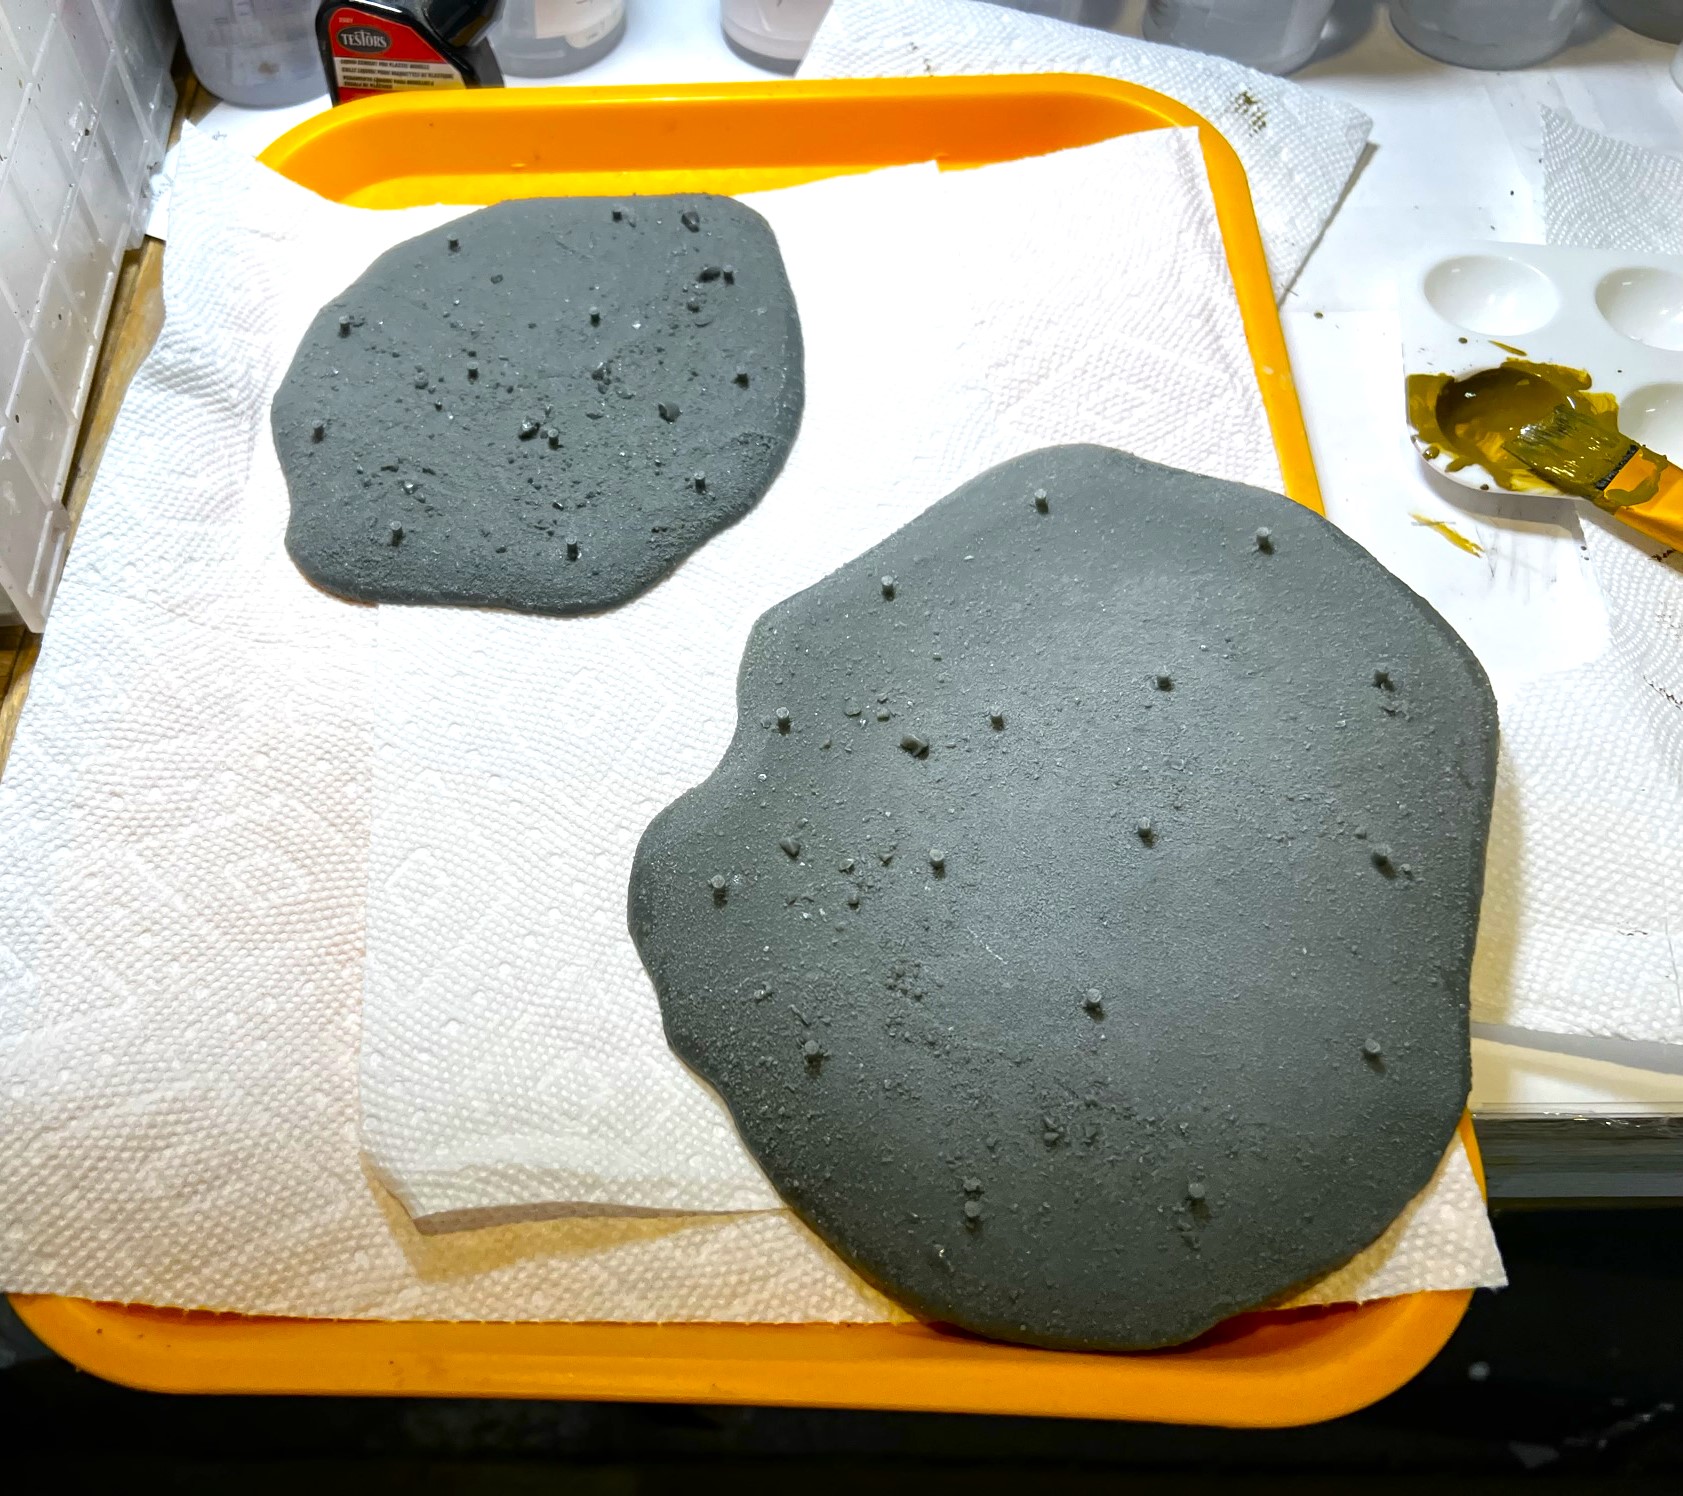
Washing the plastic foliage and the bases.Two of the washed resin bases showing the prongs, right before priming – on the right!
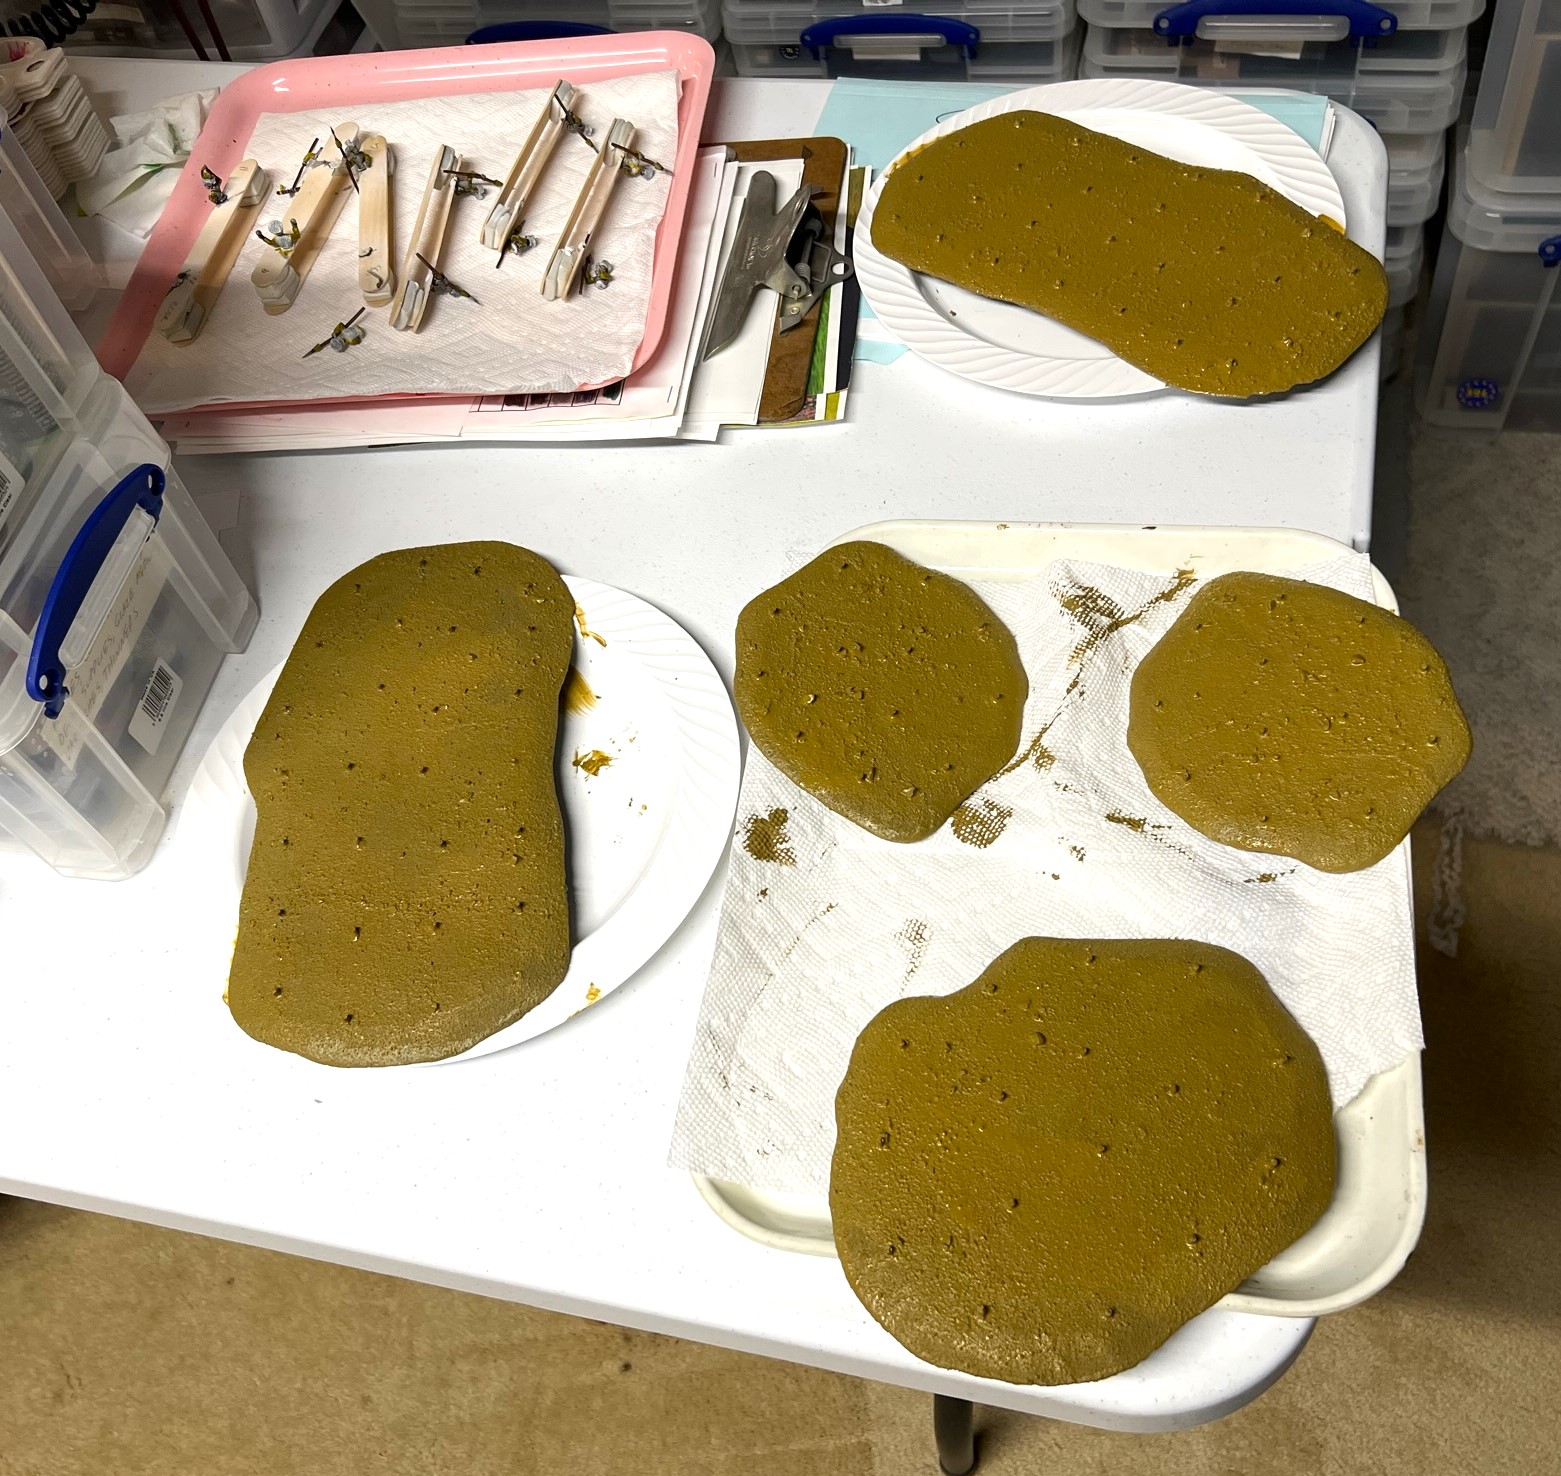
I primed the bases green-brown and let them dry overnight. I list all the paints and other materials at the end of the blog for those interested in that type of information.
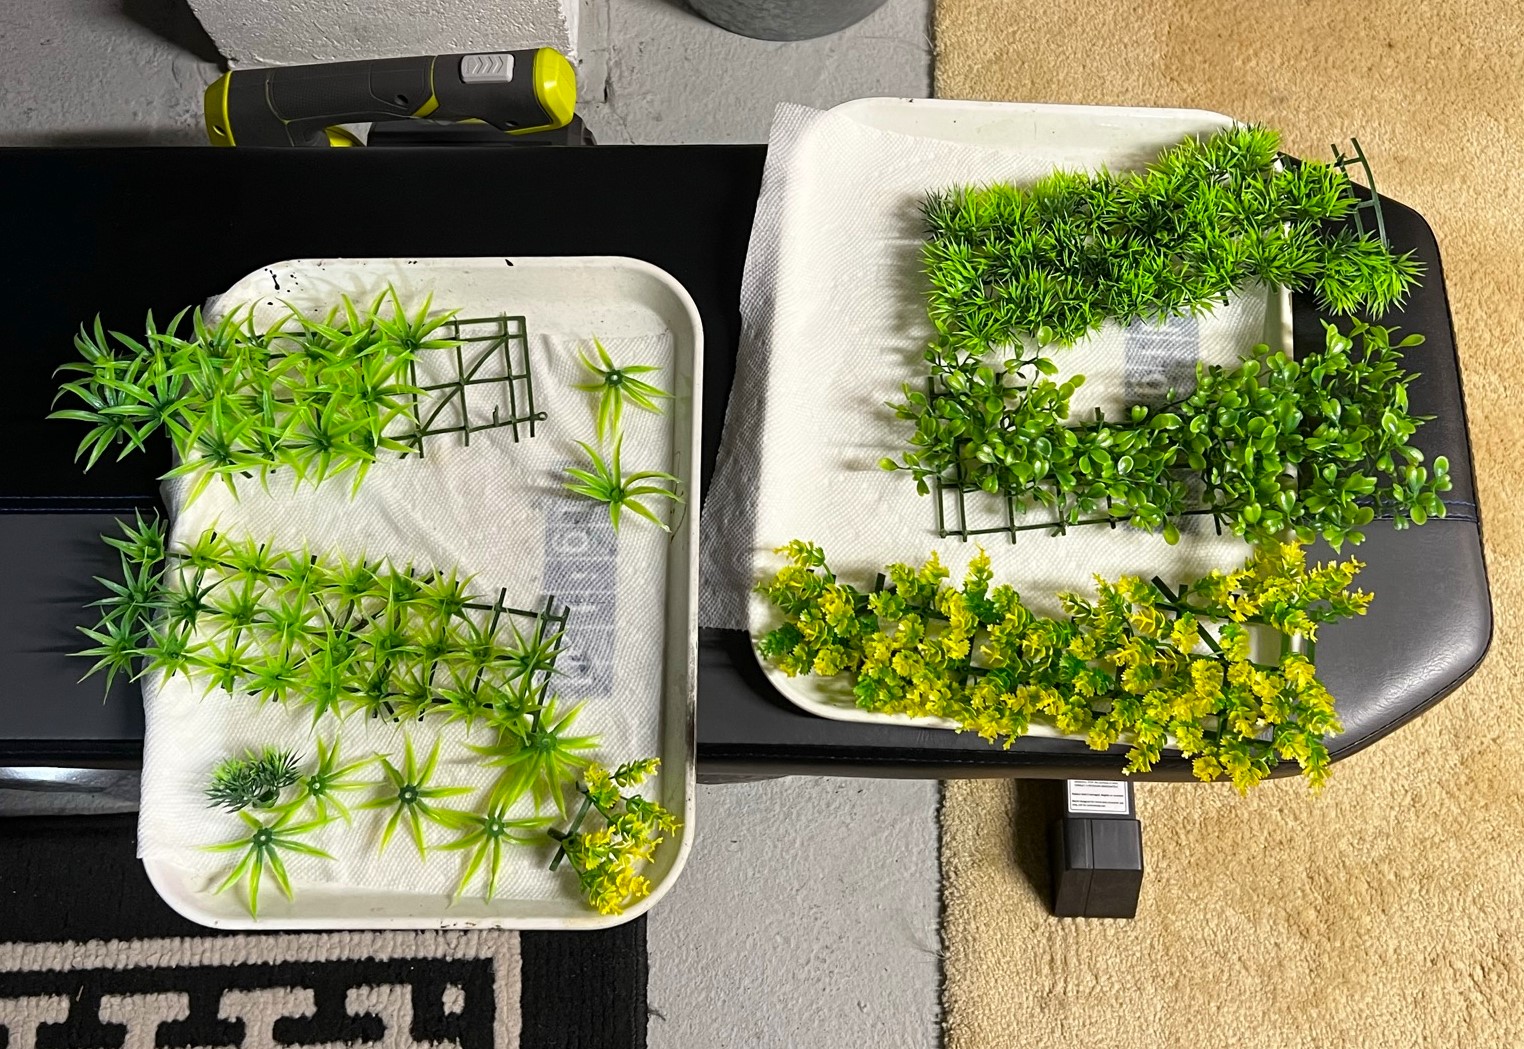
Five of the seven bases primed and drying.Lots of available foliage!
Then, I then mocked out where I would apply the foliage with 1.25″ washers. When I was happy, I applied the foliage with Apoxie Sculpt to 5 of the bases and let that cure overnight. Why five and not seven? Well, as I said, I was also working on Winkie cavalry, and two of the primed bases were hiding under a paper towel and I missed them.
Small base with foliage affixed with Apoxie Sculpt.The 5 non-missing bases with the foliage attached as above – plus the extra prongs have been removed down to the base level.
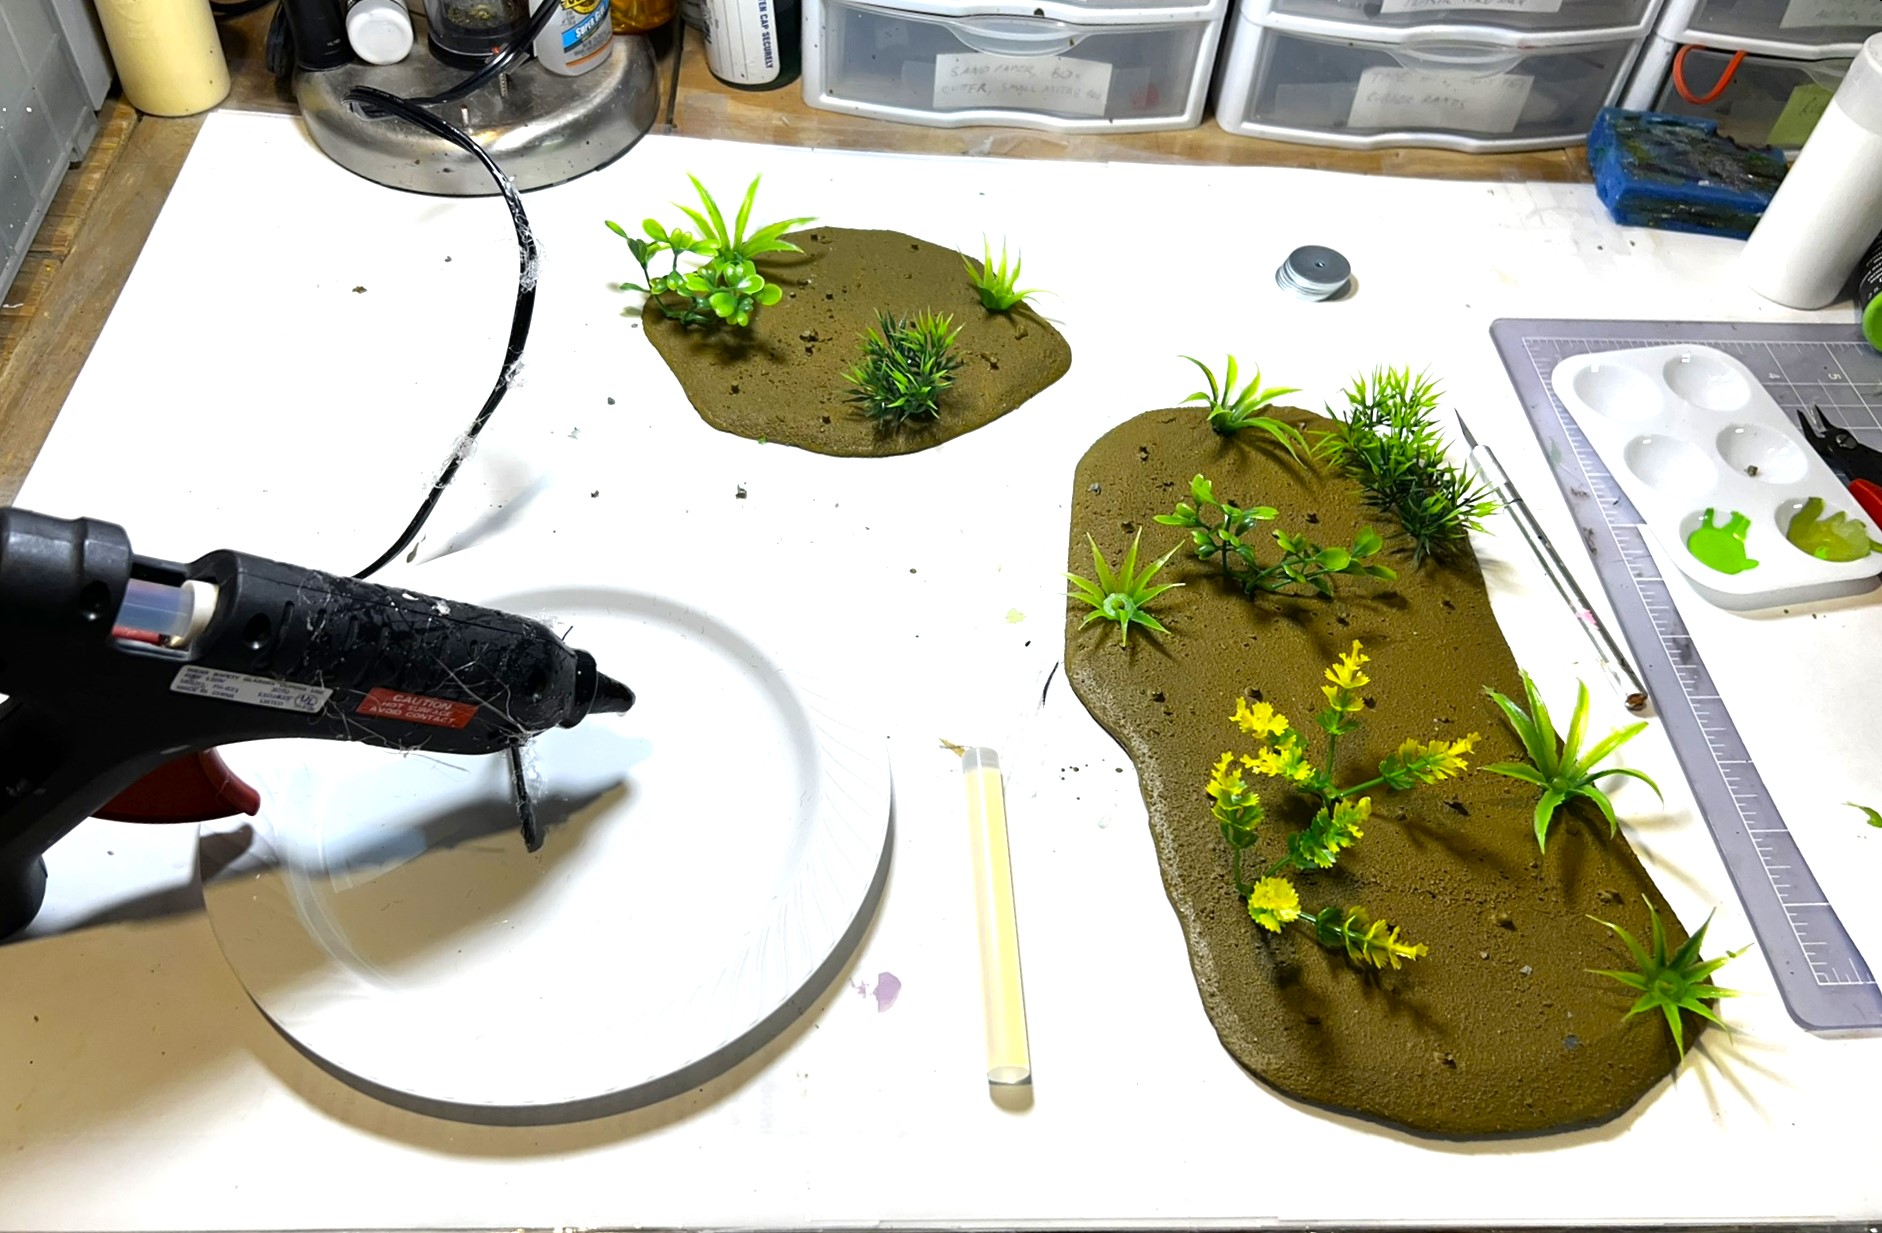
The next day, the Apoxie Sculpt had cured, I did a quick inventory and I was concerned that I did not buy enough bases! After finding the hidden two, I decided that I did not have the luxury of time to wait another day to wait for Apoxie Sculpt to cure on these last two – so I went with hot glue – which worked great and instantly. I then painted over the Apoxie Sculpt and glue with a couple of green craft paints. Next, I applied three successive green hobby washes to the foliage, and let that dry. Then I cut off the remaining prongs, and applied brown texture paint over the places where the prongs had been removed.
Glue gun to the rescue.The 7 bases are shown here after I added the brown texture paint over the removed prong locations. These are shown over the card stock stand-ins I used at TotalCon 37 – so size-wise I was pretty close. Note that the washes on the foliage have lessened the plastic look significantly.
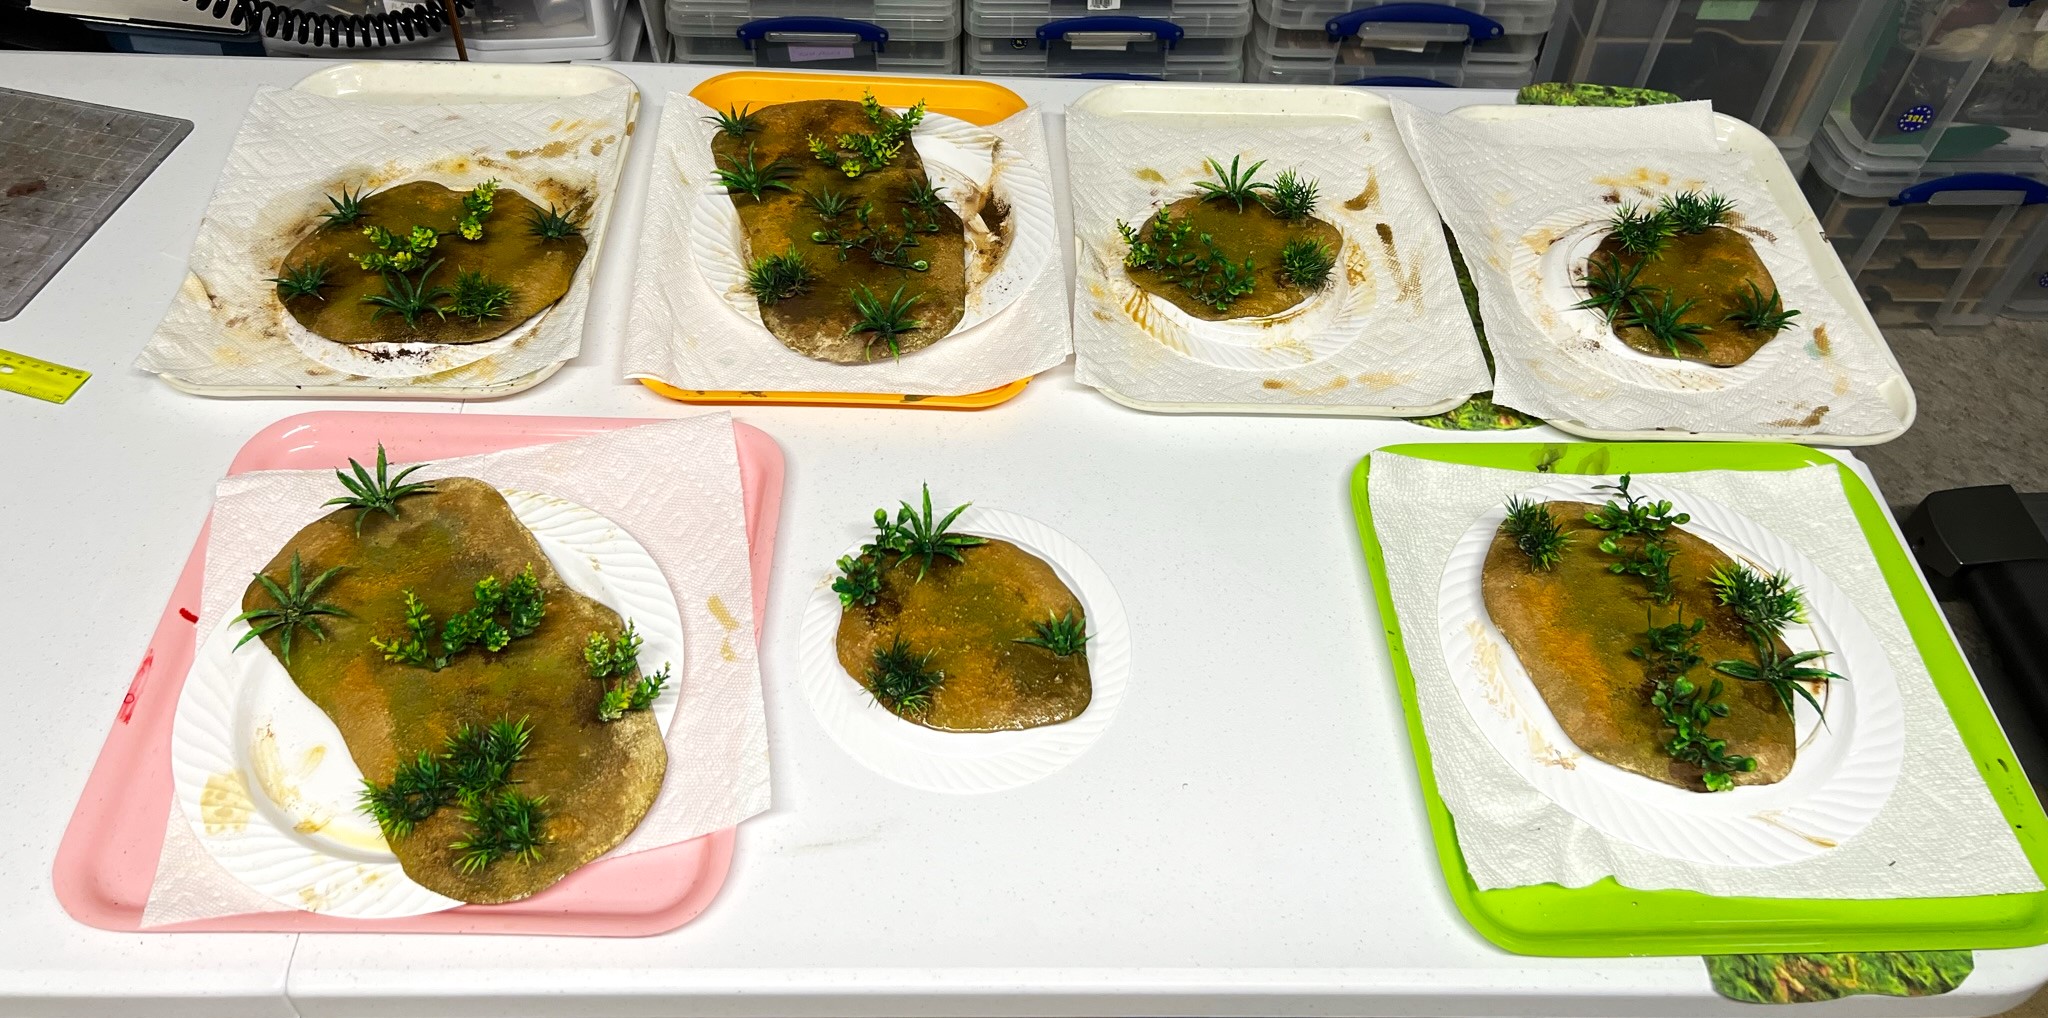
At this point I moved on to adding multiple pigments (like 7!). My goal was to blend the edges to look as if they bordered a beach, with a more jungle-like ground surface towards the centers of the bases. I added the 7 pigments, and fixed them with Vallejo thinner and let them dry.
First pigments session.
I was not satisfied with the first go with the pigments. I felt that the blends could be better – especially the transition from the beach areas inward. I also was not happy with the beach-bordering areas themselves. With that, I gave it a second attempt to address the shortcomings. That did address the issues – and then I added some scatter leaves and some laser cut low lying Gamers Grass plants that I bought from Things from the Basement at TotalCon – plus some Shadow’s Edge Miniatures jungle tufts.
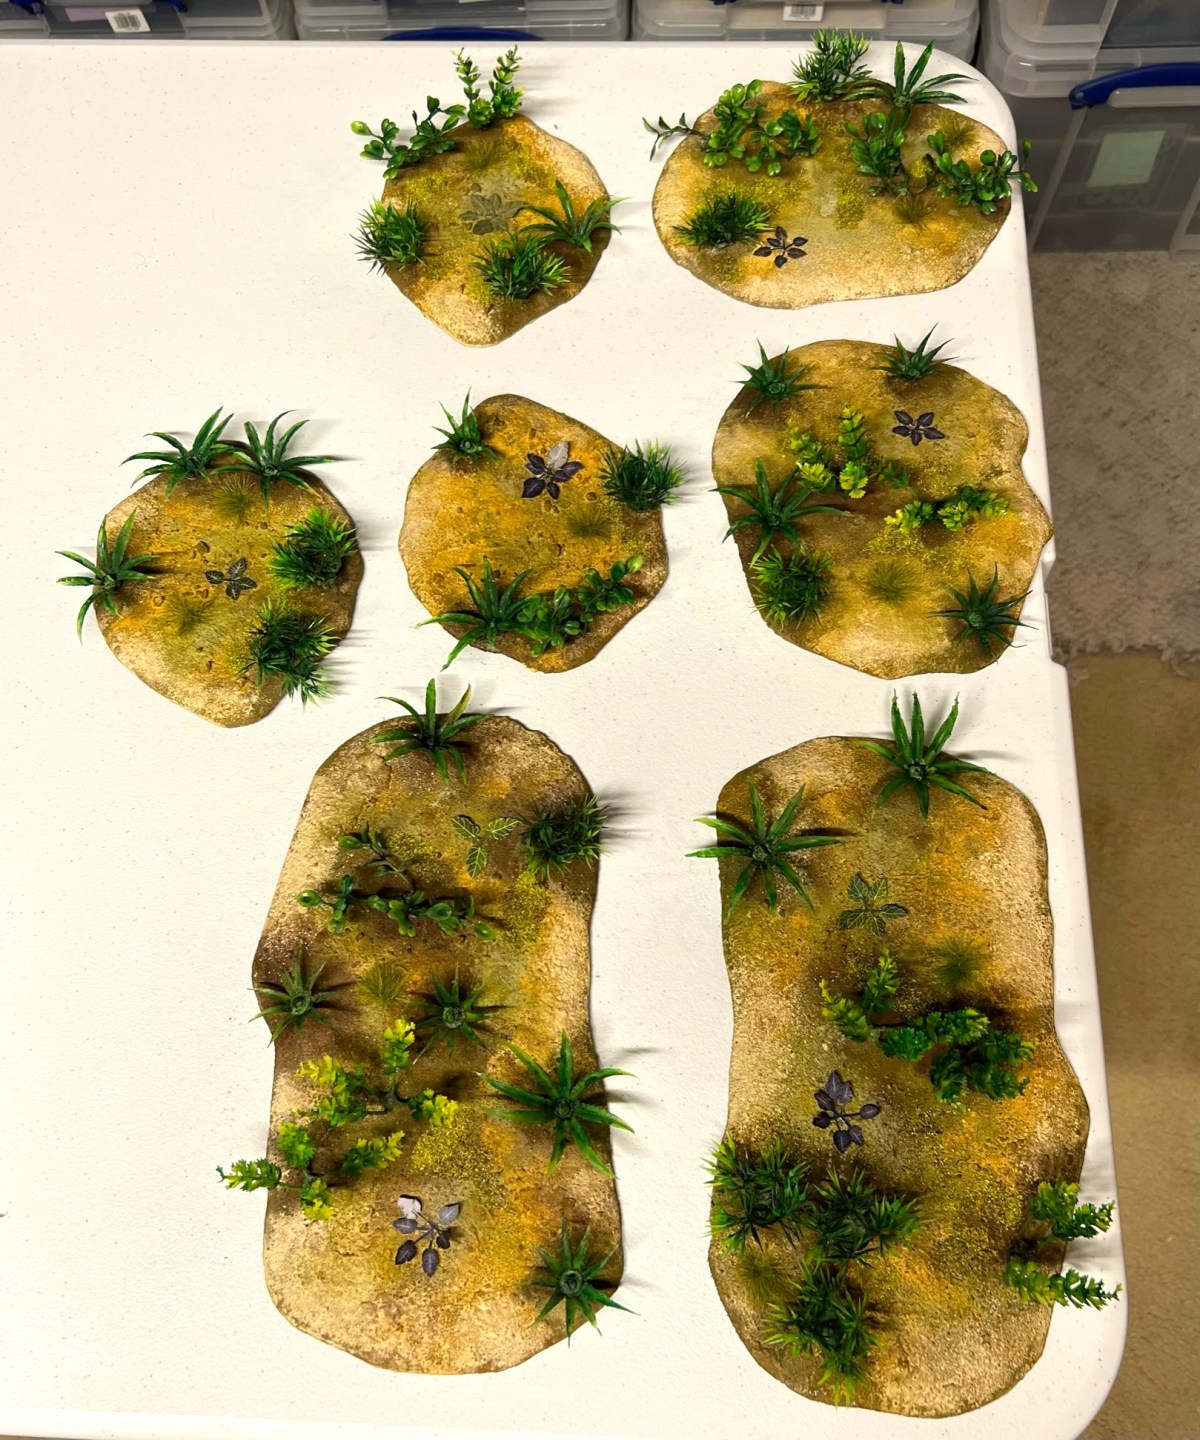
I was pretty happy with the final products seen below.
The seven bases completed. Note the added low-lying plants and tufts.Close up of a medium base with a conquistador halberdier and an “underdressed” Maya novice for scale. For the Maya’s sake, let’s hope there are very few thorns.
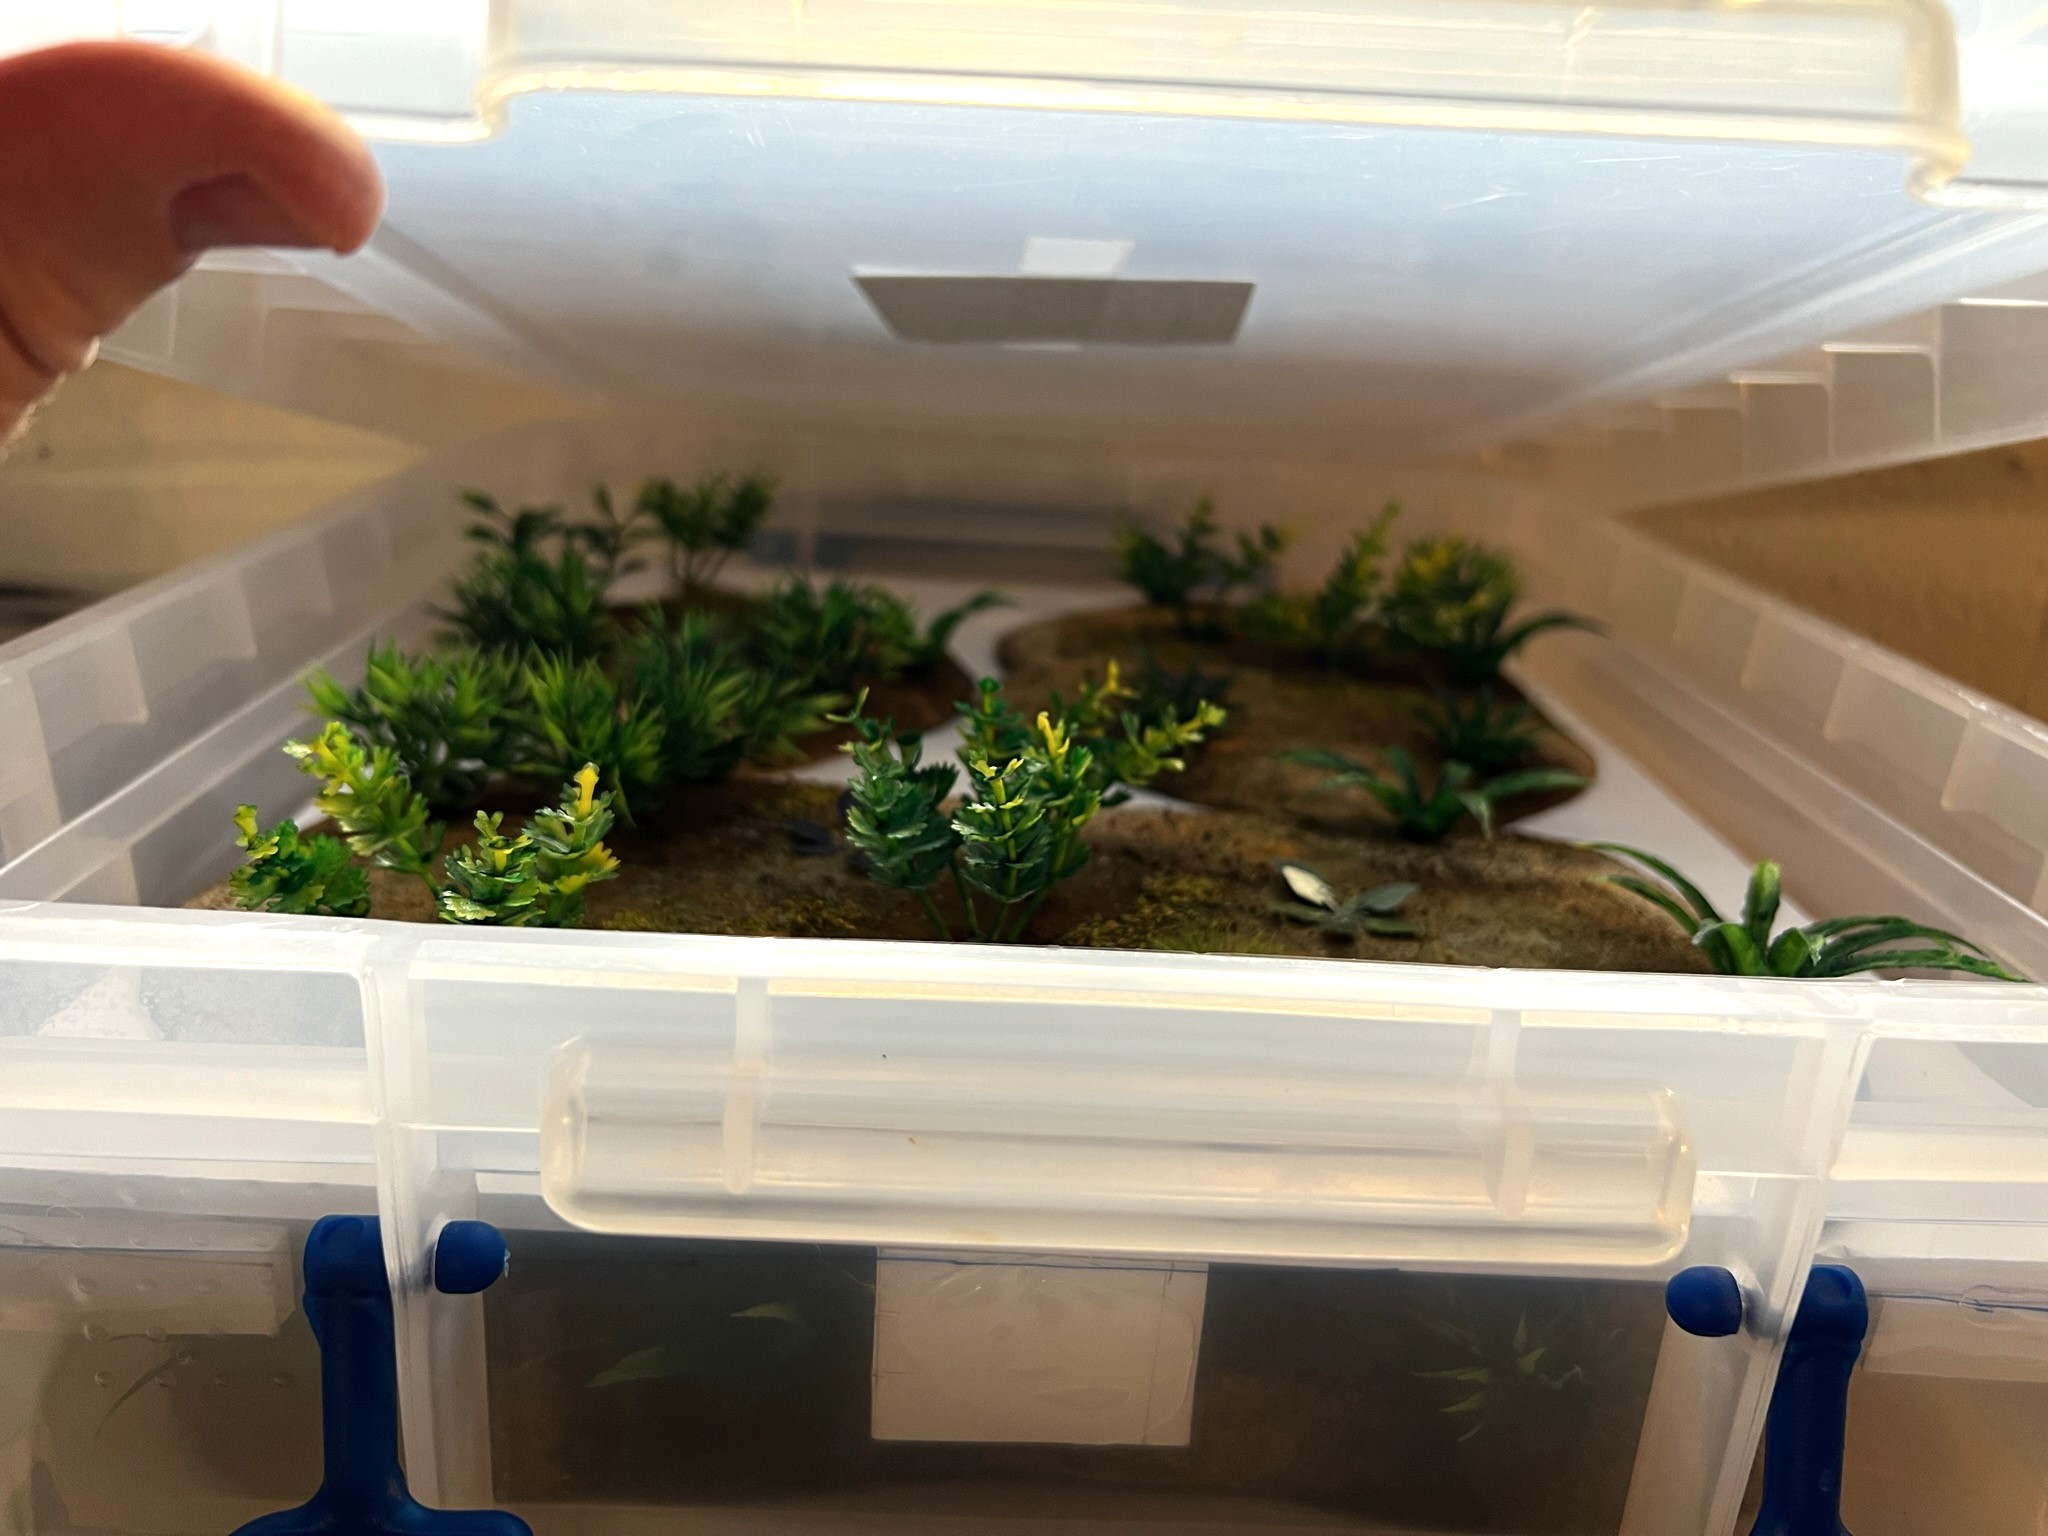
I can see using these bases for many other games – and I believe that they work well with my jungle bases with the palm trees. As to now storing and transporting them – I modified a 32-liter Really Useful Box with hot glue and posterboard/foam board into a three-level “apartment” Jungle Box. The bottom level is lined with adhesive magnetic sheets (my jungle bases with the palm trees have steel washers embedded underneath). The jungle paths also fit in here rolled up with the trees being upright. The next two levels fit the seven bases described here – four on one, and three on another. Both levels are made of posterboard and are resting on posterboard pieces that I hot-glued to the walls of the box. I did need to make the level that is immediately above the trees into three pieces so that I could get it by the supports of the top level (which is in one piece). No levels will crush any foliage (thankfully). Voila – a Jungle Box ready for Cold Wars transport!
The top level – rests on one solid piece of foam board.Side view of the Jungle Box showing the three levels.
I hope this was useful to those of you considering similar projects. I do highly recommend Dave Stone’s stuff – I also previously shared his Aztec Style Serpent Statues that have been very popular at my games. Check him out!
My next post will be coming (hopefully) somewhat quickly as I need to finish preparations and packing up for Cold Wars. It will show my Winkie Zilk-riding cavalry – stay tuned! For my fellow bloggers, I’m trying to keep up with you, and know that I always read your posts and try to give you feedback. This month is, however, nuts, so I might be a bit tardy, mea culpa. As always, much thanks for taking a look – and let me know what you think!
Miscellaneous details and references for those interested in that sort of thing:
For all of my previous posts on games, units, and other projects for my 16th Century Spanish Conquest supplement for Feudal Patrol™ – “Civilizations Collide” – please see this page.
PAINTS, INKS, GLAZES, SHADES, WASHES, PIGMENTS, FLOCKING, GLUES AND MORE THAT I USED ON THESE JUNGLE BASES:
As convention season is upon me – starting with TotalCon 37 this weekend – I wanted to make a quick post on some jungle bases I have sculpted for my new Maya scenario. I bought some inexpensive palm trees on Amazon – the one on the left was for cake decorating and the other on the right marketed for use on railroad dioramas. I had 30 trees in total – and they looked pretty shiny as one would expect of plastic. And shiny is not what I wanted.
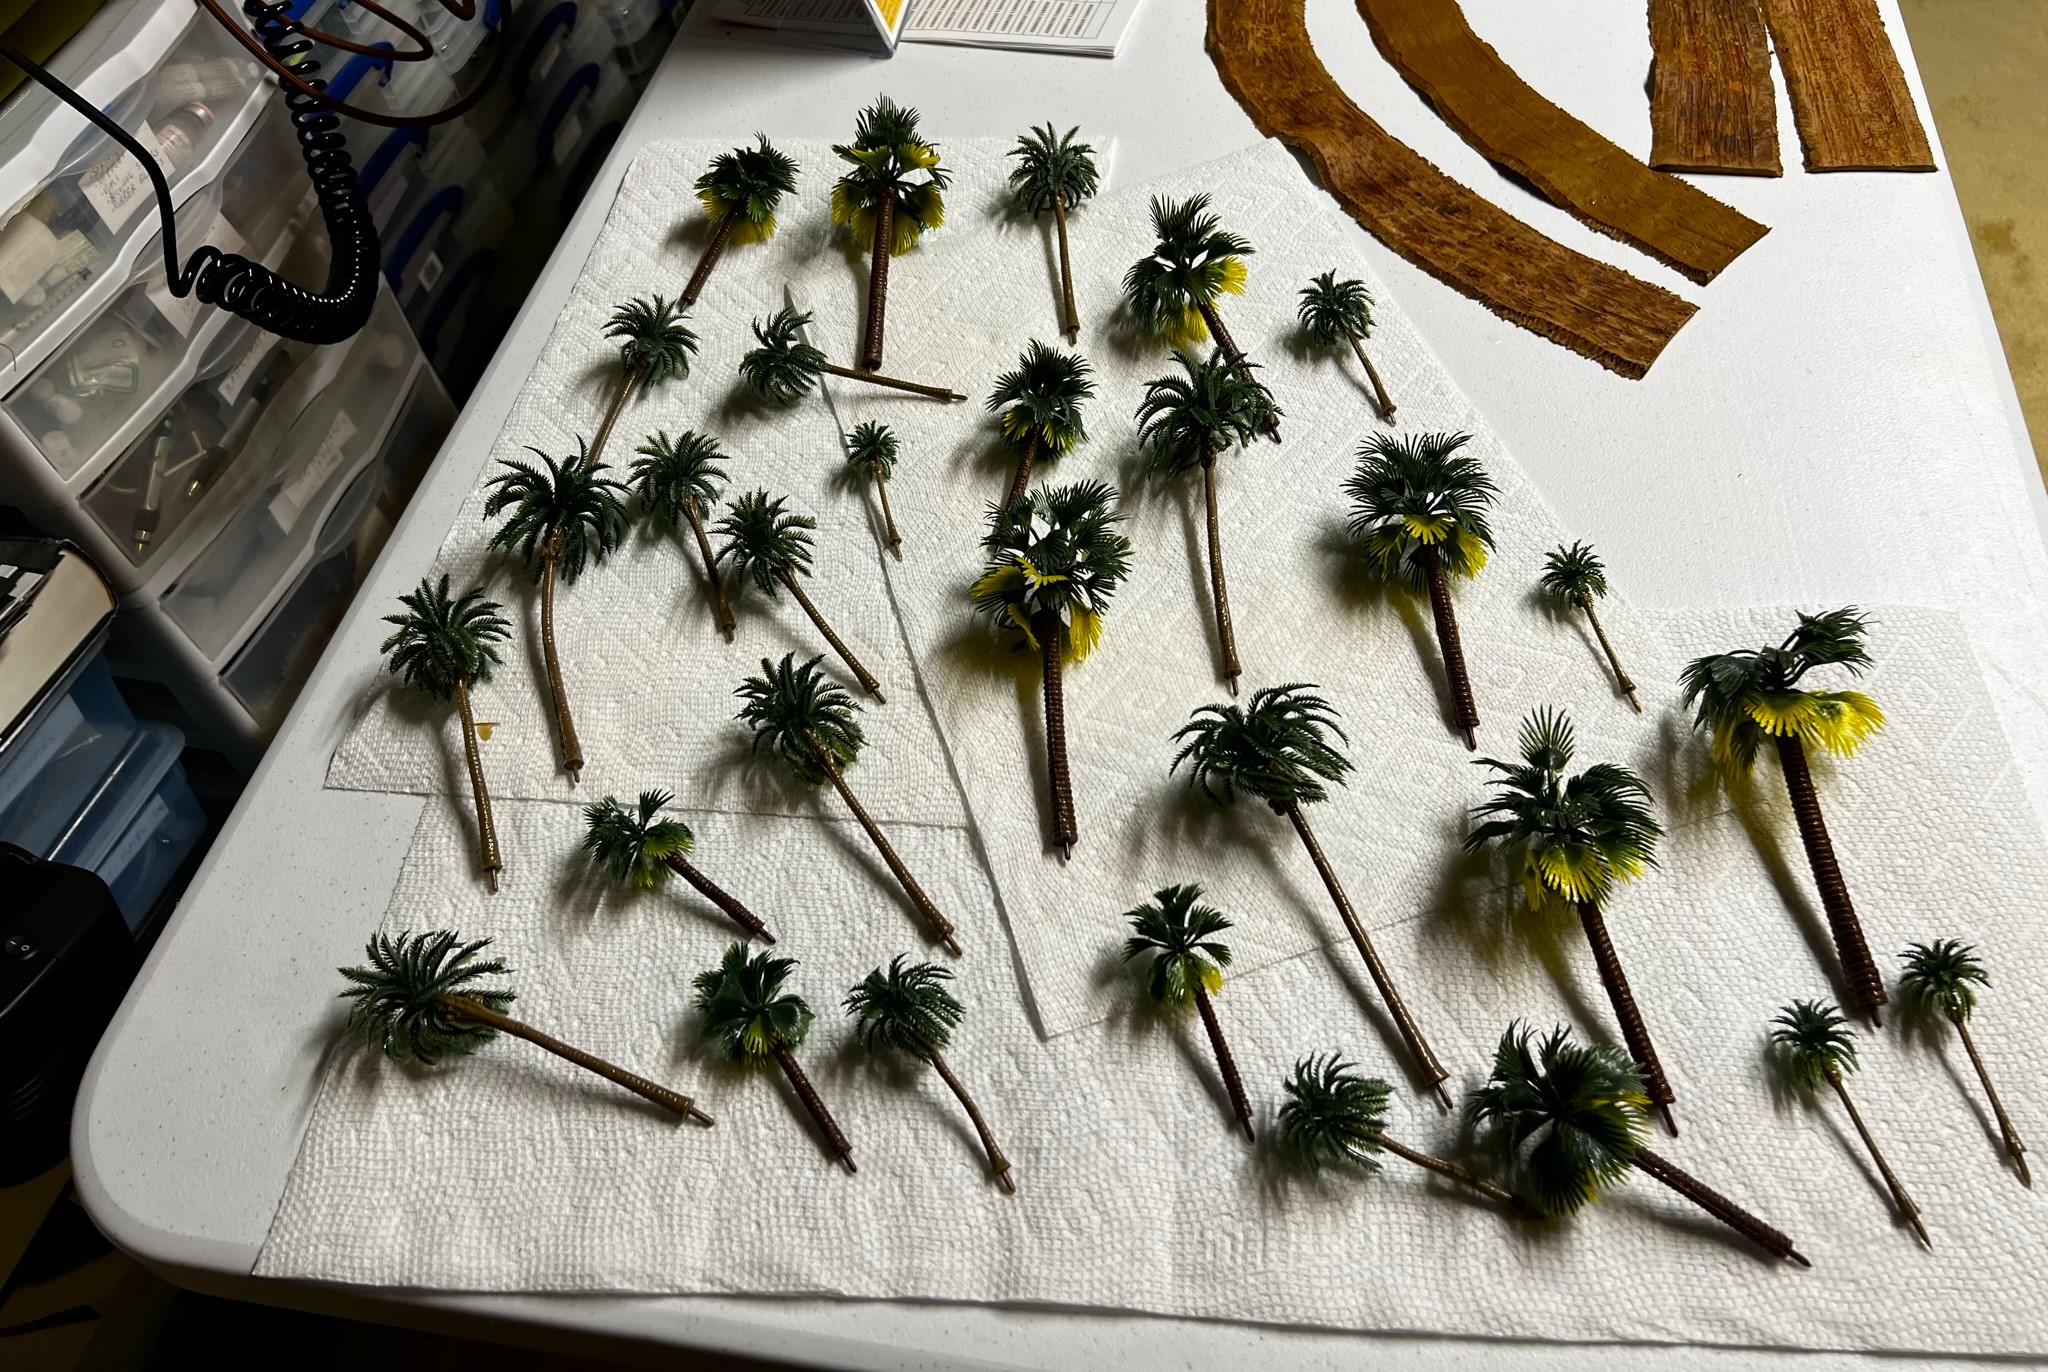
The basic preparation of the trees involved removing mold lines (lots), washing them, and making a plan for their use. I needed some single trees for use on a beach (sandy bases) and some larger more muddy looking bases for the jungle around a Maya village. These are for the Battle of CentlaFeudal PatrolTM games I’ll be running in upcoming conventions. In addition to removing the mold lines, I lightly sanded and filed the plastic which gave the bark a more friable look.
After cleaning up bad mold lines – wash time……and drying time
I then mounted the trees into poster tack on specimen jars and used three different washes on the foliage (all the paints and materials that I used are listed at the end of this post for those interested).
Mounted for applying washes to the plastic foliage to make them look more realistic.
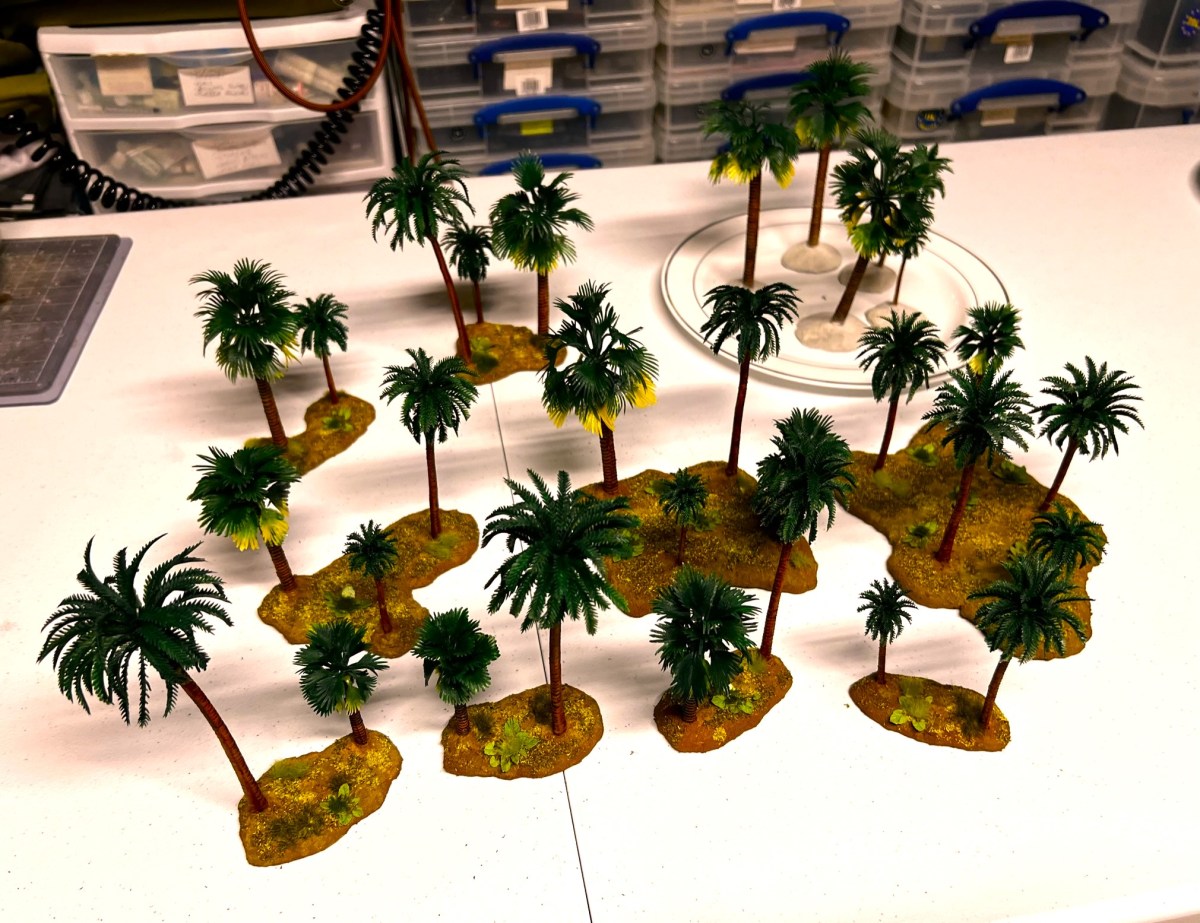
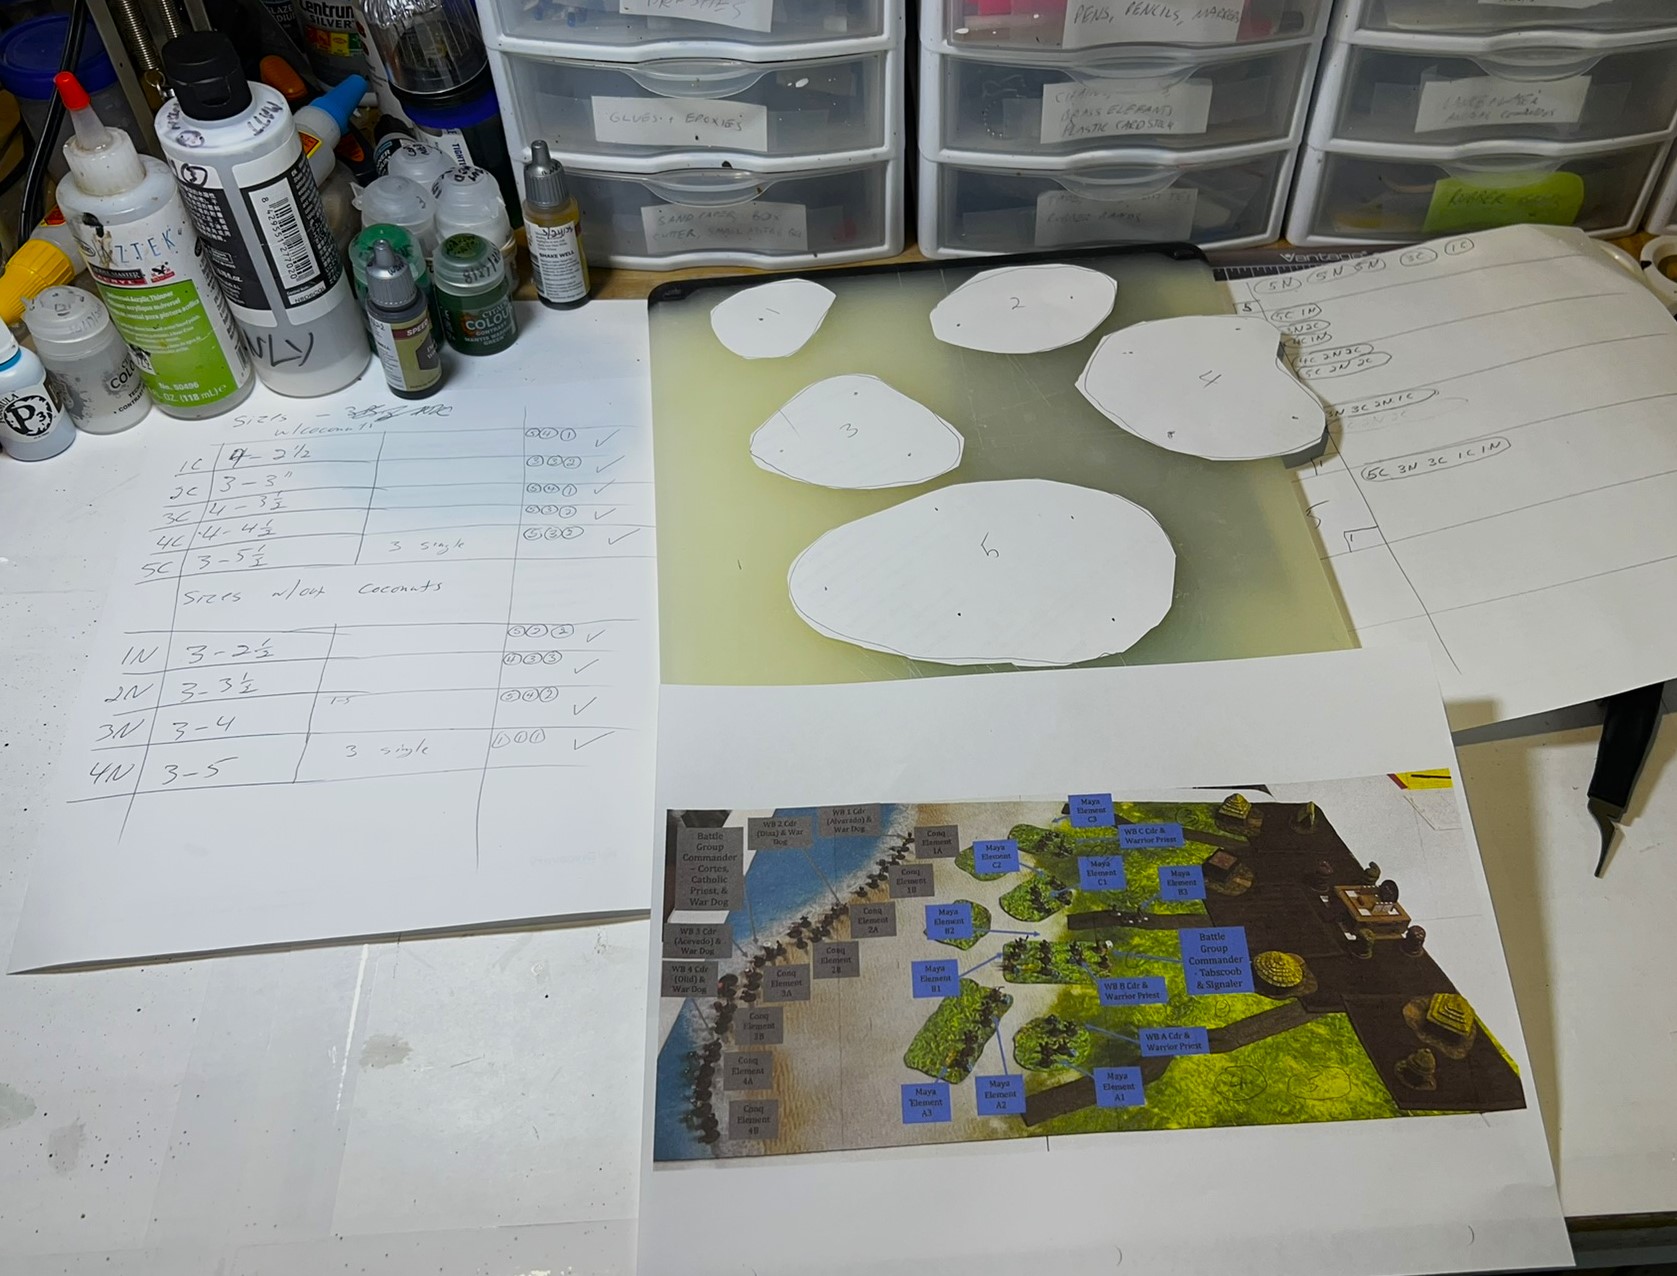
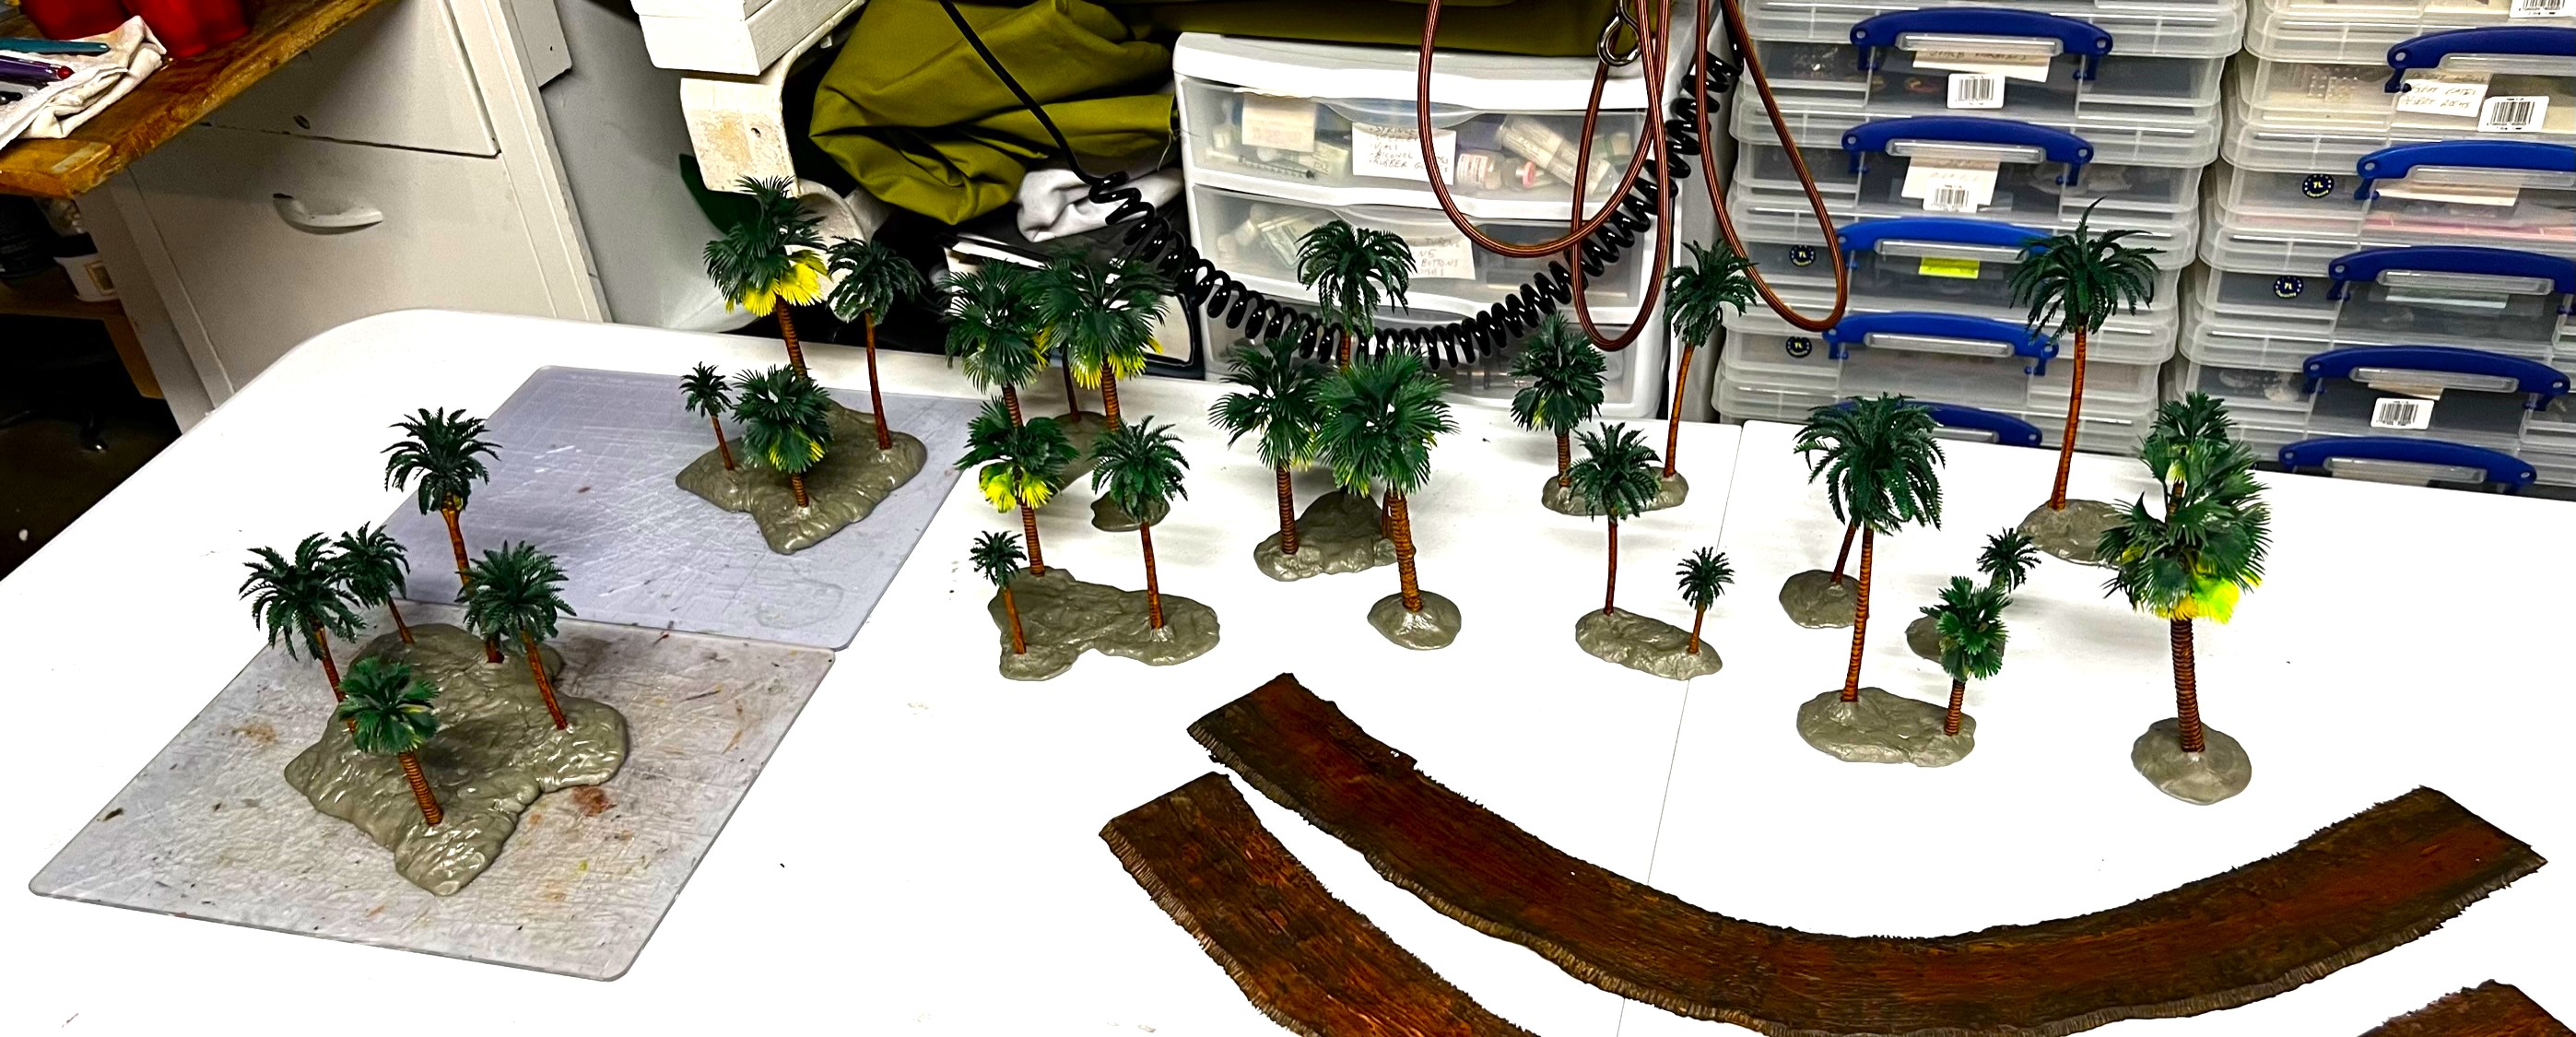
Next, I needed a more detailed plan – I wanted to make the bases such that the 30 trees were varied across all of the bases and spaced far enough apart for good gaming with miniatures. I decided to make one 5-tree base, one 4-tree base, two 3-tree bases, three 2-tree bases, and 5 single bases. The single ones would be beach bases and the others jungle bases.
The plan – with a shot of my game map as a planning guide.
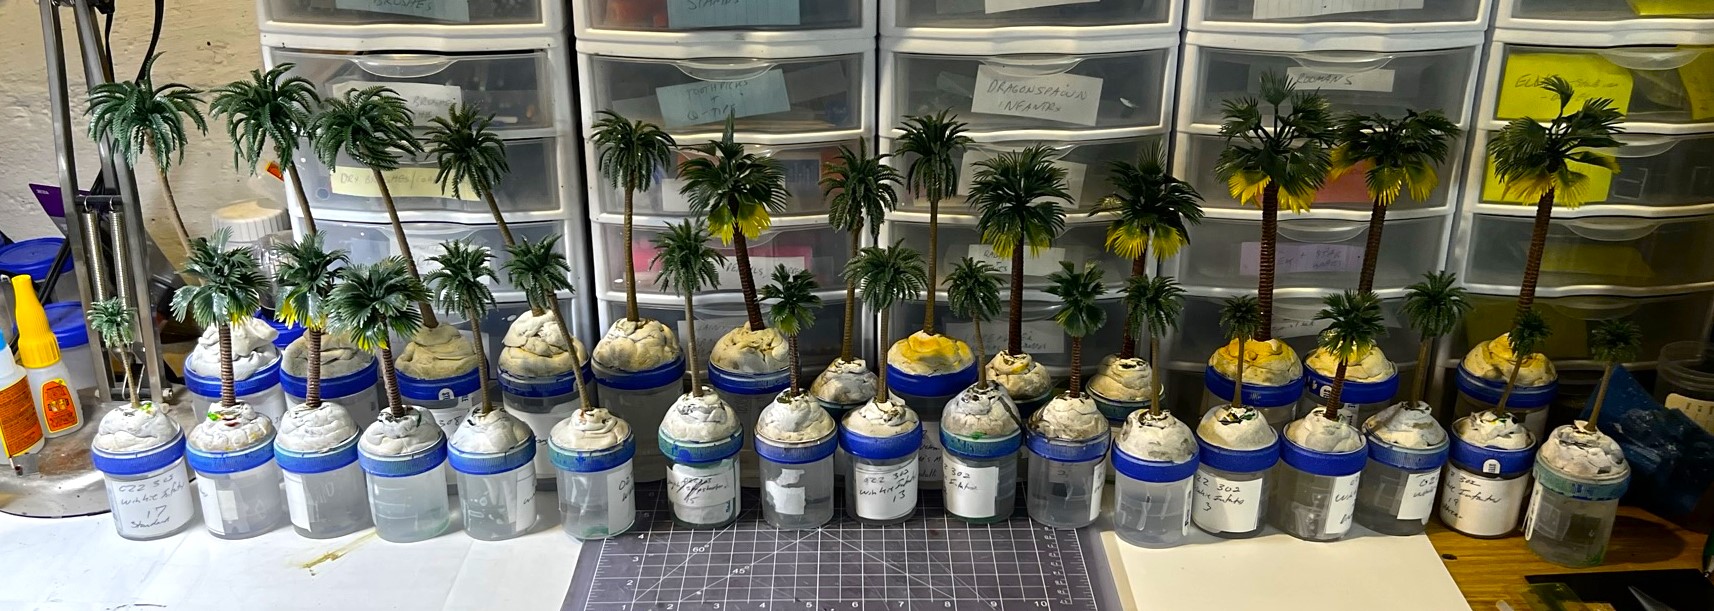
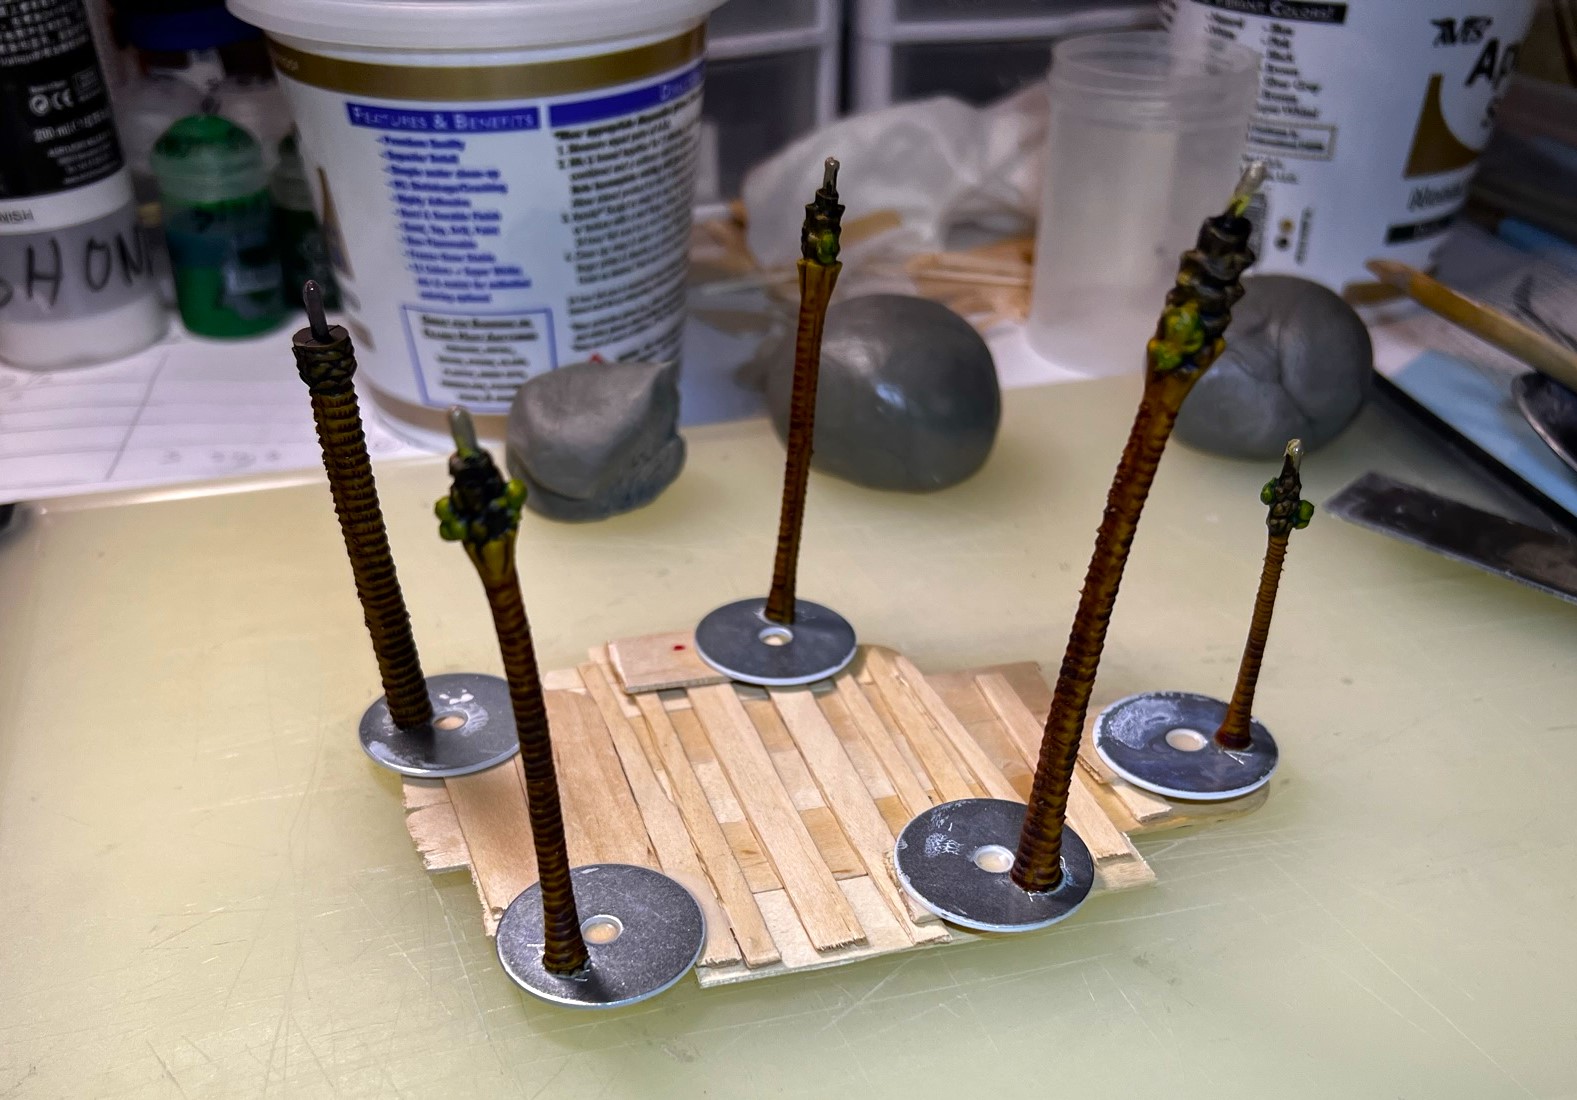
For sculpting, I went with Apoxie Sculpt, a 2-piece resin that is very workable but hardens like a rock. I needed to have some support for the trees – otherwise they would have just drooped excessively while the Apoxie Sculpt cured and hardened overnight. To solve this, I removed the little tabs on the tree bottoms, and glued the trees to steel washers. I gave a few a little bend as well.
For the 2-tree and 3-tree bases, the washers were easy to sculpt around and provided support – and I added some popsicle stick supports connecting the washers that I encased with Apoxie Sculpt and sculpted over. For the two bigger bases, I made supporting bases out of several popsicle sticks, then glued the washers with the affixed trees to them. I sculpted over the bases. More or less, these actions provided structural support and allowed me to make the bases strong. I needed to make sure that I used a putty knife to lift them from time to time off of plastic plates and cutting mats else they would cure permanently to them.
Apoxie SculptThe larger bases gleed and setting up.Washer-mounted treesTrees on washers now glues to a 5-tree base.
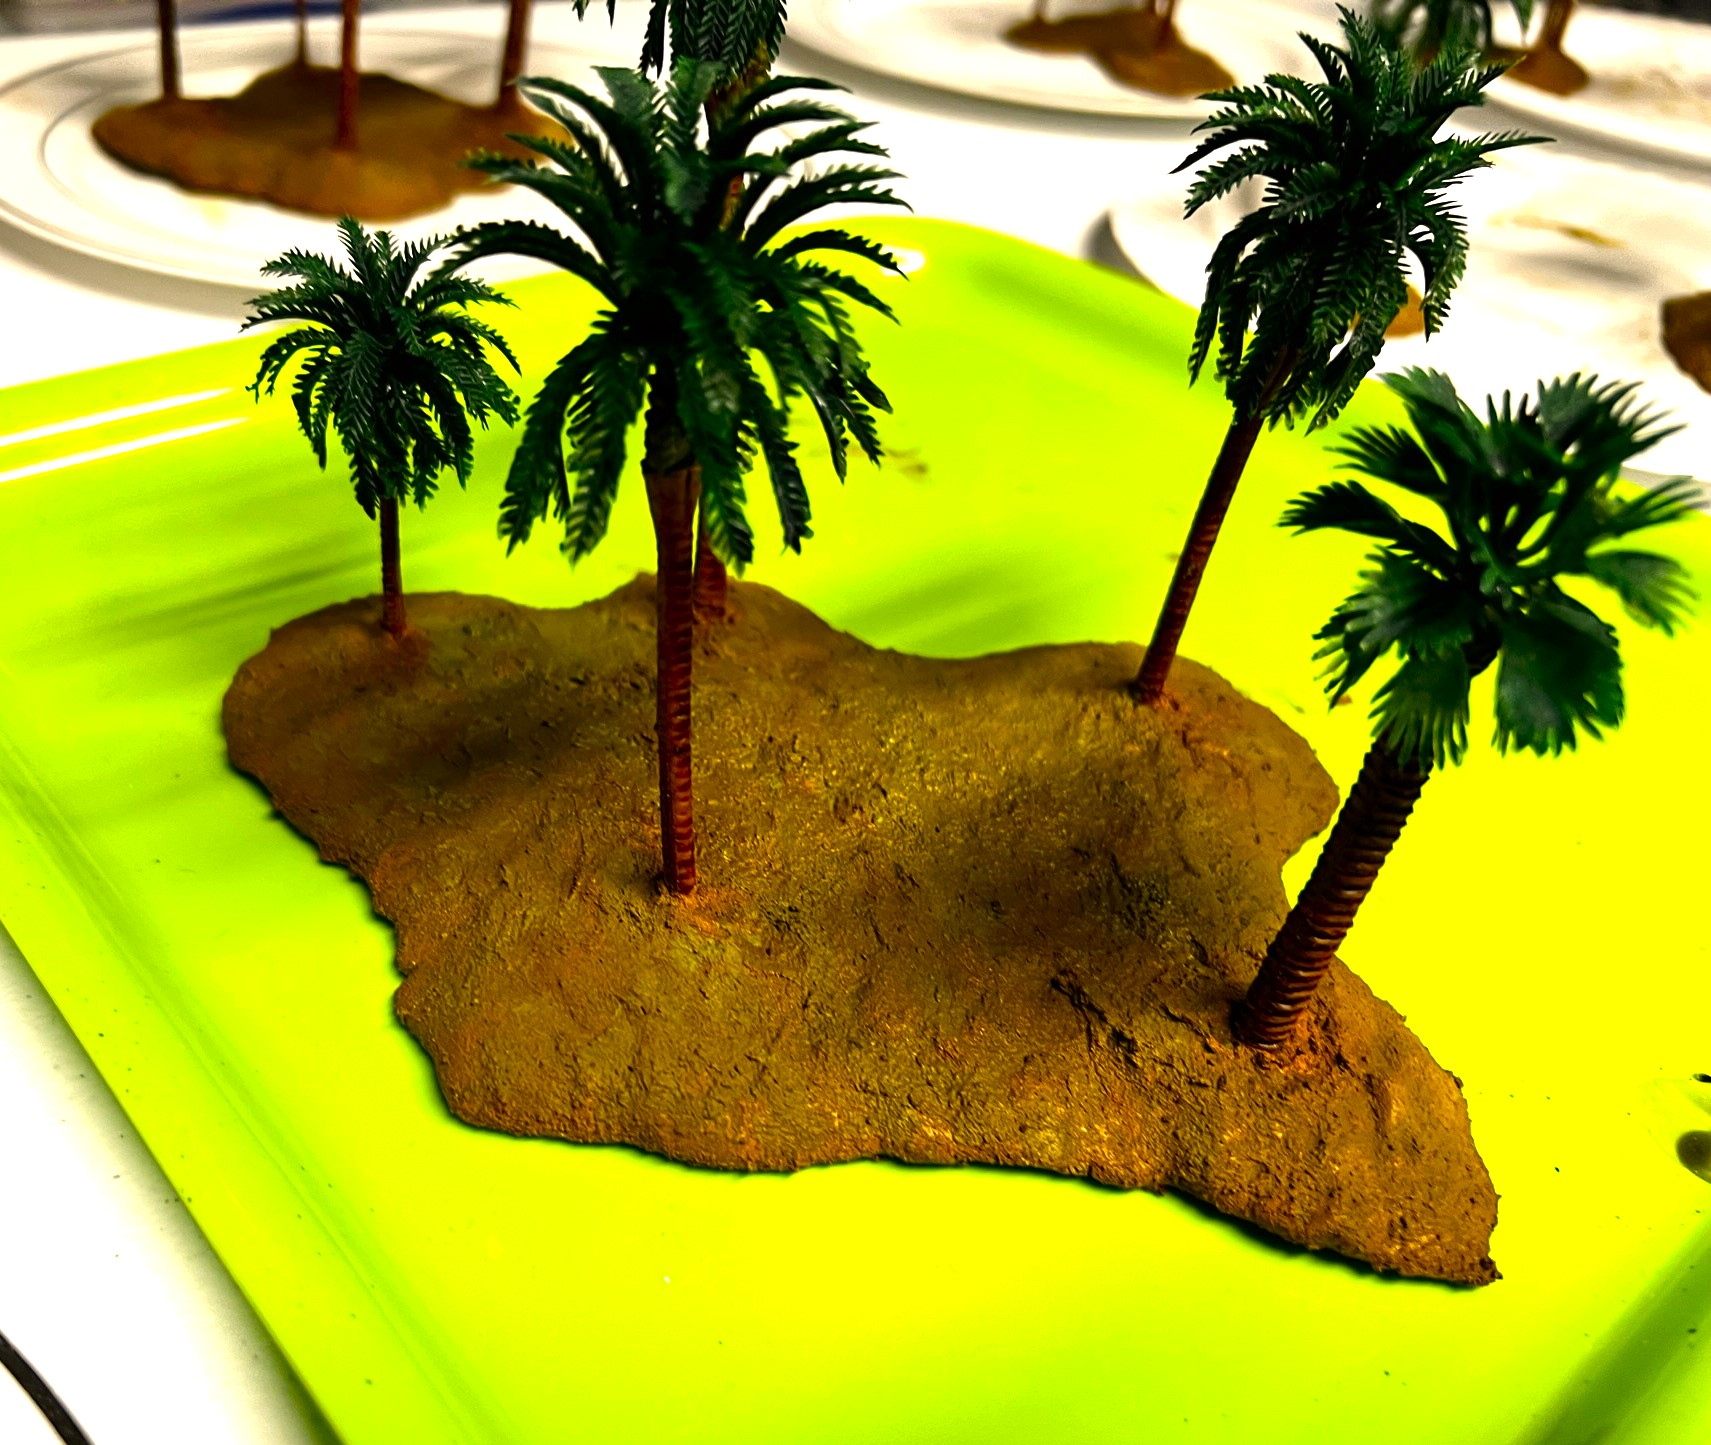
After curing to tremendous rock-hardness, the next steps for them were to get painted and flocked. For the single-tree beach bases, I used chinchilla dust over PVA (thanks again TIM!) that I have used in the past. For the jungle bases, I used a texture paint, pigments, and different flocking materials.
Bases curing – a couple of jungle paths are in front. These I got from Buck Surdu and I muddied them up with a couple of inks.Early flocking drying – pigments still wet.Close up of beach bases with chinchilla dust and glue drying.
After the texture paint dried, I played around and added multiple (3) pigments, and let them dry.
5-tree base with pigments drying.Pigments after drying.
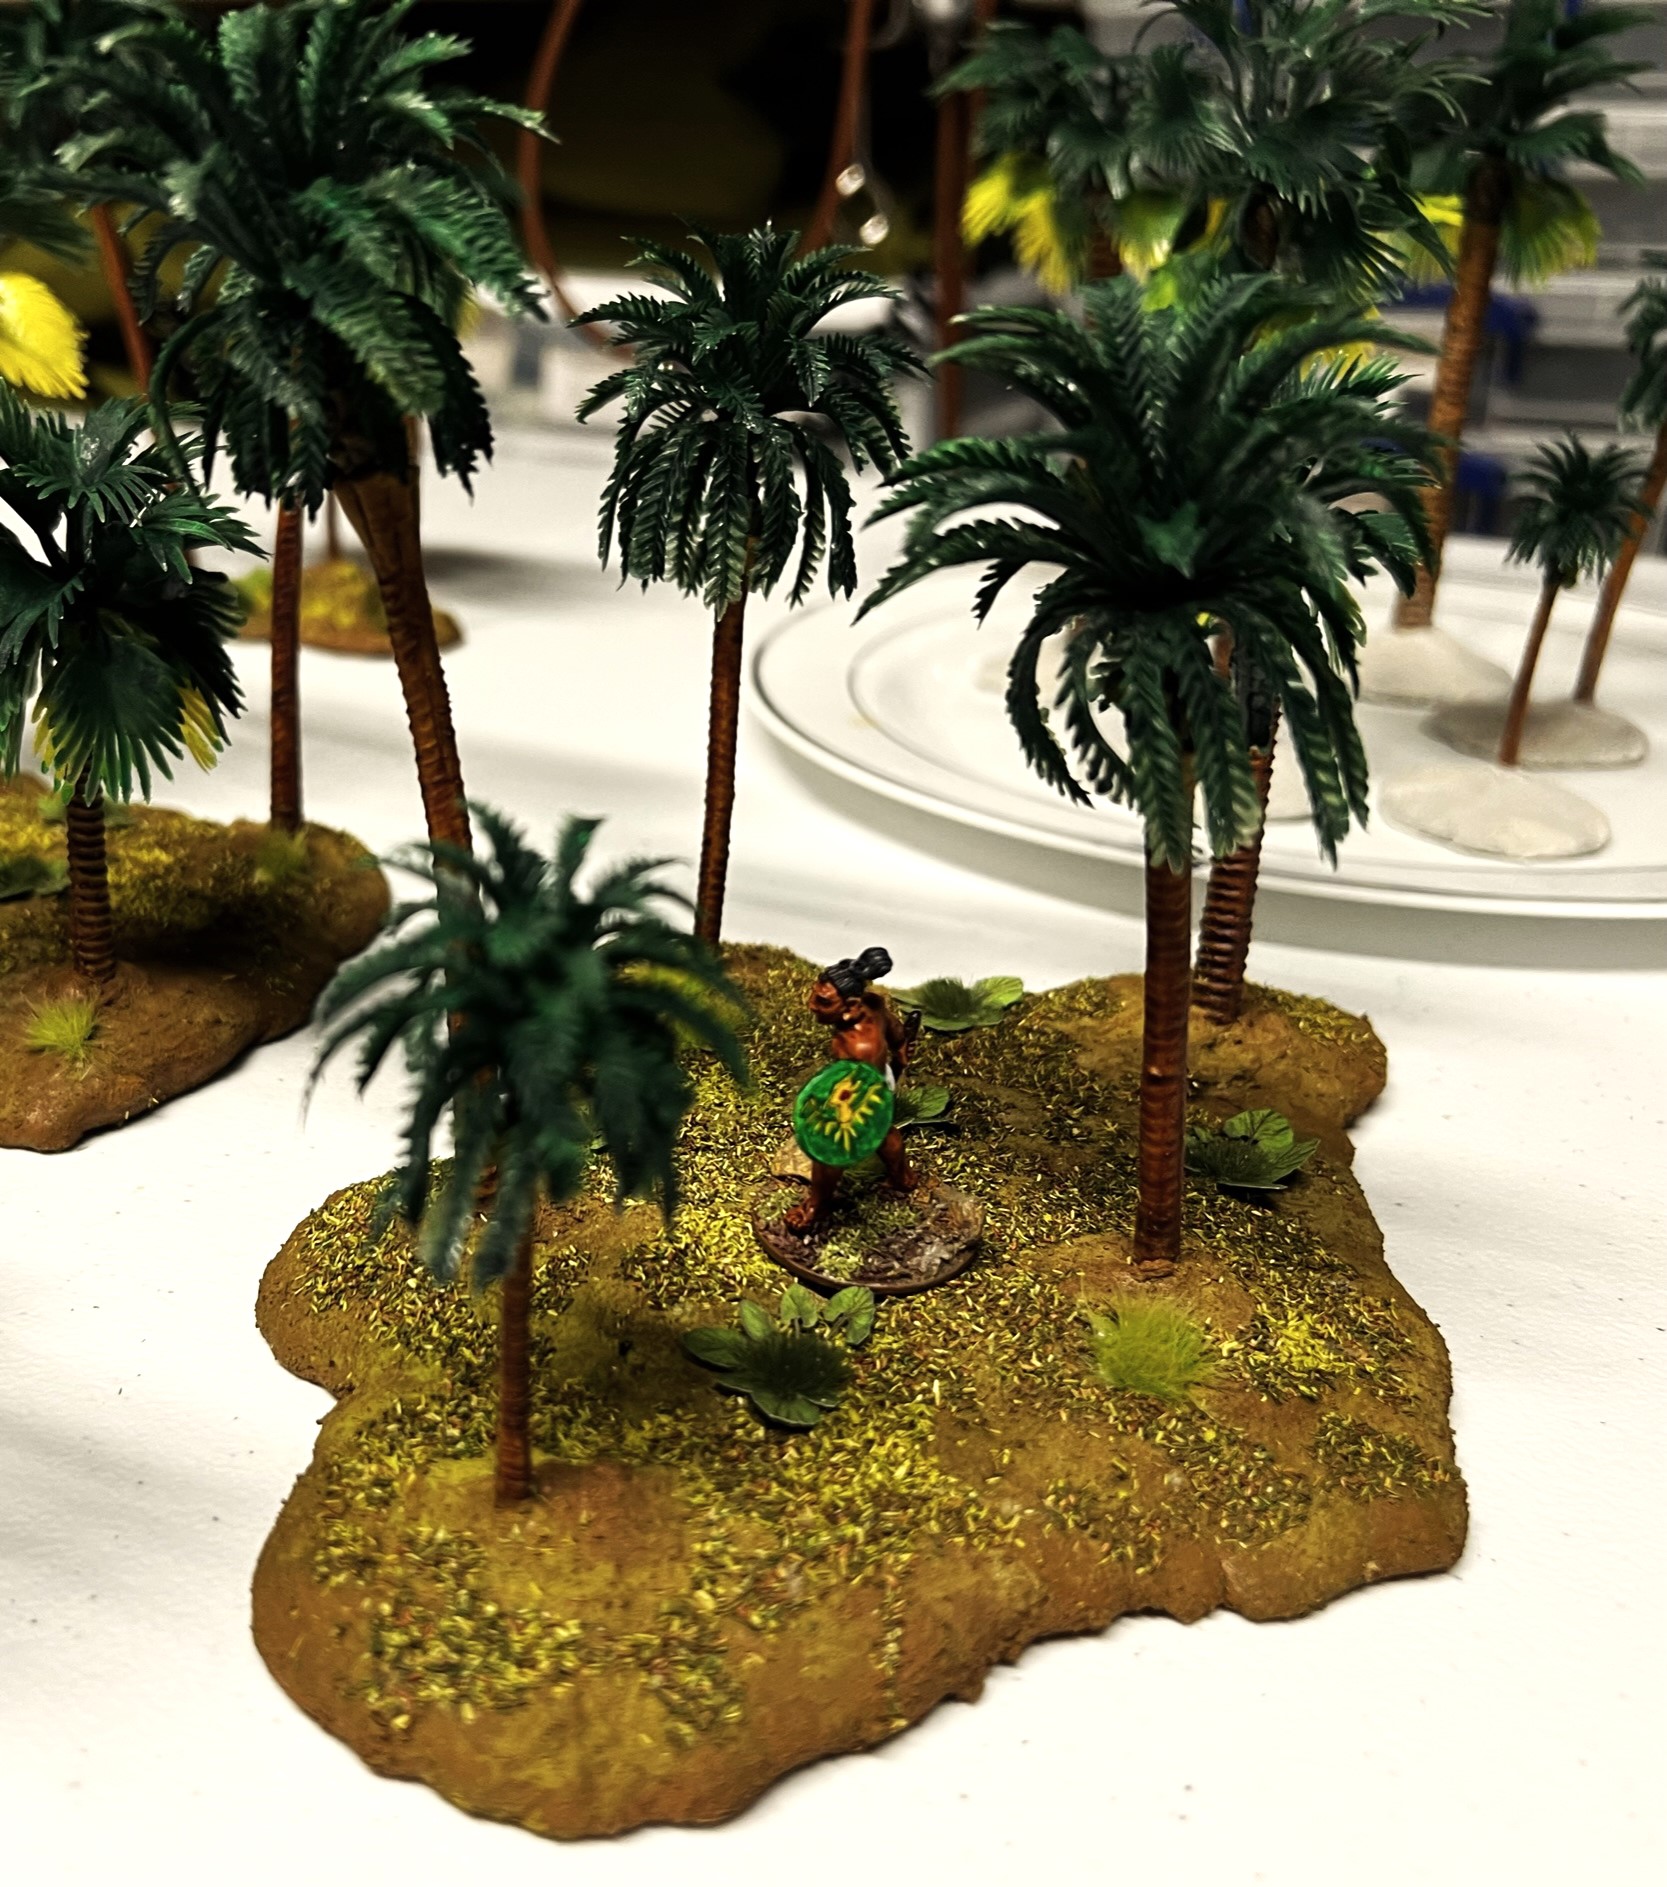
At this point, I wanted to add some tufts, debris, and low-lying foliage. I had some old 4-Ground leaves, and a Ziterdes “butterbur” laser-cut foliage that had been hanging around for years with no home. I mixed those with some tufts to create a hybrid jungle-looking plant. I learned butterbur is not native to the Americas, but with the tufts it looked fine.
The completed bases – showing the debris and low-lying plants.A close up shot of the base with a Maya warrior for scale comparison.
I have also acquired some more bases from Dave Stone’s workshop that I will eventually work into the game. These are very nice and I will also flock them similarly to match mine. Unfortunately, the UK cyber attack delayed them getting here in Massachusetts until today so they won’t get done until later – not Dave’s fault!
I hope that this was interesting – certainly it was a diversion from my recent Ozz stuff. I’m still going to run Mesoamerican games – and will be adding Ozz games too. I certainly have room for both!
Thanks for taking a look – let me know what you think!
Miscellaneous details and references for those interested in that sort of thing:
For all of my previous posts on games, units, and other projects for my 16th Century Spanish Conquest supplement for Feudal Patrol™ – “Civilizations Collide” – please see this page.
PAINTS, INKS, GLAZES, SHADES, WASHES, PIGMENTS, FLOCKING, GLUES AND MORE THAT I USED ON THESE PALM TREES AND BASES:
Sounds like a good concept for a reality show doesn’t it? Circa 1520 or so…
Actually, it’s my latest attempt at adding another structure to my Aztec terrain/buildings for games of Feudal Patrol™ in Mesoamerica (using my Civilizations Collide supplement). There have been a good number of buildings from me lately (which is why I did my contest). There is also a link at the end of this post on all of my project terrain and miniature builds for it.
And this particular post is dedicated to Ryan MacRae and Chris Rett. Why?
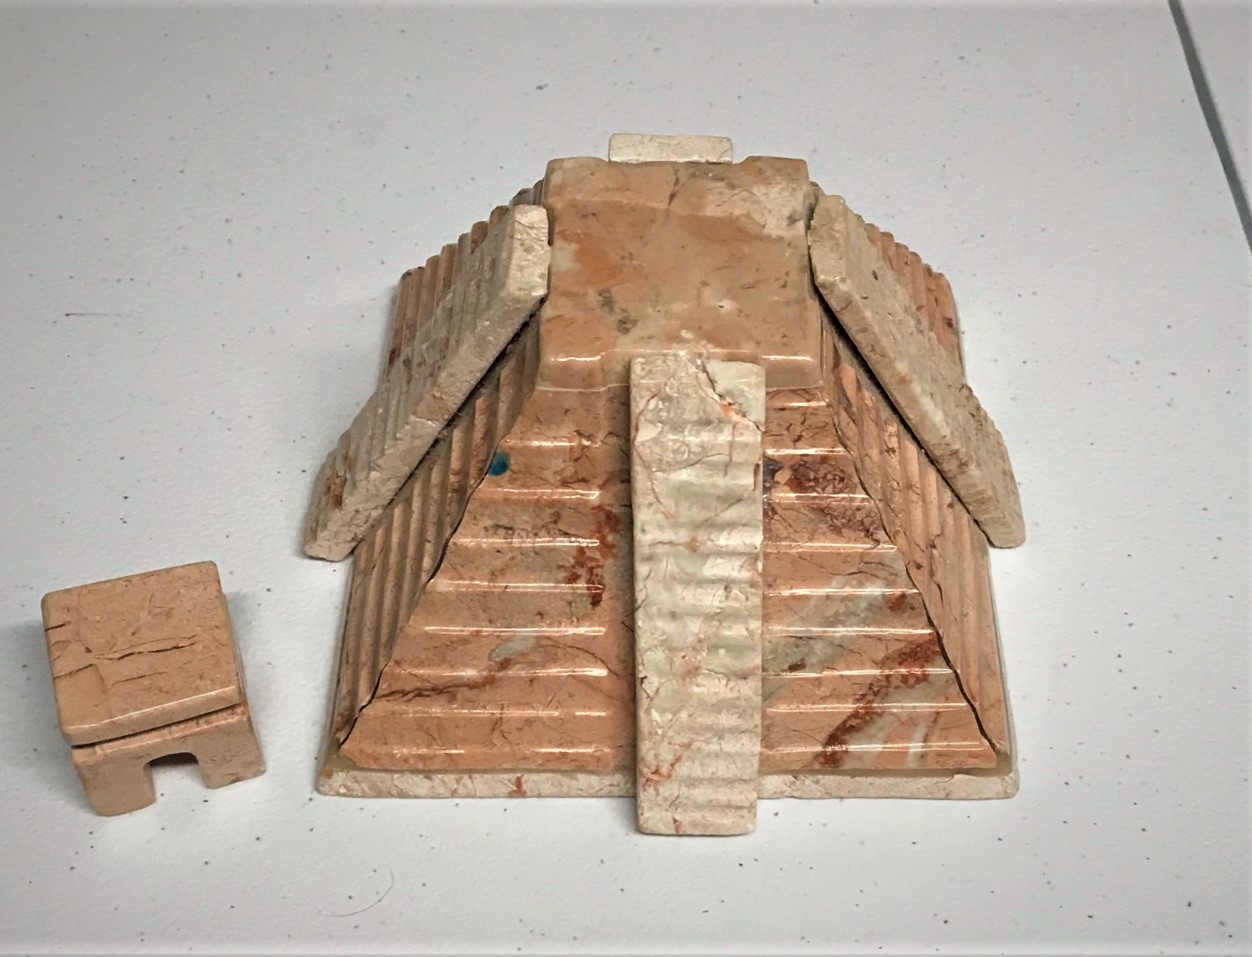
Well, this temple piece has a somewhat unclear past. It was given to me by Ryan MacRae and Christopher Rett. It was left over from their back room cleanout at the Great Stories store in Uxbridge, MA. Ryan said it was maybe originally found in his dad’s garage? Was it a souvenir? A kit project? A piece for a terrarium or even an aquarium? Who knows. All I saw in it was potential as a reasonable secondary temple-type building for Tenochtitlan. It was in two unconnected pieces, had a few cracks, and seemed to be somewhat ceramic. Obviously, I needed to have it match my other pieces. I was not thrilled with the stairs and their alignment, and it was mostly (but not totally) symmetrical. Though I believe something is either symmetrical or its not right? The top would not stay on the top if bumped. Anyways, I thought I could try to make something more useful out of it gaming-wise.
The piece as it was when I got it.
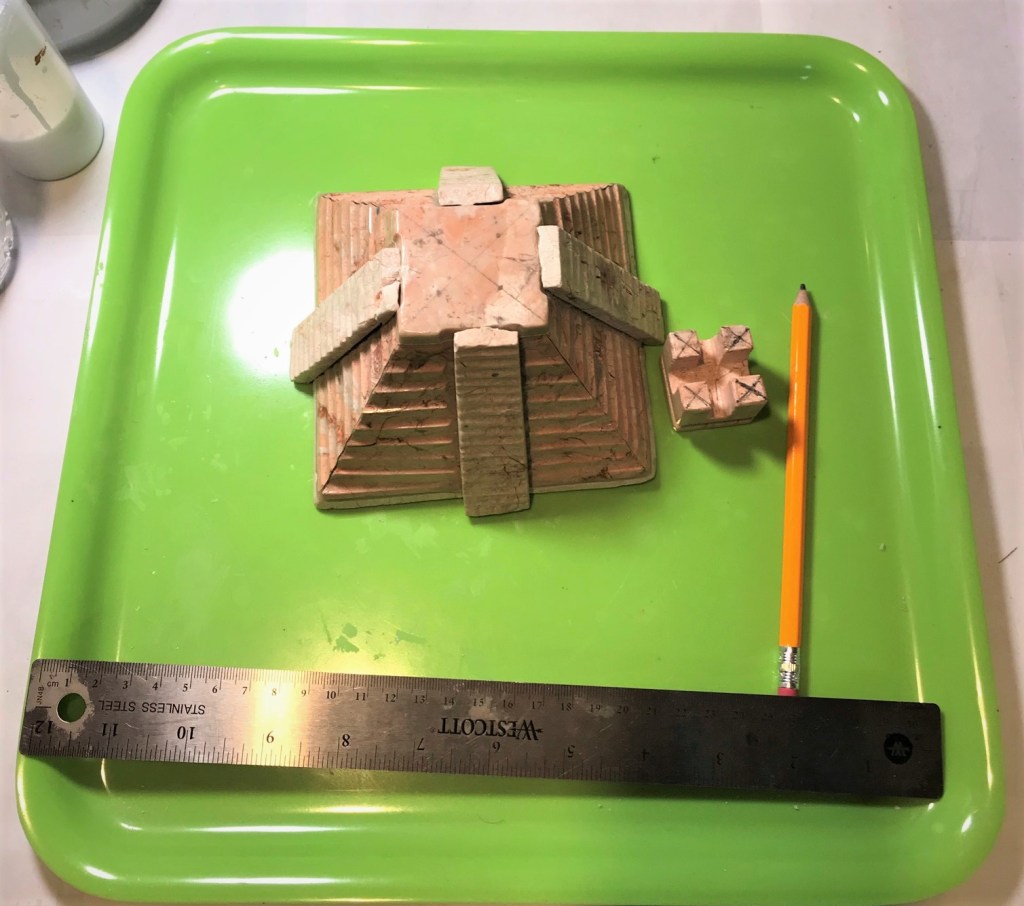
The first thing I did was to drill and install 1/8″ neodymium magnets to secure the top.
The next step was to pry off the old stairs, which I did with a screwdriver and nearly hitting myself in the eye with broken ceramic shards – I should have been more careful.
First steps
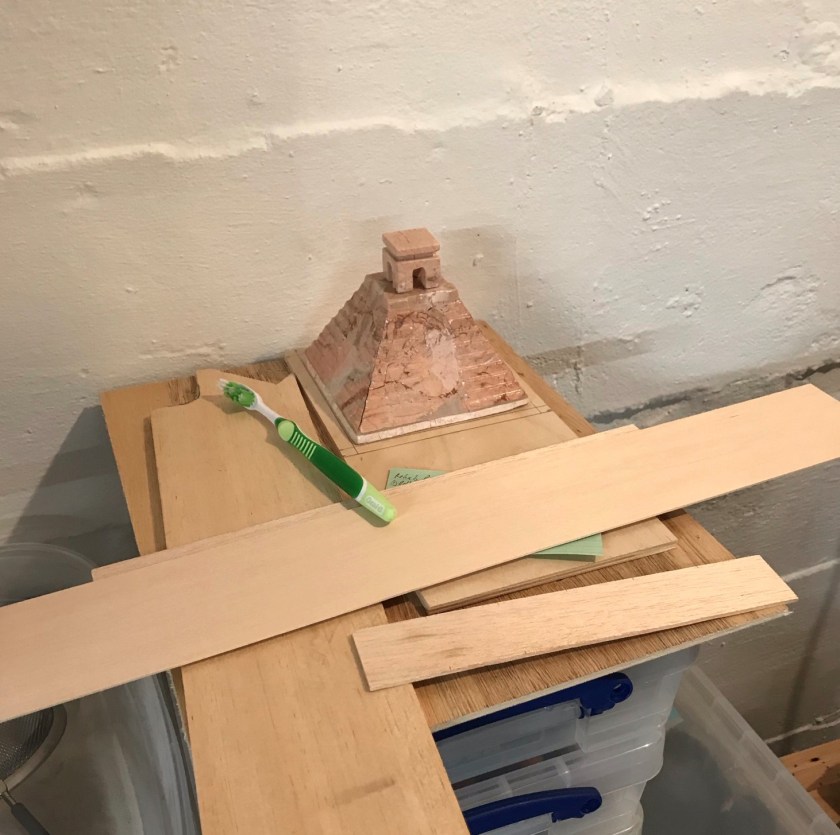
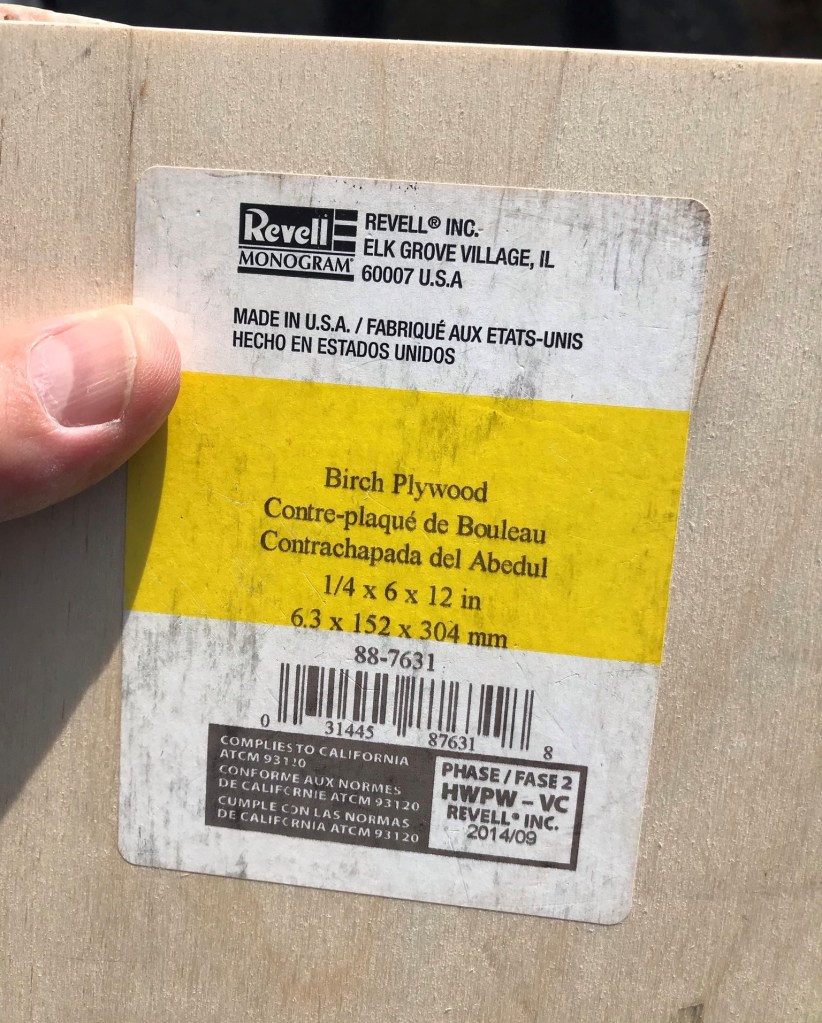
I thought it needed a base, and I did have an spare piece of Revell plywood that I cut to size up to the piece – as symmetrically as possible.
I debated about whether to use balsa or plywood, and went with the latter
Good quality hobby stuff
This mess shows my outdoor wood cutting setup – a Black and Decker cordless circular saw and my Craftsman workbench I bought in 1988.
Cutting the base.
I then sanded the edges of the plywood and the bottom of the piece, and attached the two with wood glue. As you can see, I found a way to compress the two while the glue set!
Lots of wood glue
As symmetrical as I could get it to be on the base.
Add an MBA reference book and a hematology textbook as weights and let dry overnight.
Mounting the piece.
I then decided to use black Milliput to construct the stairs. Why black? It was what was available! I don’t have a lot of experience with it, and I chose it due to being cheaper than green stuff. I did not expect to get great sculpted details on the stairs – I just wanted something that would be aesthetically ok on the tabletop. I did consider using square wood dowels, but the work involved in sizing them seemed disproportionate to the needs of this project. I also would make the steps wider and more visible – but still they would not useable by a figure on a base.
I traced out the stairs – note I made them wider as the original piece’s slots for stairs was both irregular and not quite centered.
I drilled two 1/8″ holes per stair for paper clip wires. These were at the bottom of the stairs to help with mounting. Note the asymmetry on this side.
Prepping for making the stairs.
As for the sculpting – it was a bit more difficult than I had imagined beforehand. I tried to use the existing lines on the piece as guidelines, and was successful for the most part. It’s not Michelangelo, that’s for sure. I actually was a little disappointed at this point, but I pressed on thinking the rest of the rehab may go better, and let the Milliput cure.
The sculpted stairs in black milliput.
Getting ready to dust the piece with chinchilla dust.
Sculpted stairs.
The dusting process was similar to my previous efforts with MDF – that being painting the model with a PVA/water slurry and dusting with a salt shaker containing the dust. I did add (temporarily) extra neodymium magnets so as to prevent the dust from blocking the installed ones.
All dusted up – note the extra magnets as masking.
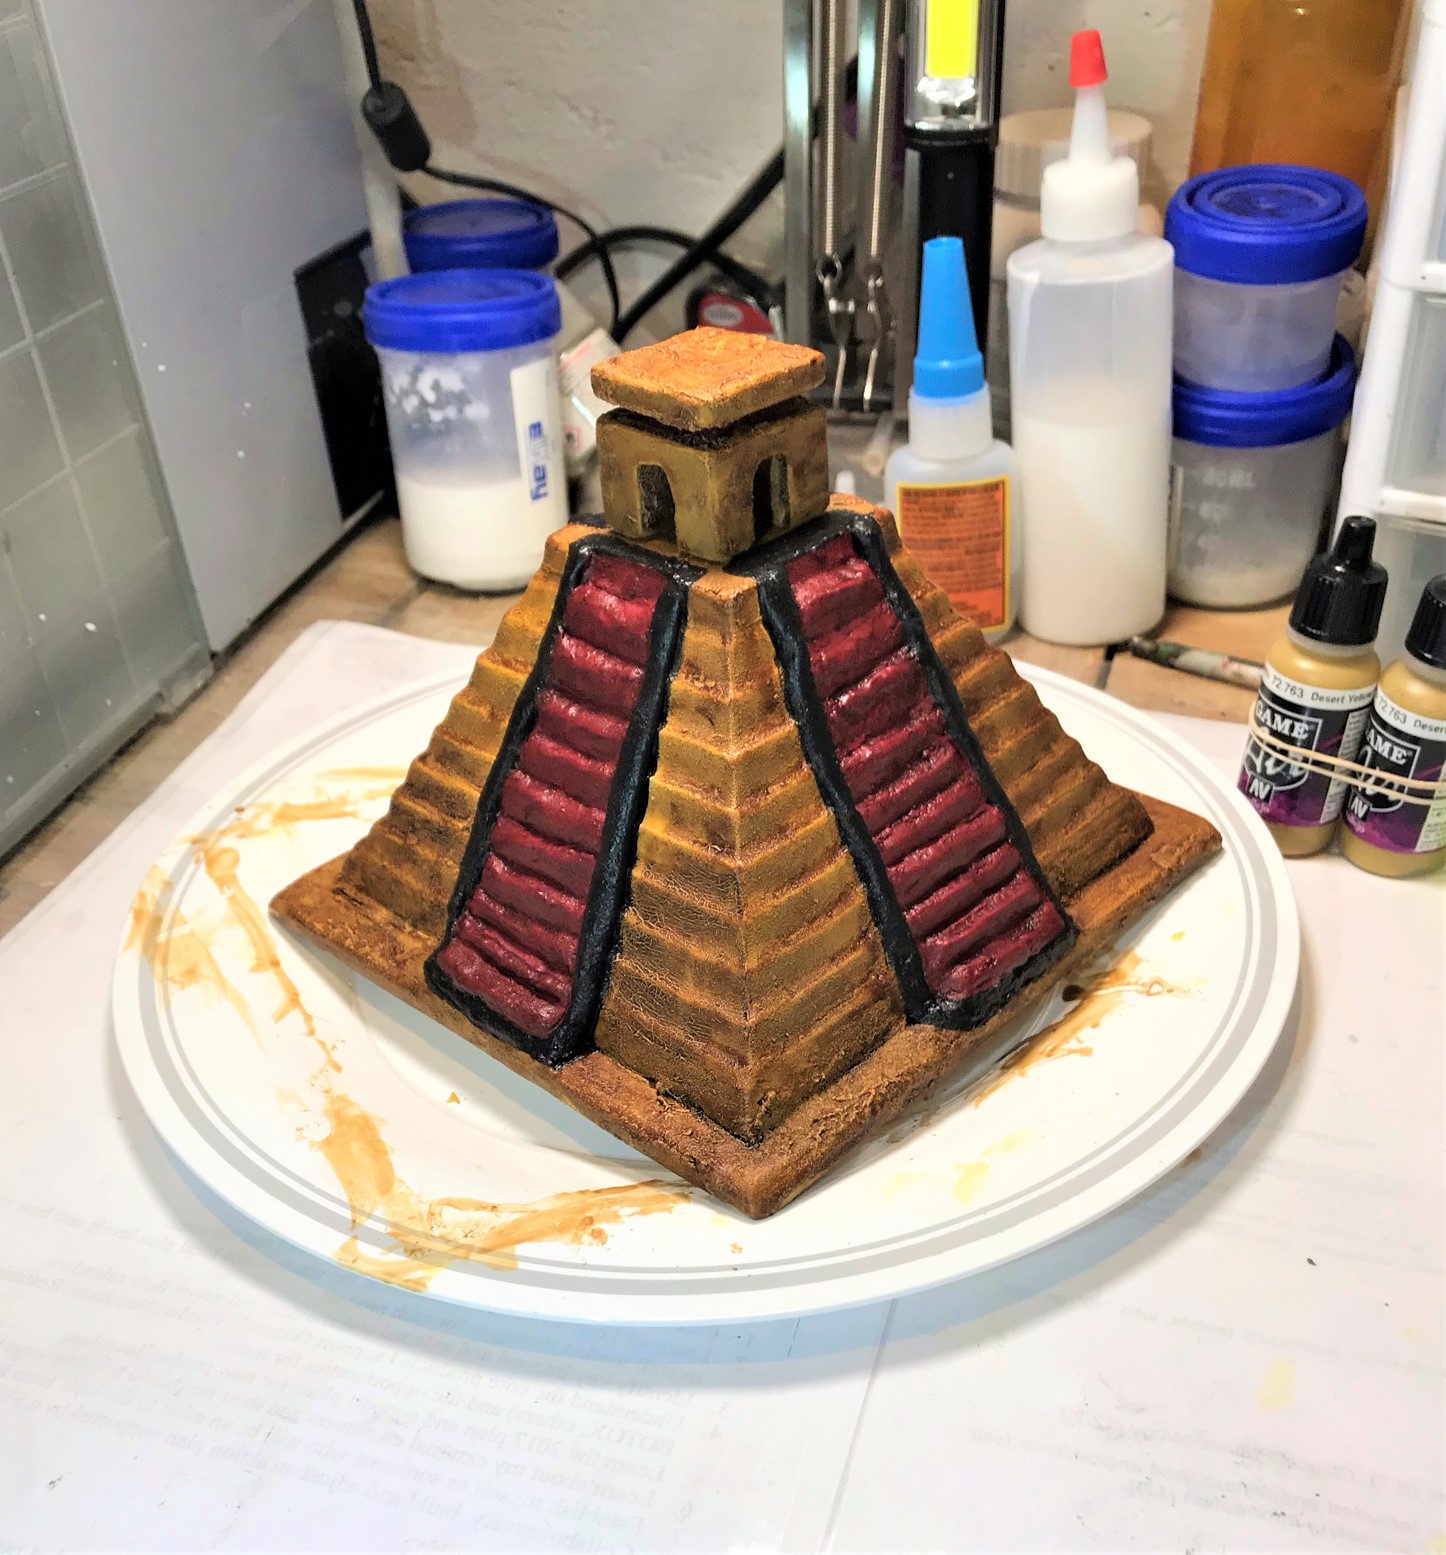
I then moved on to painting it. I dry brushed it and then painted it in the same color schemes as my MDF.
The piece after first dry brushing and base coating.
I then used Army Painter “Light Tone” on it and let it dry. Once dry, I added more highlights.
After adding the tone but before the final highlighting.Completed!
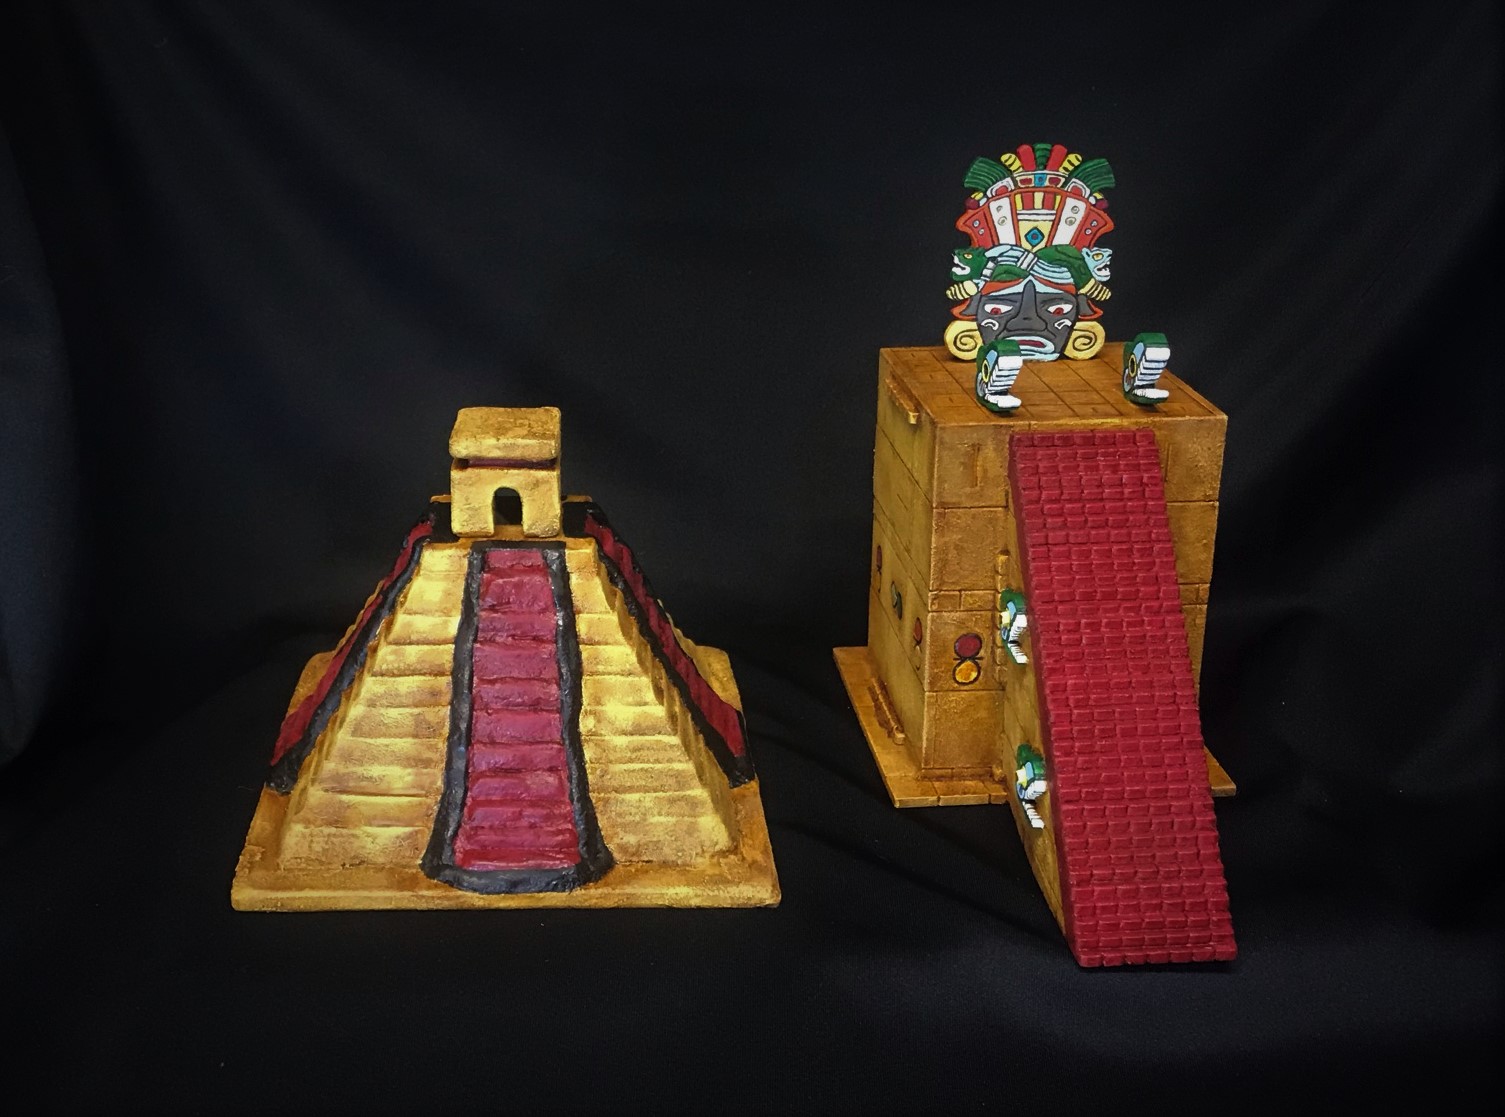
To get a feel for the model, here are some eye candy shots.
One sideOpposite sideTop side viewSome Eagle and Jaguar Warriors and a Warrior Priest by the piece.
I learned a bit during the processes of this project. I’m on the fence on Milliput as an architectural sculpting agent – it was not easy to sculpt into the stairs and I did face a challenge with regards to the Milliput’s “slump” (a term used to describe how wet concrete settles and does not hold a shape). Though, the extreme slope of the stairs (as is found with the actual ones) made gravity NOT my friend in this aspect. Maybe green stuff or Apoxie Sculpt would have been easier but more expensive. I am unsure. I think my approach in the end worked out ok, and the painting helped I think – and you, dear reader, can let me know your assessments.
My biggest goal was for this piece to be a good add to my little mini Tenochtitlan tabletop. The next two pics are good comparisons. I think it succeeded. Not my finest work, but it is acceptable.
Next to the Temple High ThroneThe piece seen next to all of my Aztec terrain (with some WIP Conquistador War Wagons in the back – more on them in a future post).
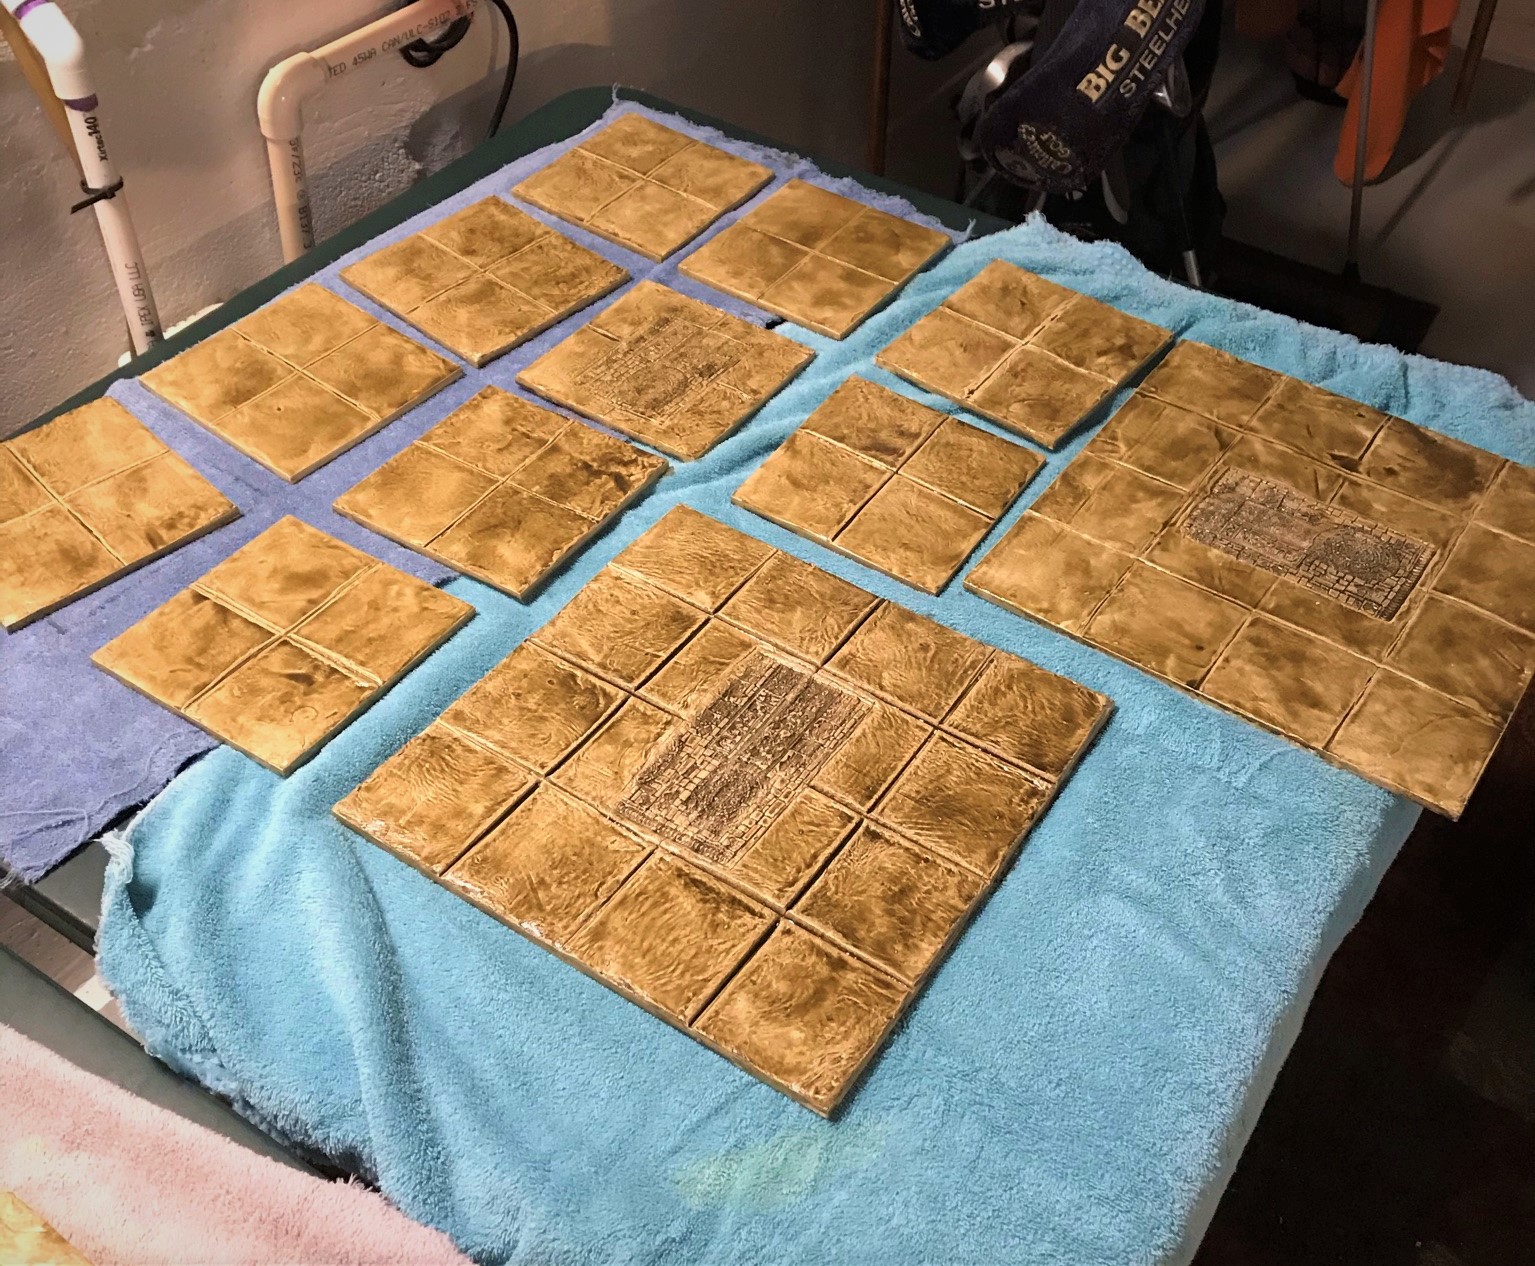
I think now my terrain just needs pavement and some causeways – I already have a working concept (below) and I will be making the surrounding lake swampy with some neat floating flora. More on this when I’m done with that!
My tabletop urban Aztec battlefield concept. There will be textured pavement and causeways on this MDF – and this will also be a future post! For rural areas, I have the other buildings.
The pavement is in WIP. I used MDF with sculpted DAS clay (including a Green stuff Aztec roller in judicious spots). It needs to set and get matte varnished, but I’m excited on the potential. I also need to build the causeways.
Pavement WIP
So that’s it for now – hope you enjoyed this post – let me know your thoughts – good, bad, or otherwise – in the comments section. Thanks for looking!
For all of my previous posts on games, units, and other projects for my 16th Century Spanish Conquest supplement for Feudal Patrol™ – “Civilizations Collide” – please see this page.
PAINTS, INKS, GLAZES, SHADES, WASHES, PIGMENTS, FLOCKING, GLUES AND MORE THAT I USED ON THIS MODEL