Professor Nitpik is back and has his own Industrial City faction for the Wars of Ozz. I painted up his infantry in 2023. But now he has his own faction with new troops, stats, (and new spelling). Right before TotalCon 39, I finished 11 figures for the cavalry regiment and three brigade commanders.
Interestingly, as a new faction they have a totally new chart with new Resolve and Elan results – to include “Reboot” and “Caracole”. The former makes the mechanical soldiers pause and gives an enemy a free hit on them. The latter results in a cavalry charge that stops short of contact with all figures firing their pistols at the enemy.
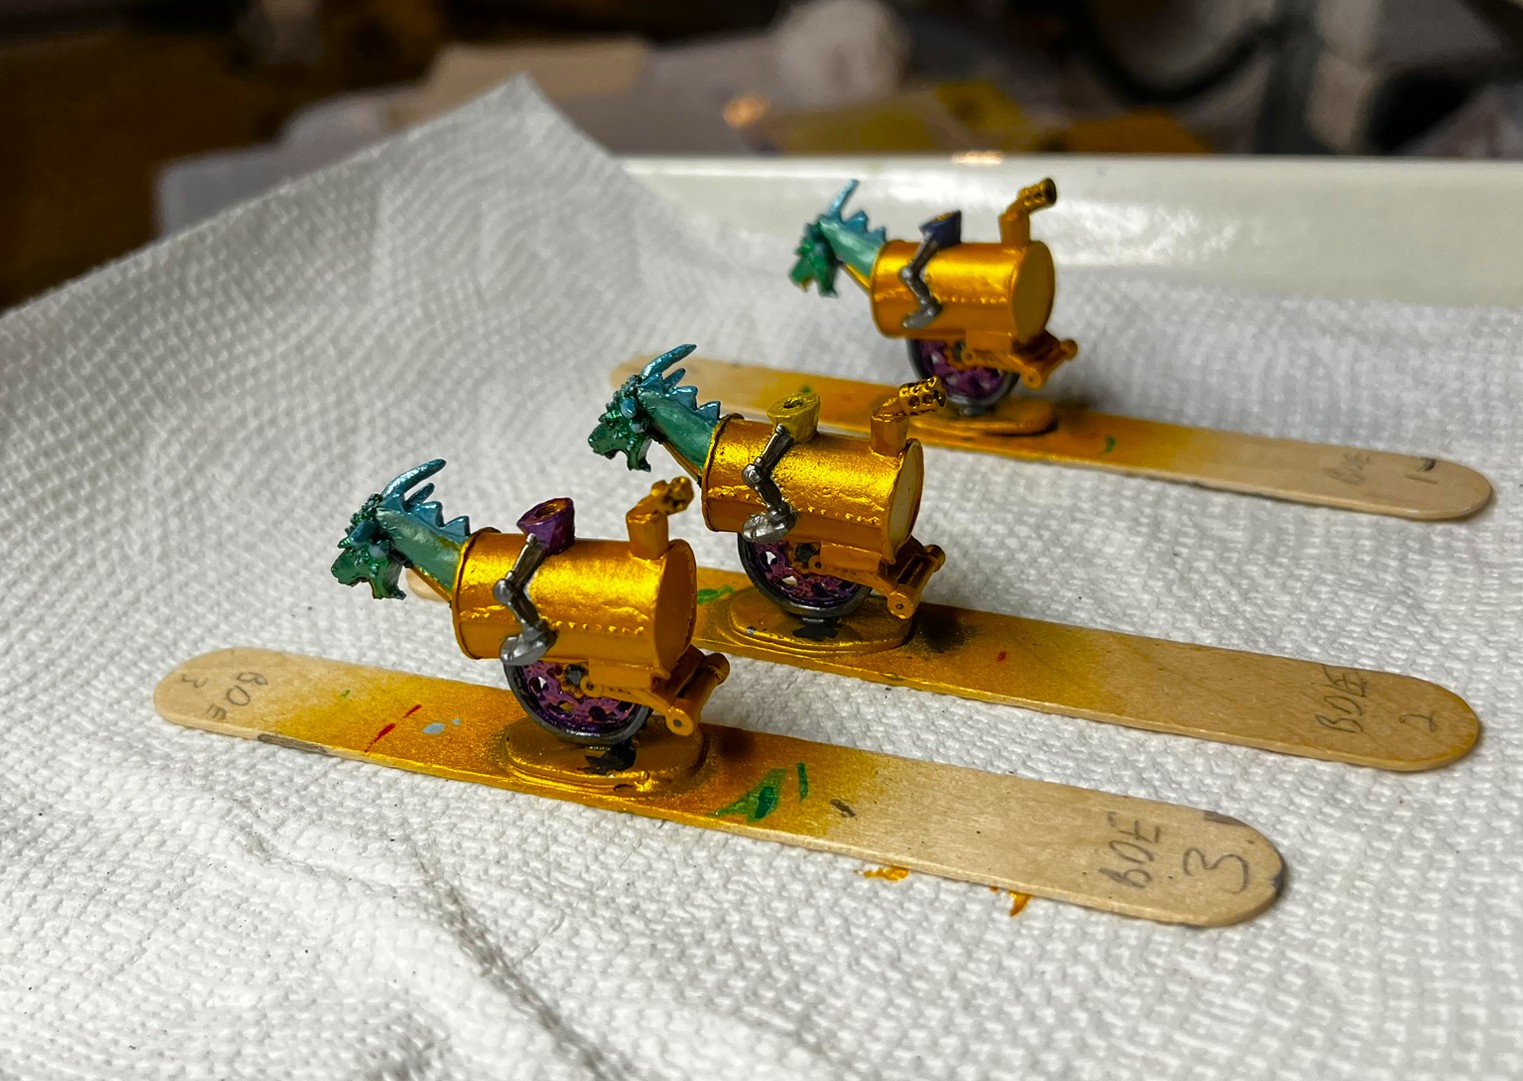
As I have been DEEP into convention prep this month, I am just going to be brief here and show you some WIP and the finished products. For these, I chose a lot of pearlized airbrush and craft paints. I also decided to make them sooty, oily, and grimy over their shiny metal coats.
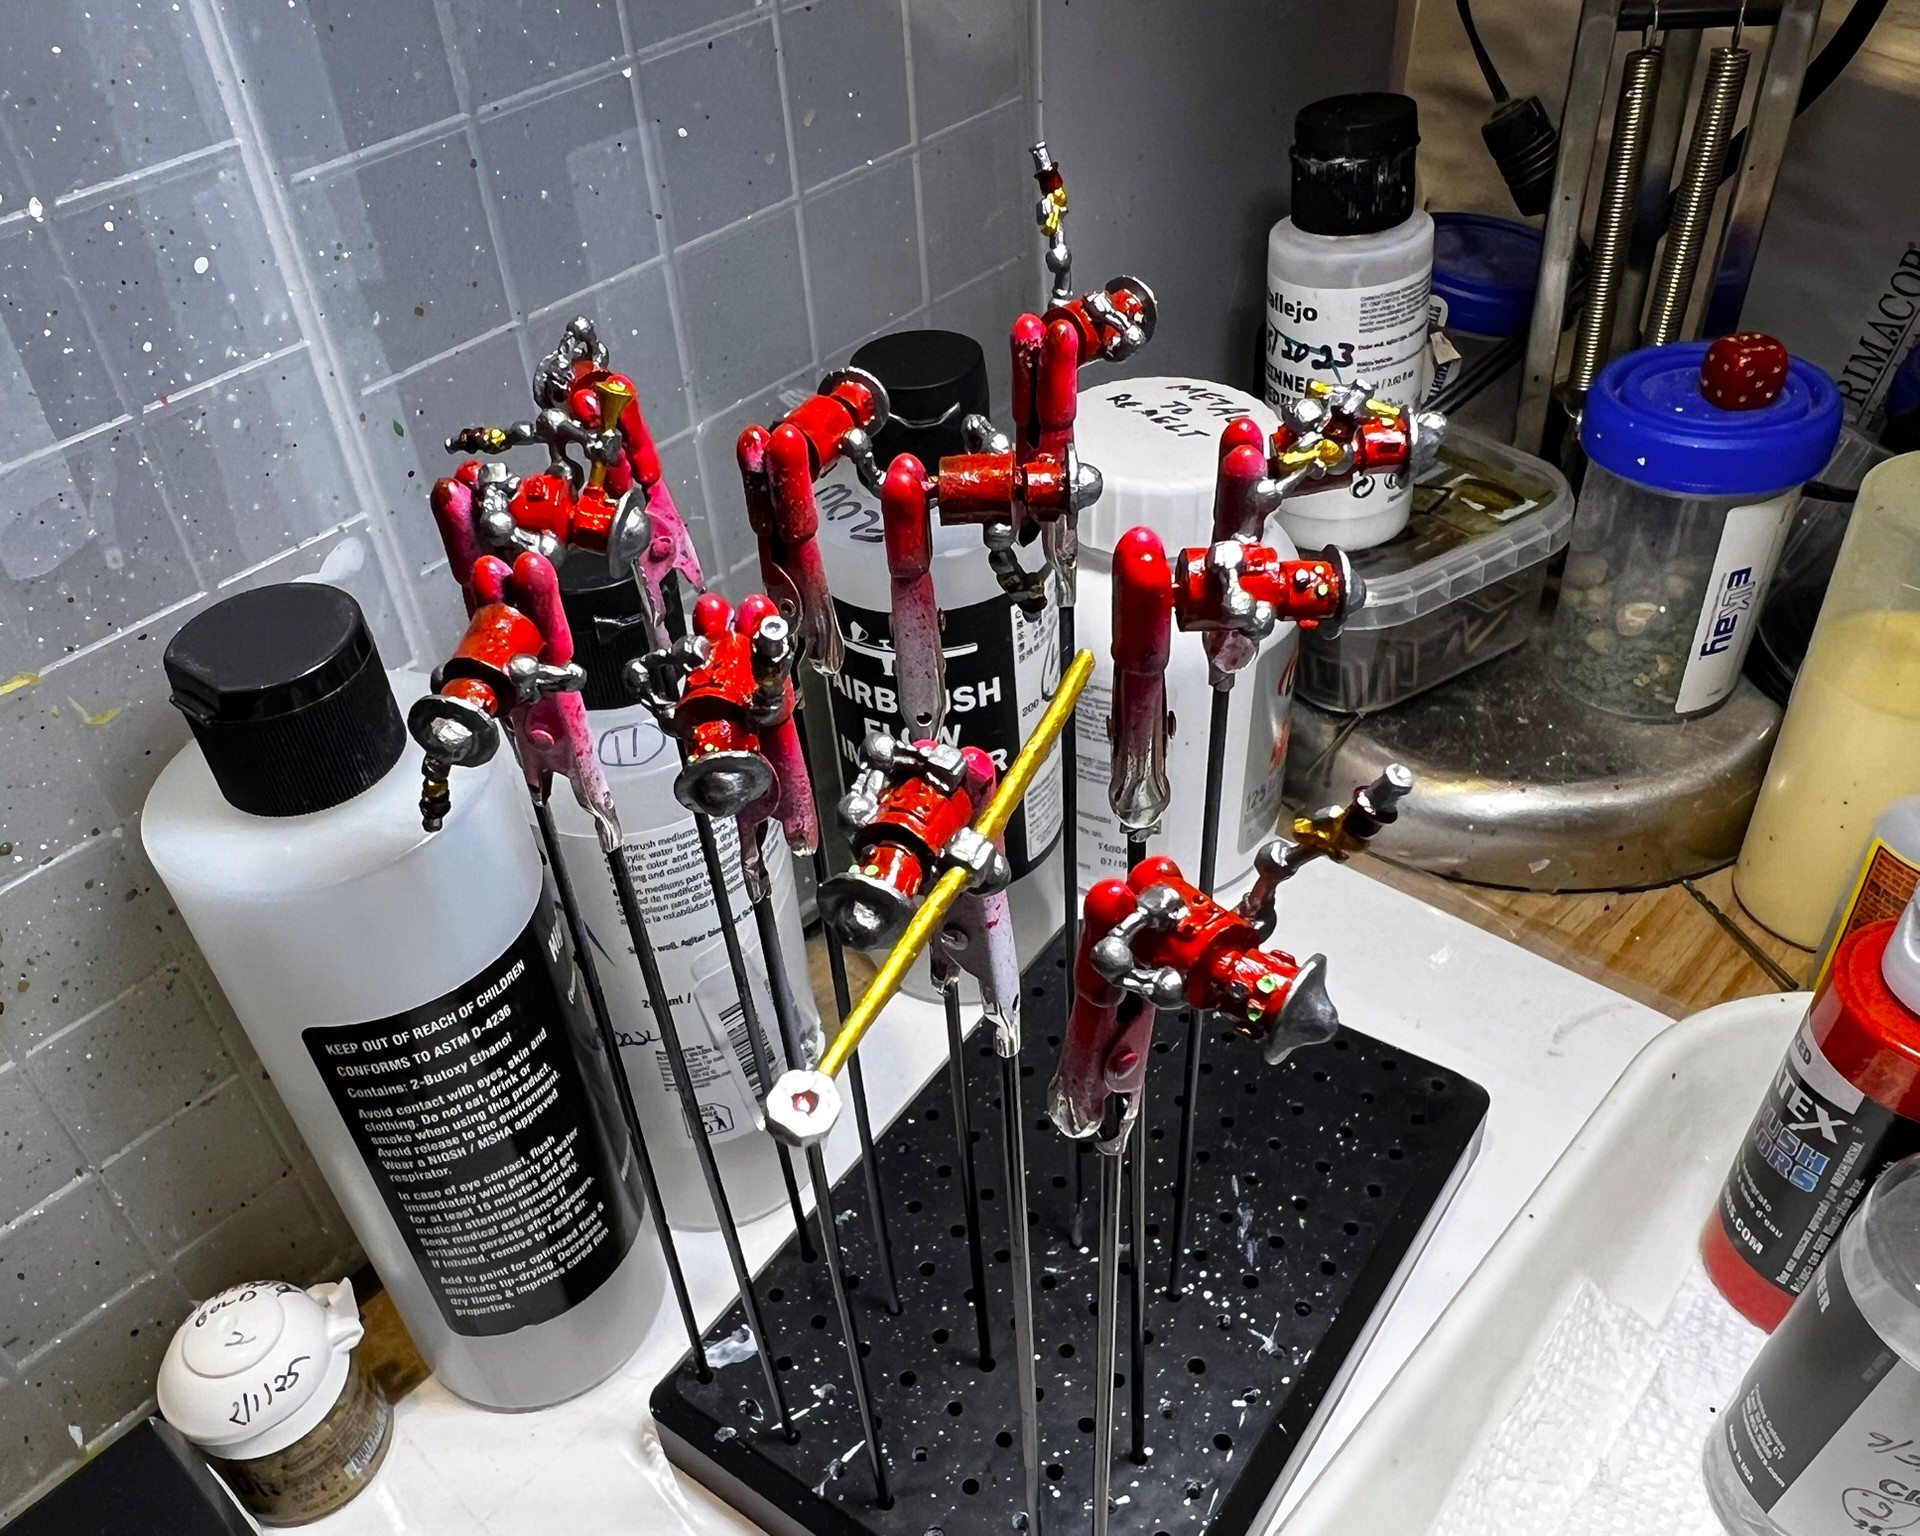
Using my airbrush I applied the pearlized copper as an undercoat over the primer. For the riders, I used a pearlized red. The brigade commander riders got pearlized blue, yellow, and purple paints. The mounts for all were painted identically.
Mechanical Cavalry early on.Brigade Commanders early on.Mechanical cavalry riders in progressFlame breaths and brigade commanders in progress
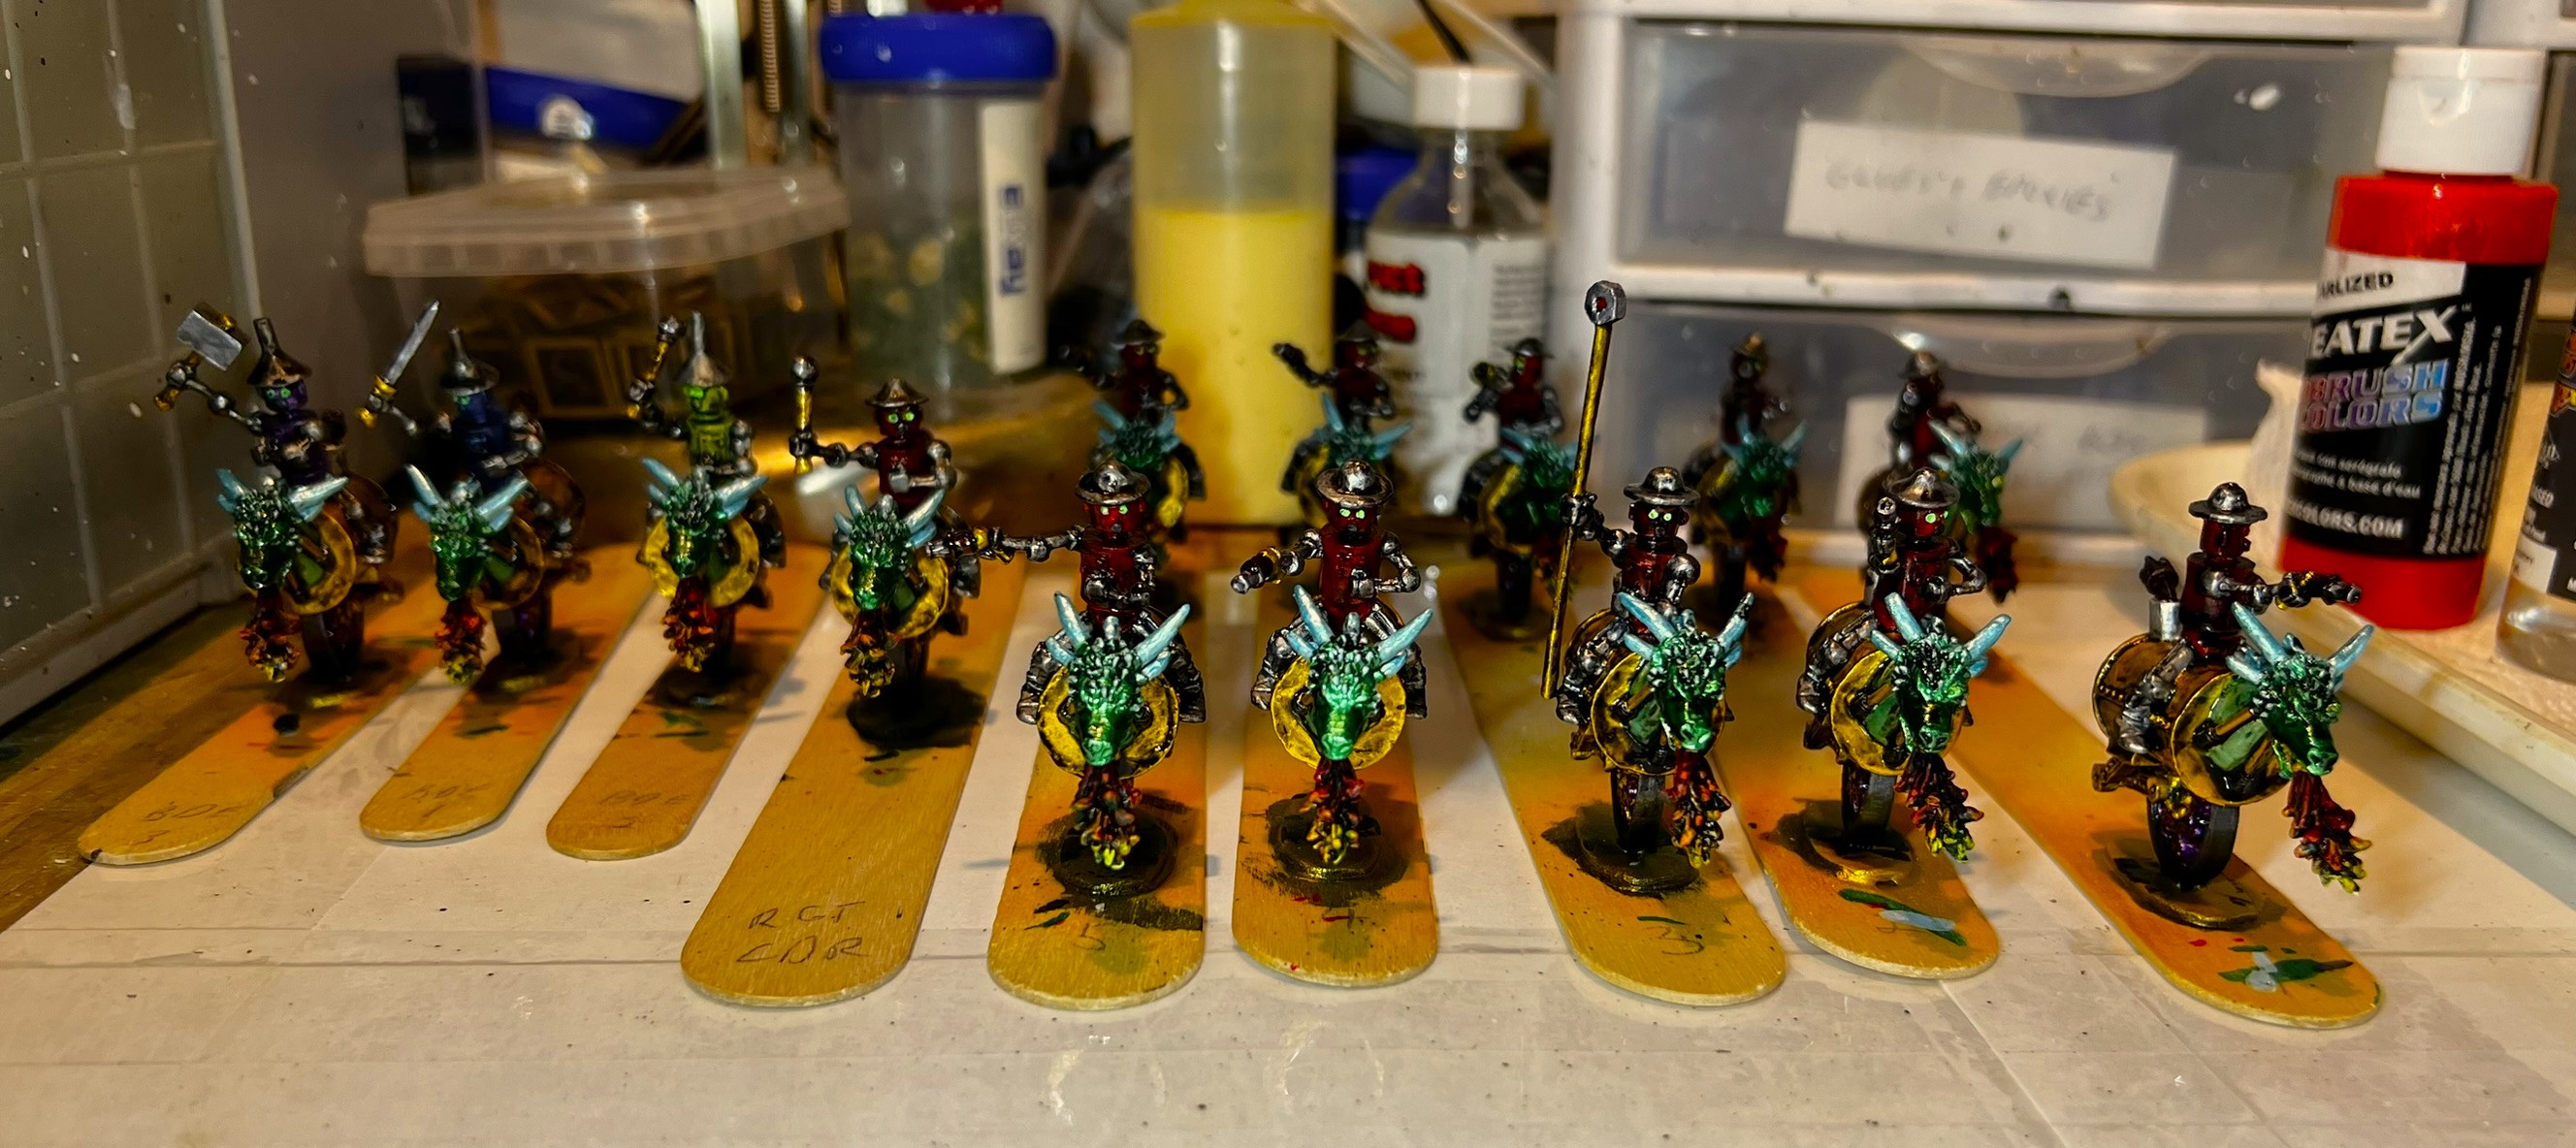
Next, I added various metallic craft and airbrush paints – mostly also pearlized. Then, I assembled them all.
Below you can see that progress before varnishing. Citadel “Nuln Oil GLOSS” provided a nice spilled/burned diesel sheen. Here are some close ups:
A cavalry trooper before varnishing
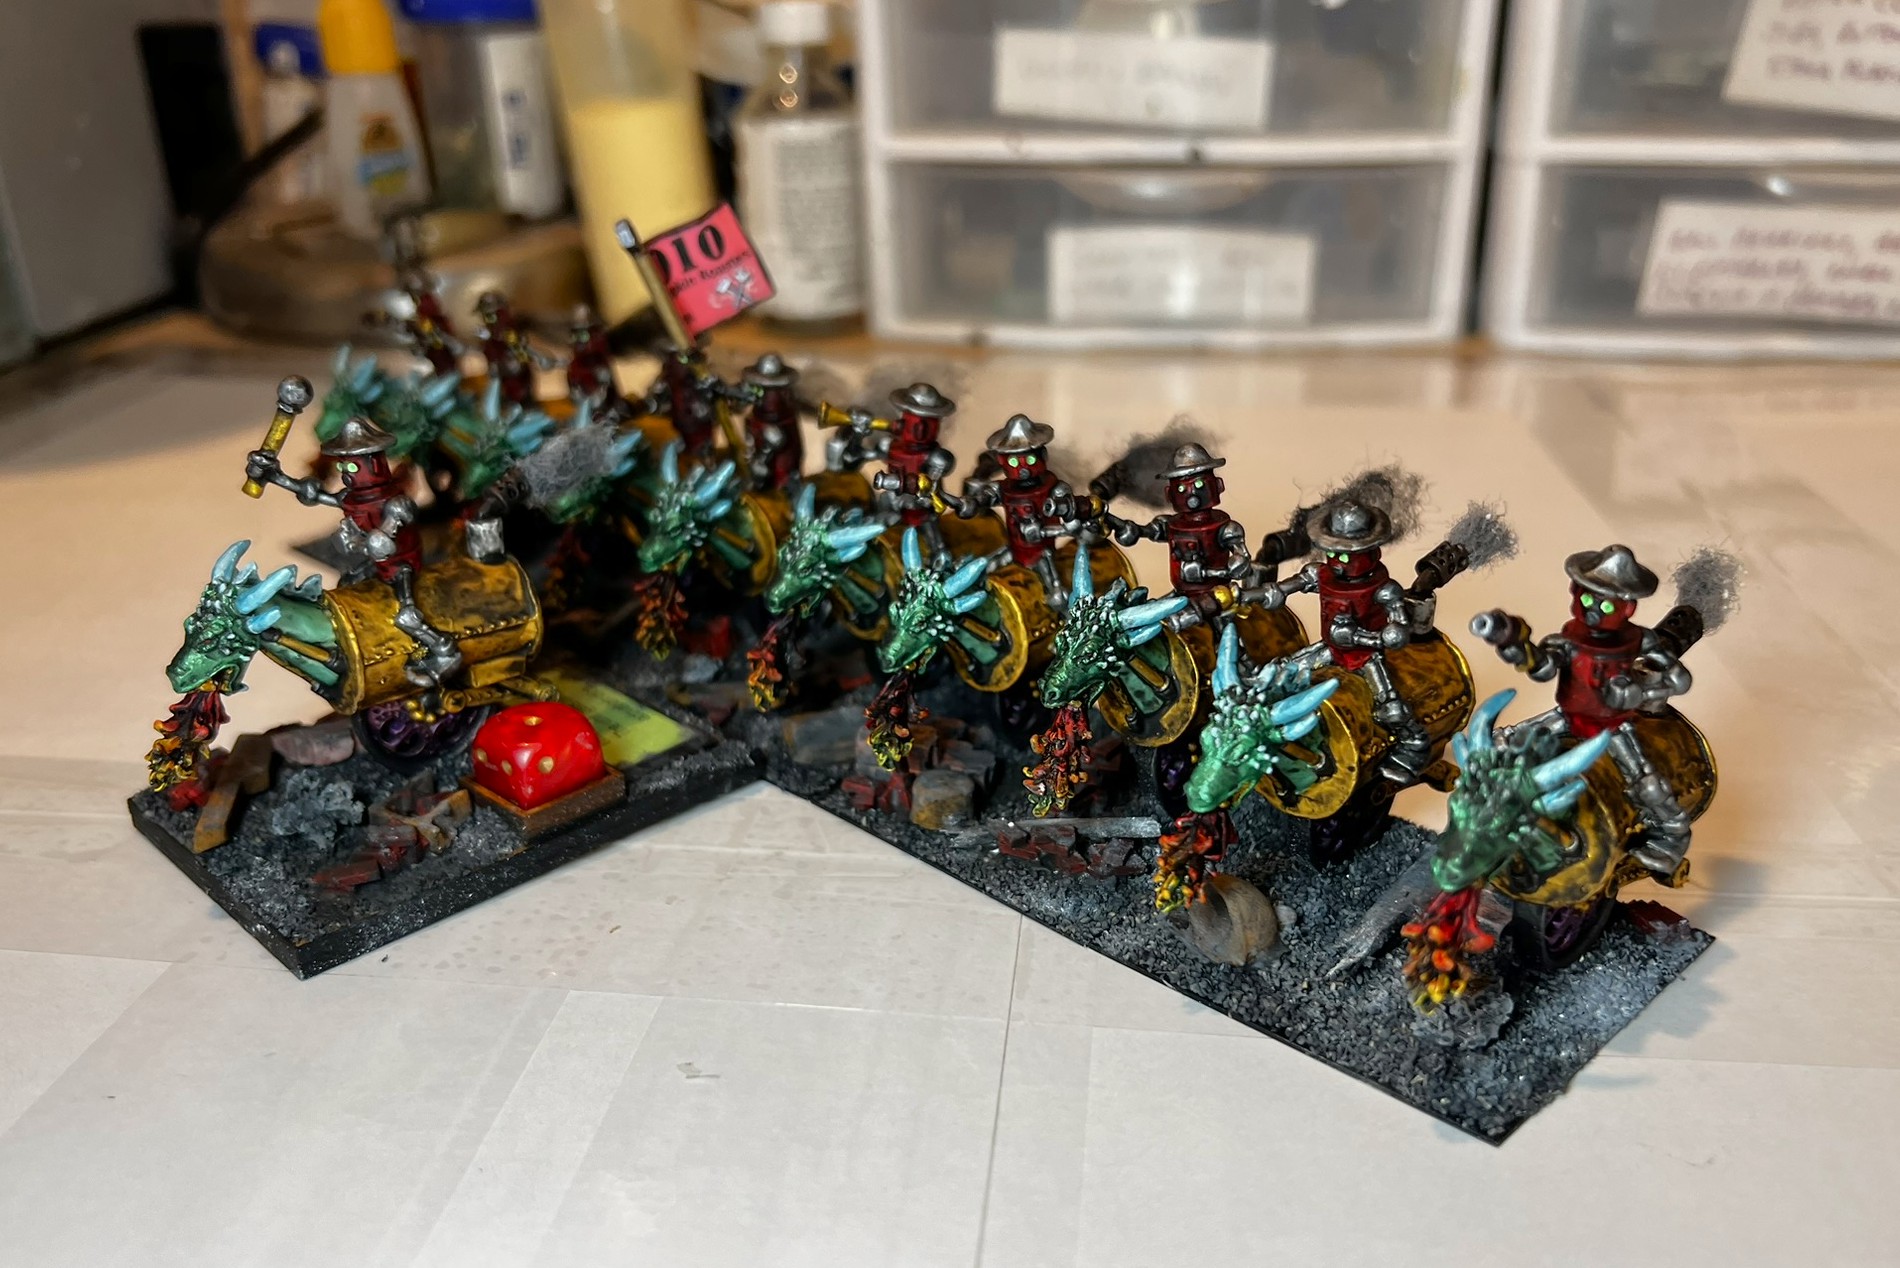
I varnished the figures with a gloss and a matte coating. I mounted the figures on their steel and MDF bases. Then, I added flocking material to “rubble up” the bases. This approach shows the ruins of the Industrial City from where they originated.
I like these railroad diorama rusted pieces.
I flocked these with junk. Then, I added pigments to the base rubble. This gave them a dirty and sooty look. Lastly, I added painted pillow batting exhaust fumes.
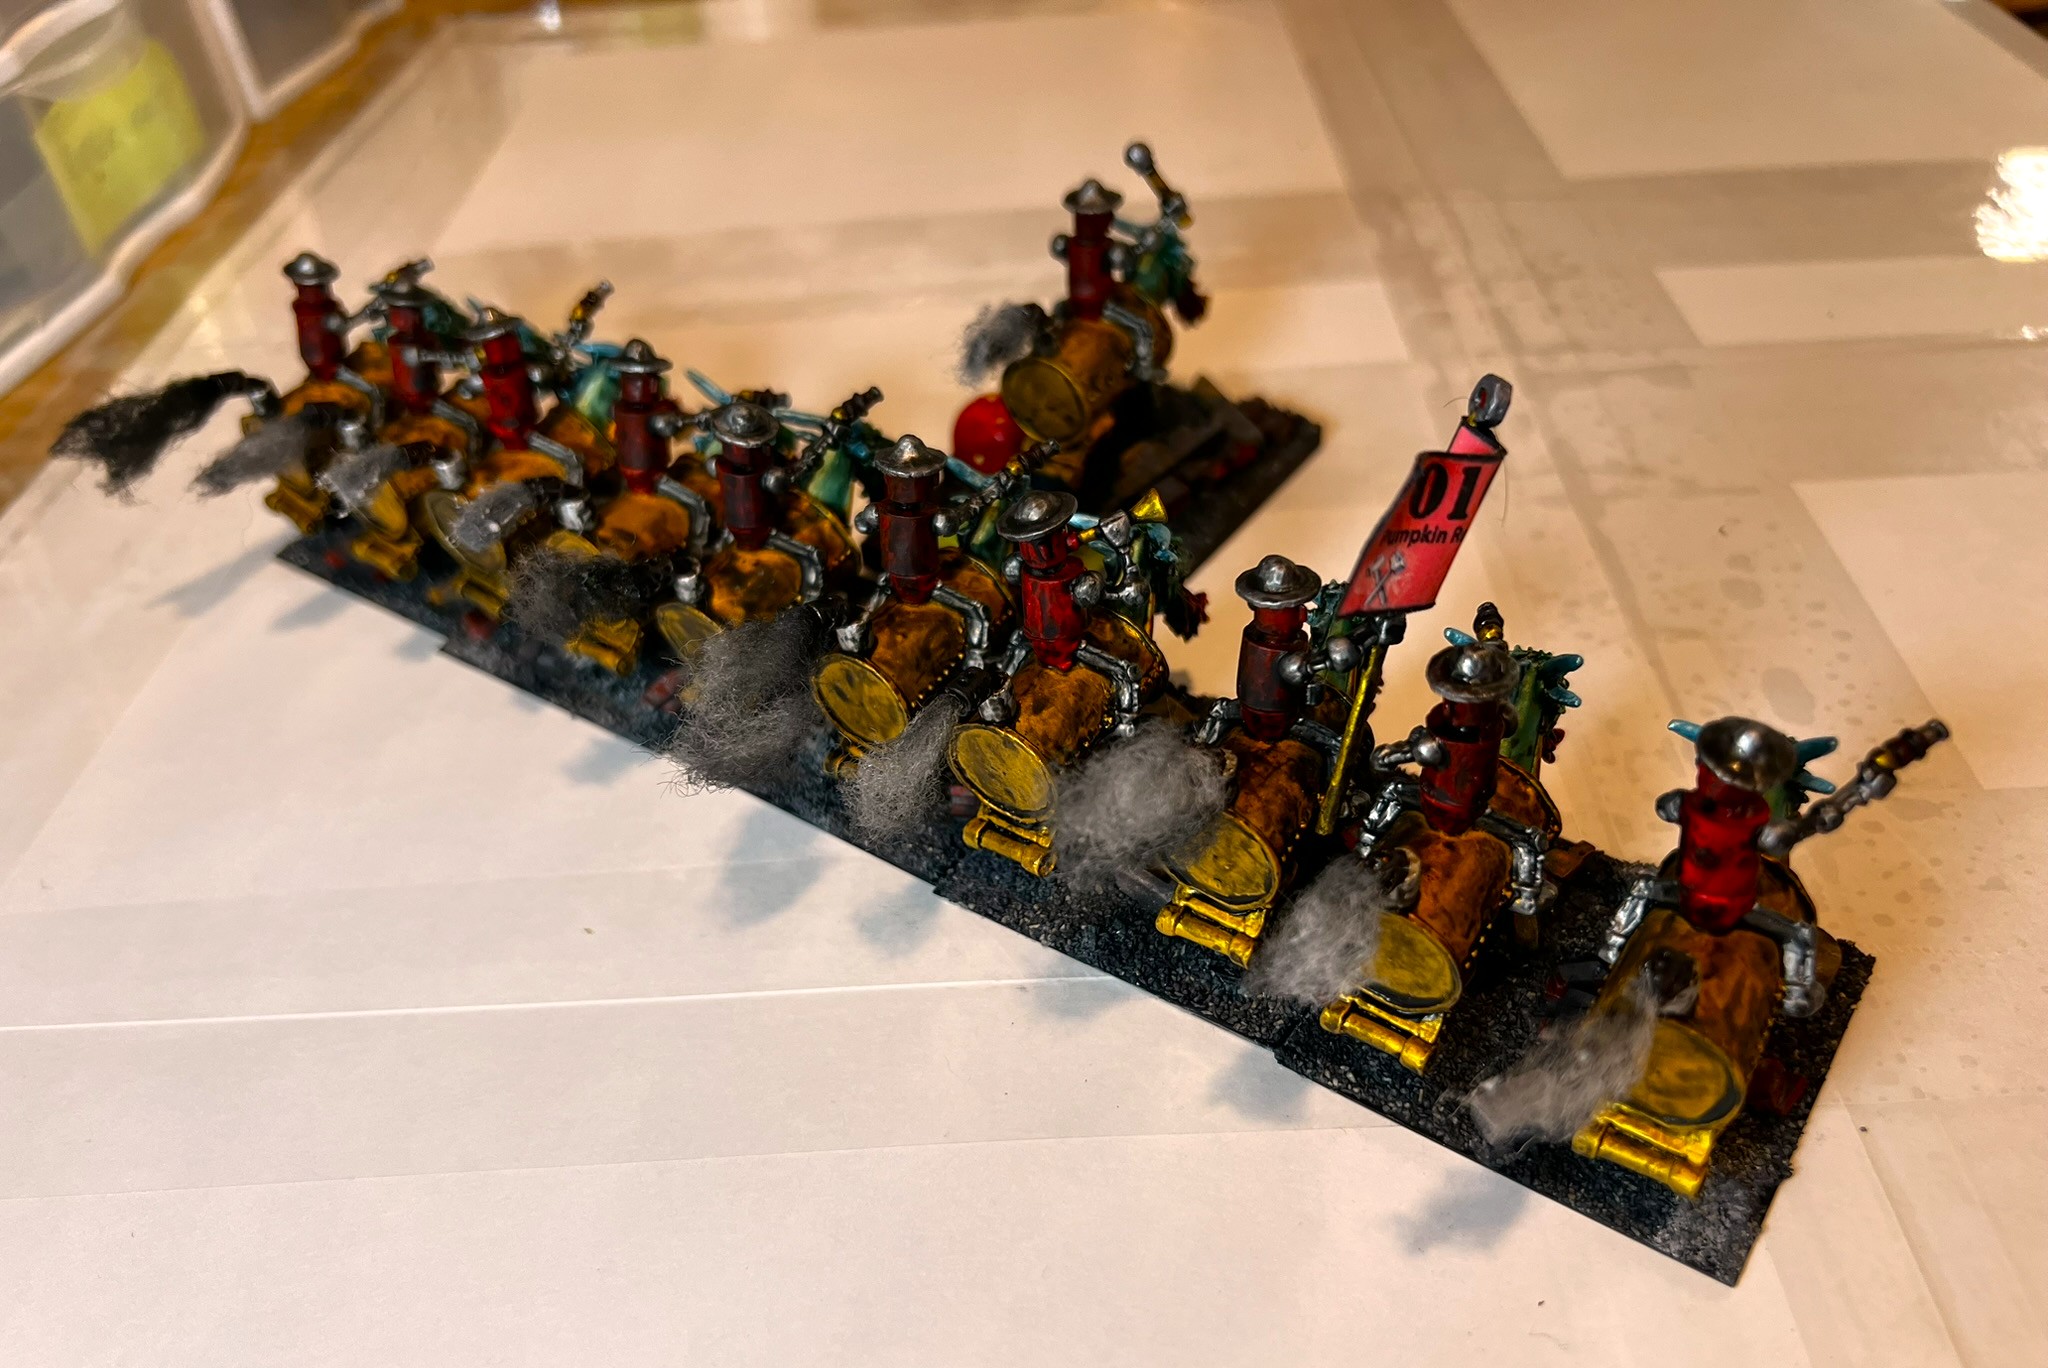
The 010 “Pumpkin Roaster” Mechanical Cavalry. So named because of their victory over the Great Pumpkinheads in a past battle.Opposite side view.Rear view showing the exhaust plumes.
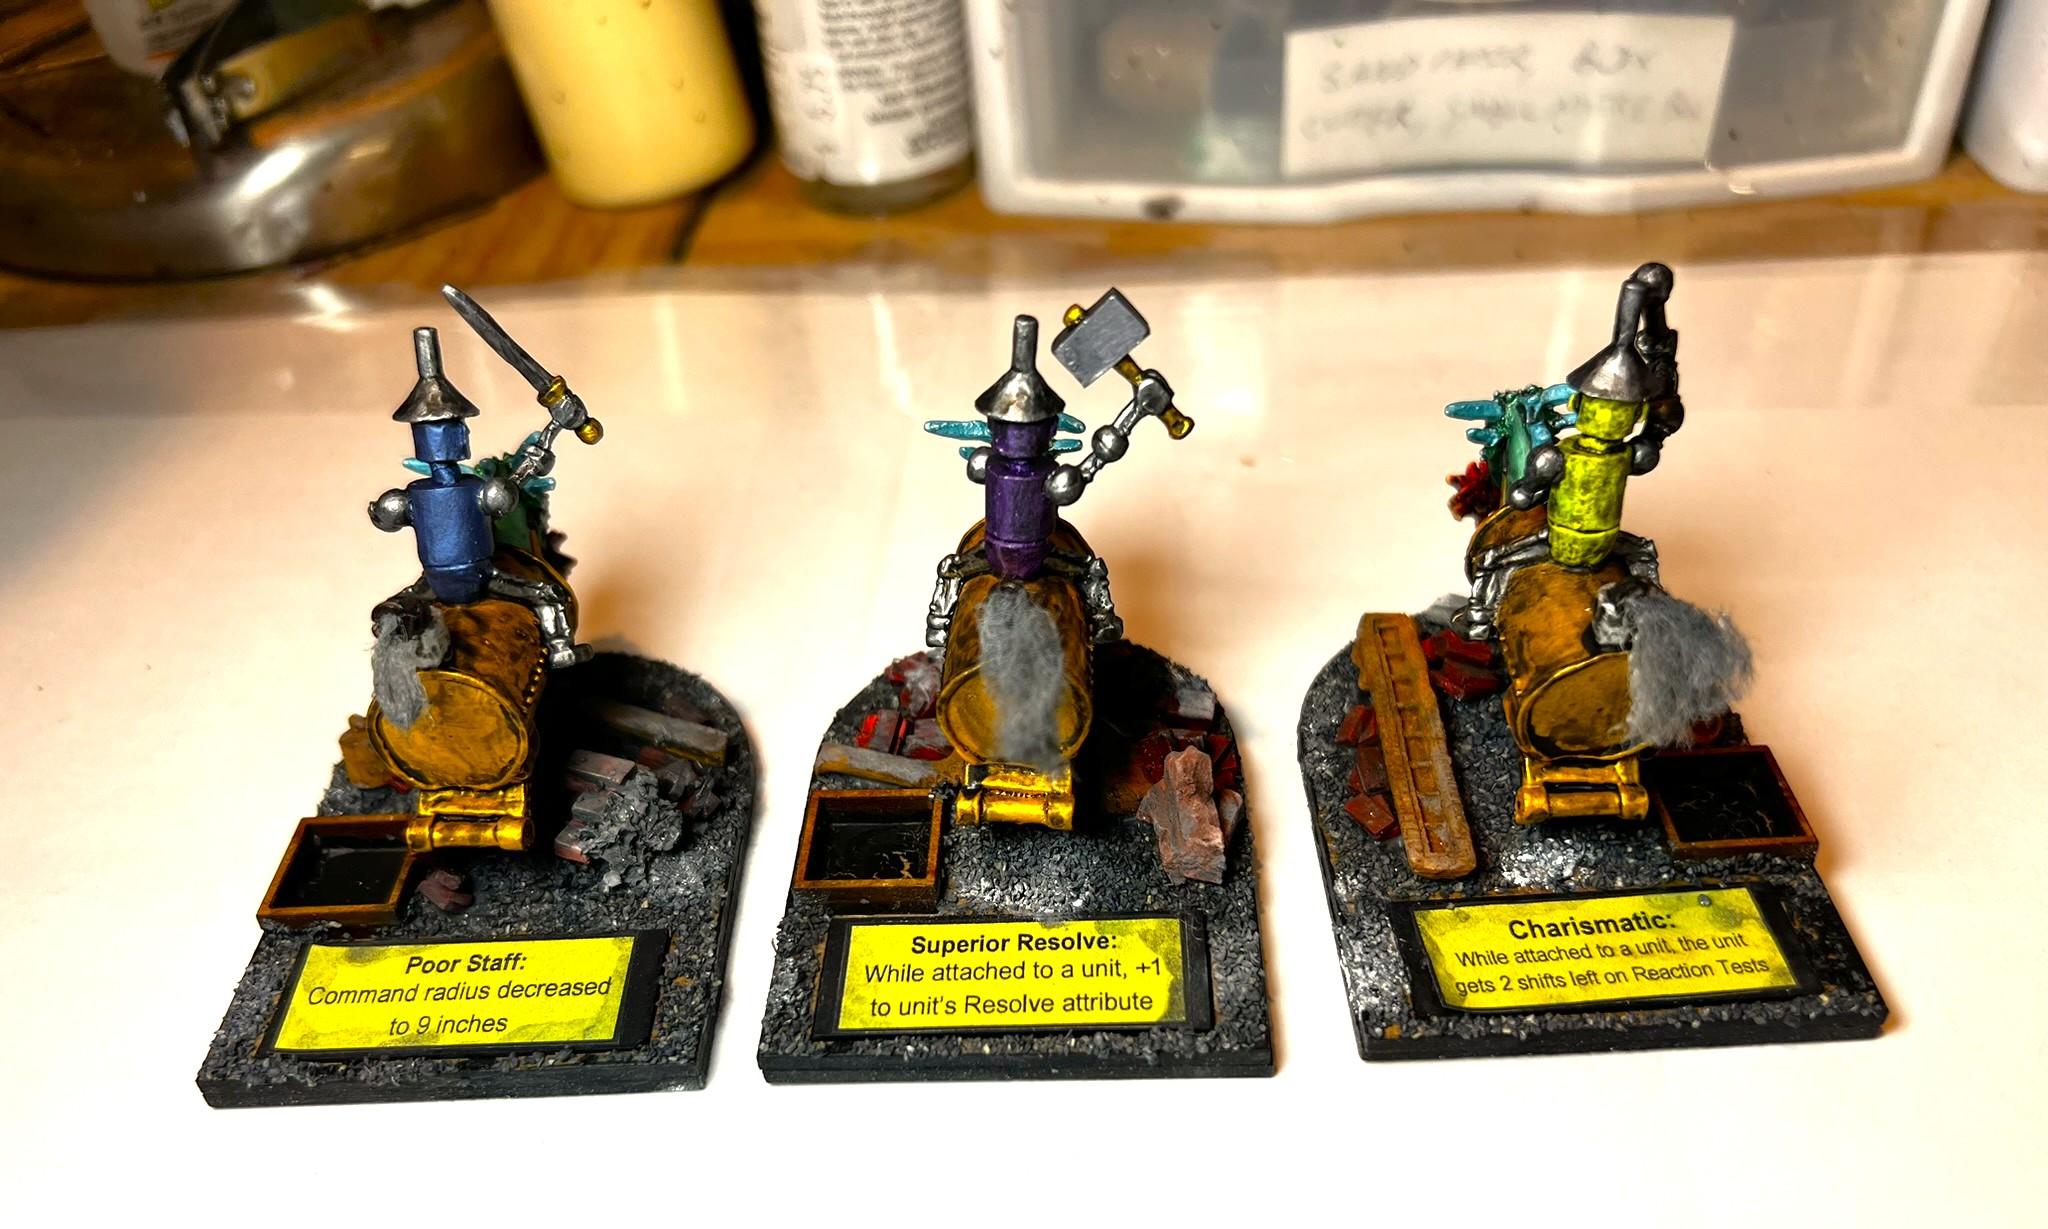
The three brigade commanders were completed similarly, and given their abilities as you see below..
Lastly, here is a video of the unit and the brigade commanders:
Video of the brigade commanders for Professor Nitpik (OZZ-544) and the Pumpkin Roasters Mechanical Cavalry.
These 14 figures statues also qualify for Dave Stone’s annual “Paint What You Got Challenge”. Check it out! I’ll say it again. Dave is a great guy. I guess he’d prefer “solid bloke.” He runs this every year between Christmas and the end of February.
These were a lot of fun to build and paint up. I hope that you enjoyed them and that you will share any of your feedback in the comments section.
Final Note
Want to learn more about Ozz? If you want to check out the excellent Wars of Ozz figures’ range, there are two places to get them. You can also get the rules there. (I make no money from this.) The game rules and the figures are available from the next two places:
Below you’ll see the list of paints and the like that I used on this project. They are more useful for me when I need to recreate a color scheme in the future. They might not be as useful for you. In any case, that’s why I post them.
Miscellaneous details and references for those interested in that sort of thing:
For my earlier posts on Wars of Ozz games, view this page. It includes figures, units, and other related projects.
PAINTS, INKS, GLAZES, SHADES, WASHES, PIGMENTS, FLOCKING, GLUES AND MORE THAT I USED ON THESE PROFESSOR NITPIK MECHANICAL CAVALRY AND BRIGADE COMMANDERS:
PVA Glue
Popsicle sticks
Gorilla Glue
Alligator clips and stands
MDF Bases
2″ Square War Games Accessories Steel Bases (21)
War Games Accessories Steel Bases (FOW1)
Vallejo Surface Primer “Black”
Createx Wicked Colors “Pearl Red”
Createx Airbrush Colors “Pearl Copper”
Createx Airbrush Colors “Pearl Green”
Createx Airbrush Colors “Pearl Plum”
Vallejo Mecha Color “Sky Blue”
Army Painter “Dark Tone” (wash)
Vallejo “Metal Medium”
DecoArt “Peacock Pearl”
Vallejo Mecha Color “Metallic Green”
Vallejo Mecha Color “Metallic Blue”
Vallejo Model Air “Gun Metal”
Martha Stewart “Duckling Pearl”
Vallejo Model Color “Off White”
Army Painter “Dark Tone” (wash)
Vallejo Mecha Color “Off White”
Vallejo Model Color “Brass”
Army Painter Speed Paint 2.0 “Brazen Copper”
Army Painter Speed Paint 2.0 “Polished Silver”
Army Painter Warpaints Fanatics Effects “Data System Glow” (effect)
Army Painter Speed Paint 1.0 “Blood Red”
Army Painter Speed Paint 1.0 “Fire Giant Orange”
Army Painter Speed Paint 1.0 “Zealot Yellow”
Army Painter Warpaints Air “Neon Yellow”
Vallejo Model Air “Chrome”
Army Painter Warpaints “Rough Iron”
Vallejo Thinner Medium
Citadel “Nuln Oil GLOSS” (wash/shade)
Battlefront “Black”
Vallejo Mecha Varnish “Gloss”
Vallejo Flow Improver
Vallejo Thinner
Army Painter “Black Battlefields” (flocking)
Juweela 1:35 Debris
Juweela Metal Scrap Rusty
Pillow batting
Vallejo “Carbon Black” (pigment)
Vallejo “Titanium White” (pigment)
Vallejo “Pigment Binder”
Vallejo Premium Color “Matte Varnish”
Black Sharpie pen
Brown Sharpie pen
Nitpik flag design from Wars of Ozz Facebook page (printed on card stock)
To paraphrase Monty Python’s Flying Circus, “…and now for something completely different…” – specifically, Pollywomps.
After Christmas but before New Year’s Eve I managed to complete a Pollywomp brigade for my Wars of Ozzgames. The brigade right now will be led by my Sleestak Command Base that I shared a description of recently in this blog. It was actually completed by December 30th, qualifying almost the entire brigade (less the Sleestak) for for Dave Stone’s annual “Paint What You Got Challenge”. It’s a fun and global challenge to paint up figures between Christmas and the end of February. The Pollywomps were perfect candidates for it.
So who are these Pollywomps? According to the “Wars of Ozz supplement“, they are denizens of “The Principality of Dismal”, also known as “the Bottomless Swamp”, and subjects of Prince Wartskin.
Nobody would ever accuse the Pollywomps of being smart. Savage, impulsive, sometimes clever – yes, but never smart. Thus, it was a wonderment when a trio of garishly accessorized Pollywomps visited each capital of the major kingdoms of Ozz and announced themselves as speakers for Prince Wartskin of Dismal. Nobody had ever heard of a place called Dismal, and with good reason, it didn’t exist until it was announced, nor was it called Dismal, but rather some blurpy Pollywomp word that sounded, at best, like Dismal. According to the Pollywomp speakers, Dismal was the city and the new principality, sometimes called the Bottomless Swamp. And just like that, another nation emerged overnight….
…The Pollywomps are more than just spear-armed infantry. In addition, Prince Wartskin fields Pollywomprats as light cavalry. Pollywomp artillery is all light cannons acquired from the Munchkins (and sometimes Winkies). They have unlimbered and strapped onto the backs of giant lumbering turtles raised in the swamp. While the turtles are slow, they do not require unlimbering to fire, and their massive shells provide some protection to the fishing crews. The wizard Nemo Mudbottom is Dismal’s foremost mage and often travels with the army. When he is among the ranks, his mere presence triggers the ability for nearby troops to blend with their terrain. Other wizards who serve, even if they are Pollywomps, lack this unique ability.
My brigade currently consists of an infantry regiment, a cavalry regiment, an artillery battery, Nemo Mudbottom, and the Sleestak Command base (which will lead until the Prince Wartskin figure becomes available anyways). I decided to consolidate the brigade into this one blog post as I worked on the units and Nemo simultaneously.
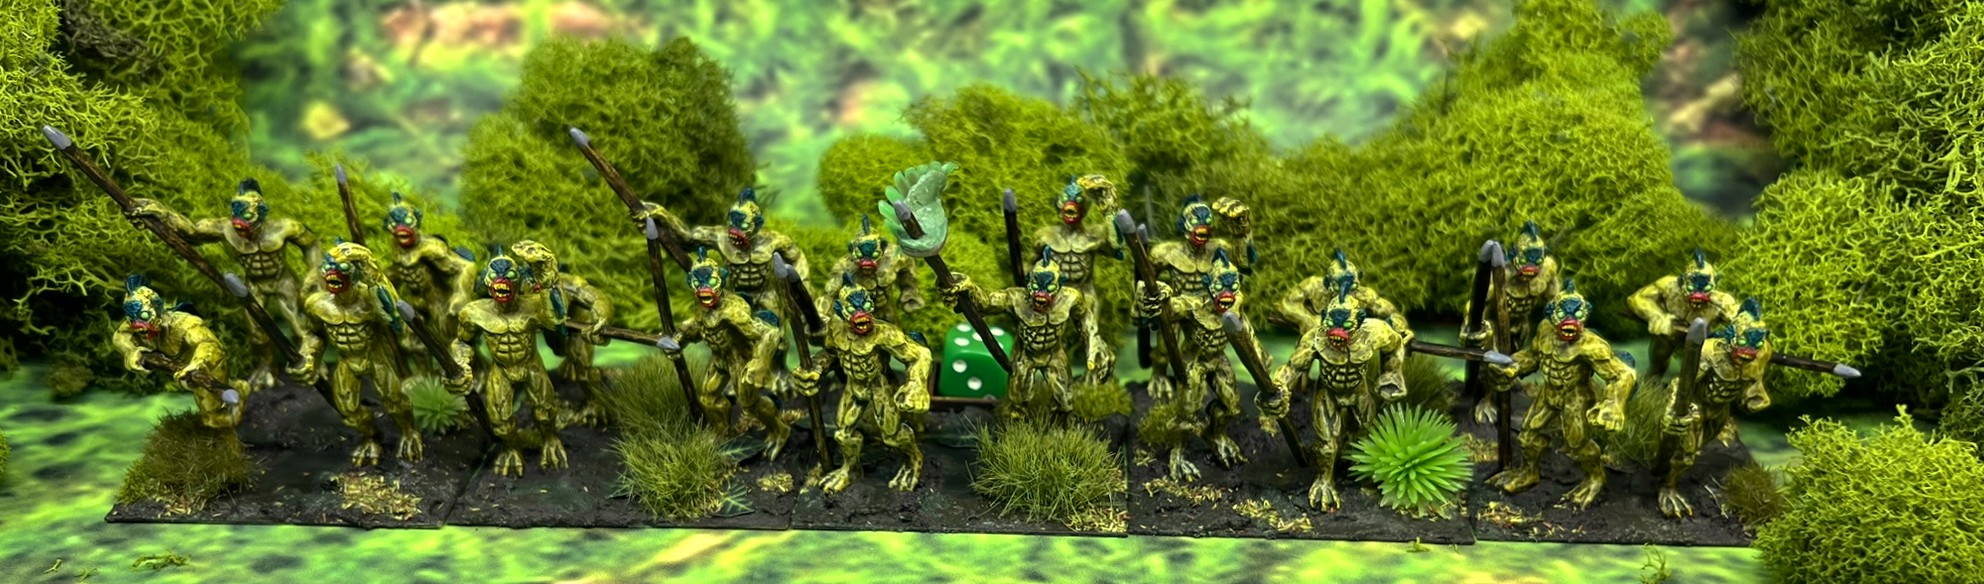
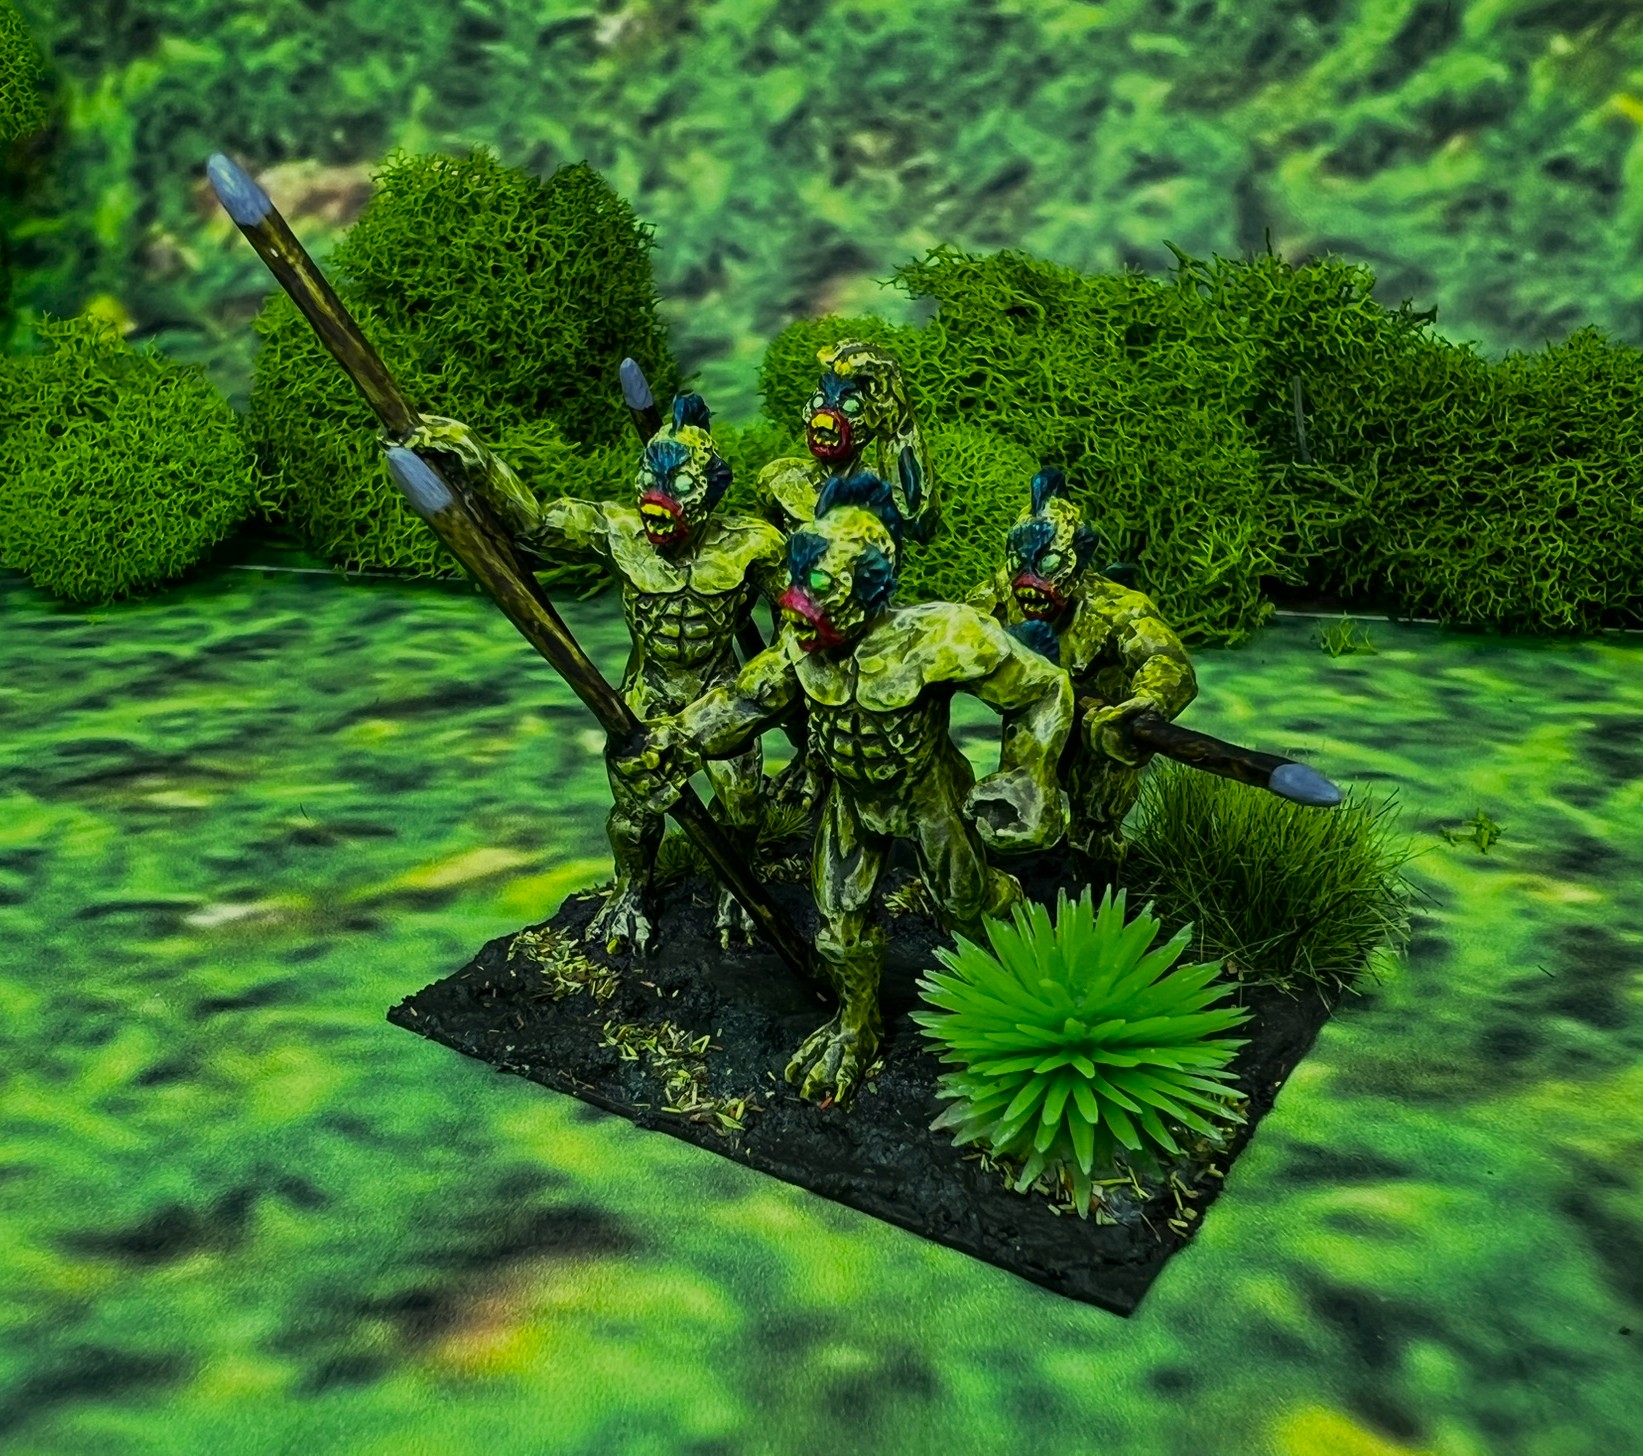
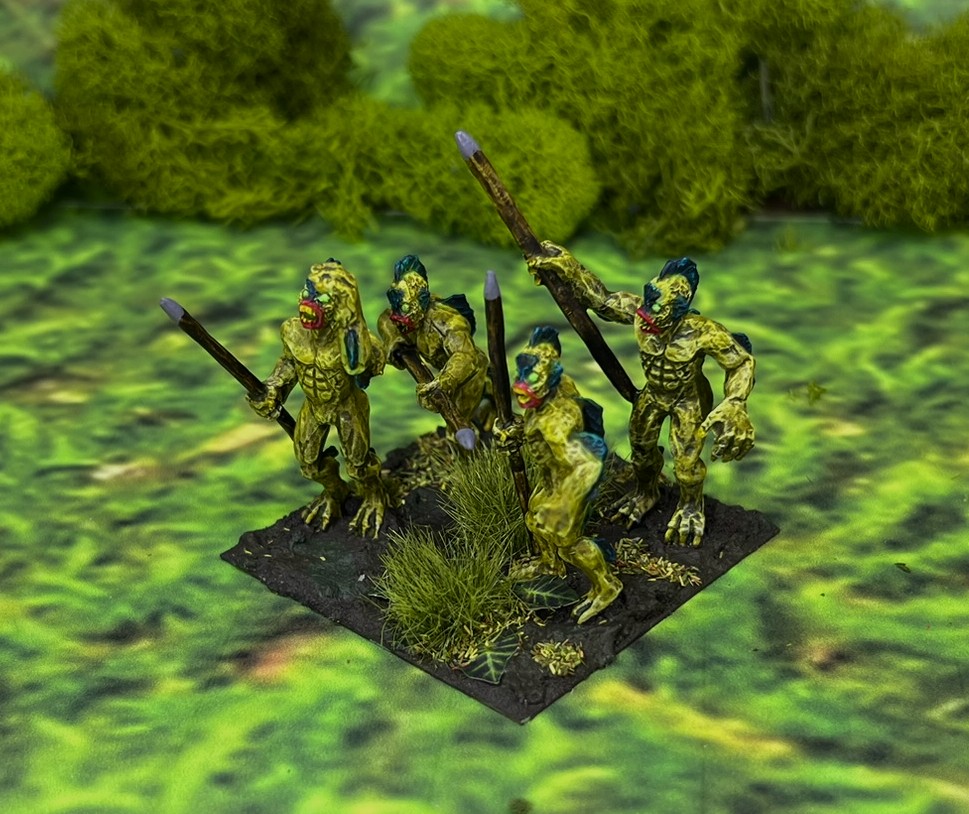
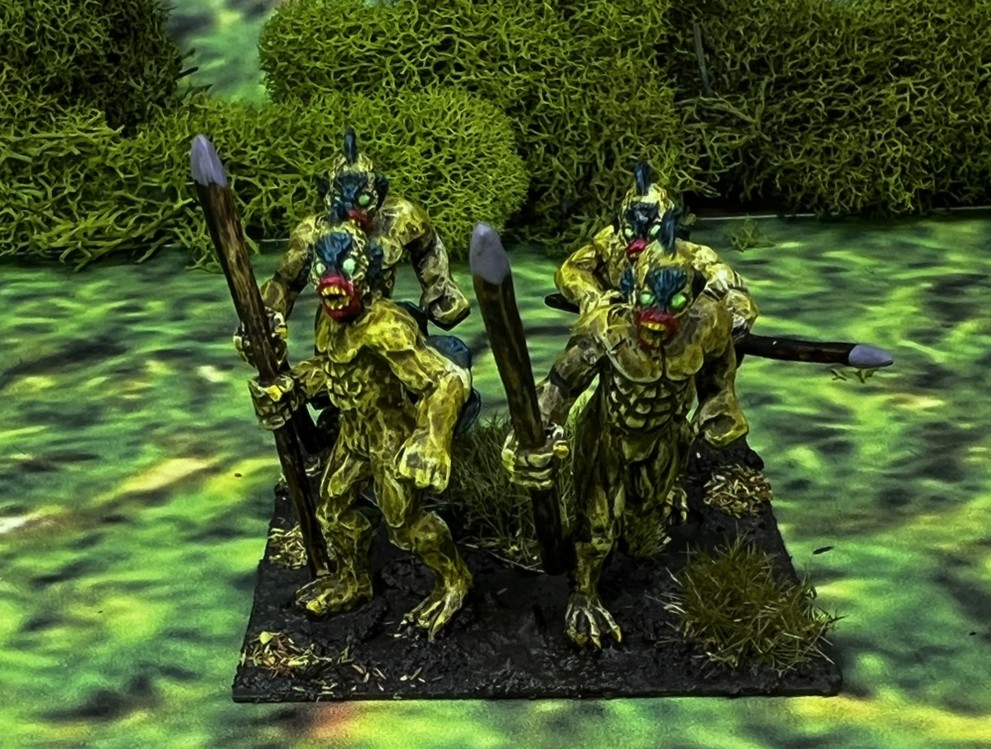
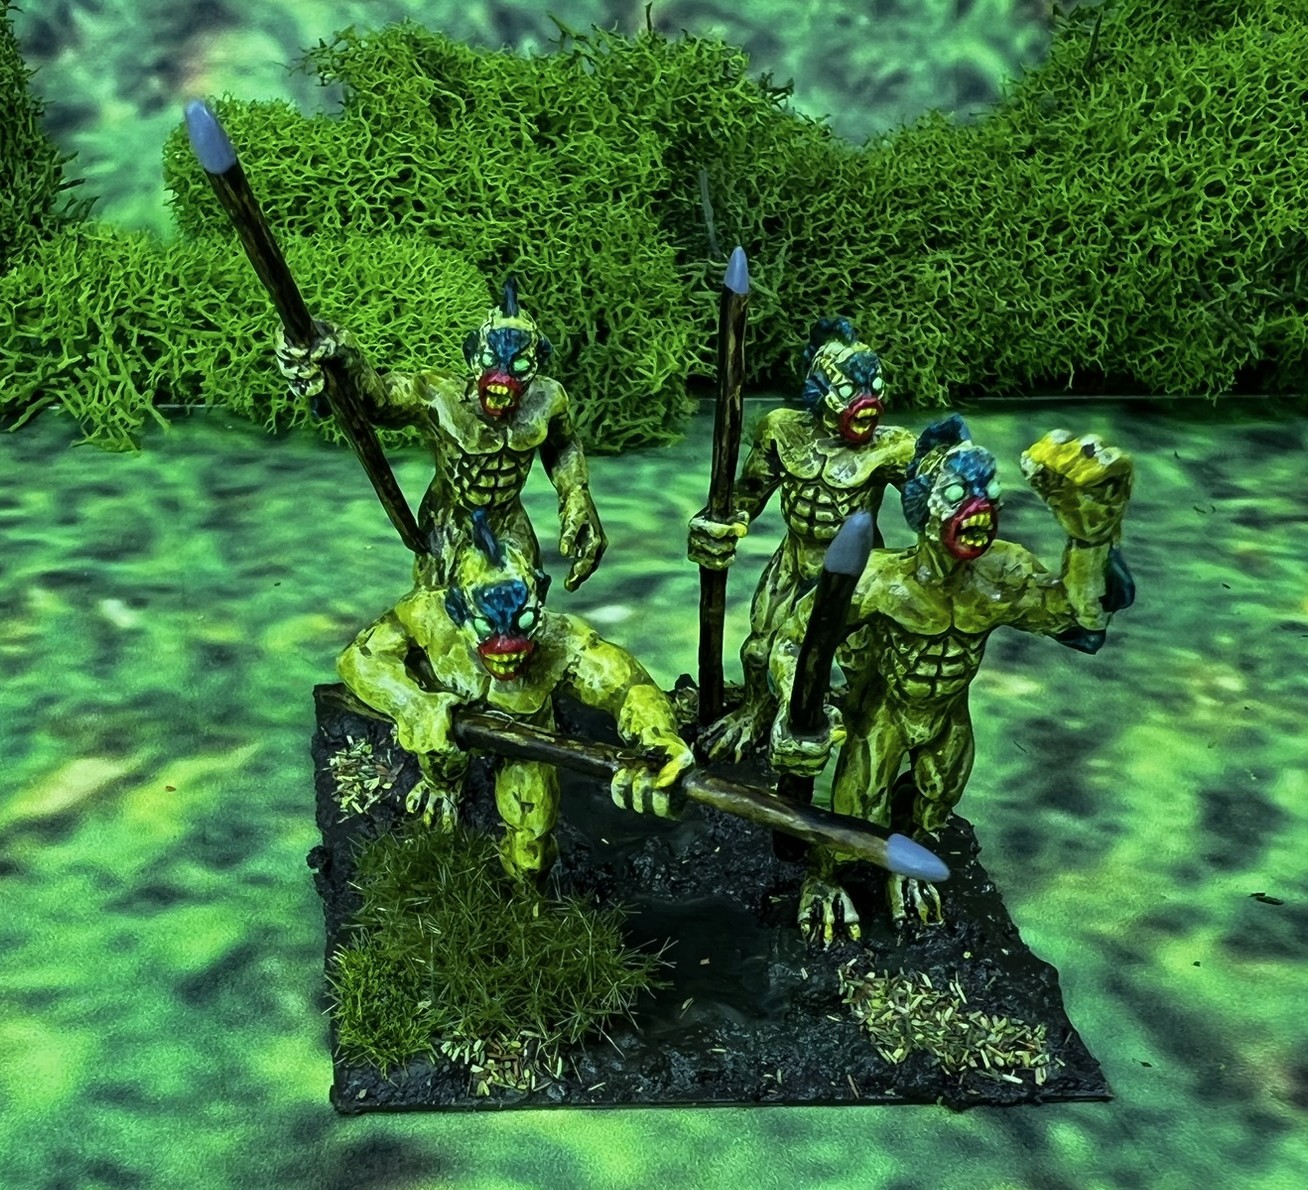
With the exception of the resin giant turtle, the figures are all metal, and 28mm. The infantry and cavalry soldiers look like the Gill-Man from the classic 1954 film “Creature from the Black Lagoon“, so I painted them as such, with some turquoise modifications around the gills and back fins.
Movie poster from “Creature from the Black Lagoon“
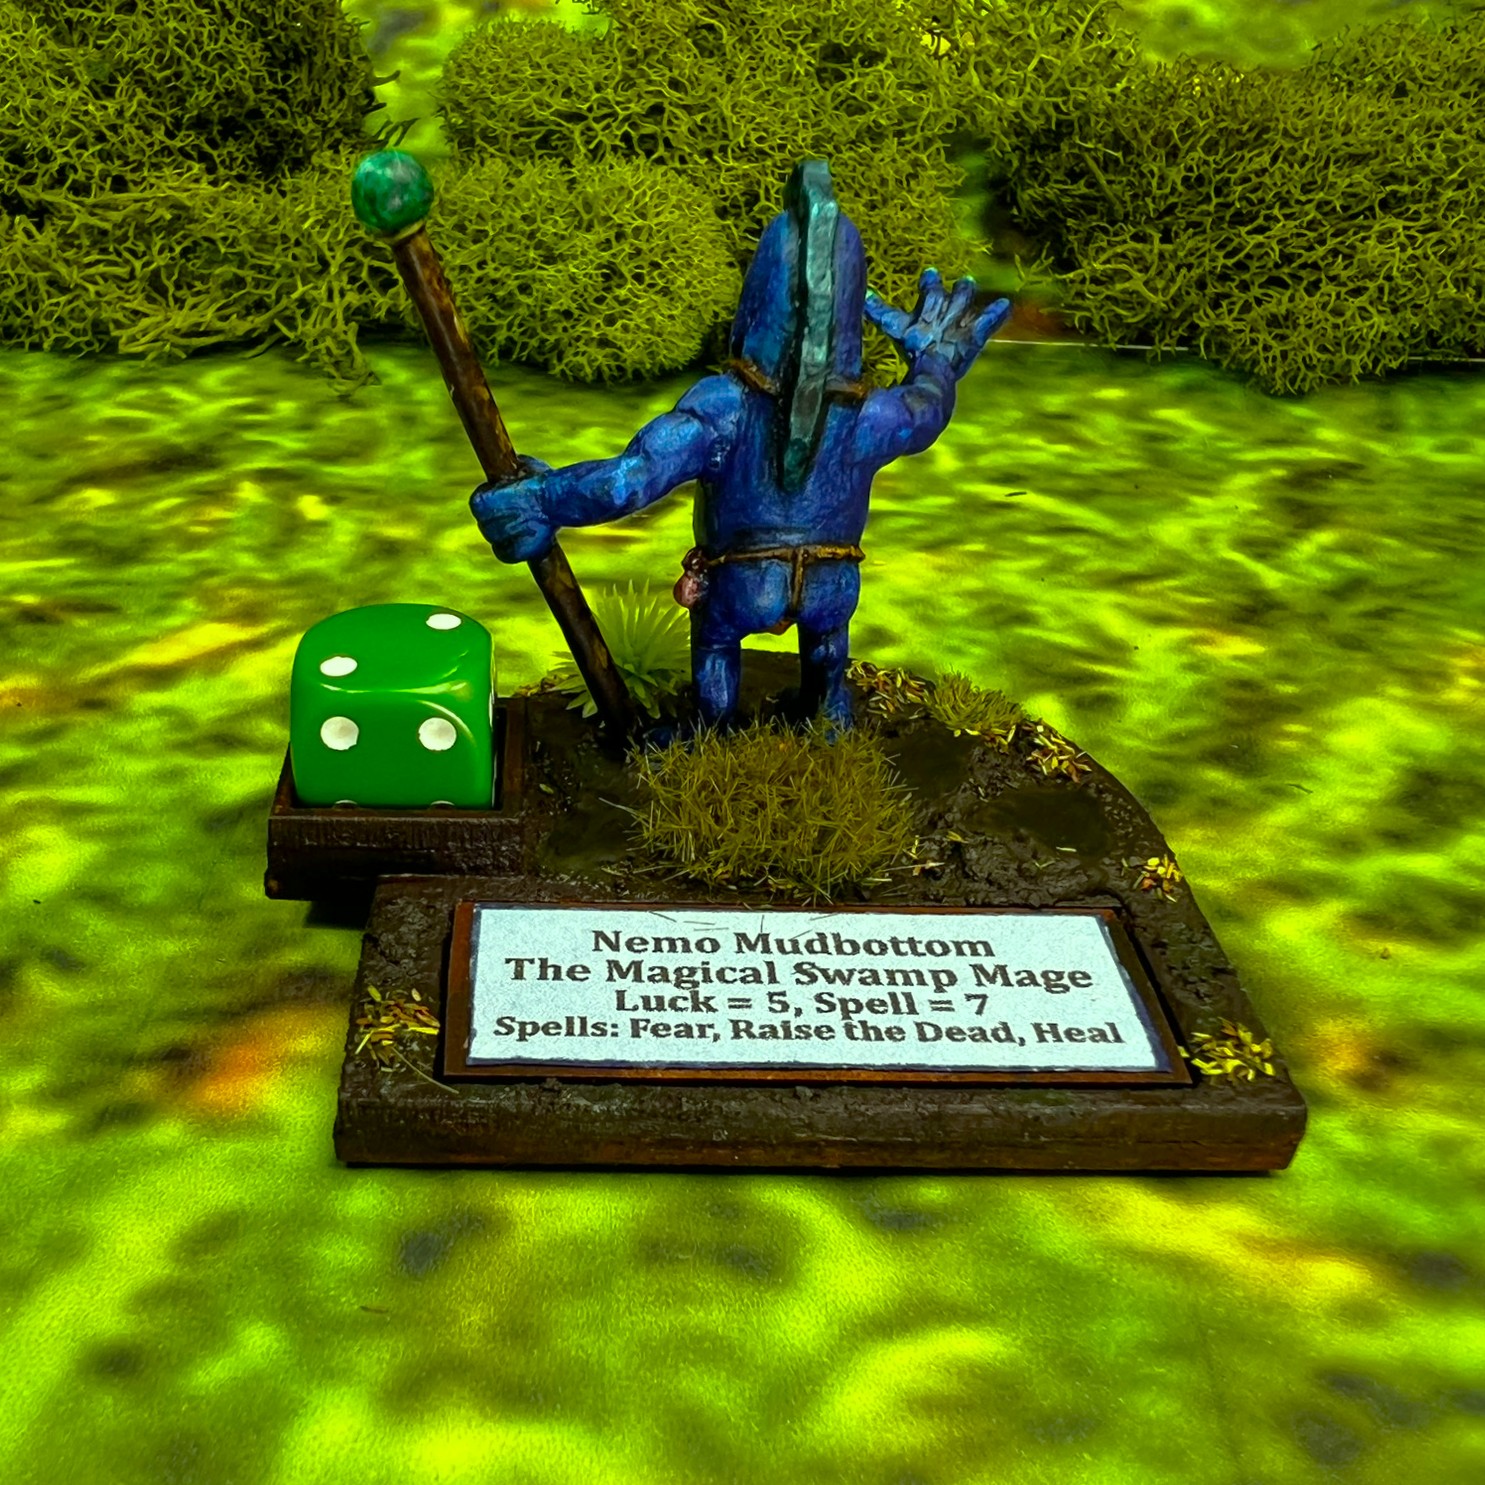
The artillery crew and Nemo Mudbottom are fishmen. Rather than make them look swampy, I decided to give them metallic blue and green shades to simulate their scales. The bases for all were painted up to represent swamp, mud, and puddles as you will see. As for combat stats, here are their stats:
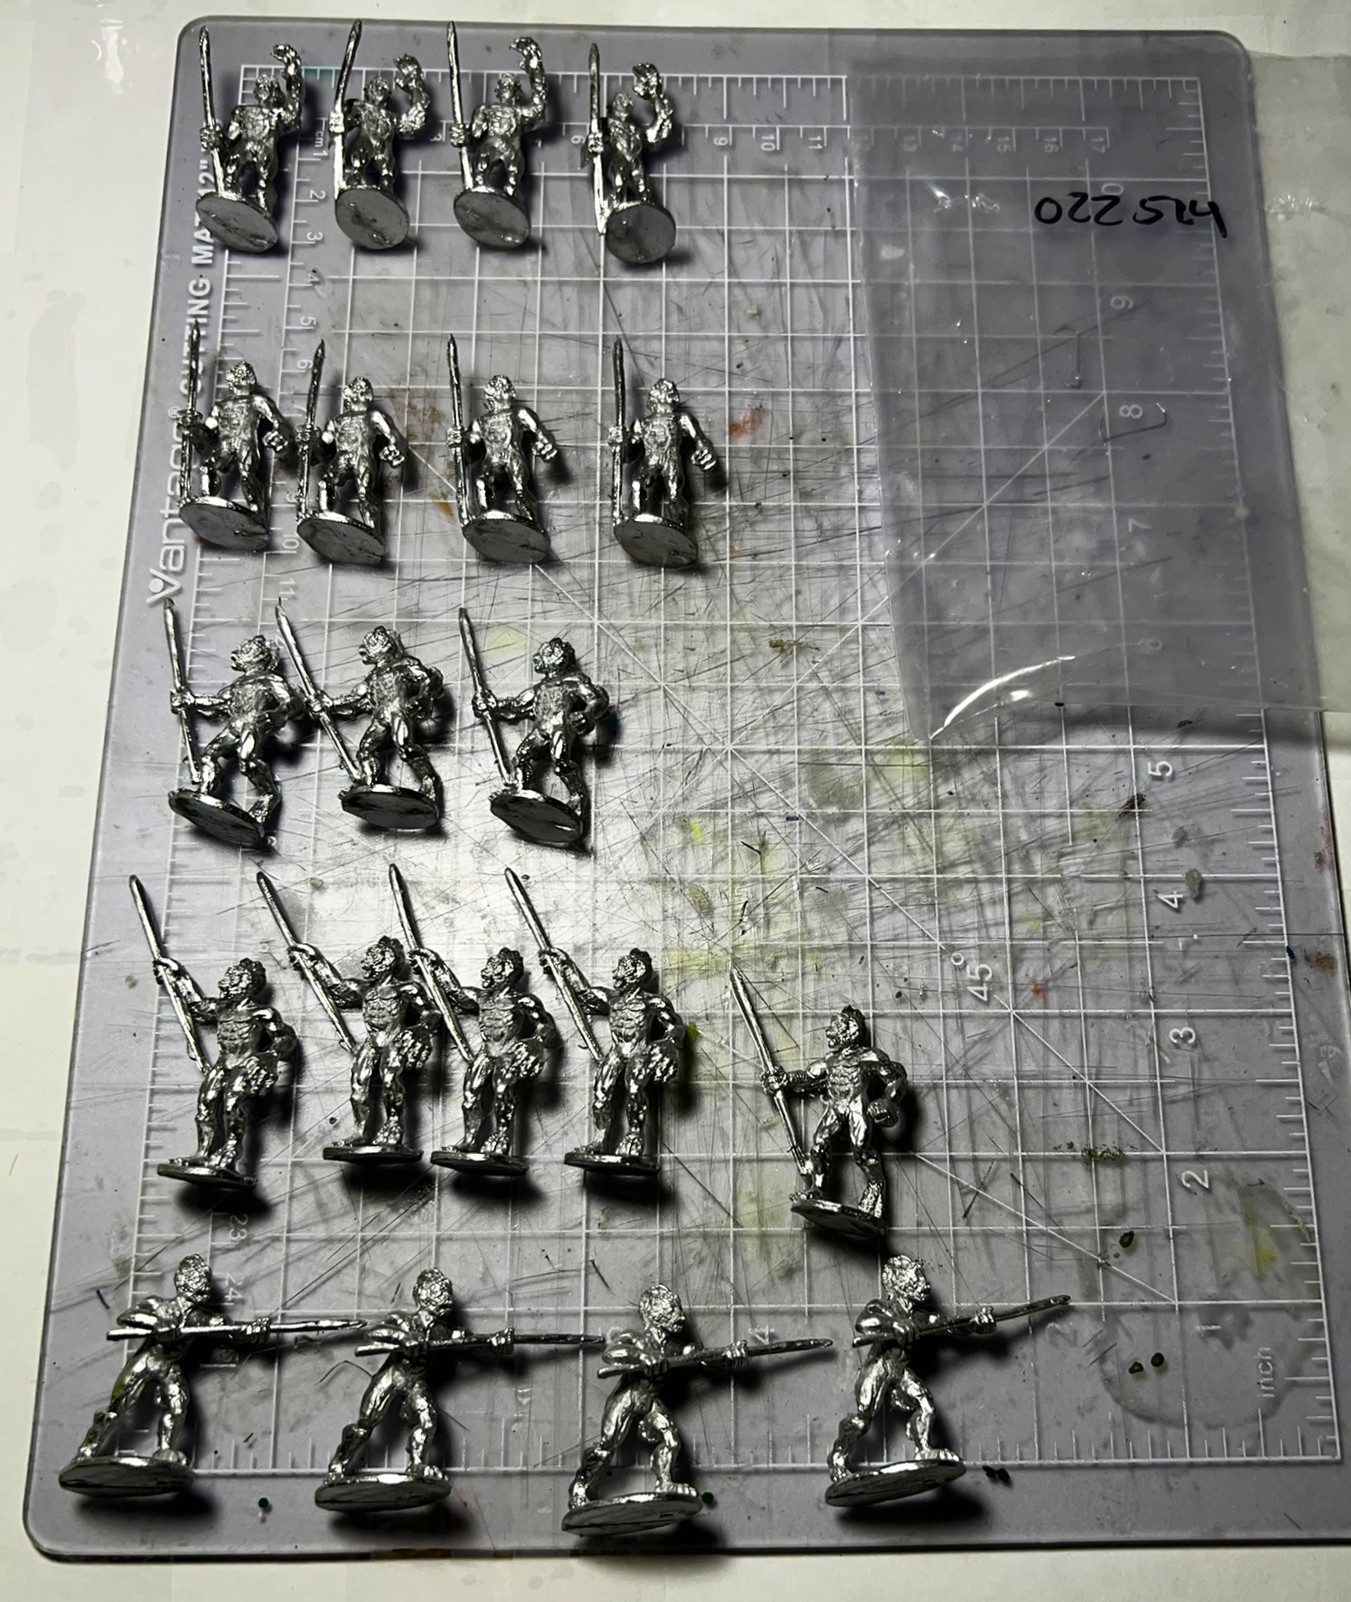
There were 20 infantry figures, 11 mounted cavalry figures, 5 artillery crewmen, 1 giant turtle with a light cannon, and Nemo. Below is what I started with:
The Pollywomp InfantryThe Pollywomp Cavalry, Artillery, and Nemo
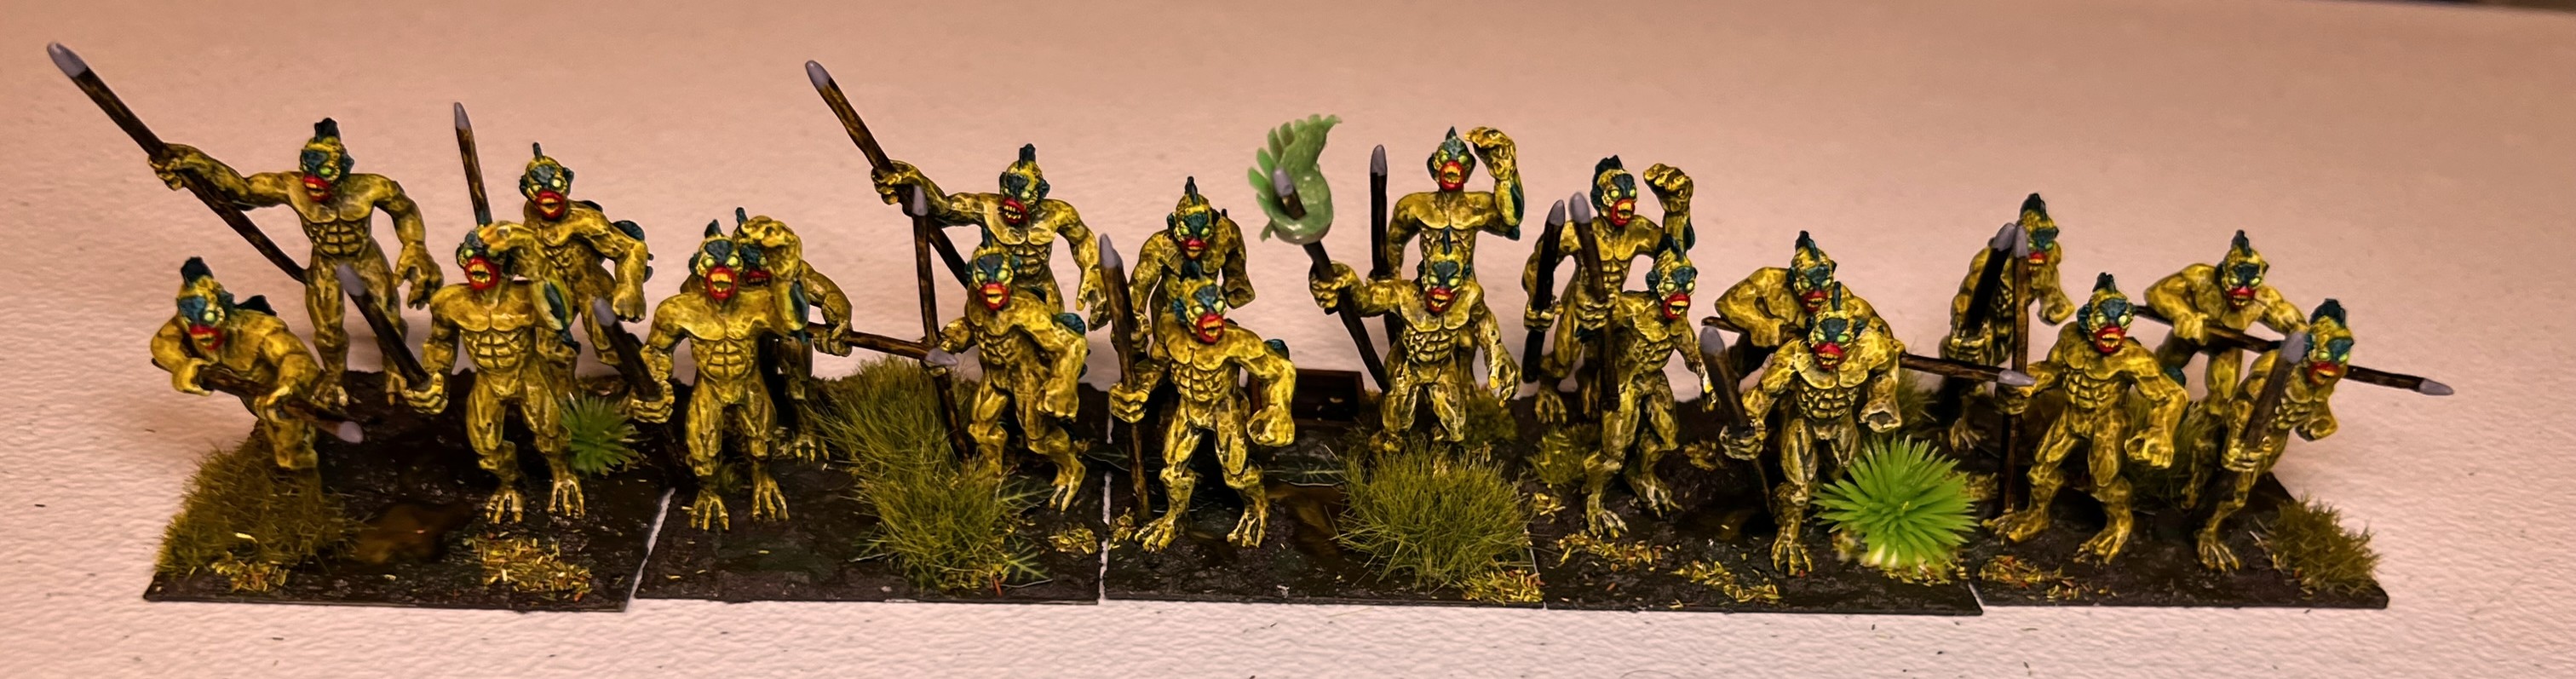
I did give the regiment a banner that I made out of green stuff and a plastic jungle leaf, even though the regiment does not have a regimental commander. All have glowing green eyes.
Here are some jungle shots of the regiment in line and column formations:
Pollywomp Infantry Regiment in line formationPollywomp Infantry Regiment in column formation
Here are some closer shots of the individual bases:
Note the leaf banner!
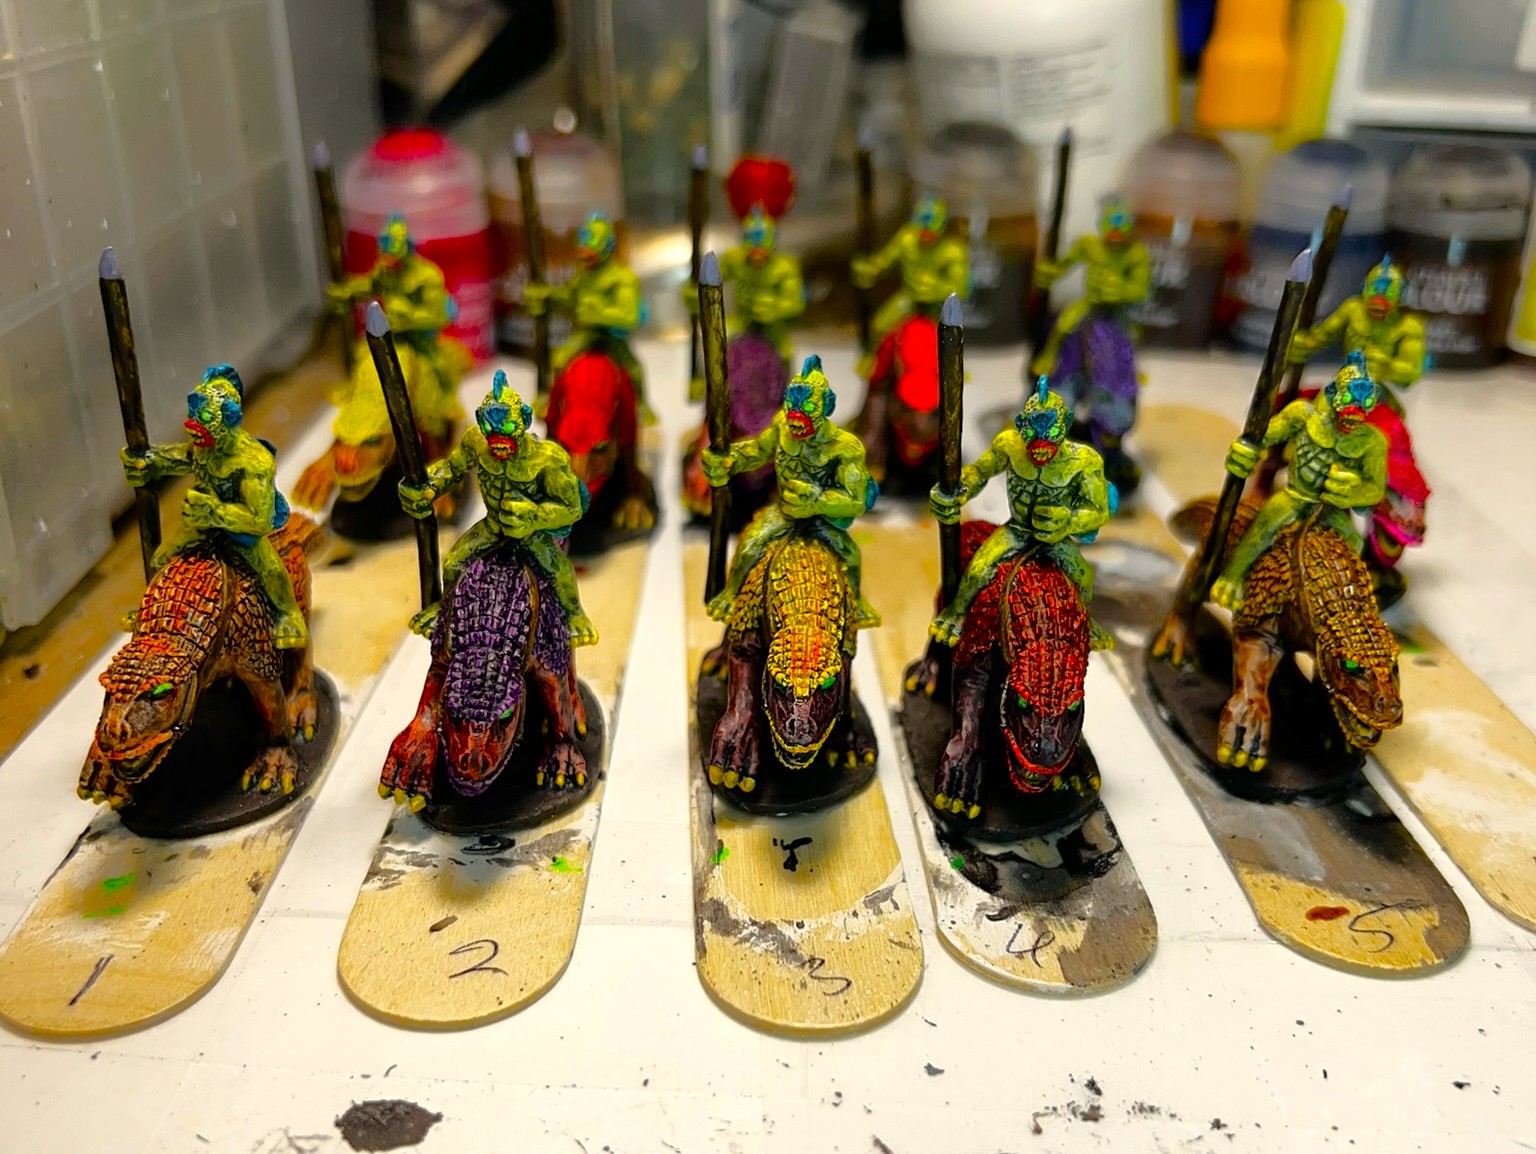
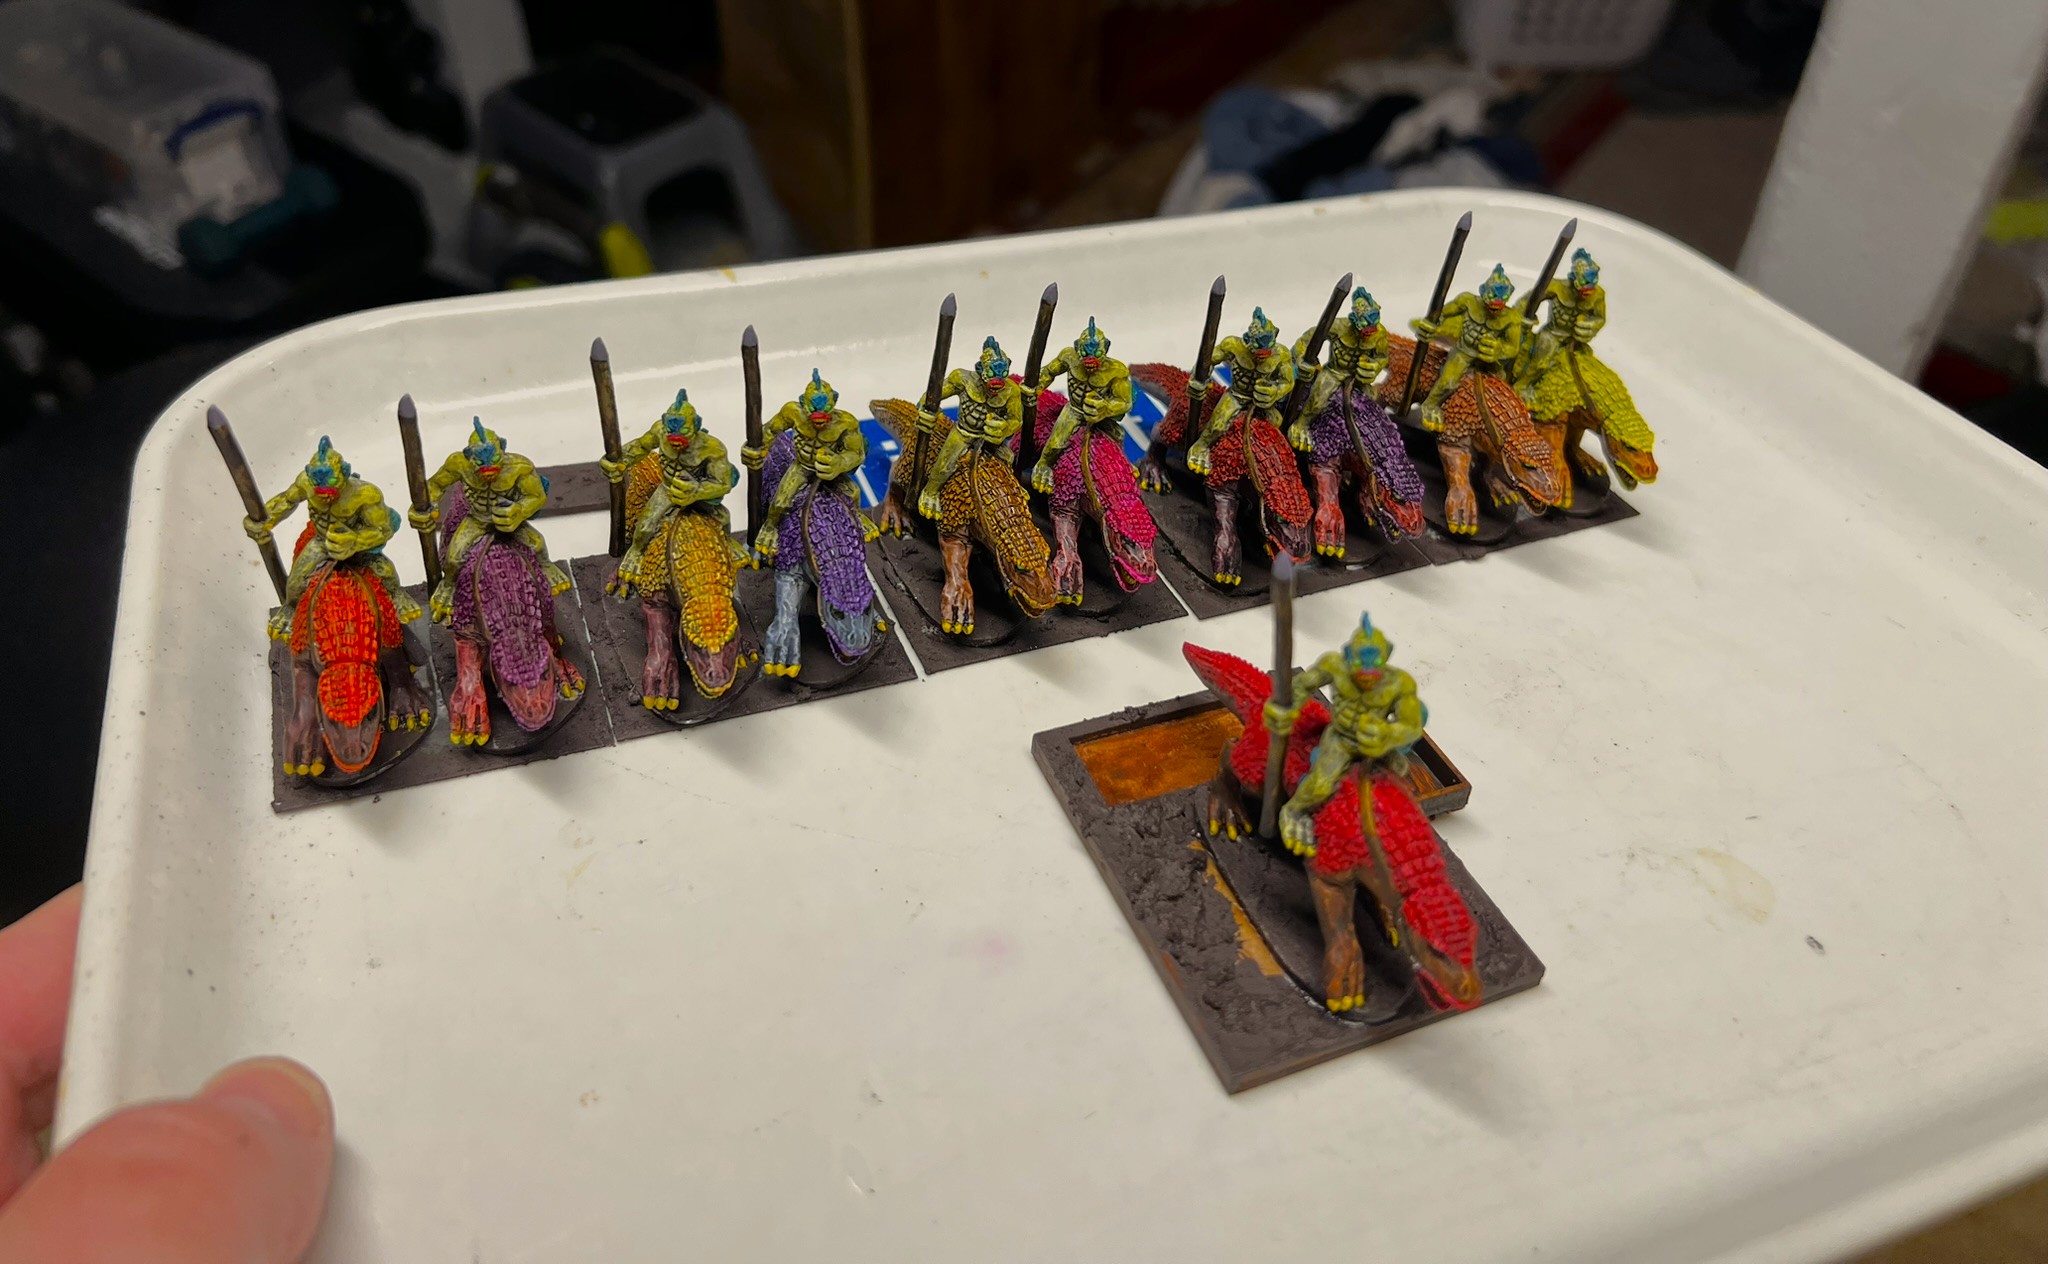
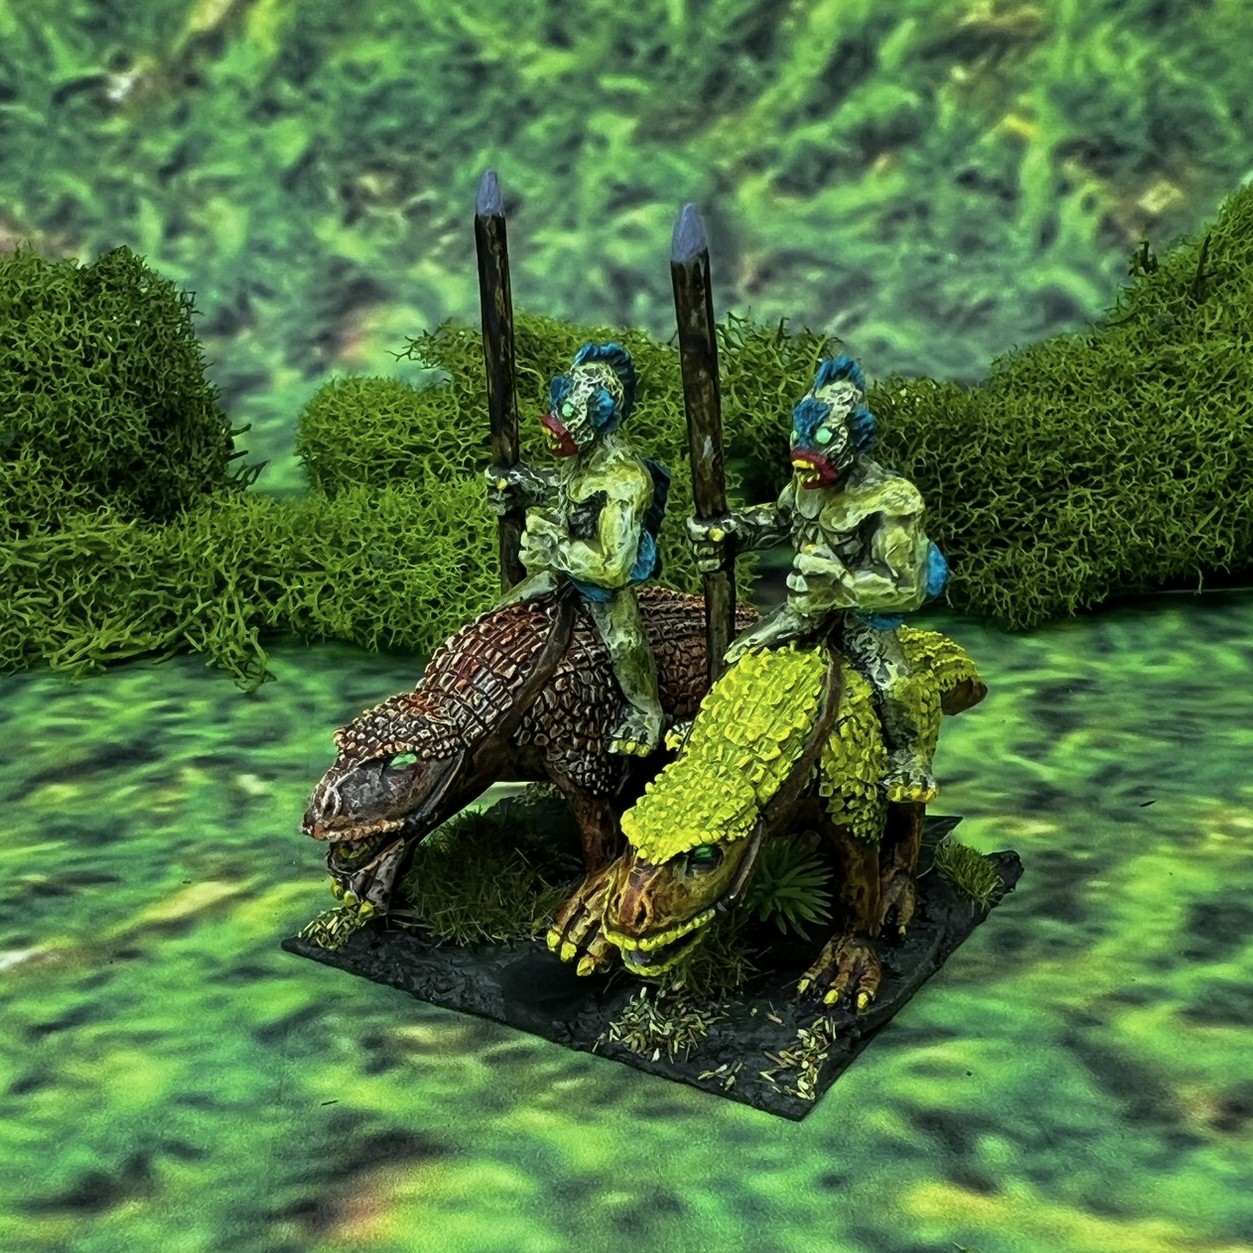
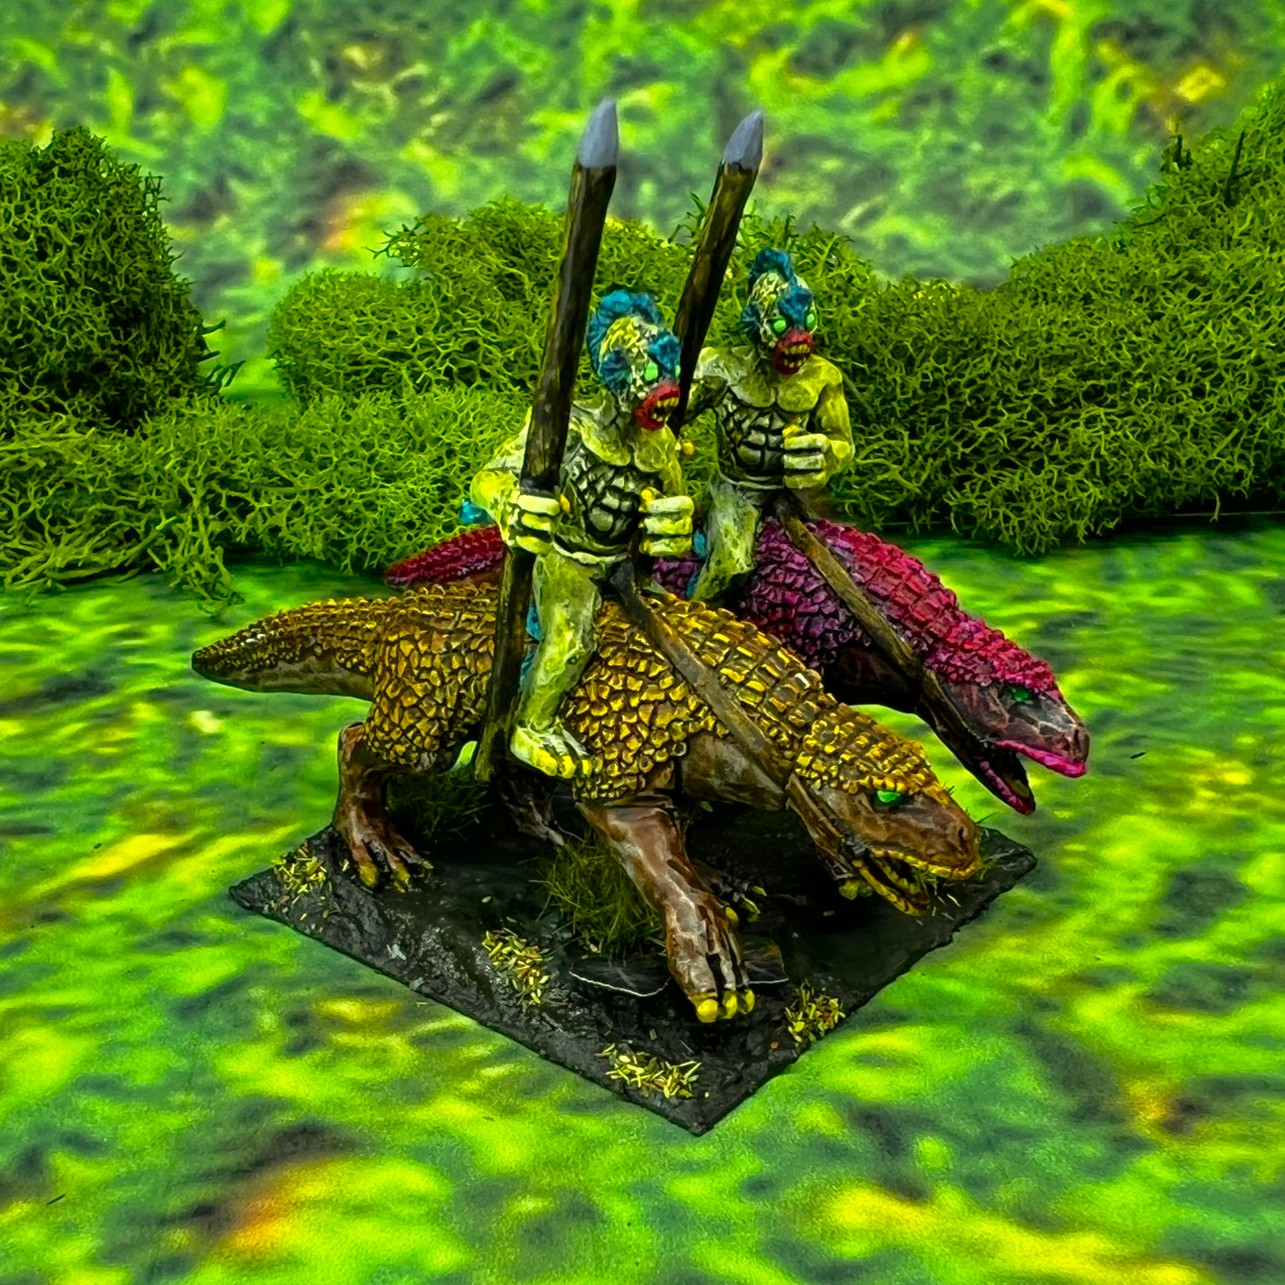
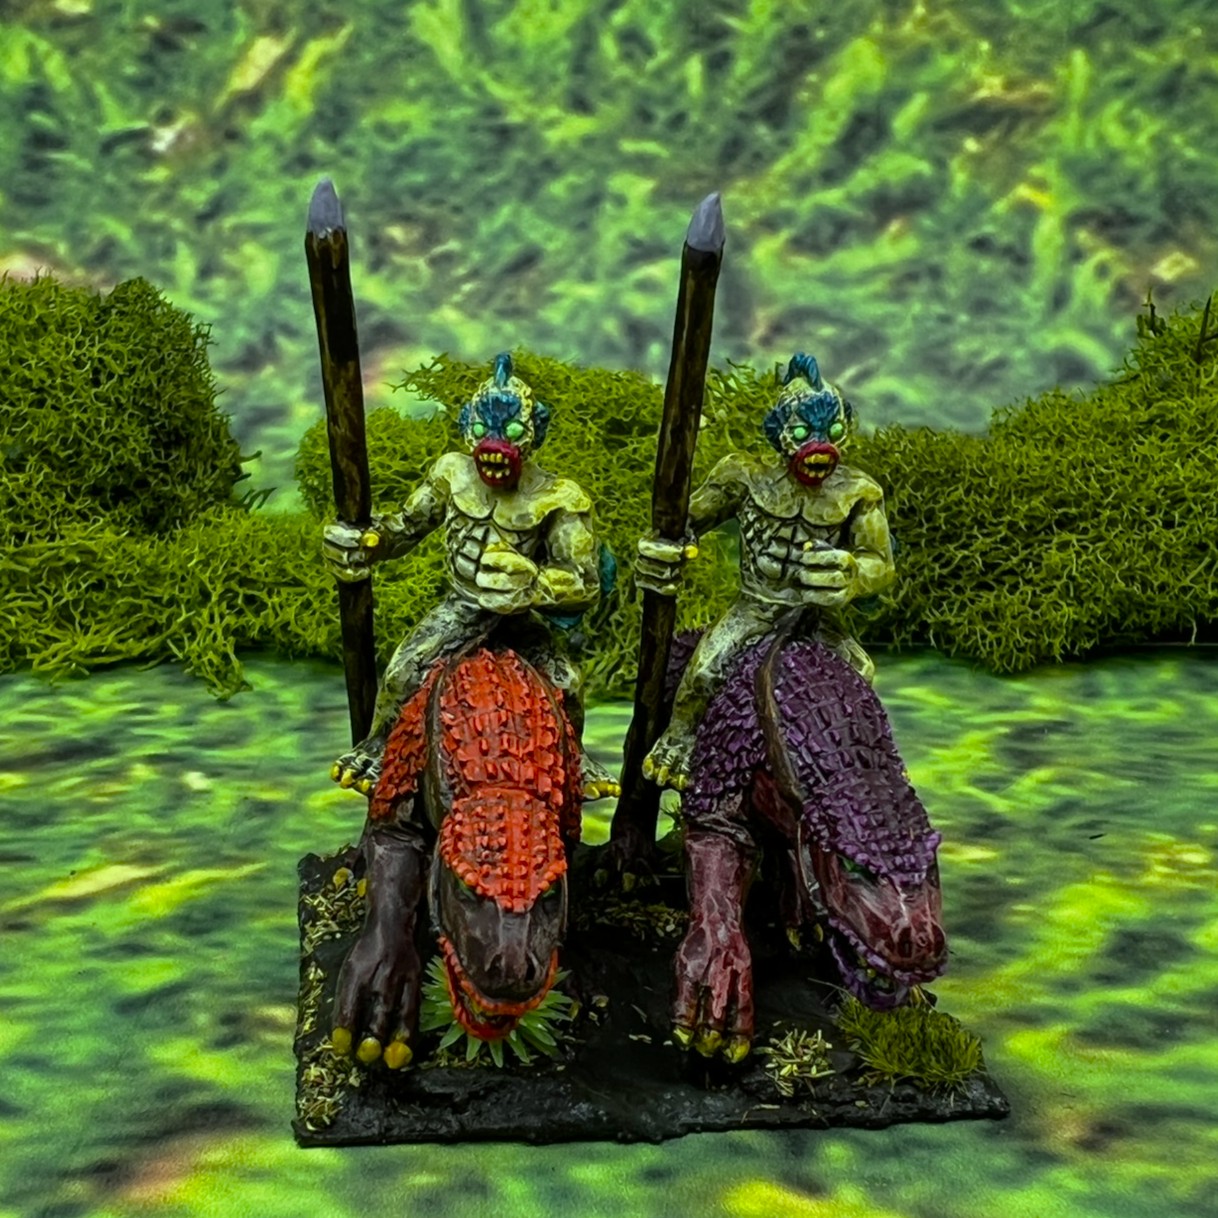
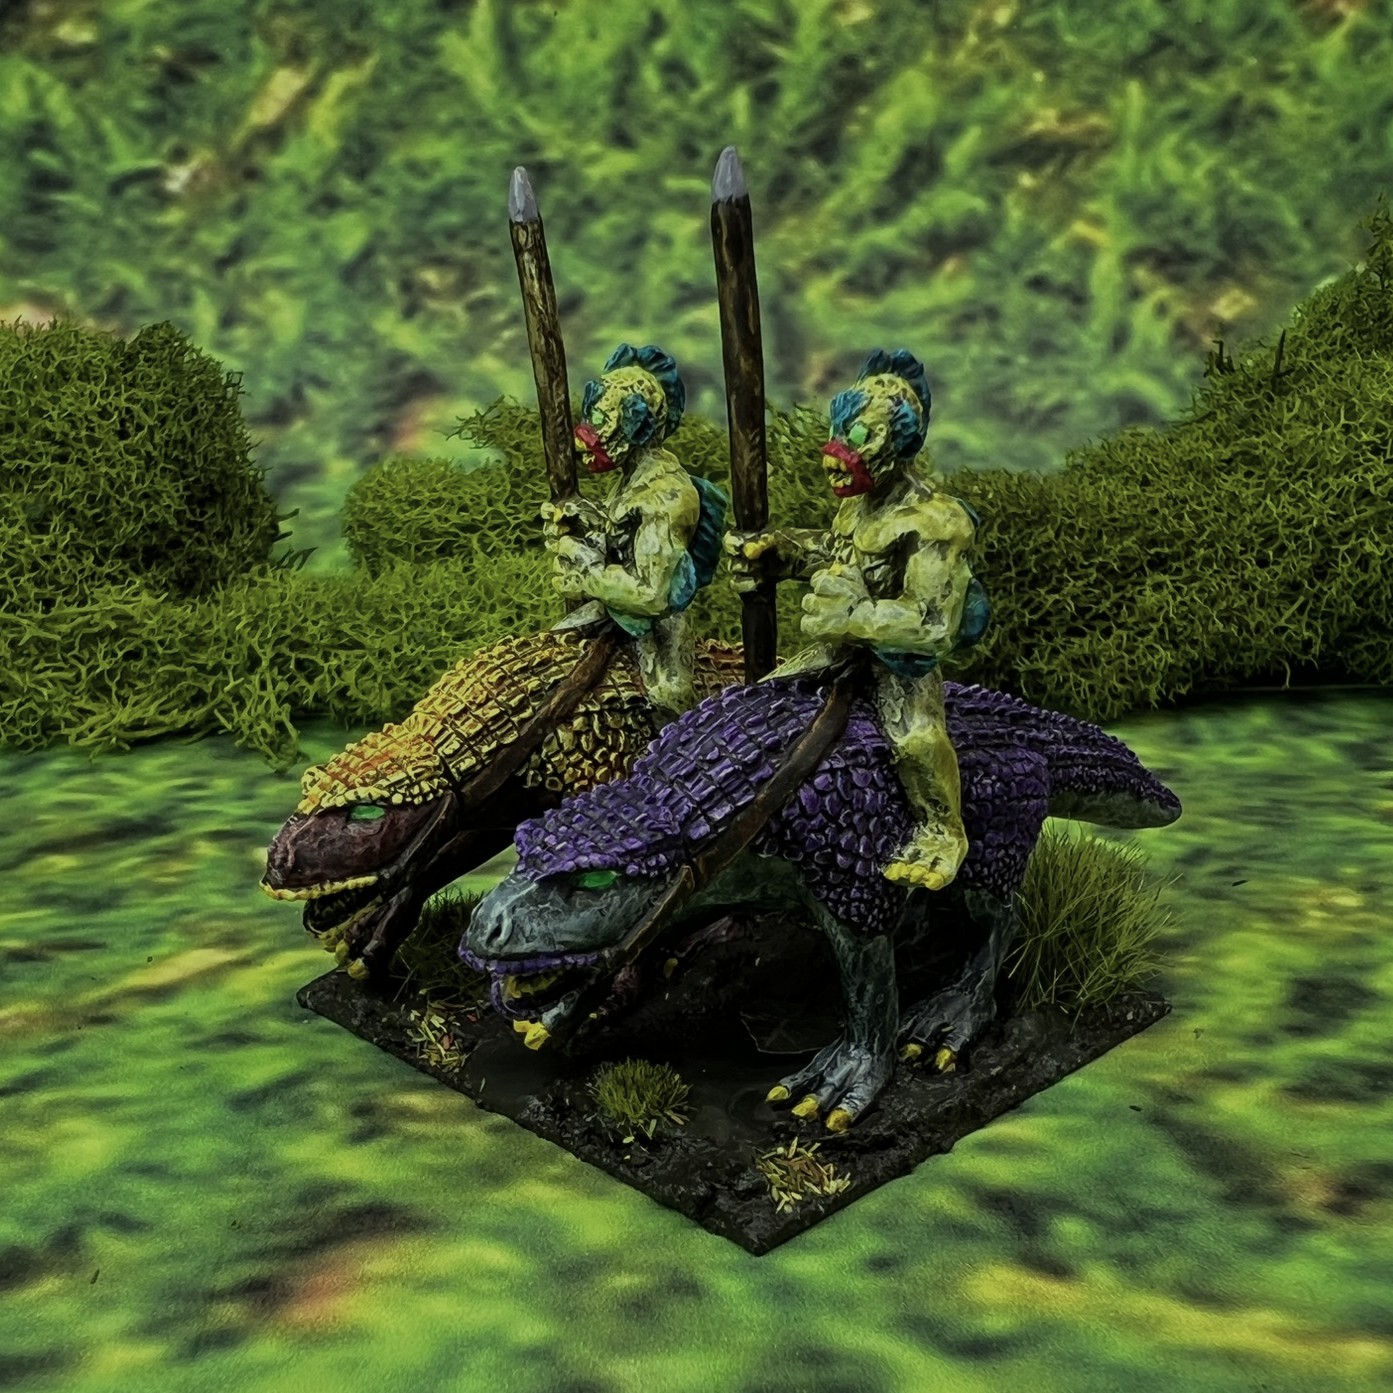
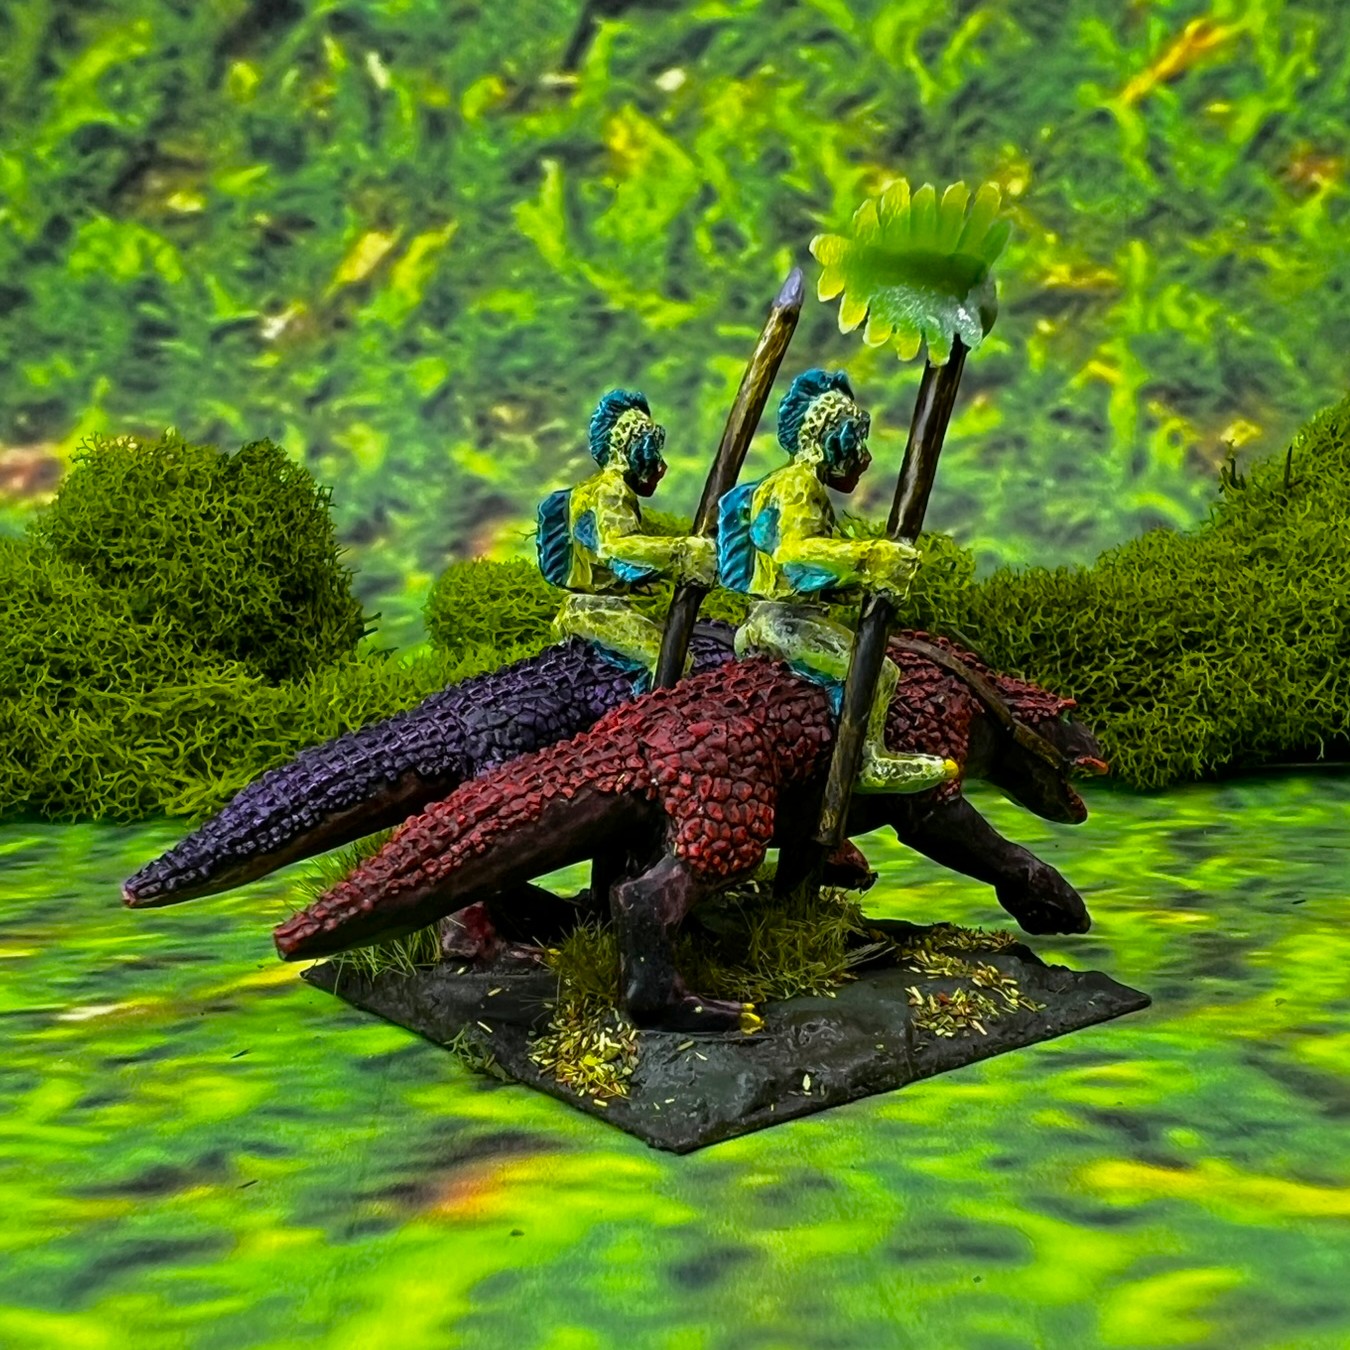
Pollywomp Cavalry on Pollywomprats
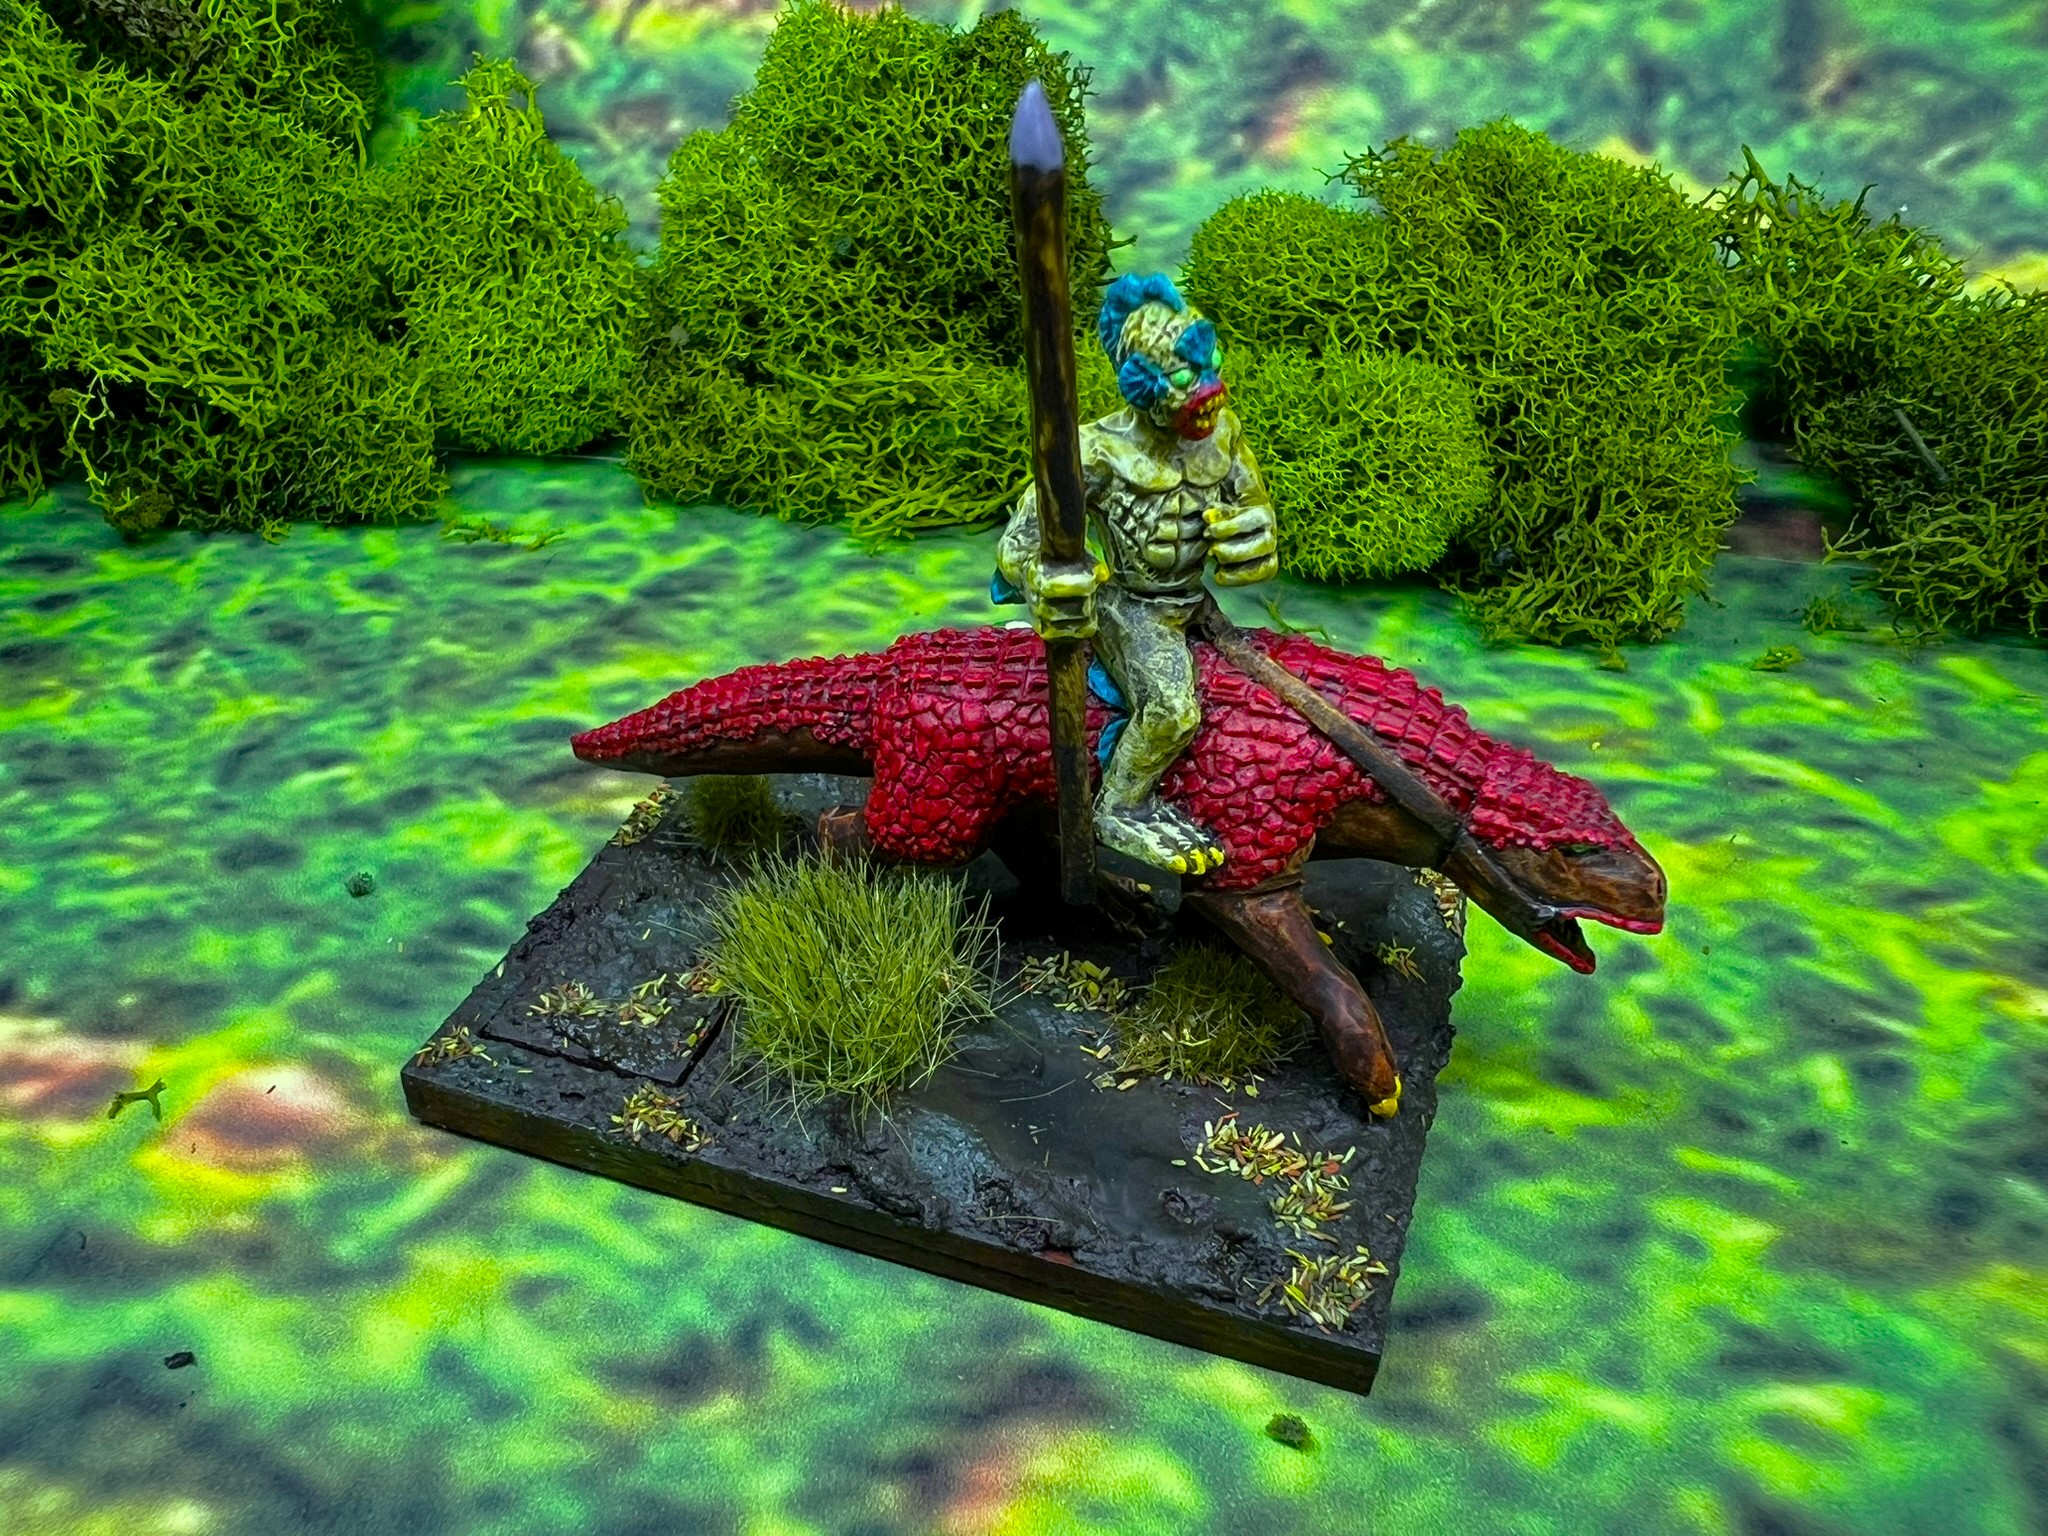
The cavalry regiment rides on “pollywomprats” which resemble a cross between an alligator and a monitor lizard. As the pollywomprats are supposed to have varied colors (similar to how the Munchkin cavalry has ponies of different colors), I made sure that no two were alike. Unlike the infantry, the regiment does have a regimental commander, which gives the unit an ability as rolled by dice. This regiment got “The Swift” giving them a +2″ bonus when they move. I also gave them a leaf banner. The riders were painted exactly the same way as the infantry color-wise.
The Pollywomp cavalry regiment, OZZ-535, ready for varnish, basing, and final flocking.The Pollywomp cavalry based and awaiting flocking.Pollywomp Cavalry Regiment in line formation.
And here are some closeup shots of the bases, starting with the regimental commander’s single-figure base. Very muddy bases!
Note the leaf banner!
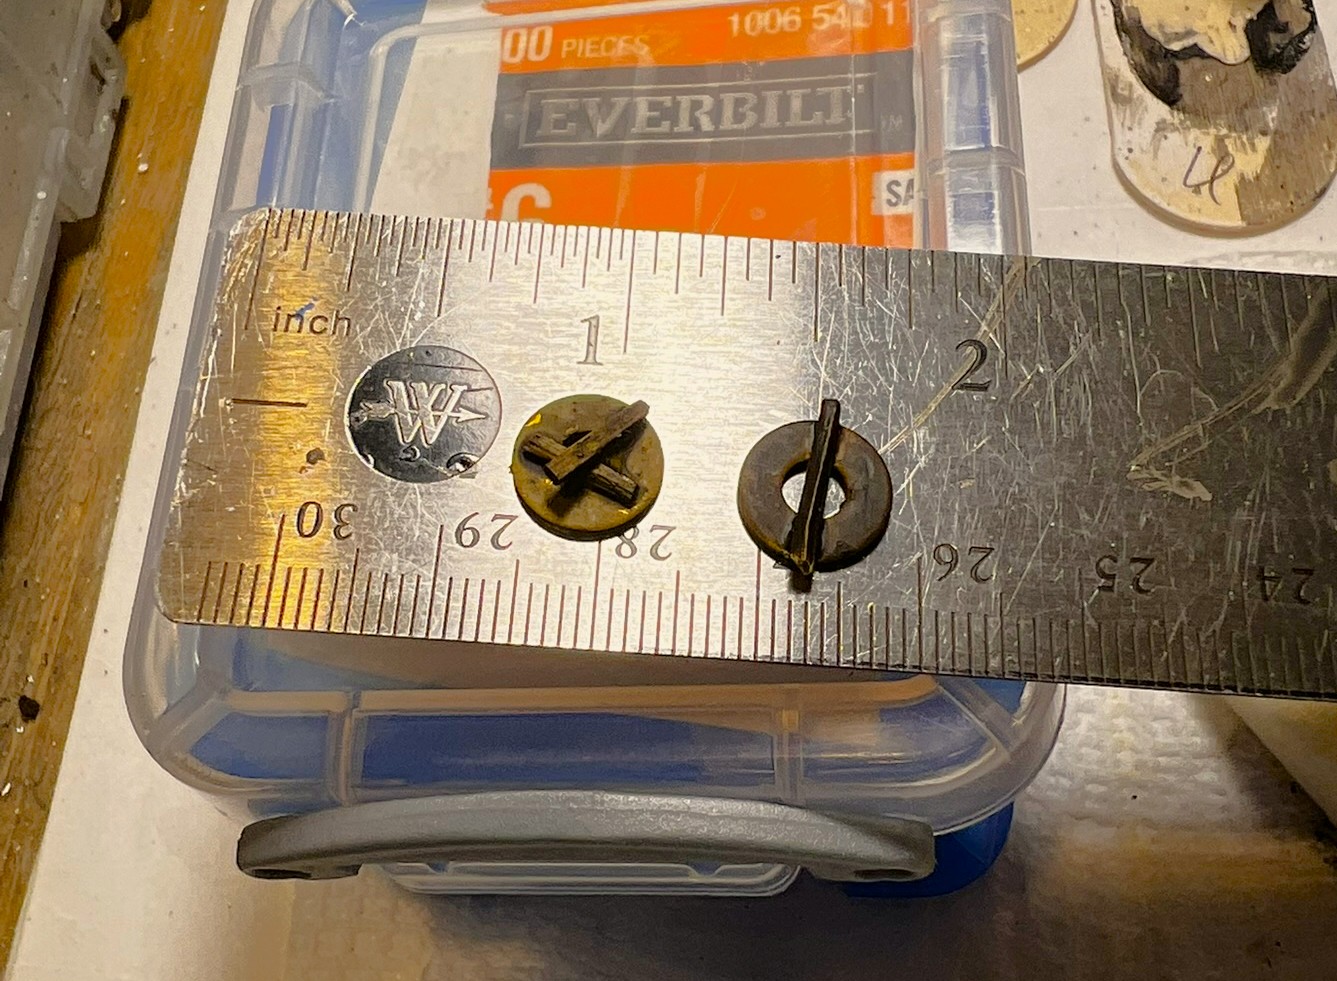
Both Pollywomp infantry and cavalry have limited missile capabilities. Each base can fire twice per game. So, for both I made small markers to keep track of that in the game. The markers are just toothpick pieces on washers, lightly painted, but small enough to put on the bases unobtrusively.
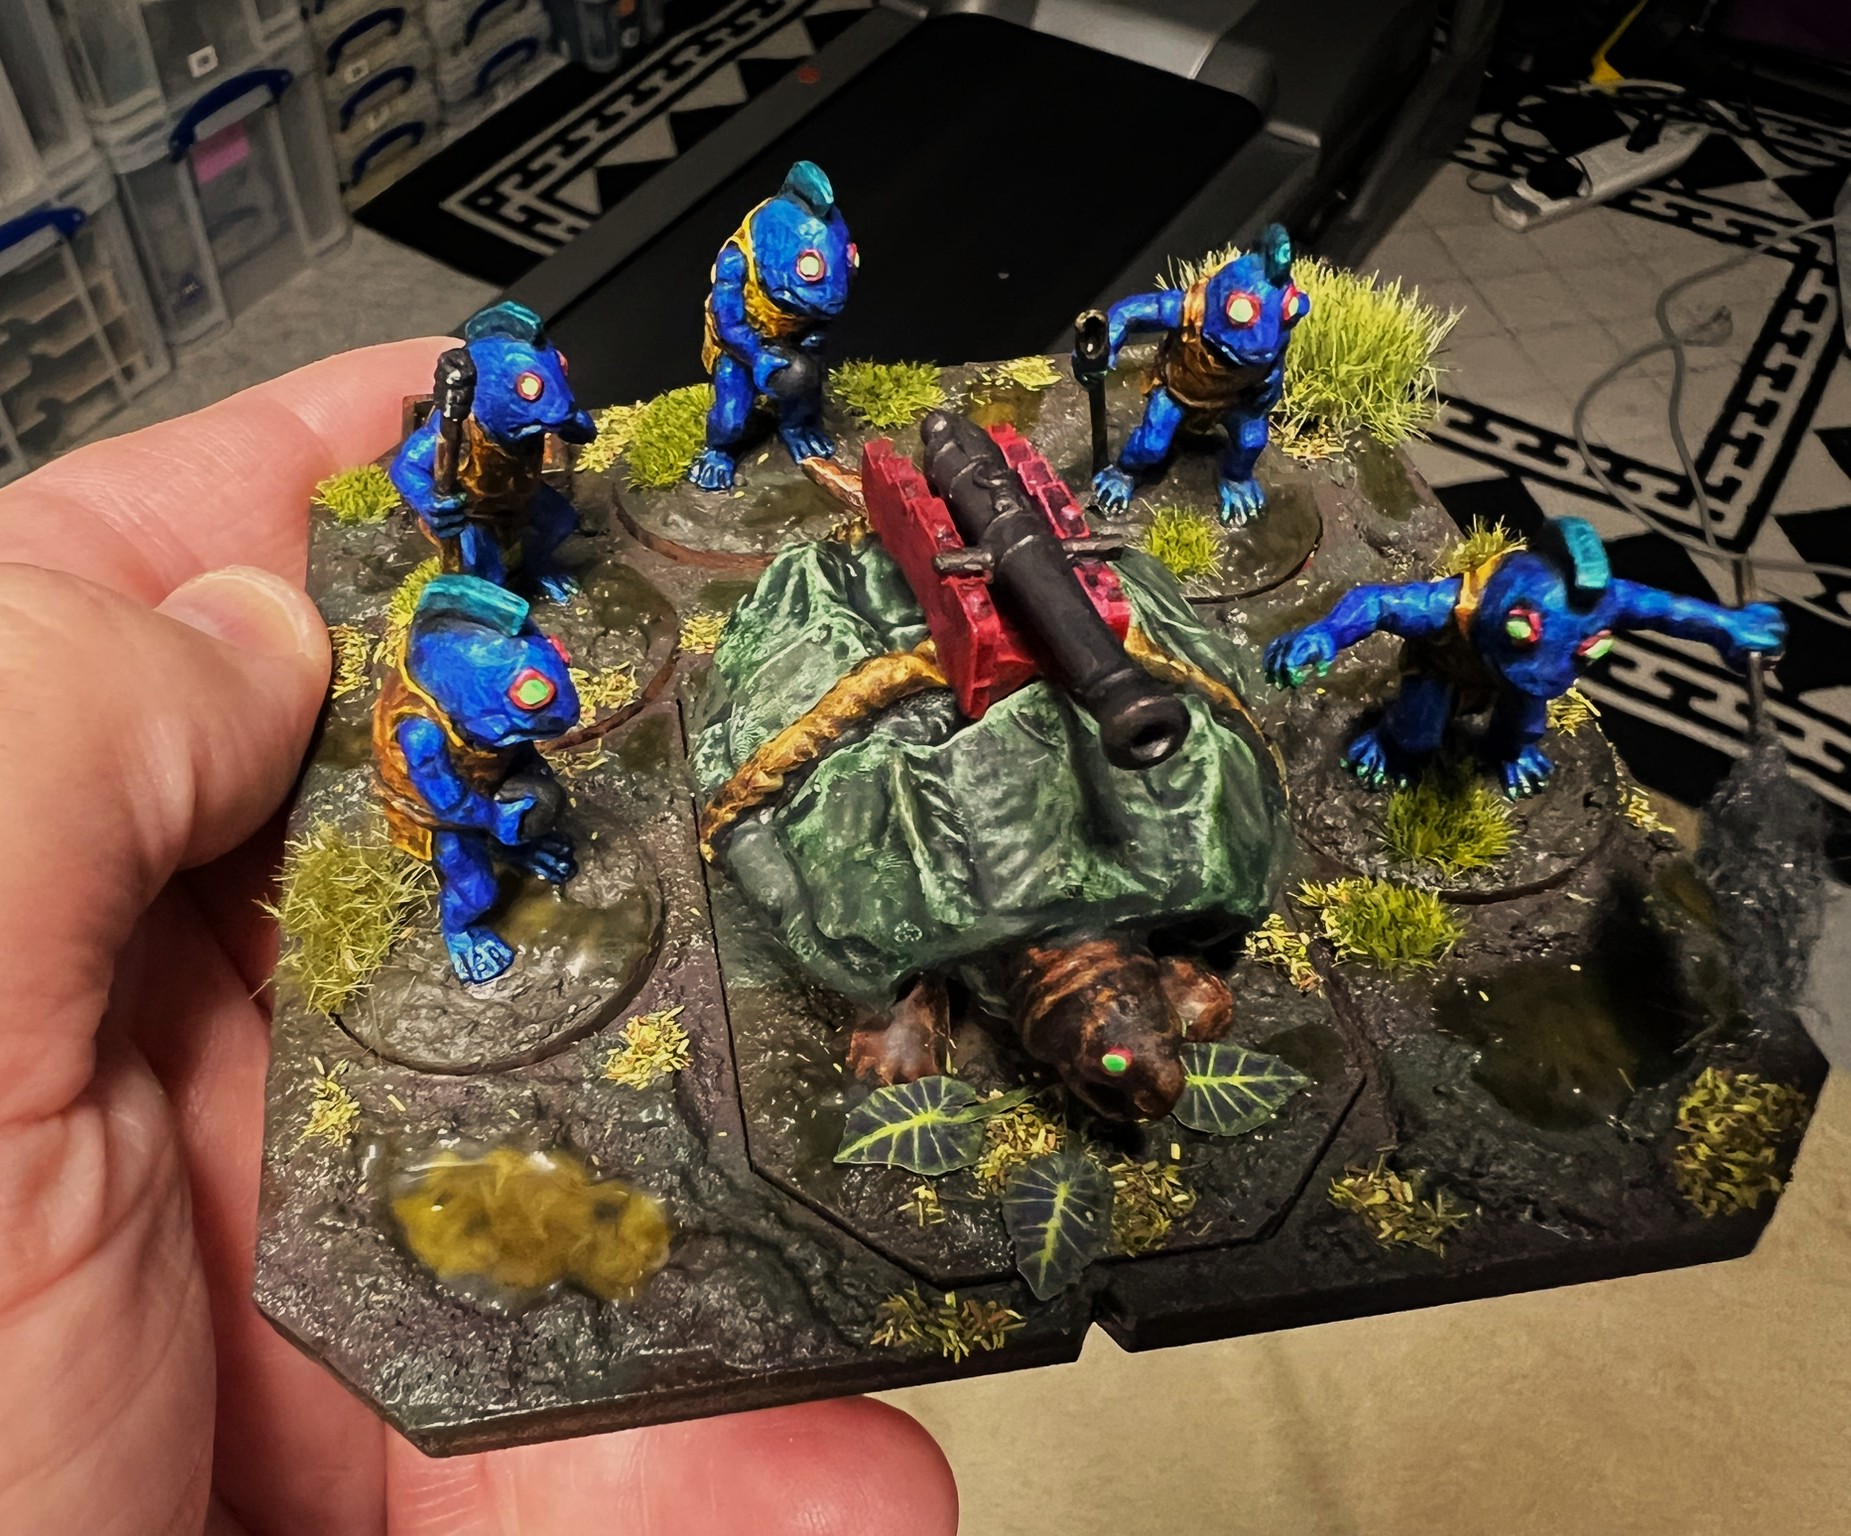
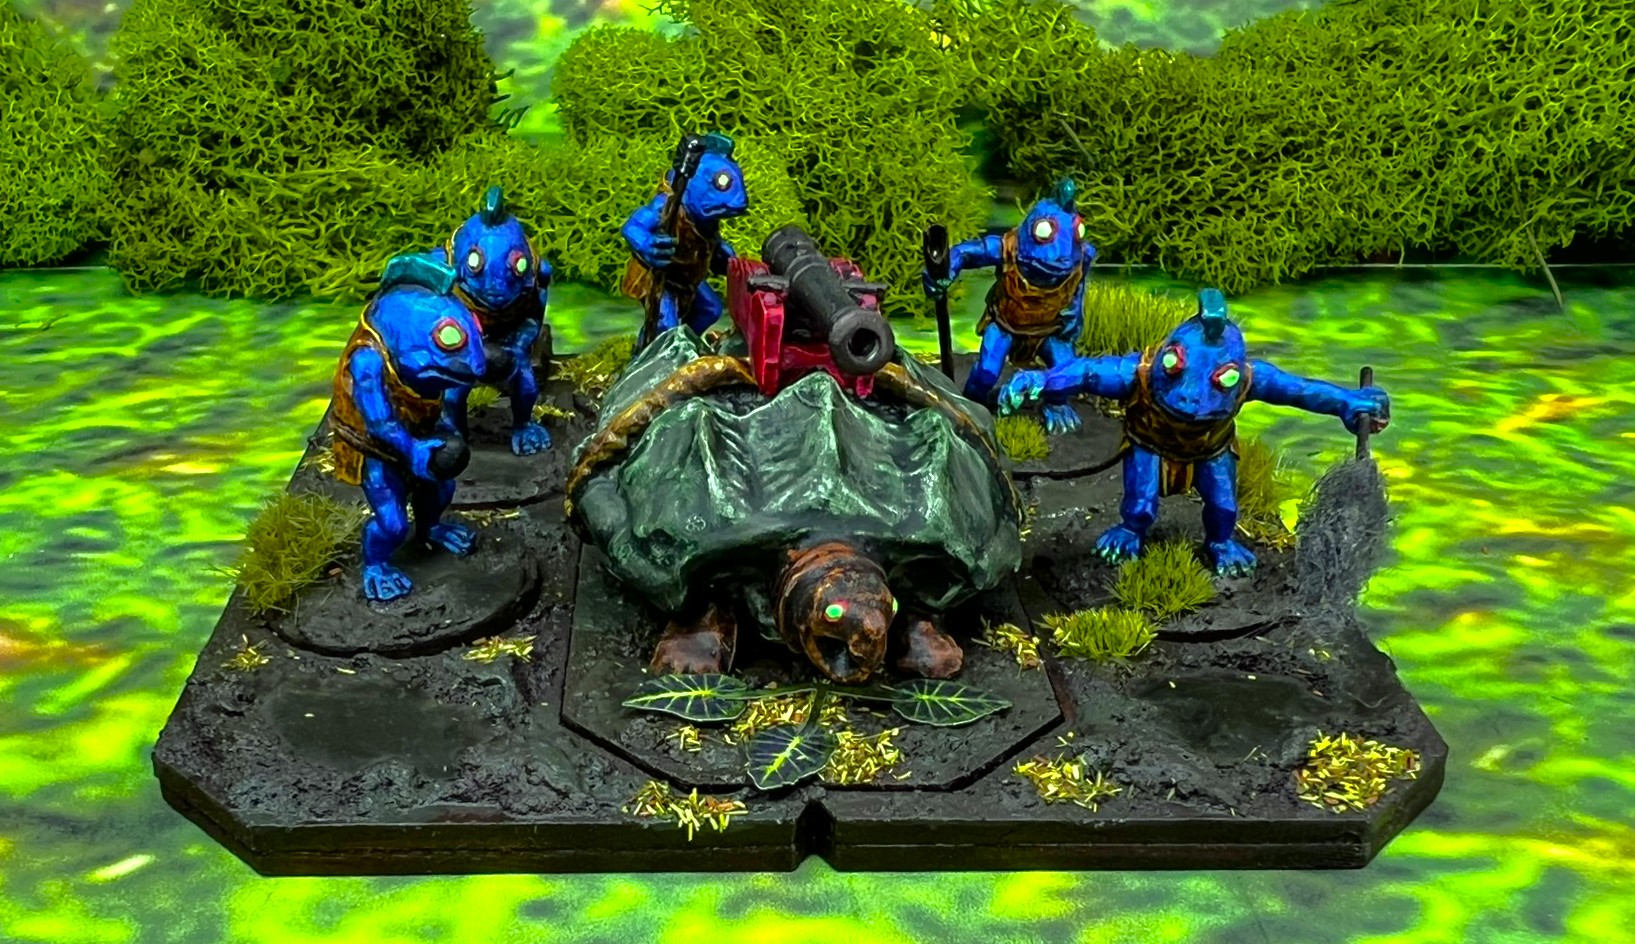
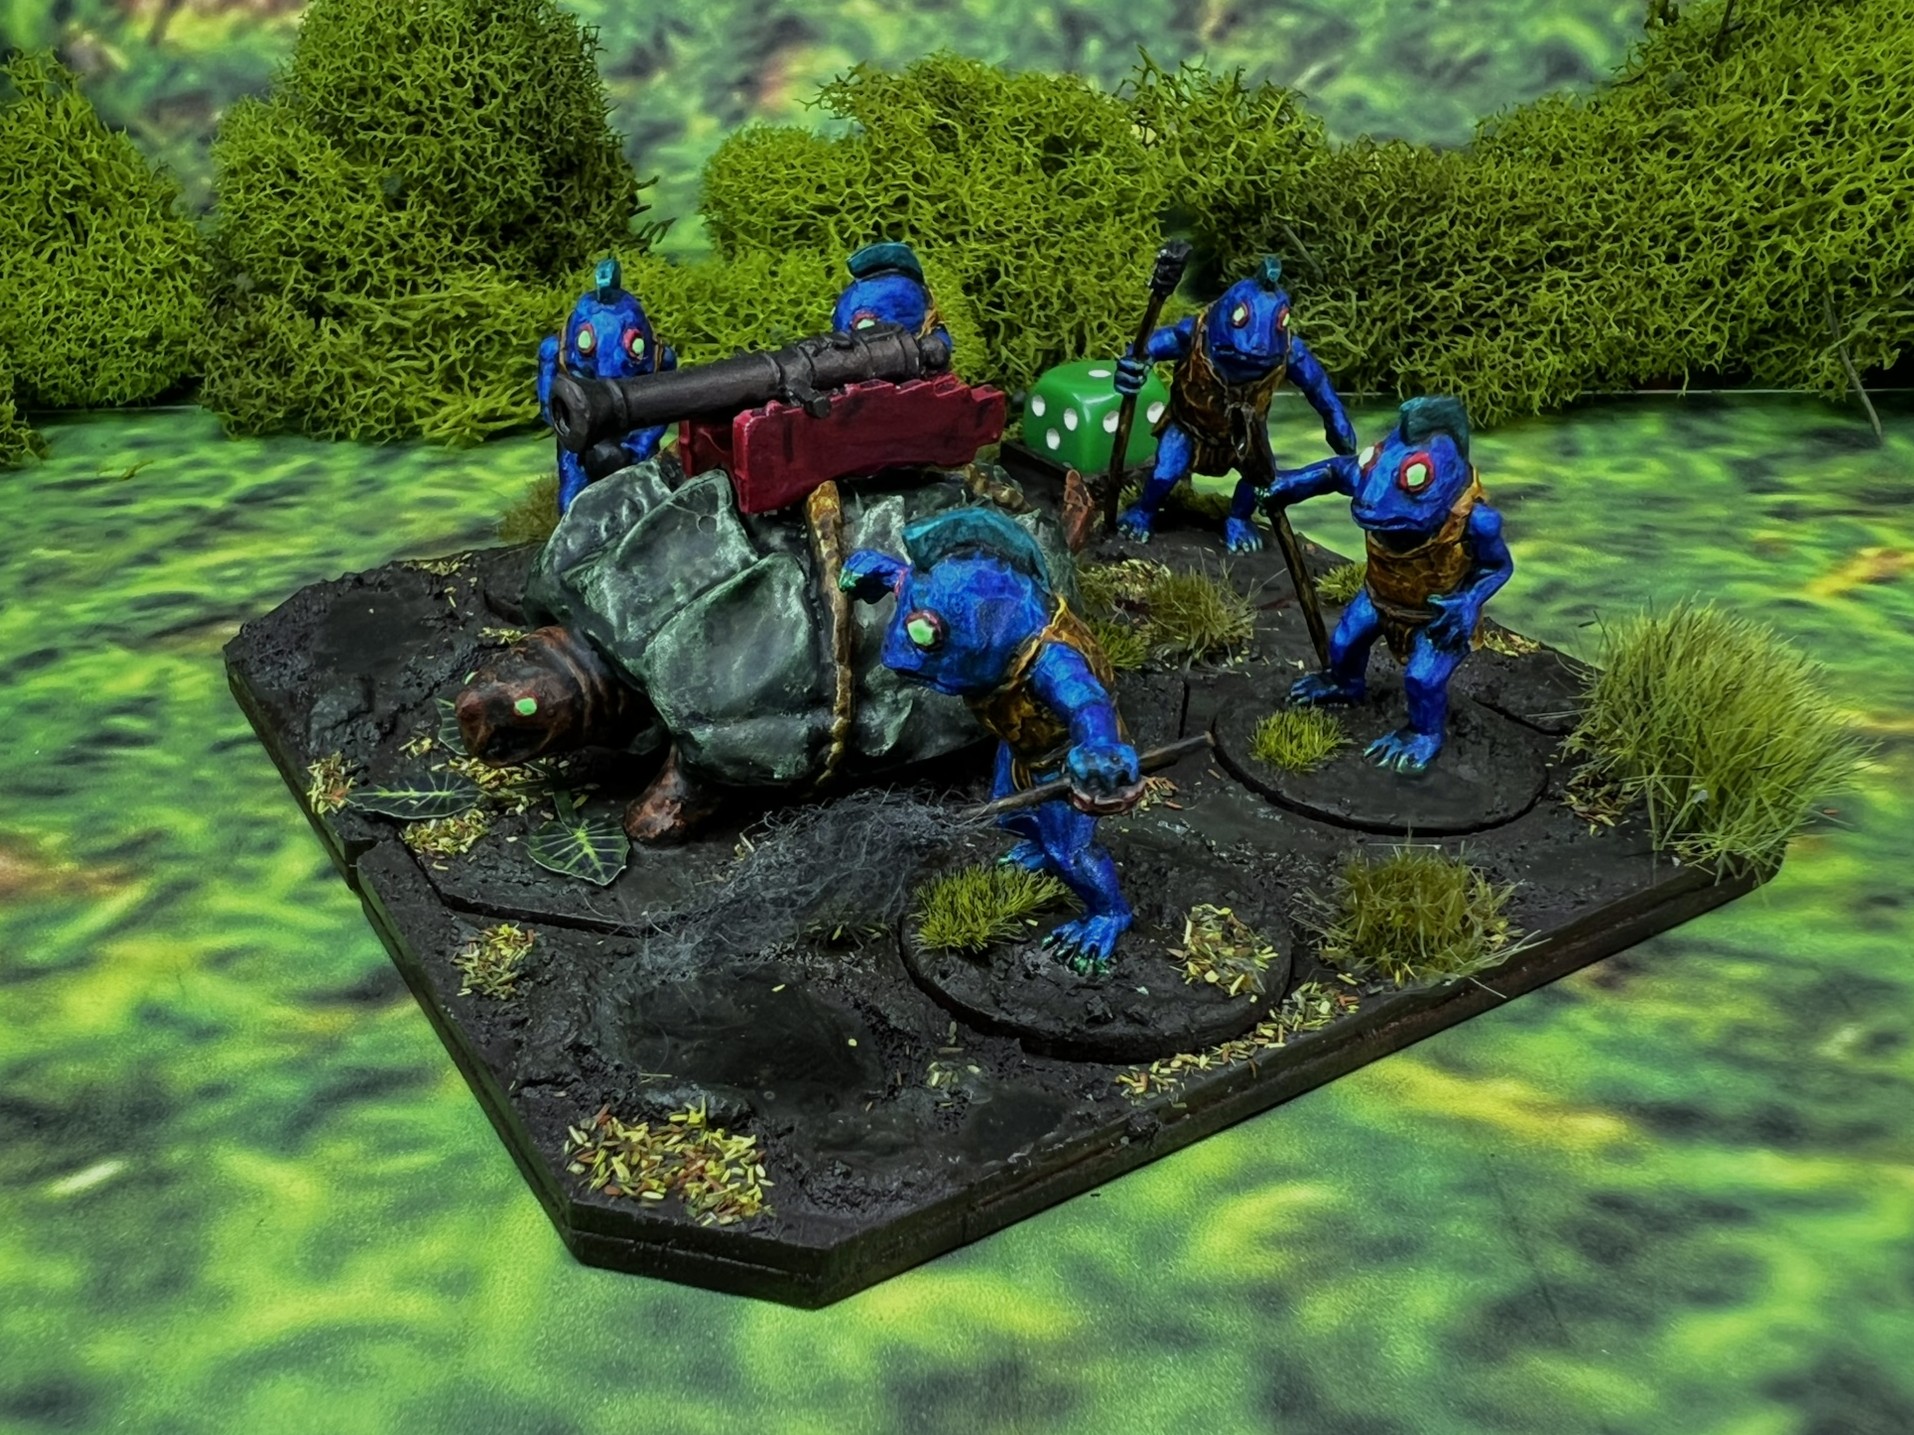
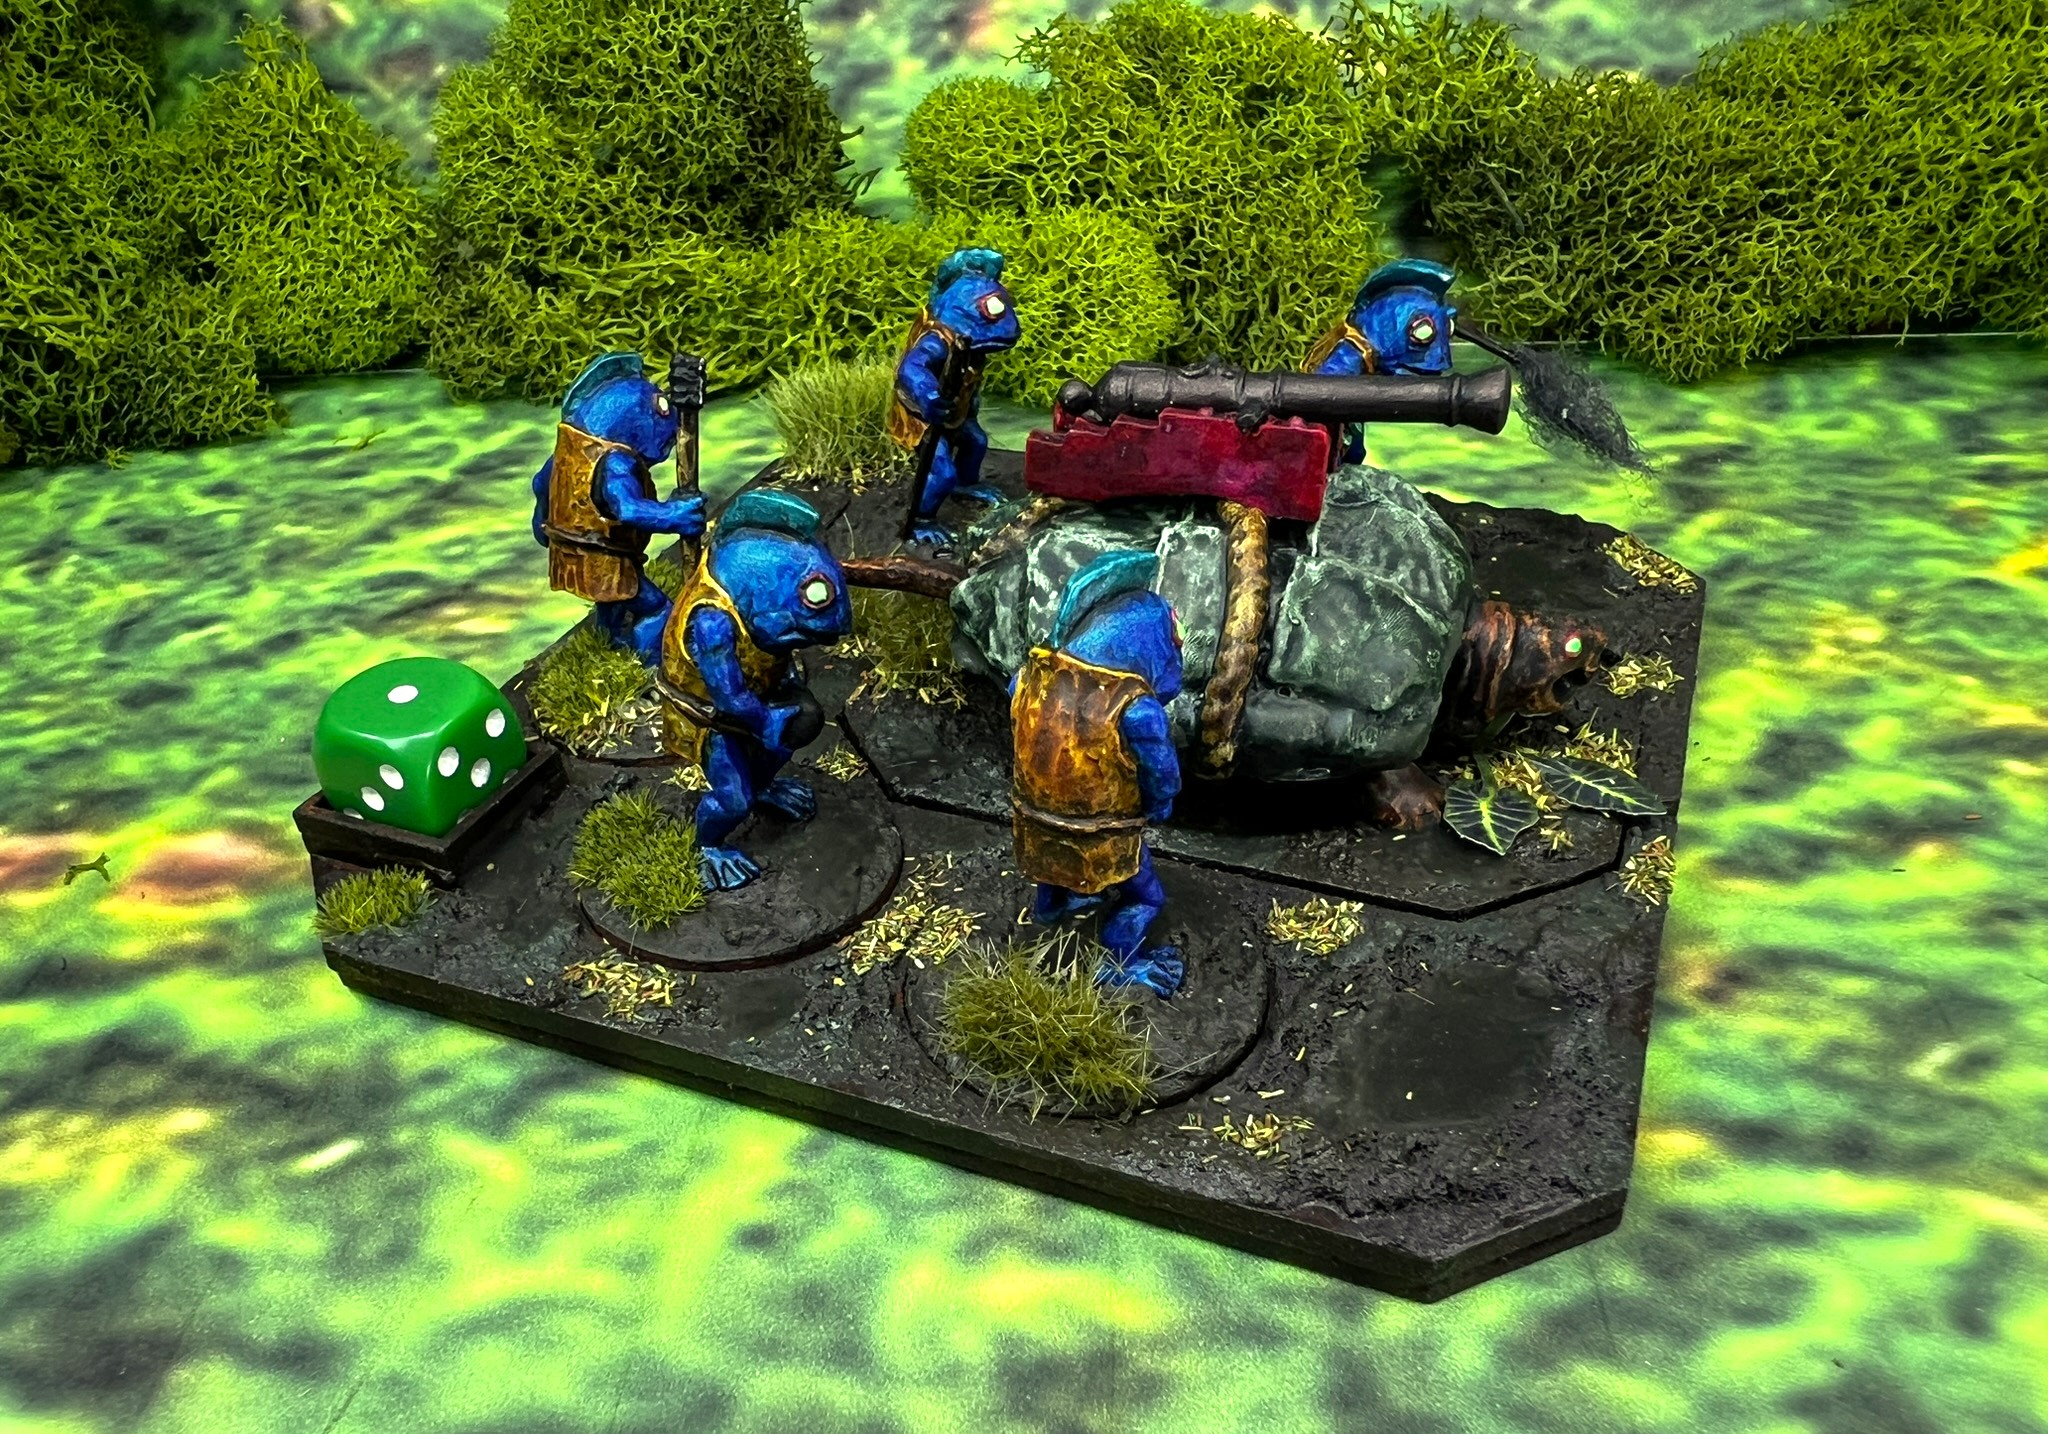
Pollywomps Artillery Battery
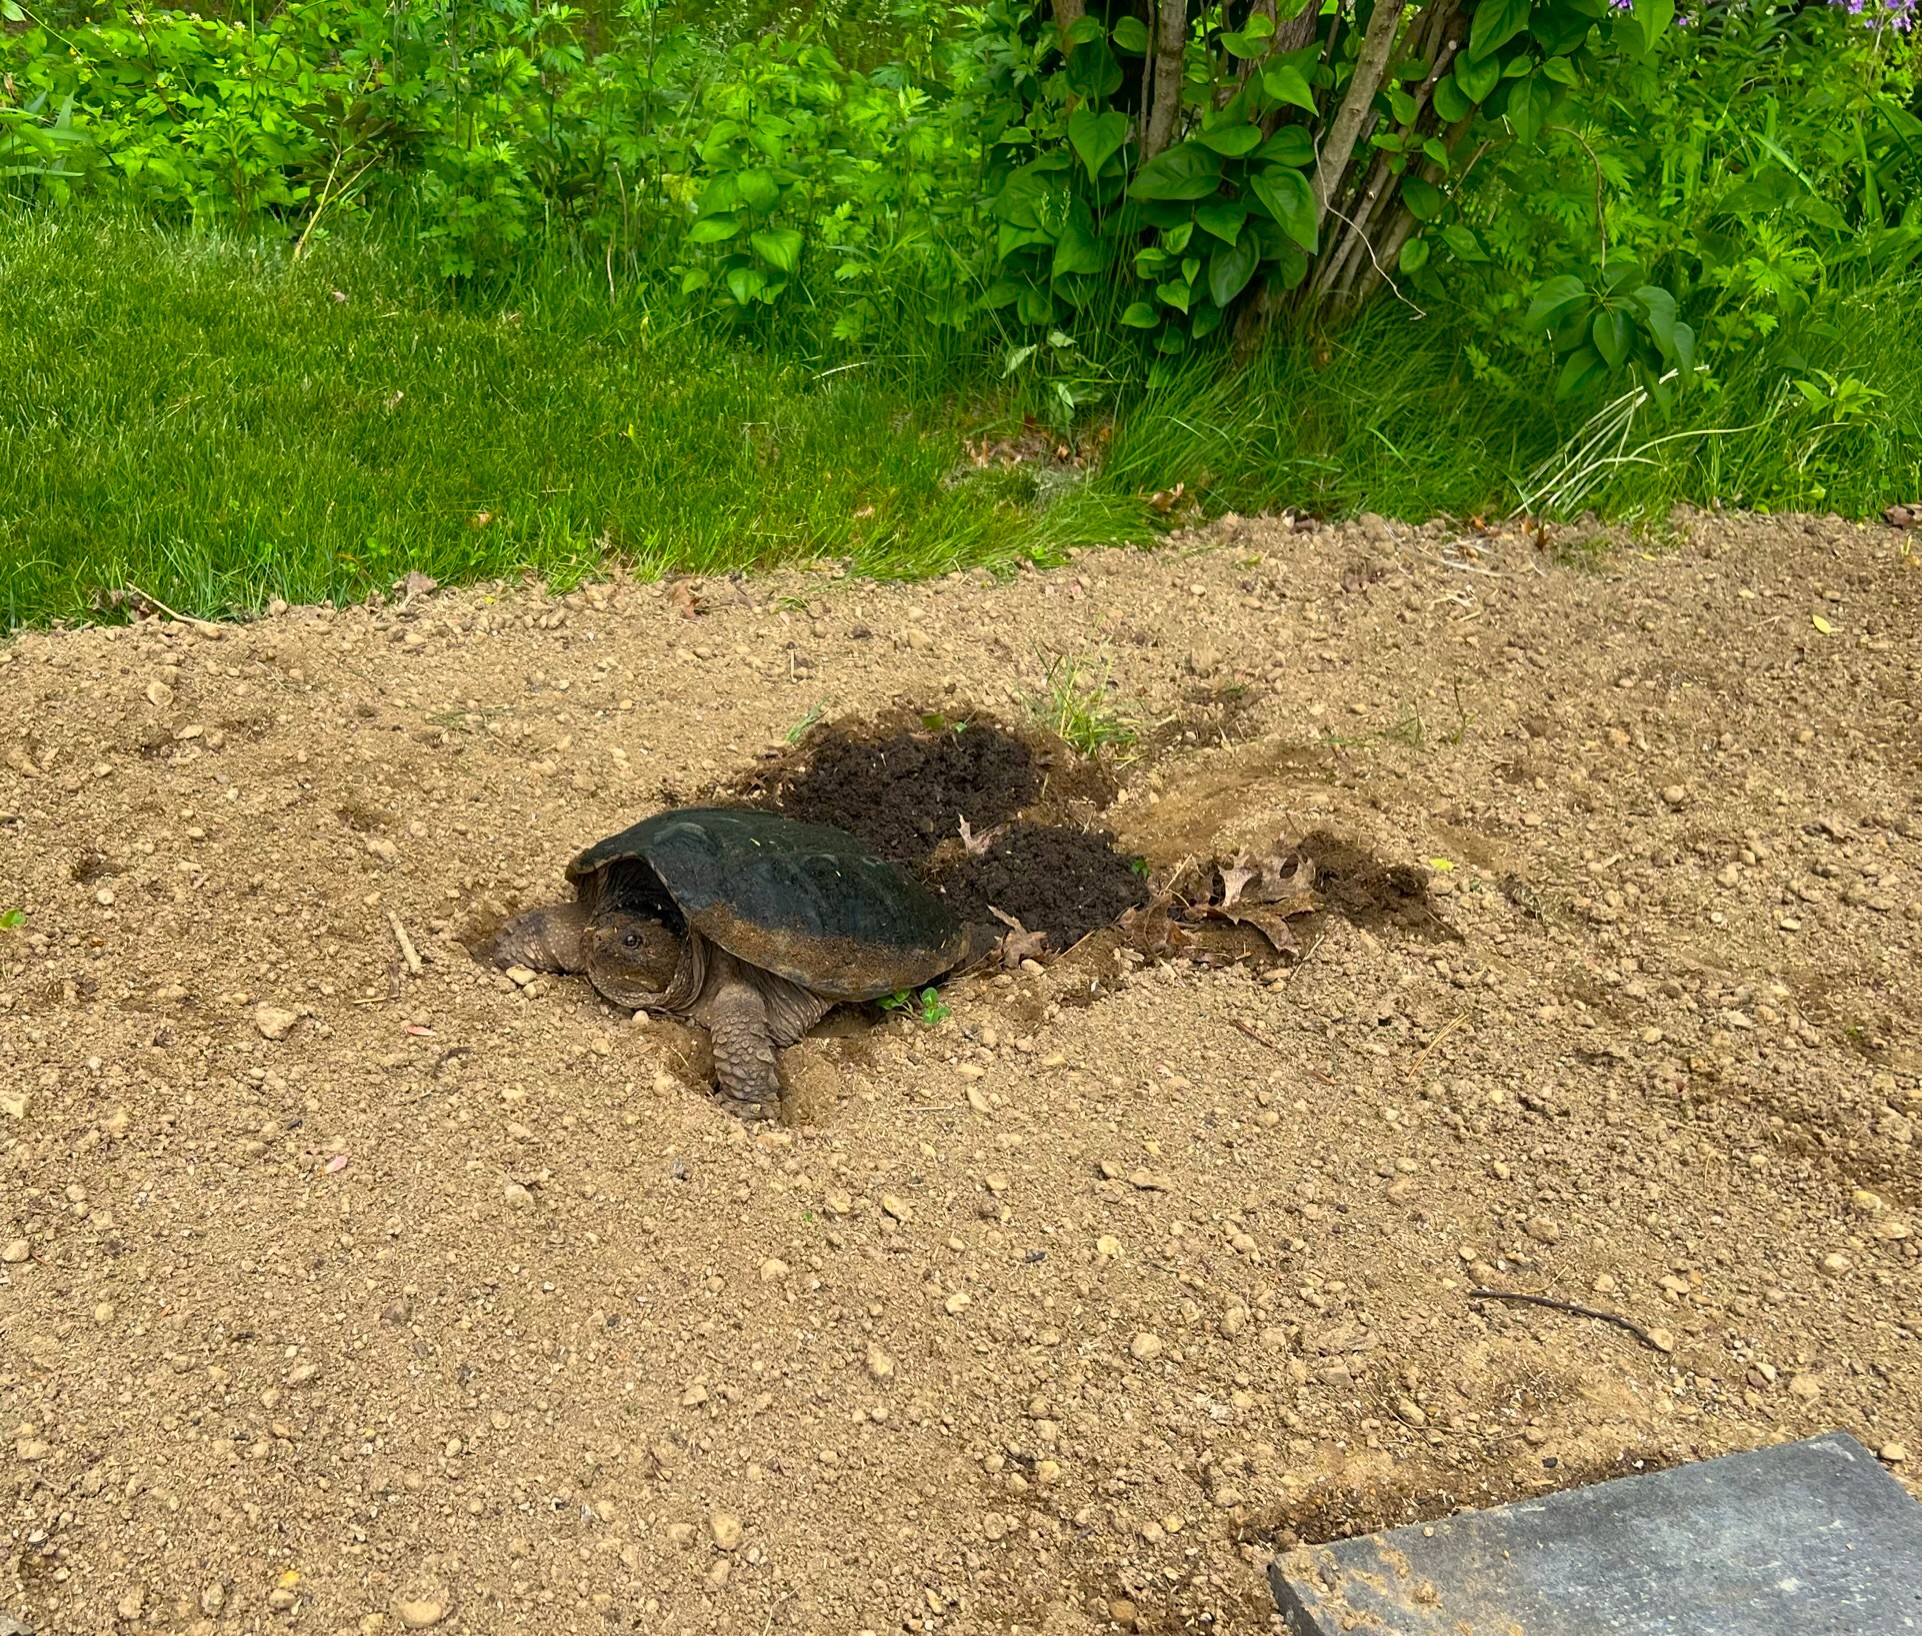
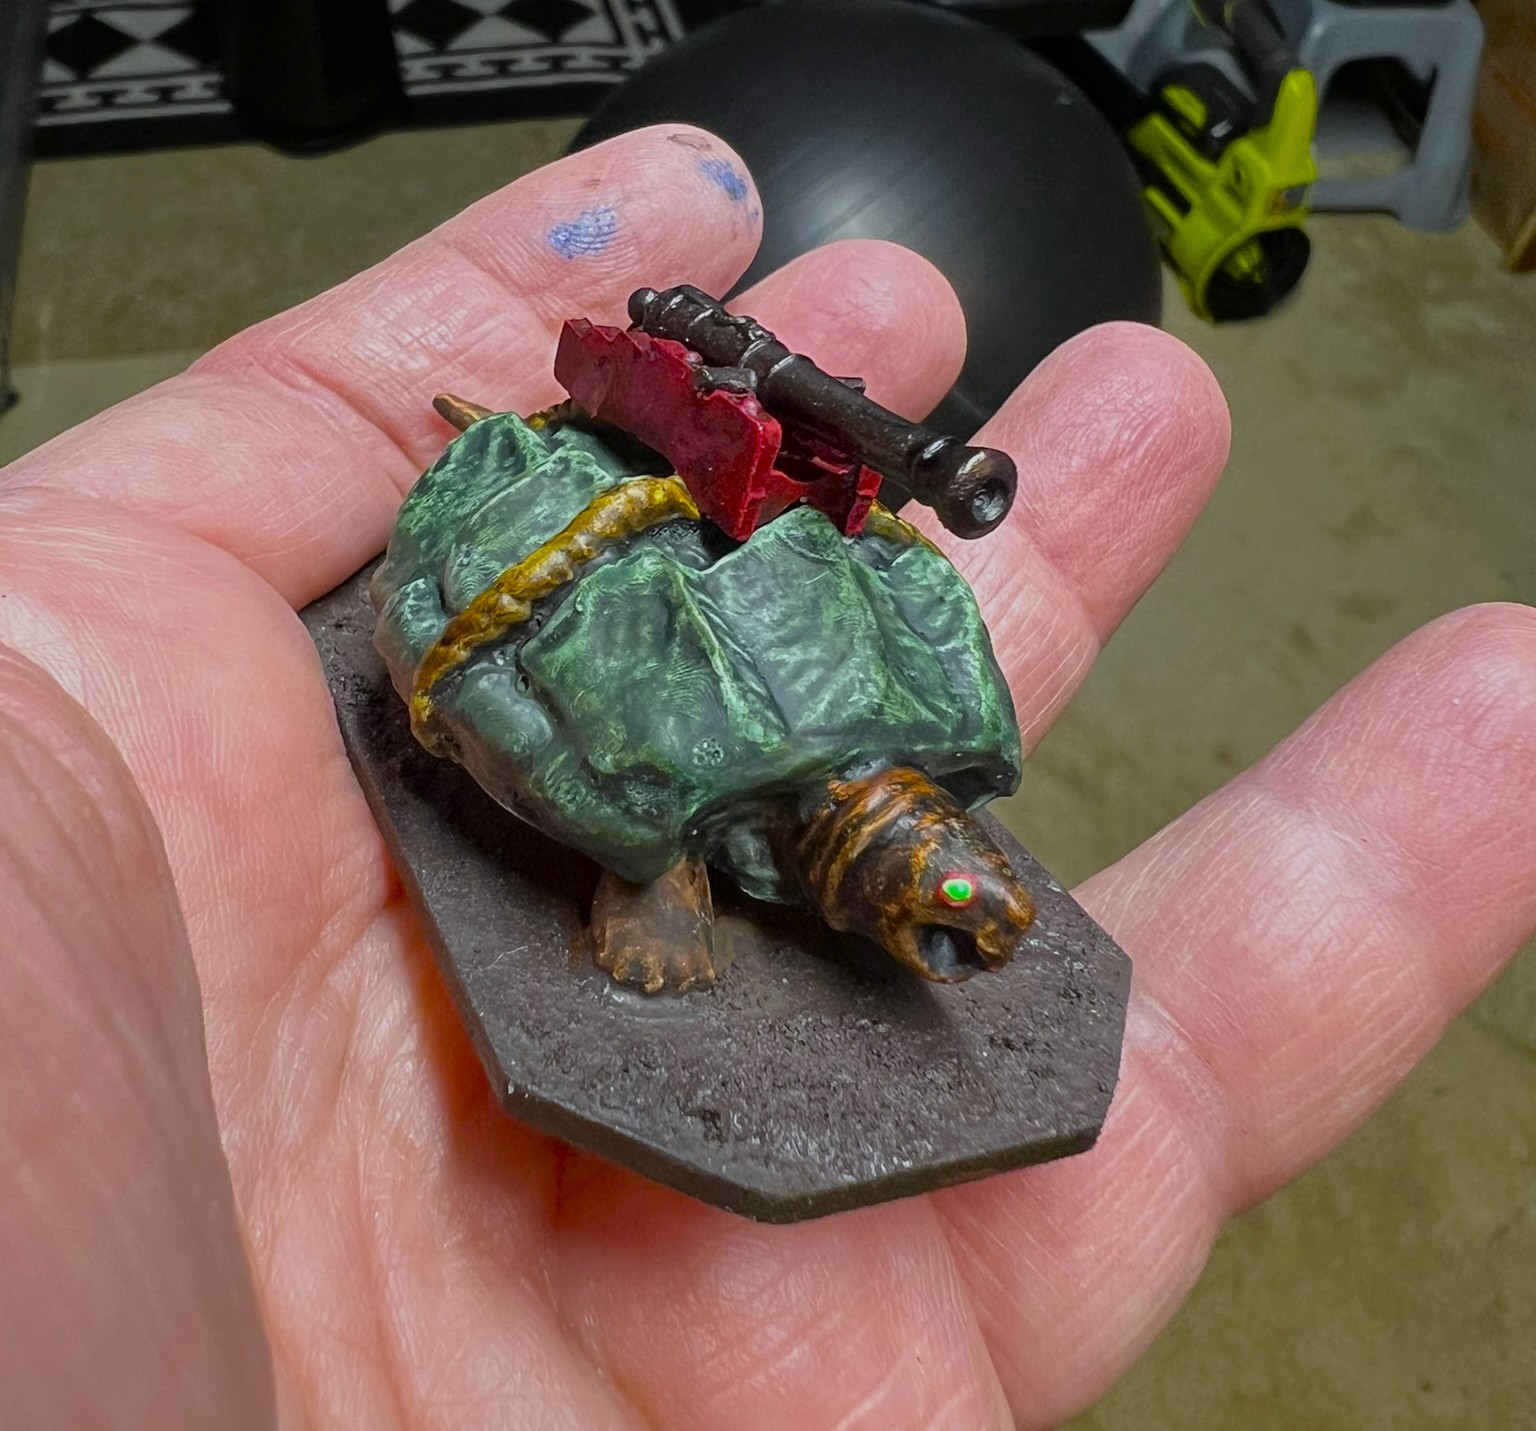
As described previously, the Pollywomps artillery is a light cannon on a giant turtle, crewed by fishmen. I painted the turtle to resemble a snapping turtle – like the ones that I shared photos of during my garage build. Both of these large turtles were trying to take advantage of my newly-seeded areas to lay their eggs.
Female snapping turtle digging out to lay her eggs in my yardFemale snapping turtle glaring at me in driveway – this one was trying and failing on the right.
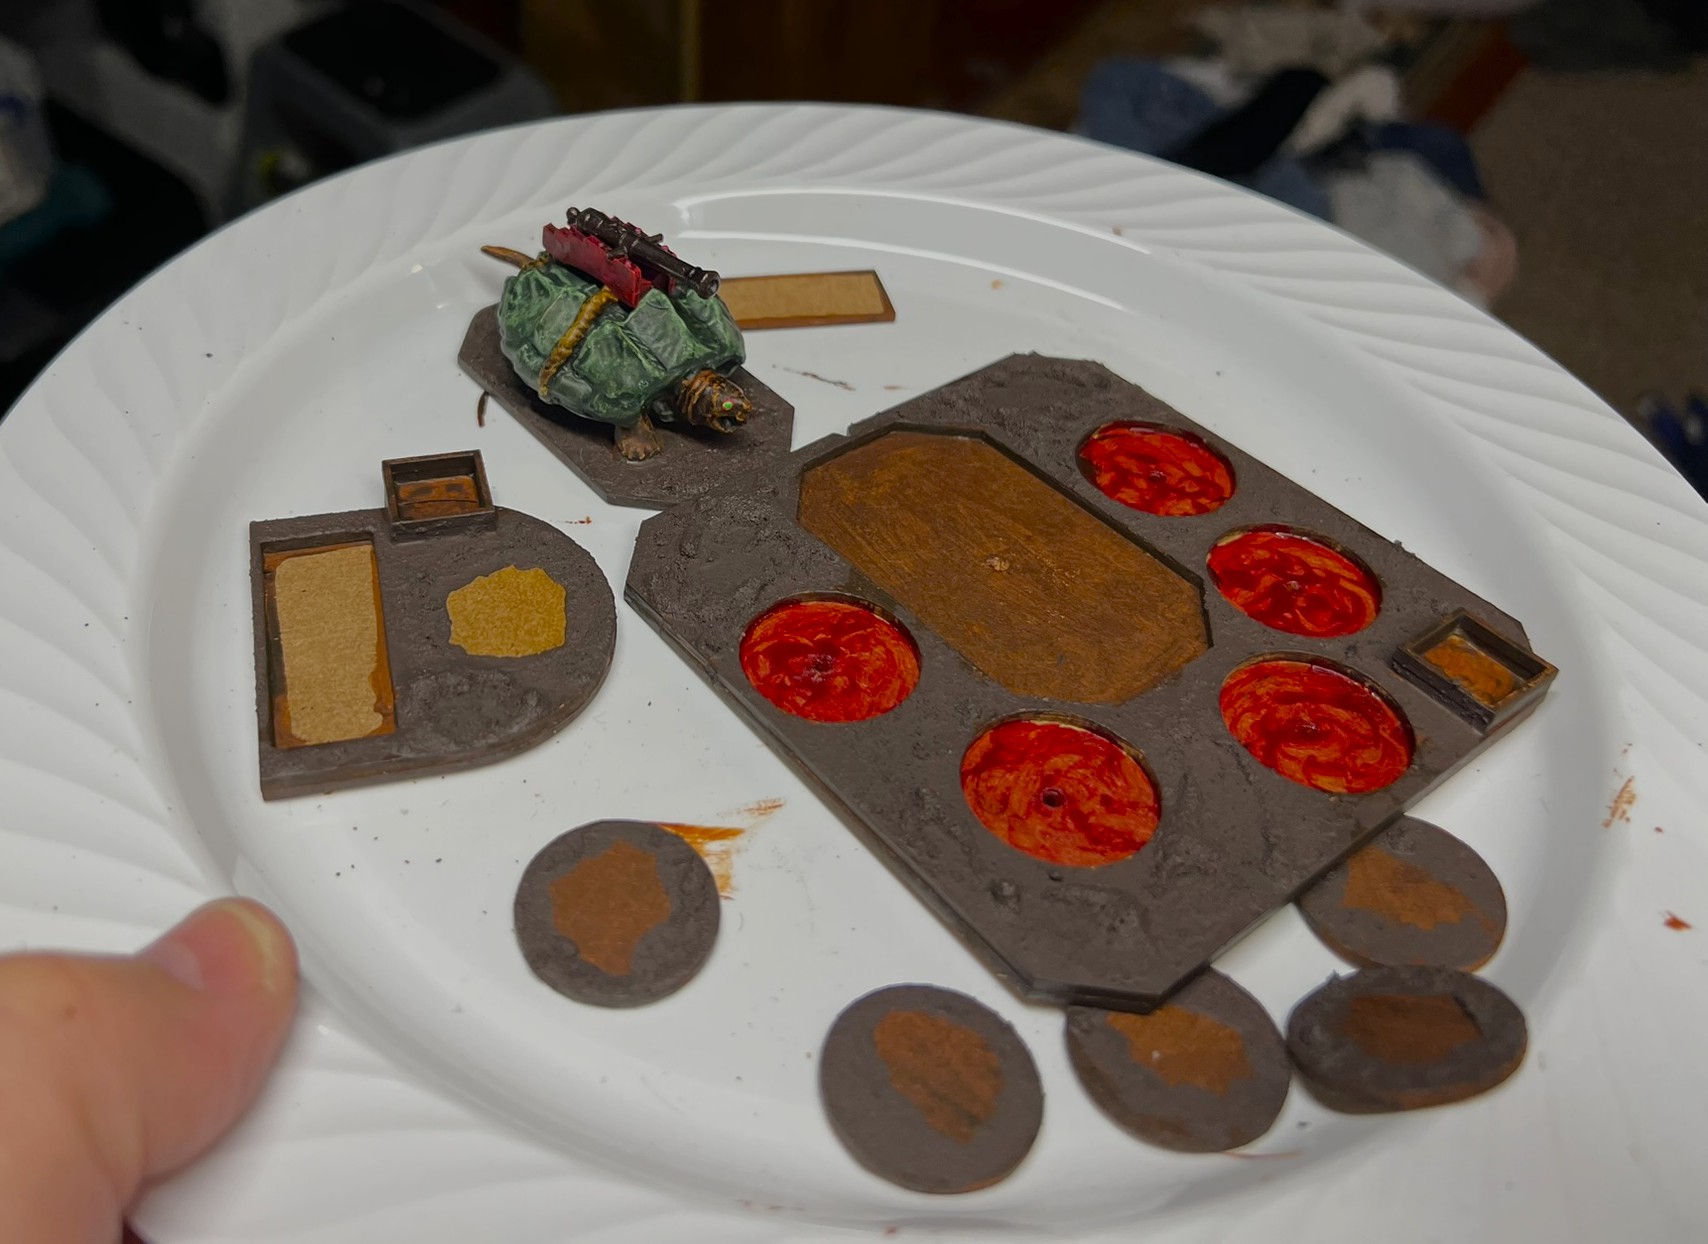
I painted up the turtle, its gun, and carriage and prepped the artillery base for the crew. I gave the gun a rusty iron look as befitting a swampy artillery piece.
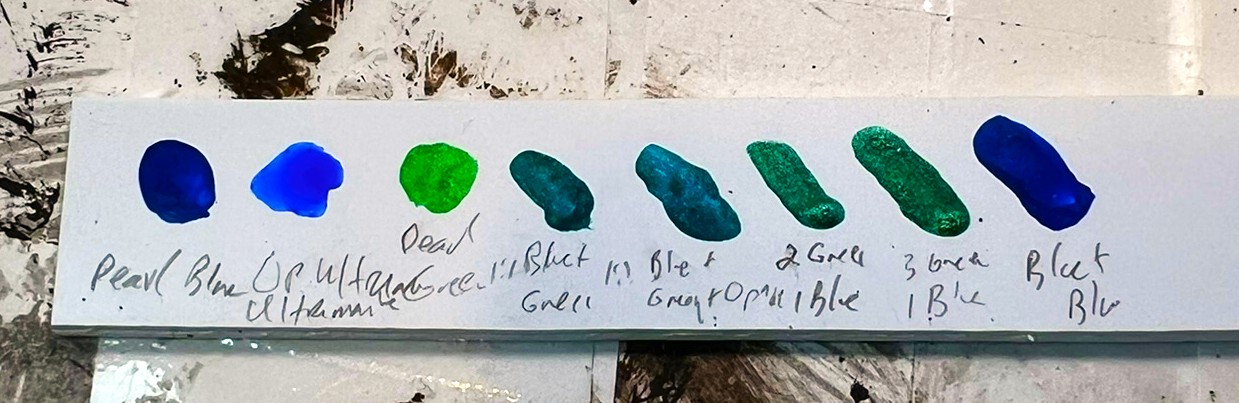
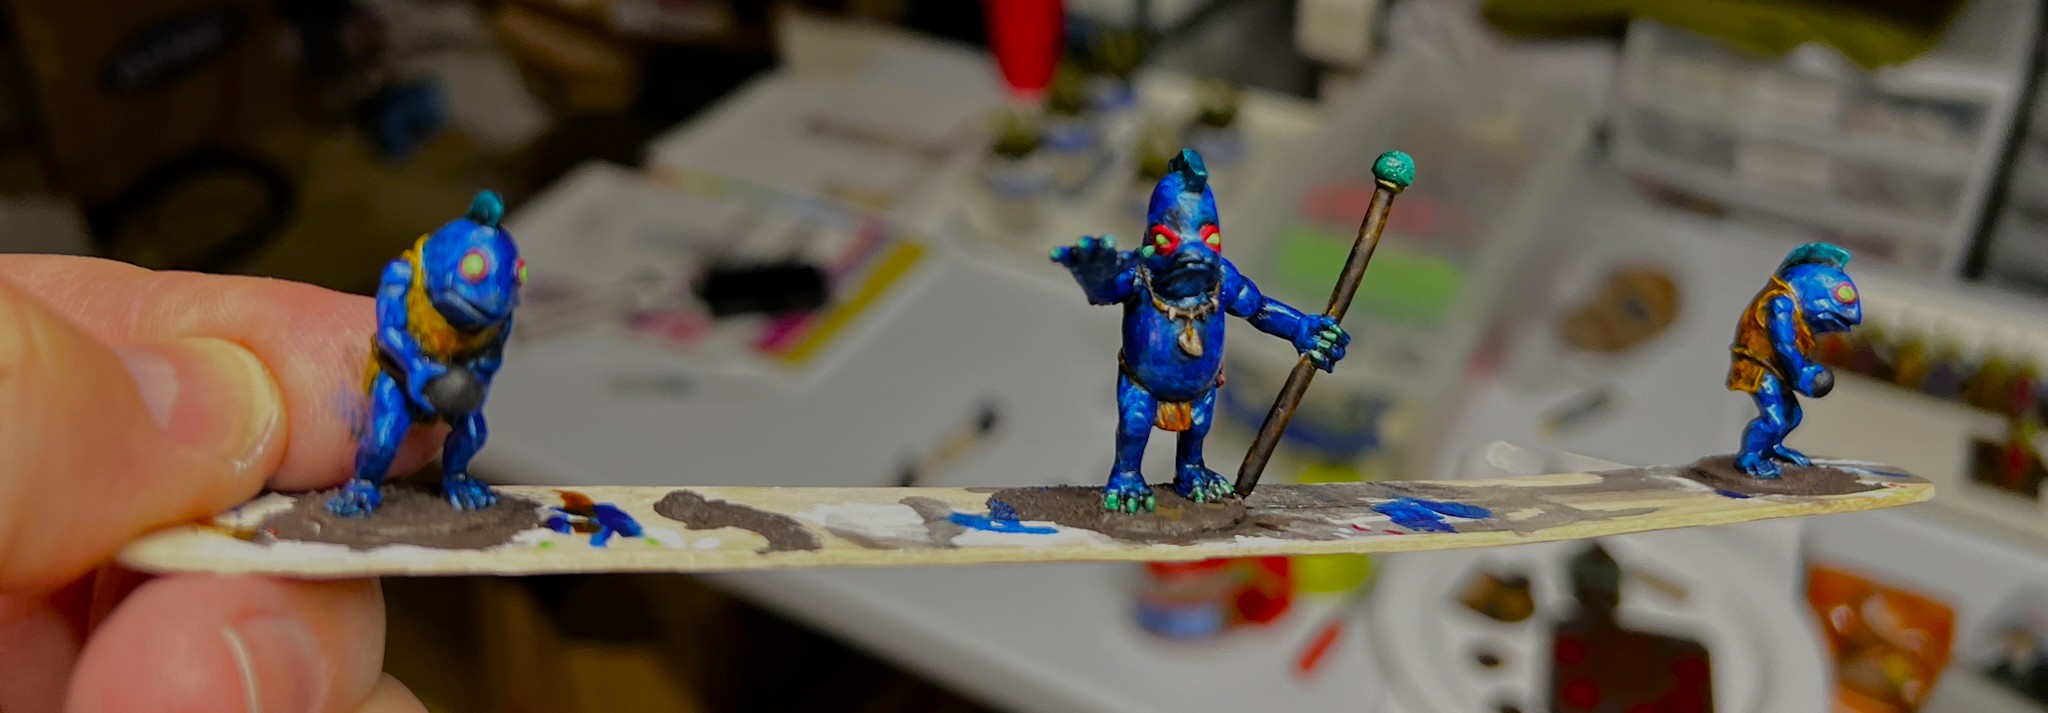
For painting the artillery fishmen crew, I experimented on a leftover piece of polystyrene. I made a palette with it using some metallic and airbrush paints to get the right combination of colors.
My palette. I ended up using the far right combination for the main body colors and the fifth from the left for fin colors.
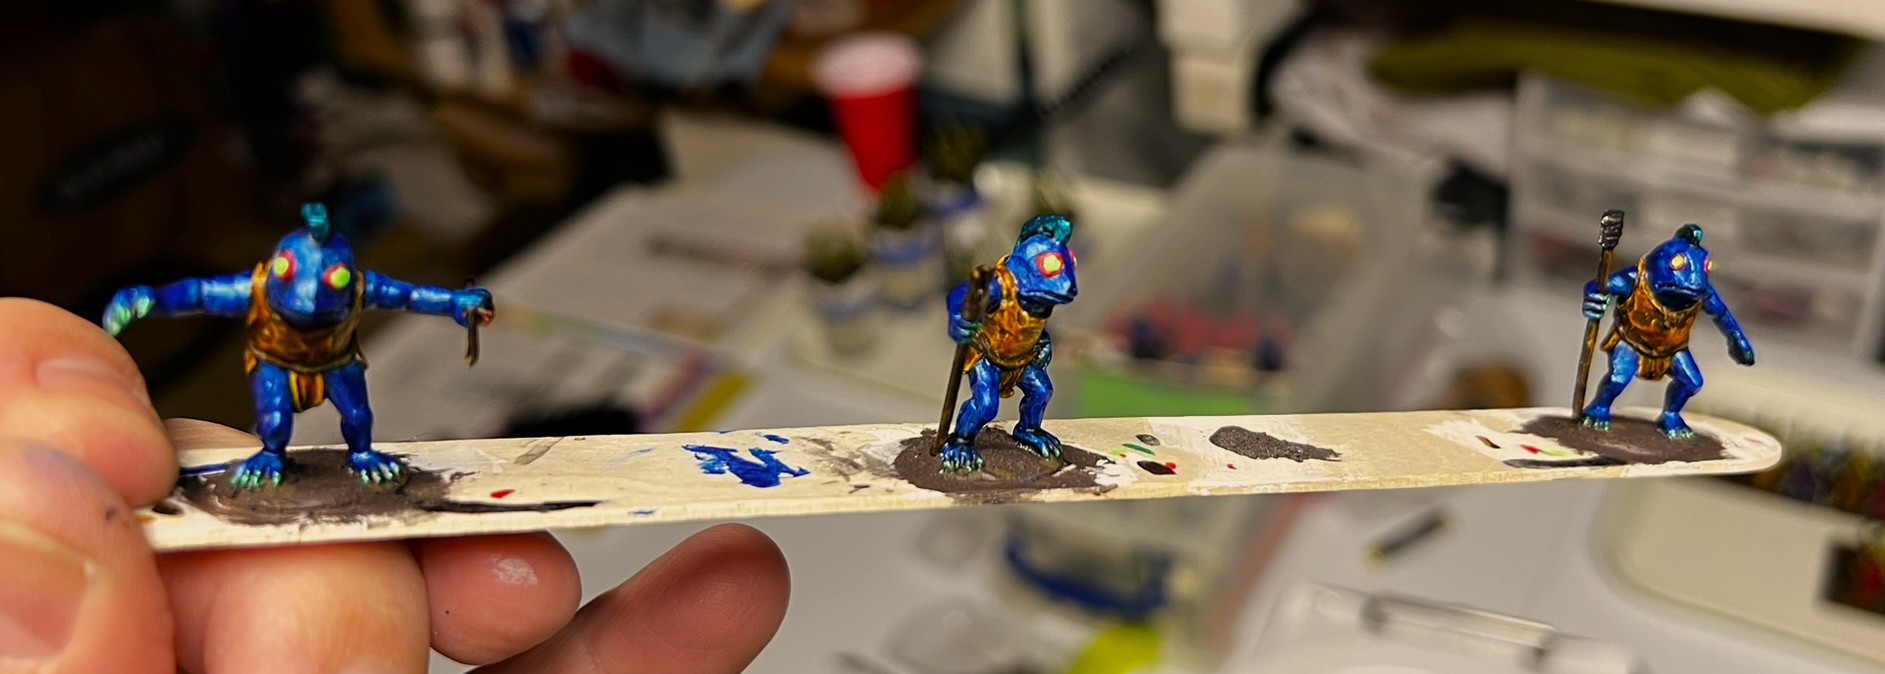
The crew painted up quickly.
Three of the five crew members. The one on the far left is supposed to have a match – but that did not cast. No worries, as I made one as you will see shortly.
I flocked the artillery base similar to the other Pollywomps as you see here below. The mud puddles were fun to do.
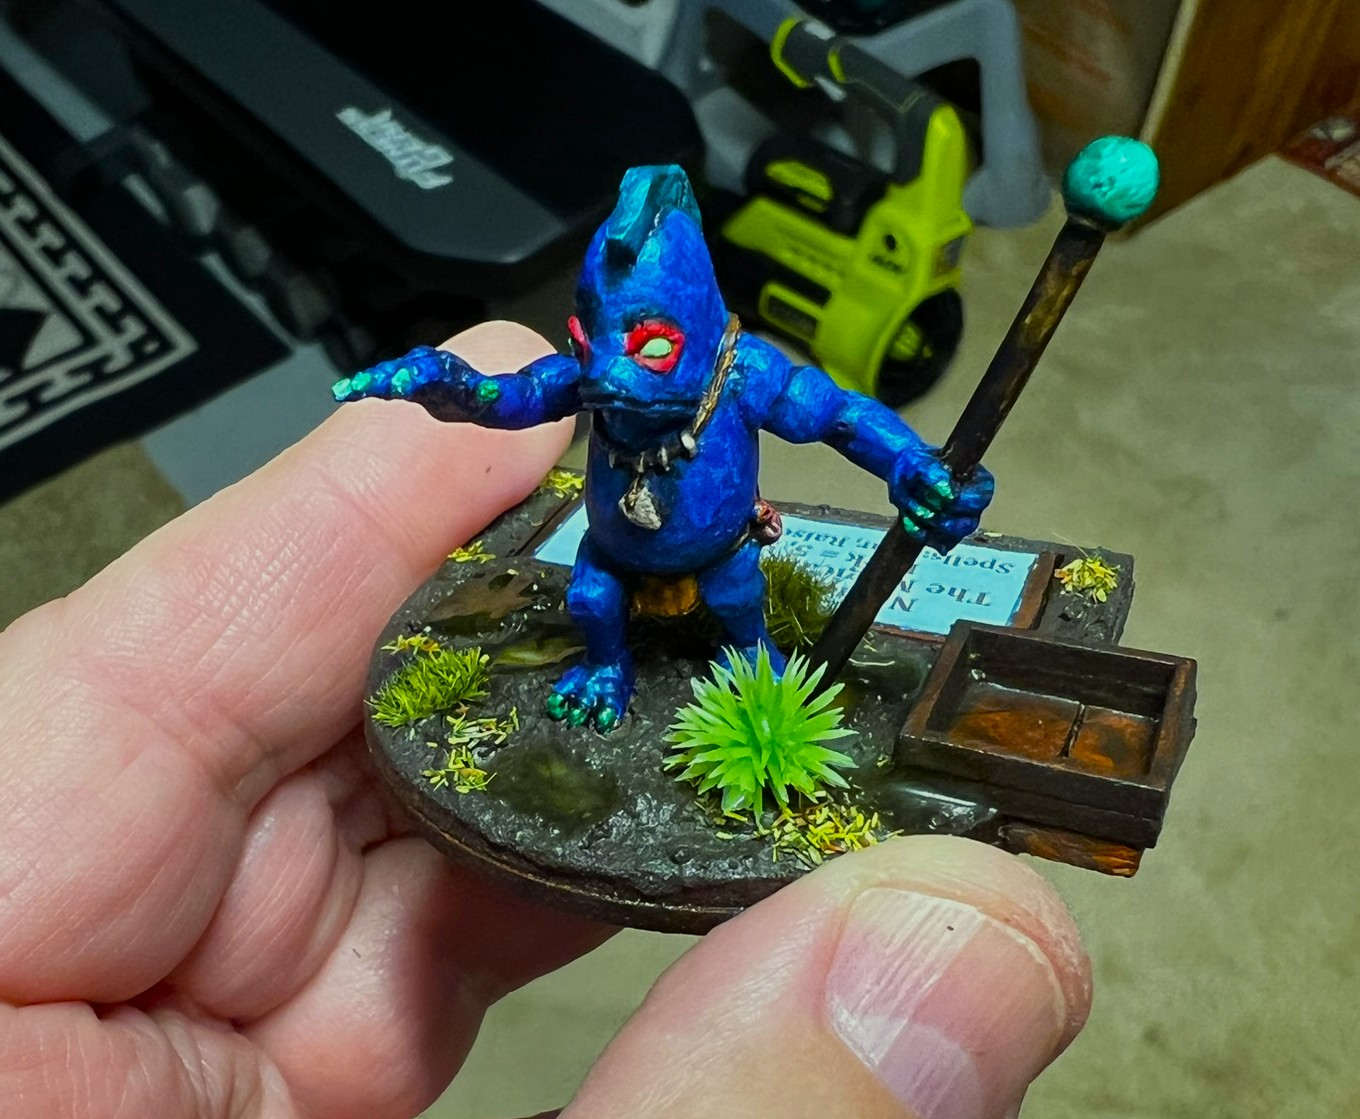
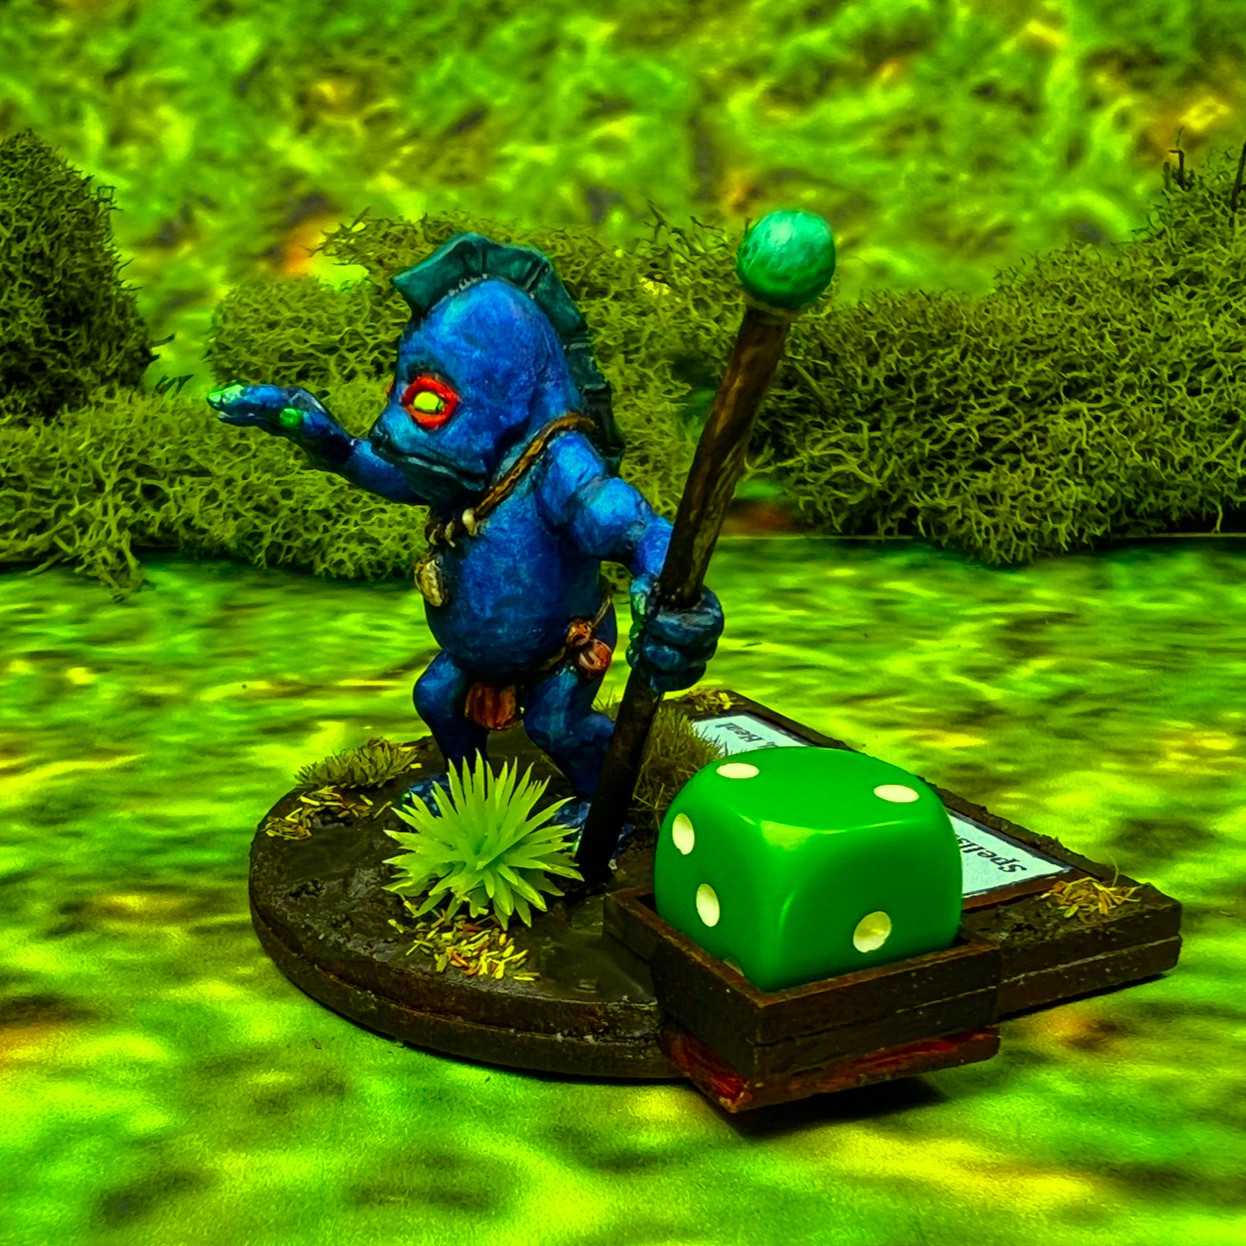
Lastly, we have Nemo Mudbottom, the Magical Swamp Mage. This wizard has three spells – Raise the Dead, Fear, and Heal. He also can provide a chameleon-like benefit to nearby troops that makes them tougher to hit with musketry.
He is larger than the Fishmen crew, but I gave him the same color scheme.
Nemo Mudbottom (in middle) with two of the Fishmen artilleristsNemo done – front……and back. Nice thong Nemo!
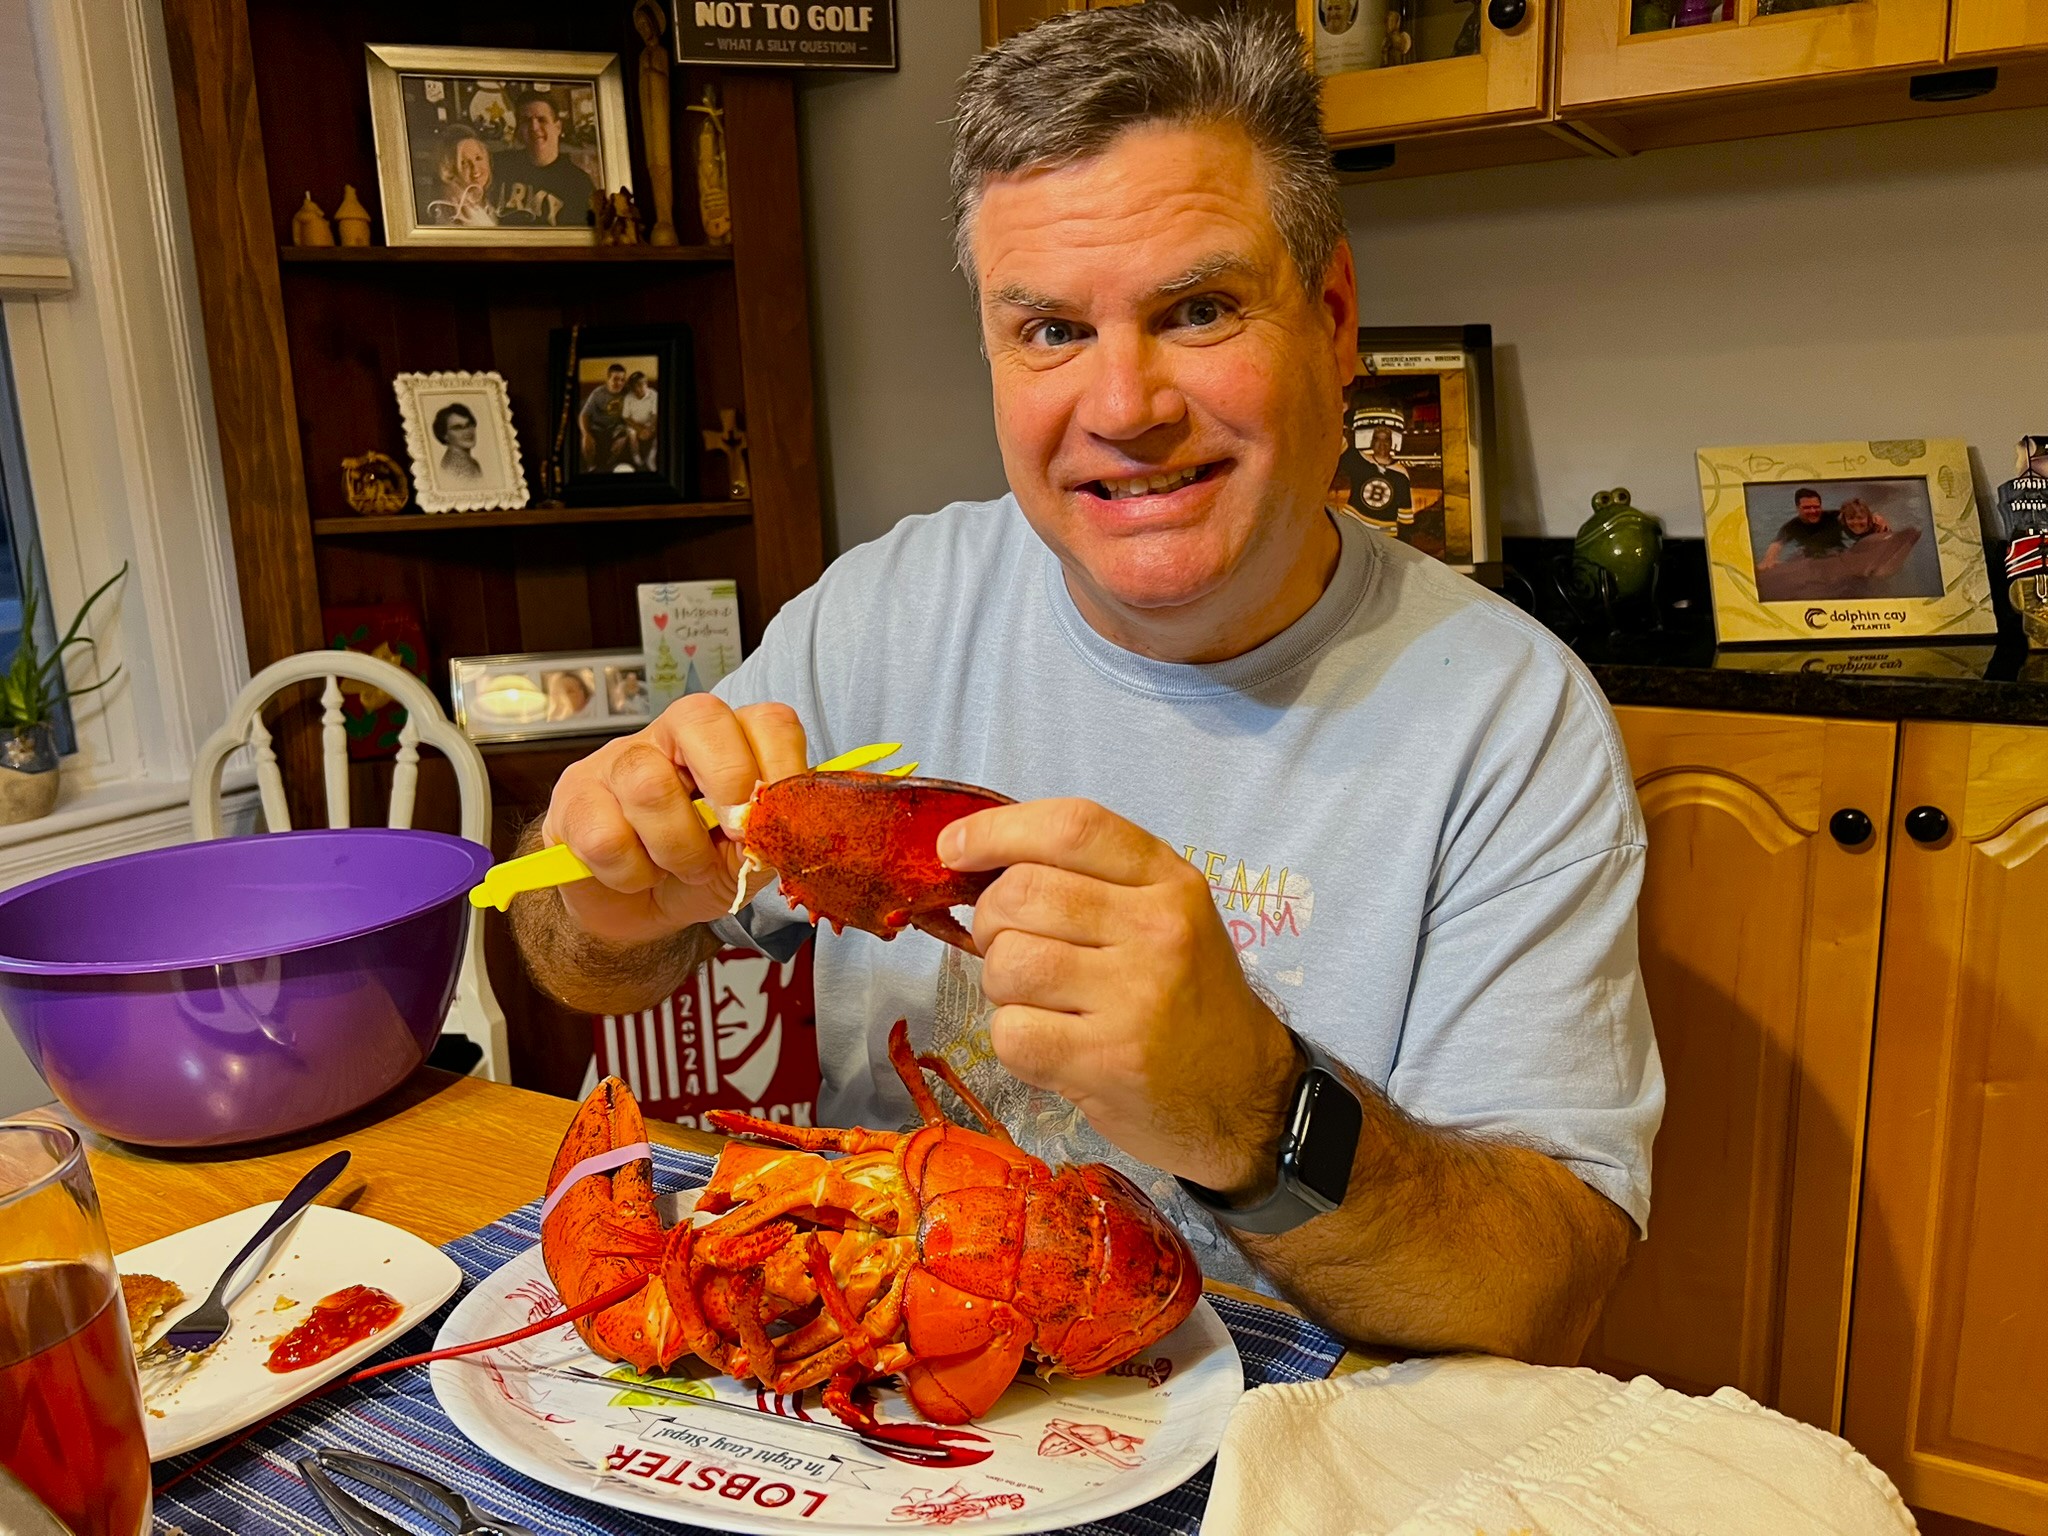
After finishing the brigade, it was time to end 2024 in style as my wife and I usually do with some big lobsters!
Nice 3 pound lobster on New Year’s Eve!!
That is it for now – next in the blog I will do a roundup of 2024 as I have done at the end of every year (well usually anyways). 2024 has been a bit insane hobby-wise…and golf wise!
Final Note
If you want to check out the excellent Wars of Ozz figures’ range – there are two places to get them and to get the rules (and I make no money from this btw). The game rules and the figures are available from the next two places:
Below you’ll see a loooong list of paints and the like that I used on these – and they are more useful for me when I need to recreate a color scheme in the future than maybe you – but in any case that’s why I post them.
Miscellaneous details and references for those interested in that sort of thing:
For all of my earlier posts on Wars of Ozz games, figures, units, and other related projects – please see this page.
PAINTS, INKS, GLAZES, SHADES, WASHES, PIGMENTS, FLOCKING, GLUES AND MORE THAT I USED ON THE POLLYWOMP INFANTRY REGIMENT:
Popsicle sticks
PVA Glue
Vallejo Premium White Primer
Vallejo Thinner
2″ Square War Games Accessories Steel Bases (SKU Number 21)
Secret Weapon Washes “Sewer Water” (wash)
Army Painter “Dark Tone” (shade/wash)
Vallejo Mecha Color “Off White”
Vallejo Model Color “Off White”
Vallejo Mecha Color “Green Blue”
Citadel Contrast Paint “Akhelian Green”
Army Painter Speed Paint 2.0 “Maize Yellow”
Secret Weapon Washes “Green” (ink/wash)
Army Painter Speed Paint 2.0 “Carmine Dragon”
Army Painter Warpaints Fanatics Effects “Data System Glow” (effect)
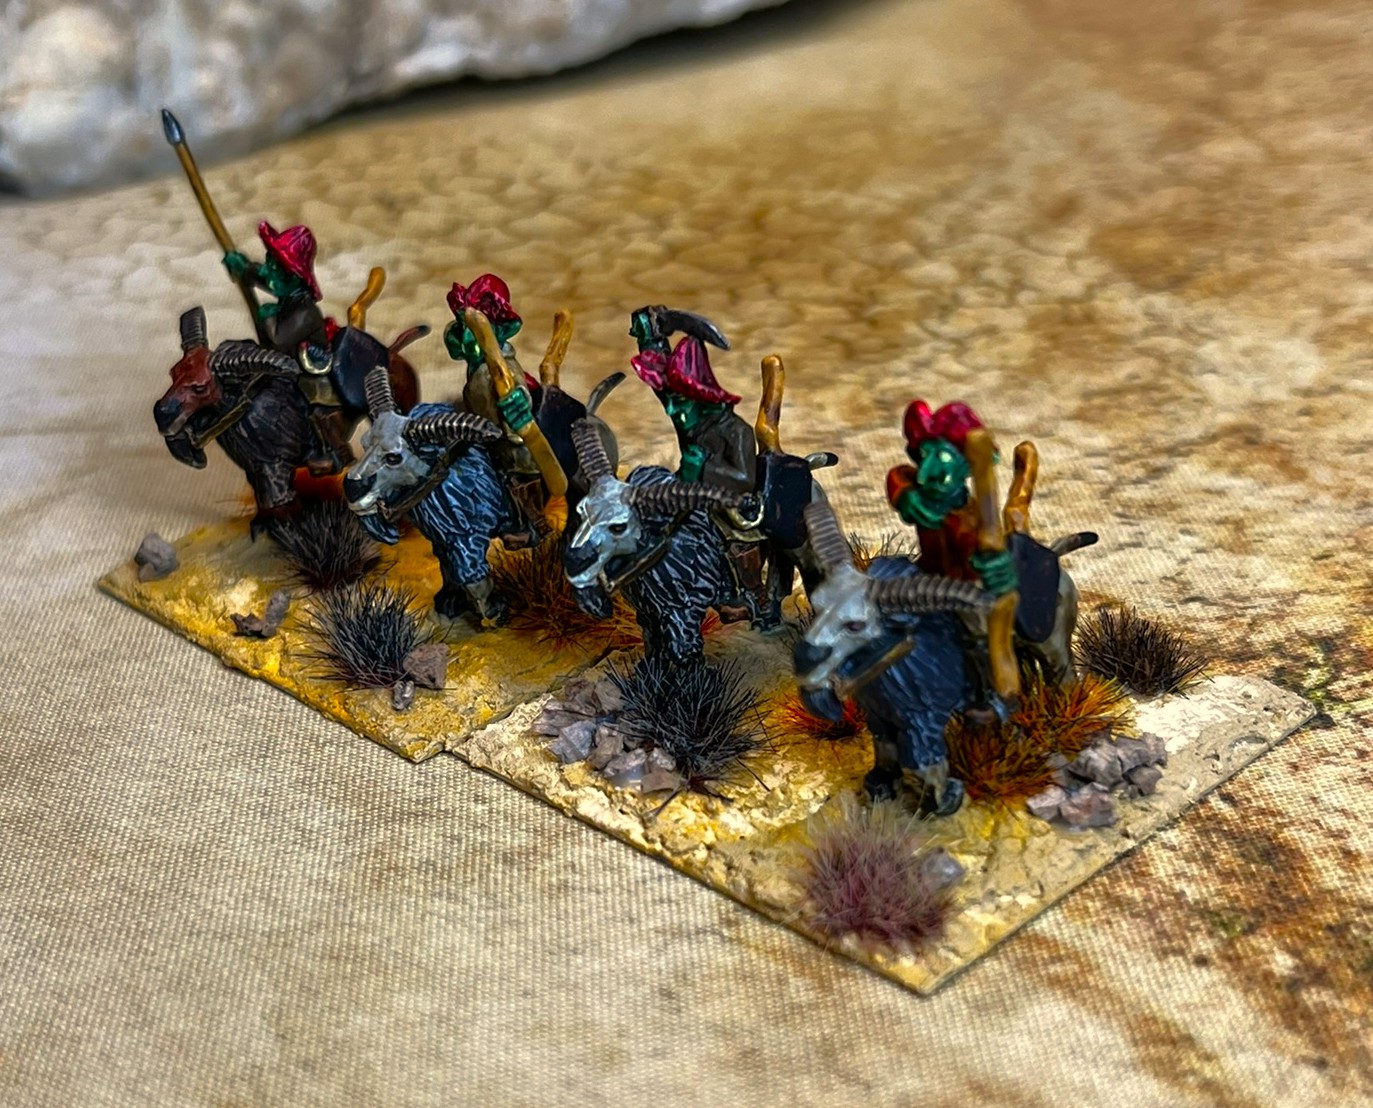
The Temujicans are a fierce faction of green-skinned Gillikin-cousins that roam the deserts of the world of Ozz in search of plunder, enemies, and glory. Like their Whim Whim rivals, they have no artillery, and similarly rely heavily on cavalry more than infantry to win their battles. By “cavalry”, please know that these dudes ride rams and goats!
Over a month ago, I posted about my four Temujican infantry regiments (84 figures) that I built and painted. Since then I have been deep into completing the Temujican faction. By that I mean that I have been working on not one but FIVE regiments of Temujican cavalry (55 mounted figures) and three brigade commanders – 58 figures in total.
The regiments in question consist of two heavy cavalry and three light cavalry. The heavy cavalry can only move at the speed of infantry, and has inherent missile capabilities as well. The light cavalry moves at regular cavalry speed, and also has bows. They are very versatile compared with other cavalry units in Ozz. All figures are metal and 28mm. The stats and official colors of the Temujicans units and individuals can be downloaded here – and can be seen below:
Official Wars of Ozz stats for the Temujicans
A nice aspect of all Ozz cavalry figures is that the mounts come separate from the riders. This makes the painting somewhat easier. Still, these did take a long time for me to finish, primarily as the light cavalry had extra stuff (bow holders and quivers) to paint and assemble. And – unsurprisingly to regular readers of this blog – did go overboard on ensuring that EACH of the 33 light cavalry had differently-colored goats and dissimilar riders’ coats. Why?
Well, the answer is twofold. First, I wanted both of the regiments to have a look of relative nonuniformity as to their mounts and similarly I wanted that same effect on the light regimental coats. Secondly, in my paint inventory I now have over 78 different types of brown, 49 tans, and 41 grays. If you include some of the flesh tones and washes those numbers get even bigger. I wanted to use some of the ones I don’t usually use – or have never used – before they turn to hardened latex rubber. And I used several different flocking materials for the bases to give an Ozz-desert look. More on that to come.
For this post, with so many paints used, any semblance of WIP discussion is out the window. I simply think that sharing the photos of the completed figures will be enough. Let me know! At the end of the post you will see the list of paints and materials that I used by type of unit and/or individuals. Know that this is more paints that I have ever used on a single project – period. The lists themselves are a good record for me to use on future projects. With that said, feel free to scroll past the painting list when you get there and wonder if I am nuts after all.
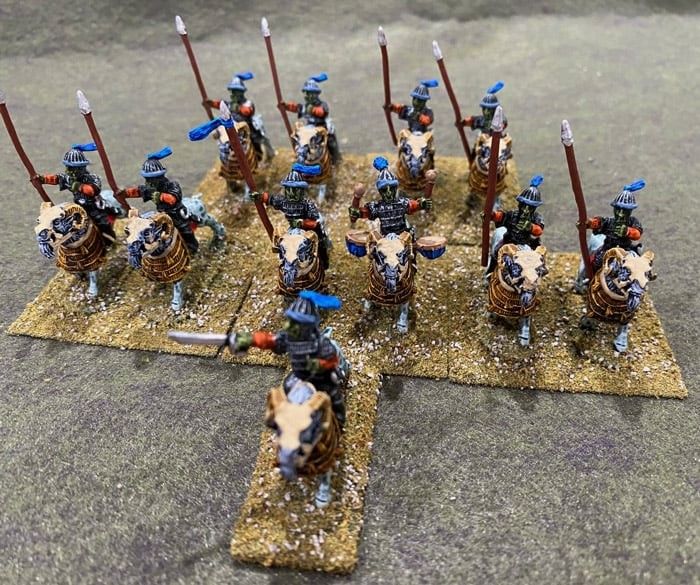
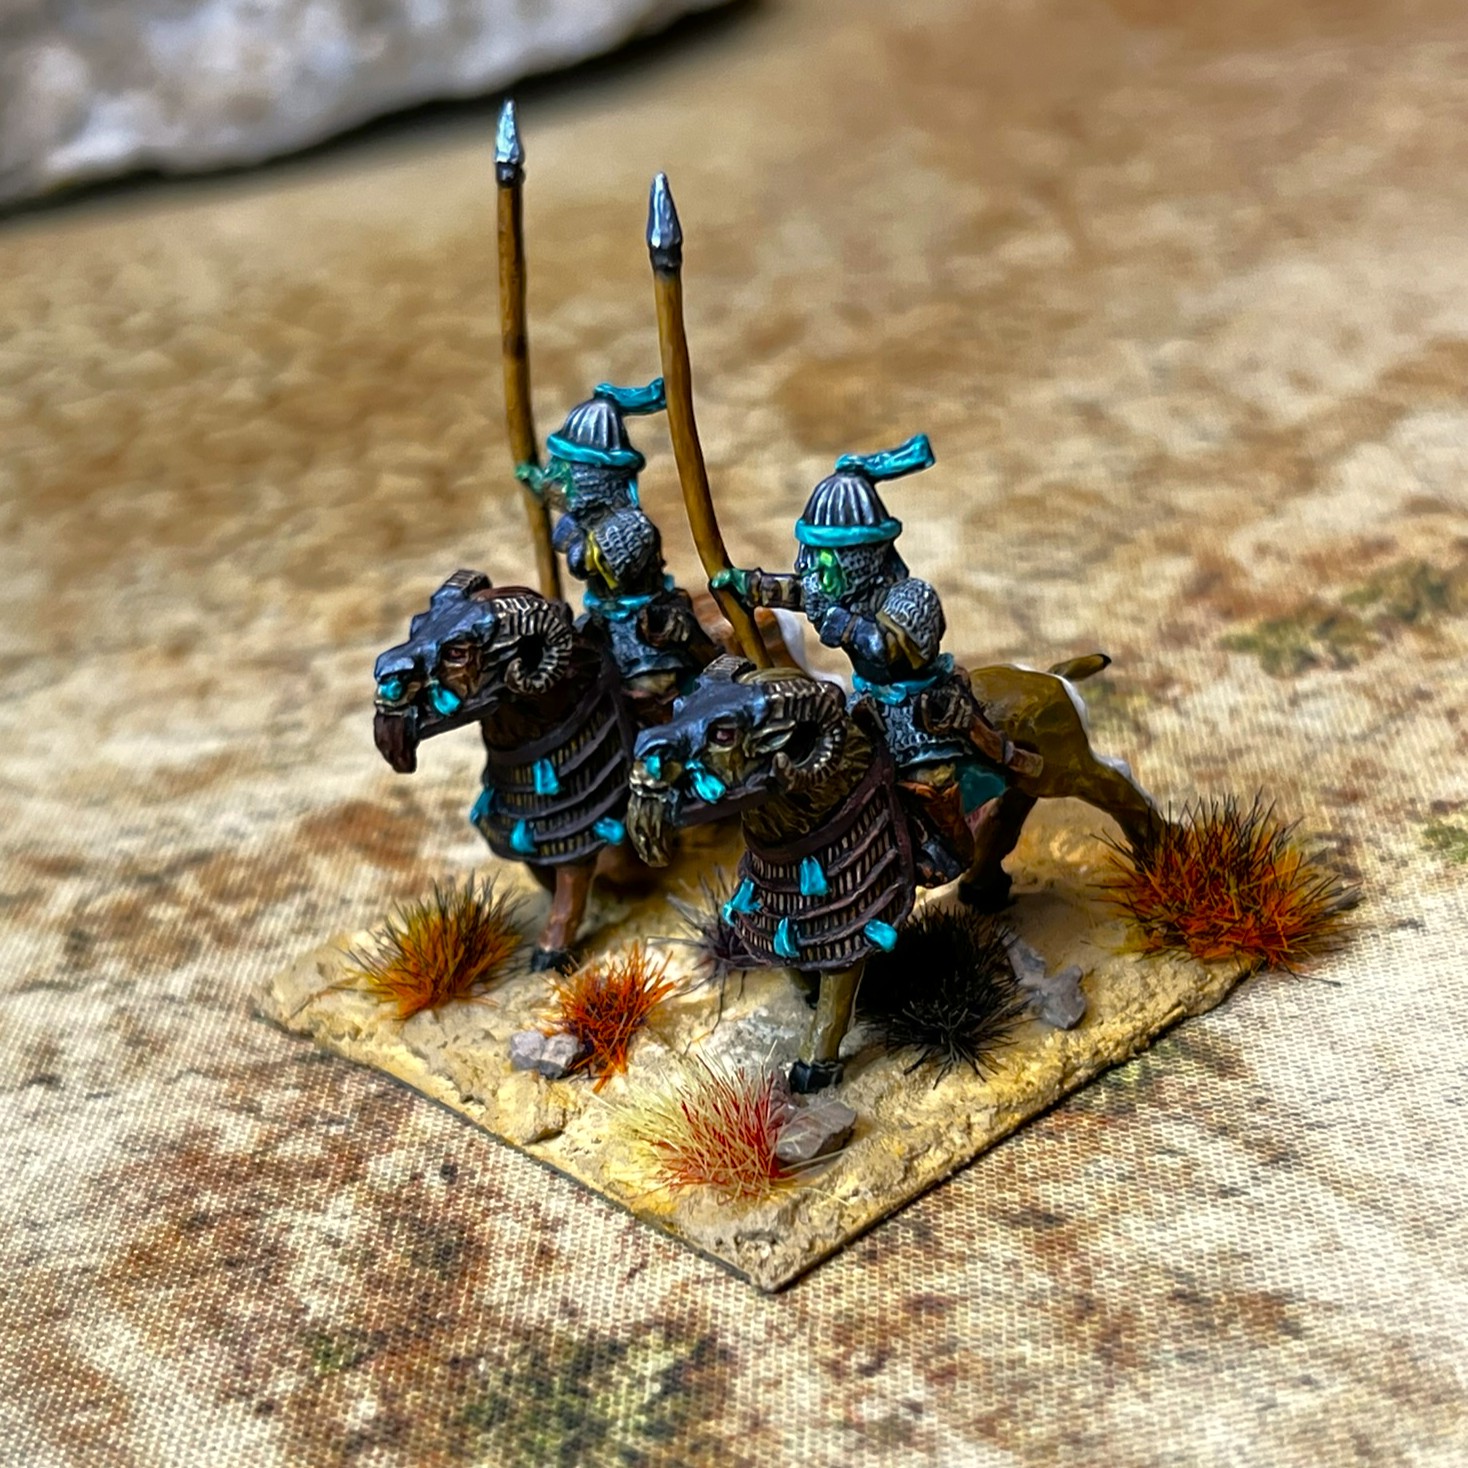
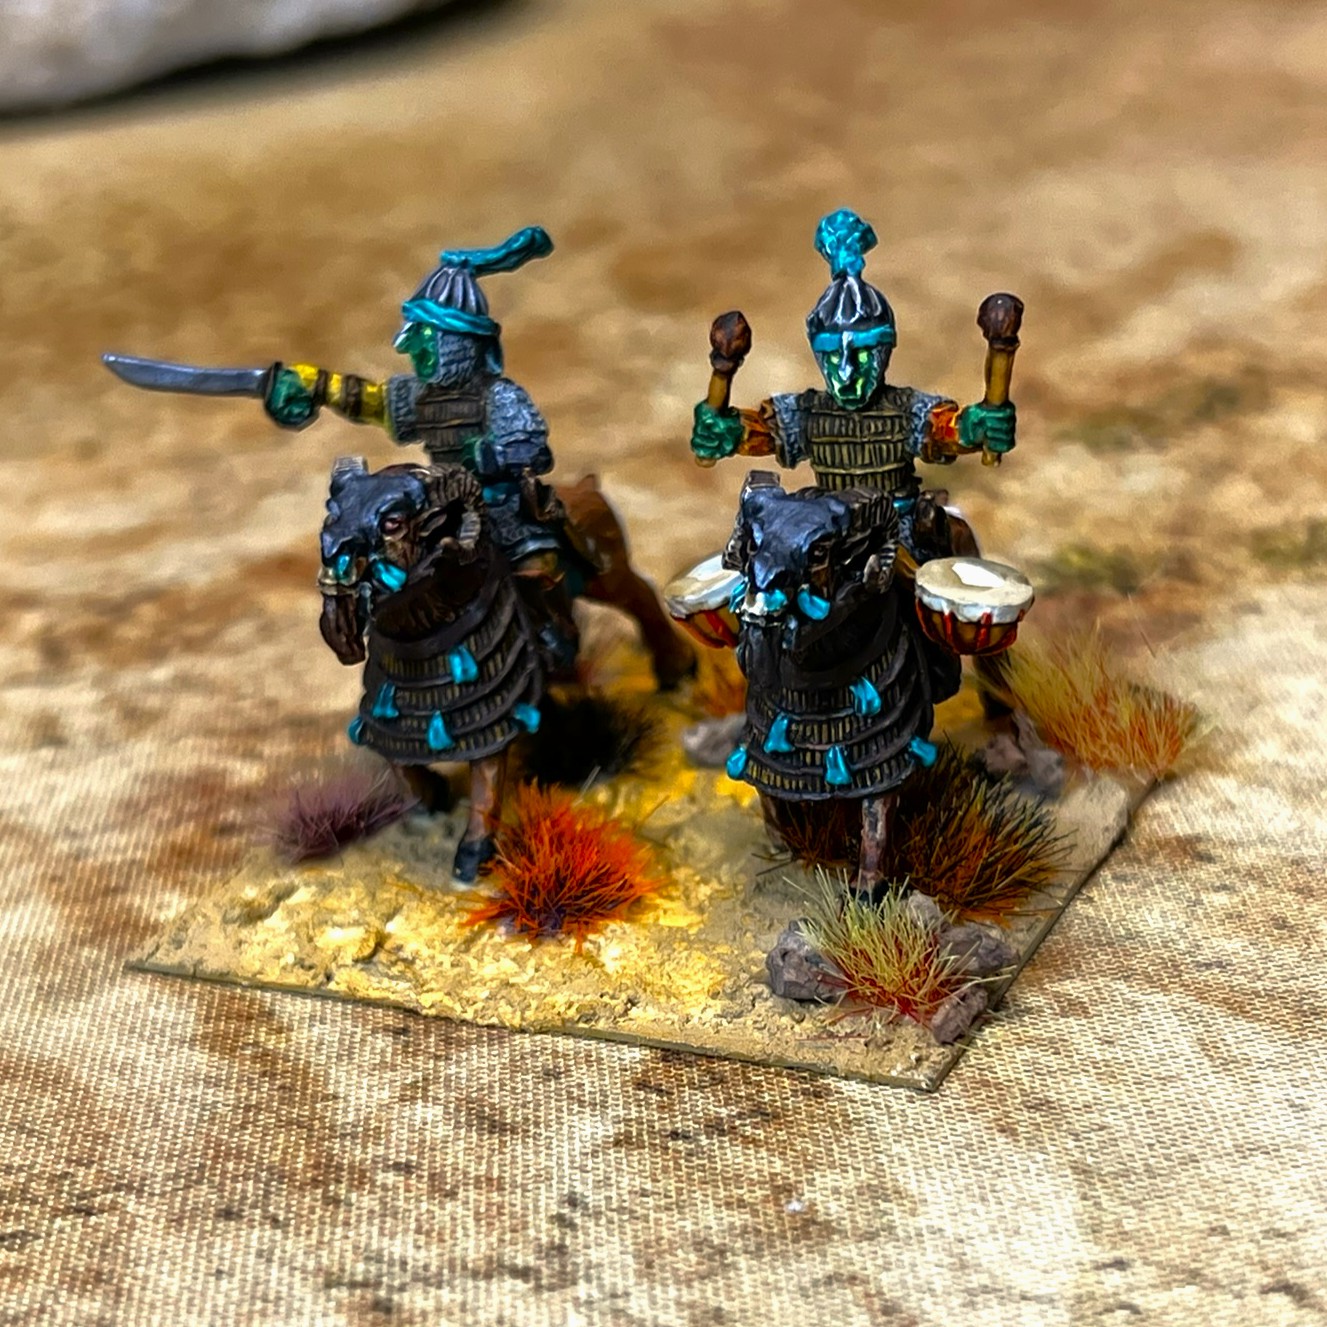
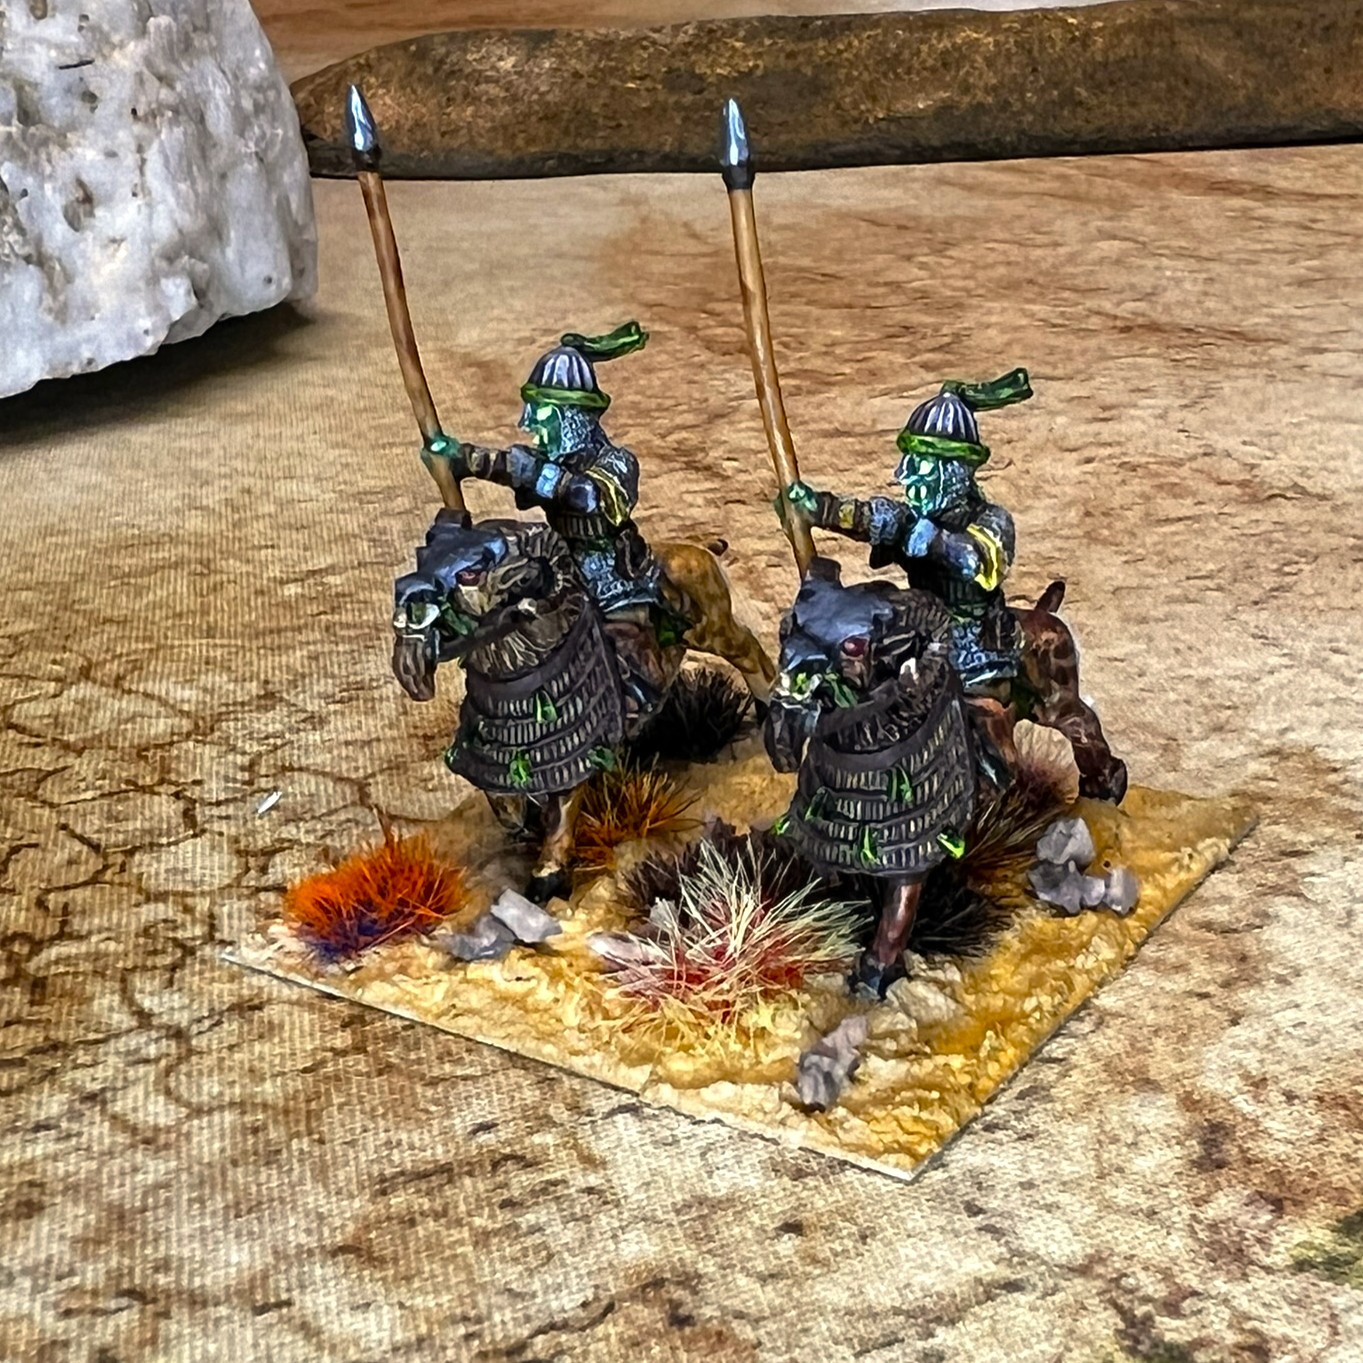
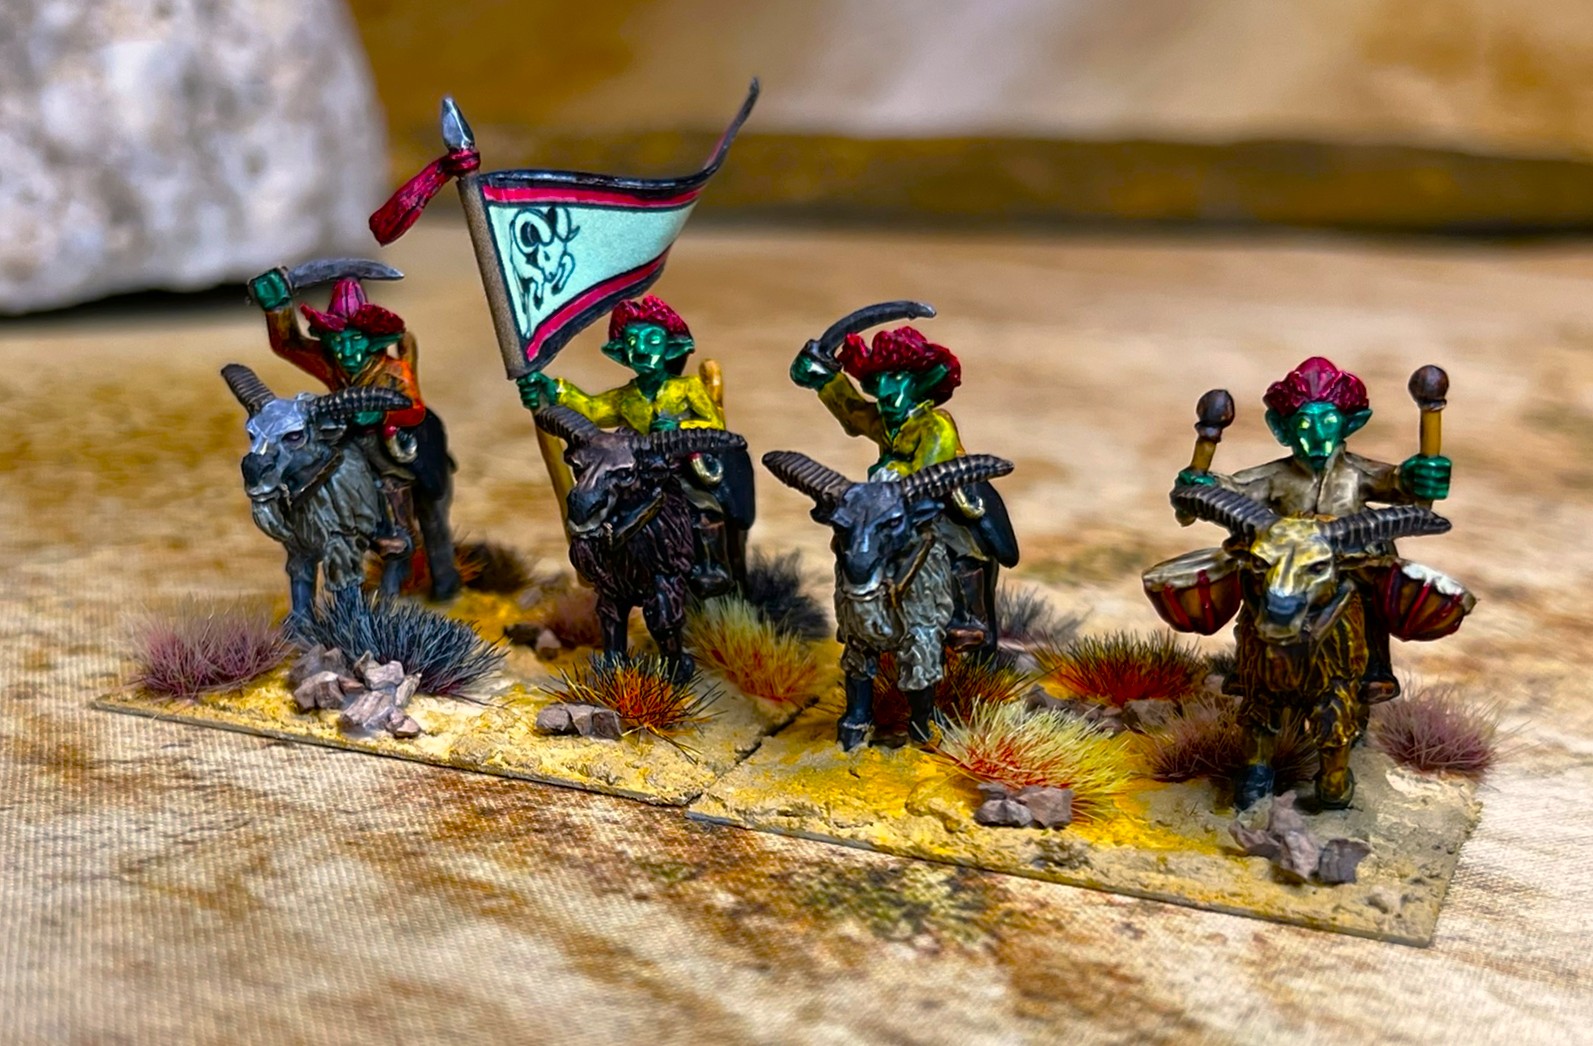
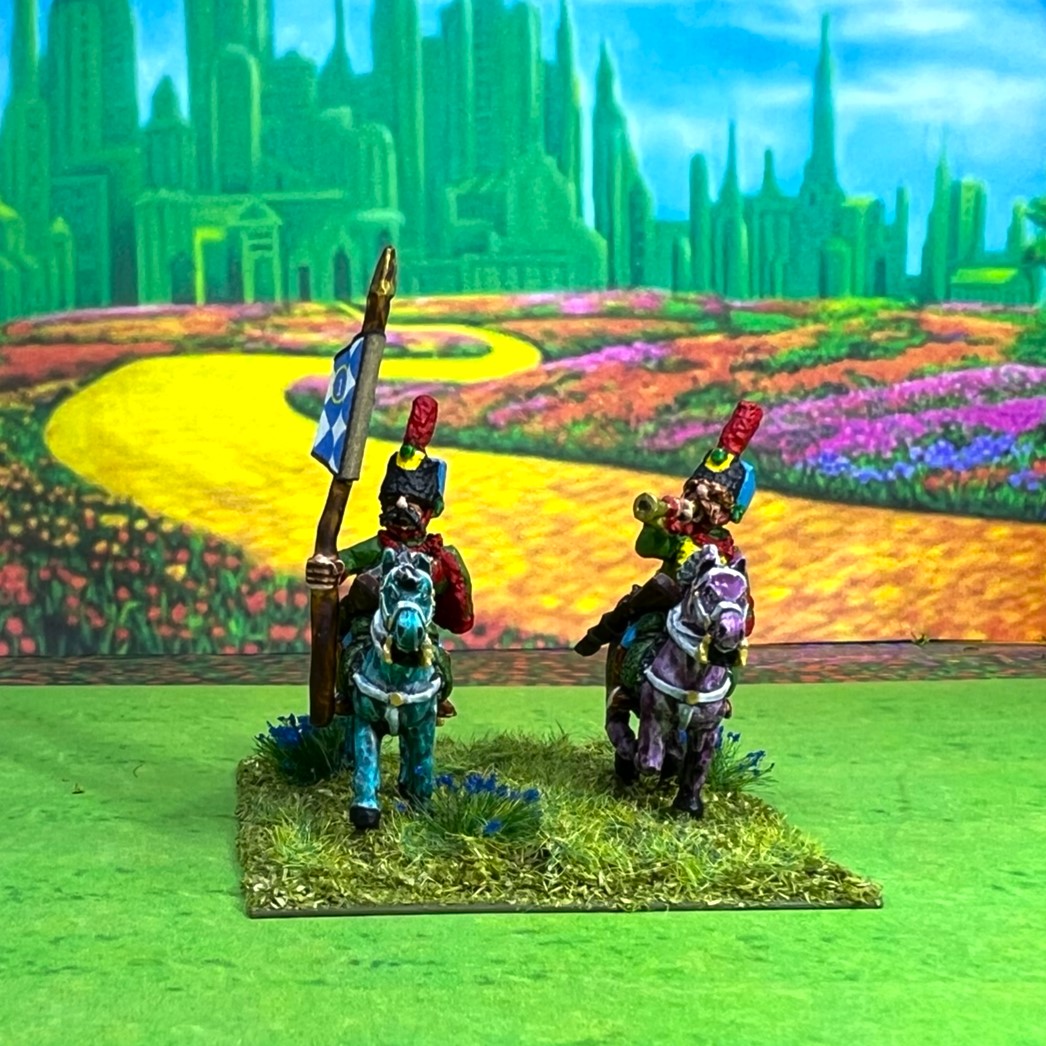
I painted the rams like the Bighorns and added white patches on their rumps, faces, and leg backs. The two heavy regiments have differently-edged flag colors – light blue and light green. That difference became the centerpiece of my color differentiation that you will see below in their photos.
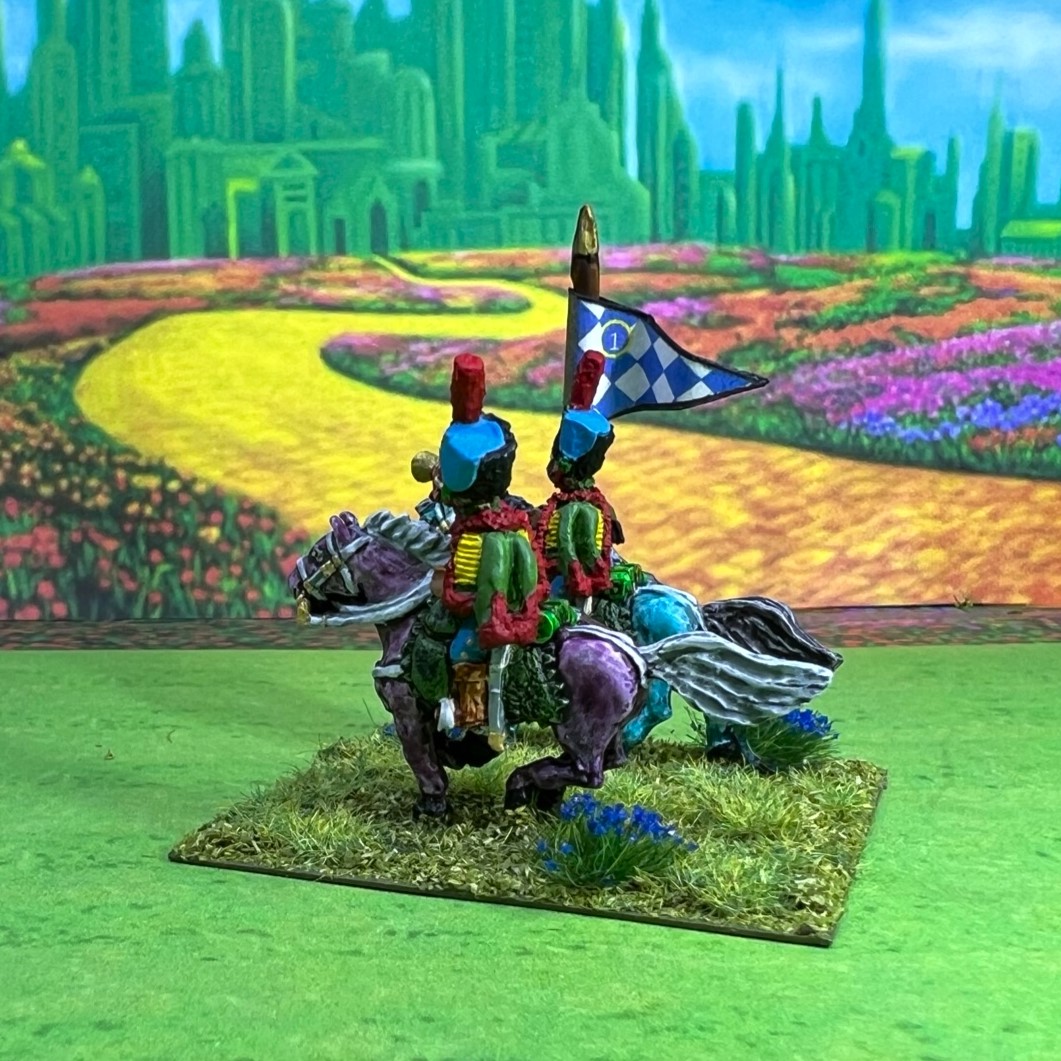
1st Temujican Heavy Cavalry Regiment
The 1st Heavy Cavalry Regiment in line formationRegimental commander standRegular baseFlag baseClose up of the stand with the officer and drummer.
Lastly, another regimental shot:
The 1st Temujican Heavy Cavalry Regiment in column formation
2nd Temujican Heavy Cavalry Regiment
The 2nd Temujican Heavy Cavalry Regiment in line formation.Regimental commanderRegular stand of two troopersThe stand with the officer and drummerFlag stand
And here is the 2nd Temujican Heavy Cavalry Regiment in column formation:
The 2nd Temujican Heavy Cavalry Regiment in column
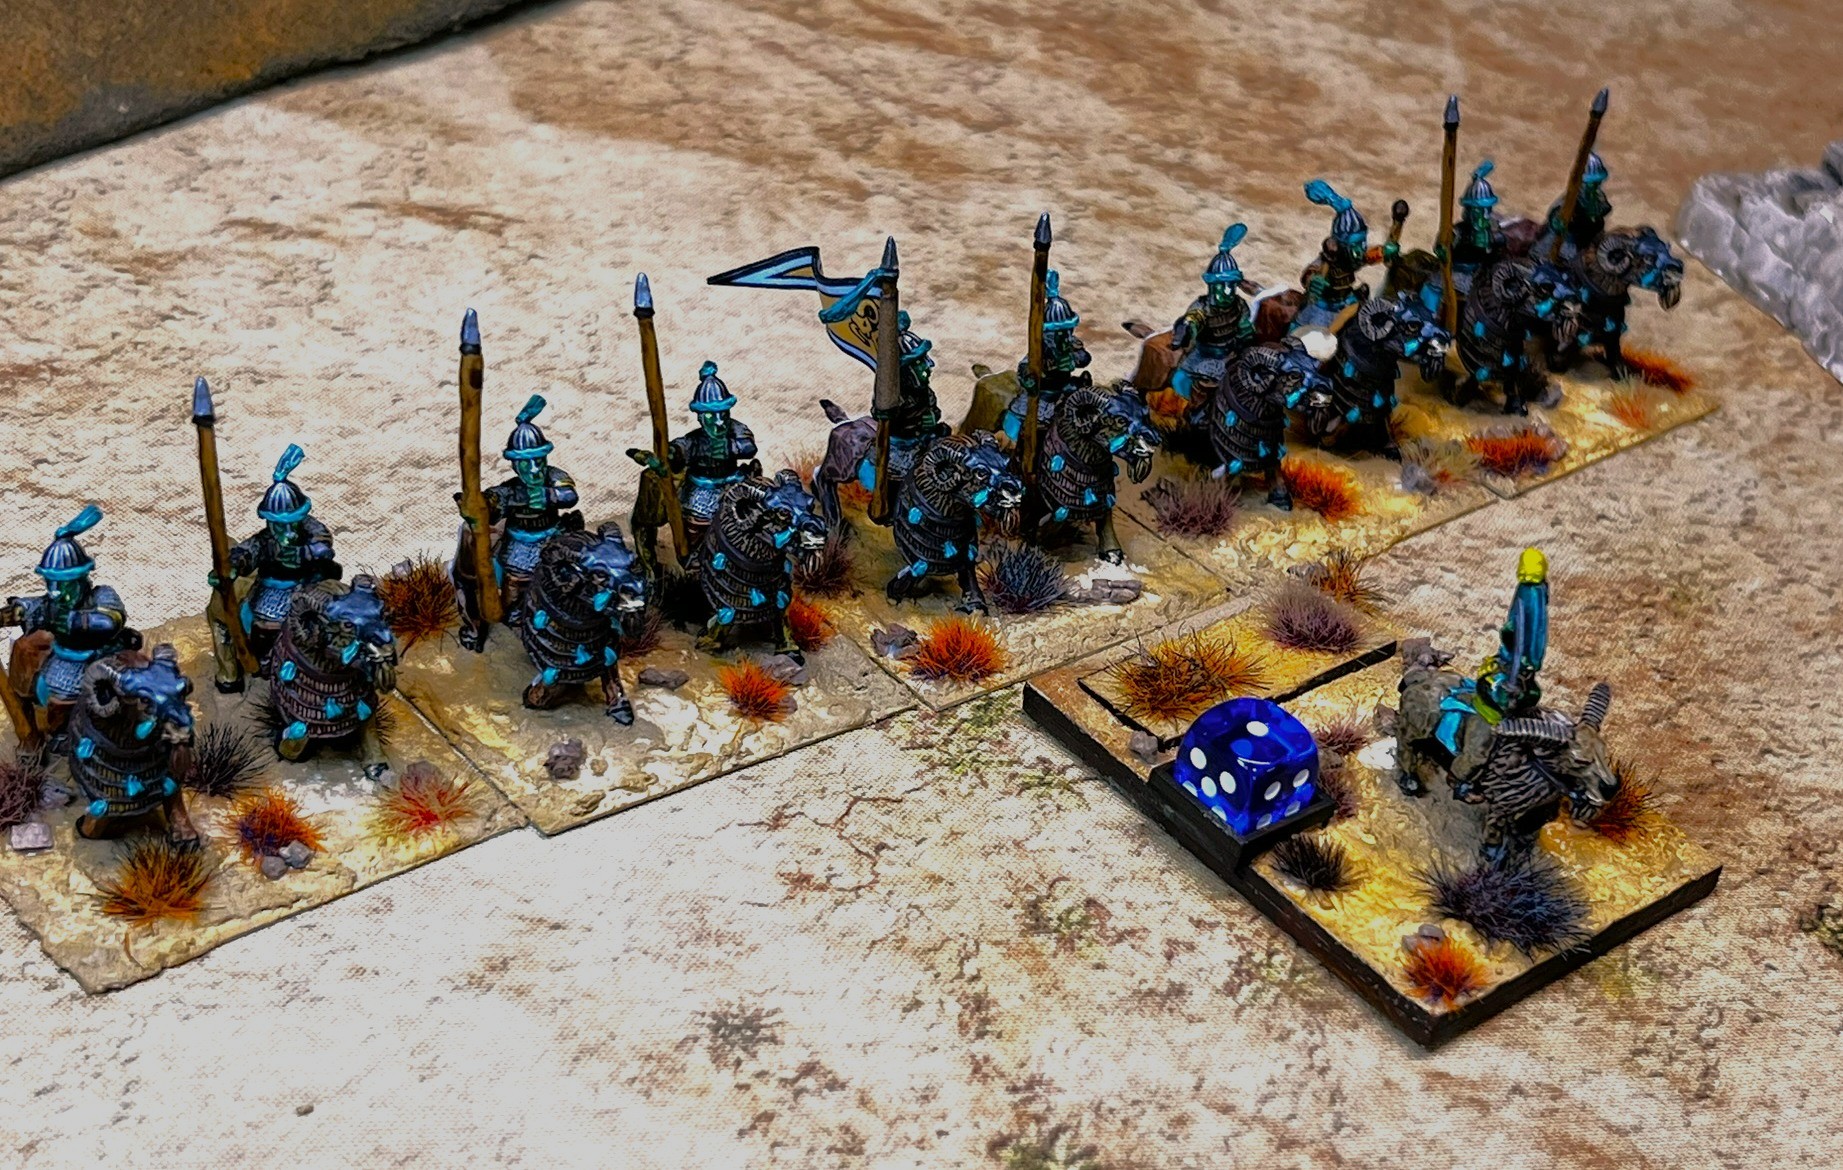
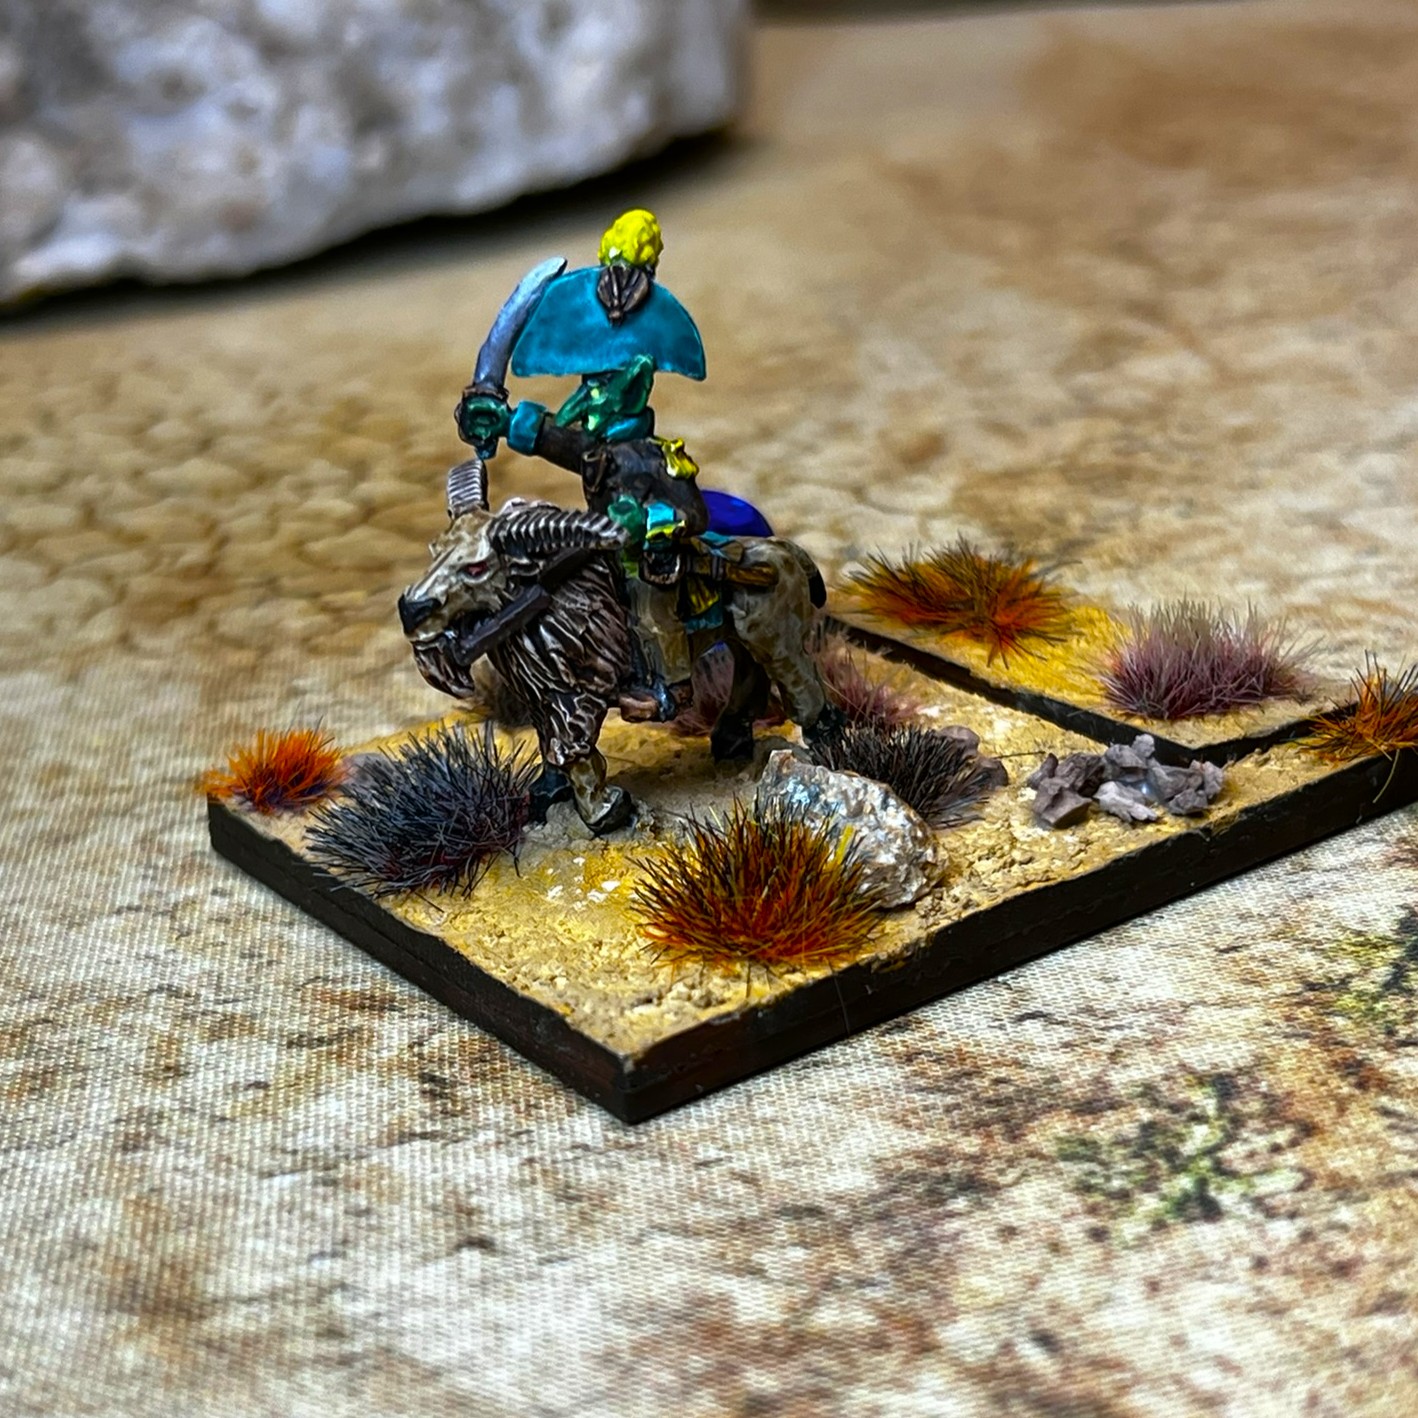
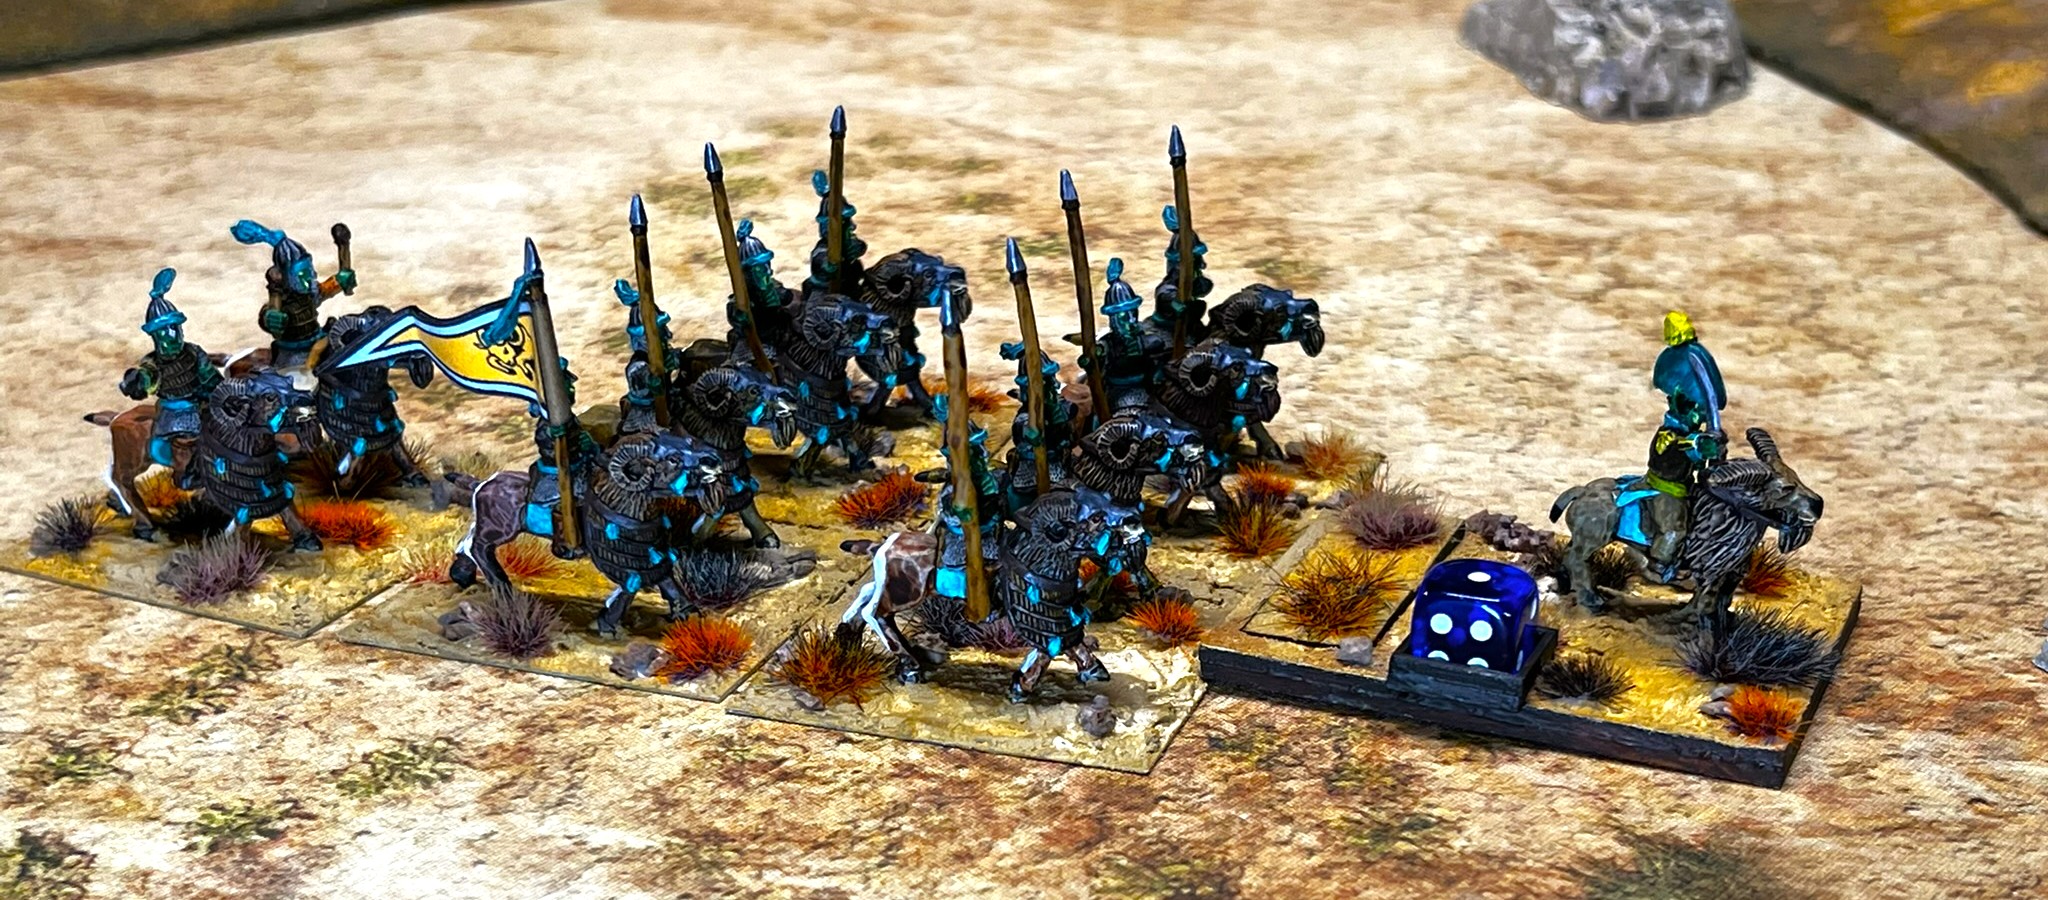
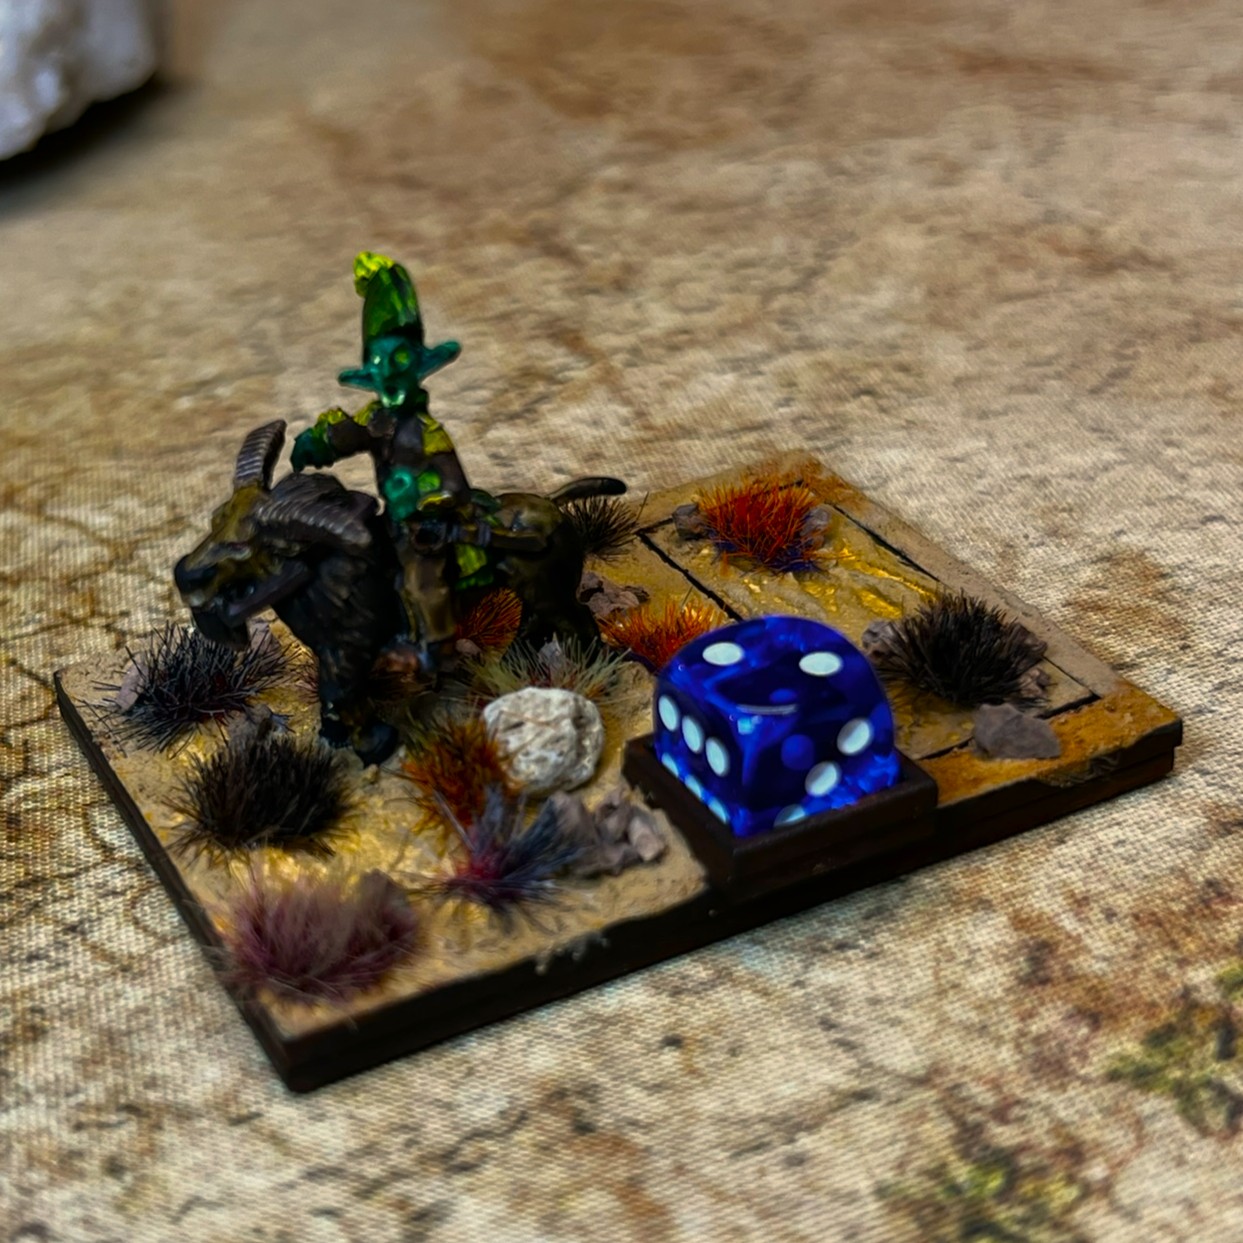
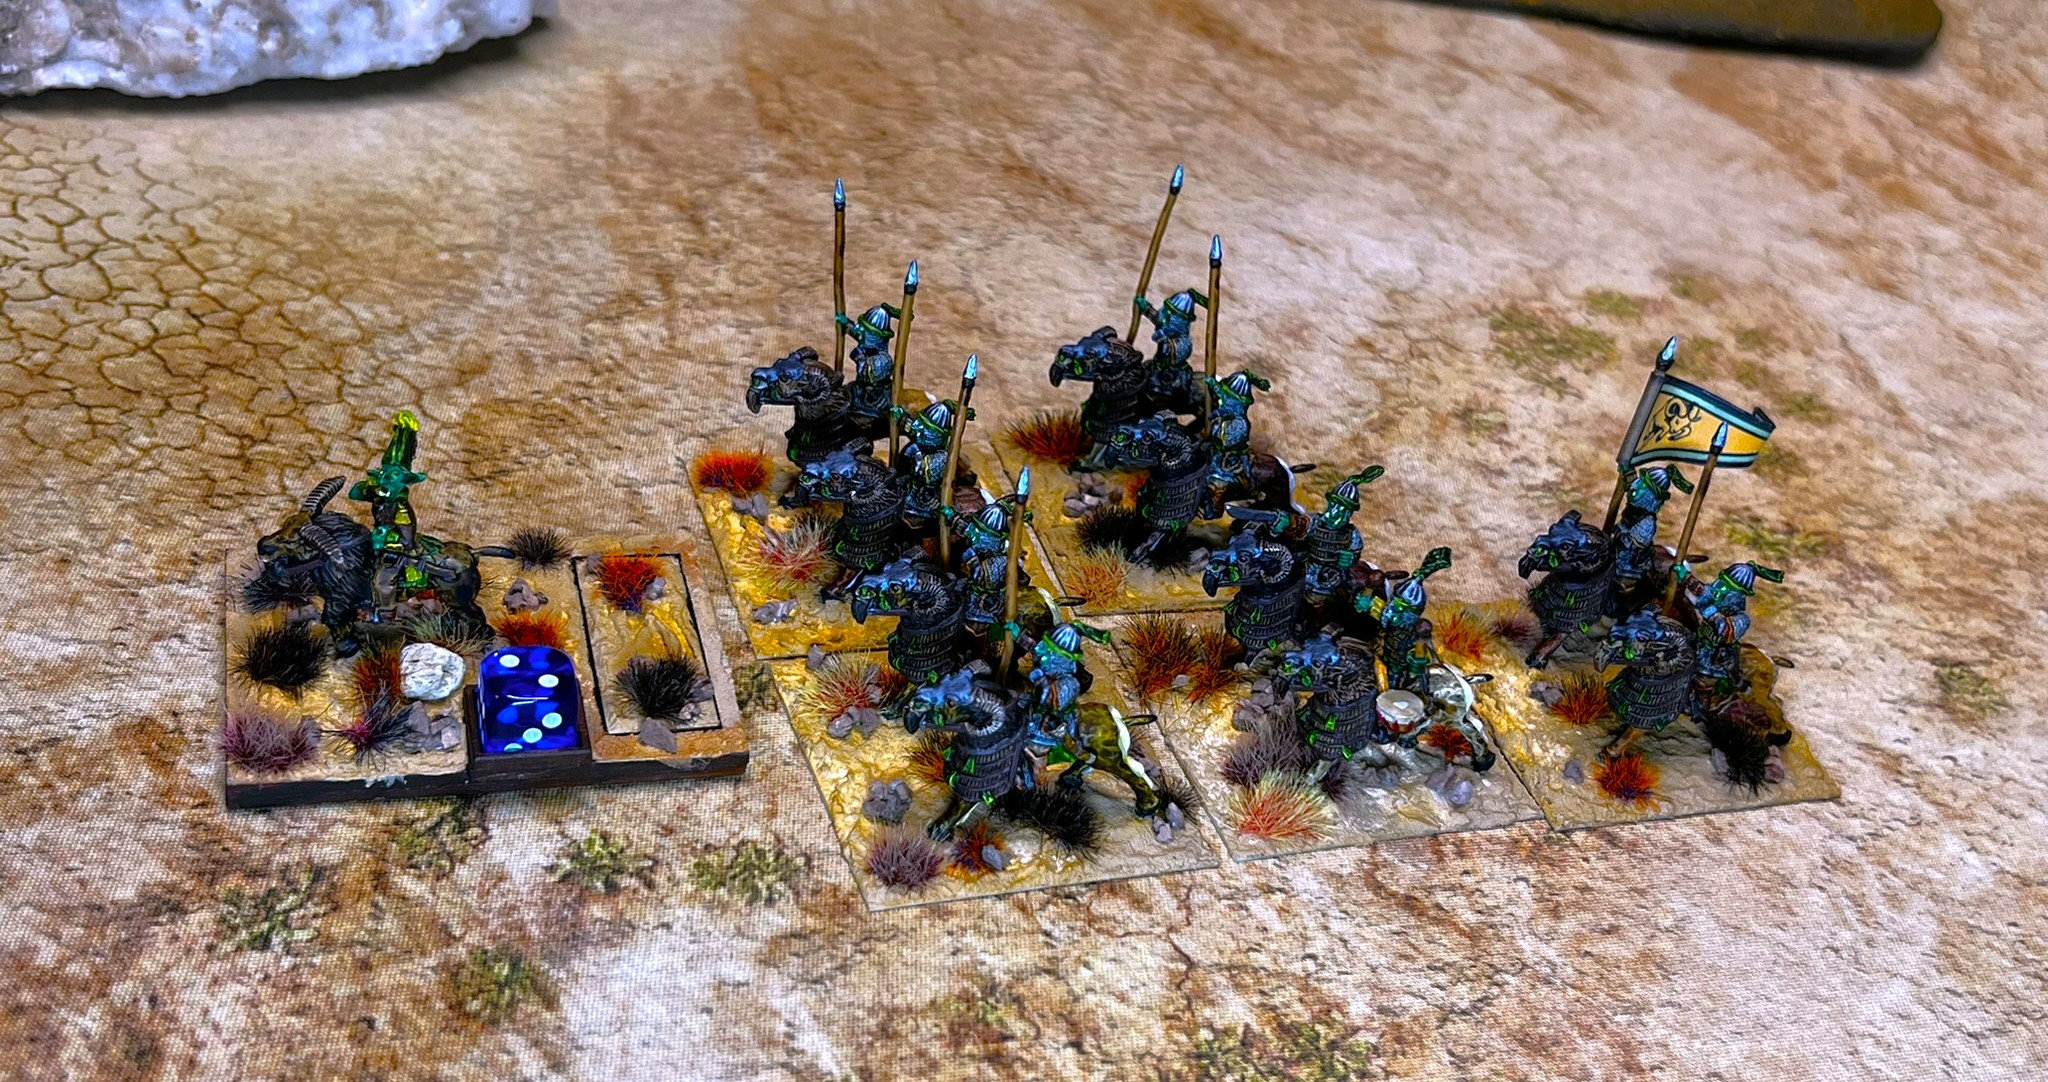
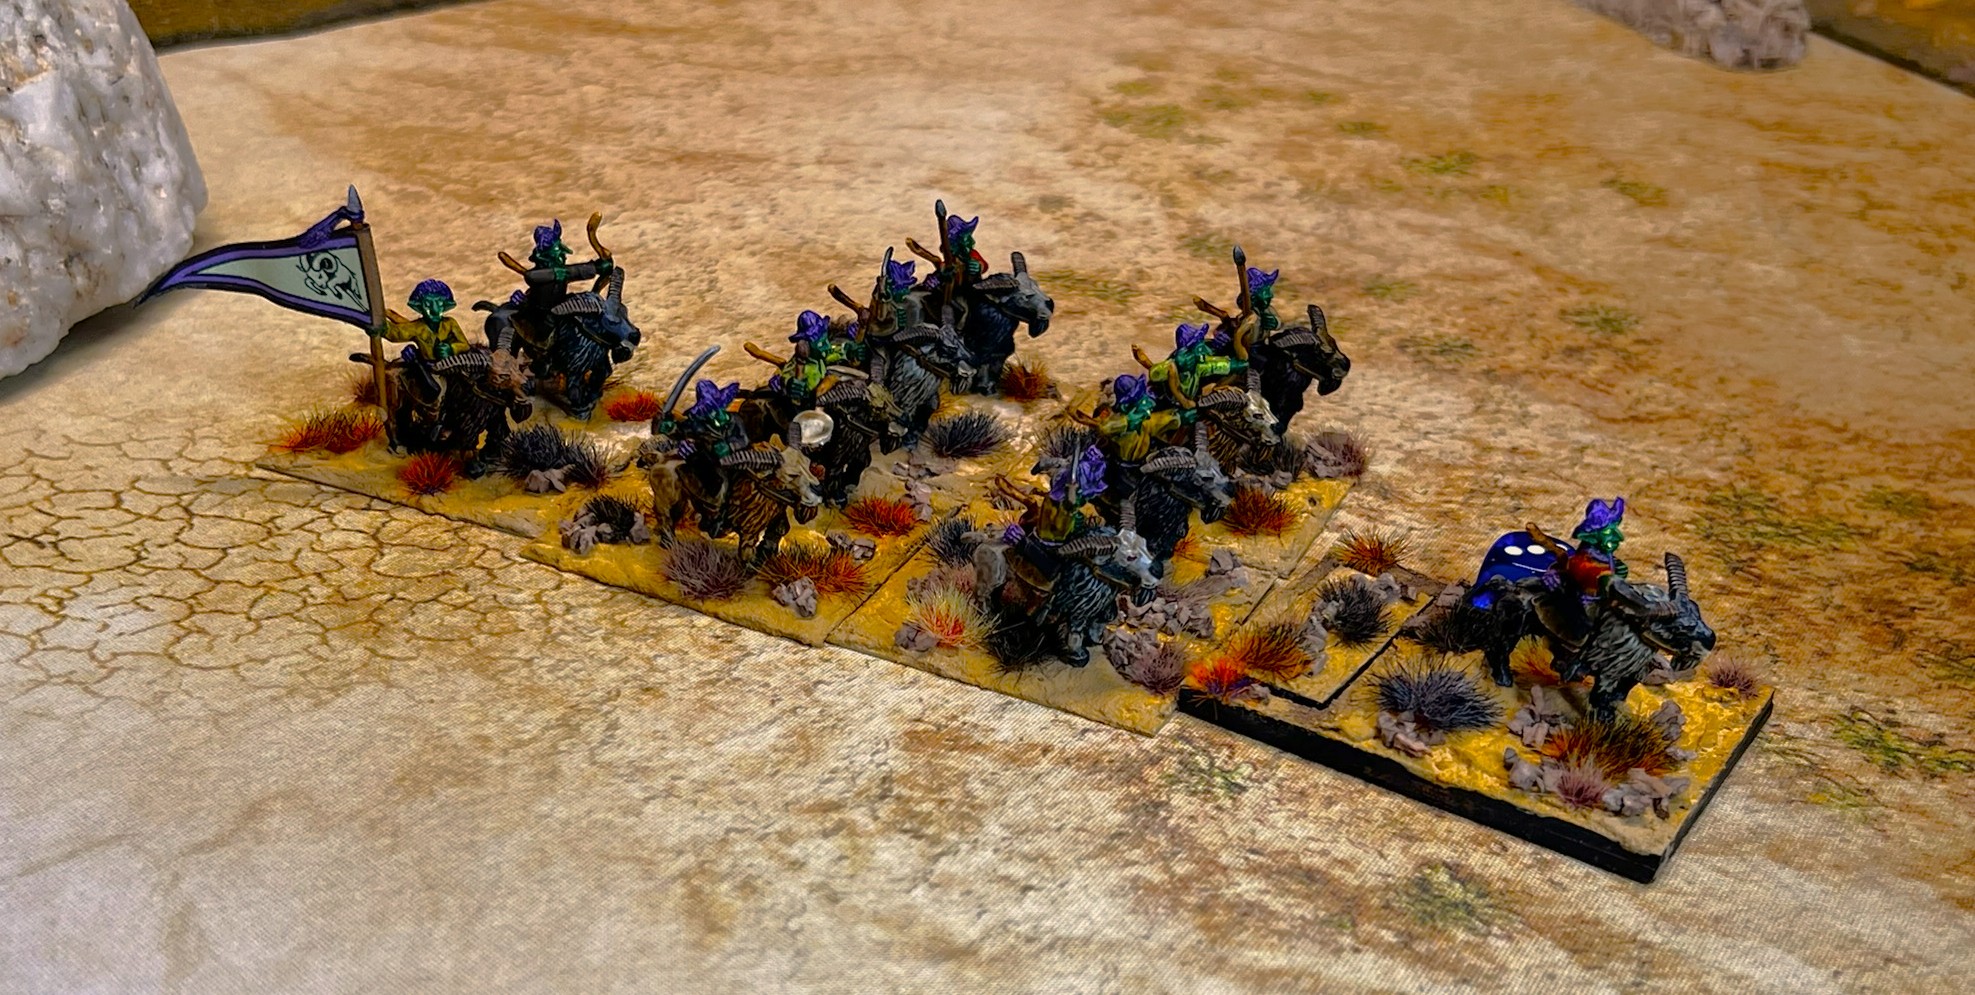
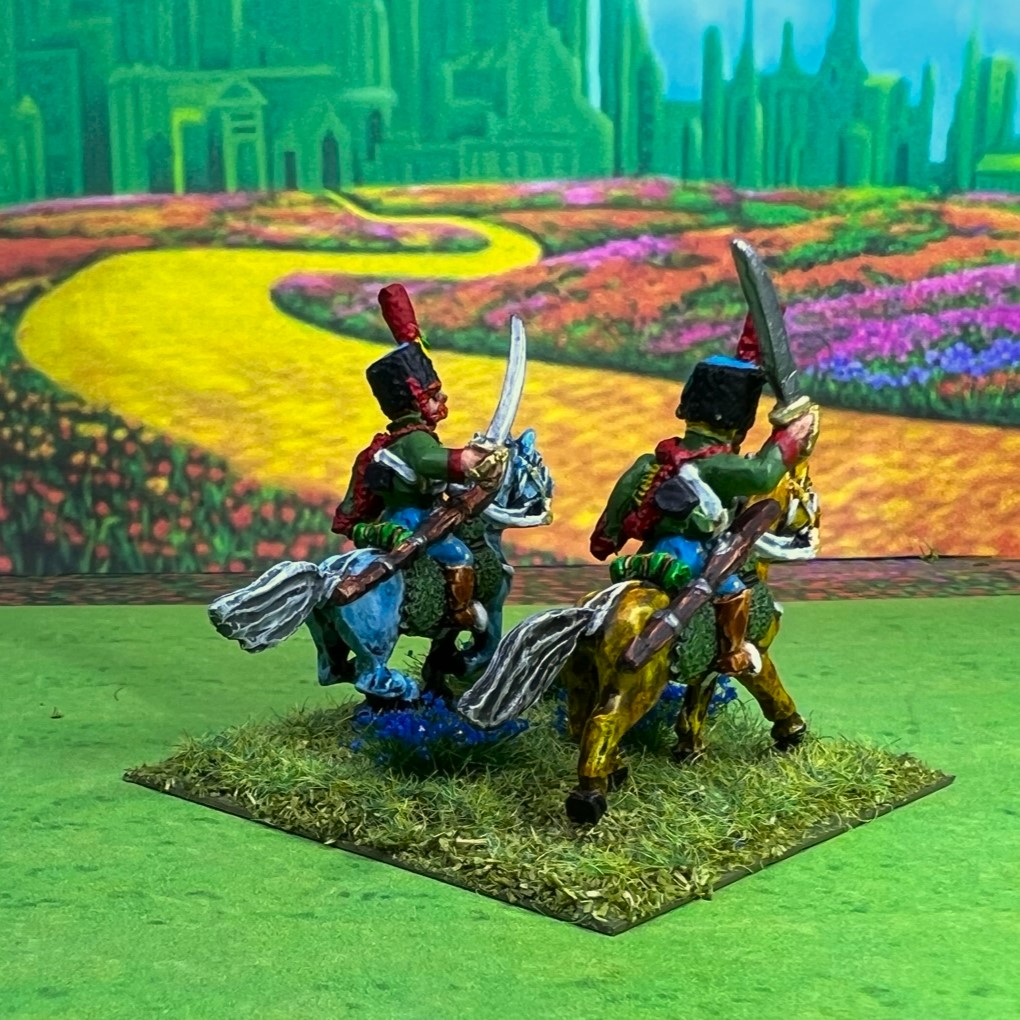
There were three light regiments of cavalry as well. These are OZZ-510, “Light Cavalry on Great Rams” on the website, but these all to me really ride goats. Their flags have orange, red, and purple borders – so those became the hat colors for their respective regiments. Otherwise, I followed the canon on coat colors and went crazy on mixing up goat colors with more grays than browns and tans.
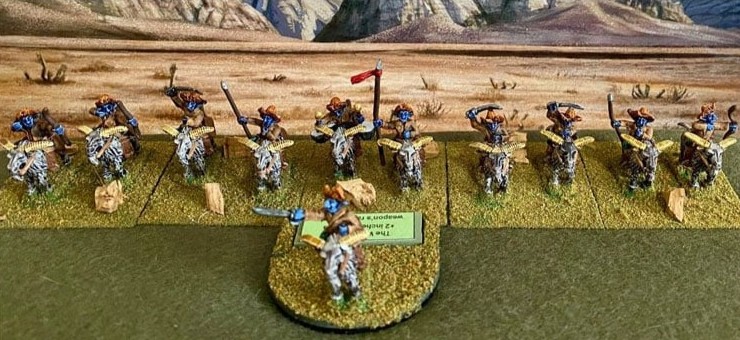
Here is the light cavalry photo from the Wars of Ozz website:
And here below are my three regiments of Temujican Light Cavalry…
1st Temujican Light Cavalry Regiment
The 1st Temujican Light Cavalry Regiment – note the orange hatsRegimental CommanderRegular standFlag and leader/drummer standsThe 1st Temujican Light Cavalry Regiment in column formation
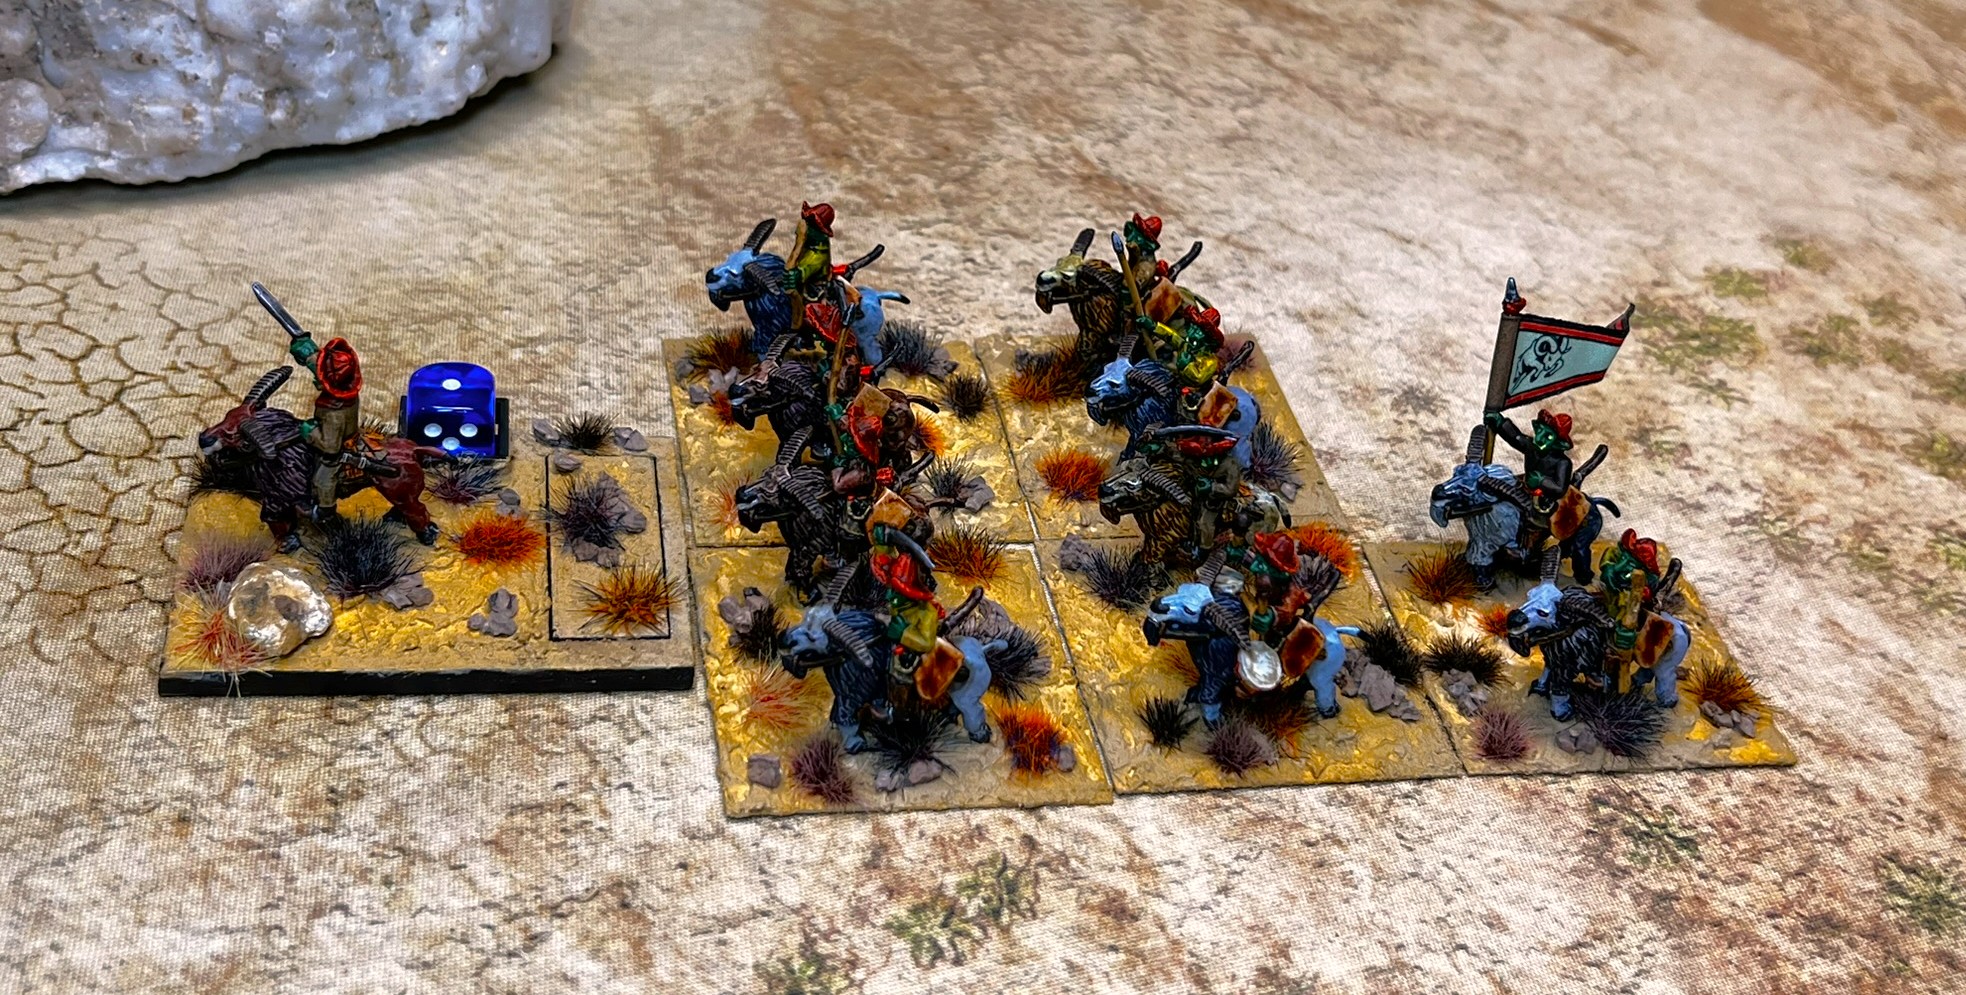
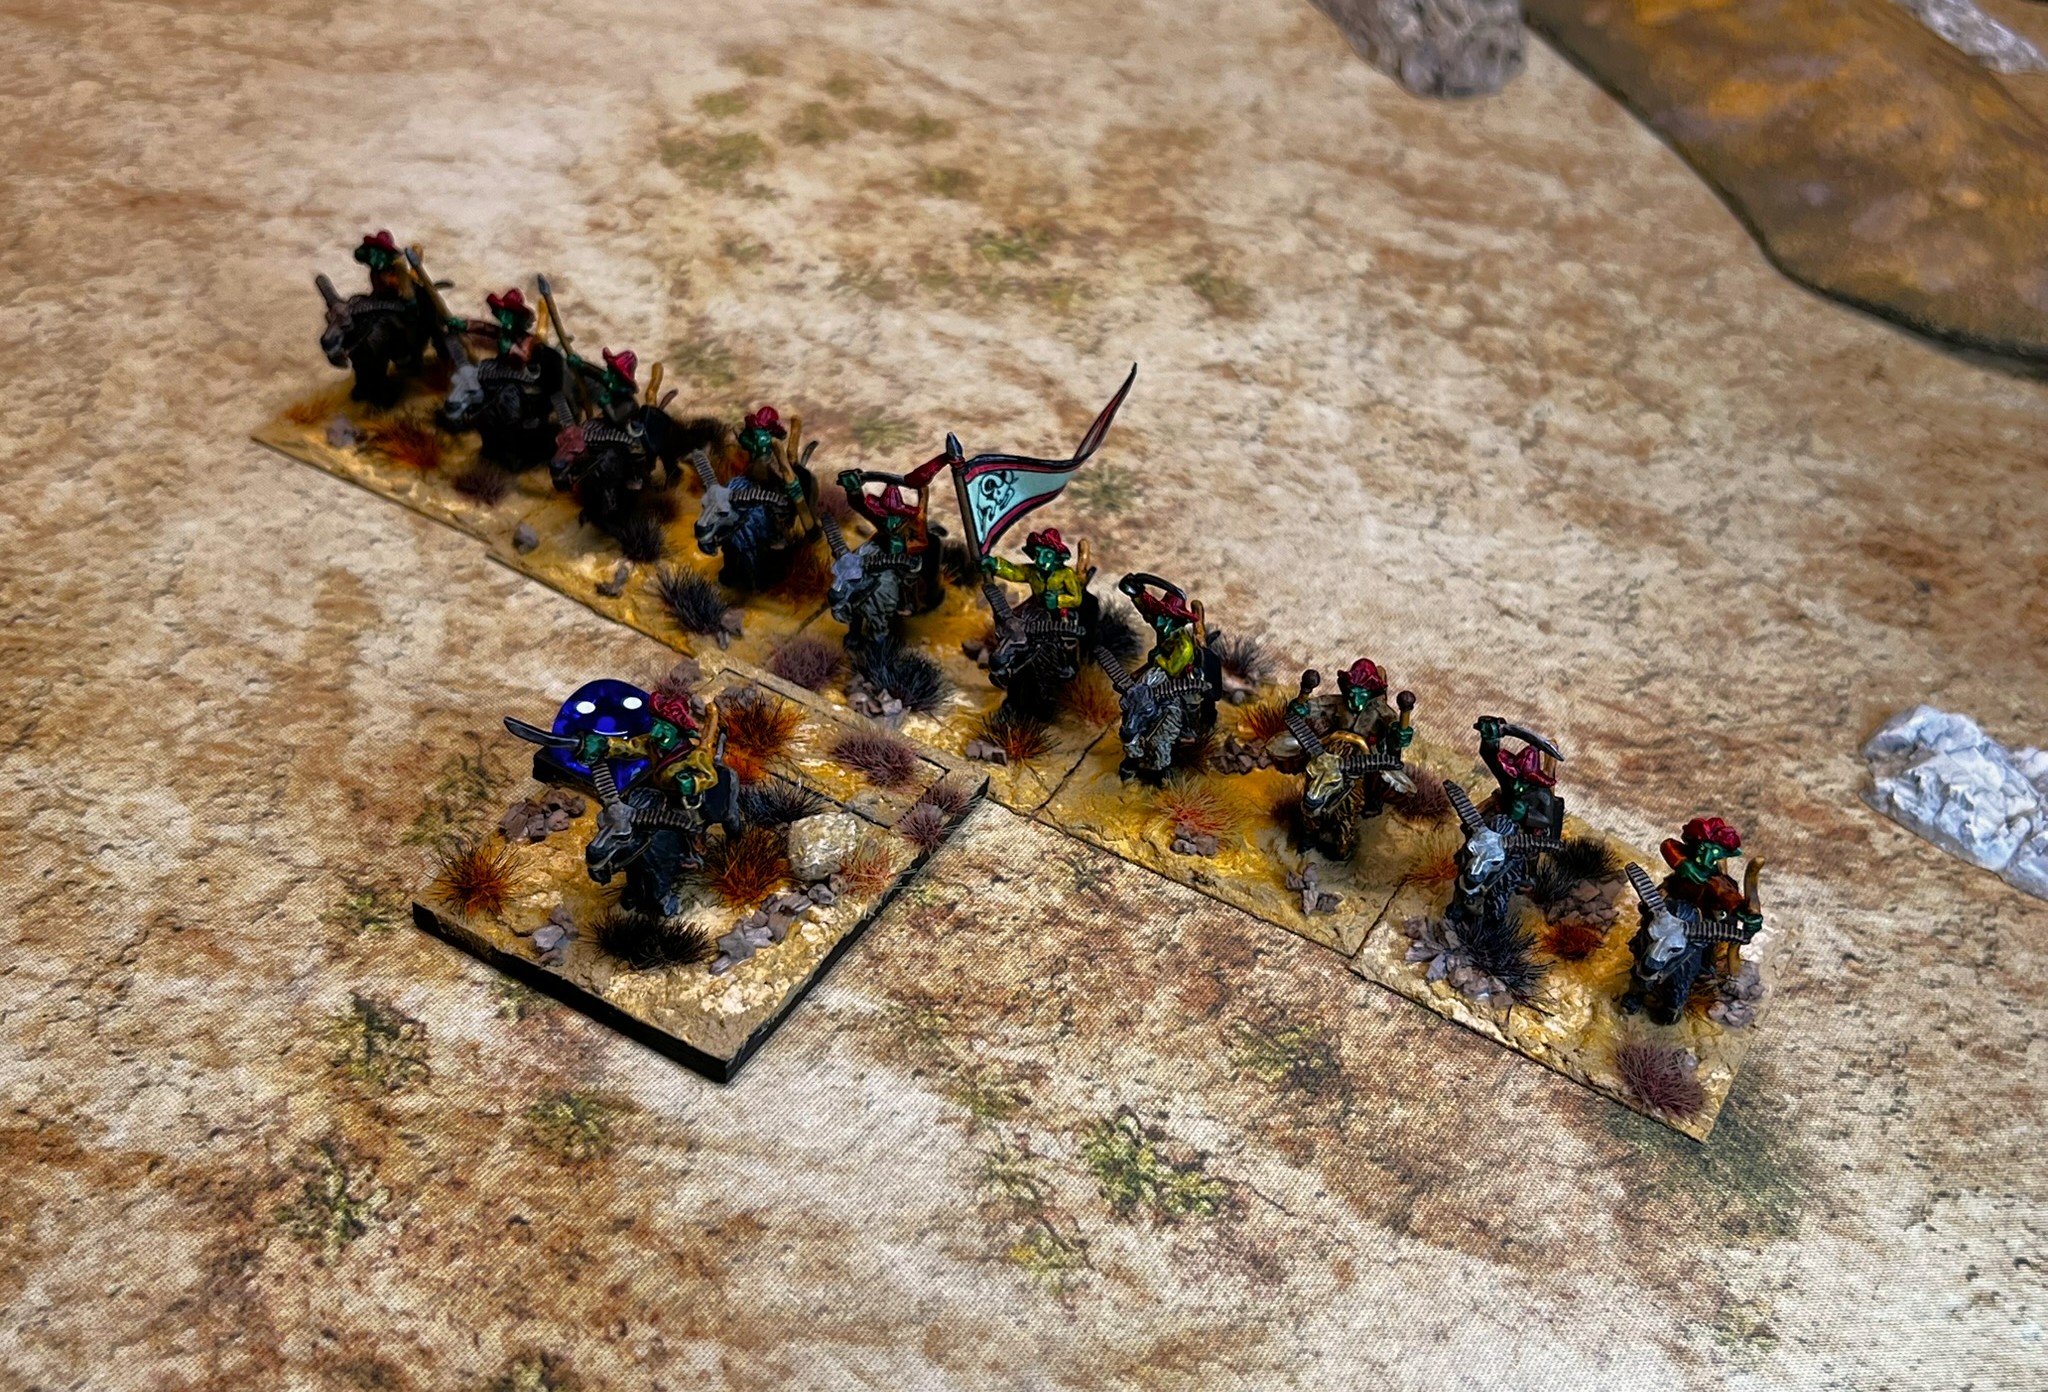
2nd Temujican Light Cavalry Regiment
The 2nd Temujican Light Cavalry Regiment – note the red hatsRegimental CommanderRegular standCommand stands for the 2ndThe 2nd Temujican Light Cavalry Regiment in column formation
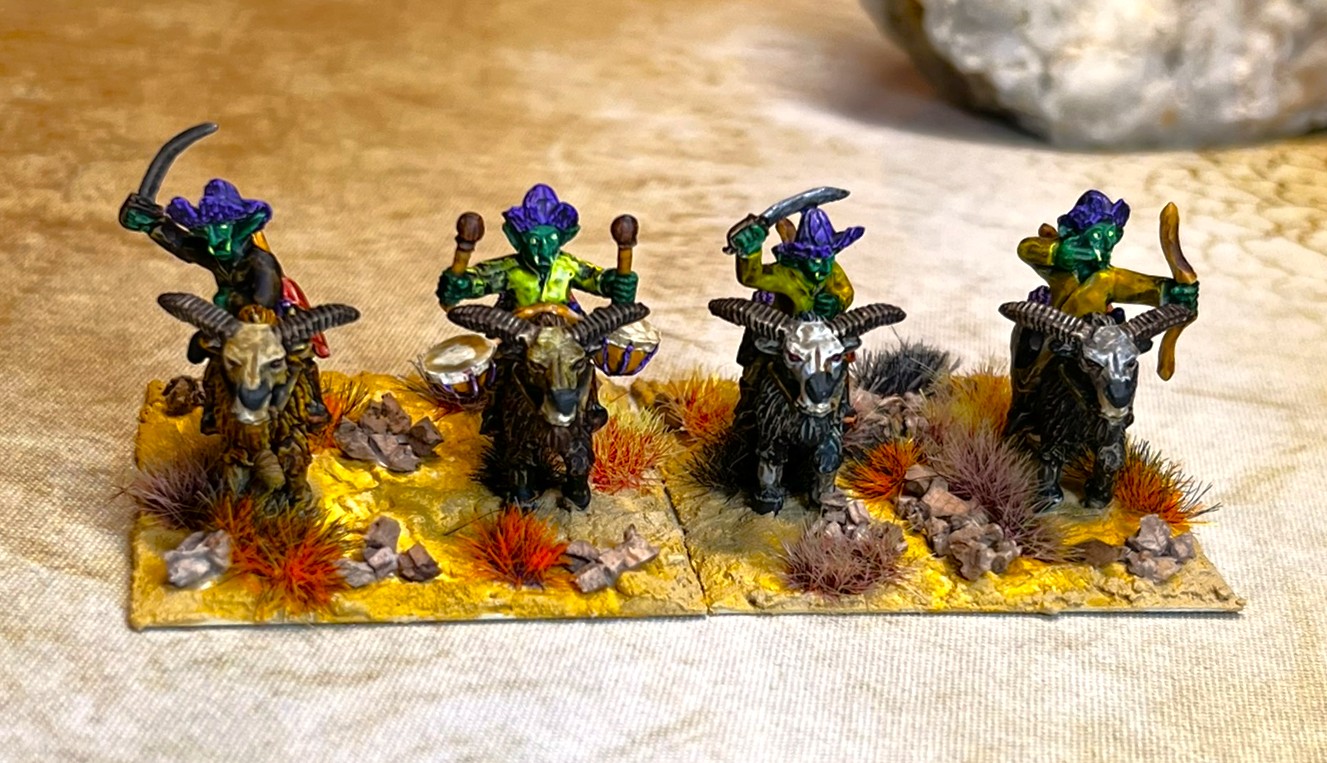
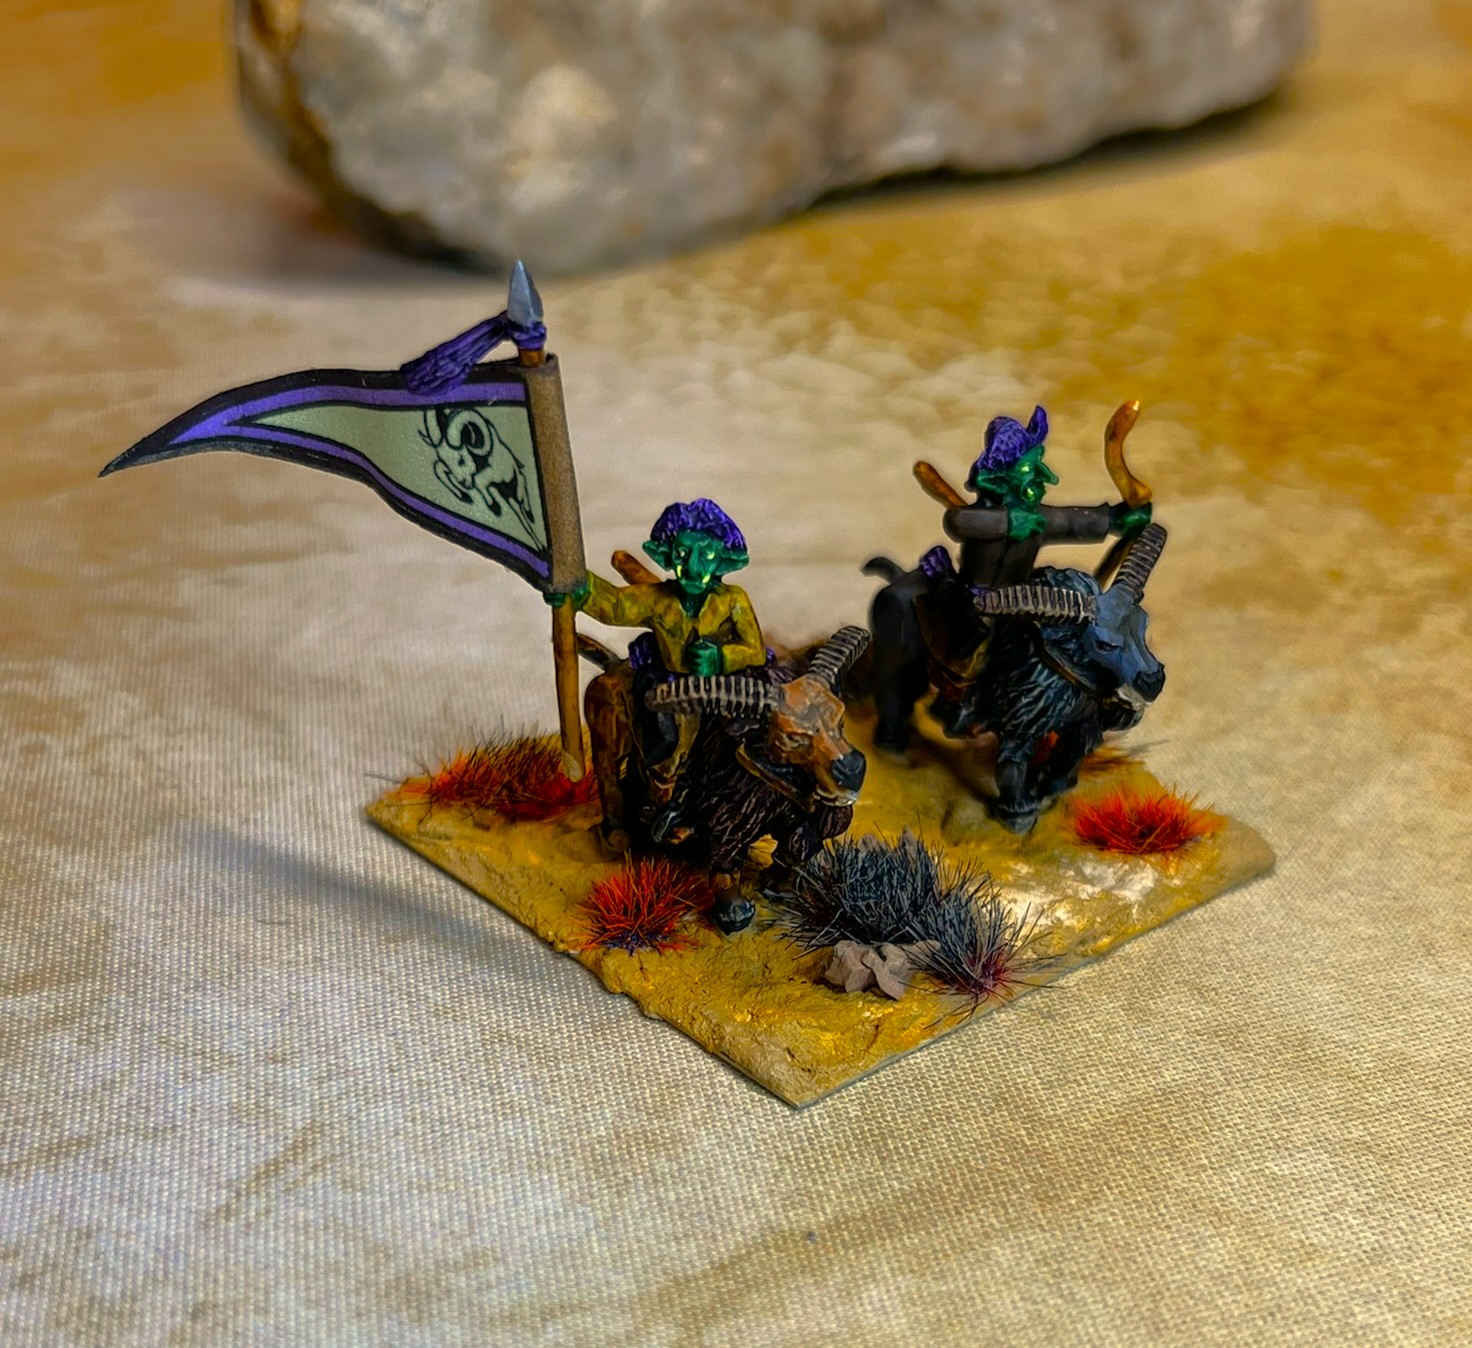
3rd Temujican Light Cavalry Regiment
The 3rd Temujican Light Cavalry Regiment – note the purple hatsRegimental CommanderOfficer/drummer stand and a regular oneFlag standThe 3rd Temujican Light Cavalry Regiment in column formation
I also mixed and matched figures to make three brigade commander stands for the Temujicans. These will command combined infantry and cavalry forces.
Temujican Brigade Commanders
The three brigade commanders for the Temujicans
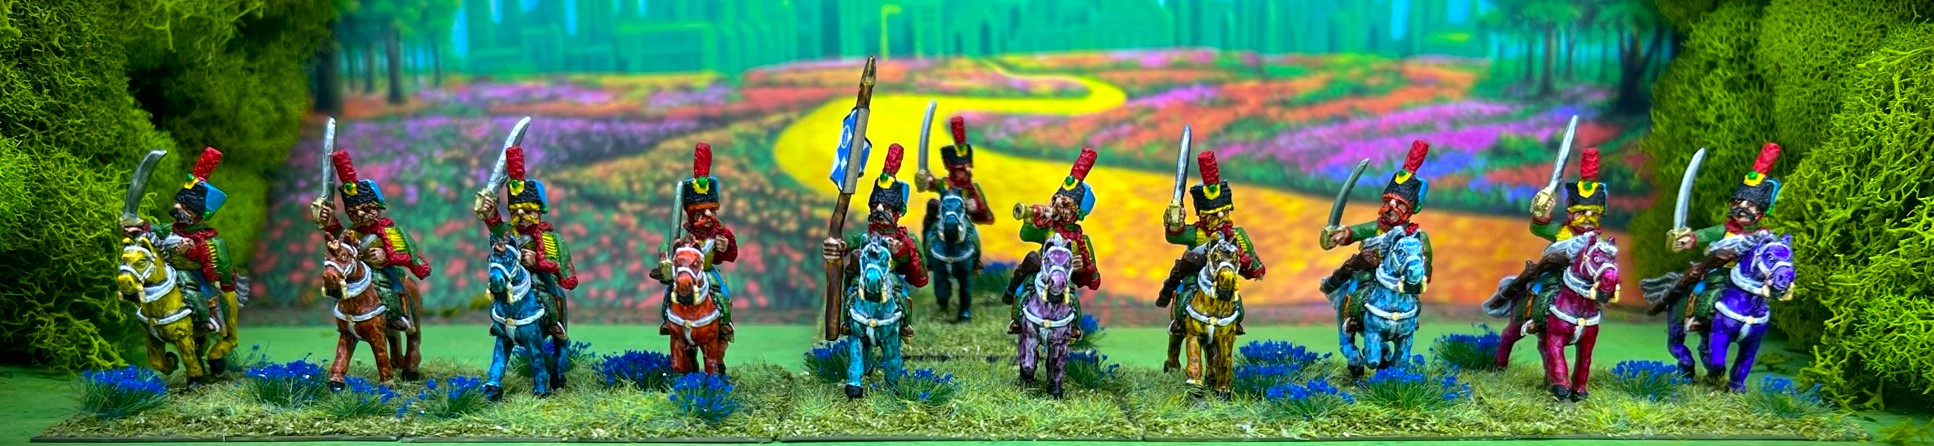
Group shots and a video!
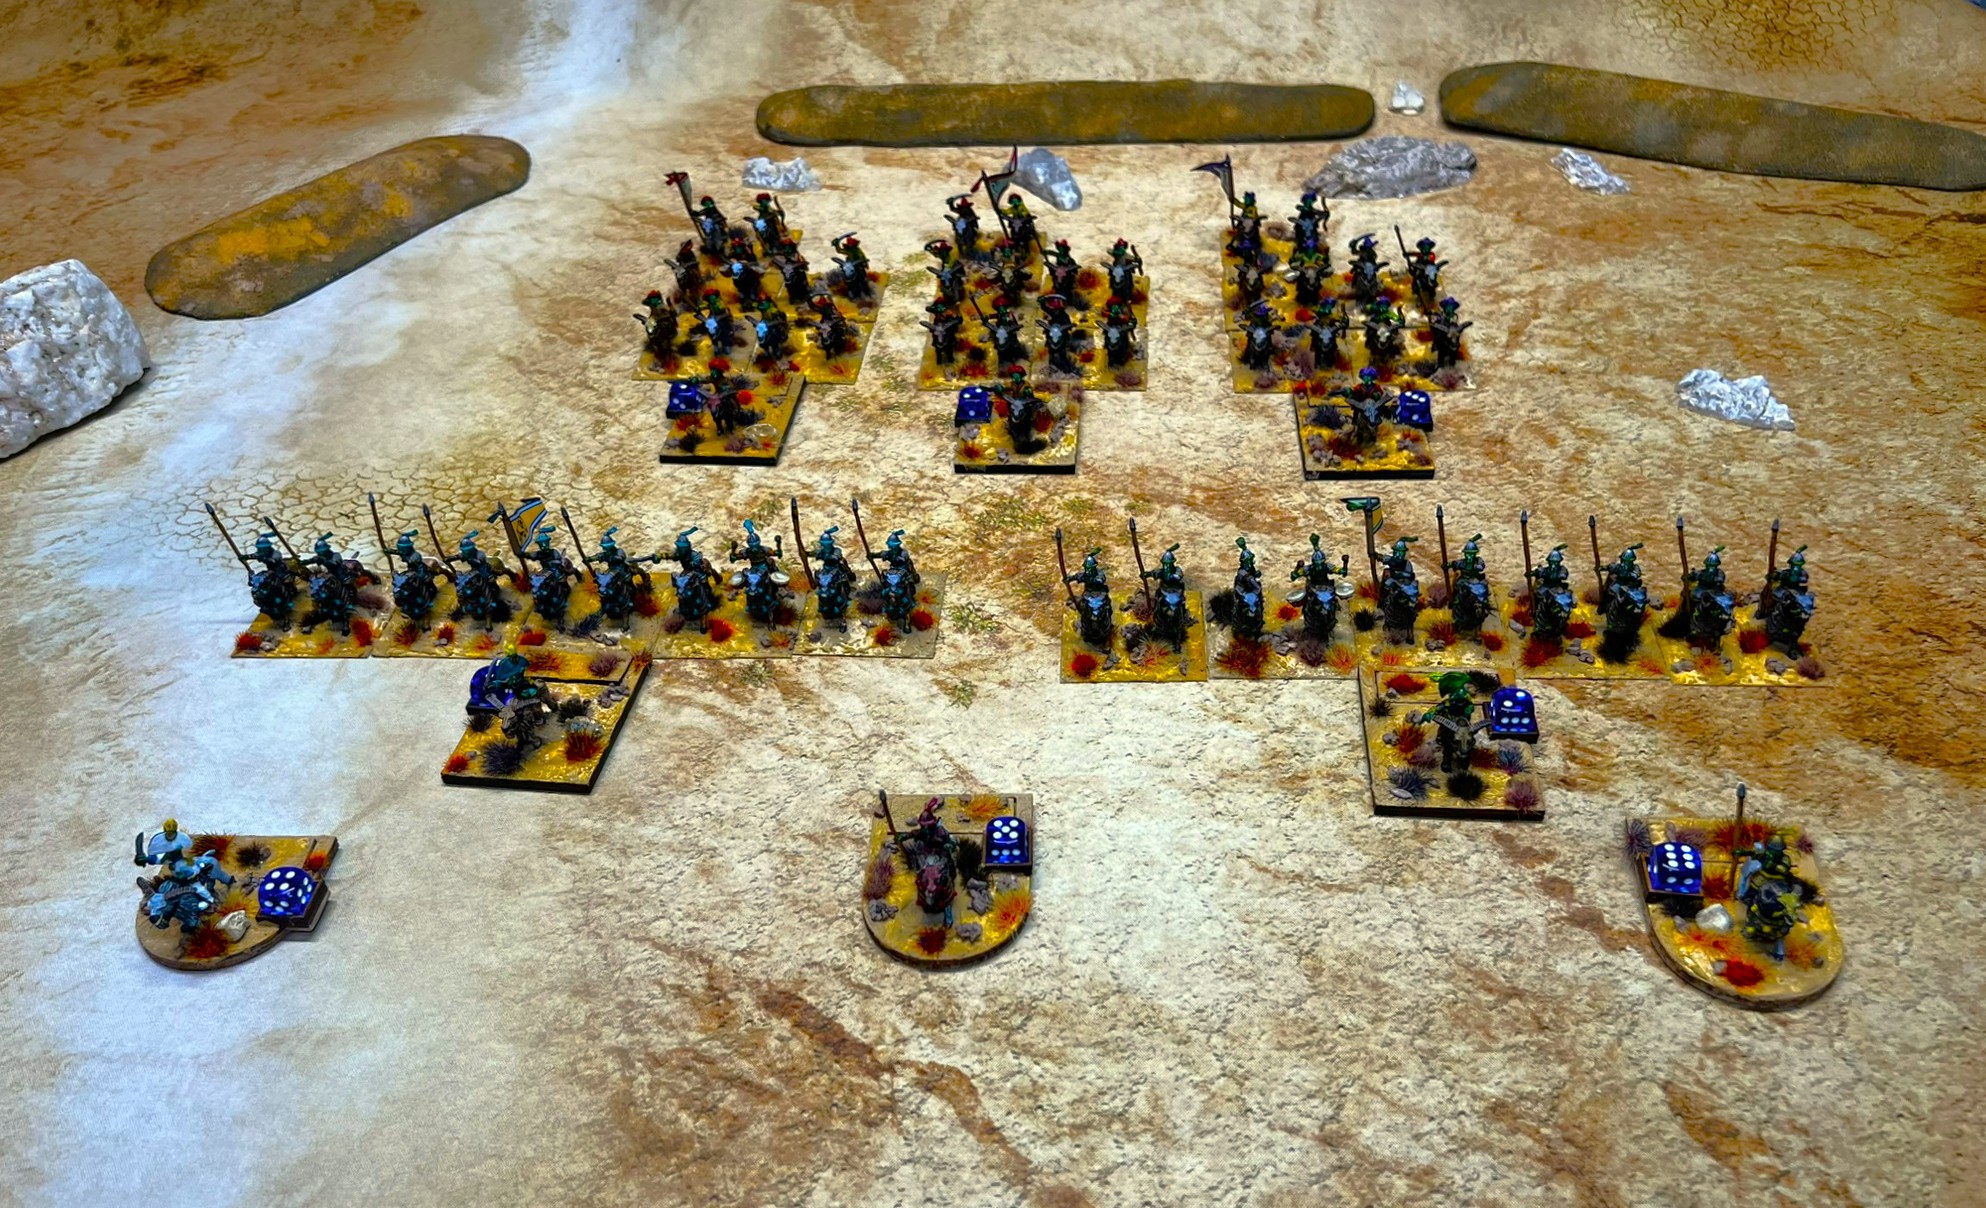
Lastly, I thought I’d share a photo of all the cavalry and a video. First, a couple of group shots – there wasn’t room enough to add the infantry and still show details!
All five Temujican cavalry regiments from the frontAll five cavalry regiments at an angle
Lastly a couple of video links. I don’t do a lot on Instagram – but here is the video below and that link as well.
If you want to check out the excellent Wars of Ozz figures’ range – there are two places to get them and to get the rules (and I make no money from this btw). The game rules and the figures are available from the next two places:
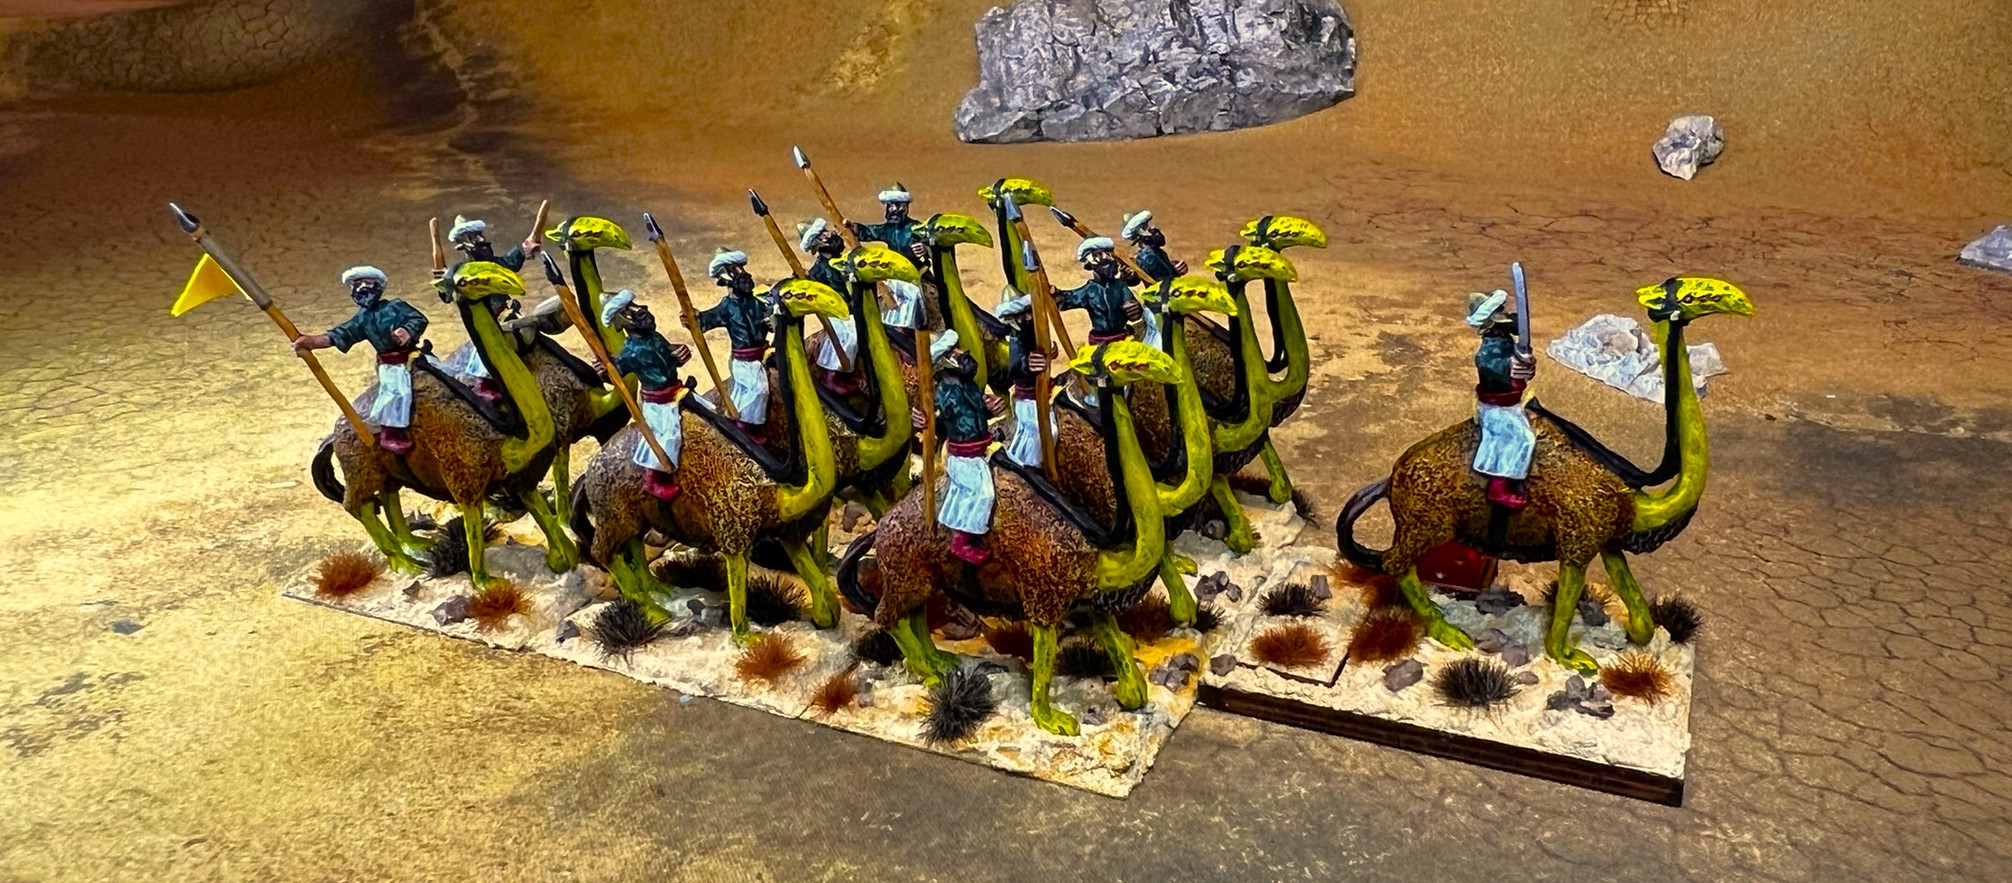
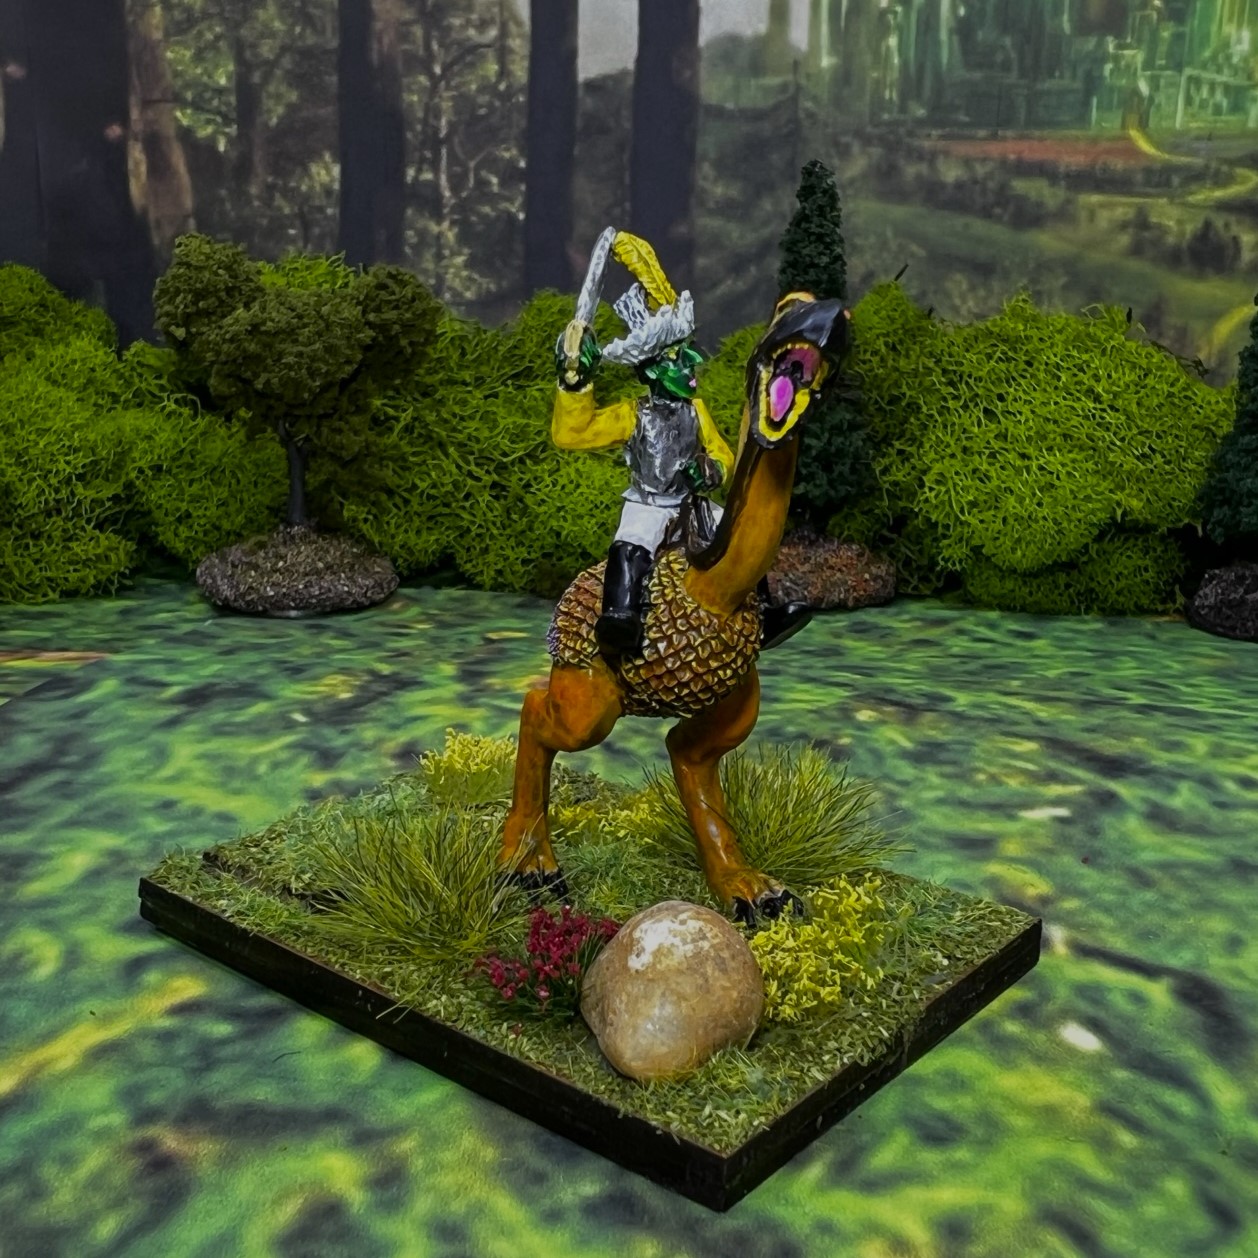
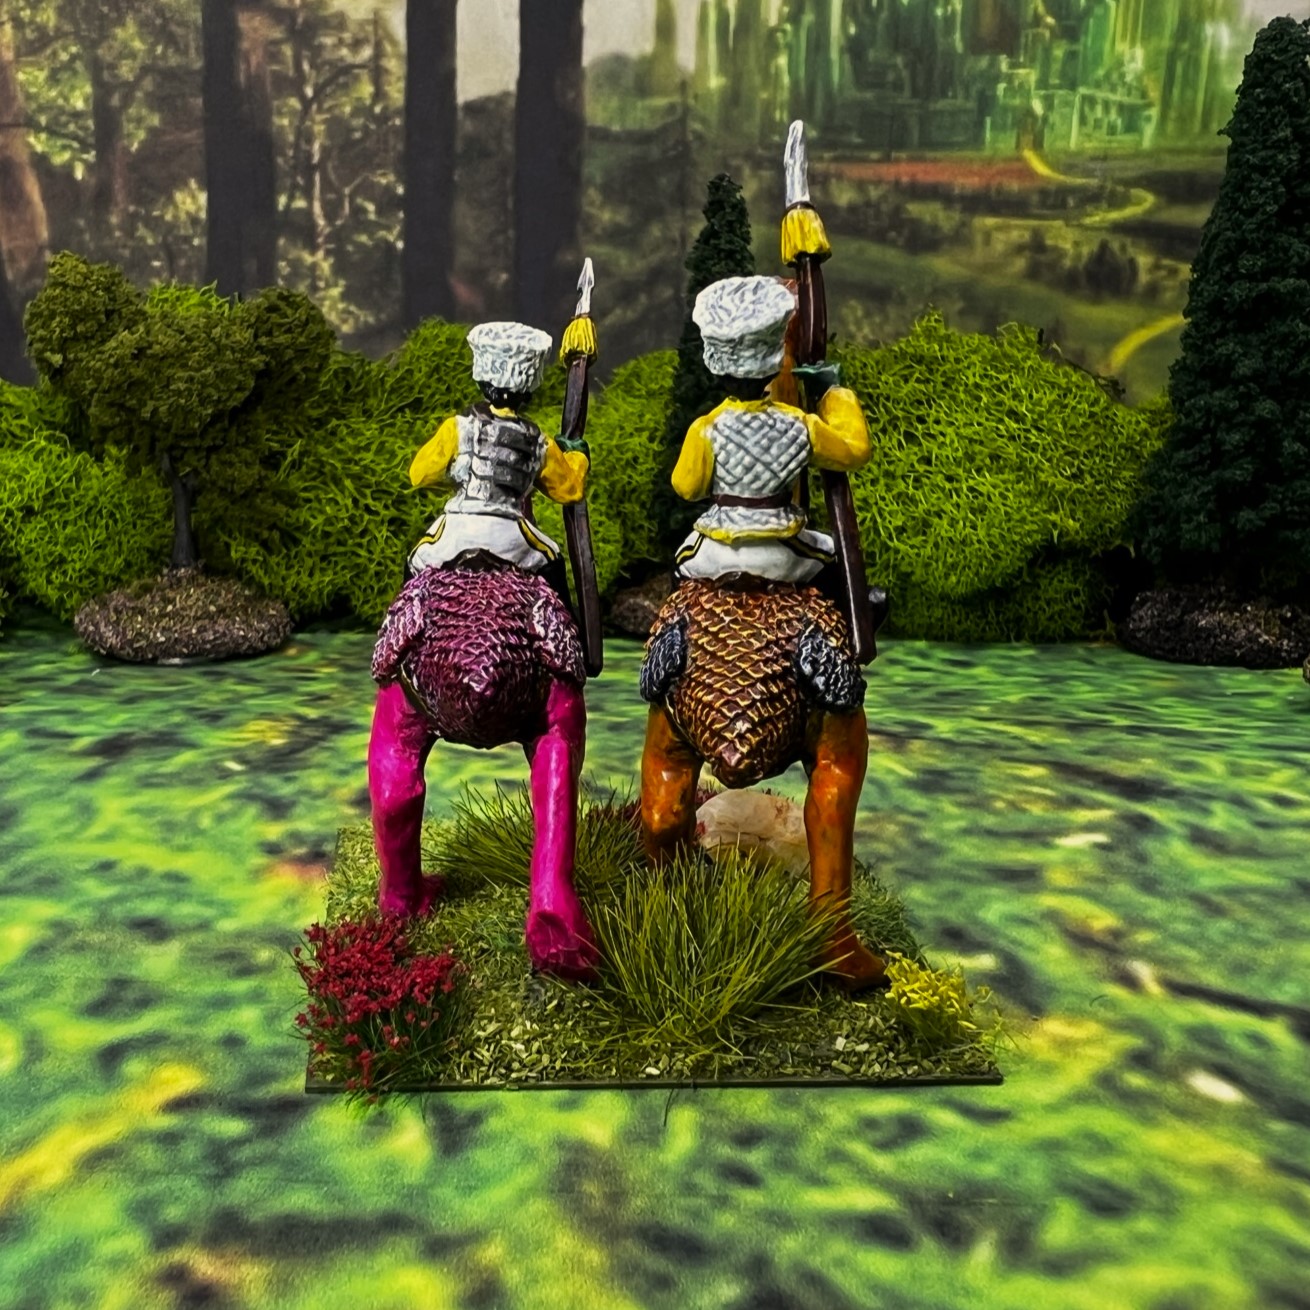
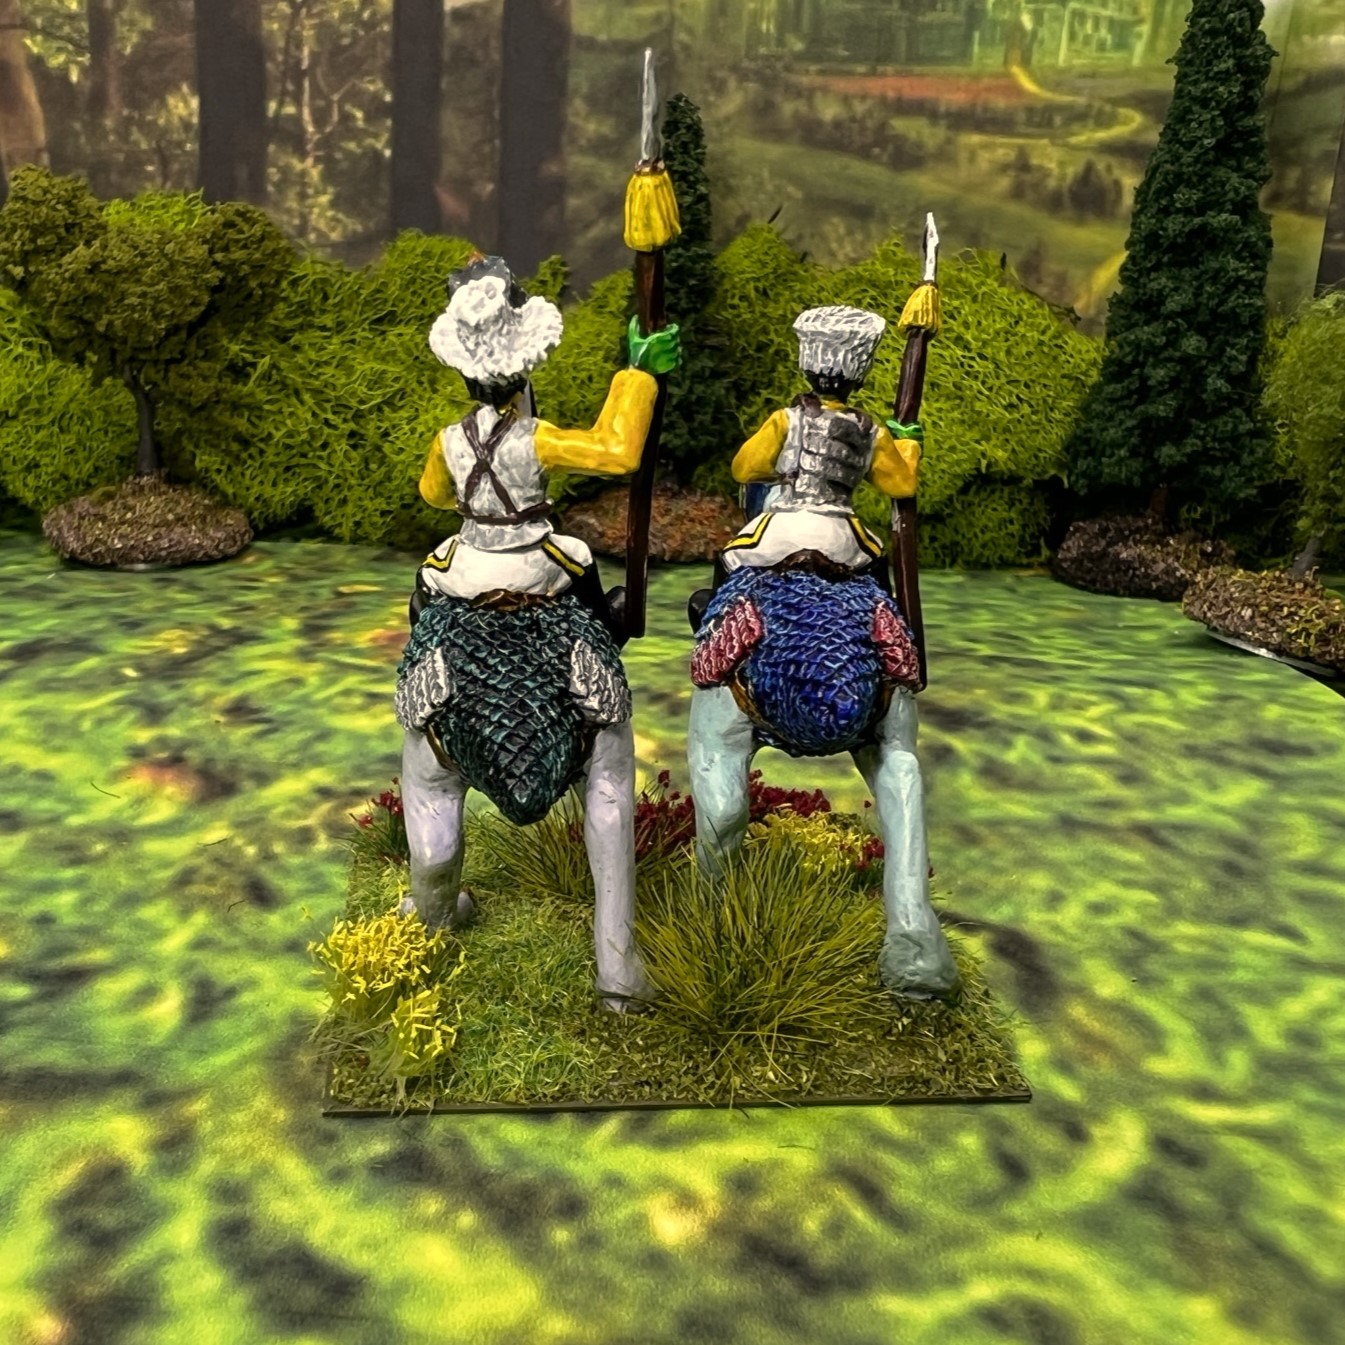
Each Whim Whim brigade can have up to six regiments of spearmen. However, each brigade is limited to a single regiment each of chariots, a single regiment of cavalry, and one of janissaries. They for example cannot have two regiments of cavalry, but could have a chariot and a cavalry and a janissary. When I have completed the Whim Whim, I will have enough to field two to three separate brigades. Each of these two cavalry (WWCAV) regiments will be assigned to different brigades.
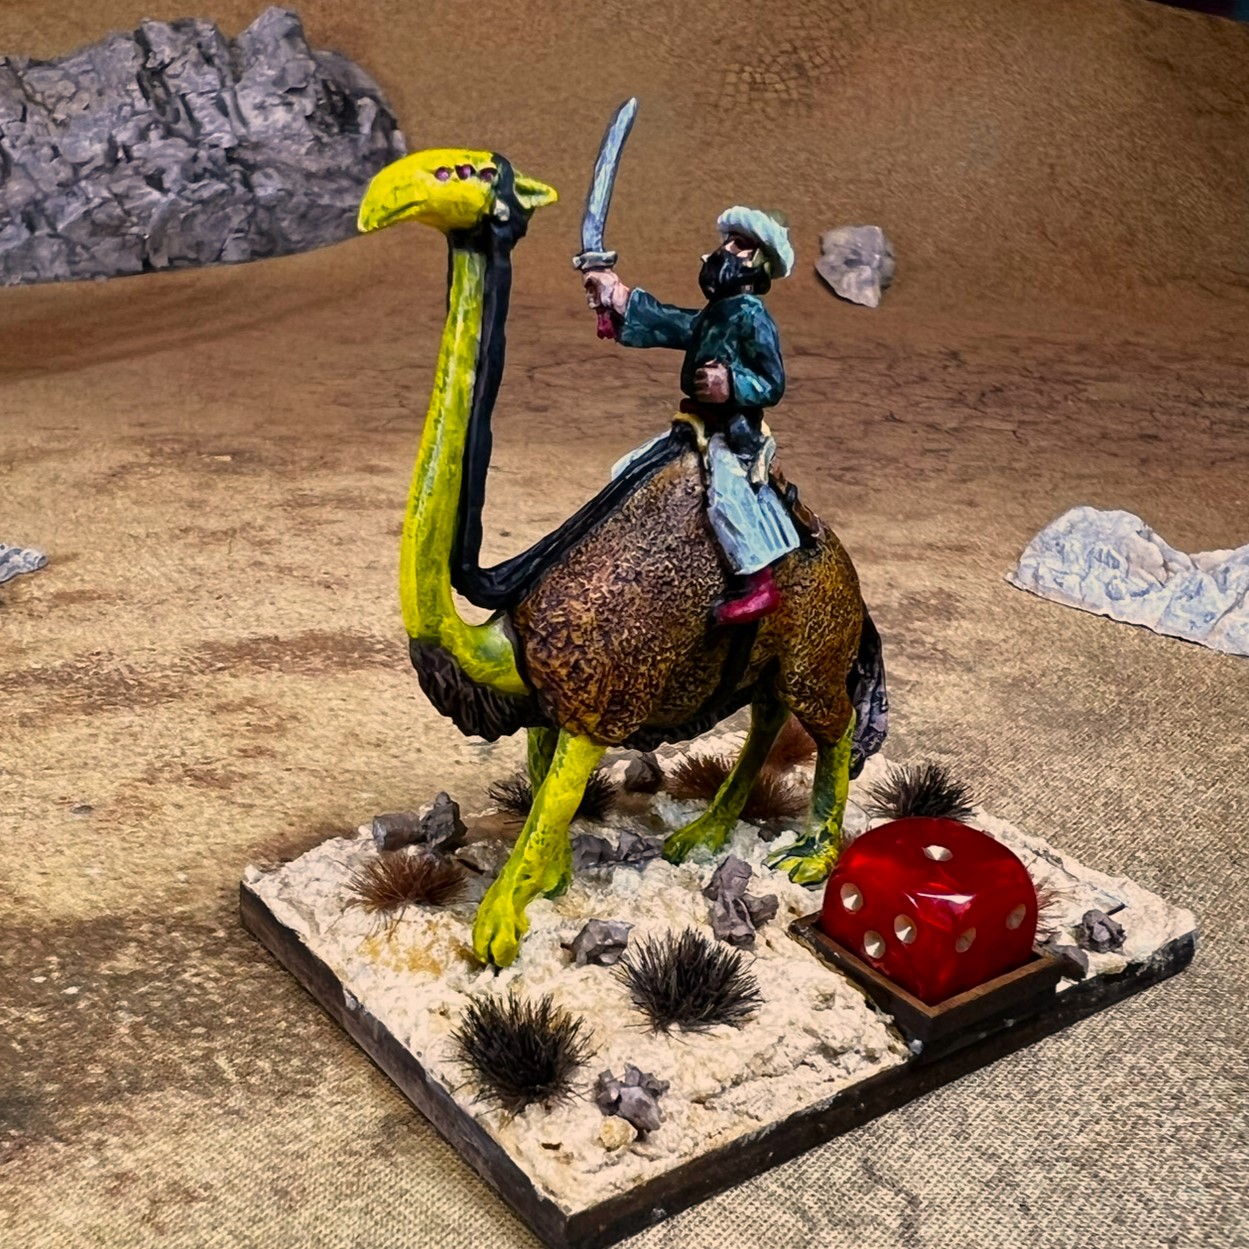
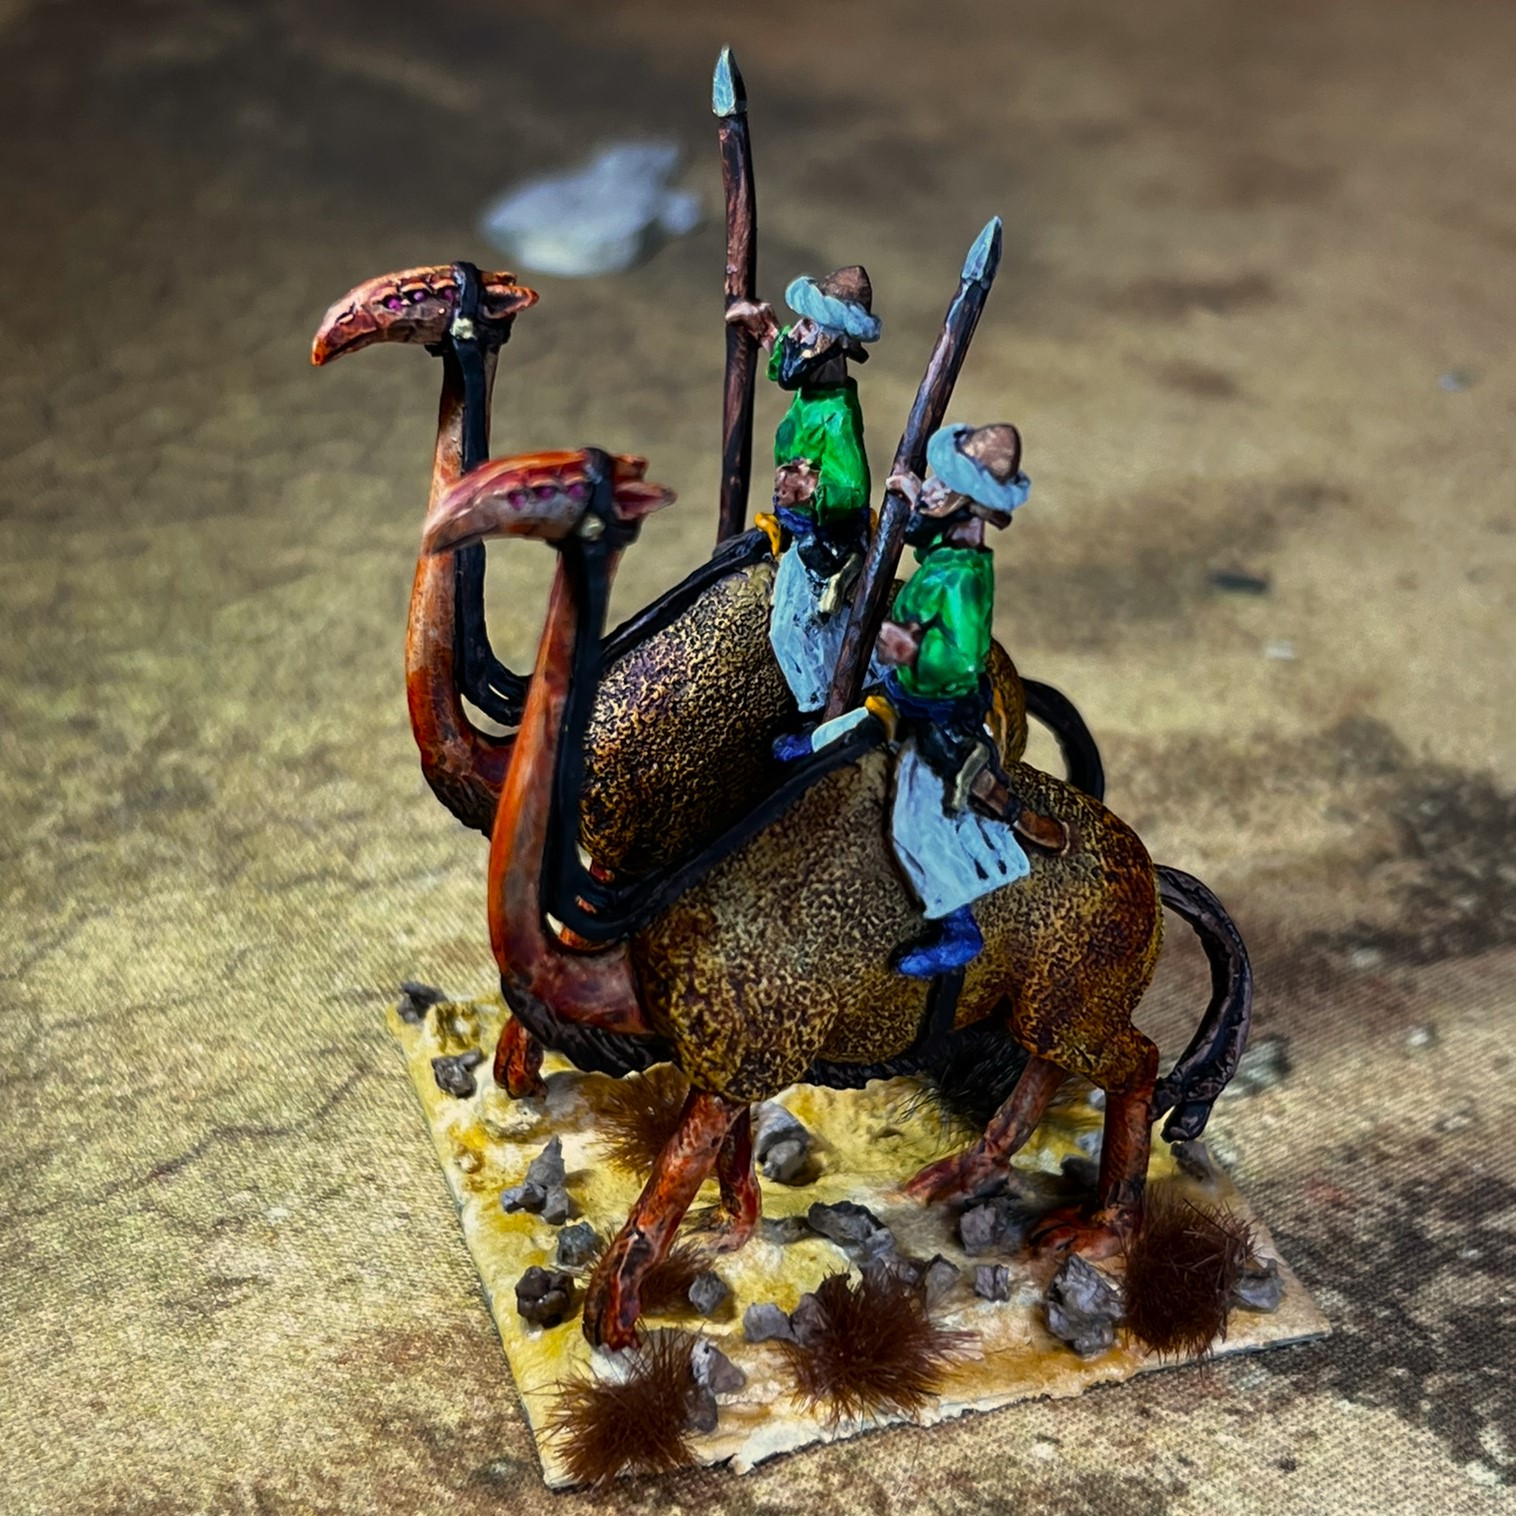
And a word about “cavalry”. When I first saw these, I immediately thought “camelry”. On further learning that the mounts were not camels, but called siliyiplix. Yes, try pronouncing that… Further, are these “siliyiplixery” units, what is the plural? Never mind, it’s Ozz! Oh, and they have 6 eyes and double or triple tails too!
On the Wars of Ozz website the photo of the regiment is as shown below:
Photo from the Wars of Ozz website
The Army list file from the Wars of Ozz Facebook group (it’s a private group but when/if you ask to join reference me) shows the following regarding colors:
“Green tunics, white turbans. Mounts are yellow or orange. Spears do not have pennons.”
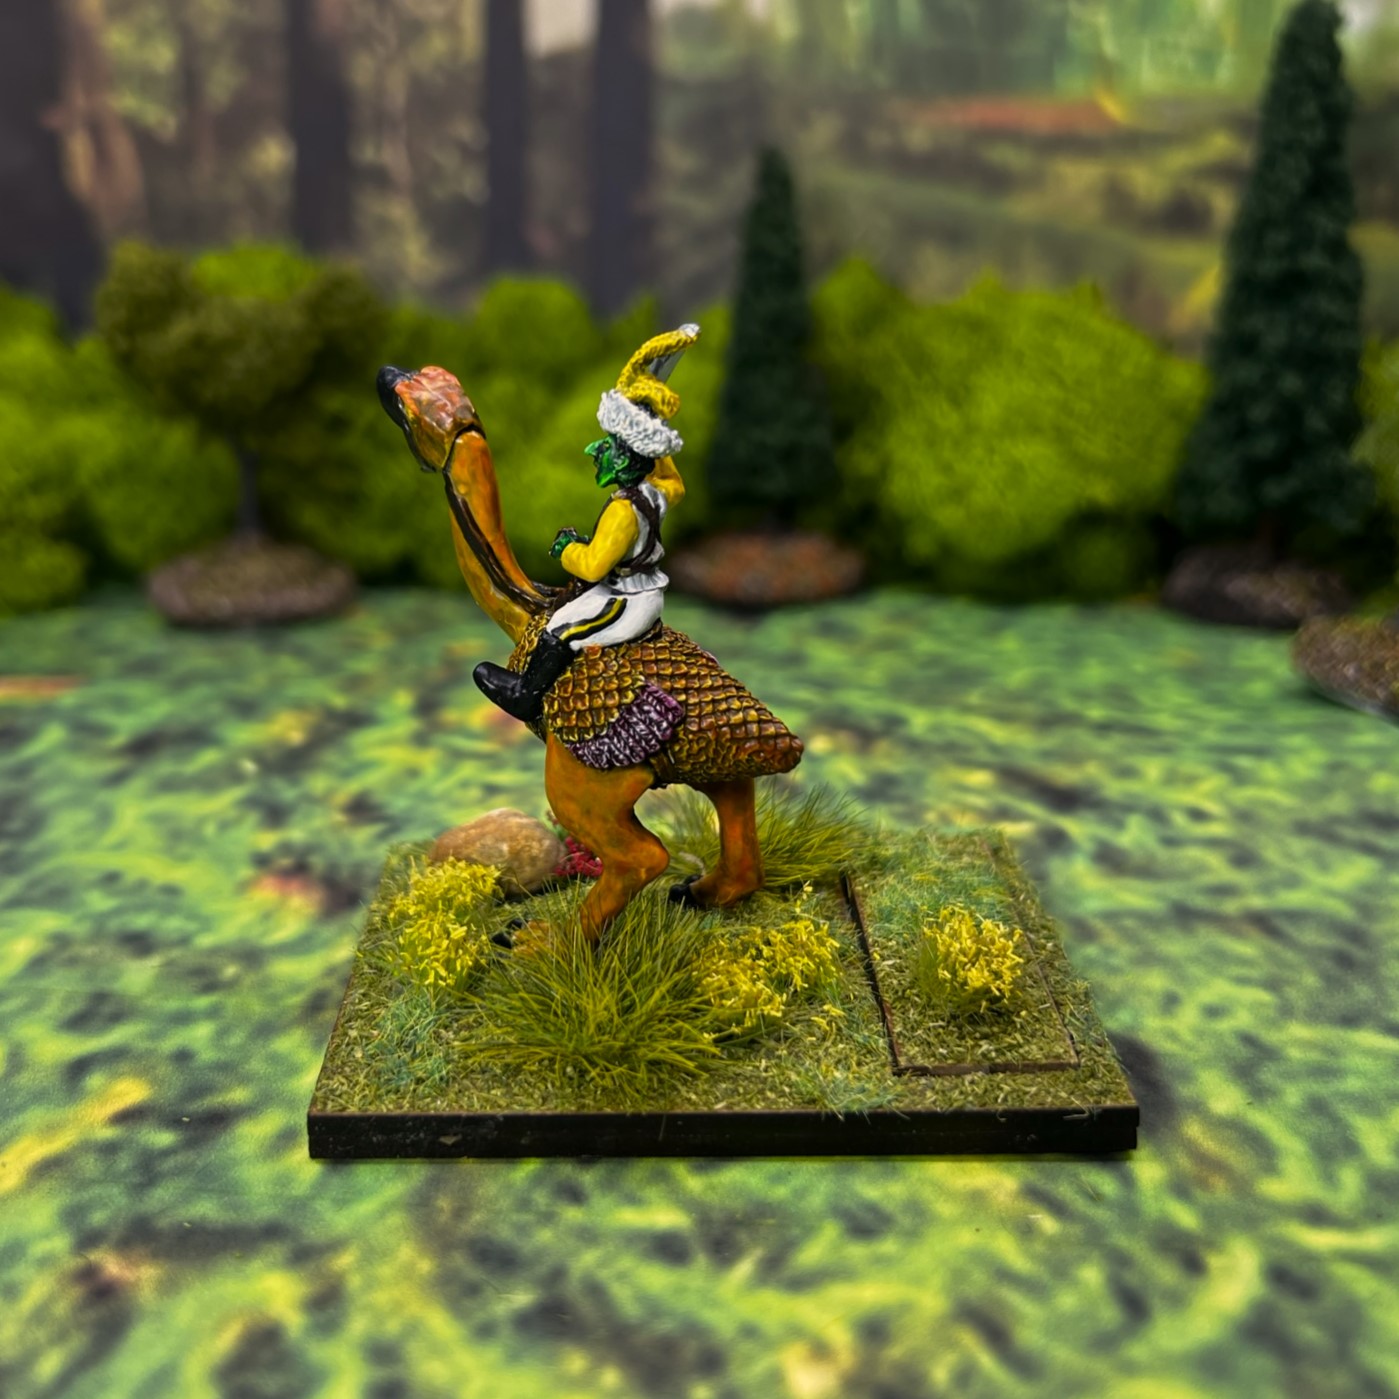
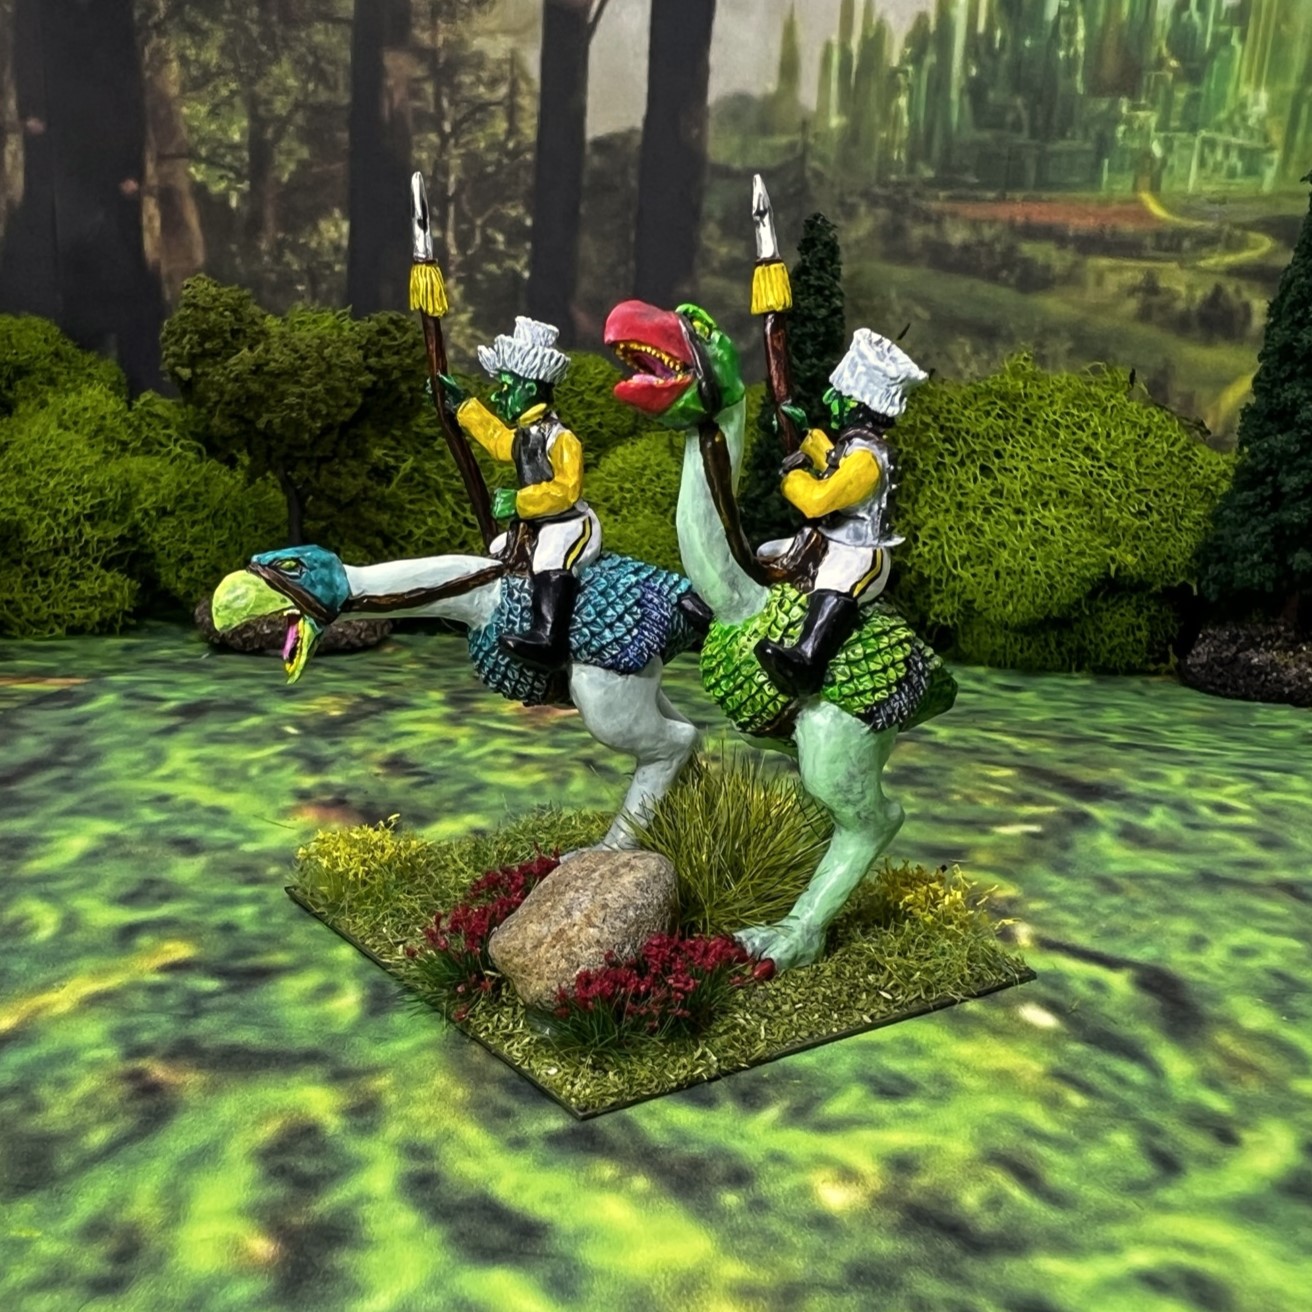
As I had the two WWCAV’s, and as I always try to have some differentiation between similar regiments, I decided to make these color choices:
Greenish-yellow (1st Regiment) and orange (2nd Regiment) mounts
Dark green (1st Regiment) and light green (2nd Regiment) tunics
Yellow (1st Regiment) and orange (2nd Regiment) saddles
Aztec yellow (1st Regiment) and (2nd Regiment) copper helmets
Red (1st Regiment) blue (2nd Regiment) sashes and boots
Light (1st Regiment) and dark-colored (2nd Regiment) spears
Each WWCAV regiment consists of 10 mounted troopers and a mounted regimental commander. The unit is found on the website as SKU OZZ-1402. Therefore I had a total of 22 figures for both. The figures are metal, and are 28mm scale.
Similar to other cavalry units in Ozz, the WWCAV are quite powerful and can have a great shock effect when used properly. The most combat power is due to a Melee value of 8/10. They are armed with spears but have no missile capabilities. The WWCAV regiments are above-average with a Resolve (ability to stand against an attack) value of 7/10, 2 better than the chariots. Their desire to get into and stay in a fight (Elan) is also 7/10. Point-wise, they cost 6 points per WWCAV. The sculpts of both the siliyiplix and the riders have a few differentions, but they are massive together and look impressive.
I started work on my WWCAV’s on August 10th and finished them on August 28th. I’ll share some WIP work below – these did involve a good bit of hobby work.
Whim Whim Cavalry WIP Shots and Discussion
I worked on the different components separately. These were:
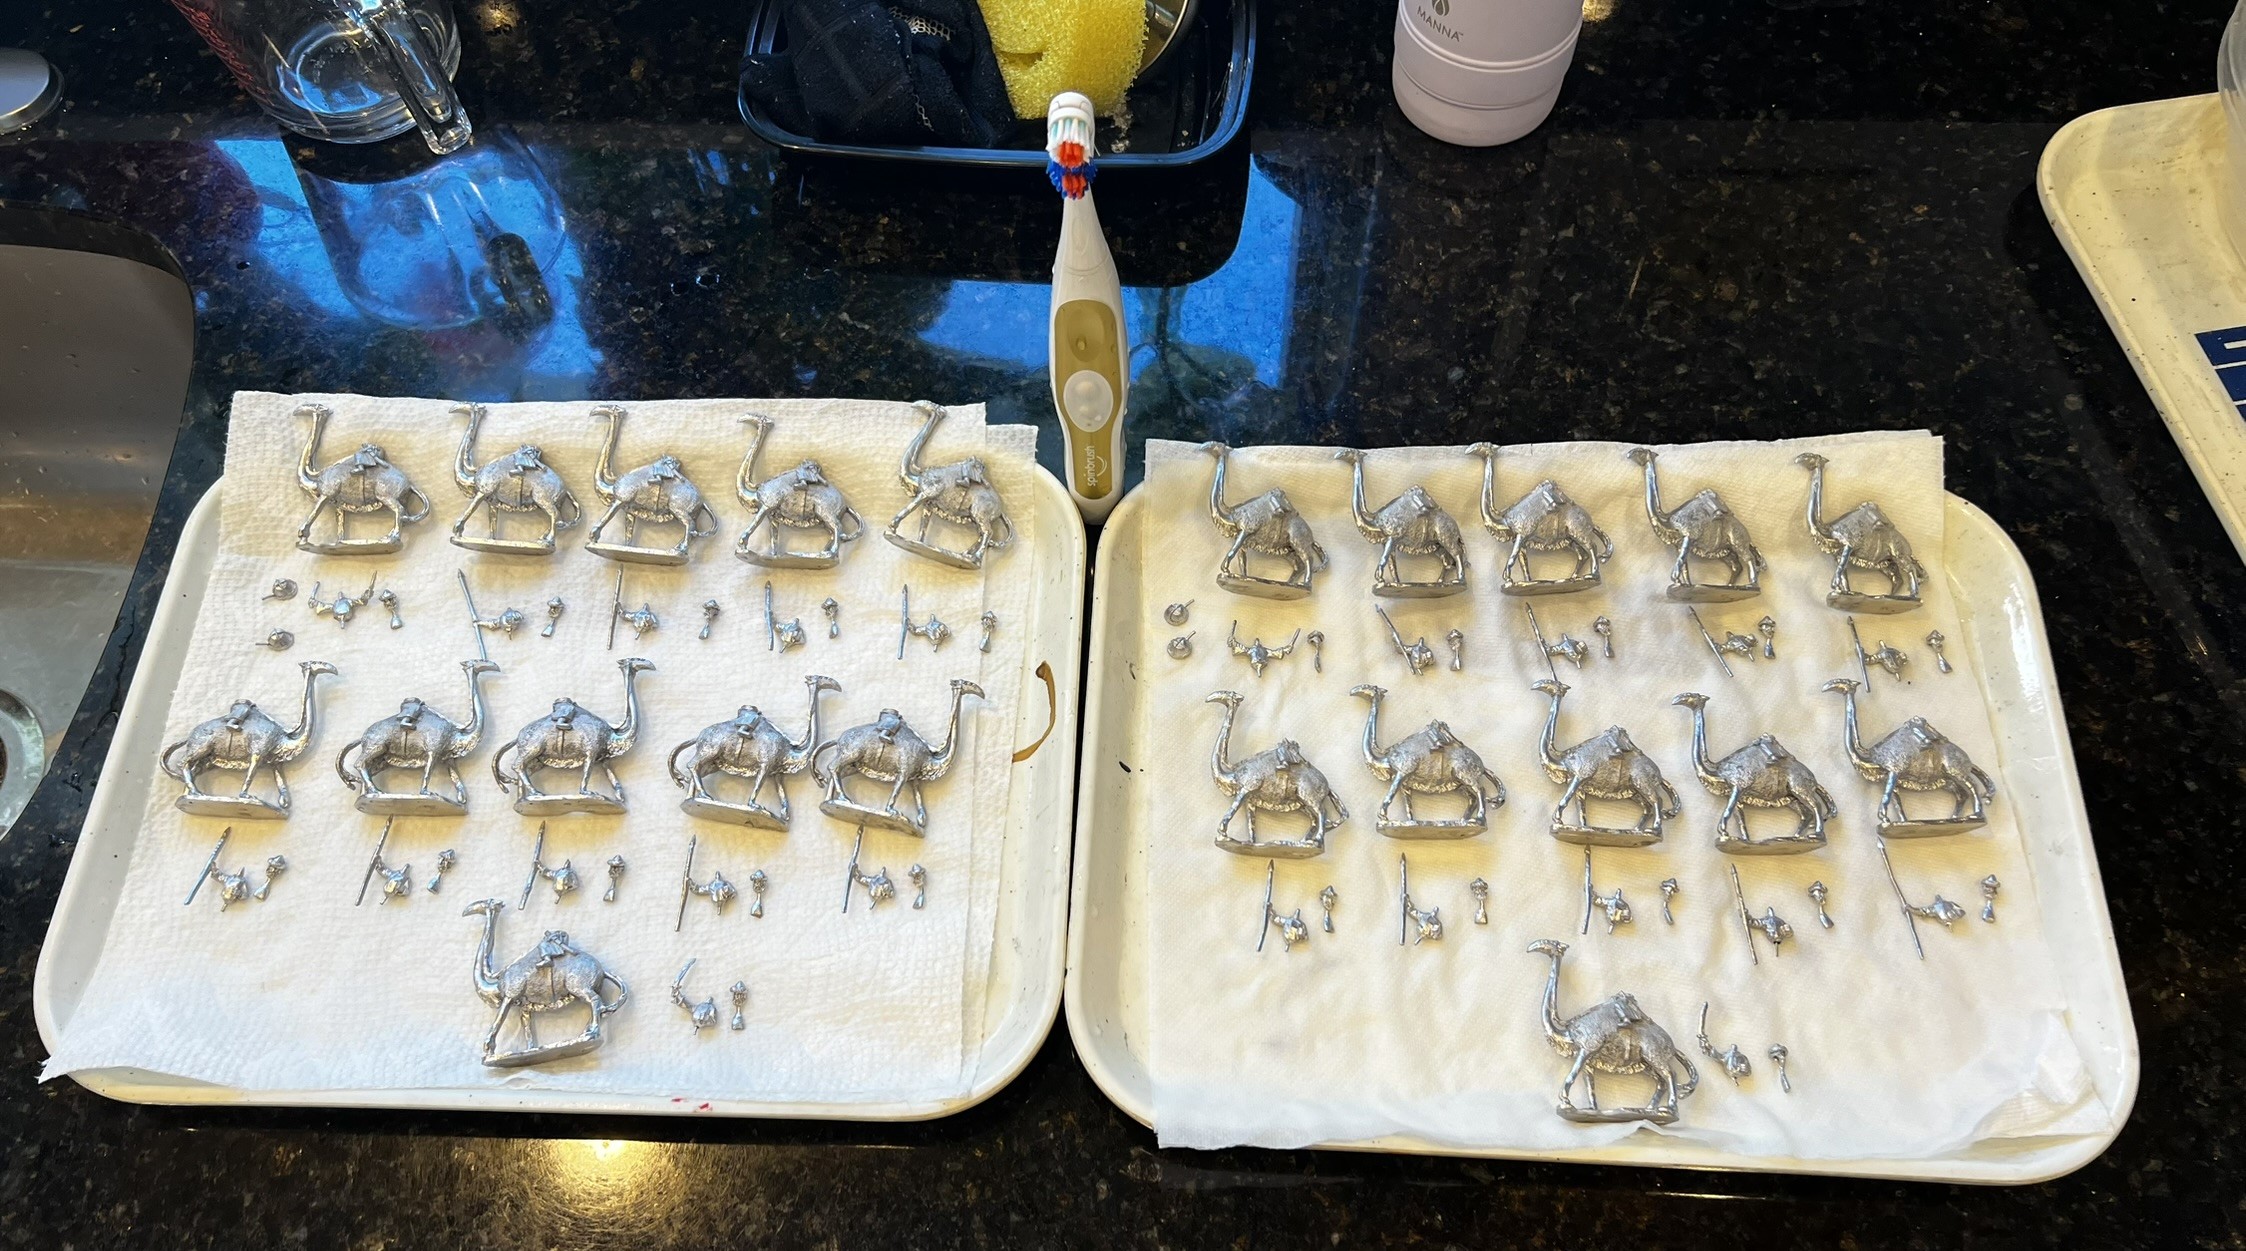
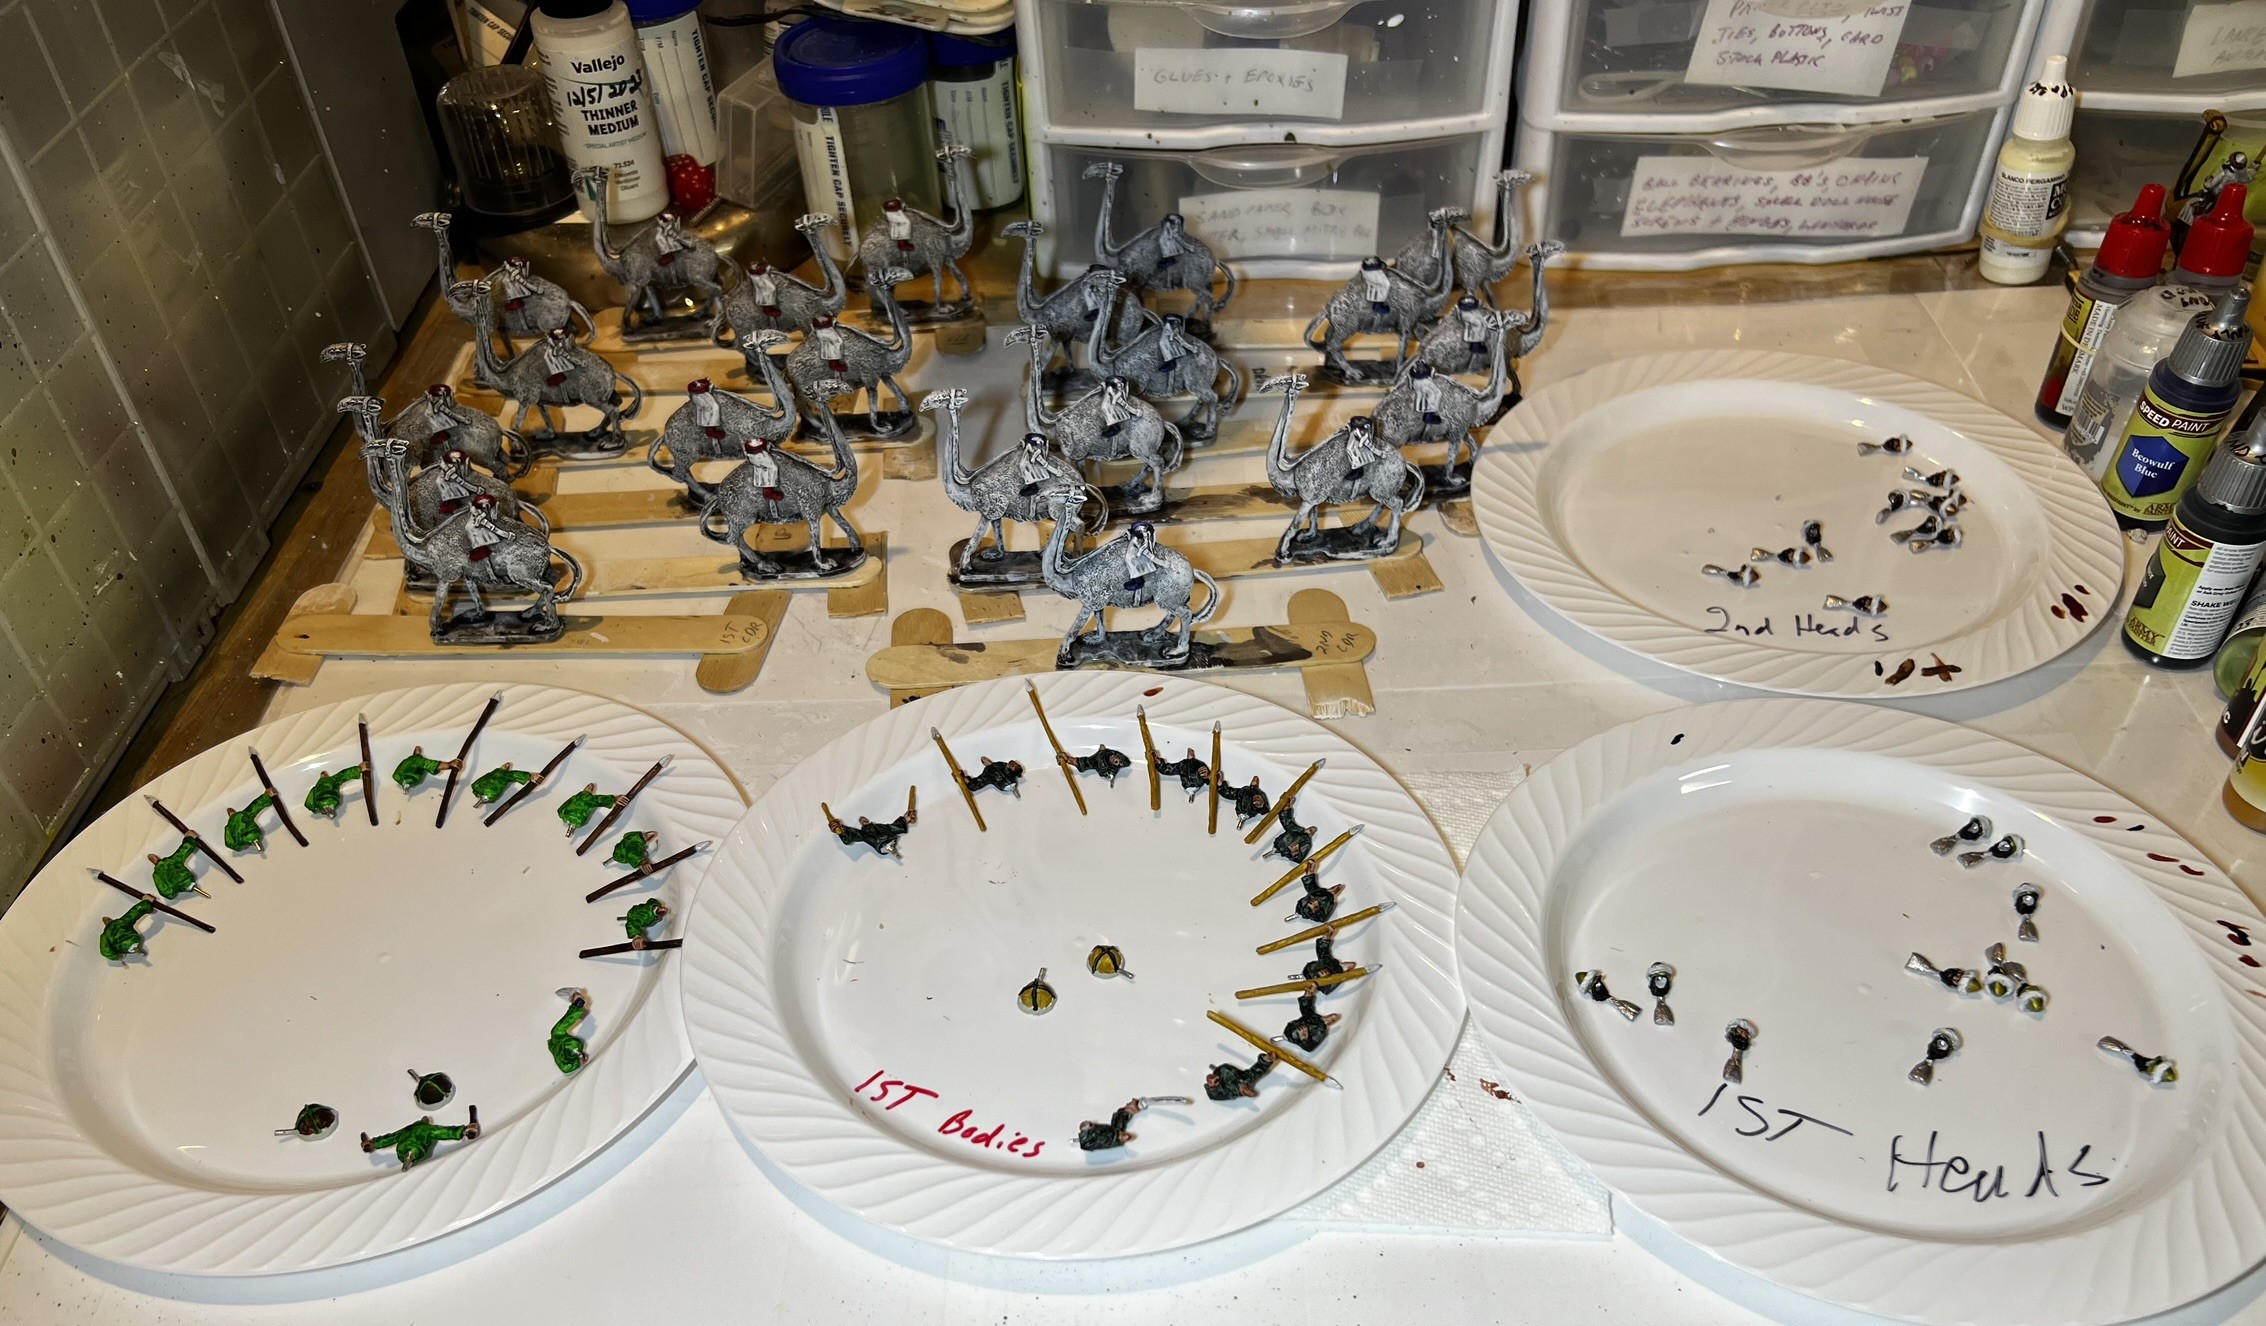
The siliyiplix mounts and rider legs
The riders’ torsi
The riders’ heads
I decided to work on each component separately. First, I performed the obligatory filing off of mold lines and removal of flash. I also drilled out for mounting of the drummers’ drums and each of the heads. Then it was on to washing the metal before priming it.
All cleaned and drying – I use an old electric toothbrush with dishwashing soap.
As my 200 ml primer bottle of Vallejo Mecha White Primer was clogging my airbrush, I went with a brush application. I won’t be buying any more 200ml primers or varnishes any more btw, they are not reliable long-term for airbrush use. I’ll buy 60 ml from now on.
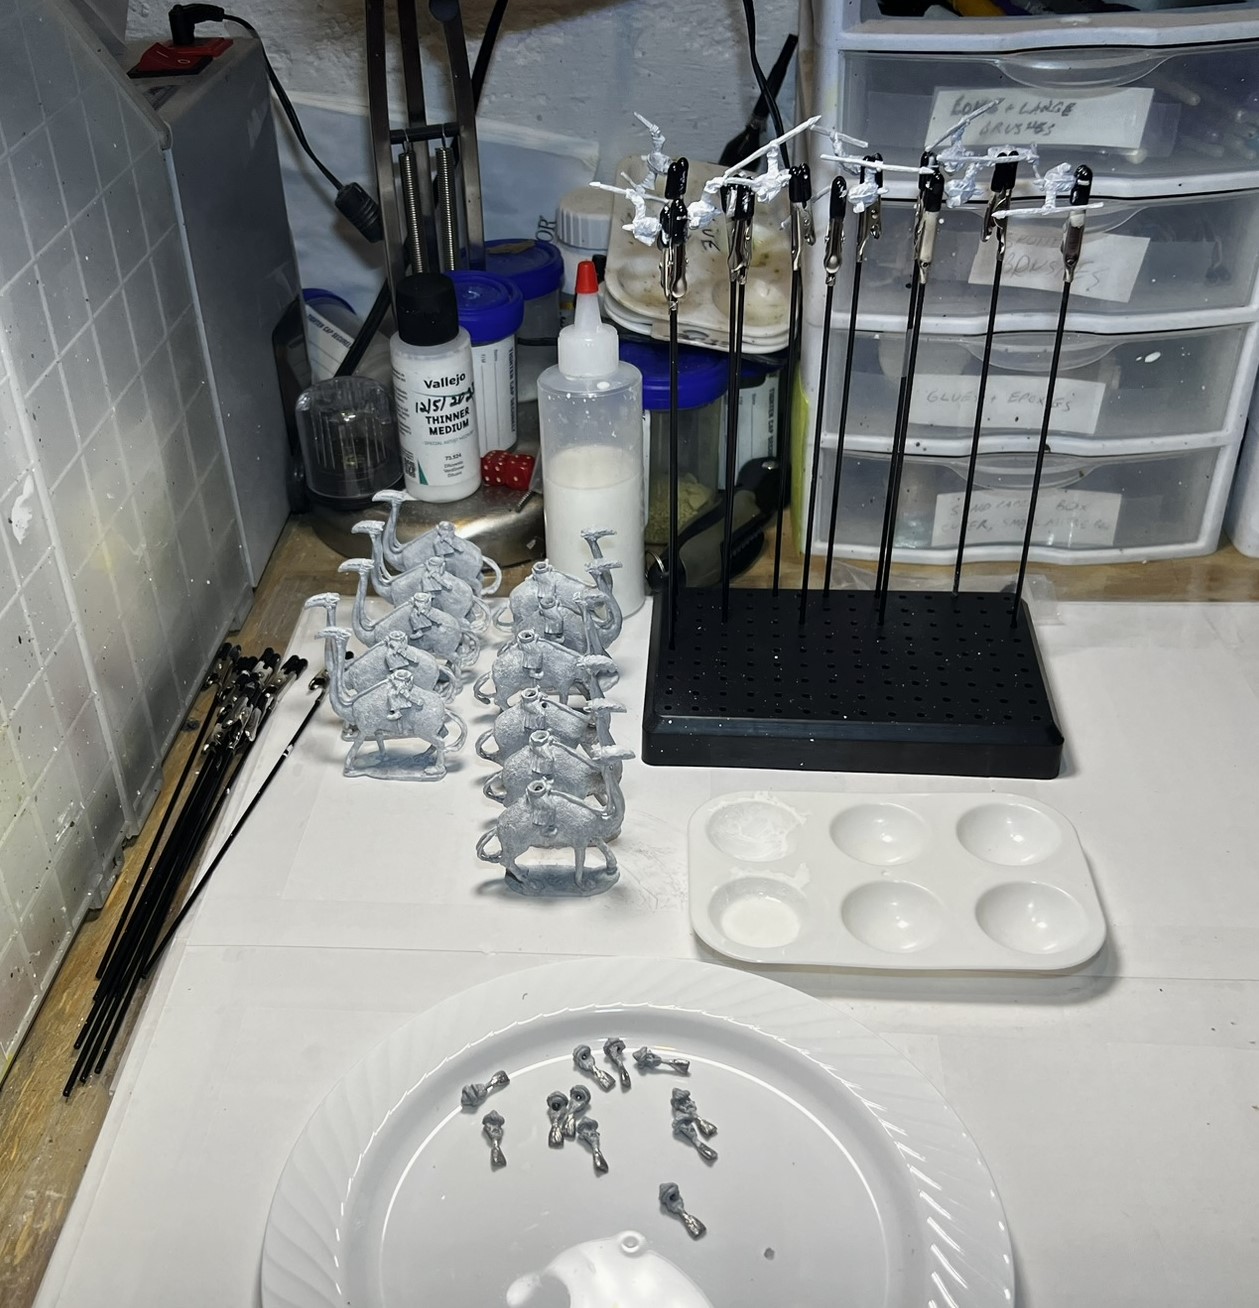
I brush-primed the lot – and used my alligator-clip stand and popsicle stick jigs to mount for painting for the torsi.
Priming done.
Then I added a wash with Army Painter Dark Tone by August 15th.
Washing done.
Then it was dry-brushing time with off-white. By August 18th I had made some progress.
August 18th progress.
By the 24th, I was on my way to getting ready for assembly – though it felt like these were taking forever!
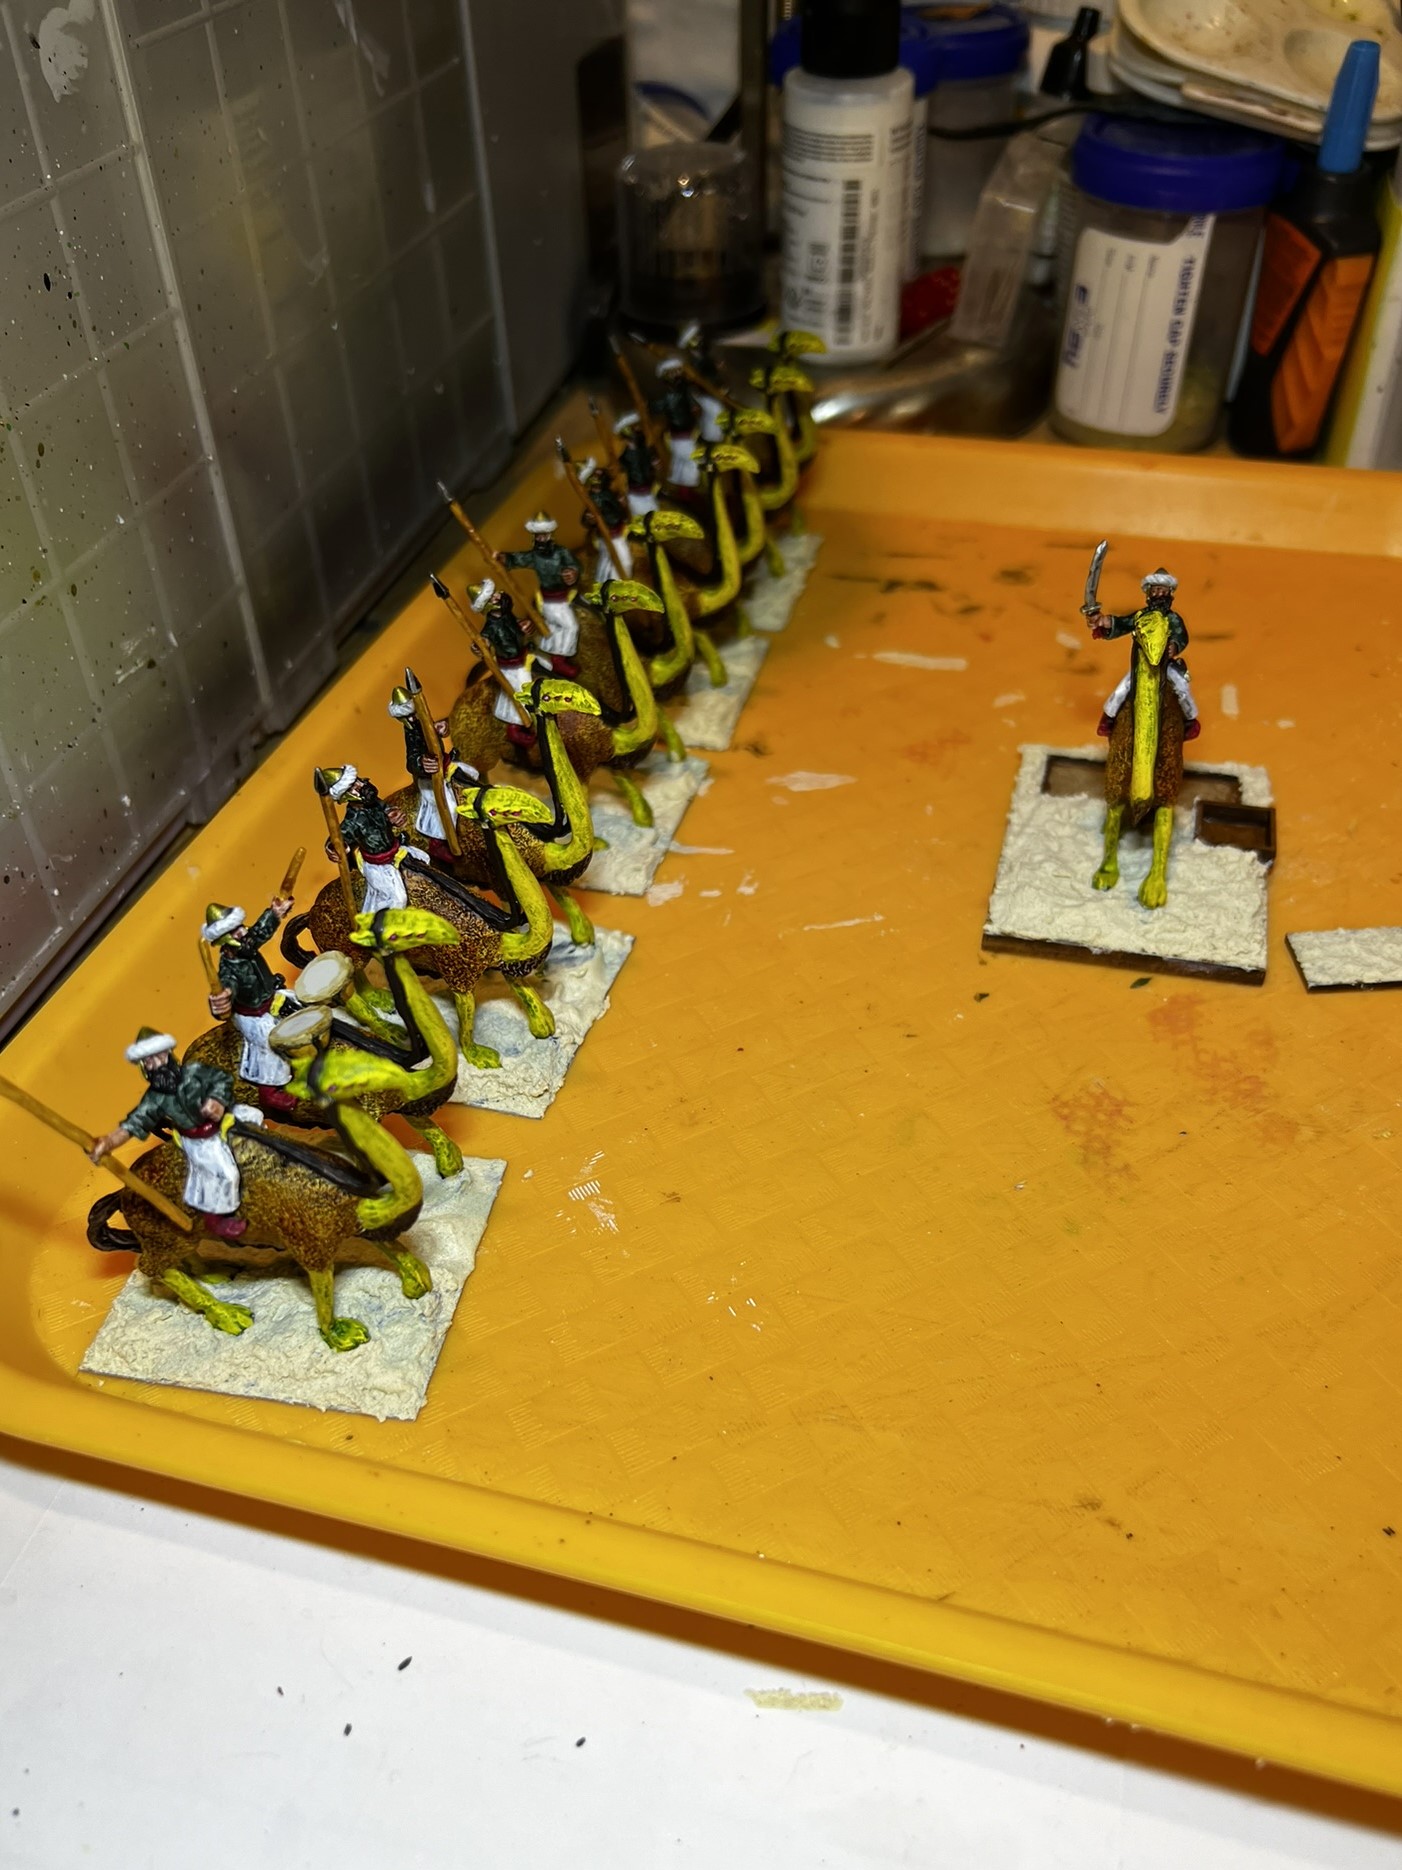
I finished assembly and on the 26th started to apply the sand paste for the bases, adding and gluing on one figure at a time.
Once that paste had dried, I added pigments before using my air brush to varnish everything. The last step was to flock everything with rocks and tufts.
Done by August 28th – FINALLY!
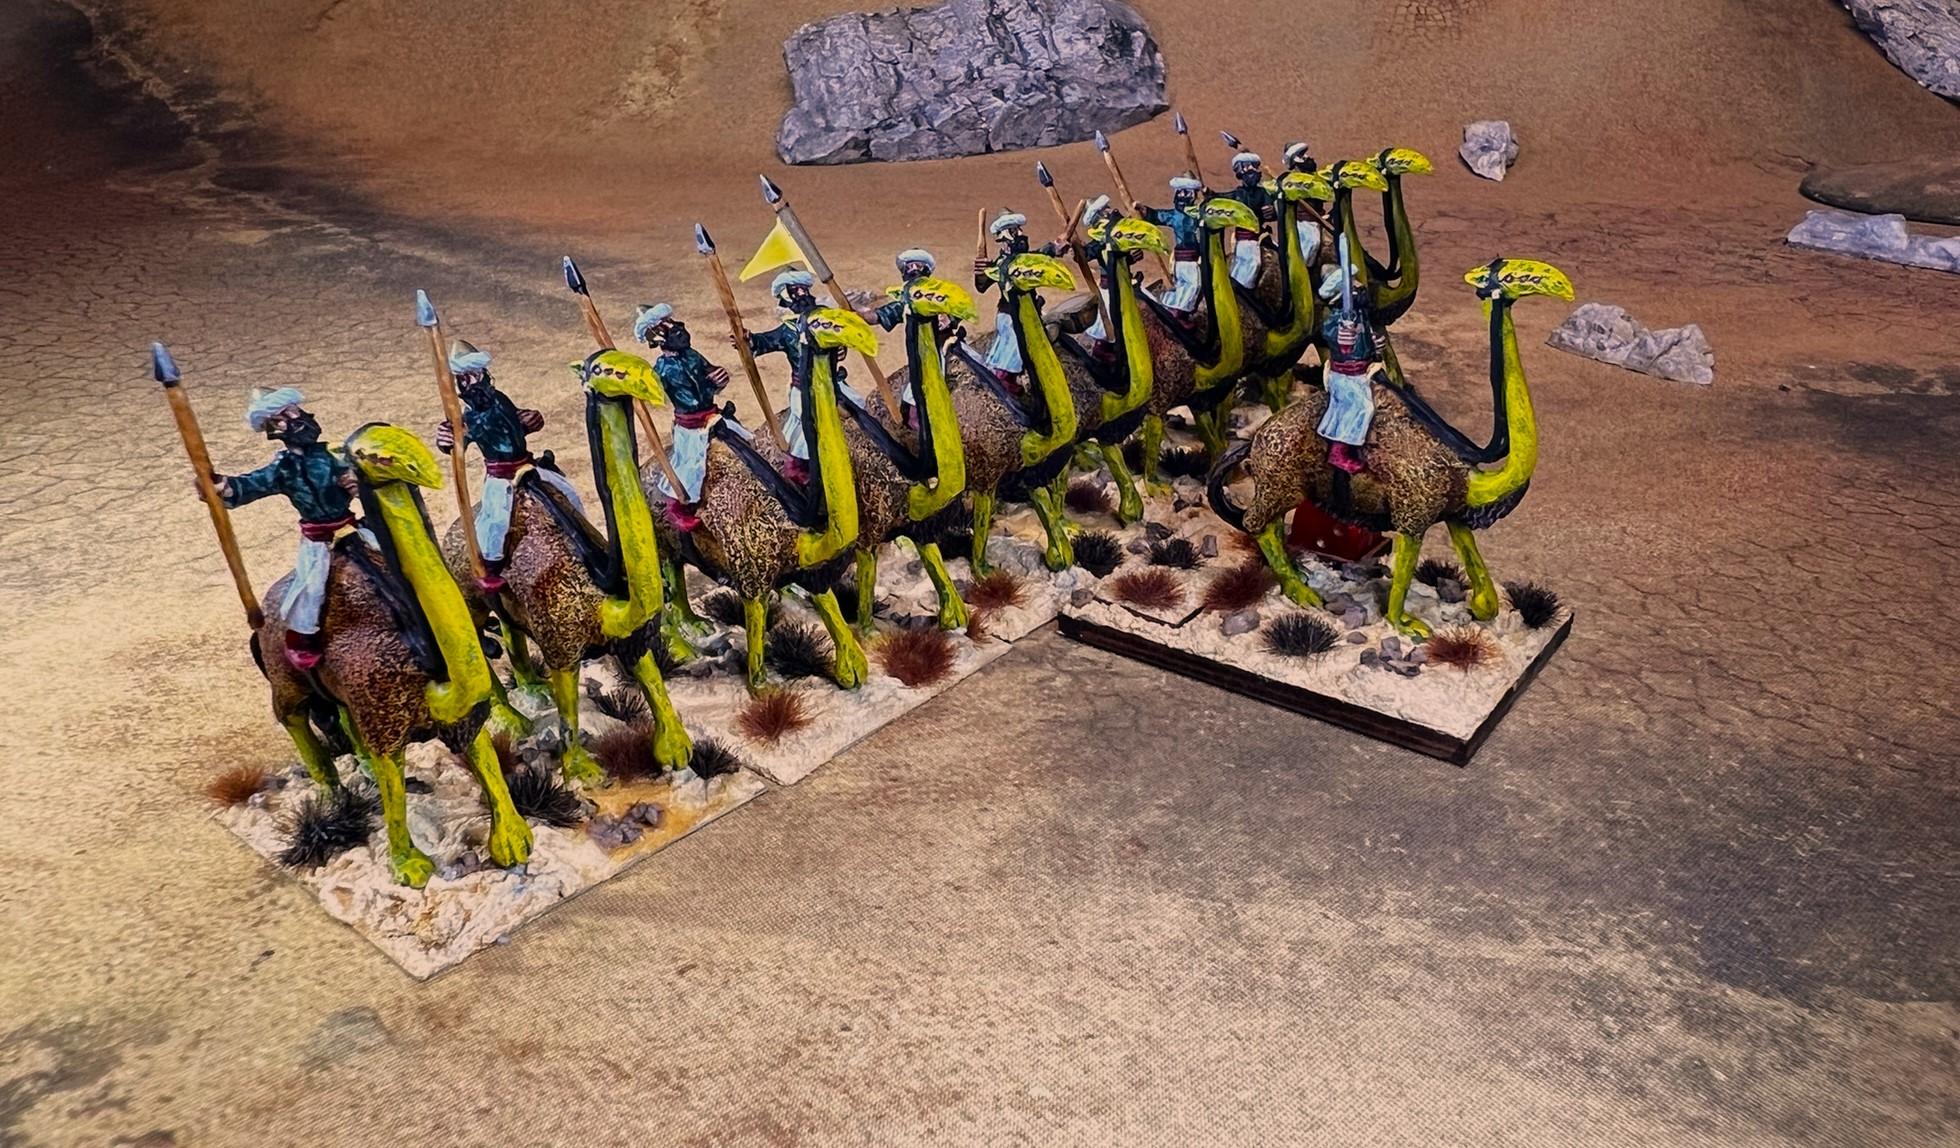
And yes, my siliyiplix have pink eyes (well, magenta really)! So do the Noobi.
Enough WIP, time now for…
Eye Candy
1st Whim Whim Cavalry Regiment
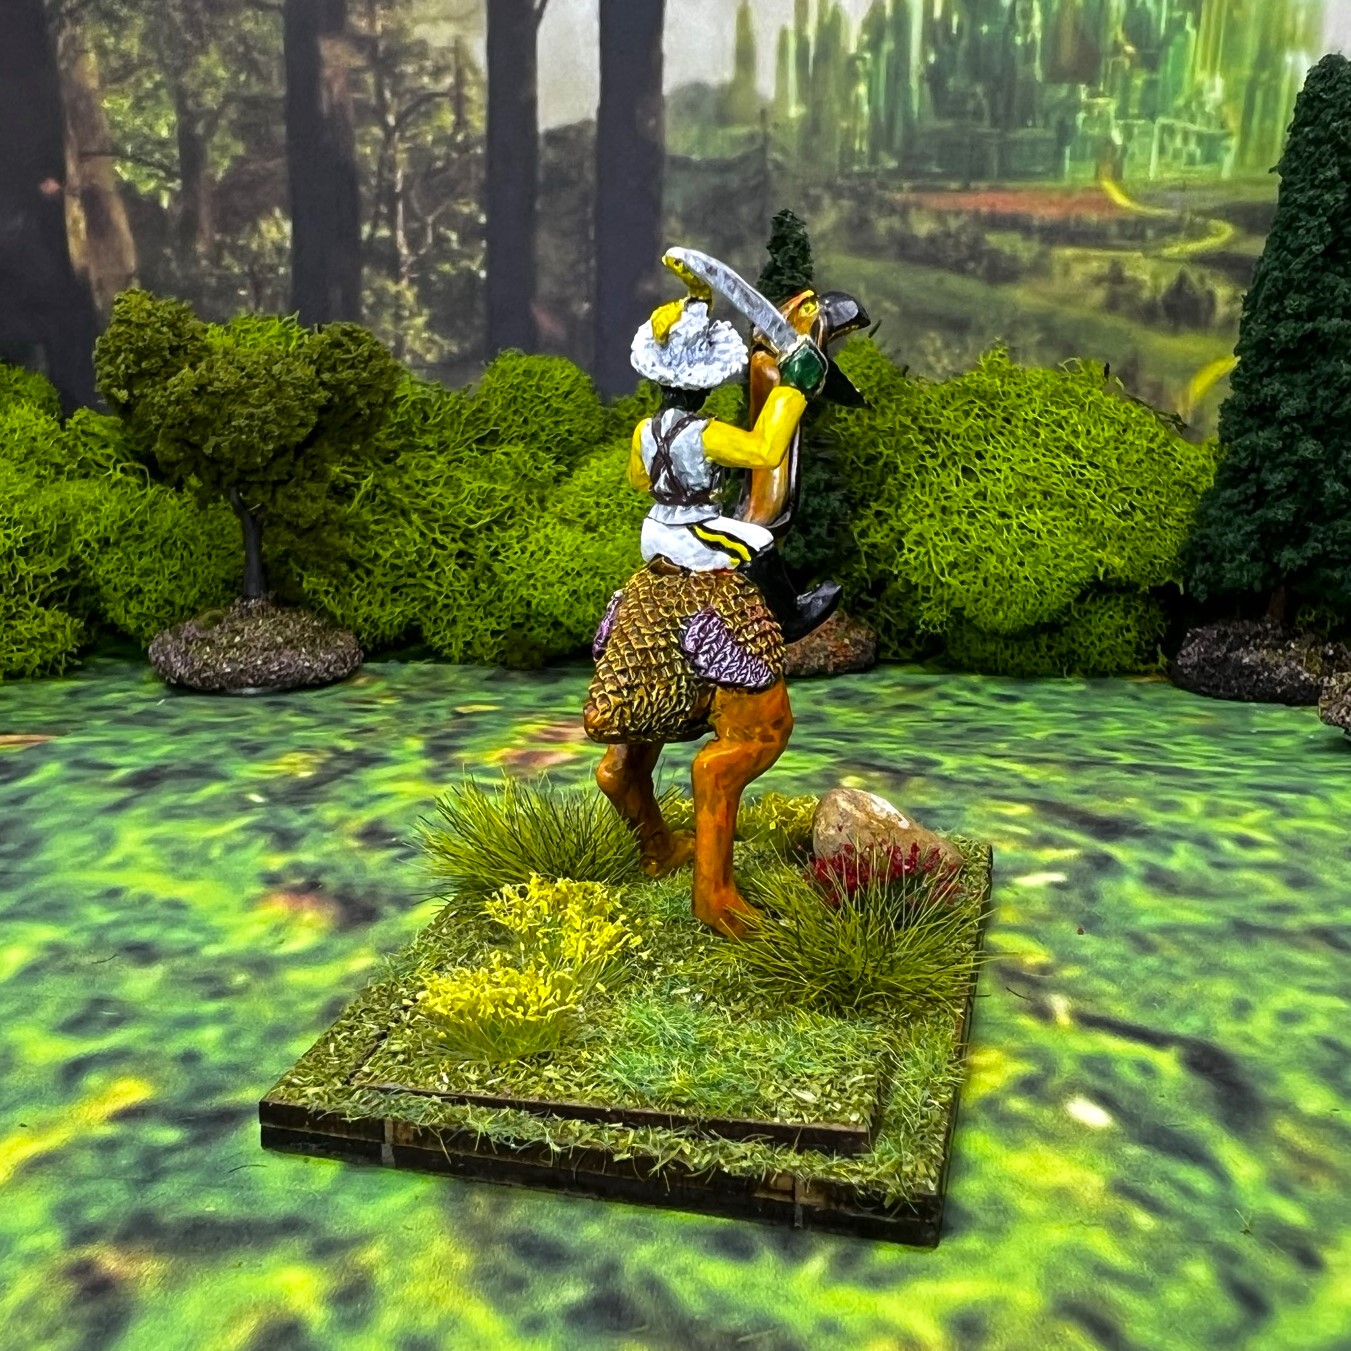
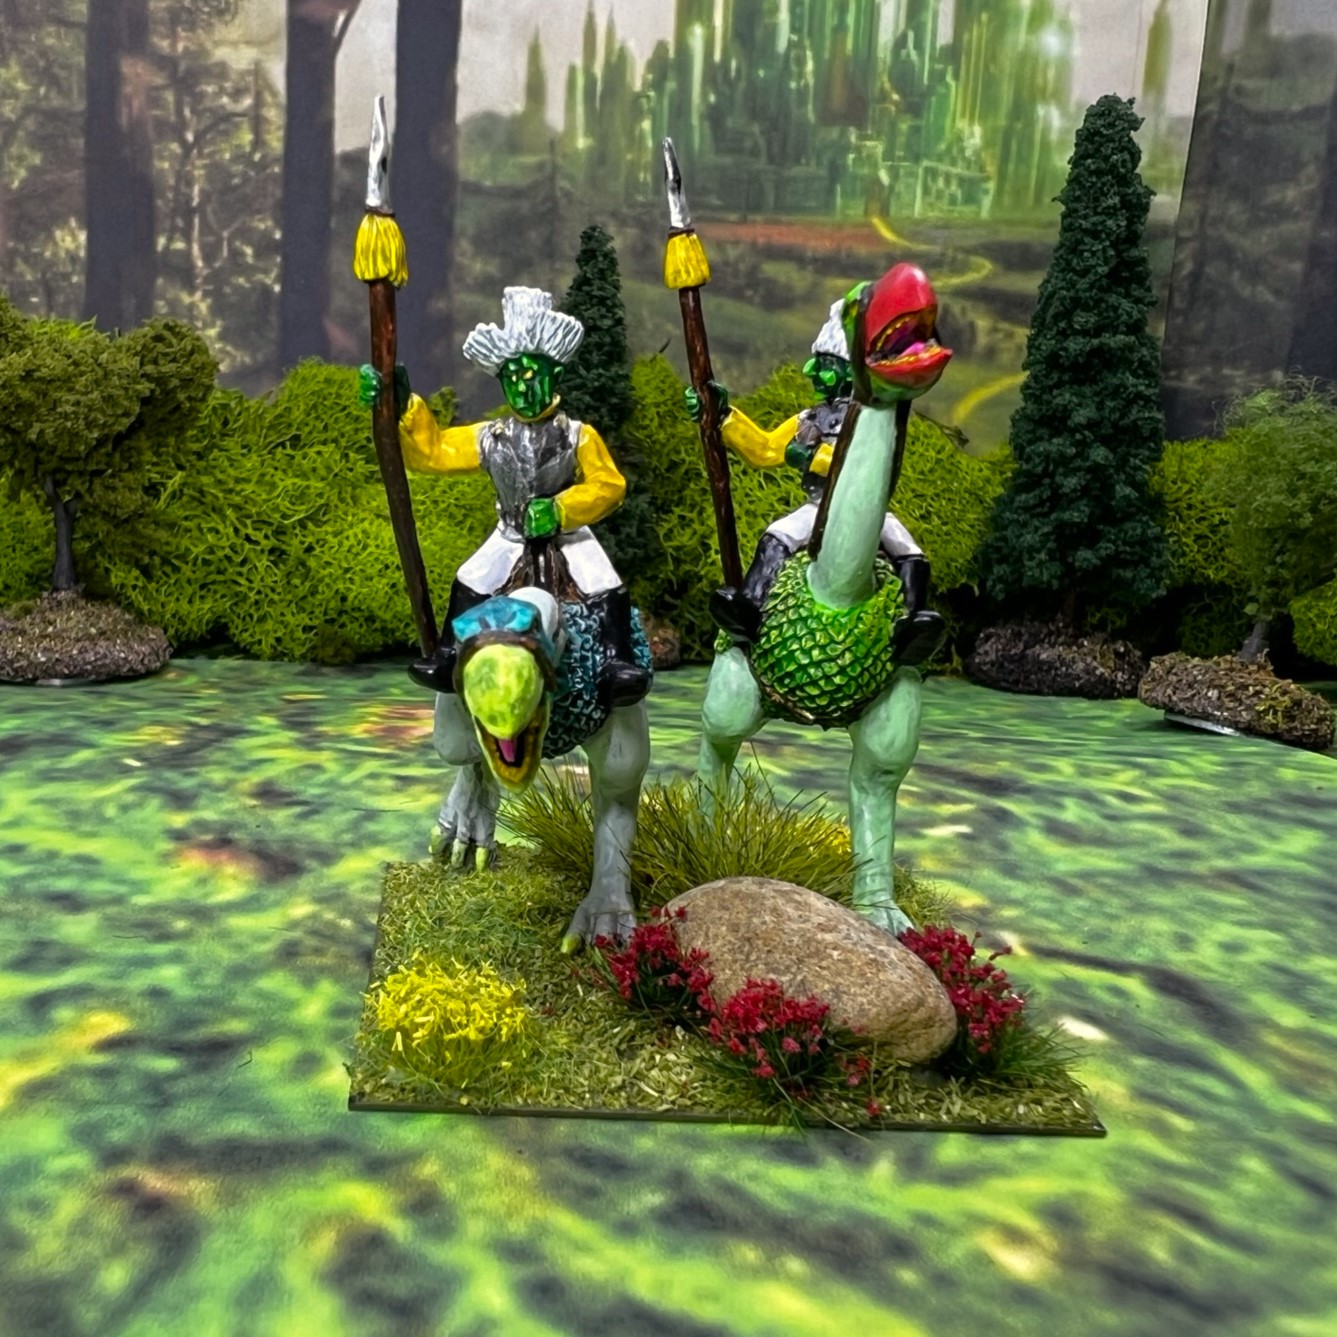
Frontal view of the 1st WWCAV.
1st WWCAV Regimental Commander
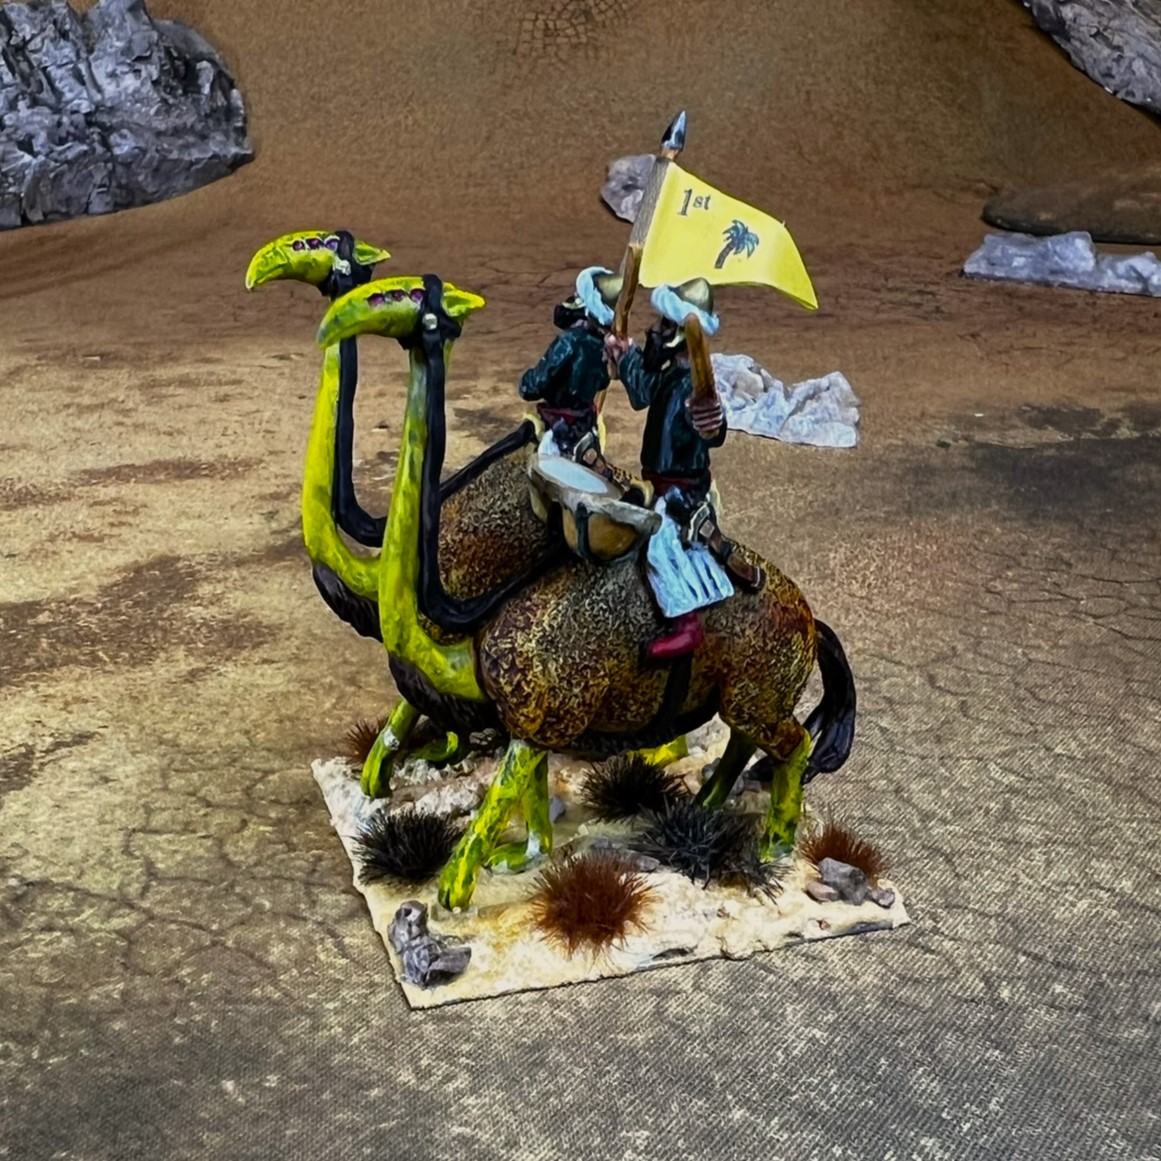
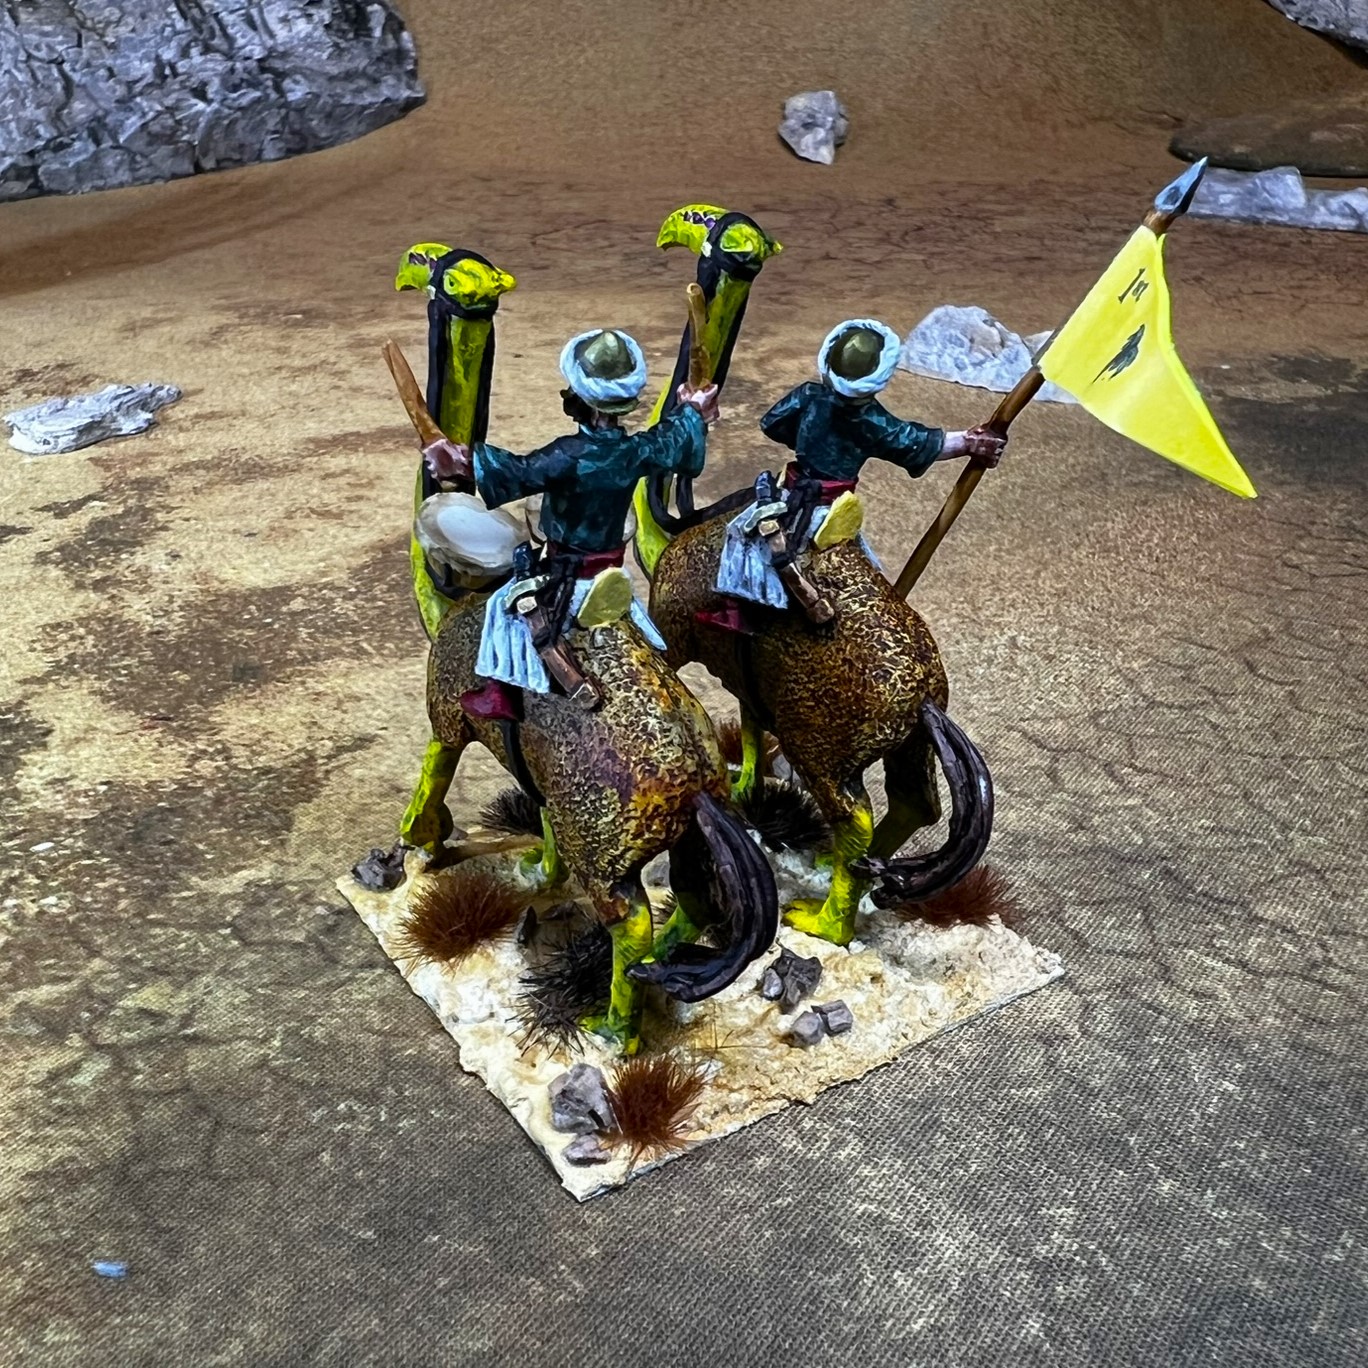
Example of a regular 1st WWCAV stand
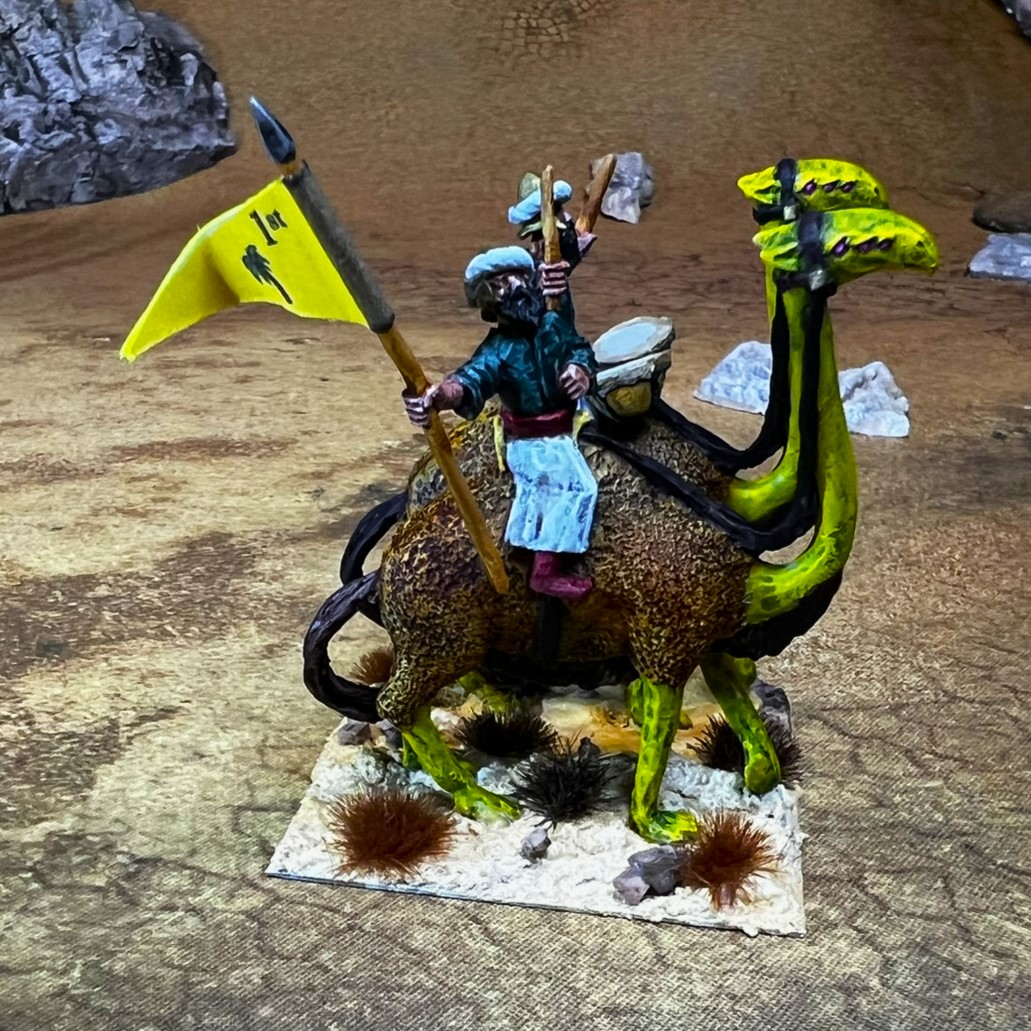
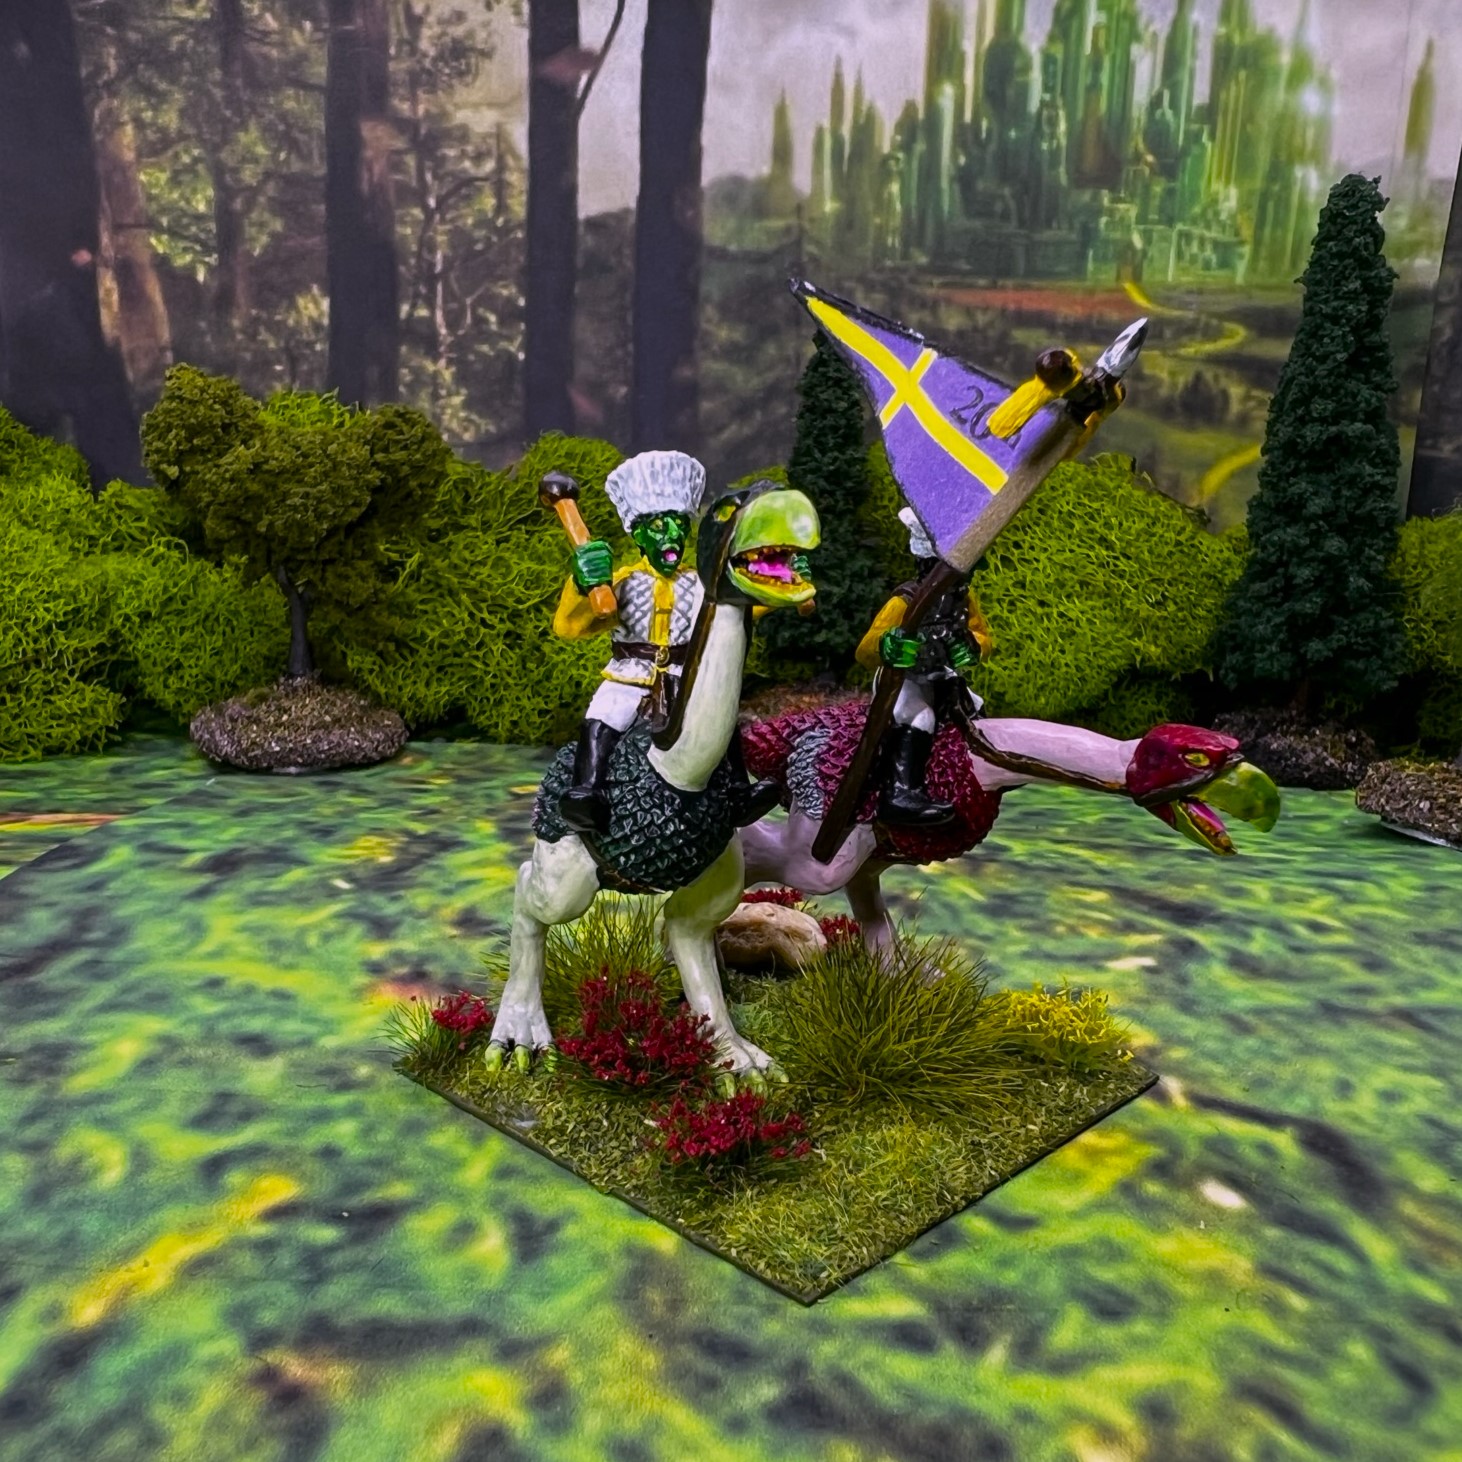
1st WWCAV Command Stand
1st WWCAV in formation
The 1st Whim Whim Cavalry Regiment in column formation.The 1st Whim Whim Cavalry Regiment in line formation.
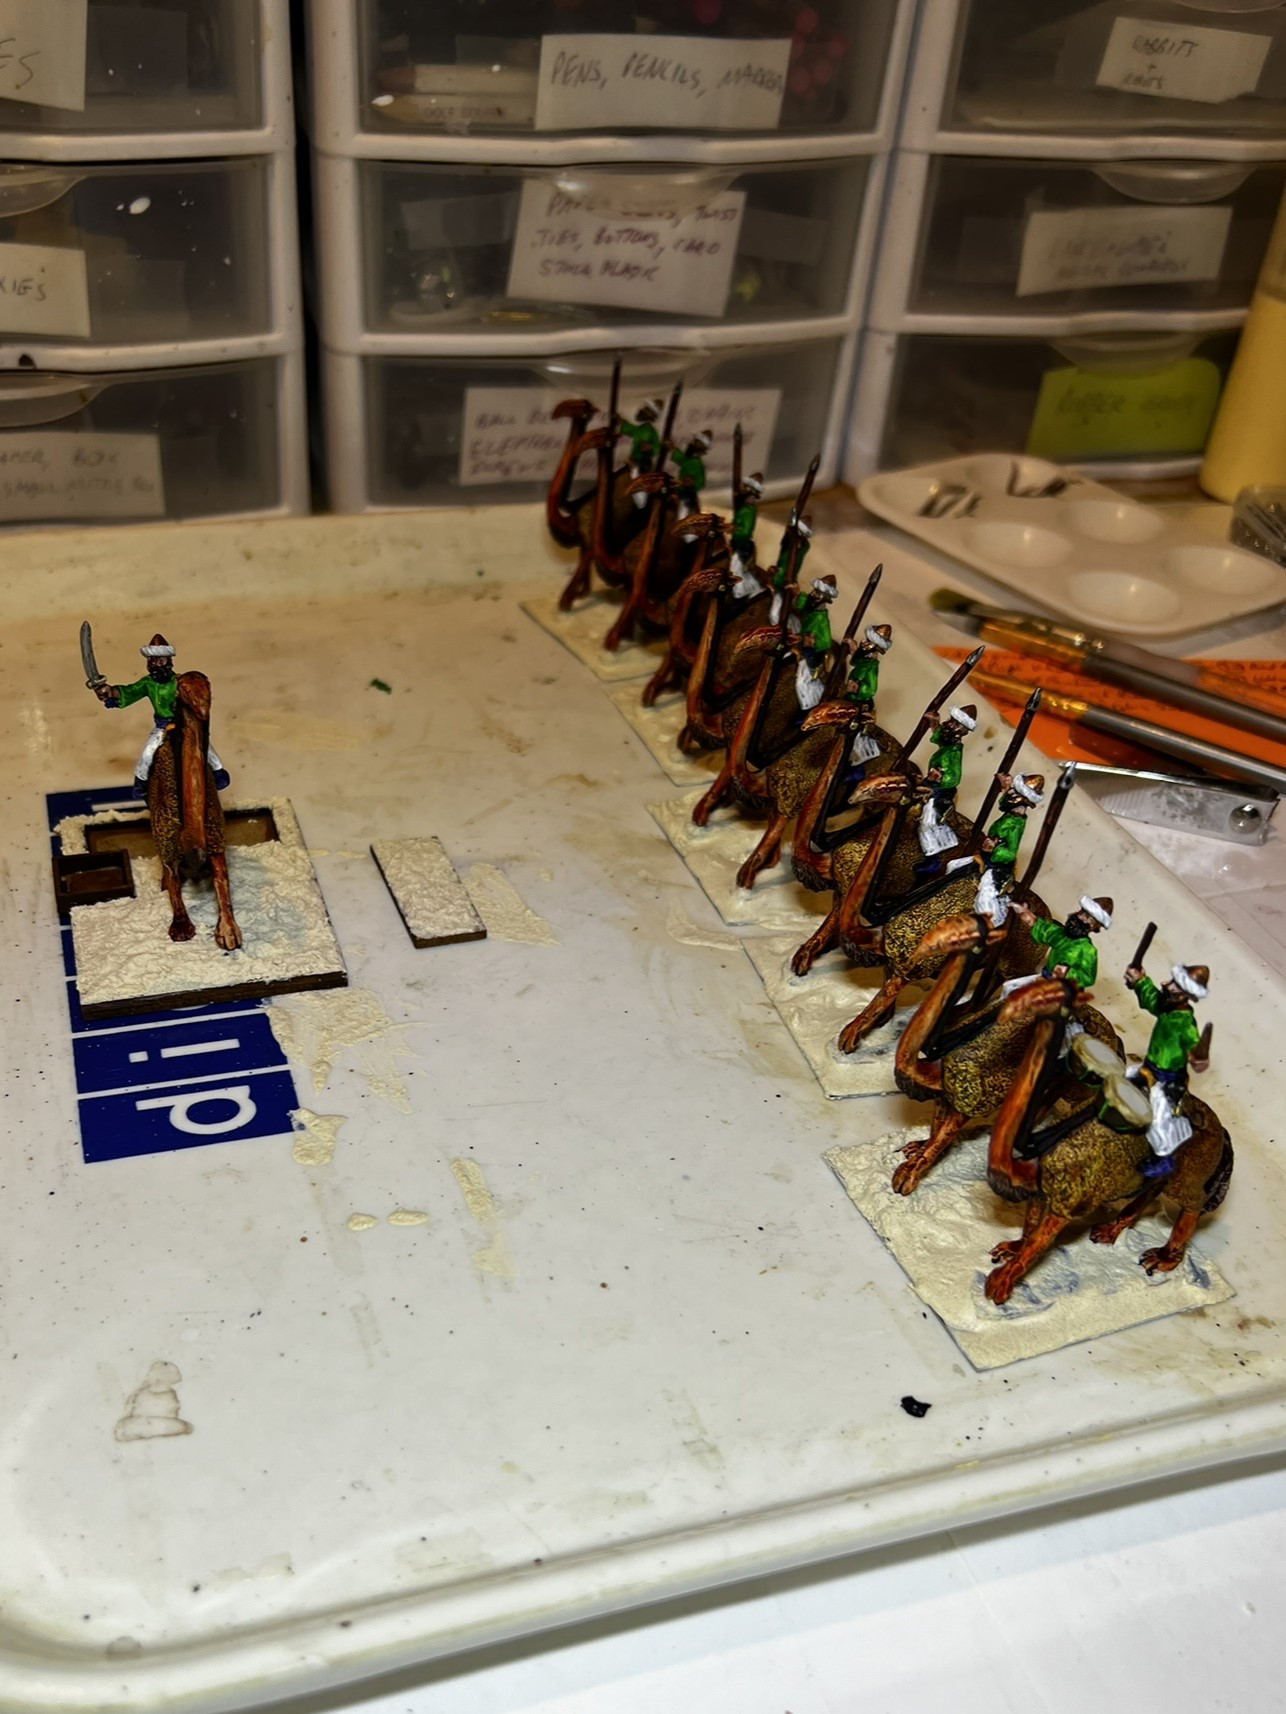
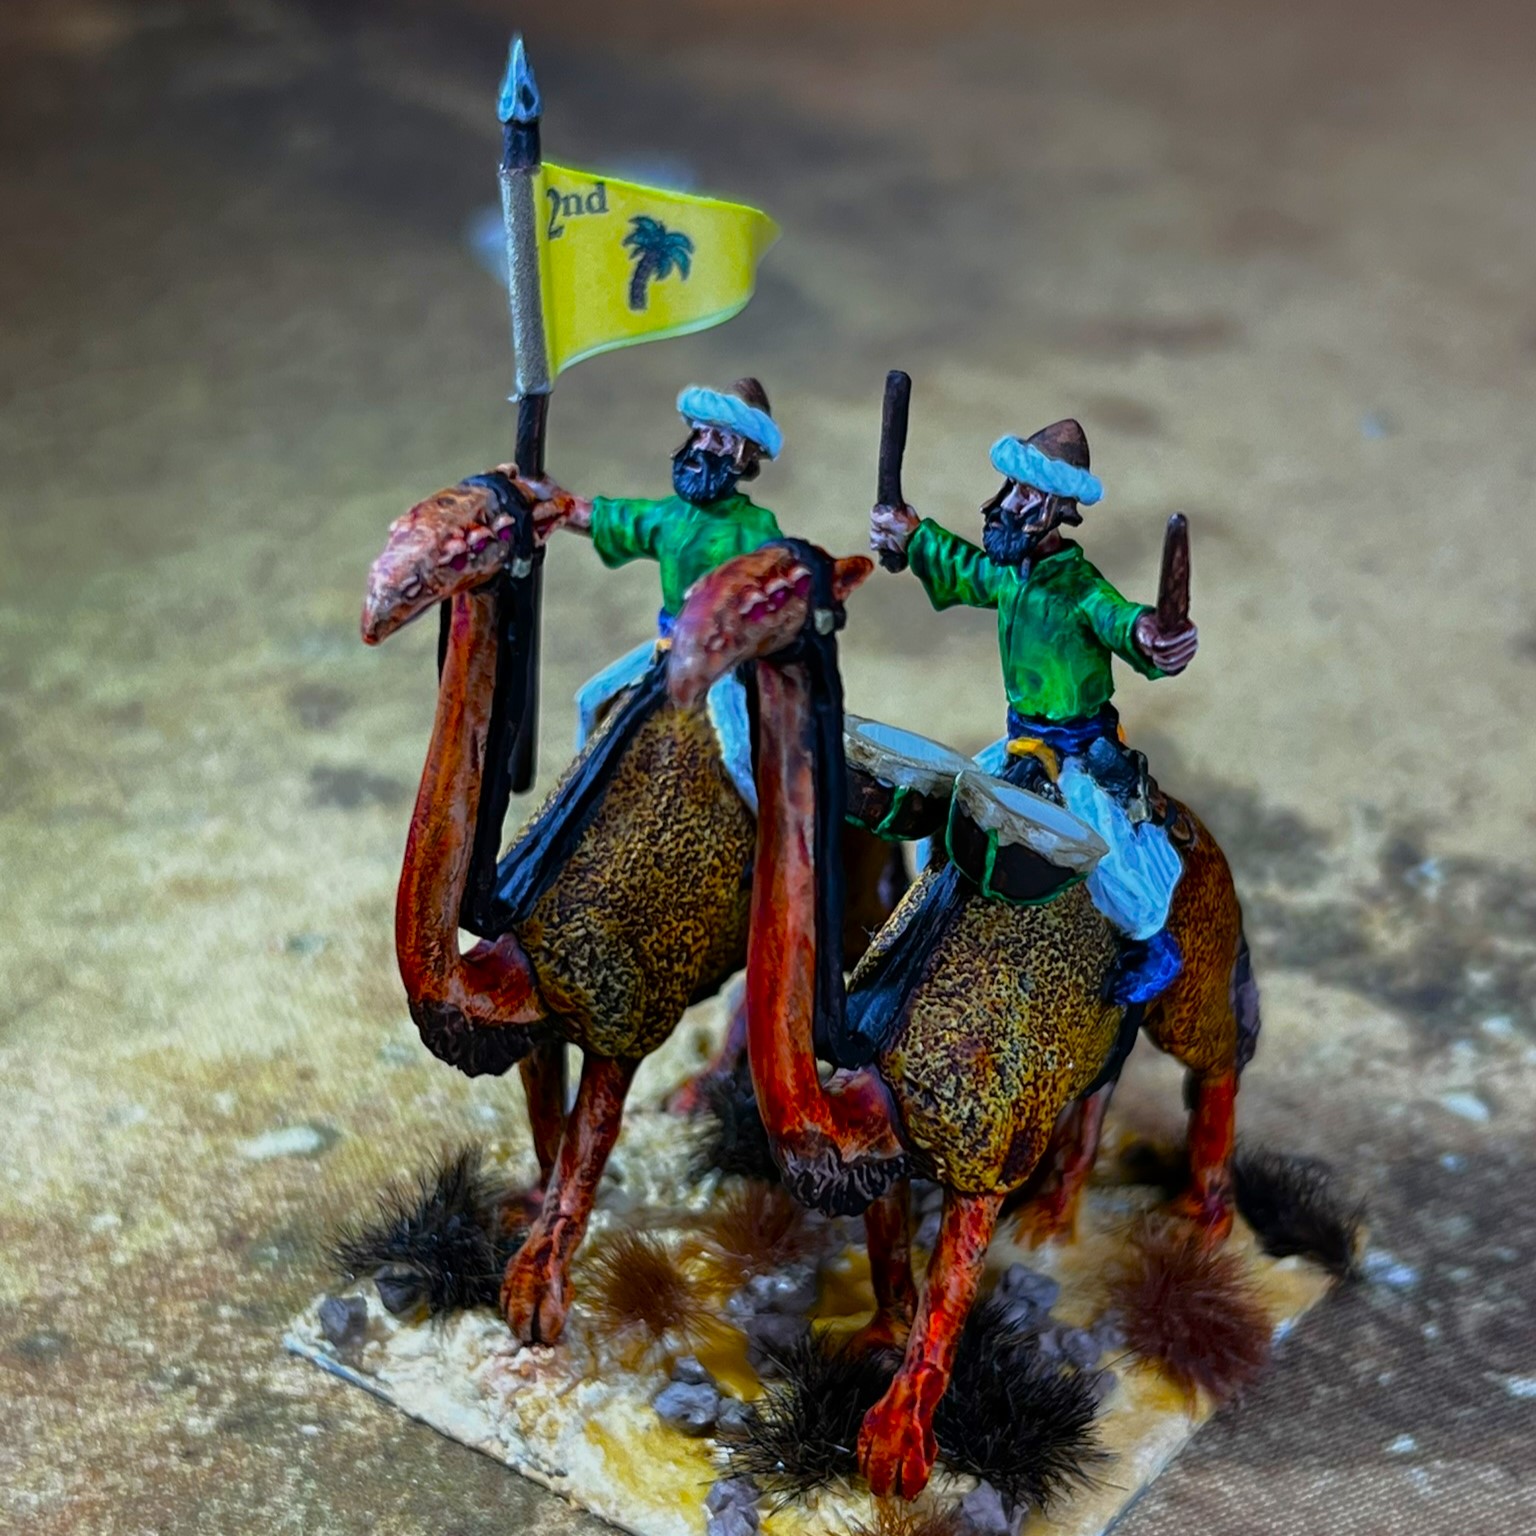
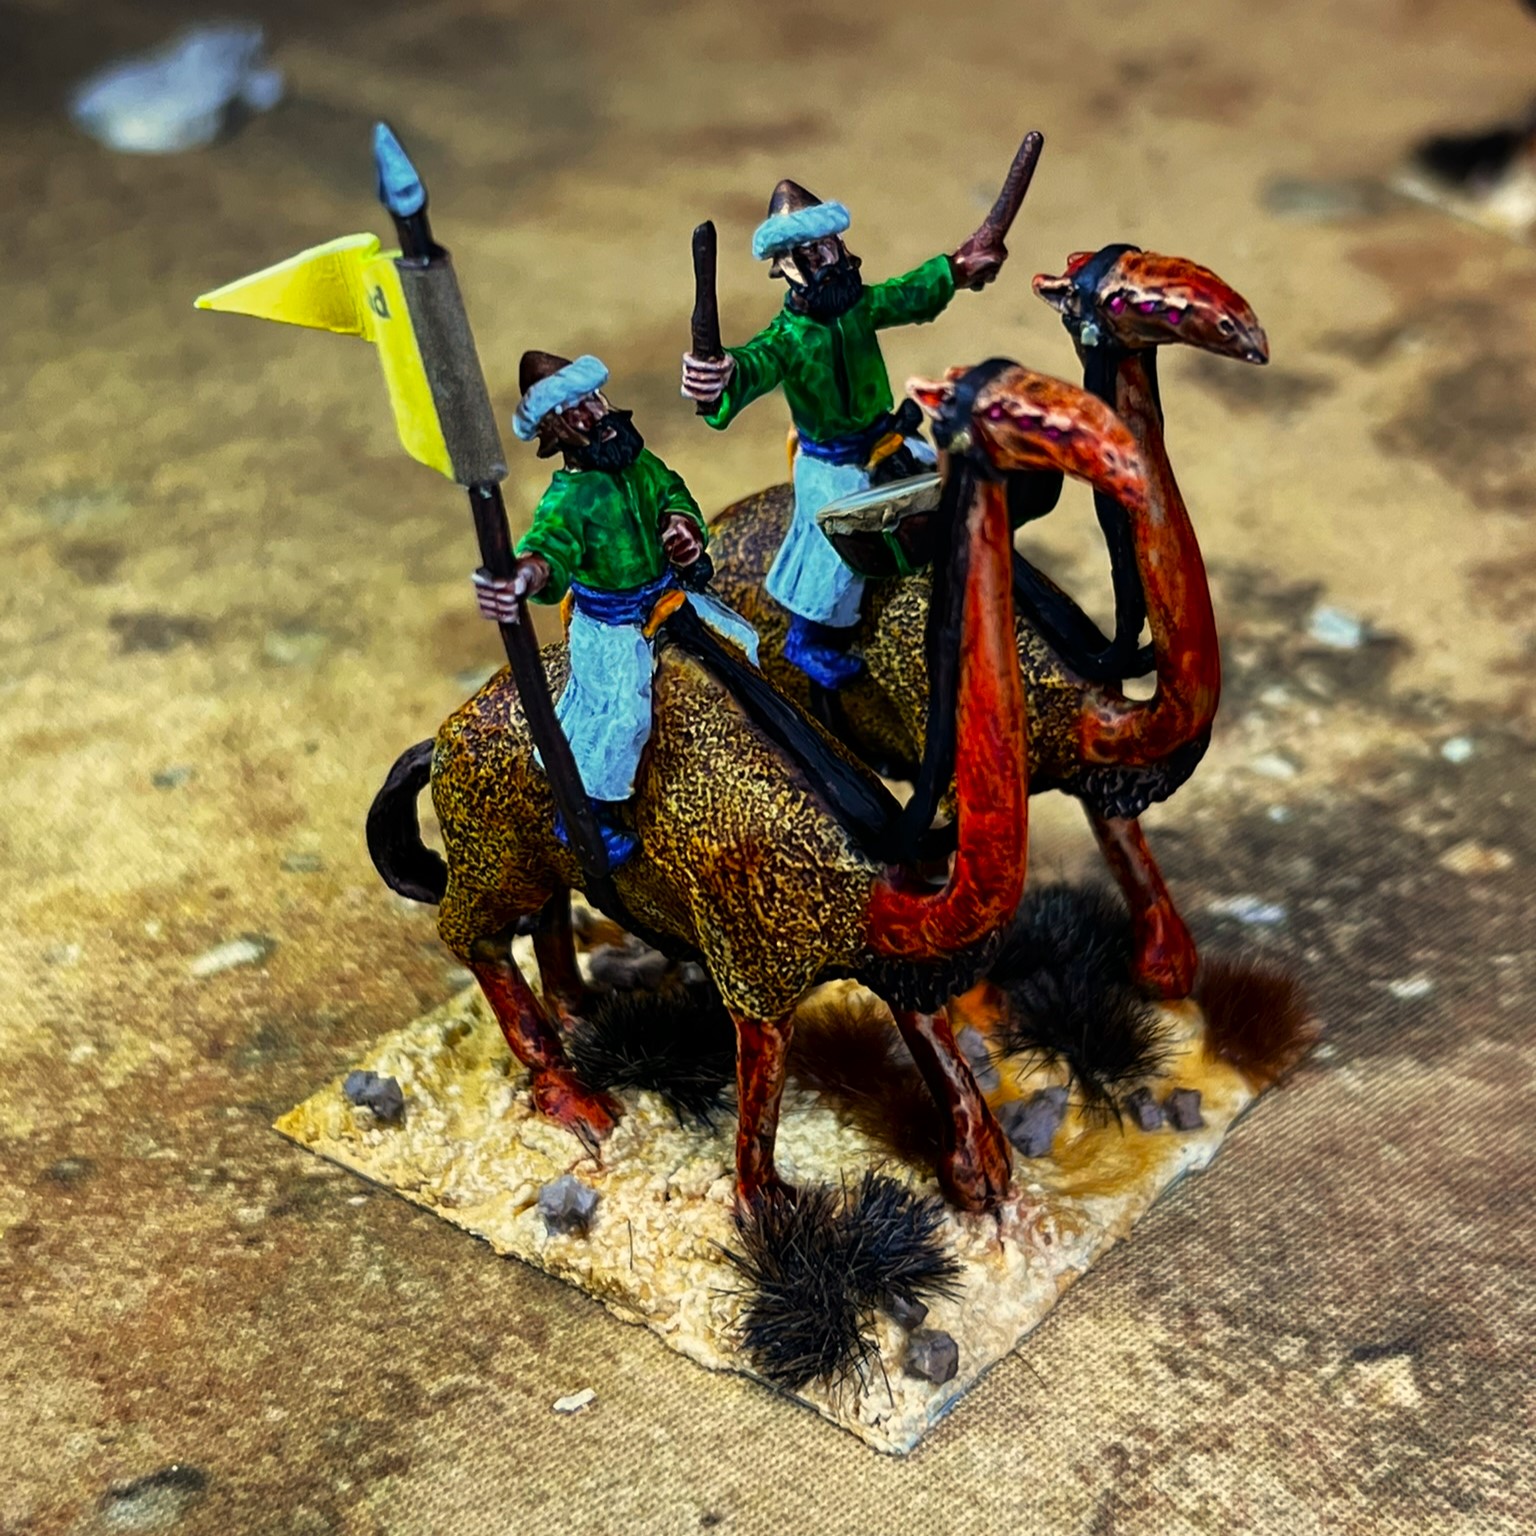
2nd Whim Whim Cavalry Regiment
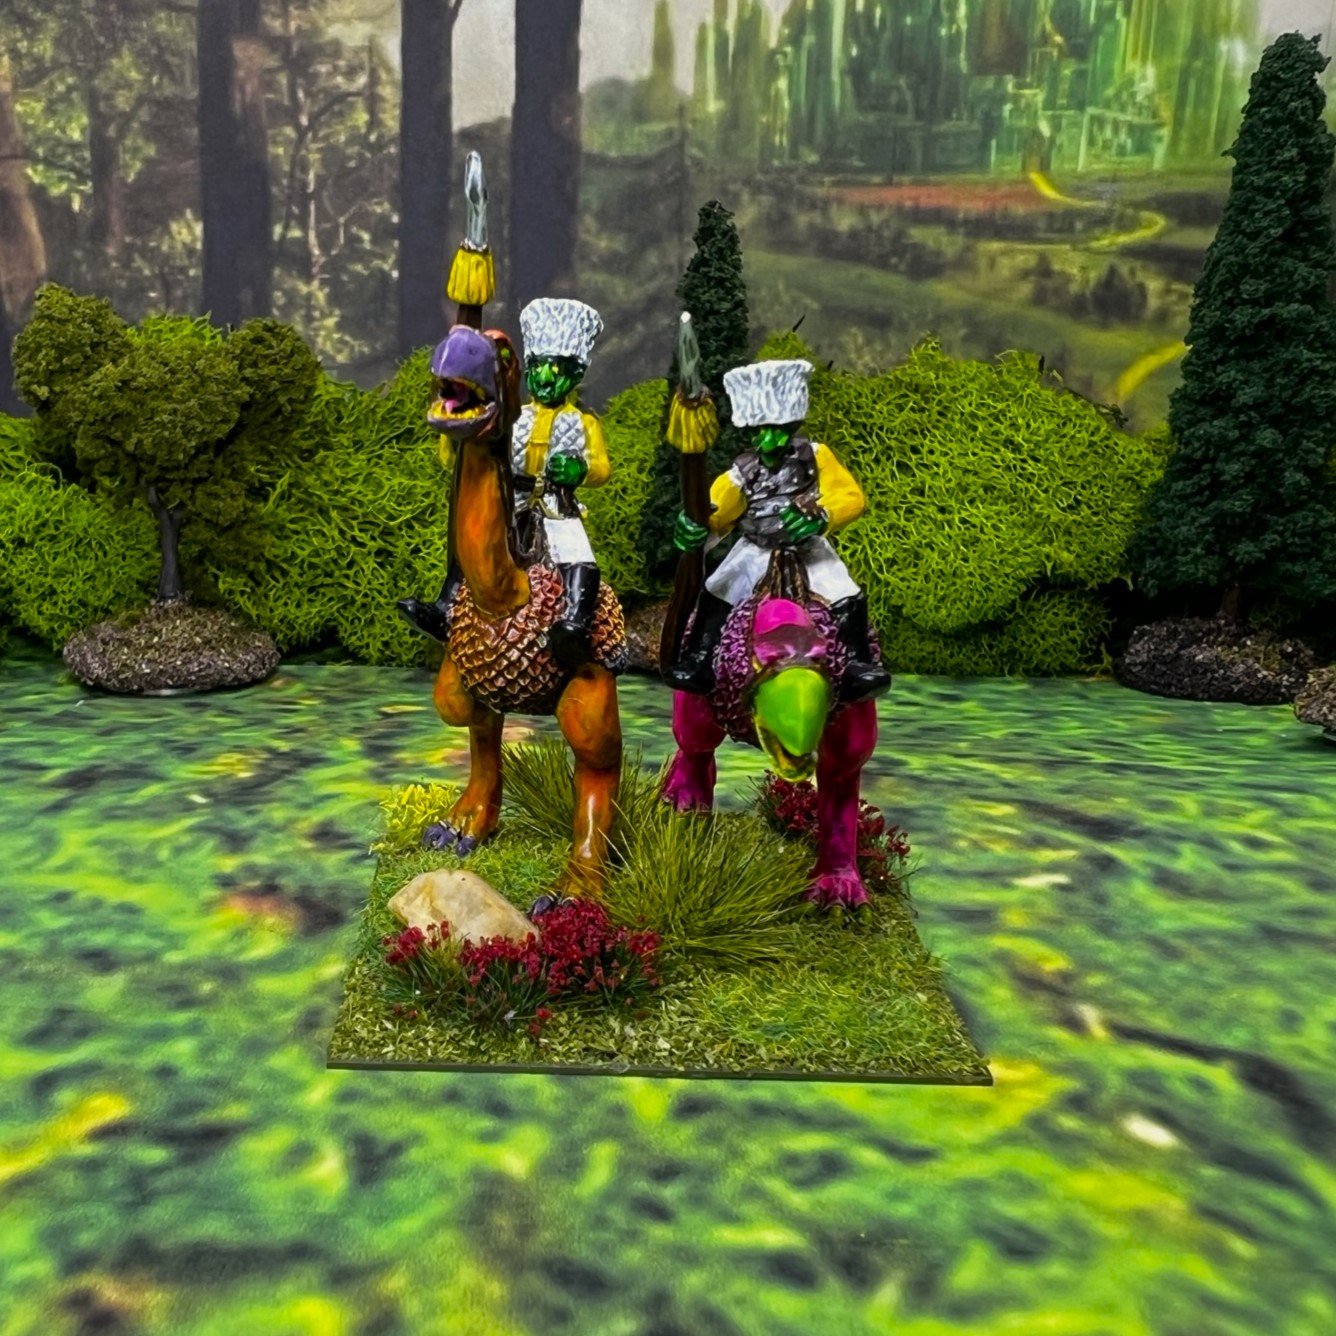
Frontal view of the 2nd WWCAV.
2nd WWCAV Regimental Commander
Example of a regular 2nd WWCAV stand
2nd WWCAV Command Stand
2nd WWCAV in formation
The 2nd Whim Whim Cavalry Regiment in line formation.The 2nd Whim Whim Cavalry Regiment in column formation.
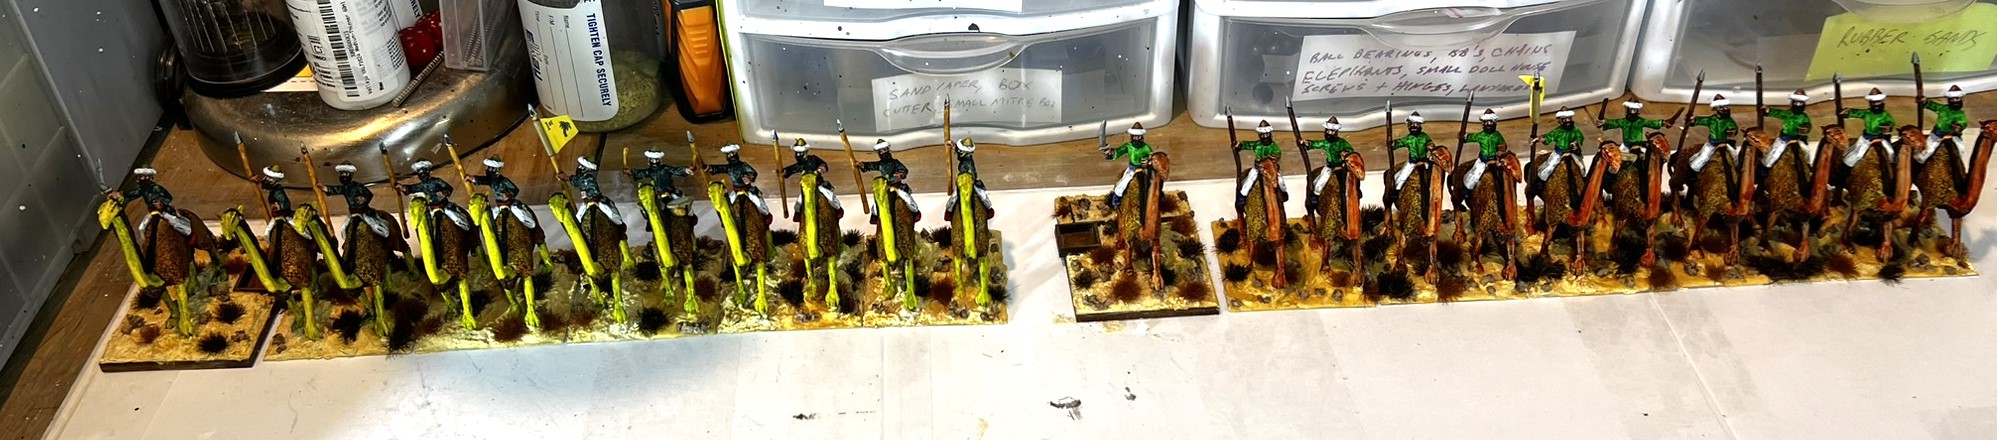
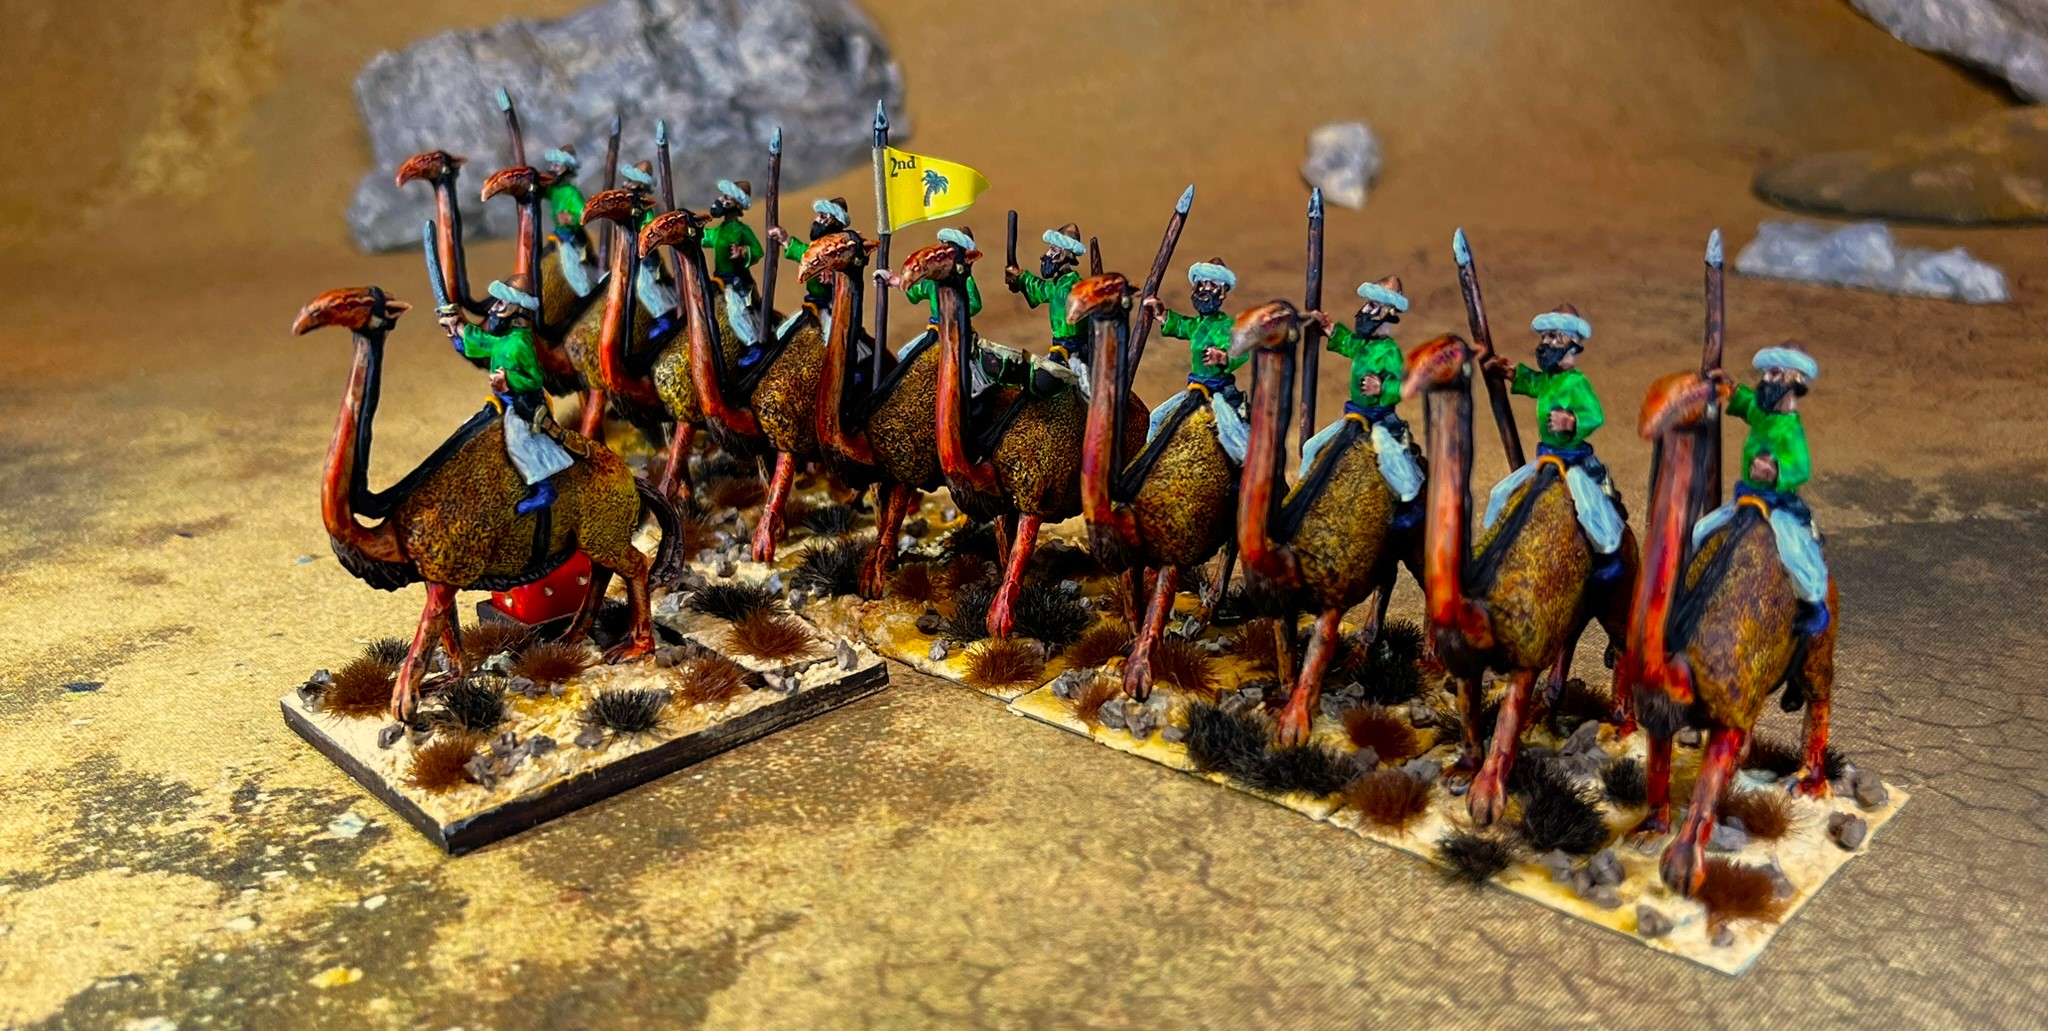
Whim Whim Cavalry Group Shot
All together now!
Perhaps this project also may qualify for Dave Stone’s “Season of Scenery 2024” community painting challenge as he includes vehicles – that is, if siliyiplix count as vehicle? Either way, Dave, much thanks for running that!
As for my remaining Whim Whim units, I have two regiments of bowmen and one janissary left to paint. I appreciate that you took a look and I hope that it was of interest.
And yes, I still have much more Ozz to come…
Miscellaneous details and references for those interested in that sort of thing:
For all of my earlier posts on Wars of Ozz games, figures, units, and other related projects – please see this page.
PAINTS, INKS, GLAZES, SHADES, WASHES, PIGMENTS, FLOCKING, GLUES AND MORE THAT I USED ON THESE TWO WHIM WHIM CAVALRY REGIMENTS:
Whim Whim flag design from Wars of Ozz Facebook page (printed on card stock)
Yellow Sharpie highlighter
Brown Sharpie pen
As you may want to check out the excellent Wars of Ozz figures’ range – there are two places to get them and to get the rules (and I make no money from this btw). The game rules and the figures are available from the next two places:
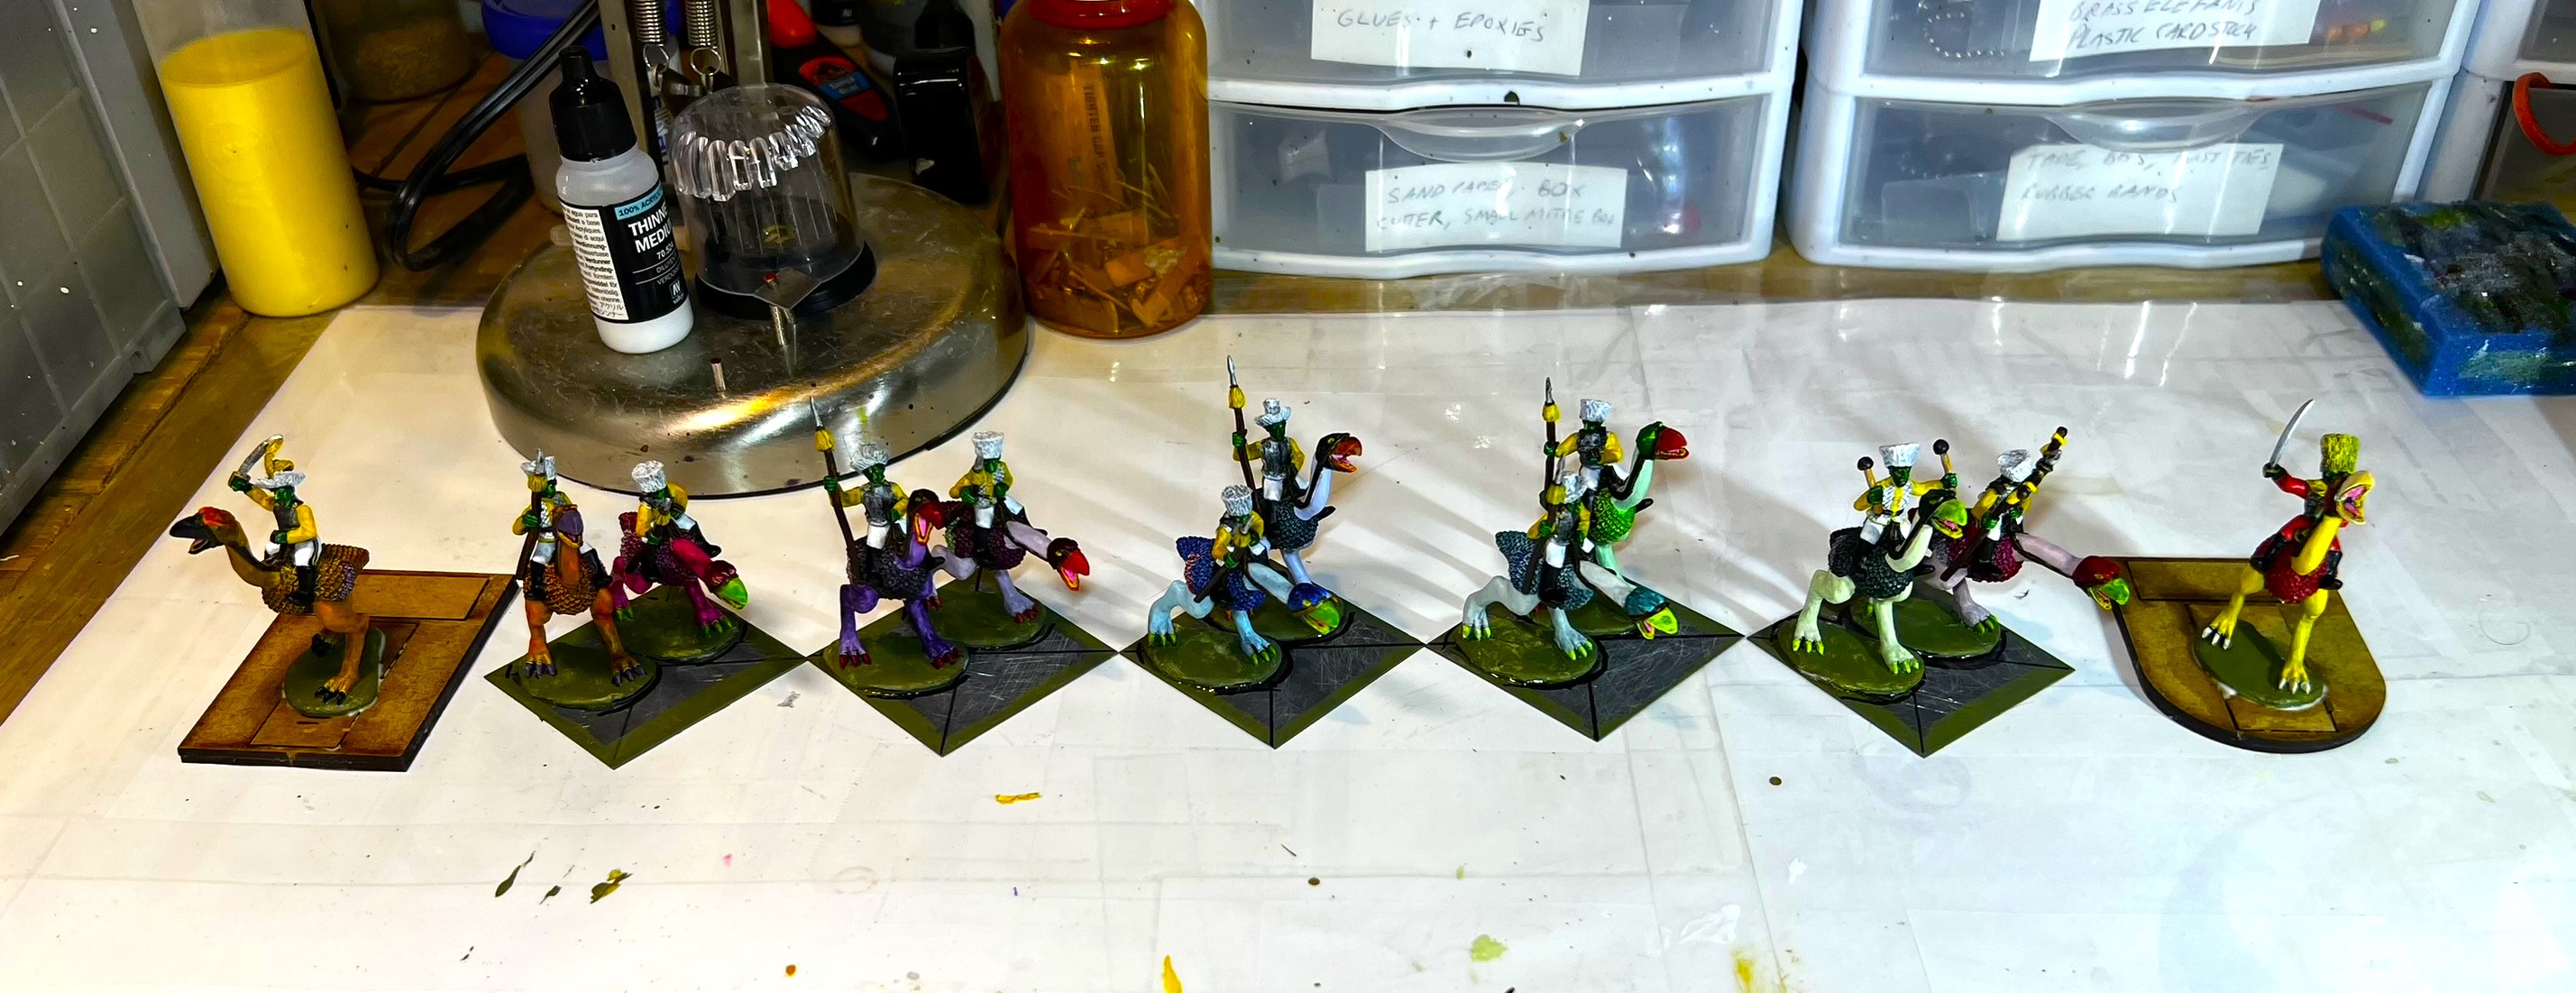
With it being my late winter-early spring “wargaming convention season”, I have been working on multiple projects simultaneously. As I mentioned in my last post Jungle Bases from Wargames Terrain Workshop, I’d be sharing a post on my Winkie cavalry which I finished recently – along with the Winkie Brigade Commander on his specially-shaped MDF base.
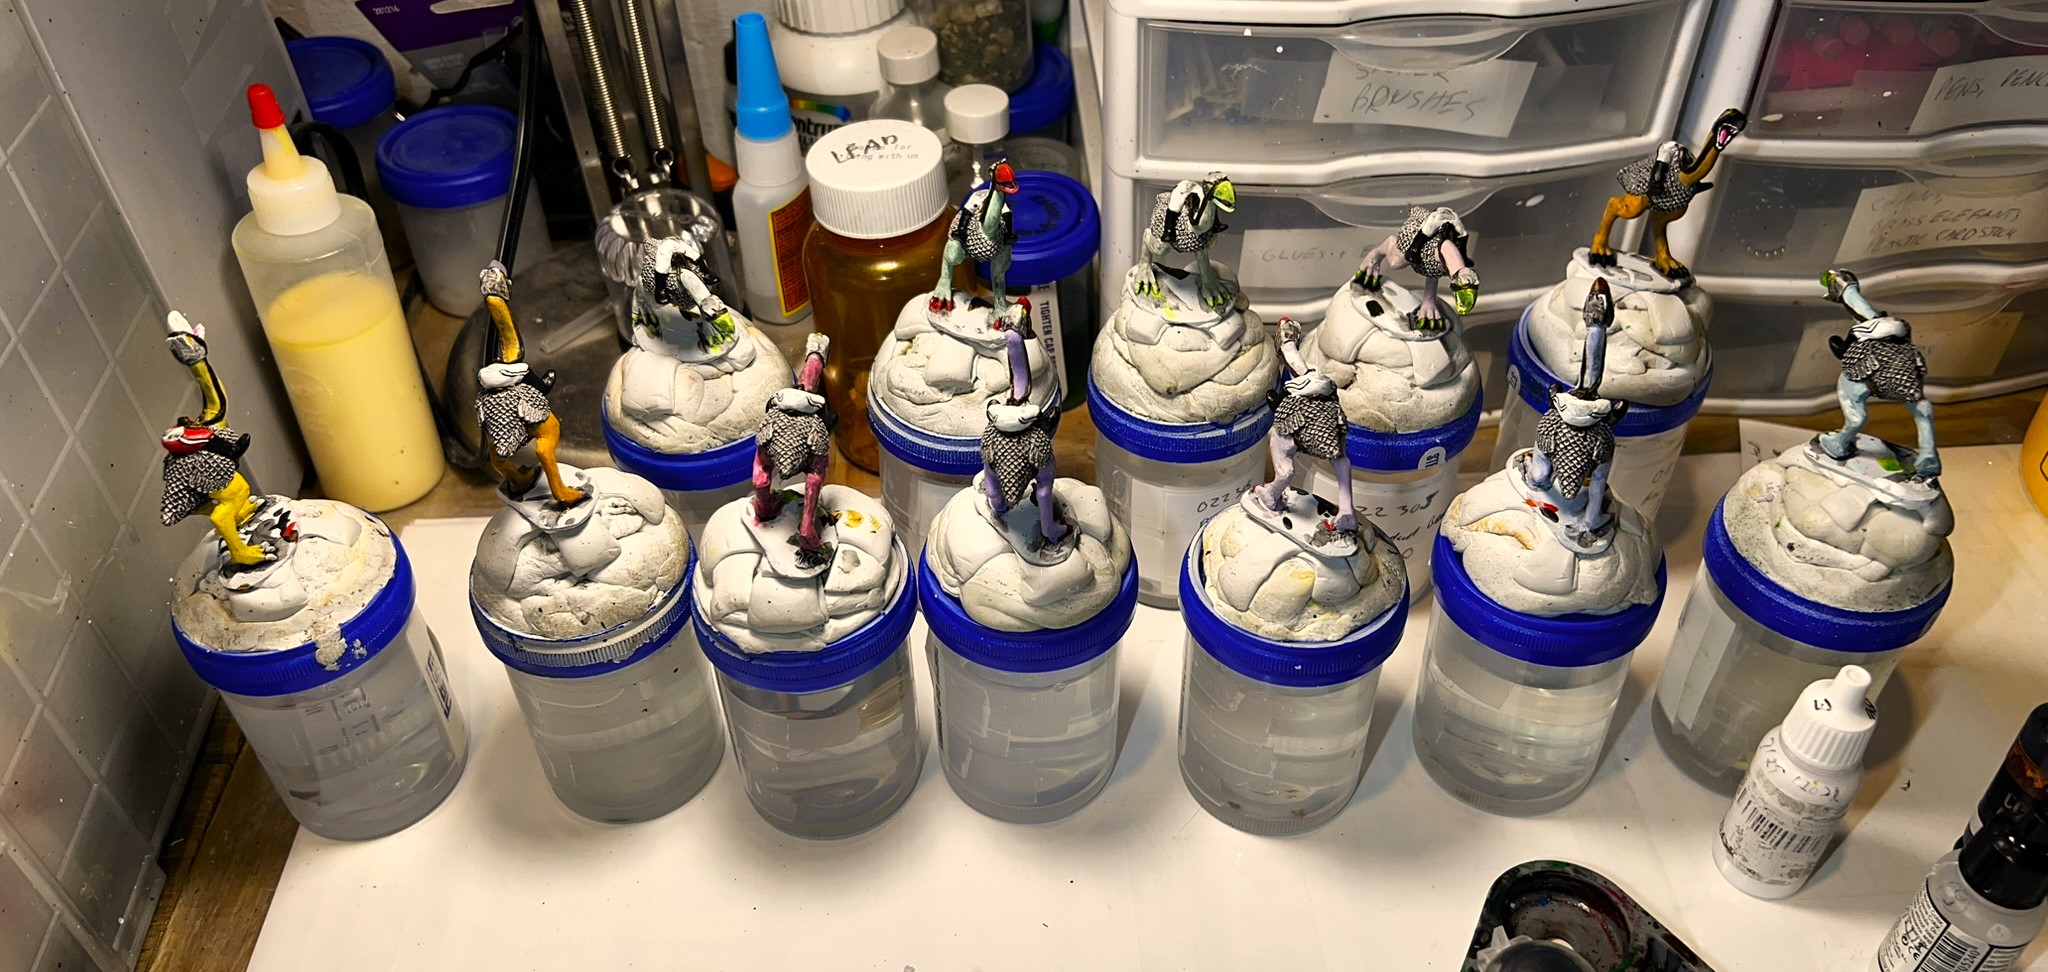
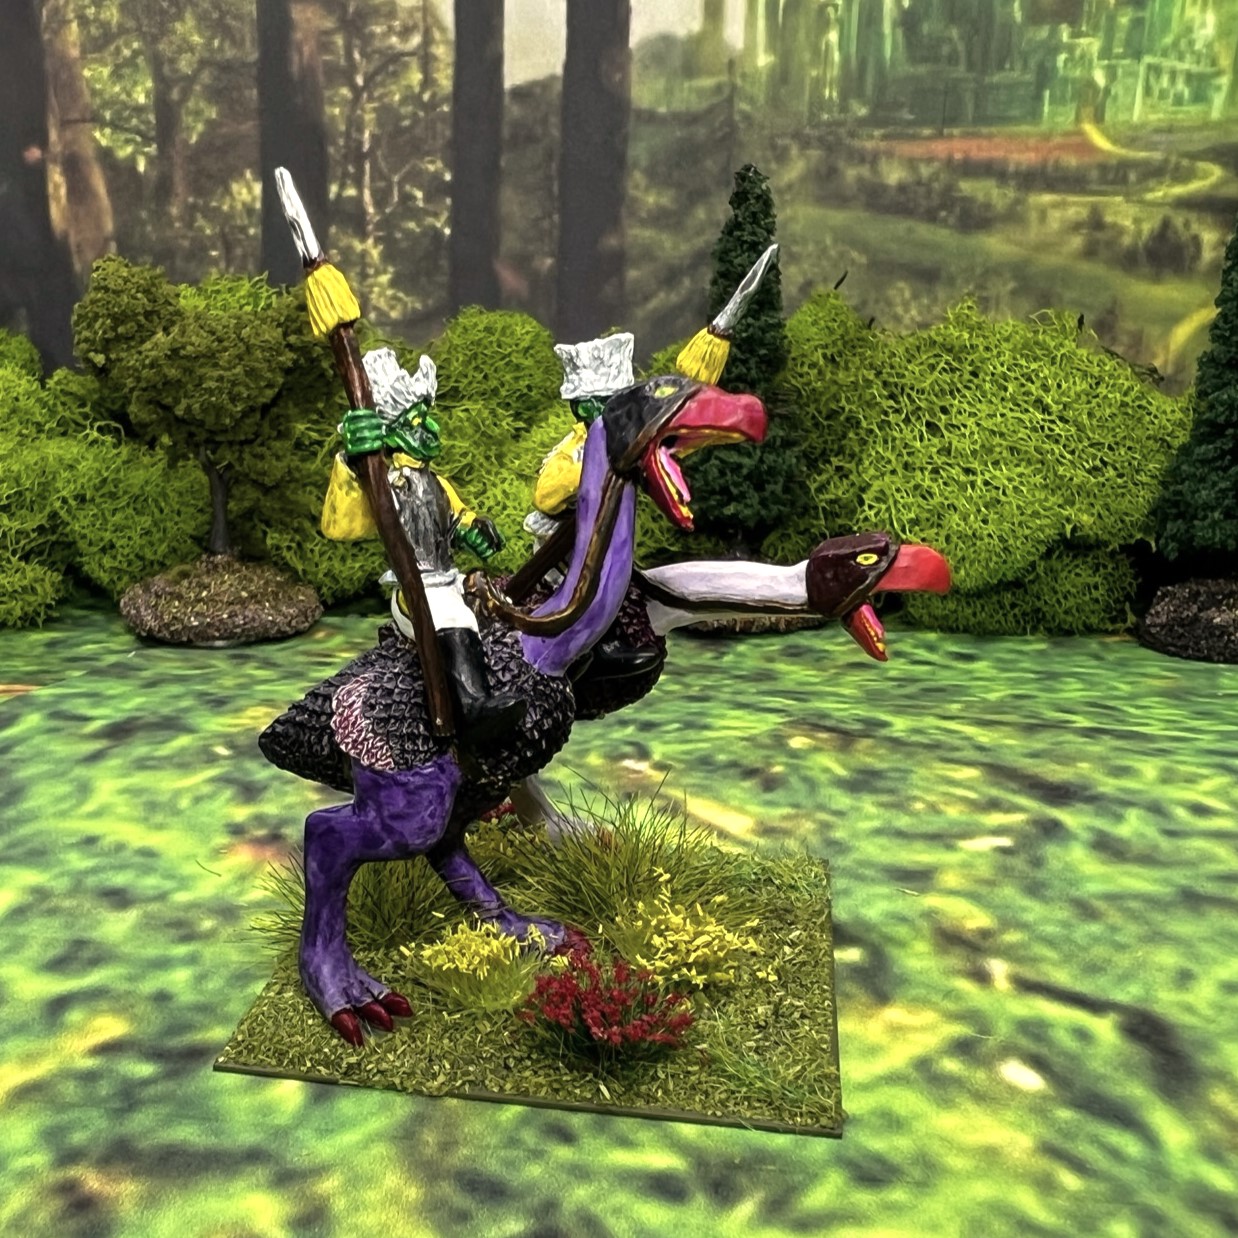
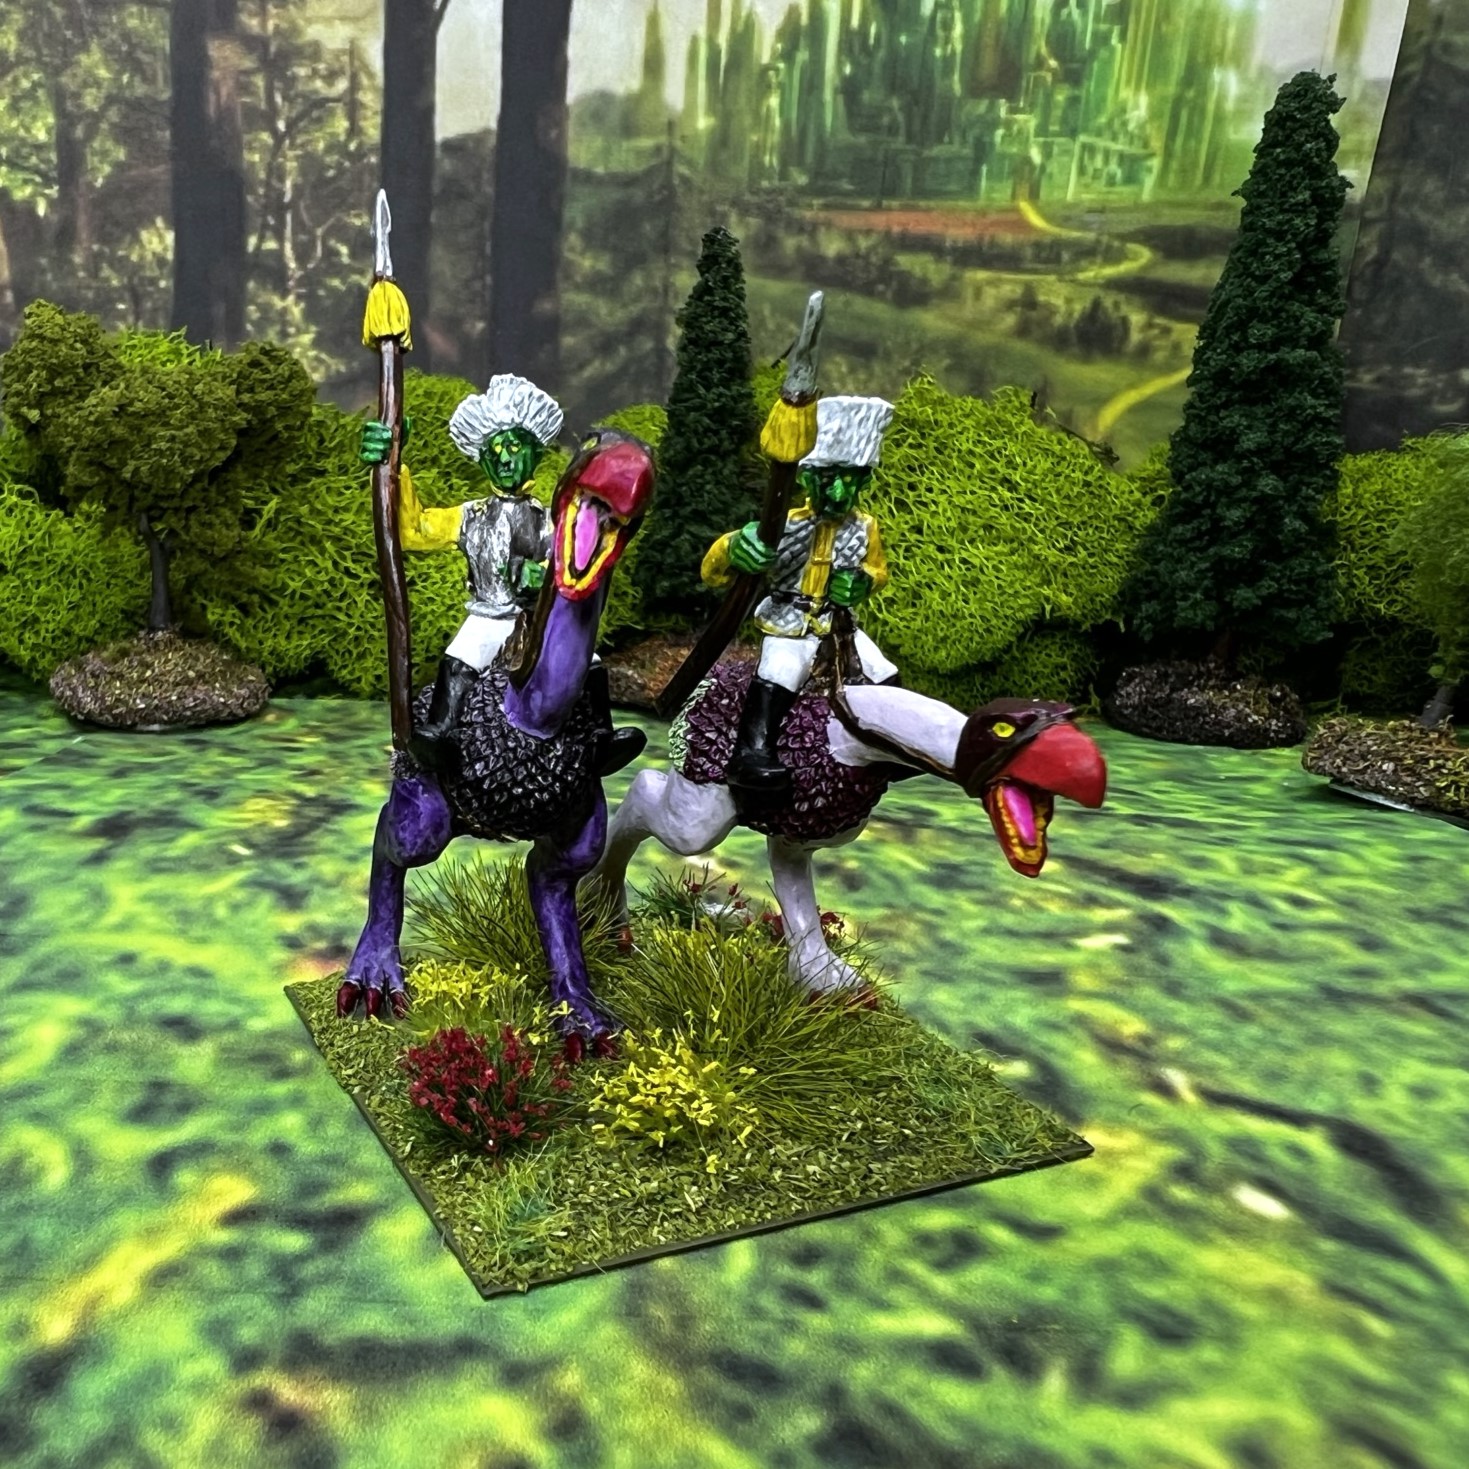
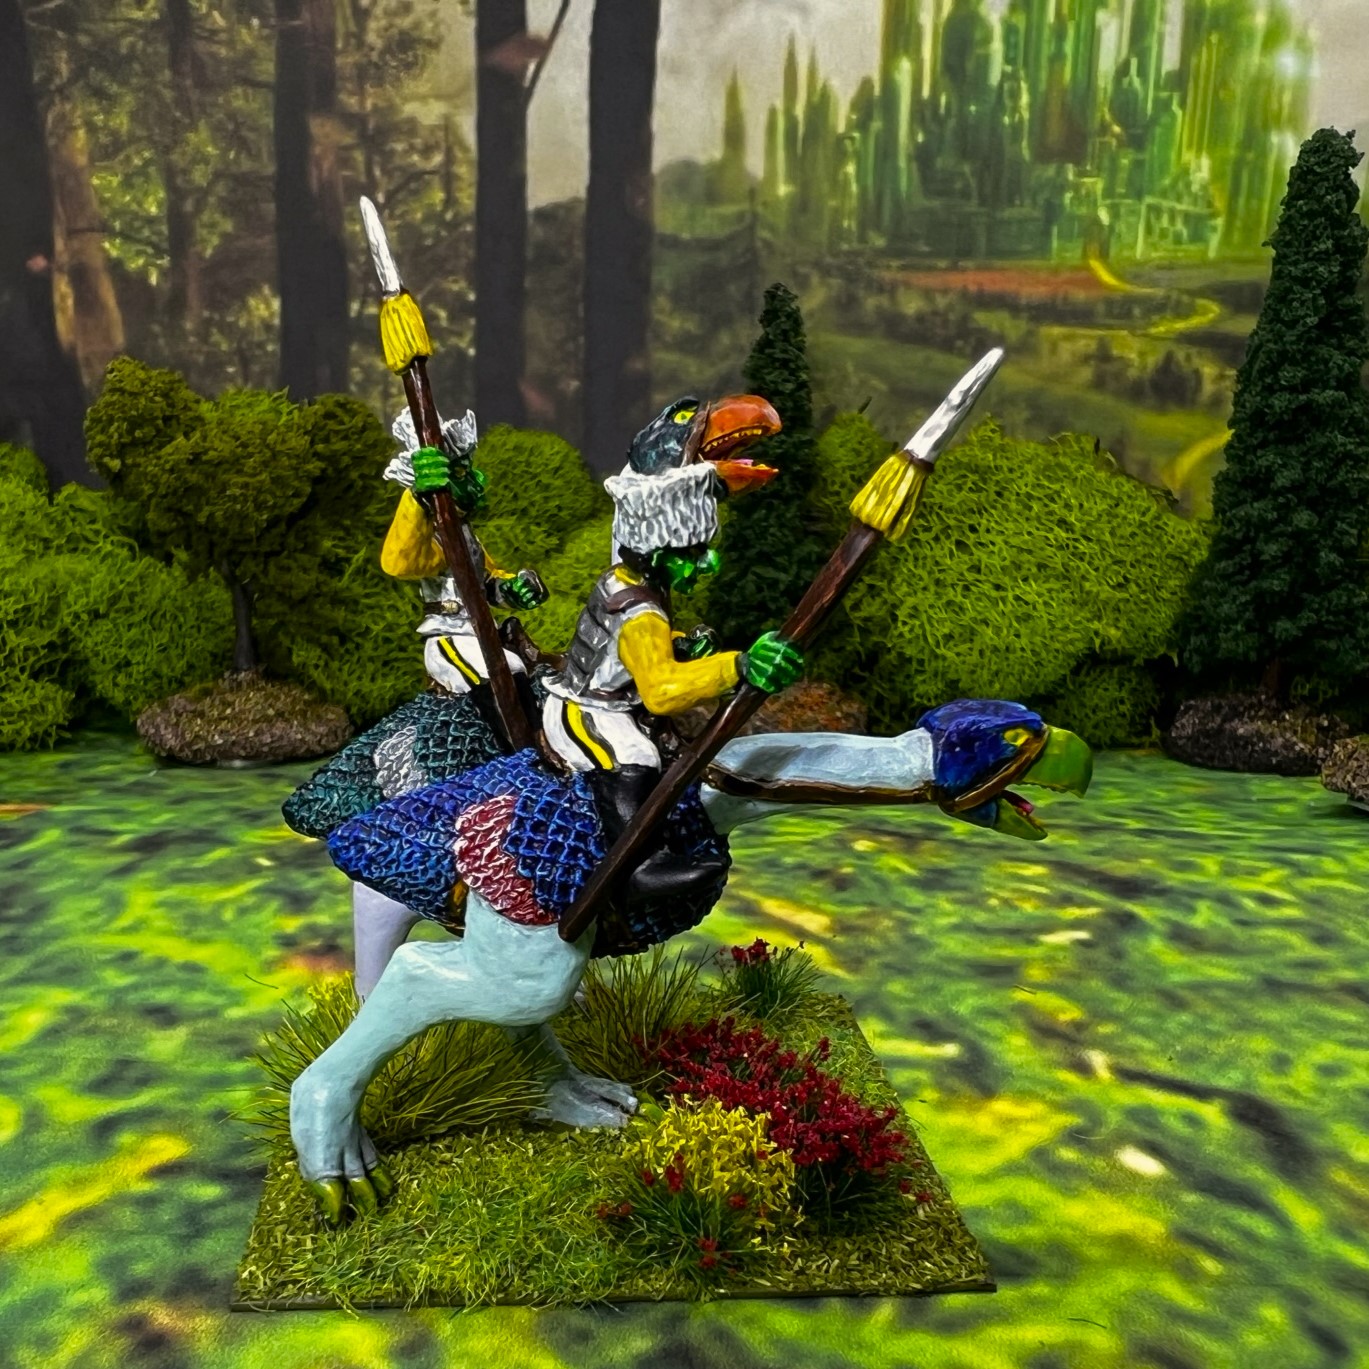
All are riding Zilks, which are carnivorous huge birds. The SKU# is OZZ305 and can be seen here. The figures come in two pieces (rider torso and a zilk combo rider’s legs combo). I had ordered/selected OZZ304 during the Kickstarter a while back, but got shipped OZZ305. The OZZ304 SKU is for the Winkie Heavy Cavalry – but they are the same price and I had no problem with having them in my brigade. There are 10 figures based on five 2″ square bases, plus the Regimental Commander on his own MDF base.
The Winkie Light Cavalry costs one point less than the Winkie Heavy Cavalry (6 vs 5) – and only loses one point of Melee (8 versus 9) and Elan (8 versus 9), so it’s still a pretty potent unit to have. Plus, I needed a Brigade Commander which came in the Kickstarter, so all is good by me.
According to “The History of Ozz”, after the Madness Bombs fell at the end of the Last Great War, Ozz was founded. East of the Emerald City, Evora the Wicked Witch of the East, conquered and molded the Winkies into her own fighting force. Winkies are believed to be mutated humans, perhaps even descended from genetically-created super soldiers at the end of the Last Great War.
As for the Winkie Cavalry, according to The Wars of Ozz:
After Evora lost her first battle to goat-riding raiders from the Great Endless Desert, she suddenly wanted cavalry. Perhaps inspired by the Madness, she had a vision of zilk-riding lancers sweeping down on her enemies. There were only two problems with this. First, the Winkies were not a mounted people. Second, nobody had ever thought of riding a zilk – – and with good reason. Zilks or “terror birds”, weren’t ridable – they were giant, carnivorous, two-legged birds of the high mountain valleys. Simply getting close to one was risking death.
Of course, after a few executions, nobody wanted to tell Evora it couldn’t be done. An expedition was mounted and a herd of zilks was corralled and broken to saddle. The Winkie survivors had the honour of being the first commanders of the Zilk Squadrons. For the rank and file soldiers being promoted to Zilk trooper is seen as a punishment rather than an honour. Everyone knew a terror bird would find a way to kill its rider sooner or later. Since drilling was almost impossible and the riders could barely get their mounts to cooperate on the field, Zilk regiments were and are poorly trained. Still, if the riders can get them to go in a straight line, the Zilks can land a charge with a powerful impact.
As discussed on previous posts, the Winkies (the orcs of the Ozz world) consider melee as their preferred means of combat. No missile weapons here!
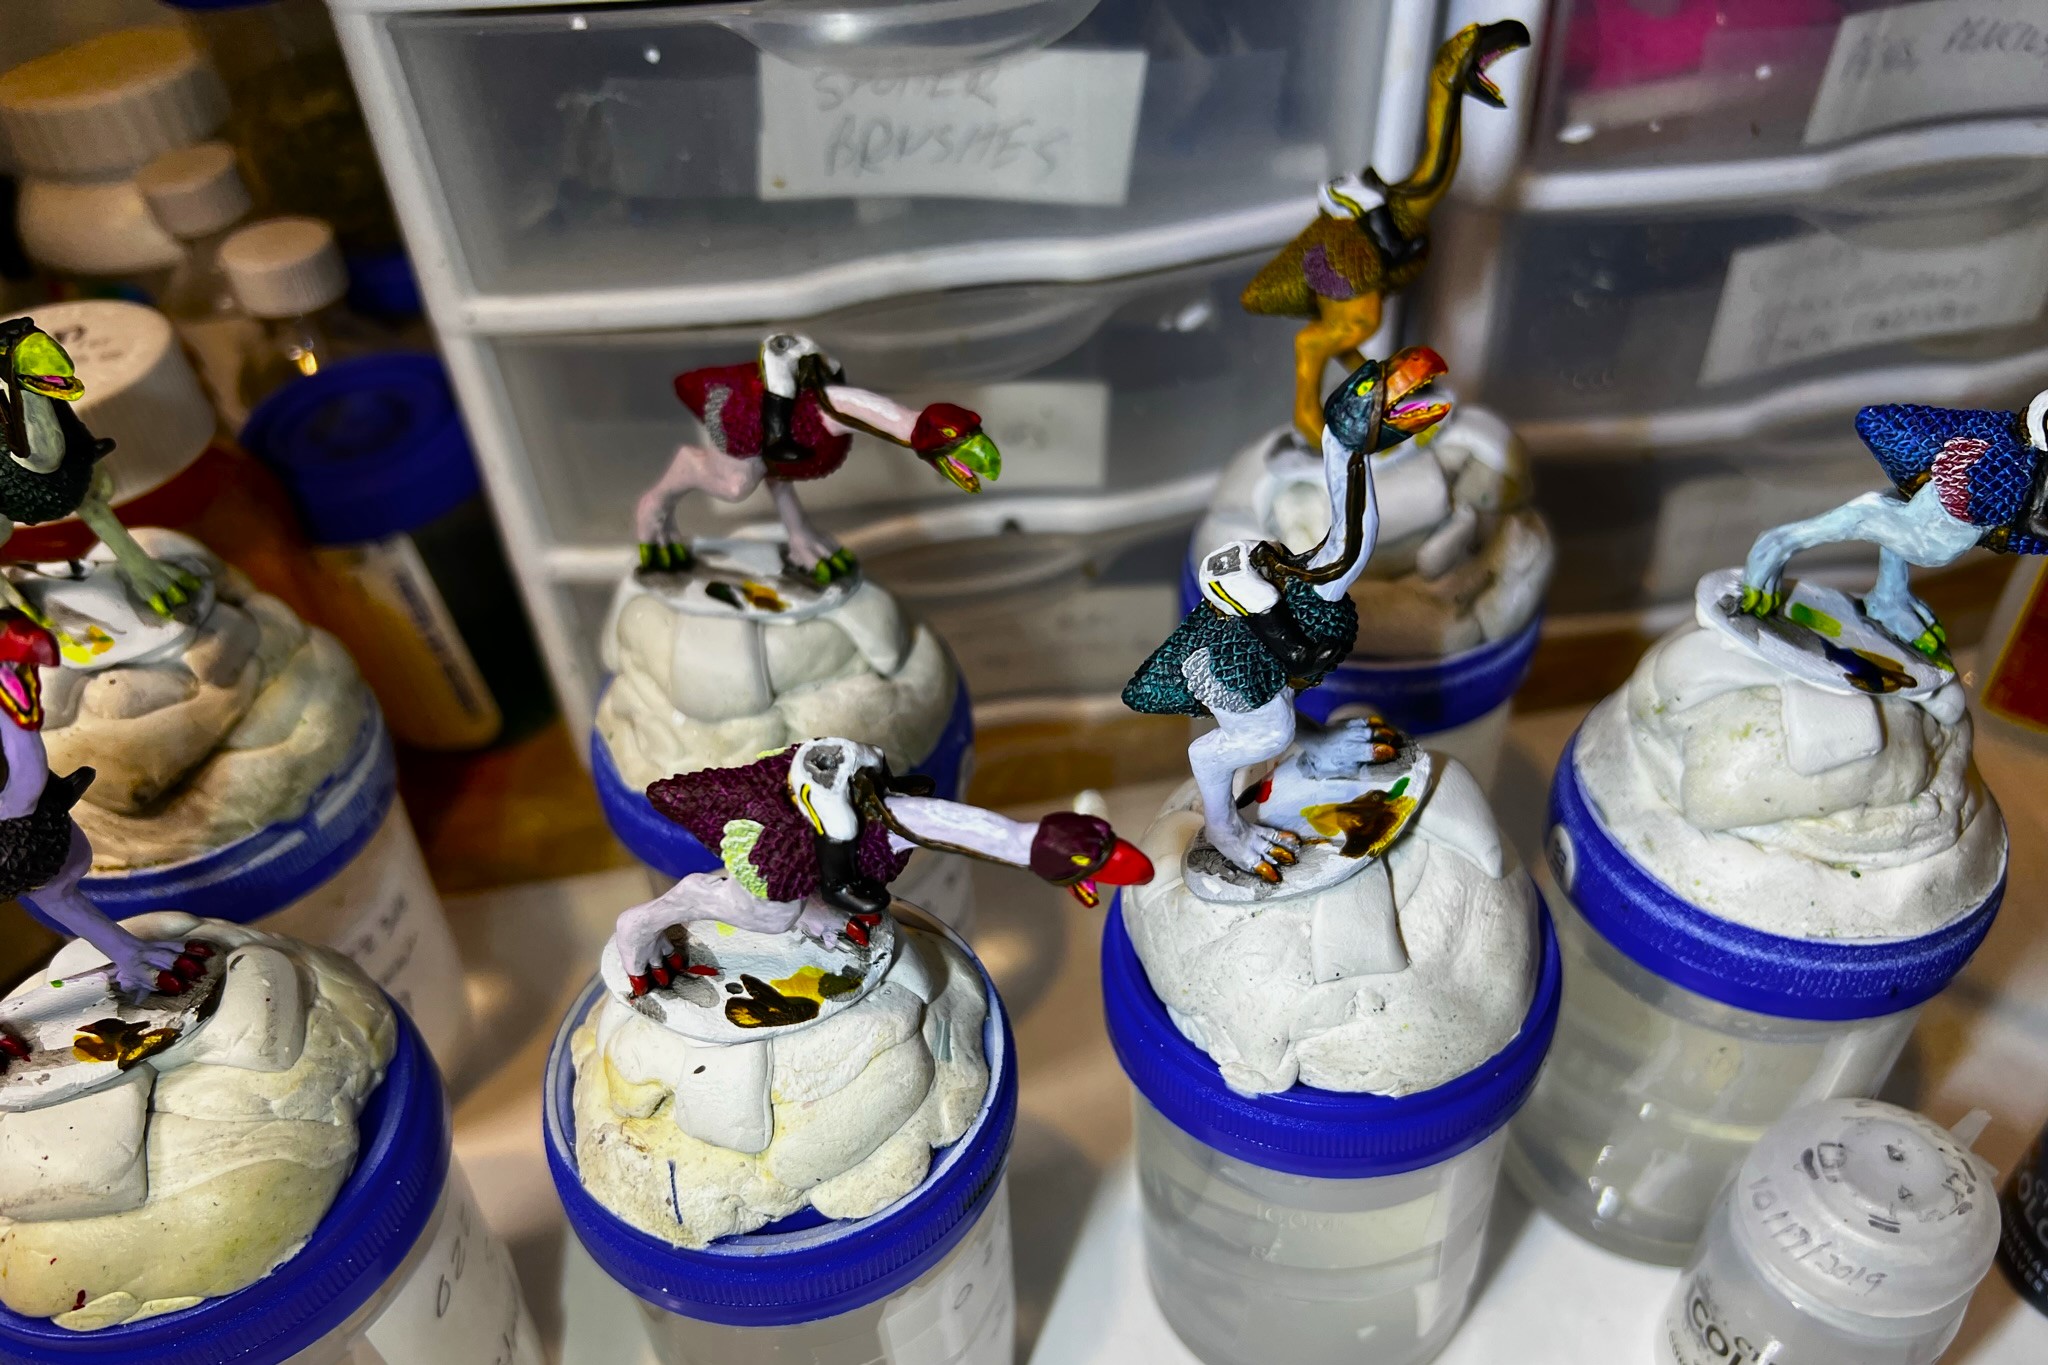
I began prepping the unit back on Monday, February 13th by cleaning up and filing off as many mold lines as I could without taking off any details. I then washed the figures with soap and water to remove any oils left over from the casting process. I decided to paint the riders and the mounts separately as I thought that might be easier given the proximity that the Winkie lances would be to the Zilk mounts. After drilling with a pin vise, I carefully put small balls of poster tack into the wells where the riders would be affixed – so as to prevent any primer from compromising future glue adhesion when I was assembling them. I then applied primer with an airbrush, followed by a wash of Citadel “Nuln Oil”. As usual, I will list all the paints I used on this project at the end of this post for those interested in that sort of thing. There were 82 this time!
One different approach that I took on for this project was to have every zilk be painted totally differently from every other zilk in terms of a painting scheme. To accomplish this, I chose a range of pastel craft paints from Michaels and mixed them with Vallejo Thinning Medium. These are shades that I would not normally use – and I used these pastels for the legs and necks, and married those to other paints (mainly contrast and speed paints) on the beaks, claws and feathers. I used a lot of different paints here! For that reason, I definitely needed another Excel spreadsheet – like this one:
Let’s move on to some WIP. Click any picture to get a better view.
WIP shots…
The Winkie Light Cavalry Regiment and the Brigade Commander at the start of the project.Here the figures are prepped for priming – note I used some ad hoc drilled out popsicle stick jigs (with poster tack in the holes) to hold and work on the riders until their mounts were done and I had painted the lances.Zilk progress on 2/19Winkie progress on 2/19
Below is my progress through 2/20:
With TotalCon37 looming, I pushed as far as I could before I needed to pack the car with all my Aztec, Maya, and Conquistador stuff. When I returned, I jumped back into working simultaneously on them and the Jungle Bases.
By 3/1 I had the riders mounted and had readied the figures for varnishing.The varnished (and dried) figures are glued to their bases and ready for flocking.
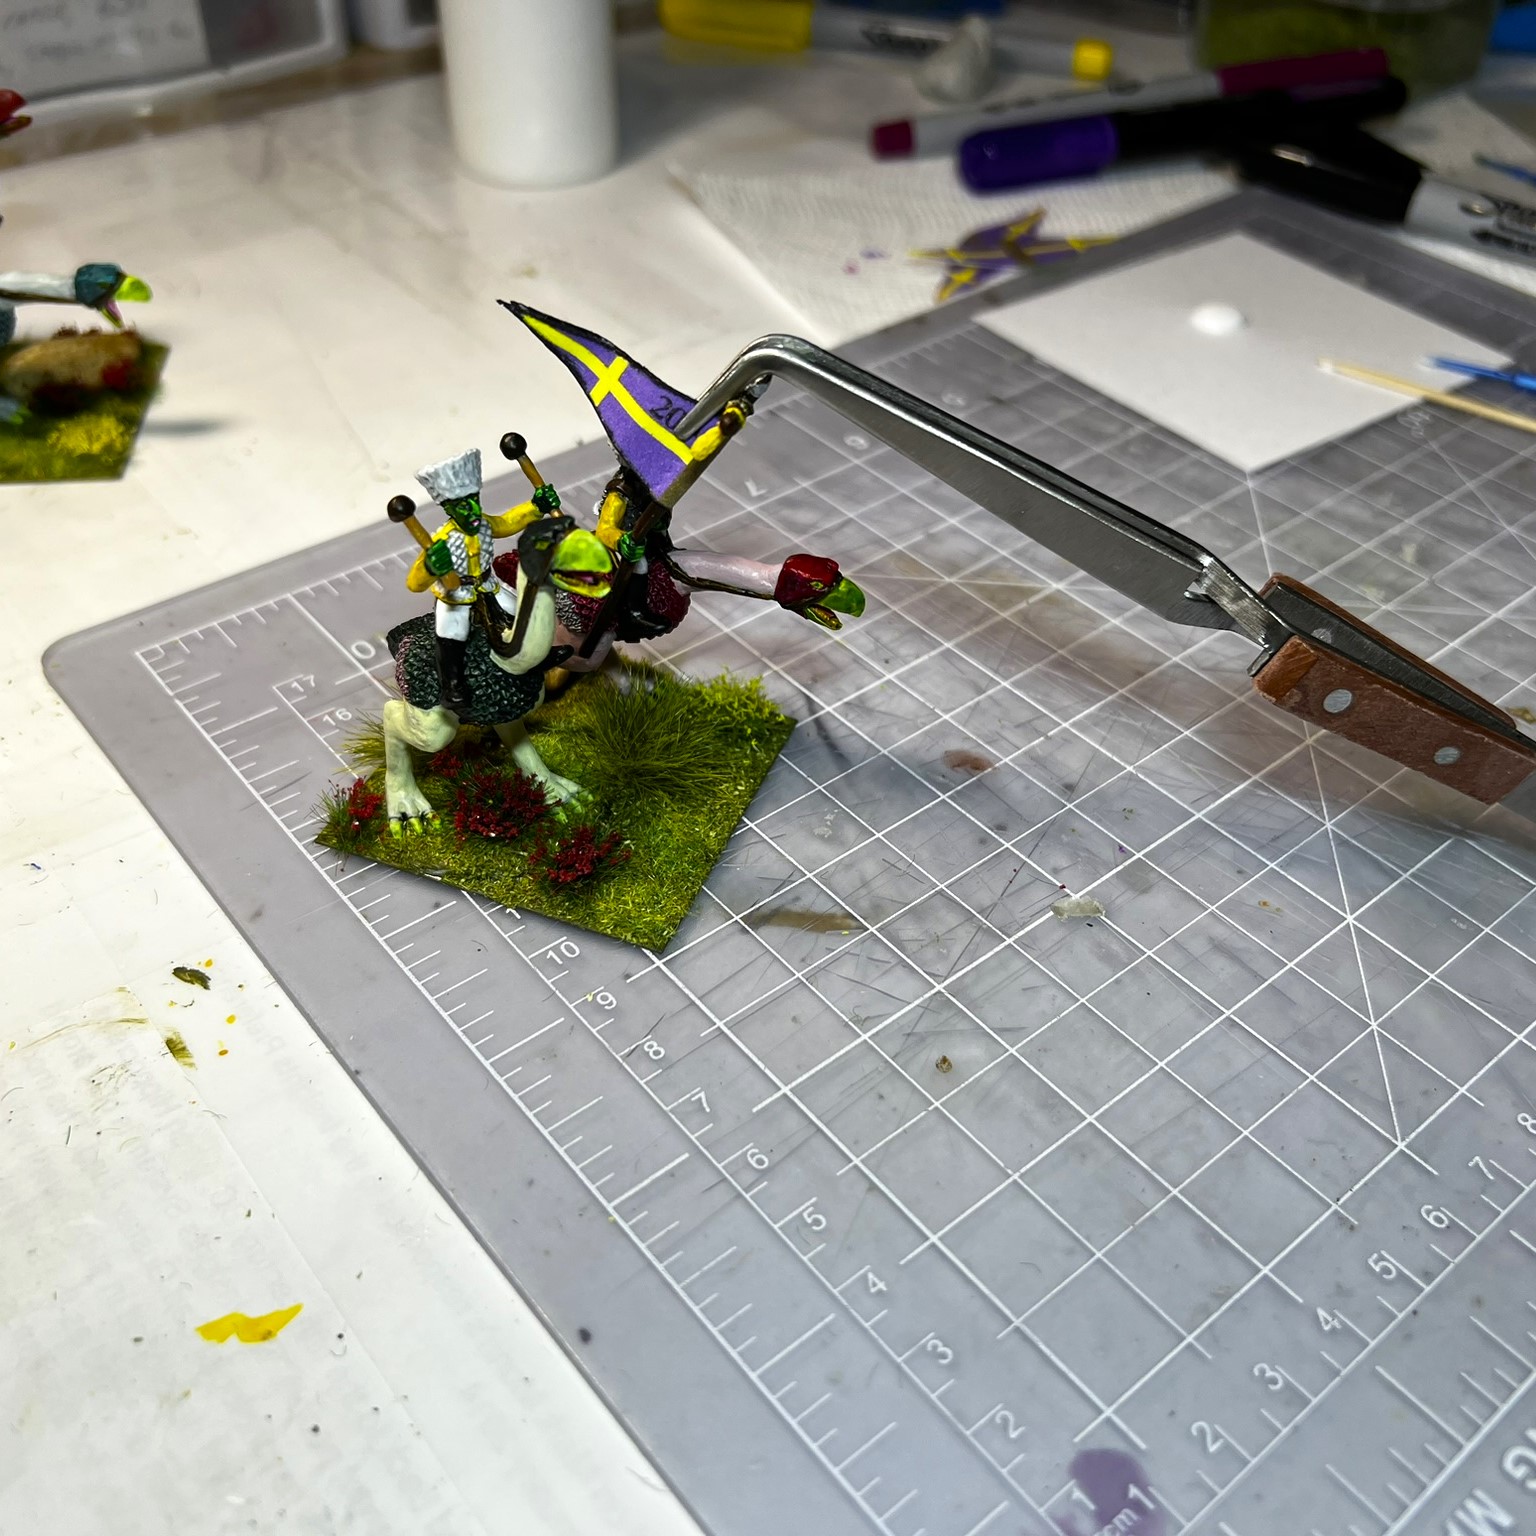
I chose a variety of tufts and grasses for flocking – plus some small rocks from near my driveway that I washed. After that, all I needed to add was the 20th colors – purple just for Roger!
I finally found a way to glue the guidon close to the pole – with these tweezers as clamps.
Now that you have seen the WIP, how about some…
Eye Candy
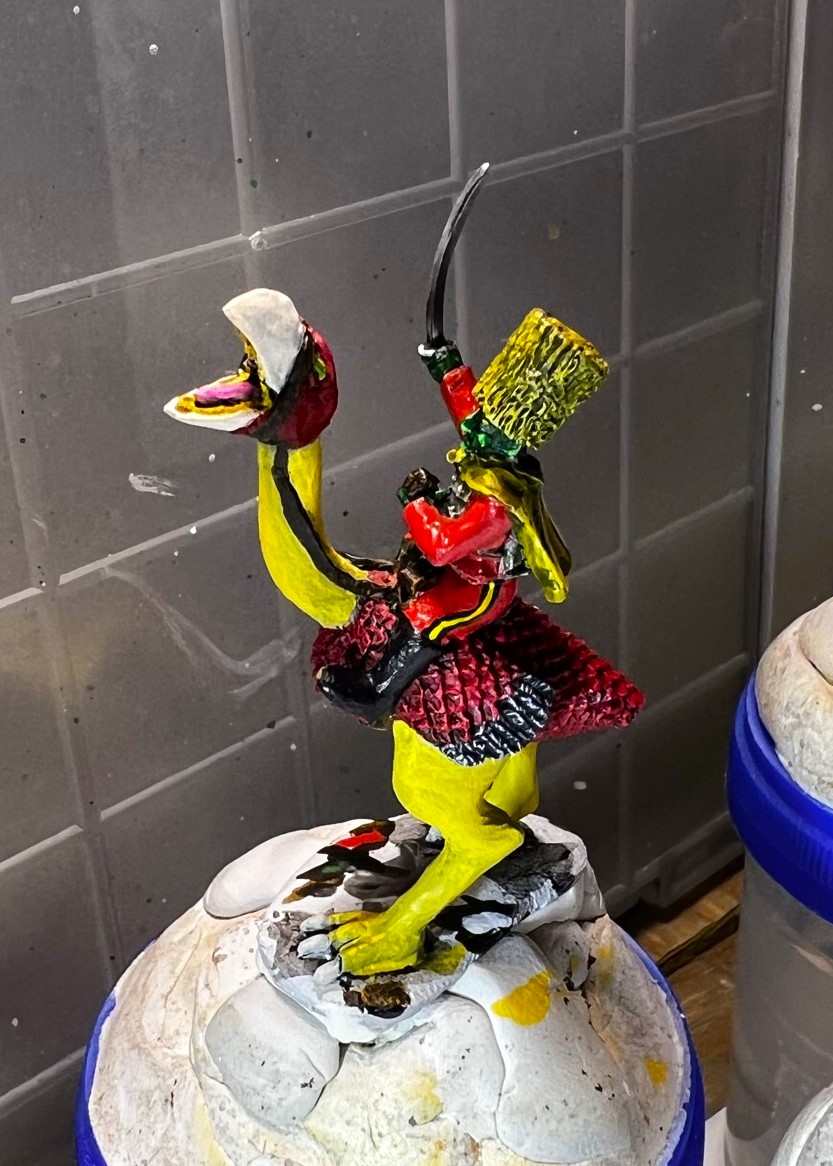
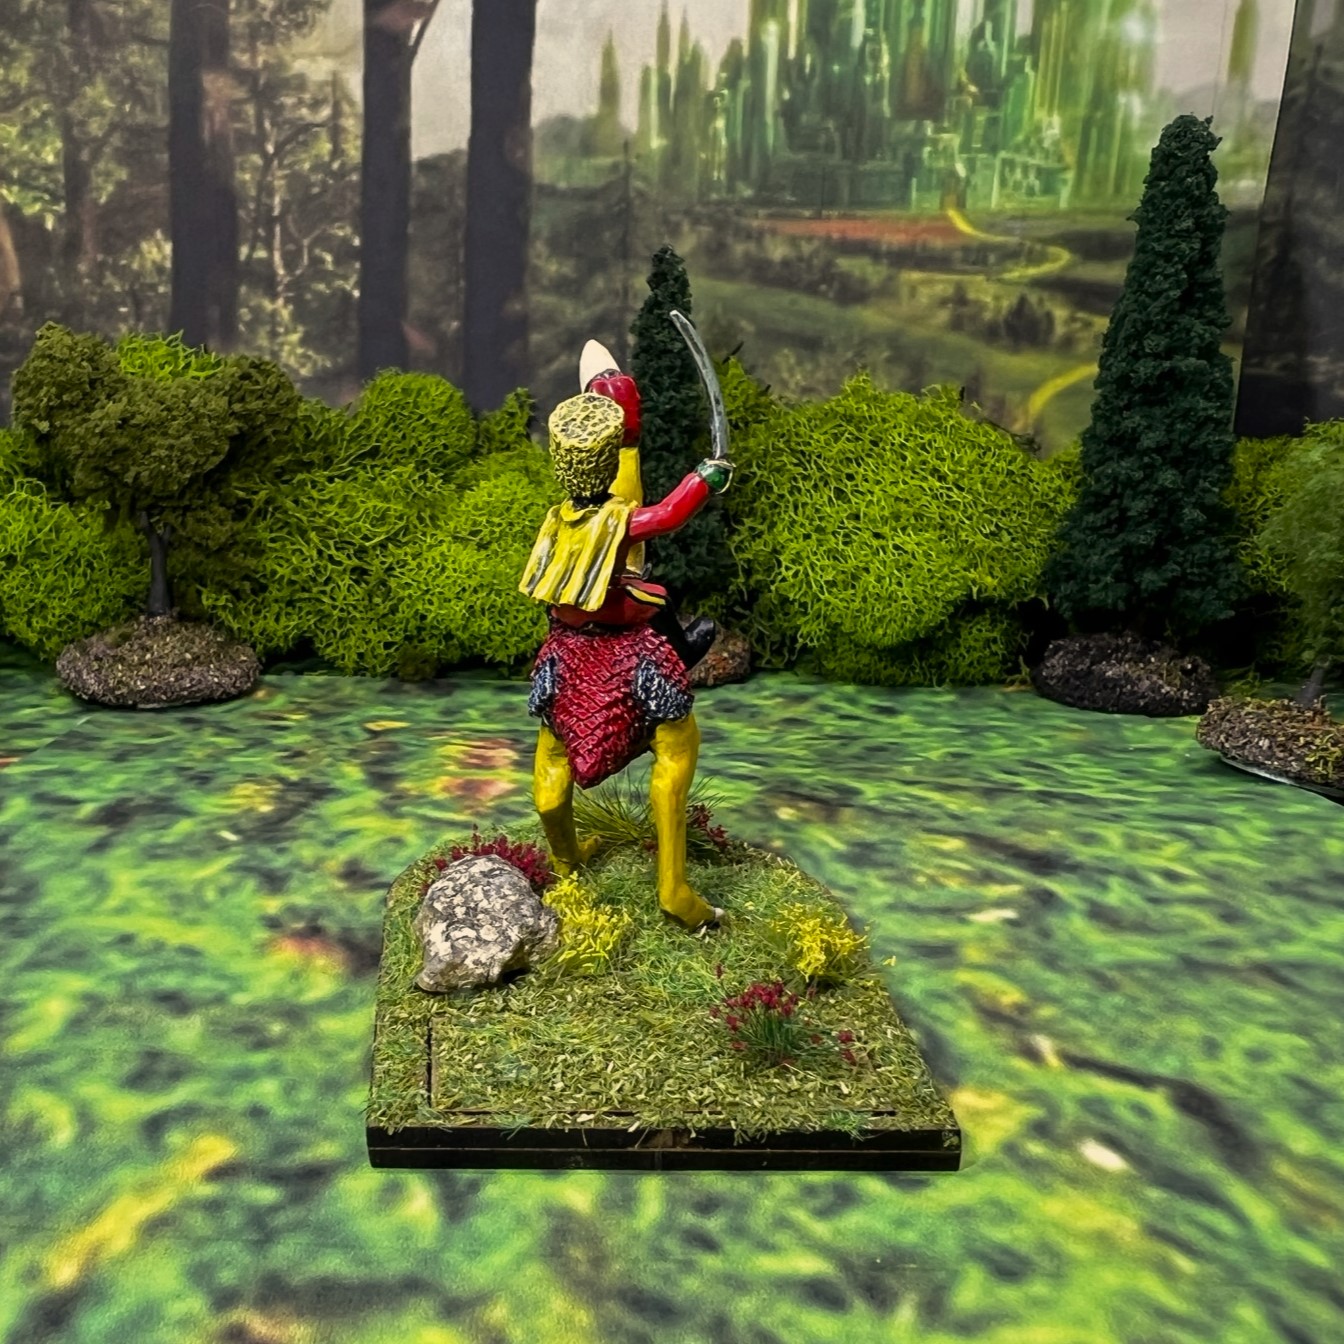
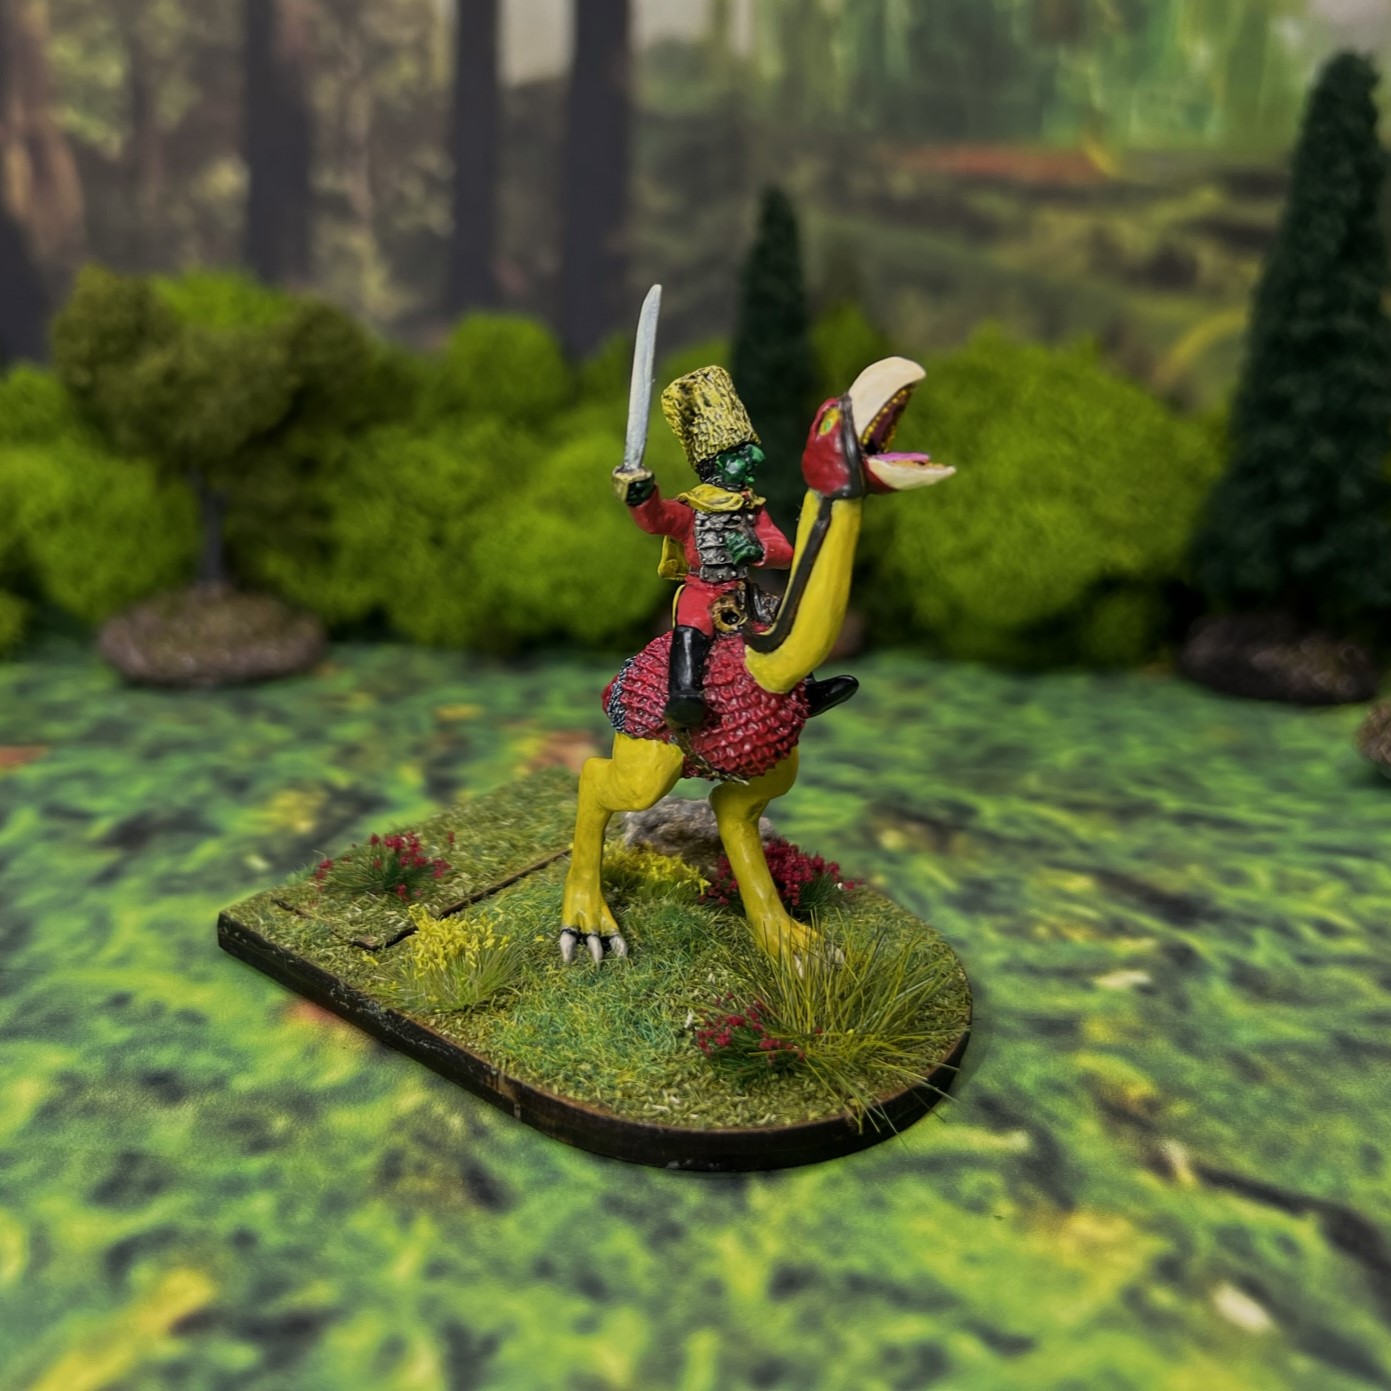
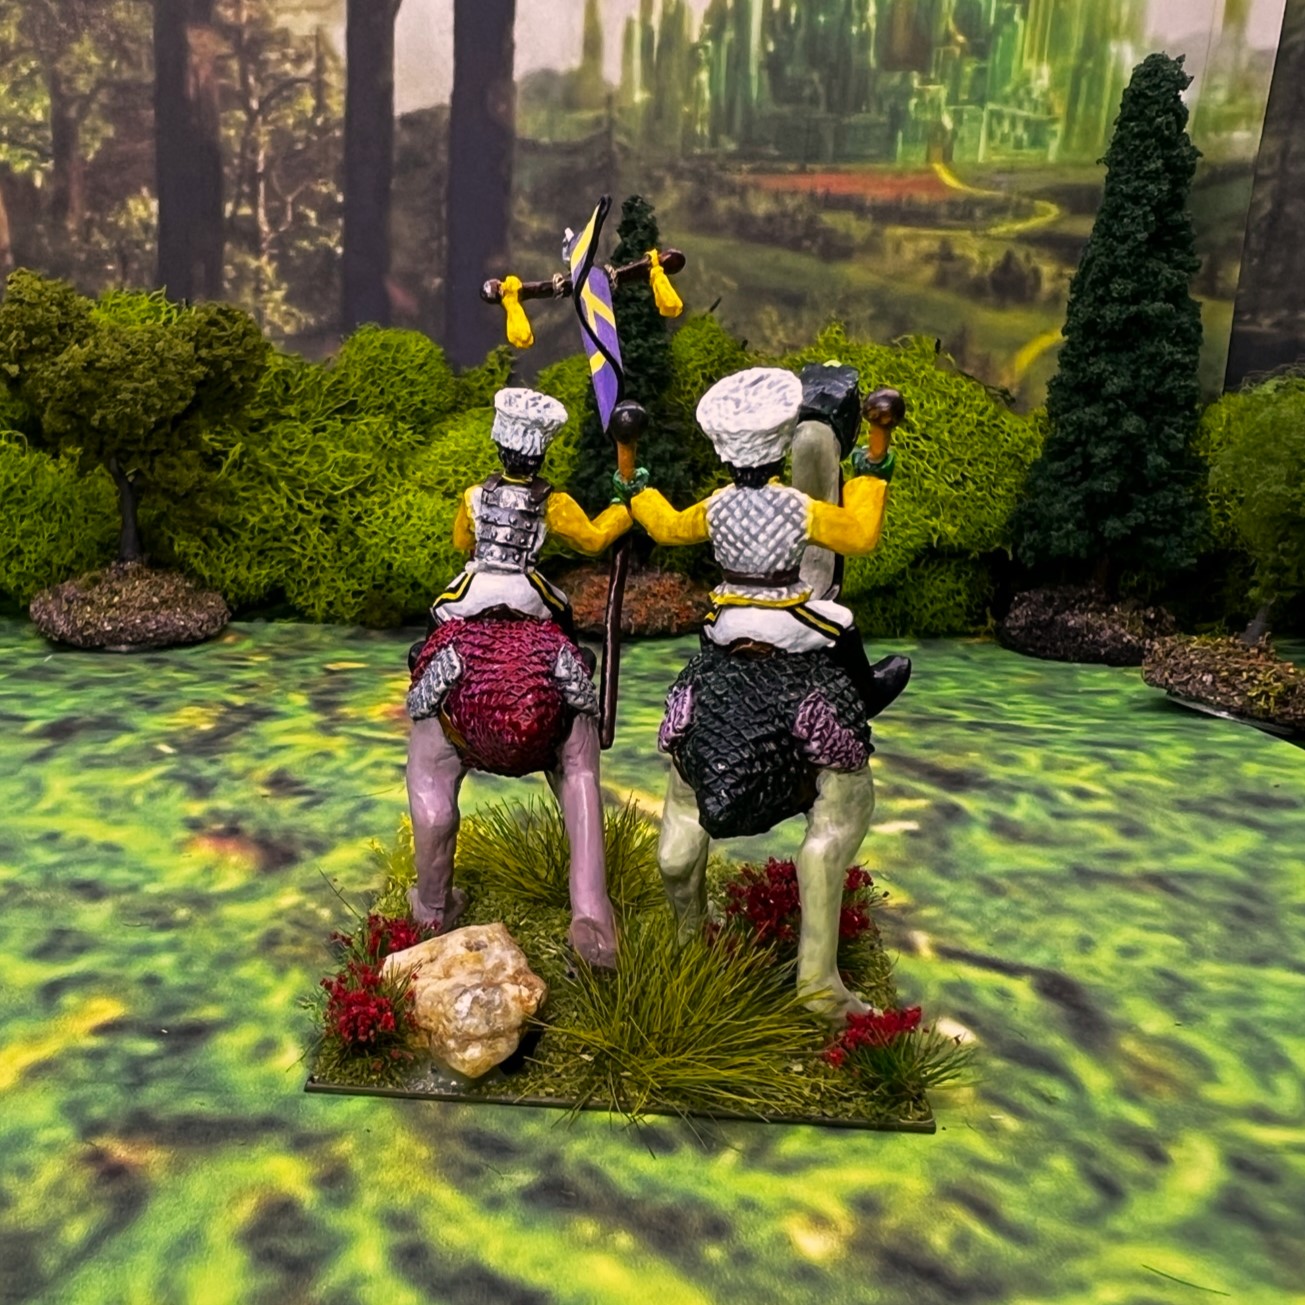
Winkie Brigade Commander
This figure had its own mount – and is free to have in your force in the game. The Brigade commander will have attribute tabs (which is why there is a tab well at the back of the figure). Early on I decided to freehand the stripes on all of these zilk-mounted warriors. His colors are unique in the brigade – I went with a red and yellow theme here.
2oth Winkie Light Cavalry Regiment
There are 5 stands of 2 figures each plus a regimental commander – and I tried to pose, paint, and arrange them as differently as possible. As with all zilk-mounted regimental commanders the one here goes on an MDF stand with a removable tab for an attribute tab in the game if needed. All have white hats per The Wars of Ozz.
Regimental Commander Stand
Stand 1
Stand 2
Stand 3
Stand 4
Command Stand
Group Shots
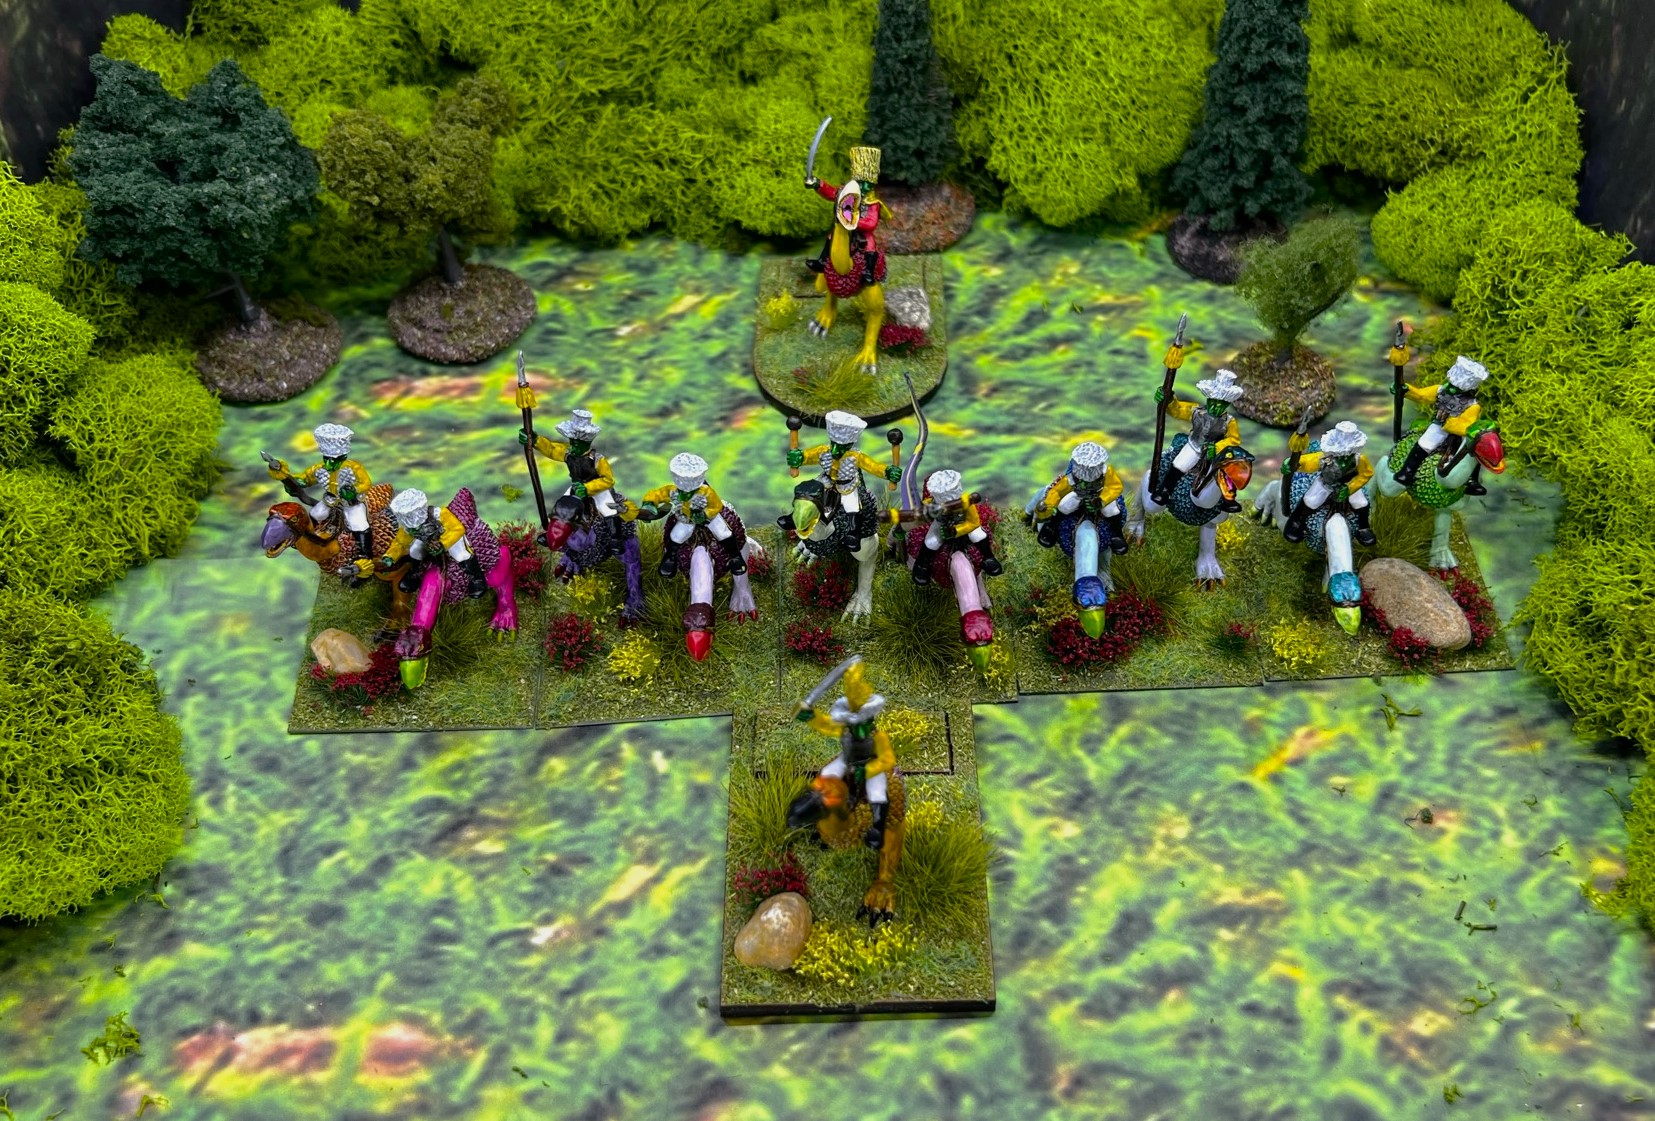
The WLCR in line with the Regimental Commander in front and the Brigade Commander in the rear.Side view or the WLCR in column with the regimental commander up front.Angled shot of the group giving an idea as to the color variations when grouped together.
I thought by having these with a lot of color that they would be wonderful attacking the Munchkin Light Cavalry!
This completes (for now) my Winkie Brigade. Next, I will be moving on to the Land of Harvest faction as well as some terrain for Ozz. But first, I am going to Cold Wars – where these Winkies will see battle!
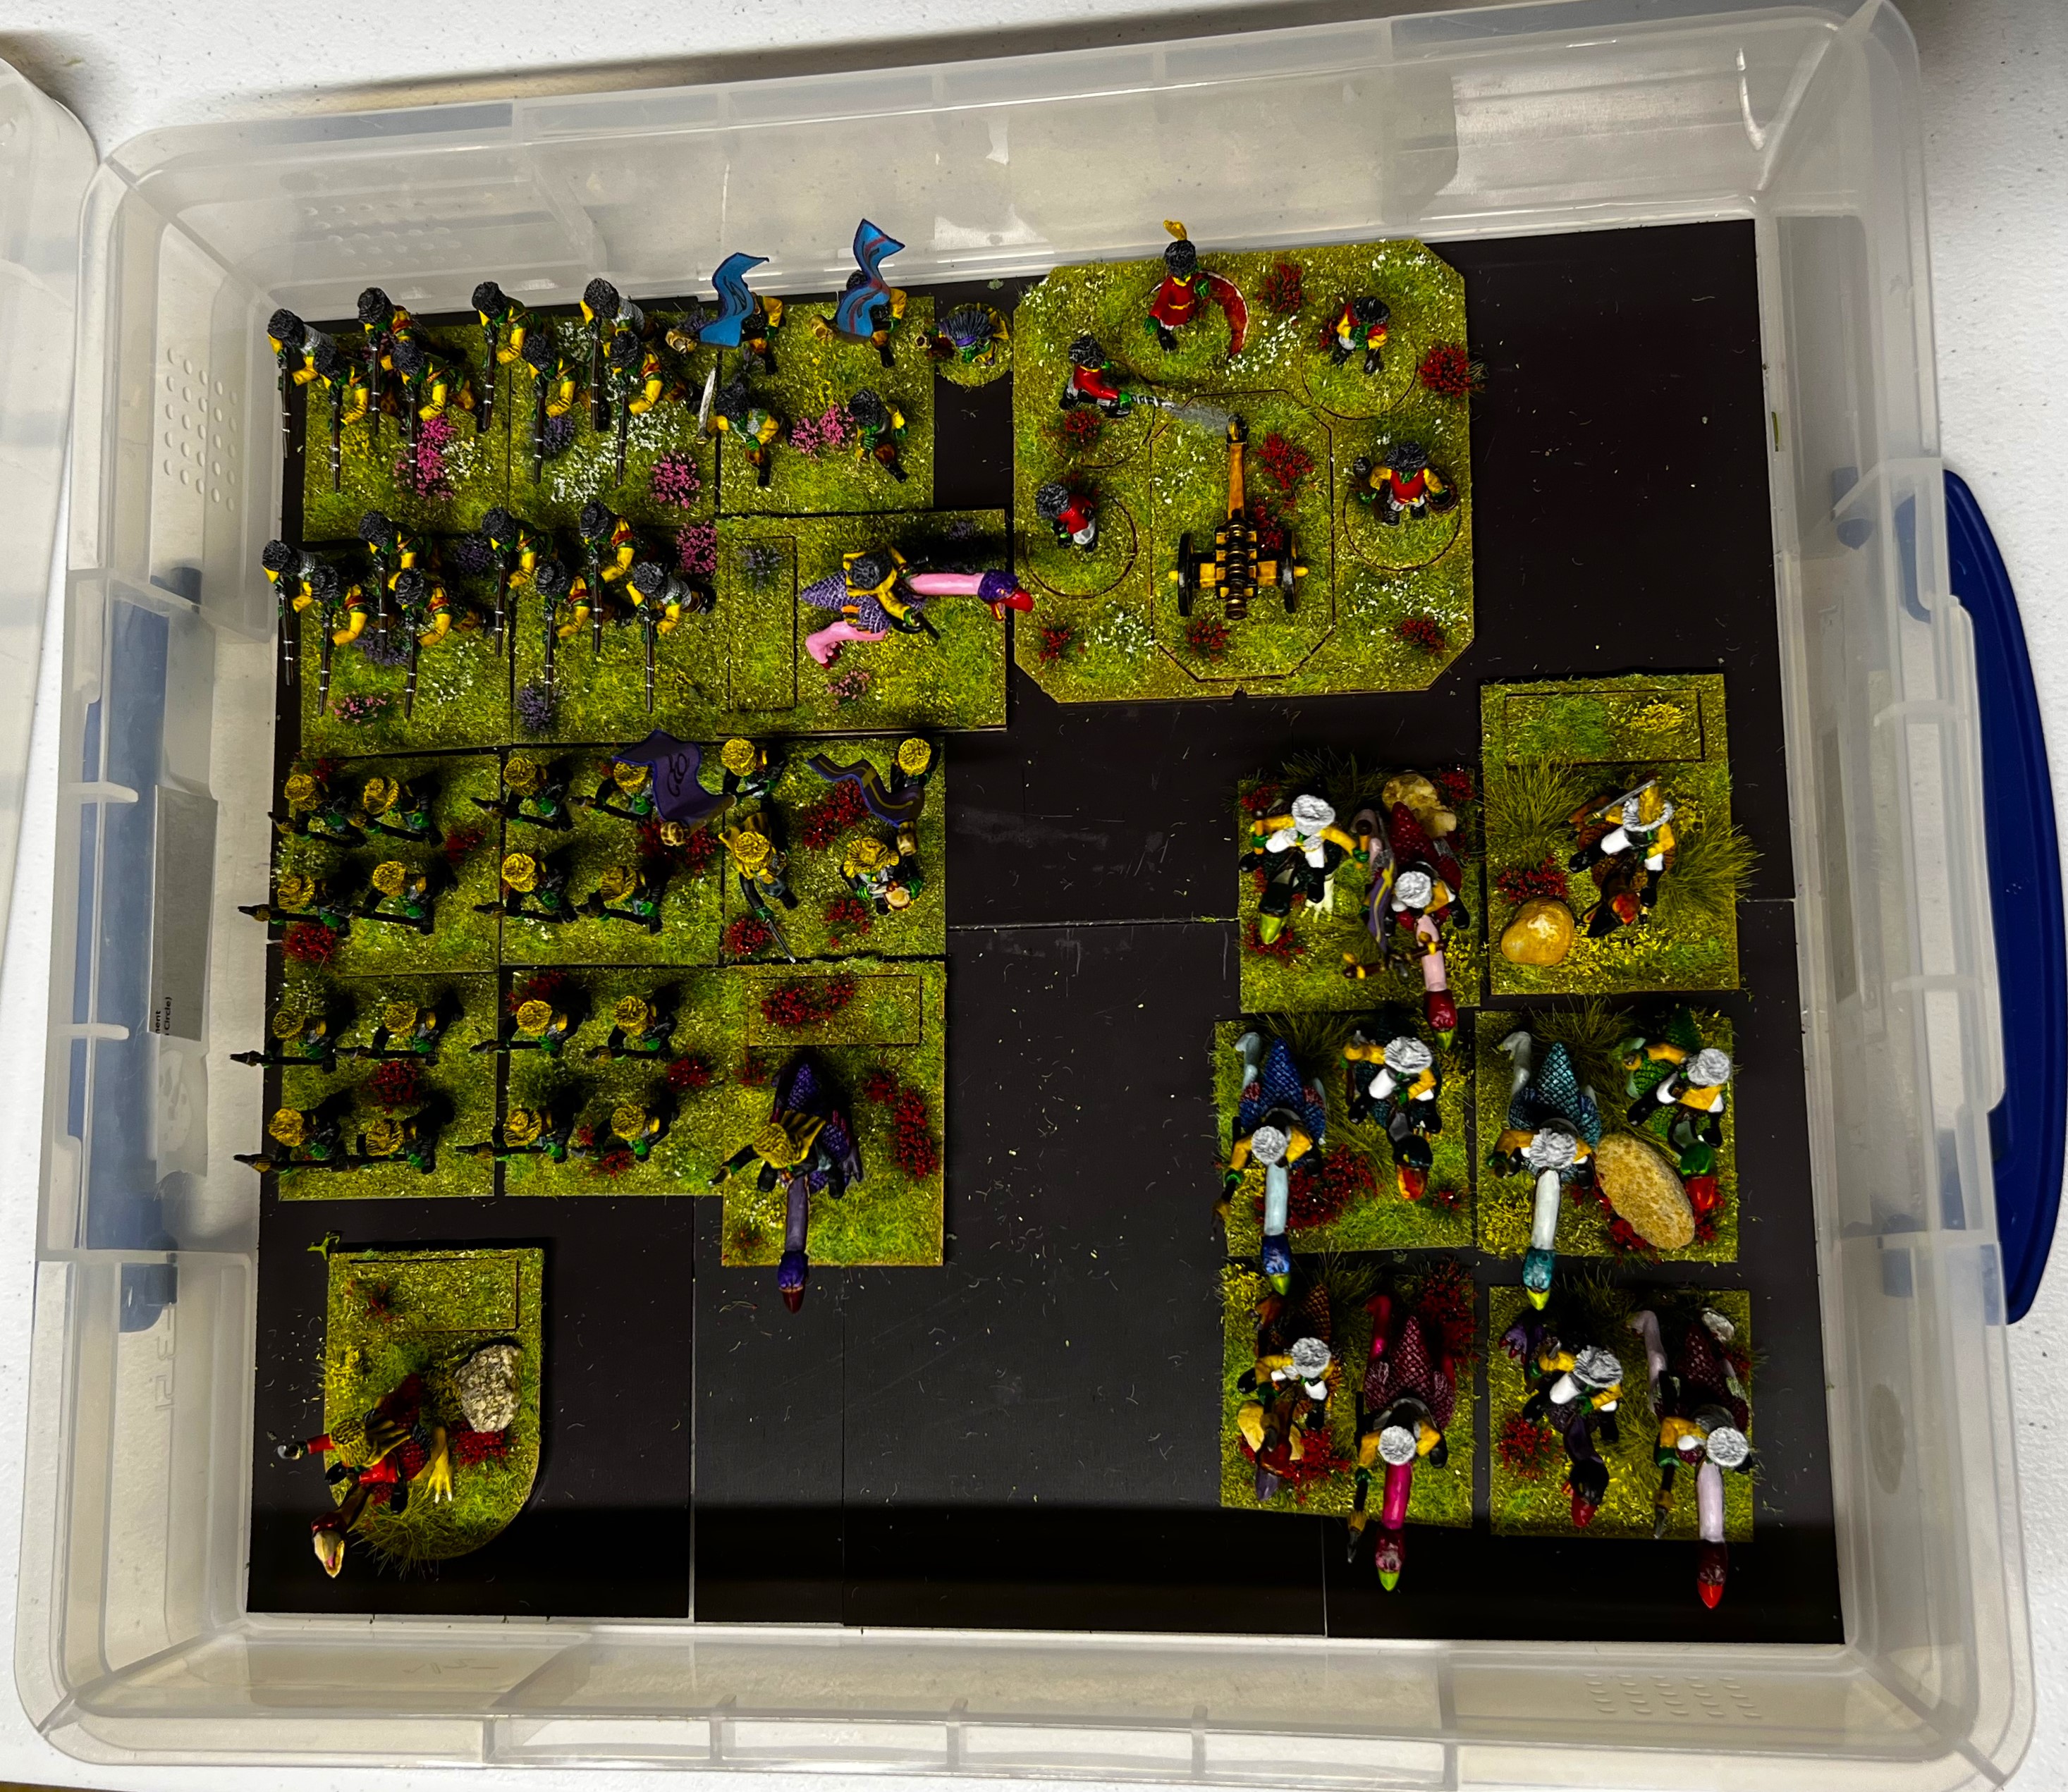
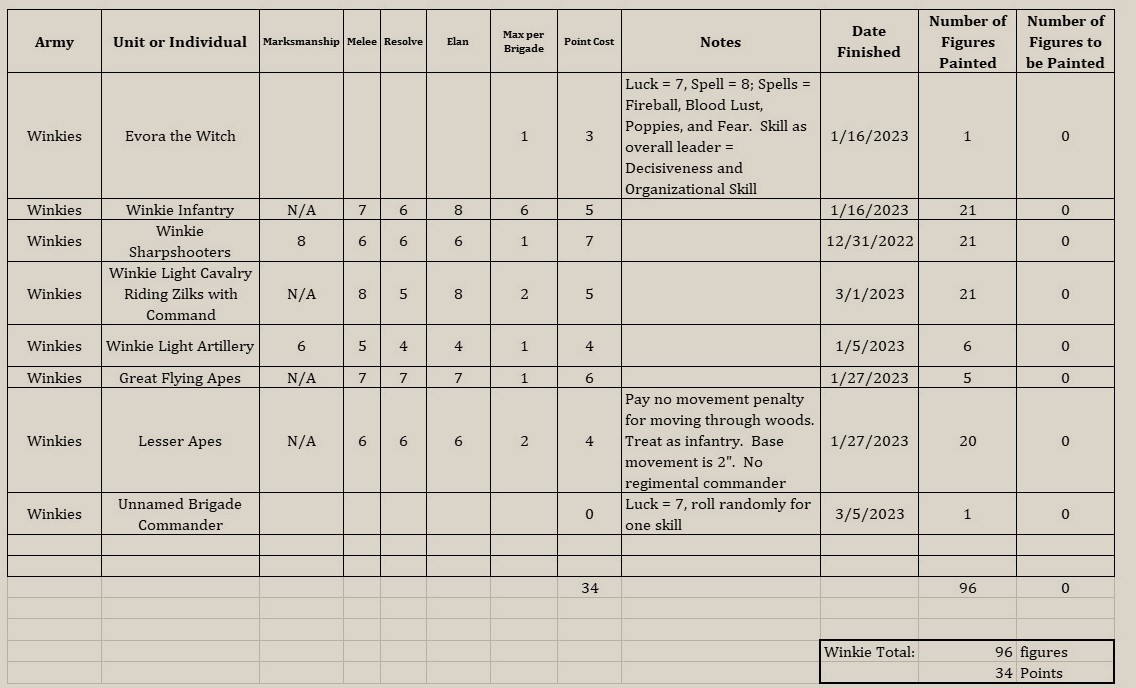
Winkie Brigade (less apes) in a boxYes, another spreadsheet showing what I have for Winkies.
And yes, I still have more to come…
Miscellaneous details and references for those interested in that sort of thing:
For all of my previous posts on Wars of Ozz games, figures, units, and other related projects – please see this page.
PAINTS, INKS, GLAZES, SHADES, WASHES, PIGMENTS, FLOCKING, GLUES AND MORE THAT I USED ON THIS WINKIE LIGHT CAVALRY REGIMENT & THE WINKIE BRIGADE COMMANDER:
Regimental MDF base from Old Glory/Wars of Ozz Miniatures
Mounted Brigade Commander MDF base from Old Glory/Wars of Ozz Miniatures
Elmer’s PVA Glue
Paper clip wire pieces
Gorilla Glue
1 1/4″ x 1″ steel base from Wargames Accessories (#FOW1)
2″ square steel base from Wargames Accessories (#21)
Vallejo Mecha Varnish “Gloss Varnish”
Vallejo Mecha Varnish “Matte Varnish”
Black Sharpie pen
Army Painter “Battlefields Grass Green” (flocking)
Army Painter “Battlefield Field Grass” (flocking)
Army Painter “Battlefields Field Grass” (flocking)
Shadow’s Edge Miniatures “6mm Dark Forest Red Tufts” (flocking)
Small stones
Army Painter “Battlefields Meadow Flowers” (flocking)
Winkie Flags from Buck Surdu printed on card stock
Again, as you may want to check out the Wars of Ozz figures’ range – there are two places to get them (and I make no money from this btw). The game rules and the figures are available from the following two places:
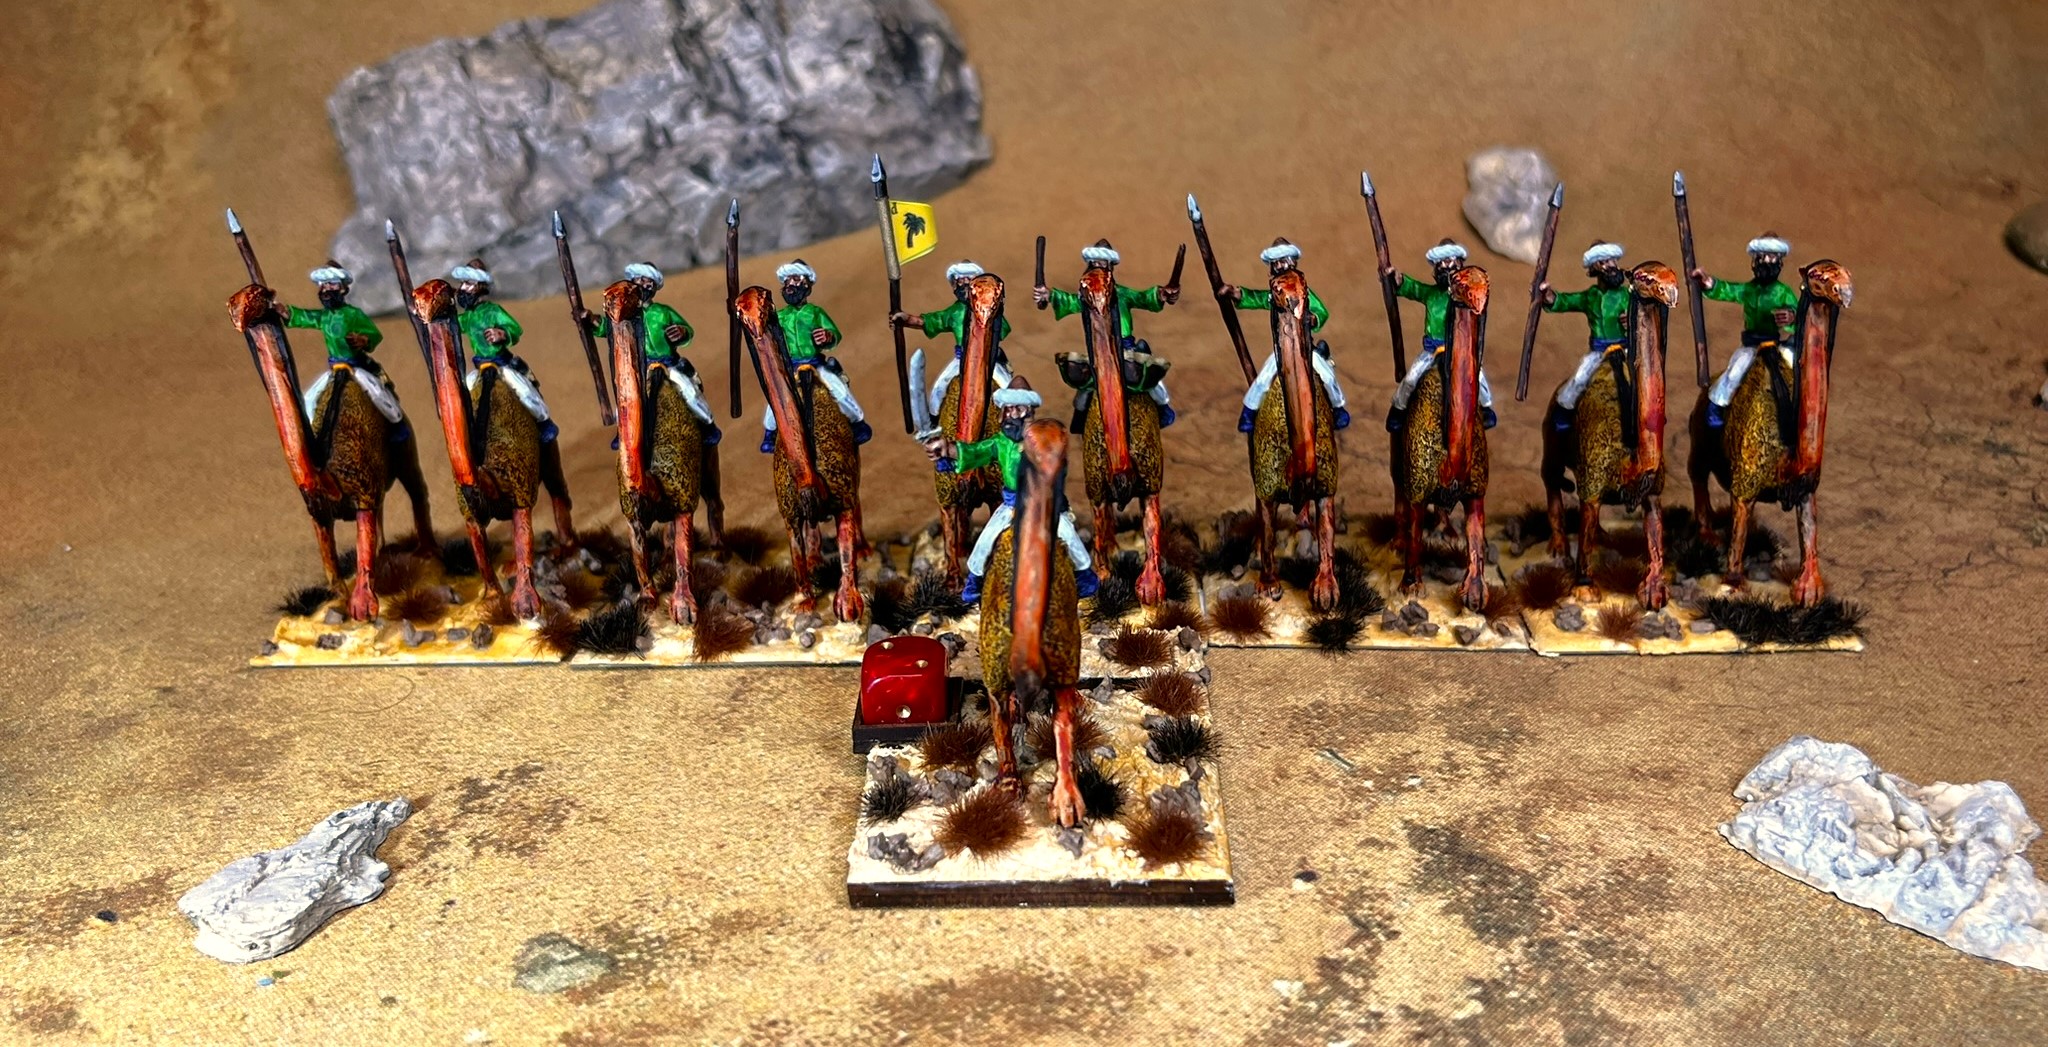
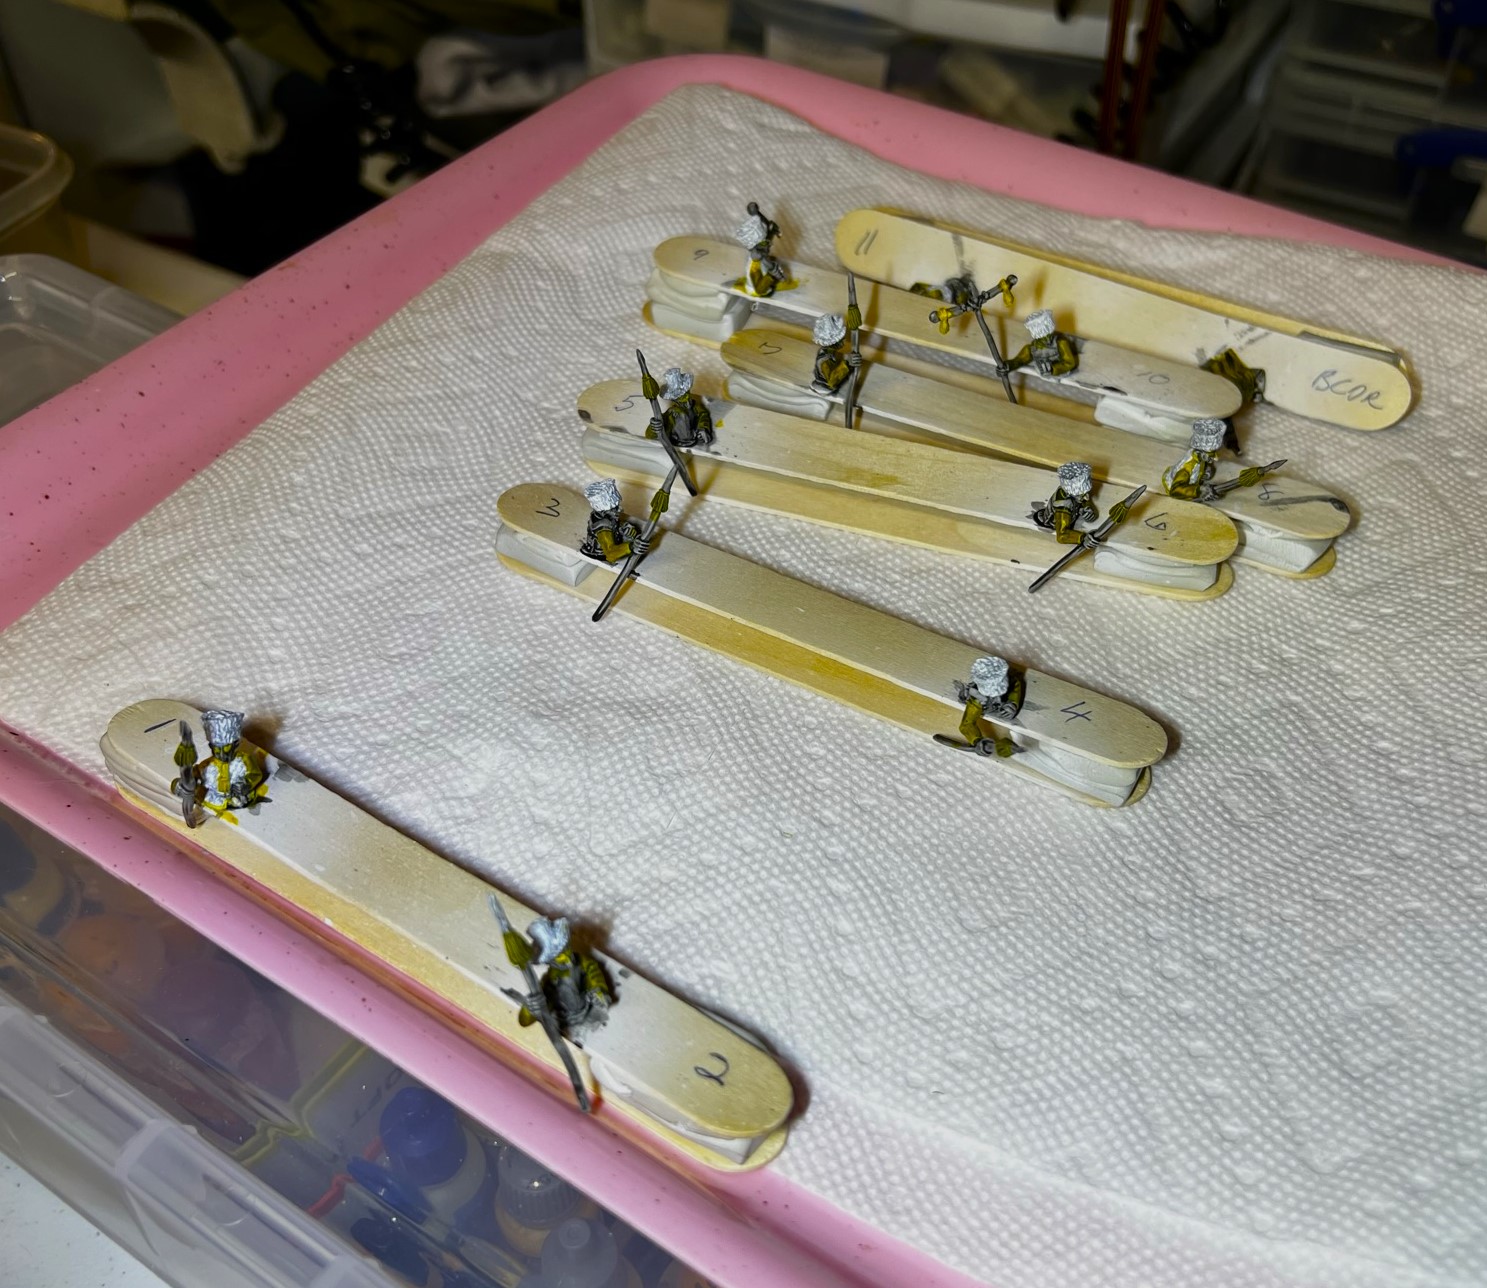
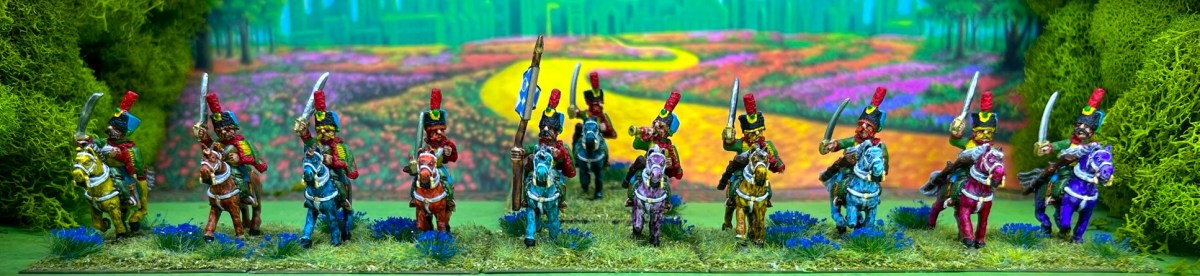
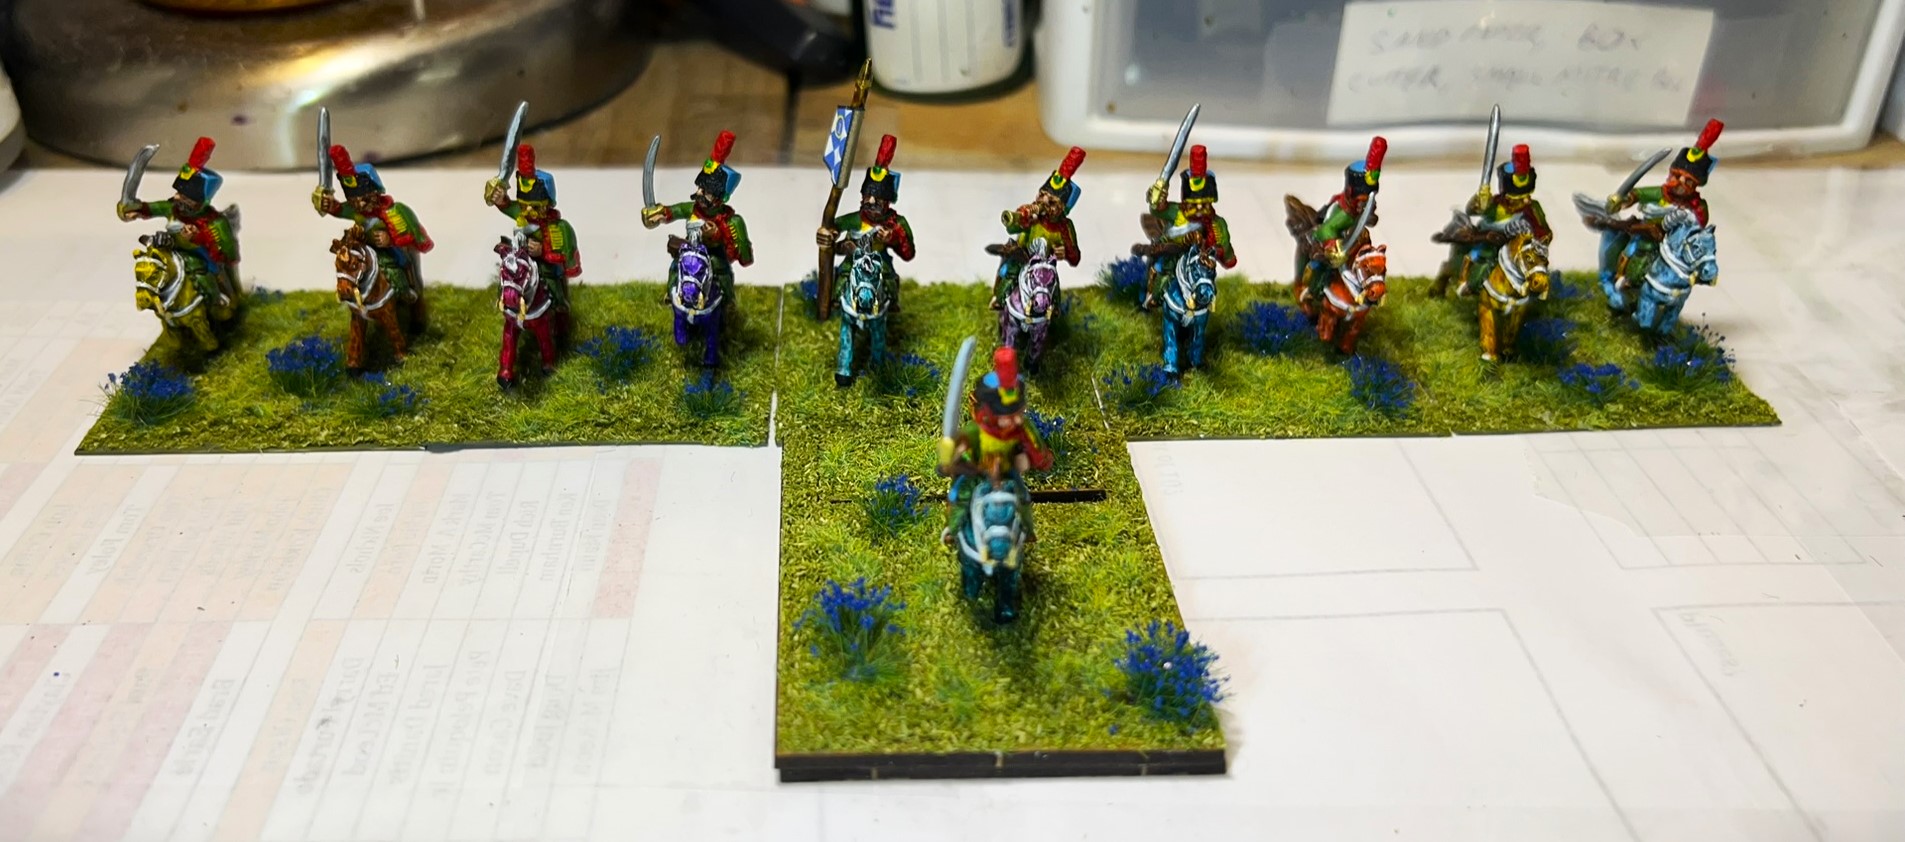
I had previously built two infantry regiments and an artillery battery for my Munchkin Brigade. It was time to add a cavalry regiment to my Munchkin Brigade for Wars of Ozz. This was a Light Cavalry Regiment, OZZ108 from Wars of Ozz miniatures.
The regiment is 28mm and metal. It is composed of made of 11 figures broken into 11 ponies, 11 riders (from the torso up), and 11 carbines. The riders also are armed with sabers, so they can also engage the enemy from a distance (although carbines are not very long ranged). The Light Cavalry Regiment (LCR) is worth the same amount of points as the Medium Artillery Battery that I described in my last post. Each base in the game can take 4 hits, even though with cavalry there are only two figures per 2″ square base. This regiment has 5 bases plus a regimental commander on an MDF base.
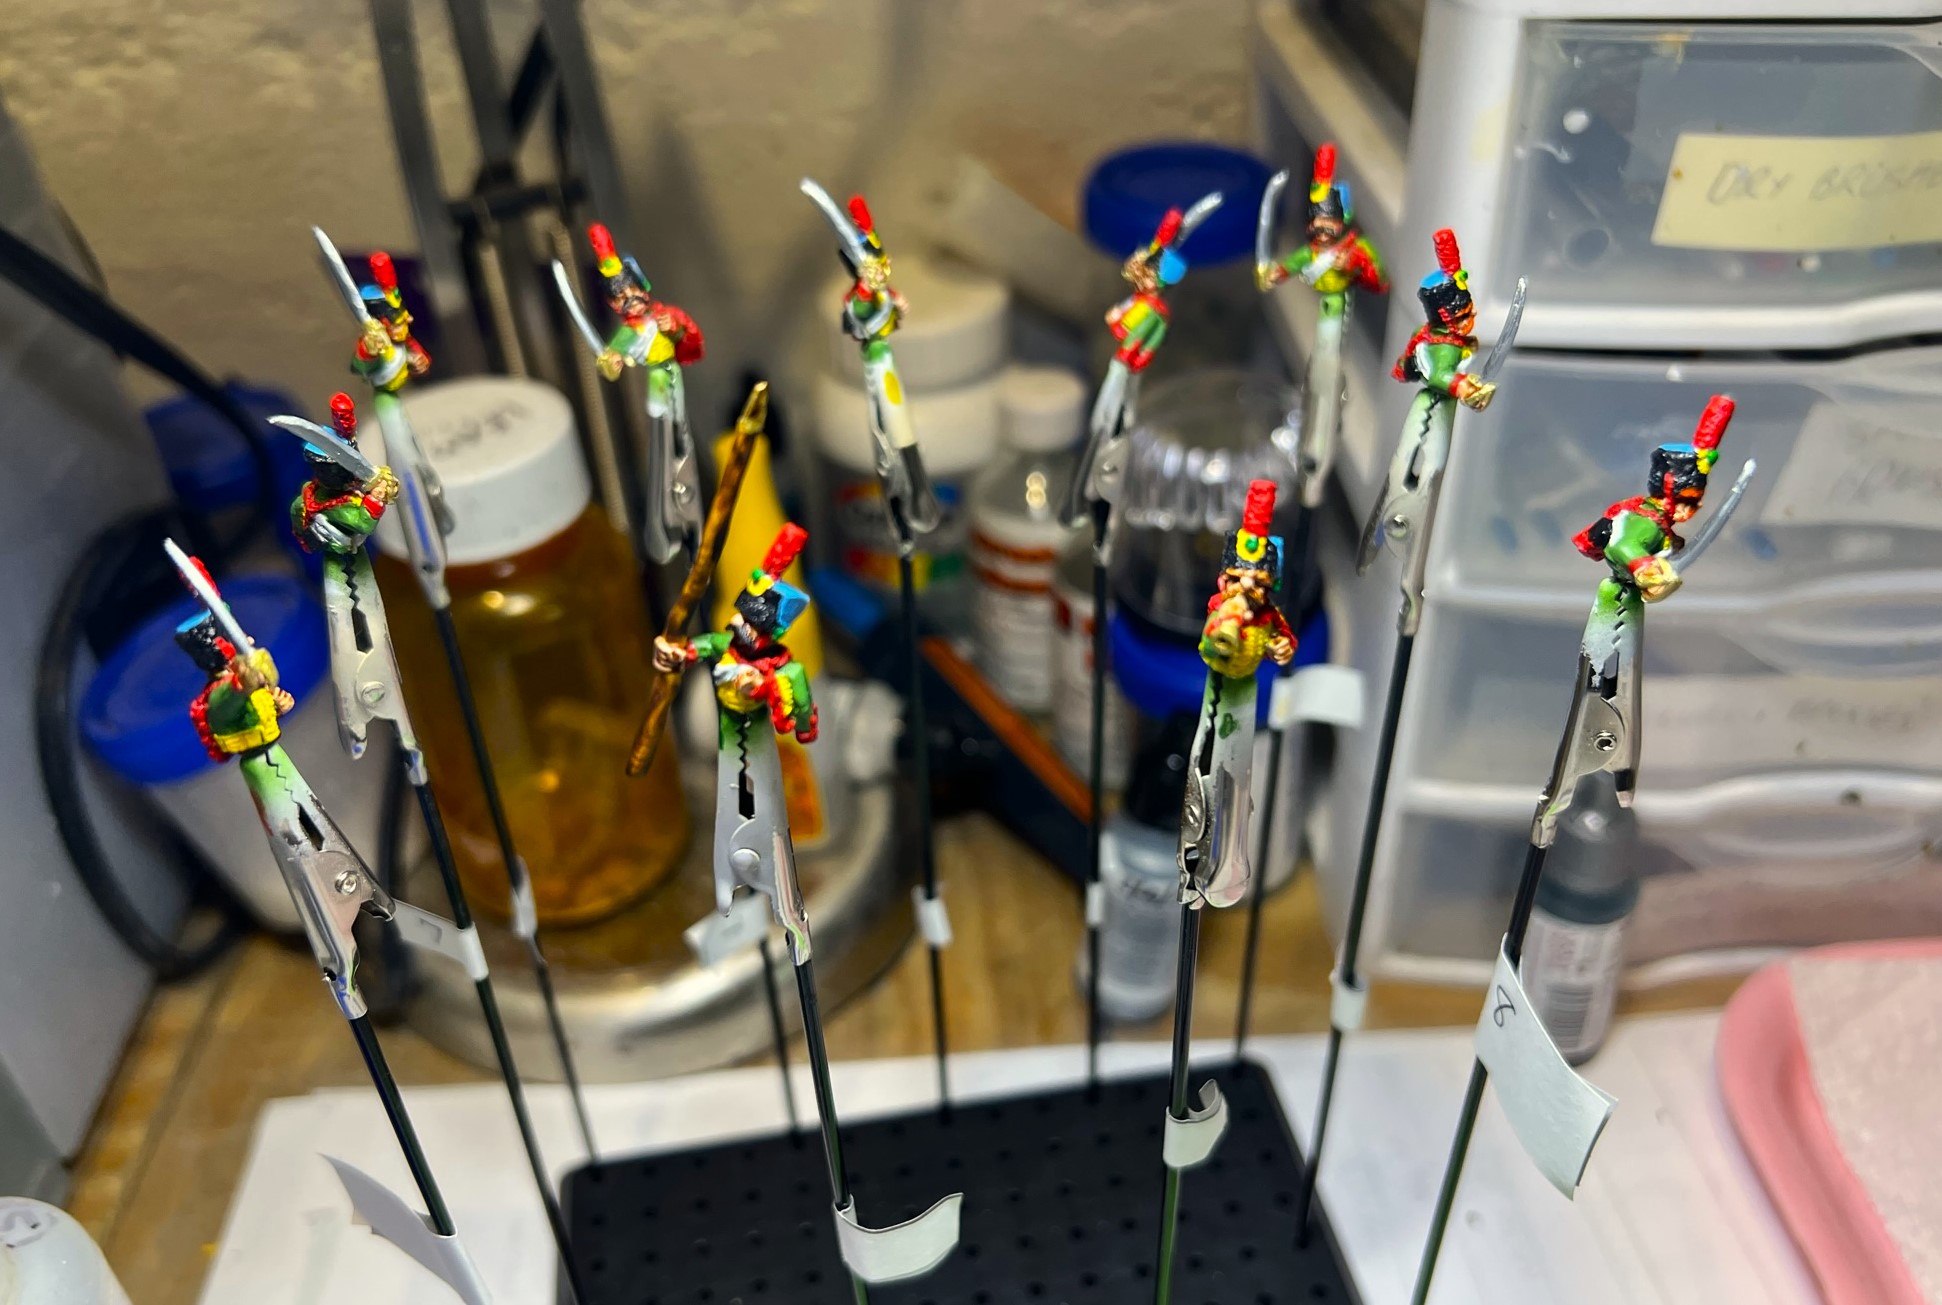
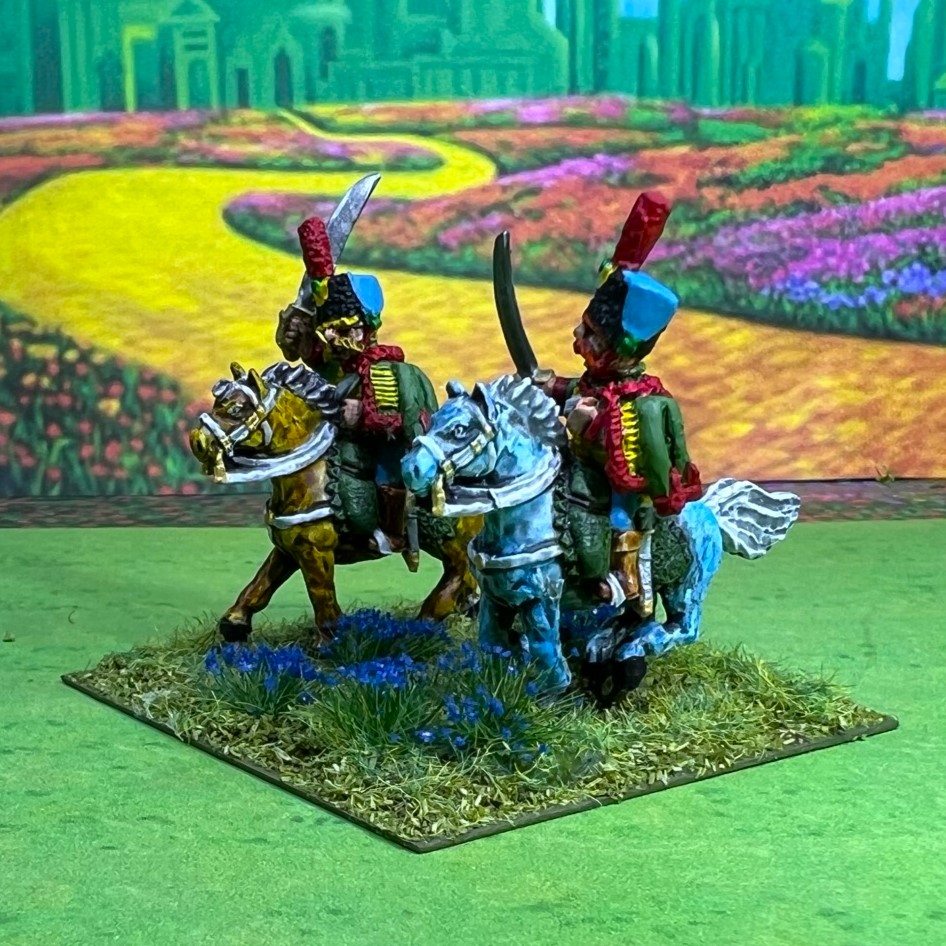
The rules say that the LCR should have “dragoon green” coats and light blue trousers. The ponies (these are Munchkins) are supposed to be in multiple pastel colors – which allowed me to use a number of Citadel Contrast and Army Painter Speed Paints. I painted the carbines, riders, and ponies all separately. Then, I assembled all after painting and varnishing was completed. I used both my specimen jars/poster tack combos and my painting stand with alligator clips to paint and varnish. The project was started on December 8th, and completed on December 19th. There was a lot more work here than I expected – I really needed to plan out the painting and assembly. I also did a bit of research on Napoleonic cavalry as my Napoleonic painting experience level is – well zero. My goal was to achieve a good tabletop standard – and you can be the judge of whether I achieved that. As usual, I will list all the paints I used on this unit at the end of this post for those interested in that sort of stuff (and for my own use for later reference as well). First, I’ll share some WIP shots, then some eye candy of the LCR.
WIP shots…
Filed and washedThe carbines in the alligator clip stand
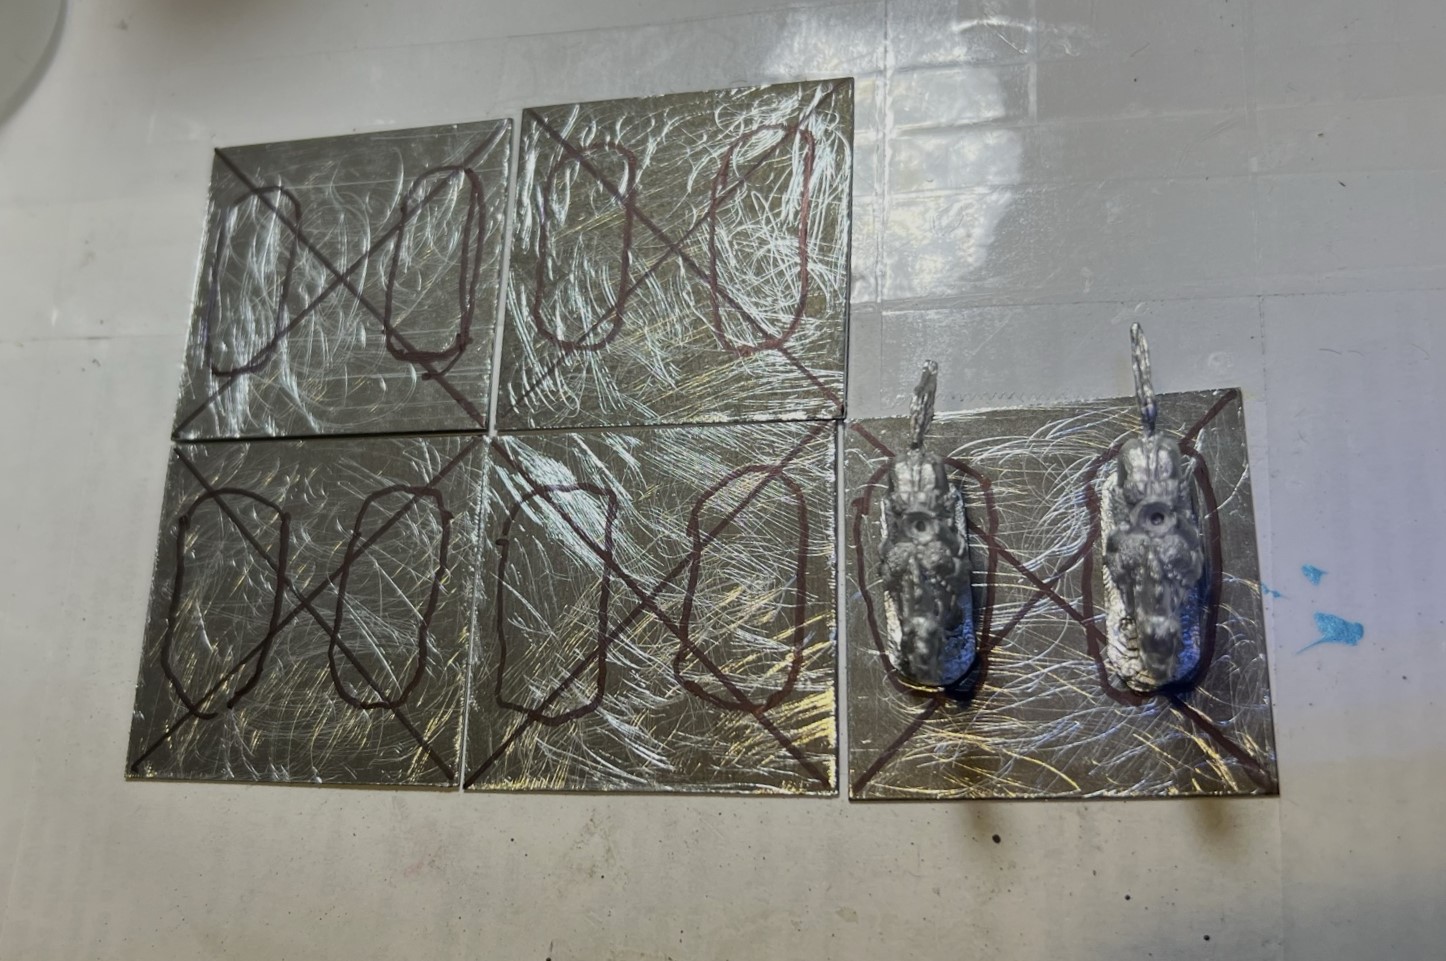
I actually prepped the bases first and started the flocking so that I would not have to manhandle the painted figures later on.
Base prep/sizing.
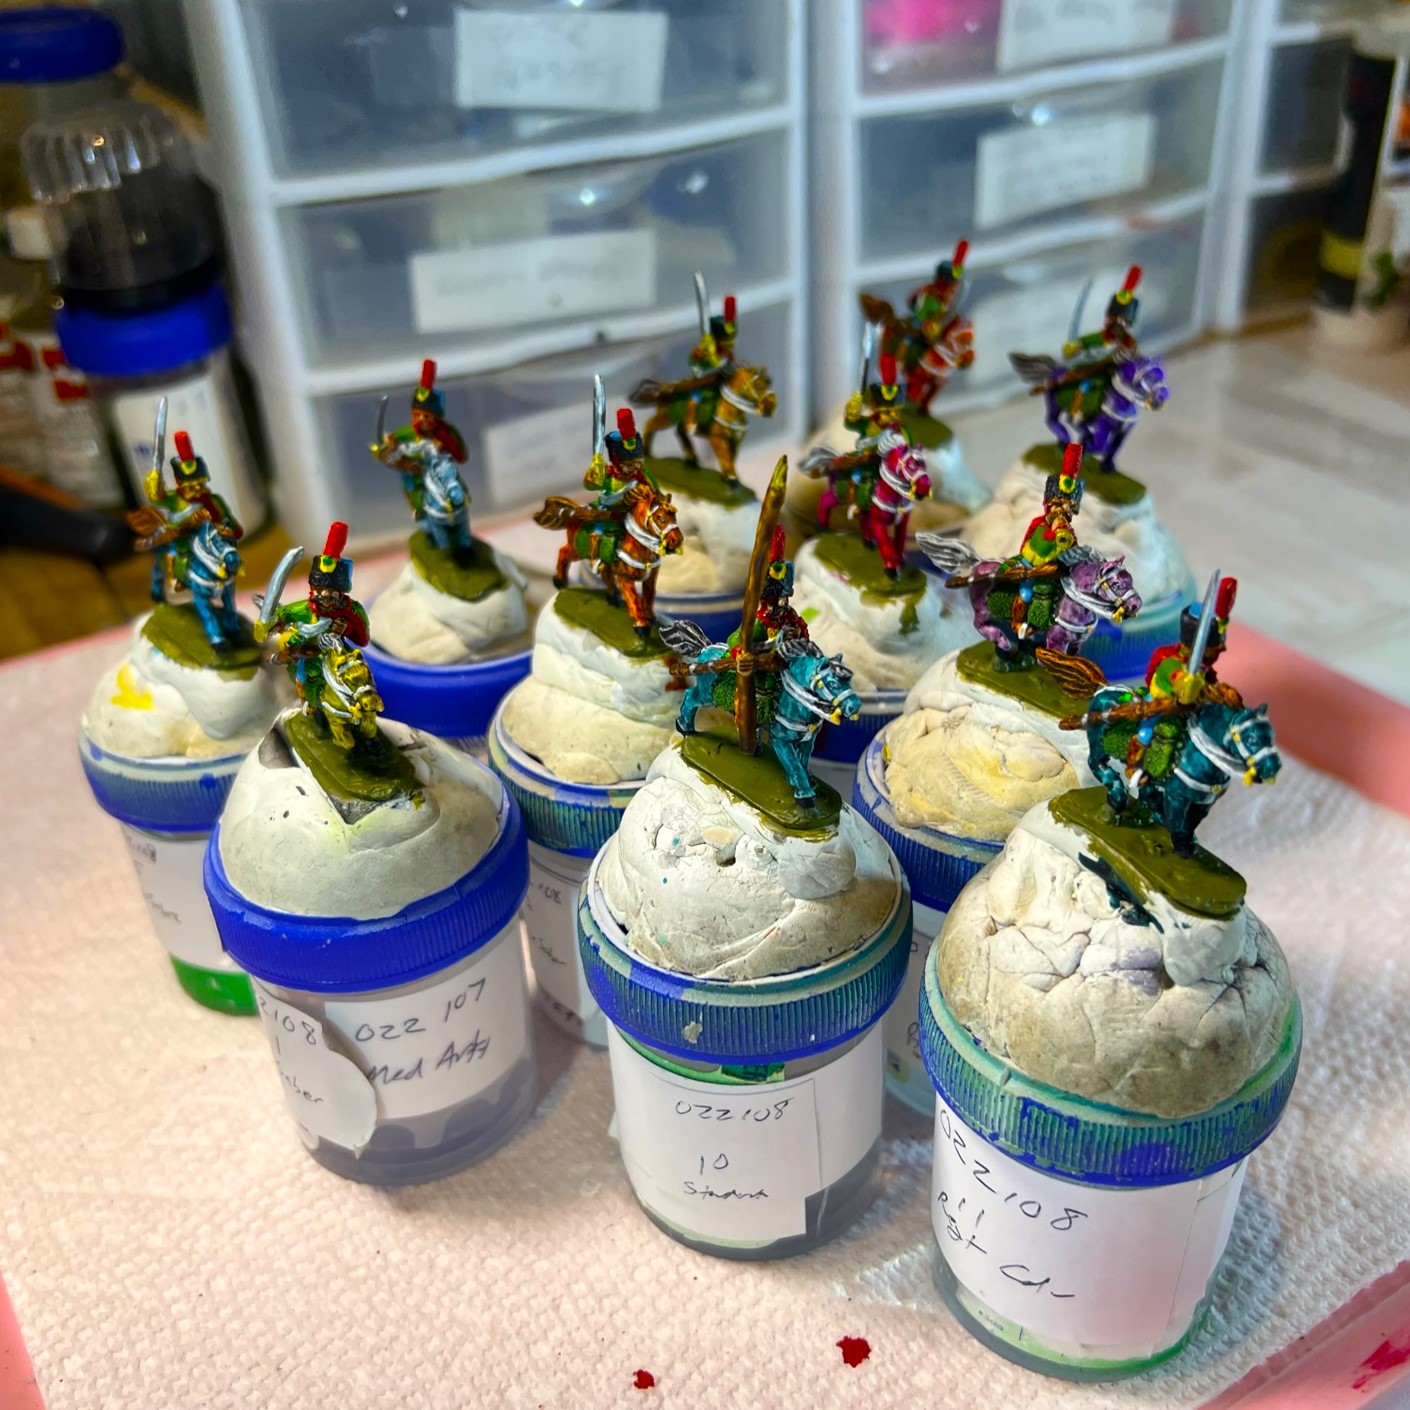
Then, I prepped/mounted the remaining torsos and riders for painting.
Mounted and tagged for painting. With each pony having a different color, this was instrumental.
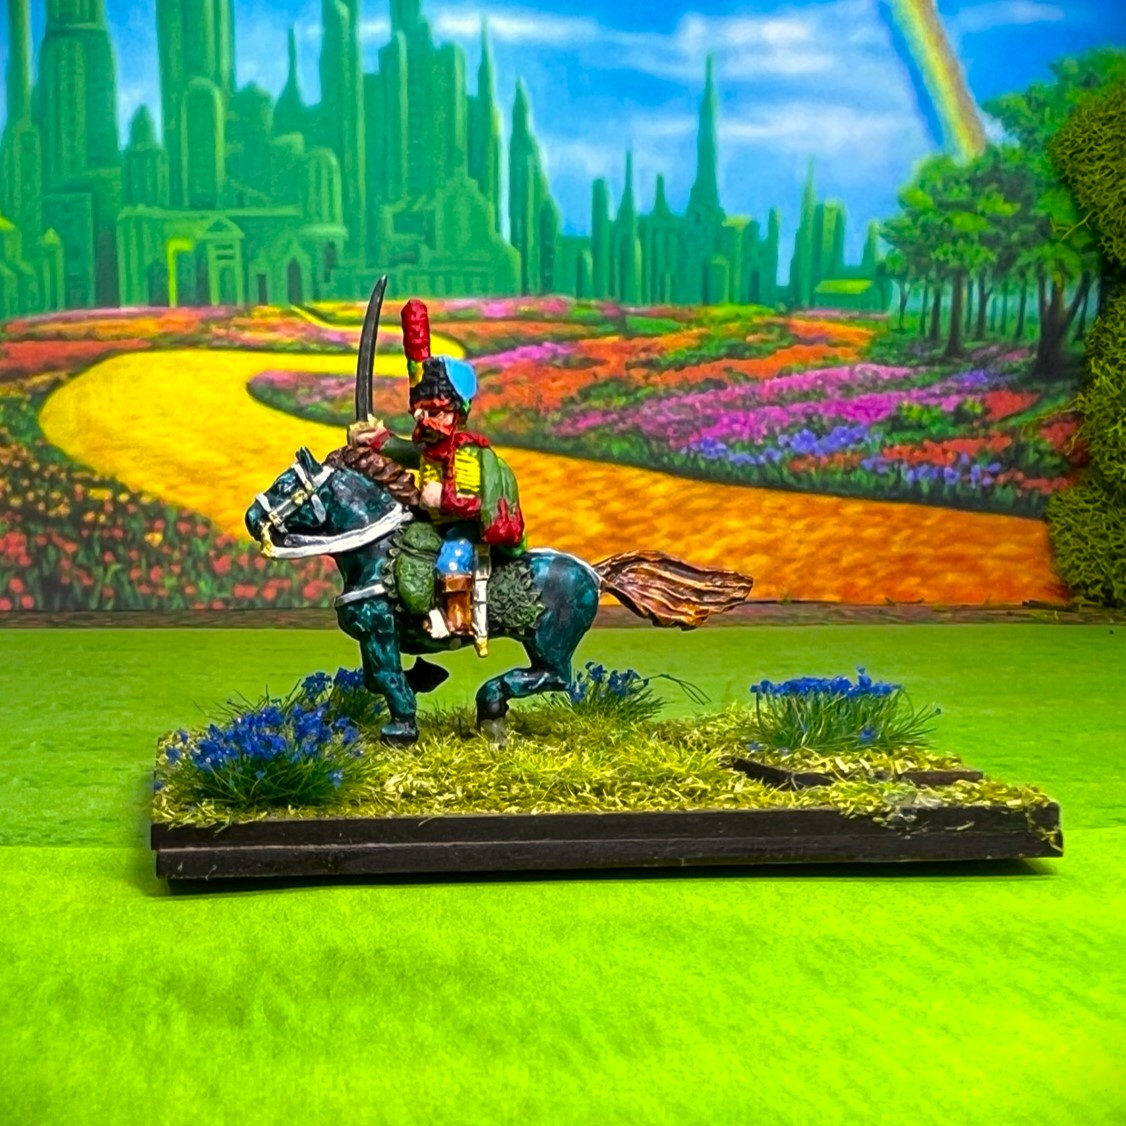
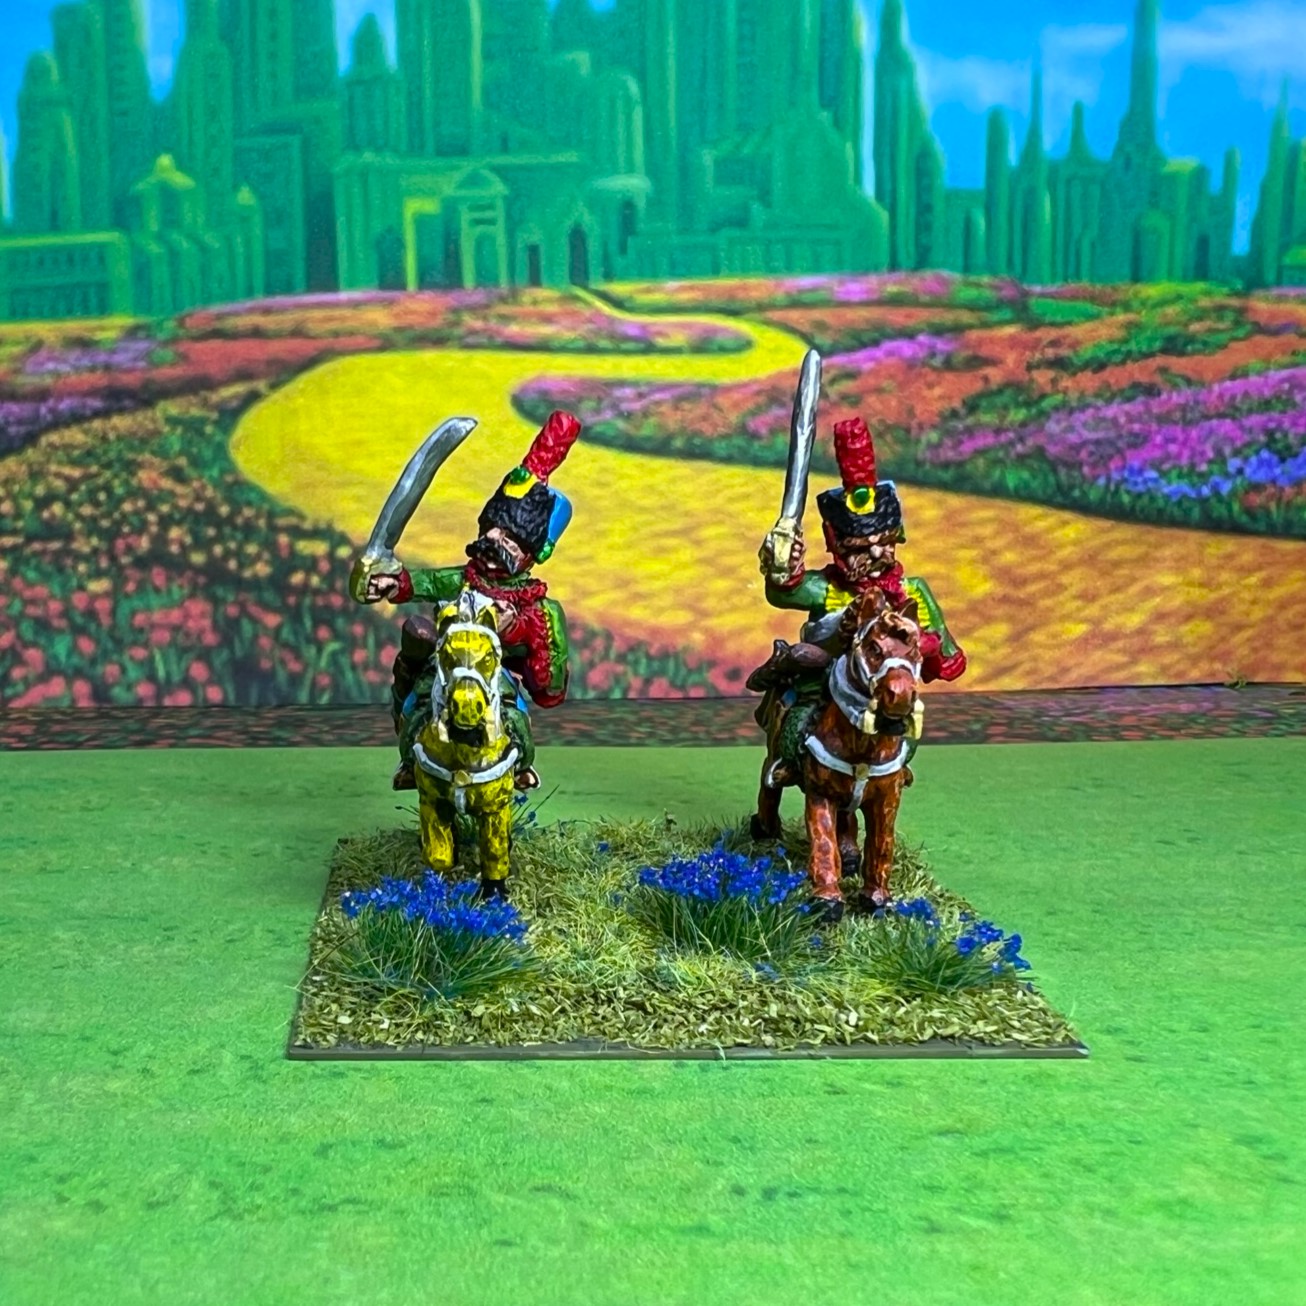
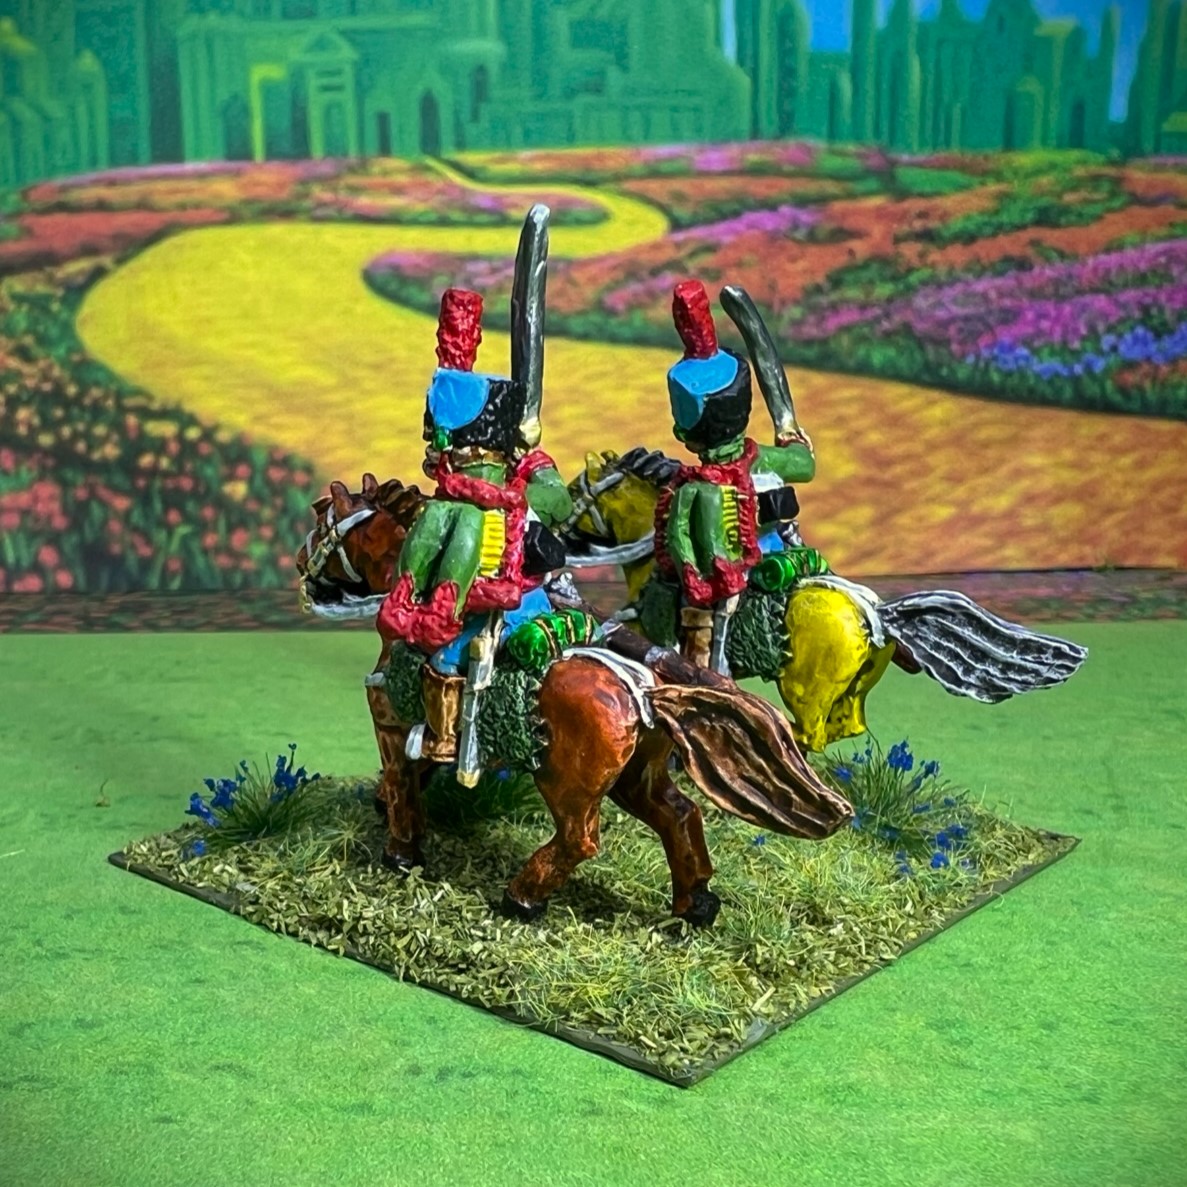
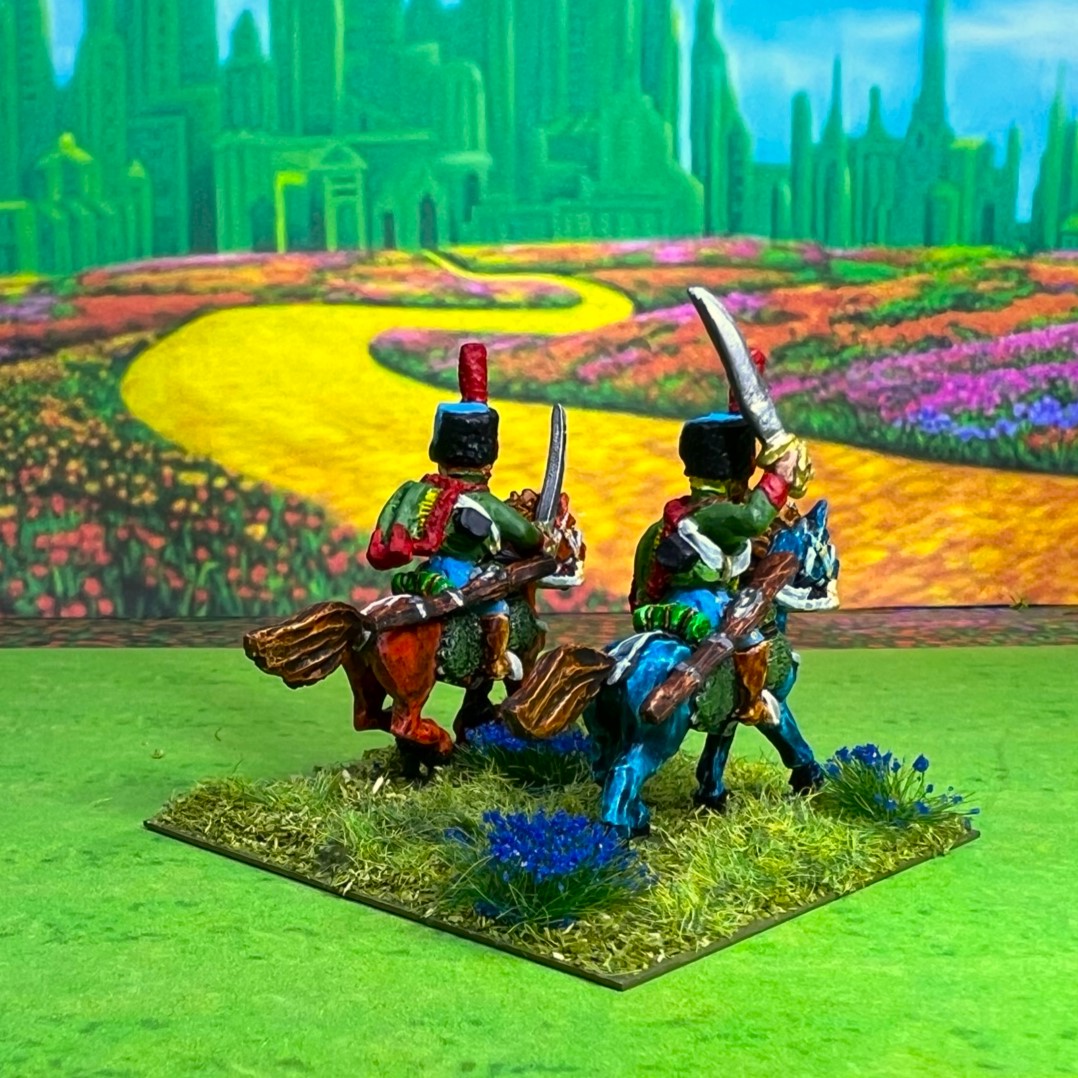
The painting proceeded ok – though with all of the details it took a bit longer than I anticipated. I actually changed the fur cap colors from light blue to black after seeing some pictures on line with the light blue on the cap tops and sides. I then looked to give a lot of colorful detail in red, green, yellow, and blue as you’ll see below.
Then I varnished the group, assembled them, mounted them on the 2″ square steel bases, and flocked them.
Assembled.Completed!
And now…
Eye Candy
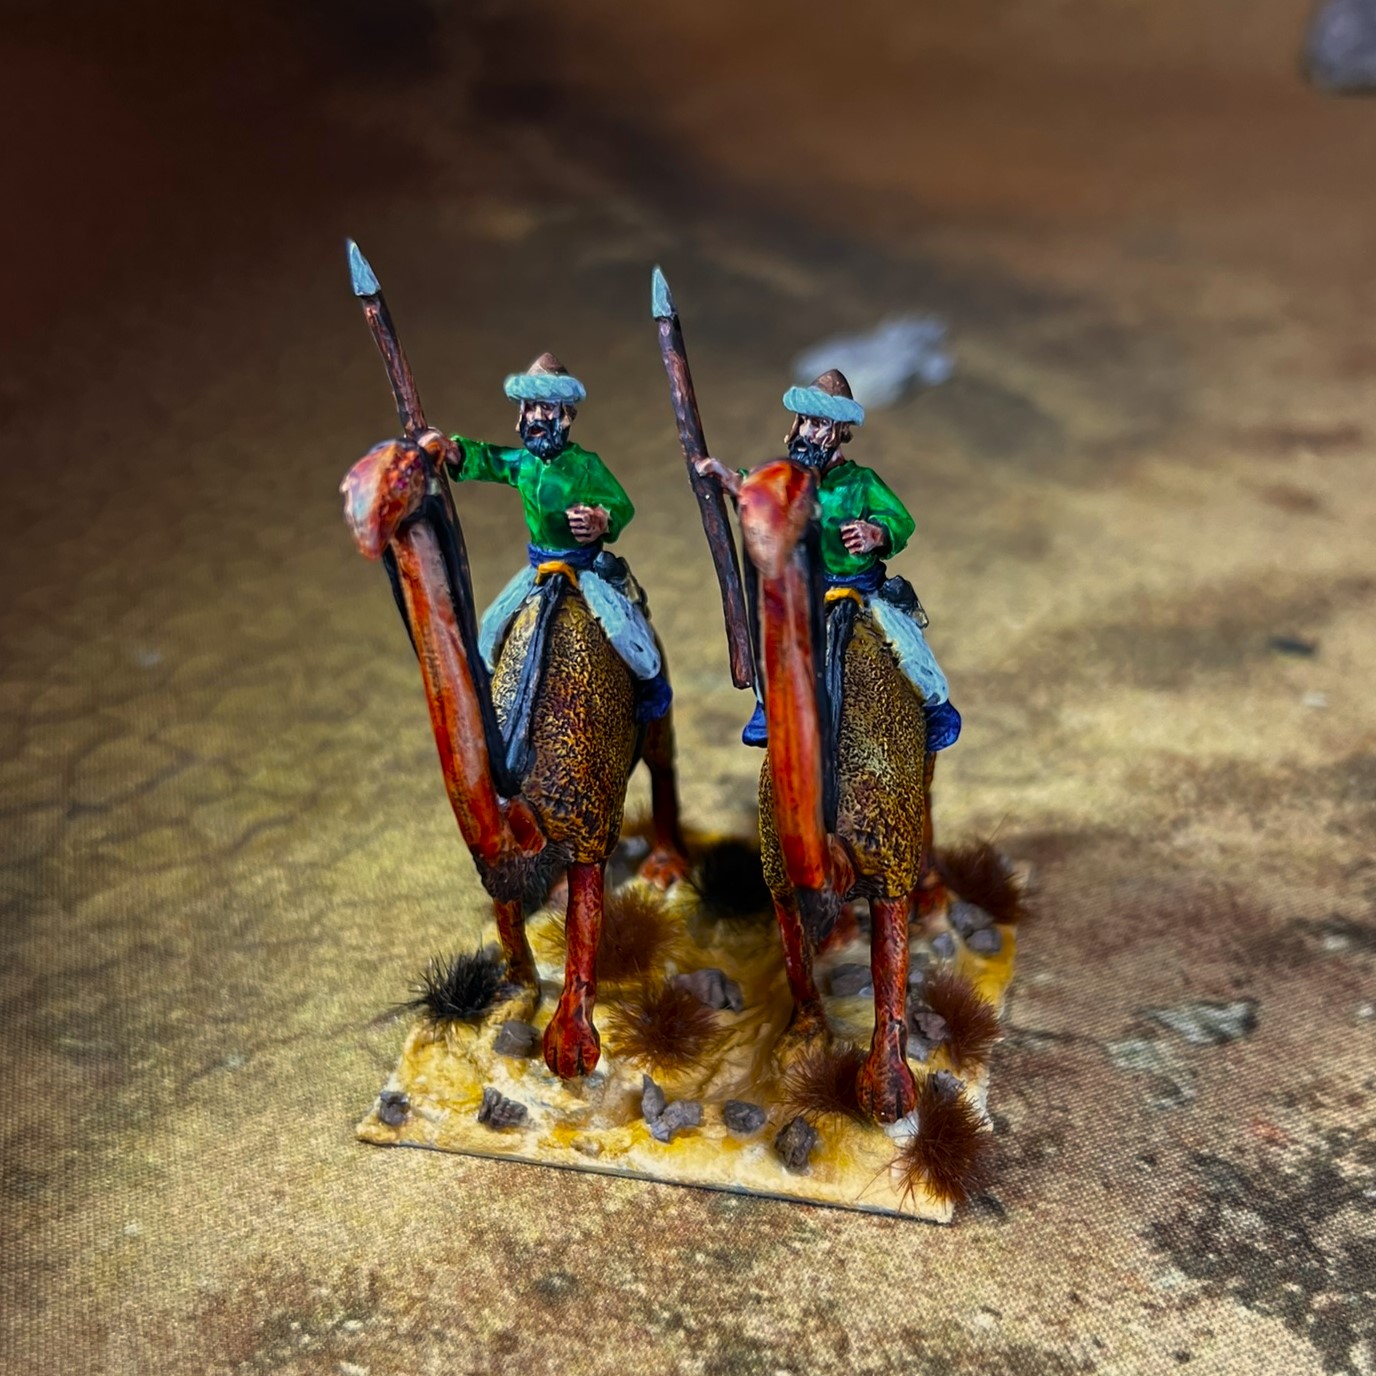
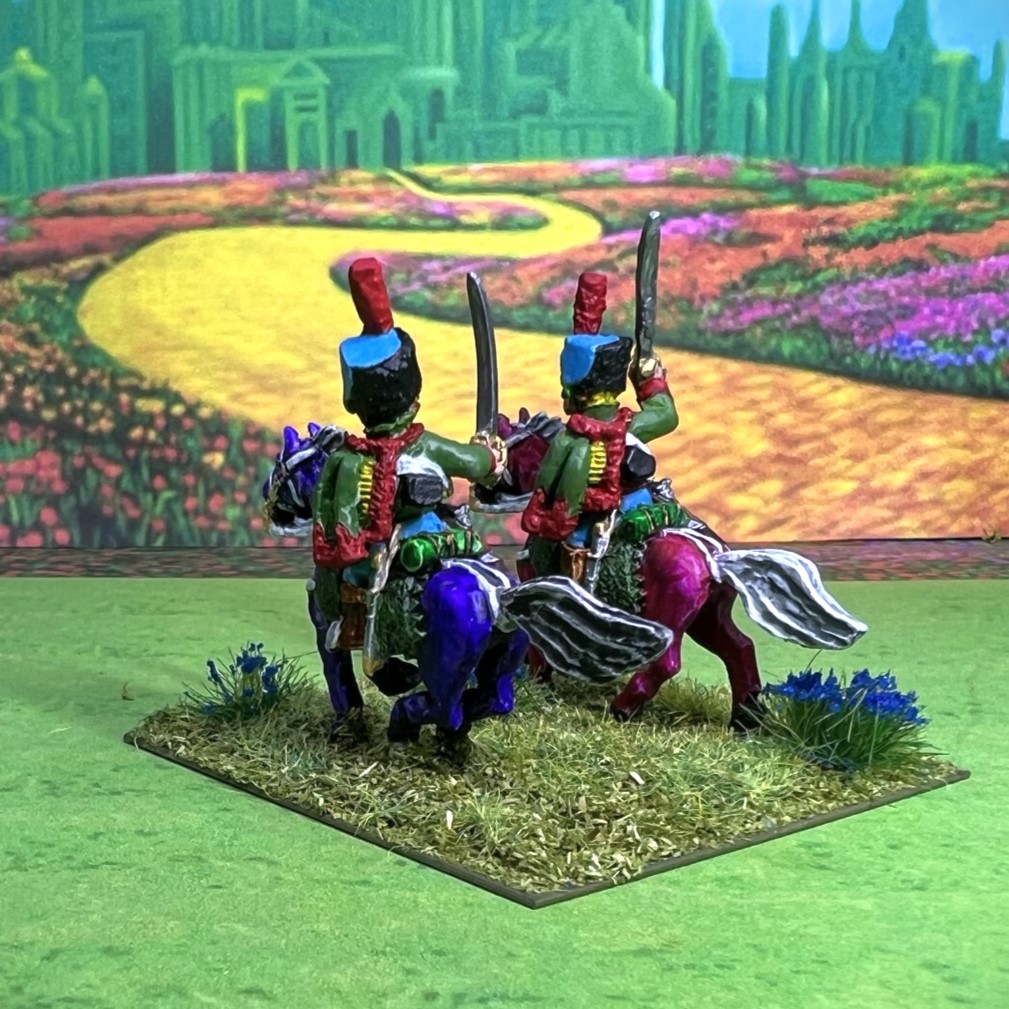
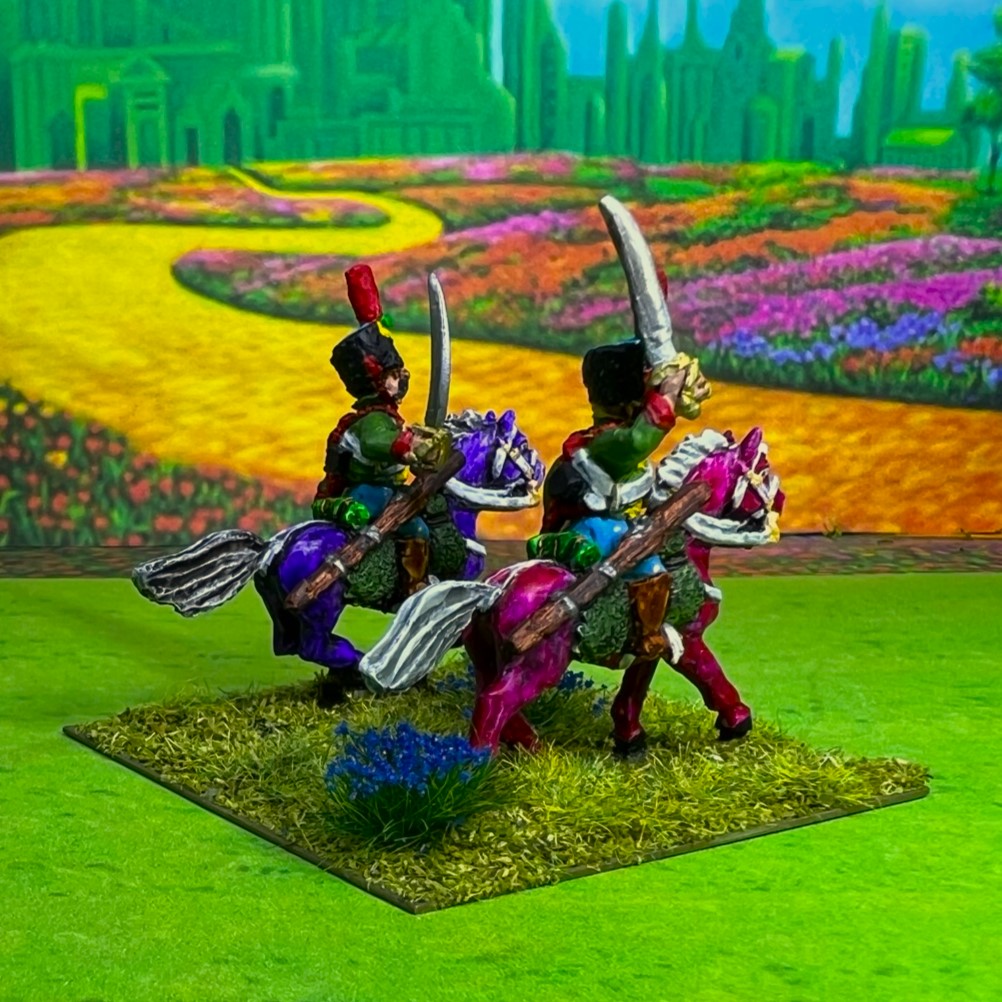
There are 5 stands of 2 figures – 4 are similar and one is a command stand with a standard bearer and a bugler. The regimental commander goes on an MDF stand.
Regimental Commander Stand
Stand 1
Stand 2
Stand 3
Stand 4
Command Stand
Group shots
The LCR in line formation, moving into melee with the Regimental Commander base in the rear.A higher angle photo of the previous formation.An angled shot of the left side of the LCR moving up with the Regimental Commander in front.The LCR ready to charge the enemy with impetus!
I will now move on to building my brigade of Winkies (basically the Orcs of Ozz). I am not sure how far I will get this year with Christmas coming plus some minor surgery for me right afterwards (oh yay). I am hoping to get at least one more unit done this month, then do a 2022 wrap up with my 2023 goals.
Again, as you may want to check out the figures range – there are two places to get them (and I make no money from this btw). The game rules and figures are available from the following two places:
Thanks so very much for checking this post out and please let me know what you think in the comments section. I wish you all a very Merry Christmas and a Happy New Year!
Still have more to come…
Miscellaneous details and references for those interested in that sort of thing:
For all of my previous posts on Wars of Ozz games, figures, units, and other related projects – please see this page.
PAINTS, INKS, GLAZES, SHADES, WASHES, PIGMENTS, FLOCKING, GLUES AND MORE THAT I USED ON THIS MUNCHKIN LIGHT CAVALRY REGIMENT:
Gorilla Glue
Paper clip wire pieces
1 1/4″ x 1″ square steel bases from Wargames Accessories (#FOW1)
Poster tack
Vallejo Premium Primer “White”
Vallejo “Flow Improver”
Vallejo “Airbrush Thinner”
Citadel “Nuln Oil” (wash)
Vallejo Model Color “Wood Grain”
Vallejo Model Color “White”
Black Sharpie pen
PS Model Color “British Brown Drab”
Vallejo Model Air “Gun Metal”
Vallejo Mecha Varnish “Matte Varnish”
Vallejo Game Air “Sick Green”
Vallejo Game Air “Electric Blue”
Army Painter “Speed Paint – Hardened Leather”
Citadel “Contrast Paint – Contrast Medium”
Martha Stewart Crafts “Pale Bronze”
Citadel “Contrast Paint – Ironjawz Yellow”
Citadel “Contrast Paint – Gryph-Hound Orange”
Citadel “Contrast Paint – Doomfire Magenta”
Citadel “Contrast Paint – Luxion Purple”
Citadel “Contrast Paint – Akhelian Green”
Citadel “Contrast Paint – Pylar Glacier”
Citadel “Contrast Paint – Nazdreg Yellow”
Citadel “Contrast Paint – Magmadroth Flame”
Citadel “Contrast Paint – Magos Purple”
Citadel “Contrast Paint – Aethermatic Blue”
Citadel “Contrast Paint – Terradon Turquoise”
Battlefront “Black”
Citadel “Contrast Paint – Basilicanum Grey”
Citadel “Contrast Paint – Gore Grunta Fur”
Army Painter “Speed Paint – Holy White”
Army Painter “Speed Paint – Crusader Skin”
Army Painter “Speed Paint – Grim Black”
Army Painter “Flesh Wash” (wash/shade)
Citadel “Contrast Paint – Baal Red”
Model Air “Bright Brass”
Vallejo Model Air “Steel”
P3 “Midland Flesh”
Citadel “Contrast Paint – Aggaros Dunes”
Army Painter “Speed Paint – Dark Wood”
Vallejo Game Ink “Yellow”
Vallejo Game Ink “Black Green”
Citadel “Cryptek Armourshade” (wash/shade)
Citadel “Contrast Paint – Karandras Green”
Elmer’s PVA Glue
Regimental MDF base from Old Glory
Army Painter “Battlefields Grass Green” (flocking)
Army Painter “Battlefield Field Grass” (flocking)
Army Painter “Battlefields Field Grass” (flocking)
Army Painter “Brown Battleground” (flocking)
Shadow’s Edge Miniatures “6mm Dark Forest Dark Blue Tufts” (flocking)
I started painting figures for my for Civilizations Collide scenarios for games of Feudal PatrolTM nearly a year ago in April of 2020. I had spent the month of March 2020 and part of April 2020 doing my research, for the supplement and looking at sources for appropriate miniatures. I decided to initially build forces Aztecs, Tlaxcalans, and Conquistadores. The last group I worked on were the Conquistadores – and I am ending with cavalry. As I shared on my last post, Hernan Cortes made exceptionally effective use of his cavalry during the conquest of New Spain. The best example is at the Battle of Otumba, where Cortes used his cavalry to save his entire force against overwhelming odds.
After having been initially driven from Tenochtitlan, Cortes and his Tlaxcalan allies had lost half of their number. They were being pursued by a massive Aztec army, trying to escape to the safety of Tlaxcalan territory. These outraged Aztecs were hell-bent on capturing every one of them for ritual sacrifice. At Otumba, Cortes was surrounded on two sides and was vastly outnumbered, and his men were exhausted. Opportunity presented itself. Cortes saw that the Aztecs’ formations were being controlled by highly costumed priests and leaders with drums, horns, and large banners. He personally led a mounted attack with five cavalry.
Yes just five, including himself.
This attack went directly at the Aztec leaders. They killed them, and the Aztec attack fell completely apart. Cortes lived to escape, regroup, and eventually return to defeat the Aztecs. Were it not for the “shock and awe” effect of a relatively small cavalry attack, history would have been greatly different.
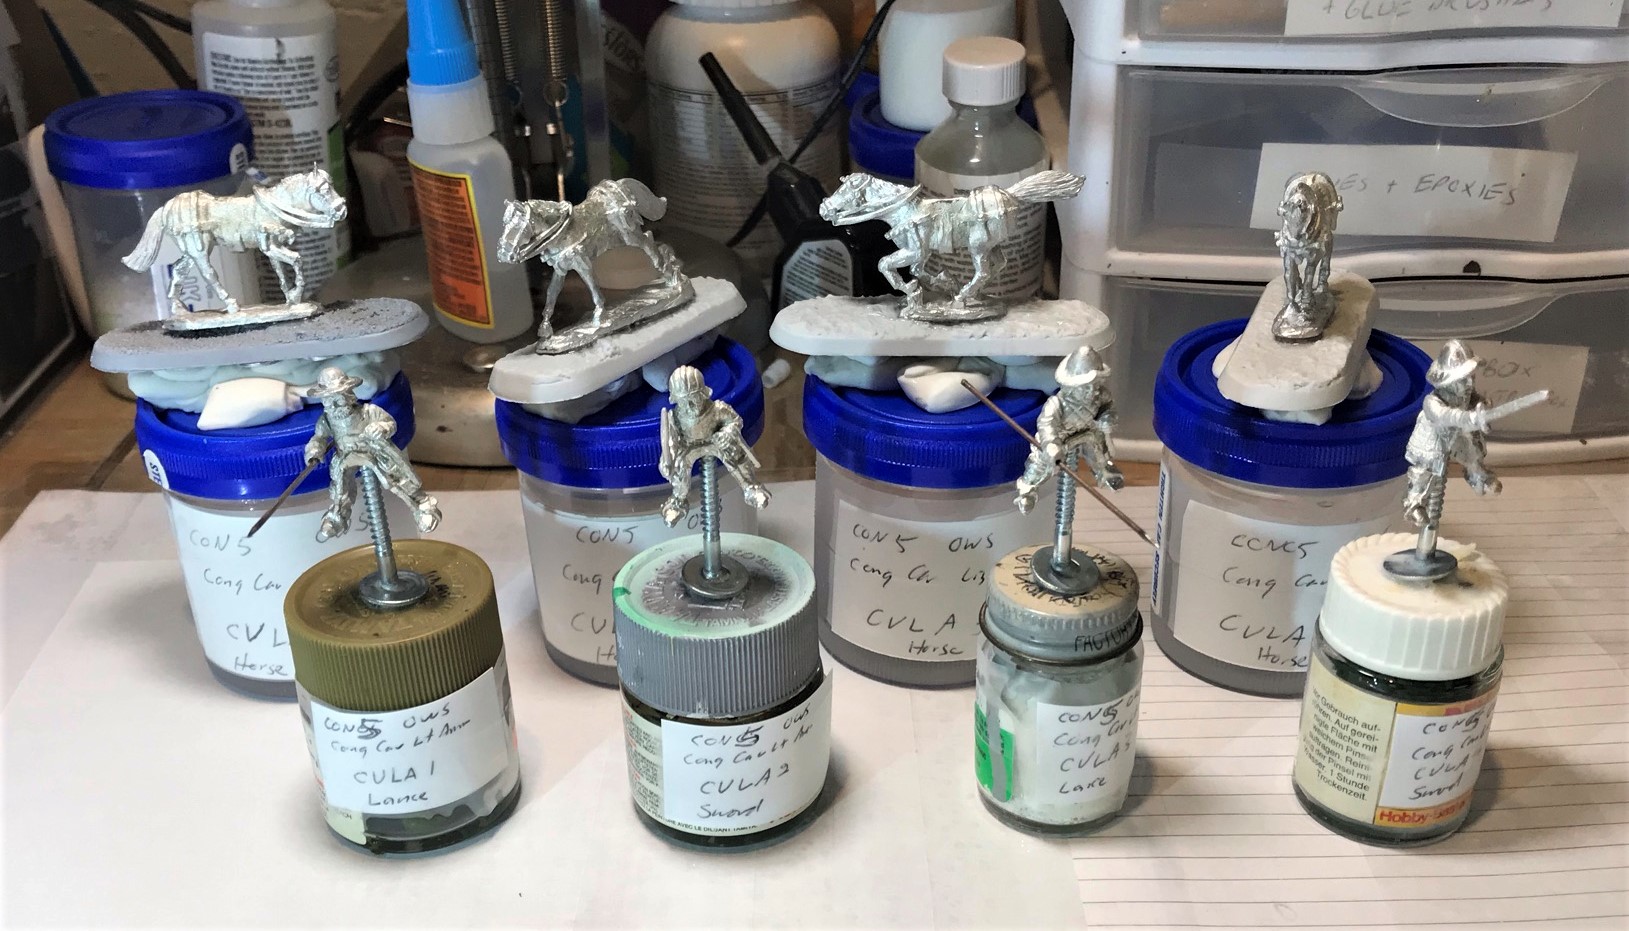
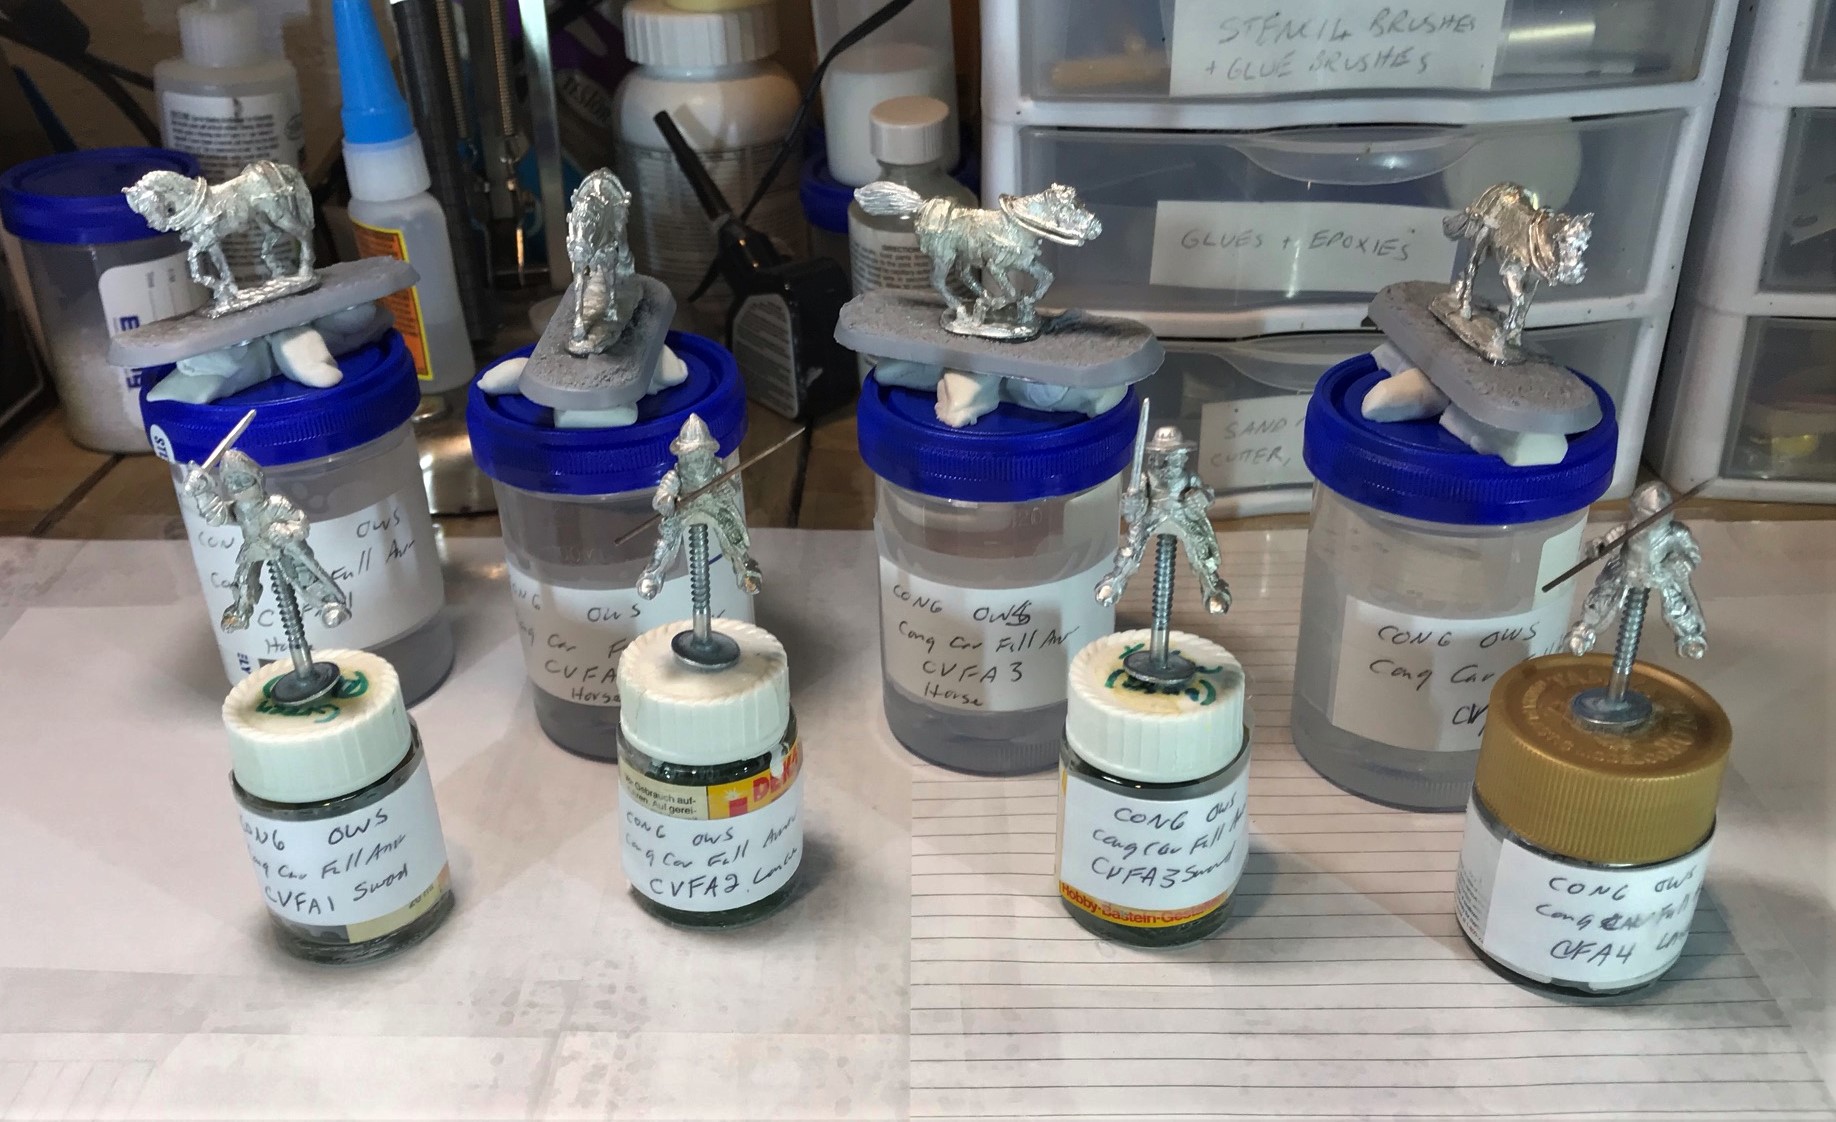
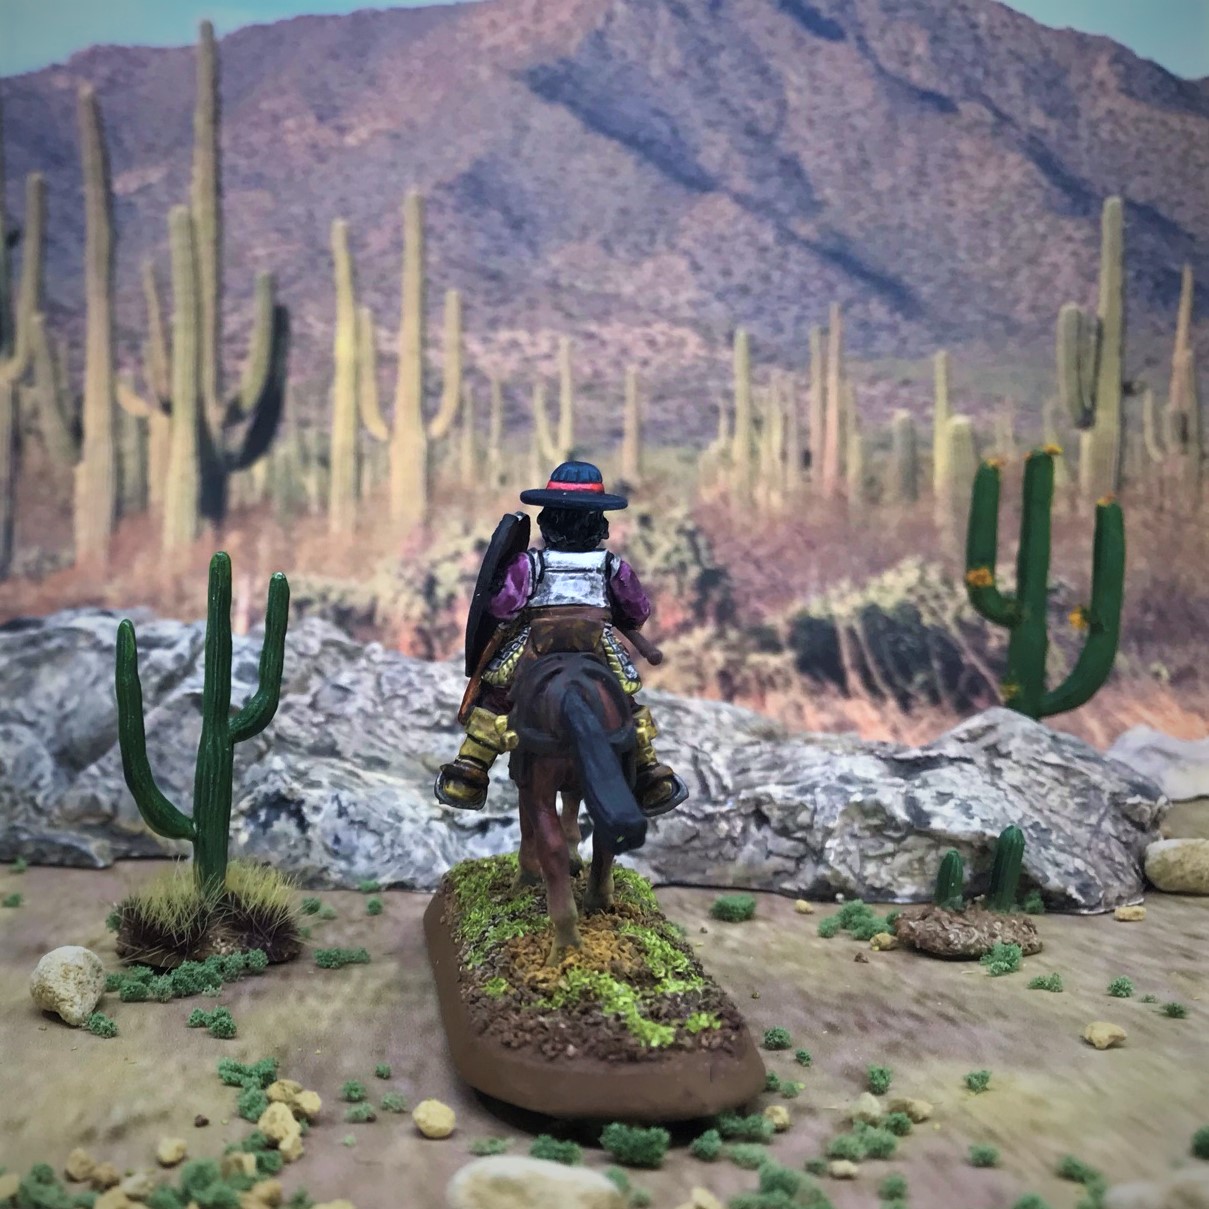
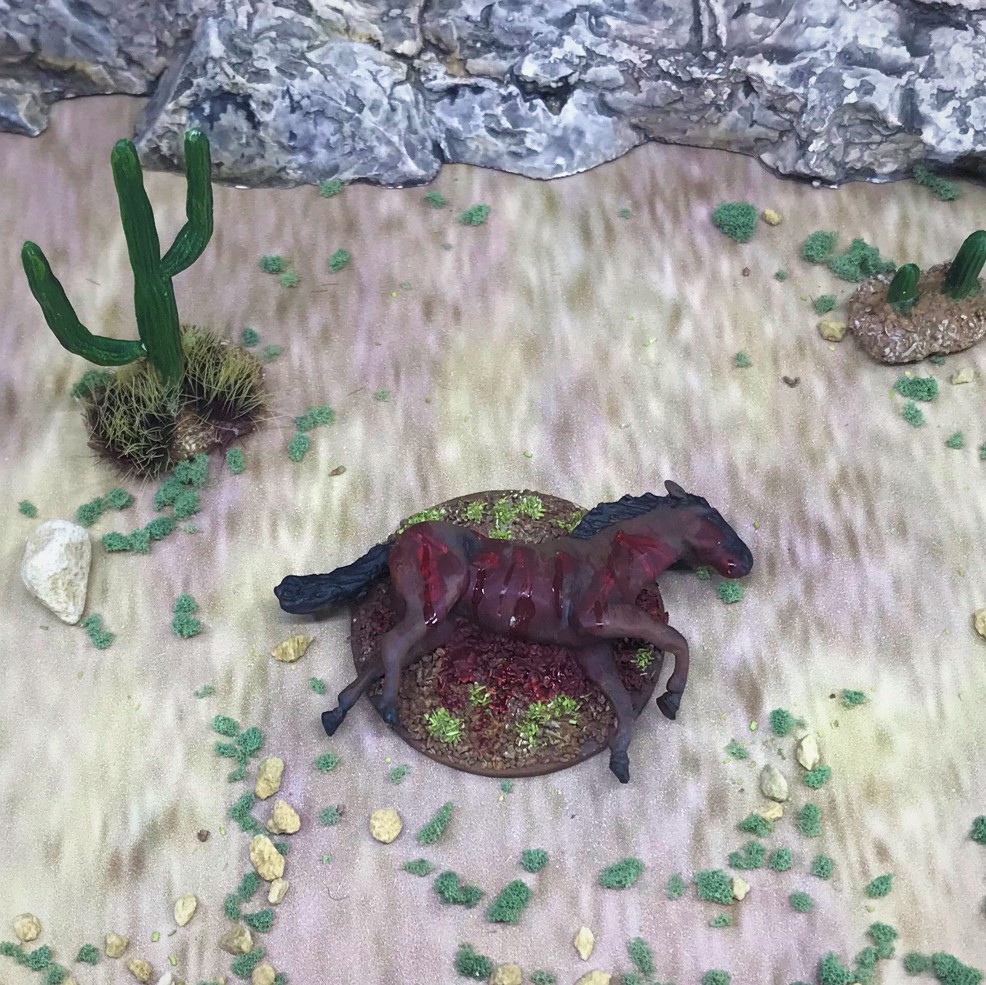
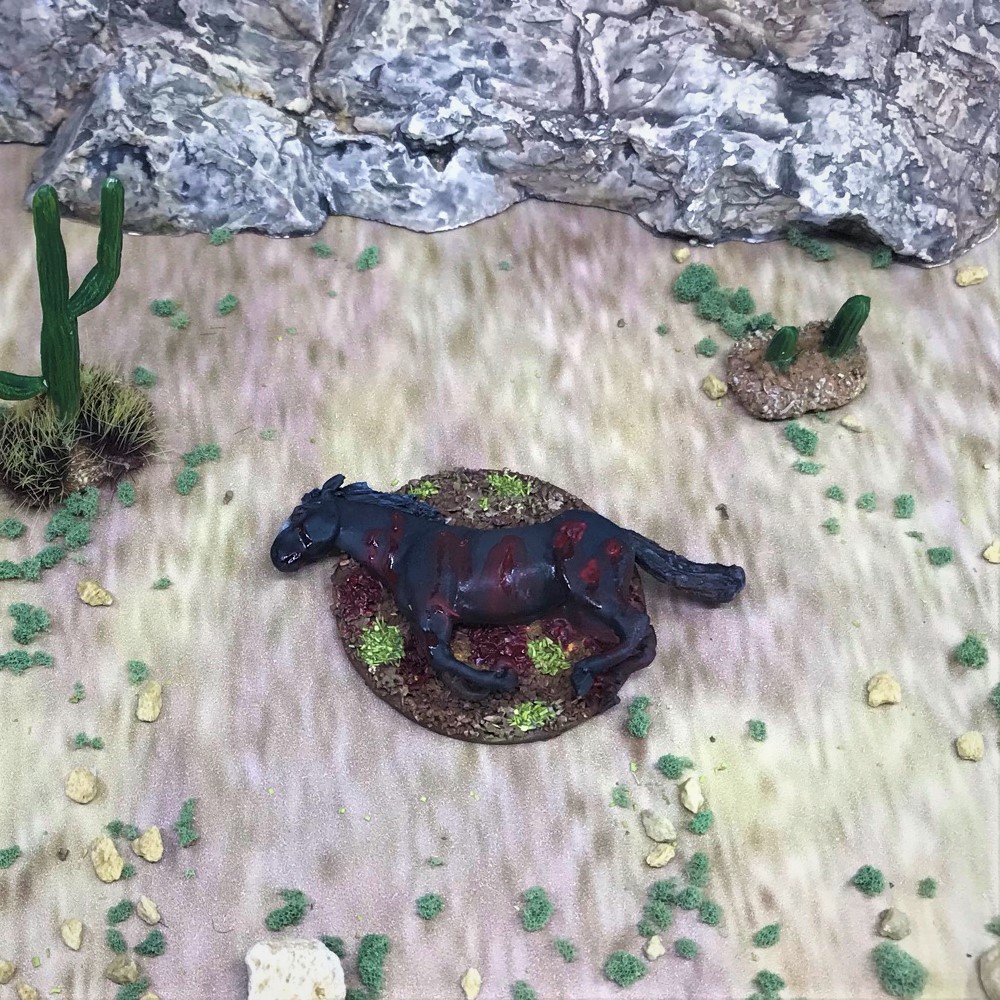
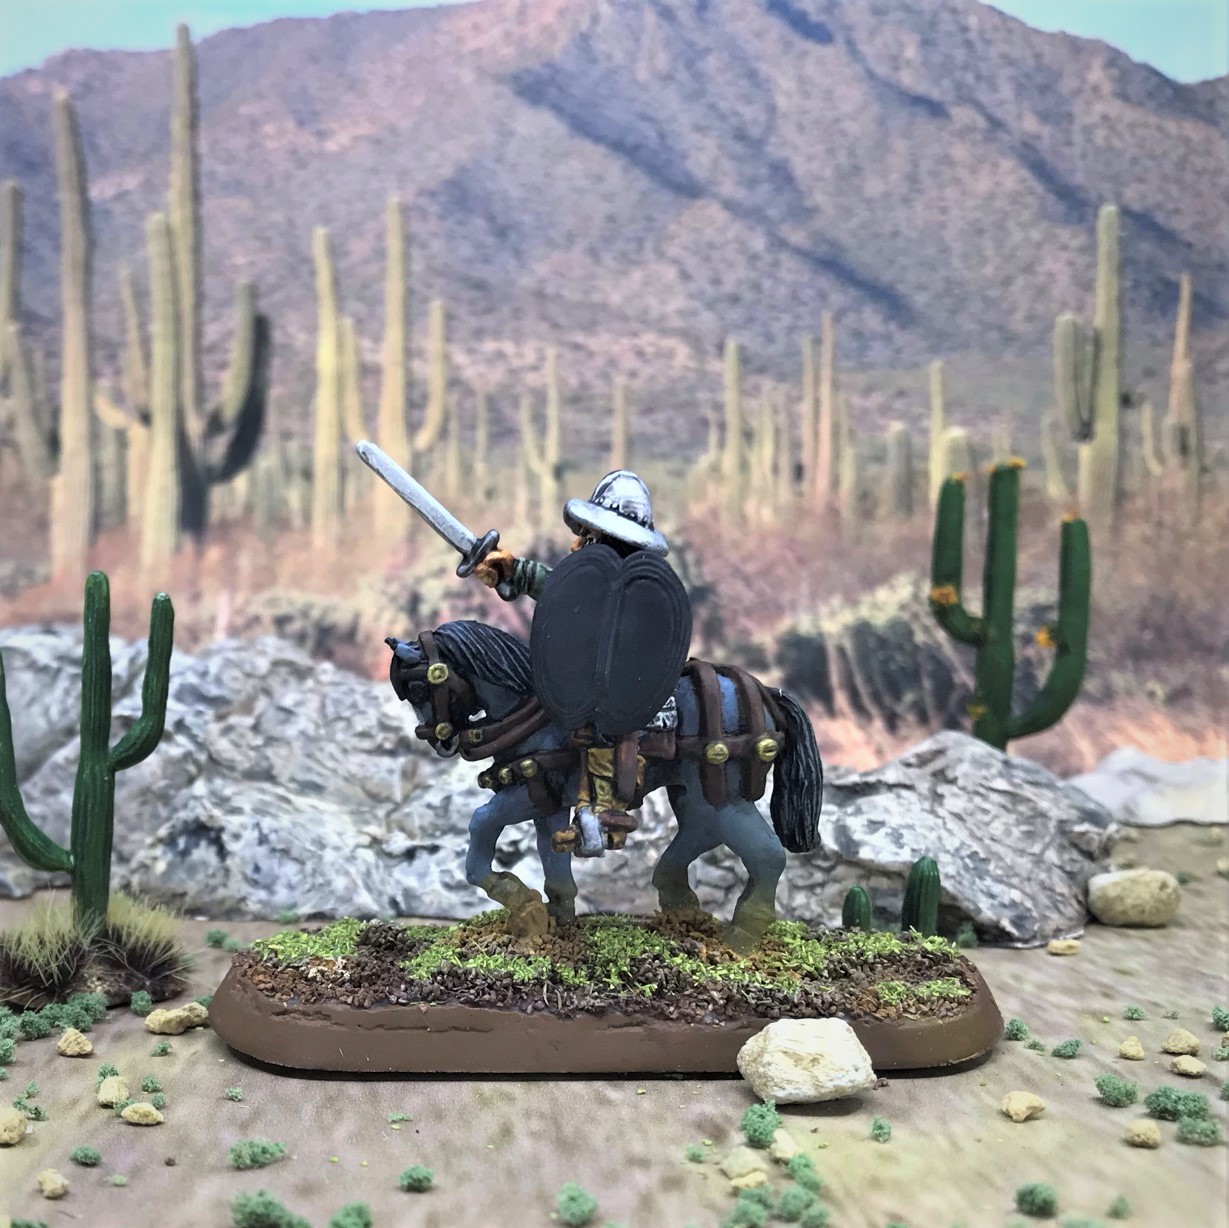
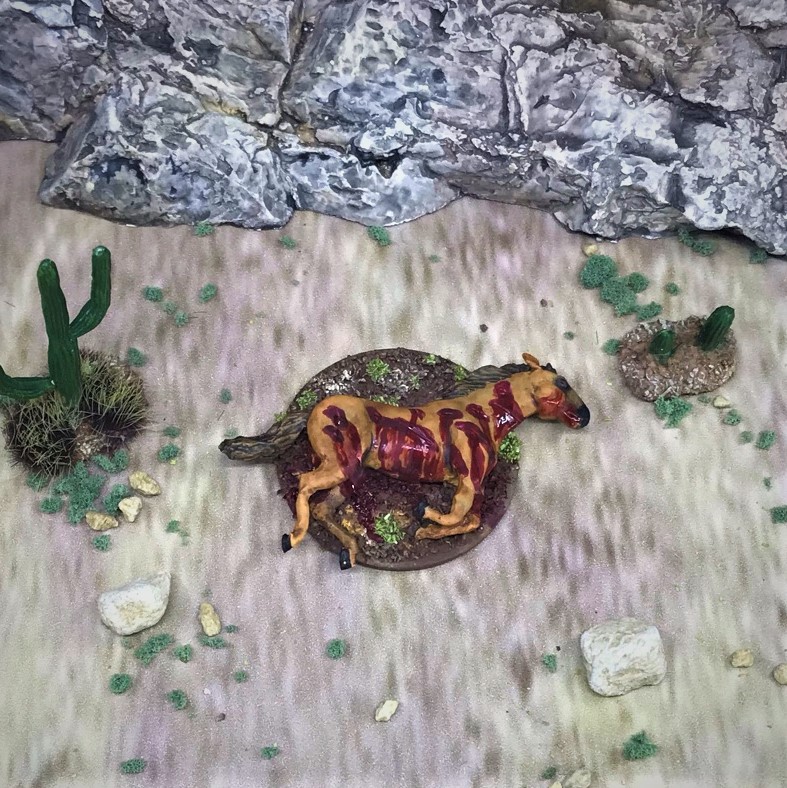
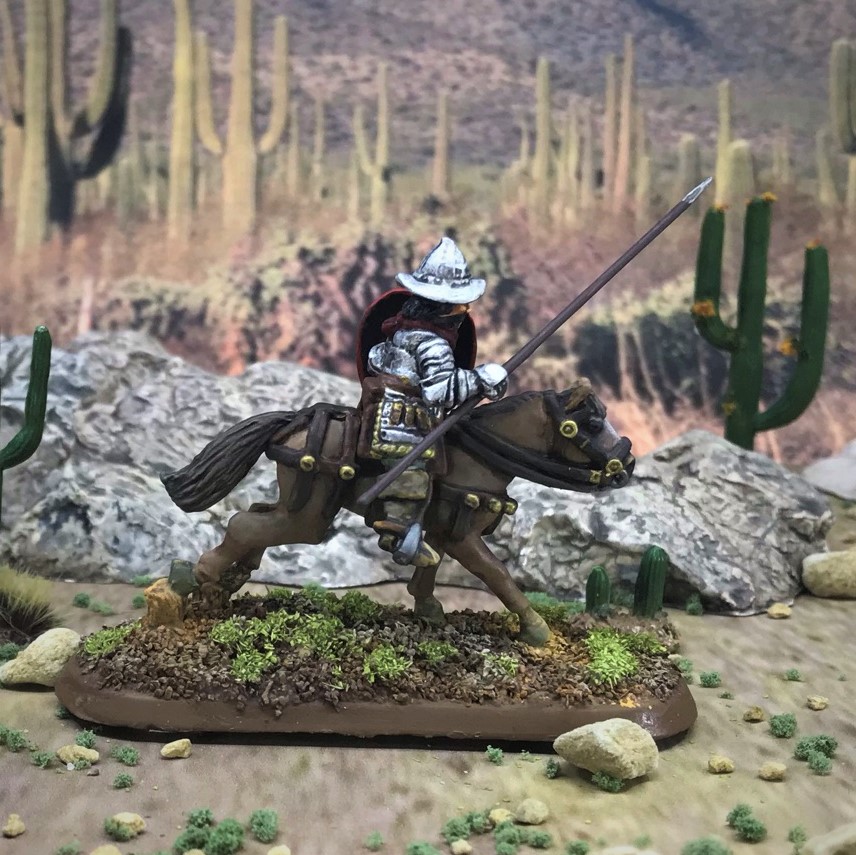
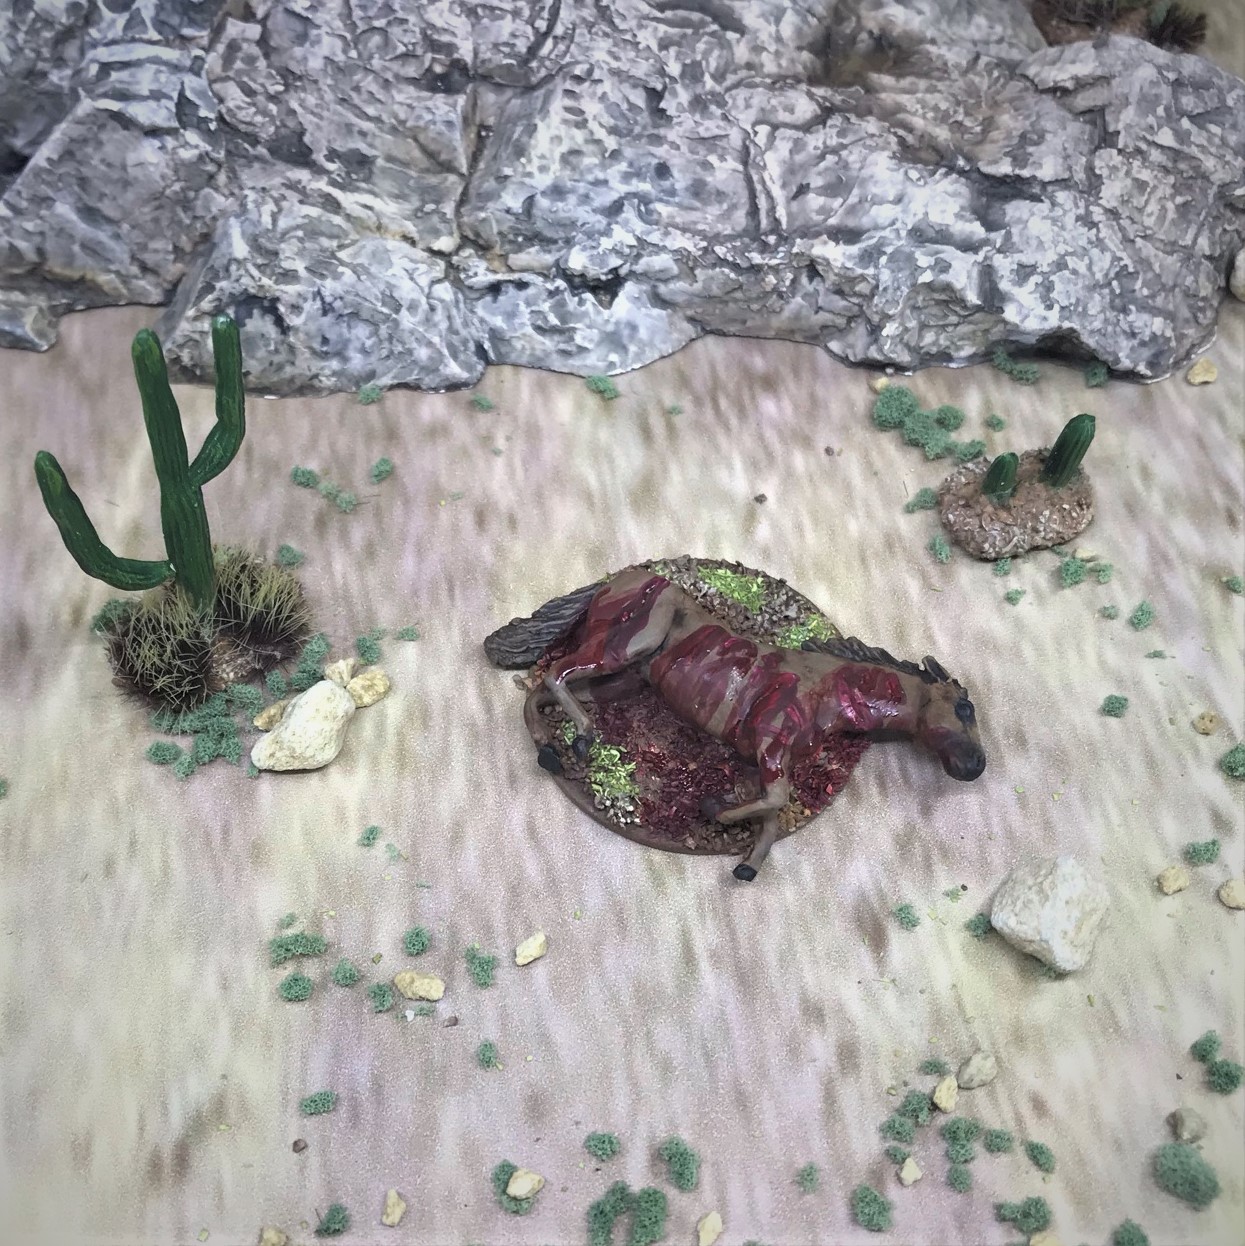
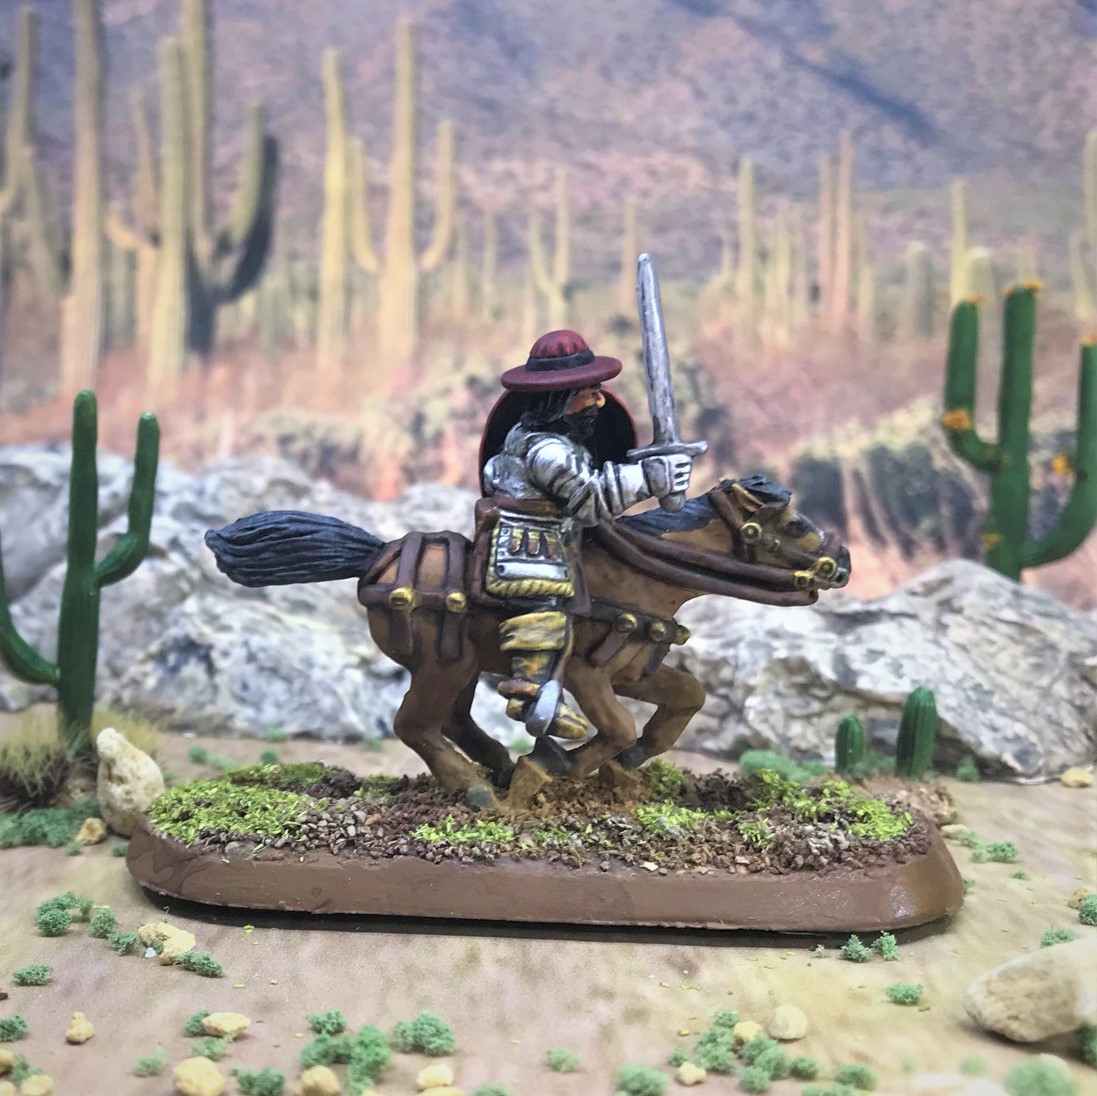
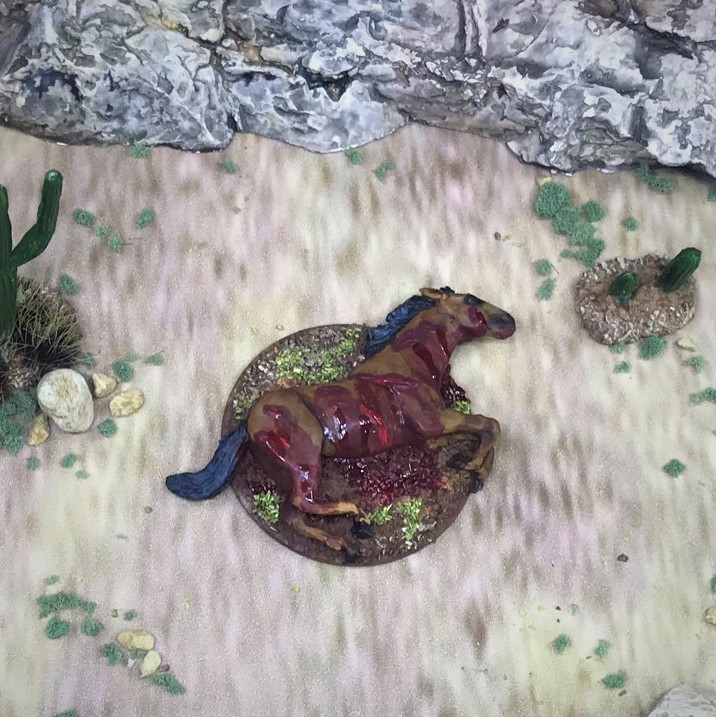
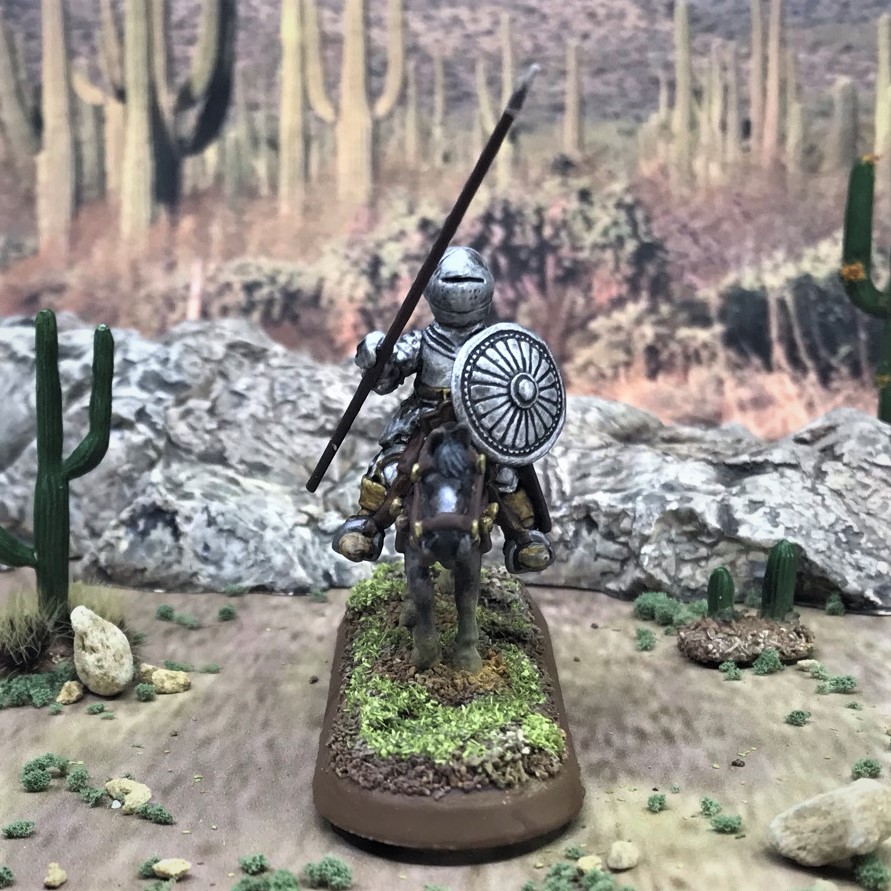
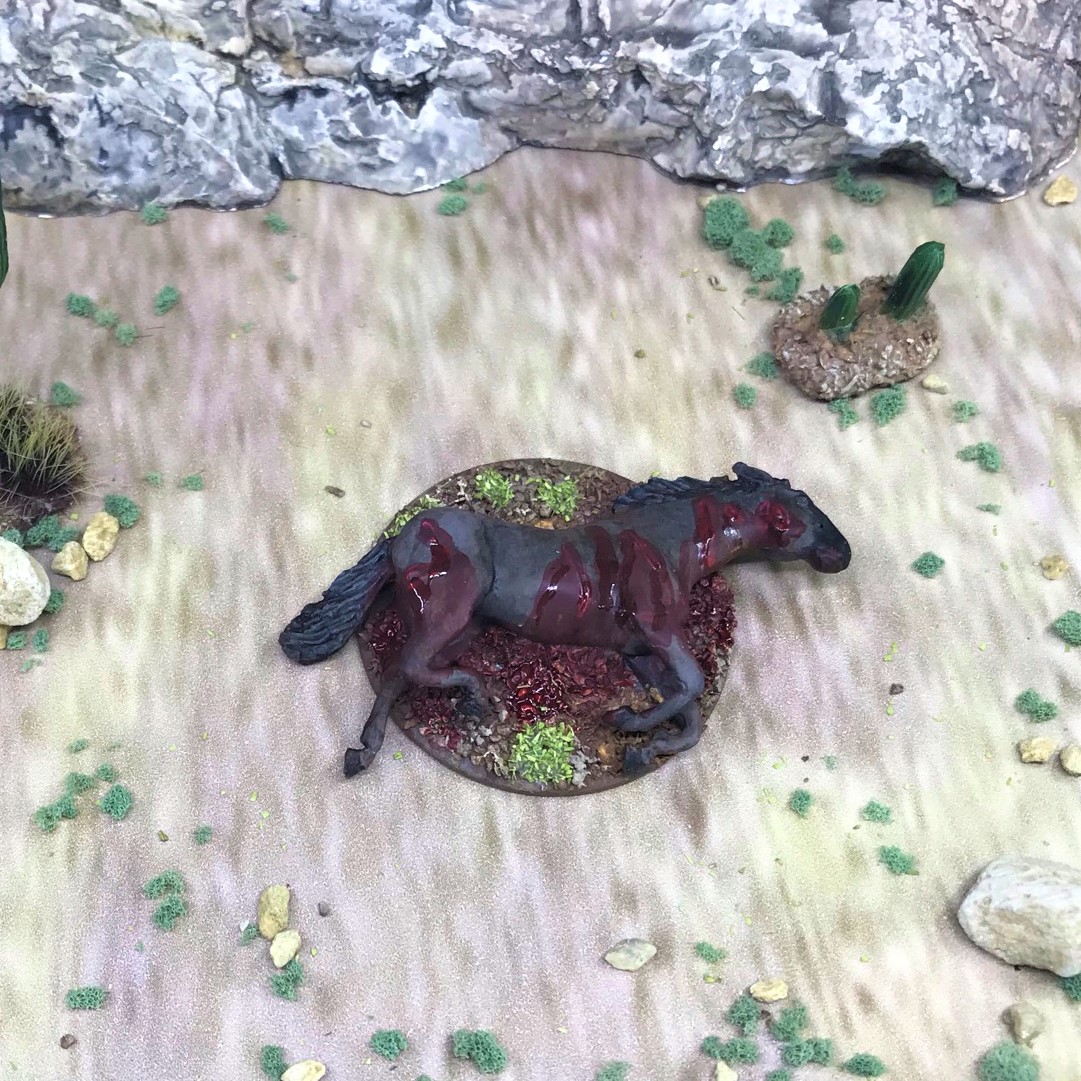
Therefore, to be representative historically, I needed to find some cavalry for my forces. I did find two groups of 28mm metal ones – 4 cavalry (eight riders and eight horses) from Outpost Wargame Services (via Badger Games). These were #CON5 “Conquistador Cavalry in Light Armor 1” and #CON6 “Conquistador Cavalry in Full Armor”. In reality, even the first group were pretty well-armored. I also decided that I wanted to have some dead horses as markers – and to this end I procured eight horses from Eureka Miniatures #100ANM05 and removed them from their bases, and painted them as wounded/incapacitated horses, replete with battle damage. All together, this made for 24 figures for this post (yes, I count horses as figures though they marry up with riders!).
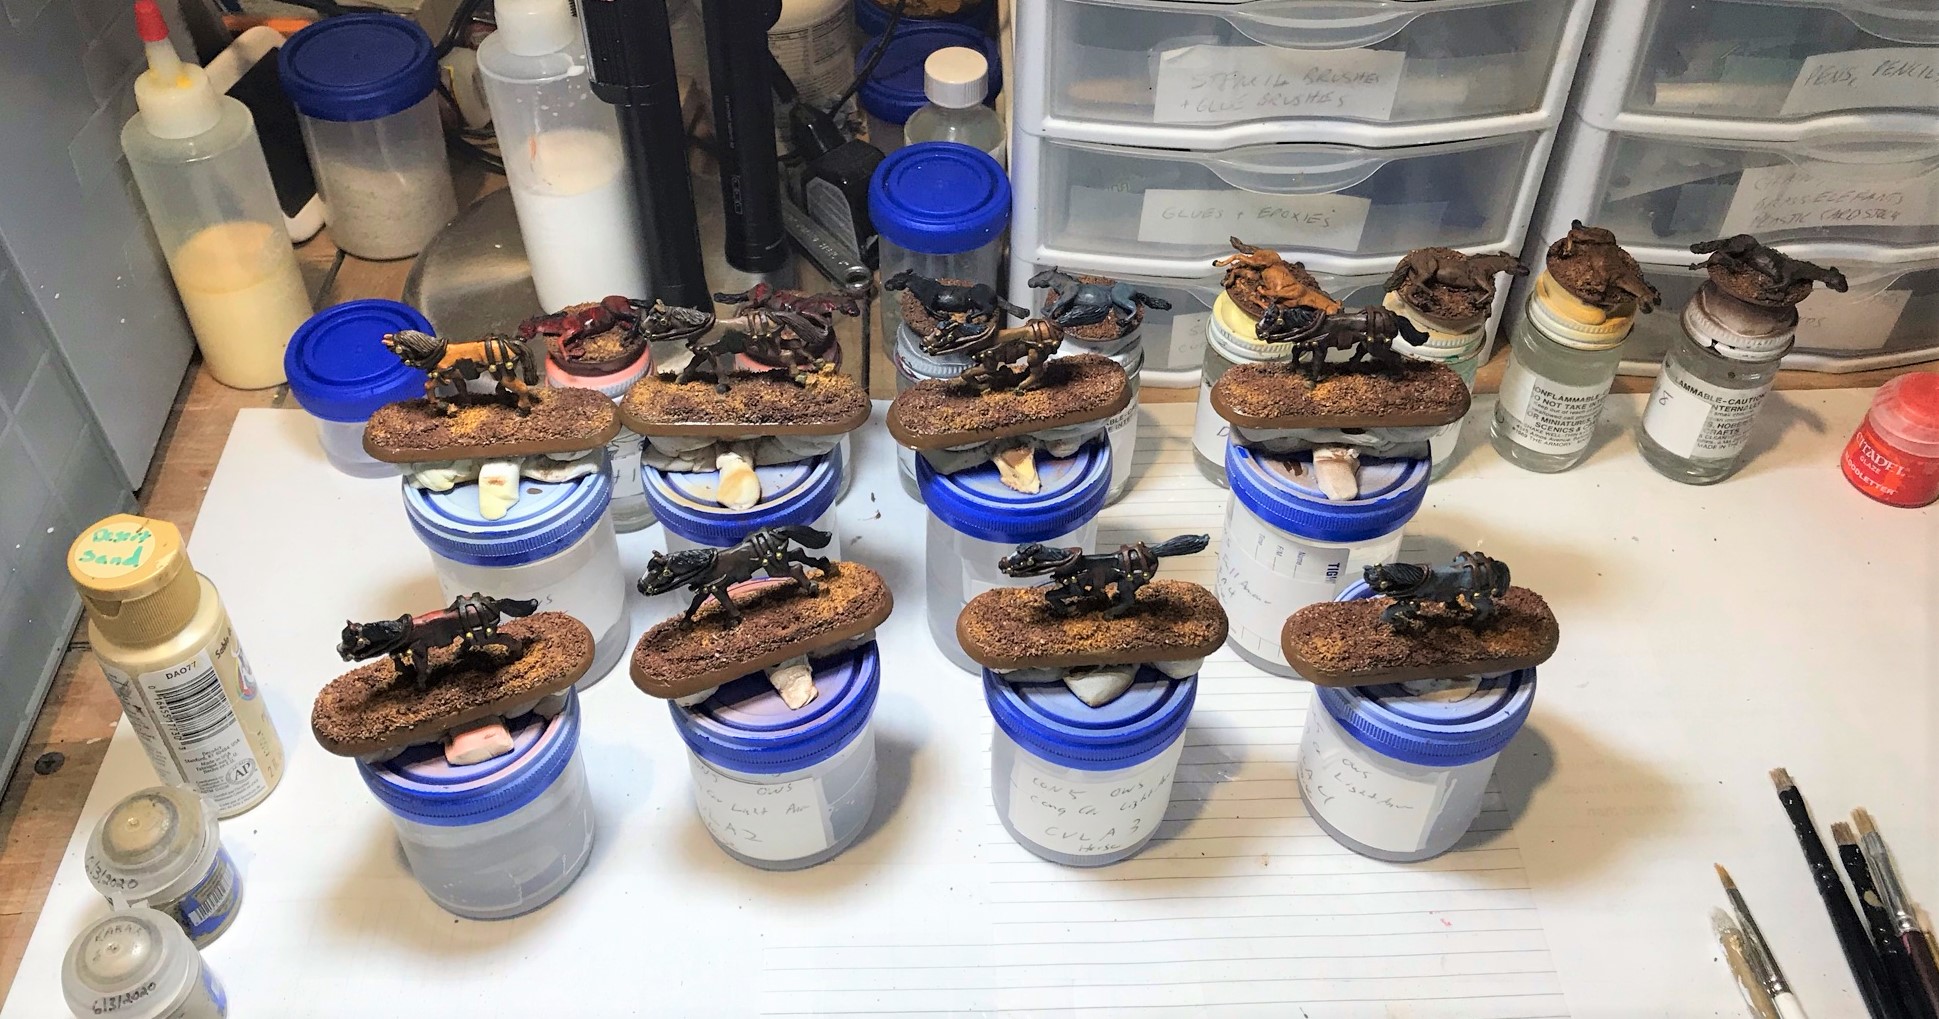
I decided a couple of things with regards to the painting of the group. First, my horses would all be different shades and colors (greys and browns). Secondly, I decided that that the wounded horses should match the colors of the unwounded ones. I had not painted any horses for decades. I did use my regular Iwata Eclipse and Neo airbrushes to prime and base coat them, and I used my Iwata Micron airbrush to do the faces and eyes. After that it was all brushwork (except for final varnishing). I experimented with different color combinations – and it actually helped to try out these combinations on the dead horses first as trials!
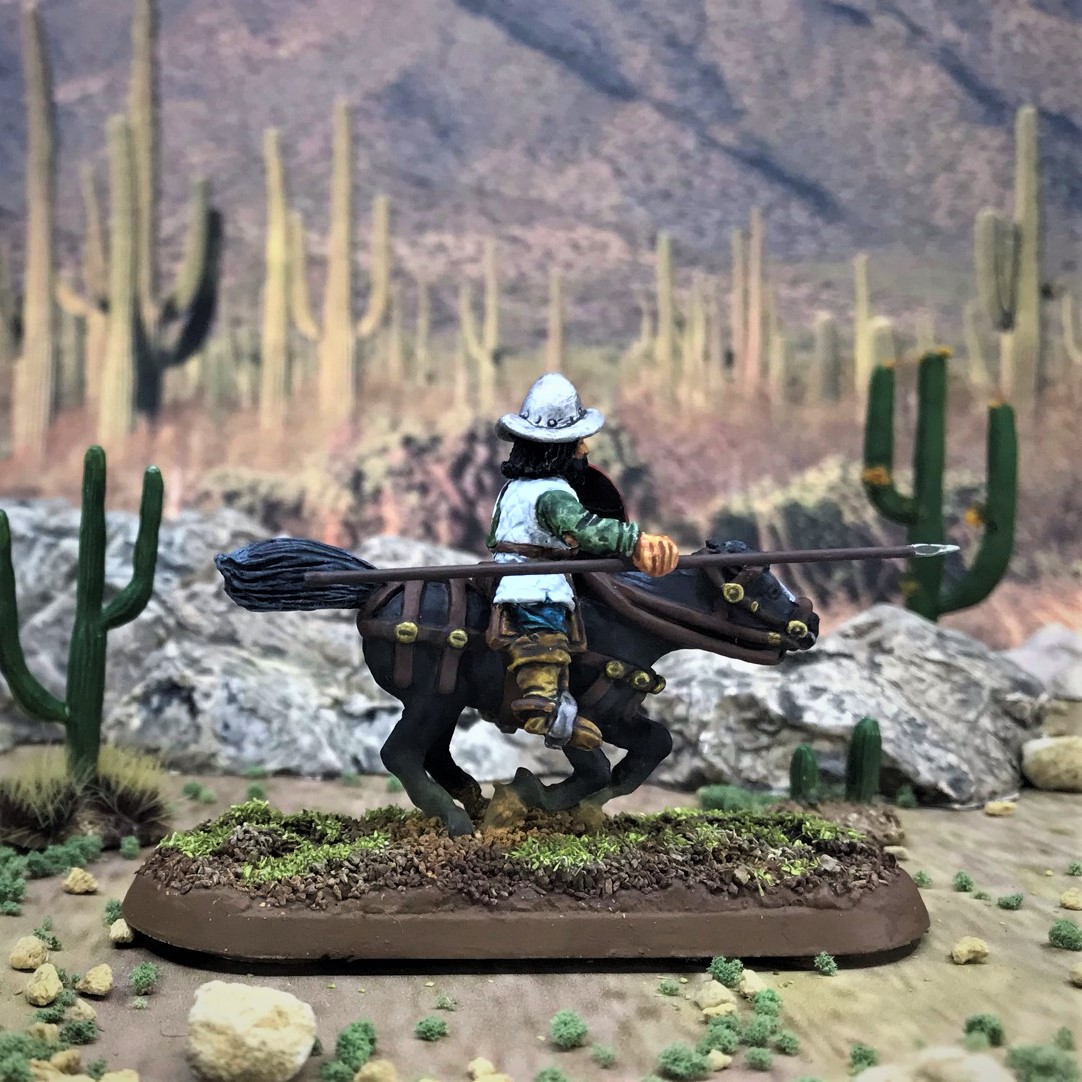
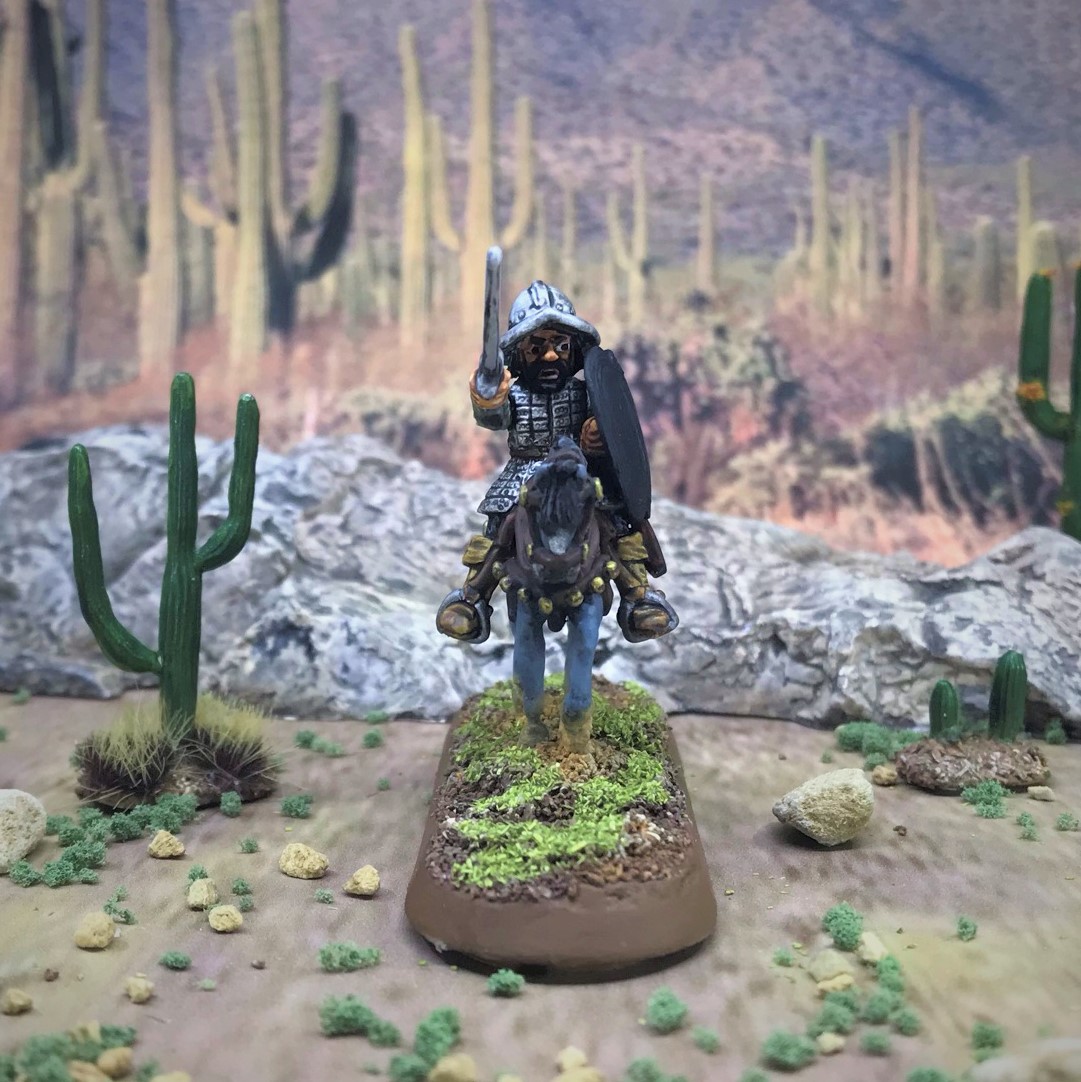
I also painted the shields first and gave each of the riders different shields. The riders themselves could be assembled with different arms. They could get a sword or an empty arm for a lance – but the lances were not included. Luckily, I had some 100mm from North Star Miniatures to cut down for lances. Each of the four would get two swordsmen and two lancers. For bases, I had some 25 x 70mm Secret Weapon Desert Mesa and Desert Wasteland that were designed for motorcycles. I found that by flocking over the bases (and hiding some tire tracks) that these were perfectly-sized for my cavalry. I added some 3/4″ steel washers underneath the bases to help with their storage in my magnetically-lined Really Useful Boxes.
These cavalrymen will be very expensive relative to other figures – and for good reason.
I had a few WIP shots that I can share below – then the final cavalry pics will follow afterwards.
The beginning!I had these pics as guides over my painting desk.My rig for painting the riders. Doubtless, it was painful for the riders…First horse base coated.
My progressive work on the “dead horse” markers.All the horses ready for riders and final flocking.
The first group is the ones in “light armor”. I numbered them CVLA1 to CVLA4.
CVLA1
I added some extra dust to the horse’s legs. I like the lance!And the casualty marker…
CVLA2
This cavalryman has a sword – and his horse is a different shade (well, they all are).And the casualty marker…
CVLA3
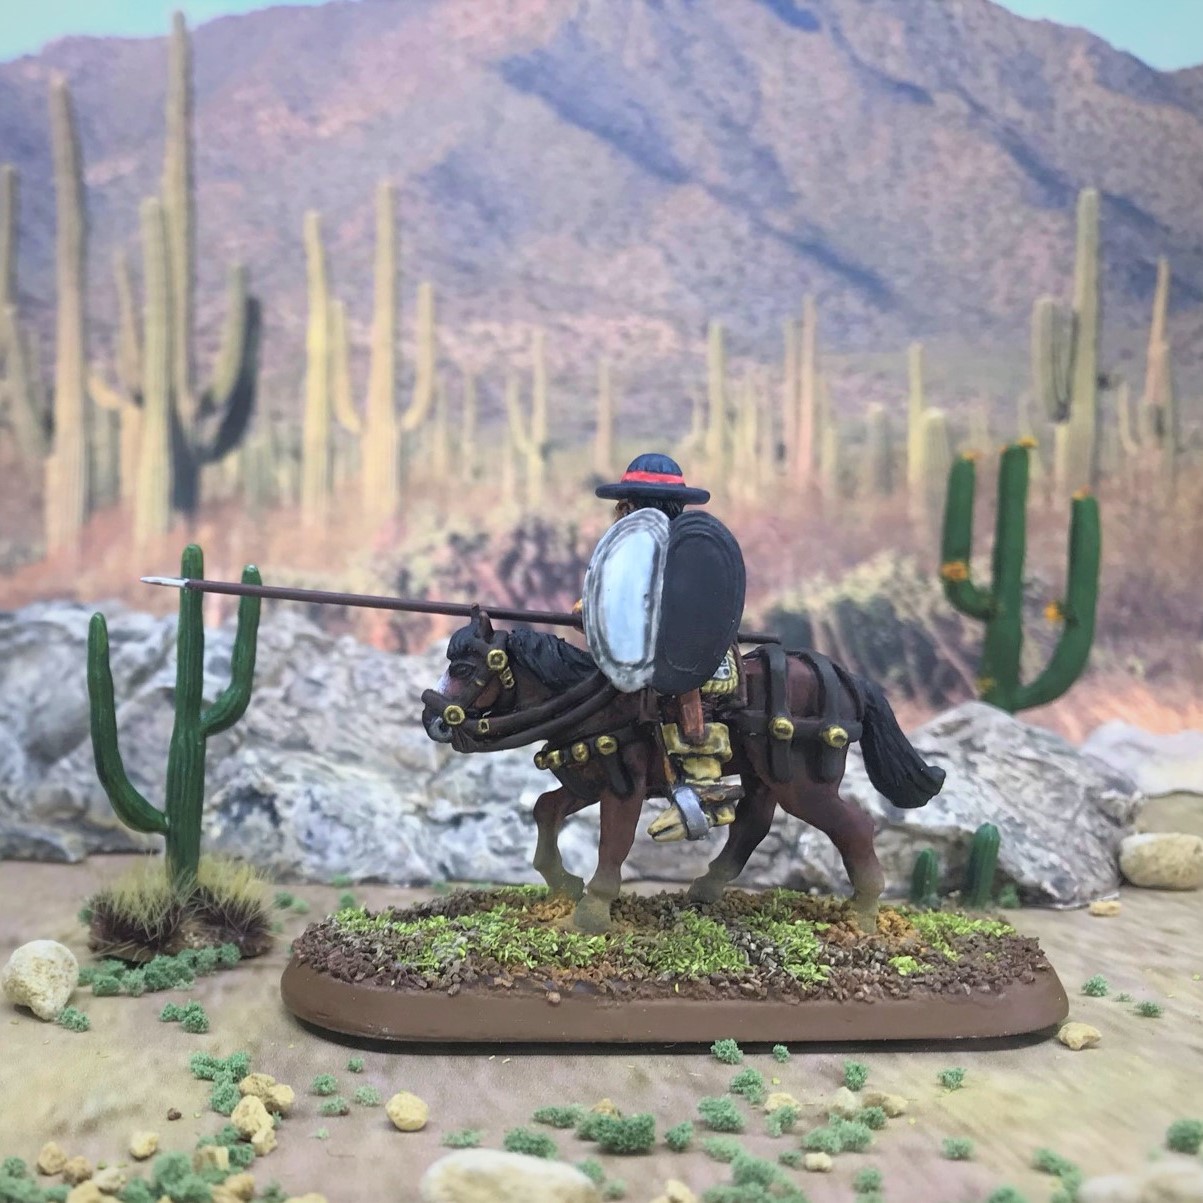
The second lancer in this group .And the casualty marker…
CVLA4
This one got a grey horse.And the casualty marker…
Group Shot
Charge! Here you can see they all have adarga shields (kidney shaped).
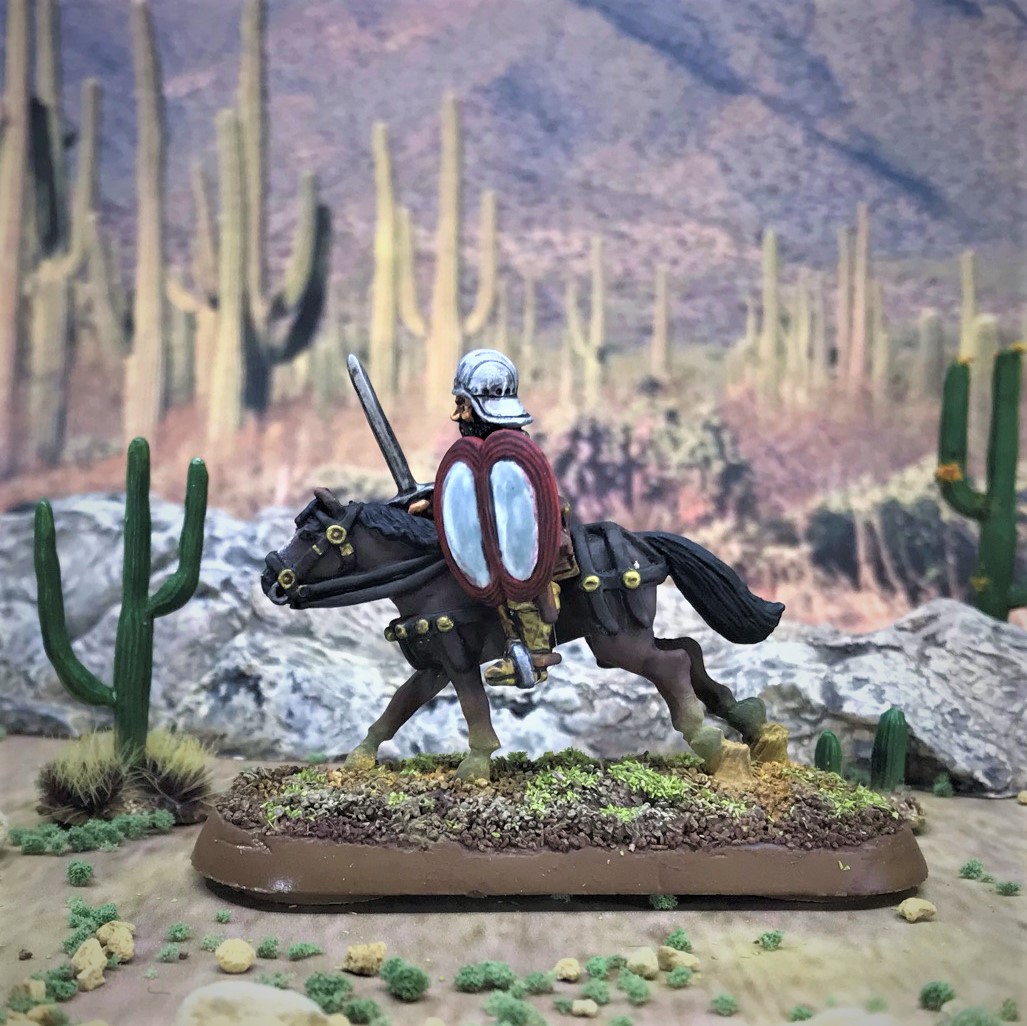
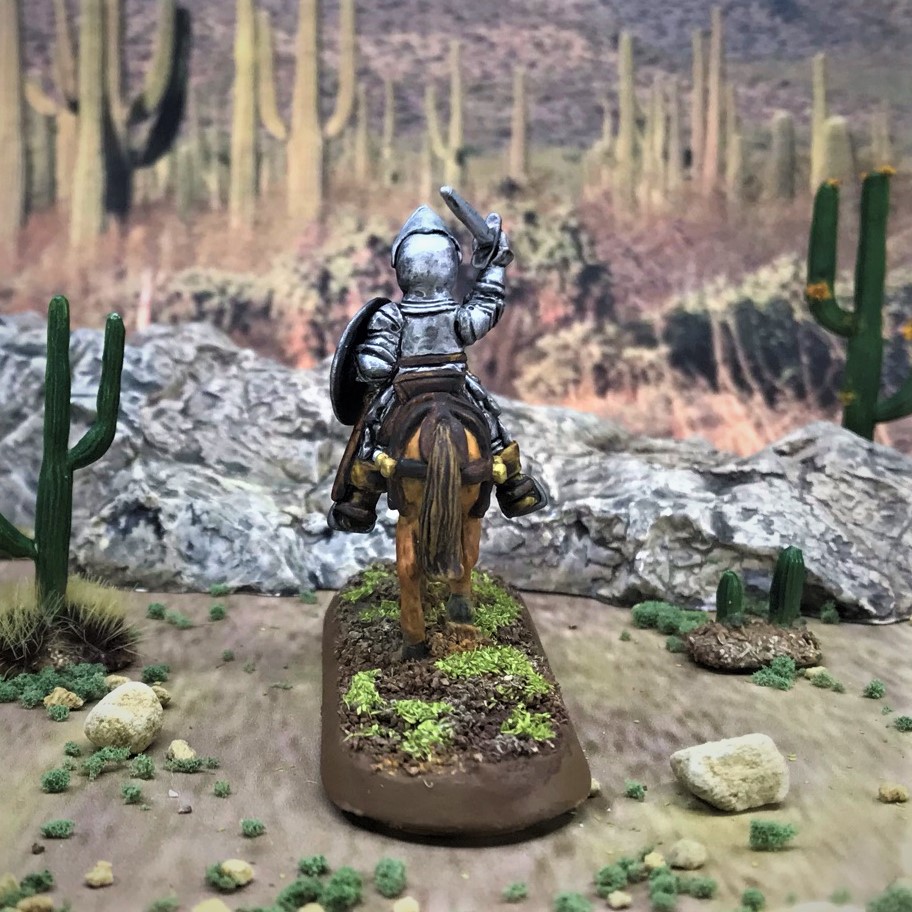
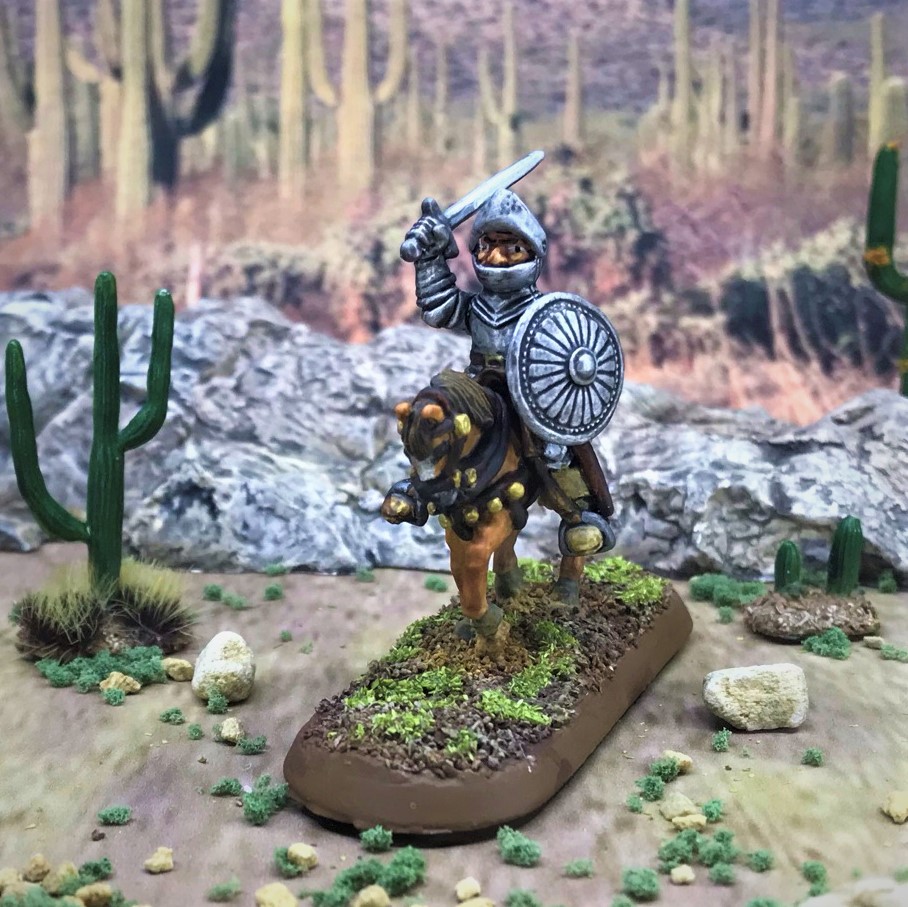
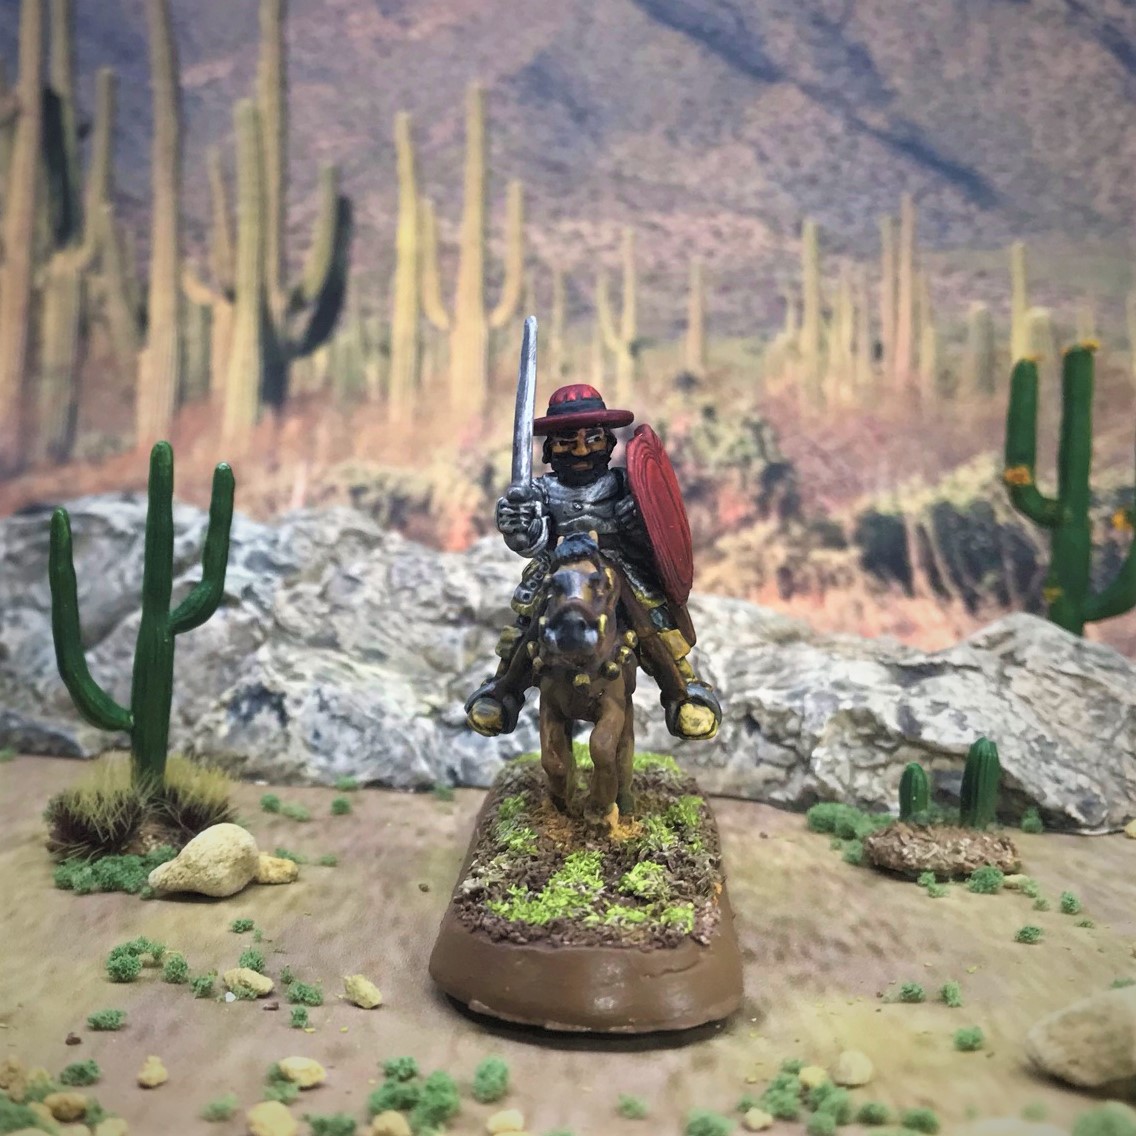
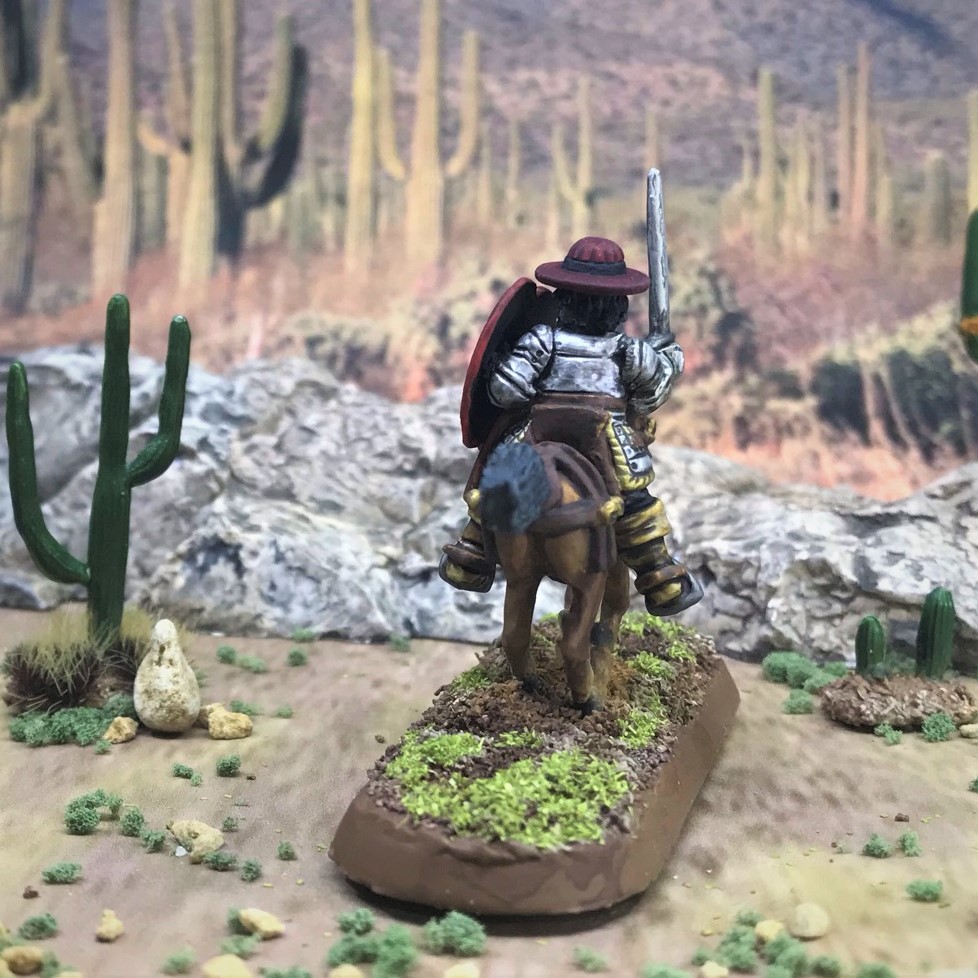
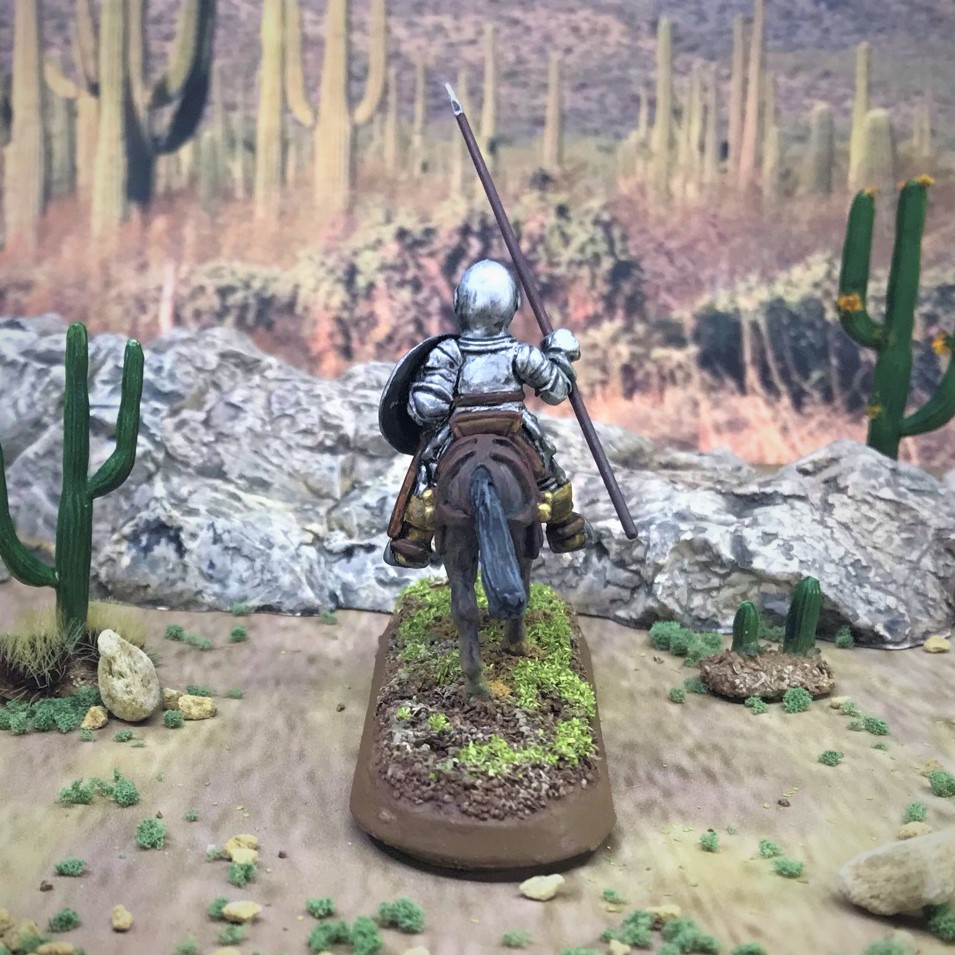
The second group includes the ones in “heavy armor”. I numbered them CVFA1 to CVFA4.
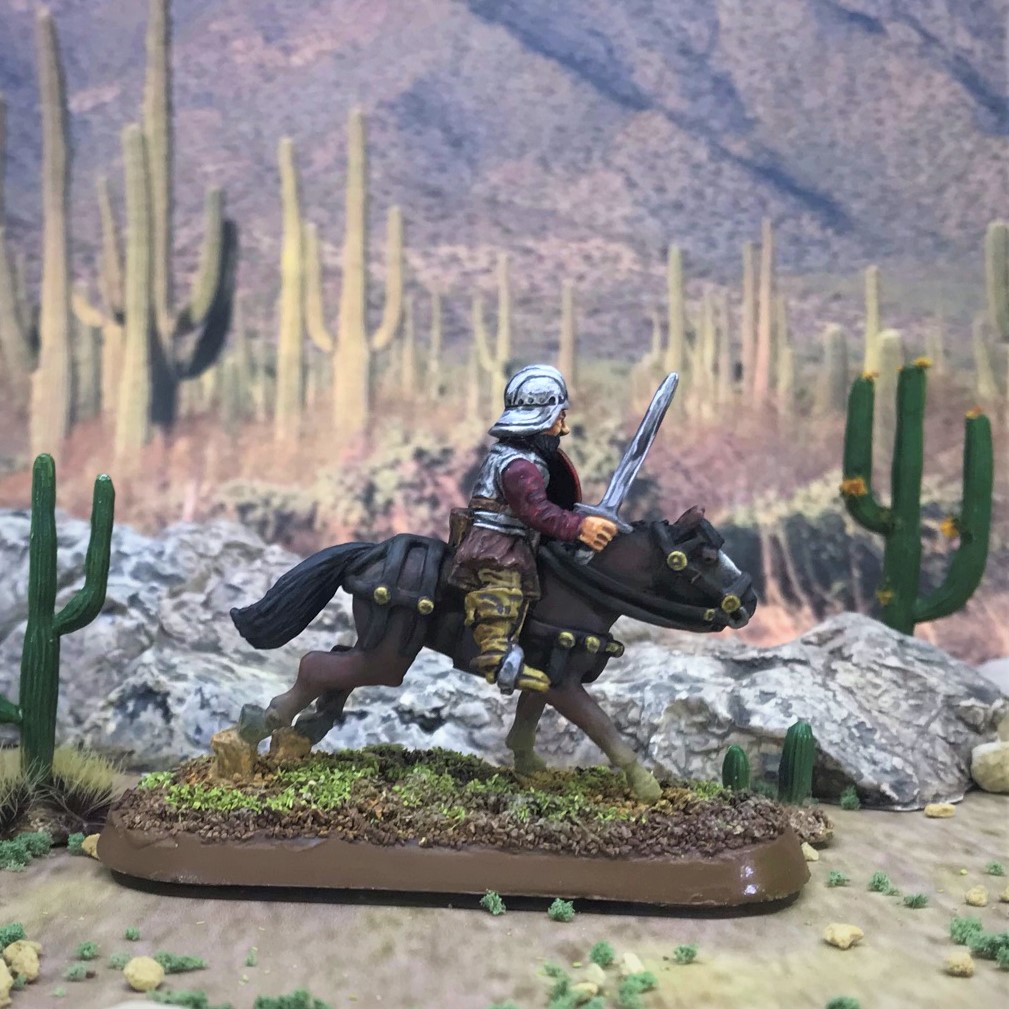
CVFA1
Lots more armor here. Also I like the horse color!And the casualty marker…
CVFA2
Tough lancer.And the casualty marker…
CVFA3
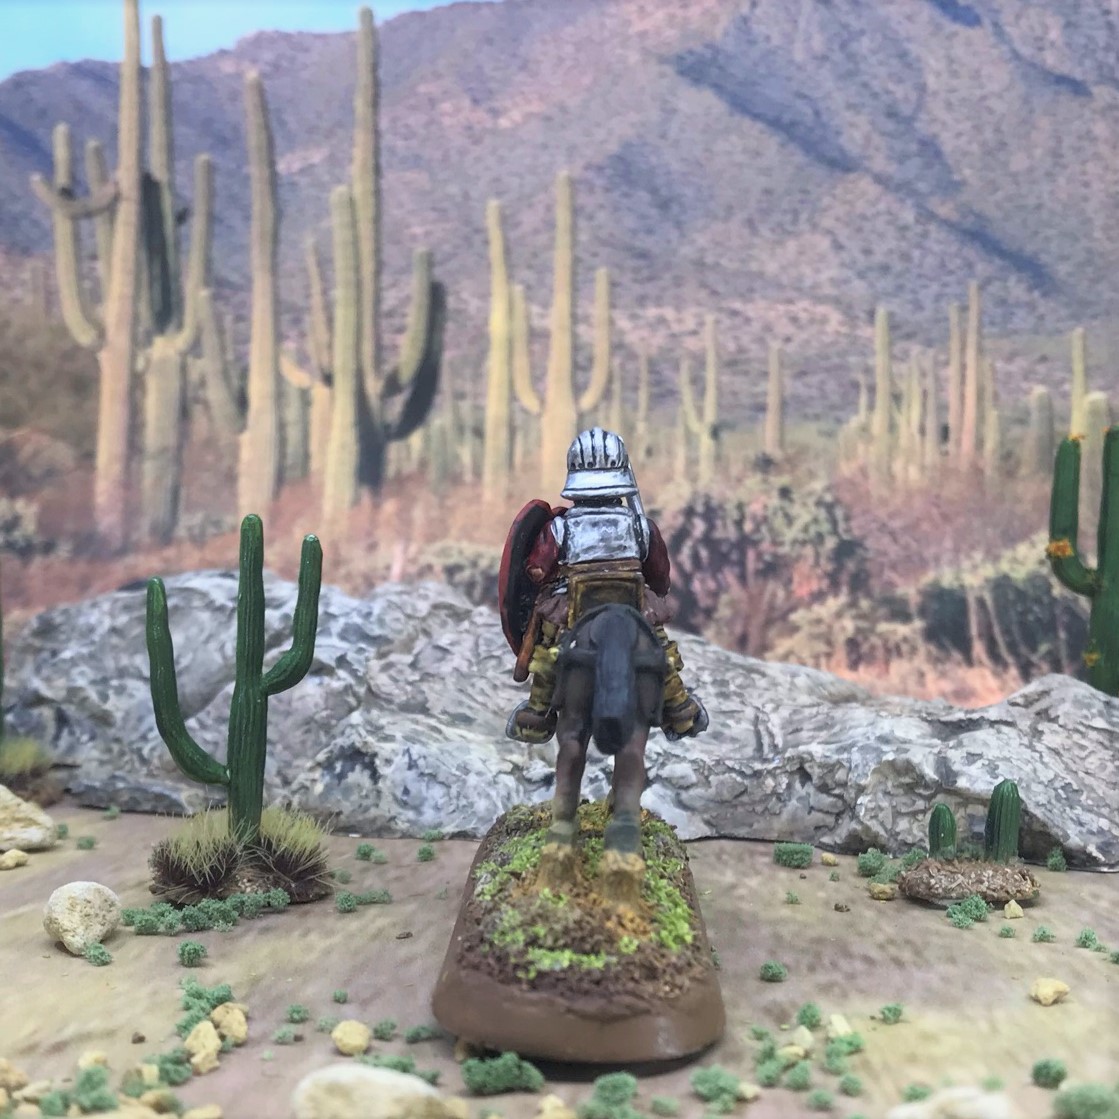
Another shade of brown!And the casualty marker…
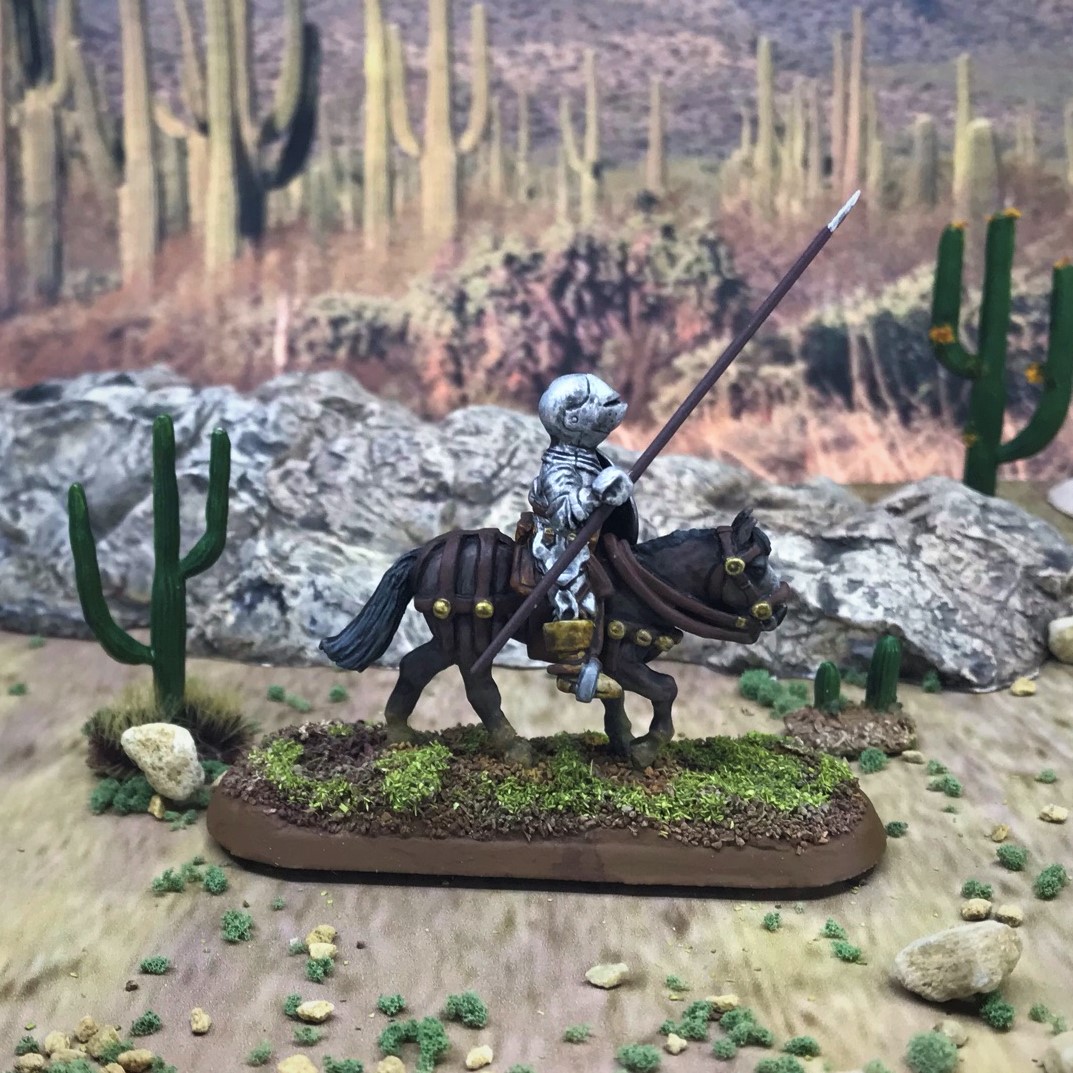
CVFA4
The most expensive Conquistador figure – a fully armored lancer.And the casualty marker…
Group Shot
Here is a good angle to see the different shades of brown I used.
These are the LAST figures in “Mark’s Conquistador Conquest”. This makes 230 figures – of which 89 were Conquistadores (painted since 12/14/2020) – which was the contest I ran. I will make a final contest post– and announce the winners in the next couple of days. All I will say is that these were completed before February 21, 2021. BUT, when I share the results I will also be announcing a similar second contest for you – my followers! Potentially free stuff for YOU!
All of my Conquistador figures!And finally, all planned figures are DONE!
This group of cavalry count as my last entry into Dave Stone’s Painting Challenge “PAINT WHAT YOU GOT CHALLENGE”. In honor of the project, I will share the most famous song about Conquistadores – from Procul Harem in 1967 (and yes I remember it – though I was indeed quite young – though I heard it often in the 1970’s too). Here are the lyrics from the song (authors are Gary Brooker and Keith Reid) and a YouTube link:
Conquistador your stallion stands in need of company And like some angel’s haloed brow You reek of purity
I see your armor plated breast Has long since lost its sheen And in your death masked face There are no signs which can be seen
And though I hoped for something to find I could see no maze to unwind
Conquistador a vulture sits, upon your silver sheath And in your rusty scabbard now, the sand has taken seed And though your jewel-encrusted blade Has not been plundered still The sea has washed across your face And taken of its fill
And though I hoped for something to find I could see no maze to unwind And though I hoped for something to find I could see no maze to unwind
Conquistador there is no time, I must pay my respect And though I came to jeer at you I leave now with regret And as the gloom begins to fall I see there is no, only all And though you came with sword held high You did not conquer, only die
And though I hoped for something to find I could see no maze to unwind And though I hoped for something to find I could see no maze to unwind
And though I hoped for something to find I could see no maze to unwind
Total figures completed to date for this project: 230 figures: 109 Aztecs, 32 Tlaxcalans, 89 Spanish Conquistadores (ZERO more to go in Mark’s Conquistador Contest!)
Stay tuned…I will have more on the game in terms of terrain and game aids. Please let me know your thoughts about this post!
Miscellaneous details and references for those interested in that sort of thing:
Previous posts on games, units, and other projects for my 16th Century Spanish Conquest supplement for Feudal Patrol™ – “Civilizations Collide”
Conquistador Cavalry (this post). 24 figures total: Outpost Wargame Services #CON5 “Conquistador Cavalry in light armour 1” (4 horses & 4 riders); Outpost Wargame Services #CON6 “Conquistador Cavalry in full armour” (4 horses & 4 riders); Eureka Miniatures “Moving Horses” #100ANM05 (8 horses used as casualty markers).
Perro de Guerra (Conquistador War Dogs). 13 figures total: Outpost Wargames Services #CONS6 “War Dogs” (8 war dogs); Eureka #100CON13 “Dog Handler and Dogs” (1 dog handler/pikeman and 4 war dogs)
Conquistador Foot Command, Crossbowmen, and a Couple of Officers. 11 figures total: Outpost Wargames Services #CONC1 “Conquistador Foot Command” (a leader, a banner bearer, a drummer, and a bugler); Eureka #100CON04 “Crossbowmen” (5 crossbowmen); and Eureka CONC1 “Conquistador Officer” and an unknown SKU officer (2 officers)
Total figures completed to date for this project: 230 figures: 109 Aztecs, 32 Tlaxcalans, 89 Spanish Conquistadores (ZERO more to go in Mark’s Conquistador Contest!)
PAINTS, INKS, GLAZES, SHADES, WASHES, PIGMENTS, FLOCKING, GLUES AND MORE THAT I USED ON THESE CONQUISTADOR FIGURES:
Gorilla Glue
1.25″ Everbilt Fender Washers
3/4″ steel washers
Secret Weapon 25mm x 70mm “Desert Mesa” beveled bases
Secret Weapon 25mm x 70mm “Desert Wasteland” beveled bases