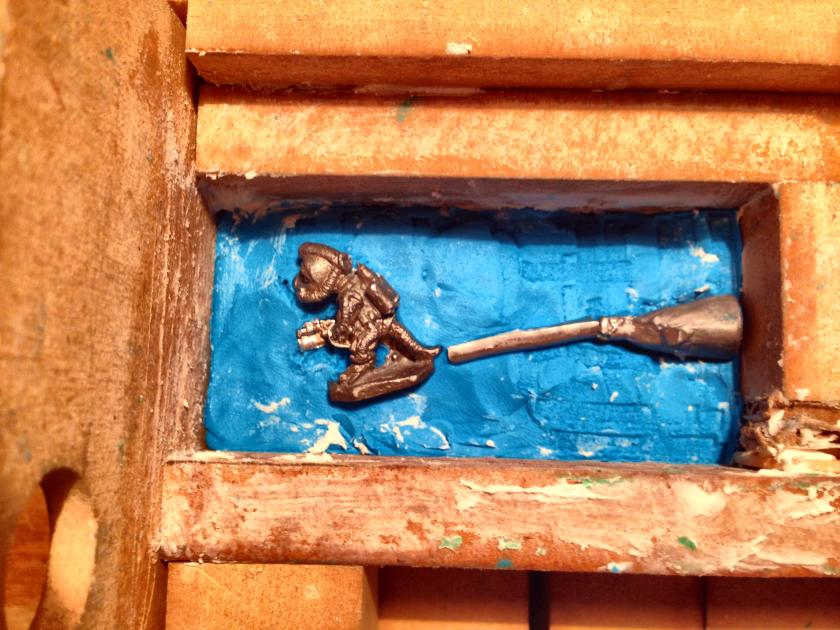
A couple of figures that I saw on eBay caught my eye. They were retro-looking astronauts/cosmonauts that had no provenance. I could not tell that they were probably 54mm from the photo, but I did believe that they would be great for future sci-fi games. They also looked fun to cast!
I do not have the brain figure, but I did have two Macrons. I decided to mold them, thinking they could be “Space Giants”.
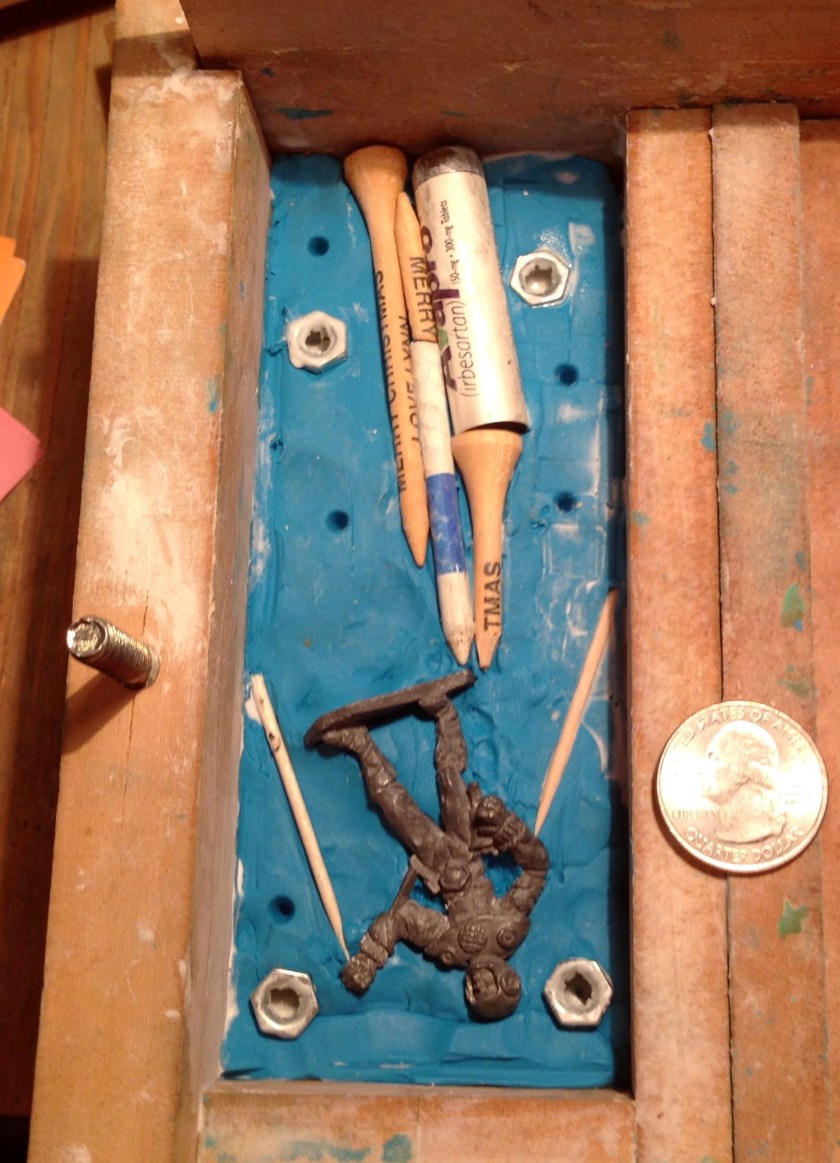
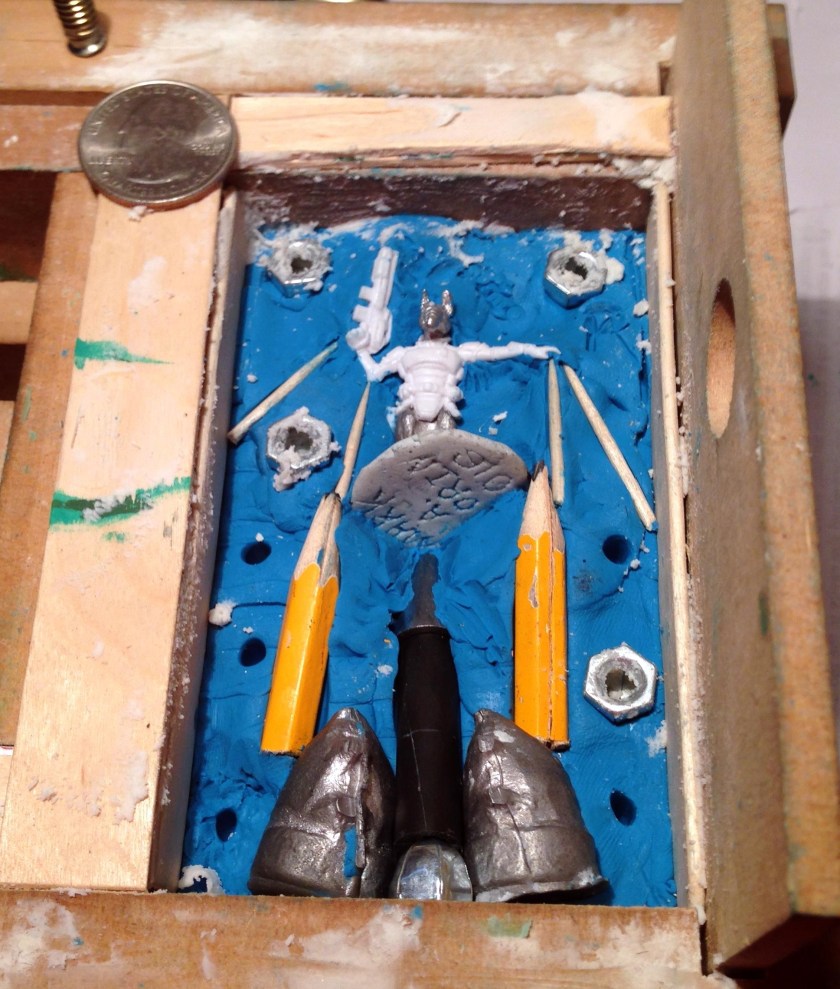
They were both in good shape. I made a two-piece mold with Quick-Sil from Castaldo with one of the Macrons. I made this mold rather tall to accommodate a large plug that would give the figures better detail. I also experimented with using golf tees (that had “Merry Christmas Love Lynn” on them and an old pharma pen top for my mold opening. I also added toothpicks for venting.
Macron mold – first half
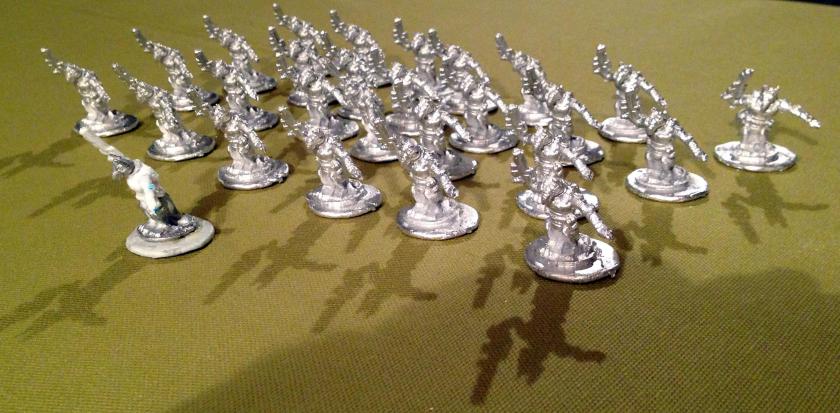
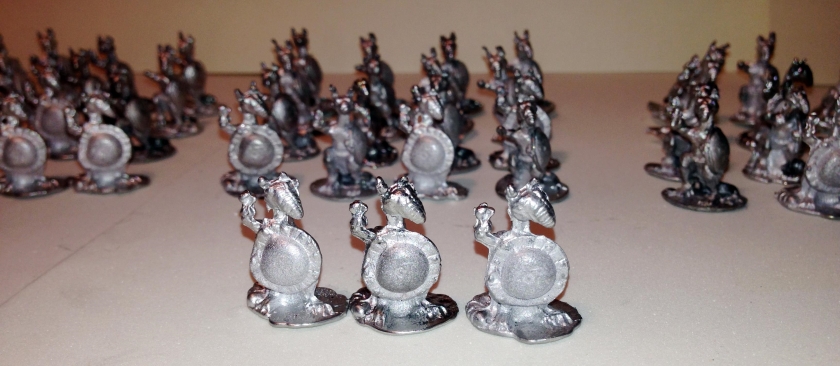
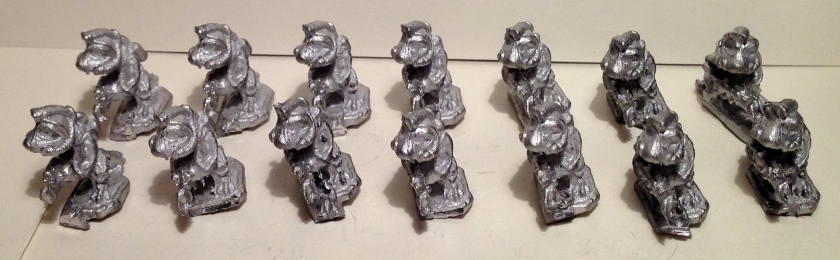
The mold desighn worked fine, and I was able to cast 24 satisfactory examples with a mix of 67% tin and 33% lead at 565° F. The mold did not need much tapping at all which was great. They did use up a lot of metal though relative to smaller figures, as one would expect.
24 Macrons
I sent off half to Buck Surdu, and I kept the rest. I am looking forward to getting them painted soon!
I have been a bit behind on blogging but I hope to catch up over the next few days. I have been quite busy with work and projects on the weekend (and golf of course!). I also sent Buck Surdu some of these miniatures, and I did not want his first look to be on my blog. His trip to Costa Rica meant that I’d need to wait a week while the figures awaited his return and inspection (he is after all an Infantry Officer).
I wanted to wait to do this as he inspired this project. During an April conversation with Buck about my recent casting project to resurrect the 1977 Ral Partha “Rooman War Party” (01-044), he suggested that I was somewhat adept at making Quick-Sil molds and casting. Perhaps I should consider making “Space Roomans”? Intrigued, I pondered how to do this in a quality way. Luckily I have been getting good ideas about conversions by reading other blogs, such as Buck’s and Chris Palmer’s.
I started by searching eBay for a nice jewelry saw – as I thought this would work better than my Dremel for fine cutting of metal. I found one cheap, and then looked for a suitable sci-fi miniature that was worthy of conversion. There was a large lot of 38 resin figures from a Reaper Kickstarter that I got for $29 that included pulp figures and science fiction figures. I was taking a chance, but it worked out. Once the figures arrived, I looked at all of them for possibilities, and one stood out.
The eBay entry – the eventual conversion figure is in the red circle
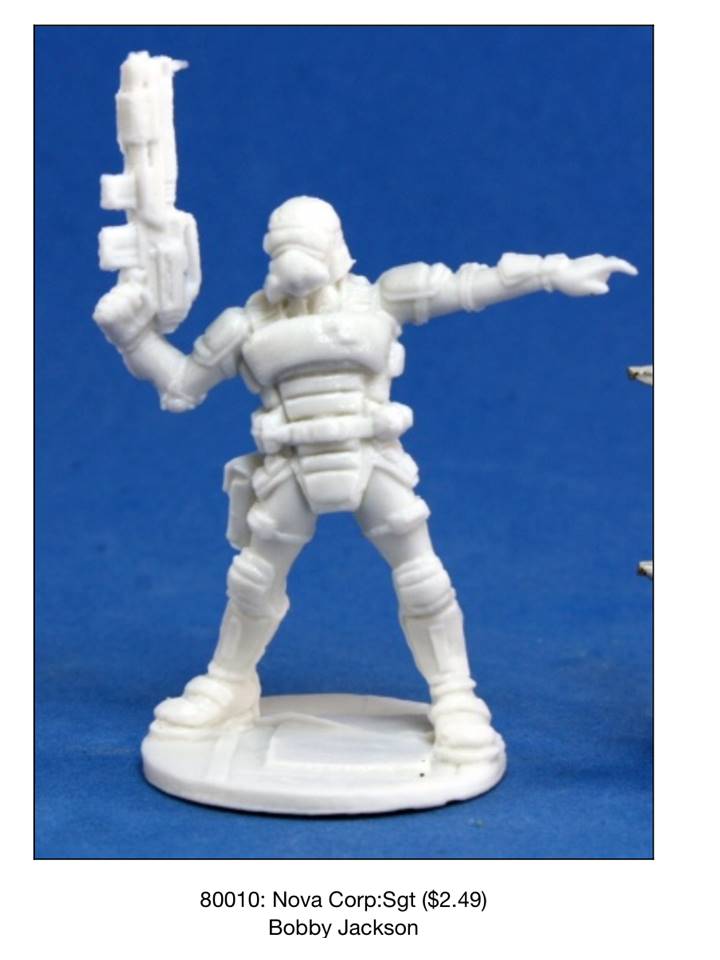
This figure was Reaper 80010, “Nova Corp Sergeant”, by Bobby Jackson.
Picture of figure from Reaper website
I then looked for a suitable Rooman to convert as well. I did not have the heart to sacrifice an original Rooman, so I used one of my castings. There are two types, one with a shield on the front, and one with a shield on the side – and only the one with the shield on the side looked capable of conversion. I used the jewelry saw and an Exacto knife to cut the shield from the Rooman. I then cut the Rooman in half and removed his head (sounds brutal doesn’t it?). The Nova Corp Sergeant was a lot easier to cut being made of resin! I used the Exacto knife to cut off his head and carefully remove his legs, preserving his body armor. Simultaneously, I sculpted some bases to assist in my casting. These I made from Aves® Apoxie Sculpt modeling compound that I got in Bel Air, MD at a Hobby Shop that I found when I attended HARCON. It’s a modeling shop and not the gaming shop that Buck suggested to me, but my error proved fruitful as I found this product to be is much easier to use than Milliput. I have found that I need these bases to create better castings – the older miniatures had pretty thin bases that did not always come out when I molded and cast them.
The Nova Corp Sergeant (before losing his head and legs), an unconverted Rooman example, and a bisected and decapitated Rooman in the process of conversion. Note my Apoxie Sculpt bases curing in the background.
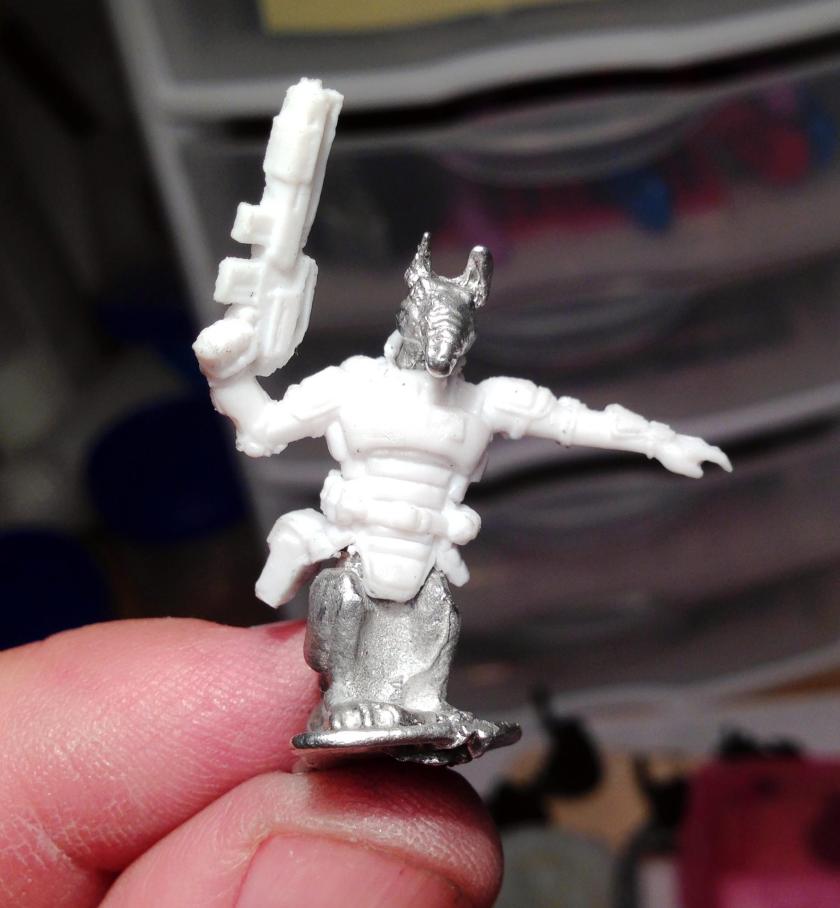
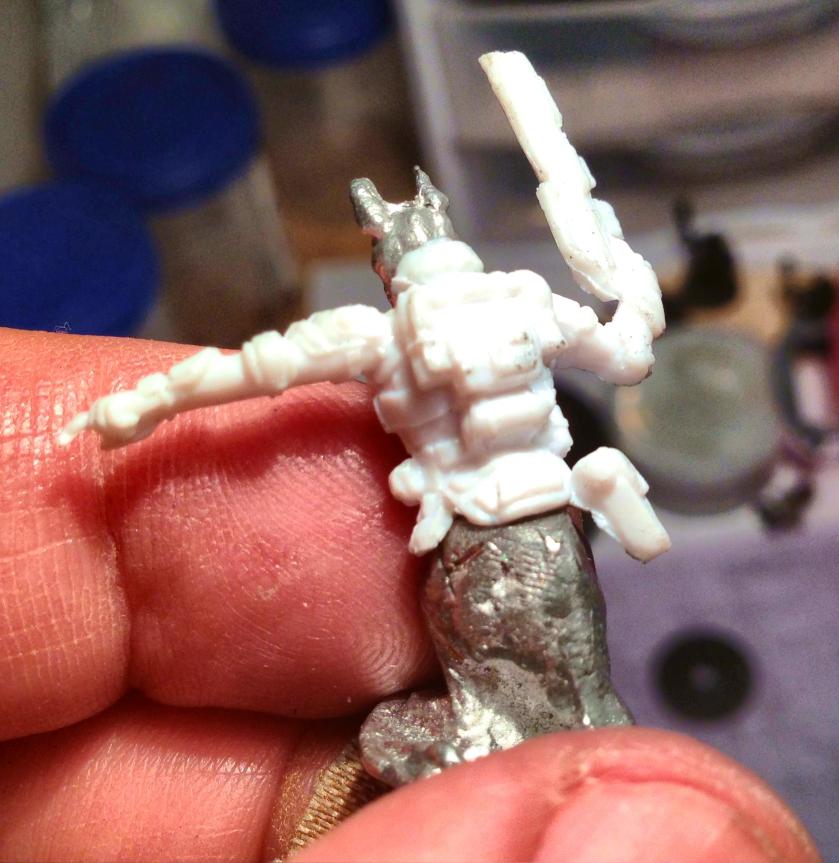
After I had done my Dr. Frankenstein cutting, I drilled a small hole in the Rooman and the torso of the Nova Corp Sergeant, and pinned the two with a paper clip wire and super glue. This allowed me to get a proper angle between the two figures. Then, I carefully carved out space for the Rooman head, and it fit well in the armor. Lastly, after a 24 hour cure for the Apoxie Sculpt bases, I affixed the conversion to one.
The front of the initial Space Rooman conversion before adding the base
The back of the Space Rooman Conversion (less the base). Note the file marks on the Rooman haunches – I smoothed those out with wood glue
The master figure awaiting a base!
The next step would be to create a two-piece mold using Castaldo Quick-Sil. I tried this time to create a better flow of molten metal via three channels made from pens and pencils – which worked great for gravity casting. I found that pointing the tips at the edge of the base worked well. I also used toothpicks for venting the mold and helping with flow. This, with some excision with my Exacto knife, made a very large plug at the top that would get all the mold filled by virtue of its weight.
The first mold half – note the Apoxie Sculpt base (with my name on it for posterity). I used a combination of old casting plugs, a pen, two pencils, and toothpicks to create the flow system of this mold.
The completed first mold half awaiting the second pour of Quick-Sil.
I then mixed together approximately 66% tin, and 34% lead (probably some trace bismuth in there too), and melted the alloy to 560° F.
I tapped the mold on my steel-sheeted table after pouring, and employed all the safety equipment that I have previously described in this blog. As always, this is dangerous!
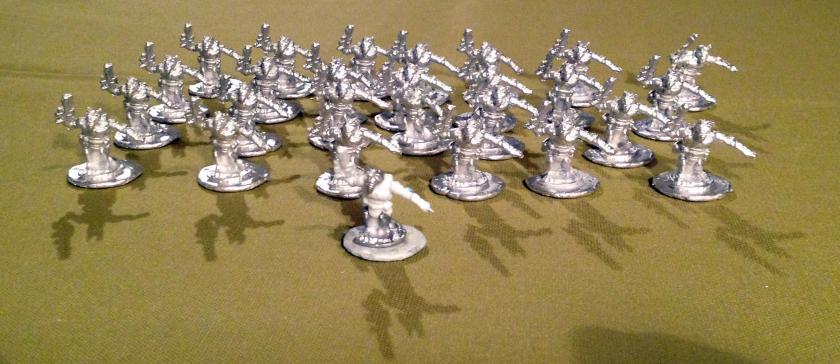
I must say that the final product exceeded my expectations. Very few of the molds failed to come out as desired which I attribute to my design above. I ended up with 26, and sent a lucky 13 to Buck for use in sci-fi games!
A Regiment of Space Roomans, led by the master!
Front view of the Space Roomans with master figure in front
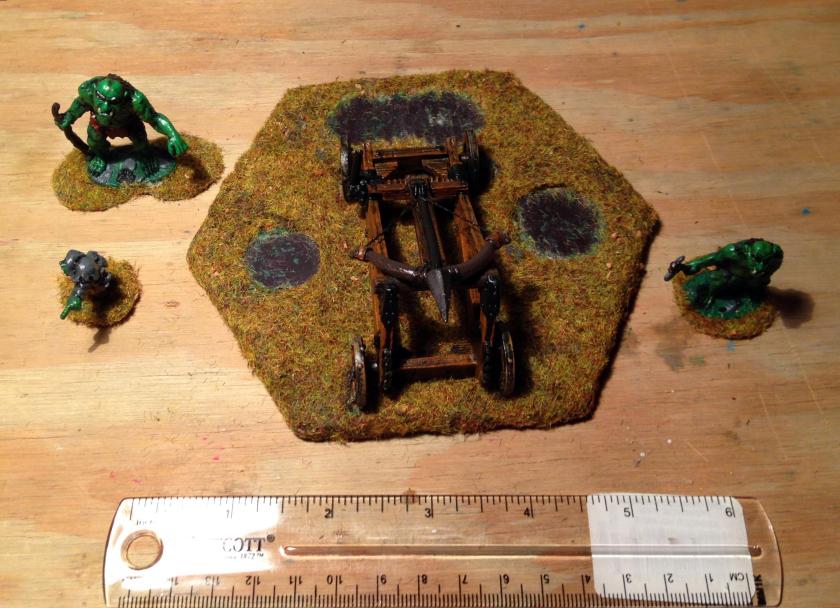
I saw an item on eBay that was listed as “Ogre Baleesta”. As I already had an Elven Ballista, I thought it a good idea to have a crew-served weapon for the bad guys. Little did I know that this would turn out to be a pretty involved project! I paid a little more than $30 for the three figures and the ballista.
The figures as shippedI love doing a little research on Lost Mini’s Wiki site: http://www.miniatures-workshop.com/lostminiswiki/index.php?title=Main_Page. I want to document my figures as best as possible, and I have gotten a bit more familiar with digging into the catalogs there. I found these all in the 1994 Grenadier catalog. However, they were not Ogres, but “Trolls” and a separately listed “Heavy Bolt Thrower with Hunchback Gunner”.
The set of Trolls is #3107, sculpted by Sandra Garrity, and included both Trolls in a blister pack. It was part of the “Fantasy Legends Blisters” line. The figures themselves had “1992” and SM-33 and SM-34 and “Garrity” on the bases.
The ballista and gunner was #9204, and was in the “Fantasy Warriors Grand Pack Line”. I then proceeded to treat them all as a Troll crew and a ballista. To call them Ogres when they were Trolls seemed so inappropriate!
The ballista had been crudely cemented, and that took some work to correct. I was happy that a string had been attached to the ballista as that saved me some work.
Ballista rear view as shippedDetail of the bottom of #3107 Trolls by Sandra Garrity
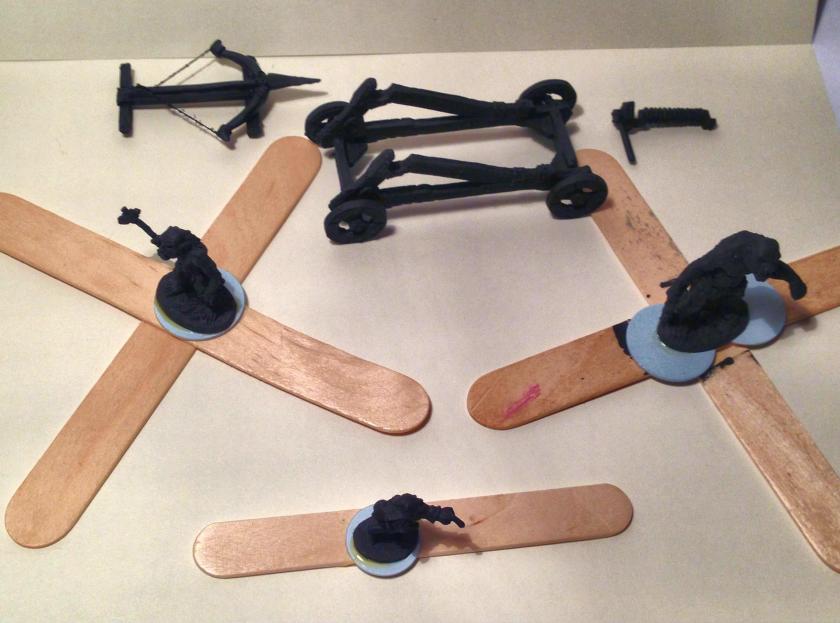
I removed the old cement and disassembled the ballista. I then primed the set in Jeff Smith’s workshop on a cold February day with Krylon “Ultra Flat Black” and mounted as below for painting.
On washers on popsicle sticks and ready for painting!
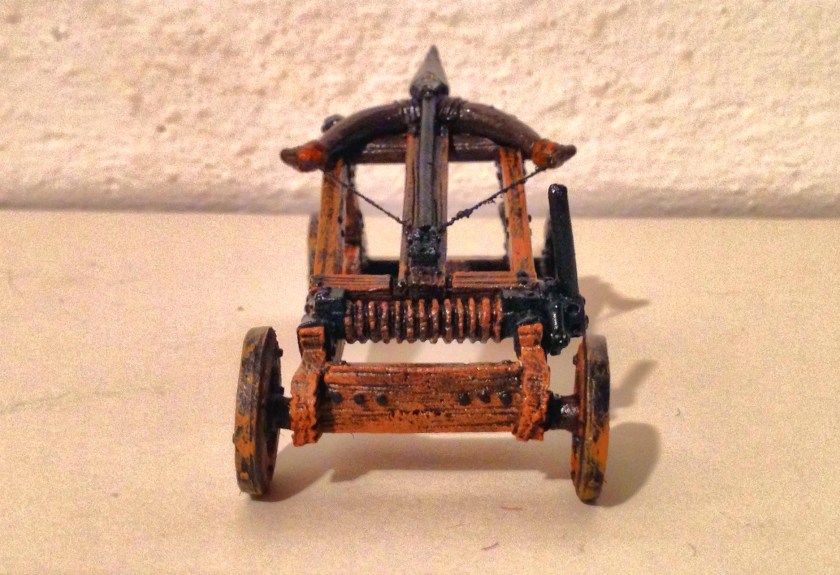
I used Citadel’s “Dryad Bark ” as a base coat for the ballista wooden elements. I subsequently employed two inks in succession as washes – Secret Weapon’s Washes “Heavy Body Black” and P3’s “Brown Ink”. On this I applied a dry brush application of Citadel’s “Scrag Brown”, followed by a wash with Citadel’s “Agrax Earthshade”. For the bolt and other iron parts, I used Tamiya’s “Gun Metal” and Polly-S “Rust”. Finally, I used Citadel’s “Nuln Oil” as a light wash to darken the iron components even more. Eventually I was able to apply a couple of coats of varnish to the ballista. As I needed to apply coats of varnish to the undercarriage and the top of the ballista, and as New England would not warm up, this took longer than I wanted! I was able to apply Krylon “Clear Glossy” followed by Krylon “Clear Matte” varnish and moved on to the crew.
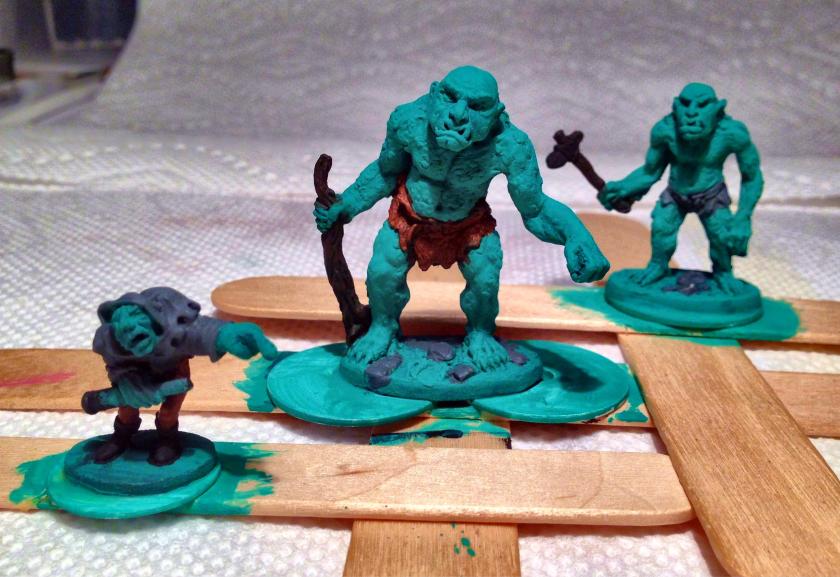
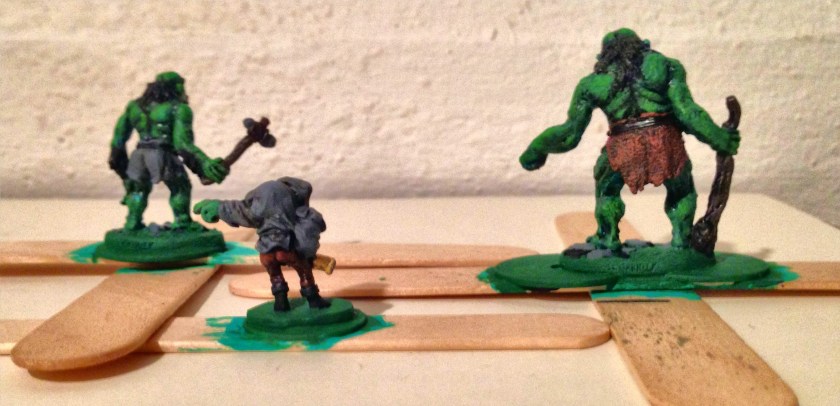
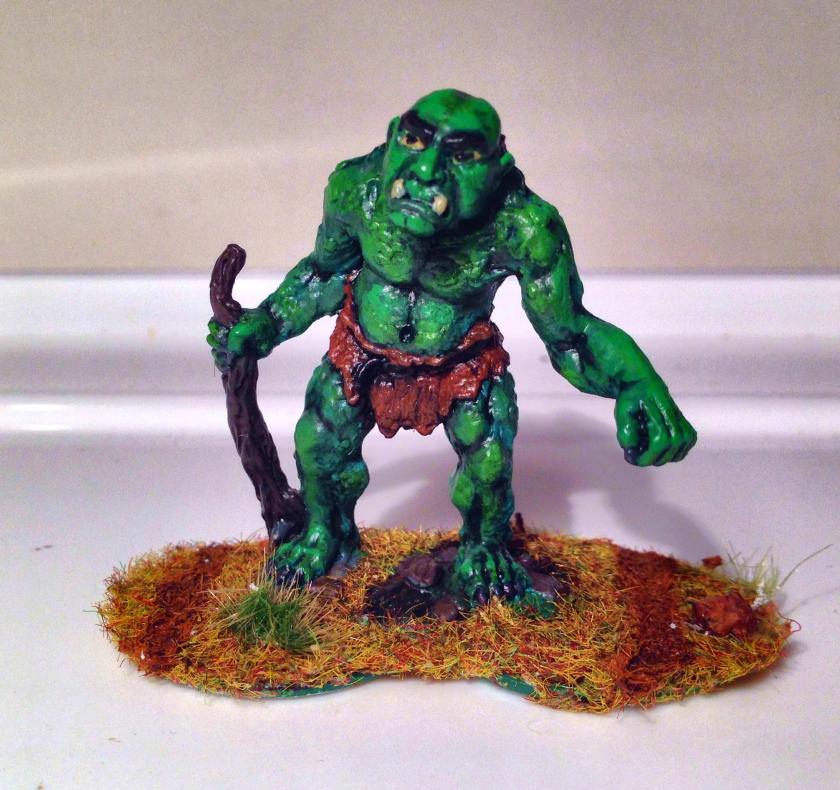
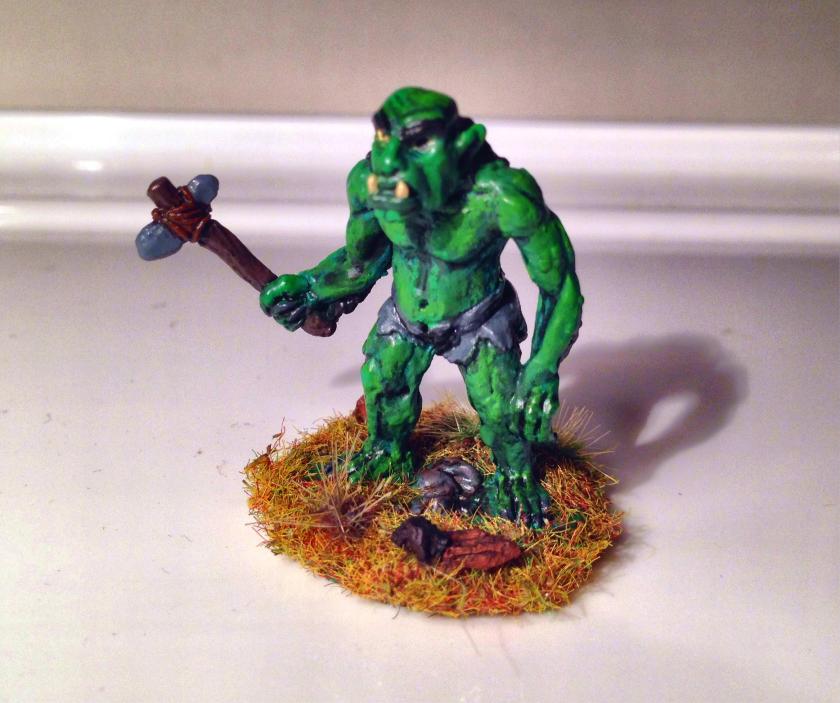
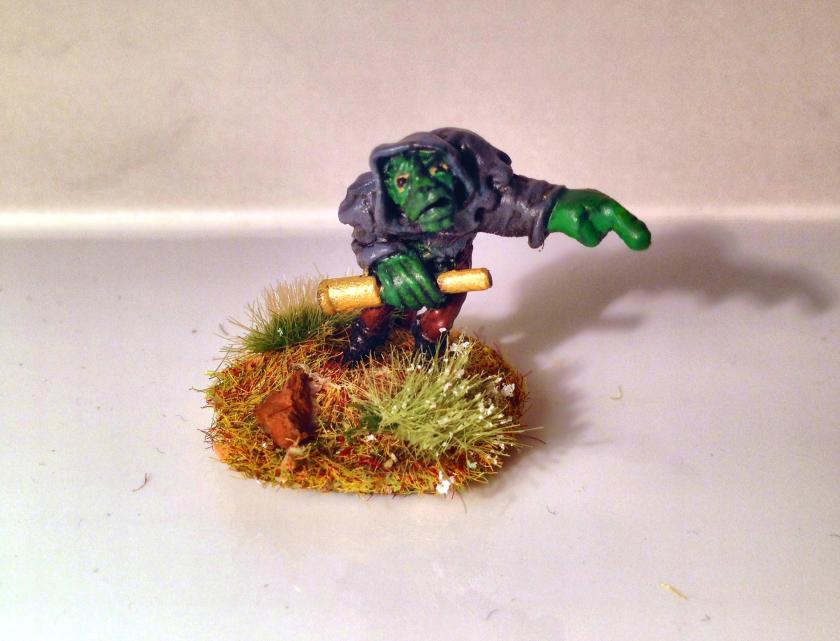
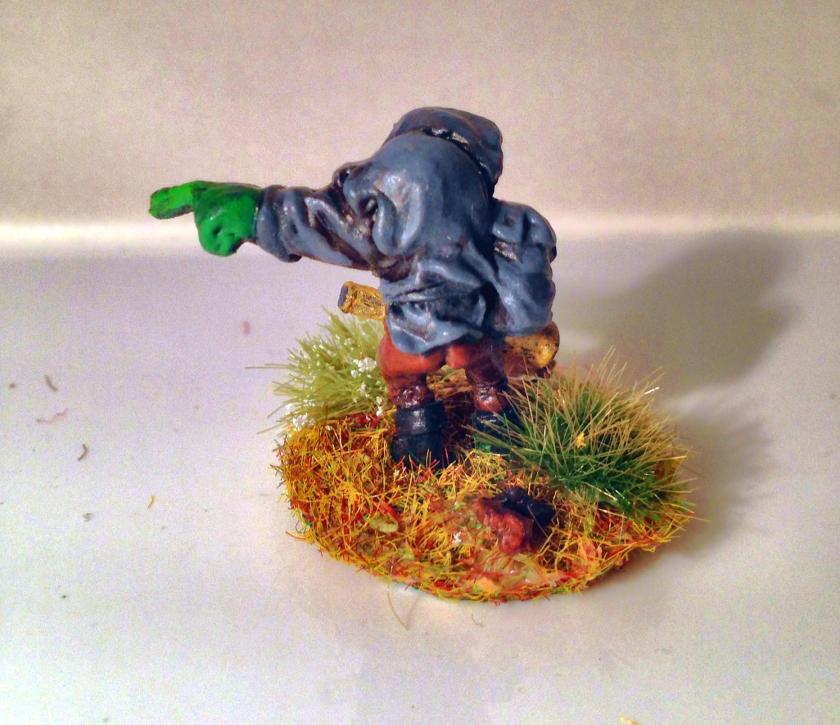
The ballista completedI base coated the crew with Armory “Dark Green” on the skin, with Armory “Chestnut” and Americana “Zinc” on pants and cloaks and stones at the figures’ bases. For the clubs and handles I used Citadel’s “Dryad Bark”. The gunner’s boots got Americana “Black”. Then I applied a wash with two inks – Secret Weapon Washes “Storm Cloud” and Citadel’s Agrax Earthshade on the skin. For the eyes, I used Citadel’s “Ushabti Bone” and Americana “Lamp Black”. I further wanted to get the right tone for the skin – I wanted greasy, sweaty Trolls! To accomplish this, Citadel’s “Waaagh! Flesh” and Polly-S “Slime Green” worked well when highlighted with Citadel’s “Niblet Green”. Then I used Americana “Lamp Black” on all the Trolls’ hairy parts. For the gunner’s telescope, I used Martha Stewart Craft’s “Pale Bronze”. I proceeded to add highlights (with Americana “Black Tie” on the hair and lightened “Zinc” on the cloak) and depth to the skin with the use of washes (more “Nuln Oil”, “Agrax Earthshade”, and Secret Weapons Washes “Stone”. Then I varnished them the same way as the ballista.
The first base coat on the TrollsAfter painting and varnishingRear view after painting and varnishing.
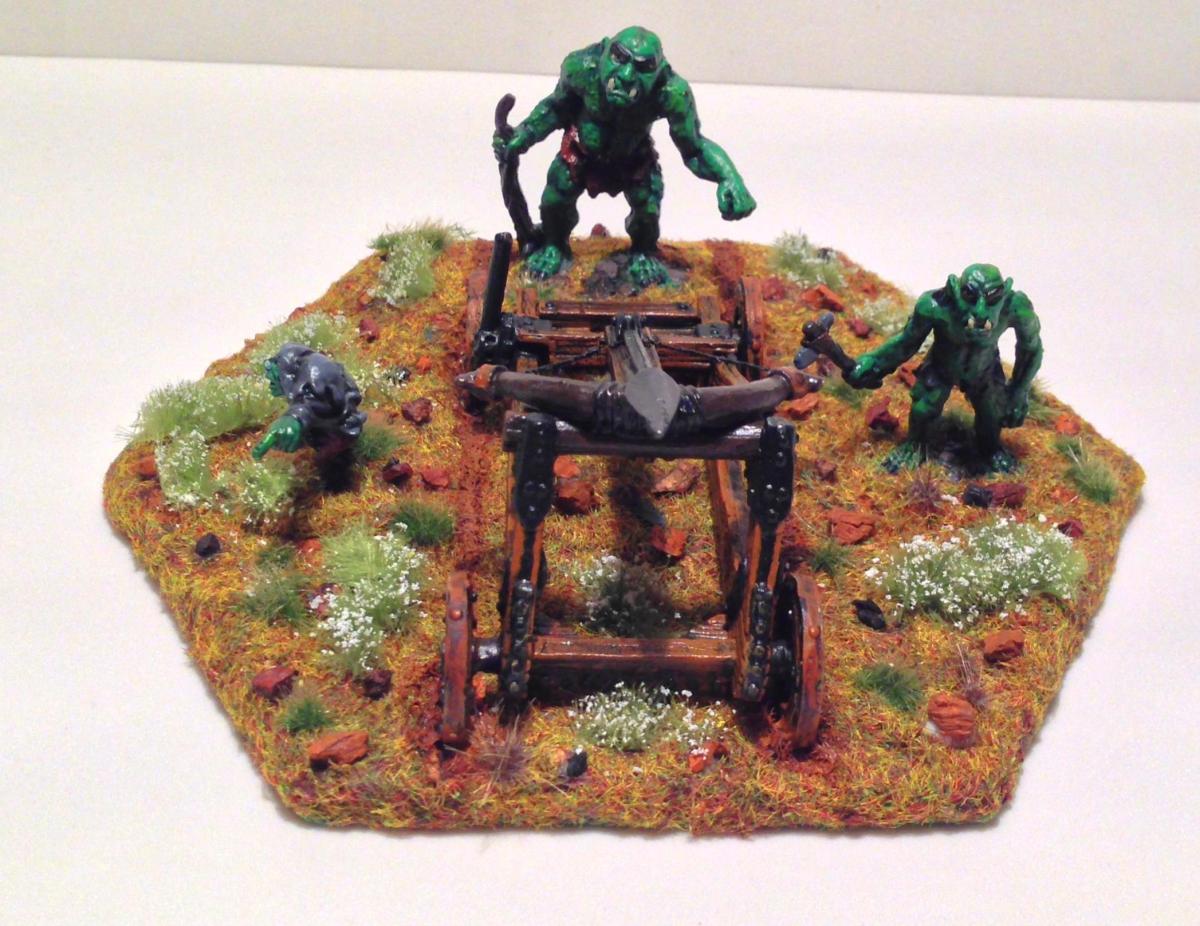
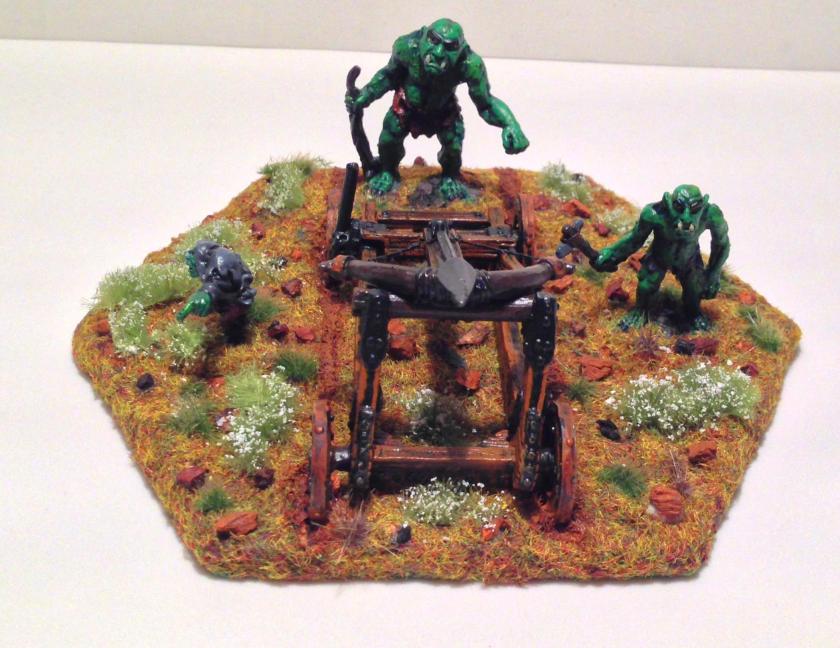
My concept was to craft a hex base large enough to deploy the set. I cut out a hex base from 1/8″ plywood (luan), and primed it with Deka-Lack “Grun”. On the bottom of the base I glued several washers for the model to be stored on magnetic sheets. I flocked the base with Ziterdes “Alpine Meadows” and painted any rocks “Skrag Brown”. Using my Dremel, I carefully removed enough wood to install magnetic sheets in the base so that I could have the crew leave the ballista. These sheets proved insufficient to the task in terms of being able to hold the figures to the base. I fixed this by drilling 1/4″ holes with a spade bit and adding neodymium magnets (1/4″) in the middle of each base. These are powerful magnets. The figures can hang upside down from the base without falling now!
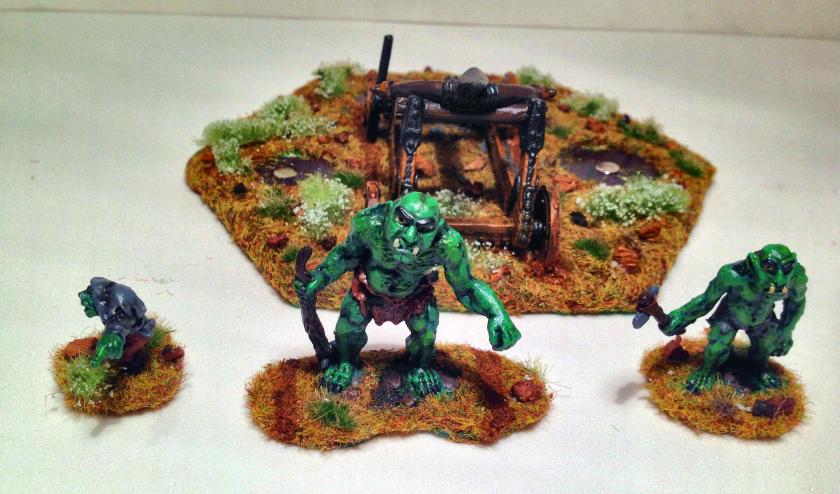
I wanted the idea of the model to be that the large Troll was the locomotive force for the large ballista, with the other Troll being the loader and the small Troll the gunner. The large Troll would push the ballista through the turf leaving wheel ruts. Therefore, I used more “Skrag Brown” to create the image of the wheel ruts. I then reflocked the bases of the figures and the main base and added more rocks, grass, and meadow flowers from Army Painter. After a couple of iterations, I was able to disguise the fact that the crew could be removed.
The initial routing for magnets and slots for ballistaFirst shot at magnets and flockingBefore addition of 1/4″ neodymium magnetsFinal frontal view of the modelGunner side viewLoader side view
Rear view angle Crew detached – note neodymium magnets in the center of where figures are mounted Large Troll, Frontal view
Large Troll, reverse sideMedium TrollMedium Troll reverse sideThe Hunchback GunnerThe Hunchback Gunner, reverse side
All in all, I am happy with the way that it all came out. I like the deployability of the crew, and will use this technique in other models. I hope that they are fun to control in my next game!
Certainly Iron Winds Metals is attempting to outdo its Kickstarter project from last year!
There are a LOT of options here and anyone who wanted to get in would certainly find much here to be desired. Unlike last year, the miniatures will be shipped as orders are filled. It ends soon – and these are great Ral Partha figures!
Kudos to IWM – this is pretty impressive. I am still working through my projects (like last year’s Kickstarter!), which is the only thing holding me back!
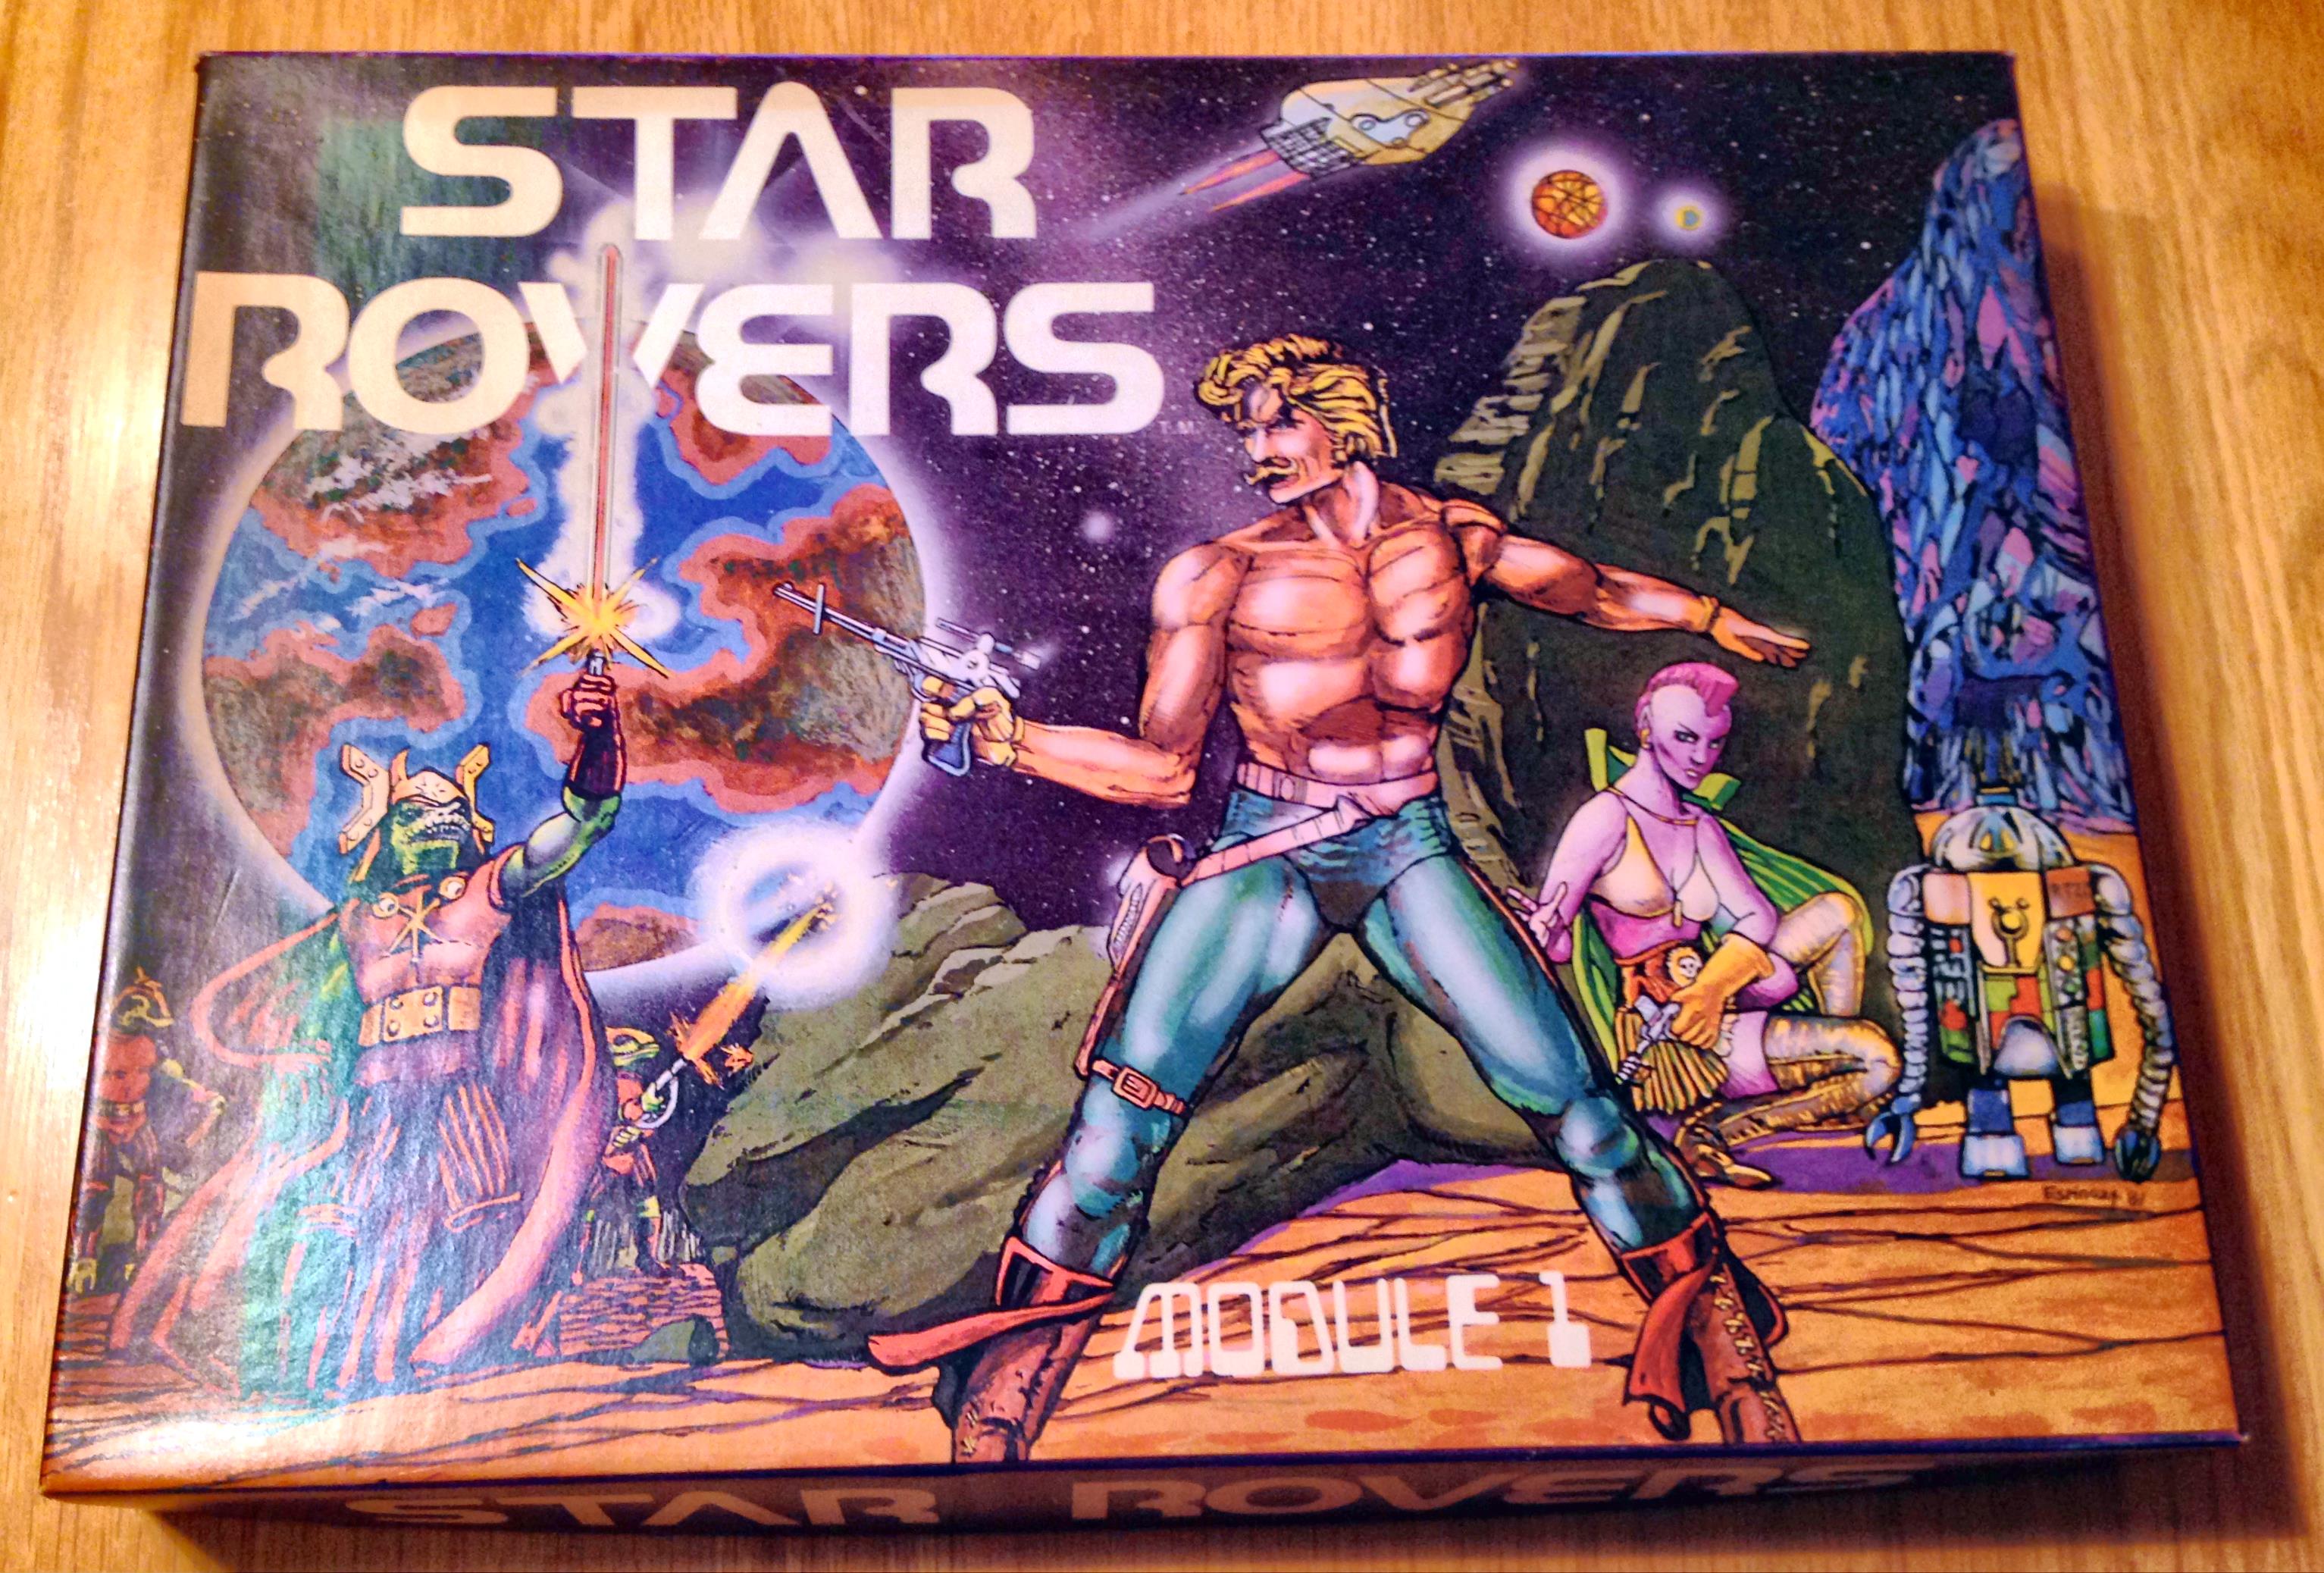
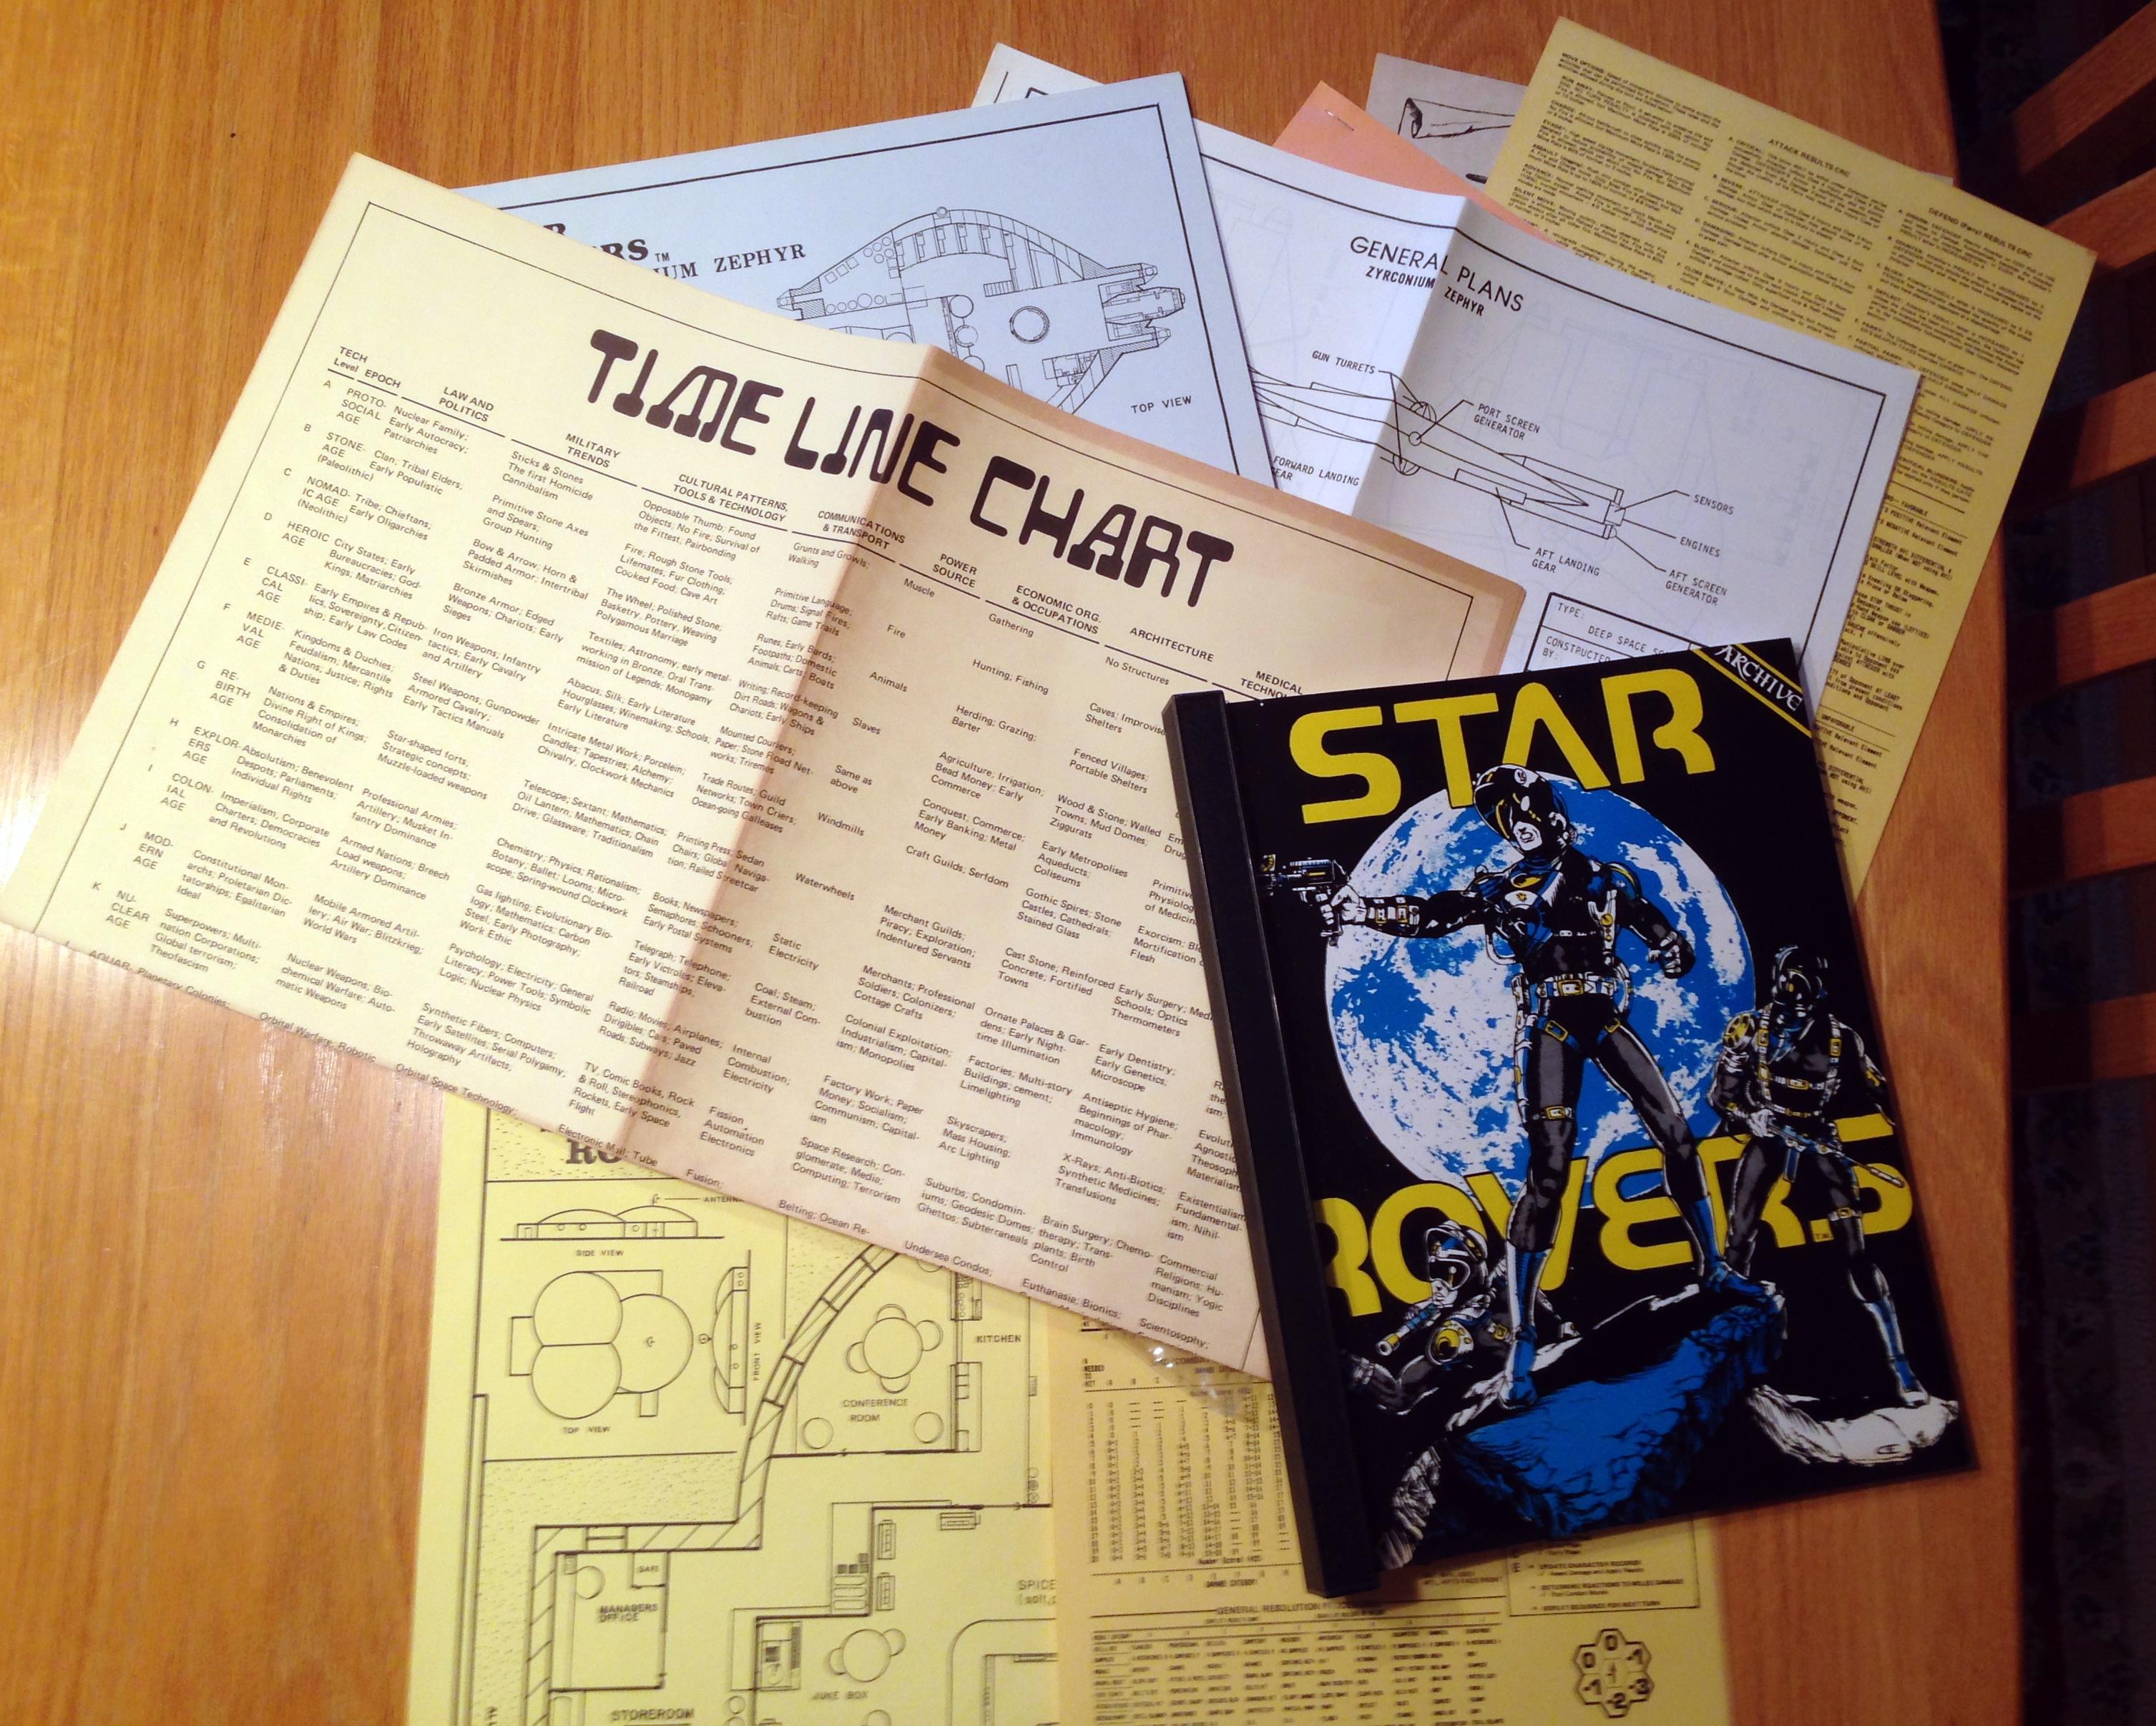
Having recently discovered how cool the miniatures from Archive Miniatures “Star Rovers” line was – I was interested in getting a copy of the game. Thanks to eBay, I got a brand new one at a reasonable price.
It was an sci-fi RPG from 1981. While it was “Module 1”, I do not believe that any other modules were printed.
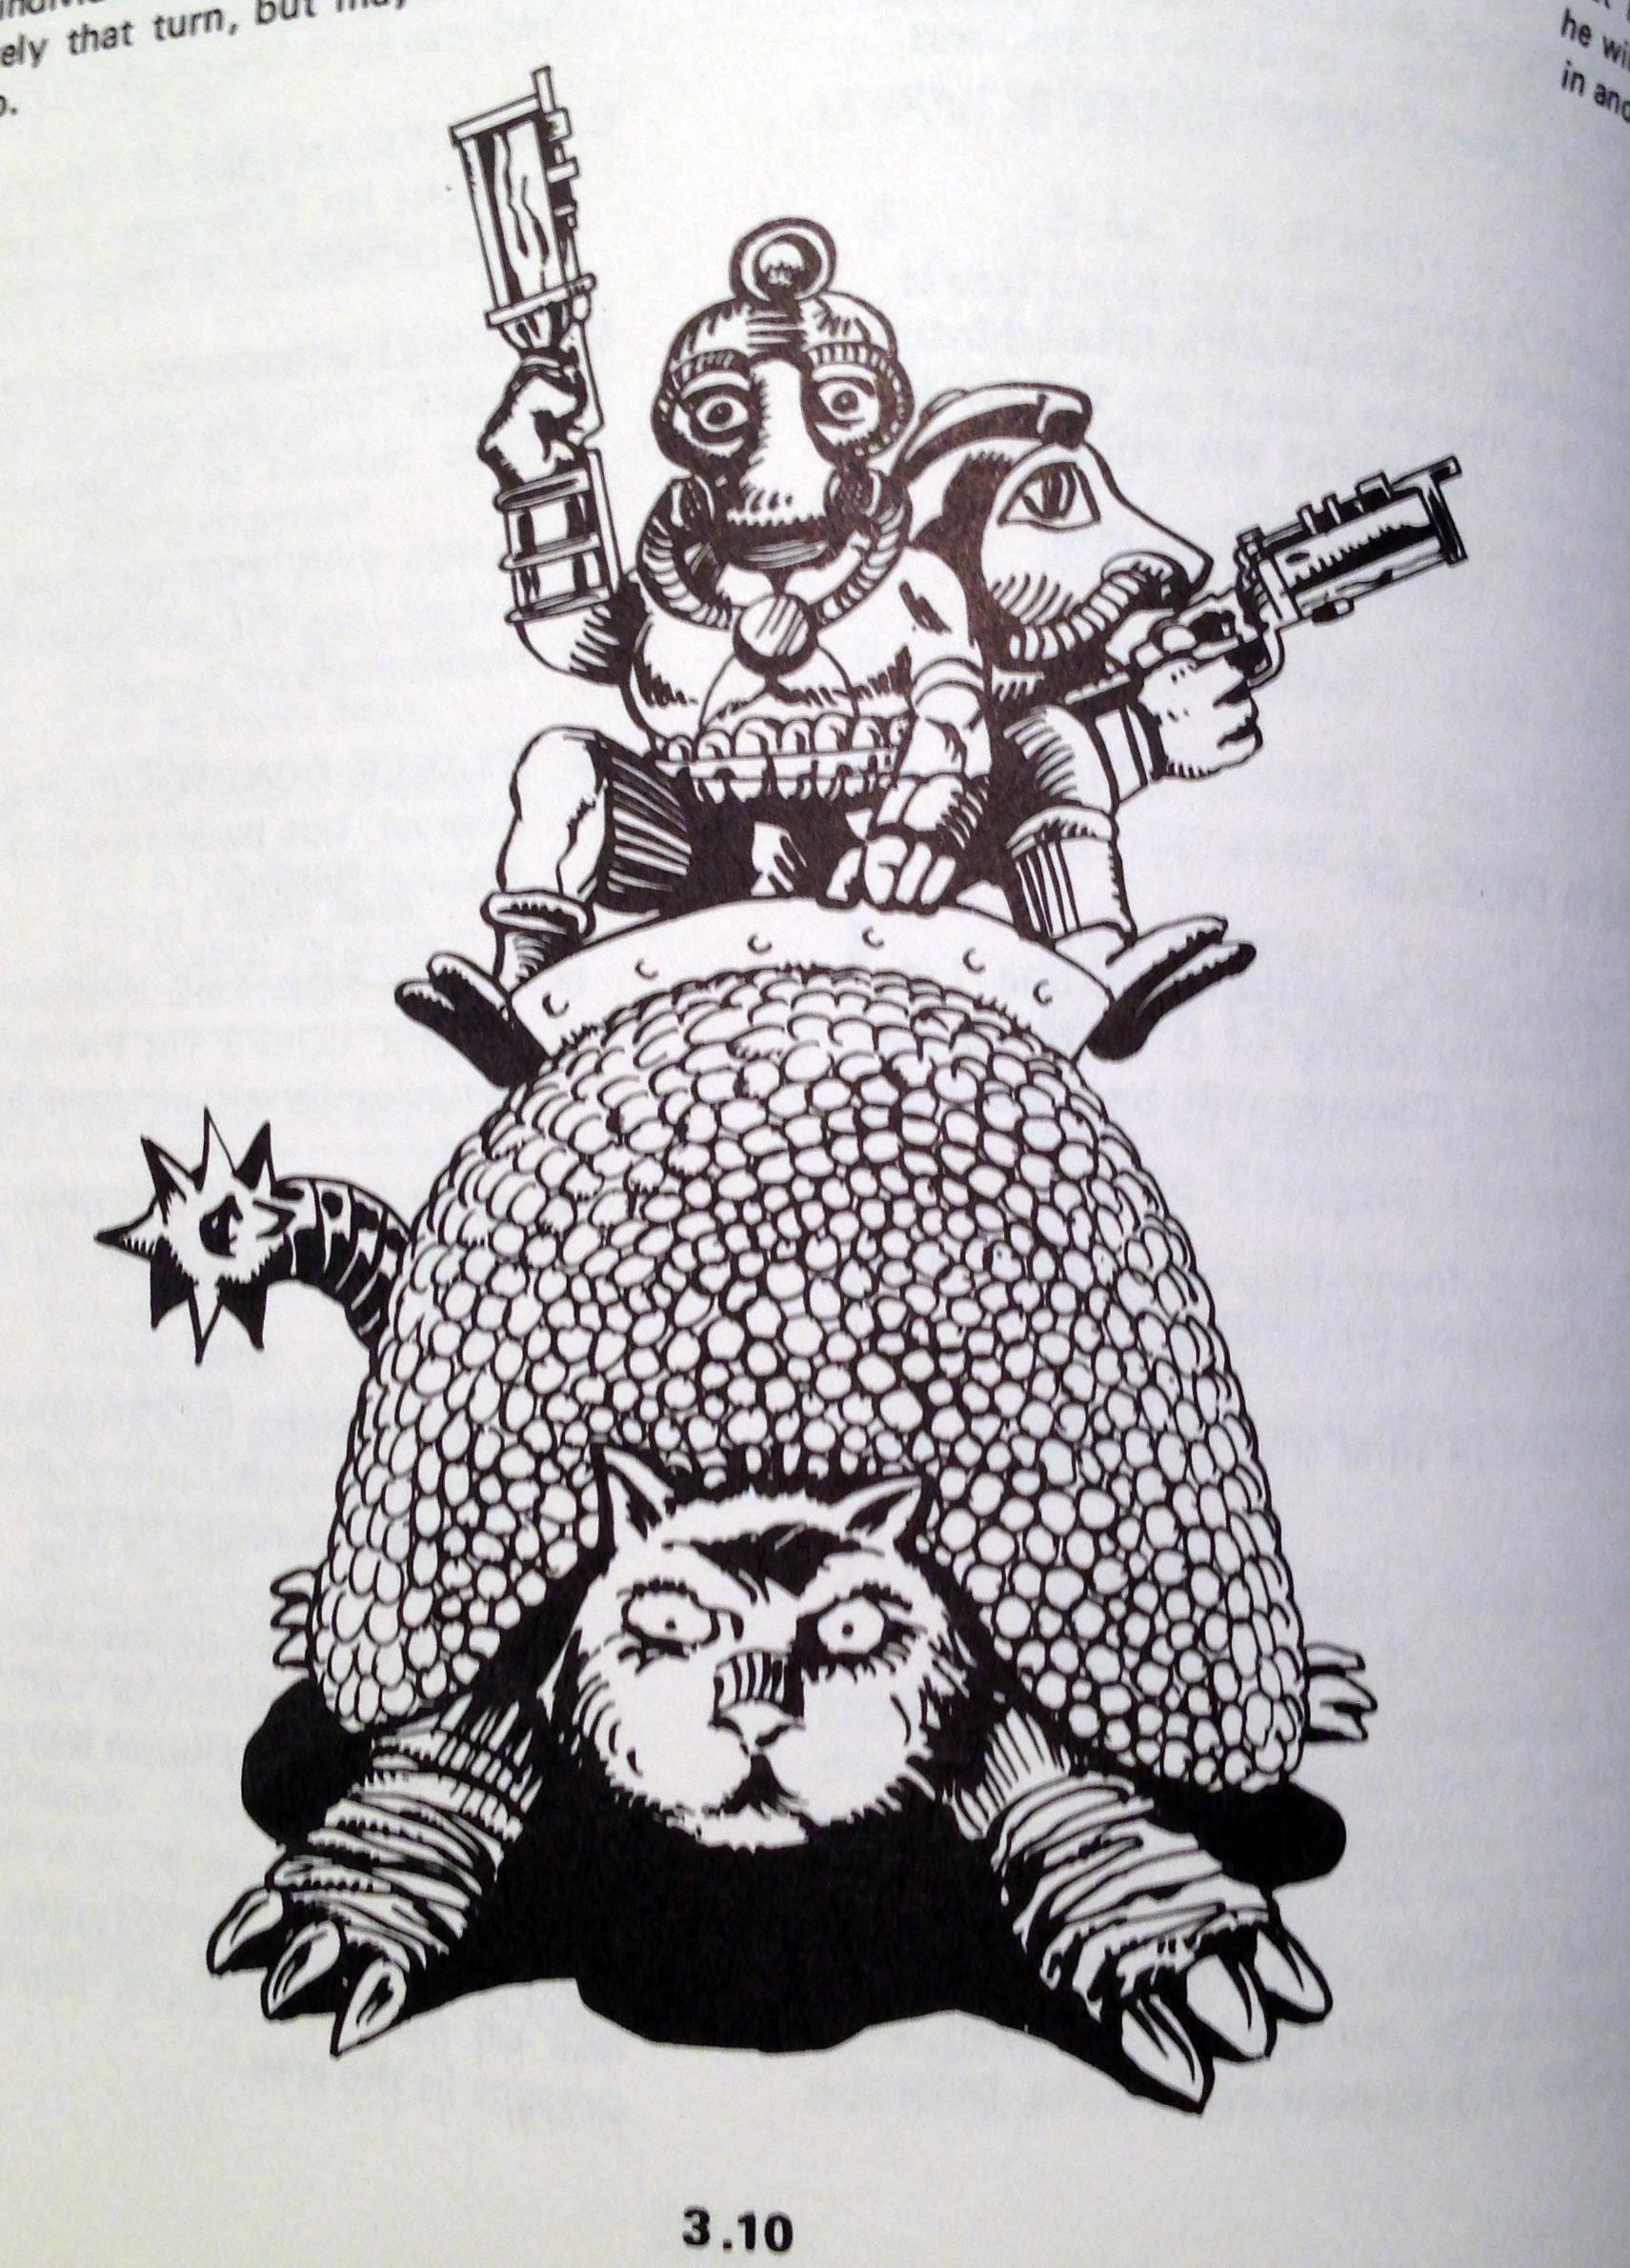
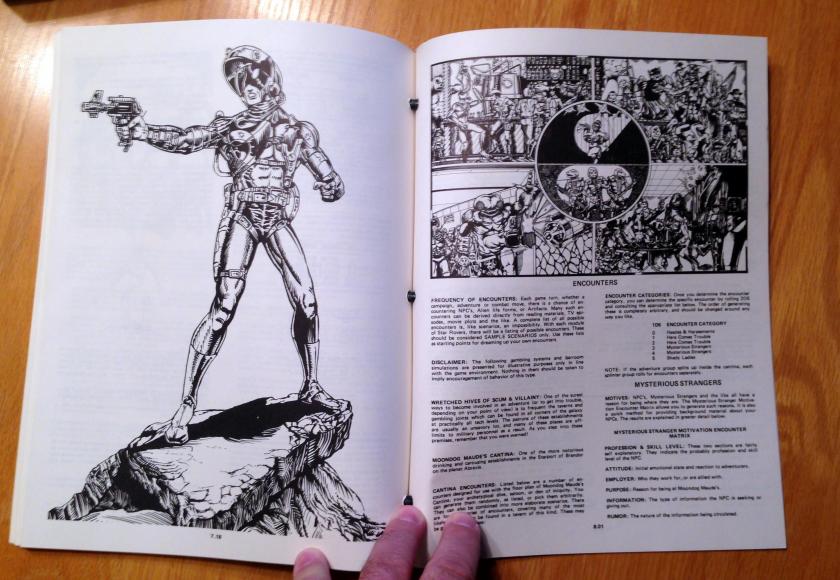
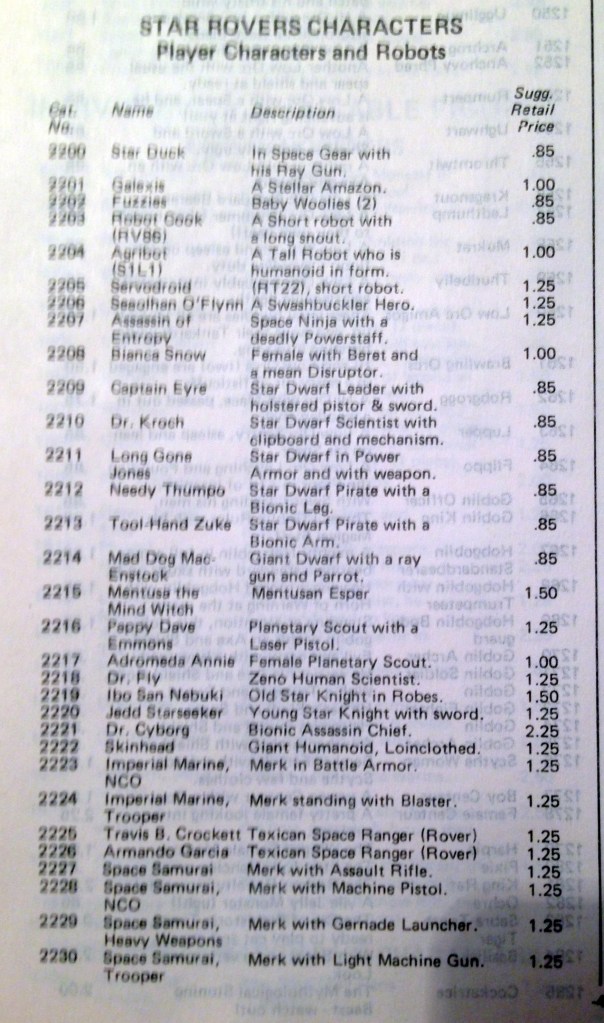
The game looks pretty cool – and there was a lot of cool artwork. As I have been amassing Archive Miniature Star Rovers figures like Star Ducks and Power-Armored Frinx, I am hoping that reading the game will help me. Also, there was an original Archive catalog in mint condition in the box as well.
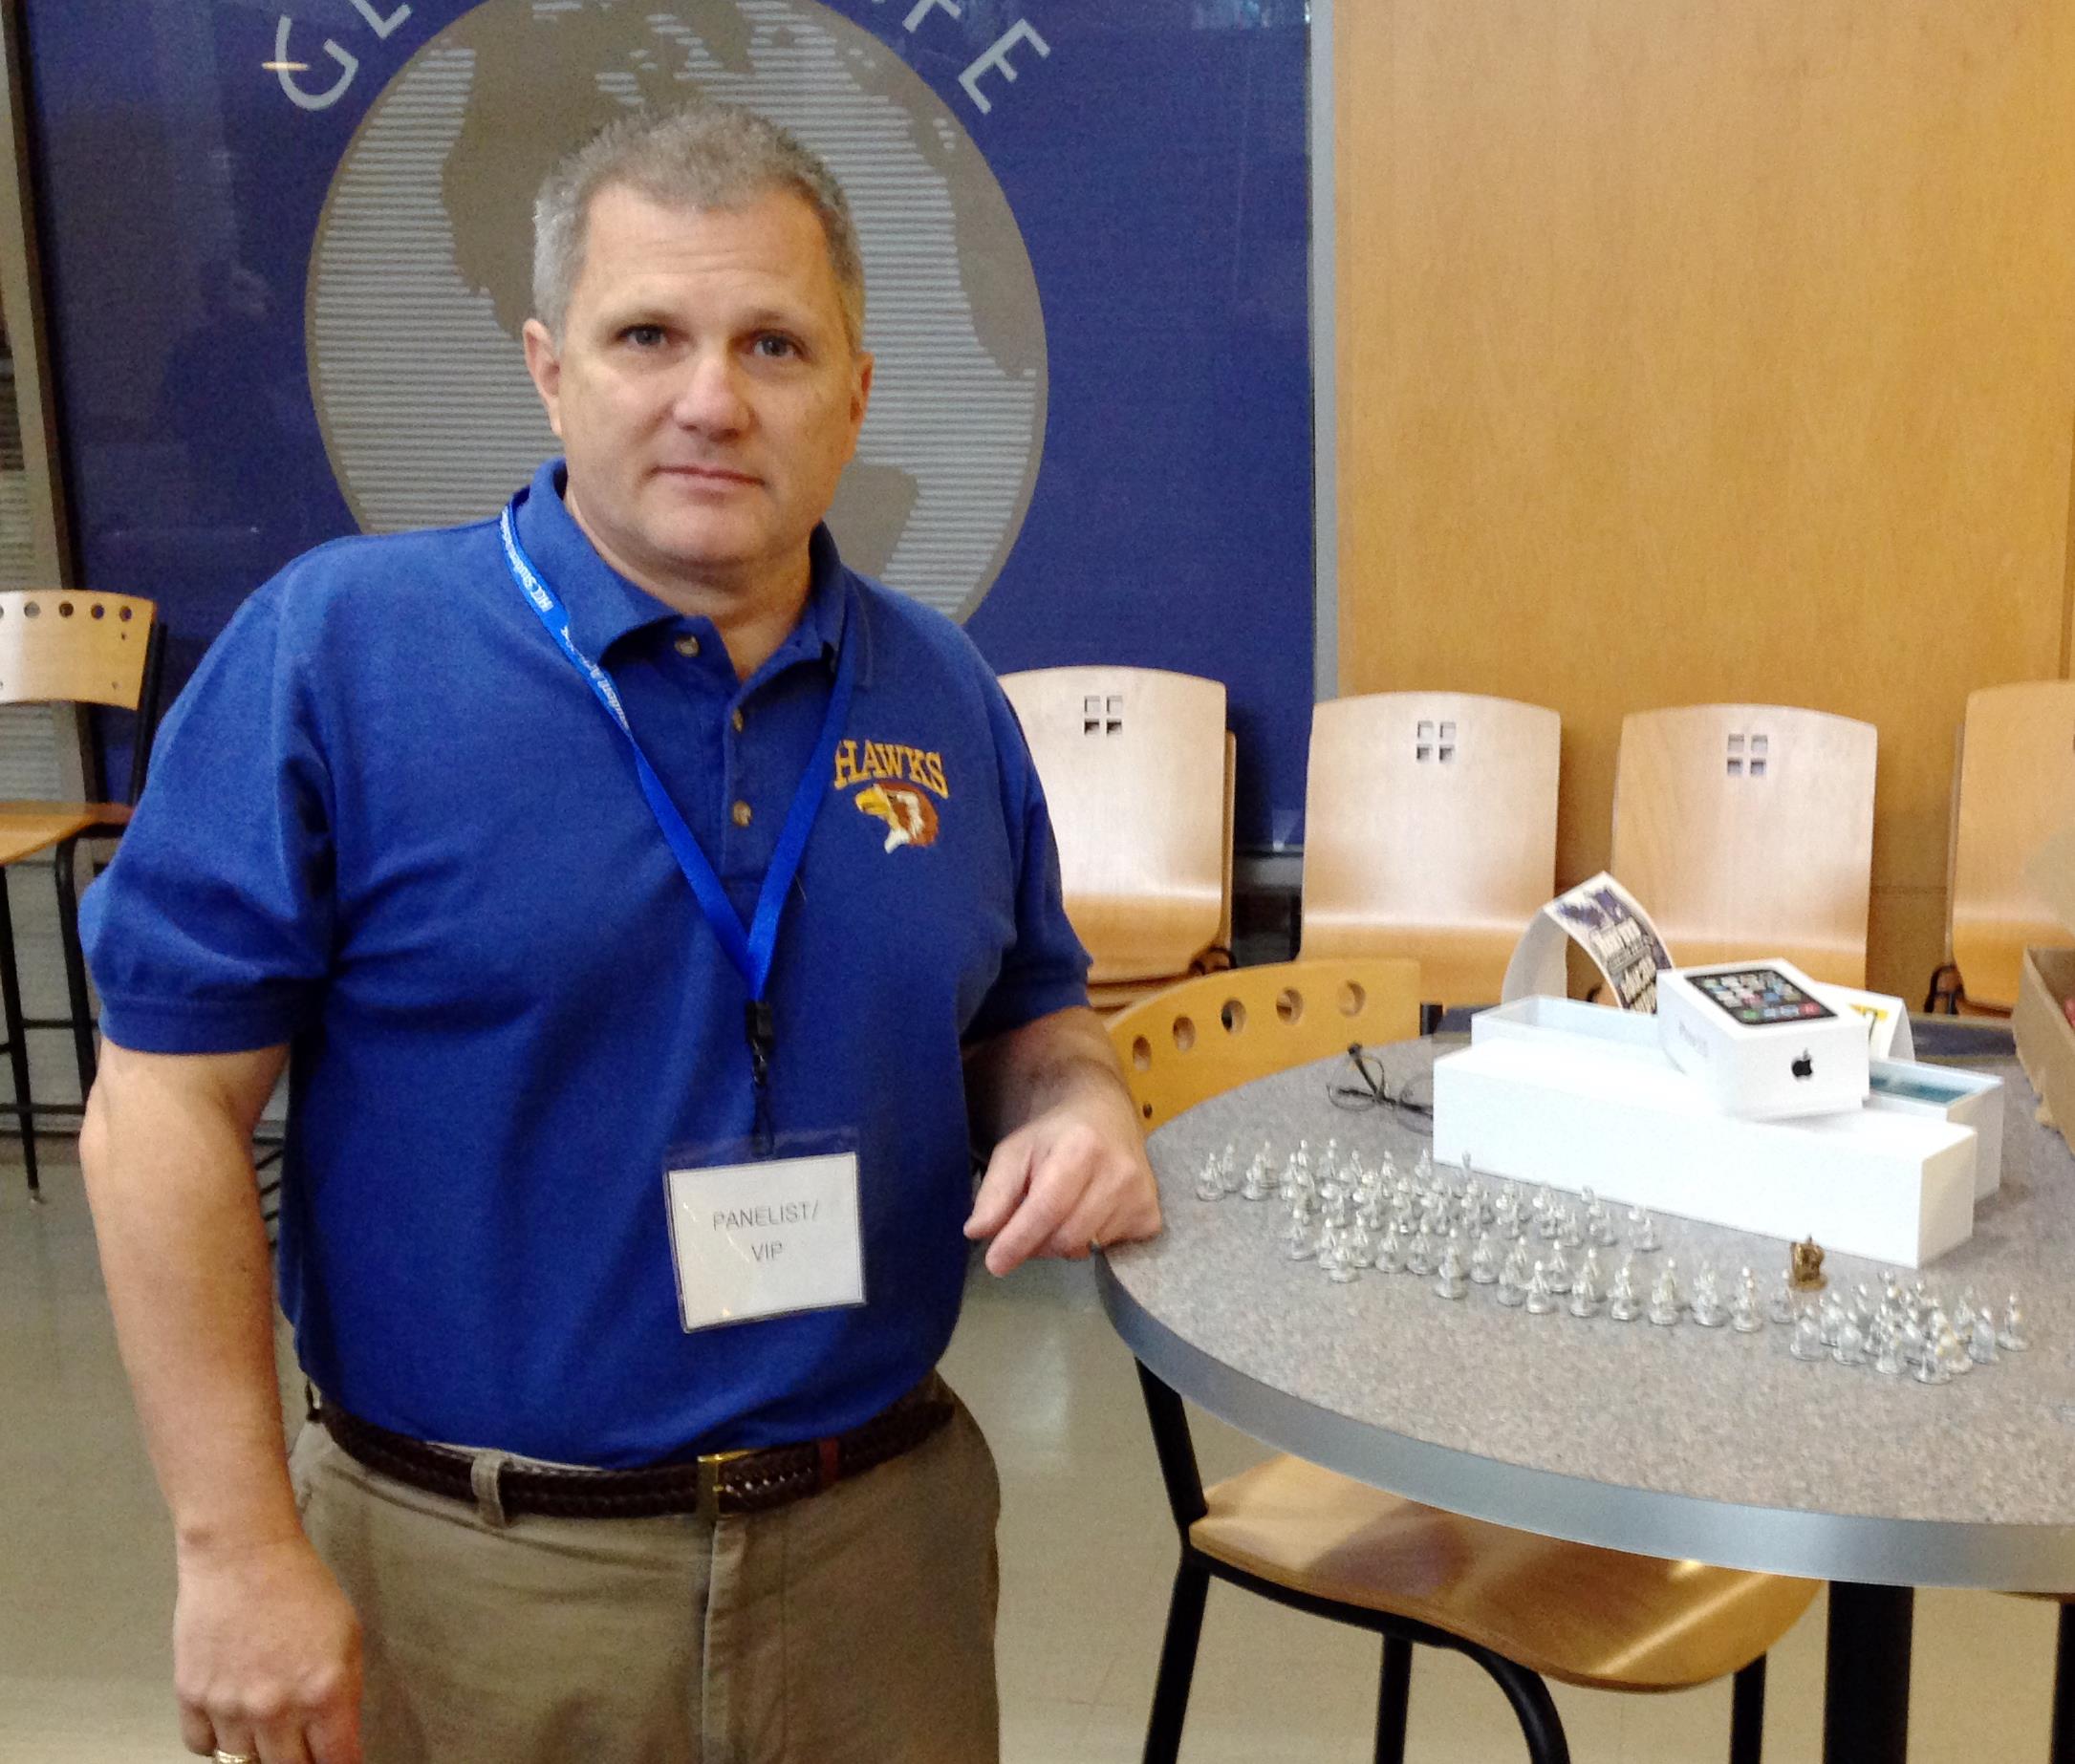
I was fortunate to be able to meet with Dave Wood for a couple days in Abingdon, MD (let’s call it WOODCON) and with Buck Surdu at the Harford, MD HARCON in the last week of April. To round out the month of April, what could be better than getting together with friends and getting some gaming in? Plus, I got to deliver to both the miniatures that I had been casting for them that have been discussed extensively in this blog. Dave got Roomans and crossbows, while Buck got Star Ducks, Power-Armored Frinx, Roomans, and crossbows. I also supplied him with an Apple watch box and an iPhone box for his sci-fi Combat Patrol project.
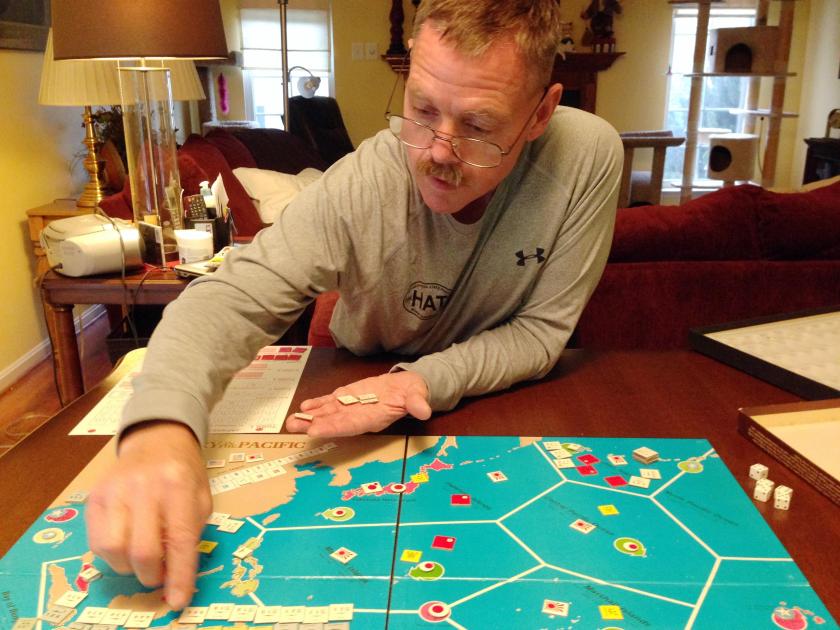
Dave and I started out with a game that we had played probably dozens of times back when we were roommates at West Point. It was the old Avalon Hill game Victory in the Pacific. Its a board game simulating the naval conflicts in World War II. I played the Japanese, and lost to Dave in the last turn, but it was a nice time.
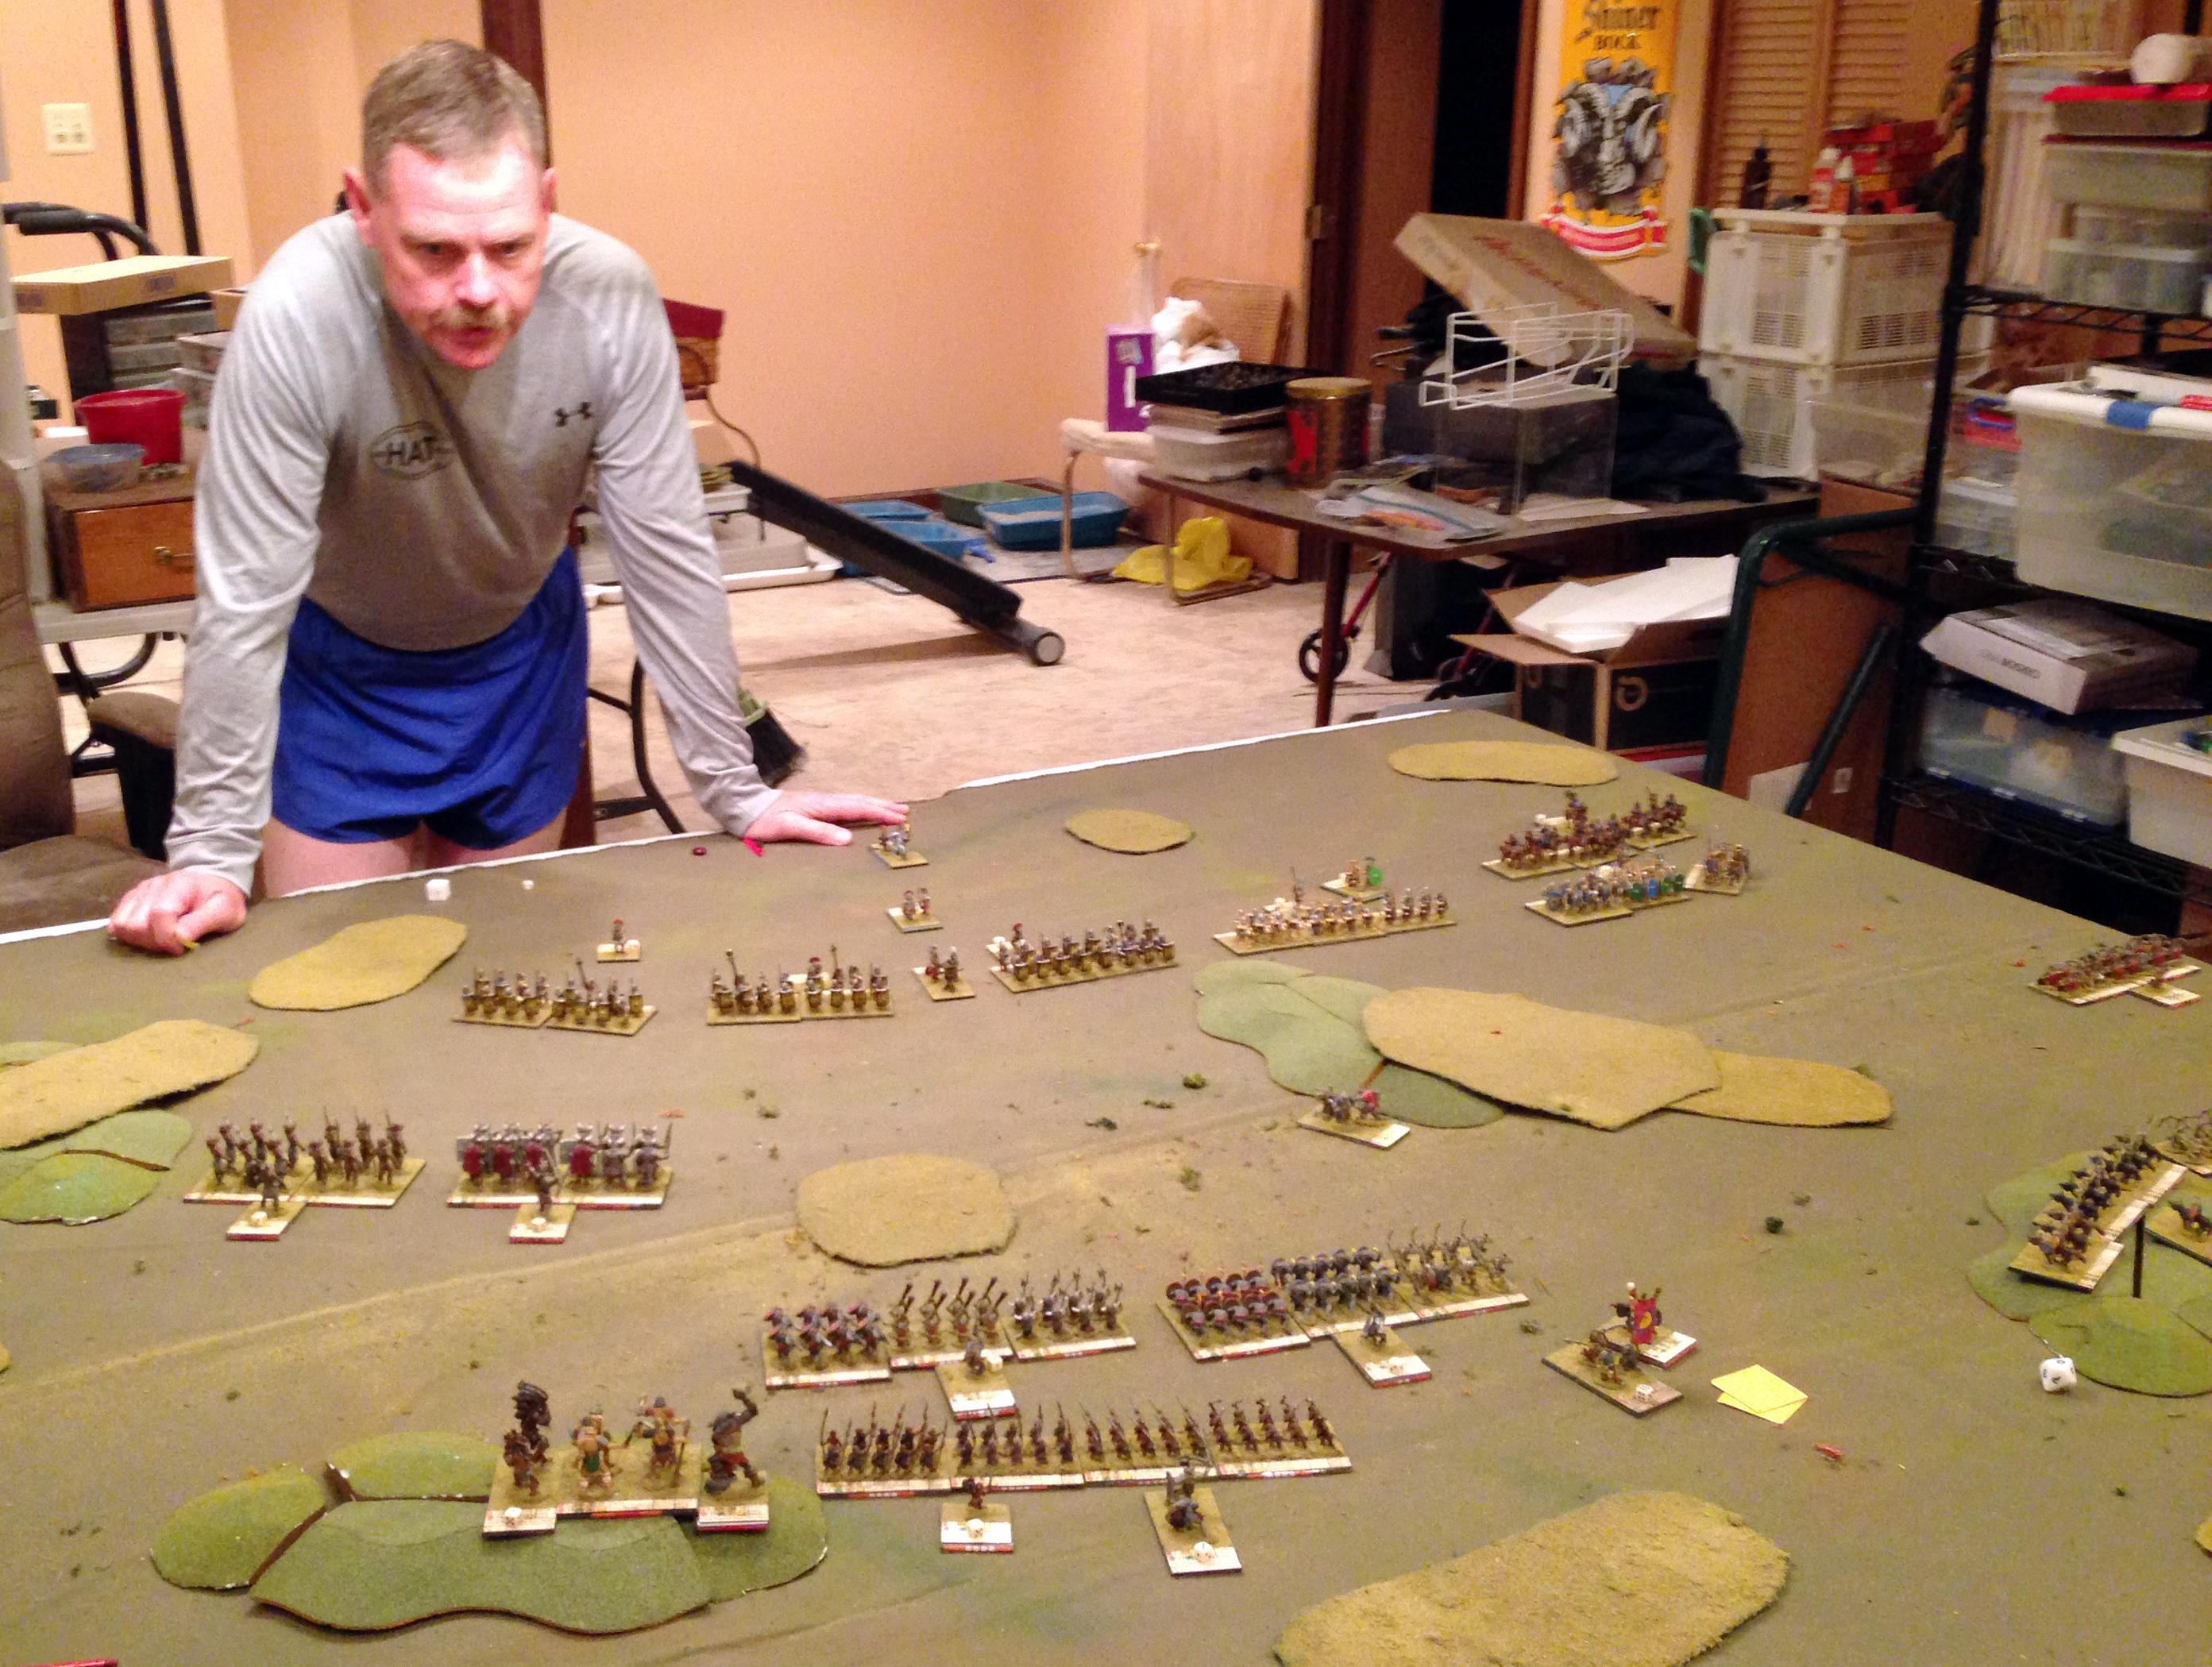
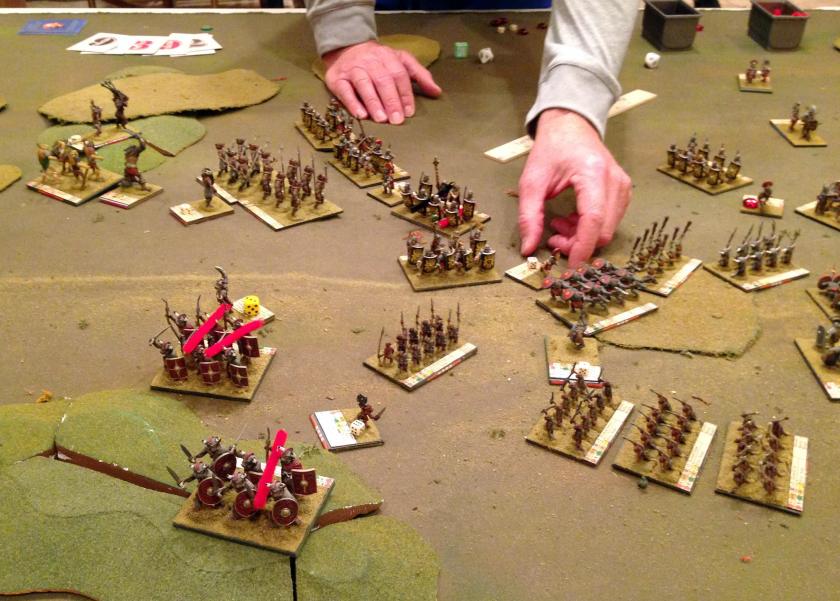
The next day, we started by getting in a fantasy game with Romans defending against a horde of Orcs, Goblins, Minotaurs, and some other bad guys. I wanted some more experience with the Bear Yourselves Valiantly rules, and Dave was happy to help. I took the bad guys side. The highlight of the game was being able to use a spell on an Orc ballista which was then able to hit his overall Roman Army Commander. Luckily, Dave was able to get that commander safely out of the way of the ballista, so he lived. Dave’s Roman Legions did a number on my Minotaurs, while my Goblins and wargs had better luck with his Roman Auxiliaries. We called it early (I think Dave would have prevailed easily) so we could get in some game play with Buck’s Combat Patrol rules.
Starting positions – Romans on leftDave’s Roman Legion dispatches the MinotaursThe Orc Ballista hits the Roman Army Commander (with the help of a spell)Melee in the MiddleThe Roman Auxiliary Commander faces an Onslaught of Goblins on Wargs
The scenario we used for the Combat Patrol game was Boers versus Zulus. I took the Boers, and it was a great skirmish game. While I own these rules and the card decks, I had not yet played with the. My hats off to Buck and Chris Palmer on putting together a really nice system.
Here, I was able to hold off the Zulus, although not without casualties. In fairness, Dave did give me a substantial advantage in forces.
Boers hold the line against ZulusThe Boers Survey the Carnage
The last thing that Dave and I got to play was another Victory in the Pacific game, with us swapping sides from the previous game. As the Americans, I was able to win. We both feel that the Americans have an advantage in the game, which is counter to what you might see in the Wikipedia entry! Anyways, thanks Dave for a great time, and thanks Brenda for letting me borrow Dave!
Of course, I also have to thank Dave as he loaded me up with some great Thunderbolt Mountain miniatures (that eventually I will paint!), and a few others.
Dave plays the Japanese Empire in Game 2
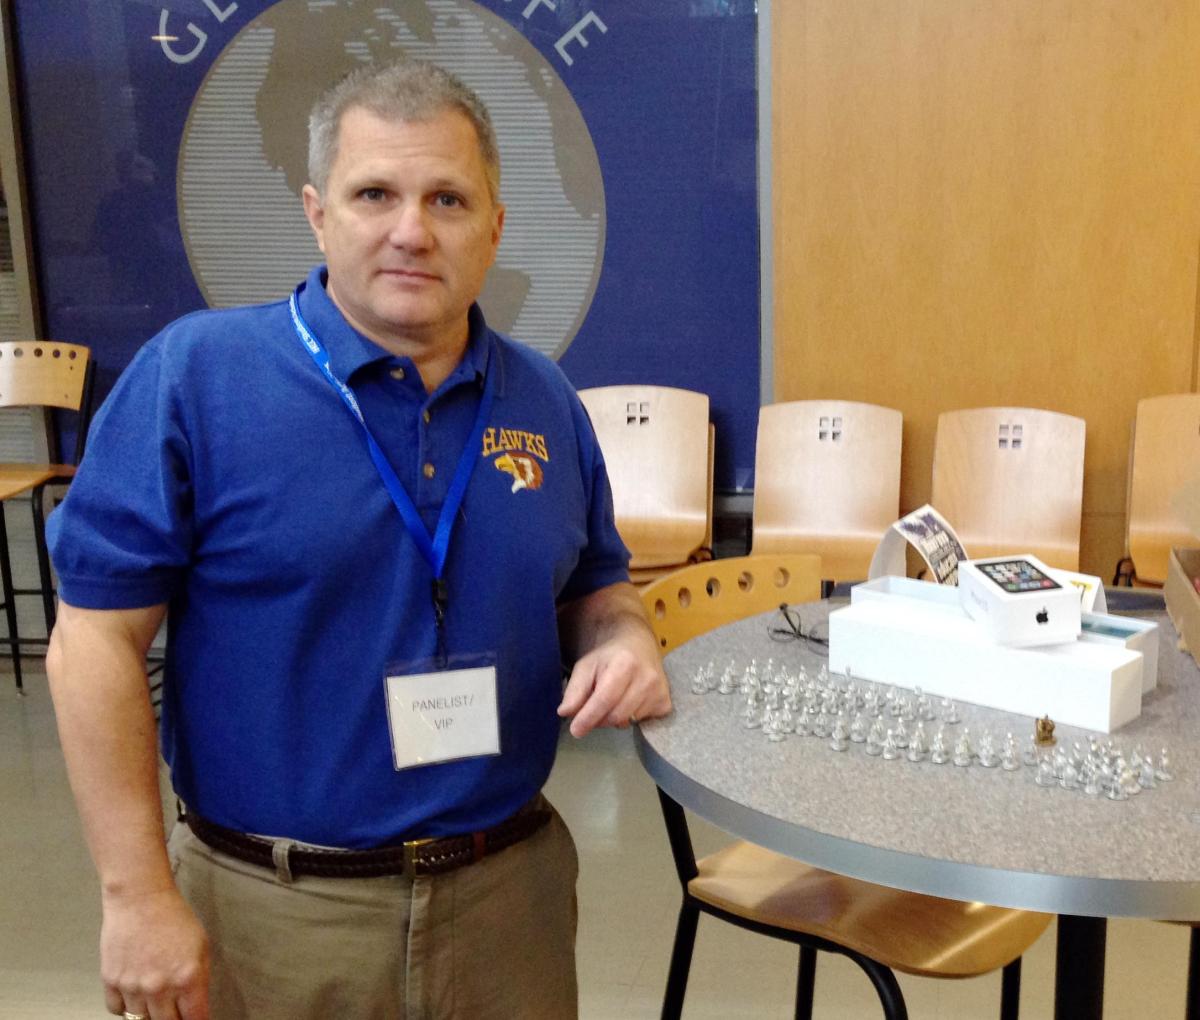
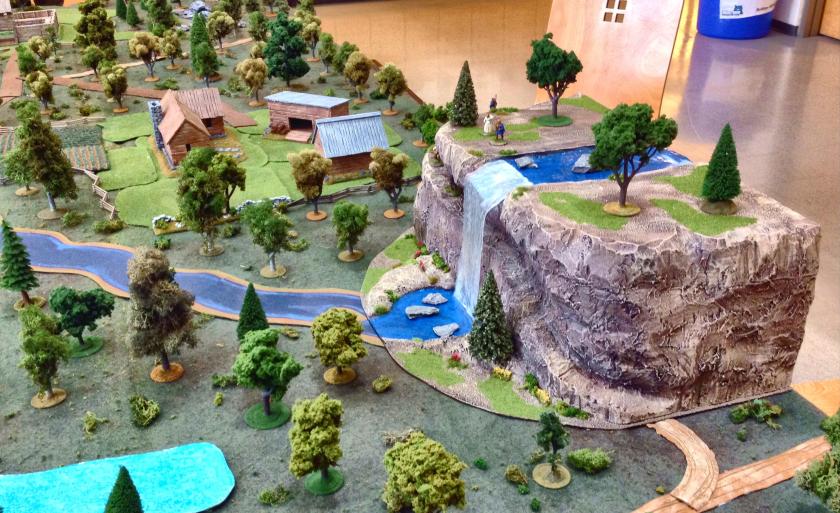
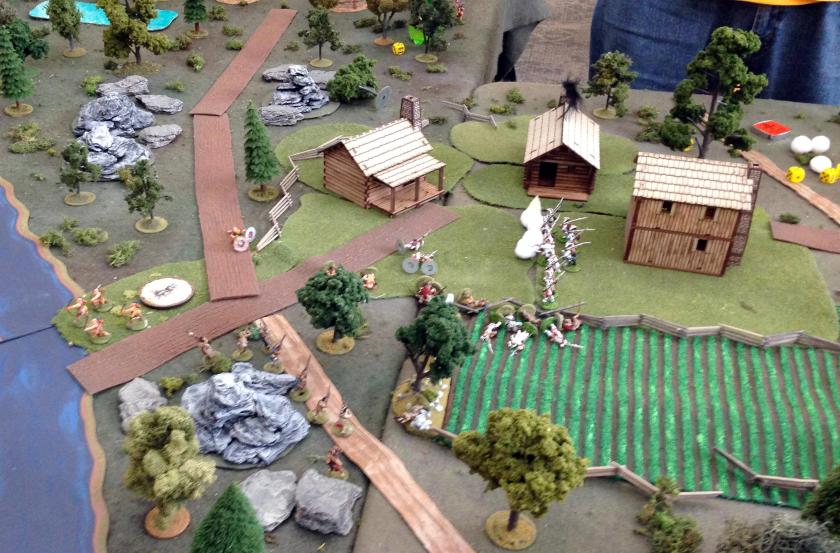
On Saturday I attended the HARCON with the HAWKS. It was great to hang out with Buck again, and the Muskets and Tomahawks game (French and Indian War skirmish) was a blast. I got to play twice. As you can see, the tabletop was phenomenal!
The first game I had three groups of Iroquois (British allies) who had to raid a trading post and burn down half of the buildings (there were three so hmmm). I went up against Kurt, who luckily for me did not get his Huron allies until later in the game. Still, he conducted a great defense and I only burned down one building. Great GM’ing by Don!
Between games, there was a nice seminar about game design with Buck, Chris, and Zeb. That was very interesting!
The second game was against Eric, and I took the French side. That game come down to a final roll, where Eric charged my French officer with the Iroquois sachem and another Iroquois warrior. I had one other French figure left, and my office pulled a rabbit out of his hat and died dispatching the attackers. Here, Kurt was a great GM!
It was a great day and thanks again to the HAWKS who made me feel welcome yet again!
Buck gets his Star Ducks, Power-Armored Frinx, and RoomansMuskets and Tomahawks TabletopGreat Looking Waterfall!My Iroquois attempt to flank the French in the first gameAfter a close assault, my Iroquois take some leadMy Iroquois got around the building and ignited it, but the French fought backThe building is burned!In game 2 against Eric, the French save the trading post!
This weekend was cold and blustery. Definitely no golf! Saturday was cold and rainy, and we got 5″ of snow on Saturday night, and 5″ more all Monday – kept me looking for Spring!
I took the opportunity to make a couple of more molds on Saturday. I made another Rooman War Party mold of the smooth shield Rooman from Ral Partha 01-044 or ES-44 (1977 miniature). I also made a new mold for eventual sci-fi play with Buck Surdu’s “Combat Patrol” rules. This was a 1981 “Power-Armored Frinx” (2040) from now-defunct Archive Miniatures “Star Rovers” line. From what I can see, a Frinx is a goofy reptilian biped. He could be armed with a large gun or a flamethrower, or perhaps a blaster? The figures looked cool and worthy of casting. I made both of these two molds a little longer and less wide.
Power-Armored Frinx Mold Half
Sunday came, and with it the miserable cold, wind, and snow. Undaunted, I set up my operation in my unheated garage. When the wind got too strong, I just shut the door- which was most of the day.
Ahh, April in Massachusetts! My casting operation is set up in the garage.
I was able to have a much lower melting temperature than my last efforts ( a range of 360-400 °F versus 600-650 F°). The flow was better and more manageable. As I got the hang of it, my castings got better, even with molds that I thought I might have damaged with the higher temperatures on my last casting. With six molds, I was able to crank out 82 miniatures, which really was satisfying.
A Regiment of Roomans
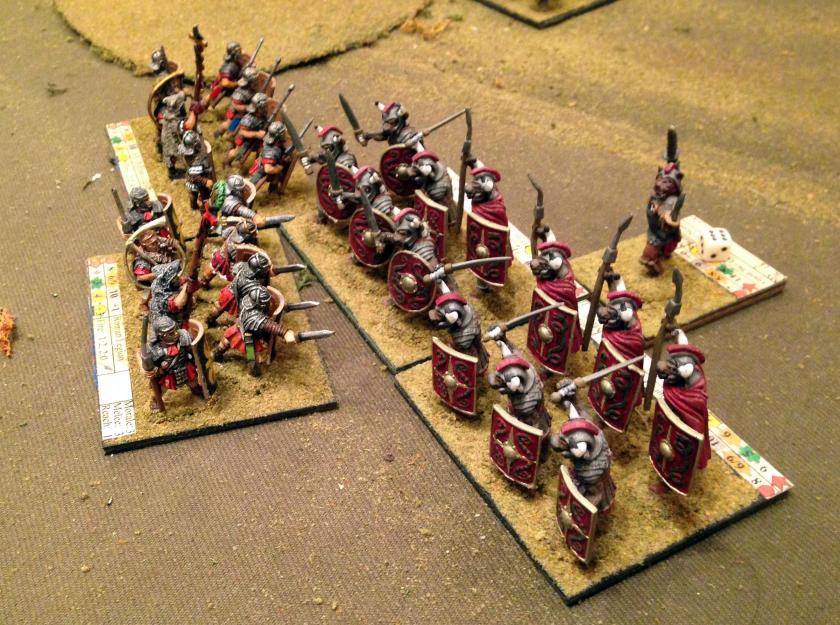
I had a total of 83 Roomans now, enough to complete my units, with a battalion for friends Dave Wood, Buck, and my daughter Ellen. In the process of cleaning up flash and doing Quality Control, I ended up putting 8 into the recasting collection – but that just left me with the best of the Roomans left for myself, Ellen, Buck, and Dave. Some were better than others – but all in all they should paint up nicely and could have a variety of weapons and not just their original pikes.
Rooman Regiment Close Up on Command Group
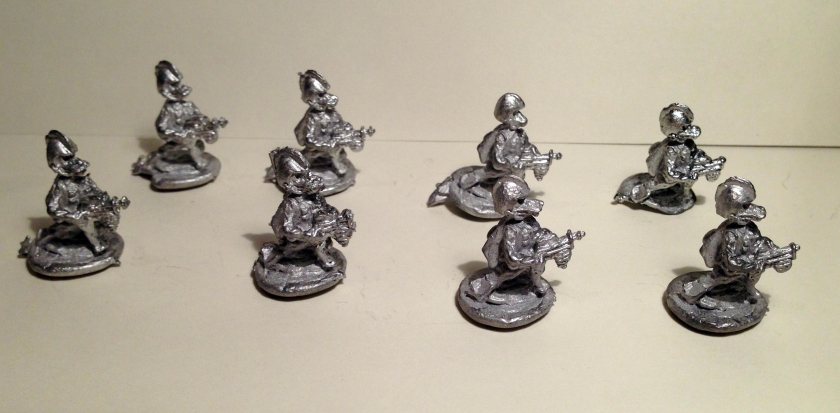
The Archive Star Ducks (2200) came from the “Star Rovers” line. These were a challenge as their ray guns did not always come out. I decided that the Star Ducks with truncated Ray Guns looked like and would be armed with submachine guns – and be just fine. With some practice and the new alloy, I had greater success as the afternoon went on, and ended up with a total of 14 armed with ray guns with 8 with submachine guns.
Star Ducks with Ray GunsStar Ducks with Submachine Guns
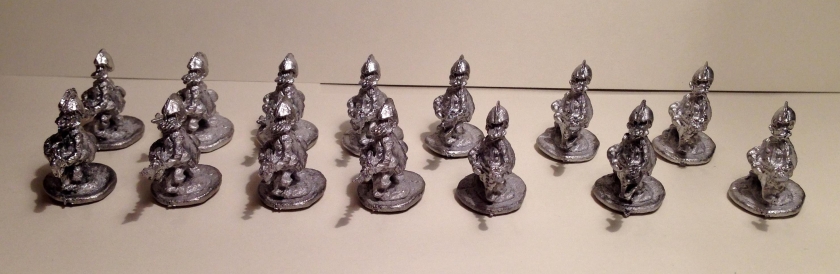
I was very pleased with the Power-Armored Frinx figures. The longer molds allowed me to get more details into the molds by tamping and rotating them after filling them with the molten metal. I ended up with 14 of these Frinx, and I can’t wait to see them get the Surdu touch!
Power-Armored Frinx
I had several key learnings from my efforts.
I found that longer molds are easier than wider ones for casting.
Using an alloy with 50% tin as described above was a lot easier than using plain lead, in terms of being able to use lower temperatures as well as better flow.
Each figure averaged 0.39 ounces of the alloy after recycling plugs and flash. With that ratio, I could cast 25 figures from 10 ounces.
I think six molds is the perfect number for quality production and safety.
The Quick-Sil is a great material to make molds with, but you need to be prepared to have an Exacto knife to add venting gates and open channels. Luckily, Quick-Sil is easily cut. If the mold needs adjusting, do it with the Exacto knife.
After pouring, tap/tamp/bang gently and rotate the mold to get the metal into the details.
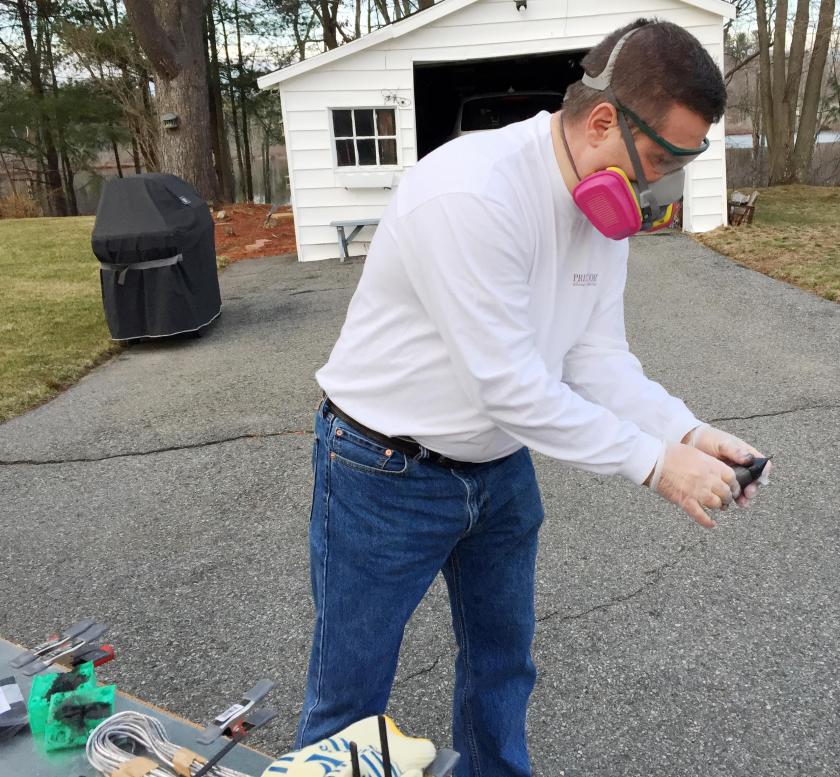
Safety is paramount. The molten metal can indeed fly around, and it is HOT. I would not even think to try this without heat-resistant gloves, eye protection, and a respirator (breathing lead fumes is not a good choice). Having all of my skin protected is important, as well as anything that could get hot metal on it, like shoes, pants, long-sleeve shirts, etc. Protect your workspace too. I use steel sheets to insulate my work bench, which also has the advantage of making splattered metal easy to clean up and recast.
This was a fun project – and I am so happy that now I can round out any unit of out-of-print miniatures as long as I have one to mold and cast.
On Easter Sunday after dinner, Chris Smedile and I were able to crank out 6 Archive (1981) Star Ducks (#2200 from the “Star Rovers” line) and 22 Roomans (both types from Ral Partha “Rooman War Party”). I made two molds earlier in the day and we had fun trying to get the casting process correct.
First mold half for the Second Rooman ModelStar Duck Ready for MoldingMaster Star Duck for Casting
Thanks to Chris there was a good number produced. Two of the Star Ducks did not have their ray guns fully formed, but ended up looking like they had submachine guns, so I kept them. The other four were good, and had flash that looked like the guns were firing – an unexpected bonus.
The Roomans mostly came out, but some were remelted for recasts. Some were missing an ear, which my daughter Ellen Morin described as “battle damage”!
Still have more to do but having fun making them – and even more fun doing them with Chris!
Back when I was at West Point, I was introduced to “Roomans” by Buck Surdu. He had a unit of them armed with pikes. He had painted them green and called them “Beaks”. He even had altered one to be armed with a sword and gave it a scratch-made airborne beret – I think that Buck still has them!
Over the years, I looked for them in hobby stores and only managed to find one package of three at Eric Fuch’s hobbies (I think in the mall at Burlington, MA – the shop long ago went out of business I believe). Ral Partha first cast these figures in 1977 as part of their “Personalities and Things That Go Bump in the Night” series as “Rooman War Party”. Originally, they were ES-44, and later 01-044. In fact, they were kangaroos (think beastmen) and did not have “beaks”, and were armed with piano wire pikes. Two of the three figures in the pack were the same with a smooth shield on the side, while the third had a riveted shield that was held in front. With the advent of eBay, occasionally I see some, but very infrequently. Sometimes I’m lucky – and have even found one ES-44 in its original packaging. Other times I find one or two in a lot mislabeled as goblins or just loose in an estate collection that I’d have to strip down. My goal was to get to 36 Roomans , and then paint them up at once.
As part of my search, I contacted Iron Winds Metals and they told me that unfortunately the old molds for the Rooman either no longer exist or cannot be found. I was able to get some of the piano wire pikes from them however which was appreciated!
So, as I cannot get them from the folks who made them, I made the decision to see if I could cast some and make my goal (these are for personal use and I have no plans to sell them although that seems to happen a lot on eBay – I wish that I could buy the originals!).
I have cast figures before with some Prince August molds back in the 1980’s. However, I was not using the right safety equipment back then to say the least (no respirator, no gloves, and heating on the gas stove in the kitchen). I did not have any way of checking the temperature of my metal, which was a mish-mash of old figures, modeling metal, fishing weights, and any lead or tin I could cobble together. My results were less than great, but acceptable – and any bad figures just got recycled into new ones.
I looked at some ways of making a mold and casting again, and some required a spin casting set up (not happening don’t have the space), vulcanizing rubber molds in my kitchen oven (I know enough to not even think to try to get my wife to go for that option), or liquid RTV (room temperature vulcanizing) rubber. The last option was a good possibility, as it came in a can and you added a catalyst. It did seem messy, and there was some discussion I saw about degassing with bubbles and that seemed problematic.
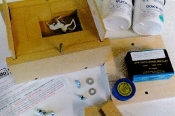
Luckily, I came upon a product called “Quick Sil” by Castaldo at a distributor known as Castings – http://miniaturemolds.com/main.sc. You mix equal amounts of two different putties and in 15 minutes it forms a hard silicone rubber. They sold me a mold-making kit (RTV Quick-Sil Starter Kit) that had the putty, a mold press, and all the items I’d need to make a mold. http://miniaturemolds.com/MAKE-YOUR-OWN-MOLD_c80.htm . They did warn of a learning curve with the product, which was true as you will see – but I do like the product.
RTV Quick-Sil Starter Kit from Castings website
The mold press is necessary to drive out bubbles from the rubber as it cures. It has a series of wooden blocks to create the mold shape and size that you want, with wing nuts and a cover to make a press. You can use it to make one or two-piece molds. For this Rooman project, I did need a two piece mold.
My Mold Press
My first attempt involved trying to make one mold for three Rooman figures.
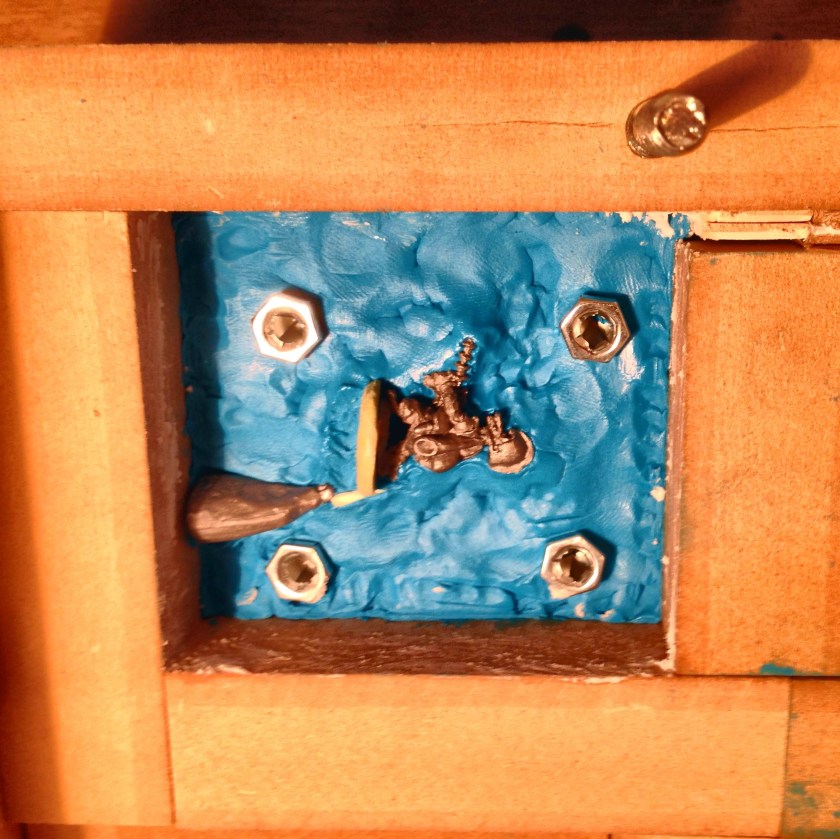
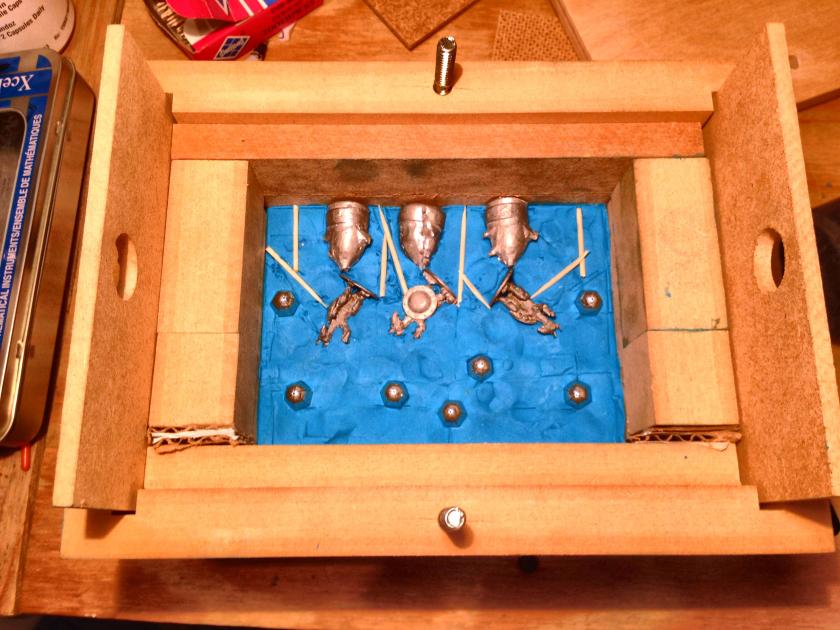
The procedure is as follows (more or less). First, you put down a blue sulfur-free clay upon which the figures and mold keys are placed. Then you mix the two parts of the Quick-Sil – which you need to get in the mold within two minutes. The Quick-Sil will be placed over the figure and the blue clay. You compress the mold in the wooden press, and let the Quick-Sil cure. Then you remove the combination from the press. The blue clay is then removed from the new mold half. You apply a releasing cream to the mold half, avoiding the figure. You then prepare a second batch of Quick-Sil, and repeat the process, ending up with a two-piece mold – theoretically.
My first try to make a mold was overly ambitious and failed, wasting a lot of Quick-Sil, but provided key learnings. This failure occurred for a few reasons. I was too concerned with overworking the Quick-Sil putties which have a two-minute working time. I ended up underworking it. Also, my first try was too thick to cure in 15 minutes in a cold mold press. I needed to make a much thinner mold, and work the two putties longer before putting into the mold press. I also needed to warm the press and the figure with a blow dryer before adding the Quick-Sil and warm the mold while it was curing. I also needed to wait 26-28 minutes for the mold to fully cure.
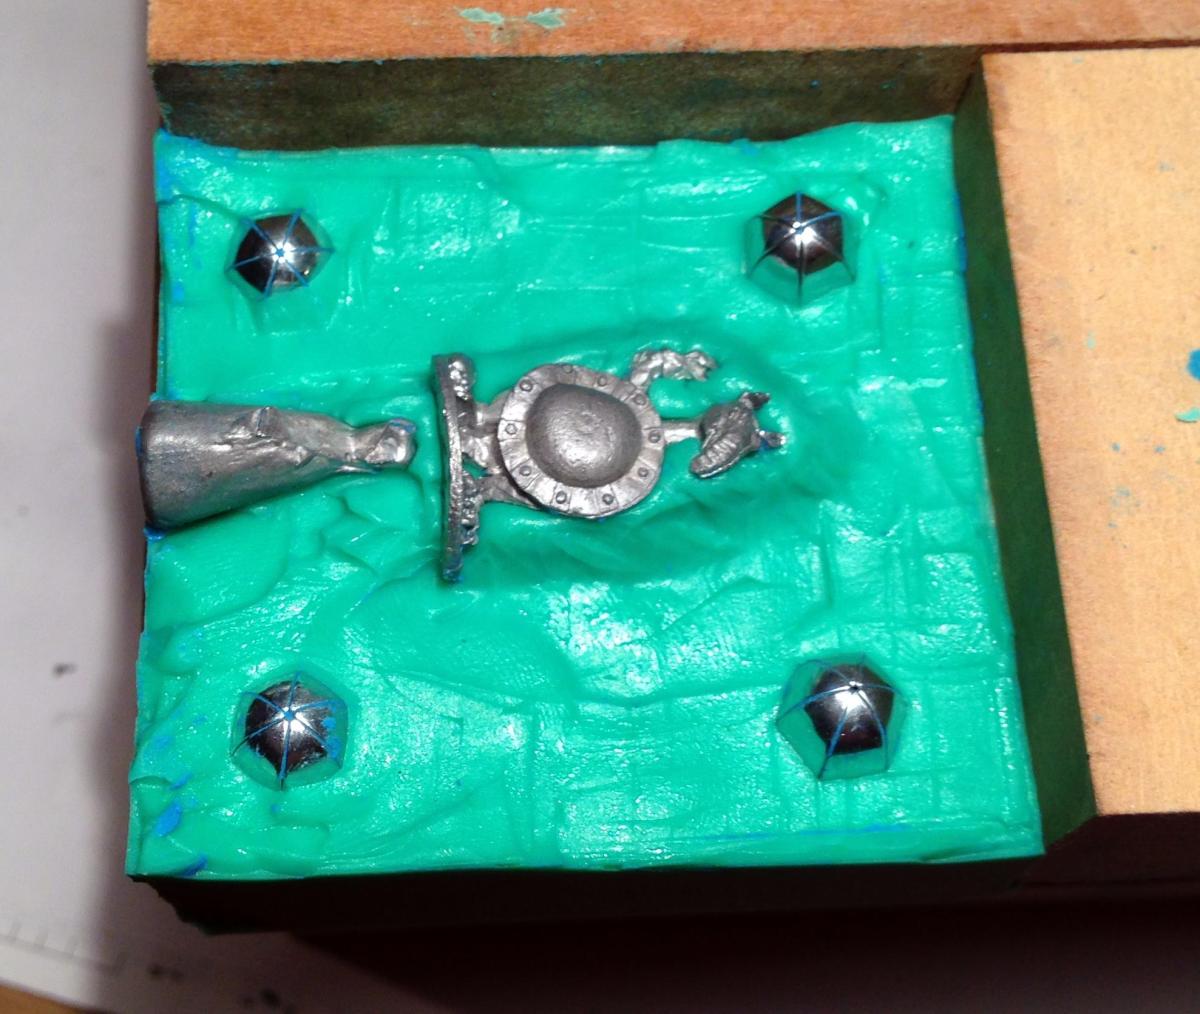
My first attempt at the mold half. The figures have been placed into the blue modelling clay next to pouring plugs. I also added toothpicks as venting gates. The metal nuts are for keys, and I had them upside down!
My second try was much better. I used just one figure, and made the mold smaller and thinner. I warmed the mold and the figure with a hand-held blow dryer before and after putting in the Quick-Sil. I also put in the keys correctly this time. These actually act as nice ways to align and shut the mold.
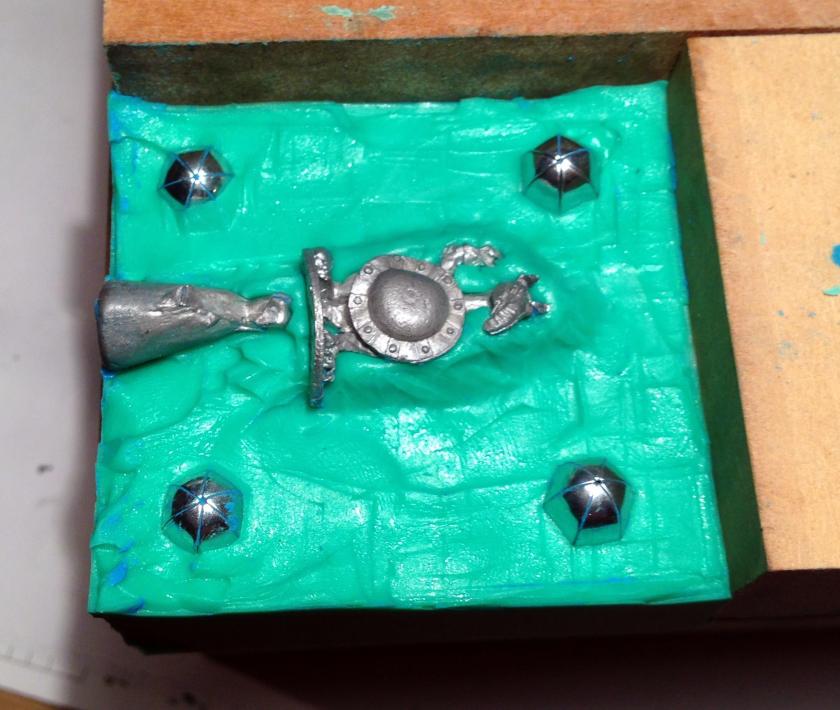
Attempt #2. Note the well I made for the figure in the modelling clay.
I flipped the mold half, and removed the blue modelling clay.
After curing, the first mold half looked like this
I then applied the Castaldo mold release cream on the mold avoiding the figure (Quick-Sil sticks to itself so this lets the two halves not stick together). I then repeated the process with the press. I did need to add cardboard shims to get the second mold half to the correct depth. Later on I made a third two-piece mold of the same figure. Using an Exacto knife is critical to getting the pieces out of the press.
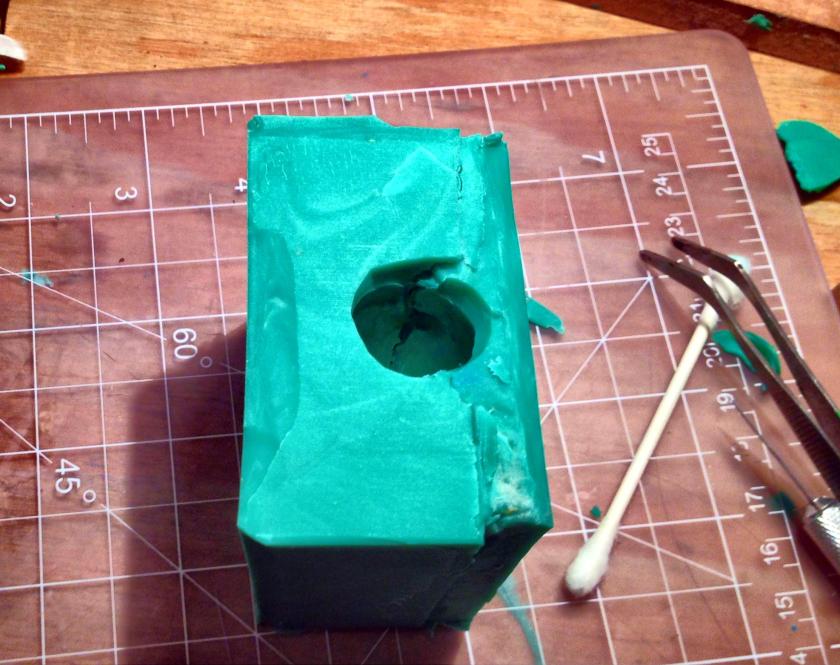
The two mold halves. The keys really helped align the mold and allow it to close. I used an Exacto knife to clean off excess rubble and open the pouring hole.
The two pieces together of the first functional mold
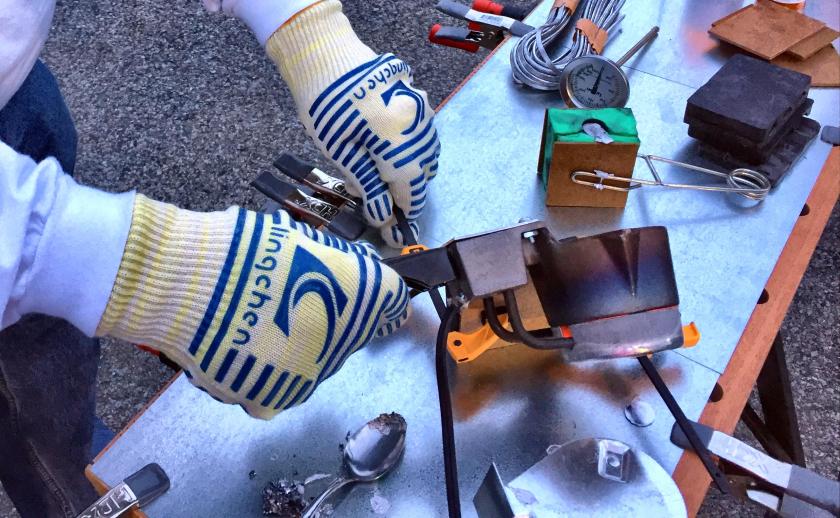
I needed to apply graphite powder to the mold interior so that the hot metal would flow properly. I got this from a locksmith in Worcester. Later on in the casting process, I would learn that its good to tap the mold with the hot metal in it to get all the mold filled. I am glad I had great heat-protective gloves, eye-protection, a respirator, long-sleeves, and pants on when I did that as hot metal flew around! My wife is glad I am outside!
Please note that I had steel sheets from Home Depot clamped to my work bench as well as a working surface. This was a big help when I casted – and a pretty inexpensive way to make a safe place to work with hot metal. I also had a Lyman thermometer to check the molten metal in my crucible as it had no temperature control except being on or off. I’d recommend this and I found that it cast well between 500° and 600° F. My metal was a combination of old broken figures plus any saved lead and tin alloyed metal I had kept since the second Reagan Administration.
Figuring out the graphite powder dispenser.
Applying the graphite powder to the mold
My crucible (Hot-Pot2) with broken figures awaiting rebirth as Roomans!
Pouring the metal – with heat resistant gloves
Trying an old Price August Mold. Note my workspace – steel sheets clamped to my Craftsman adjustable workbench
I ended up needing to cut some venting gates in the molds as well for better casting. This is easy in the Quick-Sil with an Exacto knife, as the rubber cuts fairly easily. I am fairly certain that I was responsible that day for all the world’s Rooman production!
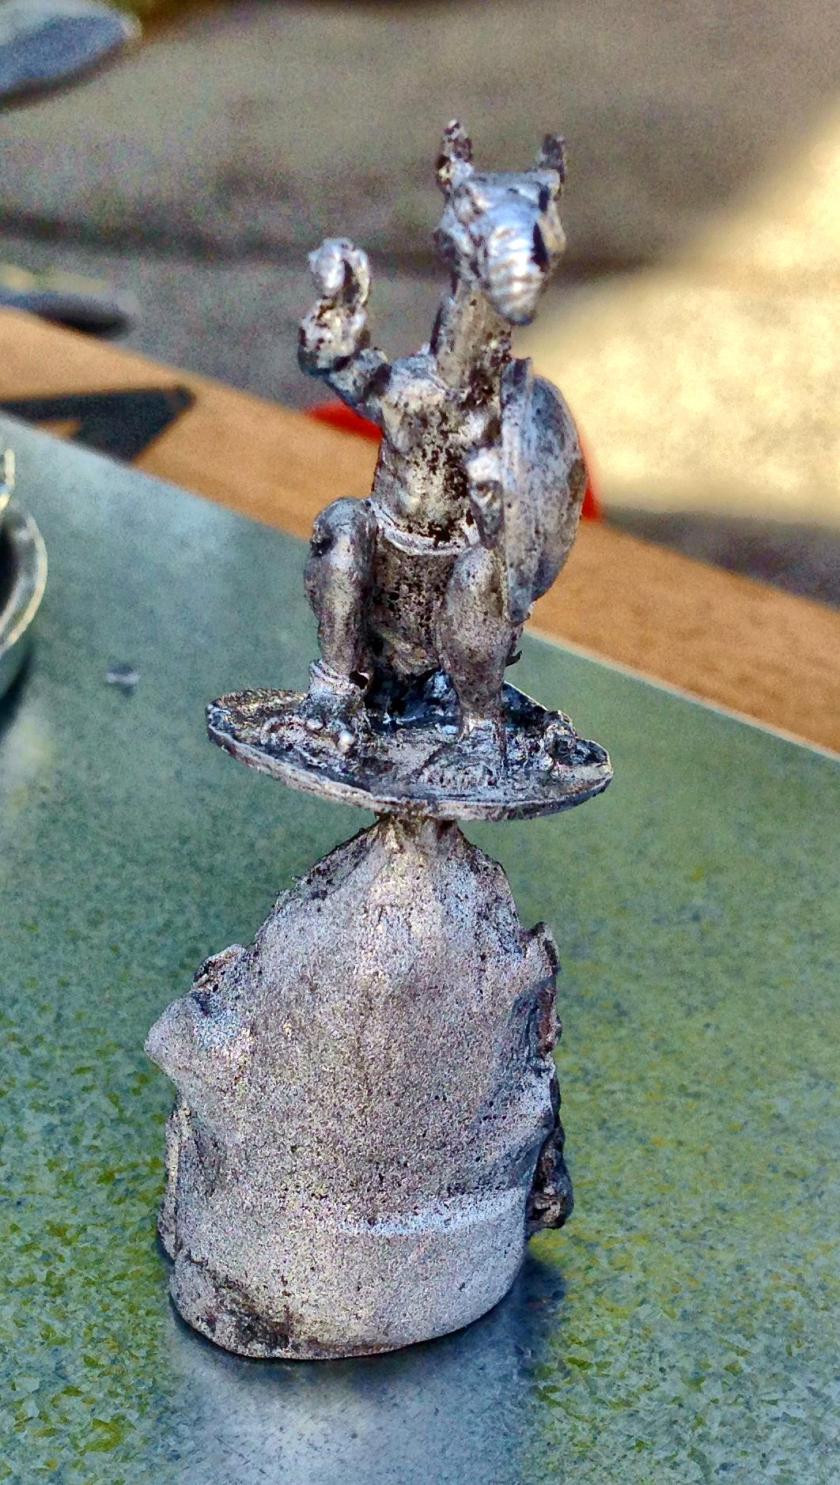
The first Rooman produced by the mold.
I ended up with 12 this weekend – 9 from the first mold and 3 from the second. after a while, the castings got better and easier.
The first 12 on my back bumper still on the flow hole plug
I removed the plugs with a pair of cutting pliers, and now I have 12 more Roomans. I need a few more though to complete the total.
The first 12 Roomans
My next attempt will be with the other Rooman model, and with some Archive Miniatures Space Ducks that I found on line as well. Stay tuned. I am happy to now have a way of getting out of production miniatures when I need them. I would recommend the RTV Quick-Sil starter kit for anyone wanting to do the same.
Winter is always a tough time to complete miniature projects in New England. I like to prime my figures, which involves spray paint, and I like to save and protect my paint jobs, which involves spray varnishes. Unfortunately, both of these are sensitive to cold and humidity – if only I had a heated garage! I did get lucky his month with the help of Jeff Smith who let me use his workshop to prime, but more on that in a bit. Work travel impacted production as well for me.
I needed a few “large creatures” for Wizards to control for my fantasy war game rules. I have a few that I got on eBay that are in progress, but I did not want a month to go by without any production at all.
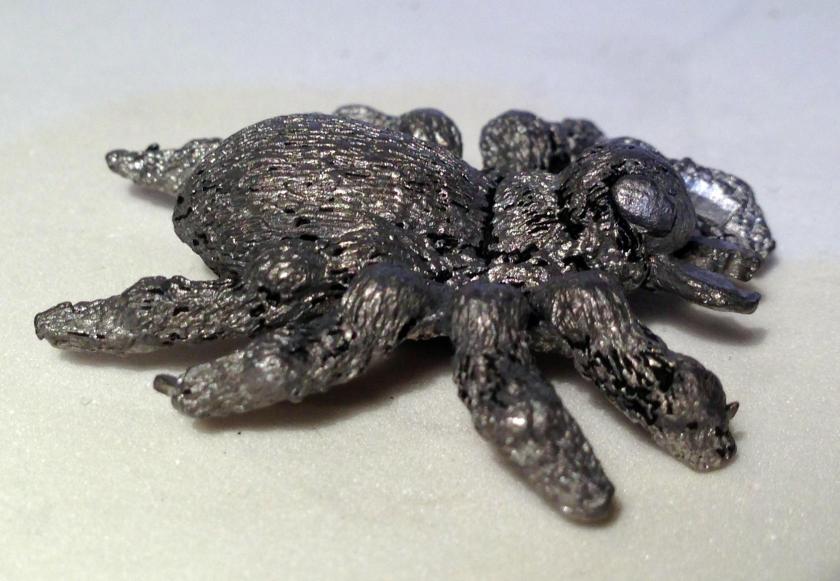
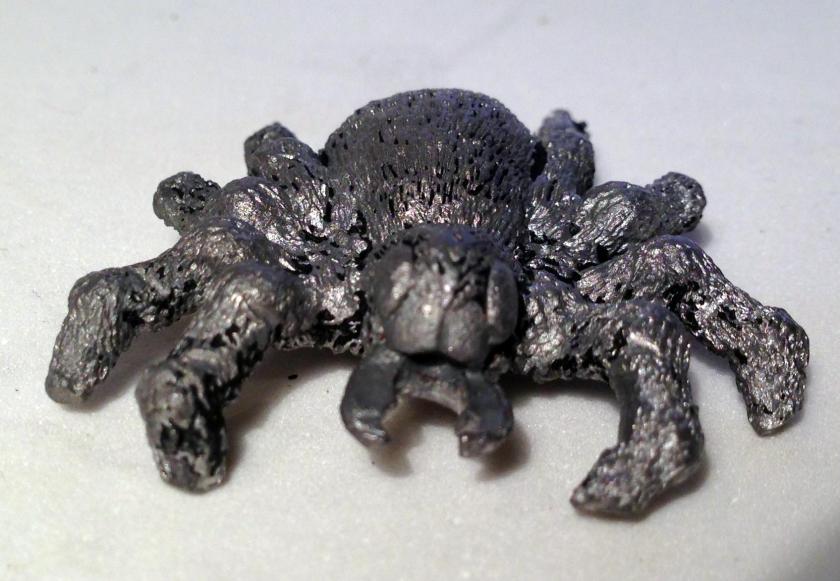
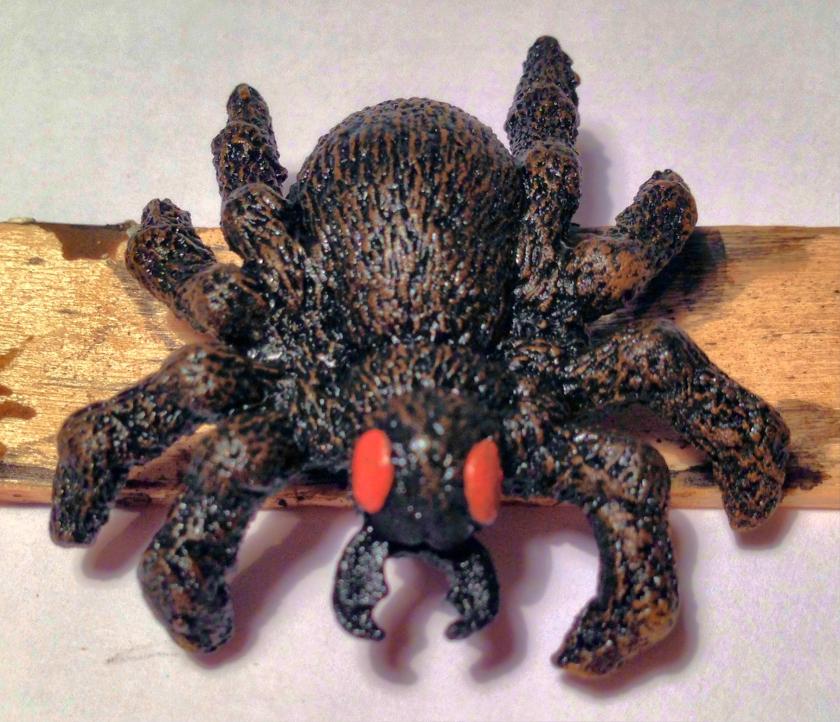
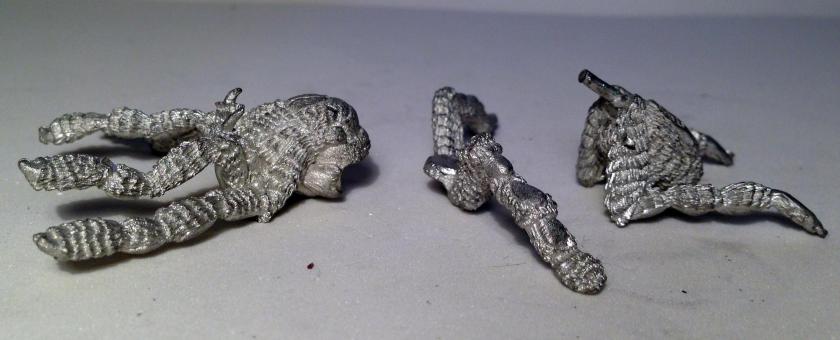
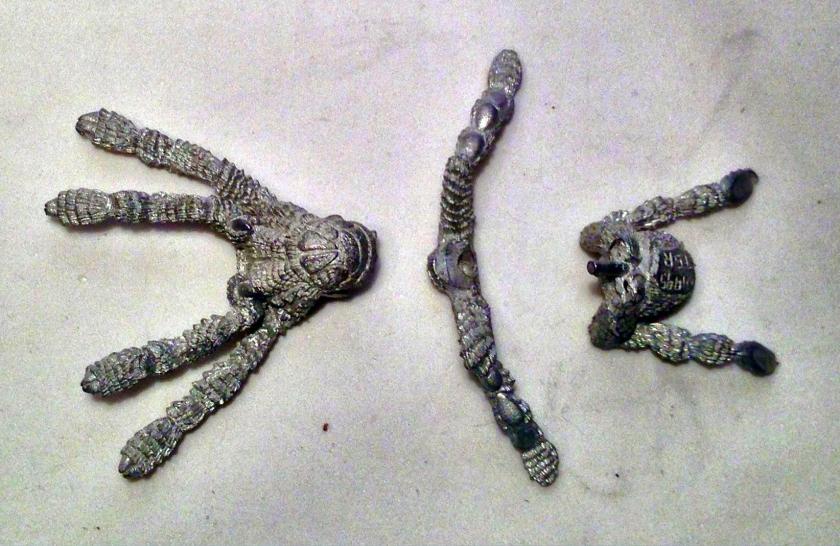
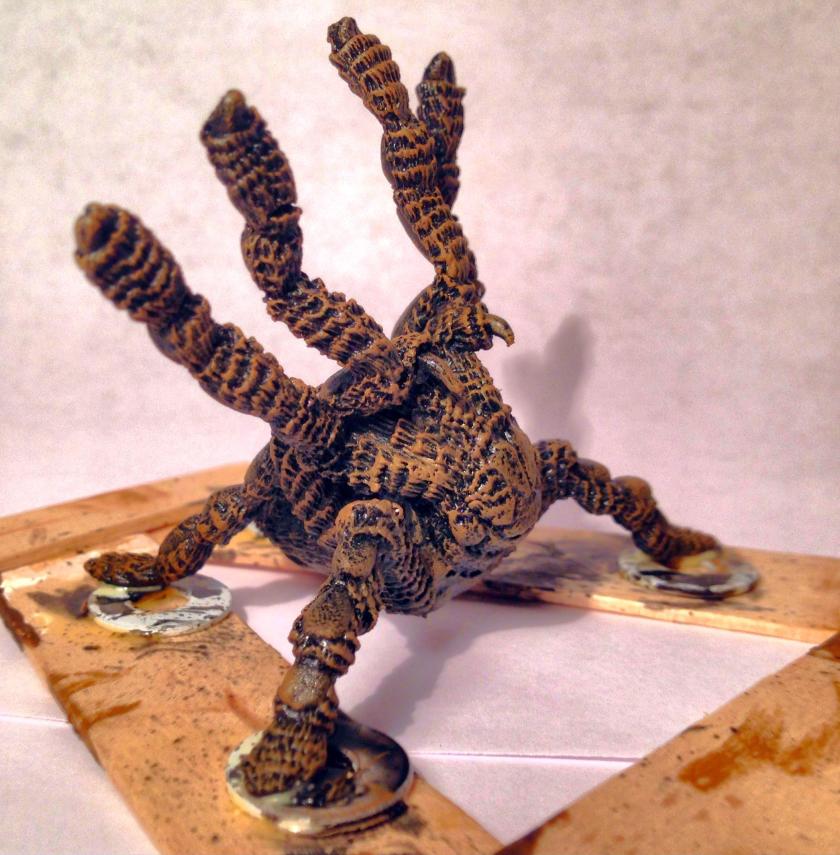
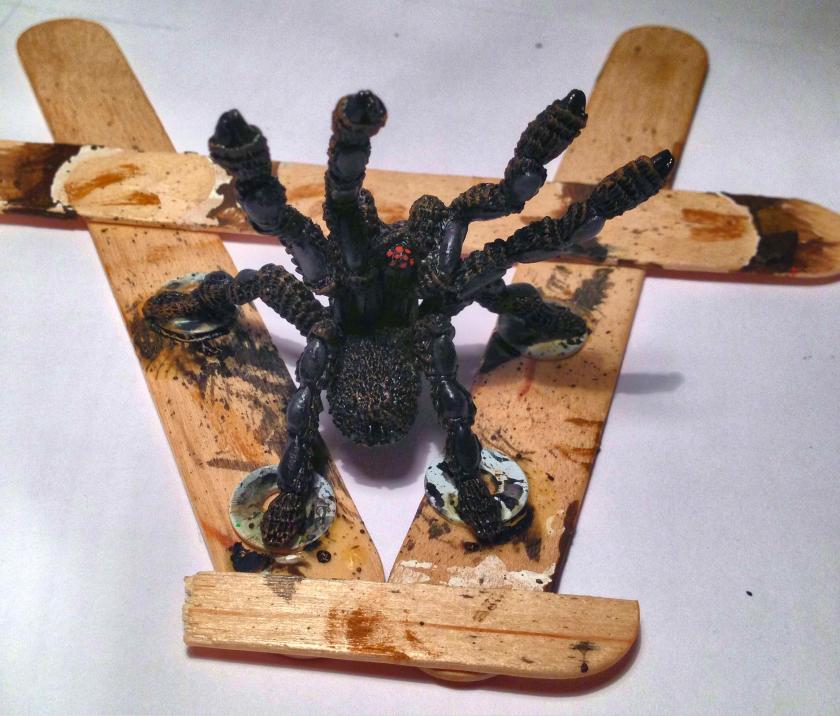
Maybe because of the passing of David Bowie last month, I had “Ziggy Stardust and the Spiders from Mars” echoing through my head. I really was a big fan of Bowie, and was lucky enough to see him one time back in the 90’s. It was a great concert. So, with a nod to the Spiders from Mars, I focused on two spiders I got on eBay. The first one was the smaller and older of the pair, called “Huge Spider”. It was made by Grenadier in 1980 as part of 5004 “Tomb of Spells” boxed set for AD&D. The second was a larger Ral Partha figure that came in 3 pieces and looks like a tarantula. It was made in 1995 for TSR’s AD&D 2nd edition Monsters series. It is 11-515, and according to Lost Mini’s wiki it was called “Spider/Steeder”. I will deal with each in turn.
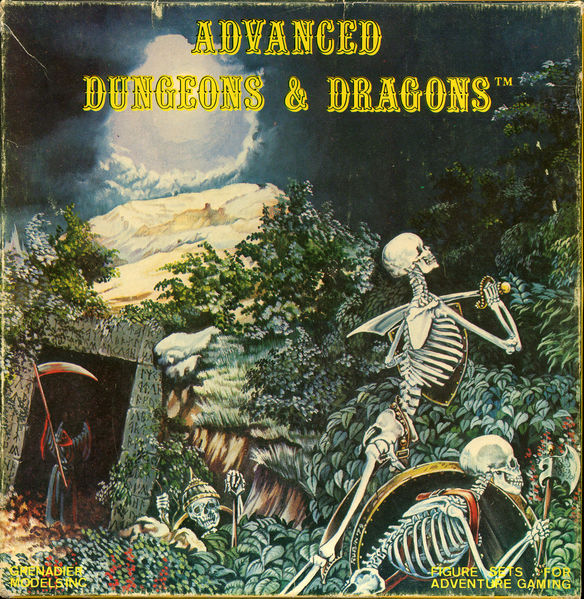
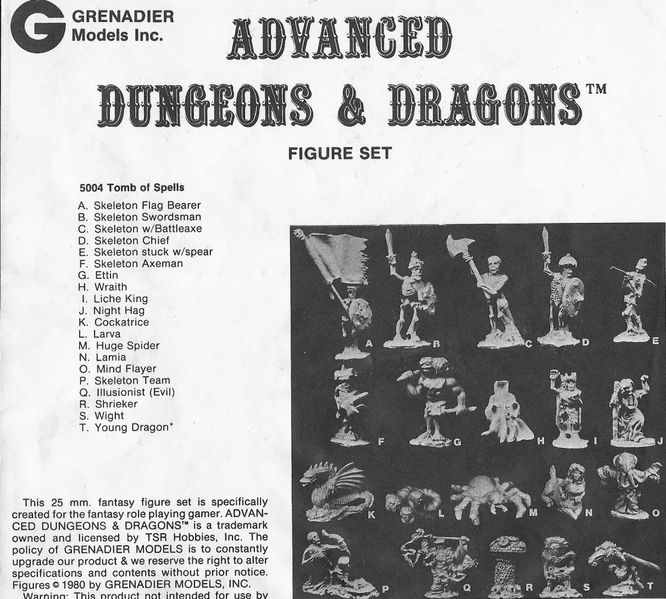
The Tomb of Spells set had 20 miniatures in it (pictures of box and insert below from Lost Mini’s Wiki). Originally, the Huge Spider had only 6 legs, but subsequent versions were given 8 legs. The eyes were not those of a spider and more akin to the compound eyes of an insect.
Original Box Cover for the Grenadier Tomb of Spells Set
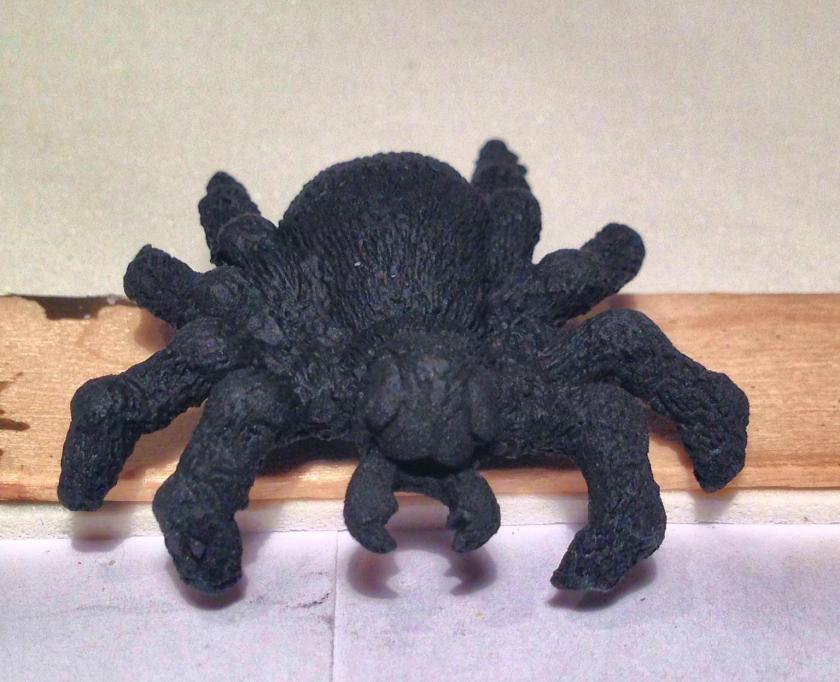
Tomb of Spells Insert (Huge Spider is “M”)The figure itself was painted black, and thickly so. A few days of soaking in Simple Green and scrubbing with a stiff plastic brush and a push pin got the vast majority of the old paint removed, but not all as seen below.
Side View after Cleaning (as much as possible!) Front View after Cleaning
I wanted to prime them, but the weather was around -5° Fahrenheit that Saturday. Thankfully, Jeff Smith was working in his wood shop up at Bay Path Golf Course. I took advantage of his kind offer to work there and prime several miniatures. He had a nice turntable for me to use which helped a lot. I primed the figures with Krylon Ultra-Flat Black at a safe distance from his roaring wood stove with the door ajar. Most of the vapors got sucked right into the stove which was a great solution!
I then mounted the figure on a #8 stainless steel washer and then used the washer to mount to a popsicle stick for painting. I used my scroll saw to cut a hexagonal 2½” base out of 1/8″ plywood for a permanent base. I learned from previous projects that a beveled base would hold flocking better, so I set my saw up to have about a 85° (instead of 90°) slope. I glued several zinc coated steel #8 washers to the bottom of the final base to provide a way for the model to attach to magnetic sheets in my storage drawers. My plan was to have the spiders be dark in a field of grass. To help make flocking easier I used some Deka Lack satin green (from 1987 and still good) to paint the final base. I then went back to painting the Huge Spider itself.
Grenadier Huge Spider Primed
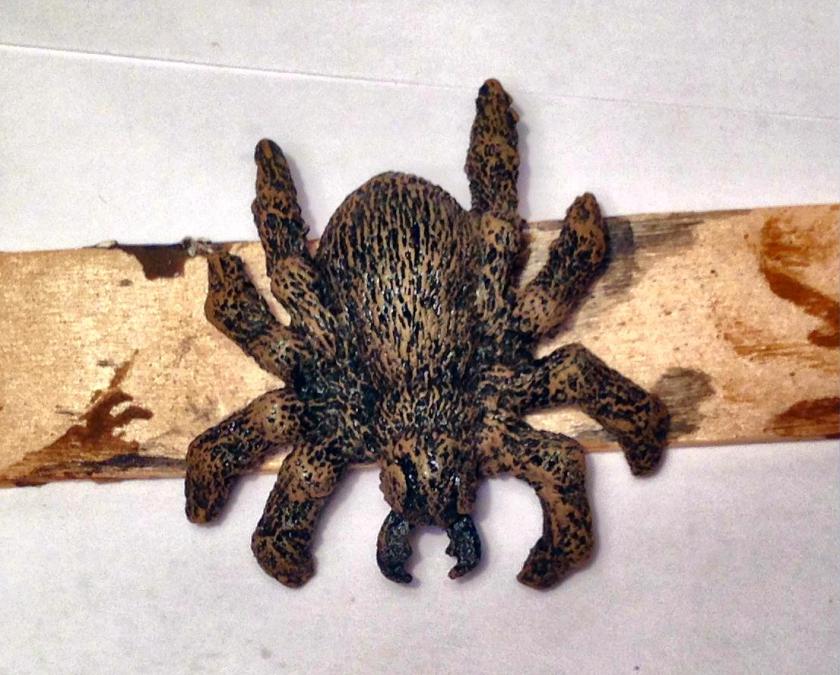
I gave it a nice light coat of Americana “Lamp Black”. When that had dried, I used Special Weapons Washes “Heavy Body Black” on the figure. I then applied a dry brush of Citadel “XV-88” all over the figure.
Grenadier Huge Spider after Dry Brushing
I then washed the figure again, this time with Special Weapons Washes “Red Black”. For the mandibles, Armory’s “Gloss Black” gave a menacing glint. Lastly, the eyes deserved menace, so Citadel’s “Wild Rider Red” was my choice.
Ready for Mounting on Final Base
As for mounting and finishing, I used wood glue to mount the figure to the hex base. Being careful to avoid the legs, I used toothpicks and small brushes to apply white glue for the flocking around and under the figure. The flocking base material was Army Painter Battlefields “Moss Green” which worked well with the underpainted green base. I sprinkled some 4Ground TSM-122 “Loose Foliage – Green” around to alter the color a bit and create depth. I sealed the entire base flocking with a slurry of diluted white glue which I let dry.
Grenadier Huge Spider Awaiting Varnishing and Final Touches
Back to weather and conditions challenges for varnishing – still too cold! And my wife really does not want varnish propellant in the house – I’ve pushed that before and will not again. Besides, it really is a health hazard. Traveling with the figure to Jeff’s workshop seemed too burdensome as I did need the usual two coats (Krylon Clear Glossy followed six hours later by Krylon Clear Matte). I also did not want dust or bumping the miniature to affect the varnish.
I came up with a nice solution using my cellar bulkhead. I opened the inner door to heat the stairway of the bulkhead from the cellar. Once warm, I affixed a couple of magnetic battery-powered LED lights for illumination on the interior of the outer bulkhead door. I put on my respirator, and shut the interior door, and used the spray varnish under the LED lights to coat the figure in a clean cardboard box with cutaways that was set on the stairs. I then opened the outer bulkhead door to vent the fumes, and quickly went back into the house from the back door with the figure before it got cold – and it worked!
After the second coat (Matte) of varnish, I used a combination of Army Painter Battlefields “Wilderness Tuft” with a few “Wasteland Tuft” and some “Battlefield Rocks” to create a more 3D effect.
Grenadier Huge Spider, Top View with Ruler for ScaleGrenadier Huge Spider, Front ViewGrenadier Huge Spider, Side View
Now I shall discuss the Ral Partha Spider/Steeder. It was made for TSR’s AD&D Monsters line in 1995. It posed some new challenges, as well as some of the same as the Grenadier model. The first was assembly. It was not immediately clear as to how to put the creature together – especially the middle. Additionally, the rod at the back was supposed to go into all three pieces, but it was not anywhere near long enough to do that. I tried E600 epoxy, and it became clear to me quickly that I needed a structural solution. Hearkening back to my Engineer days, I went to rebar and concrete – well, sort of anyways!
Ral Partha Spider before Assembly
Using my pin vise and my smallest bit, I drilled 2 holes, one in each major end. I then cut off small pieces from a large paperclip and shaped them to go through the holed in each. I had some Milliput that I had never used before. It comes in two cylinders, and when you mix them in equal proportion, it goes from clay-like to rock overnight.
I combined the two types (and used more than I needed as it turns out). I then worked it into the cavities and around the paperclips, and braced it overnight. It held up great! The model was structurally sound. I sanded and filed the excess off and went on to prime the model and prepare its final base. The only differences here from the previous spider’s was that the base was larger (3″) – everything else was the same (paint, washers, bevel). I also had previously primed this model at the same time at Jeff’s workshop before assembling with Milliput and paperclips!
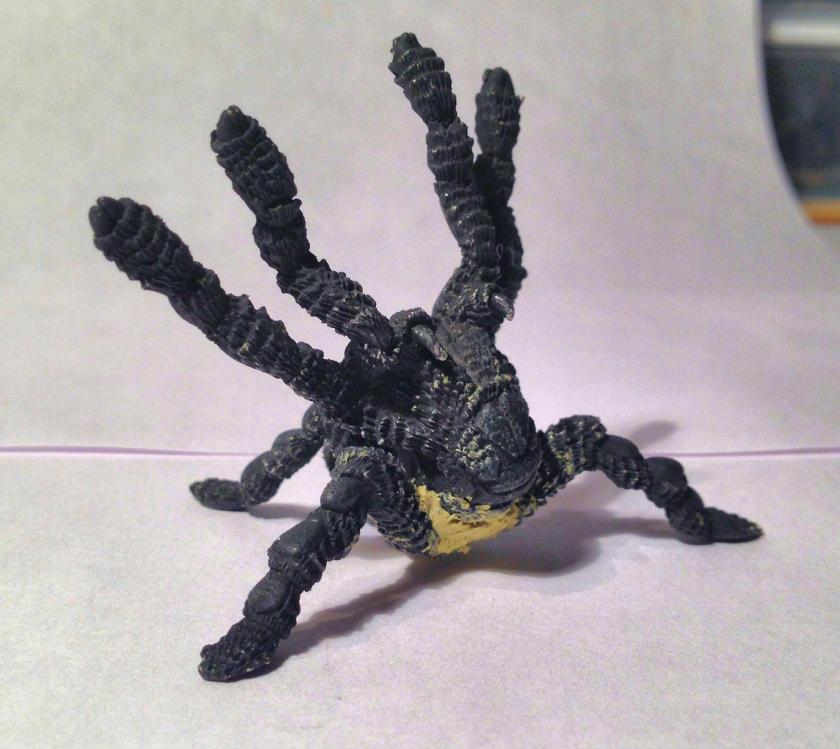
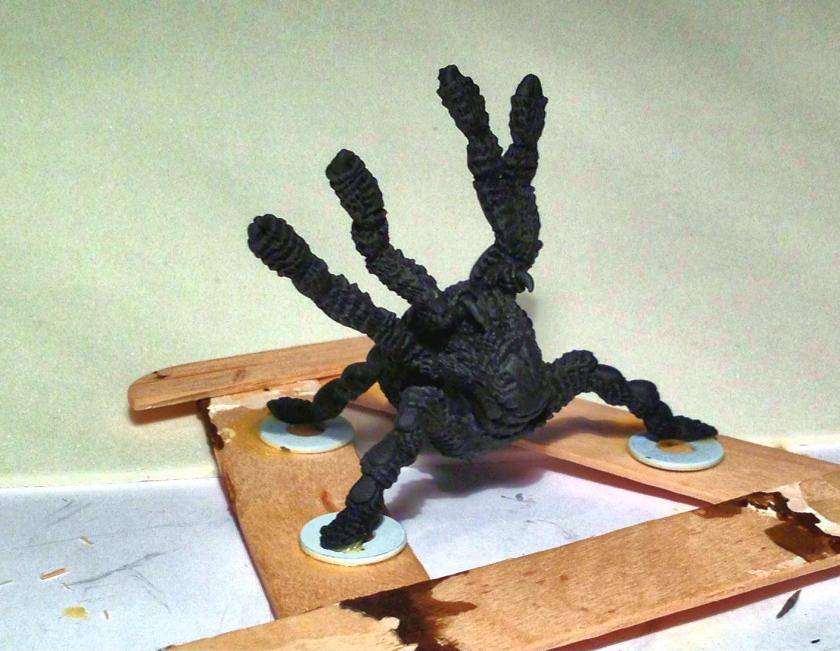
Ral Partha Spider after Priming and Assembly with MilliputRal Partha Spider After Base Coat
This figure had not been previously painted. I mounted it on washers and then mounted to a popsicle stick. As with the other model, I gave it a base coat of Americana “Lamp Black” followed by Special Weapons Washes “Heavy Body Black”, and a dry brush of Citadel “XV-88” all over the figure. The Milliput was not visible.
This figure was more akin to a tarantula. I used Citadel “Mechanicus Standard Gray” on the pads on the legs.
Ral Partha Spider After Dry BrushingI used Armory “Gloss Black” on the eye cluster, the fangs, the mandibles, and the leg tips. The eyes themselves were dots of Citadel’s “Wild Rider Red”. Another wash with Special Weapons Washes “Heavy Body Black” rounded out the painting as you see below.
Ral Partha Spider After Painting
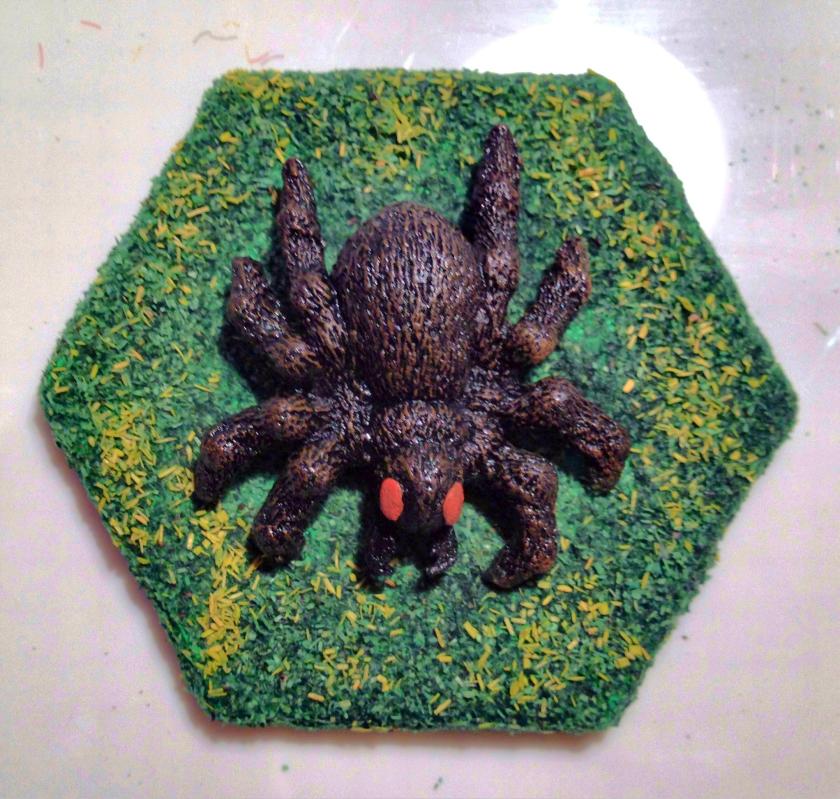
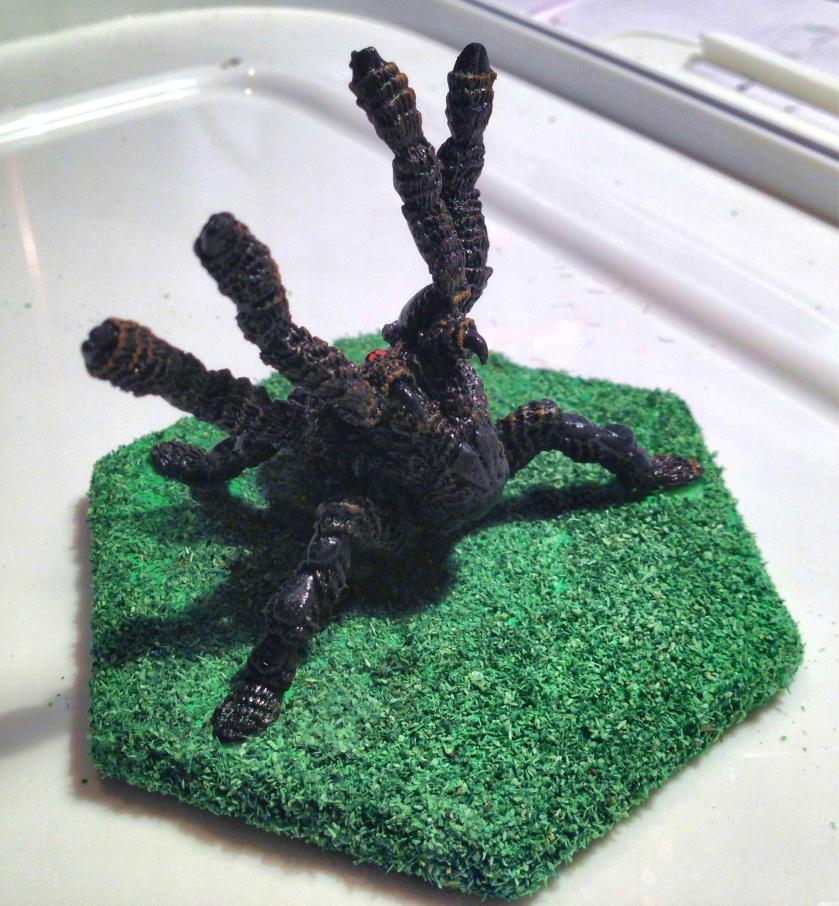
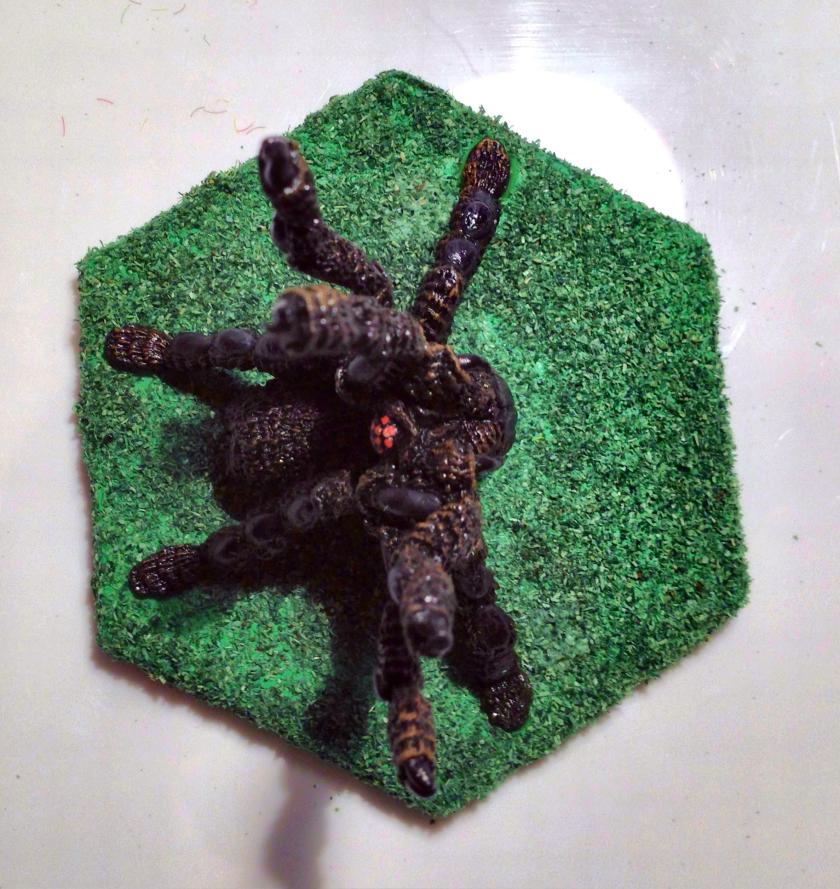
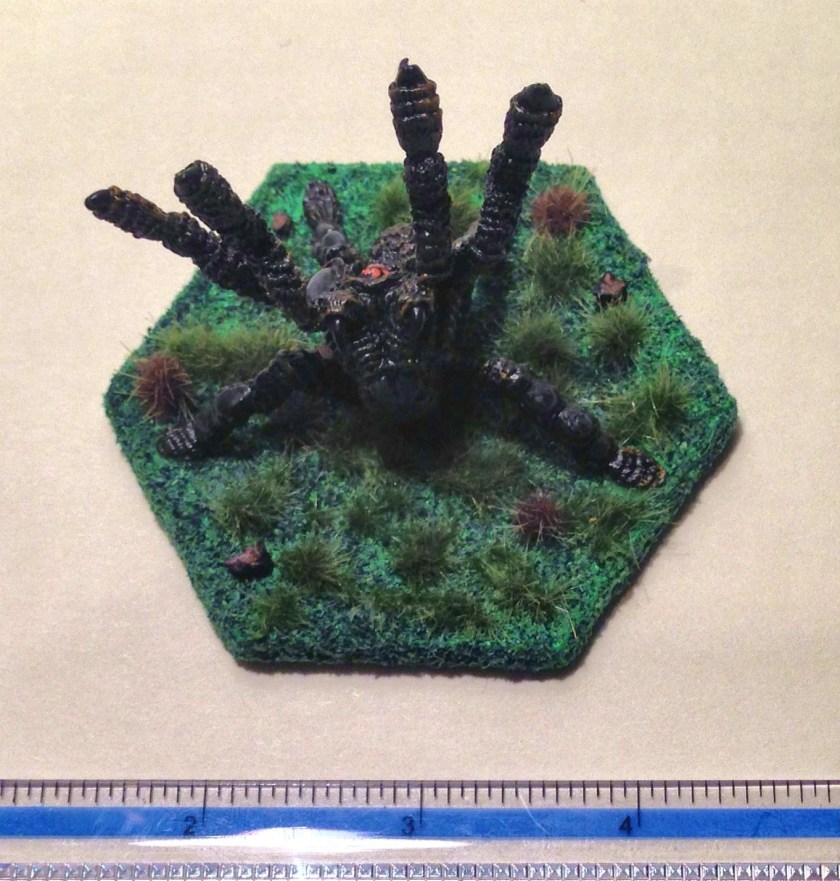
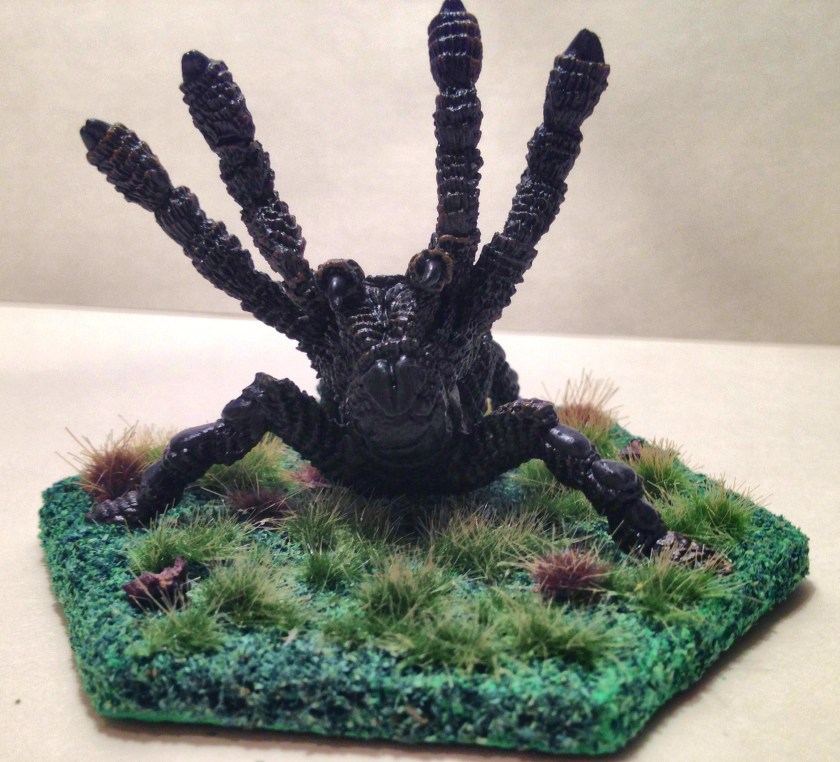
I then mounted the figure on the hex base, and followed the exact same procedure as the Grenadier model as to basing, flocking, varnishing, and finishing with grasses and rocks.
Ral Partha Spider Before Varnishing (front)
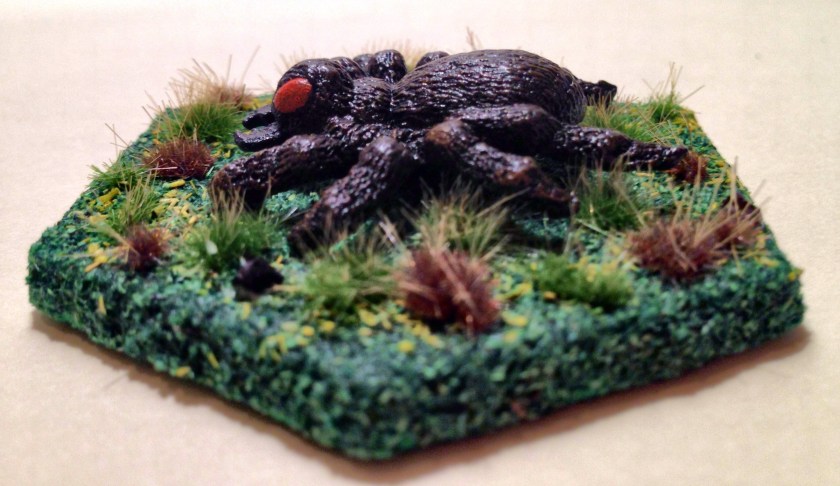
Top View before Varnishing Ral Partha 11-515 Finished! (top view)
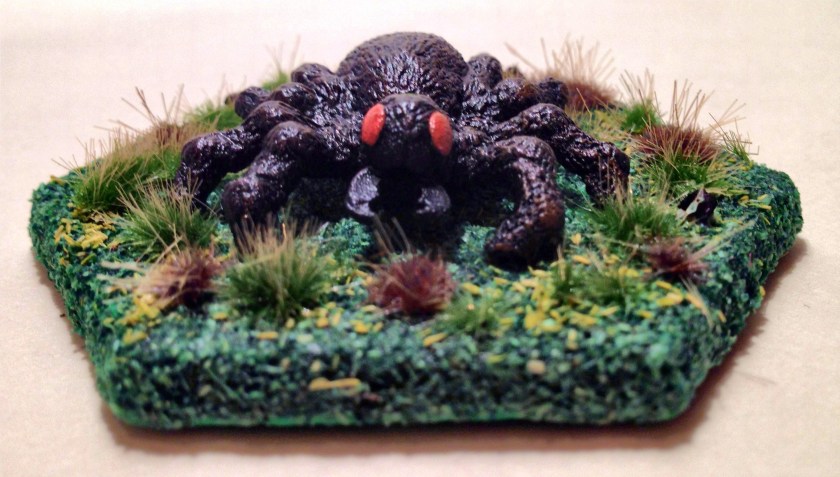
Ral Partha 11-515 Finished (front view)
Overall, I am very happy. The figures look menacing and will be great for the Wizards to control, or as autonomous monsters…Scary Monsters…another David Bowie reference if you are paying attention!