Last Saturday I got the opportunity to GM a fantasy tabletop war game battle with Ellen Morin and Chris Smedile using my War Must Be set of rules. One of my goals was to play test the rules, especially the crew-served weapons and the adjusted morale rules. The other was to let Ellen and Chris play using my shortcut cards and determine if game play moved along well.
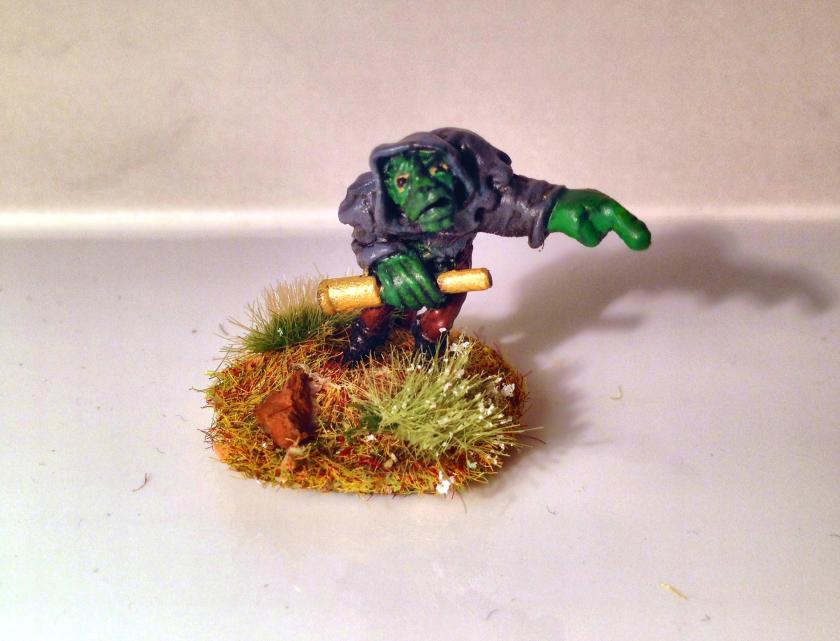
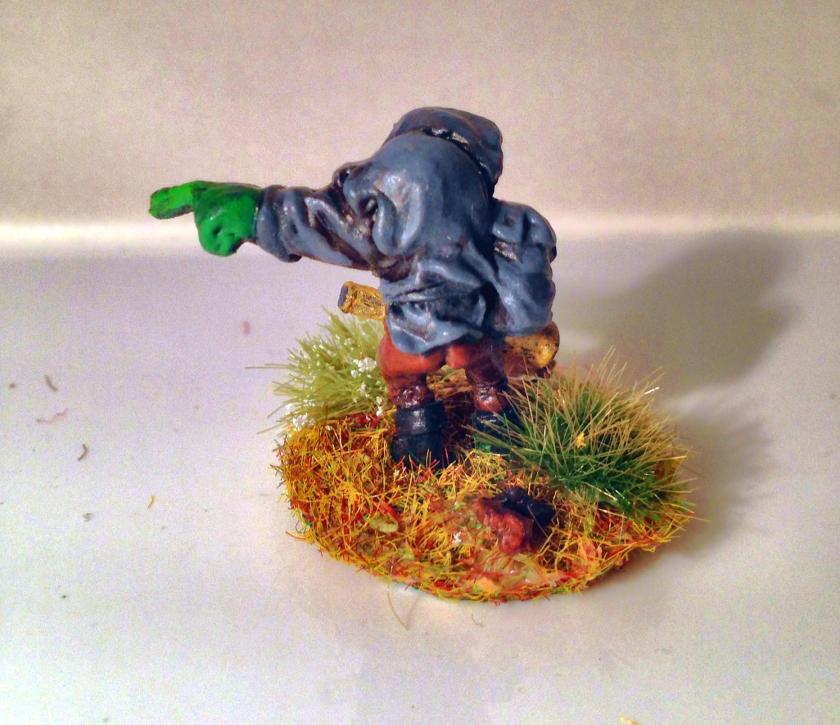
Chris had the evil attackers, consisting of several units of Orcs led by a Gnoll, two Insect Men skirmisher units, a Troll large ballista, the skeletal Nightmare Legion, and two wizards controlling large creatures respectively (a giant scorpion and a giant tarantula). The overall HQ was the Nightmare Legion’s command group. Their objective was a bridge at the rear of their enemy’s lines.
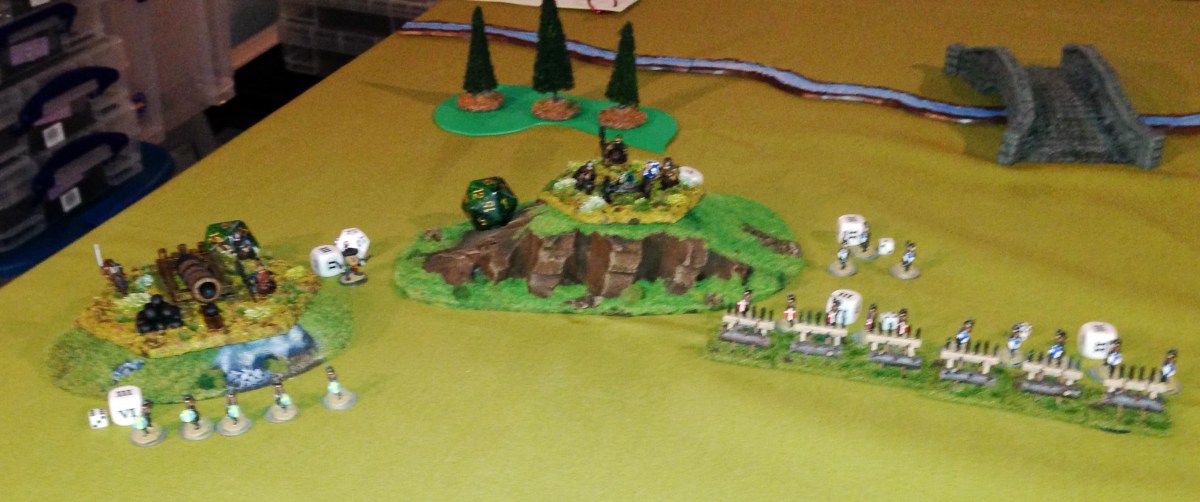
The attacker’s view
Defending against them was a collection of Dwarves, Neanderthals, and Ents. The Dwarves had excellent positioning of two primitive cannons (one large and one small bombard) on top of two escarpments – both with excellent fields of fire. These veteran crews were led by the infamous “Dwarf with No Name”, armed with two black powder pistols. These were reinforced with three Scandinavian Dwarf Skirmishers (Danes, Finns, and Swedes). The Swedes guarded the base of the escarpment with the large bombard, while the Danish and Finnish Dwarves defended chevaux de fries in front of the flank of the small bombard’s escarpment. A large mass of neolithically-armed Neanderthals held a gap between a swamp and a forest on the left flank. While they held, two Ents (Redbeard and Tanbeard) recruited small trees to augment the defenders. These two plus Waldo the Wizard were under the command of the overall force commander, Treebeard.
The defender’s viewLeft Flank of Defenders at set upThe attackers left flank at set upDwarven Bombards (Large on right, small on left) and supporting Scandinavian Dwarves at set upNeanderthals hold the gap, while Redbeard and Tanbeard recruit trees. Treebeard and his Wizard await at set up.
This set up forced Chris to move his forces up right under the guns of the Dwarves. The first salvo from the large bombard missed the forward unit of Insect Men skirmishers. However, it struck the follow on unit and killed 3/4 of them. The remaining figure, once activated, failed its morale check, and went buzzing off into cover.
The second Insect Men are devastated by the large bombard
Ellen continued to hold her position while her Ents recruited trees for the fight. Chris, realizing that he needed to bring pain onto at least one of the bombards, moved his Orc Death Head Longbow up, and made a miraculous set of rolls – killing one of the crew of the small bombard, and degrading its effectiveness at reloading and firing. He took his best melee Orcish troops with maces and put them into column as they moved into point-blank range of the large bombard. It looked like bowling for Orcs was about to happen. Ellen got the card activating the large bombard – aimed, and gave the order to fire…
She rolled a misfire…
She rolled for the consequences of the misfire…
The large bombard BLEW UP, killing one crew member, severely wounding the crew chief, and putting the gun out of action for the remainder of the game.
Things go from bad to worse for the Dwarven Bombards
The other undamaged Insect Men fought the Swedish Dwarves, driving them back. This allowed them to swing around the hill and hit the Dwarf with No Name. The DWNN raised his pistols to fire…
BOTH misfired.
One jammed, and the other blew up, wounding him severely.
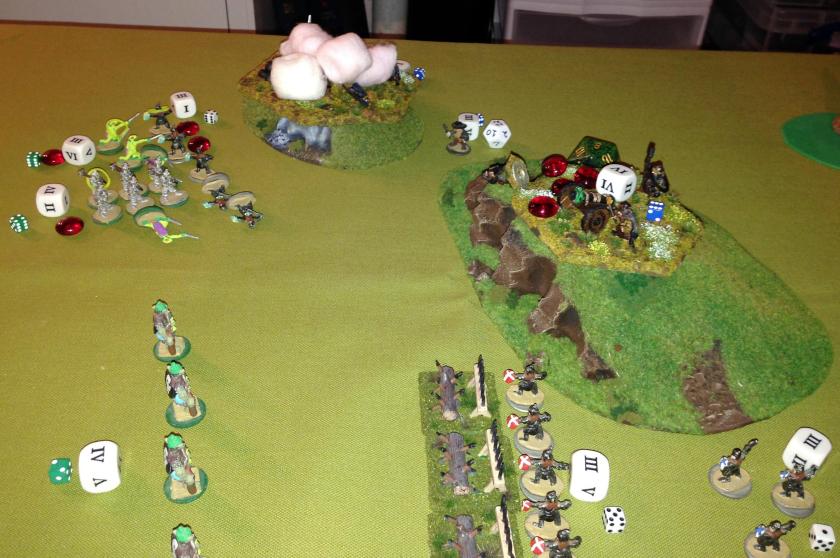
Meanwhile, the Neanderthals were being attacked by Kaadastral, Bringer of Plagues (a demon), and a Giant Scorpion controlled by the evil Wizard Greencape. A large Tarantula controlled by the evil Wizard Rooney was closing in as well, but it took a fireball from the good Wizard Waldo, wounding it but not killing it.
Neanderthal Melee Scrum
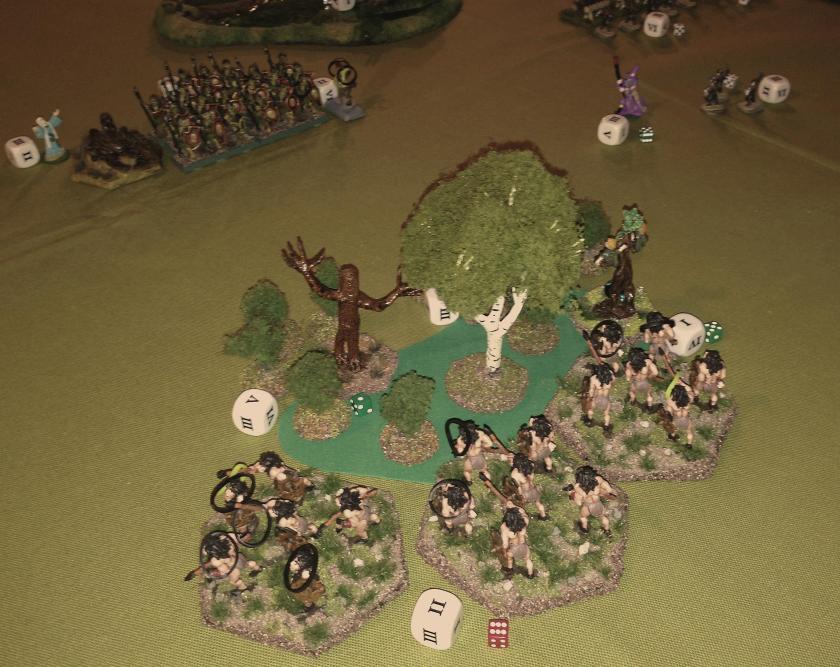
The Neanderthals gave a good fight, damaging the attackers, but not killing them. After losing about a third of their number, with the Nightmare Legion closing in, they said “we’re outta here” and ran for shelter in the Ents woods (as peasants are wont to do).
Neanderthals seeking shelter
At this point, the game was halted as my parents arrived and we had dinner. This was the day of the East Brookfield fireworks – so that took over and we celebrated Independence Day East Brookfield-style (a week later for cheaper but still fantastic fireworks show).
Both Ellen and Chris thought that the rules upgrades worked well, as did the shortcut cards. Of course, Ellen did get the bad rolls, but Chris took some maneuver chances that worked out for him. I’m not sure how it would have turned out. While the bad guys could have shot at the Dwarves with longbow and ballista with some degree of impunity, the Ents had recruited several trees and the fight was by no means certain.
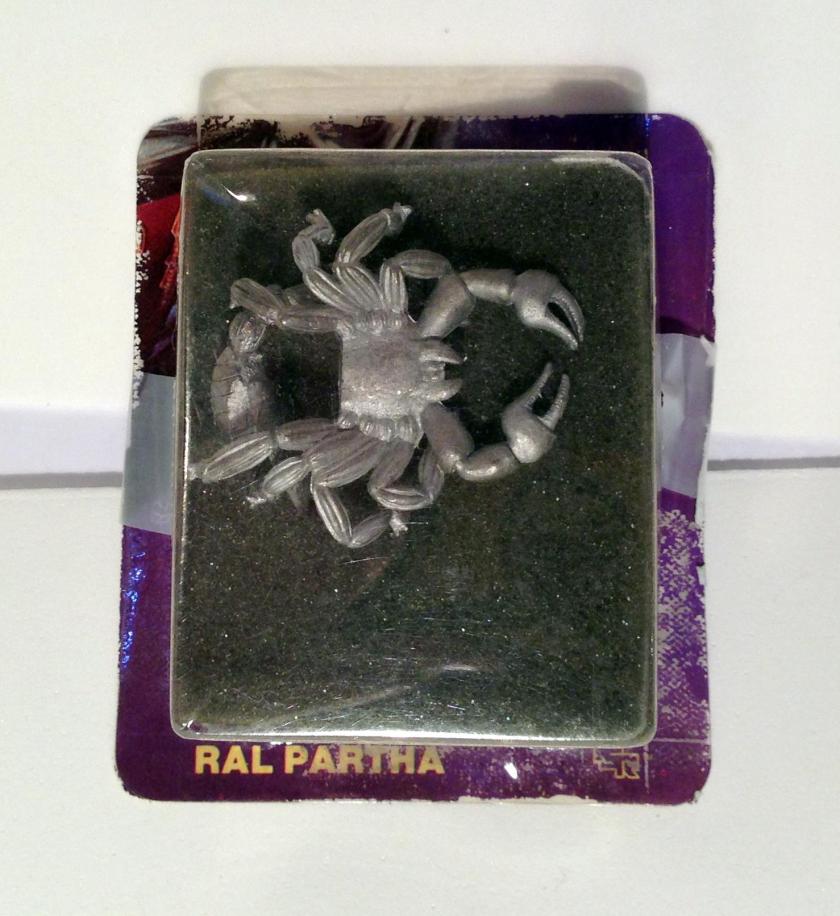
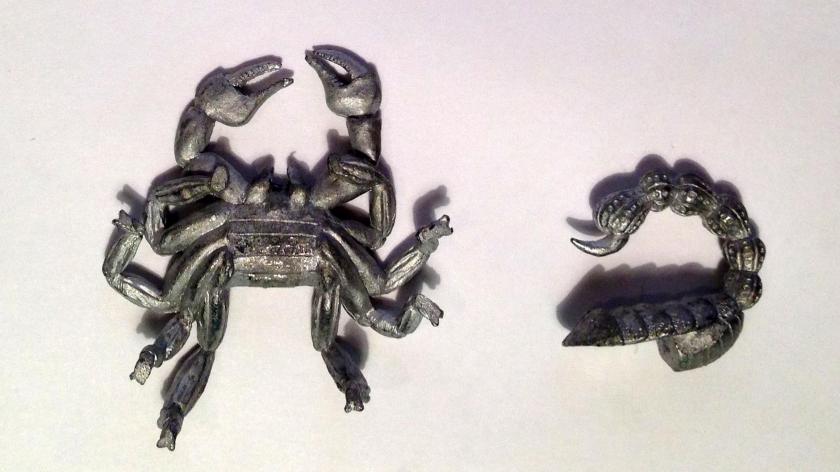
I am still working on adding some large creatures for fantasy gaming. These could be controlled by Wizards, or used as wildcard elements by themselves. Another eBay find that I made was a Ral Partha Giant Scorpion (11-452) from the early 1990’s. It had the top of the blister pack removed. I have seen many older surviving blisters in this shape – which seems rather senseless, for if it was done to save storage space it really does not. Of course, it makes it easier to buy these cheaper.
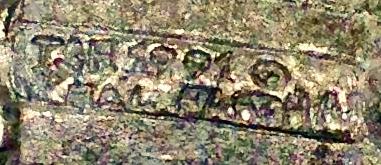
How I got the blister packageMarking on Model “TSR 1991 RAL PARTHA”
I removed it from the package, and gave it a quick scrub with a toothbrush and some dishwashing soap. After it dried, I looked at the model and tried to plan for assembly and painting.
The two pieces
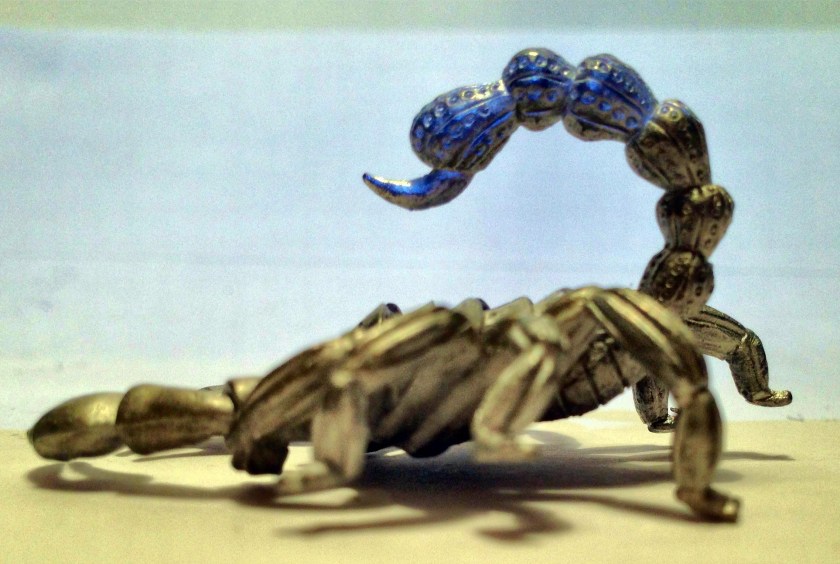
I assembled the model using E6000 epoxy, and let that set up. Then I primed the model with Krylon “Ultra-flat Black” spray paint.
The assembled model before painting
I built a 2½” hex base with 30° beveled edges for the model. I glued #8 steel washers to its bottom, and put that base aside.
This figure was simple, but frustrating. To make it realistic, I needed to portray it as an ambush predator with excellent camouflage. I went through a lot of steps and colors to achieve what I wanted.
To do this, I base-coated it with a mix of Citadel “Balor Brown” and Secret Weapons Washes “Sewer Water”. Subsequently, I applied a dry brush application of Citadel “XV-88”. Not content with the coloring, I applied a wash of Citadel “Agrax Earthshade”, and highlighted with a dry brushing of Citadel “Dryad Bark”, and a wash with P3 “Brown Ink”.
The scorpion was not in a good position for mounting flat on a base. The legs were not going to be easily affixed, and it looked unnatural. I envisioned it pouncing on prey from higher ground. I took the base that I had made and glued ¾” steel washers to the top with wood glue and let the washers dry solid. I then took my Aves Apoxie Sculpt to create a rock and mud mound from which the Giant Scorpion could attack prey and enemies. I mounted the material to the base and sculpted it while mounting the Giant Scorpion to it before it hardened. The washers really do a good job of providing a affixing surface for the sculpted Apoxie Sculpt. I let this solidify for 24 hours.
After the initial mounting on the base
With a wet mix of Citadel “Balor Brown” and Craftsmart “Khaki” I painted the entire model and base again. After it had dried, I drybrushed the model with Citadel “Balor Brown”, and finished with a wash of Citadel “Agrax Earthshade”. I then used Deka-Lack “Braun” for the stinger. Lastly, I applied a sequential triple varnishing with Krylon “Clear Glossy”, Krylon “Clear Matte”, and Testors “Dull Coat”, allowing for complete drying between each coat.
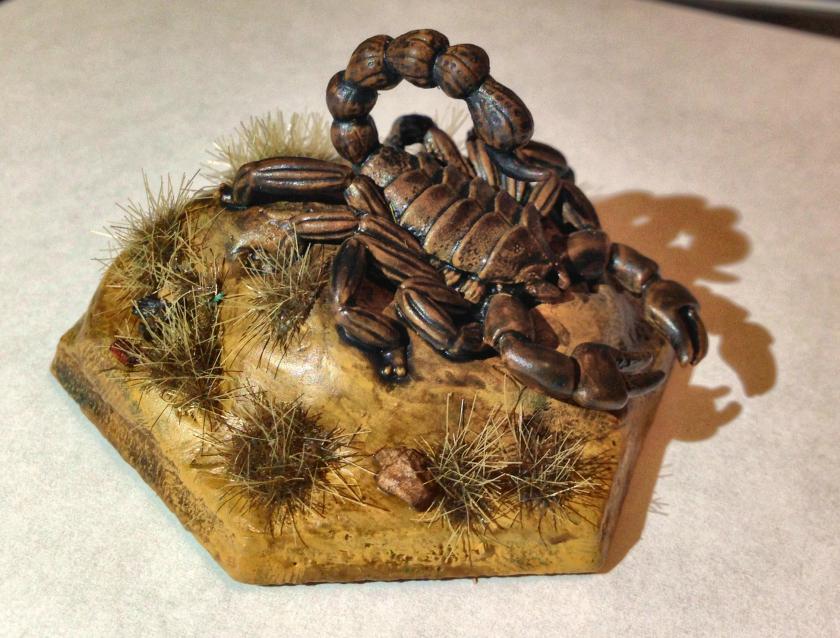
I added a couple of painted boulders and Army Painter “Wasteland Tuft” to the base.
Giant Scorpion completed
I think that the model is up to my standards – it looks realistic and is set up for play. Nature’s camouflage is not flashy.
I have even considered using this as a paperweight in my office, or even a ball marker on the golf course! The Apoxie Sculpt makes this a solid weighty model.
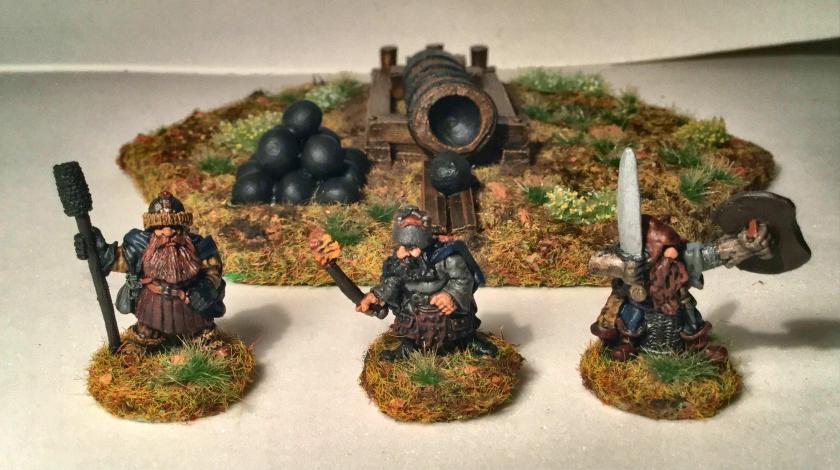
The other Dwarven crew-served weapon that I have been working on is a complete Ral Partha “Dwarf-Bombard” (02-161) that I got on eBay. The sculptor was B. Ollie, and the model is 25mm scale (I believe). It is a smaller bombard than the large RAFM one for certain, but two of the crew are identical figures – so I painted them differently.
The set in the original blister
Back of the blister – originally sold in Canada?
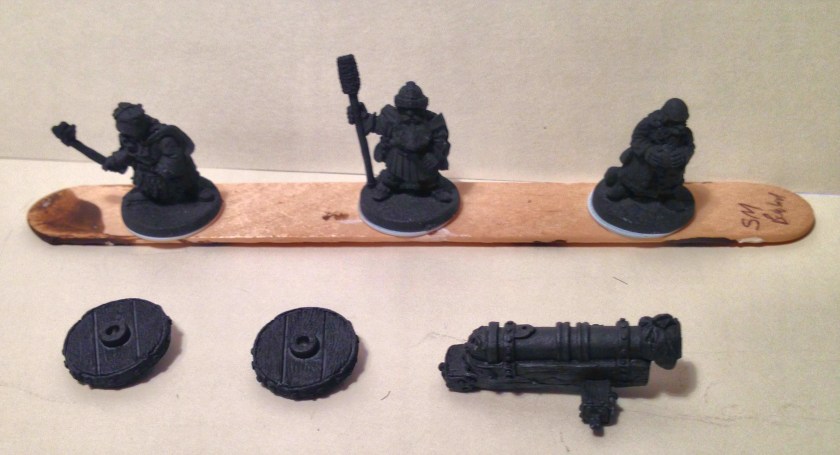
This would be a more mobile weapon for my Dwarven forces. It was part of the “All Things Dark and Dangerous” line. There are three crew figures and the bombard. One was a had a ram for the bombard, one held a torch for igniting the weapon’s fuse, and the other was a loader holding a cannonball.
Unassembled setMy Dwarf Bombard set before any assembly or painting. This is also the picture used on the Lost Wiki for 02-191
After a quick scrub with a toothbrush and some dishwashing soap, I let the set dry. I then primed the crew and the bombard (also in the winter depths in February at Jeff Smith’s workshop) with Krylon Ultra-flat Black spray paint. Then I mounted them on ¾” washers with wood glue, which was subsequently glued to popsicle sticks.
I started by working on the bombard and some cannonballs. The blister did not come with any cannonballs, so I used some Daisy BB’s I got at Wal-Mart to make a stack of them with the help of wood glue and some toothpicks for a frame. Once done, I also primed these with Krylon Ultra-flat Black spray paint. I then painted them with Secret Weapons Washes “Heavy Body Black” ink.
Here again, I wanted a wooden hex base with magnetic attachments for the set. I cut a smaller base for the kit with my scroll saw – a 3″ hex base with 30° beveled sides from 1/8″ luan plywood. I glued ¾” steel washers to the base for easier storage on Aleene’s tacky magnetic sheets that I have affixed to my “Really Useful” plastic boxes.
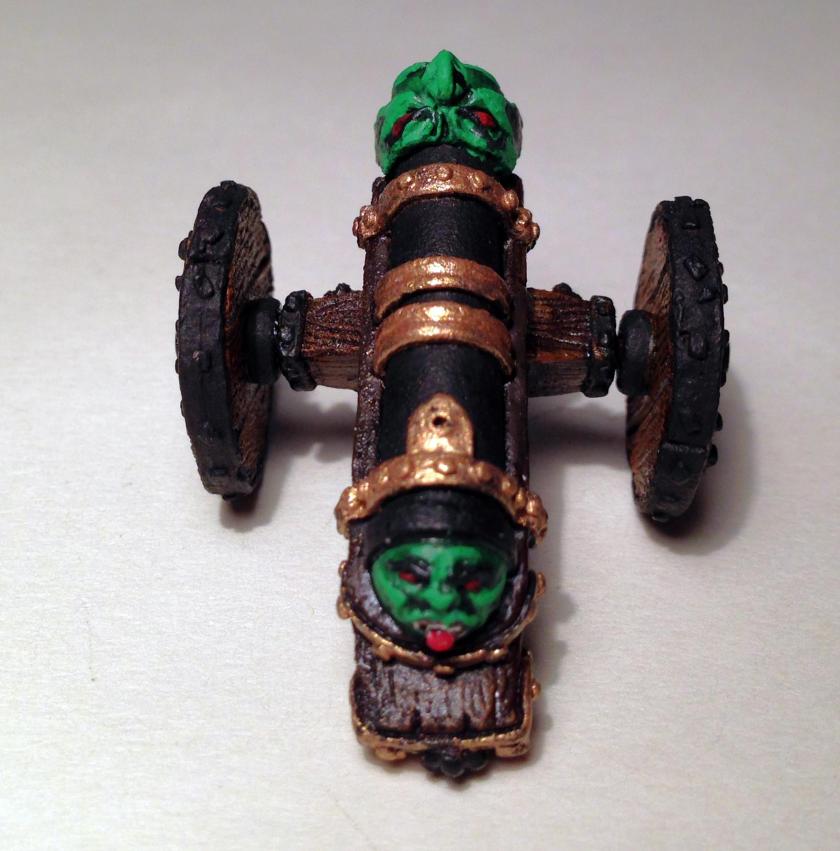
Next, I proceeded to paint the bombard. I base-coated the weapon carriage and its component wheels with Citadel “Dryad Bark”. This I followed with an application of P3 “Brown Ink”. Then I dry-brushed the carriage and the wheels with Citadel “Skrag Brown” and then washed it with Citadel “Nuln Oil”. I then added another wash, this time with Citadel “Agrax Earthshade”. I painted the metal sections of the gun and the cannonballs with Americana “Ebony”. There was a Goblin head on the bombard’s business end and back end – and those I painted with an old Polly-S “Slime Green”. I chose to paint the metal bands holding the bombard to its carriage with Martha Stewart Crafts “Brushed Bronze”. I added some Americana “Primary Red” to the goblin heads’ eyes and tongue on the bombard, as well as some Americana “Snow” to the sculpted fangs on the goblin. To finish the weapon with varnish, three coats were applied successively – Krylon “Clear Glossy”, Krylon “Clear Matte”, and Testors “Dull Coat”.
Rear view of the bombard after varnishingSide view of the bombard after varnishing
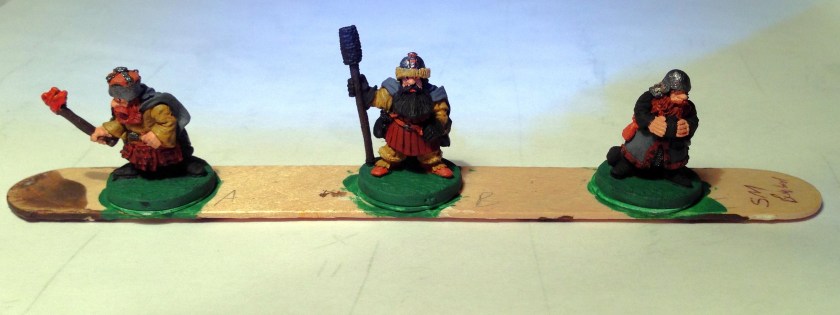
I now had another crew now needed to complete – and I had three different ones to paint. I will cover each in turn. These were the torch bearing Dwarf (“A”), the Dwarf with the Ram (“B”), and the Dwarf loader (“C”). All three got their visible skin painted with P3 “Midland Flesh”. Any visible eyes were painted with Americana’s “Snow” and “Ebony”.
For torch bearing “A”, I used Citadel “Balor Brown” on his tunic and Americans “Zinc” on his cape. I painted his leather armor with Armory “Chestnut”. His beard was painted with Polly-S “Venetian Dull Red”. I wanted the boots to be black, so I used Americana “Ebony” to good effect here as well as on the bolts in the leather armor. I chose Citadel “Dryad Bark” for the shaft of the torch. For the flame, I painted it with a successive mix of Armory “Red”, Tamiya “Orange”, and Craftsmart “Yellow”. Highlighting followed as before, and a wash of Citadel “Agrax Earthshade”. I painted “A”‘s cape frill with Armory “Prussian Blue”, and his leggings with a mix of Craftsmart “Khaki” and Citadel “Balor Brown”. Armory “Red” was my choice for the trim on the cape. I chose Citadel “Dryad Bark” for the shaft of the torch. For the flame, I painted it with a successive mix of Armory “Red”, Tamiya “Orange”, and Craftsmart “Yellow”. I used Folk Art “Gunmetal Gray” on the helmet and belt buckle. I highlighted the cape frill with a mix of Armory “Prussian Blue” and Americana “Sky Blue”, and the cape itself with a mix of Americana :Zinc” and Craftsmart “Grey”. I touched up the leather and the skin tones, then applied a wash of Citadel “Agrax Earthshade”.
The ram bearer “B” was started with Citadel “Balor Brown” on his tunic and Americana “Zinc” on his cape. Here again, I employed Armory “Chestnut” on his leather. I chose for this rammer to have a black beard – so I used Americana “Ebony” for that, as well as for his gloves, and his ram. His helmet straps got Armory “Leather Brown”. I then mixed Citadel’s Balor Brown” and Craftsmart “Khaki” for his helmet ruff and his boot spats. I chose Citadel “Dryad Bark” for the ram shaft. The cape I highlighted with a mix of Americana “Zinc” and Craftsmart “Grey”. The metals (helmet, belt buckle) were done with Folk Art “Gunmetal Gray”, while the leatherwork was highlighted with Citadel “Balor Brown”. A wash of Citadel “Agrax Earthshade” was applied, followed by more highlighting, and another repetitive wash.
The loader “C” was next. Similar to “A”, I painted his beard with Polly-S “Venetian Dull Red”. “C” followed a similar pattern as “A” and “B”. His overcoat was painted with Americana “Zinc” and his leatherwork on it and his pouches were completed similar to “A”‘s leatherwork. I used Americana “Ebony” for his sleeves and the cannonball in his hands. For the sword, I used Folk Art “Gunmetal Gray”, chestnut, and Martha Stewart Crafts “Brushed Bronze”. Highlighting followed as before, and a wash of Citadel “Agrax Earthshade”, and a touch up of skin tones with P3 “Midland Flesh”.
The crew after painting but before highlights and washes are applied (front)The back of the crew after paintingAfter highlights and washes (front)After highlights and washes (back)
I then painted all three crew bases and the hex base with Americana “Forest Green”. I took the hex base, and applied an initial flocking with Ziterdes “Alpine Meadows” and removing half of the cork “boulders”. After a day, I then used my Dremel to score places for the wheels and back of the bombard as well and the crew wells. I put in Aleene’s magnetic sheets in the 3 wells for the crew, as well as subsequently drilling ¼” holes for neodymium magnets. I used wood glue to secure the bombard and the cannonballs to their respective scored areas. Lastly I put in the neodymium magnets – securing them with wood glue and steel washes on the bottom of the base.
I next reflocked again the bases (crew and bombard) so as to try to hide the wells with the Ziterdes “Alpine Meadows”. I also used Army Painter “Meadow Flowers”, and “Wilderness Tuft” with wood glue. I also added more cork rocks (the Ziterdes product is loaded with way too many so I had a lot left over again) , and alternated painting them with Americana “Ebony”, Armory “Chestnut” and Citadel “Balor Brown”. I gave the bases a light coat of a white glue and water slurry so as to secure all the flocking. I think that I achieved a nice effect on the base in terms of a natural look.
Once everything had dried, I gave the three coat varnish to the crew as I had to the bombard as before. Each coat was allowed to fully dry. The whole kit then got a light coat of Testors Dull coat. The series of photos below show the final product.
.
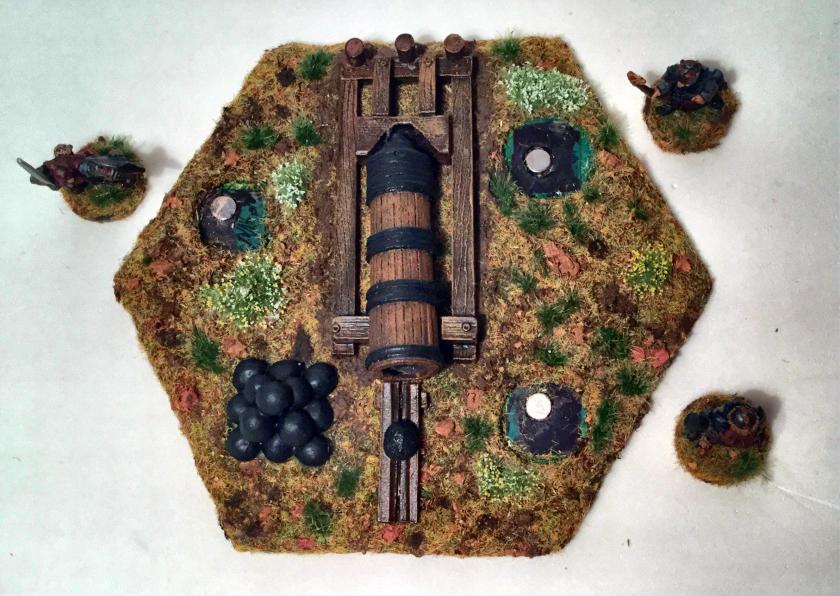
View from left flank, completed setView from right flank, completed setTop view with crew removedTop view with crew magnetically held in place
I am very happy with this kit as well! It will be a great addition to Dwarven Army with the larger bombard kit.
I have been putting together crew-served weapons for my fantasy miniature tabletop war games. I have been looking out for primitive cannon, bombards, catapults, ballistae, onagers, and the like. There seemed to be many good kits from the 1980’s that would work, but the challenge was in finding them – and completing them satisfactorily. This project turned out to be more complex than I originally thought – and in the end was a great learning experience and very satisfying.
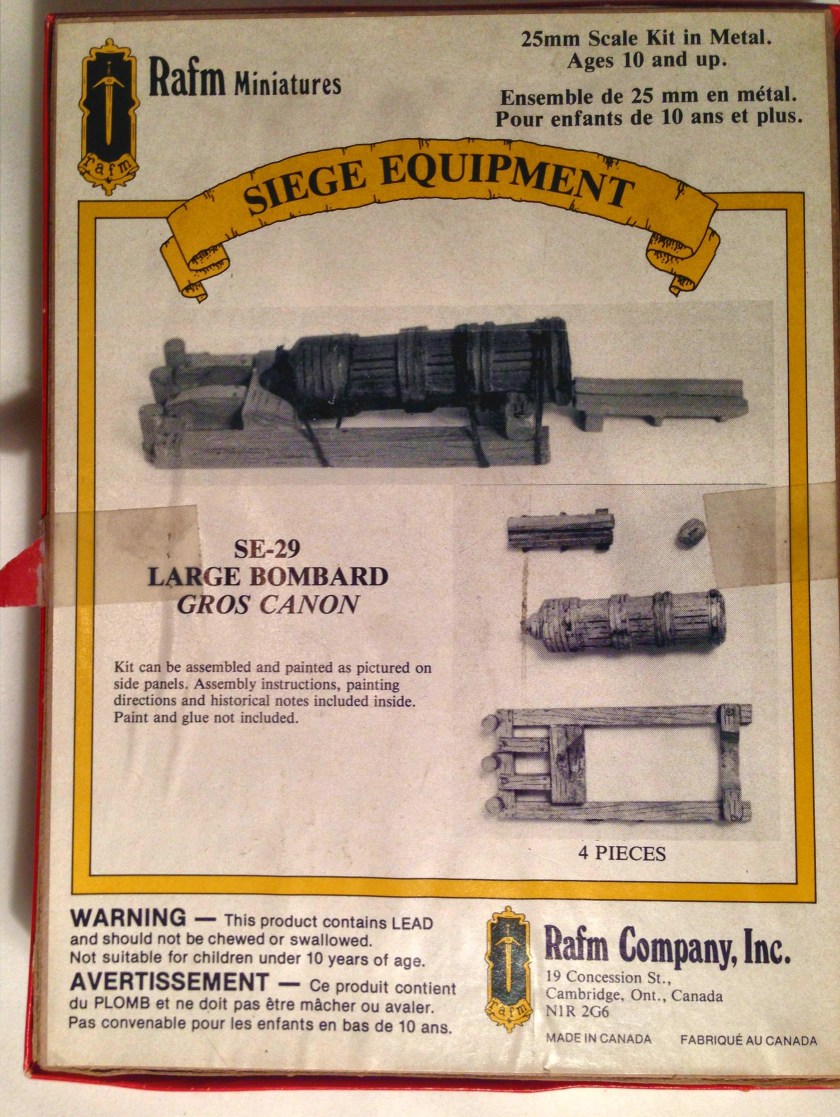
My thoughts were also that my Dwarven forces did not have any troops with ranged weapons – and that primitive cannon or bombards would be a good addition. That would also make sense with Dwarves being ostensible masters of forging iron. I know that Ral Partha has a Dwarf Steam Cannon (which I now have because of the first Iron Wind Metals 2015 kickstarter), but I was hoping to get something sooner. Another eBay find was just the ticket – a “Large Bombard” (SE-29 in the 1986 RAFM catalogue on page 44, later changed to RAF00929).
This was part of the “Siege Equipment” line from RAFM. Apparently RAFM was unwilling to expend resources to print a picture of the bombard on the cover of the box. The company settled for a picture on the bottom and the side and a label over a trebuchet picture on the front cover for all of the line. I can’t help but think that this was not great marketing on RAFM’s part.
Box cover top – Is it a trebuchet, no wait, RAFM put a label on the box!Box cover bottom – I added this picture to Lost Mini’s WikiSide of Box
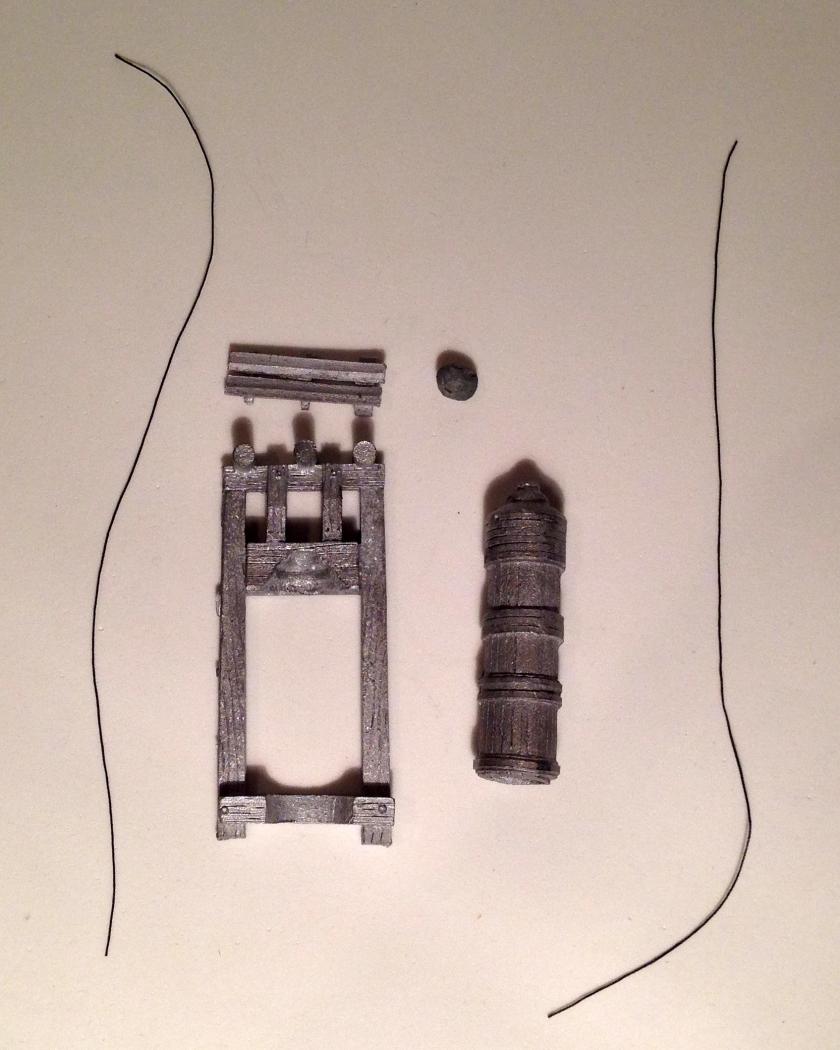
All of the pieces shown were included – and I used them all except for the string (I thought it did not add any value visually to the model). I know that bombards were roped down in history – but this was my call!
The original kit was complete as shownSide view before any work on the kit
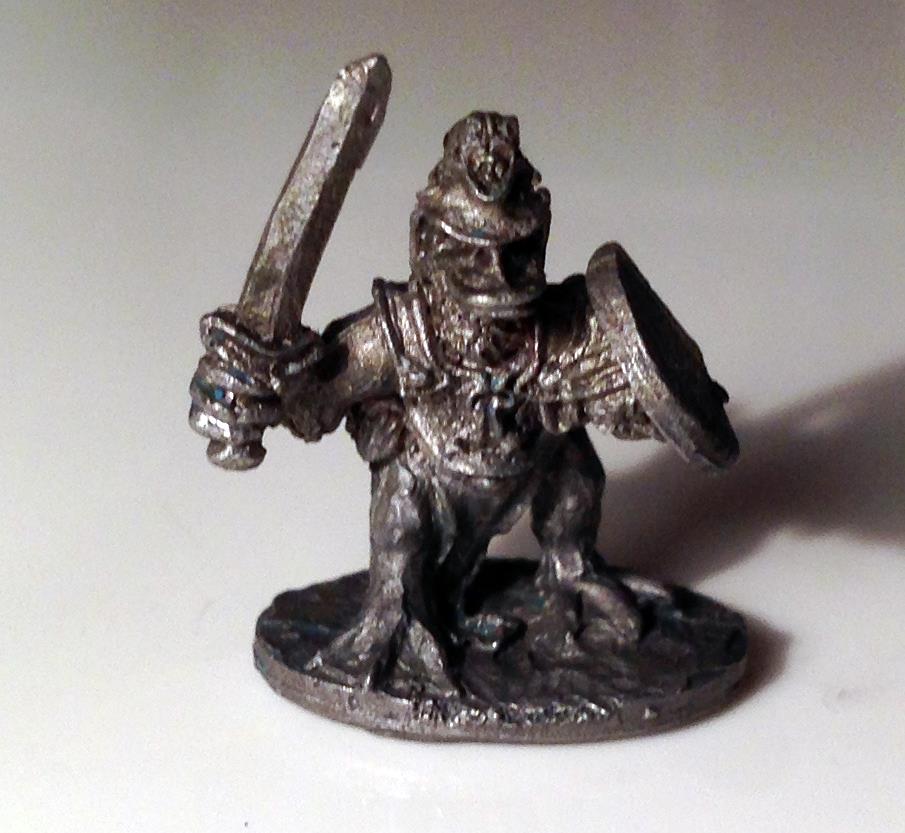
I obviously needed a crew. Luckily, I acquired a pair of Dwarves from a Ral Partha blister that had been opened and was incomplete. It was from the late 1980’s or early 1990’s – “Dwarf-Bombard” by B. Ollie (02-161). As I had an 02-161 that was complete, I was familiar with the two figures left – one was a had a ram for the bombard, and one held a torch for igniting the weapon’s fuse. From my hoard of lead, I added a Dwarf with a sword as a leader to round out the crew. This figure was a Grenadier figure, but I have been unable to determine anything else about the figure that I designated as the leader.
I primed the crew and the bombard in the winter depths in February at Jeff Smith’s workshop with Krylon Ultra-flat Black spray paint. Then I mounted them on ¾” washers with wood glue, which was subsequently glued to popsicle sticks
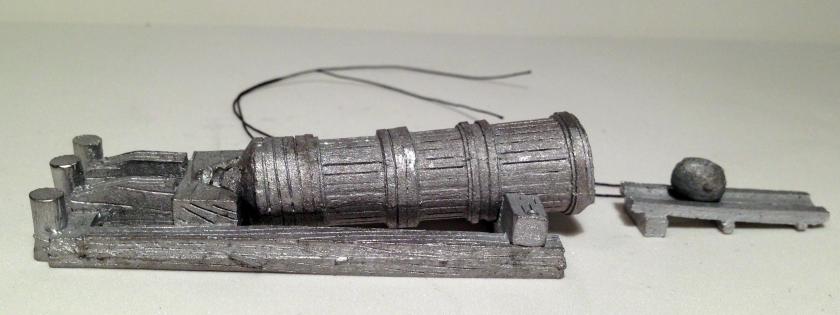
The crew and bombard primed (the gun carriage is upside down for some reason)
I started by working on the bombard. The kit came with one cannonball, and I used some Milliput to make a stack of them with the help of wood glue and some toothpicks for a frame. This took two iterations of gluing as shown below. Once done, I also primed these with Krylon Ultra-flat Black spray paint. I then painted them with Secret Weapons Washes “Heavy Body Black” ink. I also cut a base for the kit with my scroll saw – a 5½” hex base with 30° beveled sides from 1/8″ luan plywood. I glued ¾” steel washers to the base for easier storage on magnetic sheets that I have glued to my “Really Useful” plastic boxes. I used some old German Deka-Lack “Grun” from when I was stationed in West Germany (yes, paint from 1987) to prime the base. This finished off this vial after 29 years!
Cannonball stack – step 1Cannonball stack, step 2
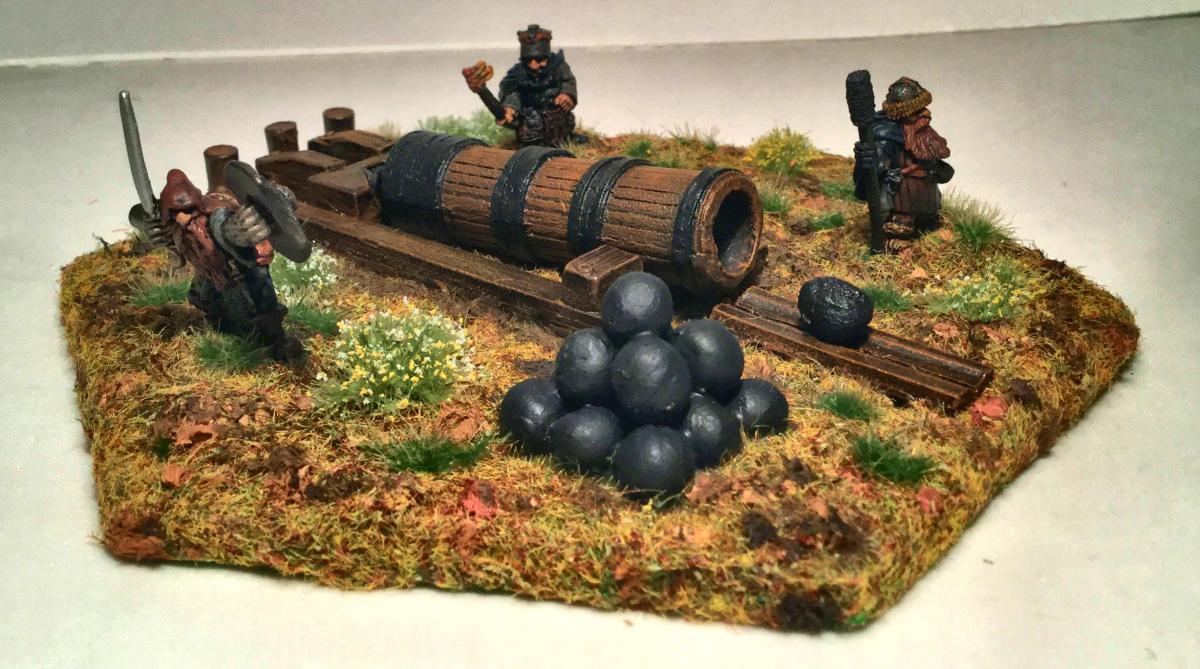
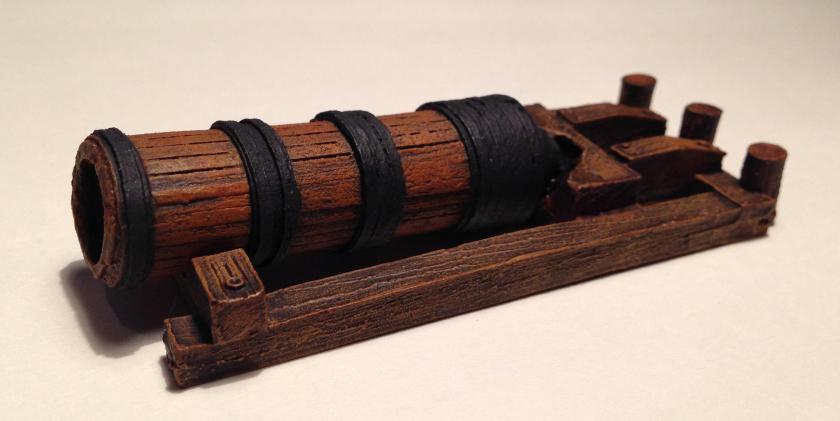
Then I proceeded to paint the bombard. I base-coated the weapon and its component carriage and loading ramp with Citadel “Dryad Bark”. This I followed with a successive series of four washes with Secret Weapons Washes “Heavy Body Black” and “Sewer Water”, and tow applications P3 “Brown Ink”. Then I dry-brushed the wooden parts twice – first with Citadel “Skrag Brown” and then with Citadel “Balor Brown”. I then added another wash, this time with Citadel “Agrax Earthshade”. I painted the metal sections of the gun and the cannonballs with Americana “Ebony”. To finish the weapon with varnish, three coats were applied successively and over two days – Krylon “Clear Glossy”, Krylon “Clear Matte”, and Testors “Dull Coat”.
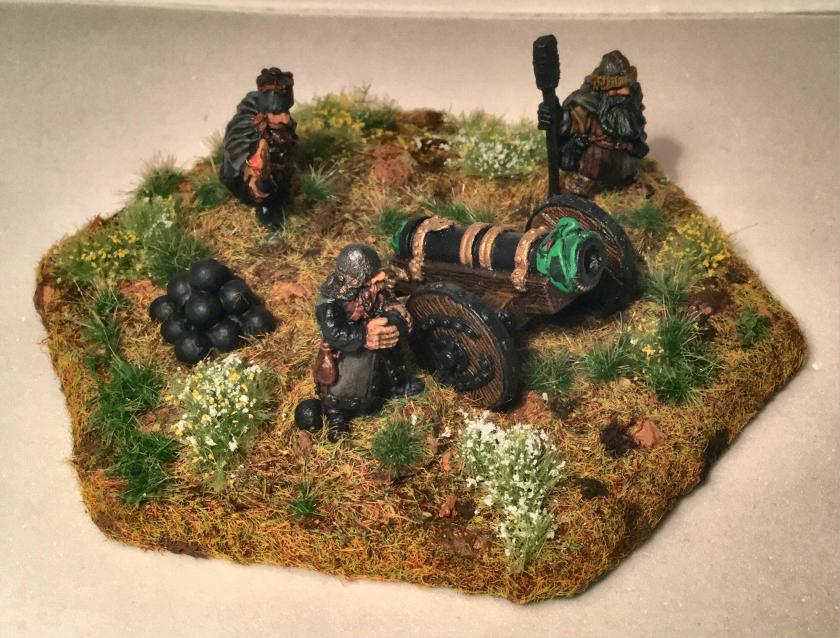
The Large Bombard painted and varnished
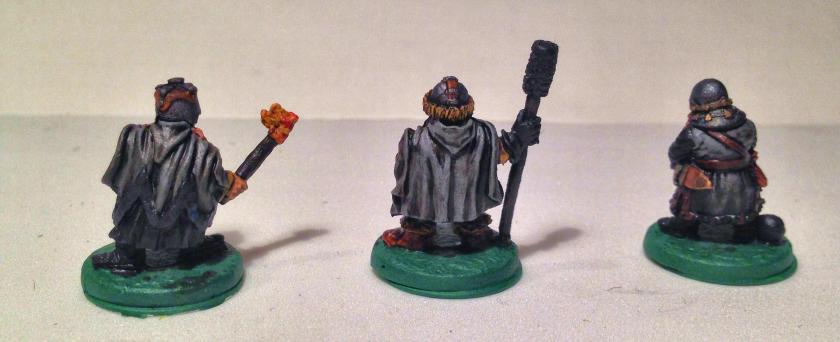
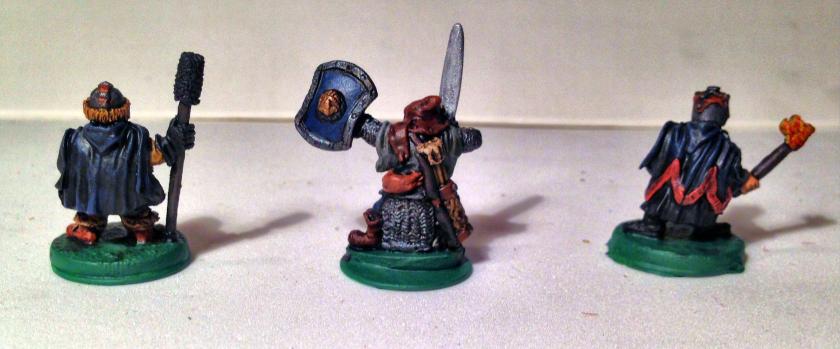
The crew now needed to be worked on – and I had three different ones to paint. I will cover each in turn. The Dwarf with the Ram (“A”), the leader Dwarf (“B”), and the torch-bearing Dwarf (“C”). All three got their visible skin painted with P3 “Midland Flesh”. I like this color on Dwarven skin. Any visible eyes were painted with Americana’s “Snow” and “Ebony”.
For “A”, I used Citadel “Balor Brown” on his breeches and Armory “Chestnut” on his leather armor. His beard was painted with Polly-S “Venetian Dull Red”. I covered his cape with Armory “Prussian Blue”, and his leggings with a mix of Craftsmart “Khaki” and Citadel “Balor Brown”. Armory “Red” was my choice for the trim on the cape. For the ram shaft, I again used Citadel “Dryad Bark”, with Americana “Ebony” on the ram head. The cape I highlighted with a mix of Armory “Prussian Blue” and Americana “Sky Blue”. The pouches were initially painted with Americana “Zinc” and subsequently highlighted by adding Craftsmart “Grey”. The metals (helmet, belt buckle) were done with Folk Art “Gunmetal Gray”, while the leatherwork was done with Armory “Chestnut”. A wash of Citadel “Agrax Earthshade” was applied, followed by more highlighting, and another repetitive wash.
“B” was started with Americana “Zinc” on his tunic. Armory “Chestnut” was used for his hat/hood, and his boots. Similar to “A”, I painted his beard with Polly-S “Venetian Dull Red”. His breeches were painted with Armory “Prussian Blue”, as was his shield and breeches. I painted his bow and the back of his shield with Citadel “Dryad Bark”, while Americana “Snow” and Citadel “Balor Brown” were my choices for the arrow fletchings and quiver respectively. His gauntlets and sword were done with Tamiya “Metallic Gray and highlighted with Tamiya “Flat Aluminum”. My choice for his mail coat was Folk Art “Gunmetal Gray”. I then highlighted all areas with lighter versions of the base coats similar to that described for “A”. “B” then got a wash with Citadel “Agrax Earthshade”, followed by some minor highlights again, to include Martha Stewart Crafts “Brushed Bronze” on the sword pommel and the shield boss. I ended with Tamiya “Flat Aluminum” on the blade.
“C” followed a similar pattern as “A” and “B”. His tunic was painted with Americana “Zinc” and his cape and boots were completed similar to “A”. I chose Citadel “Dryad Bark” for the shaft of the torch. For the flame, I painted it with a successive mix of Armory “Red”, Tamiya “Orange”, and Craftsmart “Yellow”. Highlighting followed as before, and a wash of Citadel “Agrax Earthshade”.
I then painted all three crew bases and the hex base with Polly-S “Basilisk Dark Green” from 1984, retiring this paint after 32 years. I took the hex base, and applied an initial flocking with Ziterdes “Alpine Meadows” and removing half of the cork “boulders”. After a day, I then used my Dremel to score places for the different weapon components and the crew bases. I put in Aleene’s magnetic sheets in the 3 wells for the crew, as well as subsequently drilling ¼” holes for neodymium magnets. I used wood glue to secure the bombard, the cannonballs, and the loading ramp to their respective scored areas. Lastly I put in the neodymium magnets – securing them with wood glue and steel washes on the bottom of the base.
A note here – in the future, I would only use the neodymium magnets – the magnetic sheets are superfluous and can cause reversal of magnetic flux forces which complicates figure placement (though I got mine fixed).
I next flocked the bases (crew and bombard) again so as to try to hide the wells with the Ziterdes “Alpine Meadows”. I also used Army Painter “Meadow Flowers”, and “Wilderness Tuft” with wood glue. I also added more cork rocks (the Ziterdes product is loaded with way too many so I had a lot left over) , and alternated painting them with Americana “Ebony”, Armory “Chestnut” and Citadel “Balor Brown”. I gave the bases a light coat of a white glue and water slurry so as to secure all the flocking. I think that I achieved a nice effect on the base in terms of a natural look.
Once everything had dried, I gave the three coat varnish to the crew as I had to the bombard as before. Each coat was allowed to dry fully. The whole kit then got a light coat of Testors Dull coat. The series of photos below show the production process.
I am very happy with the kit, though I wish it had taken less time! Still, I think that this will be a valuable piece in many future games.
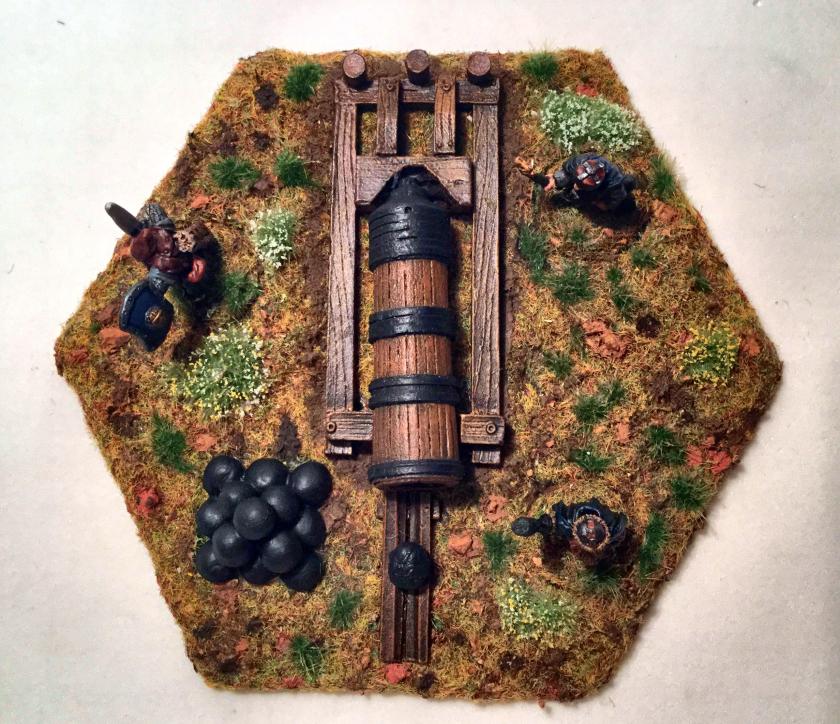
Front of “A”, “B”, and “C” from left to right after base coat painting but before washes and highlightsBack of “C”, “B”, and “A” from left to right after painting but before washes and highlightsFront of “A”, B”, and “C” from left to right after washes and highlightingBack of “A”, “B”, and “C” from left to right after washes and highlightingThe Dwarven crew in front of their bombard – complete!Top view of the Dwarven Large Bombard showing crew wellsTop view of the Dwarven Large Bombard with CrewCompleted front view of the Dwarven Large BombardNice angle view of the completed Dwarven Large Bombard
Buck Surdu sent me this as a challenge. It was a Warrior Duck armed with a sword. This figure was the smallest I had yet to try to mold and cast. Buck, back when we were at West Point, misspelled “Guards” as “Gurads” in one of his Tunnels and Trolls games he ran. I seem to remember you had to make a saving roll when you saw them or you laughed uncontrollably while they mercilessly gutted you. For nostalgia’s sake alone, I looked forward to making a couple of “Gurad” units
The master original figure (with blue clay still between his fingers) – less the base I added
My previous experiences told me that the base was too thin and friable for a mold for gravity casting. Therefore, I used one of my bases that I made from Aves® Apoxie Sculpt to help fill the mold out. Even so, it was small enough that it moved slightly between the making of the first mold half and the second. The only down side was that I had to do a little surgery with an Exacto knife on the mold, and that led to the sword having a split at its tip. Even so, this is easily filled with paint or clay, so its not a big deal.
I cast 24 from a mix of 67% tin and 33% lead, at 565° F. Some of the figures did not initially come out, but after adjustments, the gravity mold worked fine. I sent Buck half, while retaining the other half for myself. They are pretty cool and hope to get them on the tabletop soon.
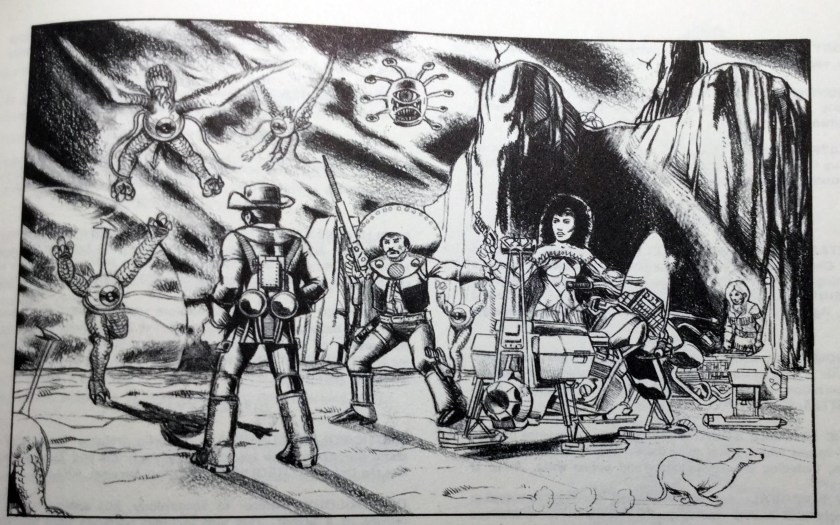
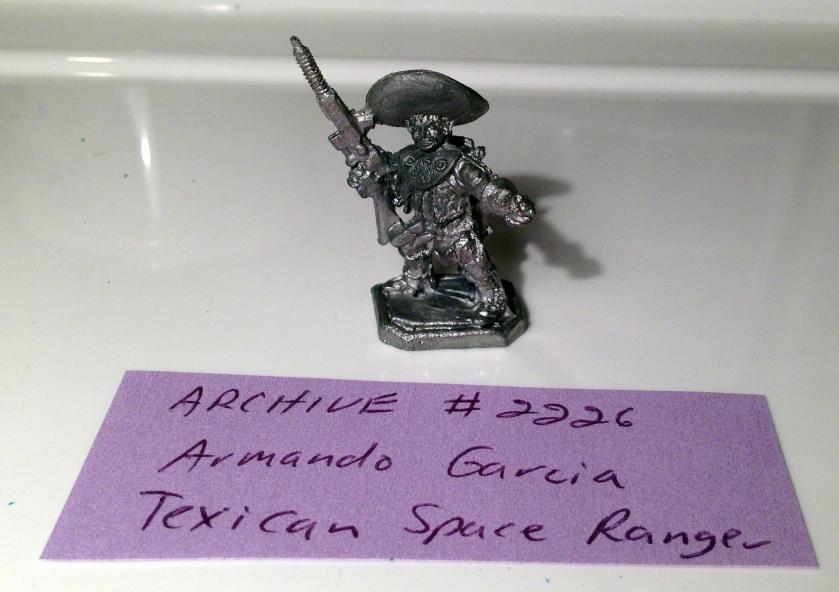
I acquired another group of Archive figures from their long-defunct “Star Rovers” line. One of them was 2206, “Armando Garcia, Texican Space Ranger”. Armando had a jet pack and a blaster or laser rifle (and a huge sombrero). He also had a partner, Travis B. Crokit, another Texican Space Ranger. On page 5.03 of the Star Rovers Module 1 game rules, there is a nice drawing of both of them and some other characters.
Texican Space Rangers Travis B. Crokit (back turned) and Armando Garcia from the Star Rovers Rules
At the time of the mold making for Armando, I did not yet have Travis, but I do now. He is quite cool as well, and wears goggles – looking like Doc Brown from Back to the Future! He will eventually be the subject of one of my molding projects as well.
Original Armando Garcia Figure, front
Original Armando Garcia figure, back. Note the jet pack!Travis B. Crokit, front
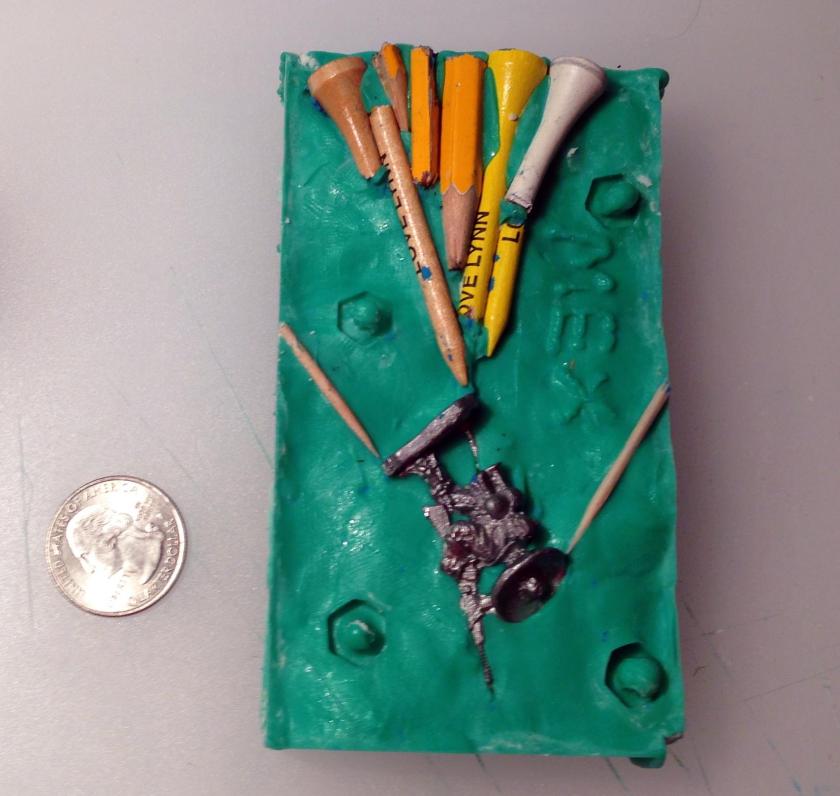
As for Armando, I made a two-piece mold from Castaldo Quick Sil. I continued to experiment with different configurations for my pouring aperture – this time with pencils and golf tees. I also tried to see if I could add something to the mold that would help me identify it better as after graphite powder is applied its pretty hard to tell sometimes. In this case – I added “MEX”.
Armando Garcia first mold half
The mold design worked well enough. I was able to cast without hardly any failures, which made me happy. I again used 67% tin and 33% lead at 565° F.
I cast 24, and again sent 12 off to Buck Surdu for his future sci-fi gaming projects. Once I get Travis done, I may add some other retro-looking sci-fi weapons to the Rangers. Buck just sent me a nice sprue of some that I will look to mold for that purpose (thanks Buck). After seeing what he did with the Star Ducks (adding sci-fi weapons), I am intrigued to try this as well.
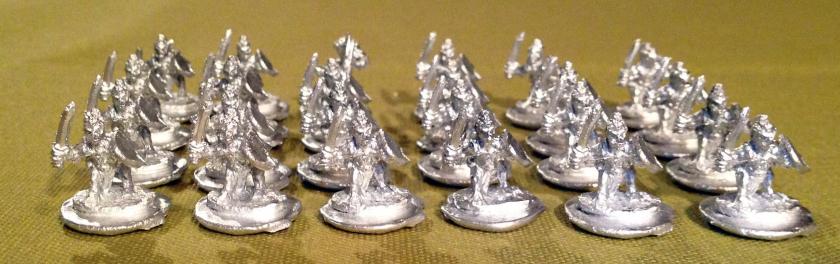
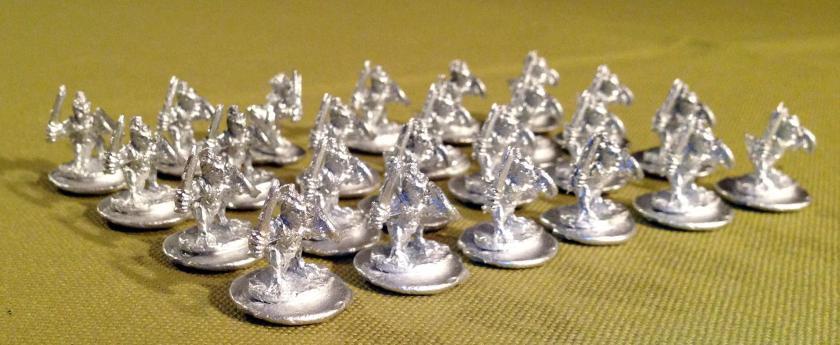
24 Armando Garcia’s led by the master figureSide view of the group
A couple of figures that I saw on eBay caught my eye. They were retro-looking astronauts/cosmonauts that had no provenance. I could not tell that they were probably 54mm from the photo, but I did believe that they would be great for future sci-fi games. They also looked fun to cast!
I do not have the brain figure, but I did have two Macrons. I decided to mold them, thinking they could be “Space Giants”.
They were both in good shape. I made a two-piece mold with Quick-Sil from Castaldo with one of the Macrons. I made this mold rather tall to accommodate a large plug that would give the figures better detail. I also experimented with using golf tees (that had “Merry Christmas Love Lynn” on them and an old pharma pen top for my mold opening. I also added toothpicks for venting.
Macron mold – first half
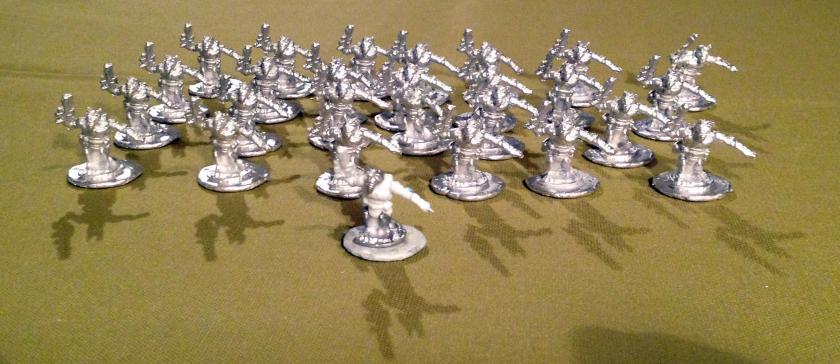
The mold desighn worked fine, and I was able to cast 24 satisfactory examples with a mix of 67% tin and 33% lead at 565° F. The mold did not need much tapping at all which was great. They did use up a lot of metal though relative to smaller figures, as one would expect.
24 Macrons
I sent off half to Buck Surdu, and I kept the rest. I am looking forward to getting them painted soon!
I have been a bit behind on blogging but I hope to catch up over the next few days. I have been quite busy with work and projects on the weekend (and golf of course!). I also sent Buck Surdu some of these miniatures, and I did not want his first look to be on my blog. His trip to Costa Rica meant that I’d need to wait a week while the figures awaited his return and inspection (he is after all an Infantry Officer).
I wanted to wait to do this as he inspired this project. During an April conversation with Buck about my recent casting project to resurrect the 1977 Ral Partha “Rooman War Party” (01-044), he suggested that I was somewhat adept at making Quick-Sil molds and casting. Perhaps I should consider making “Space Roomans”? Intrigued, I pondered how to do this in a quality way. Luckily I have been getting good ideas about conversions by reading other blogs, such as Buck’s and Chris Palmer’s.
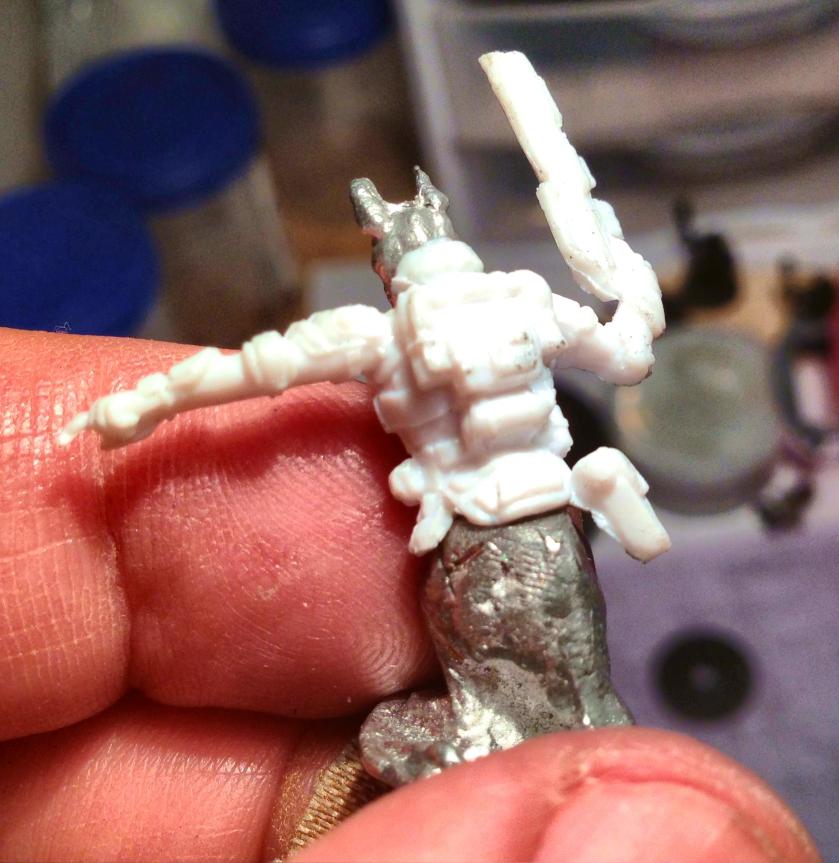
I started by searching eBay for a nice jewelry saw – as I thought this would work better than my Dremel for fine cutting of metal. I found one cheap, and then looked for a suitable sci-fi miniature that was worthy of conversion. There was a large lot of 38 resin figures from a Reaper Kickstarter that I got for $29 that included pulp figures and science fiction figures. I was taking a chance, but it worked out. Once the figures arrived, I looked at all of them for possibilities, and one stood out.
The eBay entry – the eventual conversion figure is in the red circle
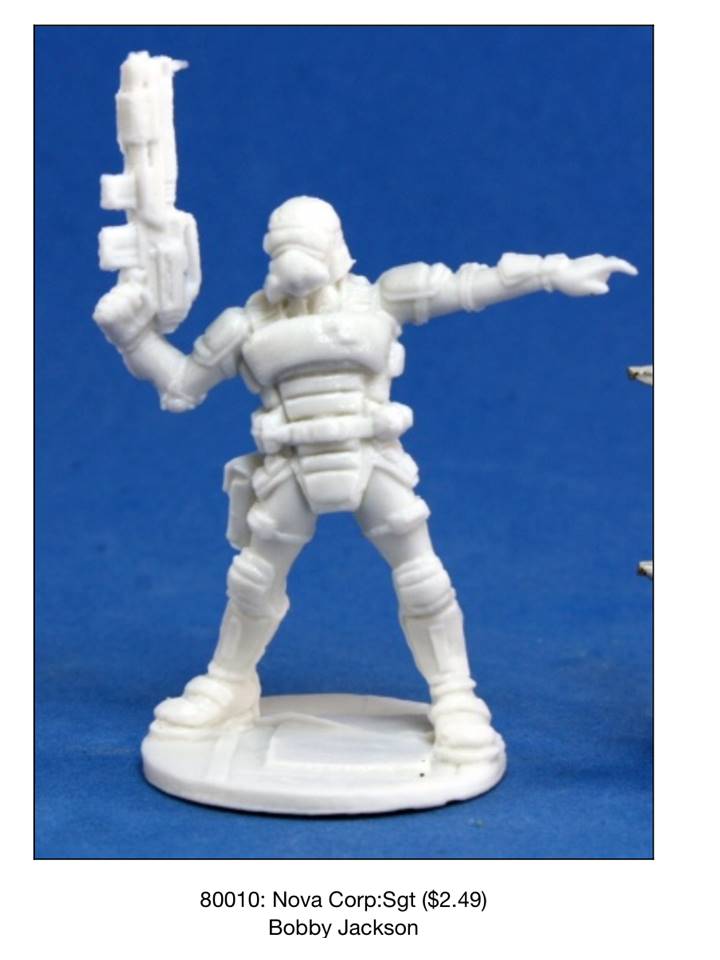
This figure was Reaper 80010, “Nova Corp Sergeant”, by Bobby Jackson.
Picture of figure from Reaper website
I then looked for a suitable Rooman to convert as well. I did not have the heart to sacrifice an original Rooman, so I used one of my castings. There are two types, one with a shield on the front, and one with a shield on the side – and only the one with the shield on the side looked capable of conversion. I used the jewelry saw and an Exacto knife to cut the shield from the Rooman. I then cut the Rooman in half and removed his head (sounds brutal doesn’t it?). The Nova Corp Sergeant was a lot easier to cut being made of resin! I used the Exacto knife to cut off his head and carefully remove his legs, preserving his body armor. Simultaneously, I sculpted some bases to assist in my casting. These I made from Aves® Apoxie Sculpt modeling compound that I got in Bel Air, MD at a Hobby Shop that I found when I attended HARCON. It’s a modeling shop and not the gaming shop that Buck suggested to me, but my error proved fruitful as I found this product to be is much easier to use than Milliput. I have found that I need these bases to create better castings – the older miniatures had pretty thin bases that did not always come out when I molded and cast them.
The Nova Corp Sergeant (before losing his head and legs), an unconverted Rooman example, and a bisected and decapitated Rooman in the process of conversion. Note my Apoxie Sculpt bases curing in the background.
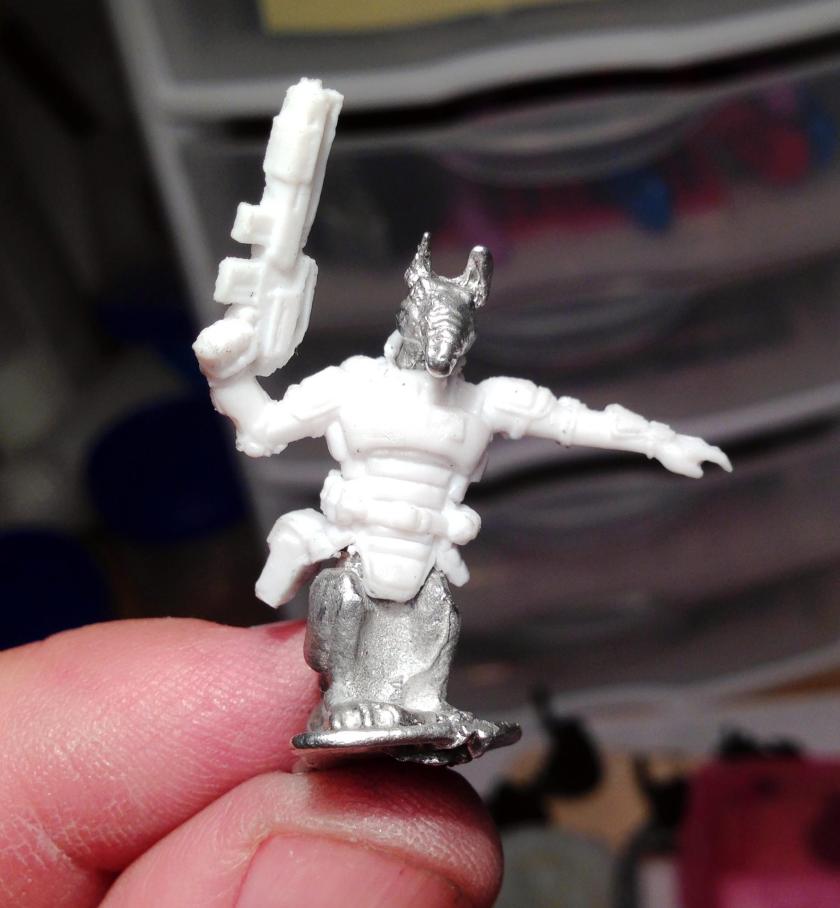
After I had done my Dr. Frankenstein cutting, I drilled a small hole in the Rooman and the torso of the Nova Corp Sergeant, and pinned the two with a paper clip wire and super glue. This allowed me to get a proper angle between the two figures. Then, I carefully carved out space for the Rooman head, and it fit well in the armor. Lastly, after a 24 hour cure for the Apoxie Sculpt bases, I affixed the conversion to one.
The front of the initial Space Rooman conversion before adding the base
The back of the Space Rooman Conversion (less the base). Note the file marks on the Rooman haunches – I smoothed those out with wood glue
The master figure awaiting a base!
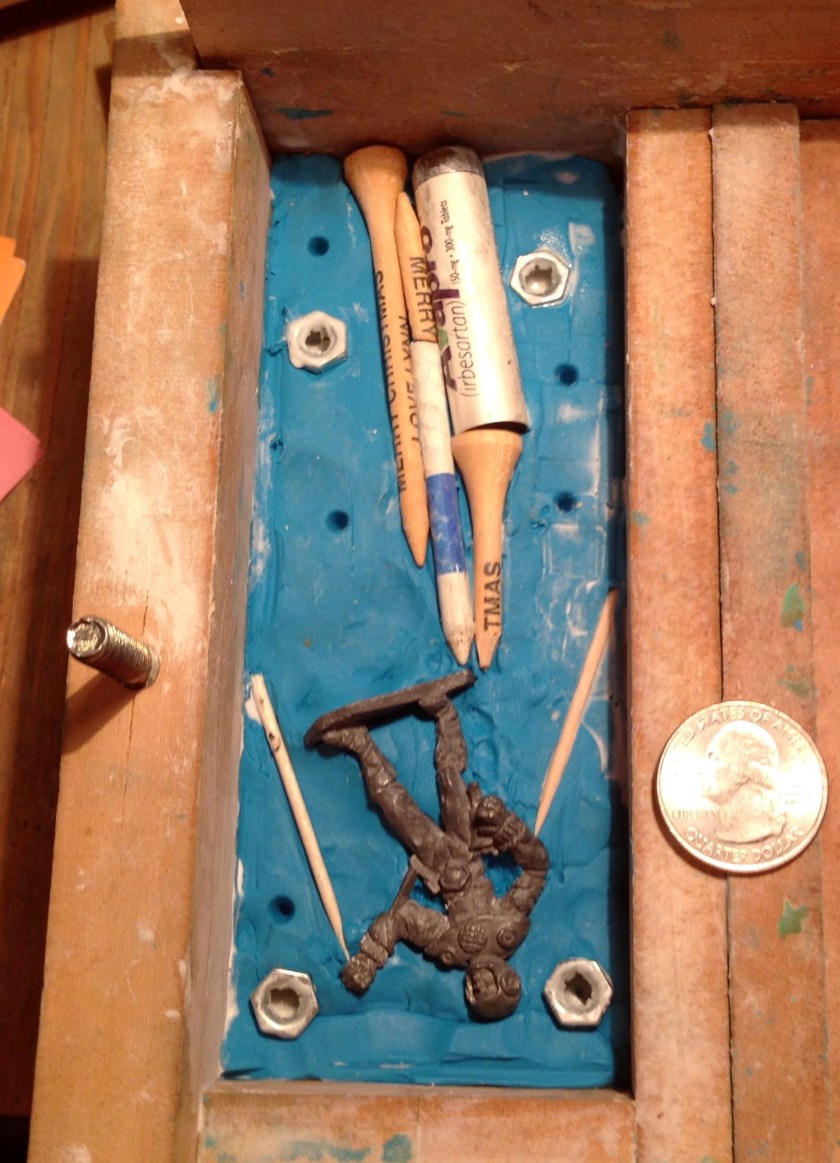
The next step would be to create a two-piece mold using Castaldo Quick-Sil. I tried this time to create a better flow of molten metal via three channels made from pens and pencils – which worked great for gravity casting. I found that pointing the tips at the edge of the base worked well. I also used toothpicks for venting the mold and helping with flow. This, with some excision with my Exacto knife, made a very large plug at the top that would get all the mold filled by virtue of its weight.
The first mold half – note the Apoxie Sculpt base (with my name on it for posterity). I used a combination of old casting plugs, a pen, two pencils, and toothpicks to create the flow system of this mold.
The completed first mold half awaiting the second pour of Quick-Sil.
I then mixed together approximately 66% tin, and 34% lead (probably some trace bismuth in there too), and melted the alloy to 560° F.
I tapped the mold on my steel-sheeted table after pouring, and employed all the safety equipment that I have previously described in this blog. As always, this is dangerous!
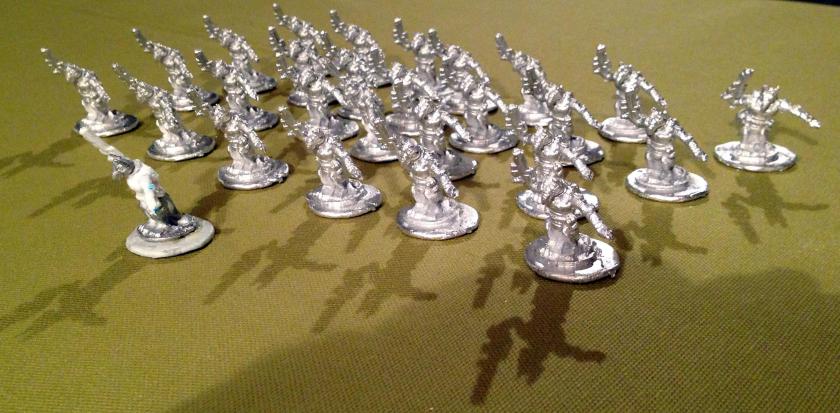
I must say that the final product exceeded my expectations. Very few of the molds failed to come out as desired which I attribute to my design above. I ended up with 26, and sent a lucky 13 to Buck for use in sci-fi games!
A Regiment of Space Roomans, led by the master!
Front view of the Space Roomans with master figure in front
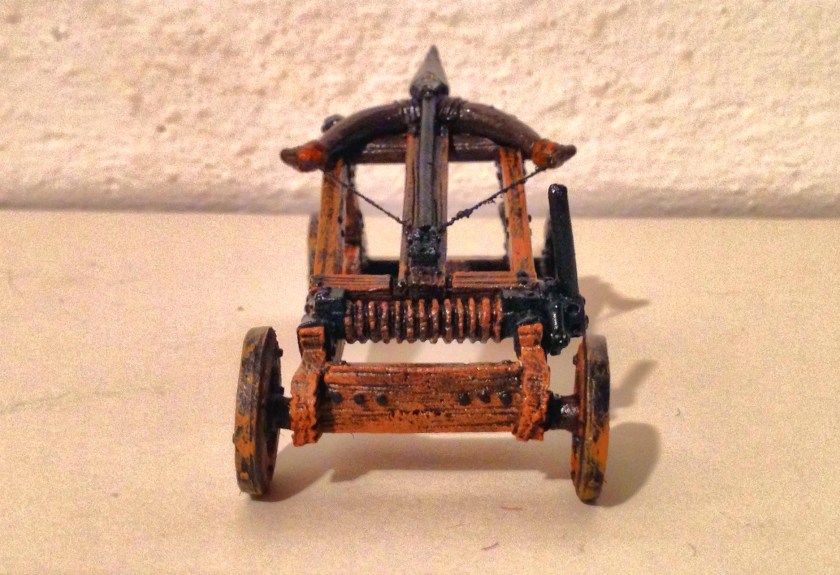
I saw an item on eBay that was listed as “Ogre Baleesta”. As I already had an Elven Ballista, I thought it a good idea to have a crew-served weapon for the bad guys. Little did I know that this would turn out to be a pretty involved project! I paid a little more than $30 for the three figures and the ballista.
The figures as shippedI love doing a little research on Lost Mini’s Wiki site: http://www.miniatures-workshop.com/lostminiswiki/index.php?title=Main_Page. I want to document my figures as best as possible, and I have gotten a bit more familiar with digging into the catalogs there. I found these all in the 1994 Grenadier catalog. However, they were not Ogres, but “Trolls” and a separately listed “Heavy Bolt Thrower with Hunchback Gunner”.
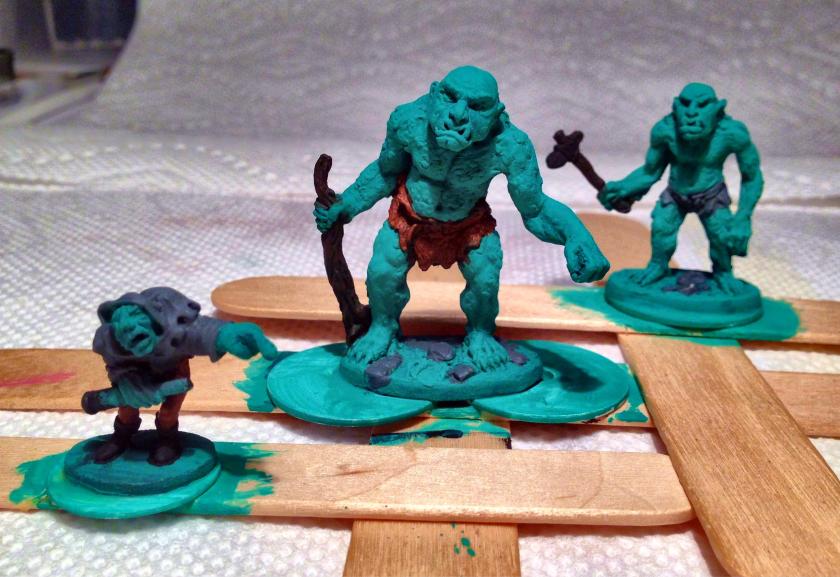
The set of Trolls is #3107, sculpted by Sandra Garrity, and included both Trolls in a blister pack. It was part of the “Fantasy Legends Blisters” line. The figures themselves had “1992” and SM-33 and SM-34 and “Garrity” on the bases.
The ballista and gunner was #9204, and was in the “Fantasy Warriors Grand Pack Line”. I then proceeded to treat them all as a Troll crew and a ballista. To call them Ogres when they were Trolls seemed so inappropriate!
The ballista had been crudely cemented, and that took some work to correct. I was happy that a string had been attached to the ballista as that saved me some work.
Ballista rear view as shippedDetail of the bottom of #3107 Trolls by Sandra Garrity
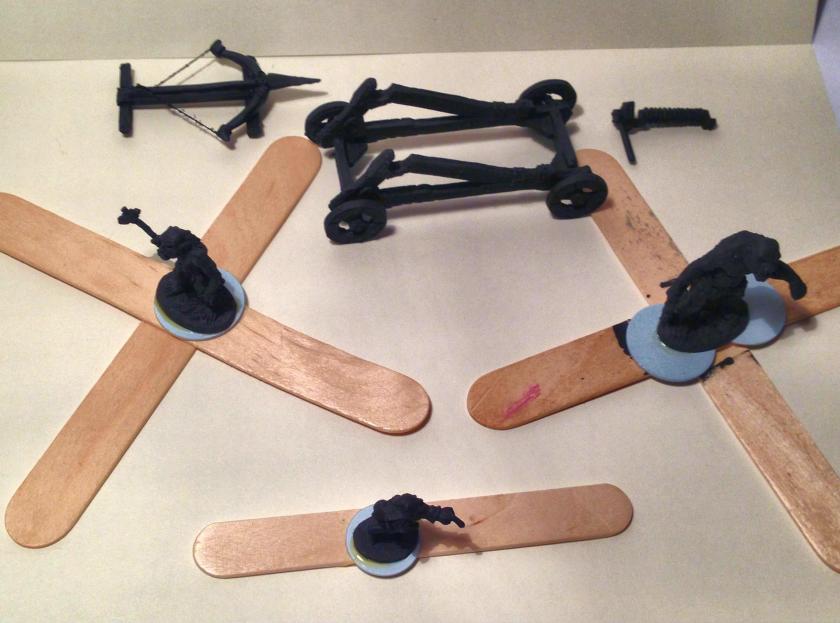
I removed the old cement and disassembled the ballista. I then primed the set in Jeff Smith’s workshop on a cold February day with Krylon “Ultra Flat Black” and mounted as below for painting.
On washers on popsicle sticks and ready for painting!
I used Citadel’s “Dryad Bark ” as a base coat for the ballista wooden elements. I subsequently employed two inks in succession as washes – Secret Weapon’s Washes “Heavy Body Black” and P3’s “Brown Ink”. On this I applied a dry brush application of Citadel’s “Scrag Brown”, followed by a wash with Citadel’s “Agrax Earthshade”. For the bolt and other iron parts, I used Tamiya’s “Gun Metal” and Polly-S “Rust”. Finally, I used Citadel’s “Nuln Oil” as a light wash to darken the iron components even more. Eventually I was able to apply a couple of coats of varnish to the ballista. As I needed to apply coats of varnish to the undercarriage and the top of the ballista, and as New England would not warm up, this took longer than I wanted! I was able to apply Krylon “Clear Glossy” followed by Krylon “Clear Matte” varnish and moved on to the crew.
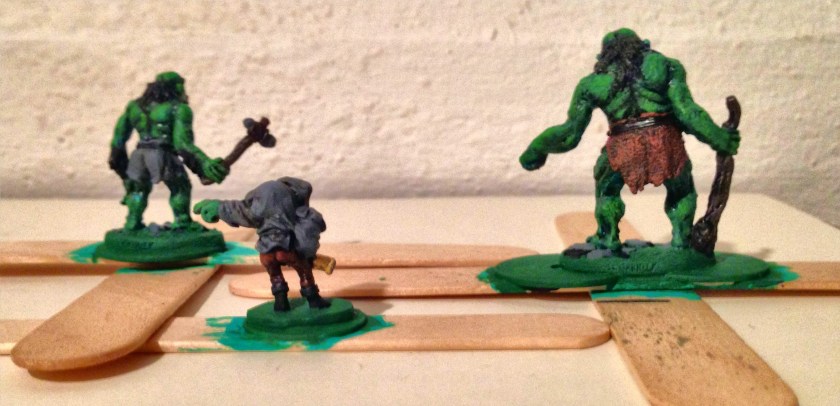
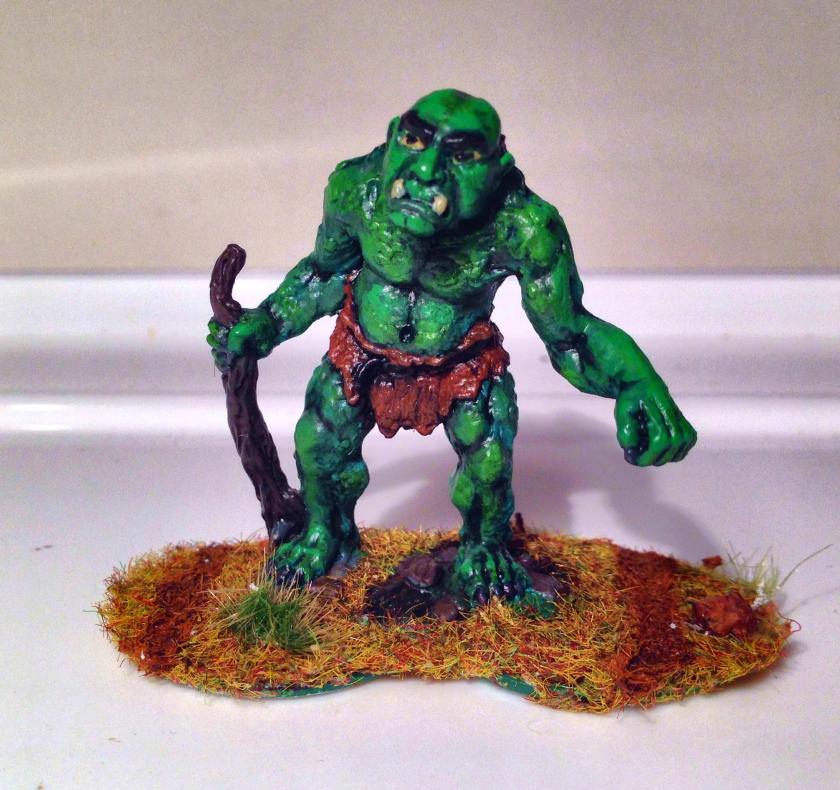
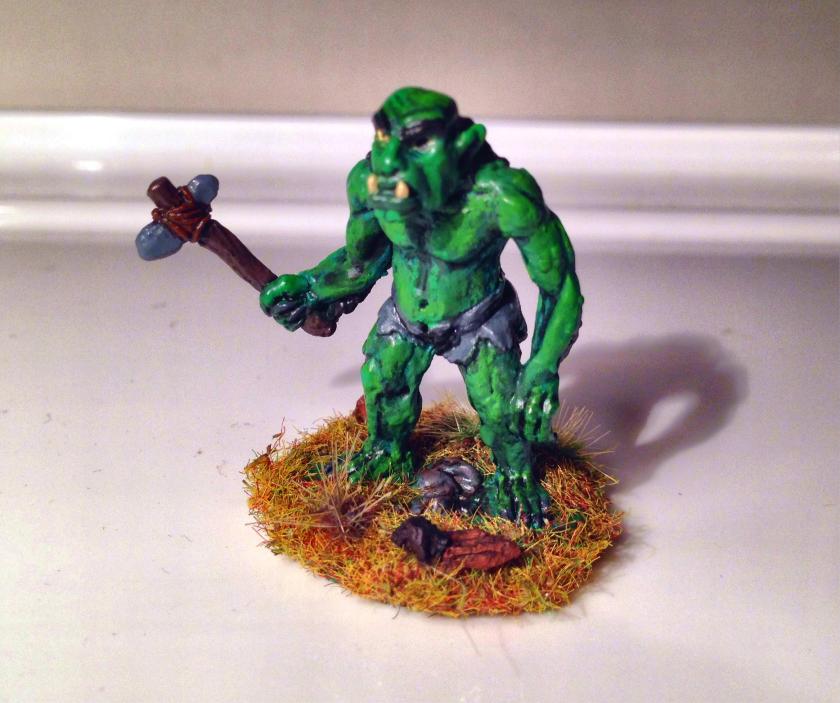
The ballista completedI base coated the crew with Armory “Dark Green” on the skin, with Armory “Chestnut” and Americana “Zinc” on pants and cloaks and stones at the figures’ bases. For the clubs and handles I used Citadel’s “Dryad Bark”. The gunner’s boots got Americana “Black”. Then I applied a wash with two inks – Secret Weapon Washes “Storm Cloud” and Citadel’s Agrax Earthshade on the skin. For the eyes, I used Citadel’s “Ushabti Bone” and Americana “Lamp Black”. I further wanted to get the right tone for the skin – I wanted greasy, sweaty Trolls! To accomplish this, Citadel’s “Waaagh! Flesh” and Polly-S “Slime Green” worked well when highlighted with Citadel’s “Niblet Green”. Then I used Americana “Lamp Black” on all the Trolls’ hairy parts. For the gunner’s telescope, I used Martha Stewart Craft’s “Pale Bronze”. I proceeded to add highlights (with Americana “Black Tie” on the hair and lightened “Zinc” on the cloak) and depth to the skin with the use of washes (more “Nuln Oil”, “Agrax Earthshade”, and Secret Weapons Washes “Stone”. Then I varnished them the same way as the ballista.
The first base coat on the TrollsAfter painting and varnishingRear view after painting and varnishing.
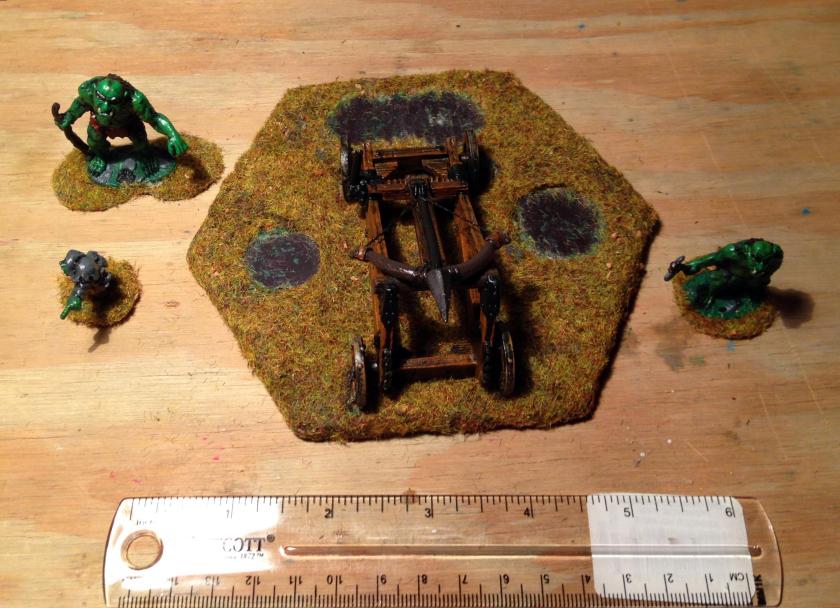
My concept was to craft a hex base large enough to deploy the set. I cut out a hex base from 1/8″ plywood (luan), and primed it with Deka-Lack “Grun”. On the bottom of the base I glued several washers for the model to be stored on magnetic sheets. I flocked the base with Ziterdes “Alpine Meadows” and painted any rocks “Skrag Brown”. Using my Dremel, I carefully removed enough wood to install magnetic sheets in the base so that I could have the crew leave the ballista. These sheets proved insufficient to the task in terms of being able to hold the figures to the base. I fixed this by drilling 1/4″ holes with a spade bit and adding neodymium magnets (1/4″) in the middle of each base. These are powerful magnets. The figures can hang upside down from the base without falling now!
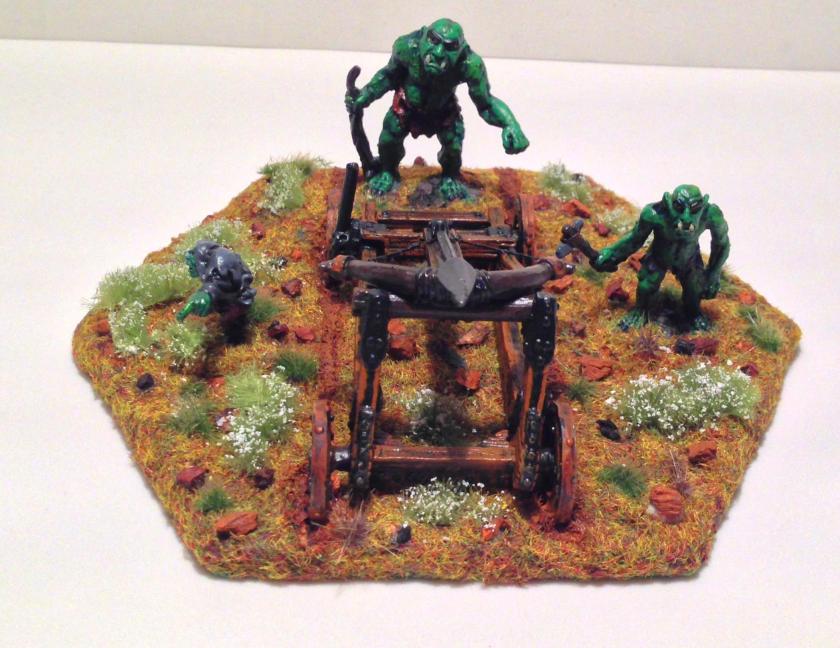
I wanted the idea of the model to be that the large Troll was the locomotive force for the large ballista, with the other Troll being the loader and the small Troll the gunner. The large Troll would push the ballista through the turf leaving wheel ruts. Therefore, I used more “Skrag Brown” to create the image of the wheel ruts. I then reflocked the bases of the figures and the main base and added more rocks, grass, and meadow flowers from Army Painter. After a couple of iterations, I was able to disguise the fact that the crew could be removed.
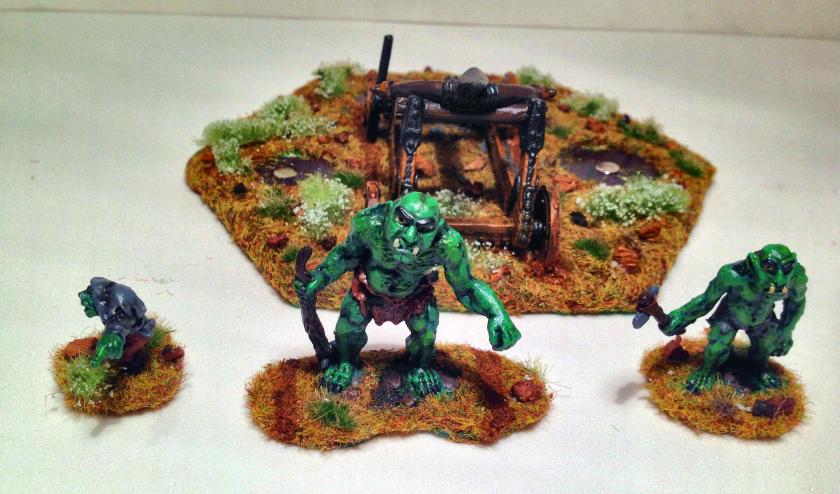
The initial routing for magnets and slots for ballistaFirst shot at magnets and flockingBefore addition of 1/4″ neodymium magnetsFinal frontal view of the modelGunner side viewLoader side view
Rear view angle Crew detached – note neodymium magnets in the center of where figures are mounted Large Troll, Frontal view
Large Troll, reverse sideMedium TrollMedium Troll reverse sideThe Hunchback GunnerThe Hunchback Gunner, reverse side
All in all, I am happy with the way that it all came out. I like the deployability of the crew, and will use this technique in other models. I hope that they are fun to control in my next game!
Certainly Iron Winds Metals is attempting to outdo its Kickstarter project from last year!
There are a LOT of options here and anyone who wanted to get in would certainly find much here to be desired. Unlike last year, the miniatures will be shipped as orders are filled. It ends soon – and these are great Ral Partha figures!
Kudos to IWM – this is pretty impressive. I am still working through my projects (like last year’s Kickstarter!), which is the only thing holding me back!


 Apoxie Sculpt to create a rock and mud mound from which the Giant Scorpion could attack prey and enemies. I mounted the material to the base and sculpted it while mounting the Giant Scorpion to it before it hardened. The washers really do a good job of providing a affixing surface for the sculpted Apoxie Sculpt. I let this solidify for 24 hours.
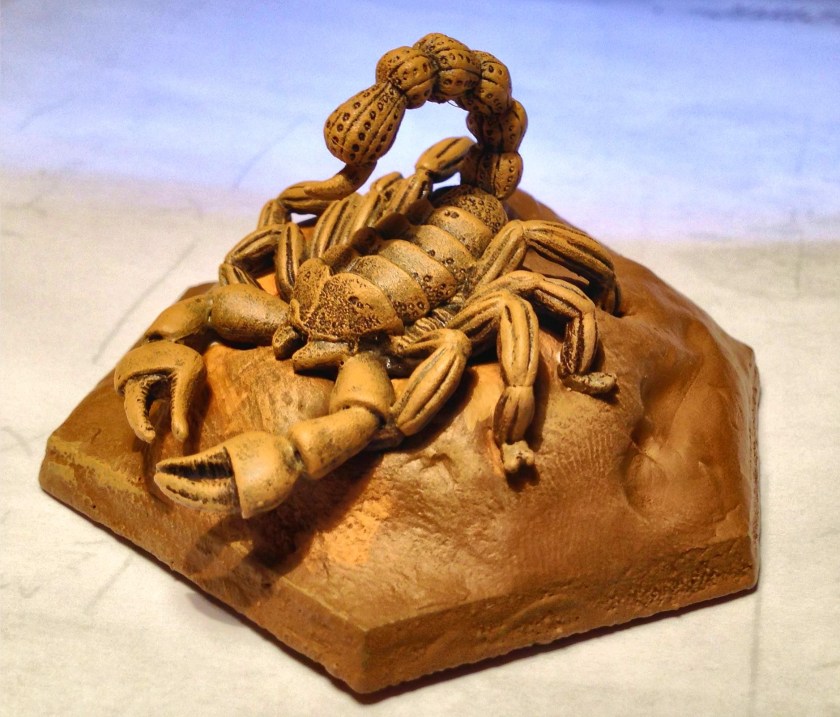


