
I have been putting together crew-served weapons for my fantasy miniature tabletop war games. I have been looking out for primitive cannon, bombards, catapults, ballistae, onagers, and the like. There seemed to be many good kits from the 1980’s that would work, but the challenge was in finding them – and completing them satisfactorily. This project turned out to be more complex than I originally thought – and in the end was a great learning experience and very satisfying.
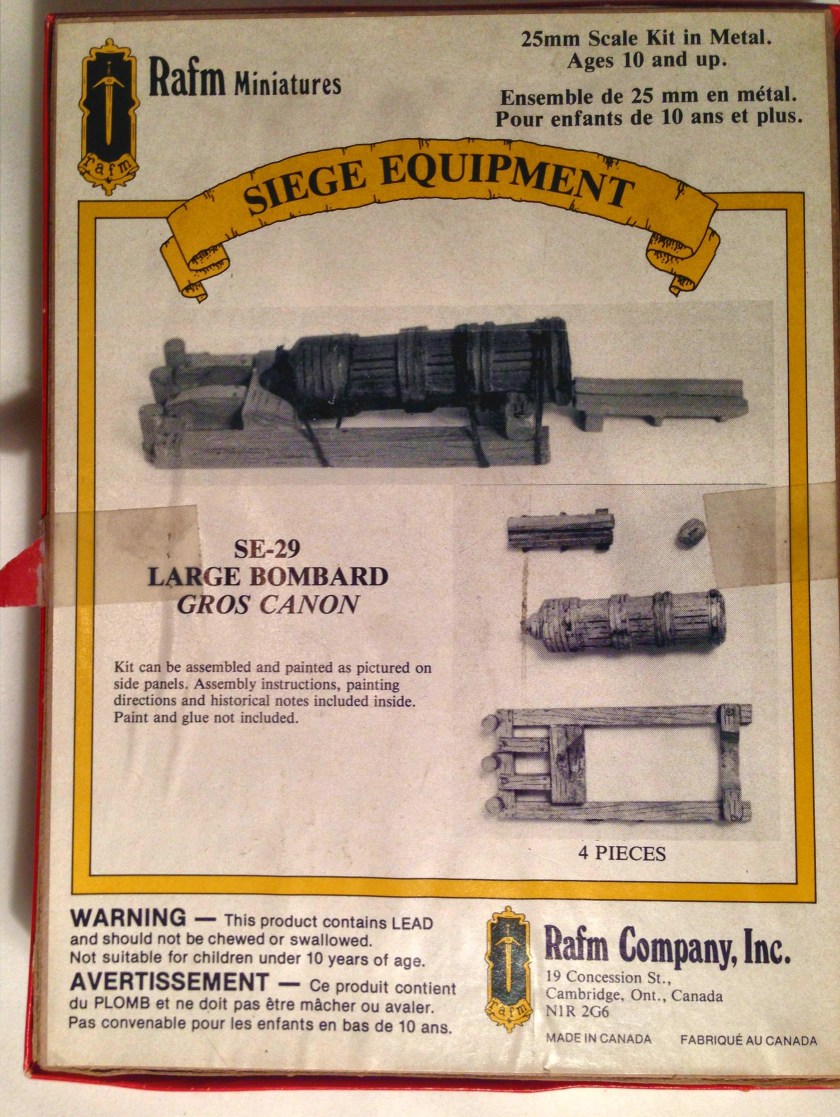
My thoughts were also that my Dwarven forces did not have any troops with ranged weapons – and that primitive cannon or bombards would be a good addition. That would also make sense with Dwarves being ostensible masters of forging iron. I know that Ral Partha has a Dwarf Steam Cannon (which I now have because of the first Iron Wind Metals 2015 kickstarter), but I was hoping to get something sooner. Another eBay find was just the ticket – a “Large Bombard” (SE-29 in the 1986 RAFM catalogue on page 44, later changed to RAF00929).
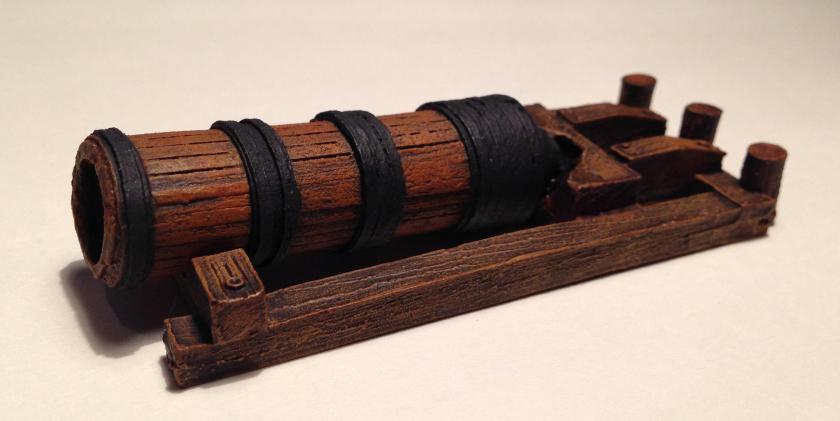
This was part of the “Siege Equipment” line from RAFM. Apparently RAFM was unwilling to expend resources to print a picture of the bombard on the cover of the box. The company settled for a picture on the bottom and the side and a label over a trebuchet picture on the front cover for all of the line. I can’t help but think that this was not great marketing on RAFM’s part.


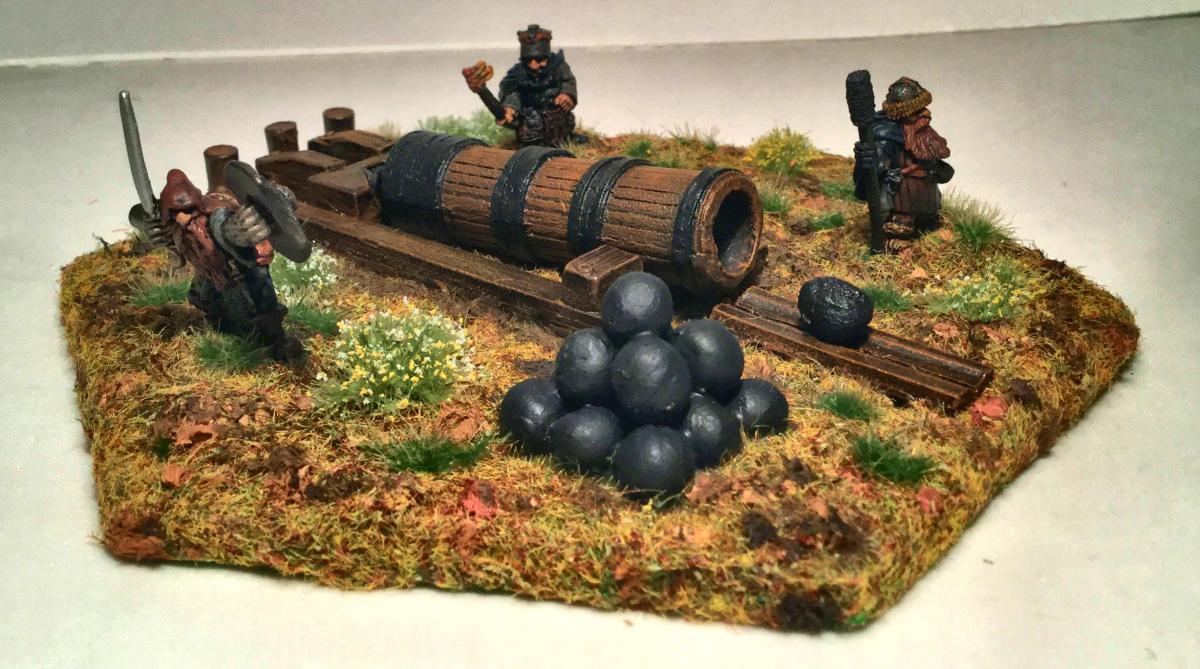
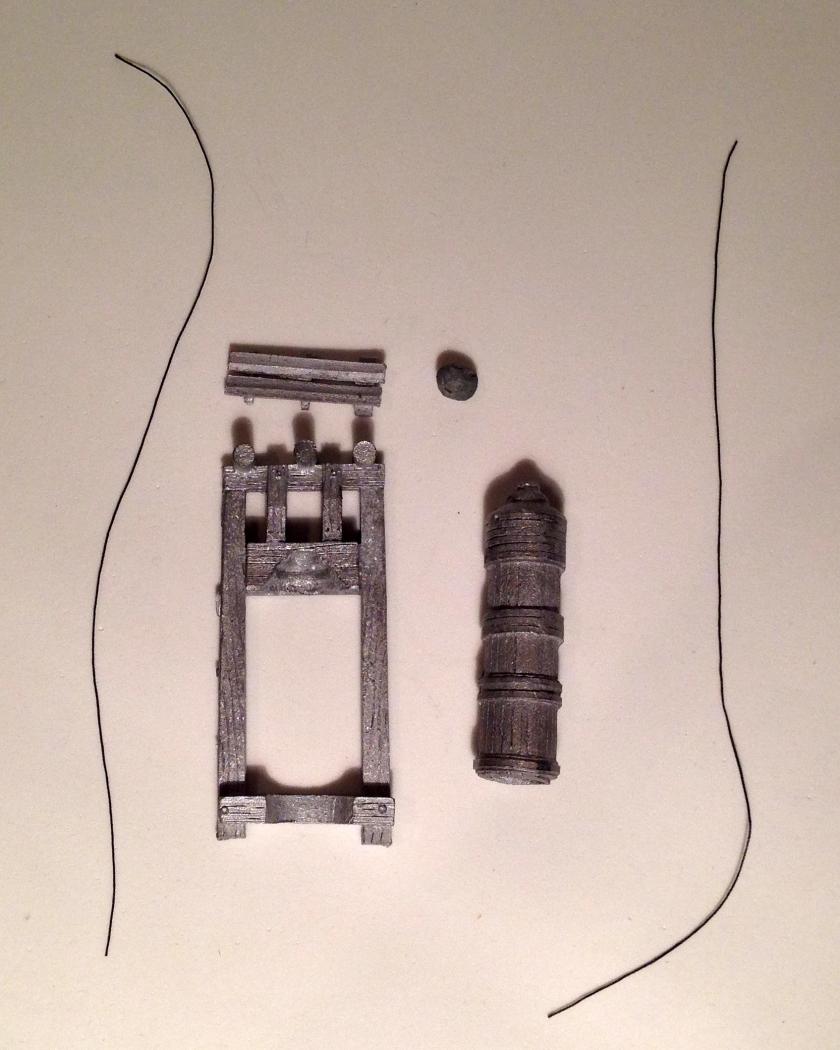
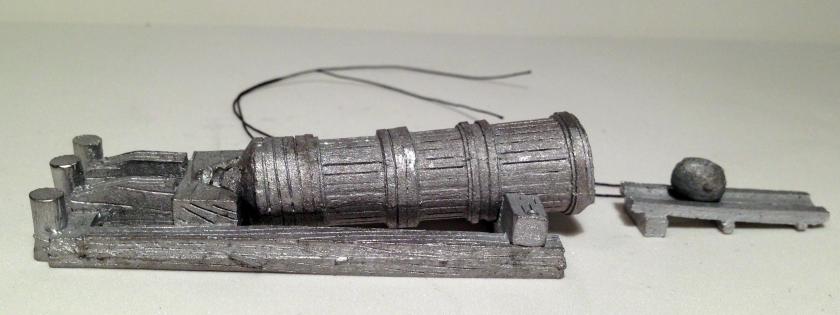
All of the pieces shown were included – and I used them all except for the string (I thought it did not add any value visually to the model). I know that bombards were roped down in history – but this was my call!
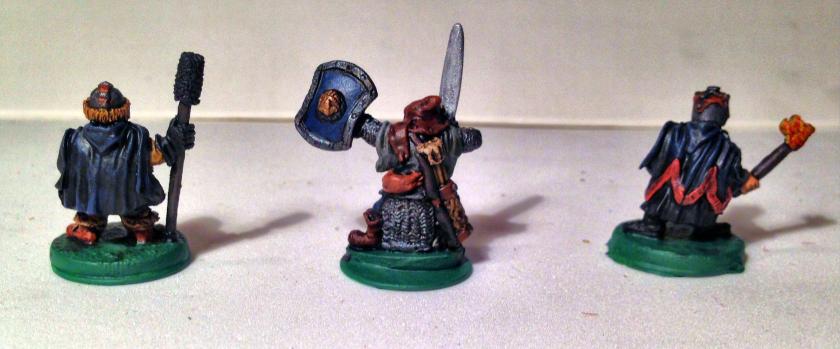
I obviously needed a crew. Luckily, I acquired a pair of Dwarves from a Ral Partha blister that had been opened and was incomplete. It was from the late 1980’s or early 1990’s – “Dwarf-Bombard” by B. Ollie (02-161). As I had an 02-161 that was complete, I was familiar with the two figures left – one was a had a ram for the bombard, and one held a torch for igniting the weapon’s fuse. From my hoard of lead, I added a Dwarf with a sword as a leader to round out the crew. This figure was a Grenadier figure, but I have been unable to determine anything else about the figure that I designated as the leader.
I primed the crew and the bombard in the winter depths in February at Jeff Smith’s workshop with Krylon Ultra-flat Black spray paint. Then I mounted them on ¾” washers with wood glue, which was subsequently glued to popsicle sticks

I started by working on the bombard. The kit came with one cannonball, and I used some Milliput to make a stack of them with the help of wood glue and some toothpicks for a frame. This took two iterations of gluing as shown below. Once done, I also primed these with Krylon Ultra-flat Black spray paint. I then painted them with Secret Weapons Washes “Heavy Body Black” ink. I also cut a base for the kit with my scroll saw – a 5½” hex base with 30° beveled sides from 1/8″ luan plywood. I glued ¾” steel washers to the base for easier storage on magnetic sheets that I have glued to my “Really Useful” plastic boxes. I used some old German Deka-Lack “Grun” from when I was stationed in West Germany (yes, paint from 1987) to prime the base. This finished off this vial after 29 years!


Then I proceeded to paint the bombard. I base-coated the weapon and its component carriage and loading ramp with Citadel “Dryad Bark”. This I followed with a successive series of four washes with Secret Weapons Washes “Heavy Body Black” and “Sewer Water”, and tow applications P3 “Brown Ink”. Then I dry-brushed the wooden parts twice – first with Citadel “Skrag Brown” and then with Citadel “Balor Brown”. I then added another wash, this time with Citadel “Agrax Earthshade”. I painted the metal sections of the gun and the cannonballs with Americana “Ebony”. To finish the weapon with varnish, three coats were applied successively and over two days – Krylon “Clear Glossy”, Krylon “Clear Matte”, and Testors “Dull Coat”.
The crew now needed to be worked on – and I had three different ones to paint. I will cover each in turn. The Dwarf with the Ram (“A”), the leader Dwarf (“B”), and the torch-bearing Dwarf (“C”). All three got their visible skin painted with P3 “Midland Flesh”. I like this color on Dwarven skin. Any visible eyes were painted with Americana’s “Snow” and “Ebony”.
For “A”, I used Citadel “Balor Brown” on his breeches and Armory “Chestnut” on his leather armor. His beard was painted with Polly-S “Venetian Dull Red”. I covered his cape with Armory “Prussian Blue”, and his leggings with a mix of Craftsmart “Khaki” and Citadel “Balor Brown”. Armory “Red” was my choice for the trim on the cape. For the ram shaft, I again used Citadel “Dryad Bark”, with Americana “Ebony” on the ram head. The cape I highlighted with a mix of Armory “Prussian Blue” and Americana “Sky Blue”. The pouches were initially painted with Americana “Zinc” and subsequently highlighted by adding Craftsmart “Grey”. The metals (helmet, belt buckle) were done with Folk Art “Gunmetal Gray”, while the leatherwork was done with Armory “Chestnut”. A wash of Citadel “Agrax Earthshade” was applied, followed by more highlighting, and another repetitive wash.
“B” was started with Americana “Zinc” on his tunic. Armory “Chestnut” was used for his hat/hood, and his boots. Similar to “A”, I painted his beard with Polly-S “Venetian Dull Red”. His breeches were painted with Armory “Prussian Blue”, as was his shield and breeches. I painted his bow and the back of his shield with Citadel “Dryad Bark”, while Americana “Snow” and Citadel “Balor Brown” were my choices for the arrow fletchings and quiver respectively. His gauntlets and sword were done with Tamiya “Metallic Gray and highlighted with Tamiya “Flat Aluminum”. My choice for his mail coat was Folk Art “Gunmetal Gray”. I then highlighted all areas with lighter versions of the base coats similar to that described for “A”. “B” then got a wash with Citadel “Agrax Earthshade”, followed by some minor highlights again, to include Martha Stewart Crafts “Brushed Bronze” on the sword pommel and the shield boss. I ended with Tamiya “Flat Aluminum” on the blade.
“C” followed a similar pattern as “A” and “B”. His tunic was painted with Americana “Zinc” and his cape and boots were completed similar to “A”. I chose Citadel “Dryad Bark” for the shaft of the torch. For the flame, I painted it with a successive mix of Armory “Red”, Tamiya “Orange”, and Craftsmart “Yellow”. Highlighting followed as before, and a wash of Citadel “Agrax Earthshade”.
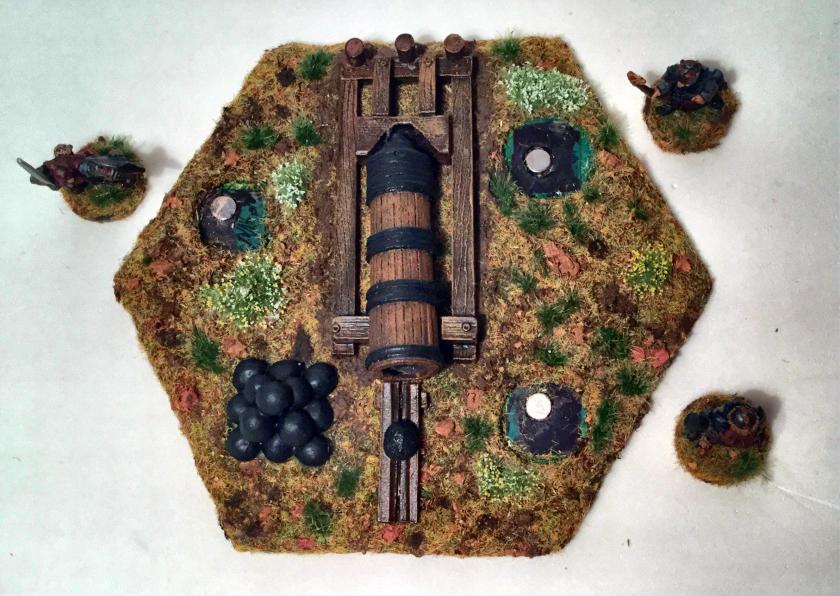
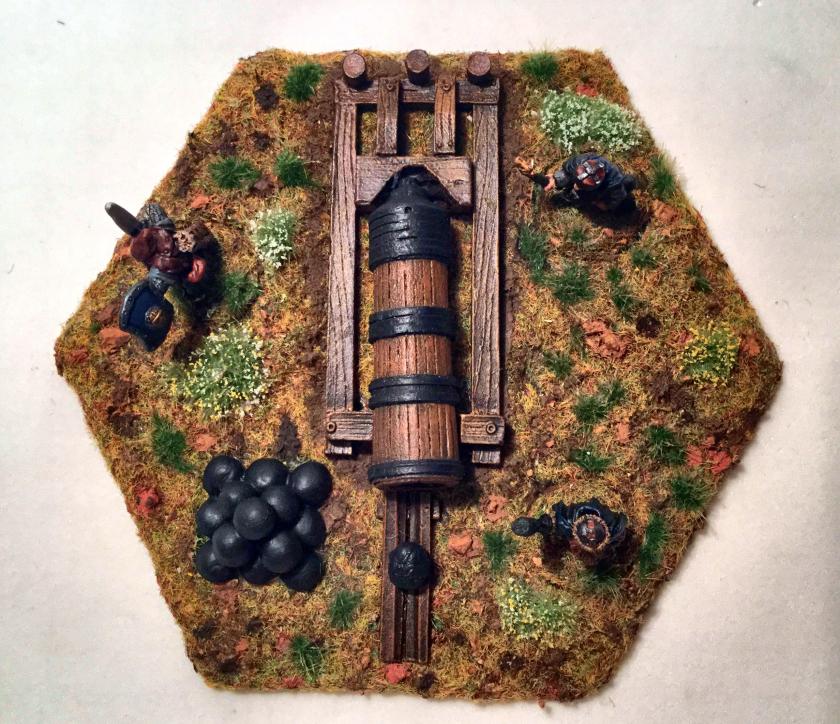
I then painted all three crew bases and the hex base with Polly-S “Basilisk Dark Green” from 1984, retiring this paint after 32 years. I took the hex base, and applied an initial flocking with Ziterdes “Alpine Meadows” and removing half of the cork “boulders”. After a day, I then used my Dremel to score places for the different weapon components and the crew bases. I put in Aleene’s magnetic sheets in the 3 wells for the crew, as well as subsequently drilling ¼” holes for neodymium magnets. I used wood glue to secure the bombard, the cannonballs, and the loading ramp to their respective scored areas. Lastly I put in the neodymium magnets – securing them with wood glue and steel washes on the bottom of the base.
A note here – in the future, I would only use the neodymium magnets – the magnetic sheets are superfluous and can cause reversal of magnetic flux forces which complicates figure placement (though I got mine fixed).
I next flocked the bases (crew and bombard) again so as to try to hide the wells with the Ziterdes “Alpine Meadows”. I also used Army Painter “Meadow Flowers”, and “Wilderness Tuft” with wood glue. I also added more cork rocks (the Ziterdes product is loaded with way too many so I had a lot left over) , and alternated painting them with Americana “Ebony”, Armory “Chestnut” and Citadel “Balor Brown”. I gave the bases a light coat of a white glue and water slurry so as to secure all the flocking. I think that I achieved a nice effect on the base in terms of a natural look.
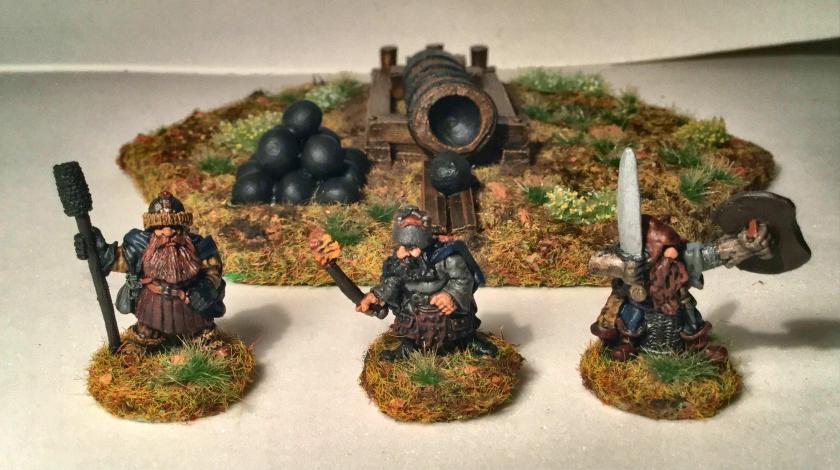
Once everything had dried, I gave the three coat varnish to the crew as I had to the bombard as before. Each coat was allowed to dry fully. The whole kit then got a light coat of Testors Dull coat. The series of photos below show the production process.
I am very happy with the kit, though I wish it had taken less time! Still, I think that this will be a valuable piece in many future games.


Really love how this one all pulled together.
LikeLiked by 1 person
Thanks Ellen!
LikeLike