

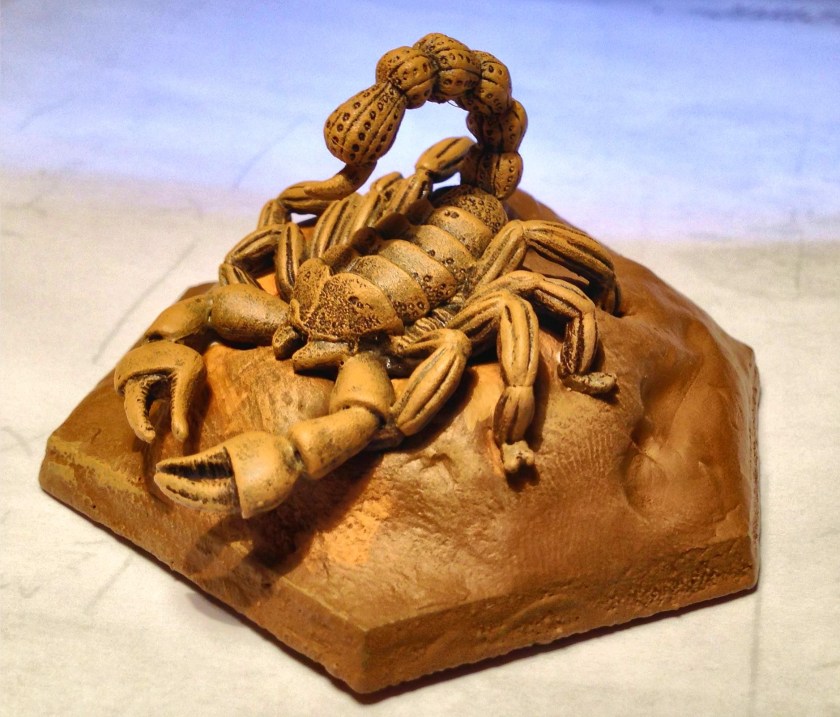
I am still working on adding some large creatures for fantasy gaming. These could be controlled by Wizards, or used as wildcard elements by themselves. Another eBay find that I made was a Ral Partha Giant Scorpion (11-452) from the early 1990’s. It had the top of the blister pack removed. I have seen many older surviving blisters in this shape – which seems rather senseless, for if it was done to save storage space it really does not. Of course, it makes it easier to buy these cheaper.
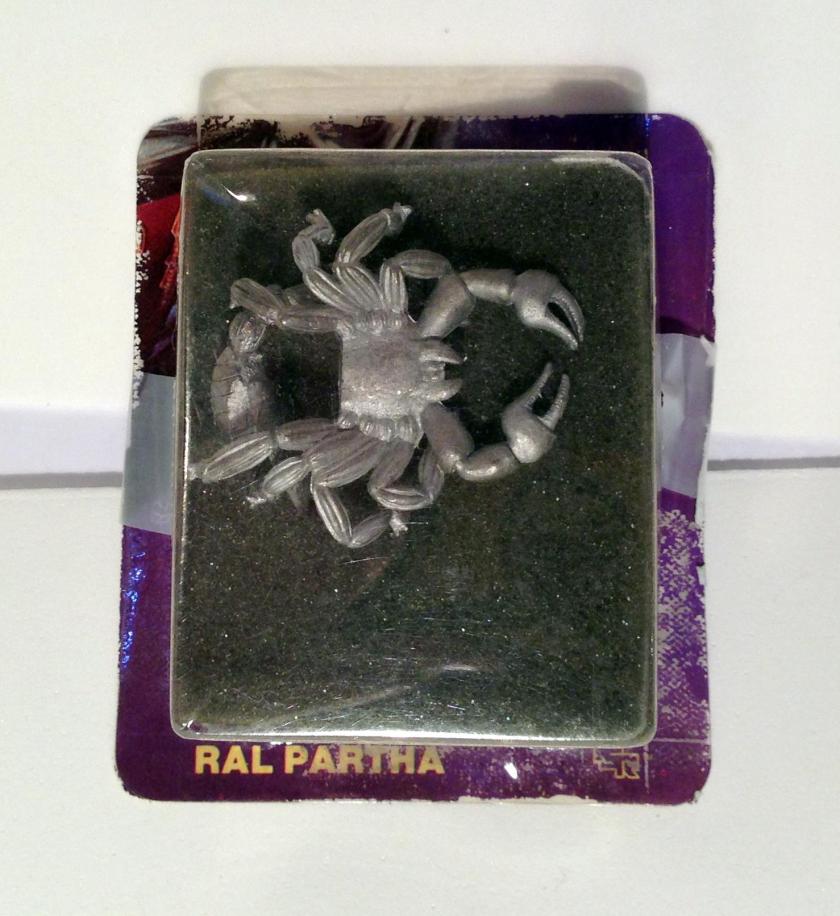
I removed it from the package, and gave it a quick scrub with a toothbrush and some dishwashing soap. After it dried, I looked at the model and tried to plan for assembly and painting.
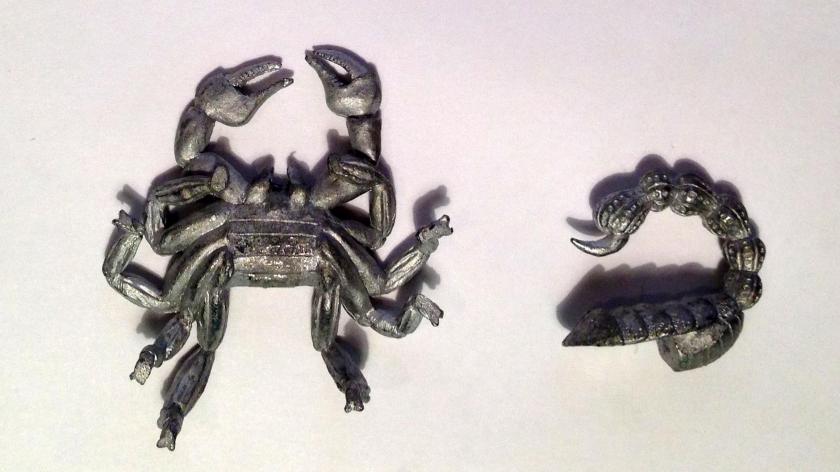
I assembled the model using E6000 epoxy, and let that set up. Then I primed the model with Krylon “Ultra-flat Black” spray paint.
I built a 2½” hex base with 30° beveled edges for the model. I glued #8 steel washers to its bottom, and put that base aside.
This figure was simple, but frustrating. To make it realistic, I needed to portray it as an ambush predator with excellent camouflage. I went through a lot of steps and colors to achieve what I wanted.
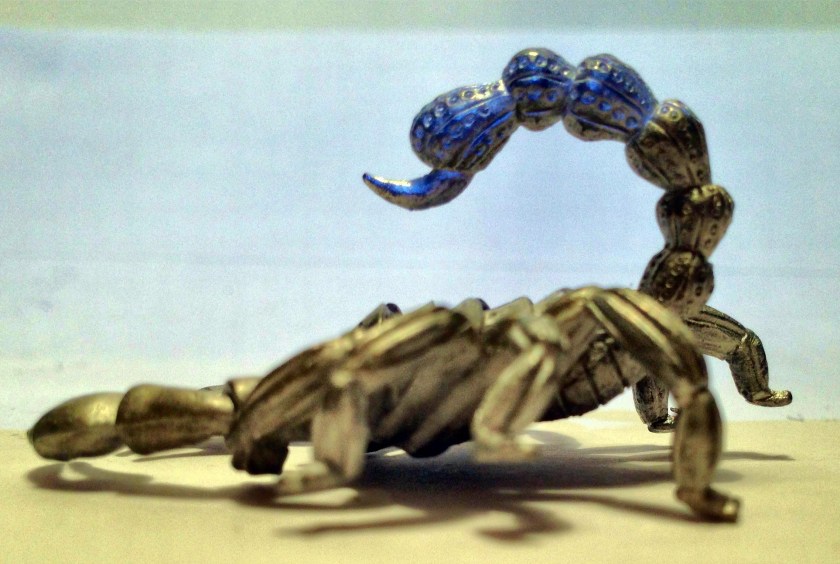
To do this, I base-coated it with a mix of Citadel “Balor Brown” and Secret Weapons Washes “Sewer Water”. Subsequently, I applied a dry brush application of Citadel “XV-88”. Not content with the coloring, I applied a wash of Citadel “Agrax Earthshade”, and highlighted with a dry brushing of Citadel “Dryad Bark”, and a wash with P3 “Brown Ink”.
The scorpion was not in a good position for mounting flat on a base. The legs were not going to be easily affixed, and it looked unnatural. I envisioned it pouncing on prey from higher ground. I took the base that I had made and glued ¾” steel washers to the top with wood glue and let the washers dry solid. I then took my Aves Apoxie Sculpt to create a rock and mud mound from which the Giant Scorpion could attack prey and enemies. I mounted the material to the base and sculpted it while mounting the Giant Scorpion to it before it hardened. The washers really do a good job of providing a affixing surface for the sculpted Apoxie Sculpt. I let this solidify for 24 hours.
With a wet mix of Citadel “Balor Brown” and Craftsmart “Khaki” I painted the entire model and base again. After it had dried, I drybrushed the model with Citadel “Balor Brown”, and finished with a wash of Citadel “Agrax Earthshade”. I then used Deka-Lack “Braun” for the stinger. Lastly, I applied a sequential triple varnishing with Krylon “Clear Glossy”, Krylon “Clear Matte”, and Testors “Dull Coat”, allowing for complete drying between each coat.
I added a couple of painted boulders and Army Painter “Wasteland Tuft” to the base.
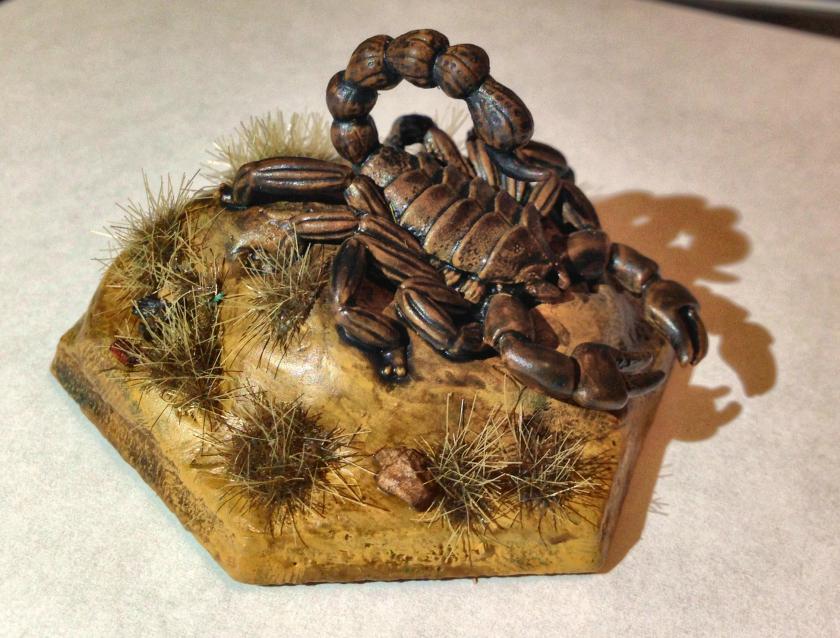
I think that the model is up to my standards – it looks realistic and is set up for play. Nature’s camouflage is not flashy.
I have even considered using this as a paperweight in my office, or even a ball marker on the golf course! The Apoxie Sculpt makes this a solid weighty model.
