Recruiting problems solved – just summon the dead! The Summoning Bell (Wars of Ozz)

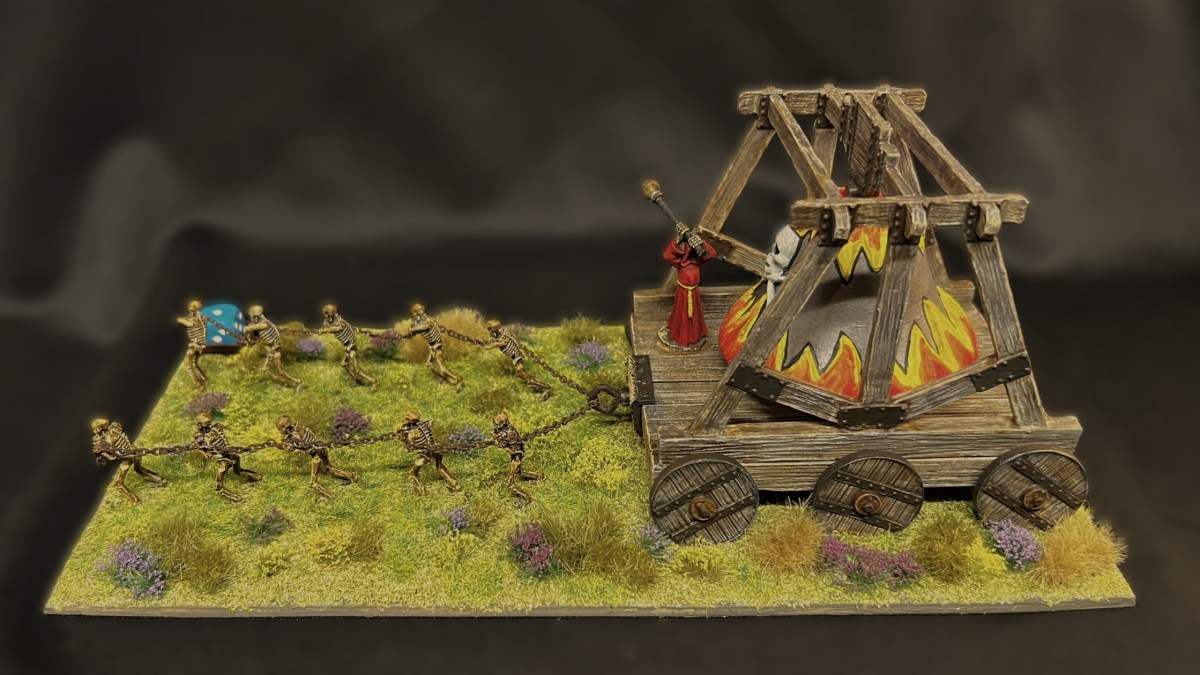
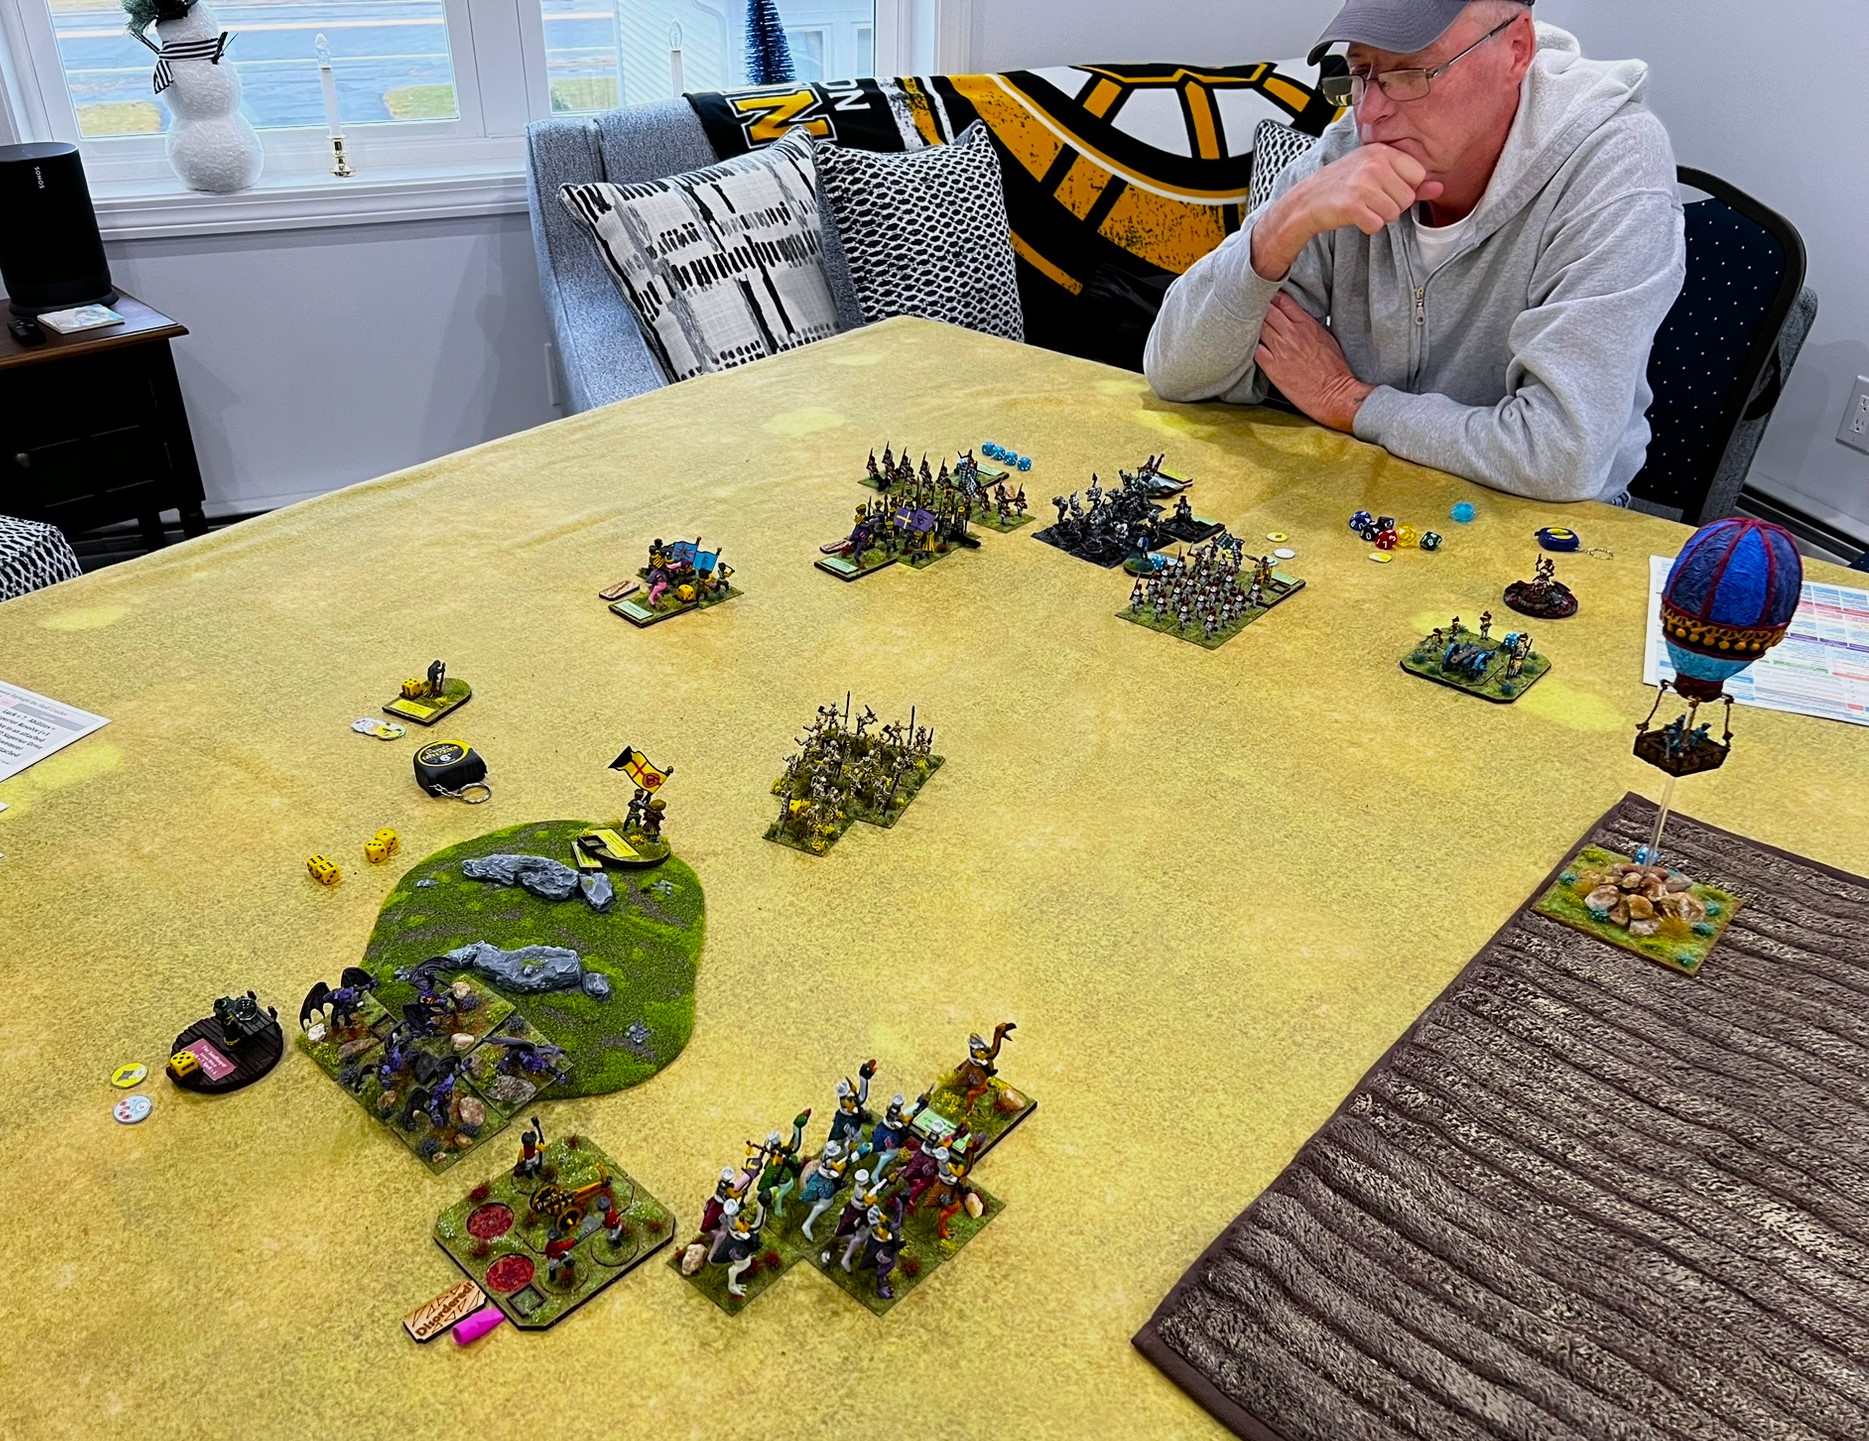
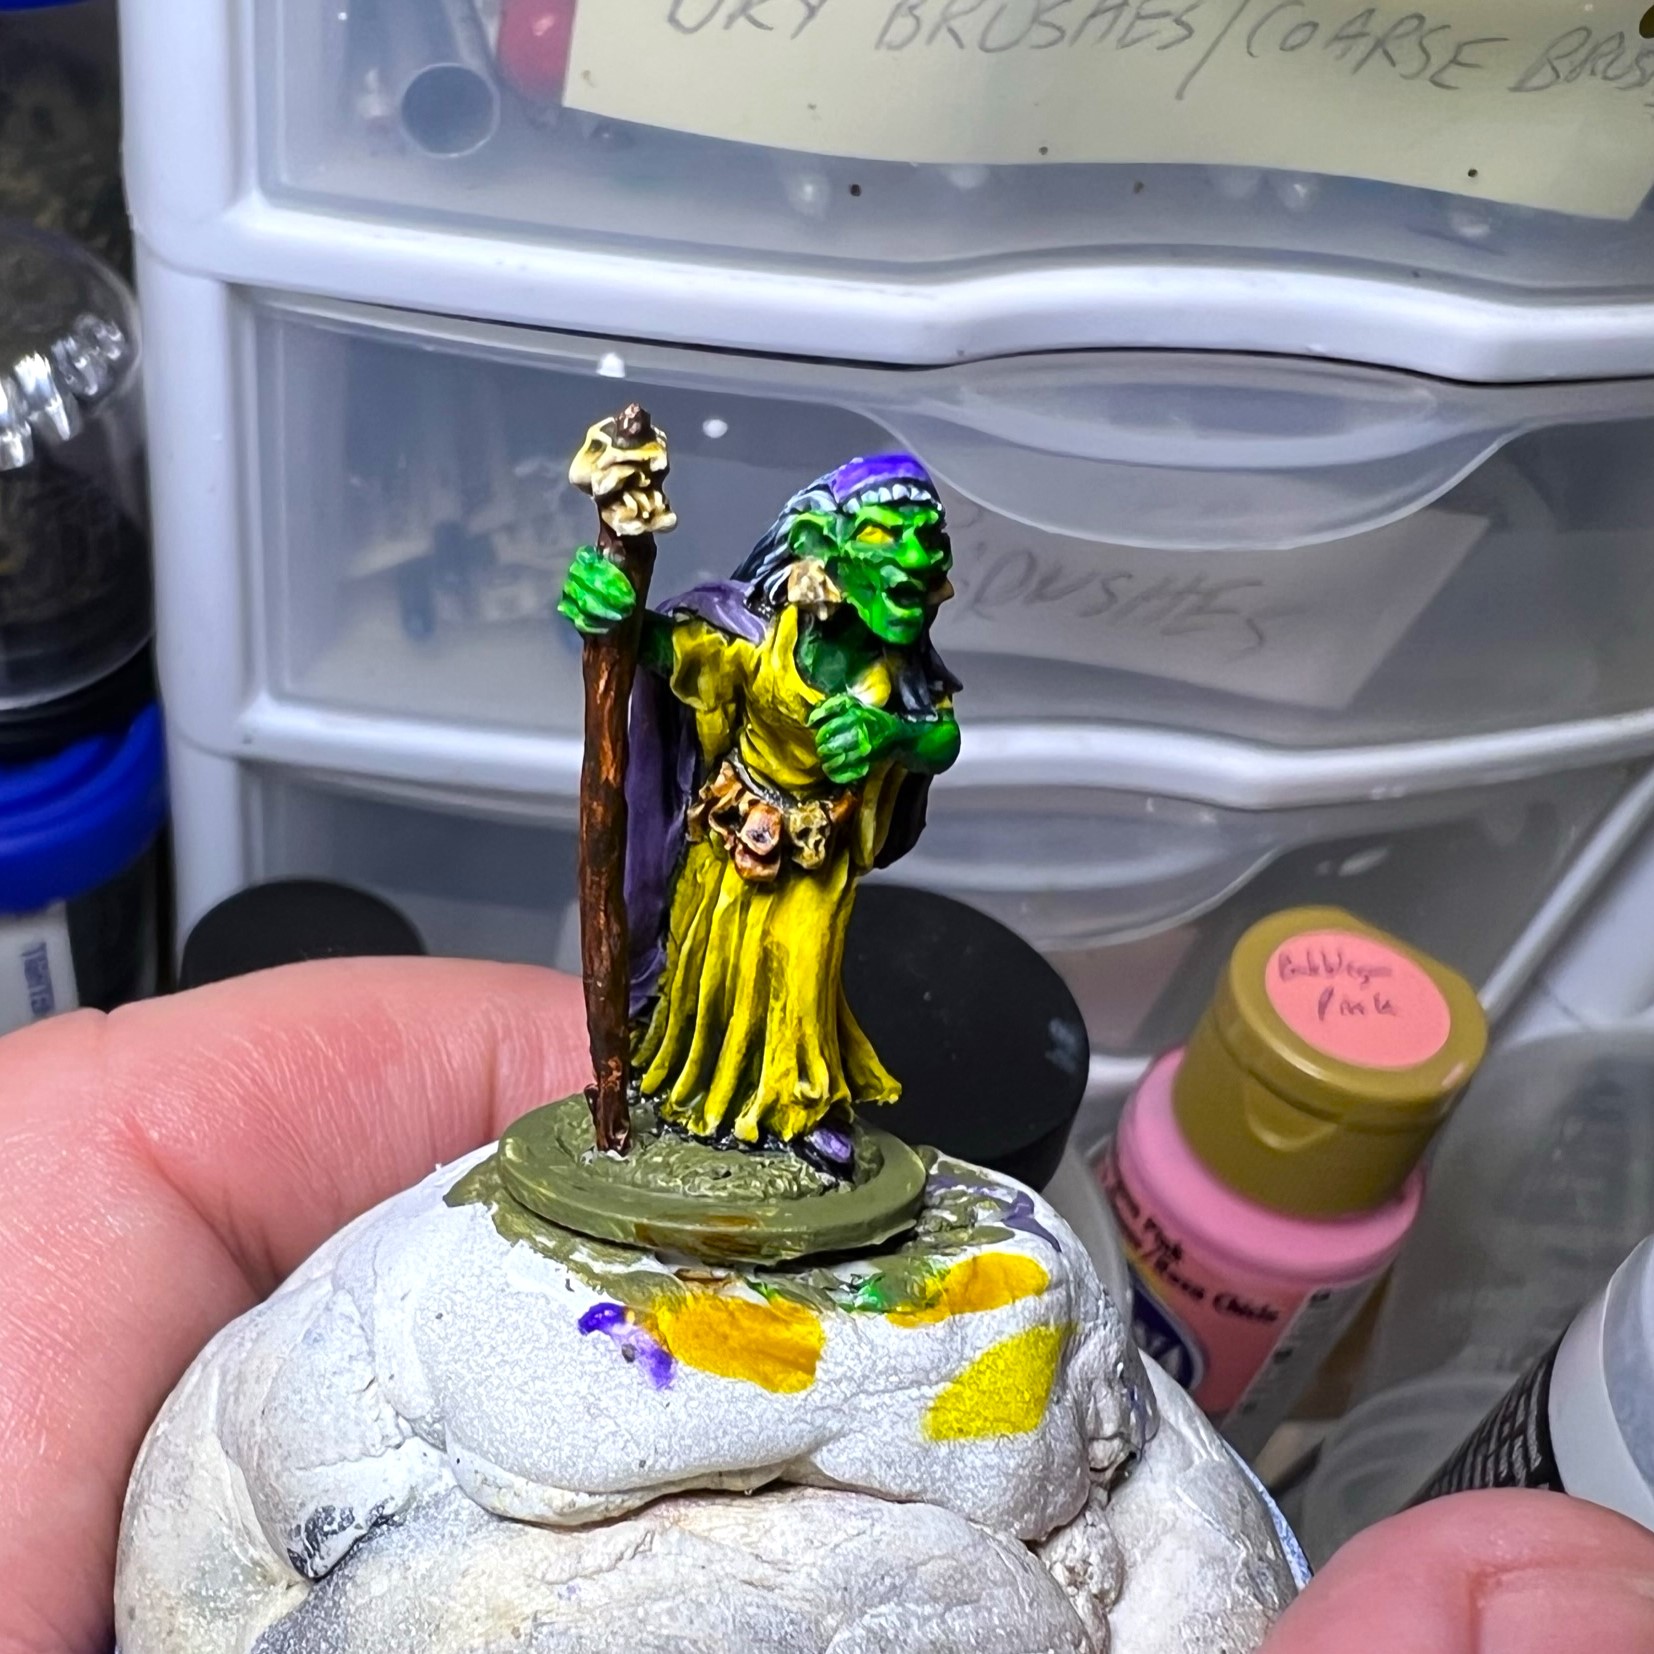
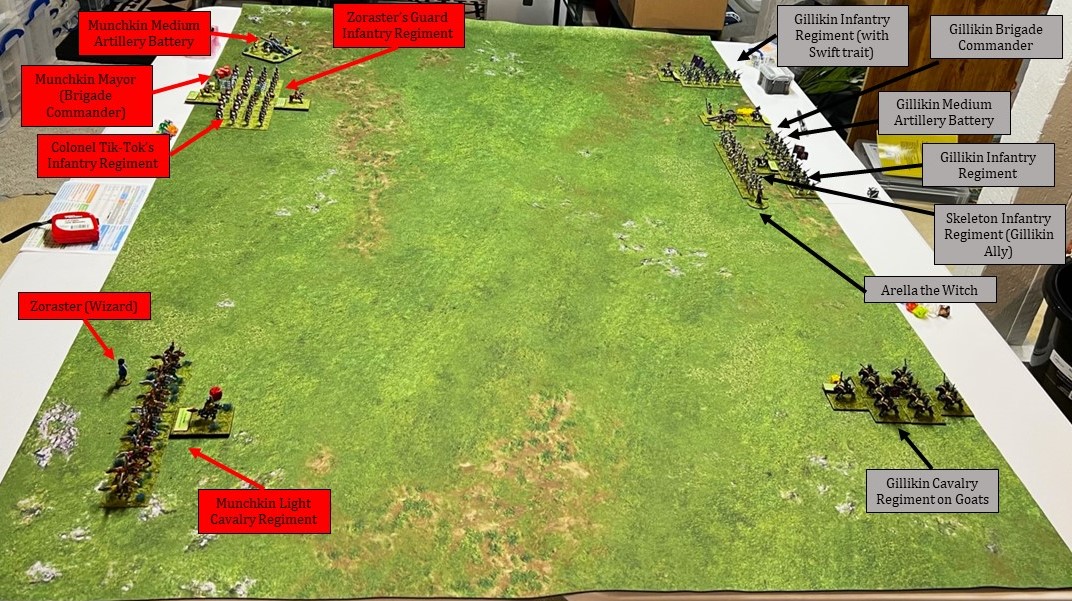
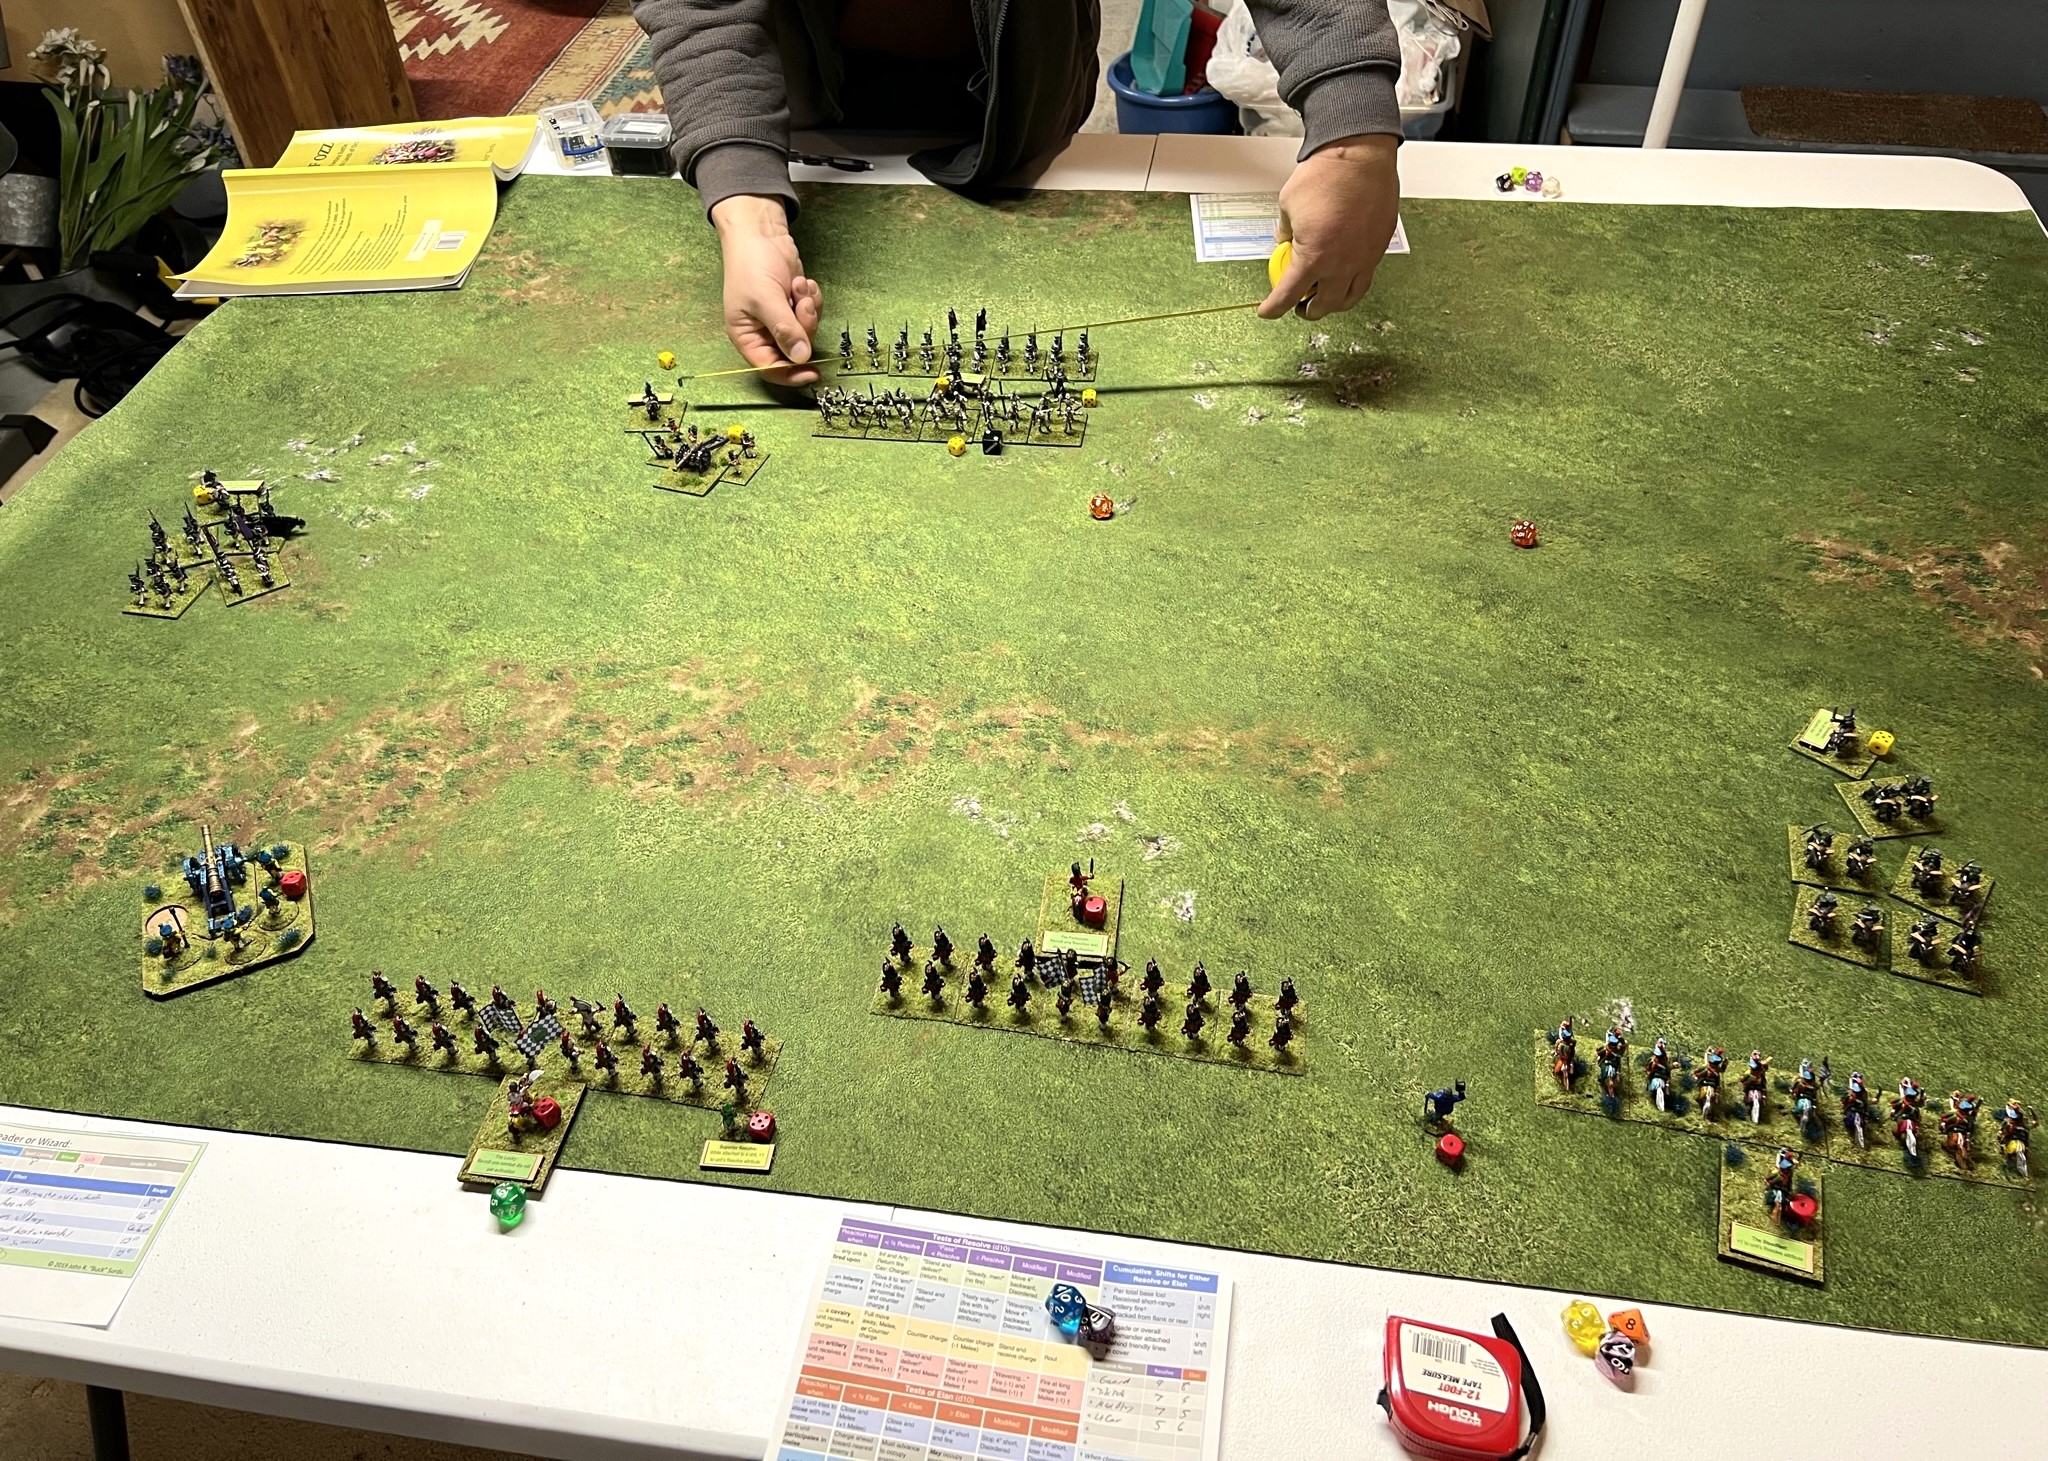
Let’s say you are on a battlefield in the world of Ozz as a either of the two witches Evora or Arella. Your recruiting efforts among your respective Winkie or Gillikin towns has not been stellar – so how to fix that? The Summoning Bell!

The Summoning Bell is a Wars of Ozz unit that has intrigued me since I first saw it on pages 24, 26, and 82 of the rulebook. Especially as the competing witch sisters Evora (Empress of the Winkies) and Arella (Empress of the Gillikins) have fought many times over posession of the Bell – with each having success. It is powerful for either the Winkies or the Gillikins – as it can summon skeletal troops to augment their forces. While ostensibly it is a Winkie unit – the Gillikins could have it too. The background is described in the rulebook as follows:

When Evora first appeared she was lugging about with her the Summoning Bell. This is an understatement; it is an enormous bell, so large it had to be toted about by slaves. It is not a creation of the Last Great War. It dates to a time much earlier and draws on powers that defy science. Where Evora found the bell and how she learned to use it is her secret. With it she can raise masses of skeleton soldiers with a single thunderous toll.

Its power has not escaped her sister, Arella. She has seen it used on the battlefield, both as an ally and against her. She has lusted for its power, and what Arella wants, she often gets. And in this case, that has been more than once. The two sisters have literally fought wars over the Bell…

Wars of Ozz rulebook, section 2.2.2.2, page 24

True, the concept of summoning the dead for a battle was already one used by J.R.R. Tolkien in The Lord of the Rings. But, it’s a concept seen in many other games as well since that time. I always find it cool.

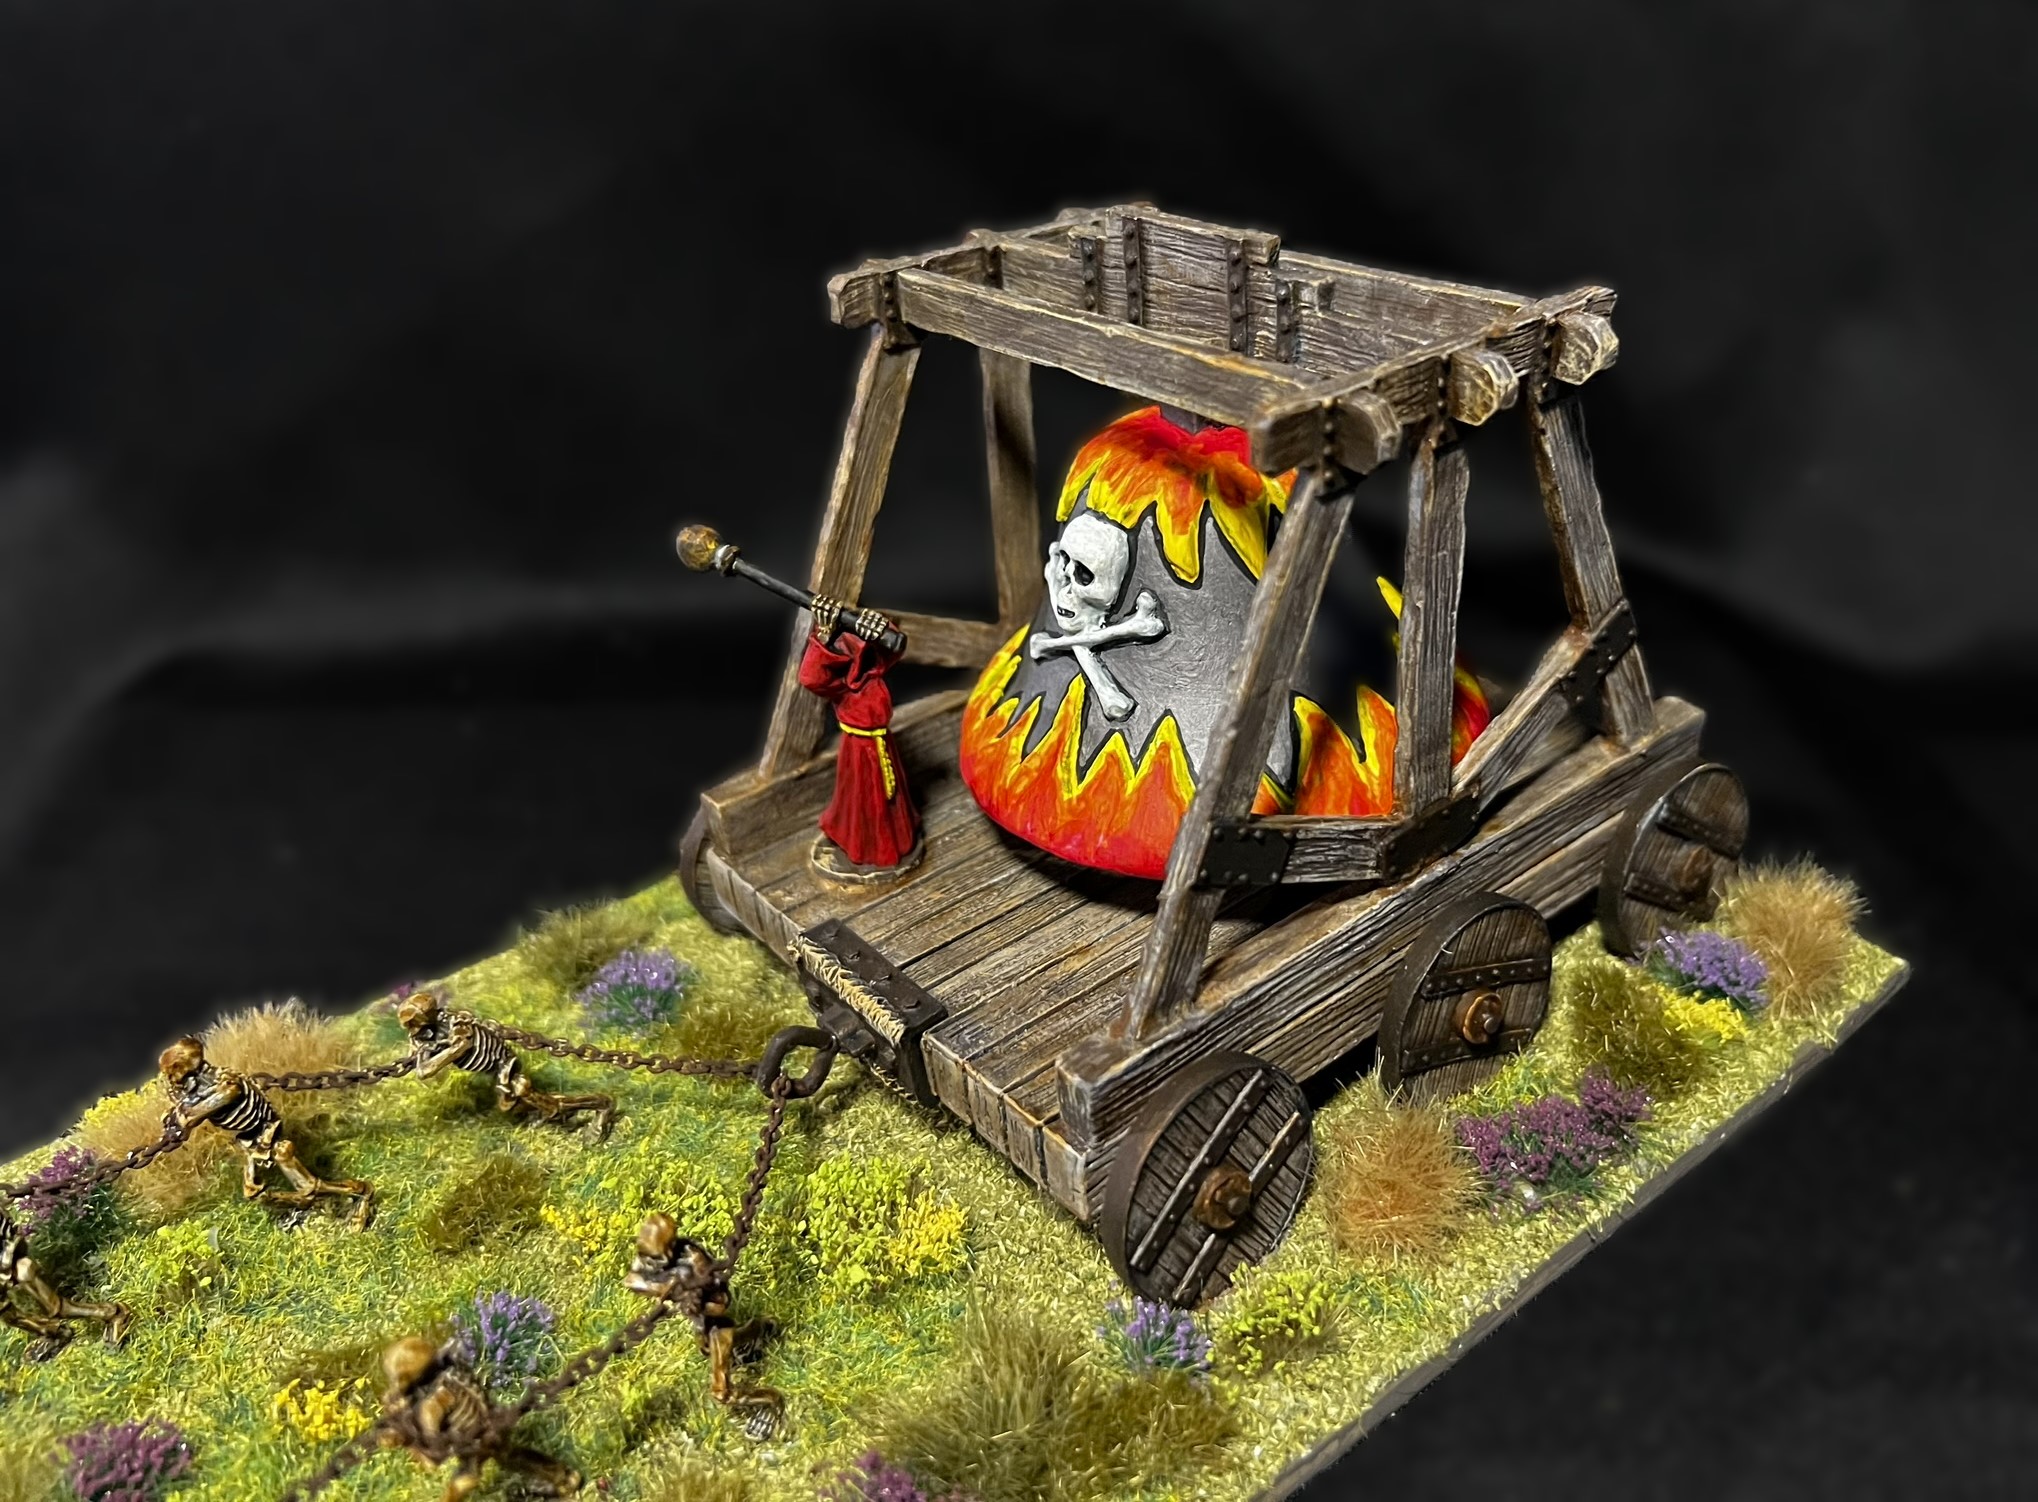
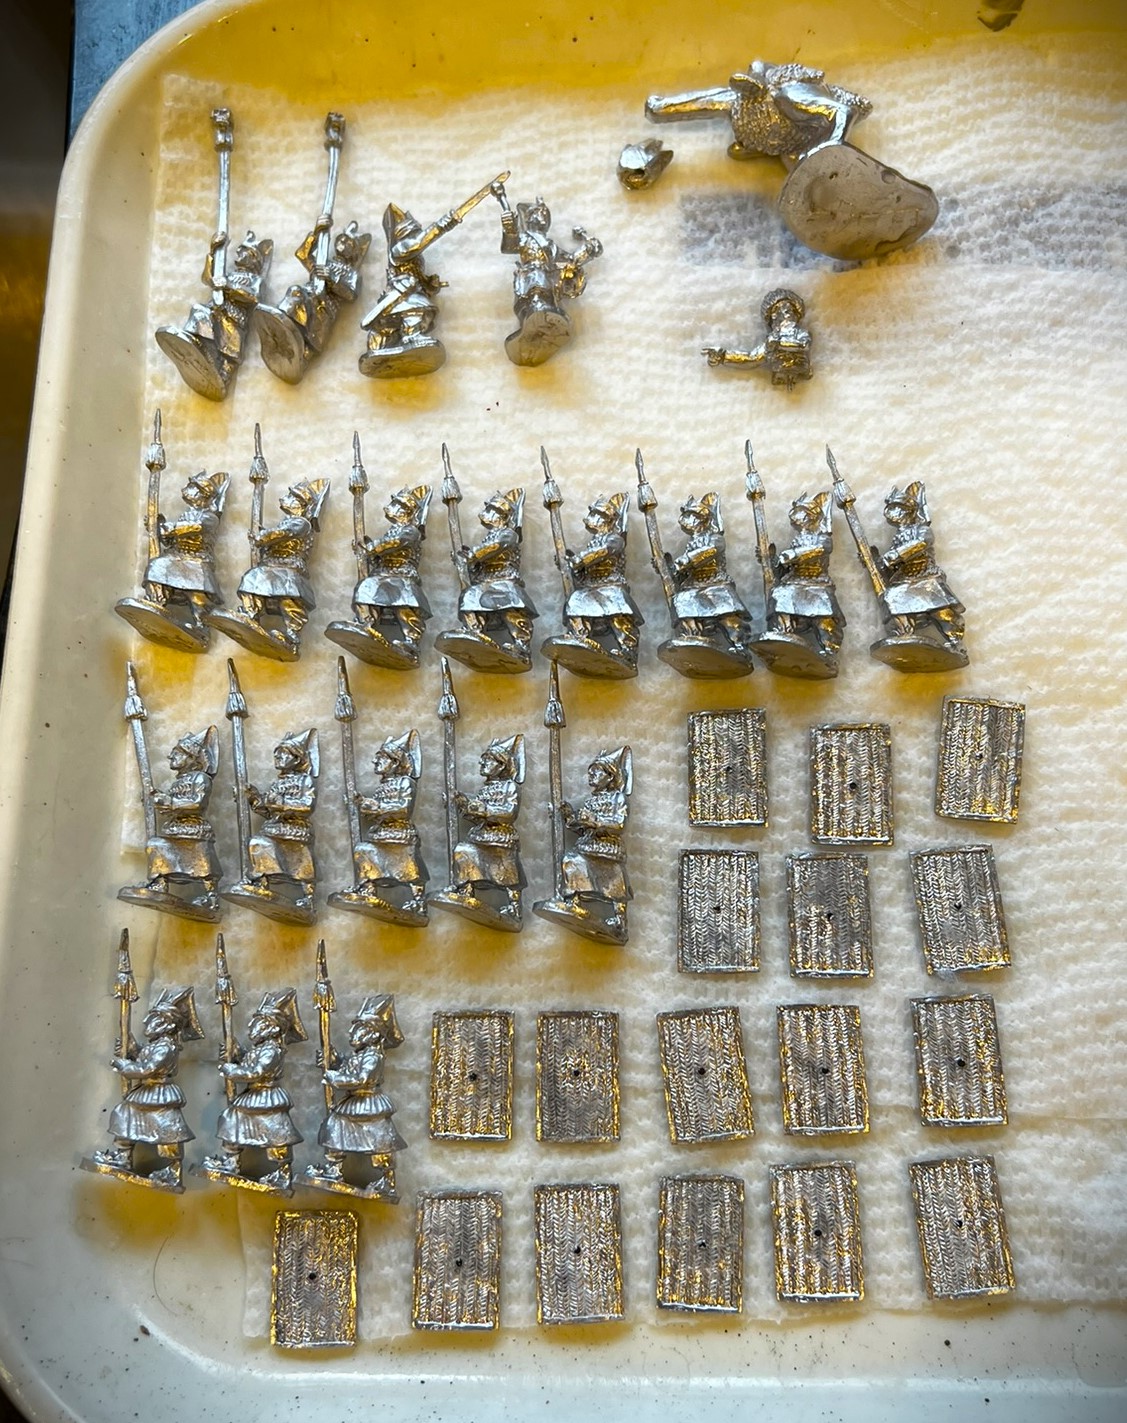
The Summoning Bell is SKU# OZZ-315. According to the website, it is supposed to have “1 Large Summoning Bell on Cart pulled by 8 Skeletons and 1 Hooded Character Striking the Bell”. The hooded dude is “The Taskmaster”. The bell and the figures are all 28mm in size and cast in metal, while the Bell is cast in resin. 

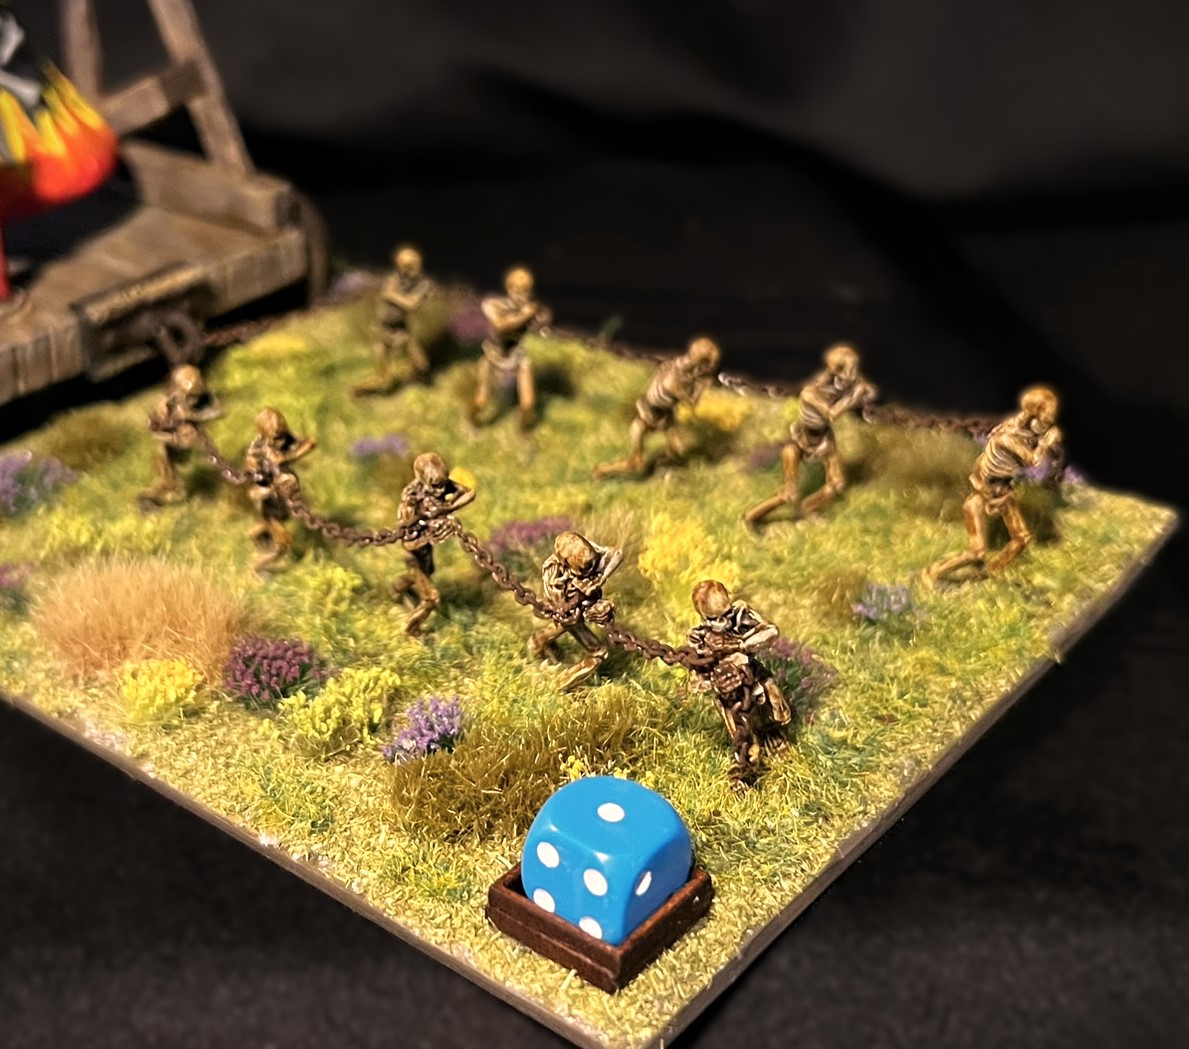
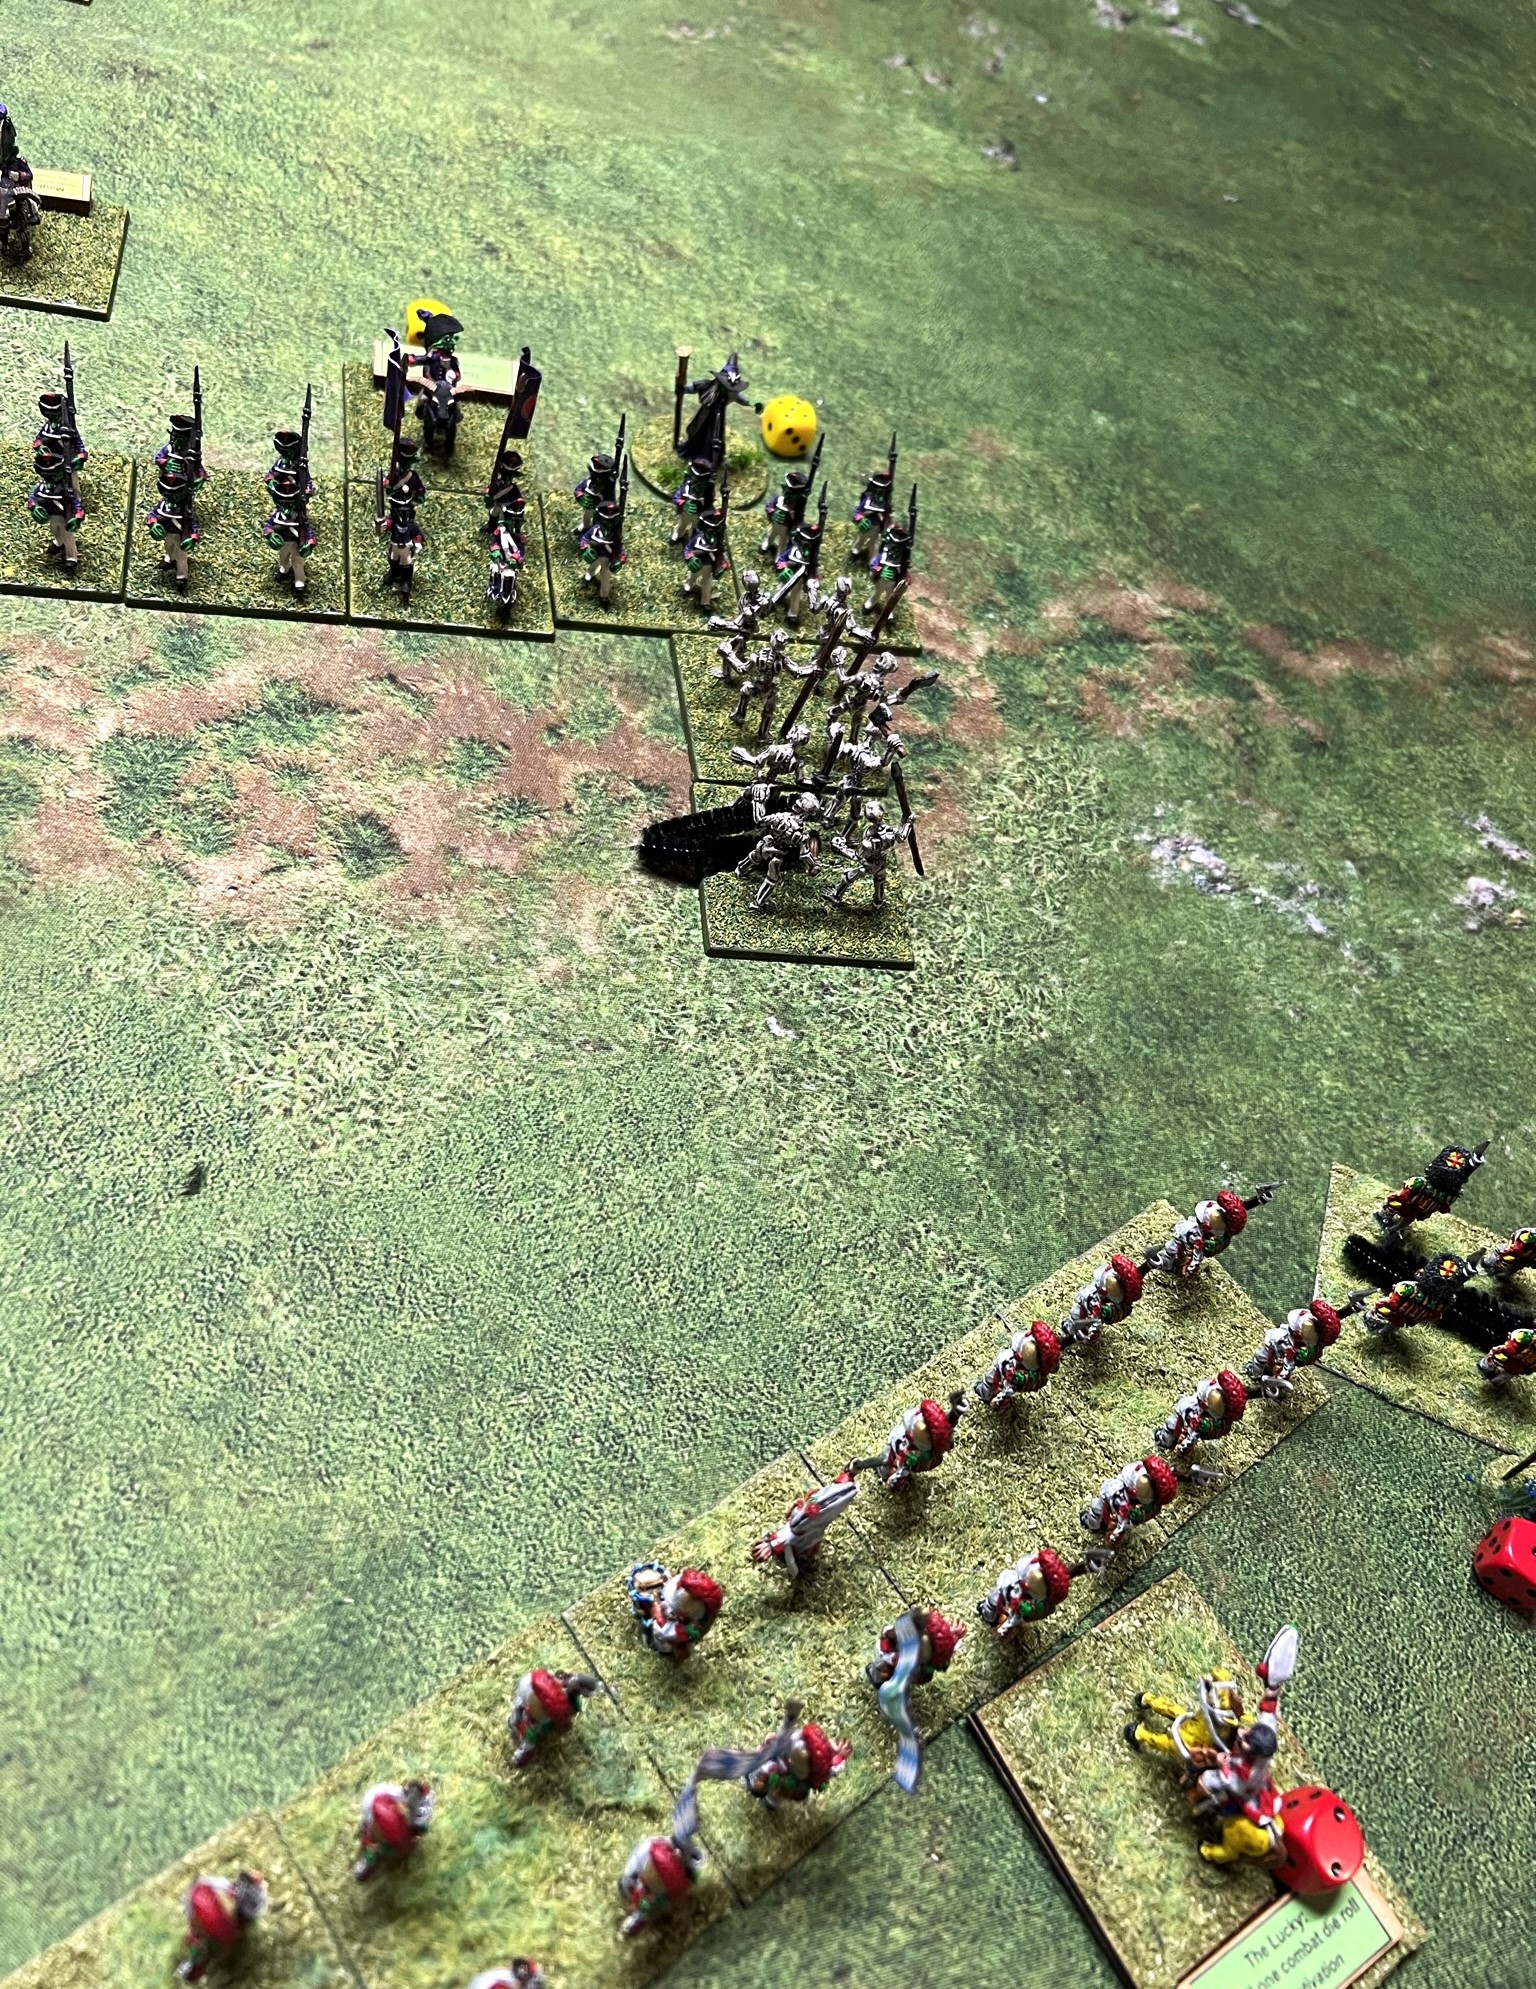
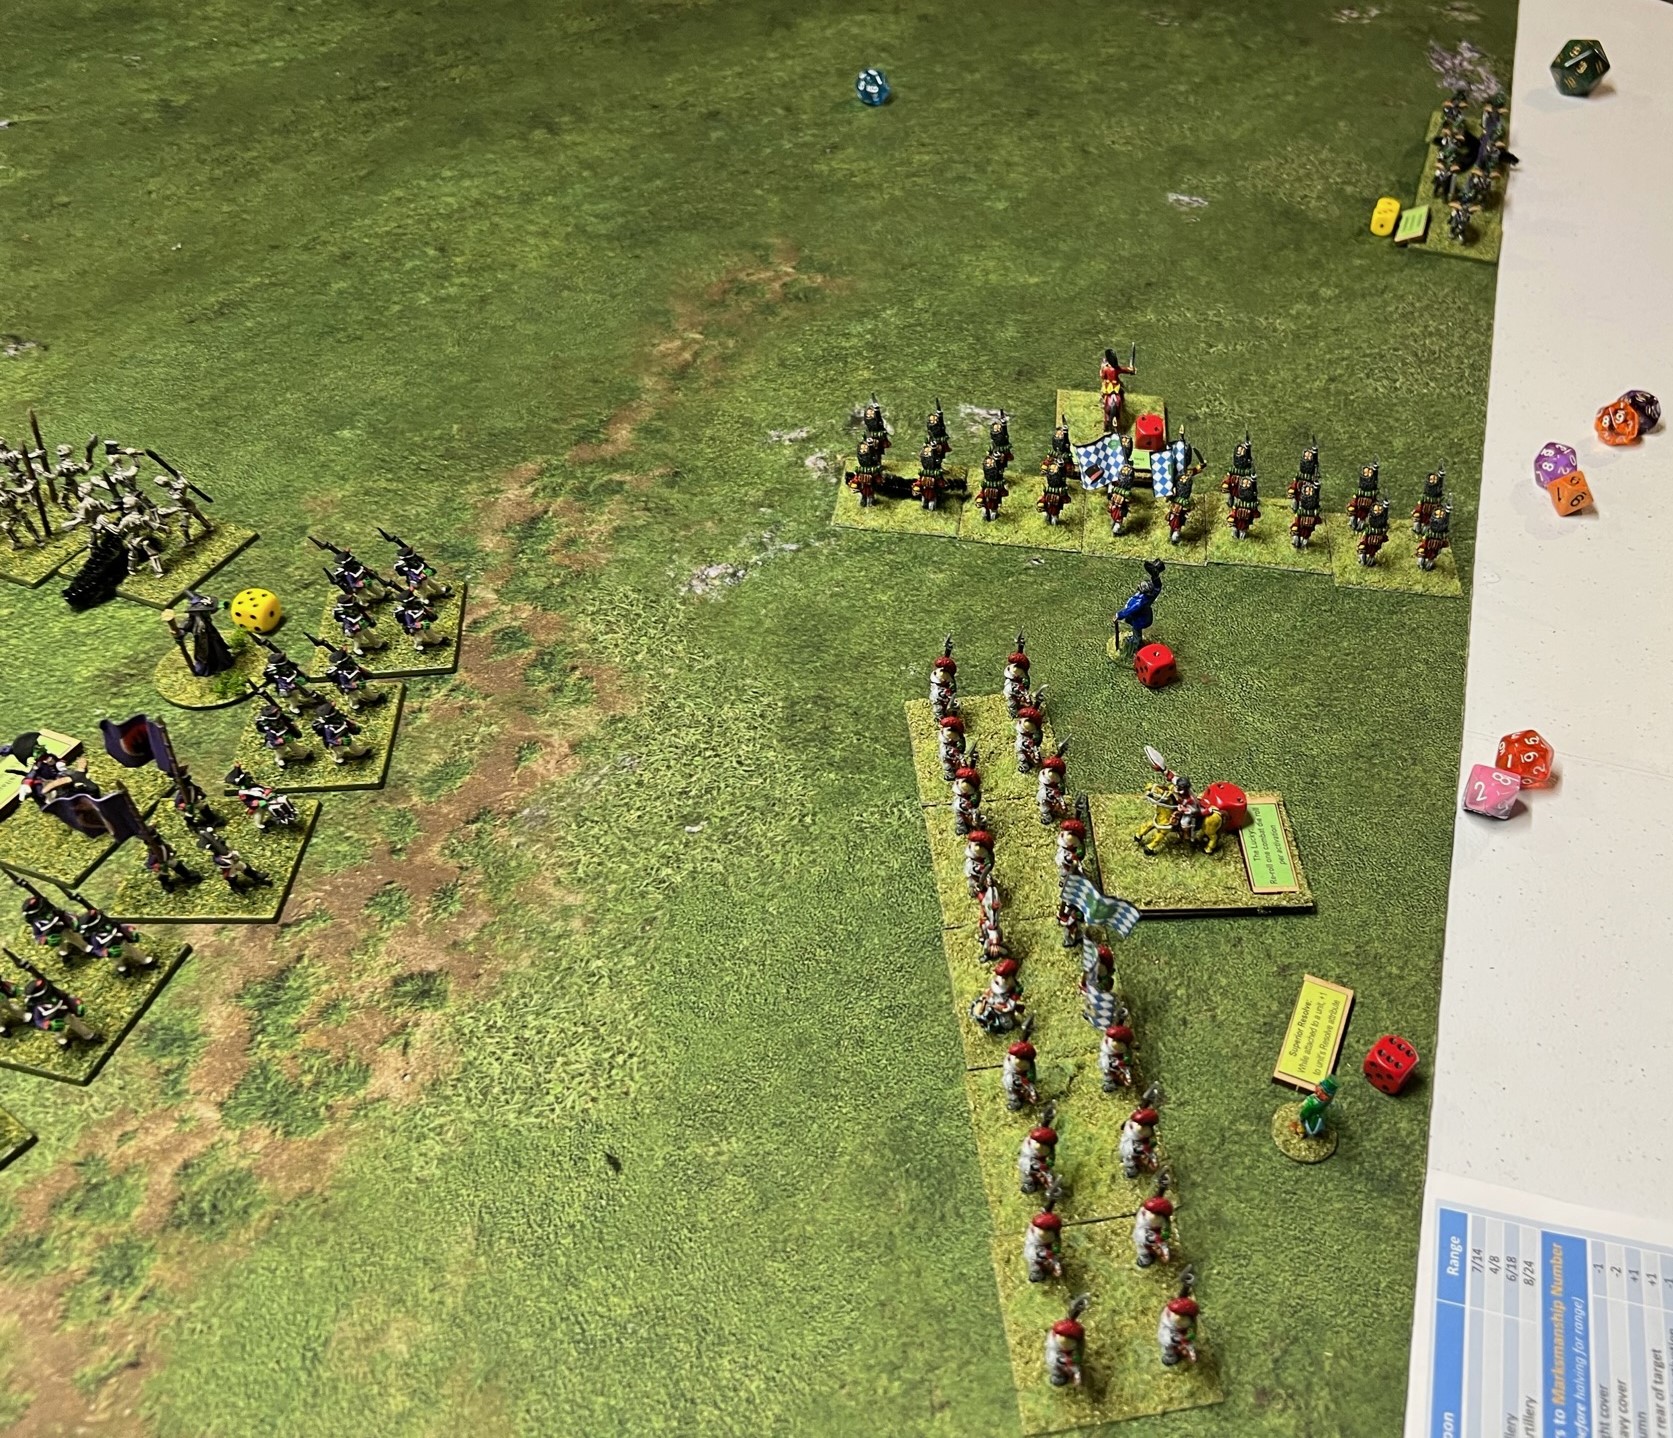
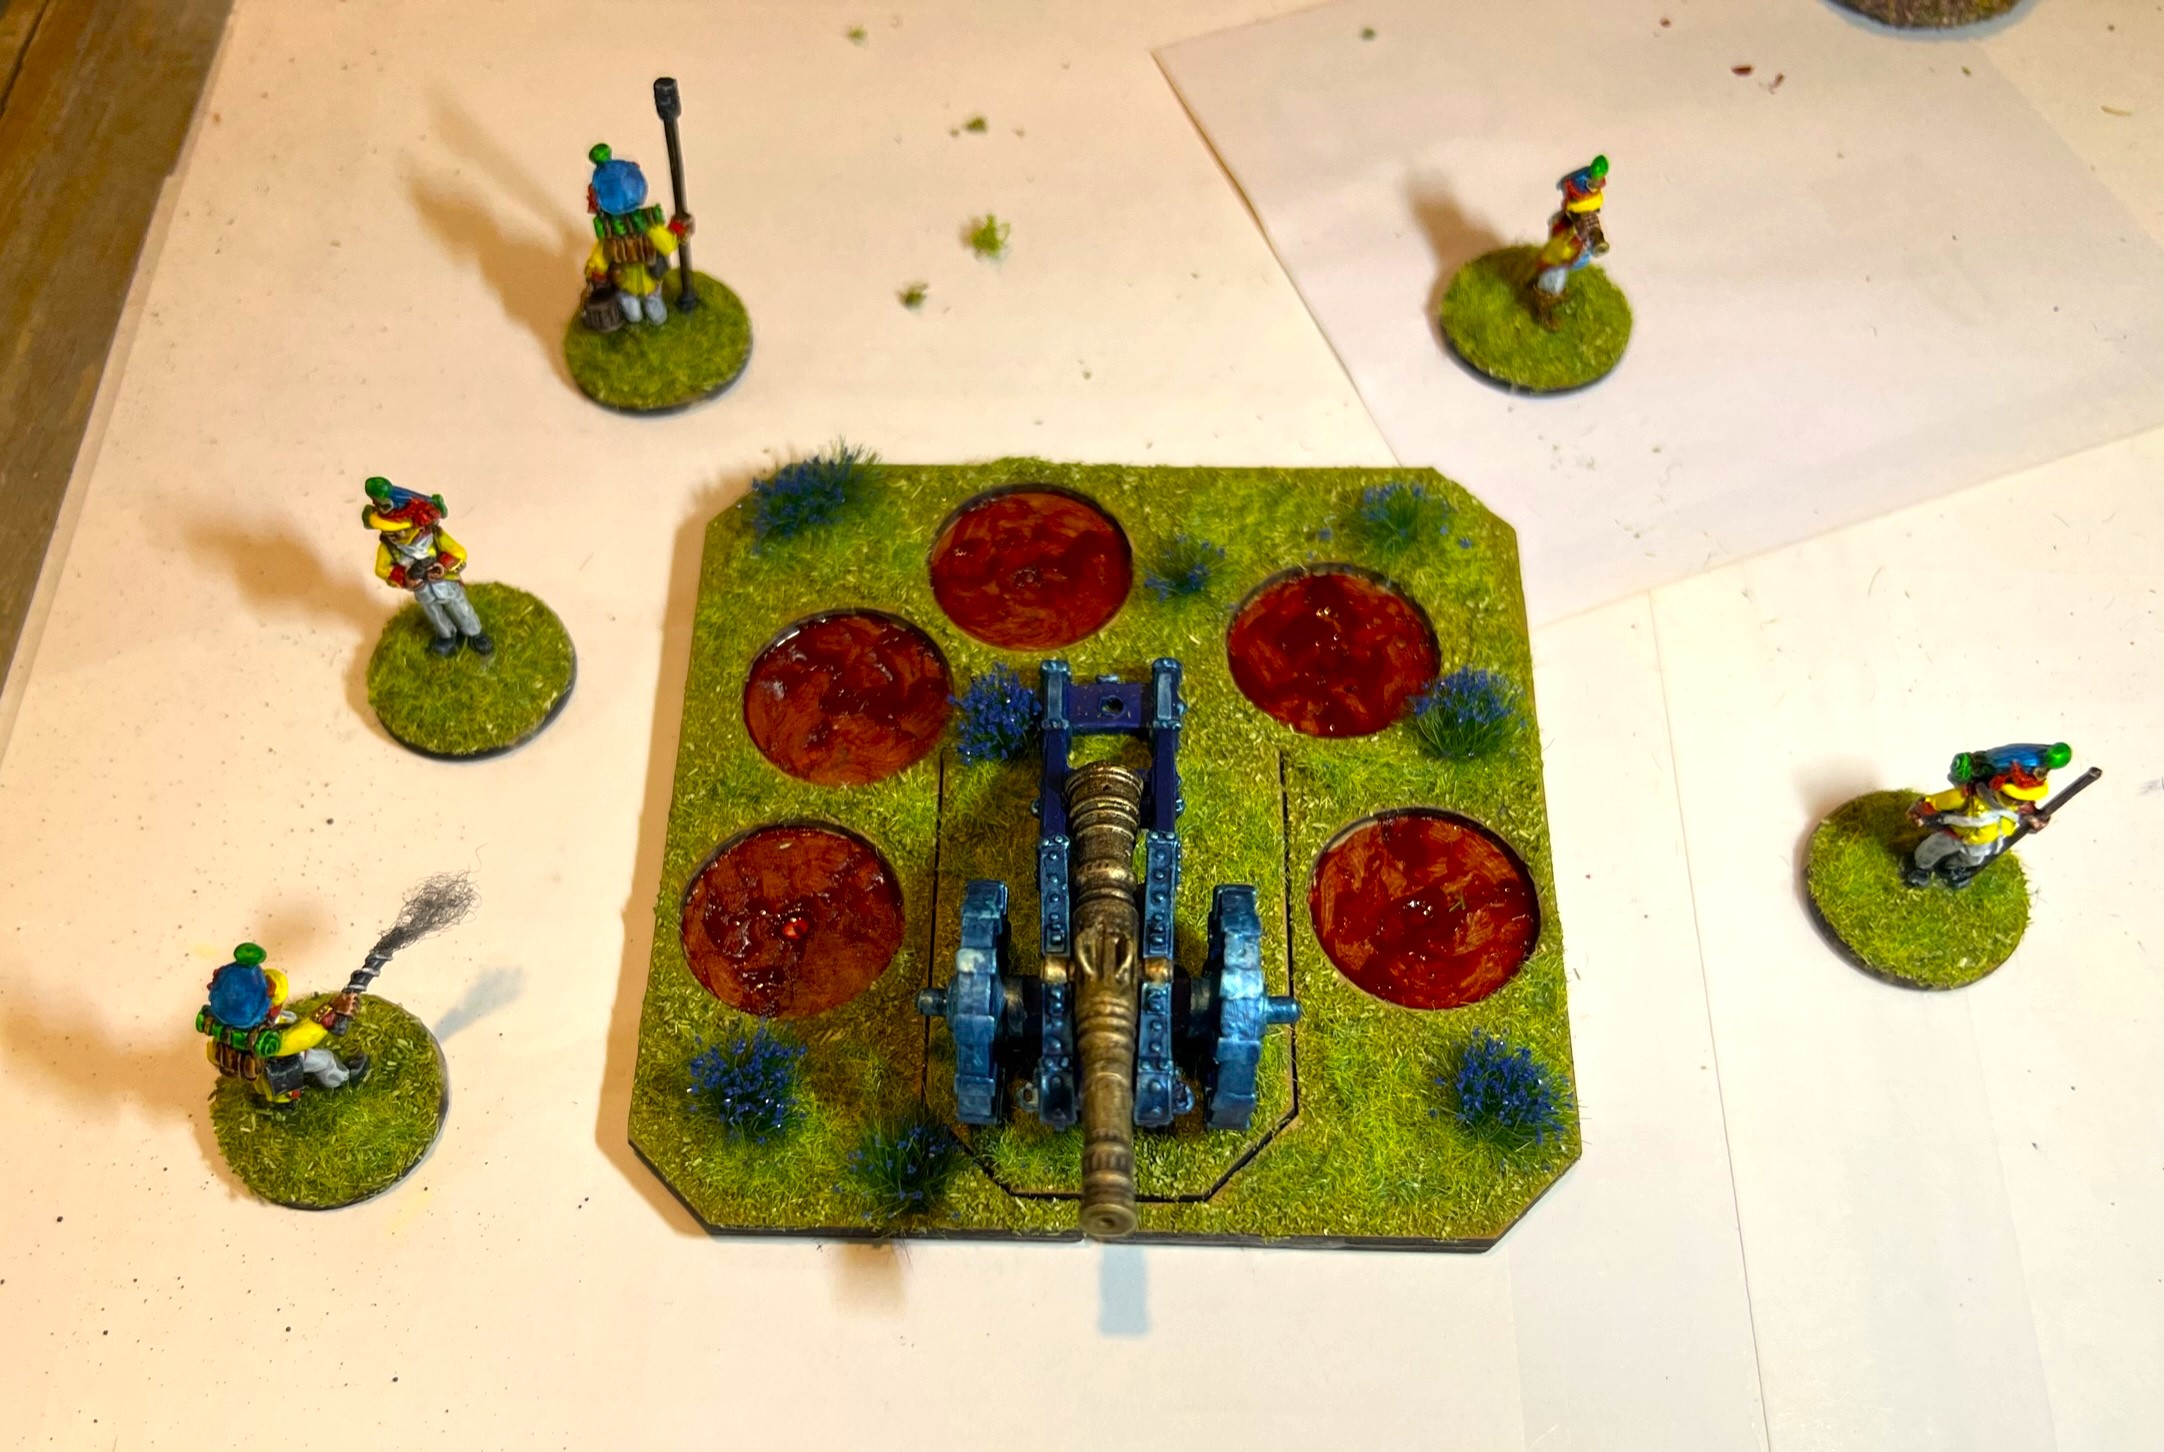
I was fortunate in that when it arrived I found that it mistakenly had an extra two skeletons – so 10 versus 8 (thanks Russ!). Given that more is better, I definitely would incorporate the extra two skeletons into the model. According to the rules, the Summoning Bell can – similar to the “Raise the Dead” spell – raise a stand/base of skeletons as long as it is in the command radius (12″) of Evora or Arella and if the roll is successful. I am assuming that it would succeed by rolling under a spell value of 8 (so successful 70% of the time – the same as Arella or Evora). Each base of skeletons so summoned could be used in three ways – as a stand-alone unit; incorporated into an existing skeleton unit that has had losses; or to augment a previously summoned unit. The maximum number of stands/bases that can be summoned is 5. Now, Arella can also try to raise the dead on her own – so that potentially increases the maximum summoned to 10 stands or 2 full regiments of skeletons.

The Summoning Bell movement rate is quite variable and likely slow as it only has a movement rate of 1d10, not the best of 2d10. It is worth only 3 points – so it is relatively cheap. It fights poorly in Melee at 4/10. Its Resolve (desire to stay in a fight) and its Elan (desire to take the fight to the enemy) are both less than average at 5/5. As its use is not usually in Melee combat, this is moot I think, as long as it can generate skeletons. While the Bell is treated as infantry, similar to an artillery base it can take 5 hits – though when it gets to 4 hits the unit is eliminated.

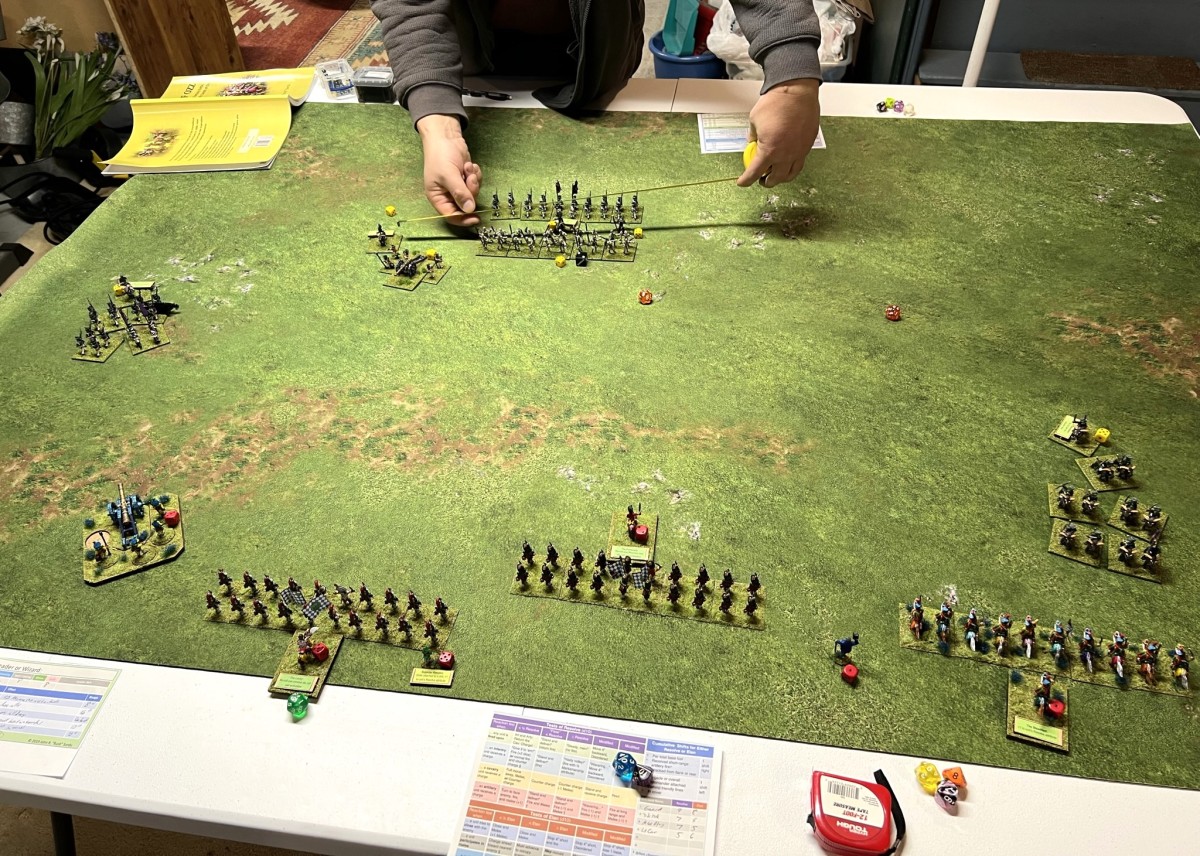
The Summoning Bell is my final Winkie unit unit at this time. (I am counting it as a Winkie unit in my inventory). This is my fifth unit for Dave Stone’s “PAINT WHAT YOU GOT CHALLENGE 2023/2024” painting challenge that runs from December 26th, 2023 to February 29th, 2024. It’s also going to play a major role in many of my upcoming games for the multiple gaming conventions that I plan on supporting as a GM. At present, that support level is now at 25 four-hour games just through May across 4 different conventions in Massachusetts, Maine, and New Hampshire (TotalCon38HAVOCMayhem, and HUZZAH!).

Building this unit was more of a modeling challenge than most – but painting it was also related as I needed to vary many steps – plus allow for the drying of glues, varnishes, and paints. As a result, I have many more, hopefully fun, WIP shots than I have in recent posts. Lastly, I’ll share some eye candy shots and list the paints and other materials that I used.
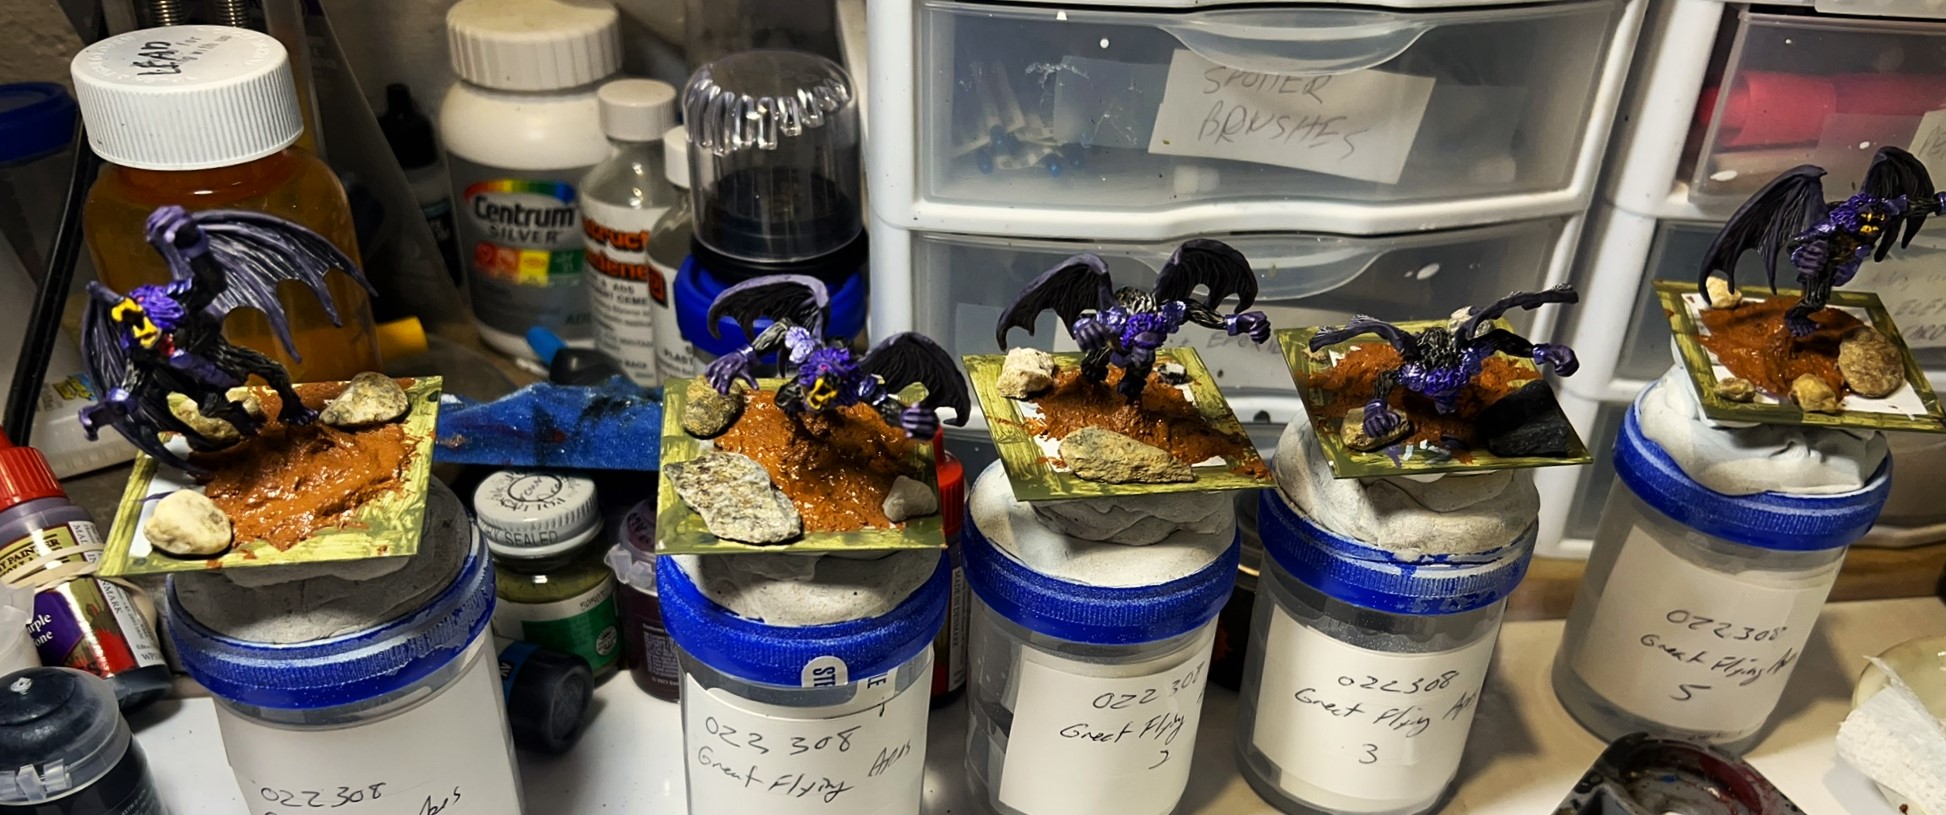
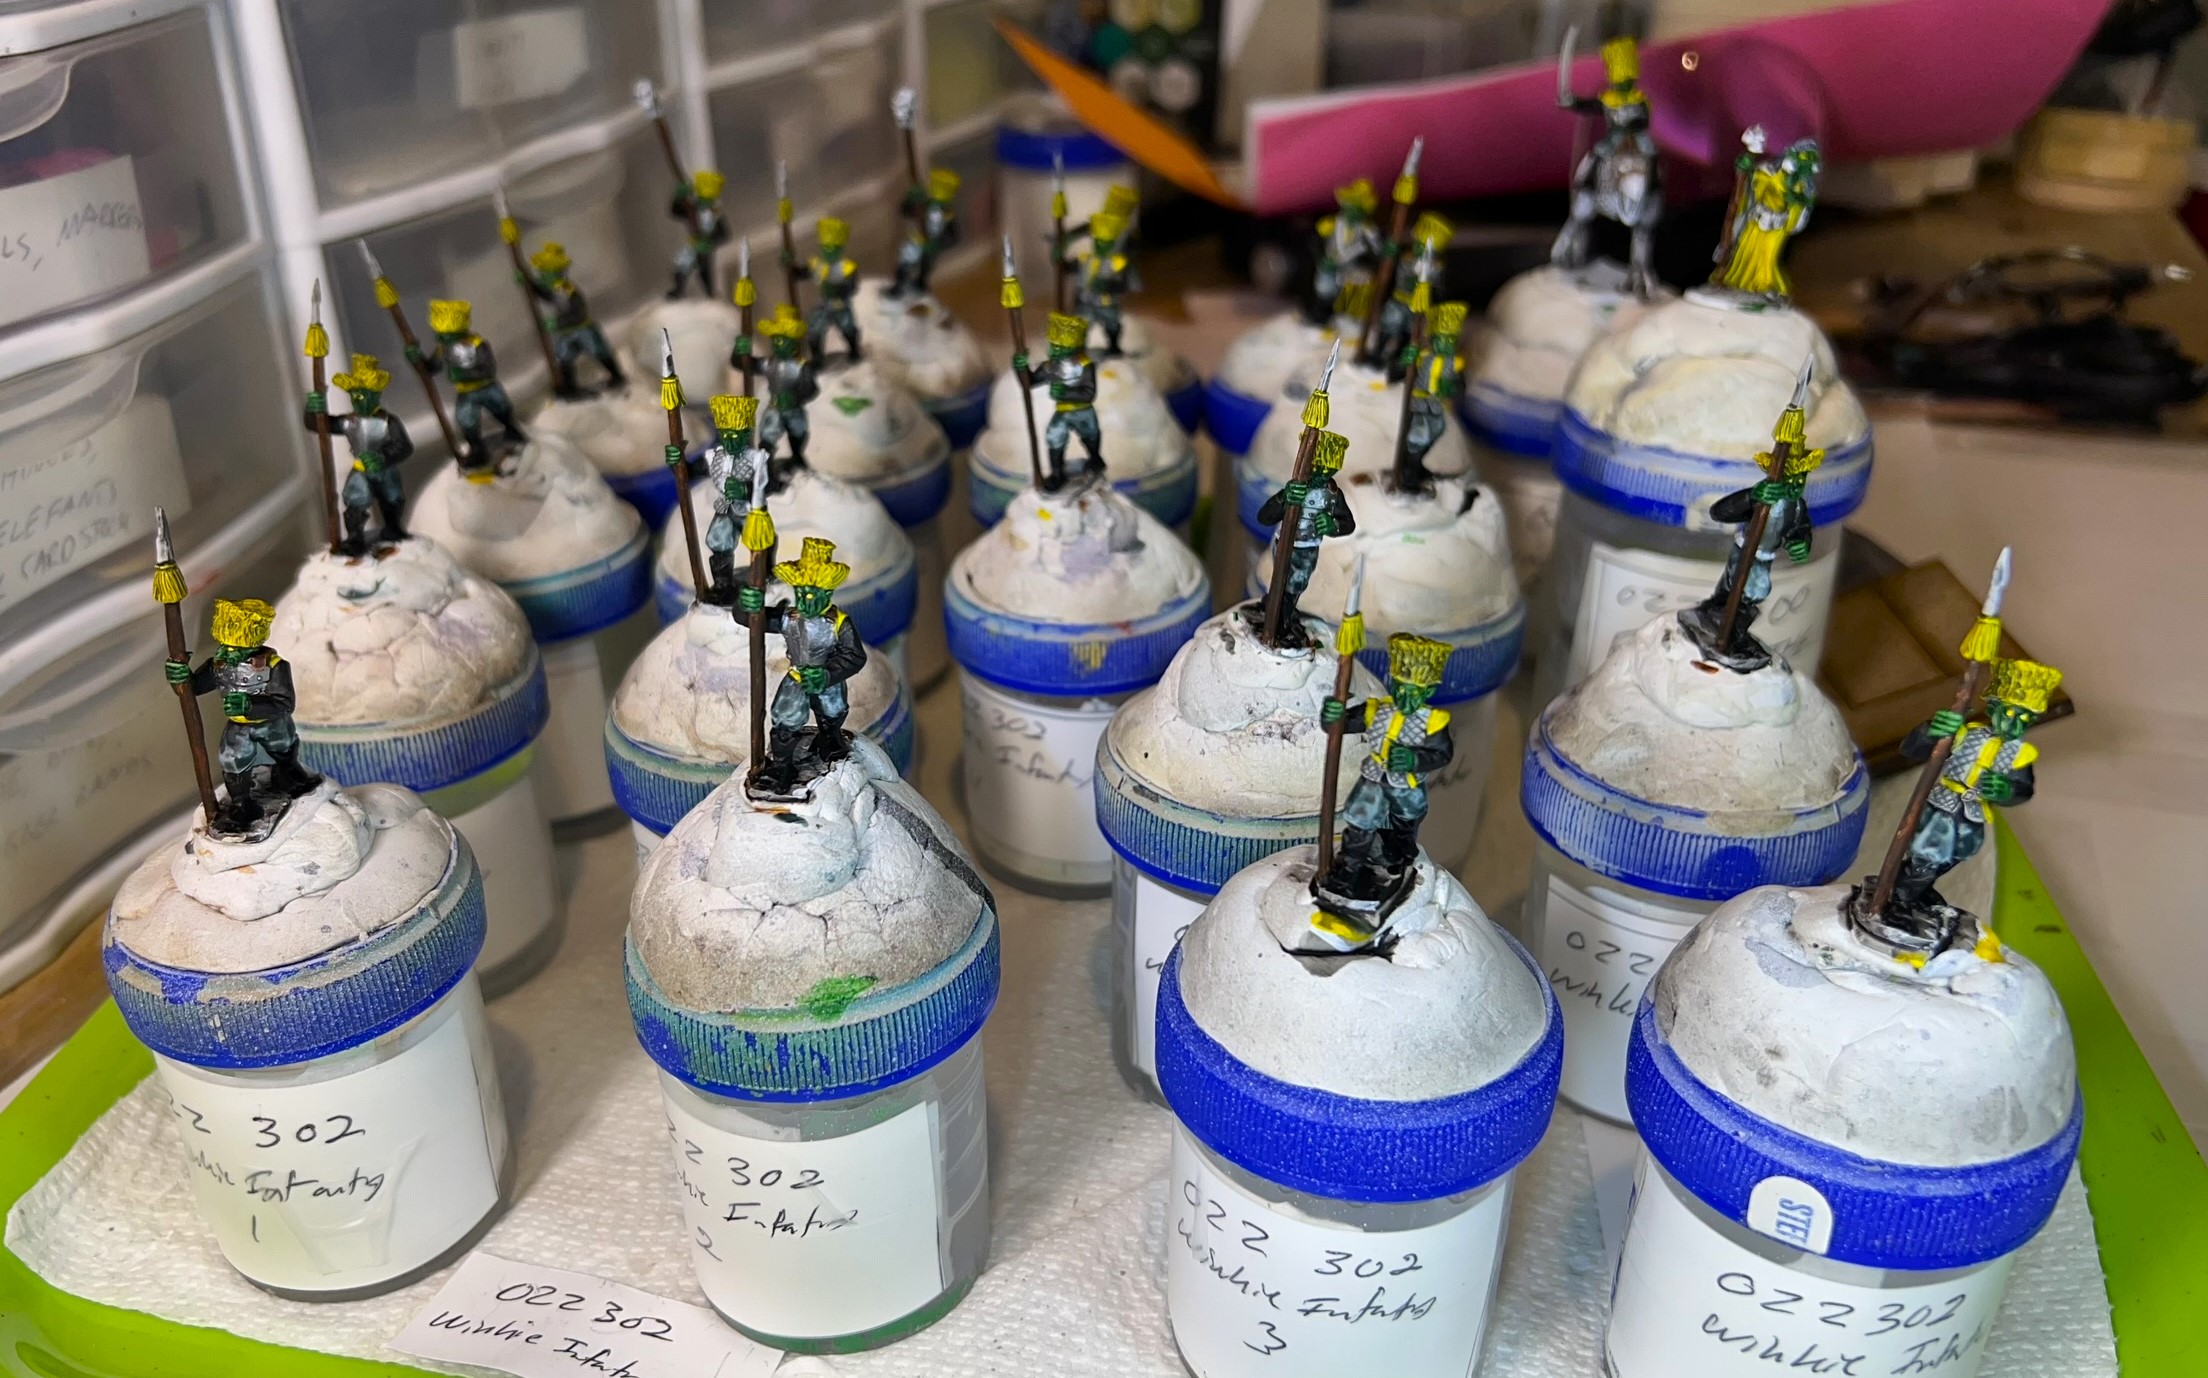
WIP shots…

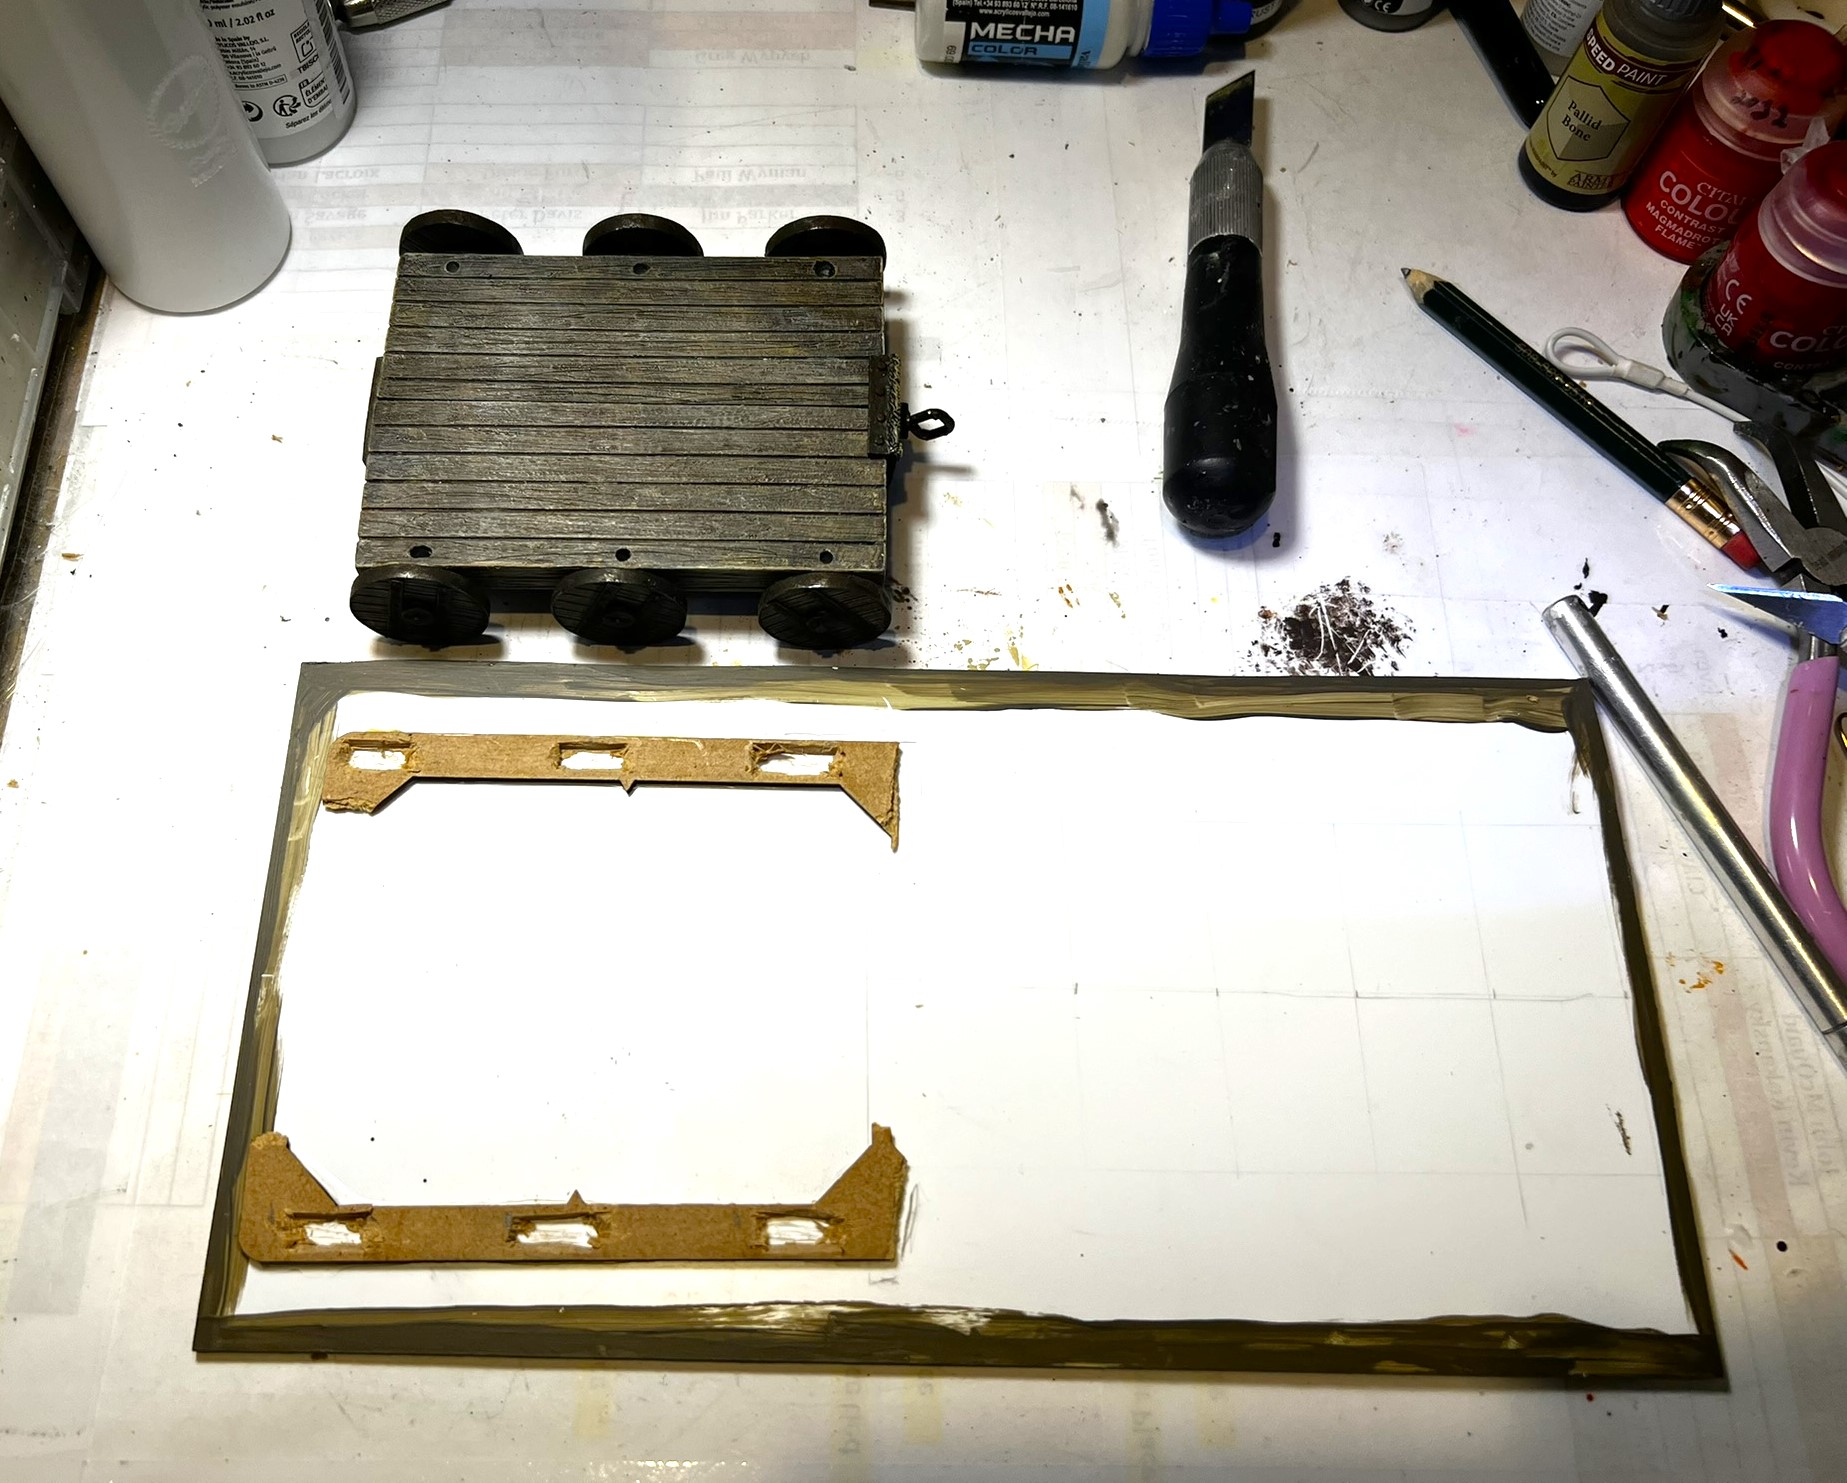
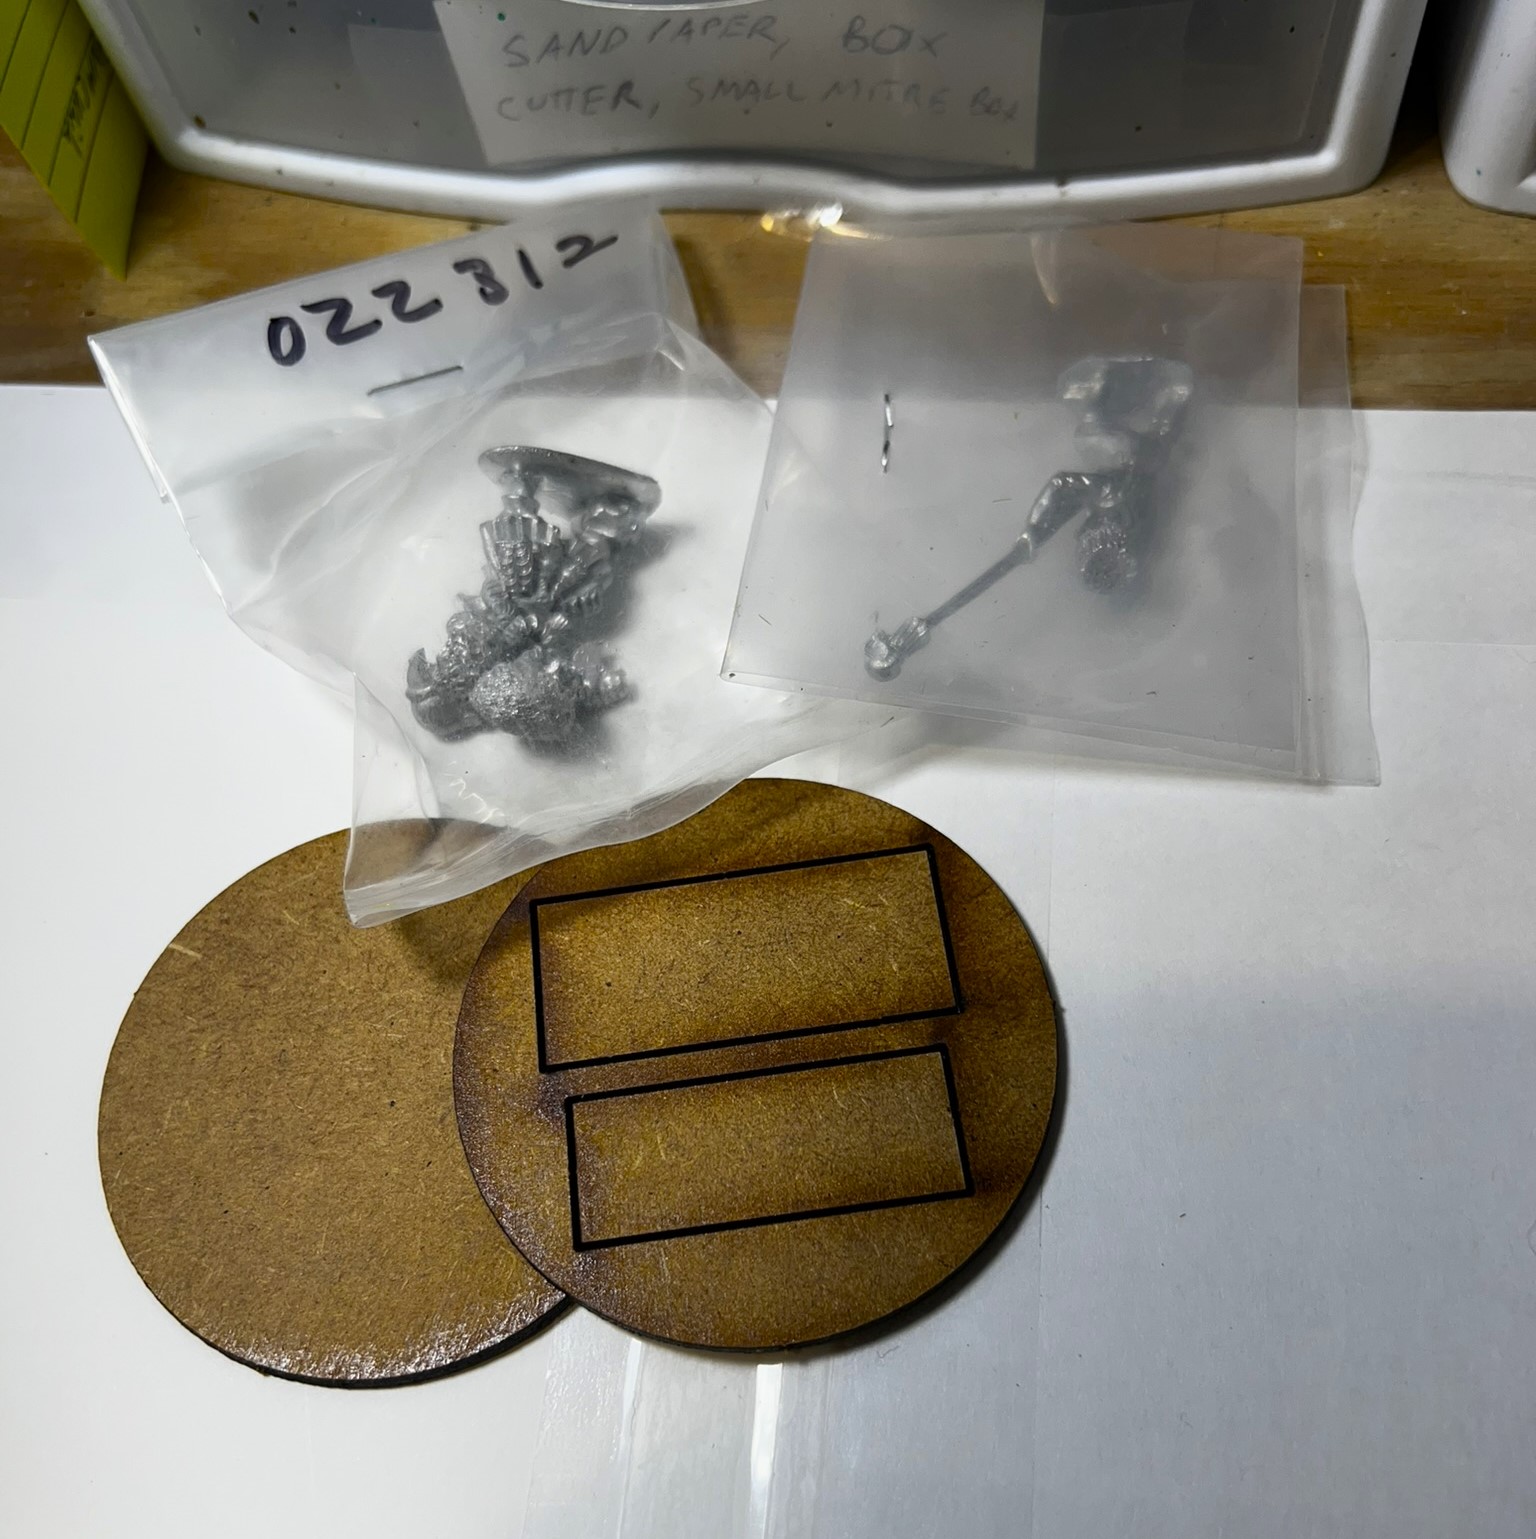
I started the work on January 12th. The first challenge was to figure out the size of the base needed and what materials to use. I mocked up the 10 skeletons and the cart and figured that I needed a 5″ by 10″ base.

Determining that the base needed to be 5″ x 10″.

I took a sheet of polystyrene, and laid out a general idea of where everything would fit.

Sketching out a mock up on the polystyrene sheet.
Cutting the polystyrene sheet – the Hyde tool is perfect for this purpose. It scores nice and clean lines.

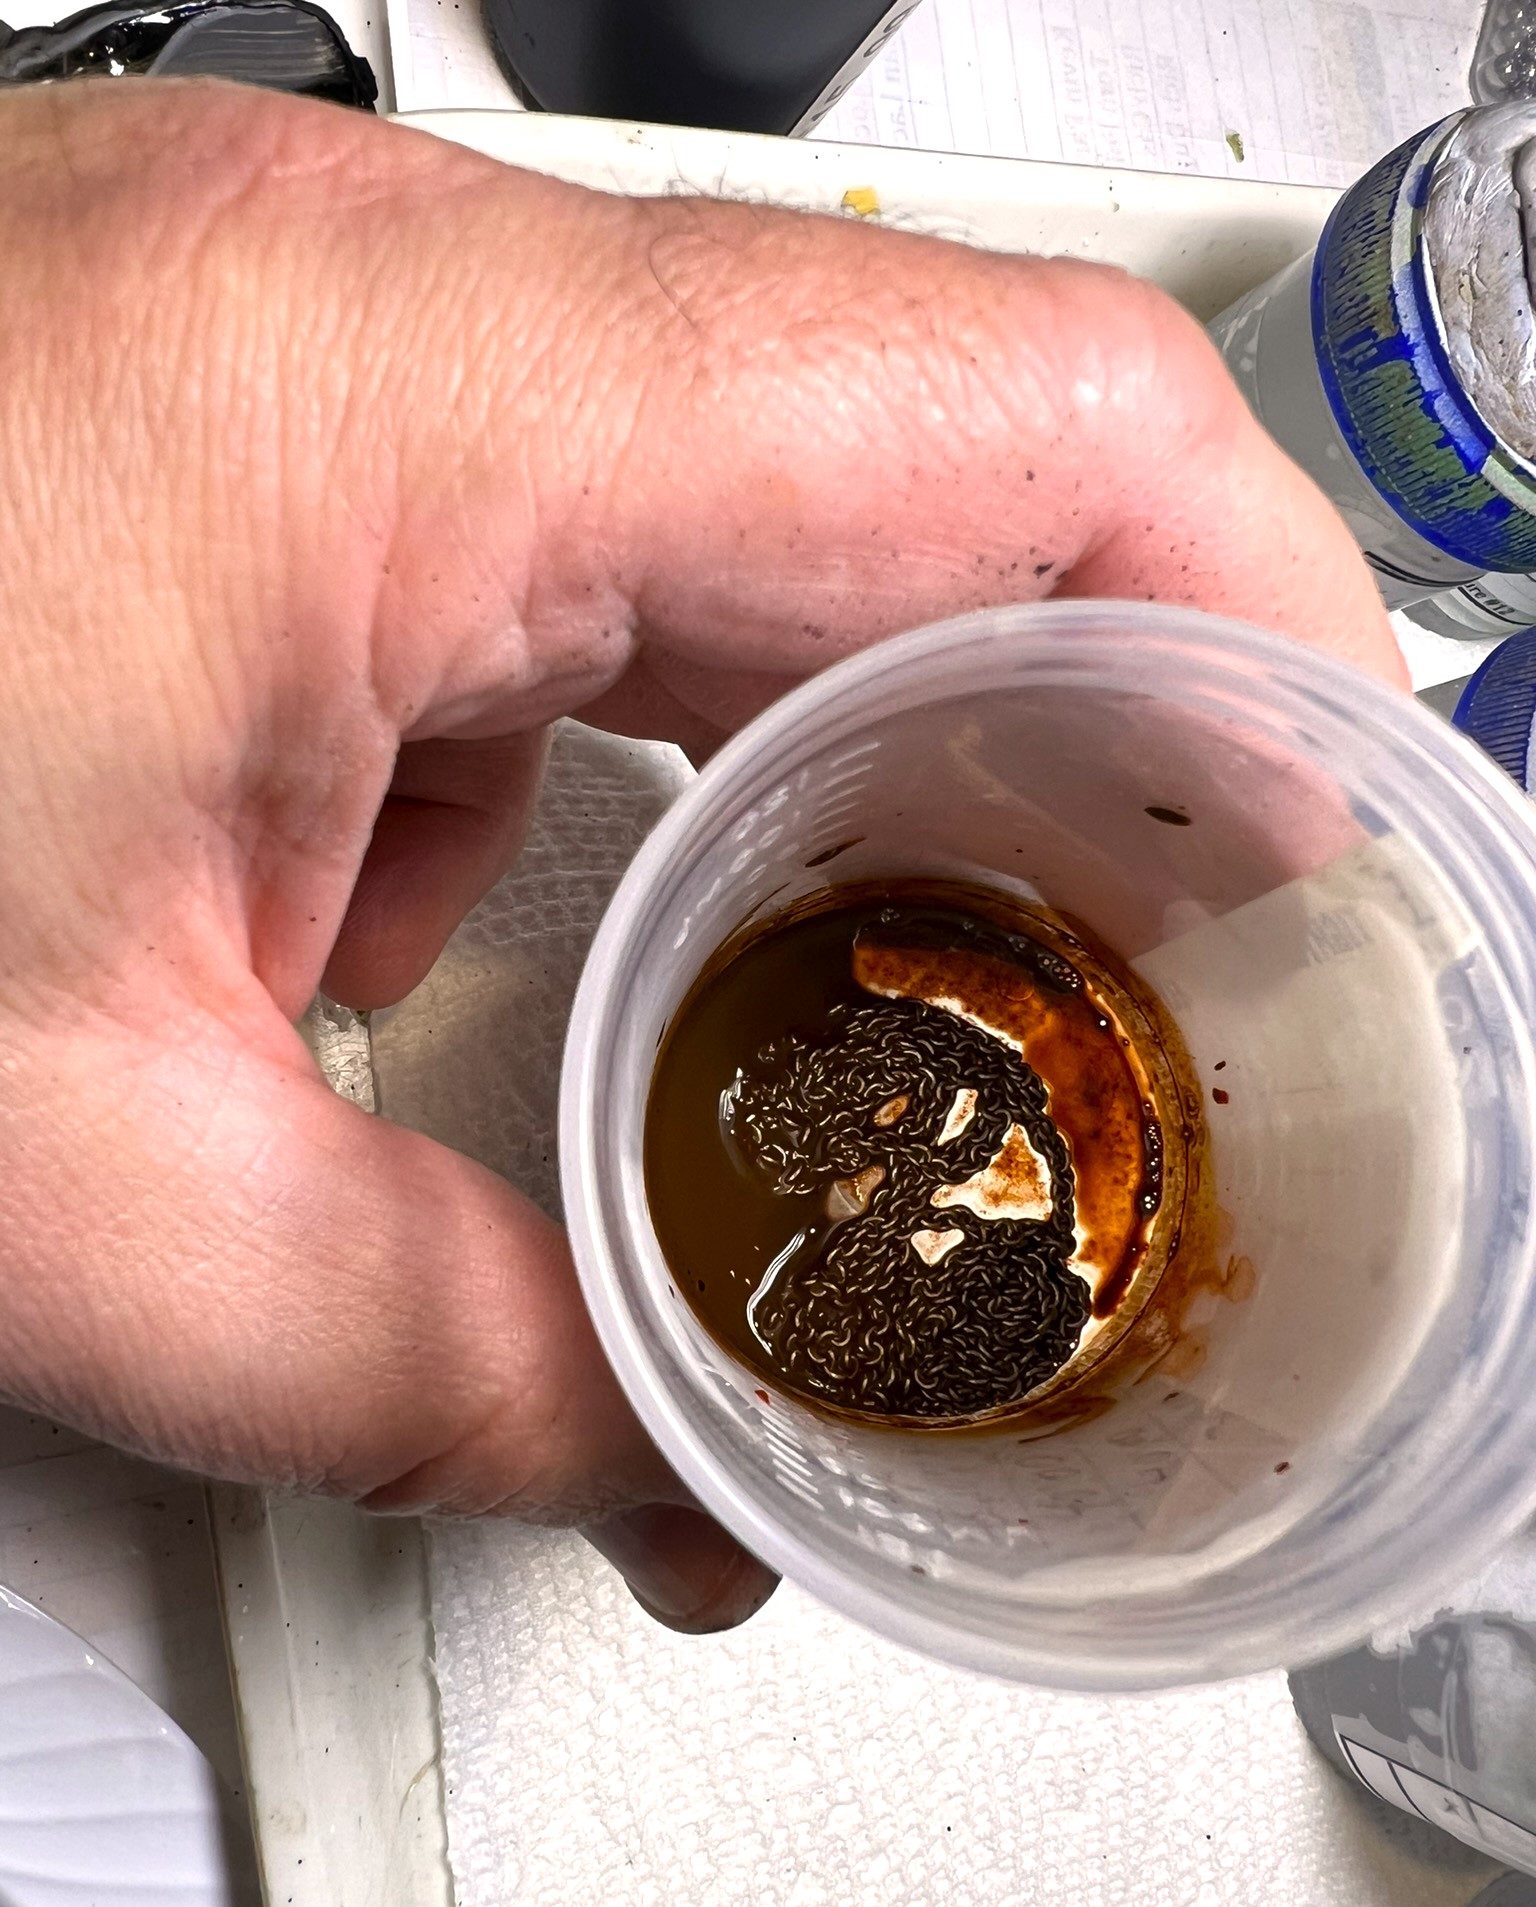
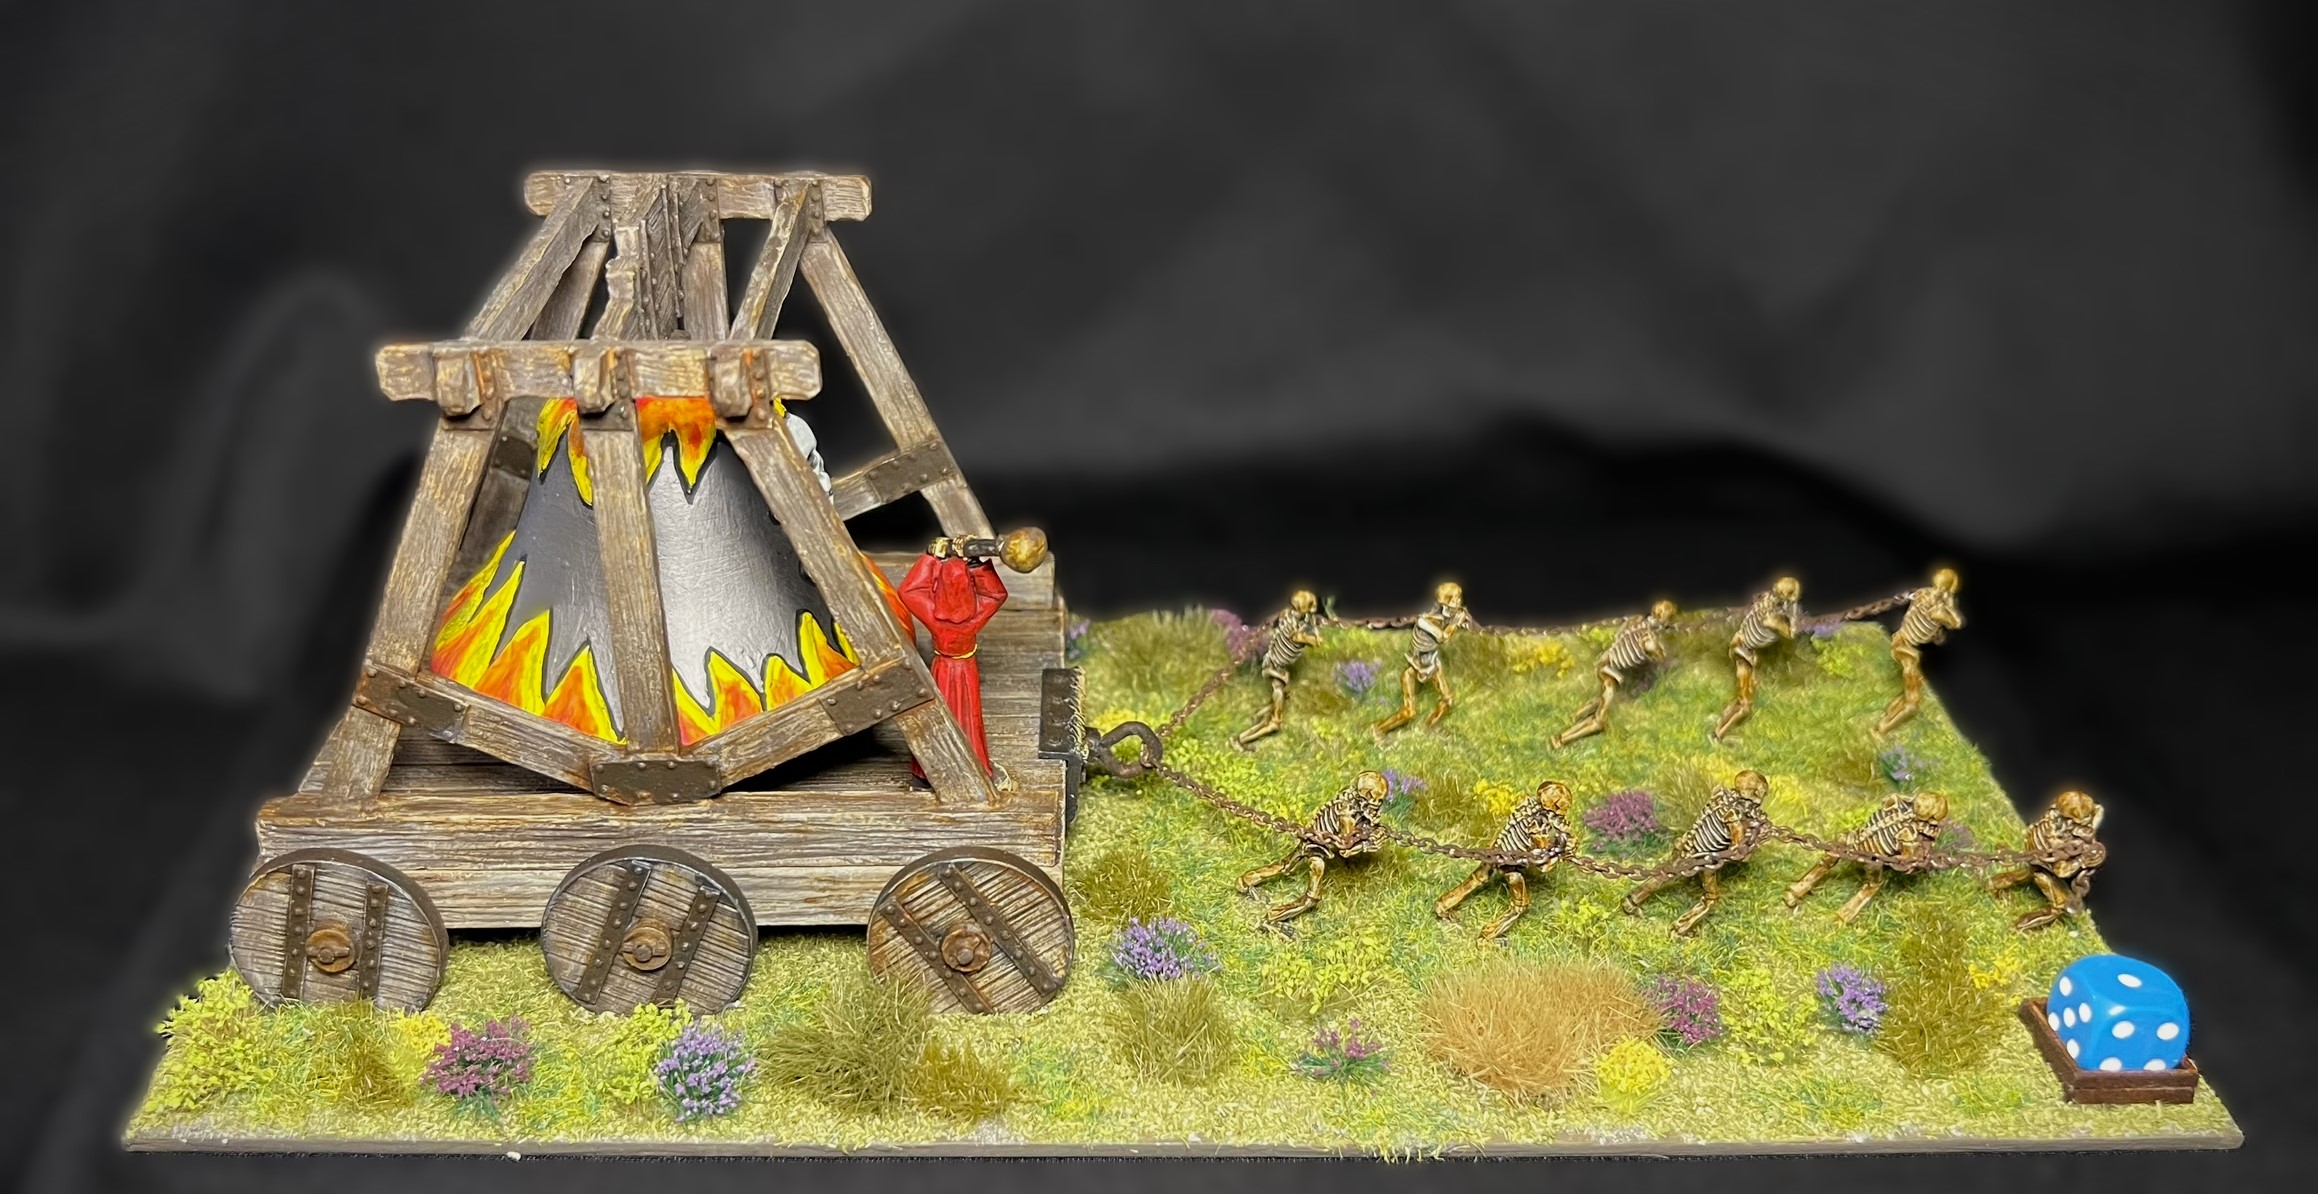
The model came with what appears to be 28-gauge wire to use as ropes with which the skeletons are supposed to pull the cart. I thought that given the backstory that chains would be far more appropriate. I had used jewelry chains similarly before with my Frinx glyptodon mounts. All I needed to do here was to drill small gaps on the skeleton figures to accomodate the chains later on and to make the chains look ancient and rusty. I cut a good length and bathed them for a while in a cup filled with rust texture paint and rust wash.

Rusting up the chains.

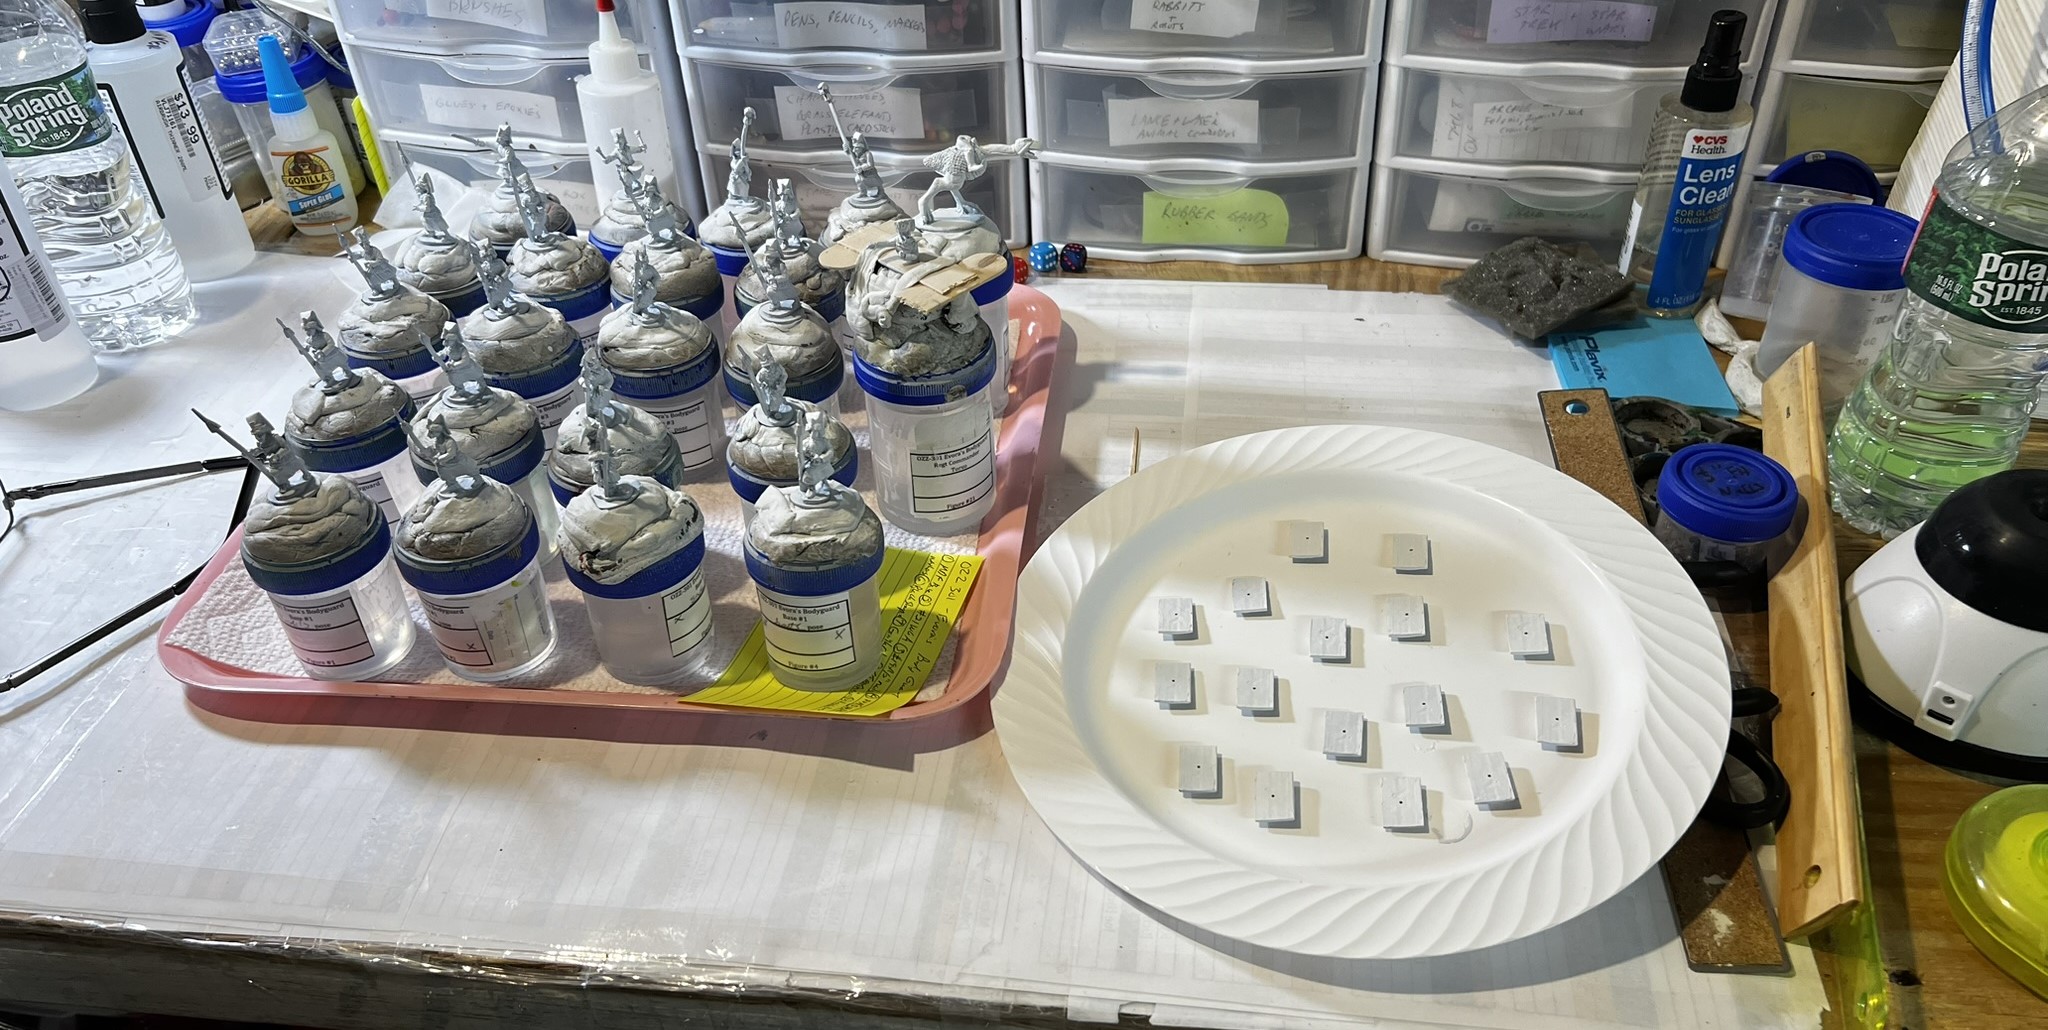
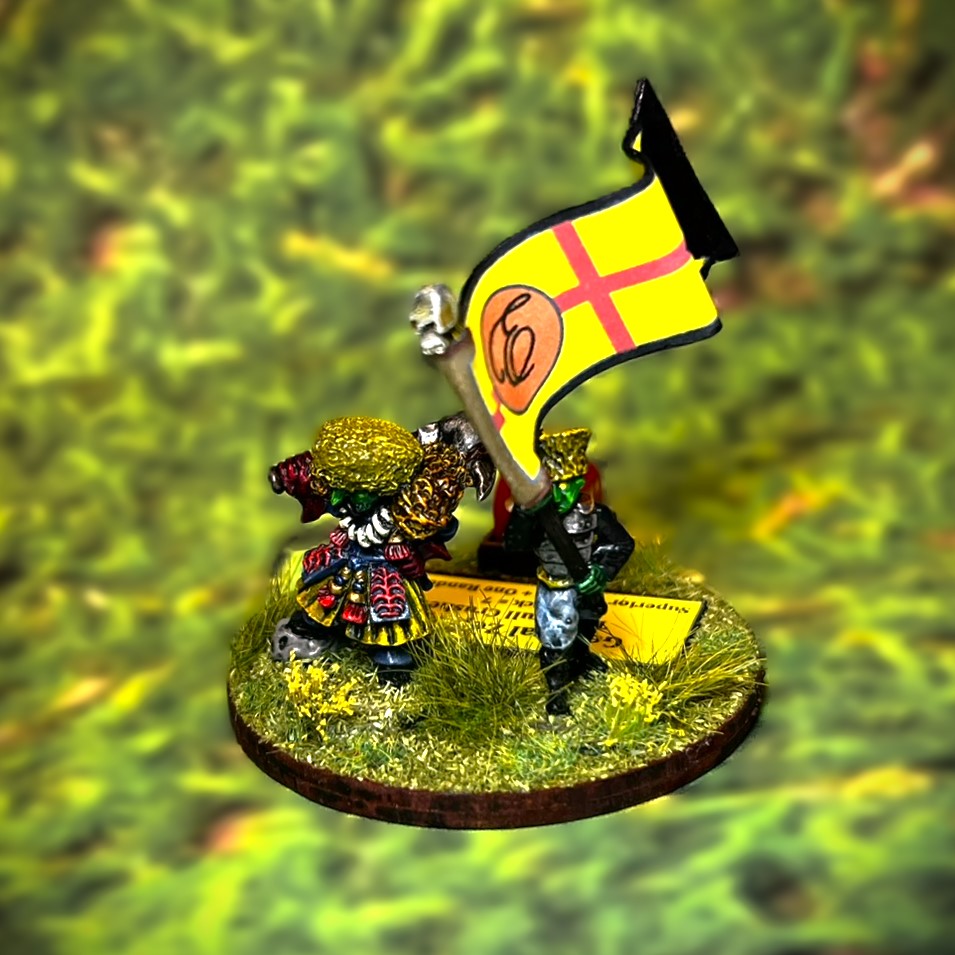
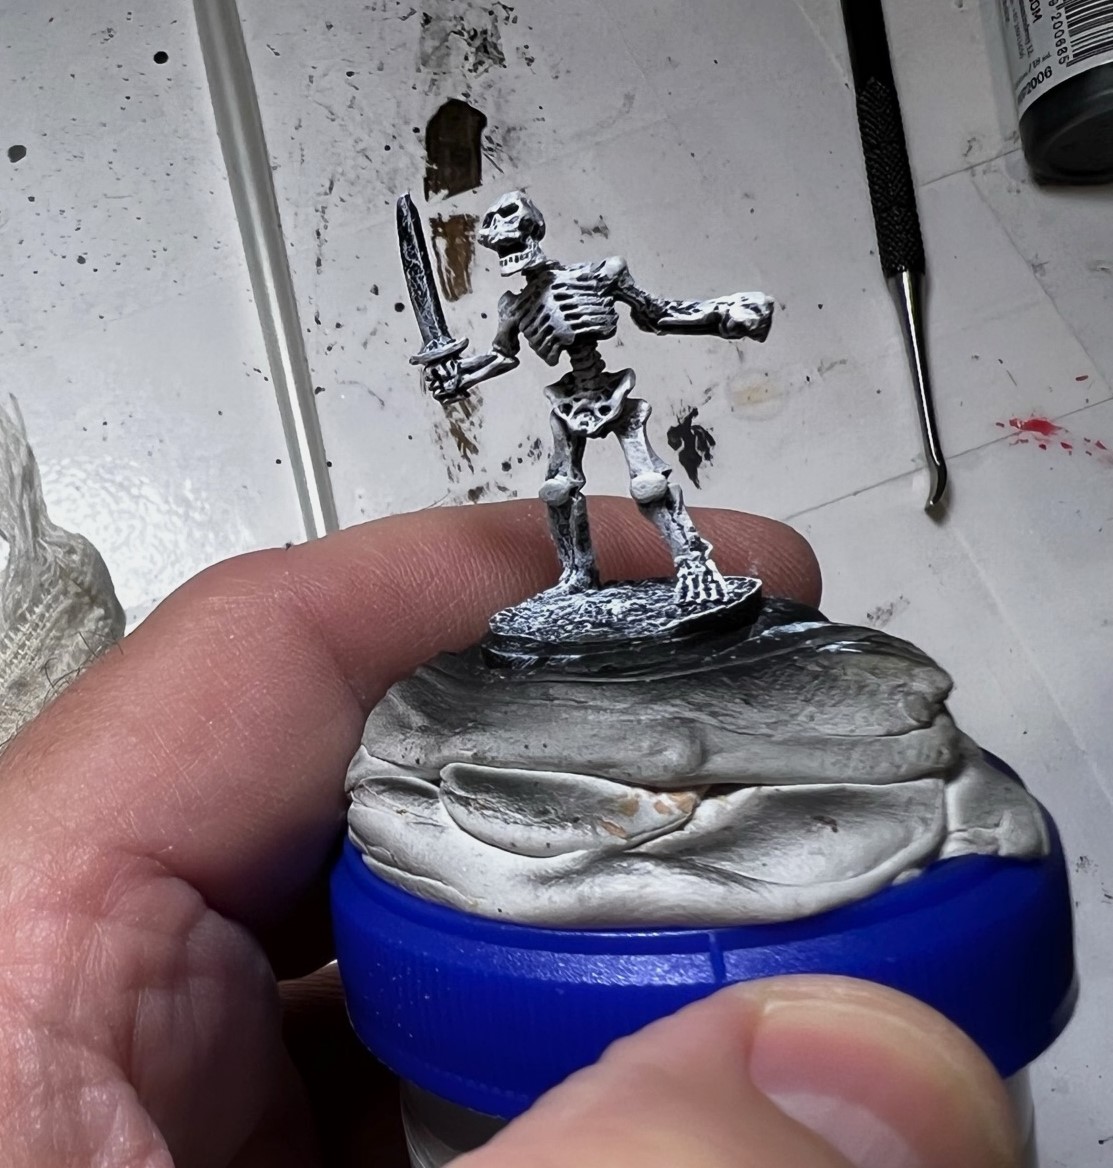
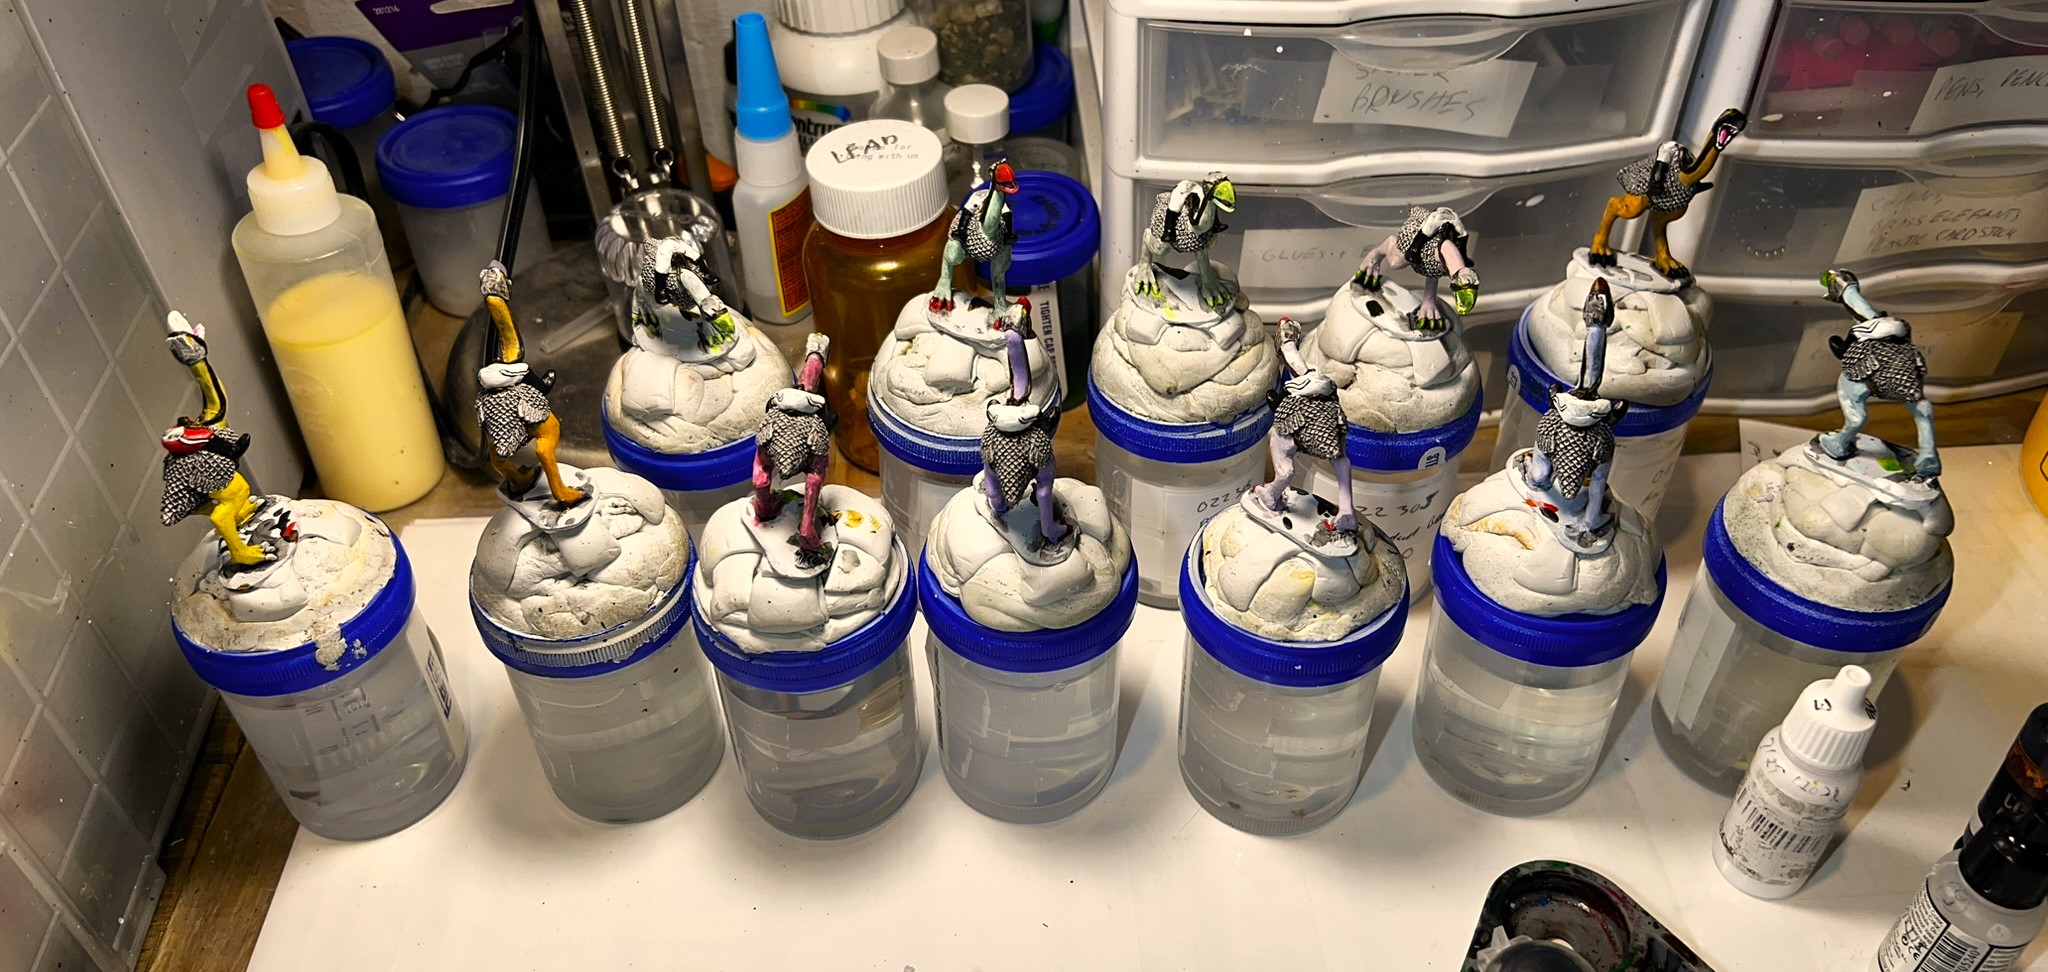
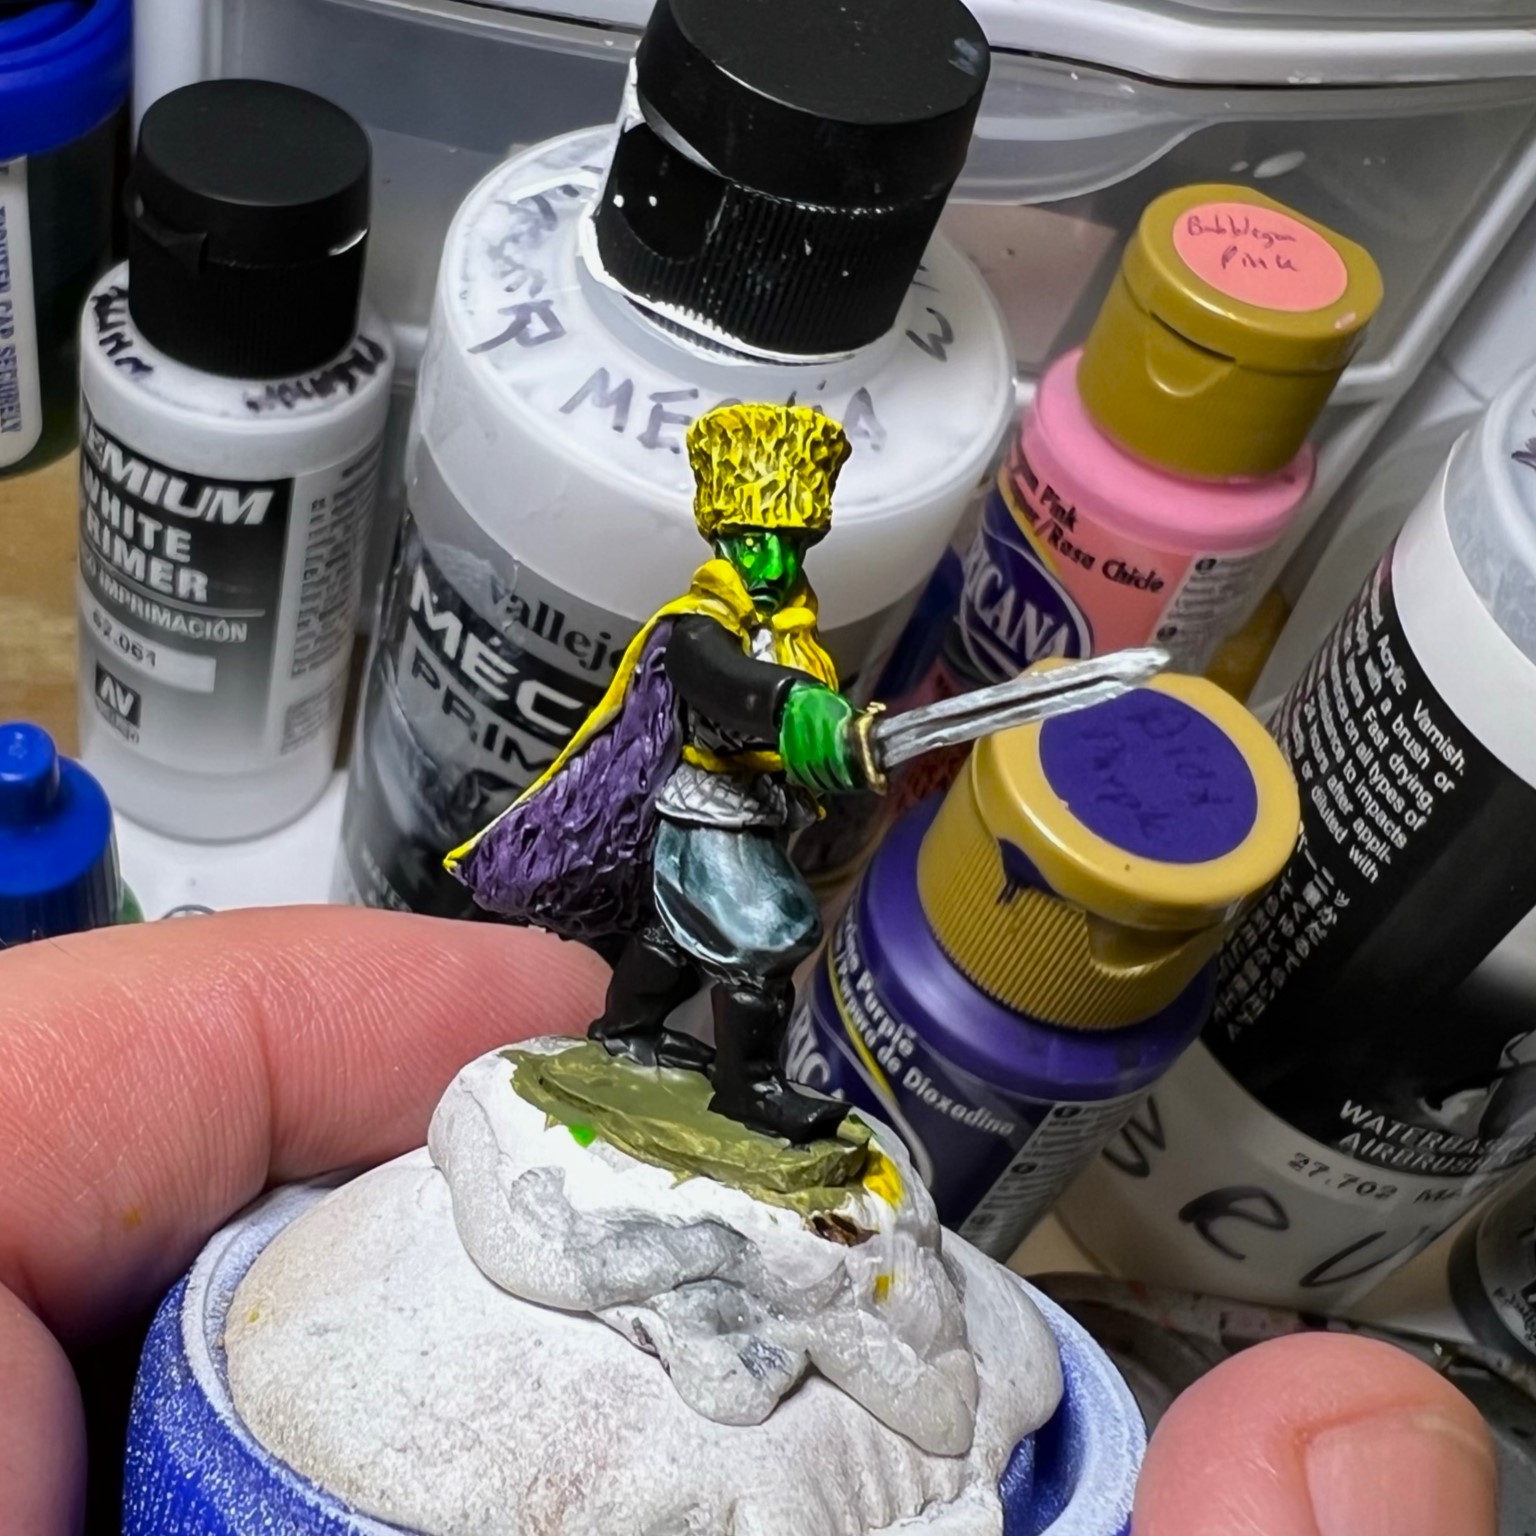
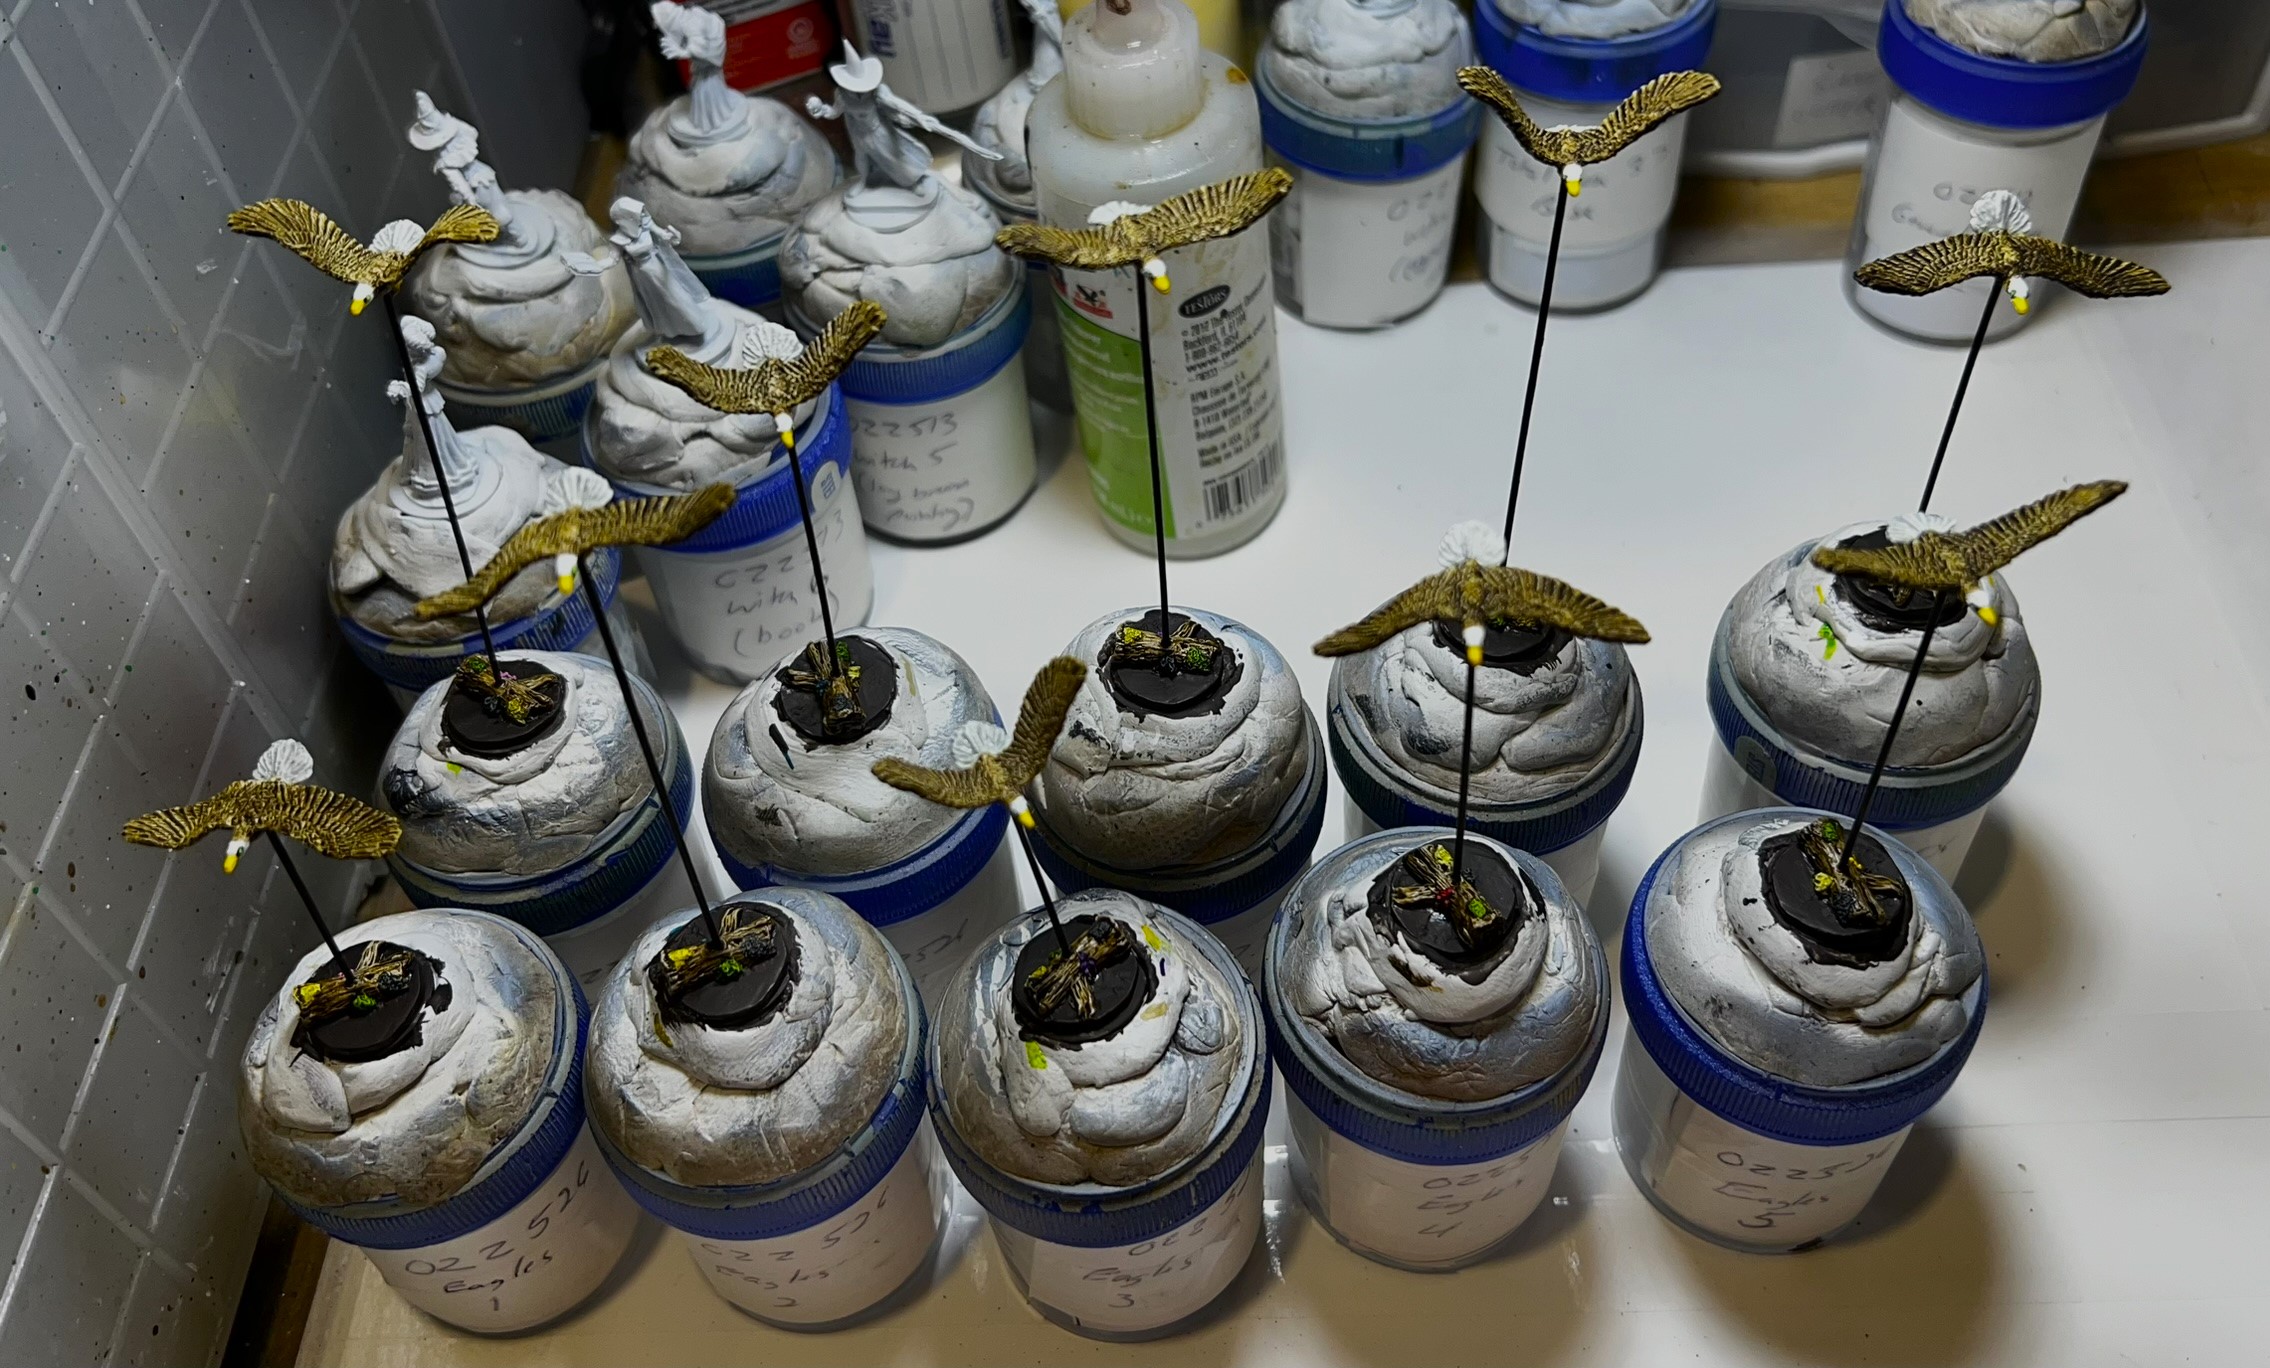
By January 17th I had primed all of the components as well as some dry brushing of the wood sections (that are made of metal). I also saw that the Bell had flames on it – as well as a skull. I decided that, unlike the photos in the rulebook, my Bell would have magical evil flames adorning it to announce the arrival of dead warriors.

On January 17th – I was on to priming and early dry brushing of the cart and the 6 wheels and prepping the bell for the painting of flames.

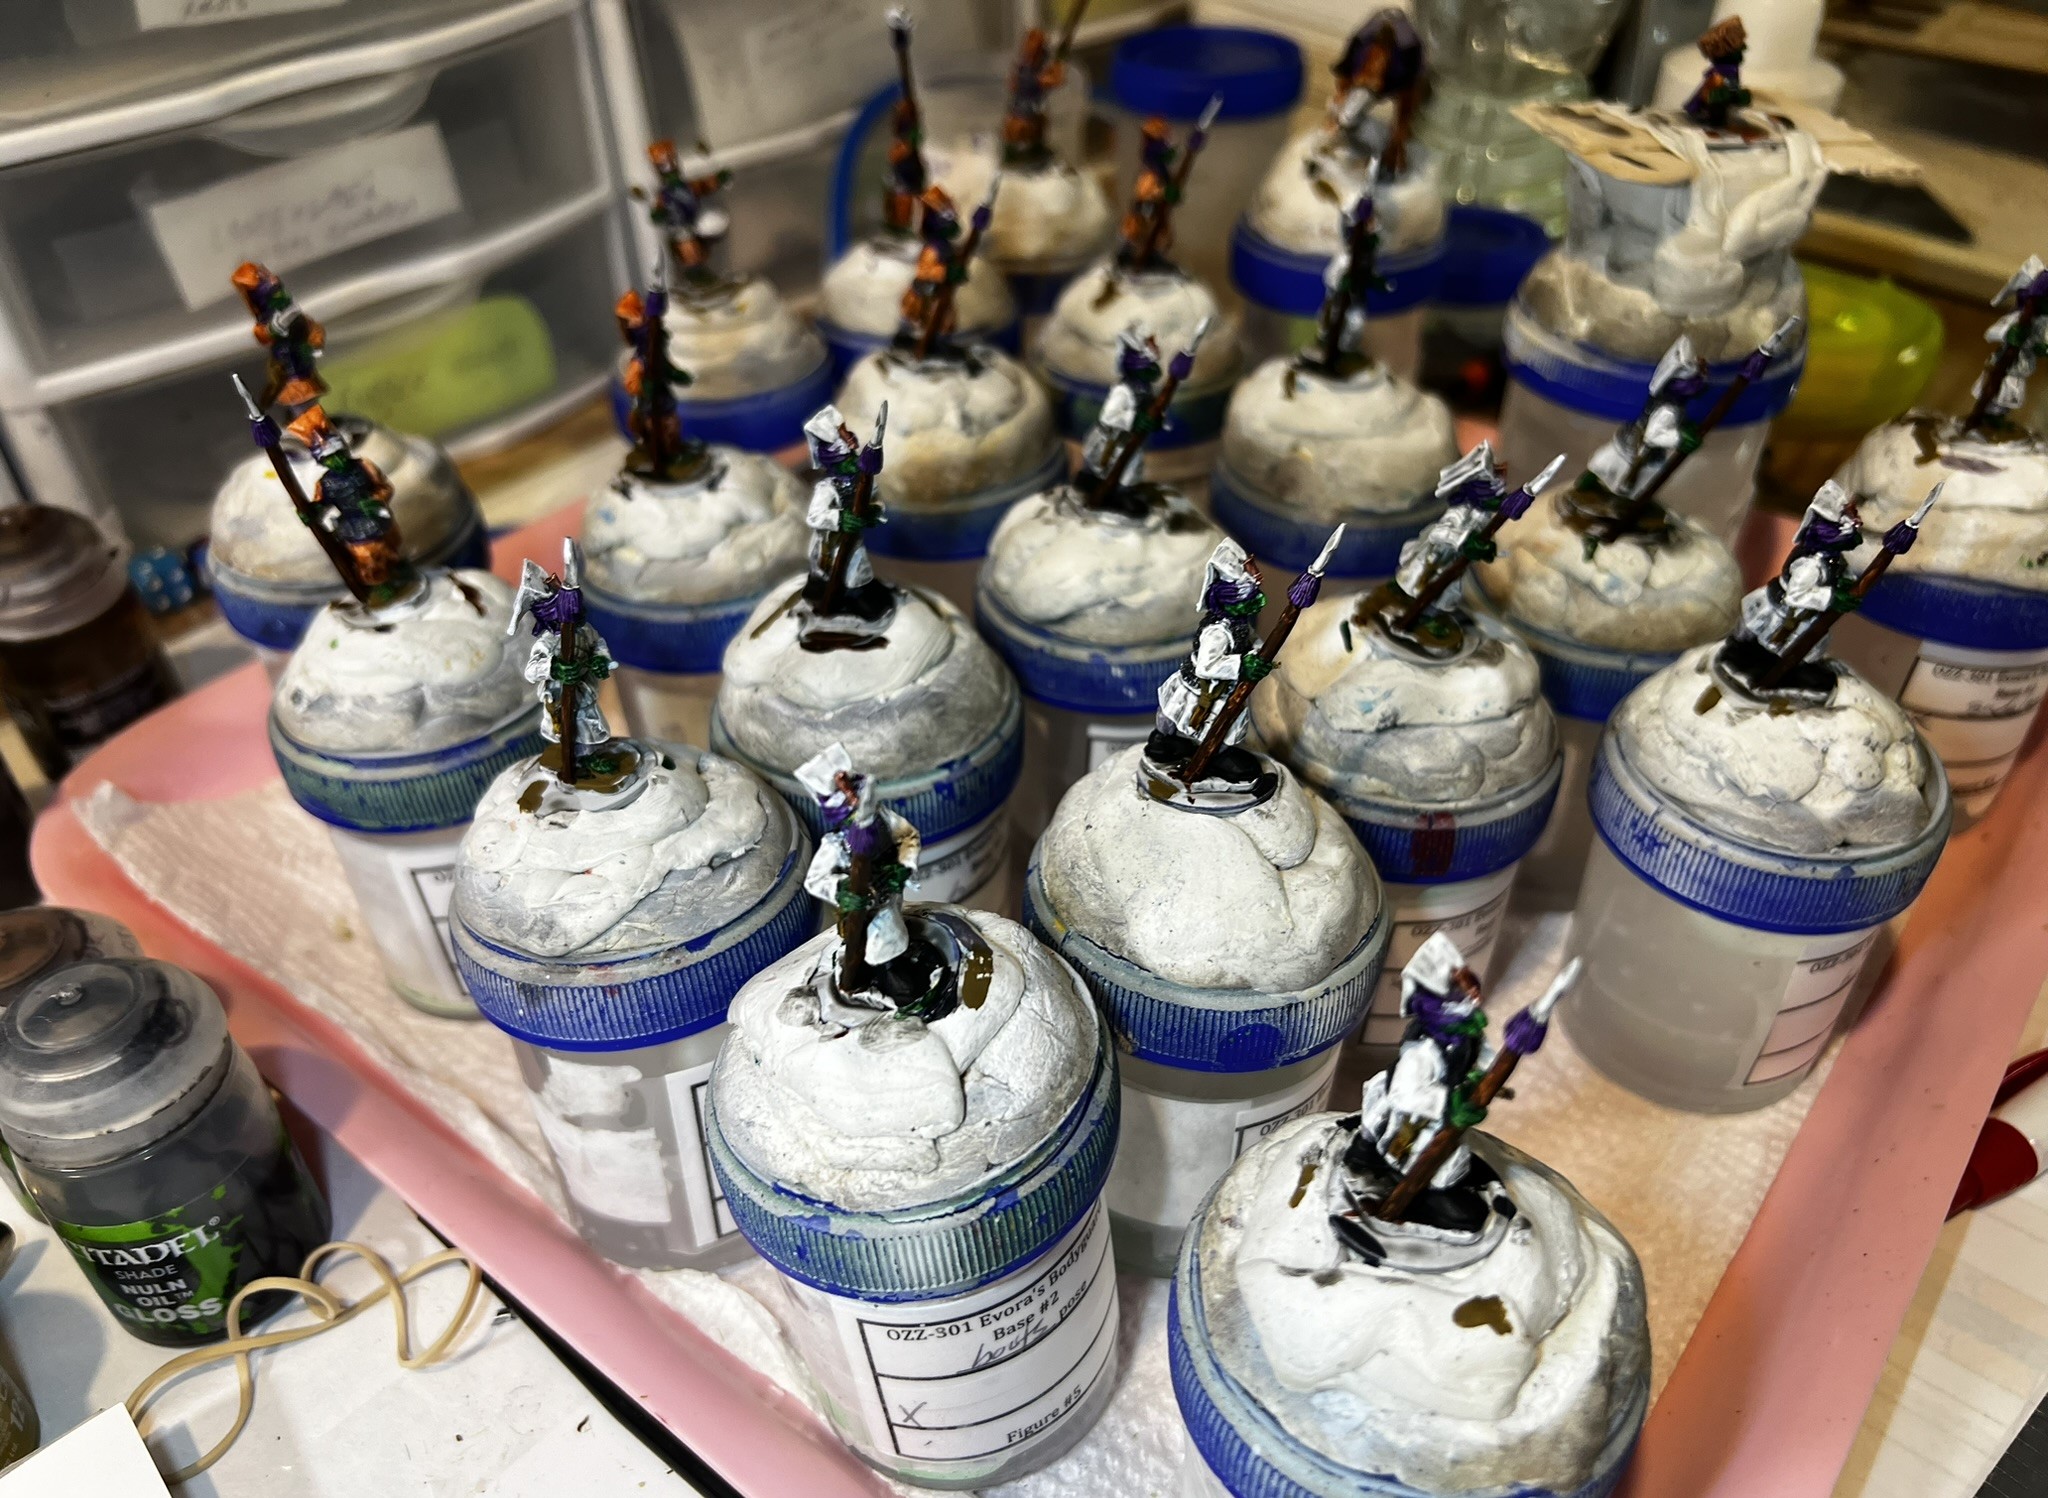
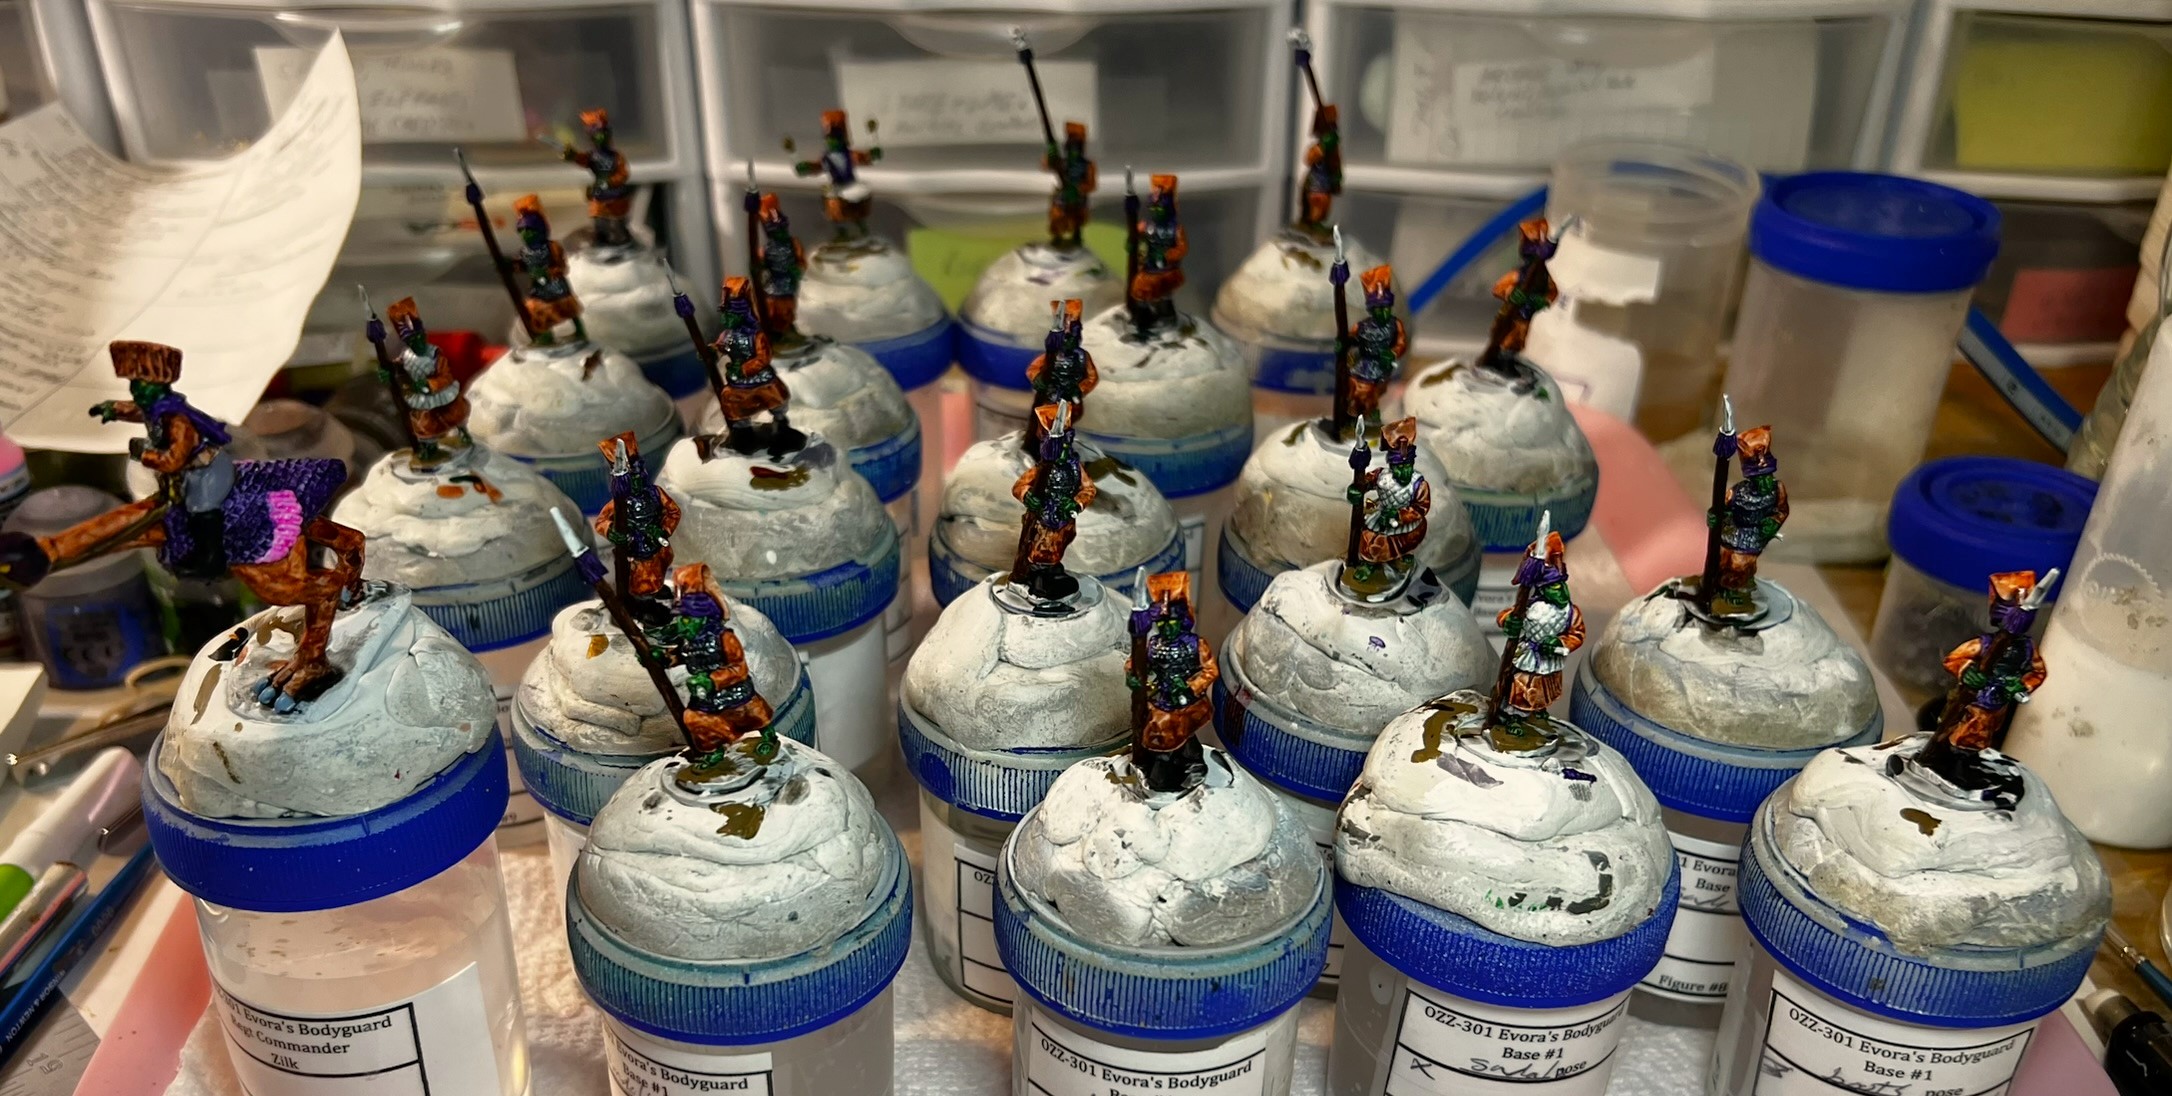
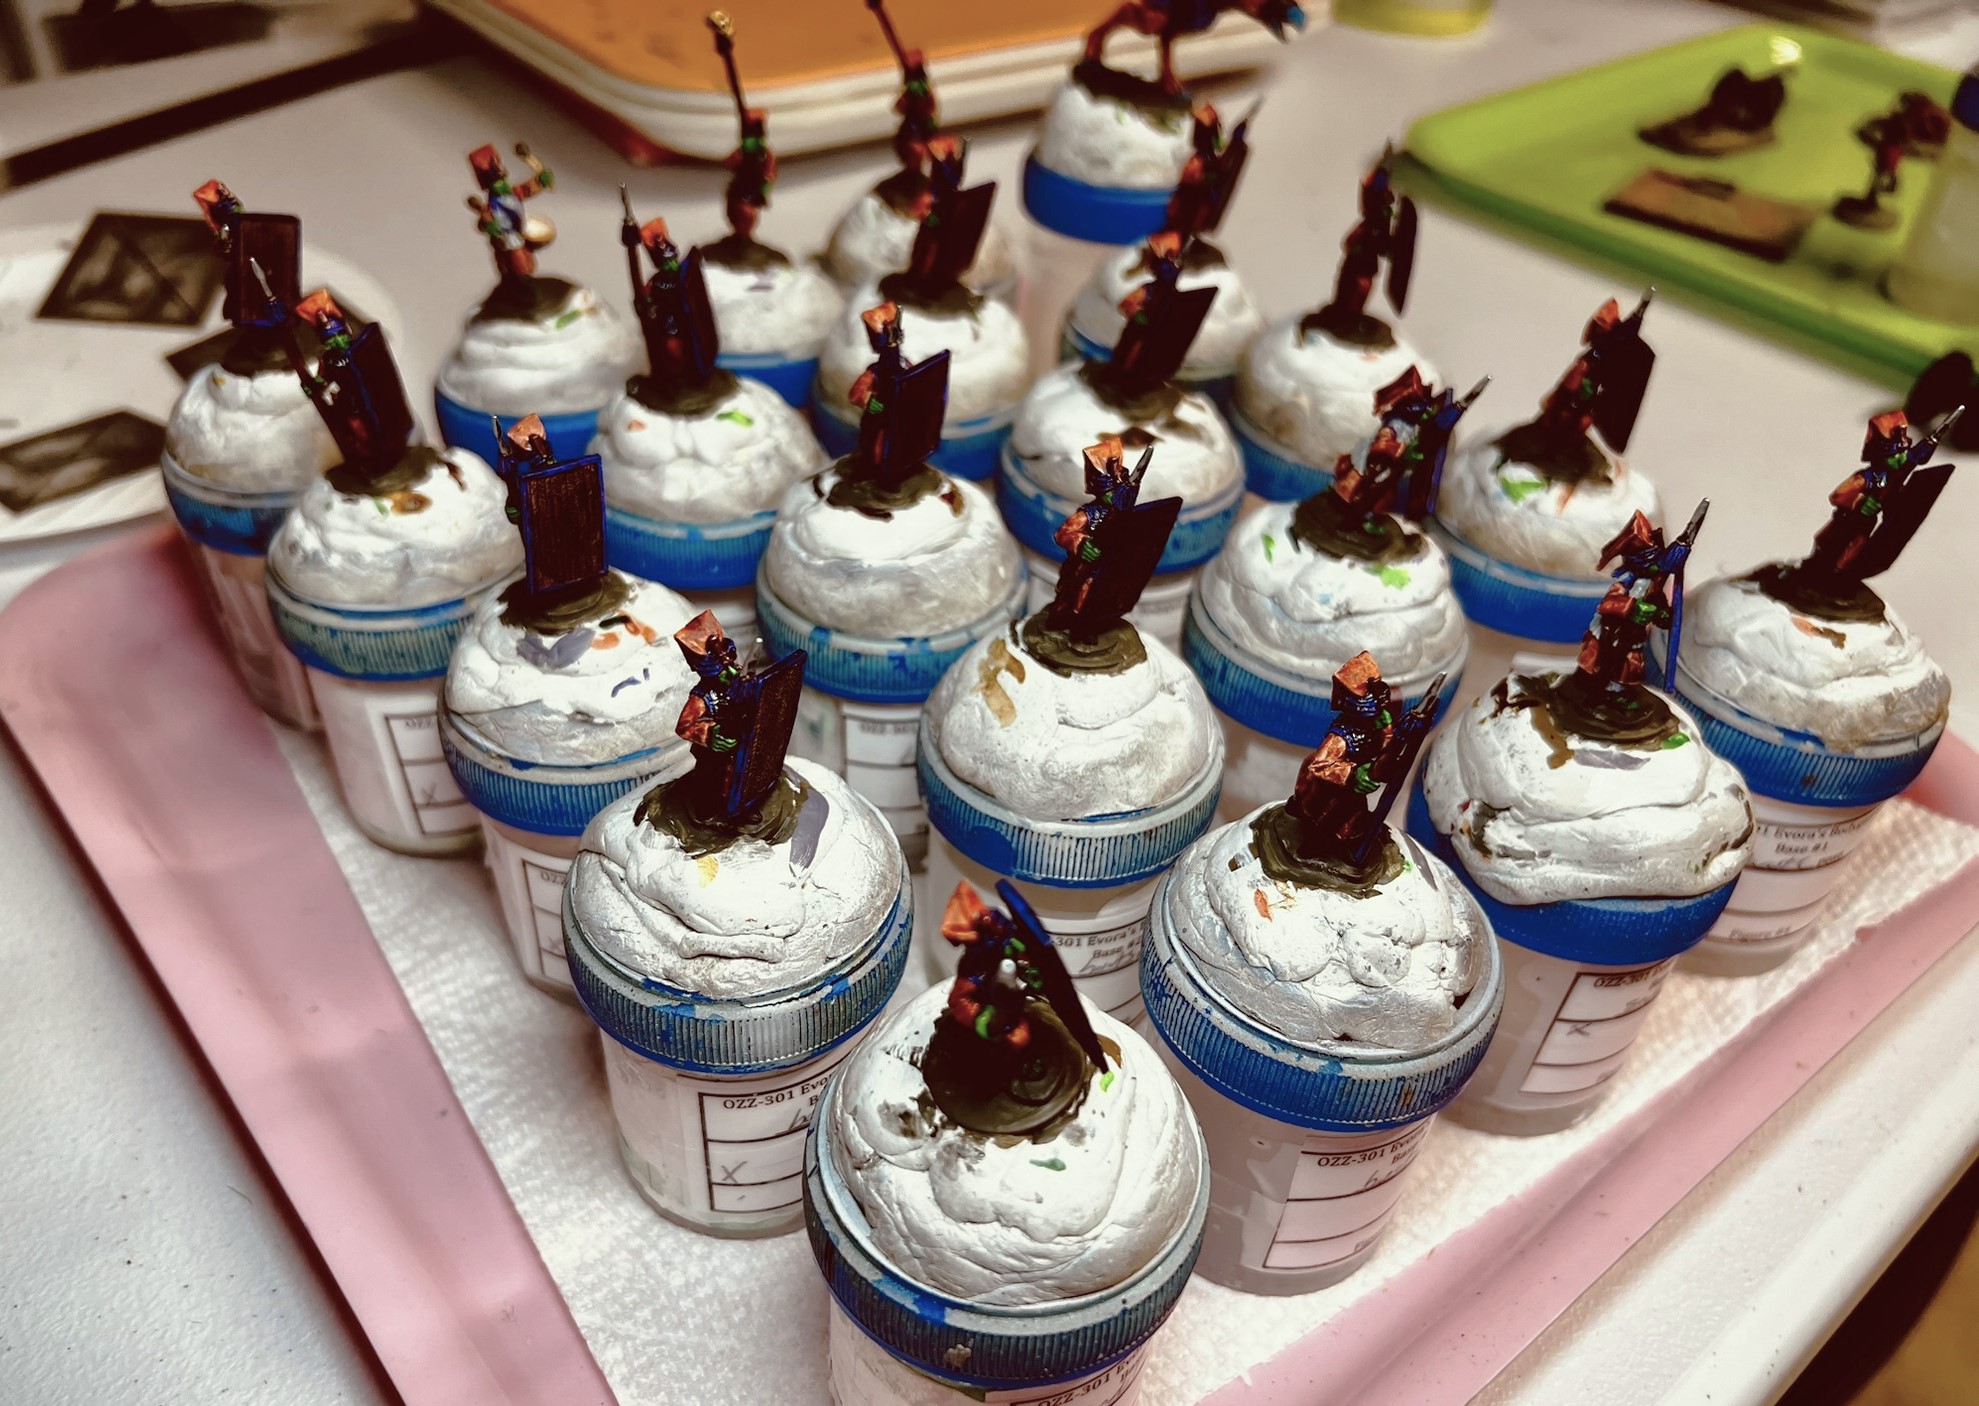
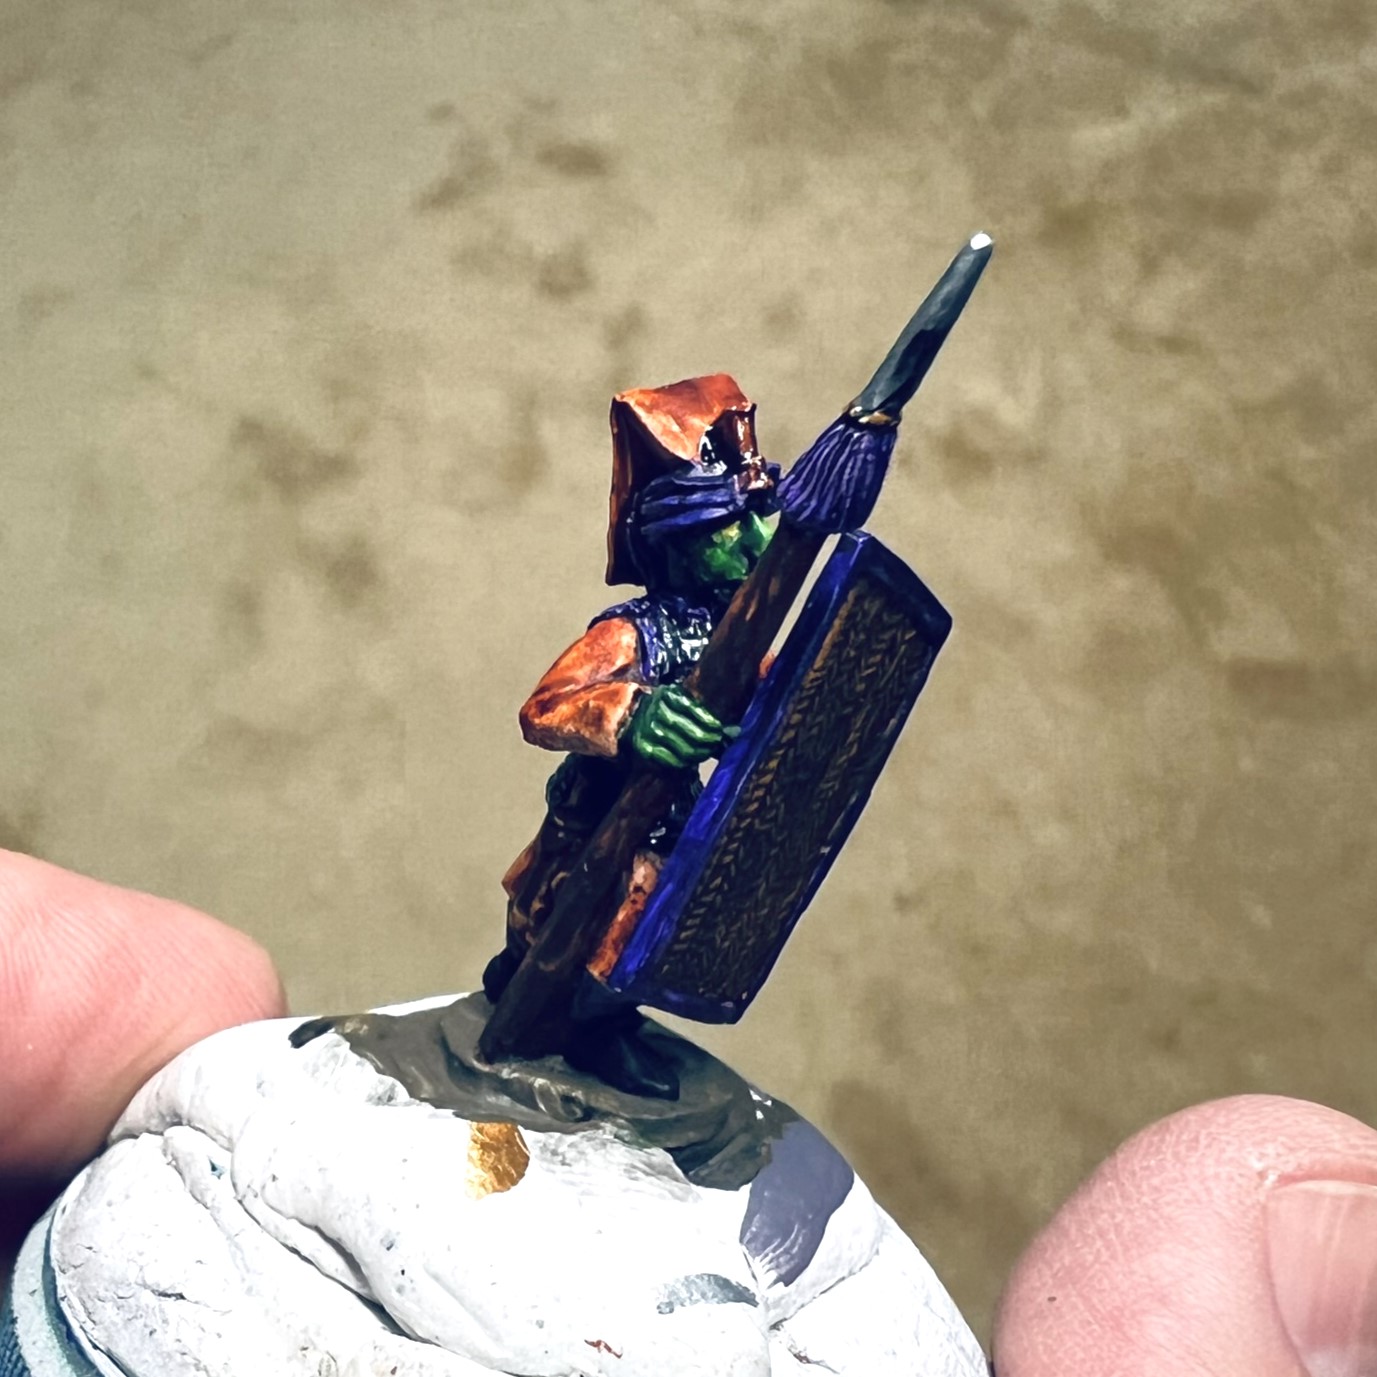
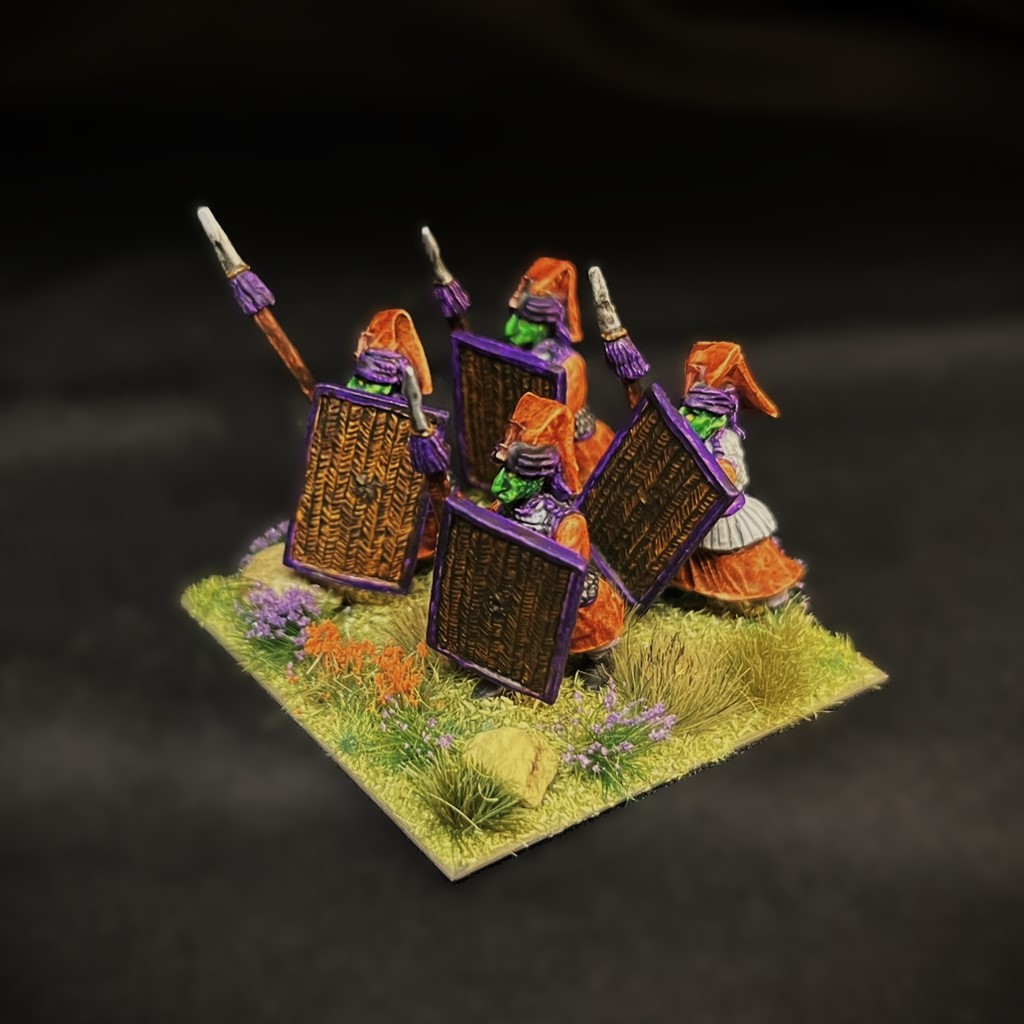
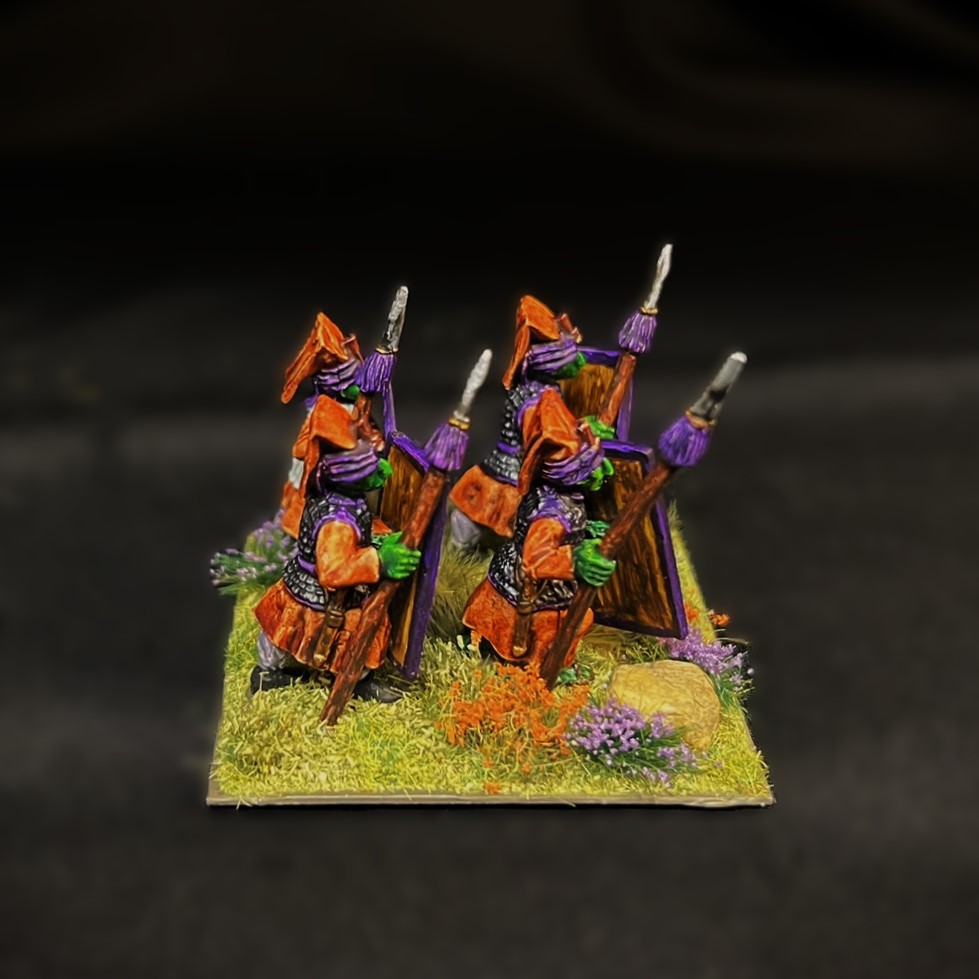
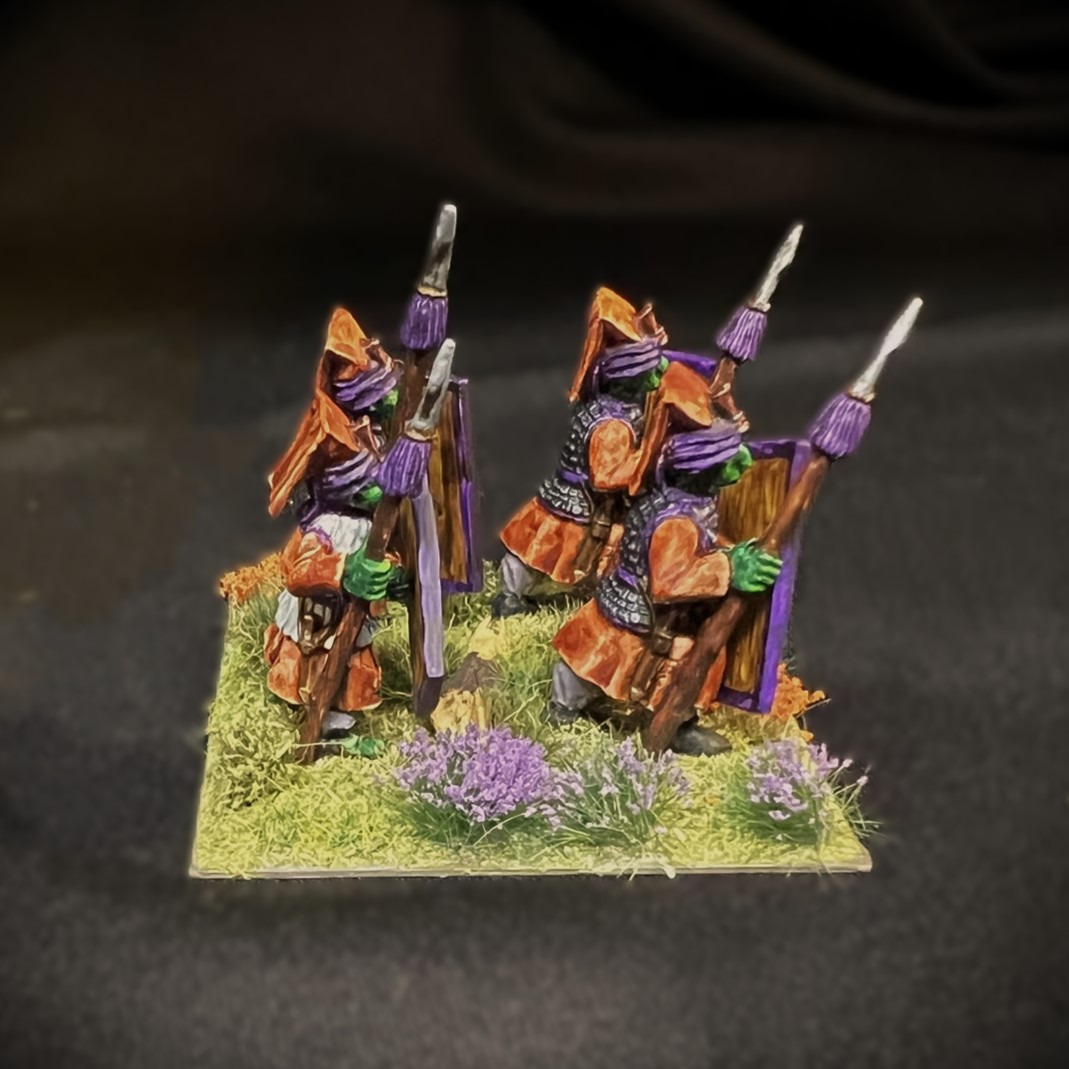
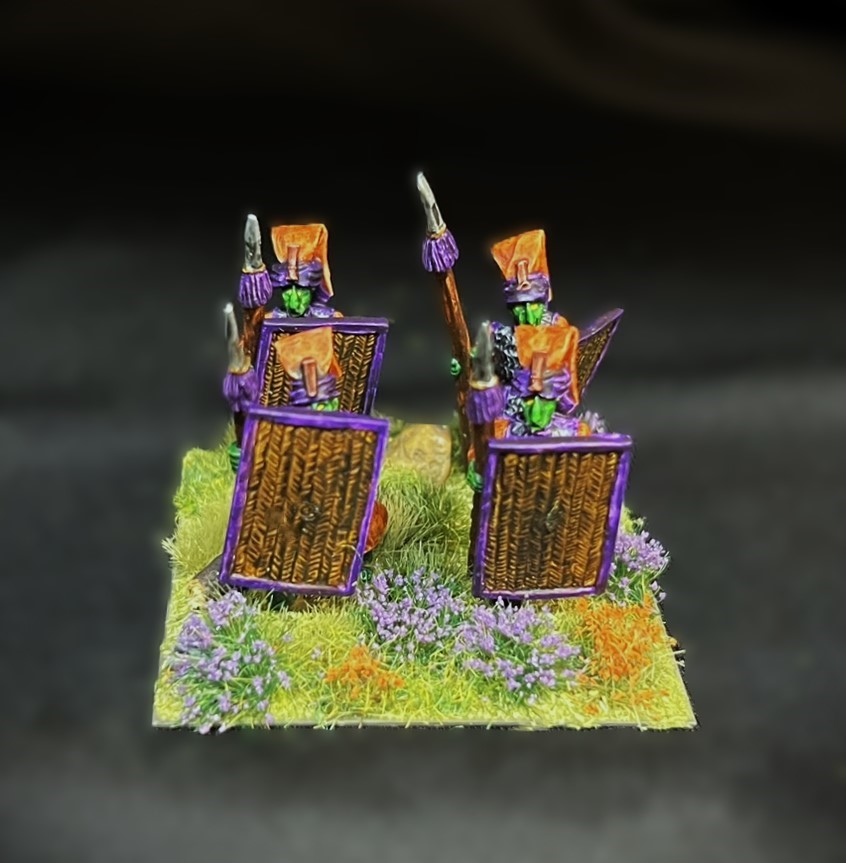
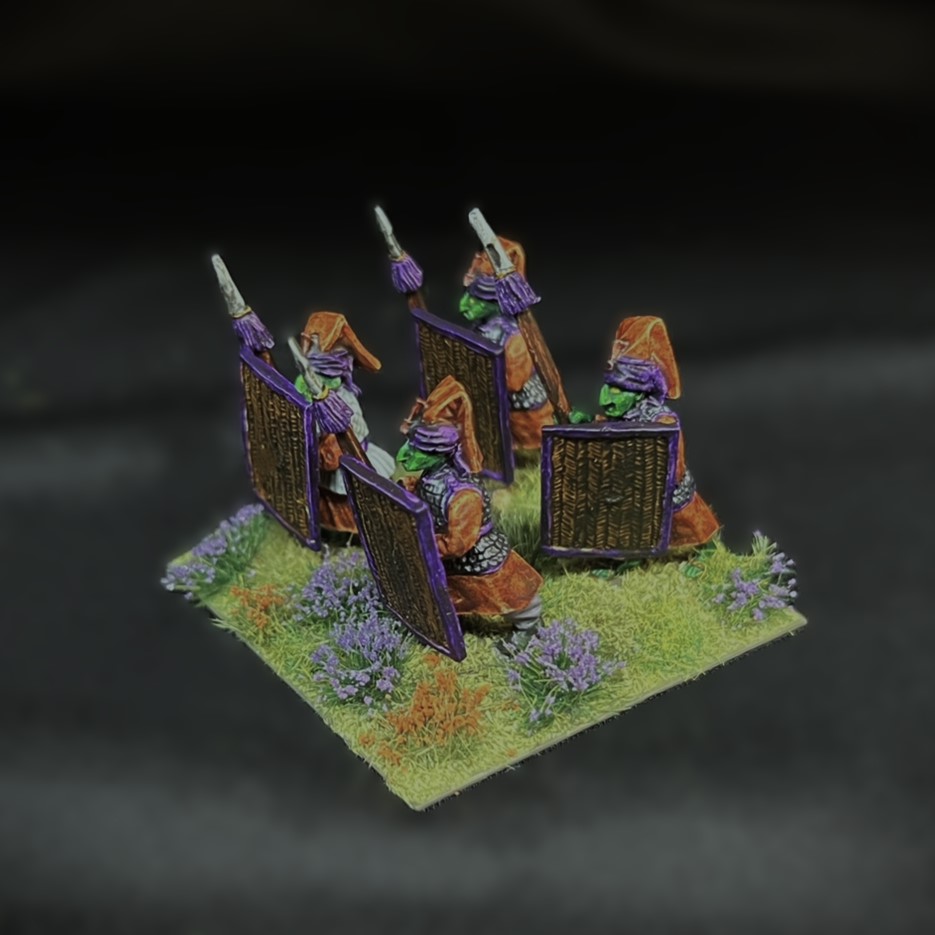
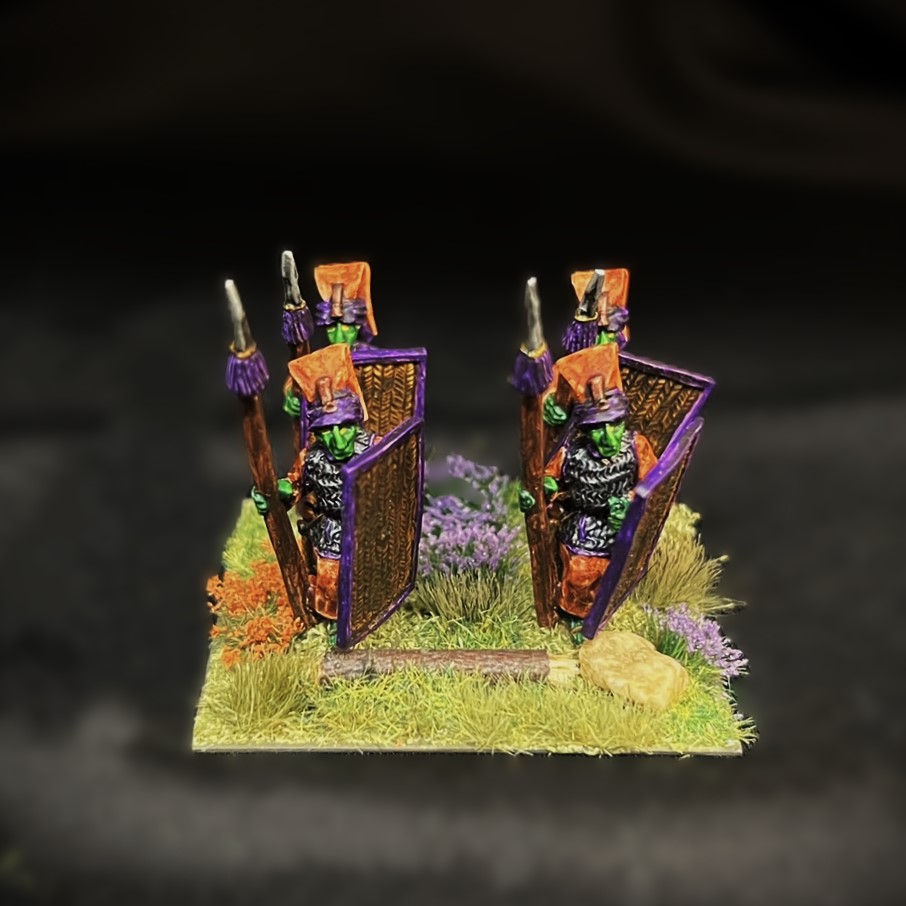
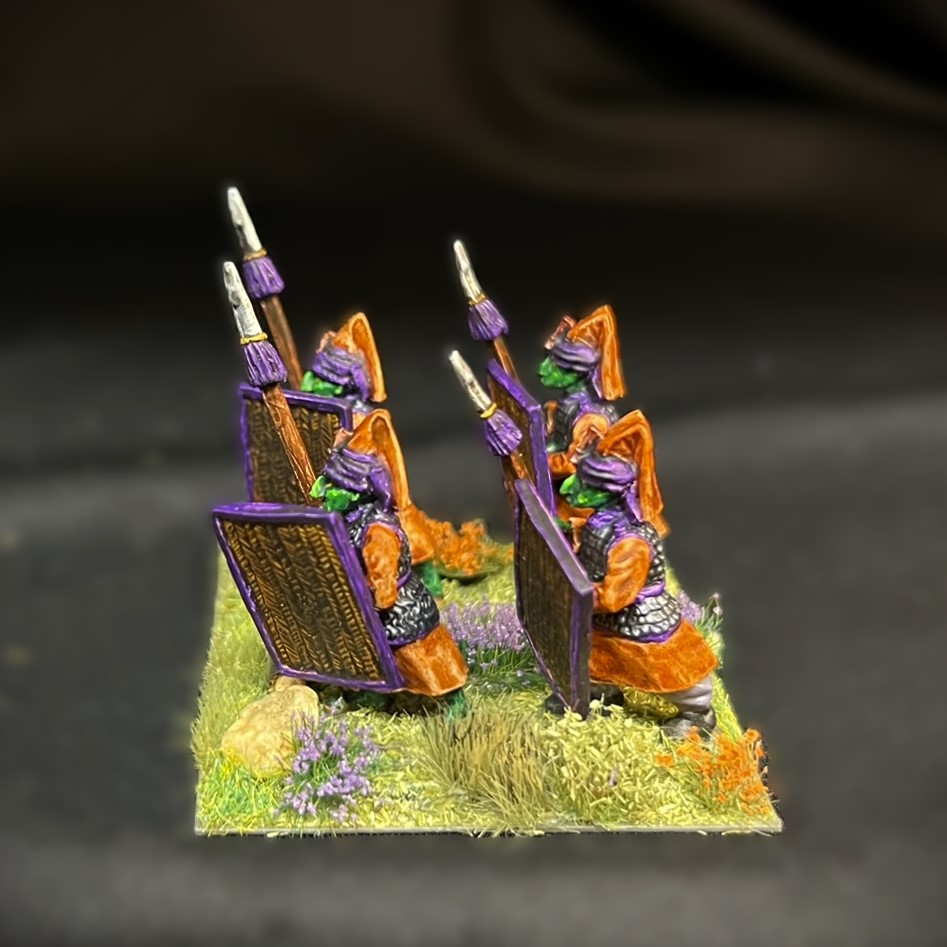
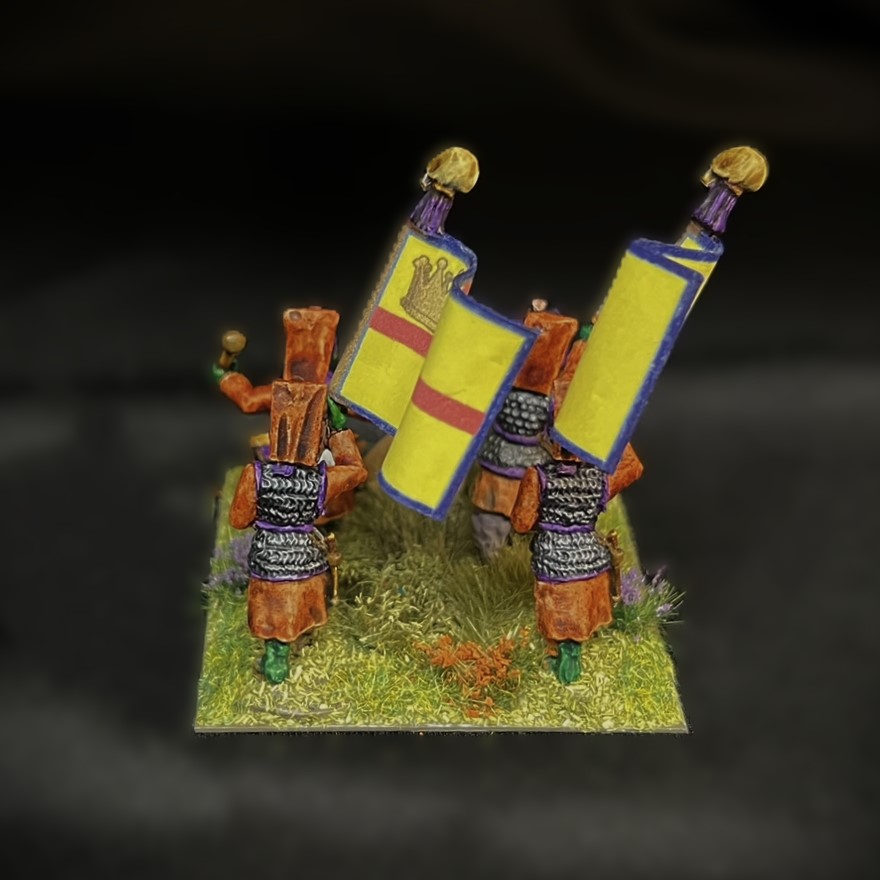
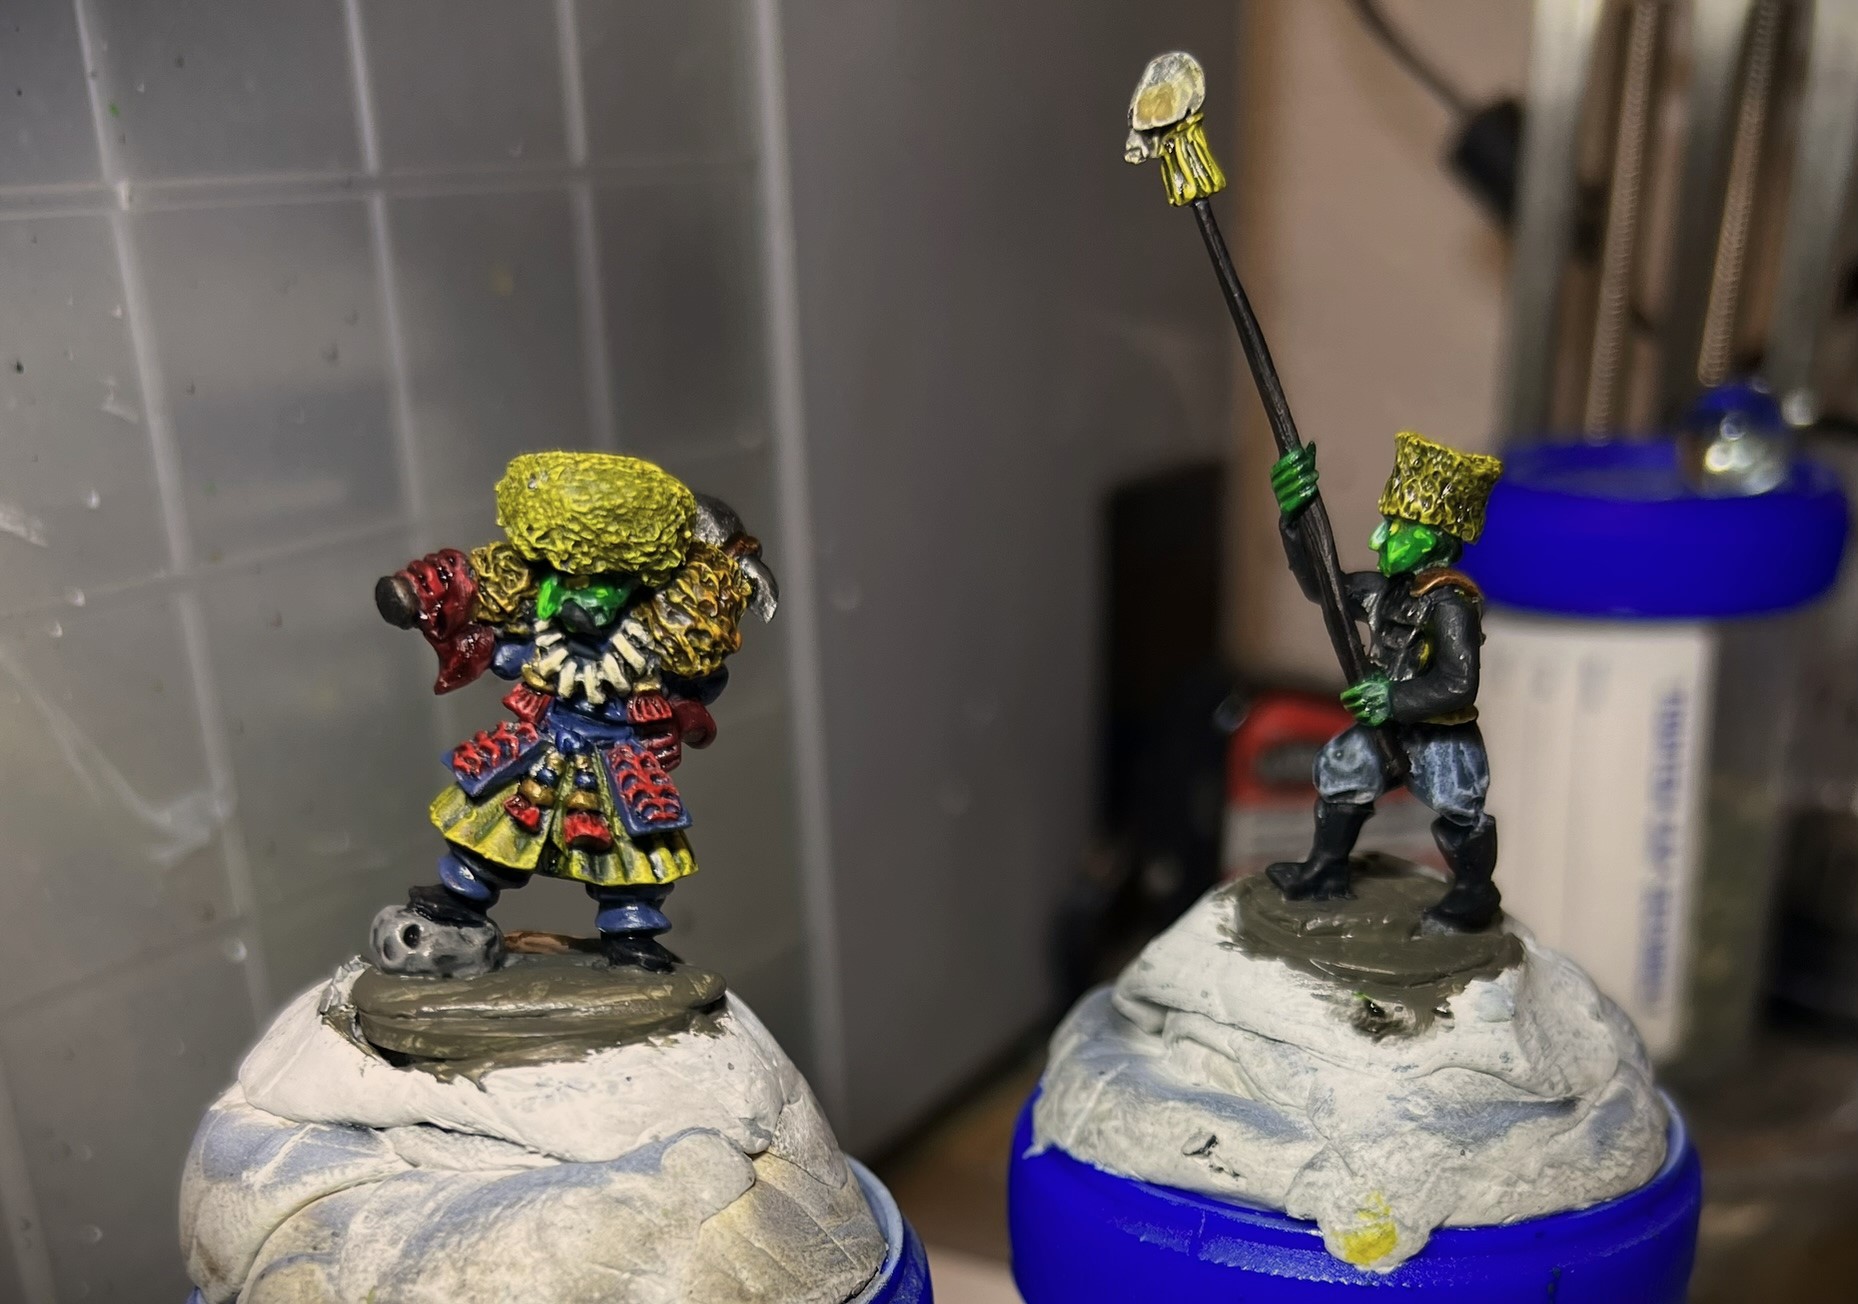
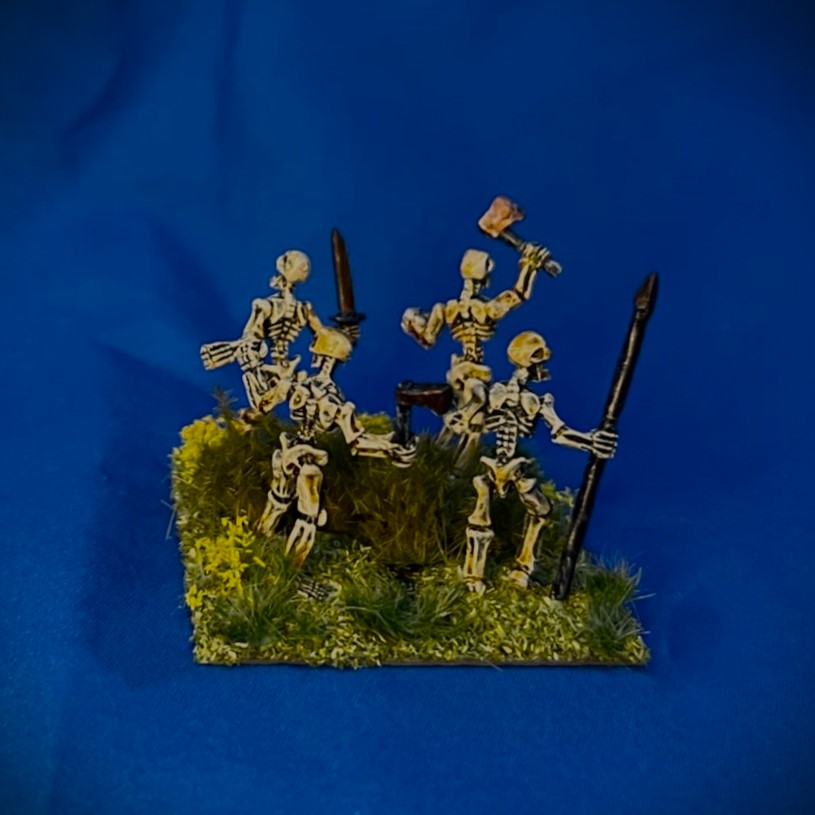
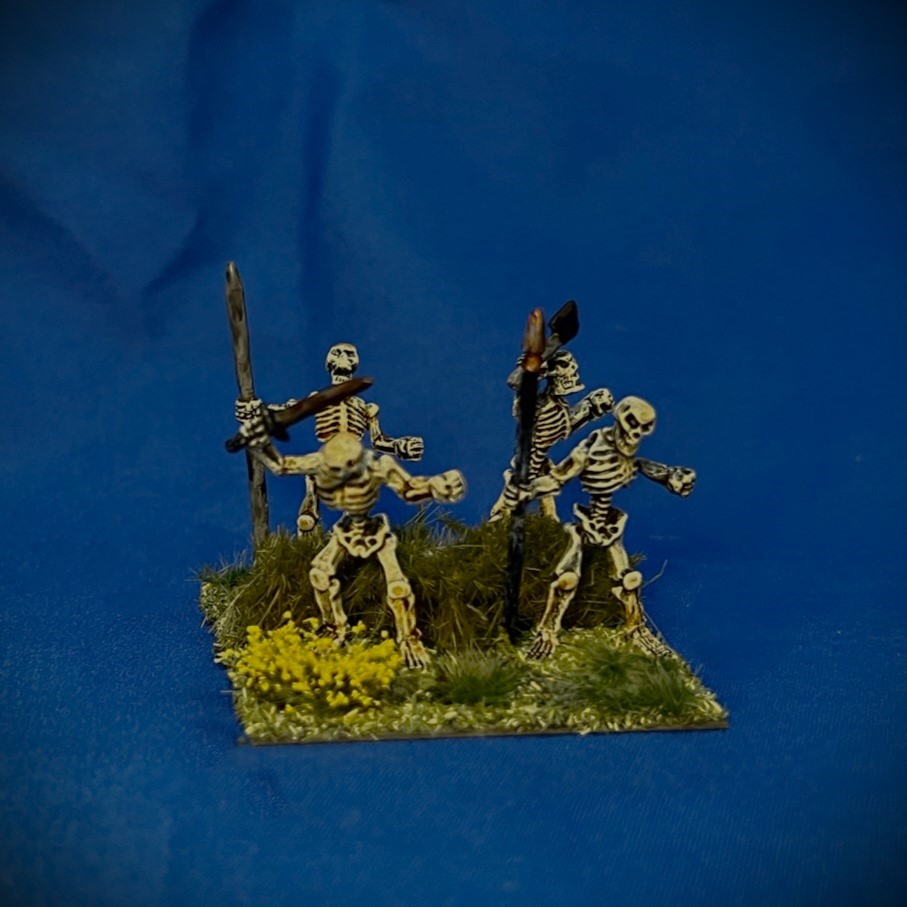
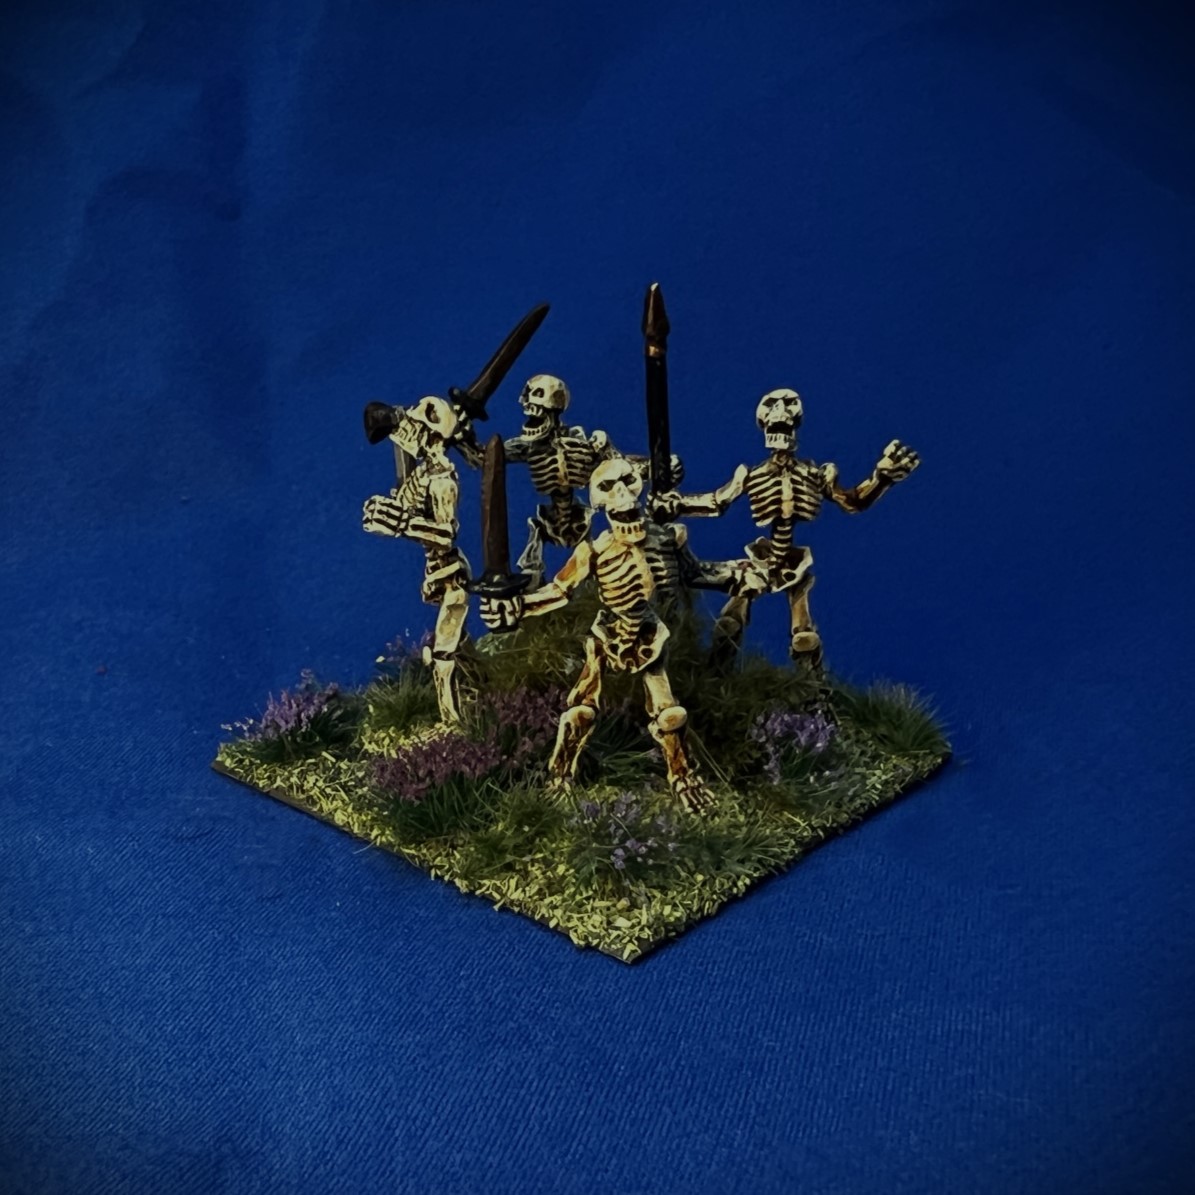
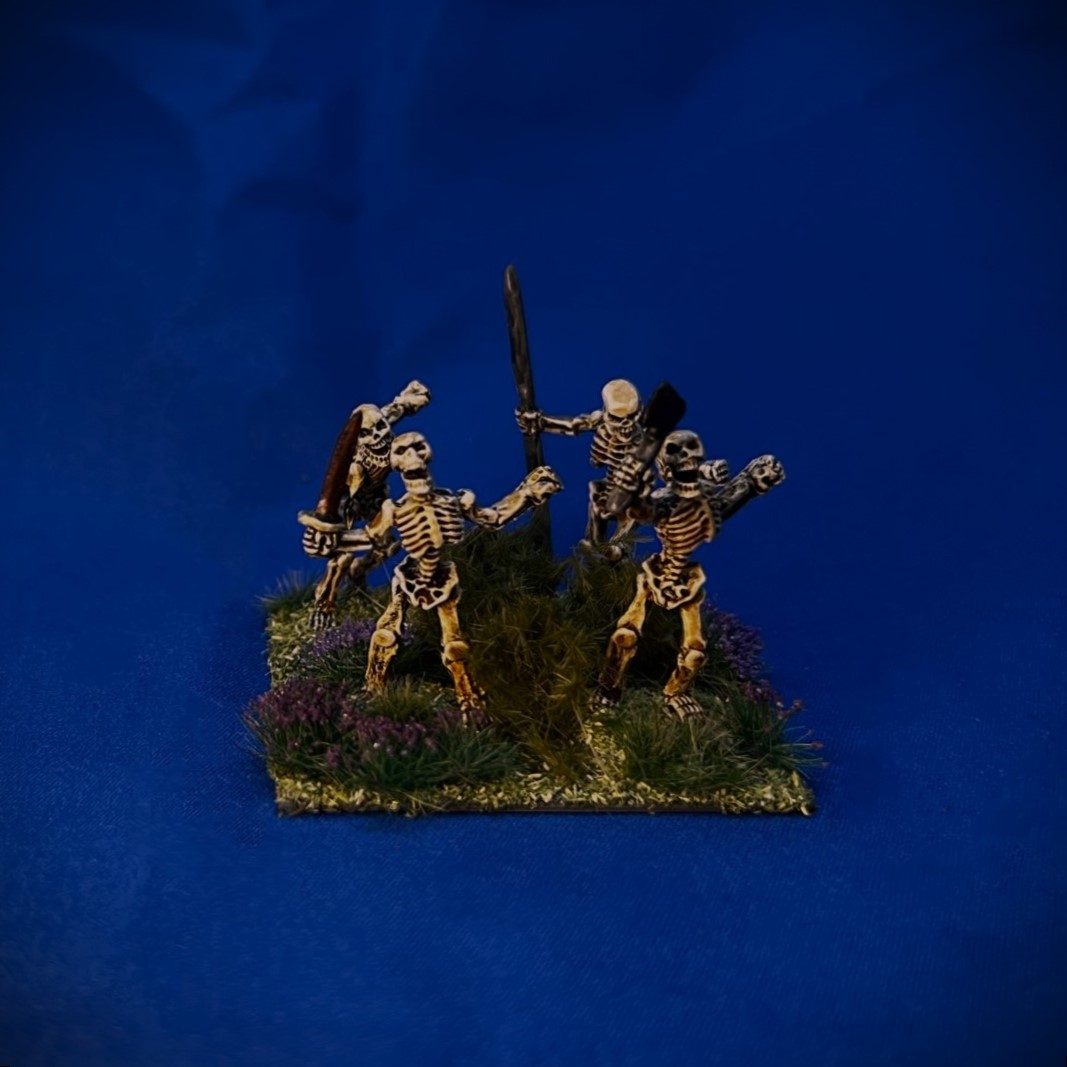
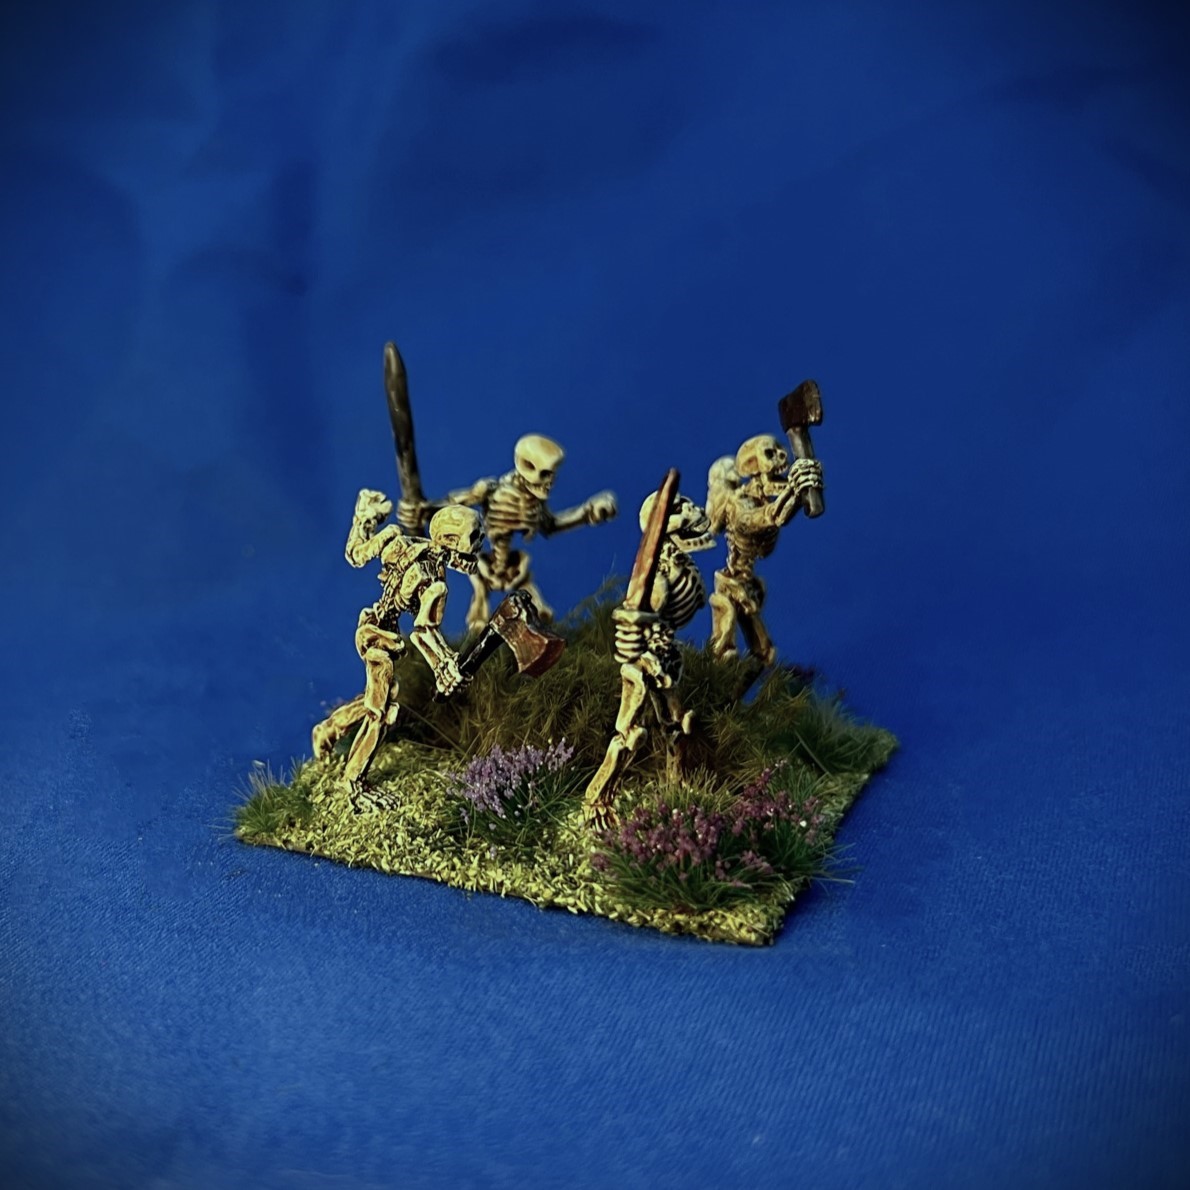
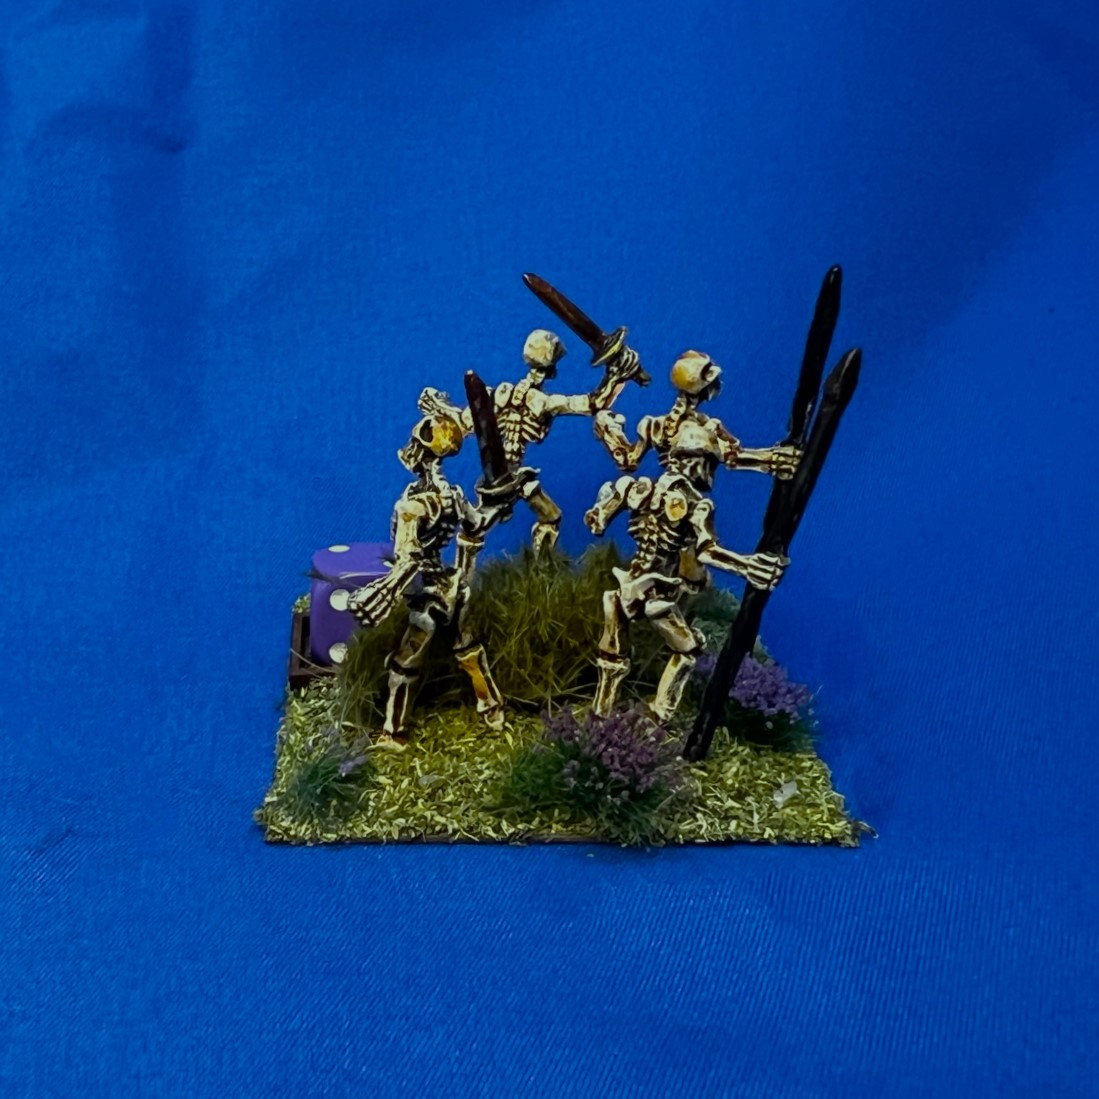
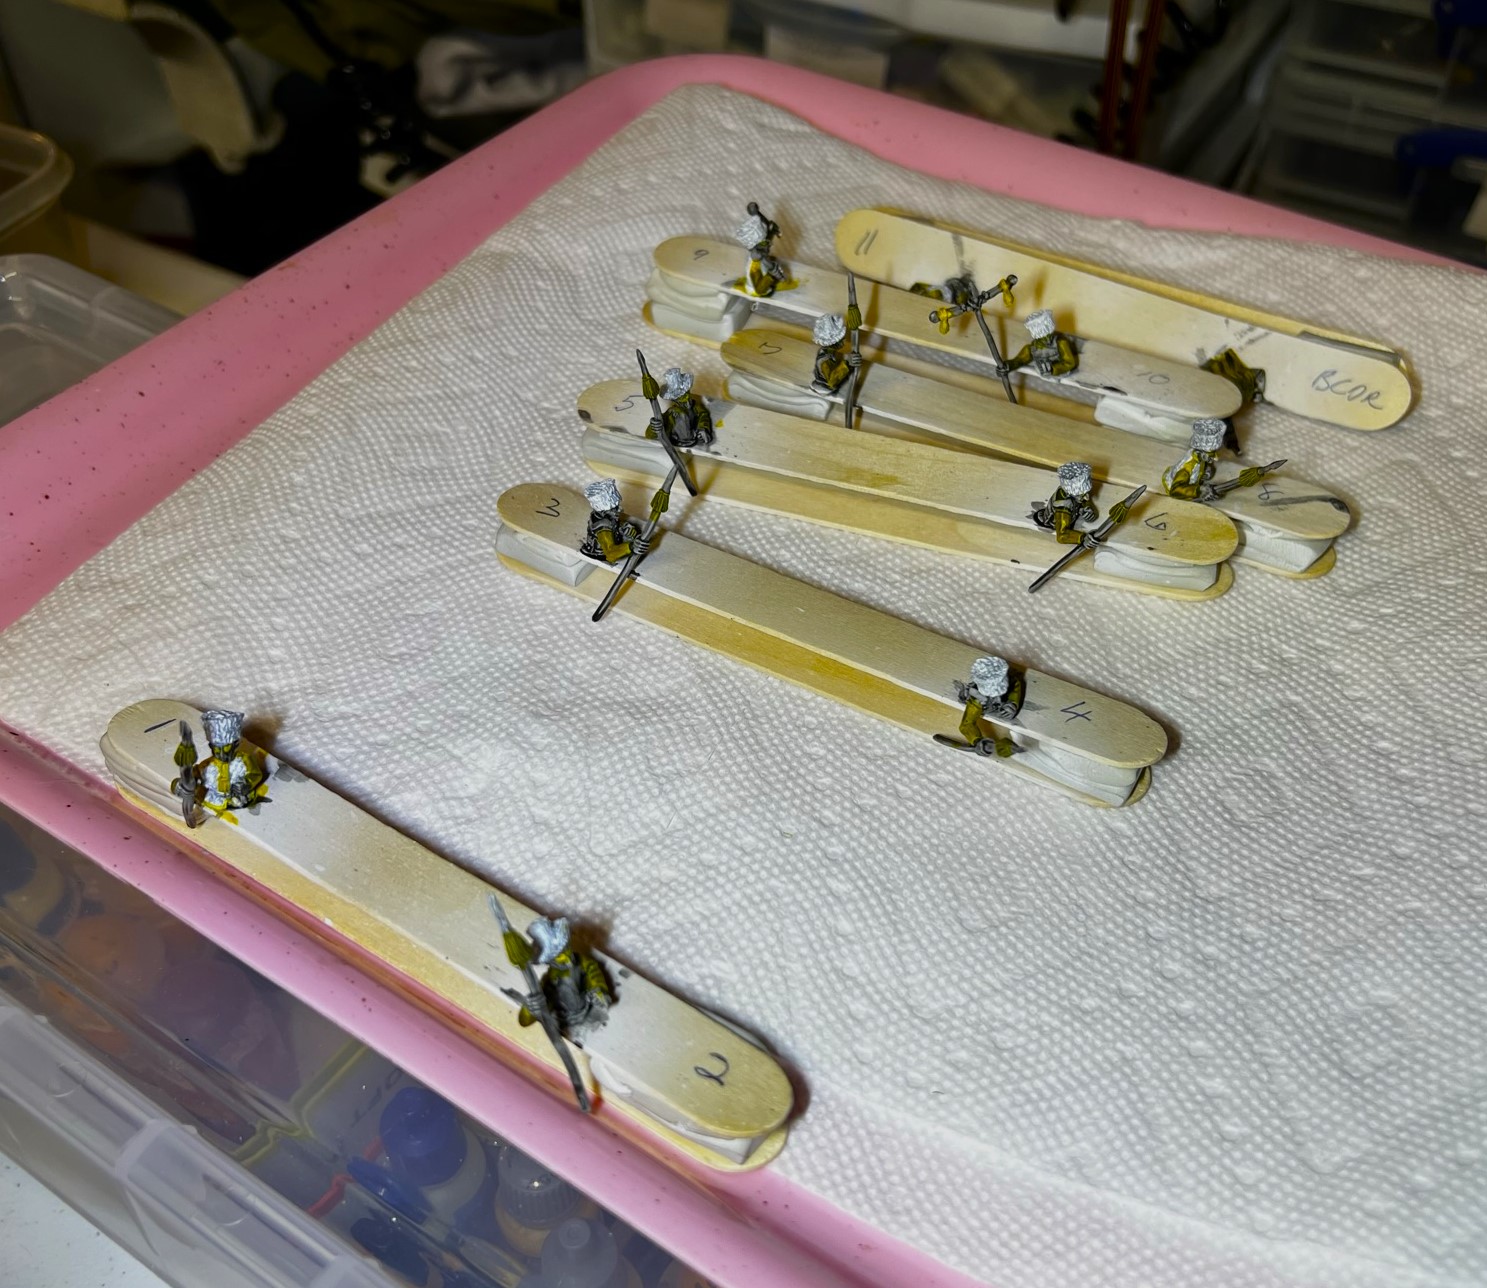
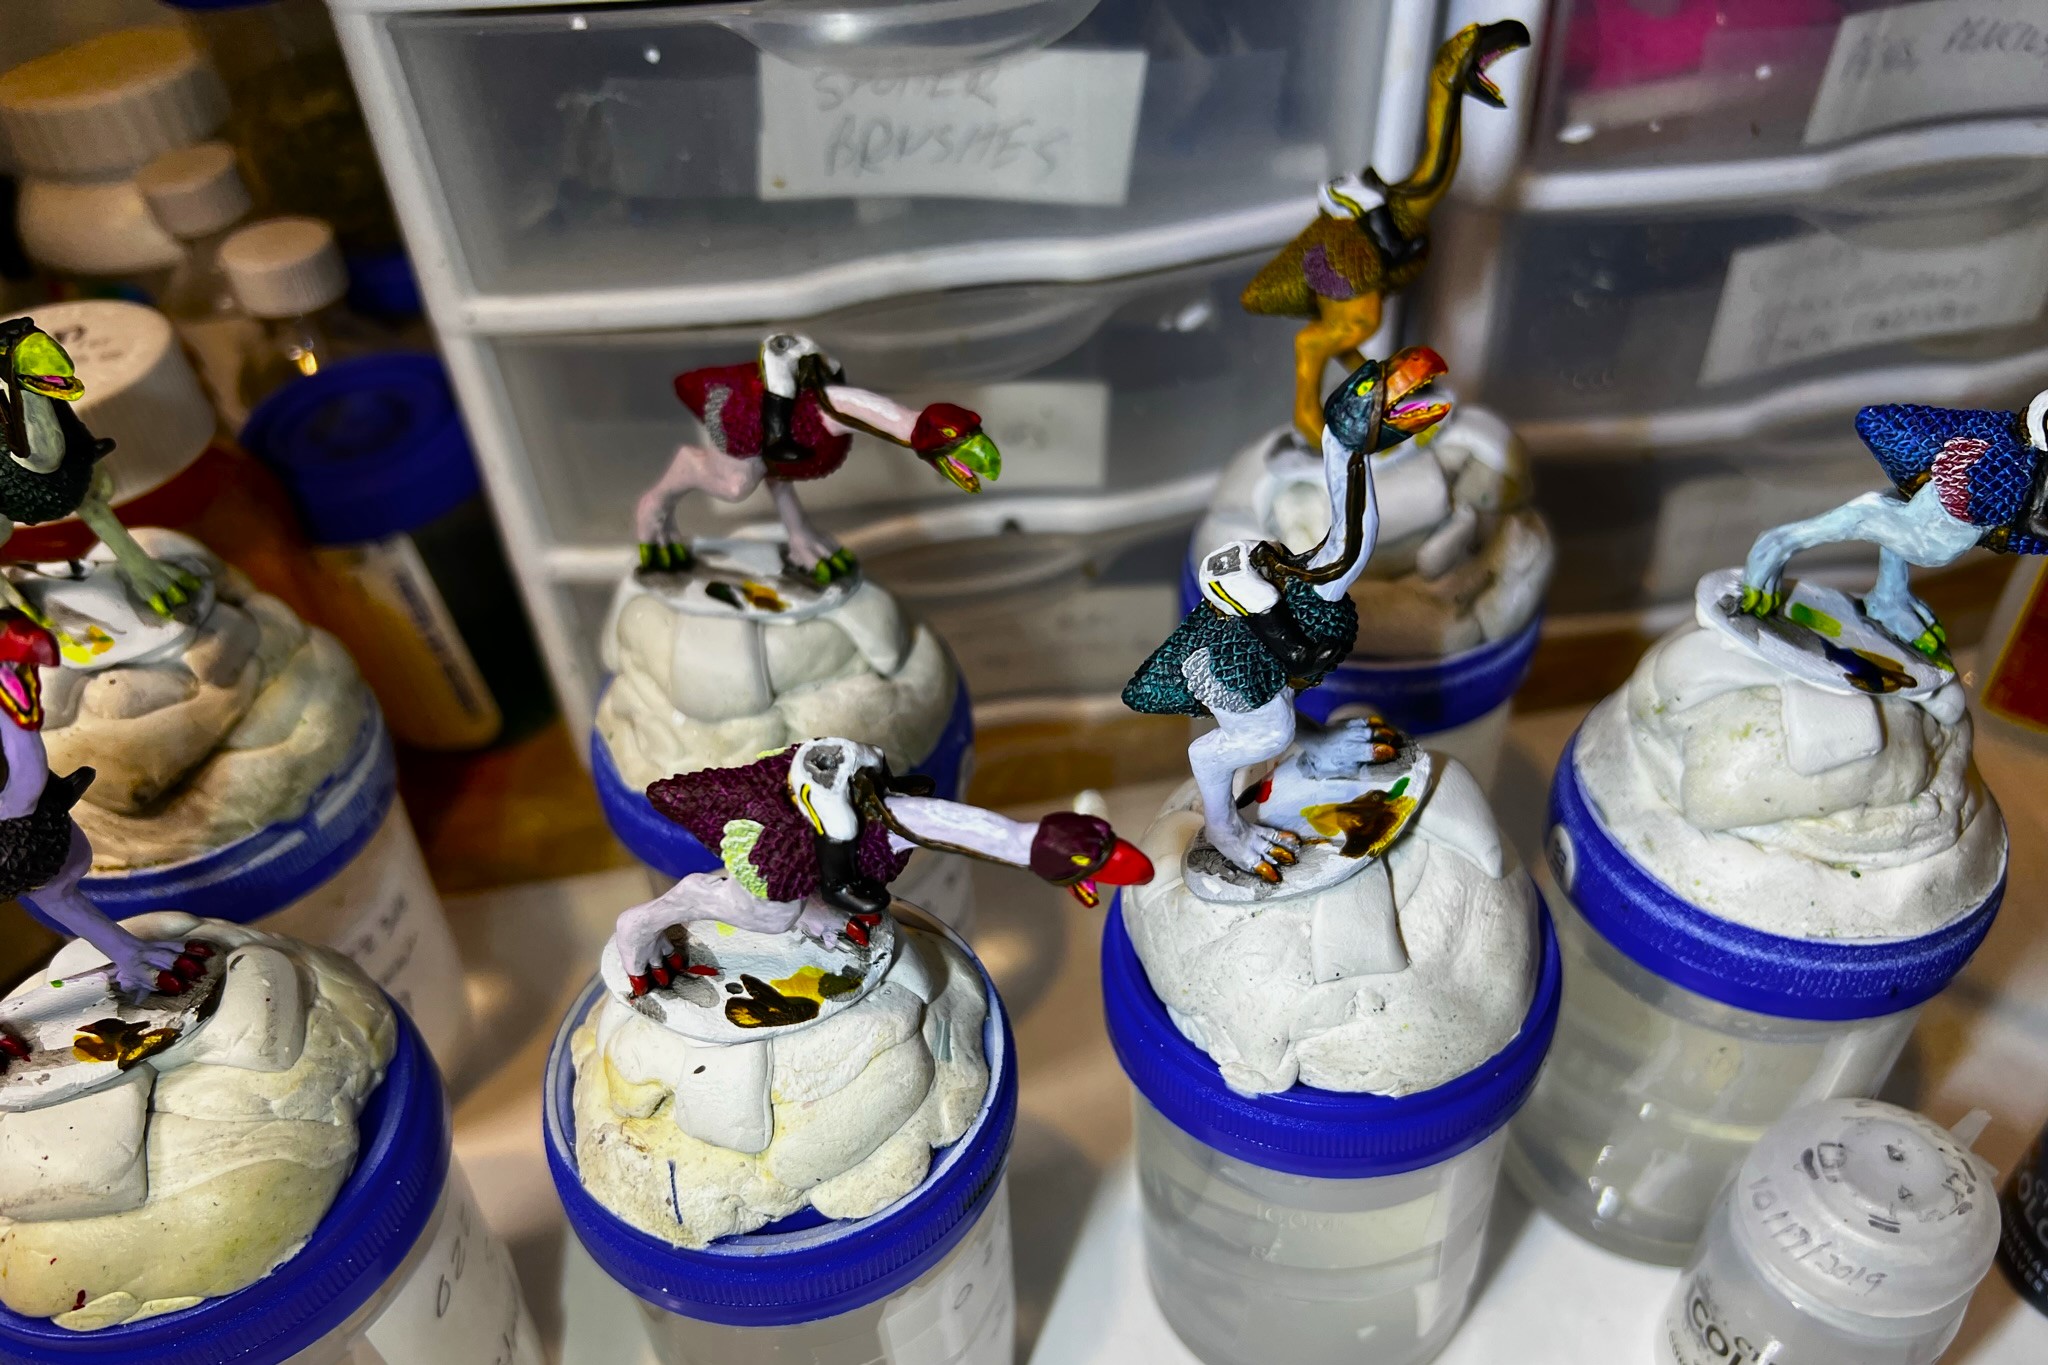
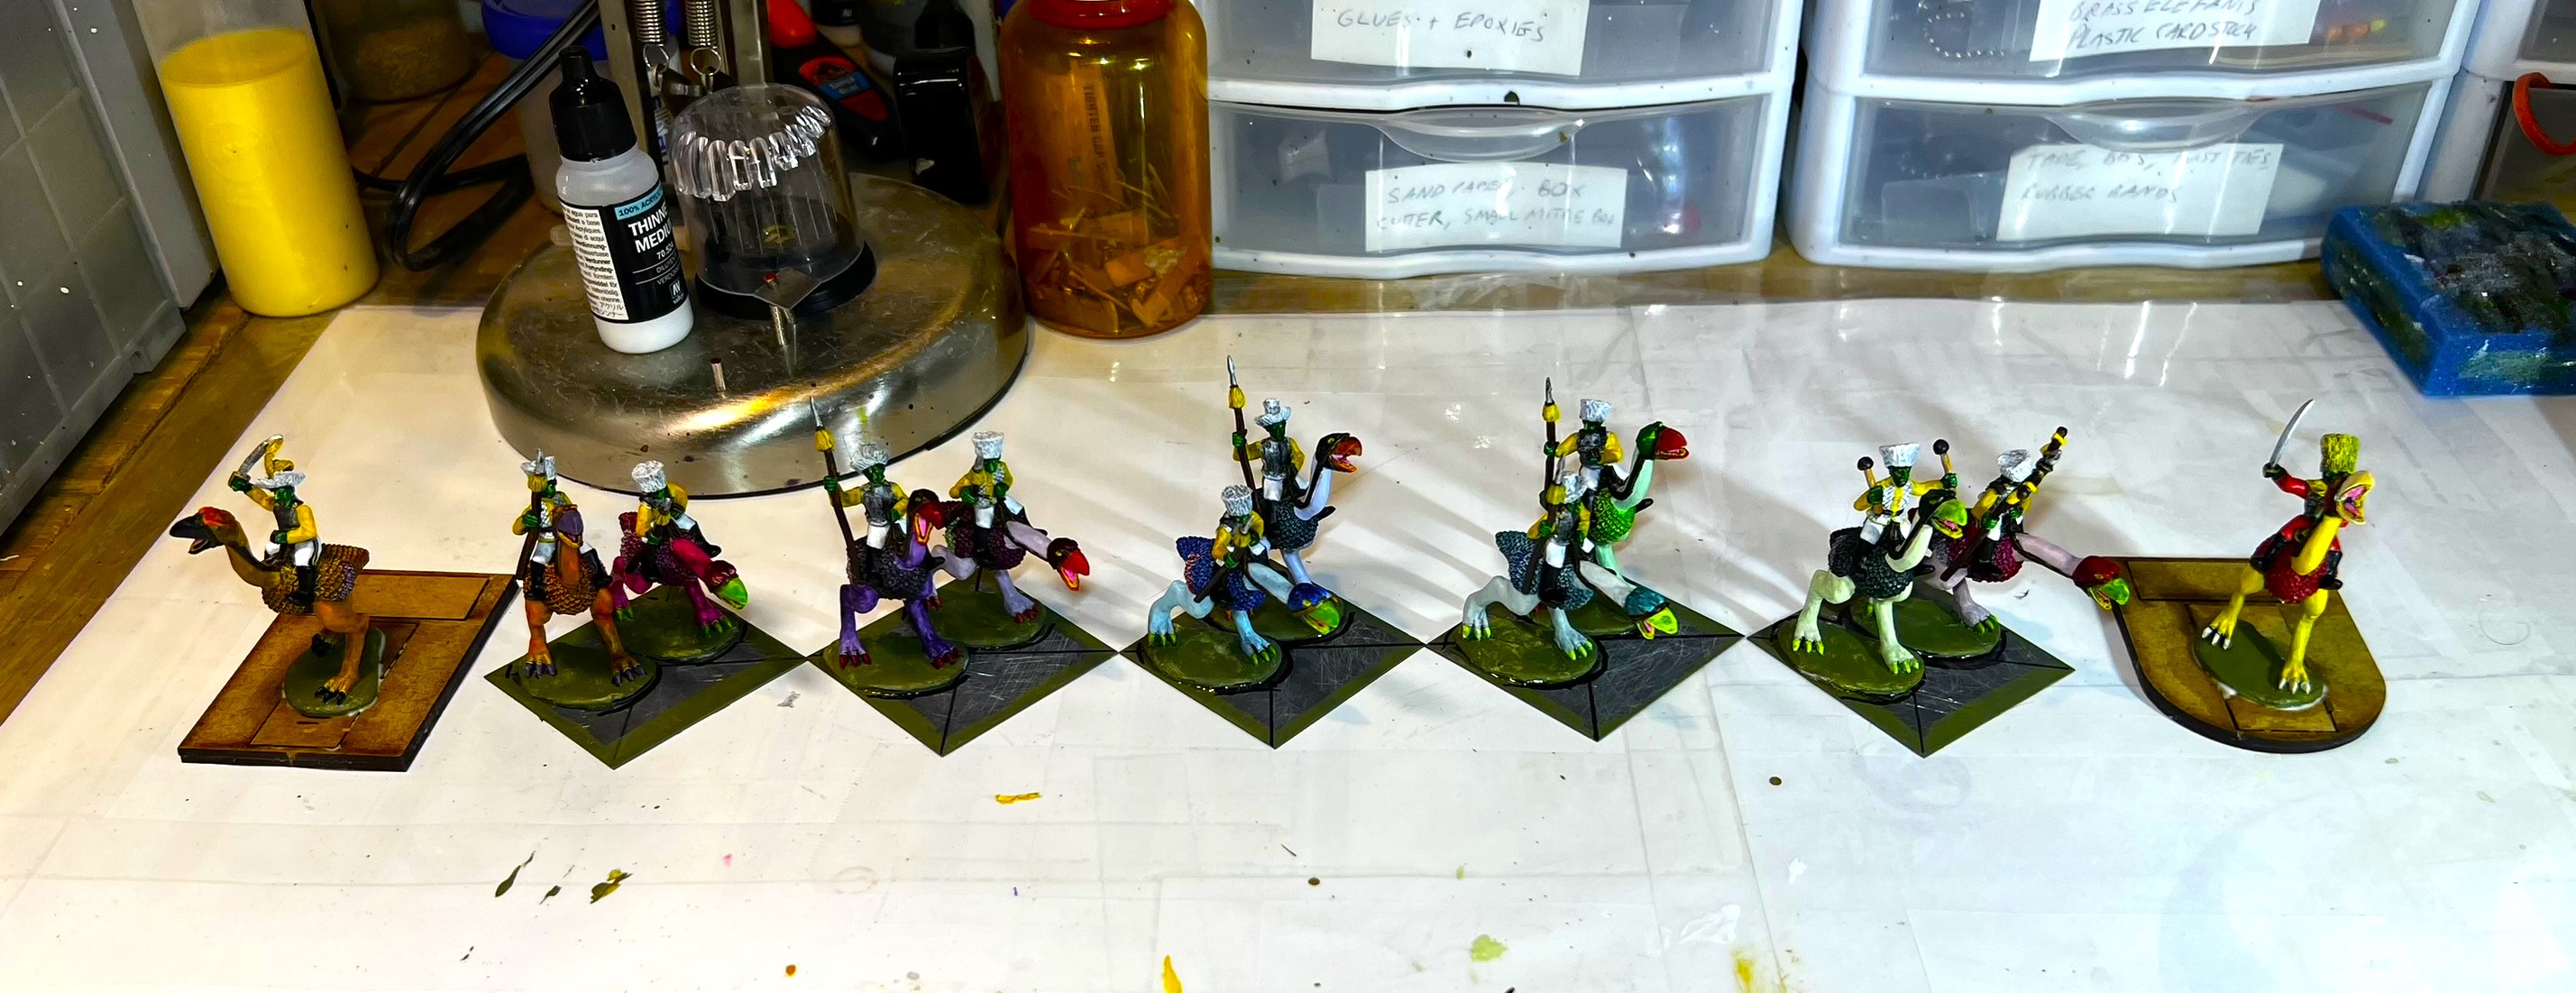
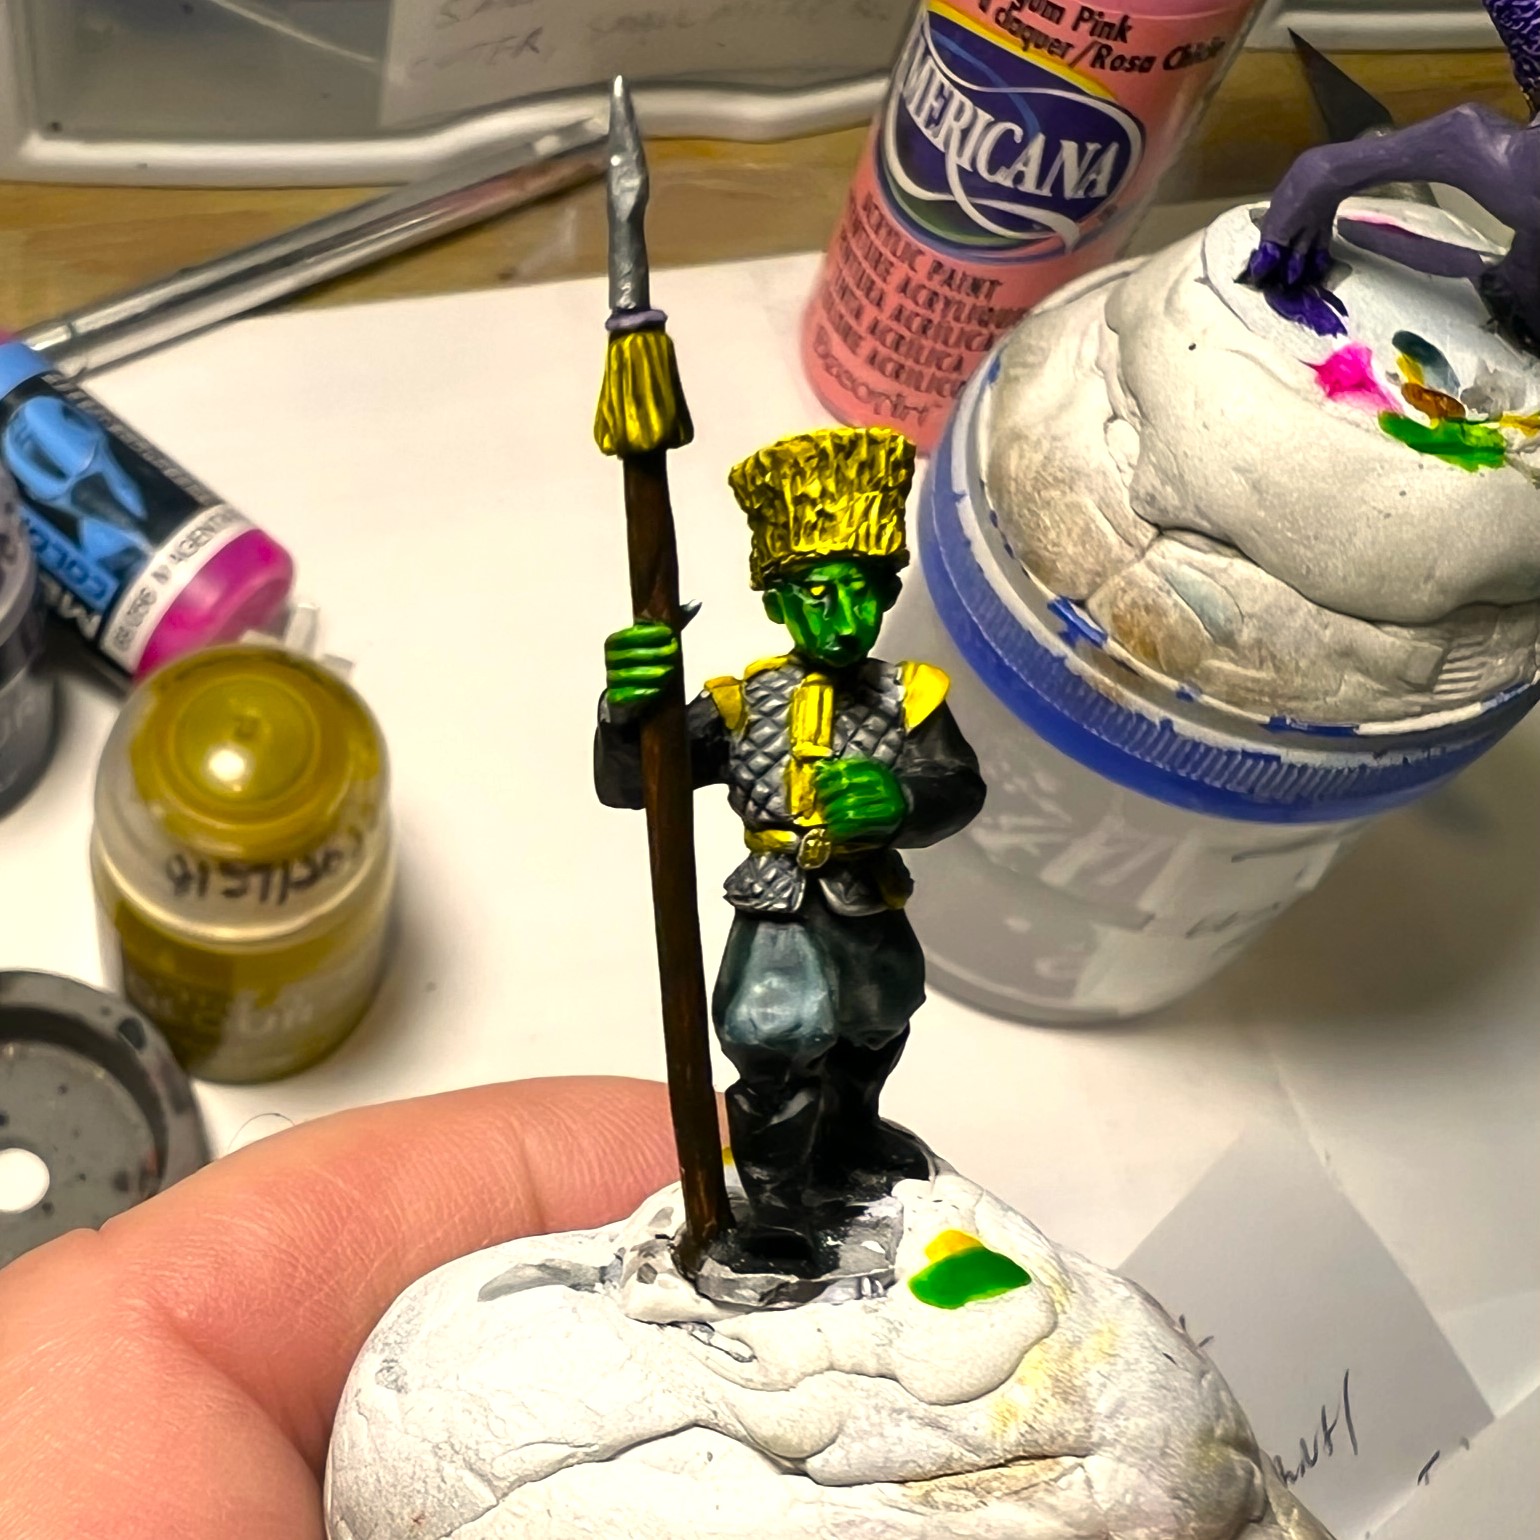
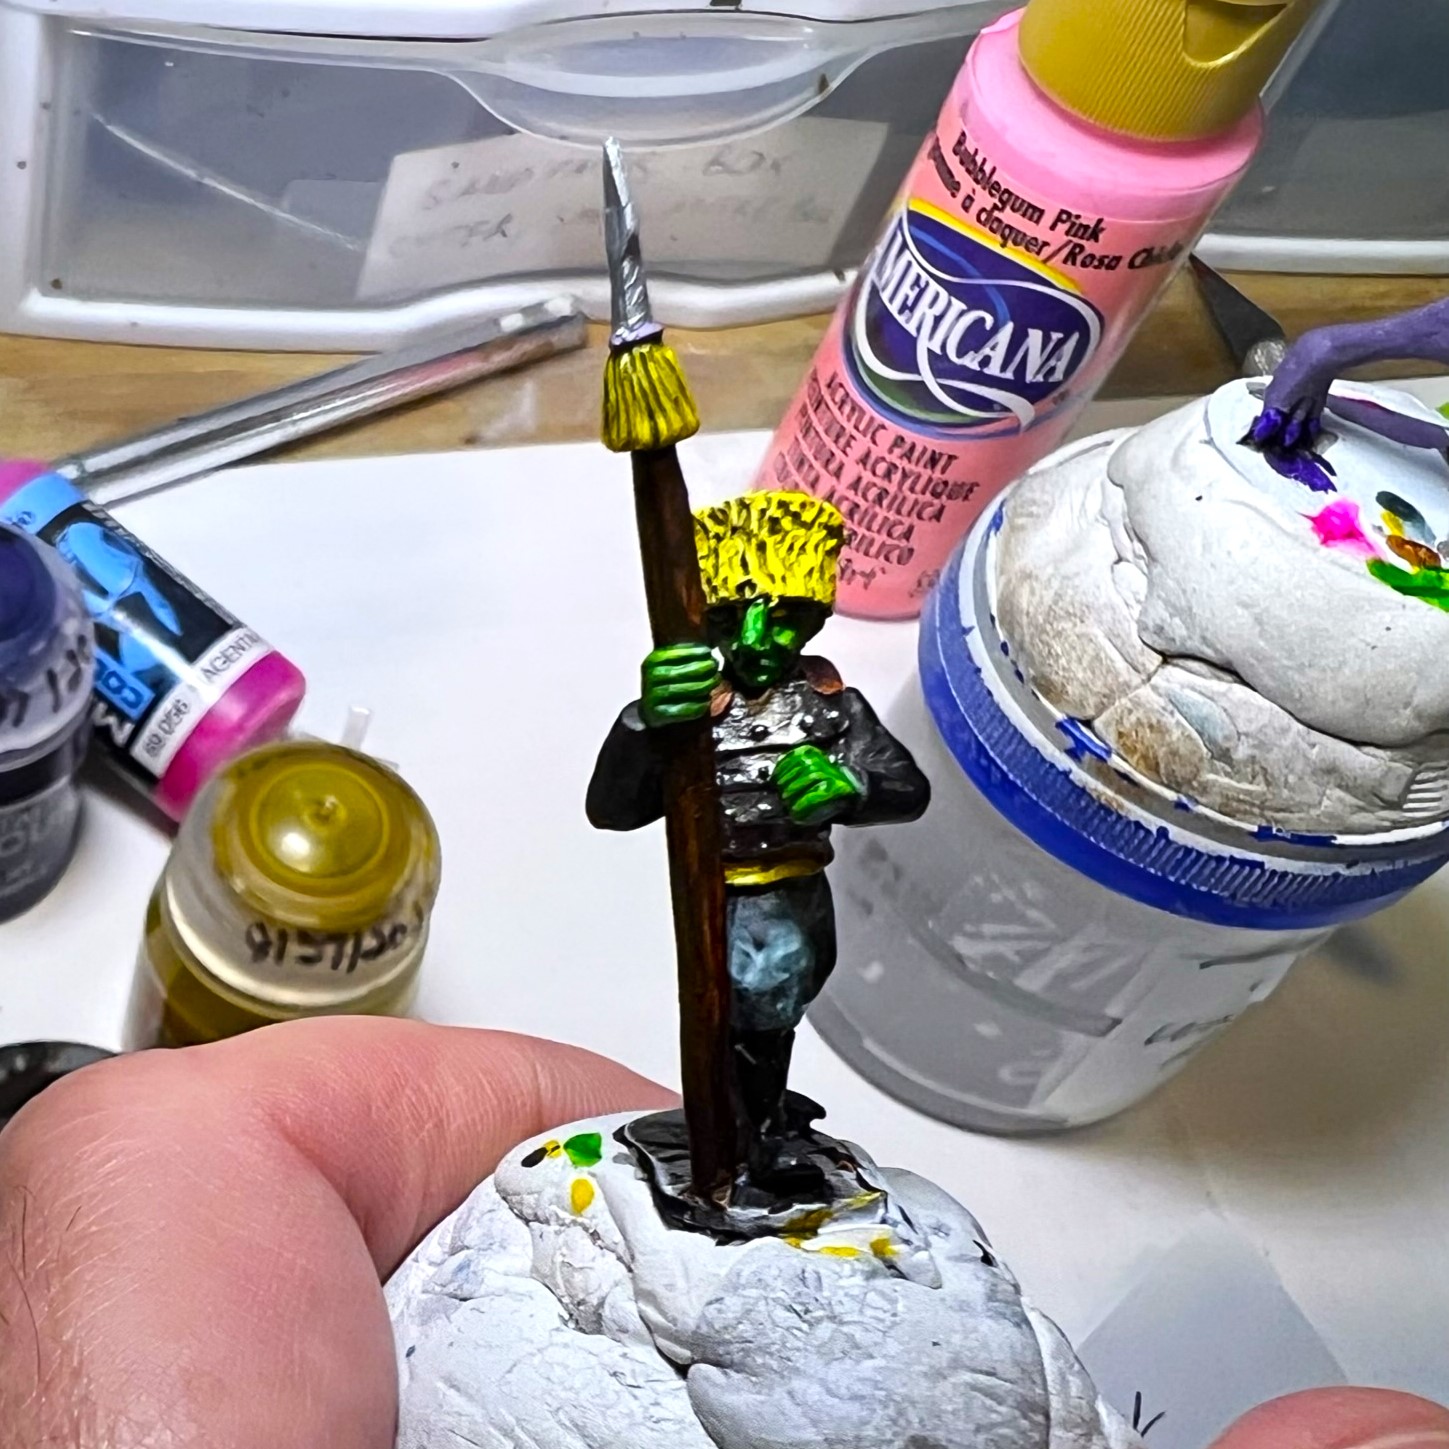
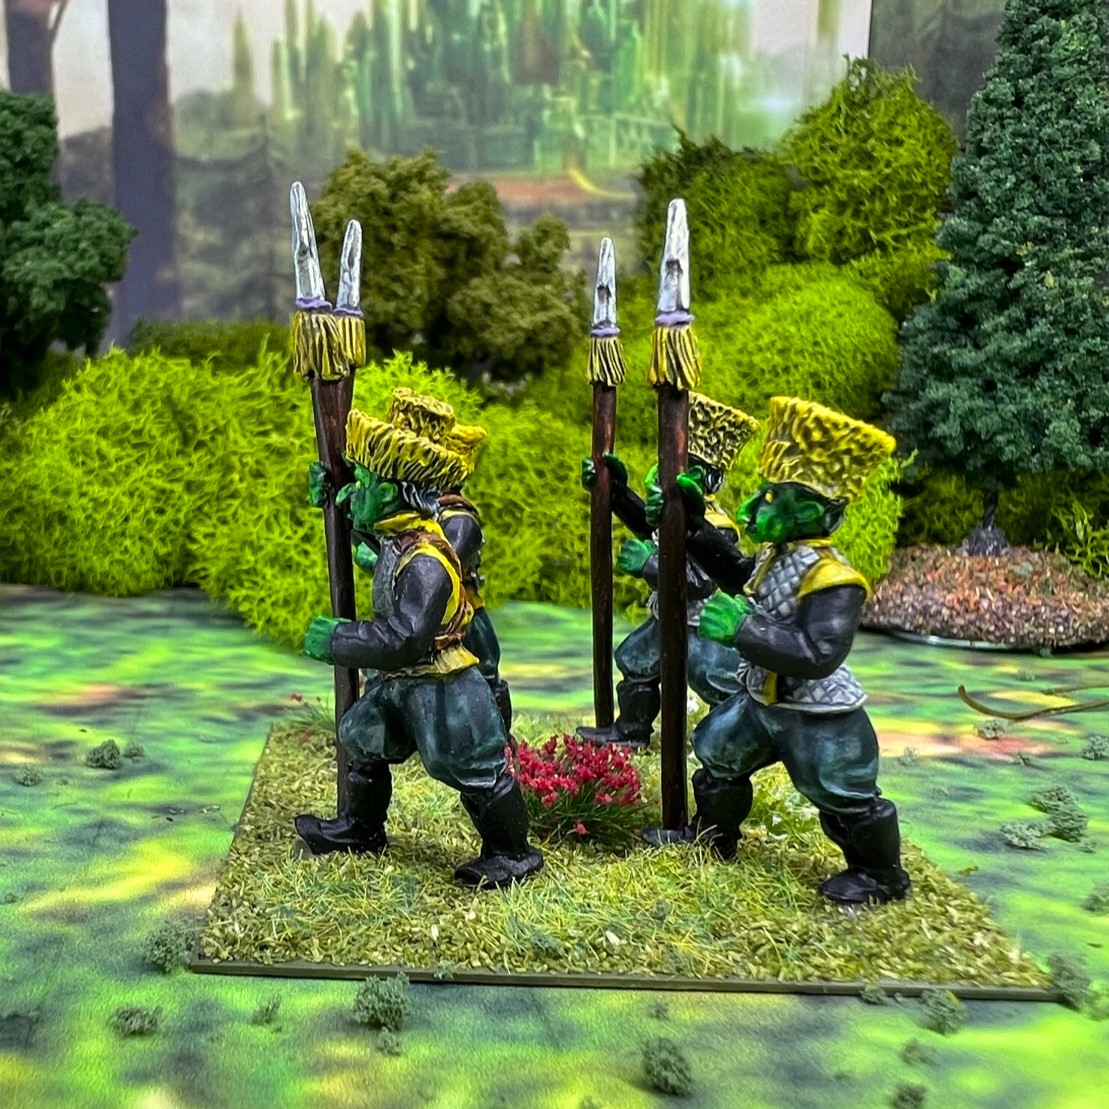
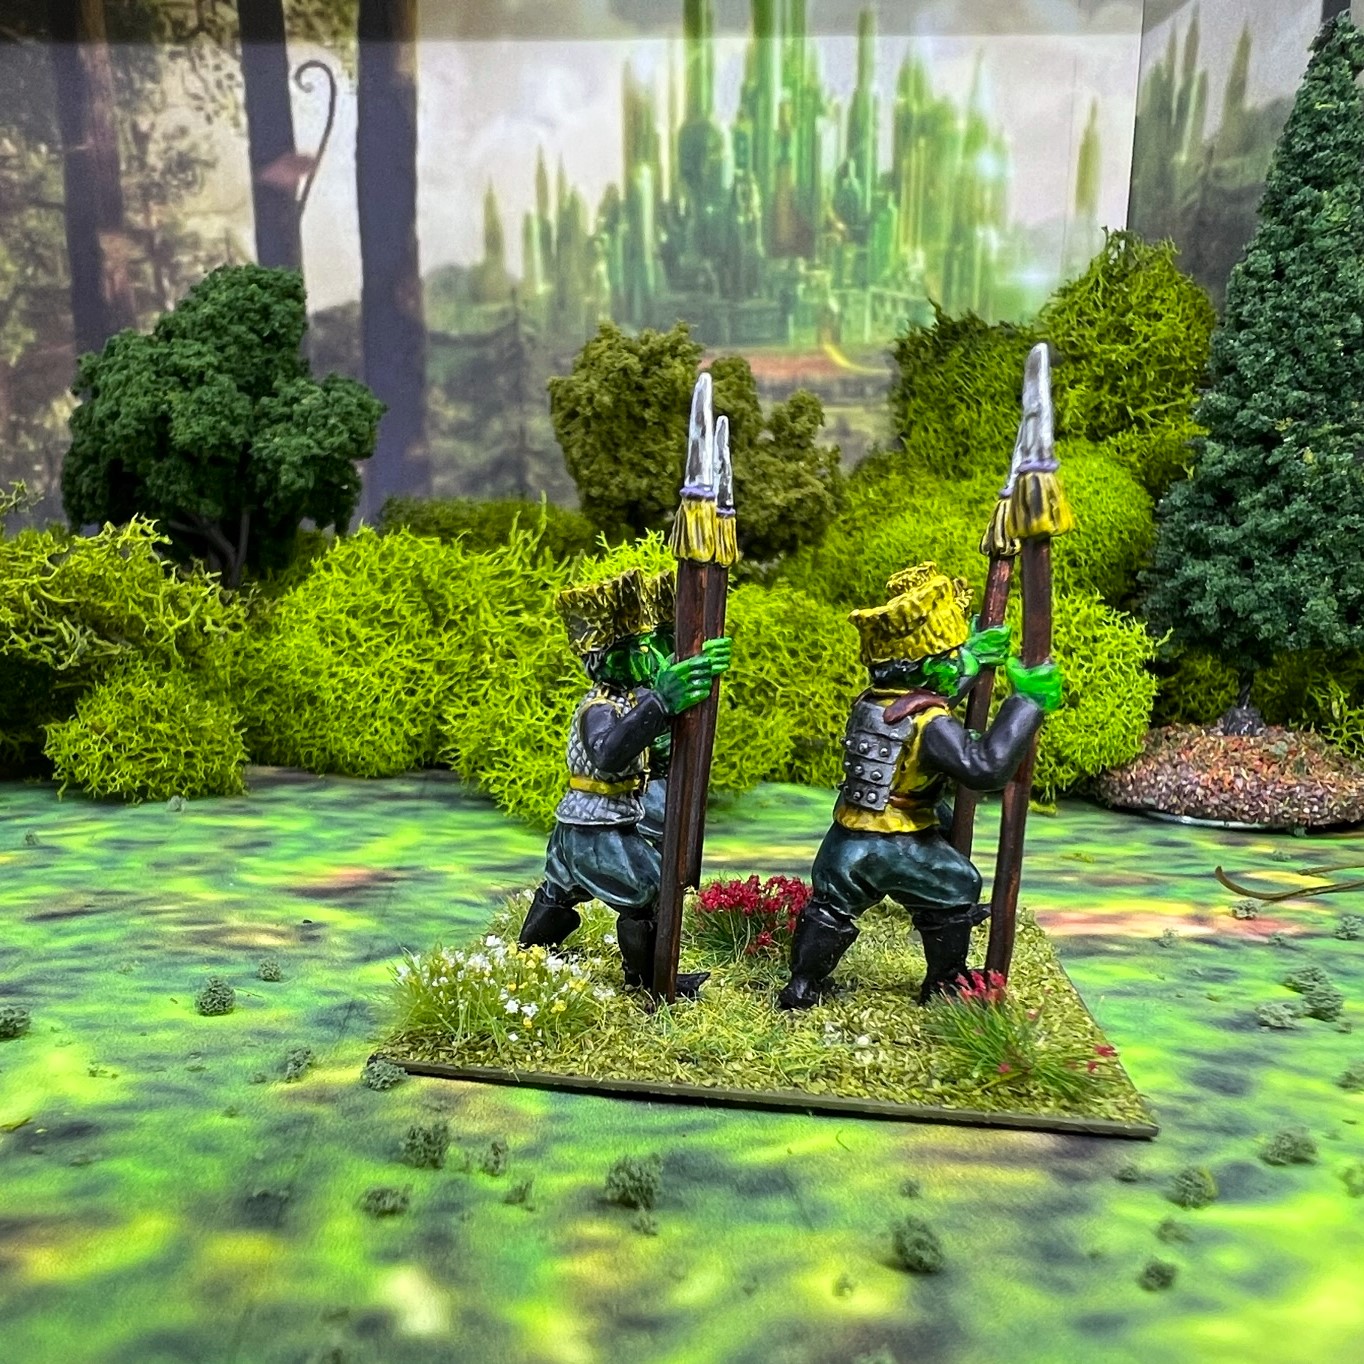
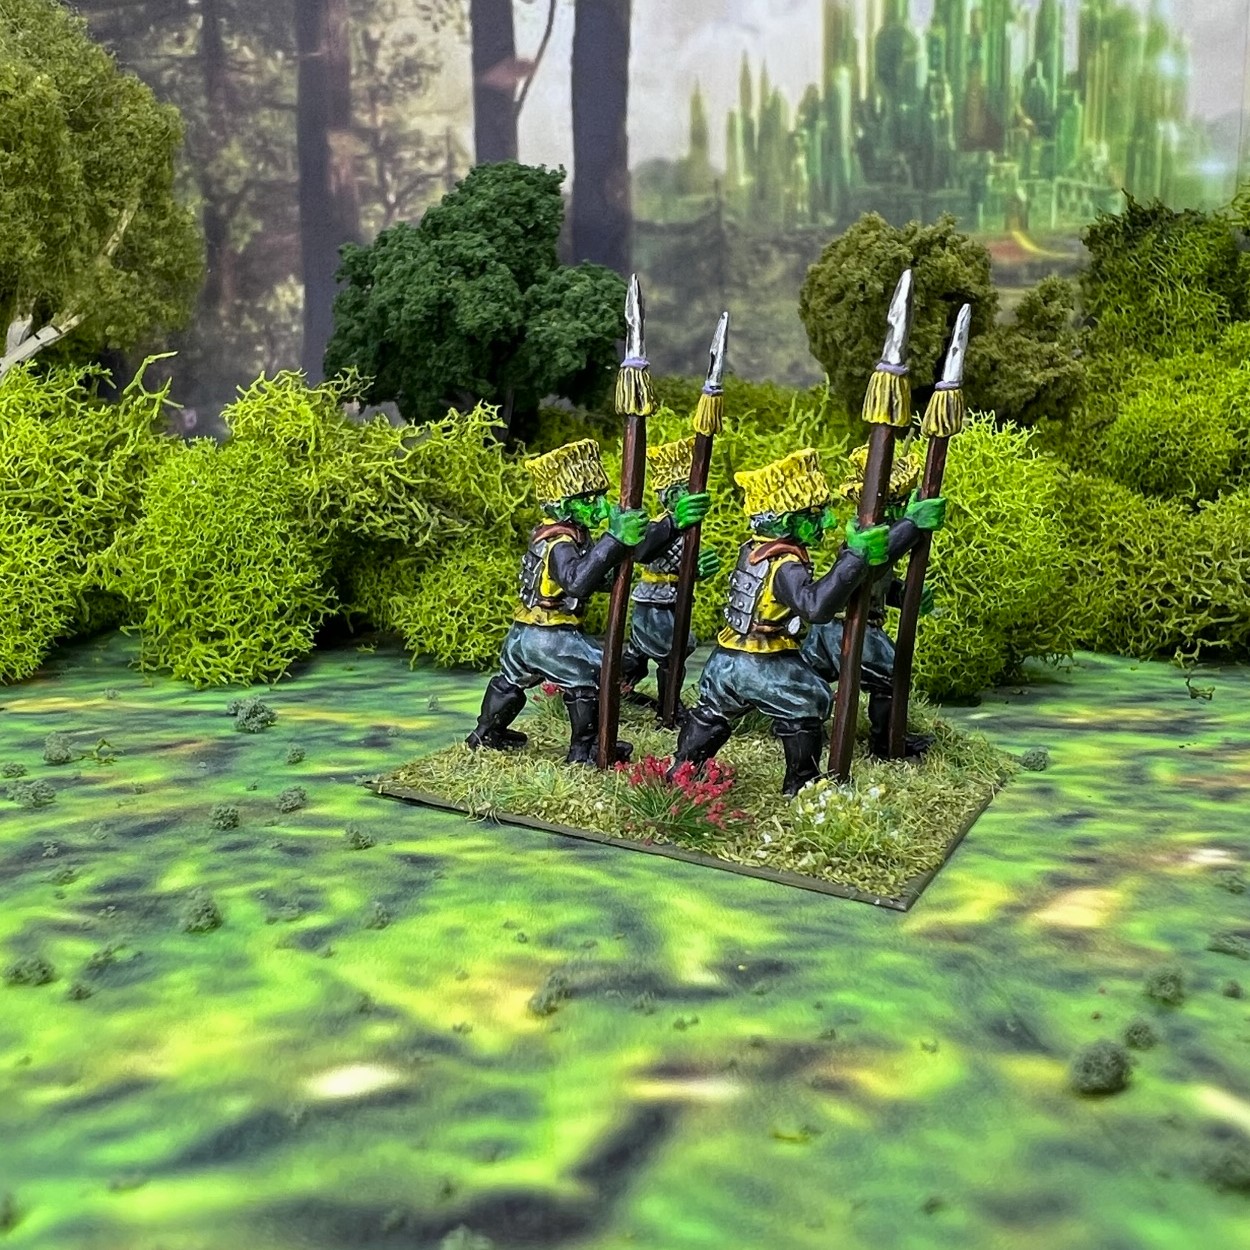
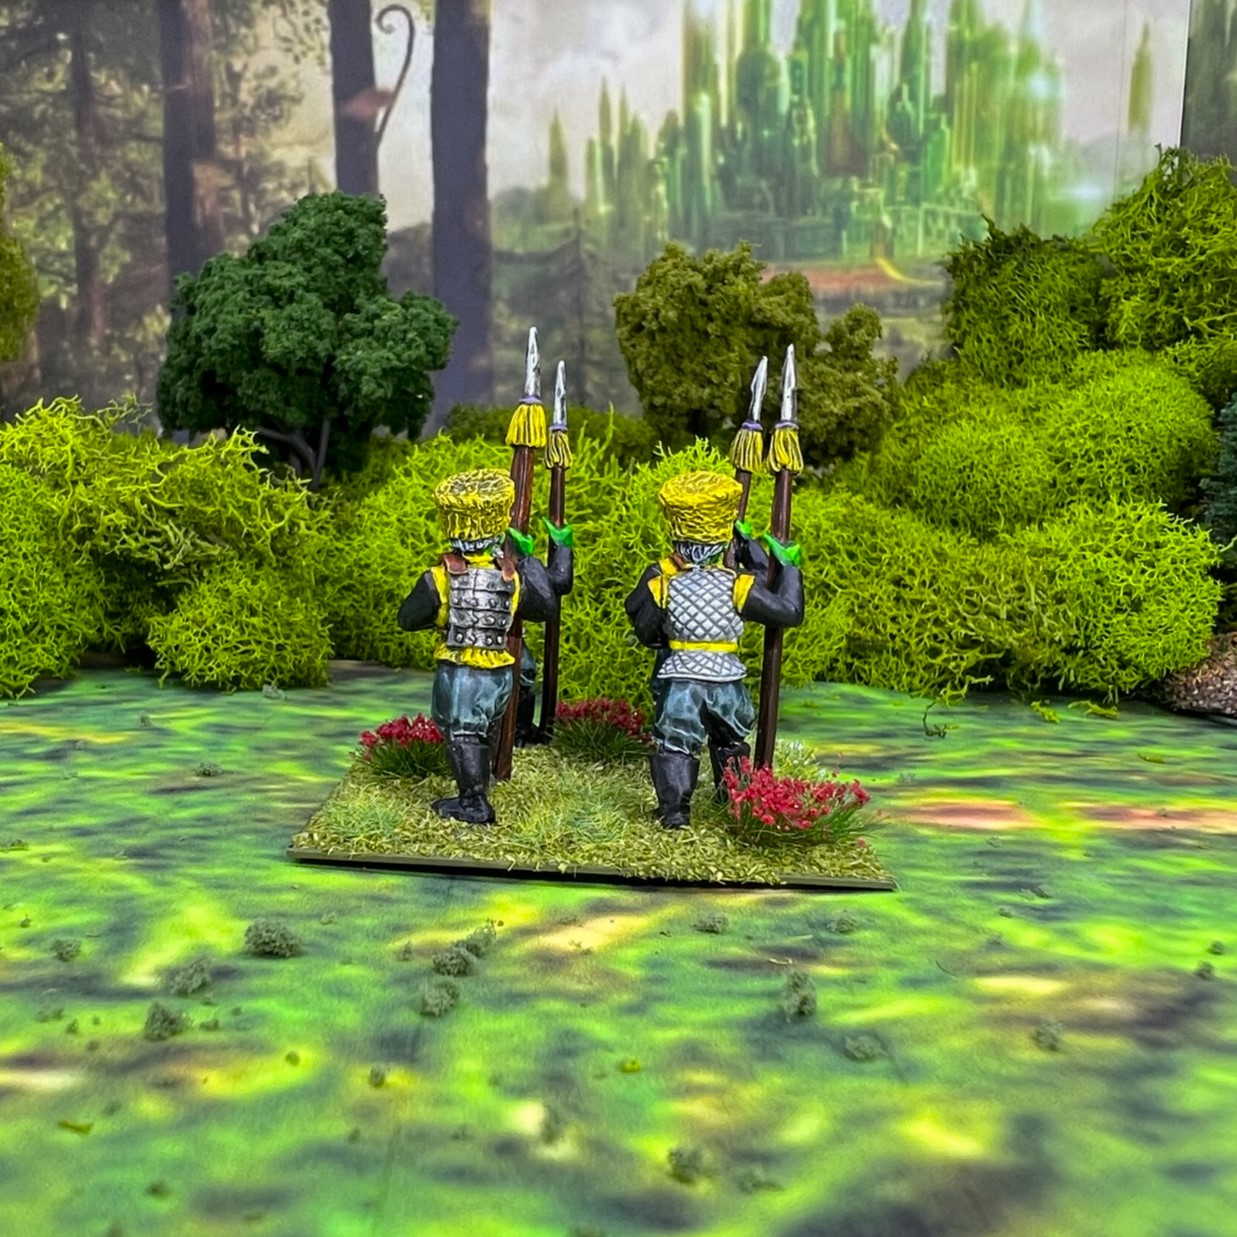
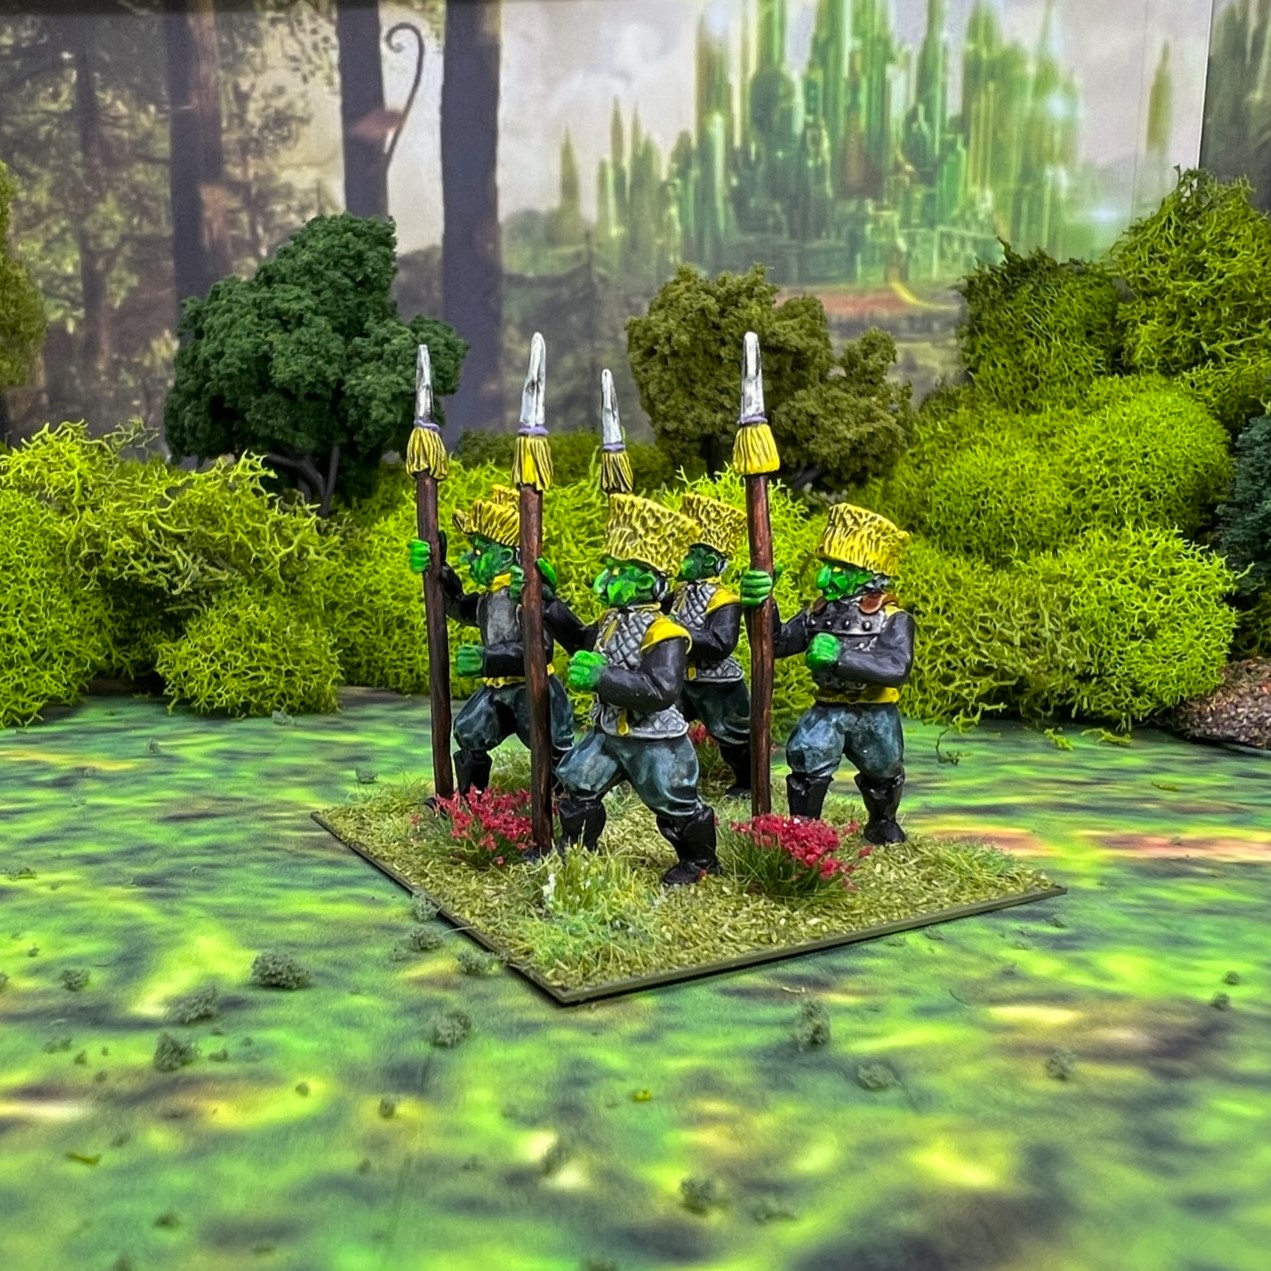
As for the augmented “skeleton crew” (there’s an oxymoron, no?) and the Taskmaster, they painted up easily and were pretty much done by January 17th less varnish and flocking. Luckily, there were 5 that would carry the rope or chain over their left shoulders, and 5 over their right – which was perfect for the model.

Skeleton crew and the Taskmaster by January 17th.

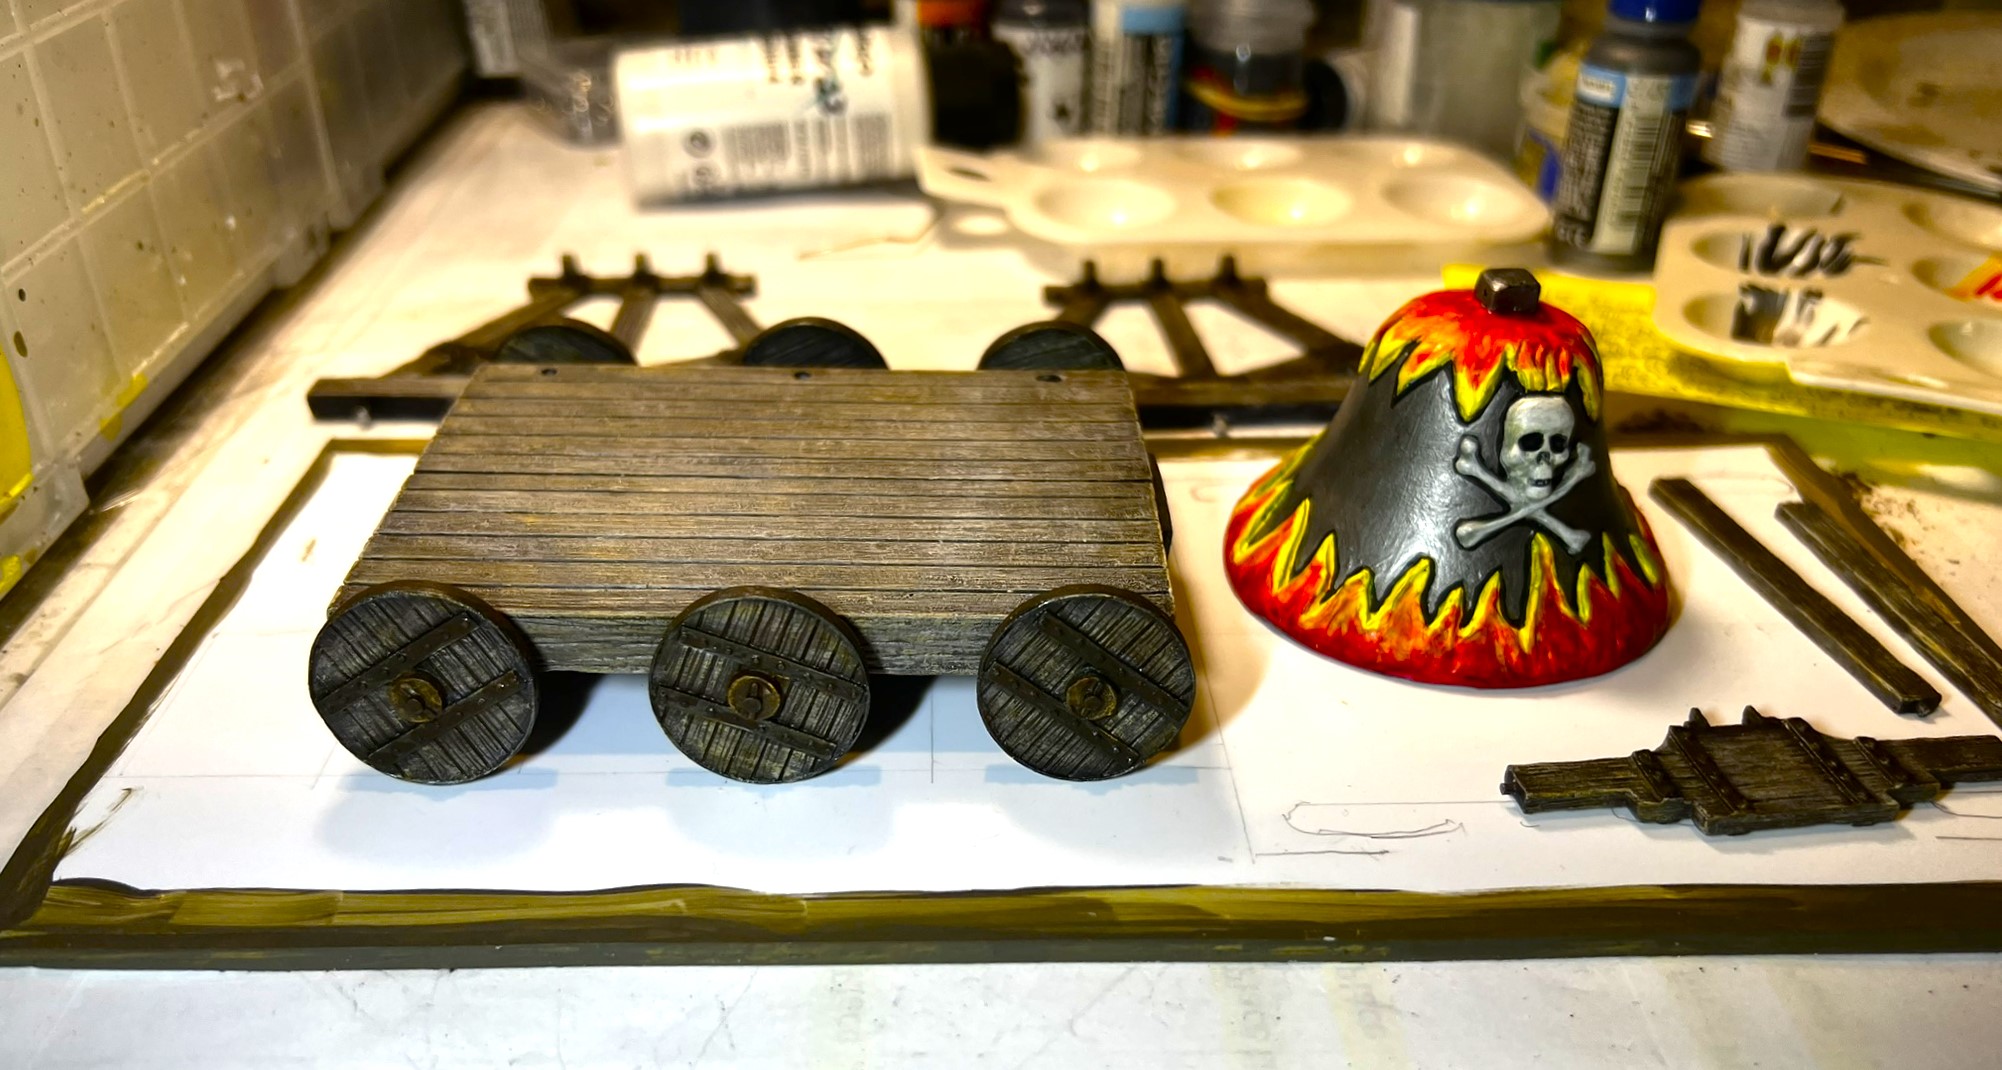
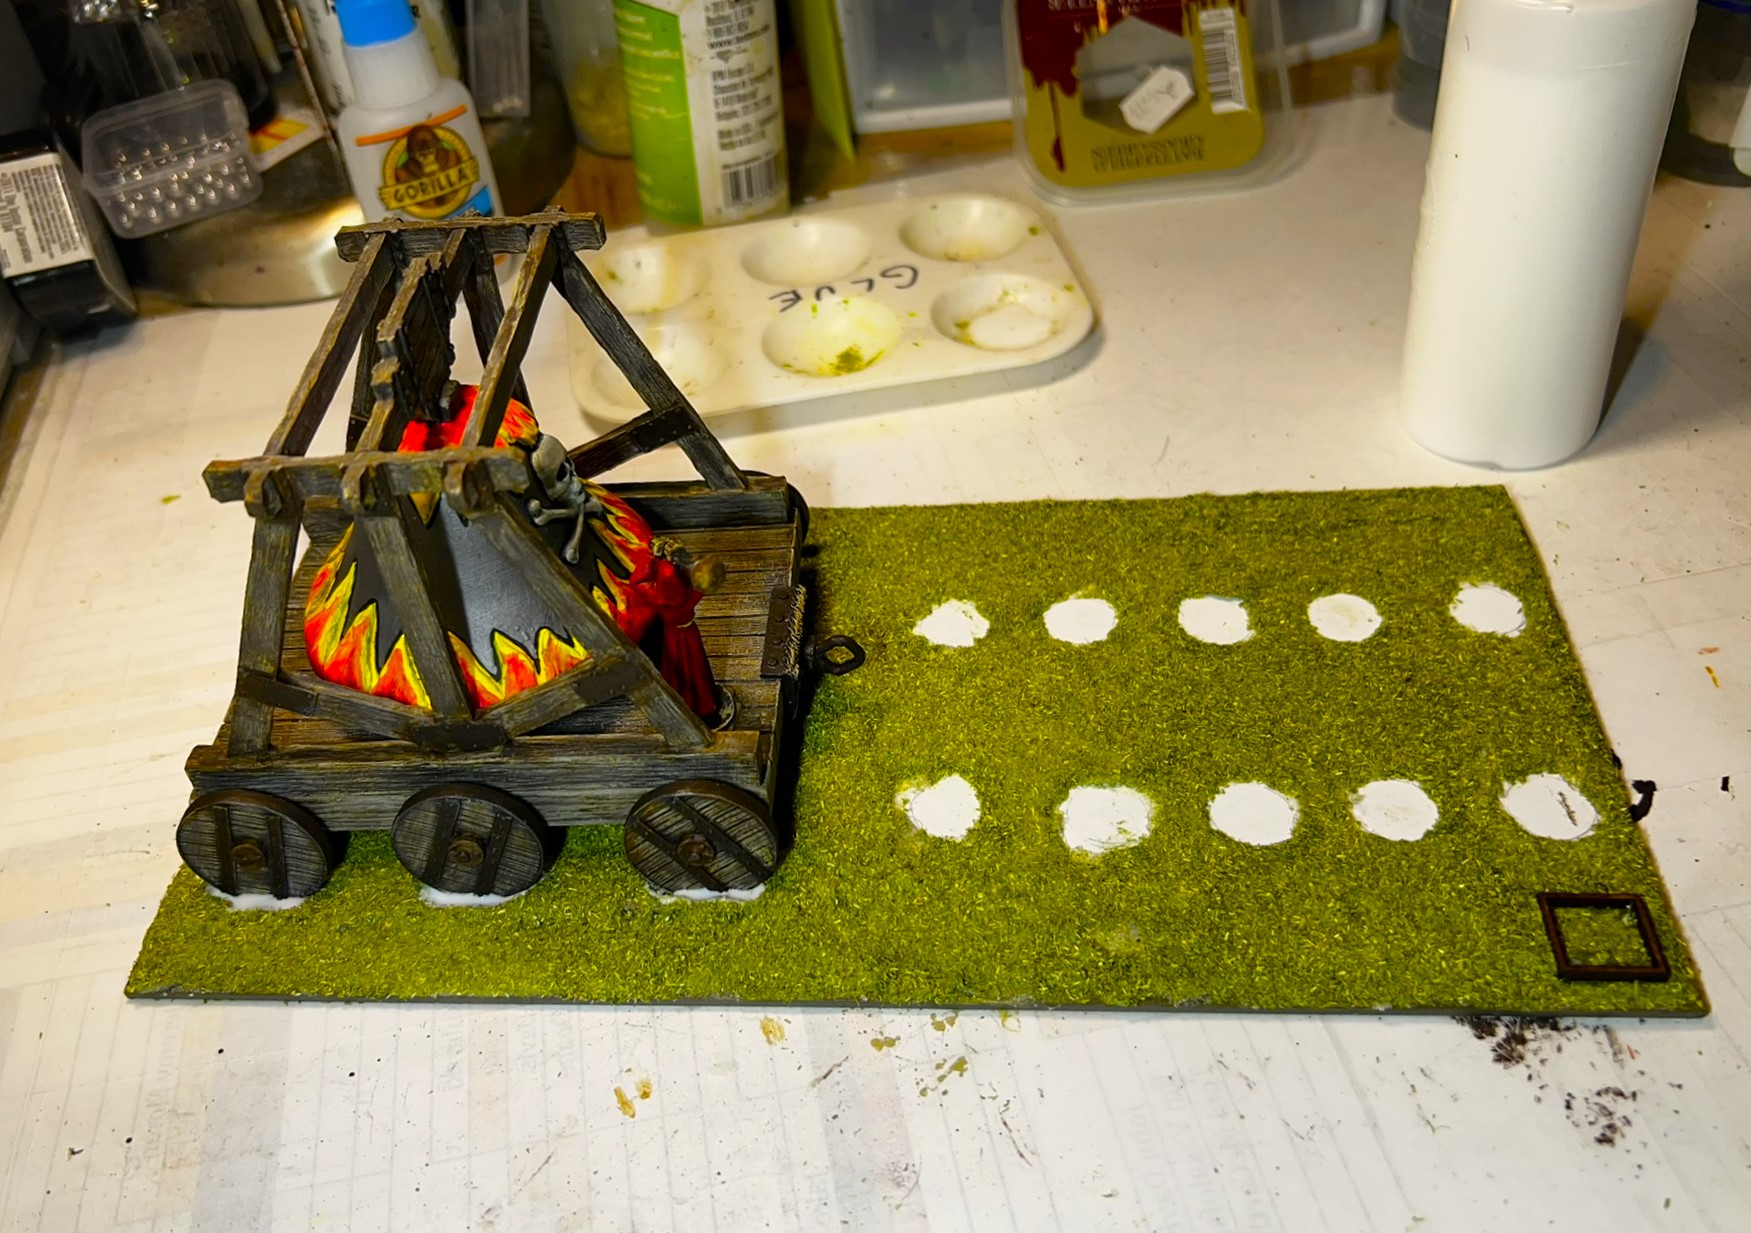
January 18th saw me doing a LOT of dry brushing of three colors plus washes to achieve a weathered wood look on the cart. I also tried to give its ironwork an appropriate rusted look. I drilled a hole through the Bell top and the metal of the Bell mount to reinforce with a paper clip wire – so that all the weight of the bell would not be supported by just glue. This might have been unnecessary as the Bell is light, but I did it anyways.

January 18th dry brushing progress.

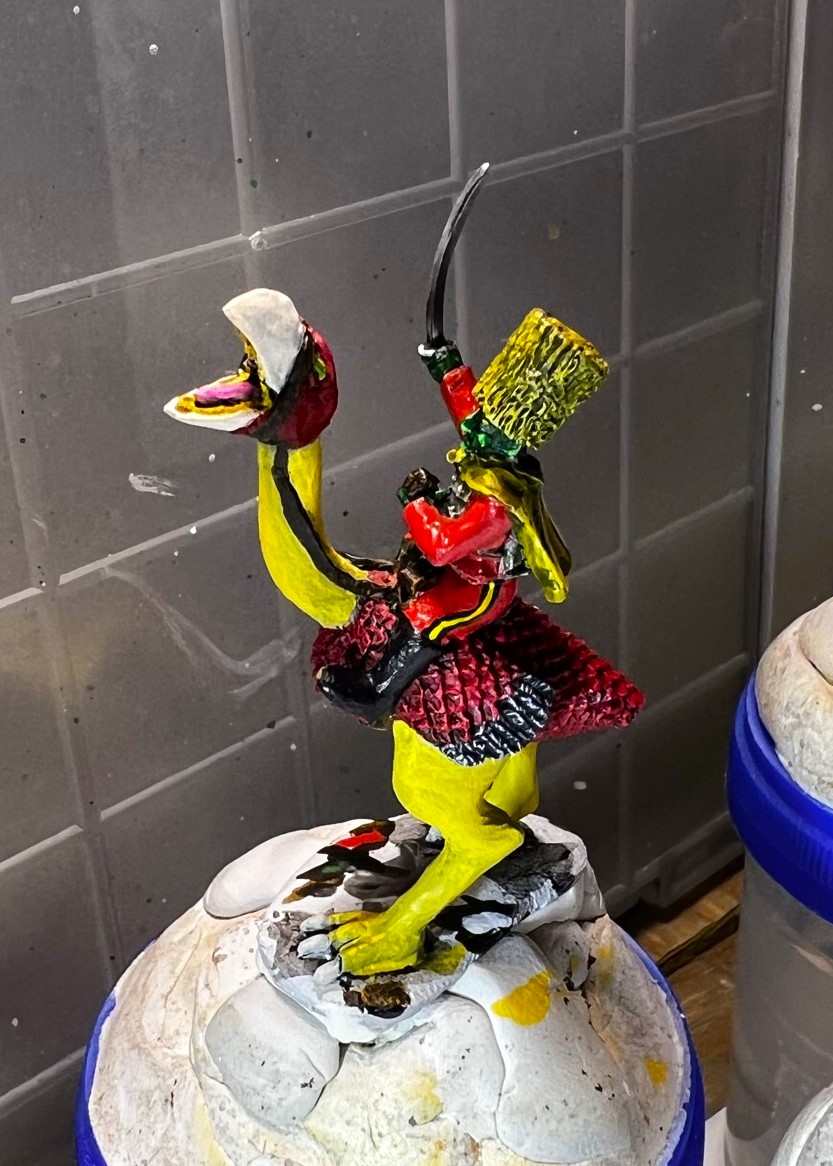
The rest of the day was used to put on the cart’s wheels and to paint the Bell as shown below. I lined the edge of the Bell with black so as to give the three colors of the flames some depth. You can see how the drilled hole in the Bell helped with painting.

Painting the Summoning Bell.

As it was late – and I wanted to sleep on it – I put the cart on the base with the bell to see how I could mount it to the slippery polystyrene. I was concerned that the heavy cart would be needing some support, especially after the Bell structures were added. At that point, I needed to sleep on it…

The lower part of the cart and the Bell were done – but the supports and mountings remained.
A top view of the previous photo with the proposed wheel positions marked in pencil.

By the morning of January 19th, I thought that I needed to chock the wheels in some subtle way that I could hide with flocking. The solution came by way of an MDF OZZ-BAS2 artillery base frame that I had saved for future use. I used half of it to glue onto the PS base along the line of the cart wheels. Always save your MDF frames!

January 19th – I cut off one edge of the MDF frame and then cut that into two equal-sized pieces. This made alignment easy.

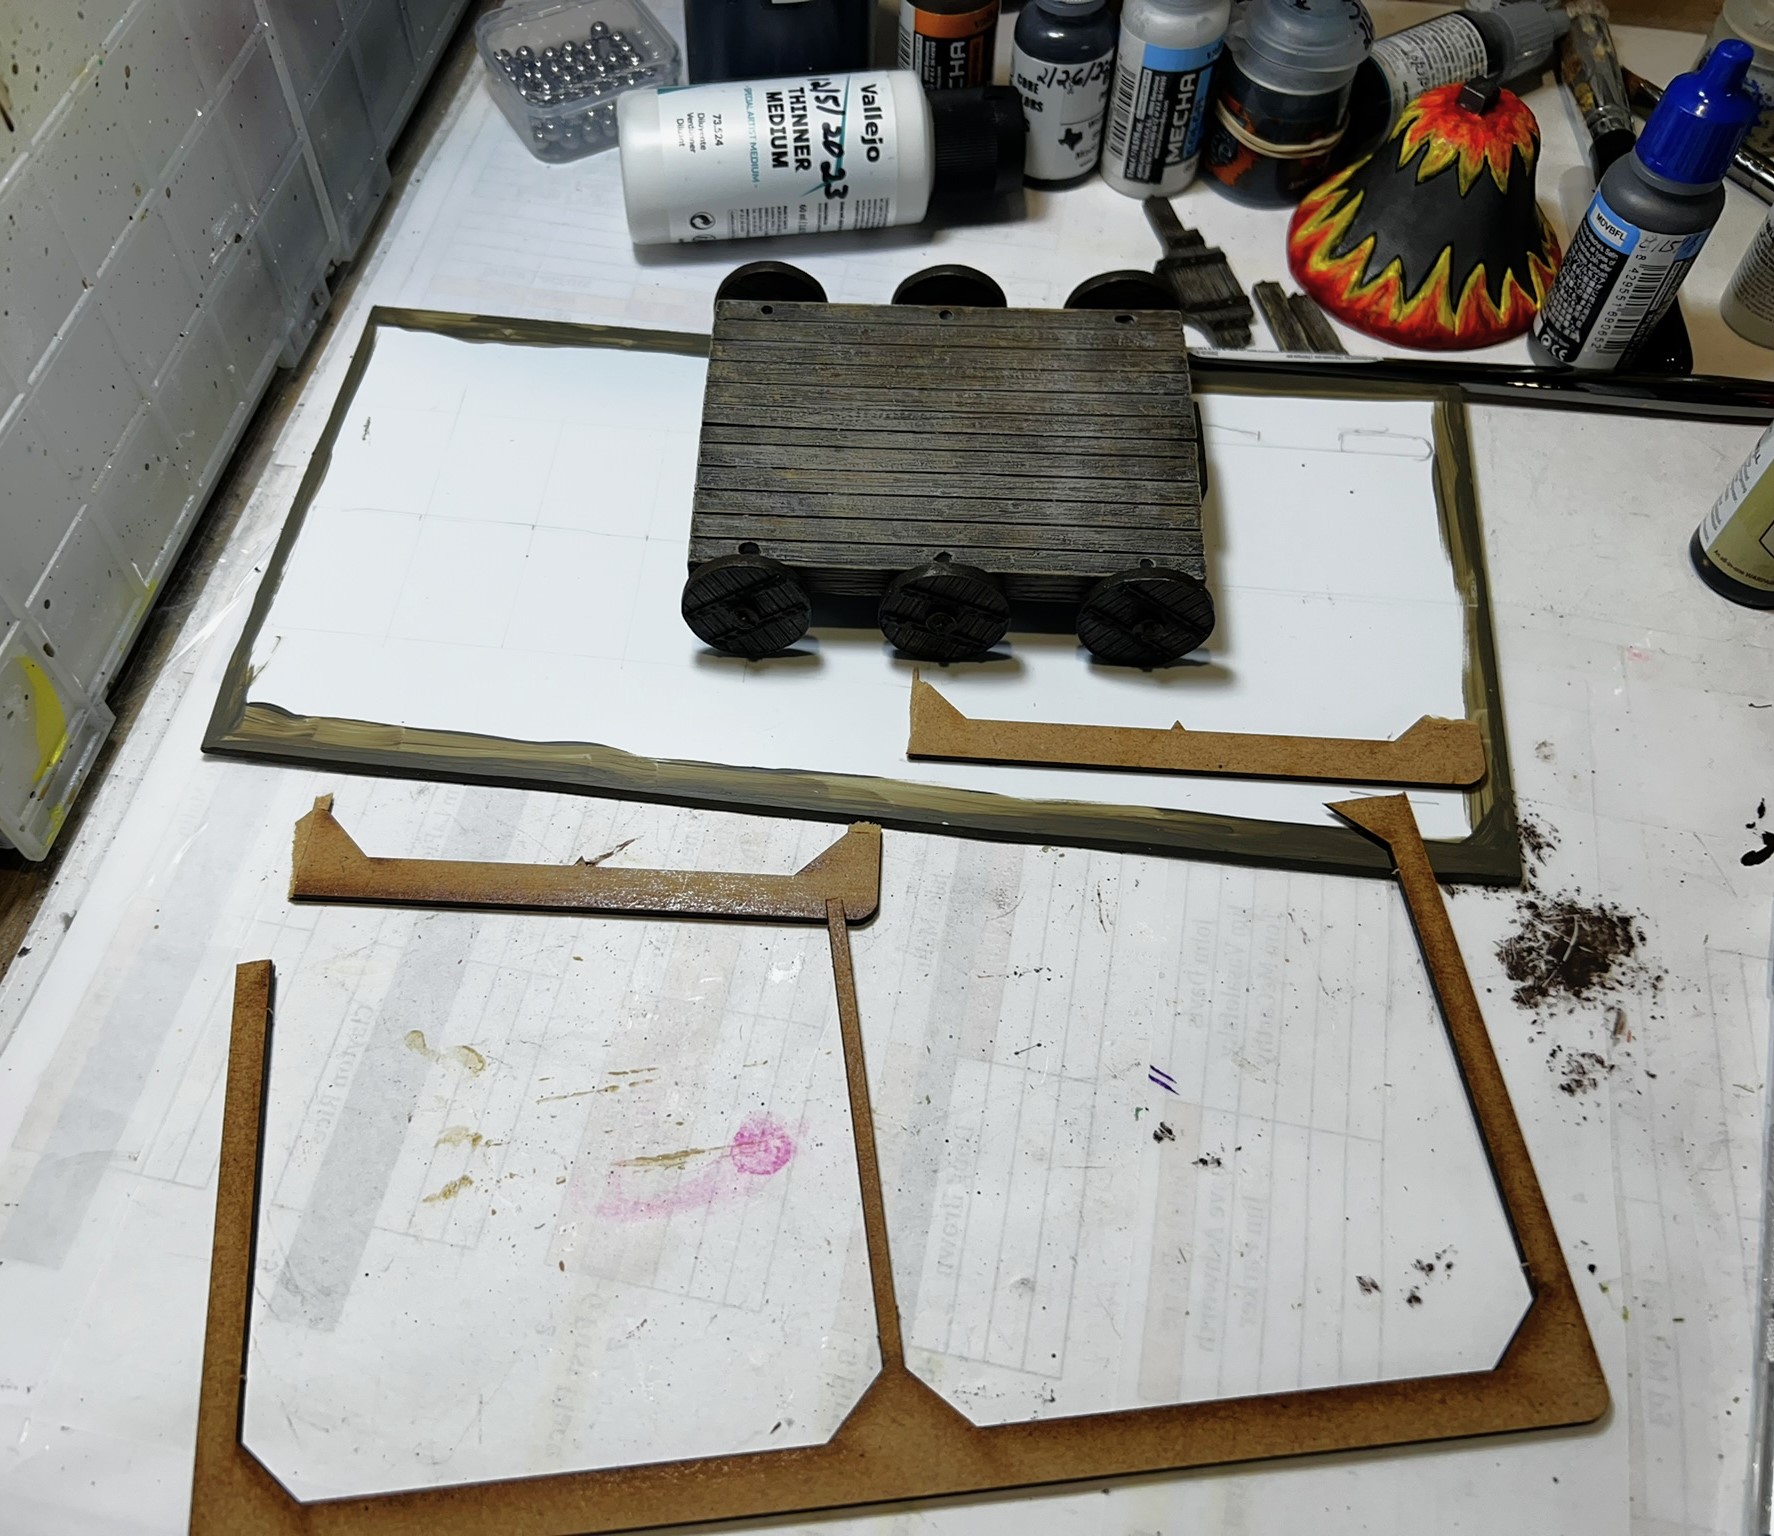
The frame pieces were then glued down, and I carefully carved out the holes to match the cart wheels. I also mounted the front chain mount to the cart using Gorilla Glue in conjunction with a small eyelet that I had rusted up to look like the chains.

The frame sections glued down with the cart used as a template. I also applied PVA all over the base except where the skeletons would go.

While the PVA dried, I assembled and glued the cart pieces and the Bell together.

While the cart PVA glue dries – rubber bands assist the connections getting glued correctly.

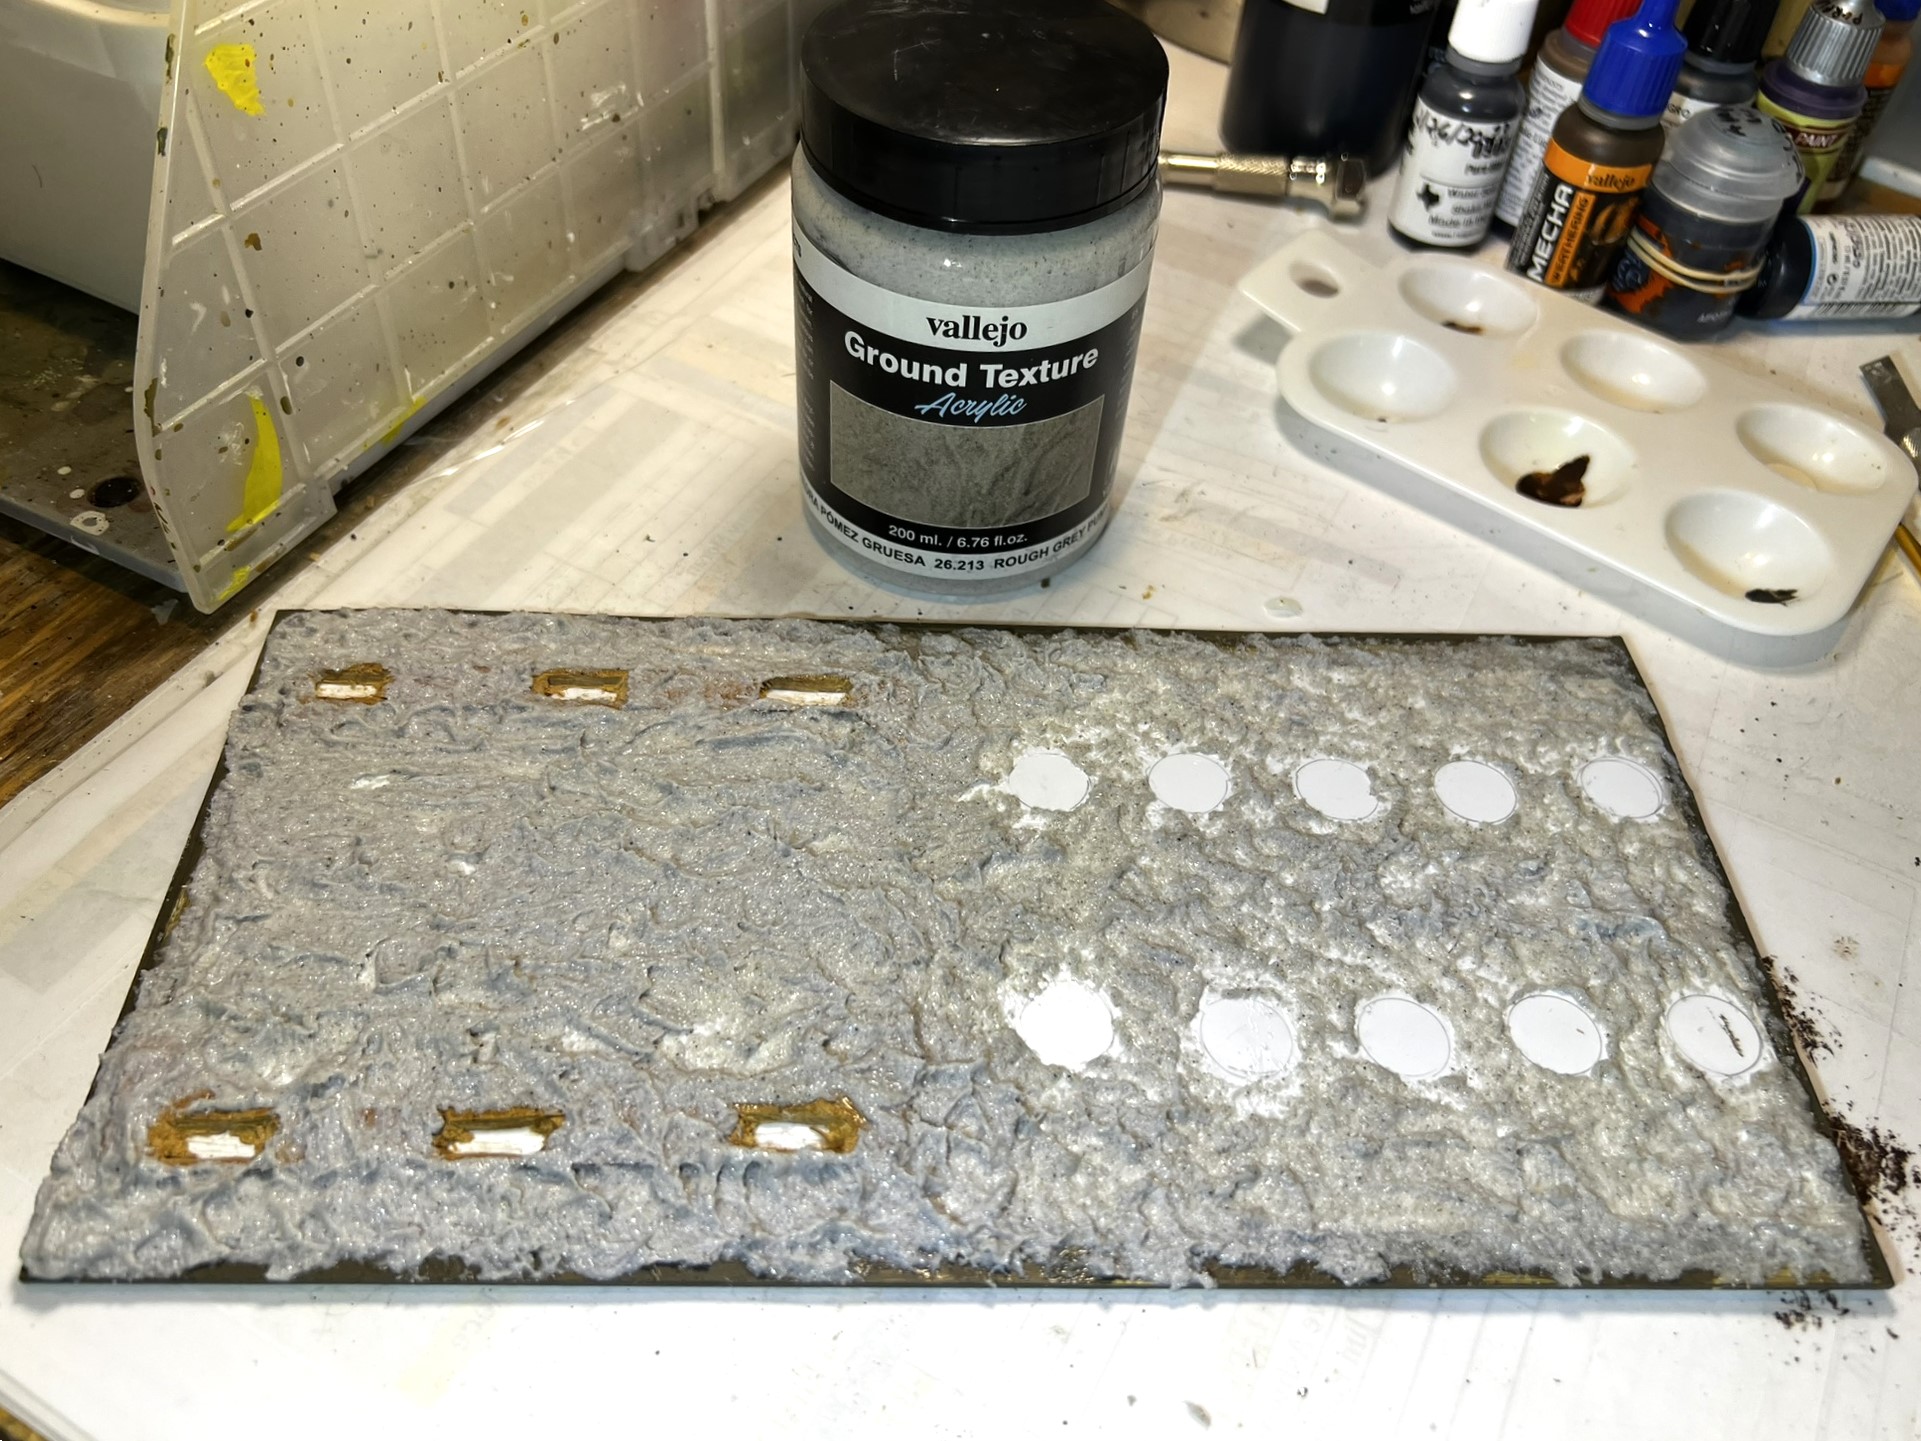
Once assembled, I varnished the cart/Bell and crew with two coats of varnish with an airbrush, and went back to the base. After the PVA on the base had dried, I covered most of the base with a Vallejo ground texture – and then let that dry.

The base after the texture paint was applied.

When that texture paint had dried sufficiently, I gave the base a flocking of grass. This would take care of the area under the cart flocking-wise.

The skeletons look on as the base gets its first grass and a Pendraken 12mm MDF dice frame.

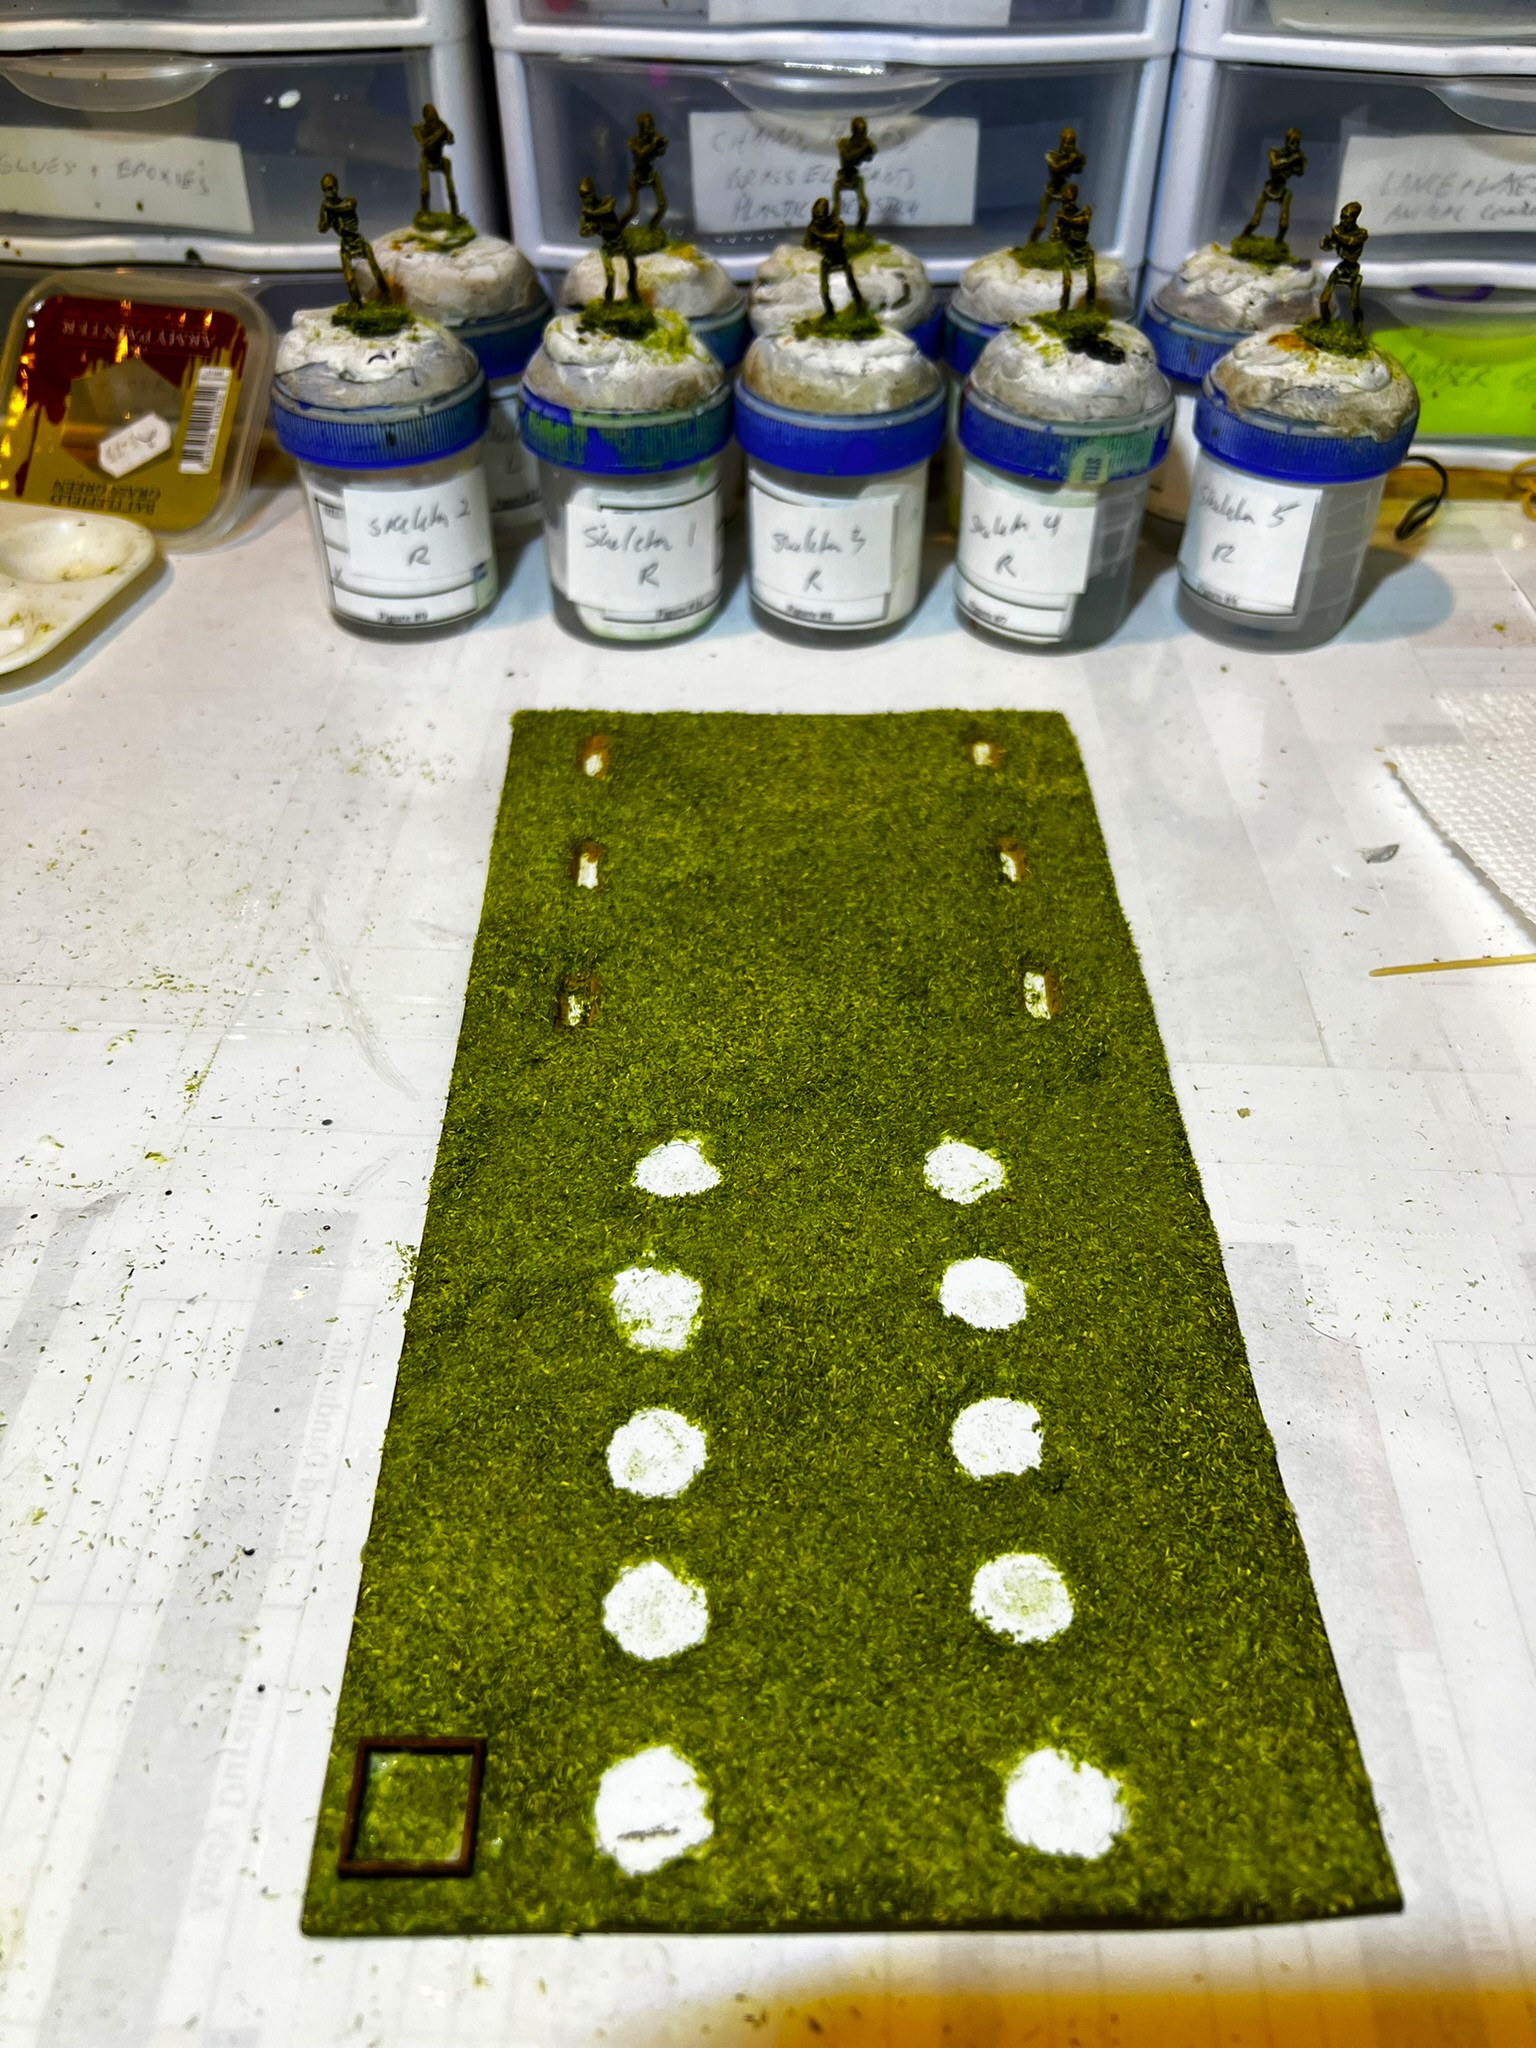
The last thing I did on January 19th was to mount the cart in the holes, add PVA to the holes, and go to sleep with hope for the morning!

The cart mounted for overnight glue setting.
The end of January 19th – awaiting January 20th to finish!

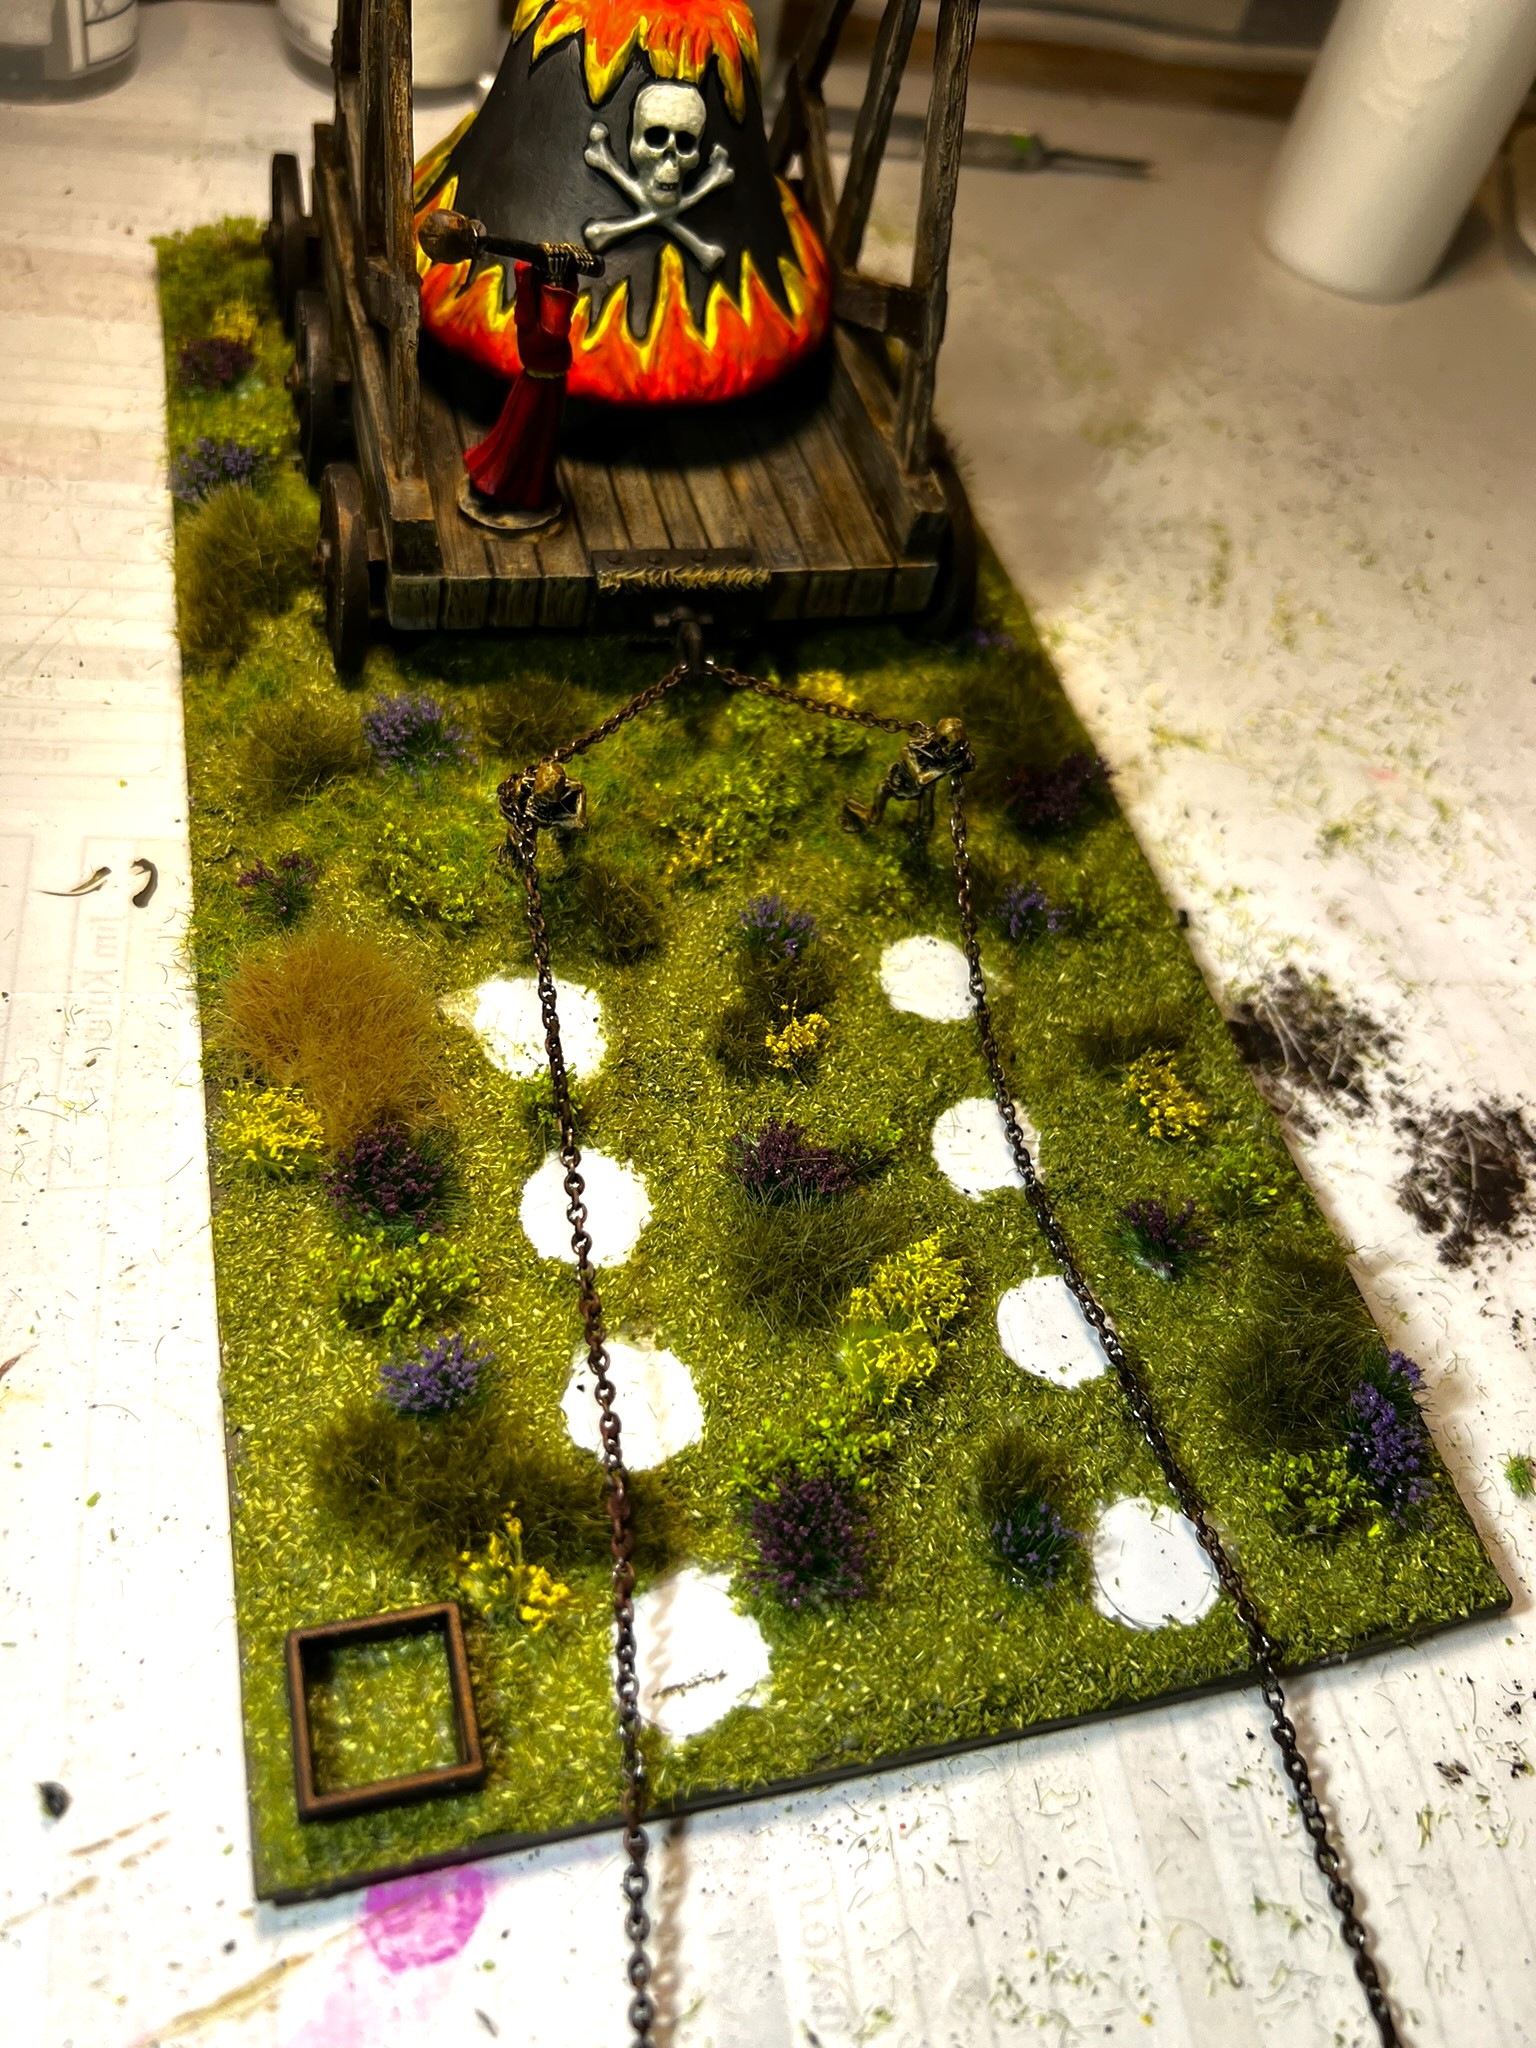
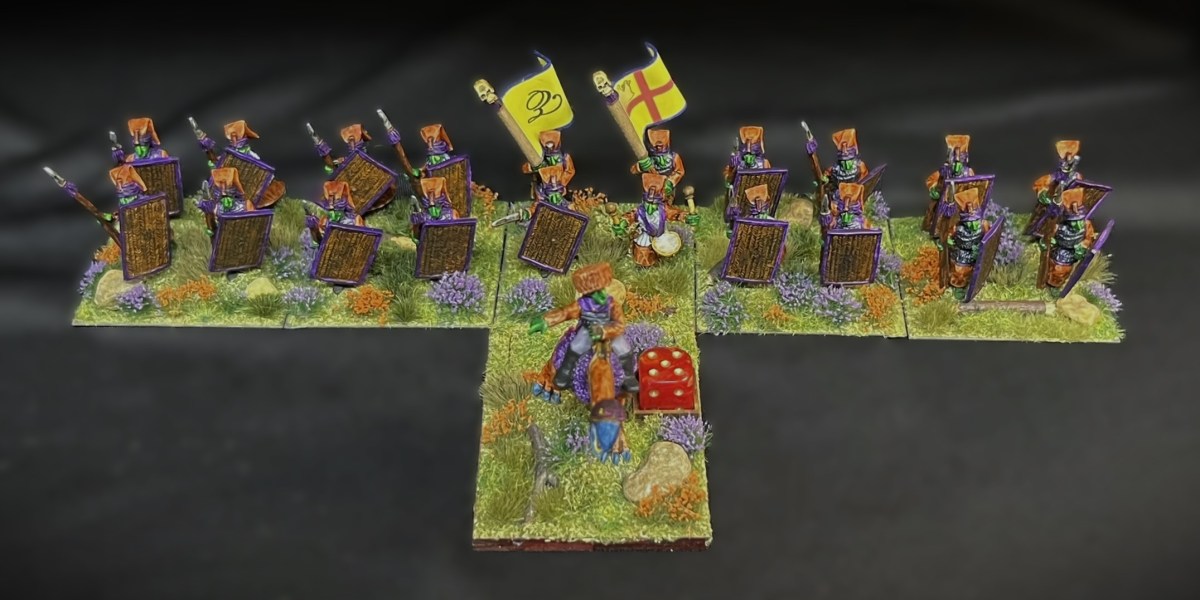
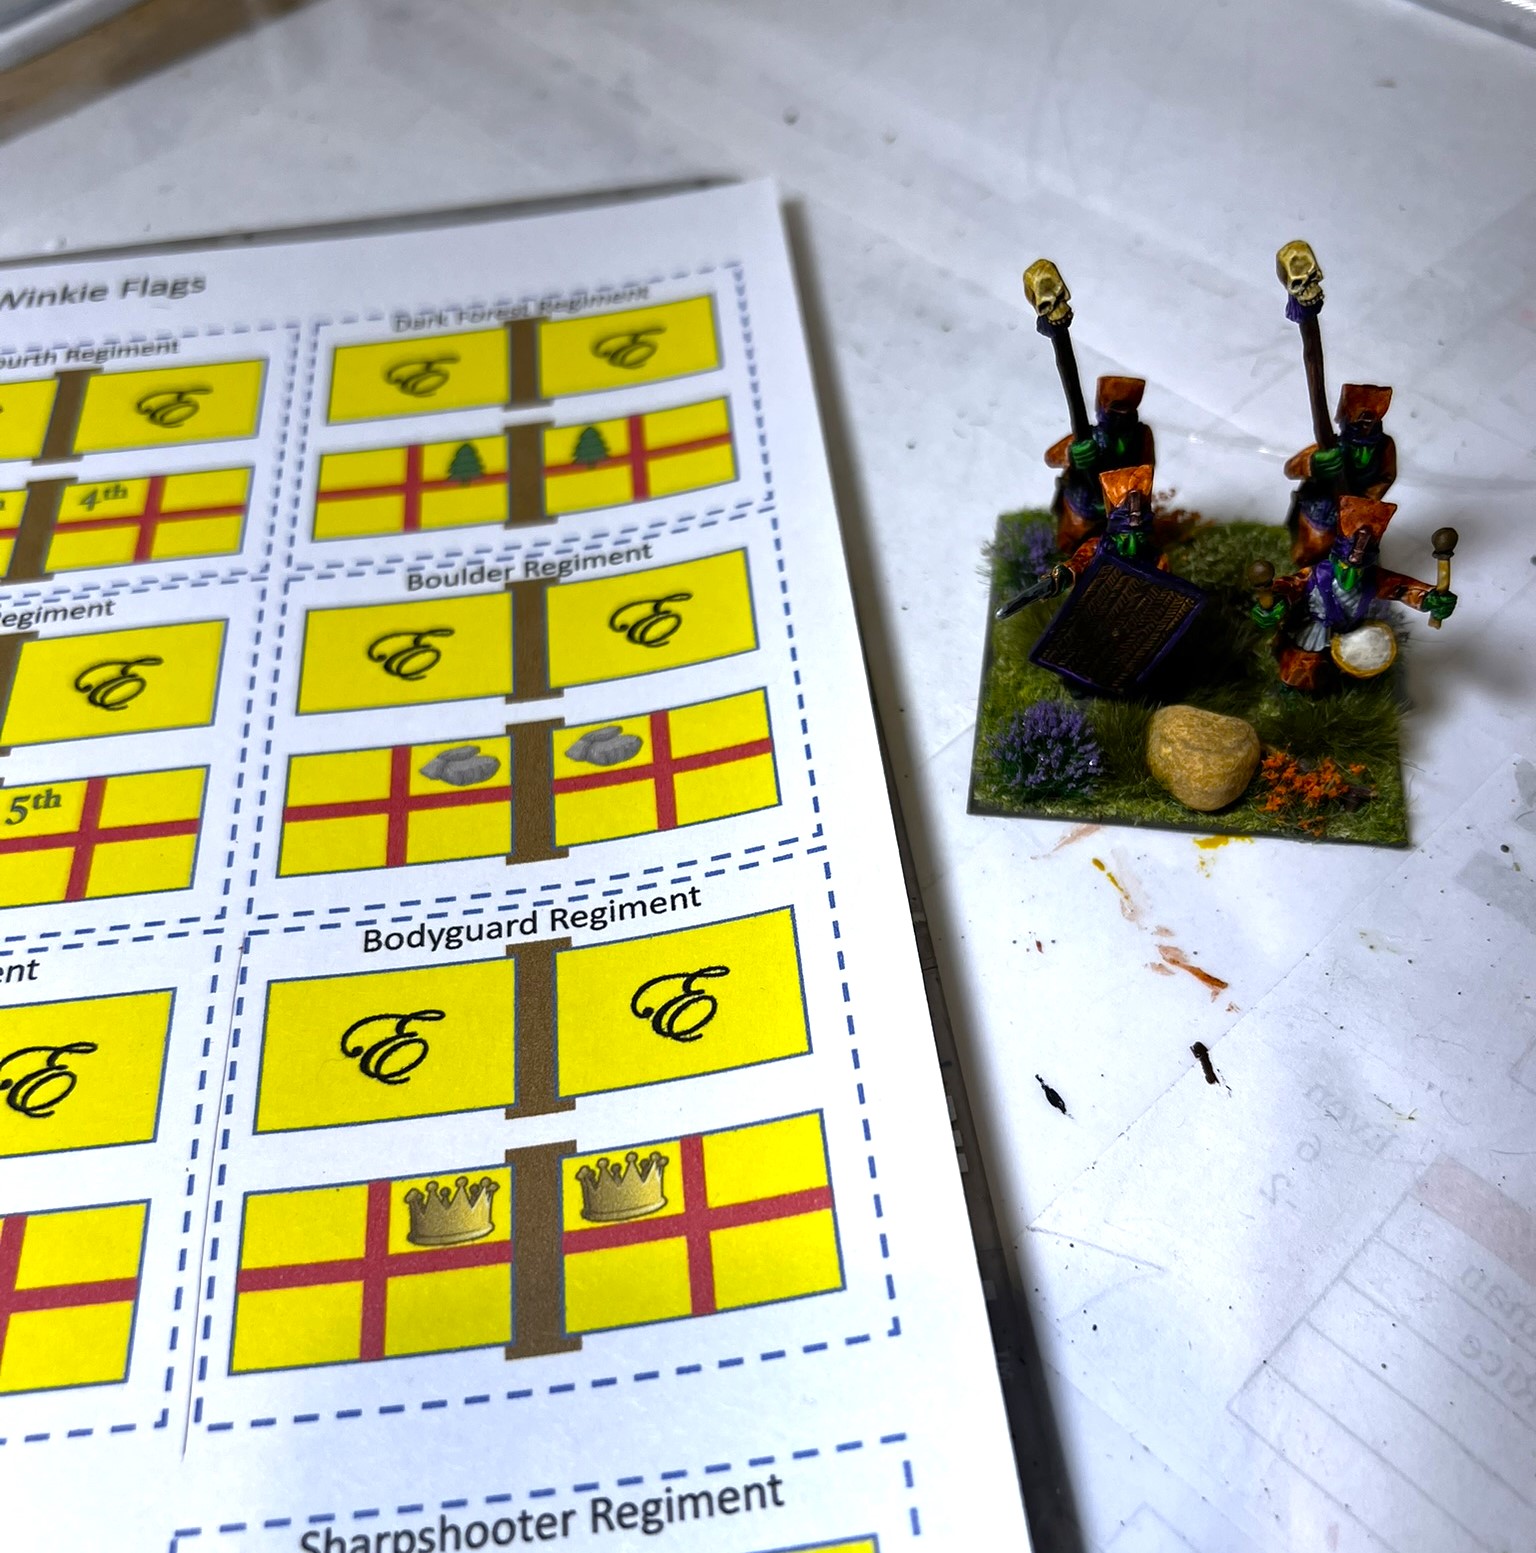
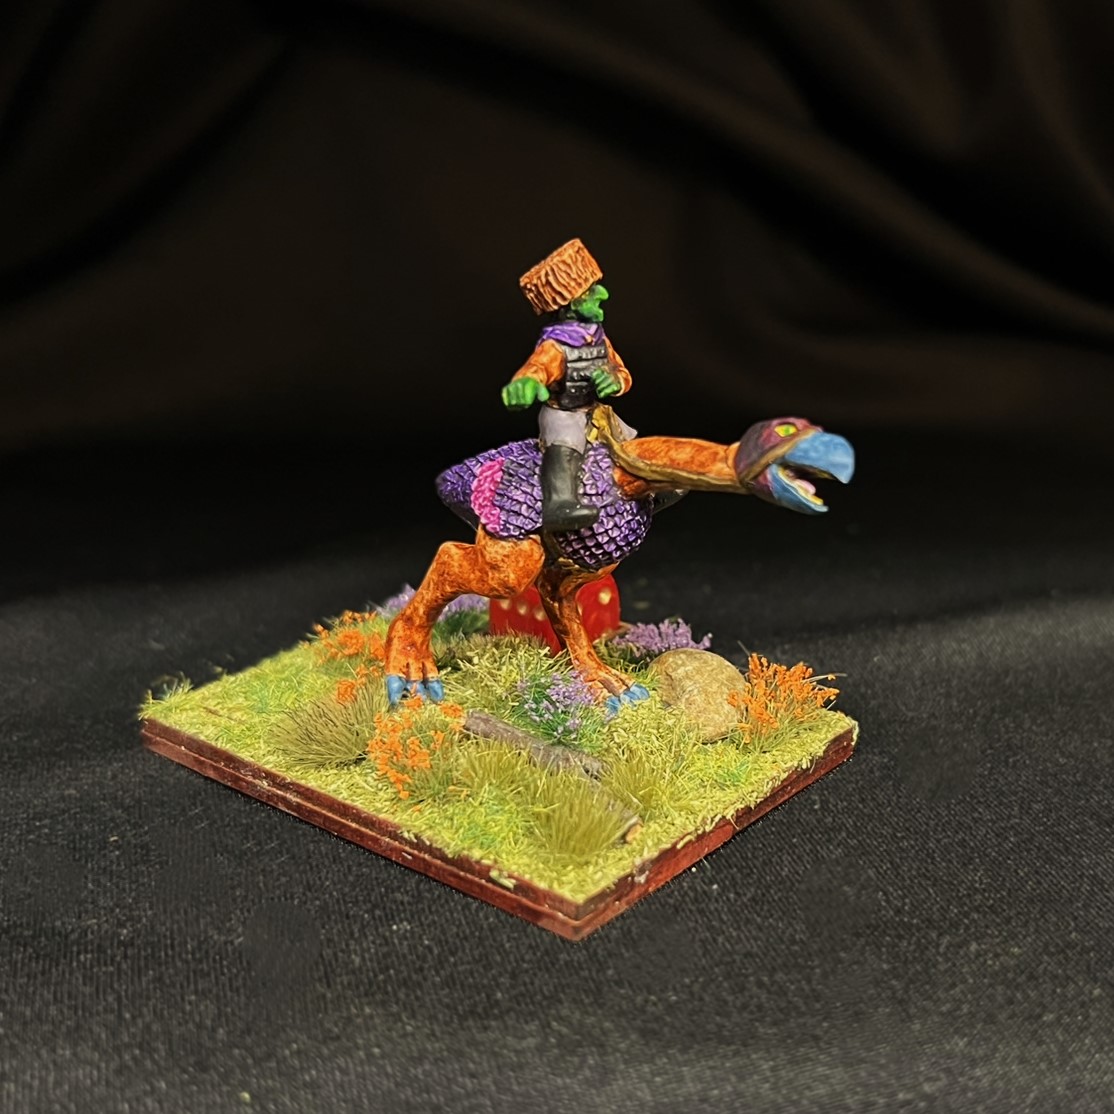
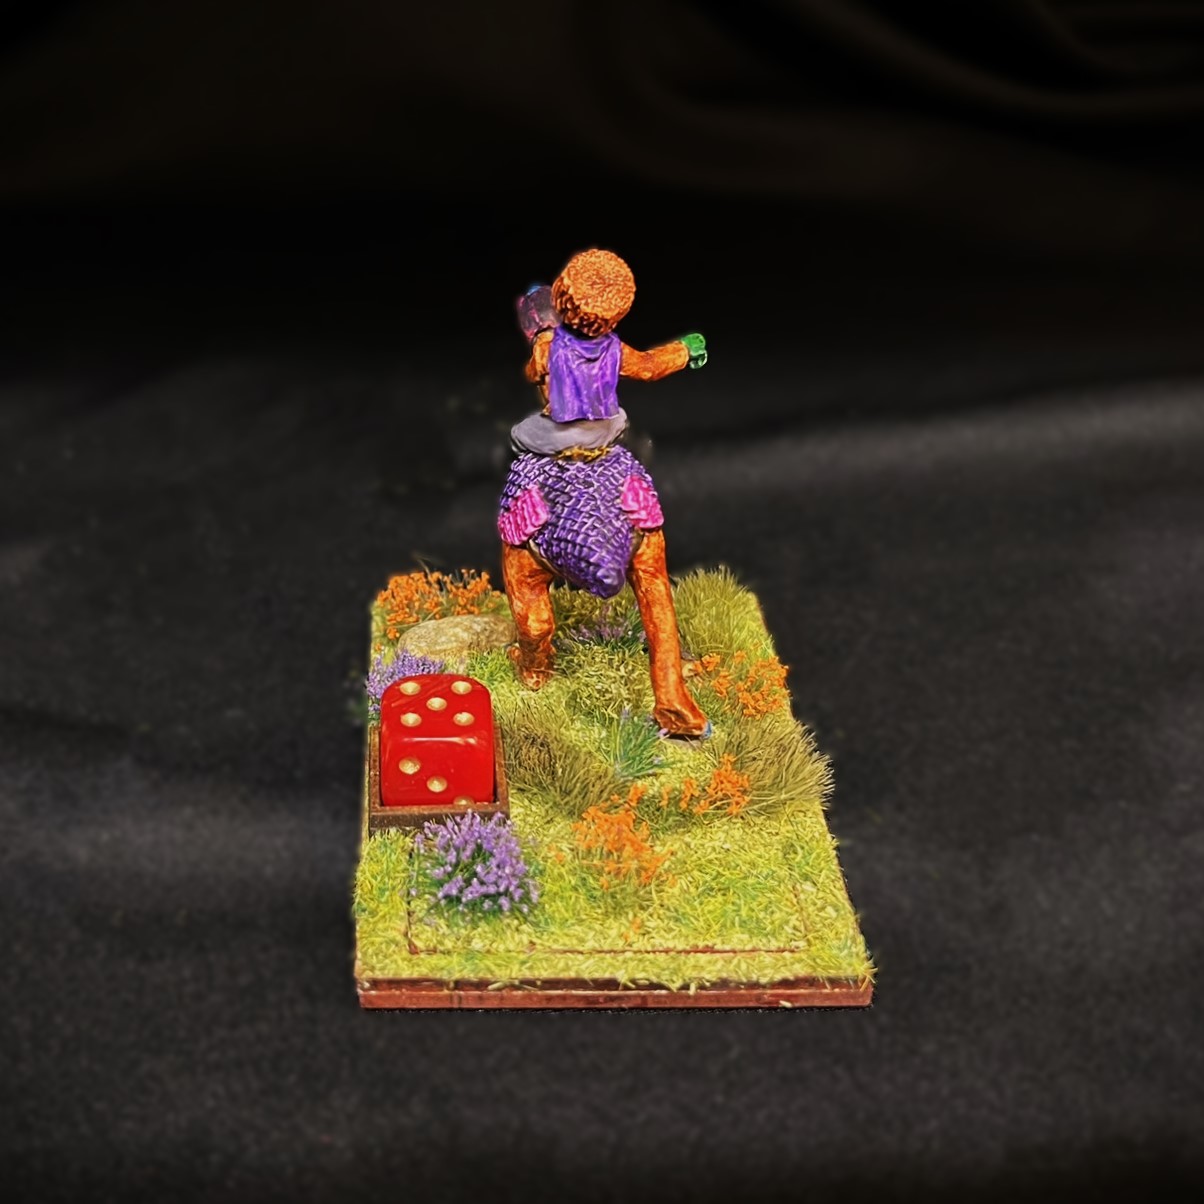
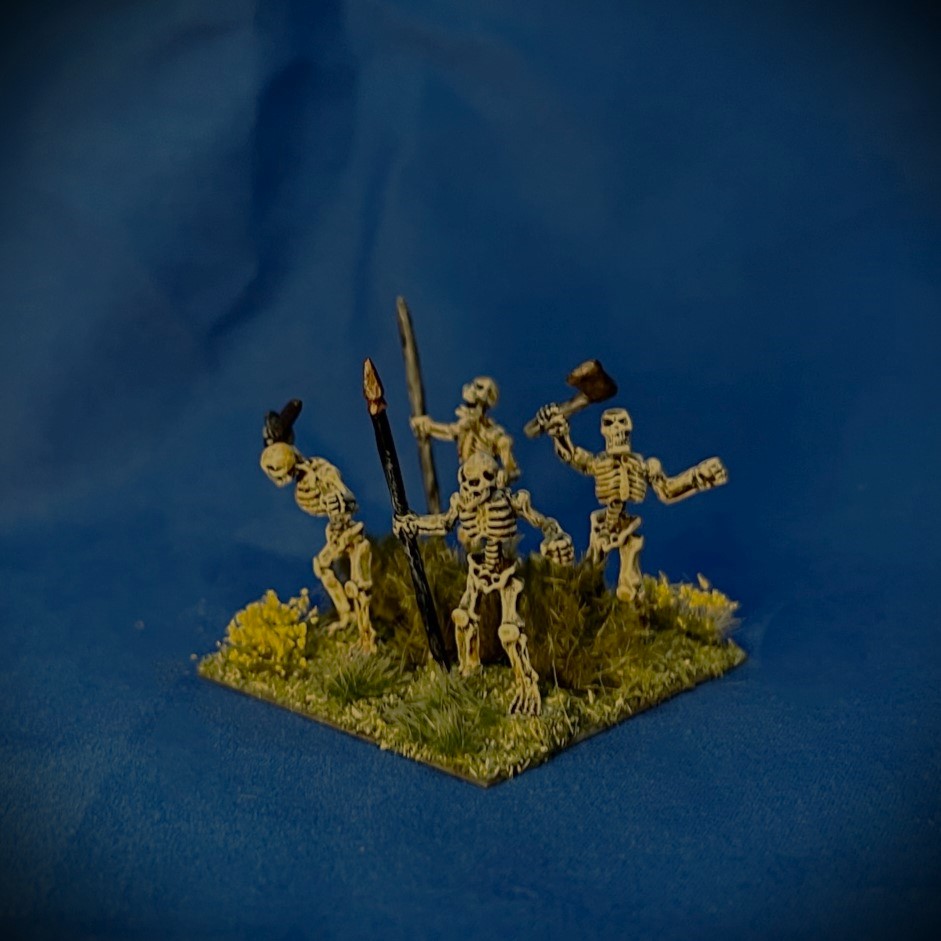
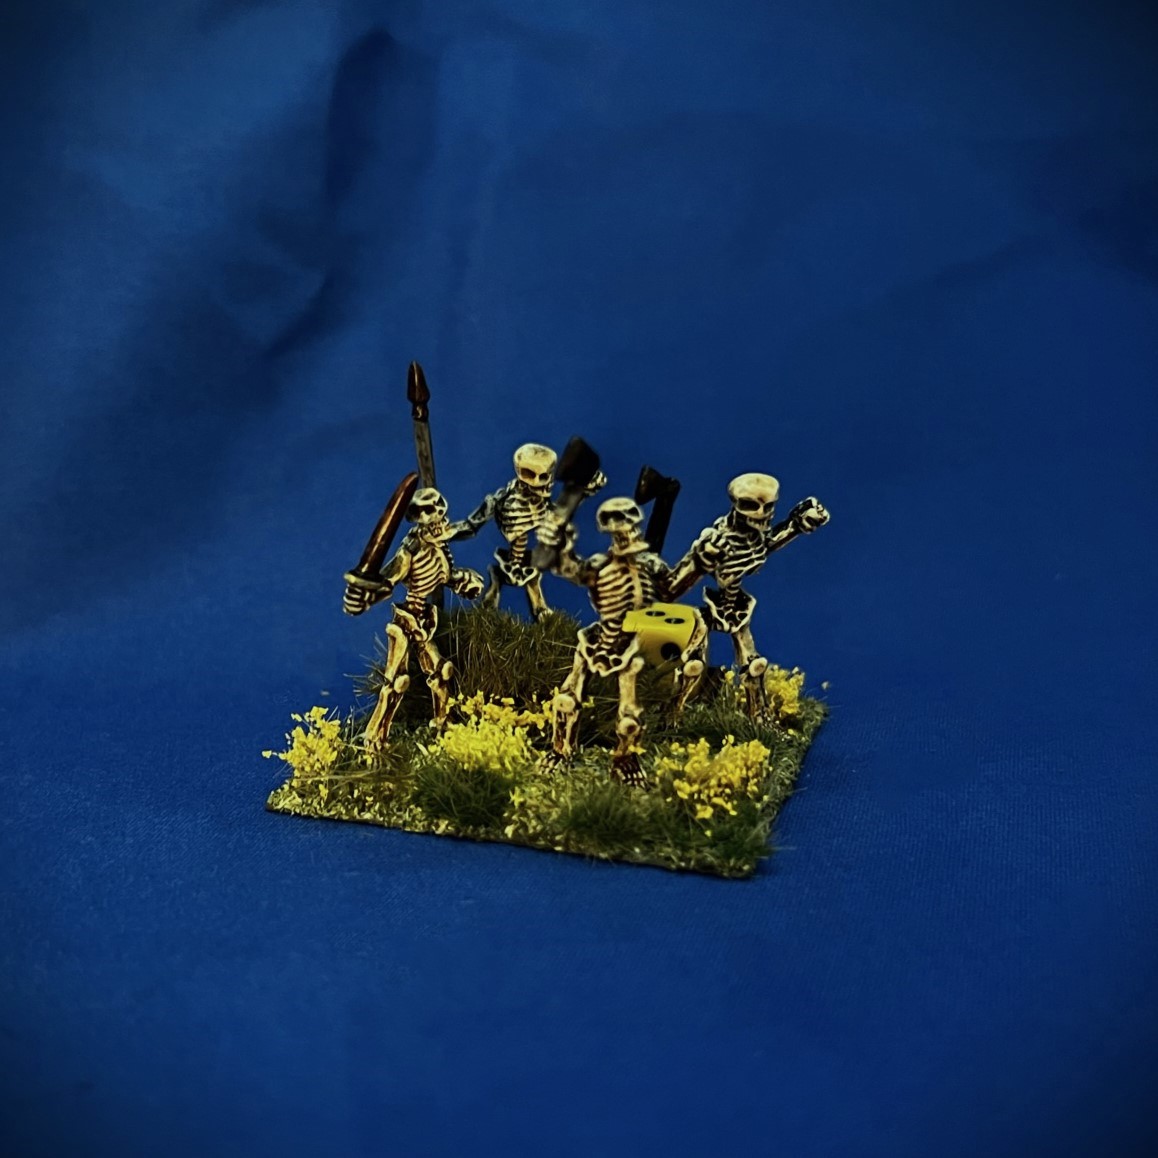
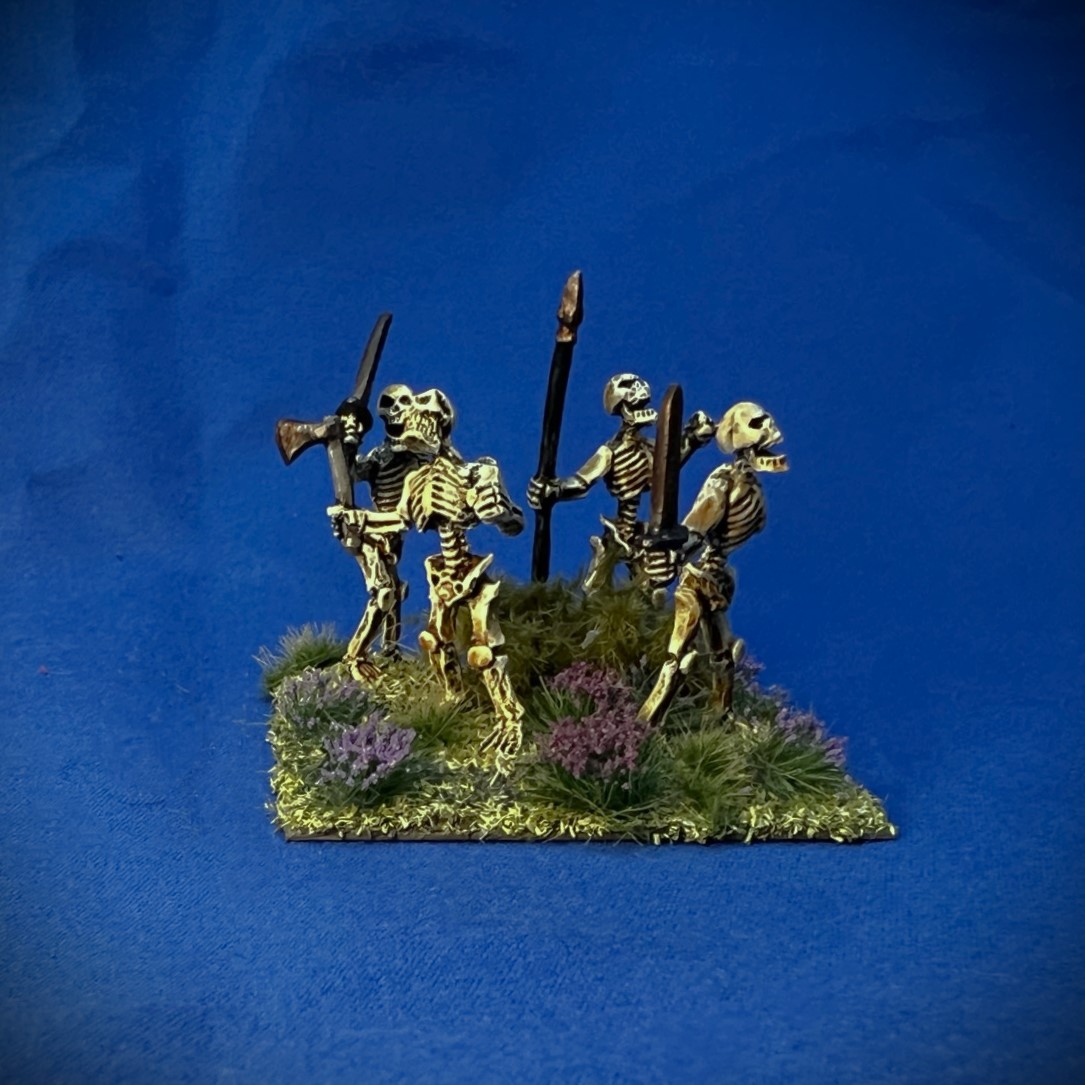
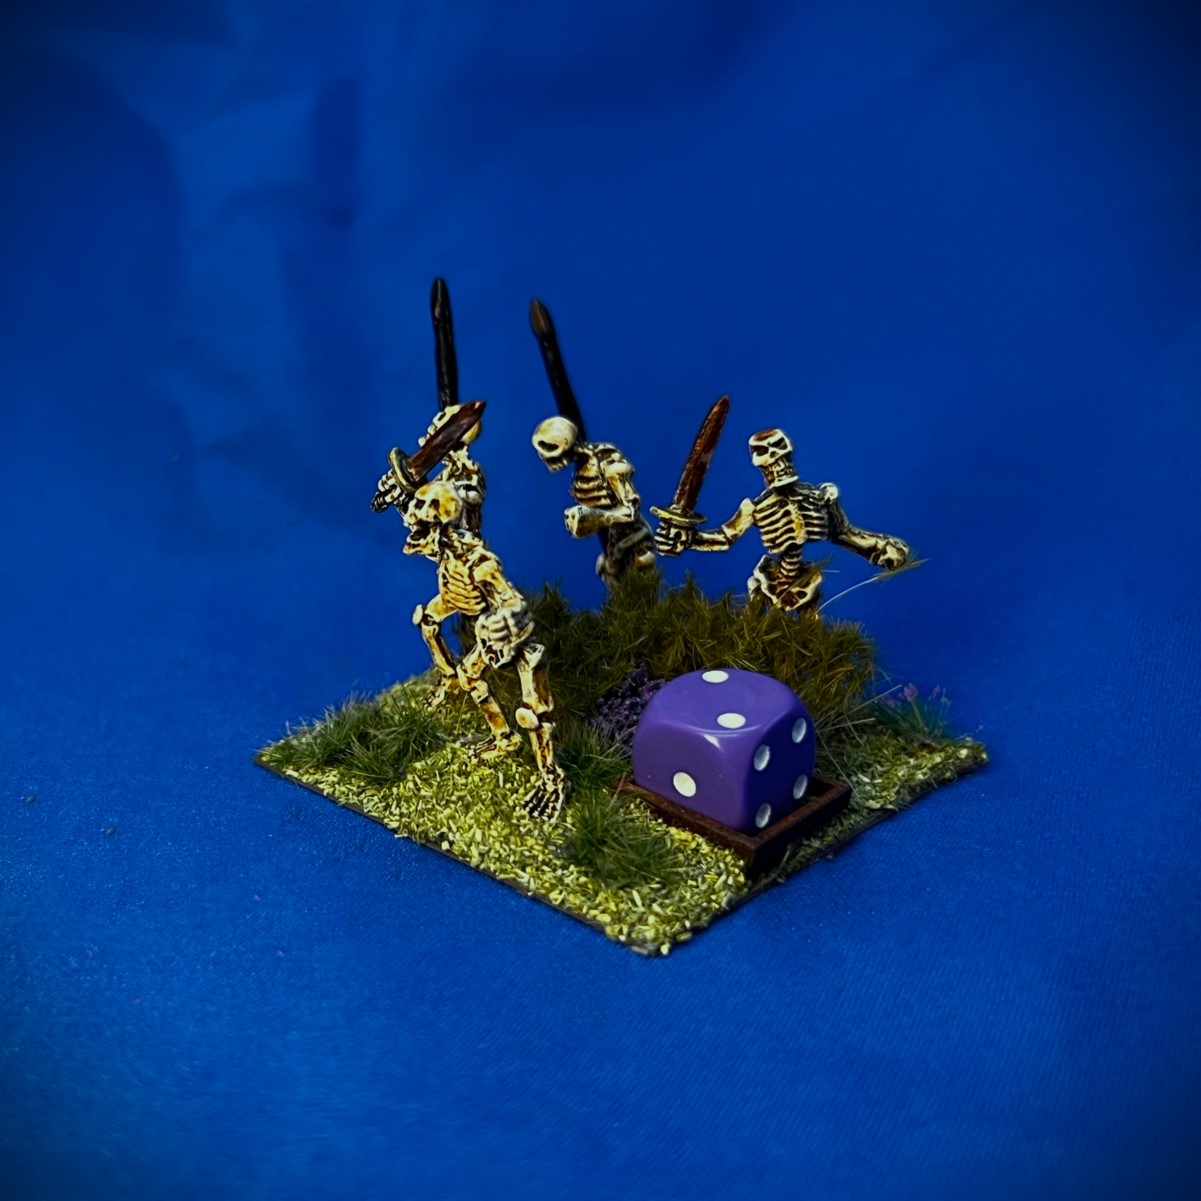
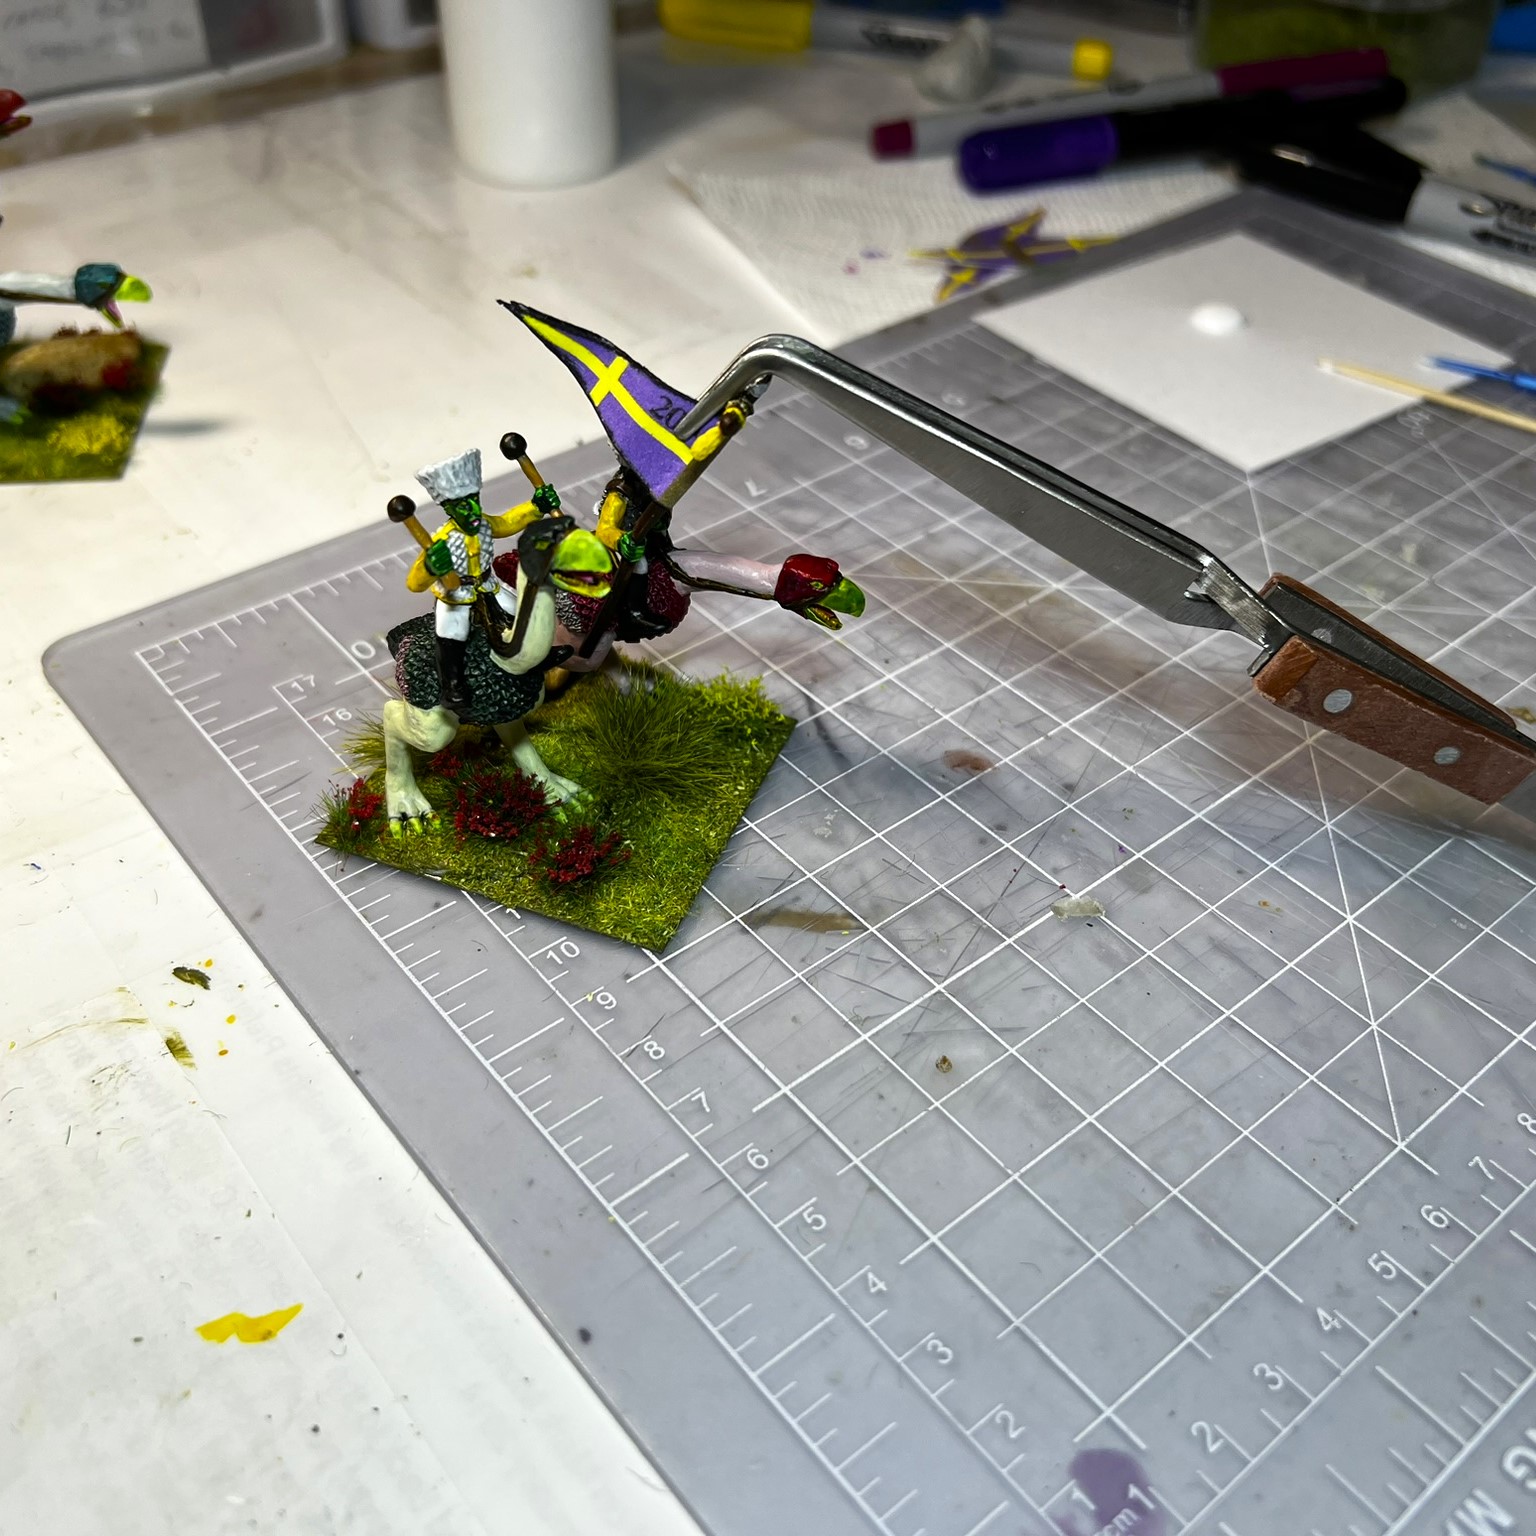
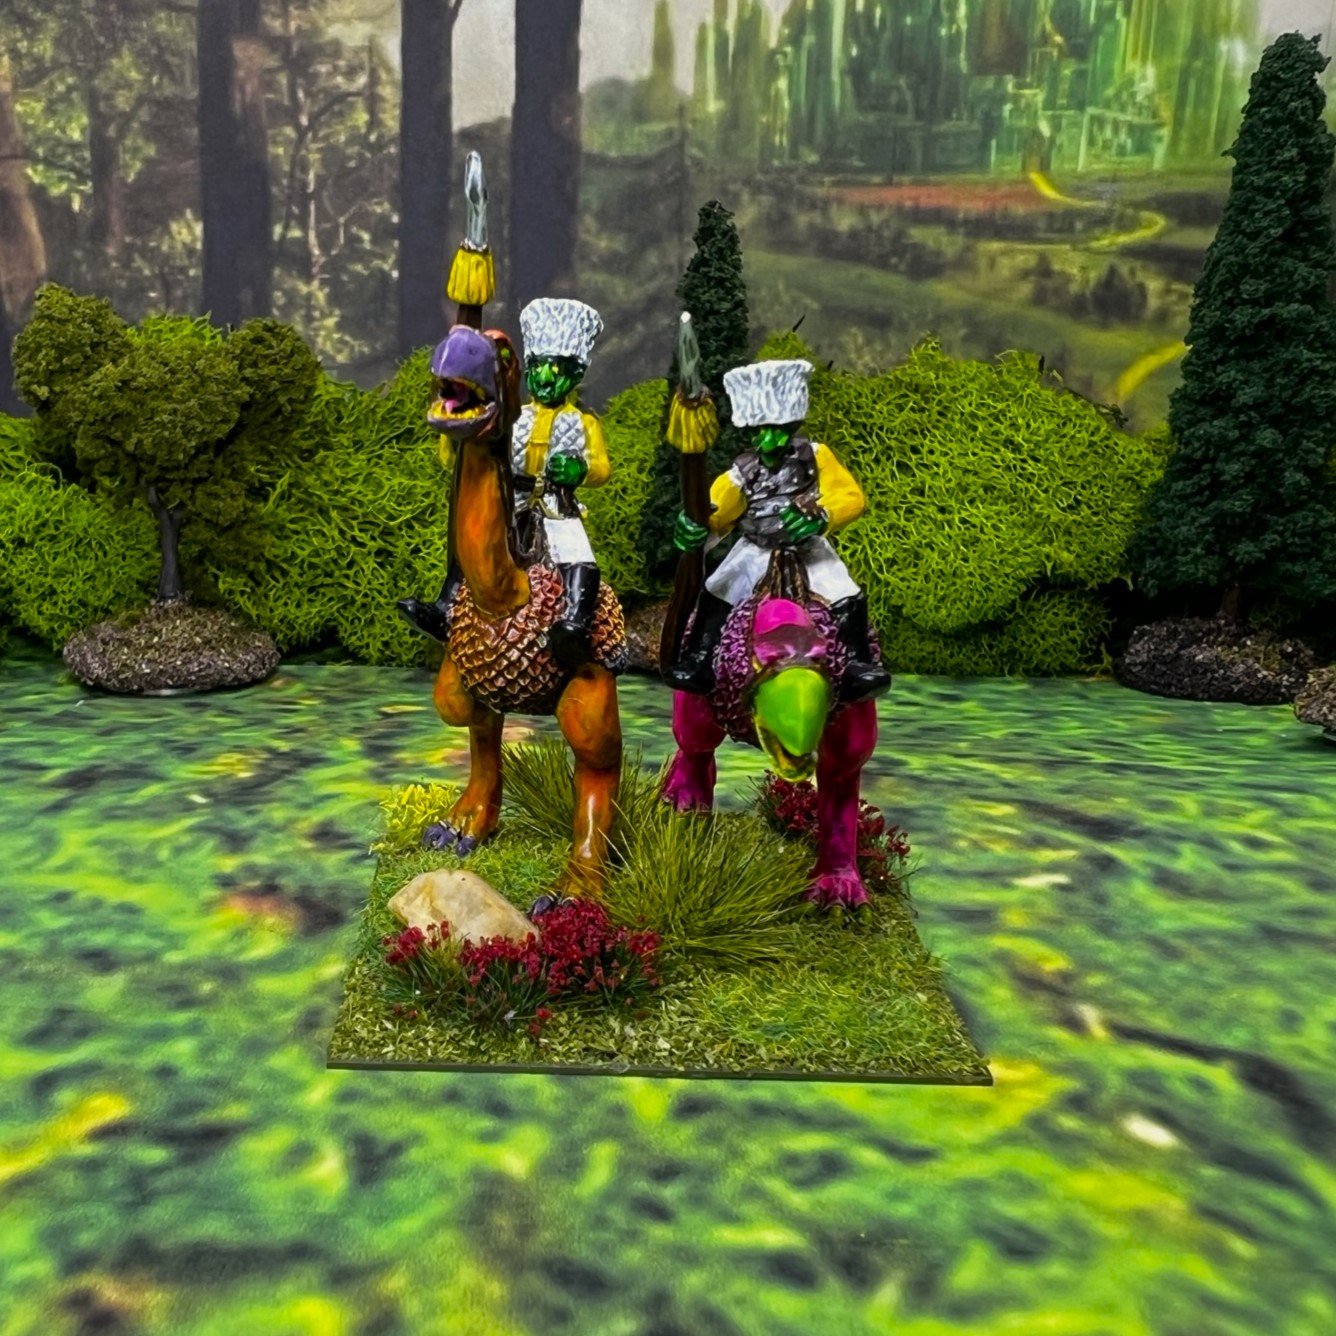
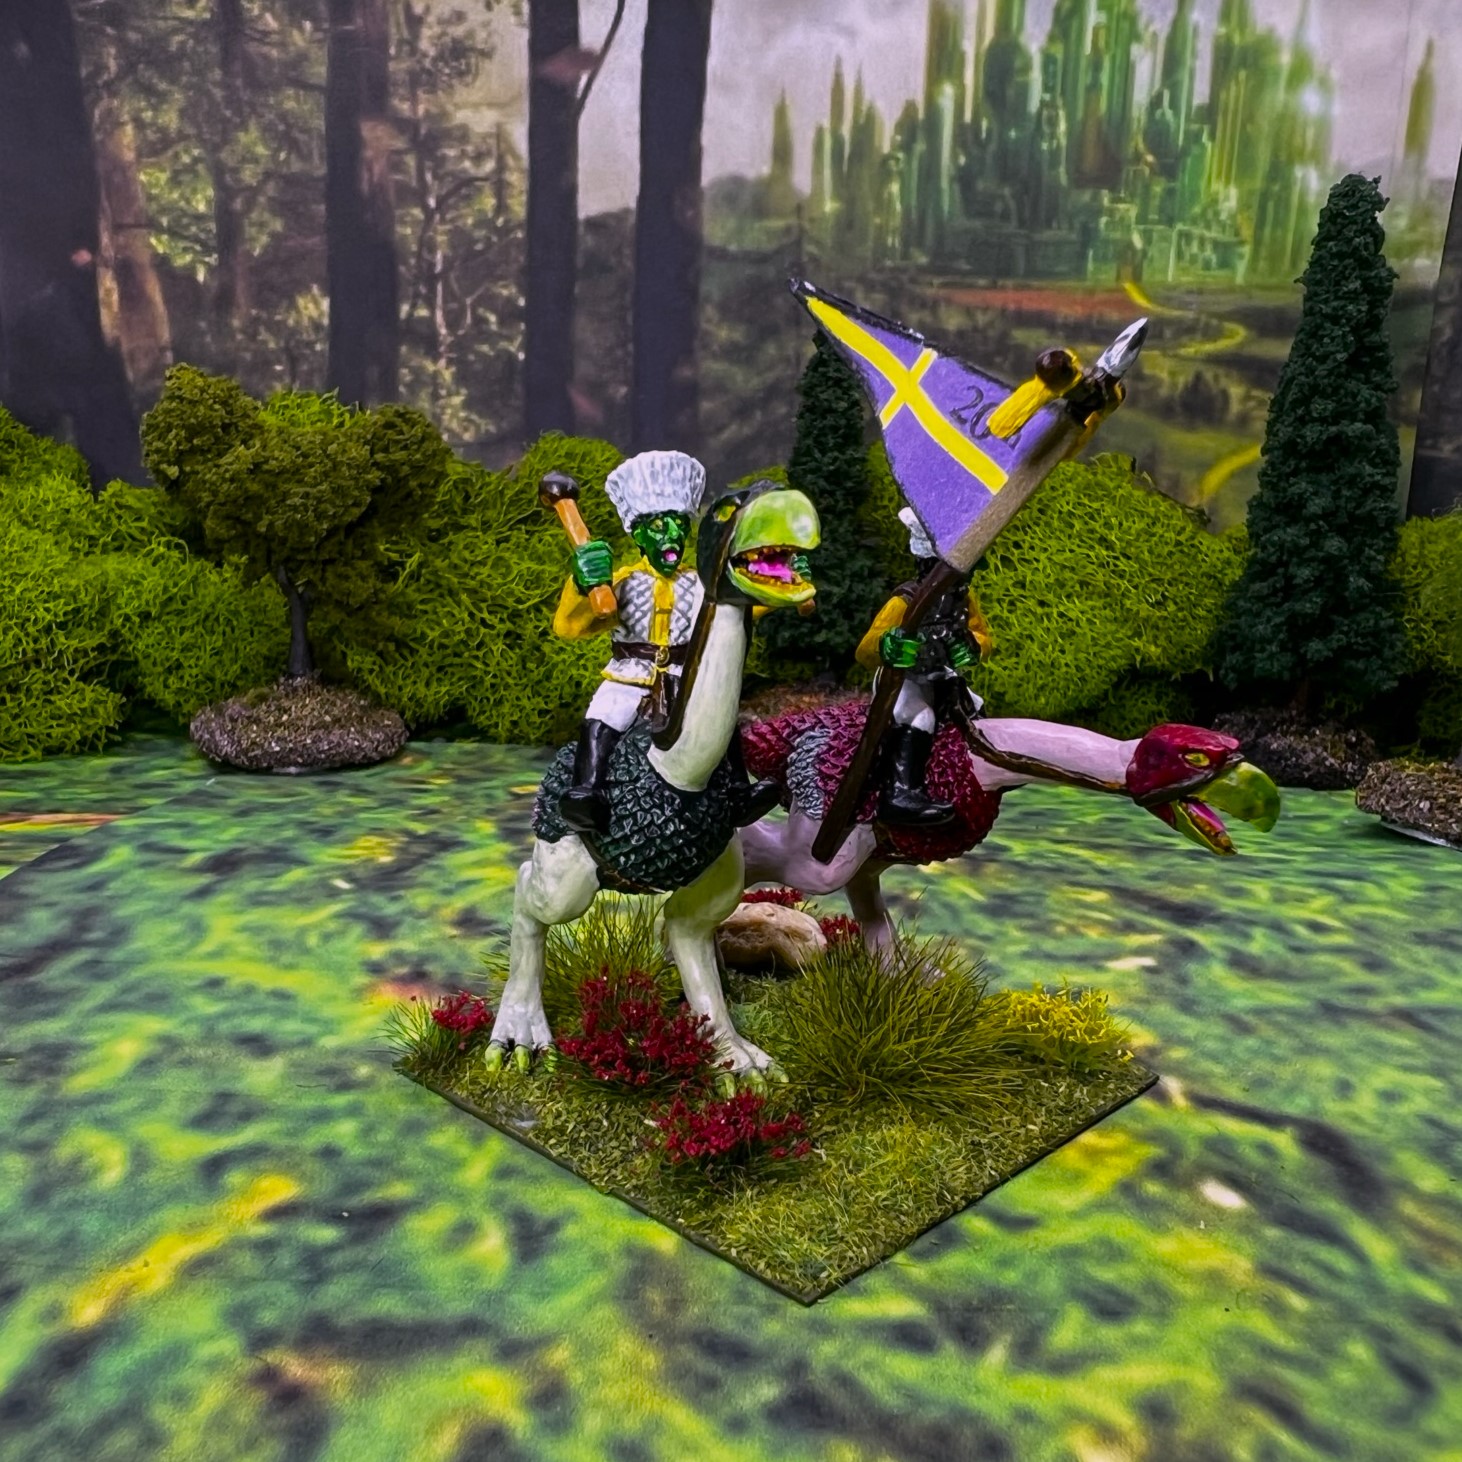
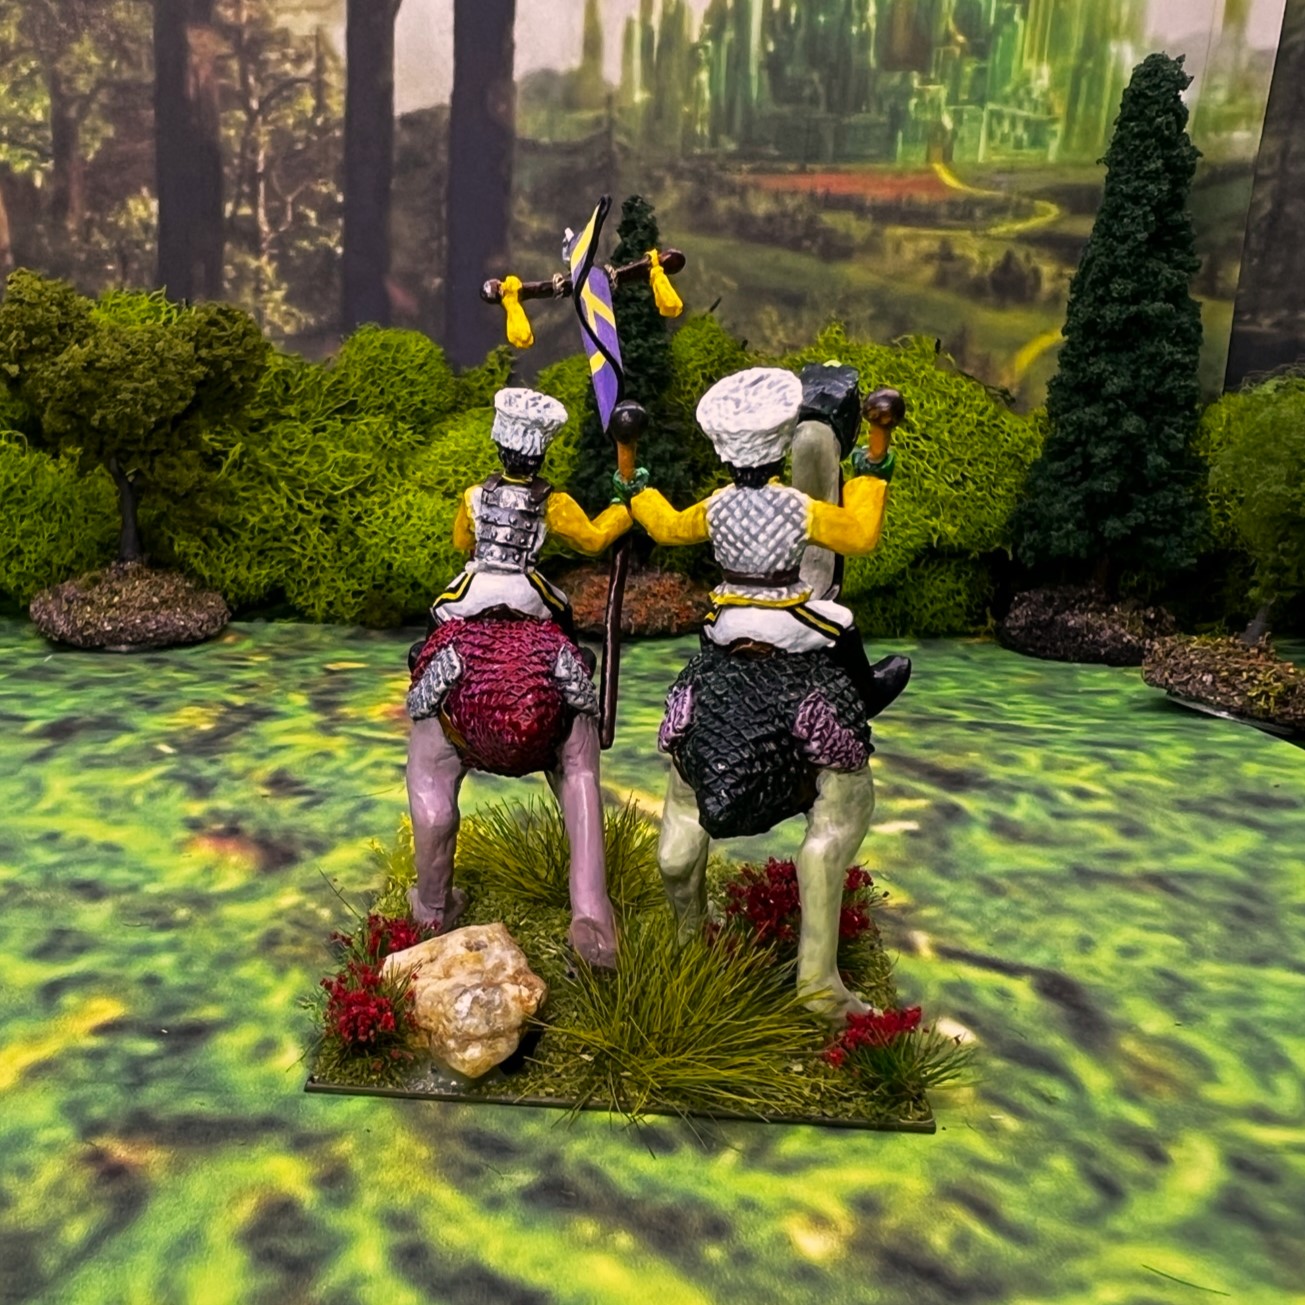
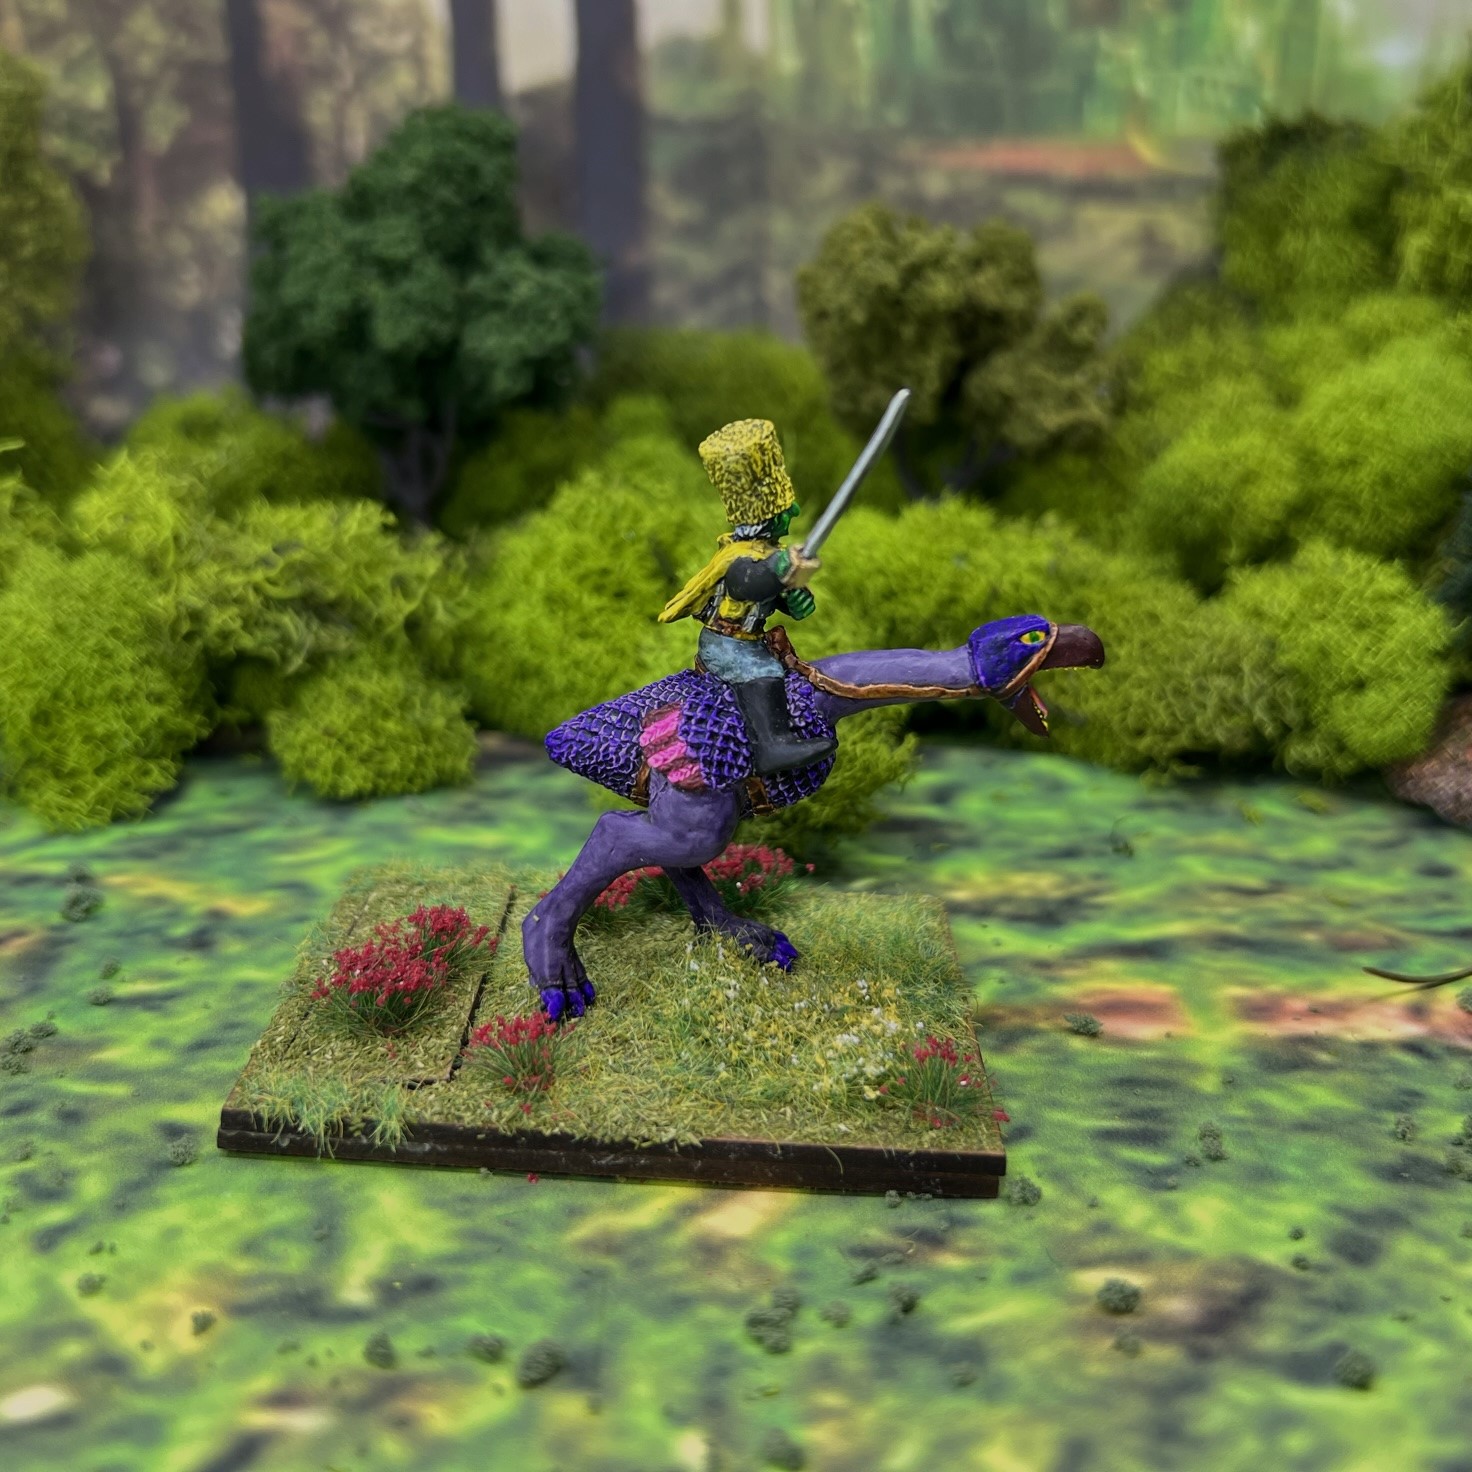
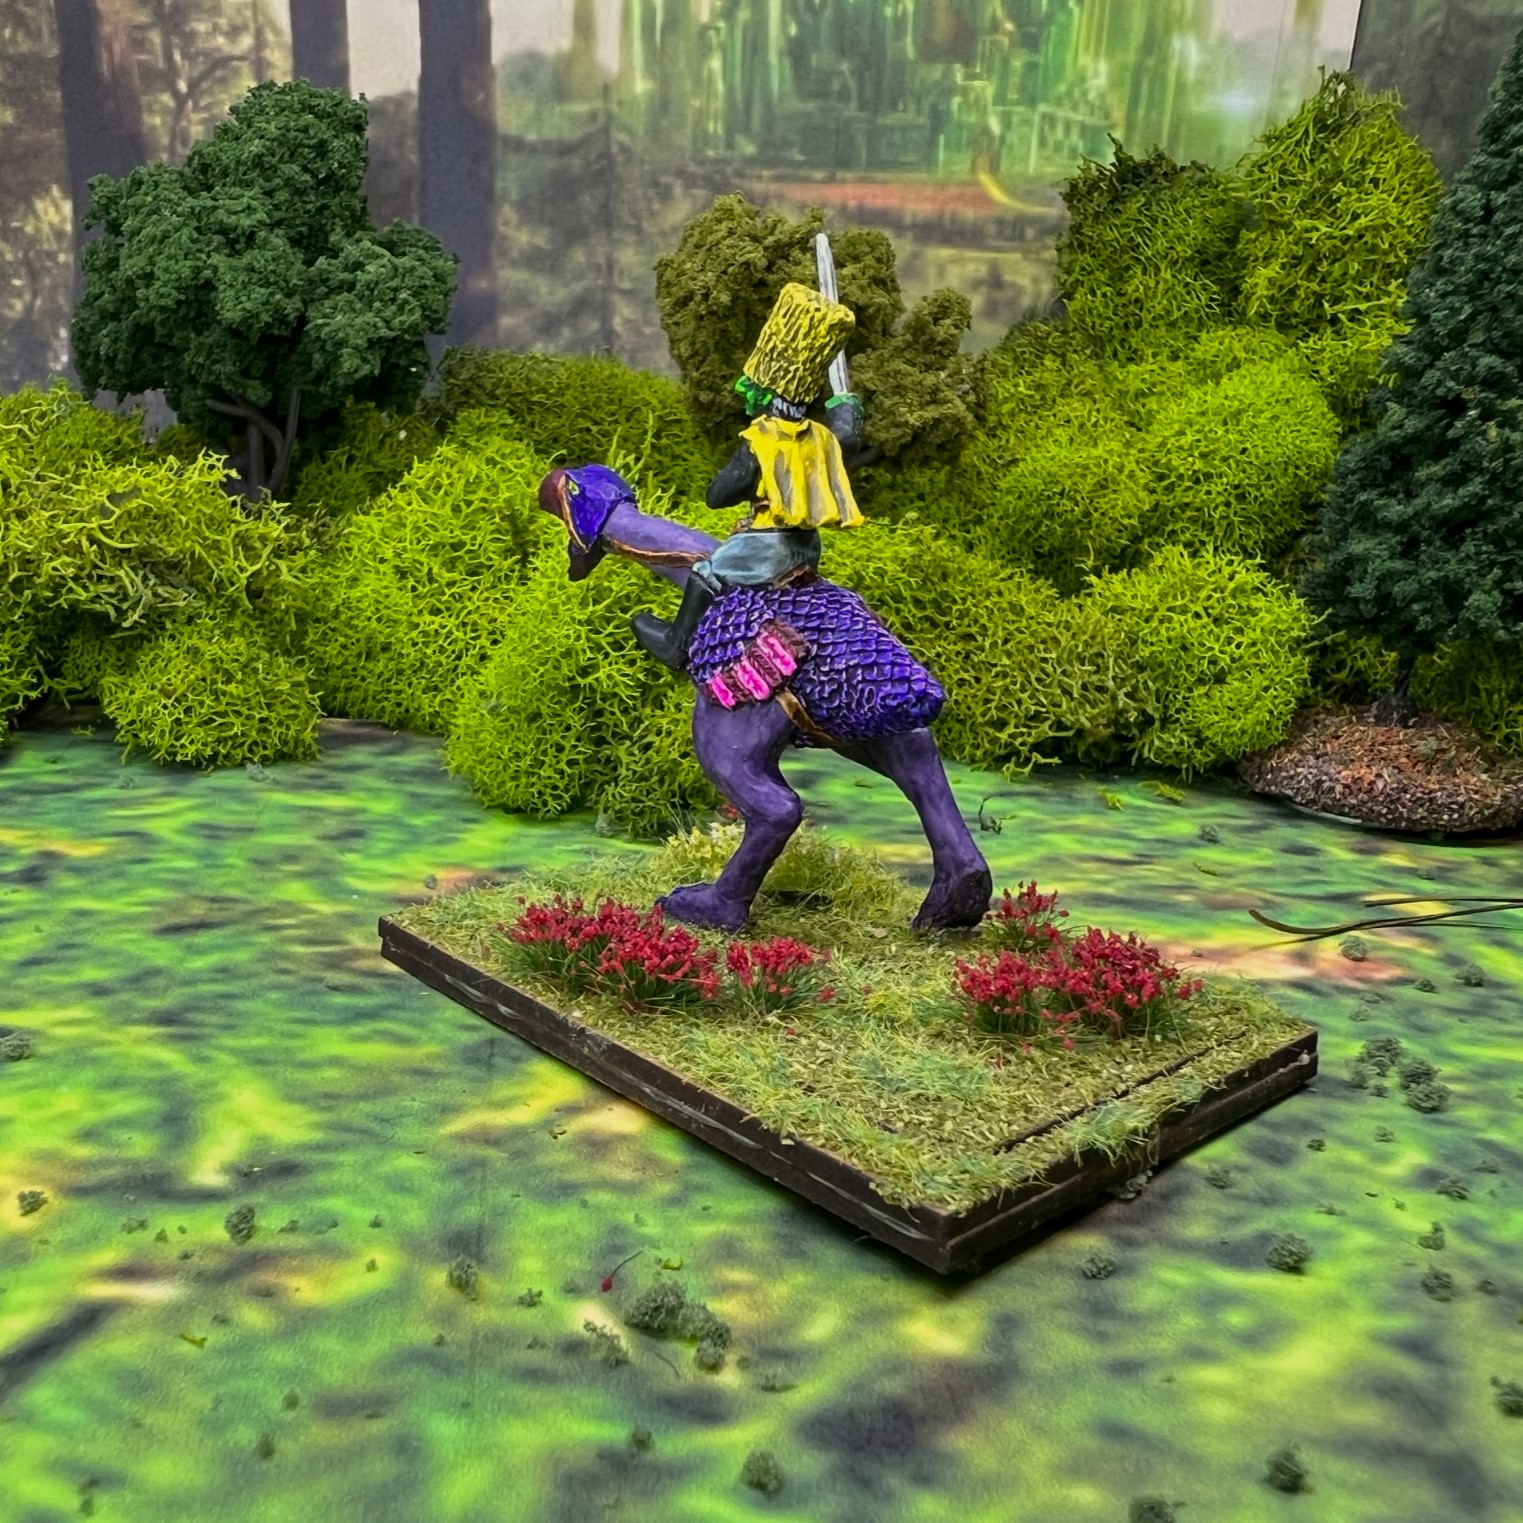
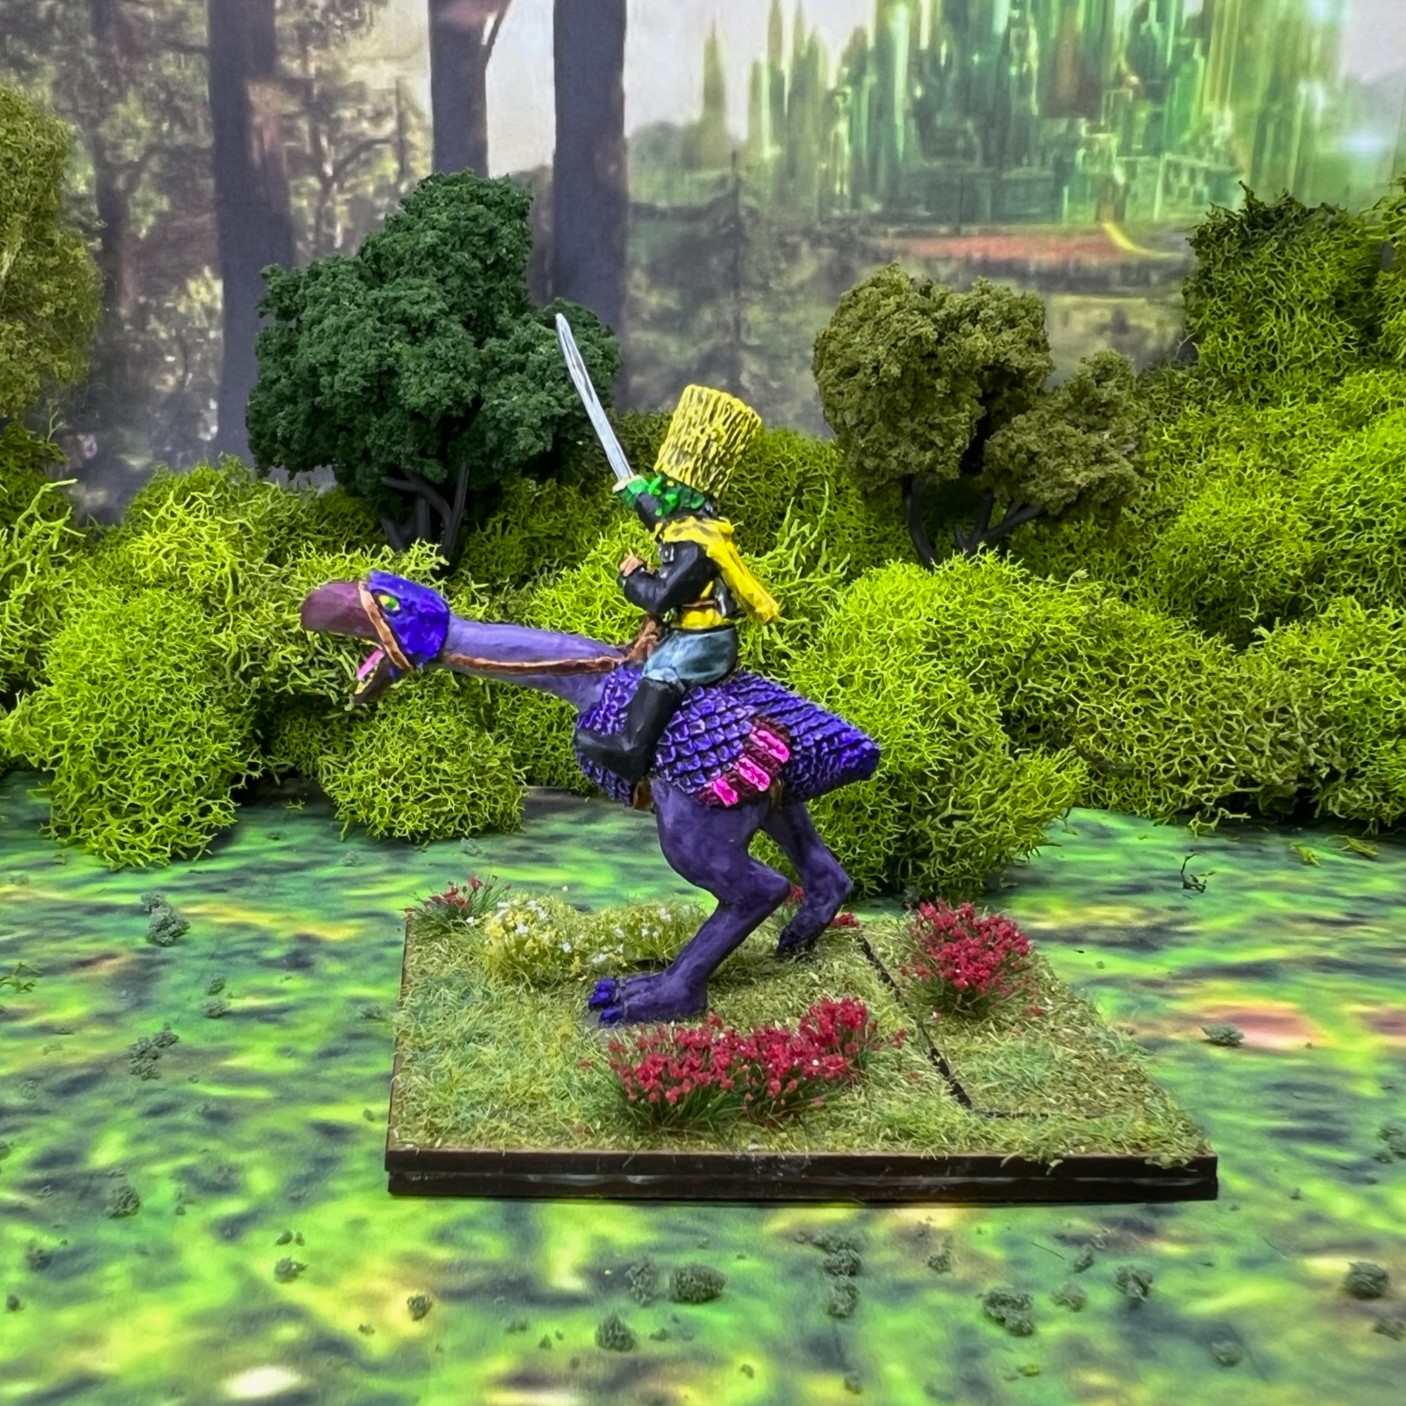
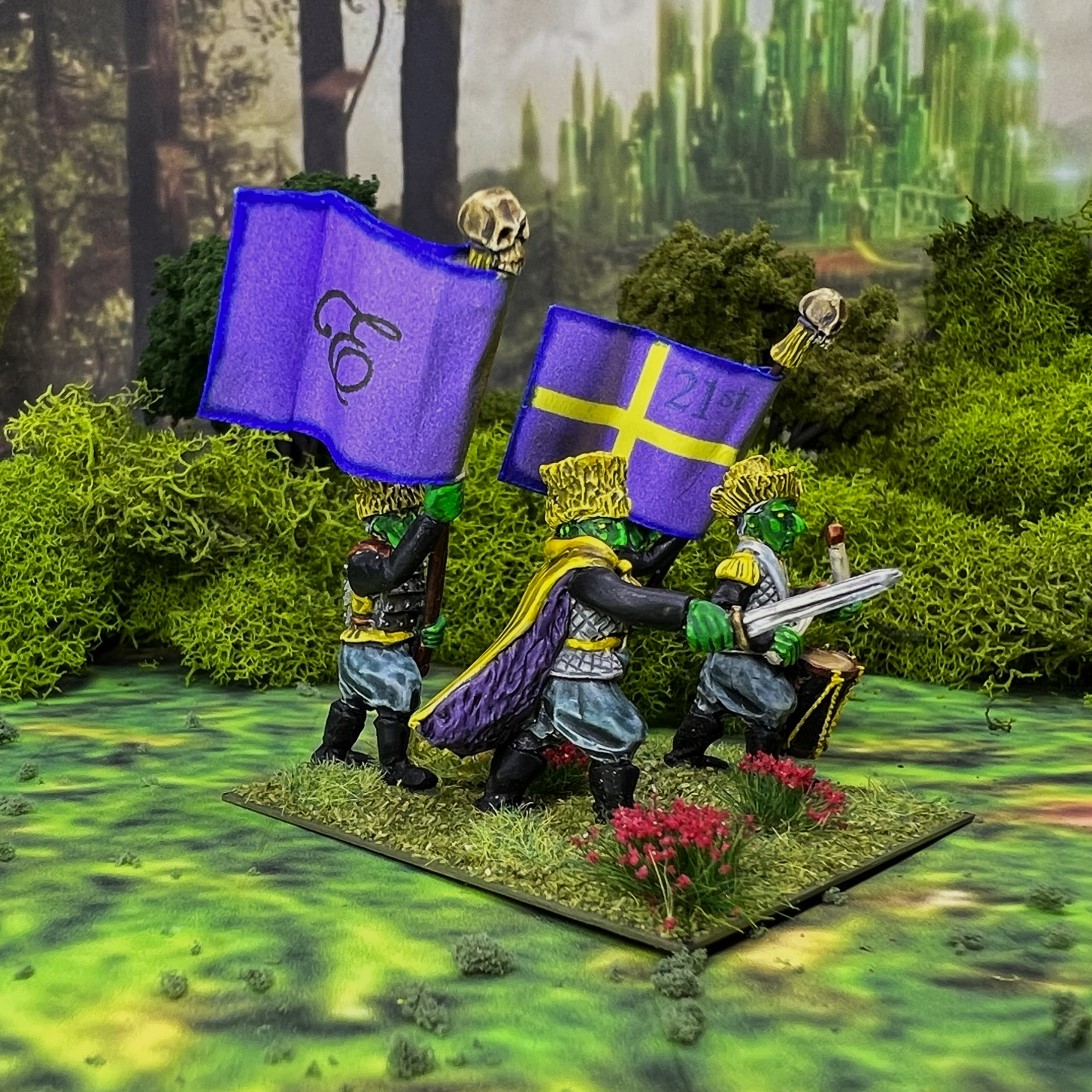
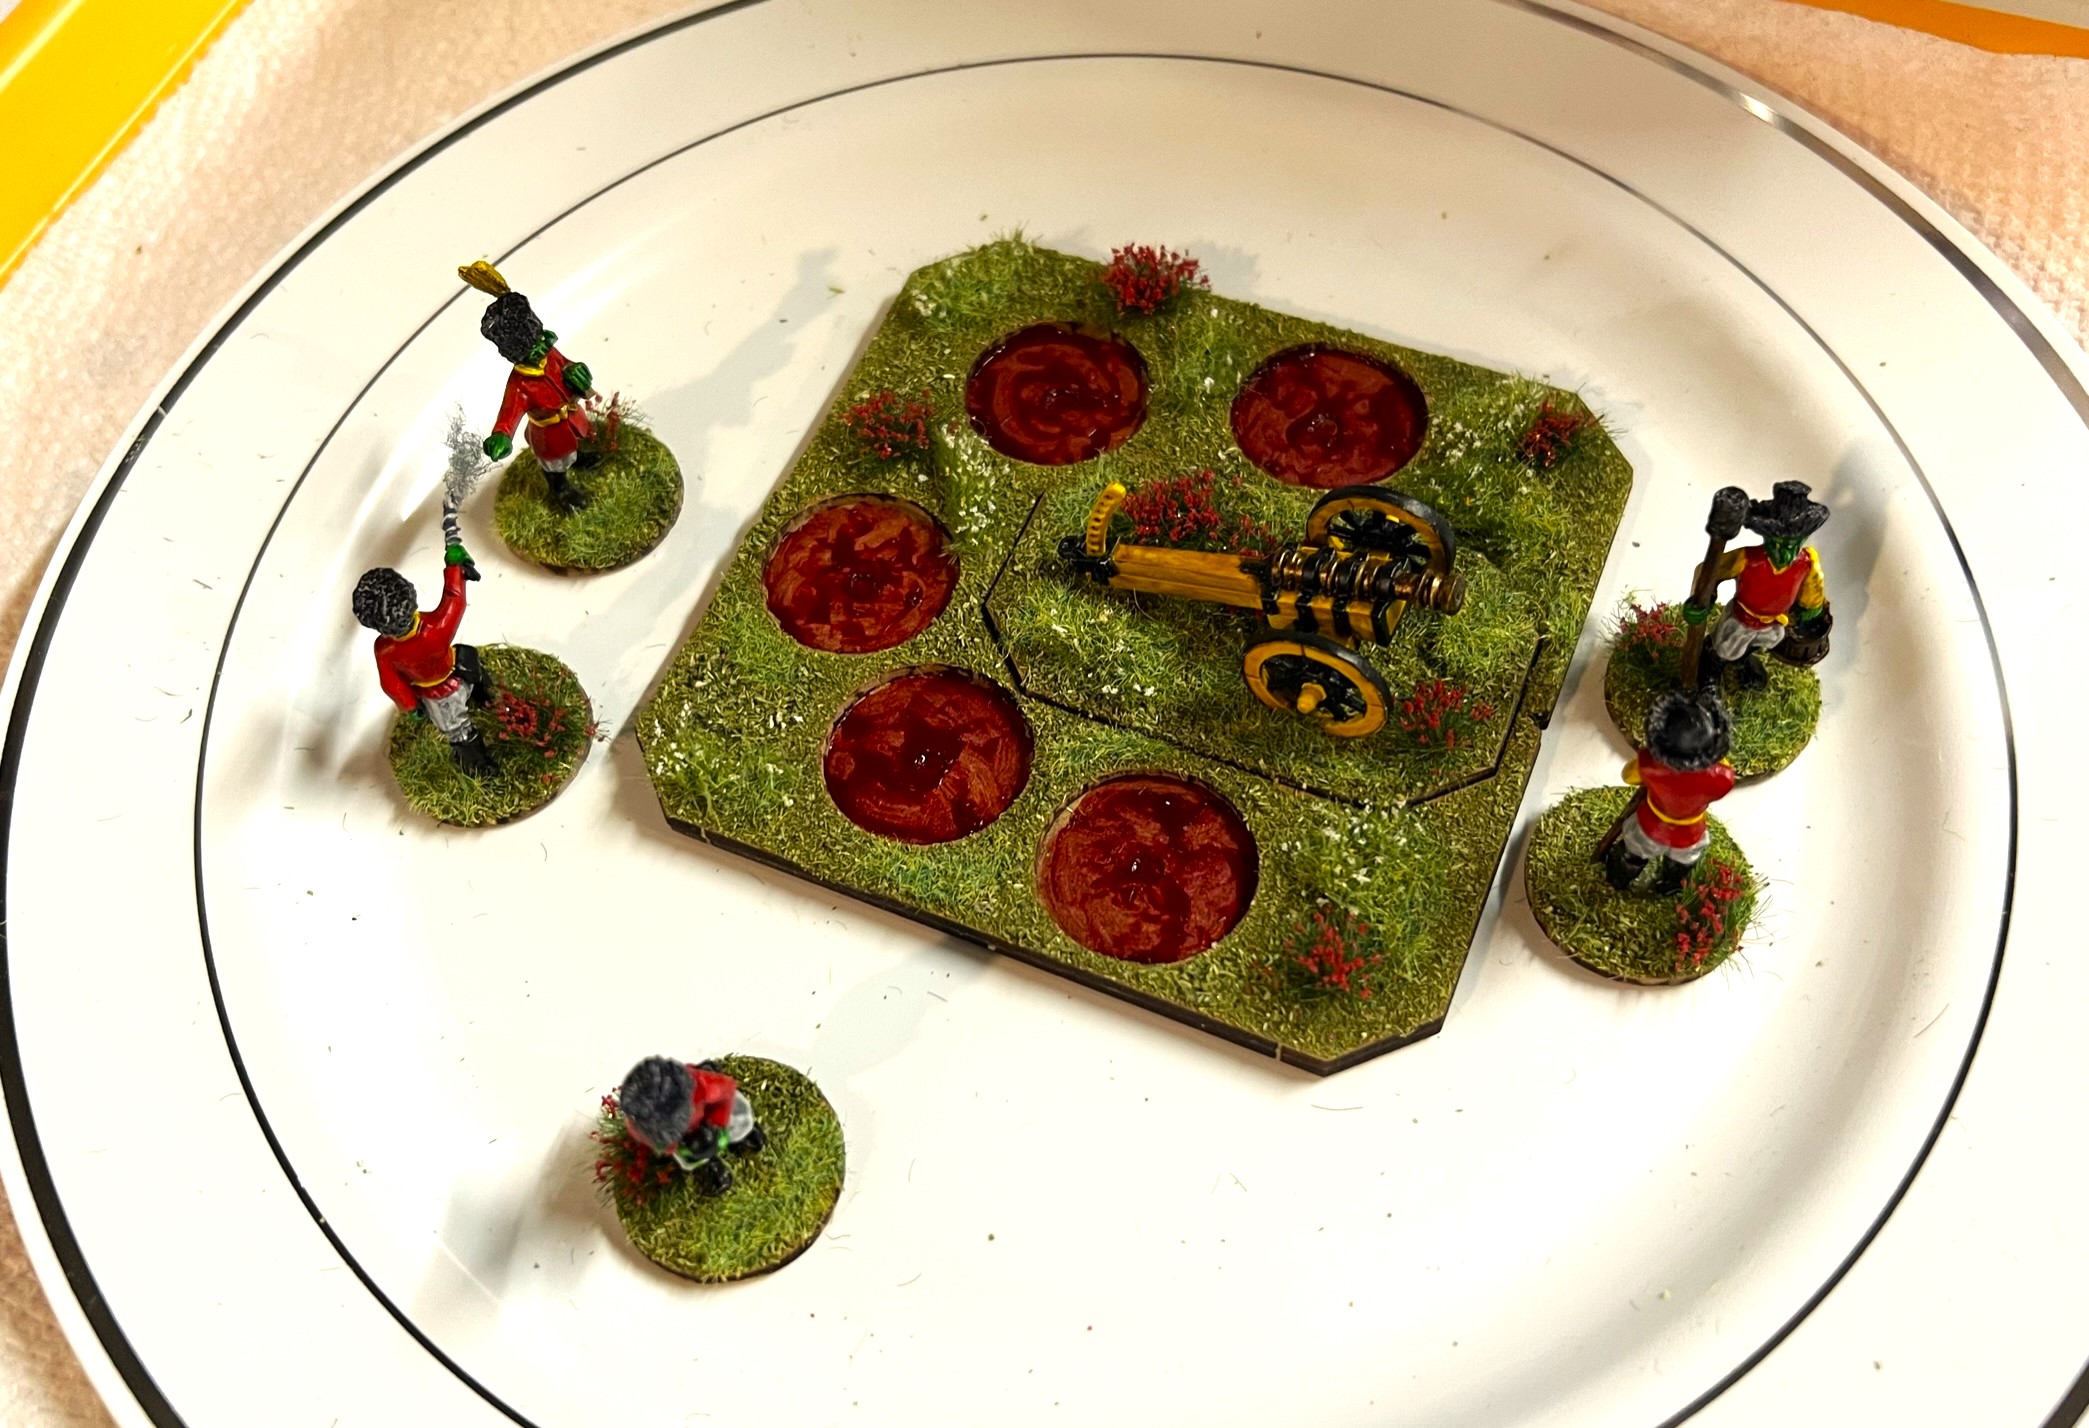
In the morning of January 20th – I was pleased to see the cart was securely affixed to the PS base. The MDF’s frames absorbency, especially for PVA, really helped with the fastening. I now needed to mount the crew – and affix the chains – but first I flocked the base so as to have better room to do that. I used both yellow and purple flowers to represent the Winkies and Gillikins respectively. I also used a variety of green and tan tufts to create a field-like look. Then, I was able to meticulously affix two skeletons at a time and then their chains. I secured the chains to the skeletons’ little hand holes with Gorilla Glue applied by a toothpick. I later covered up the shiny dried glue with rust or paint so it would not detract from the model’s aesthetics.

Mounting the skeletons.
How I serially mounted the skeletons and their chains. Doing two at a time gave me much more flexibility in this process.

And yes, I finished this bad boy on January 20th!

Success!
Skeleton-level view.

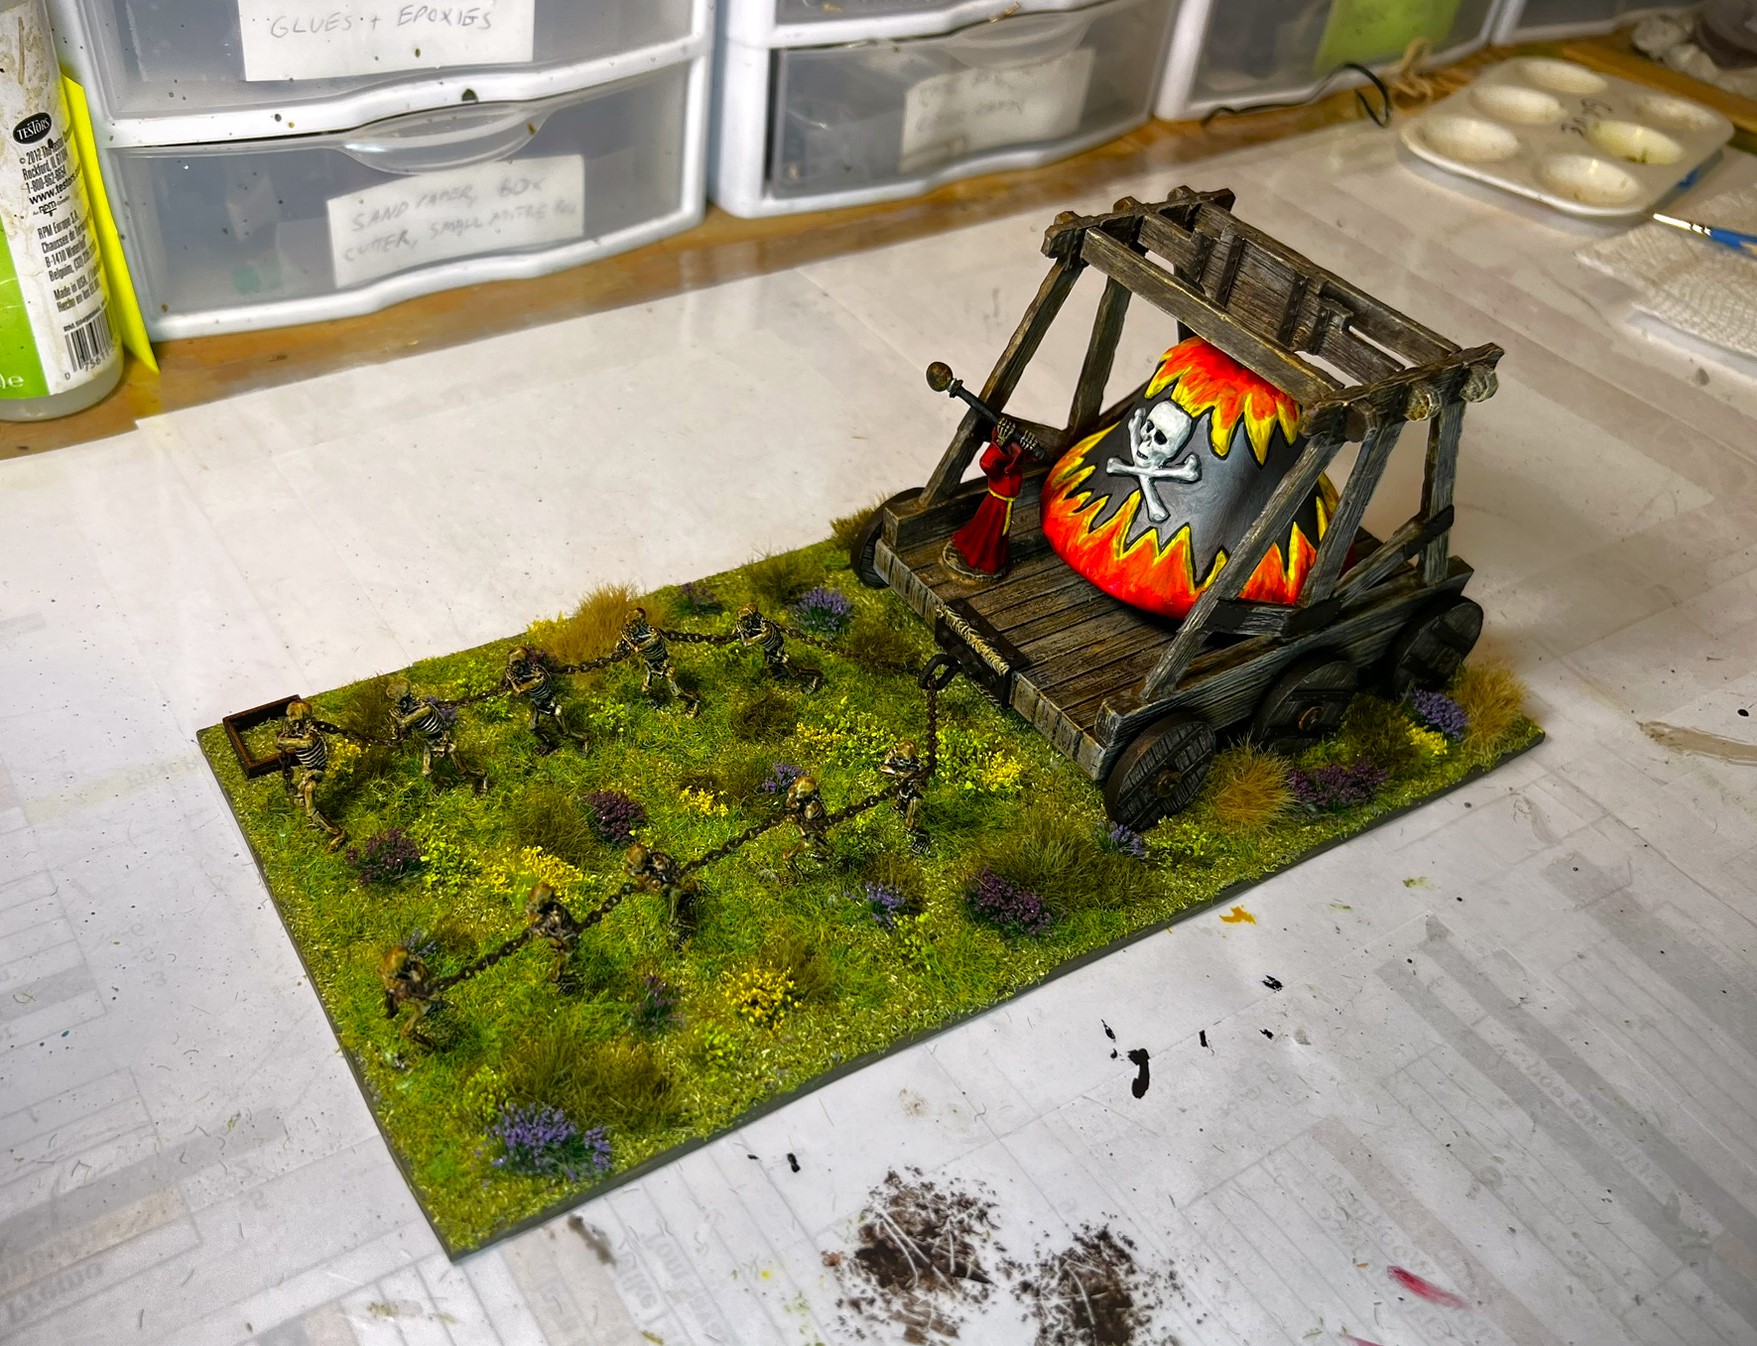
The model is relatively heavy at 1.3665 pounds!

While the cart, the Bell, and the base are not metal – the supports are!

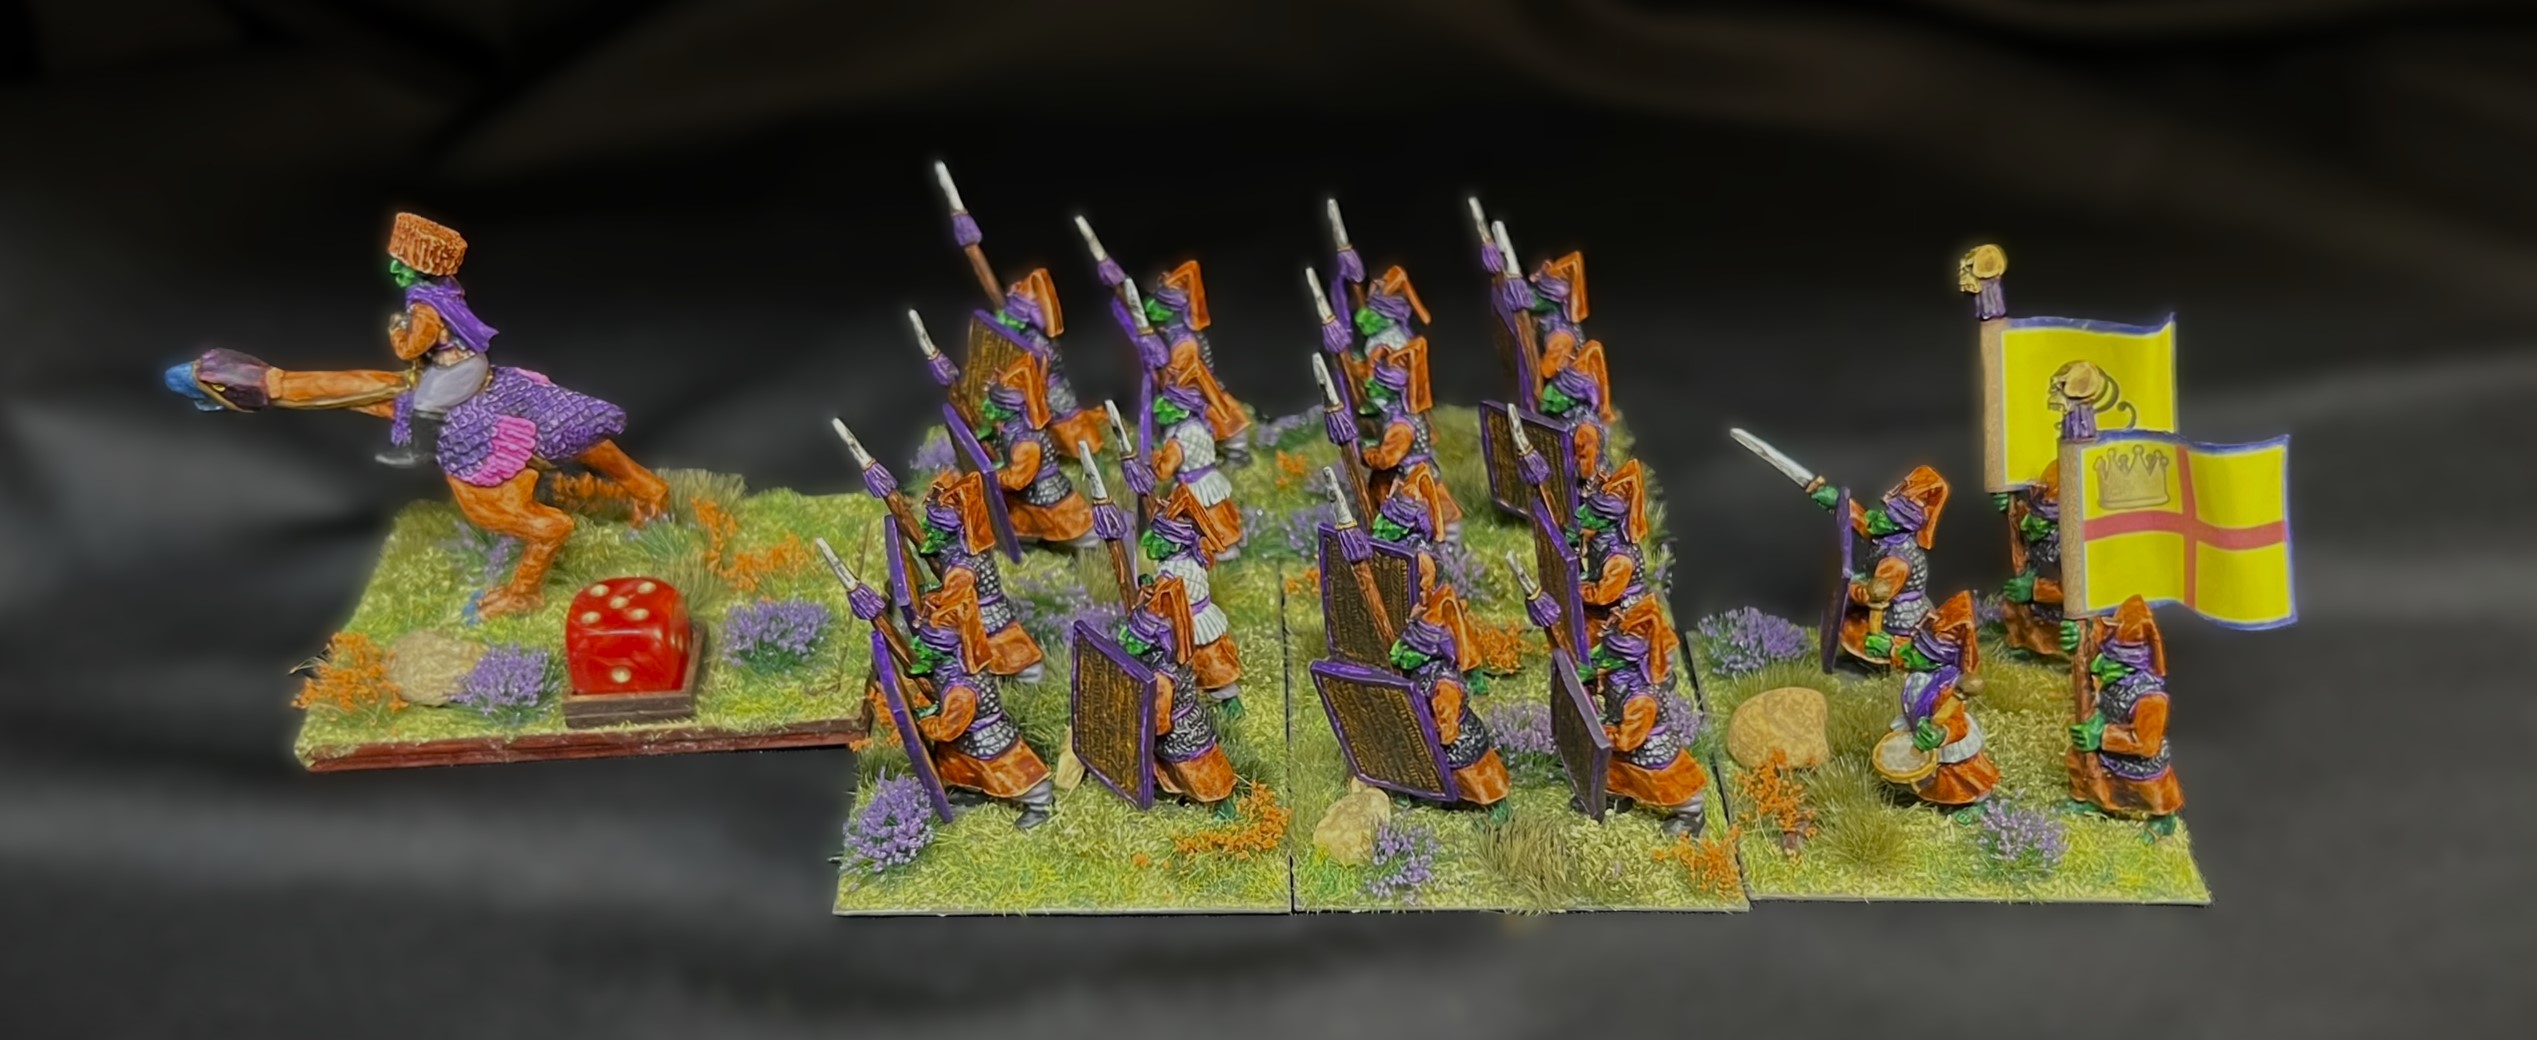
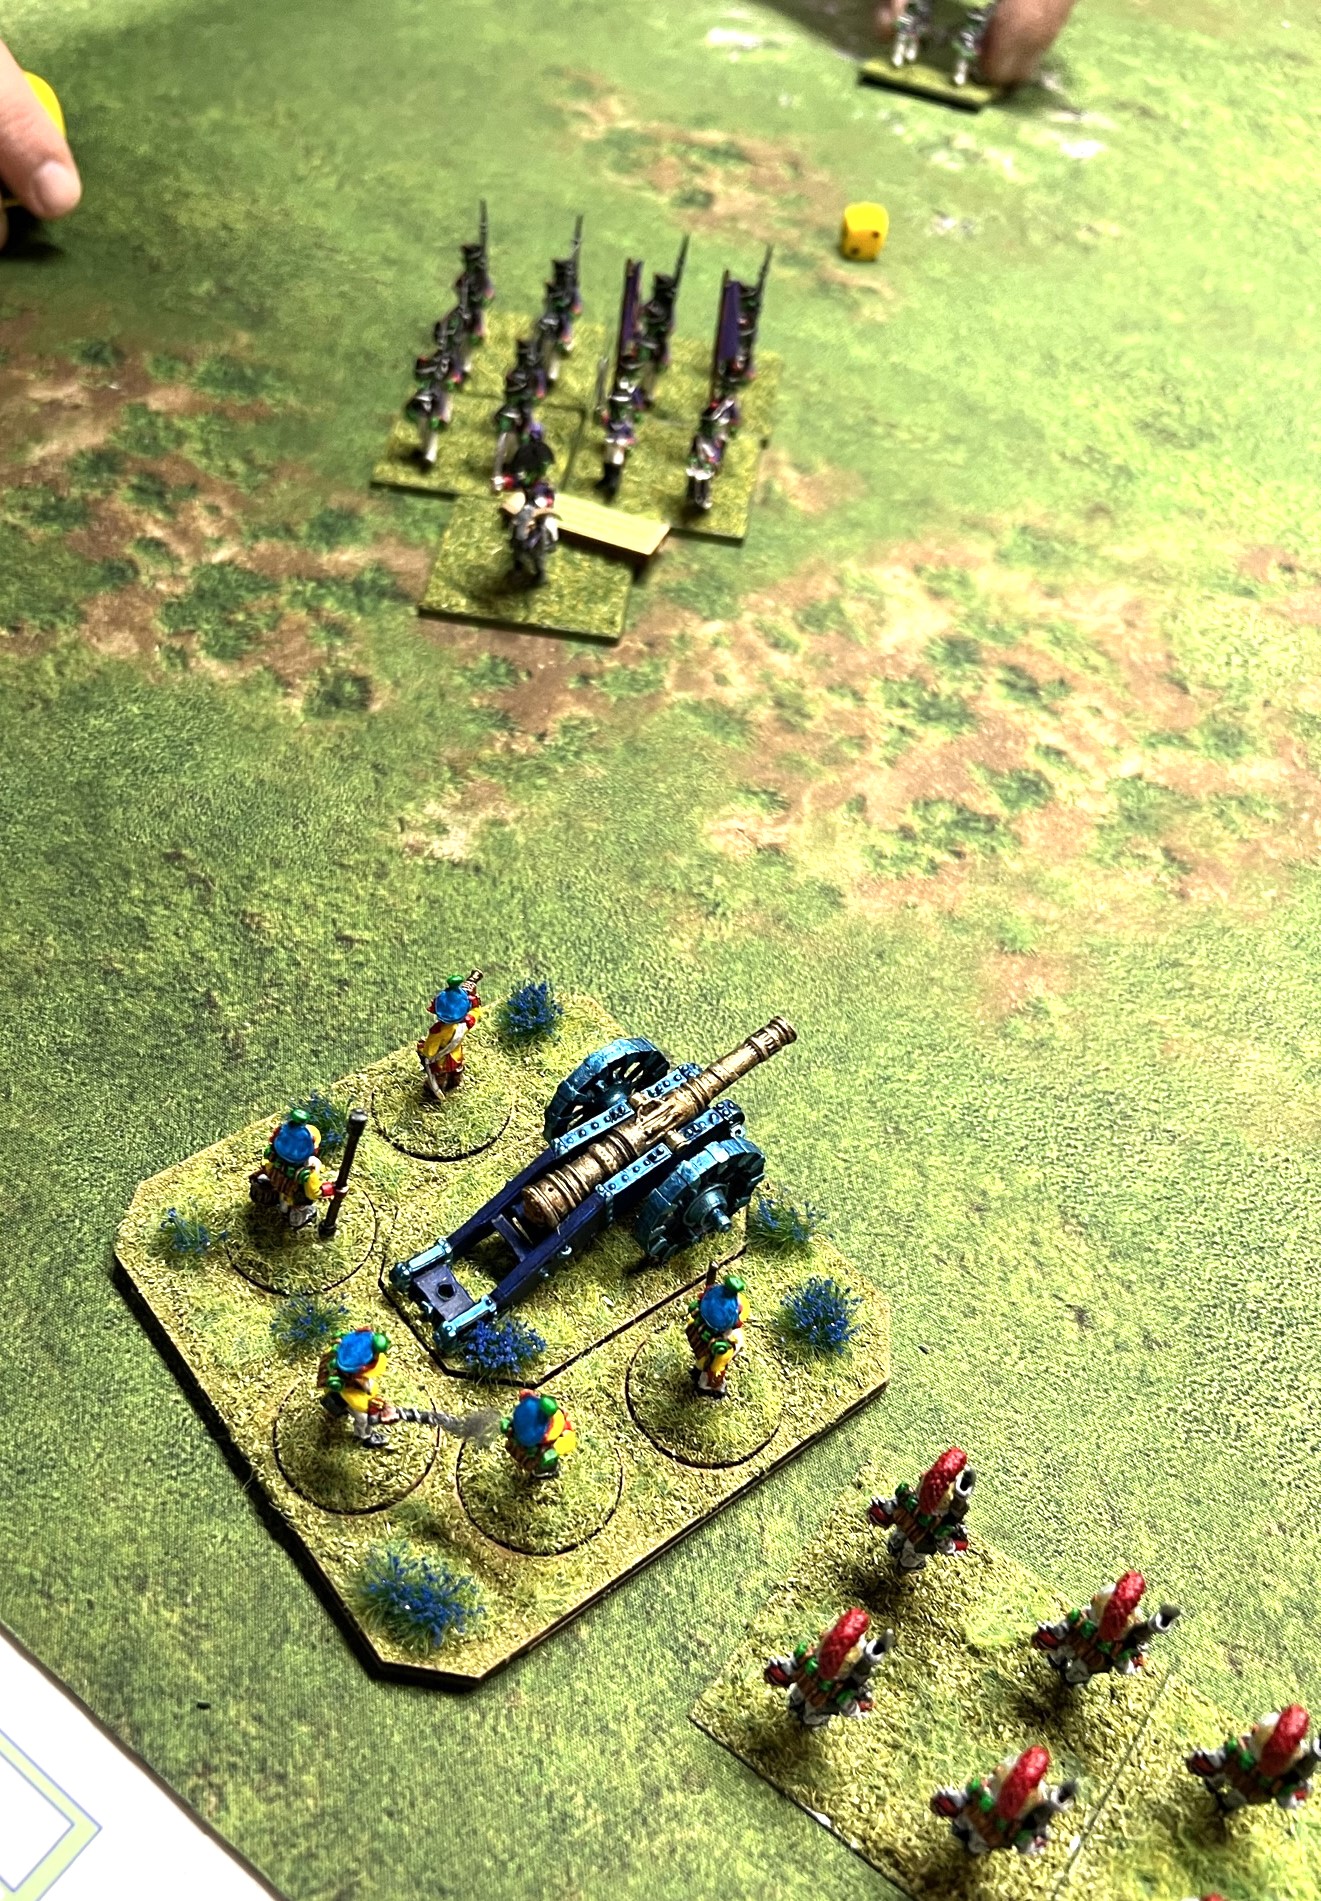
Finishing this was gratifying to say the least – now for some Summoning Bell…
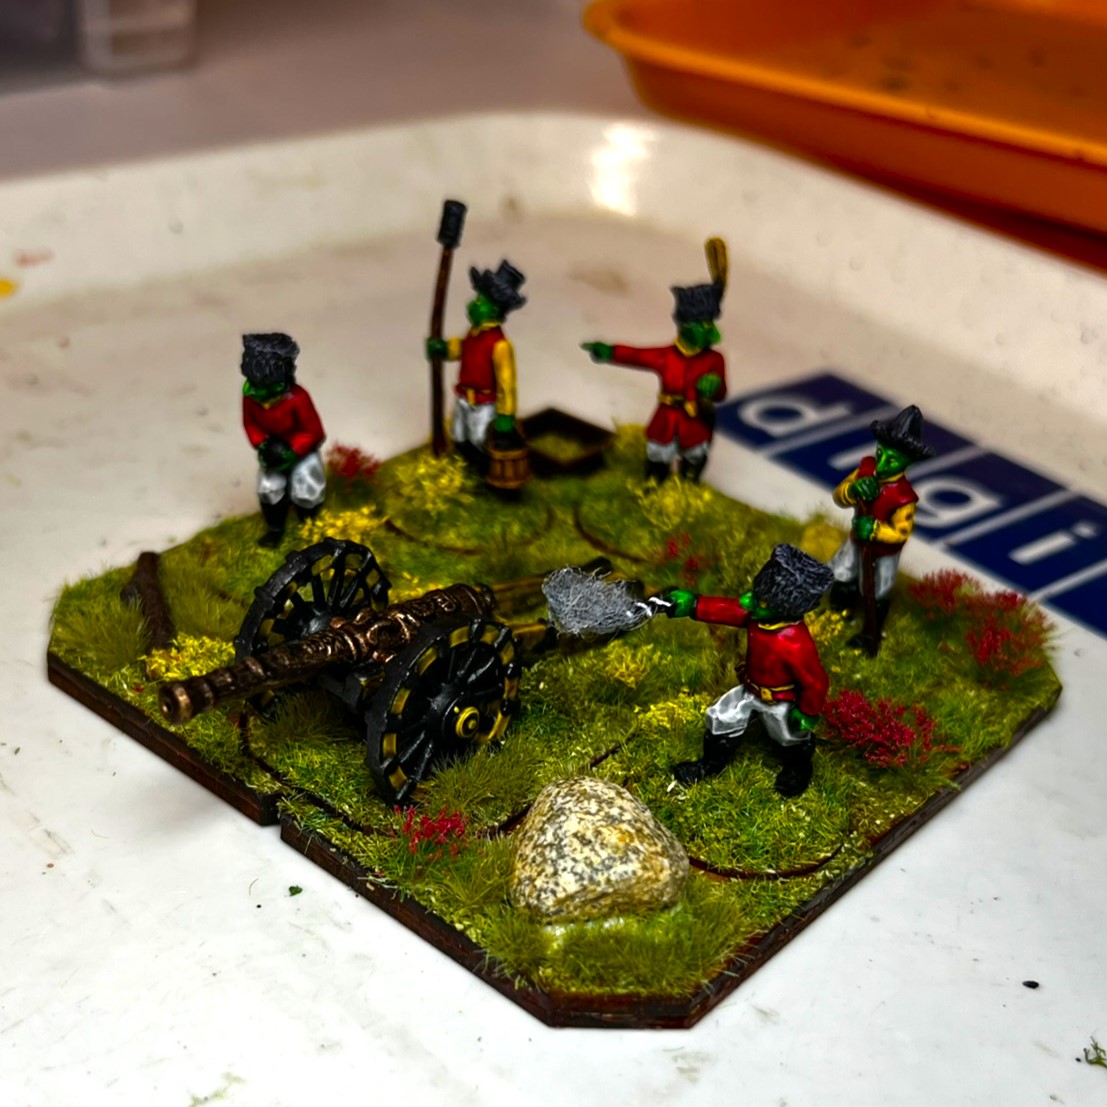
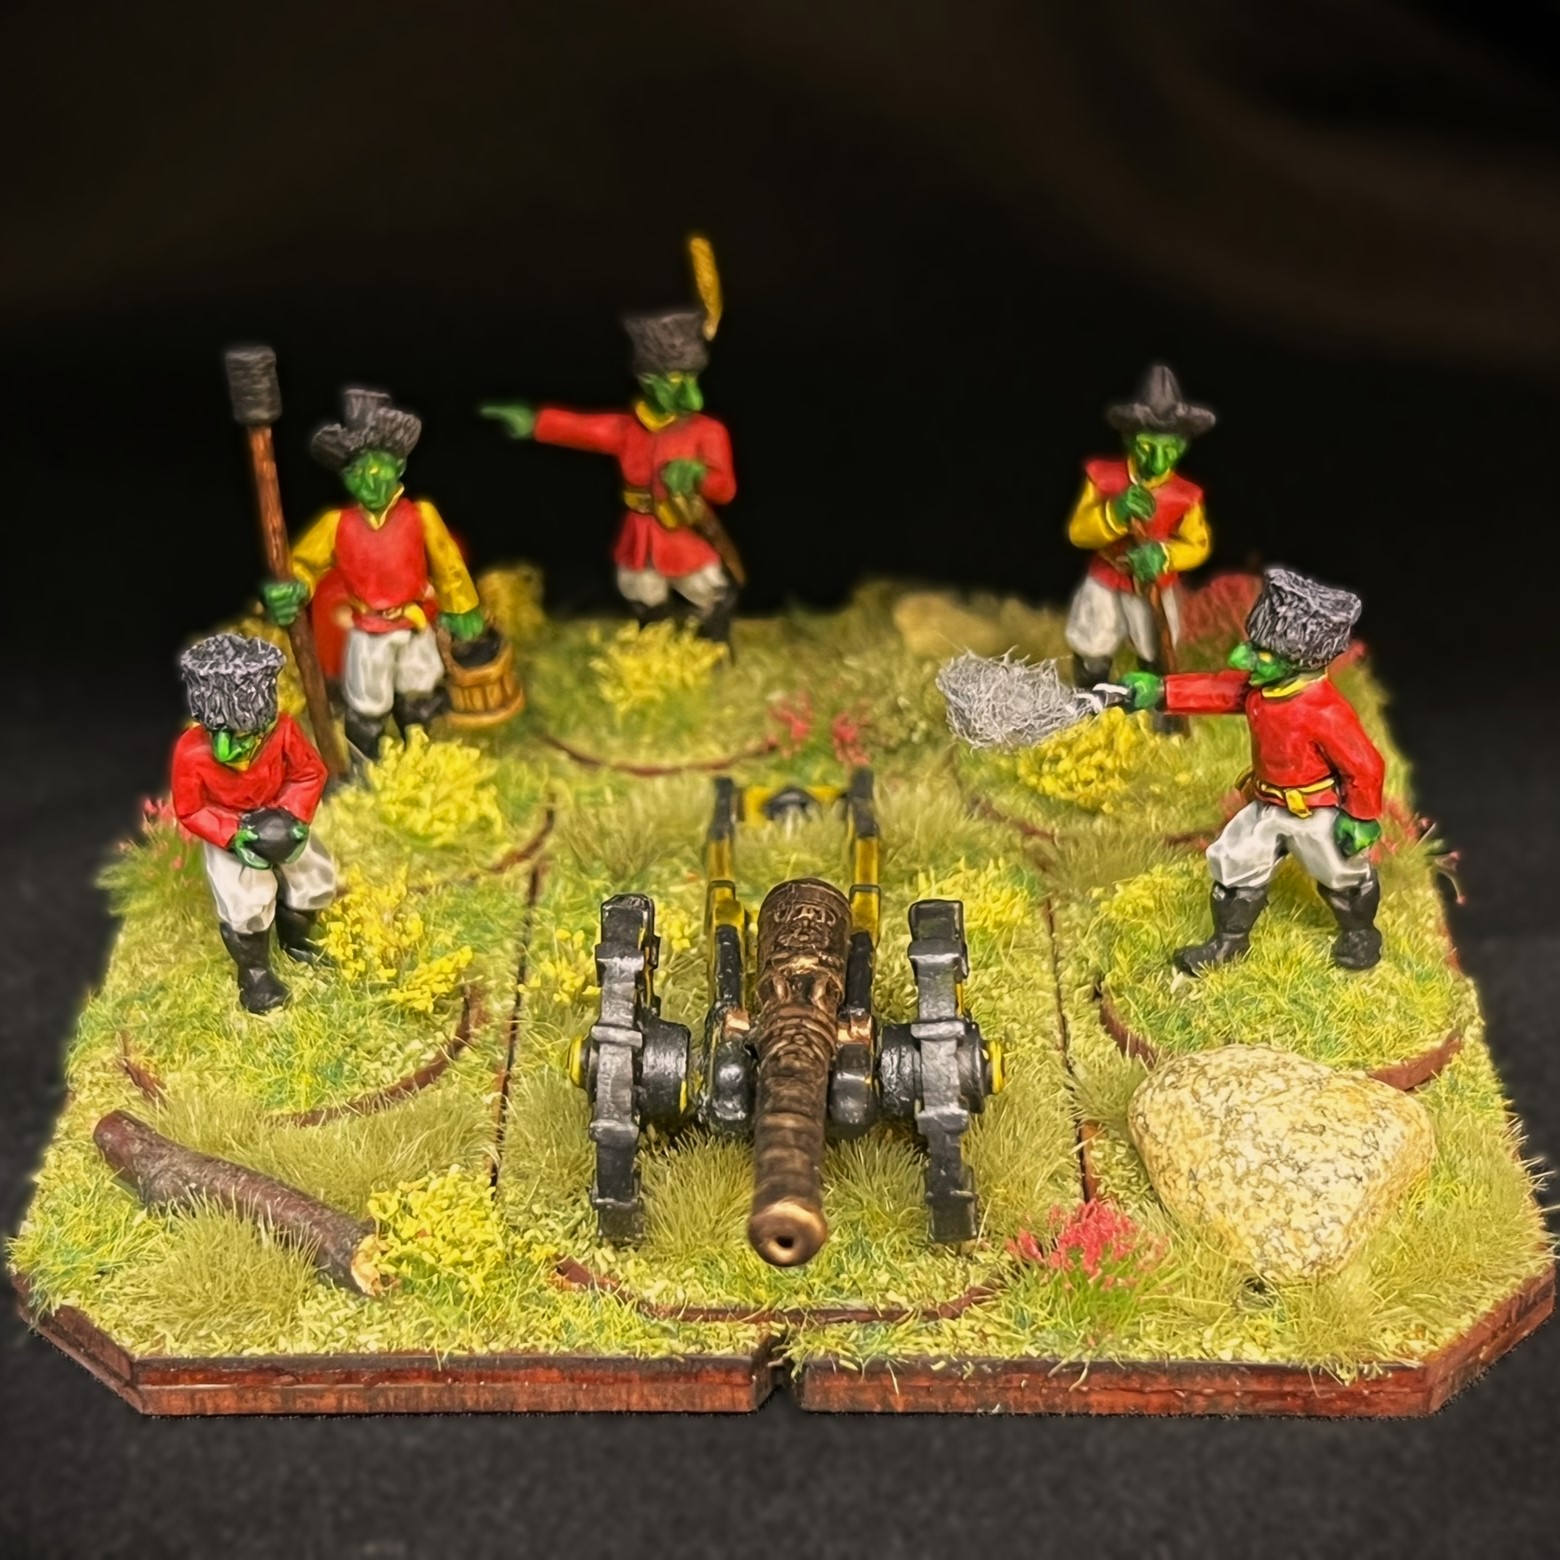
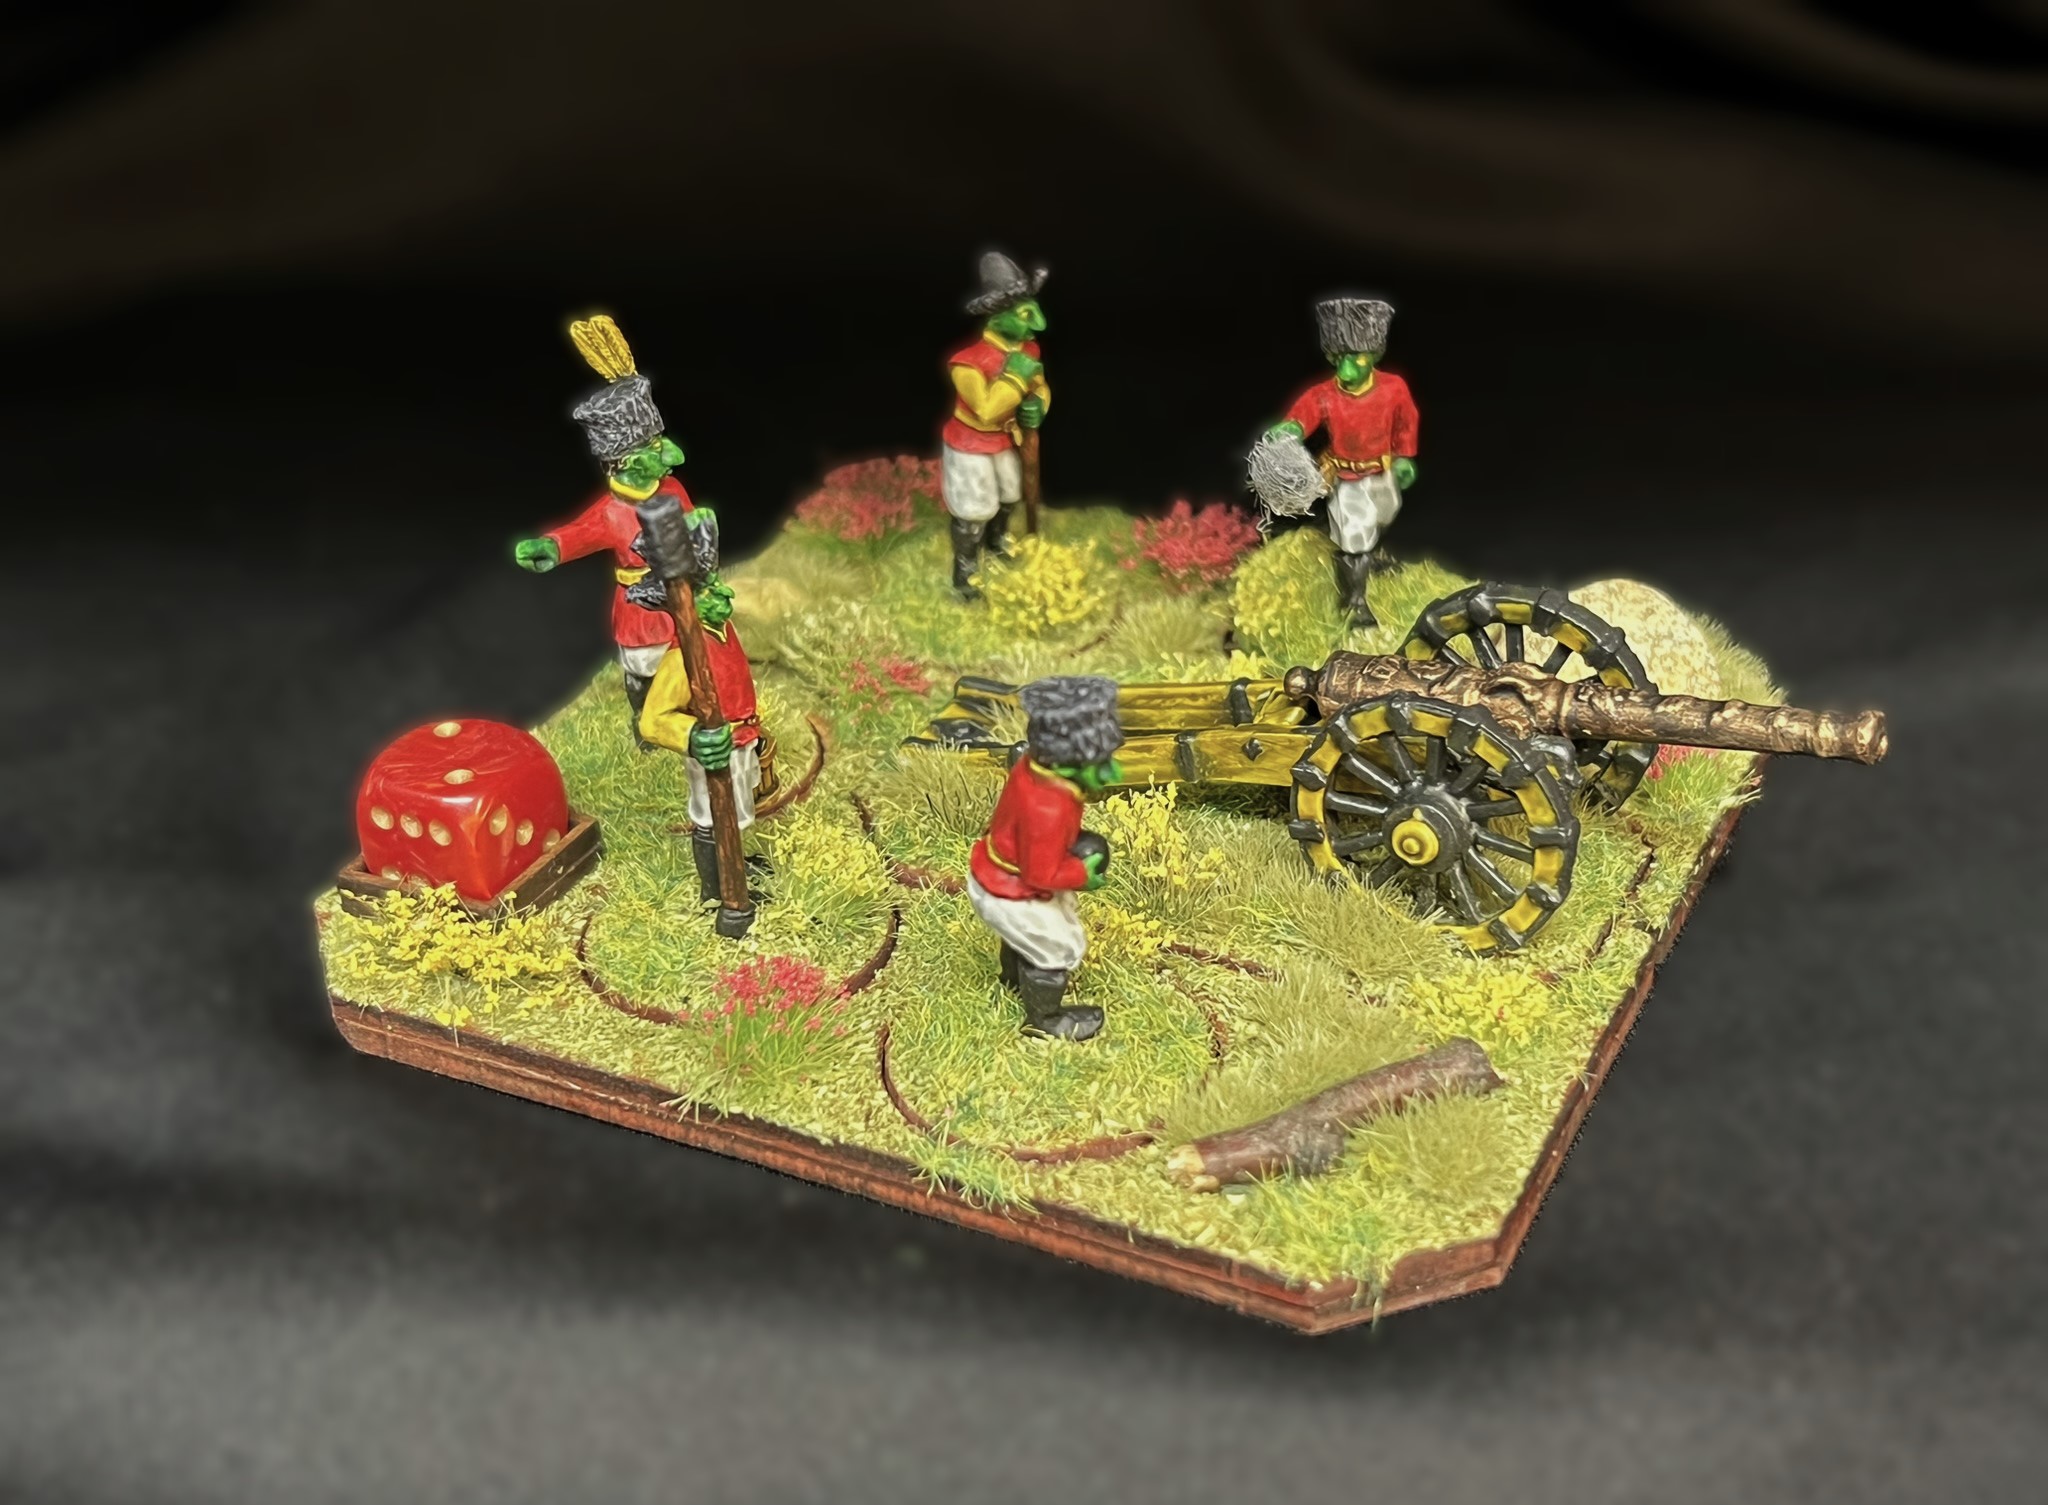
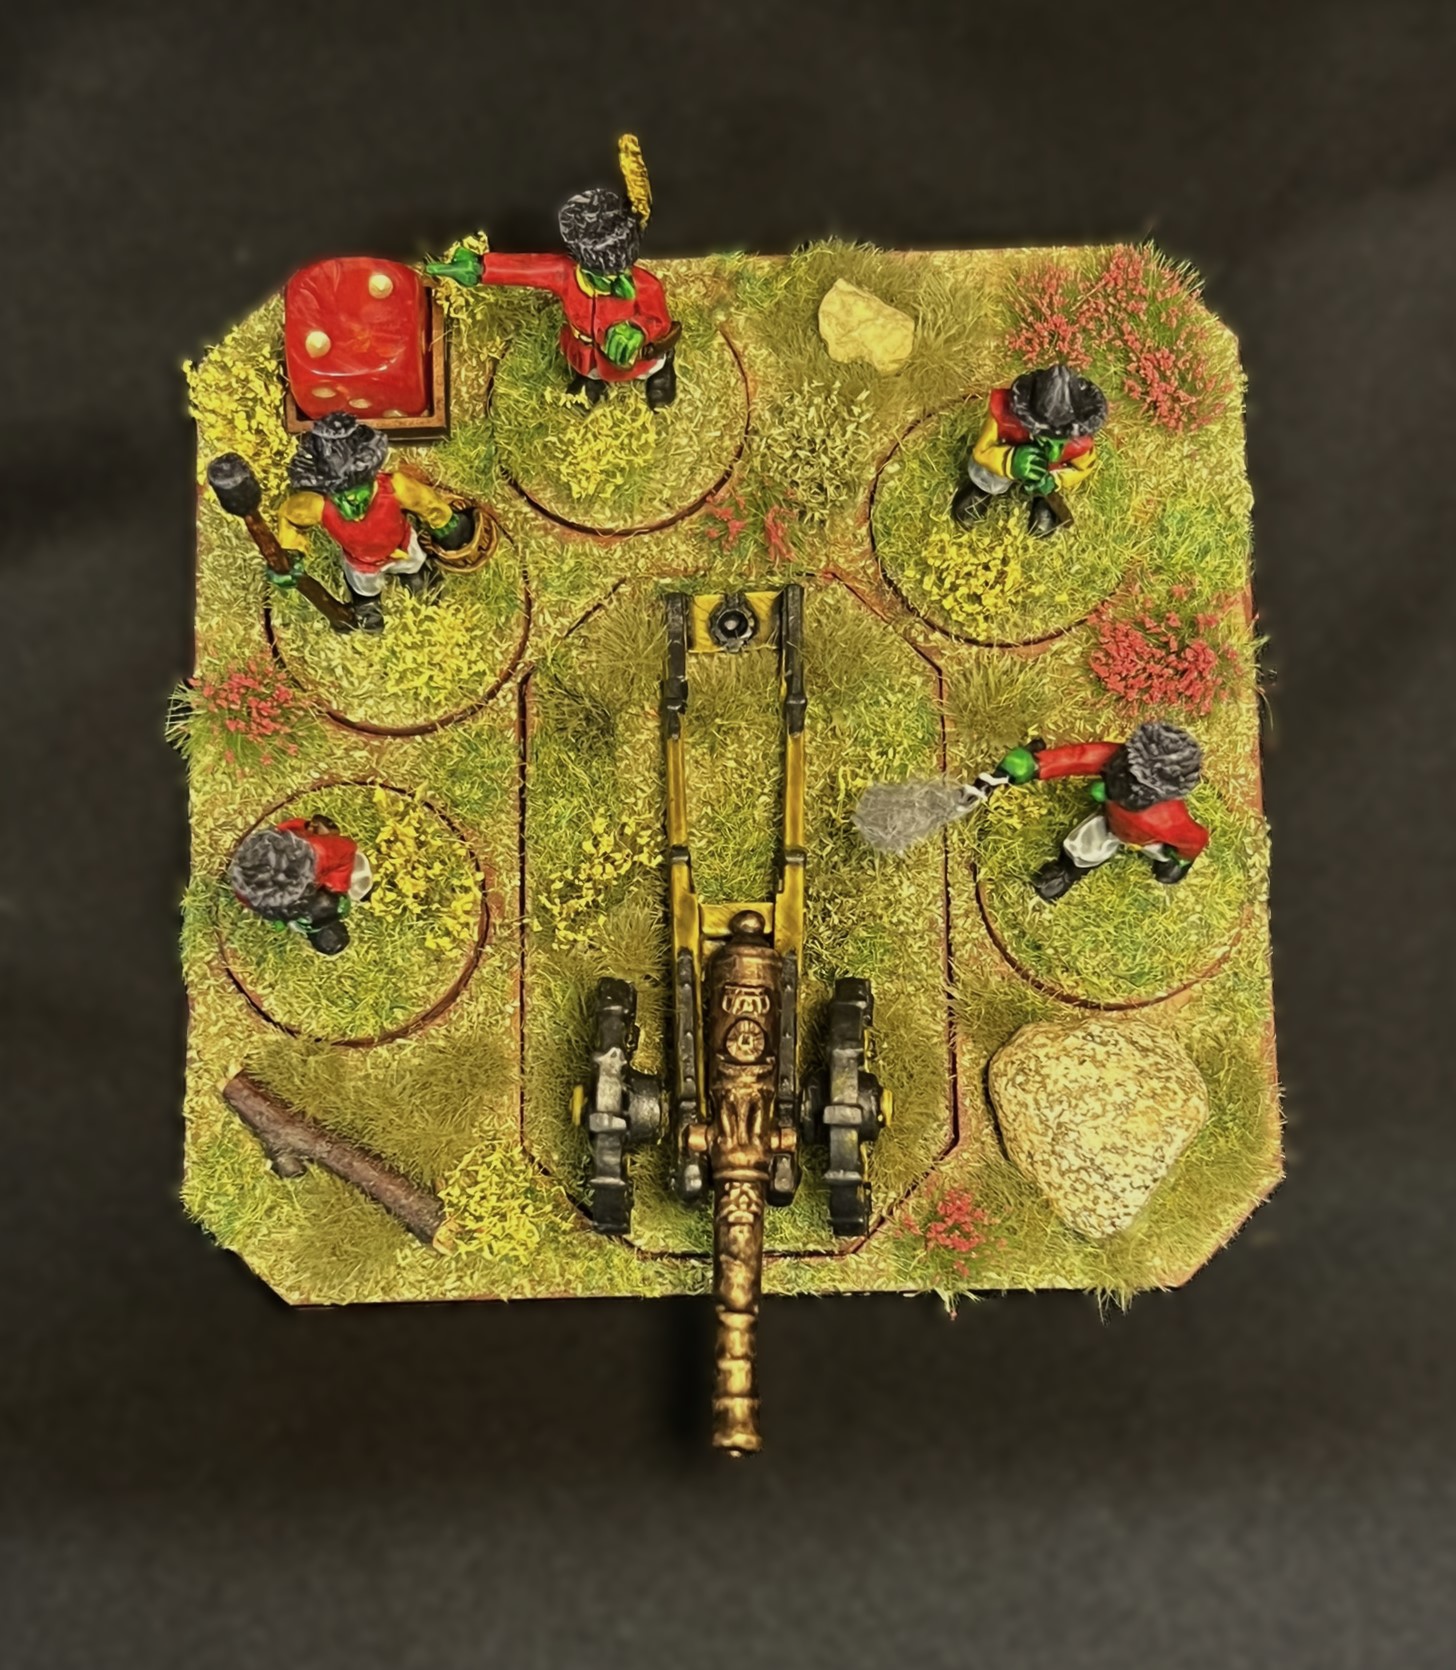
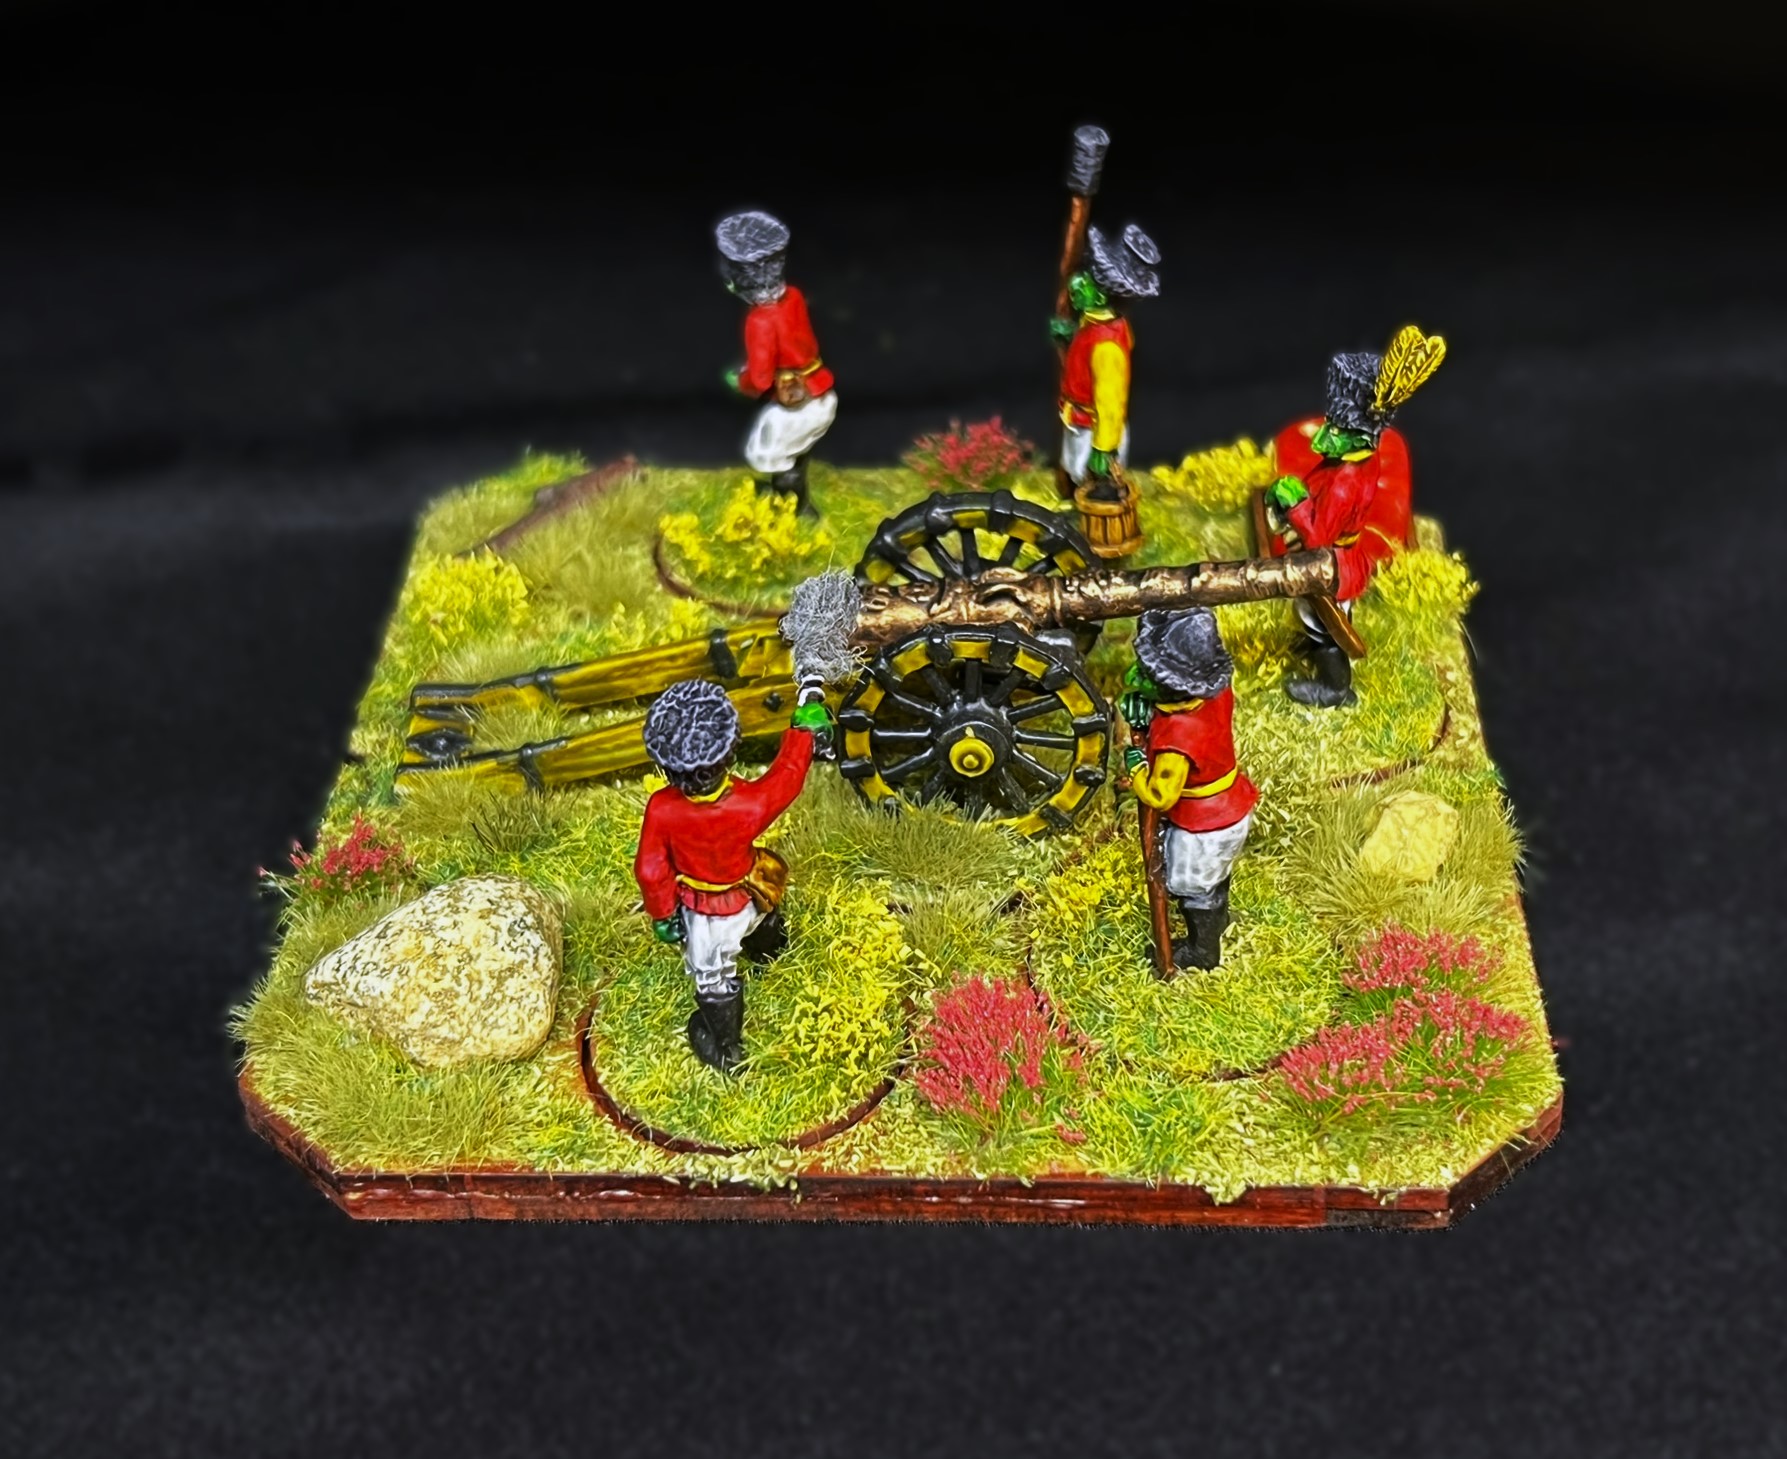
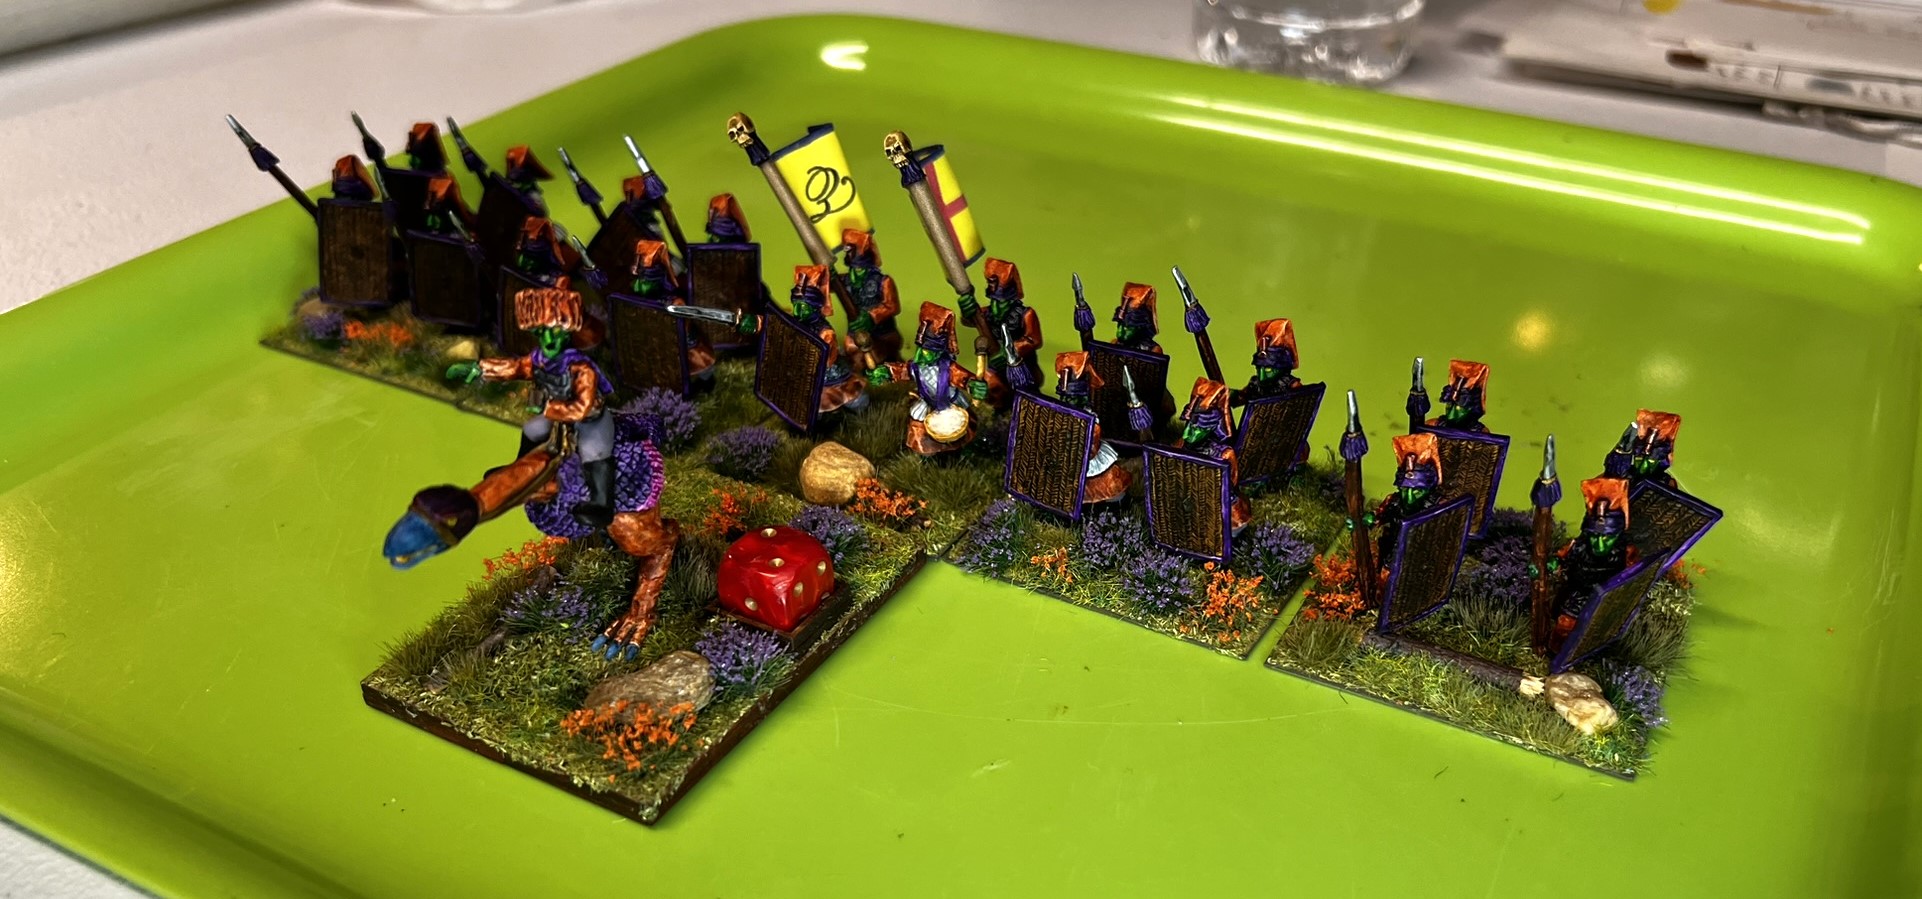
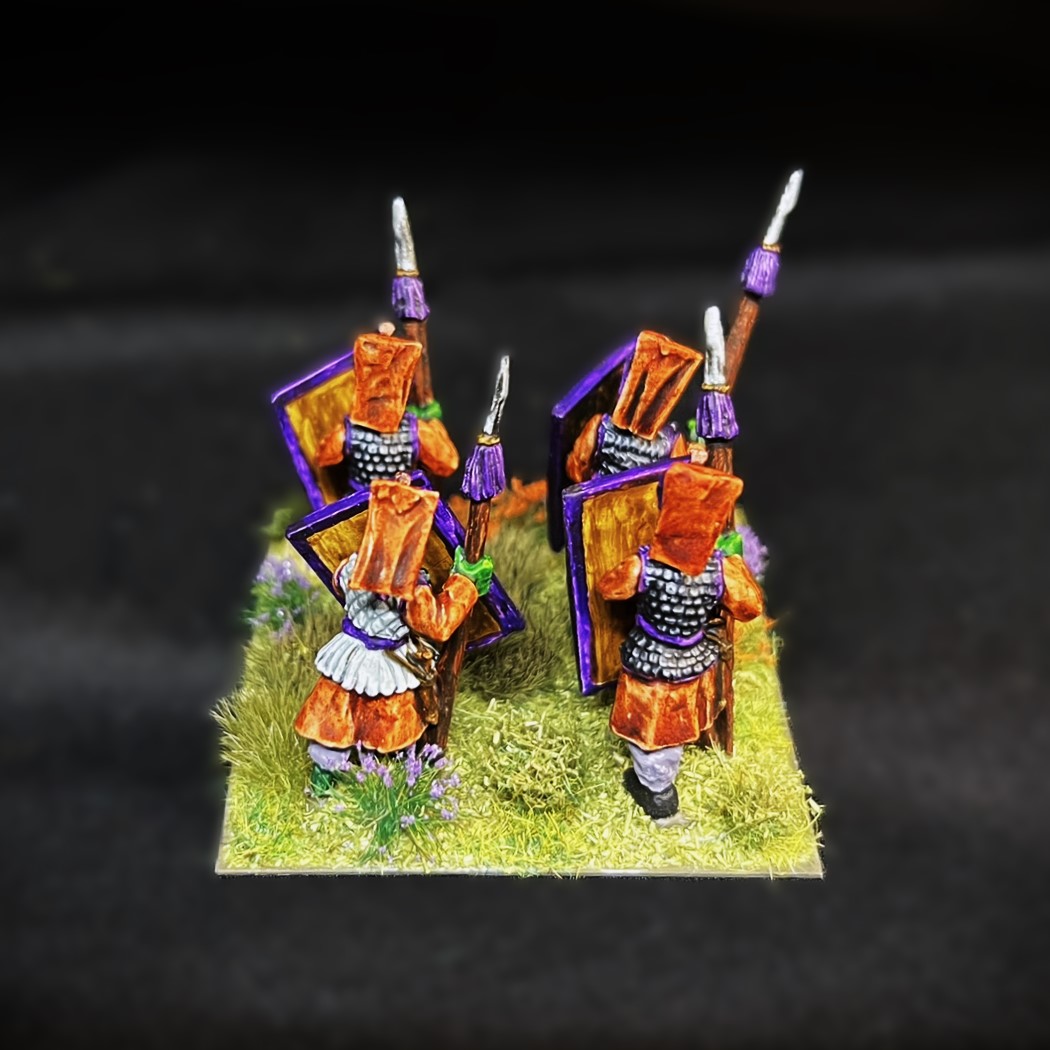
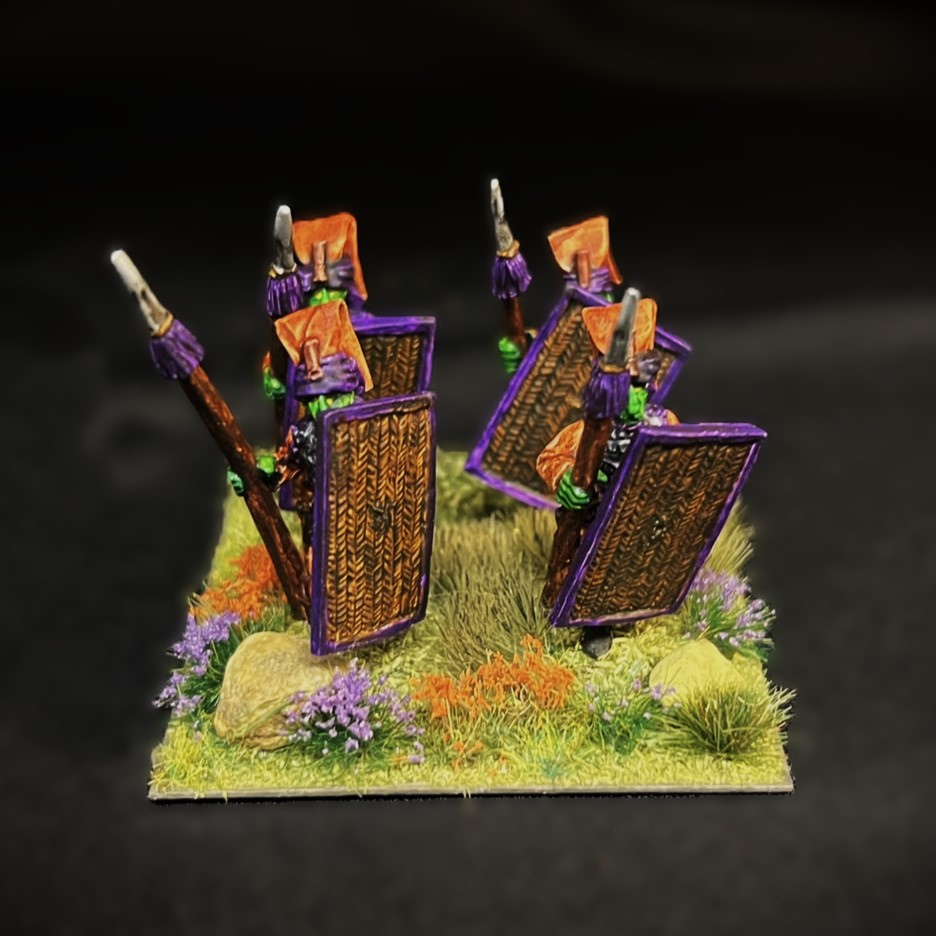
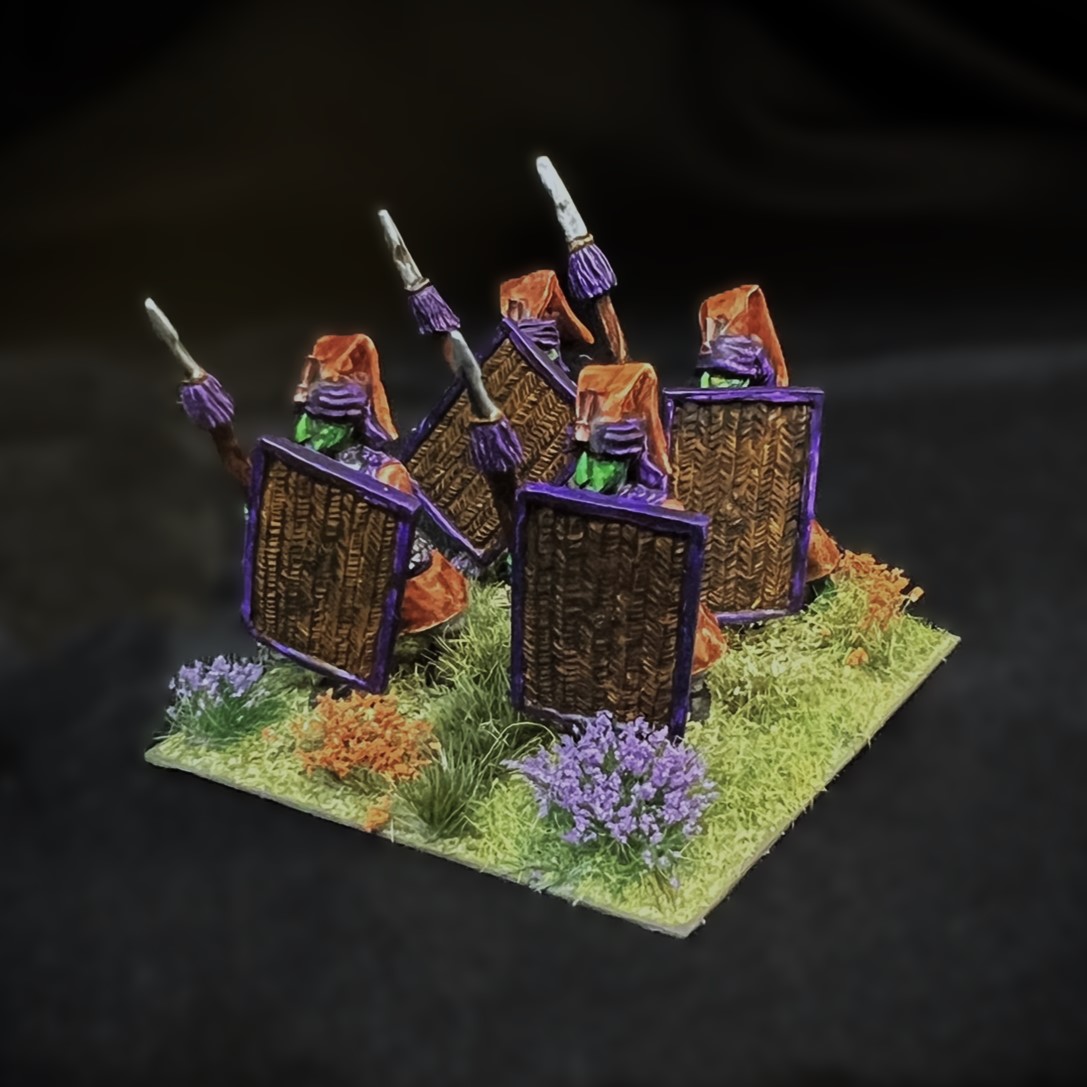
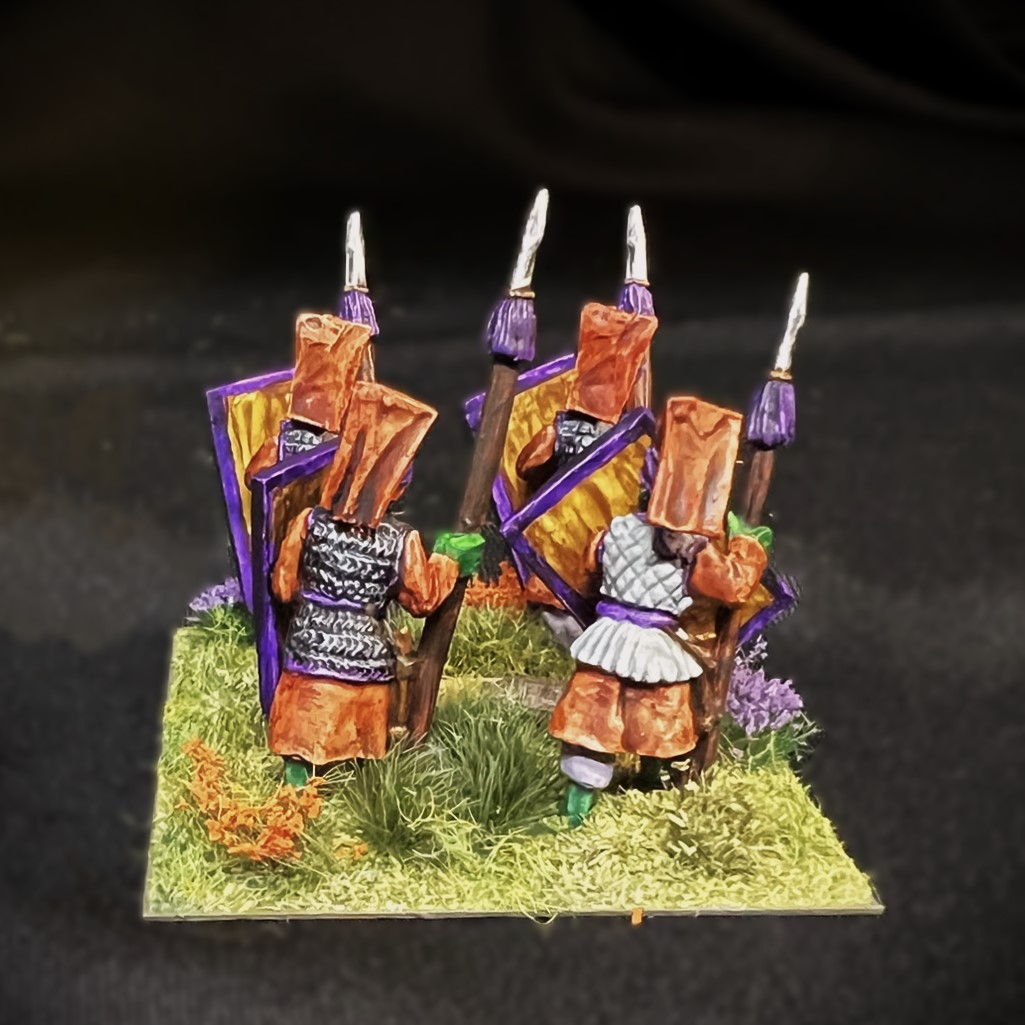
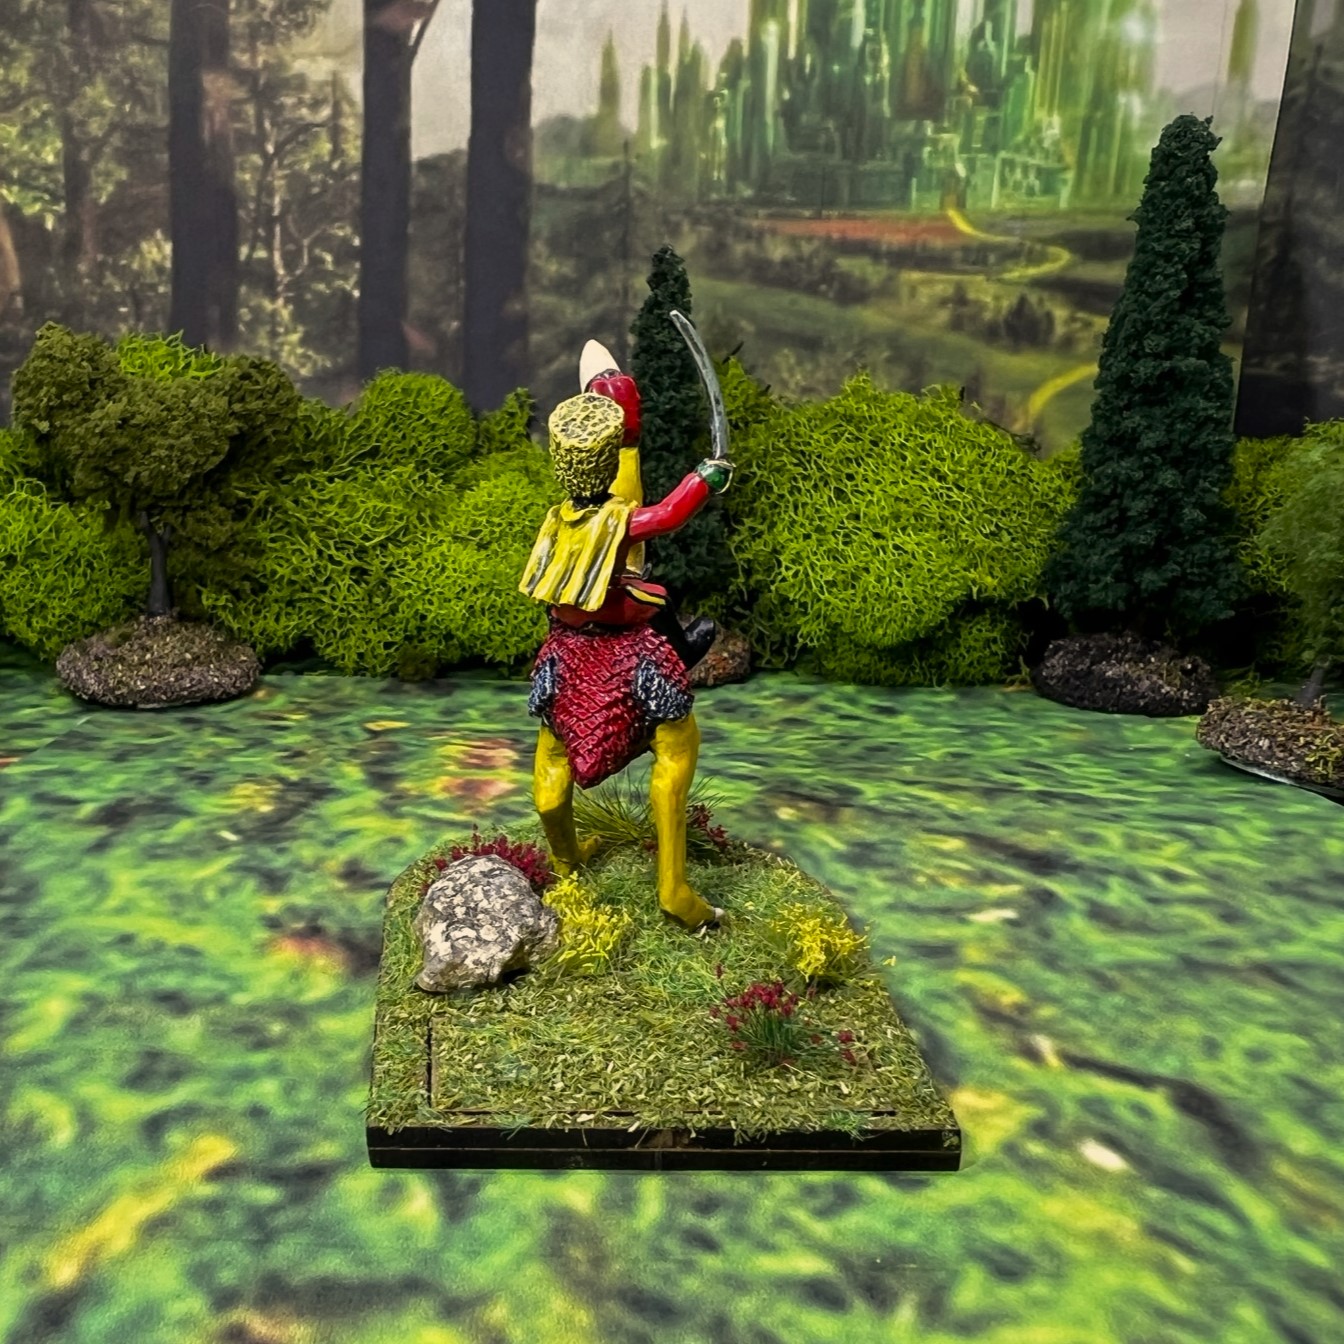
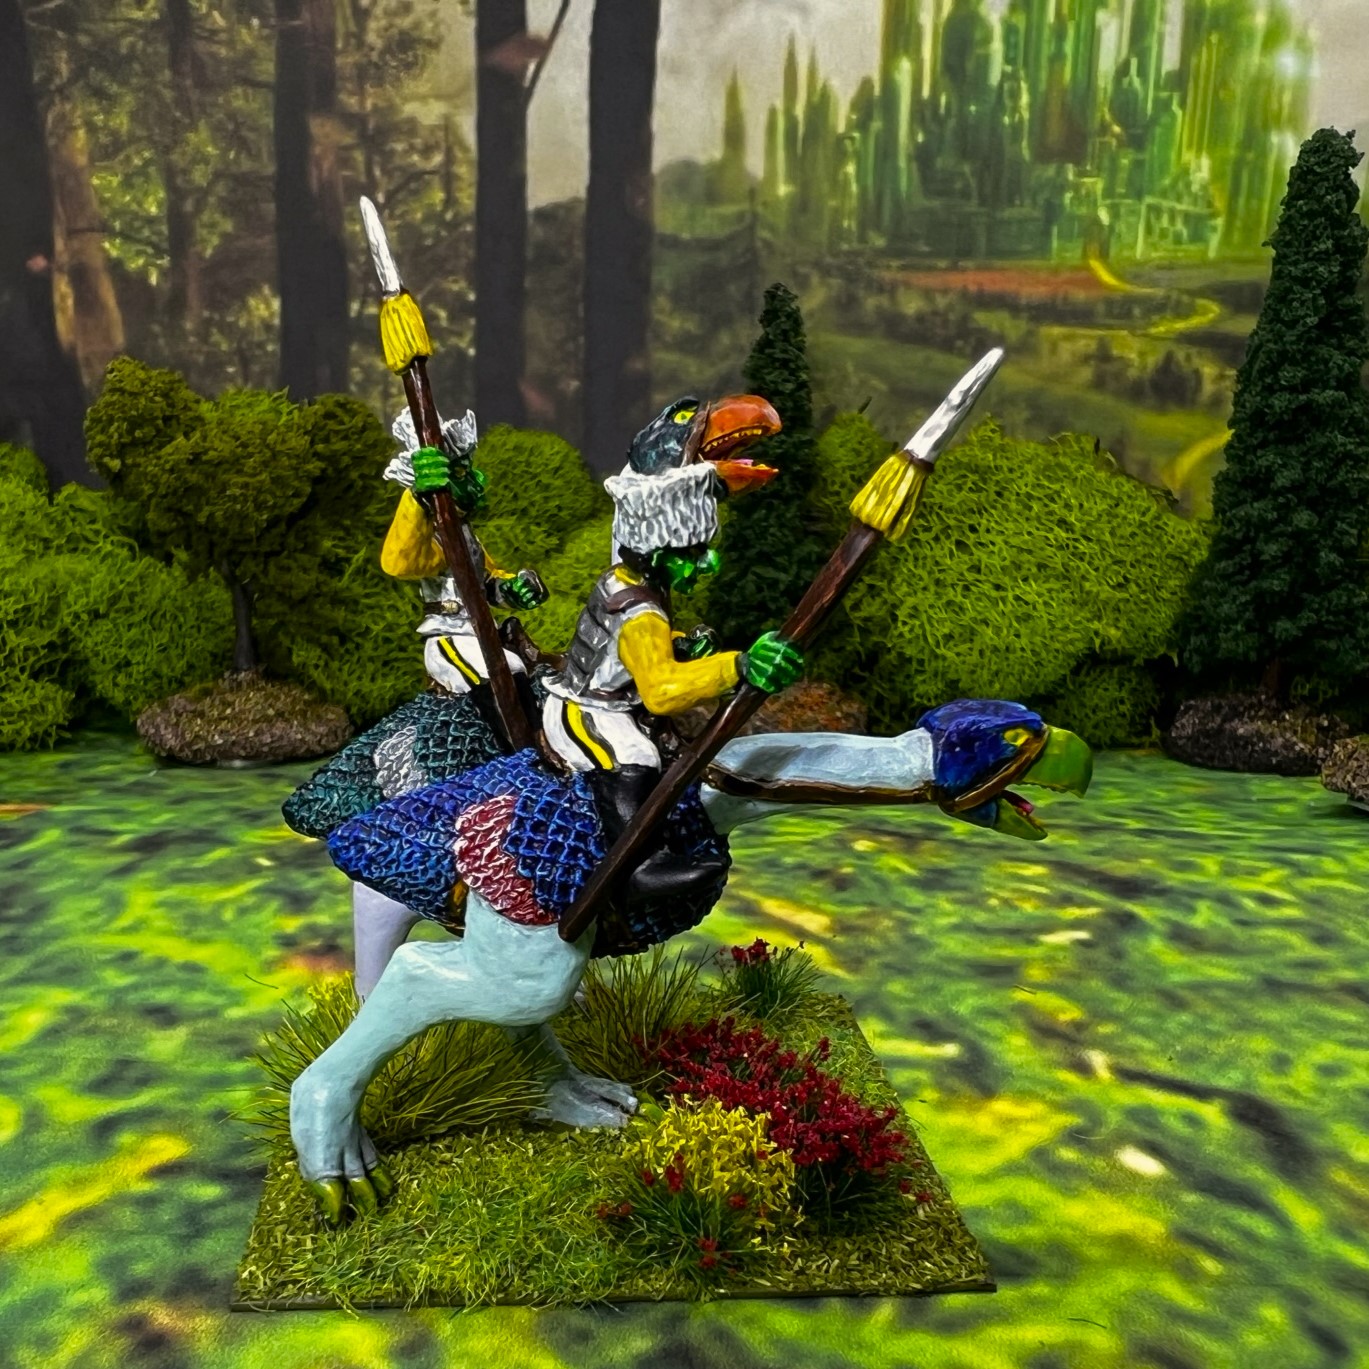
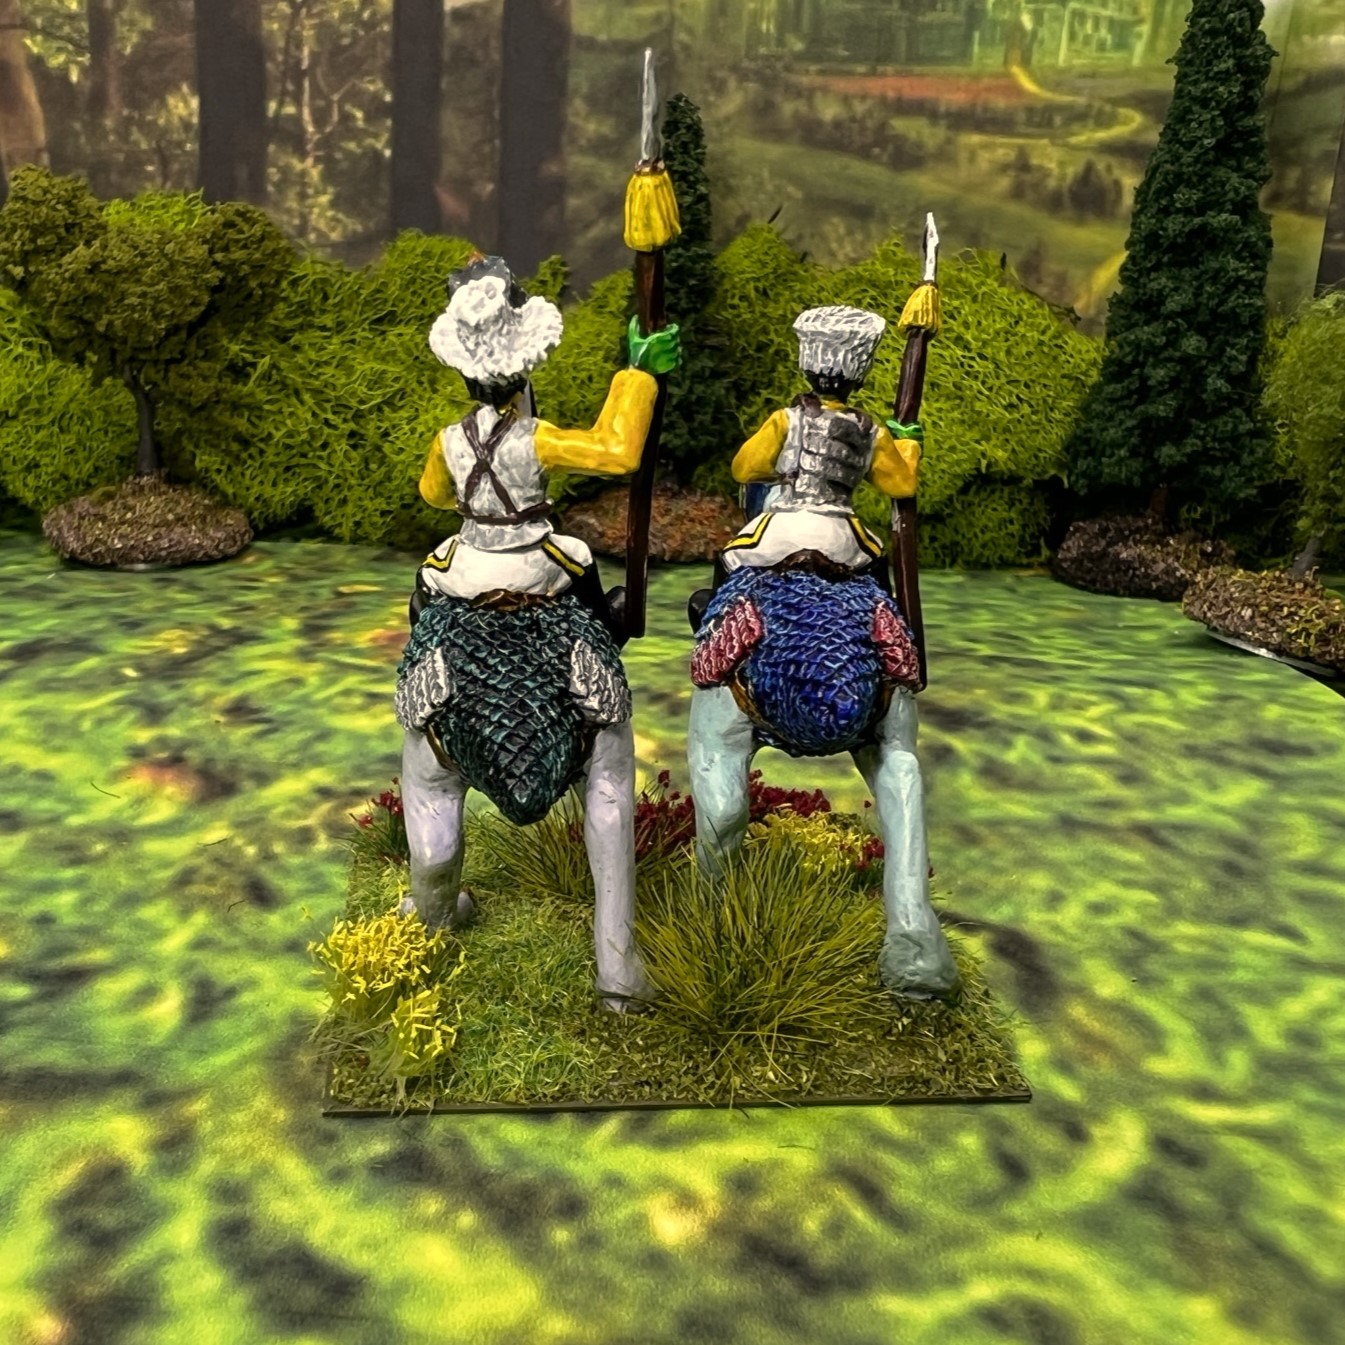
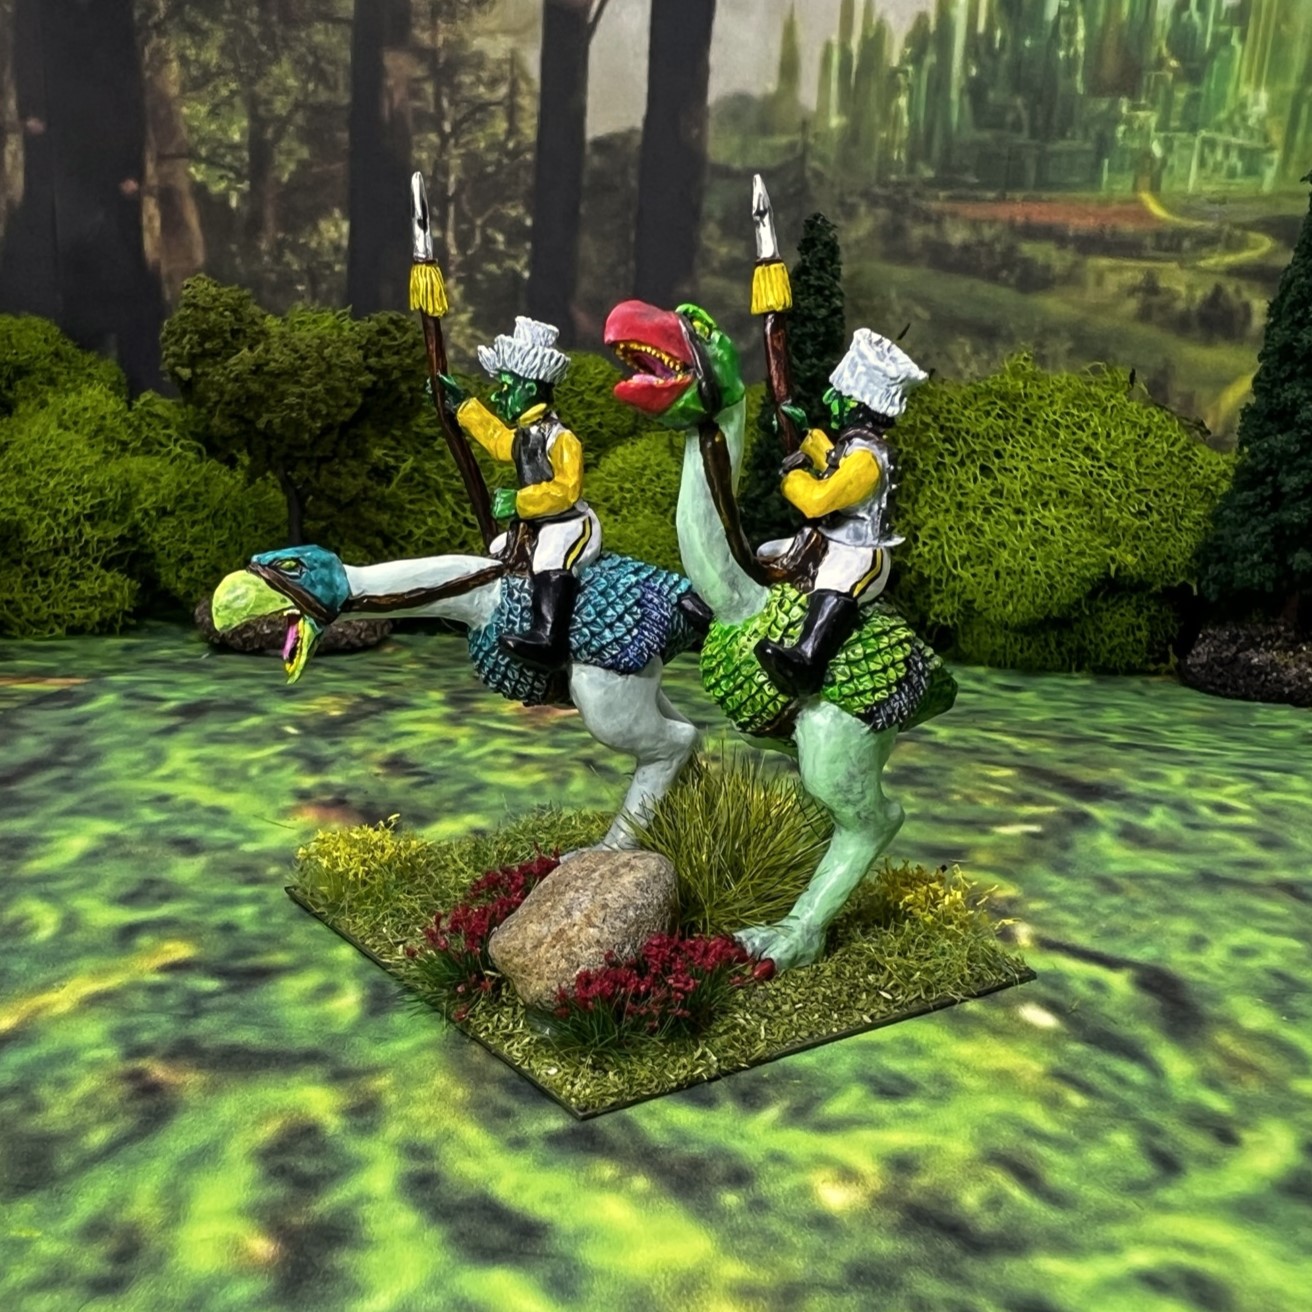
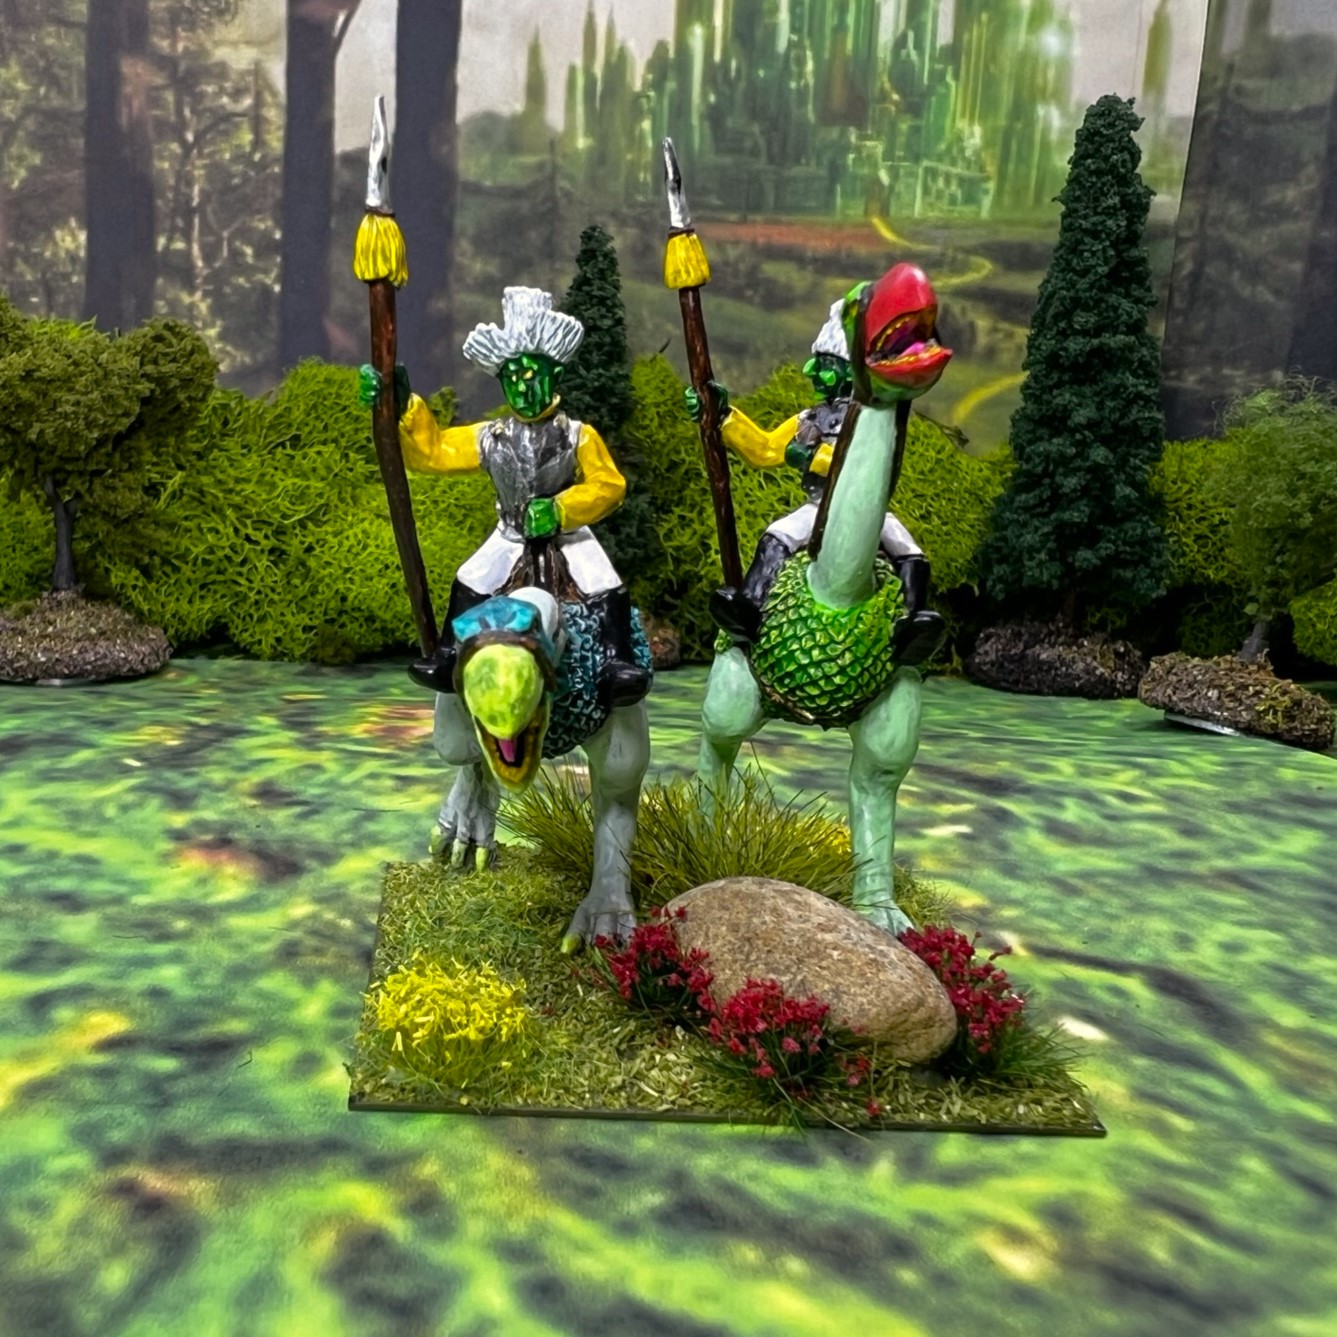
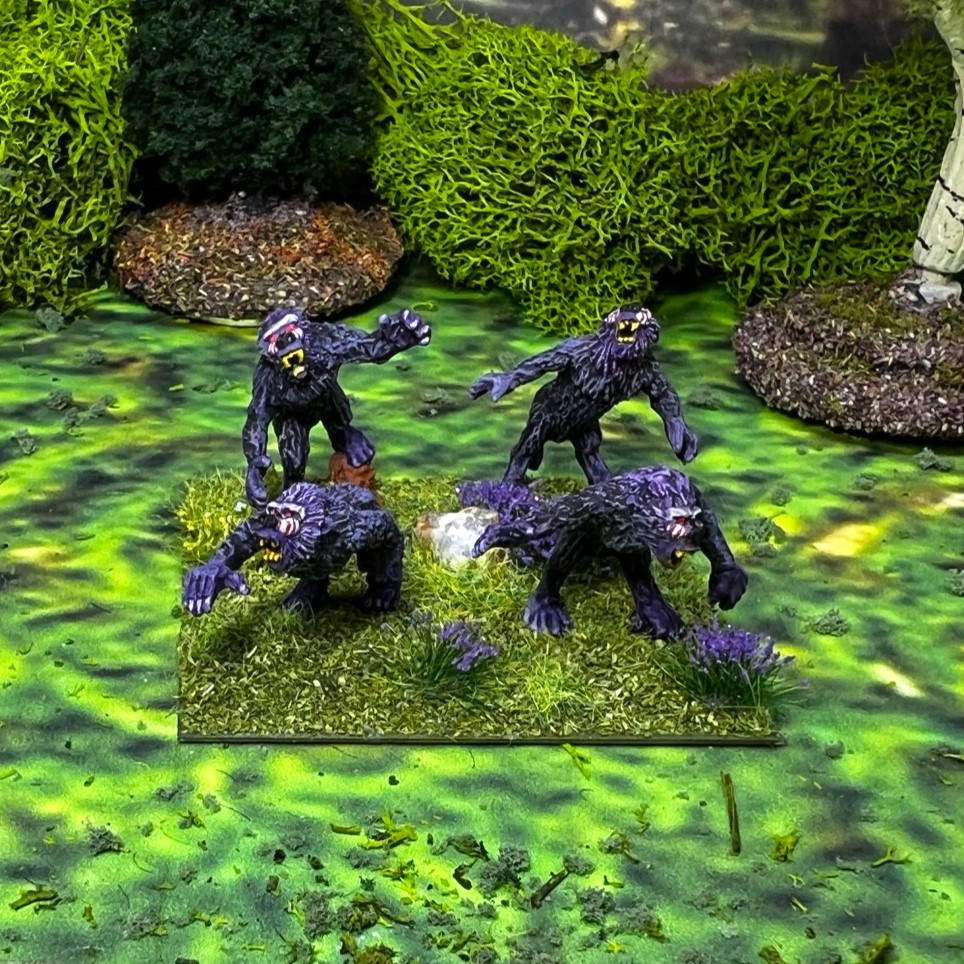
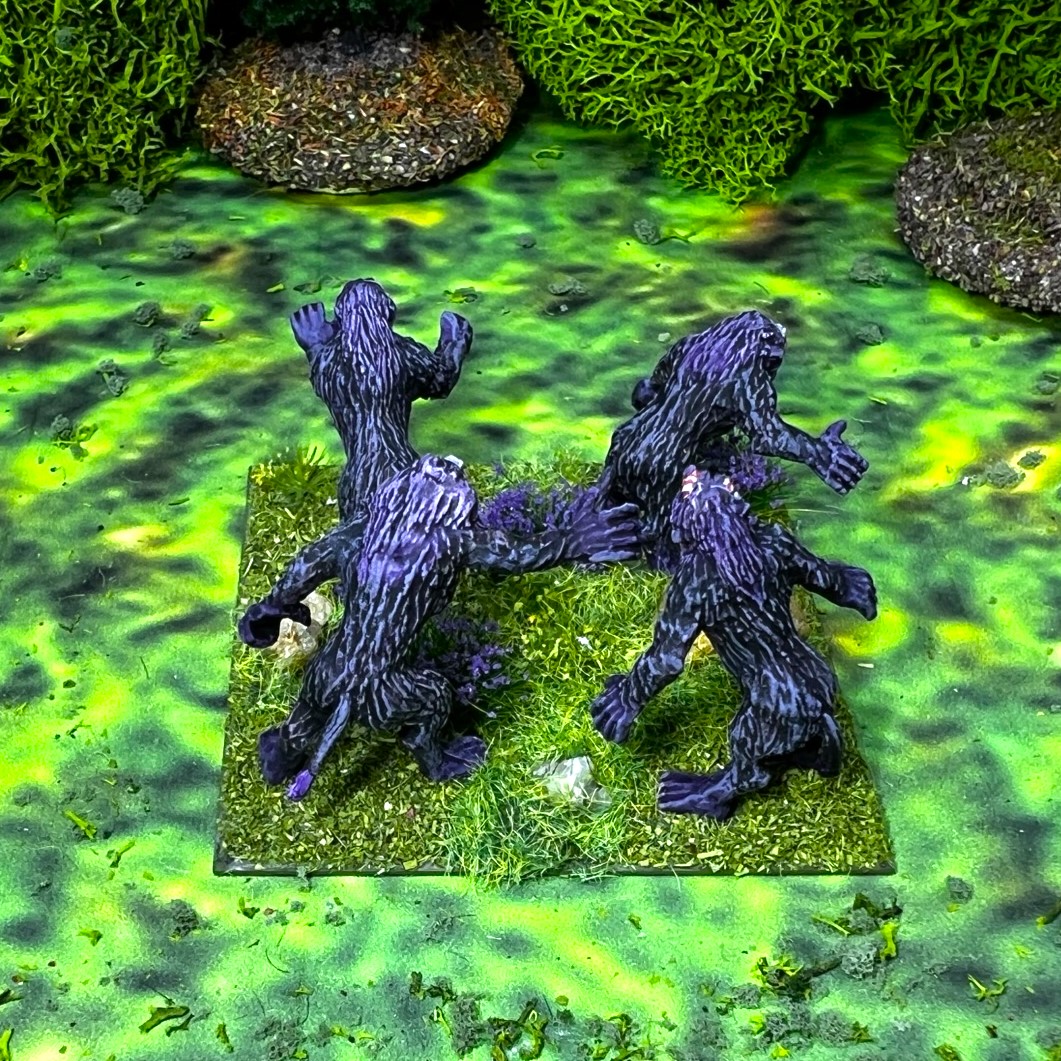
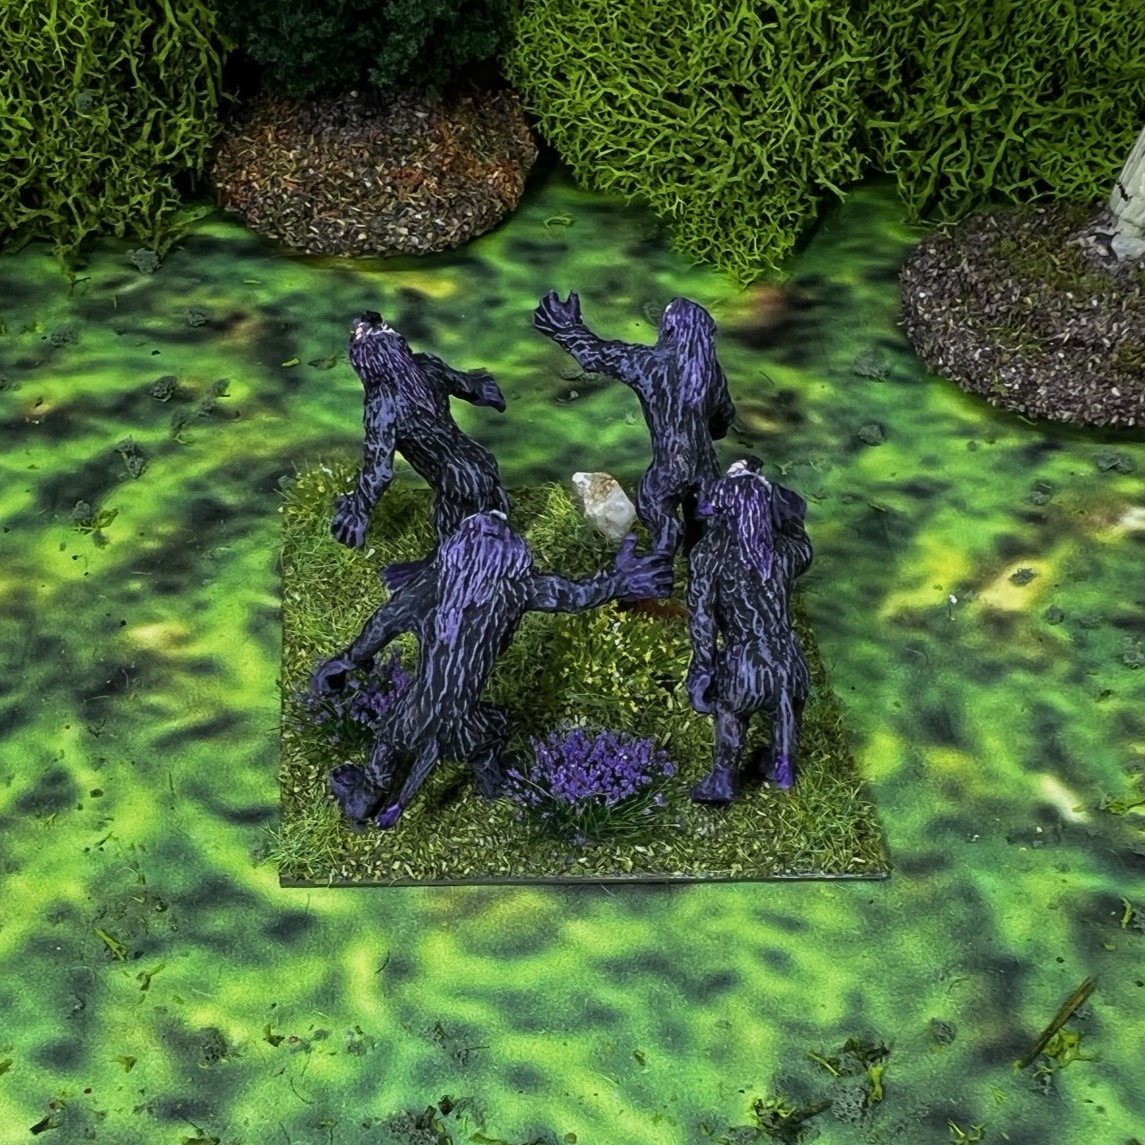
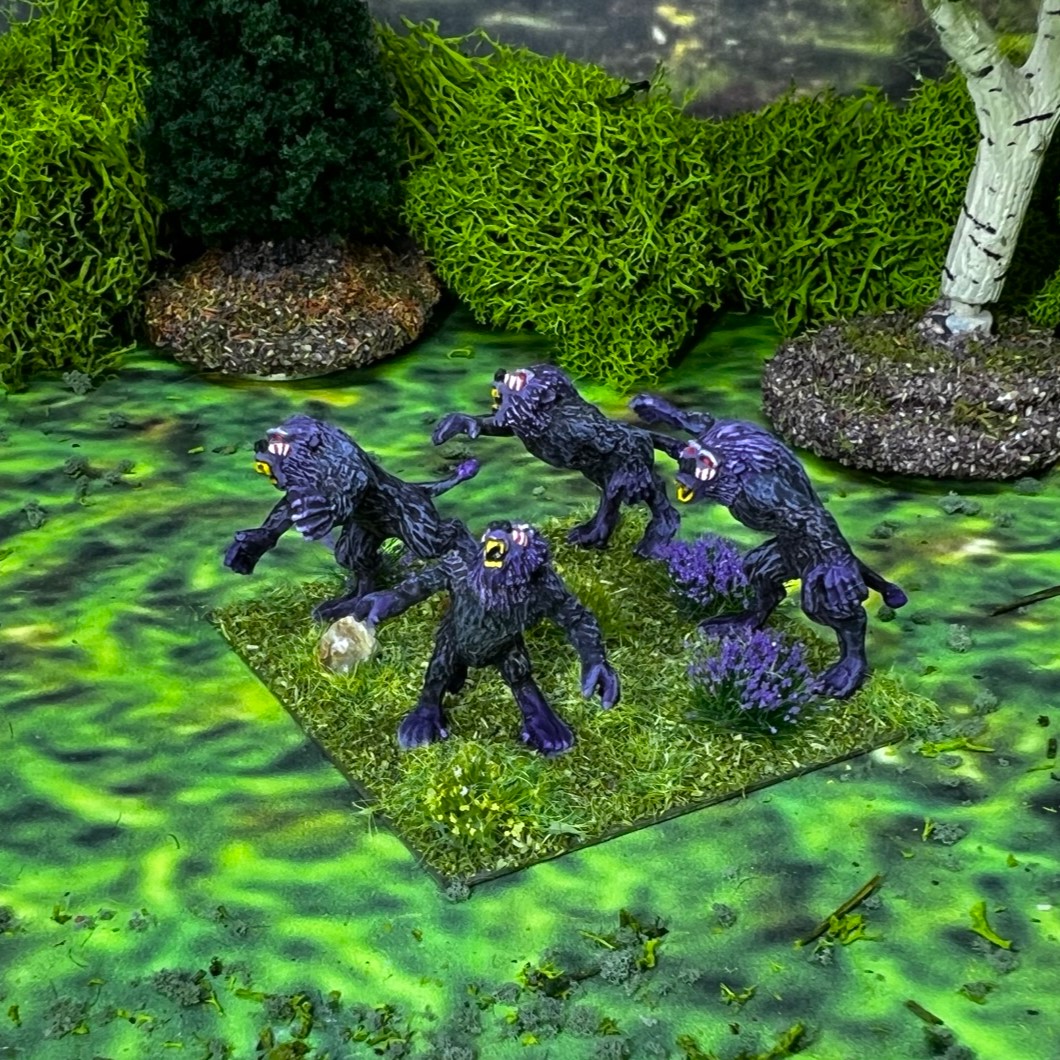
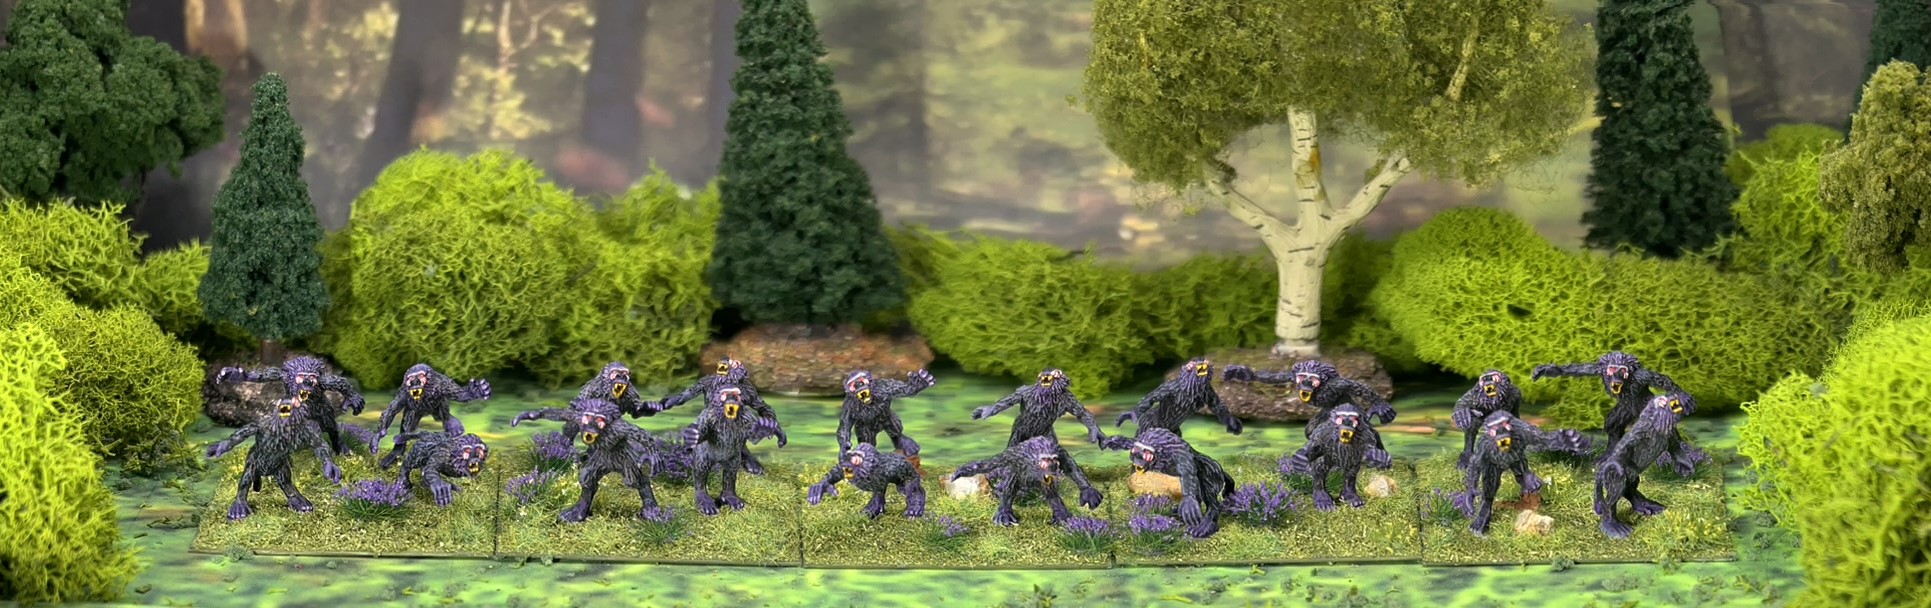
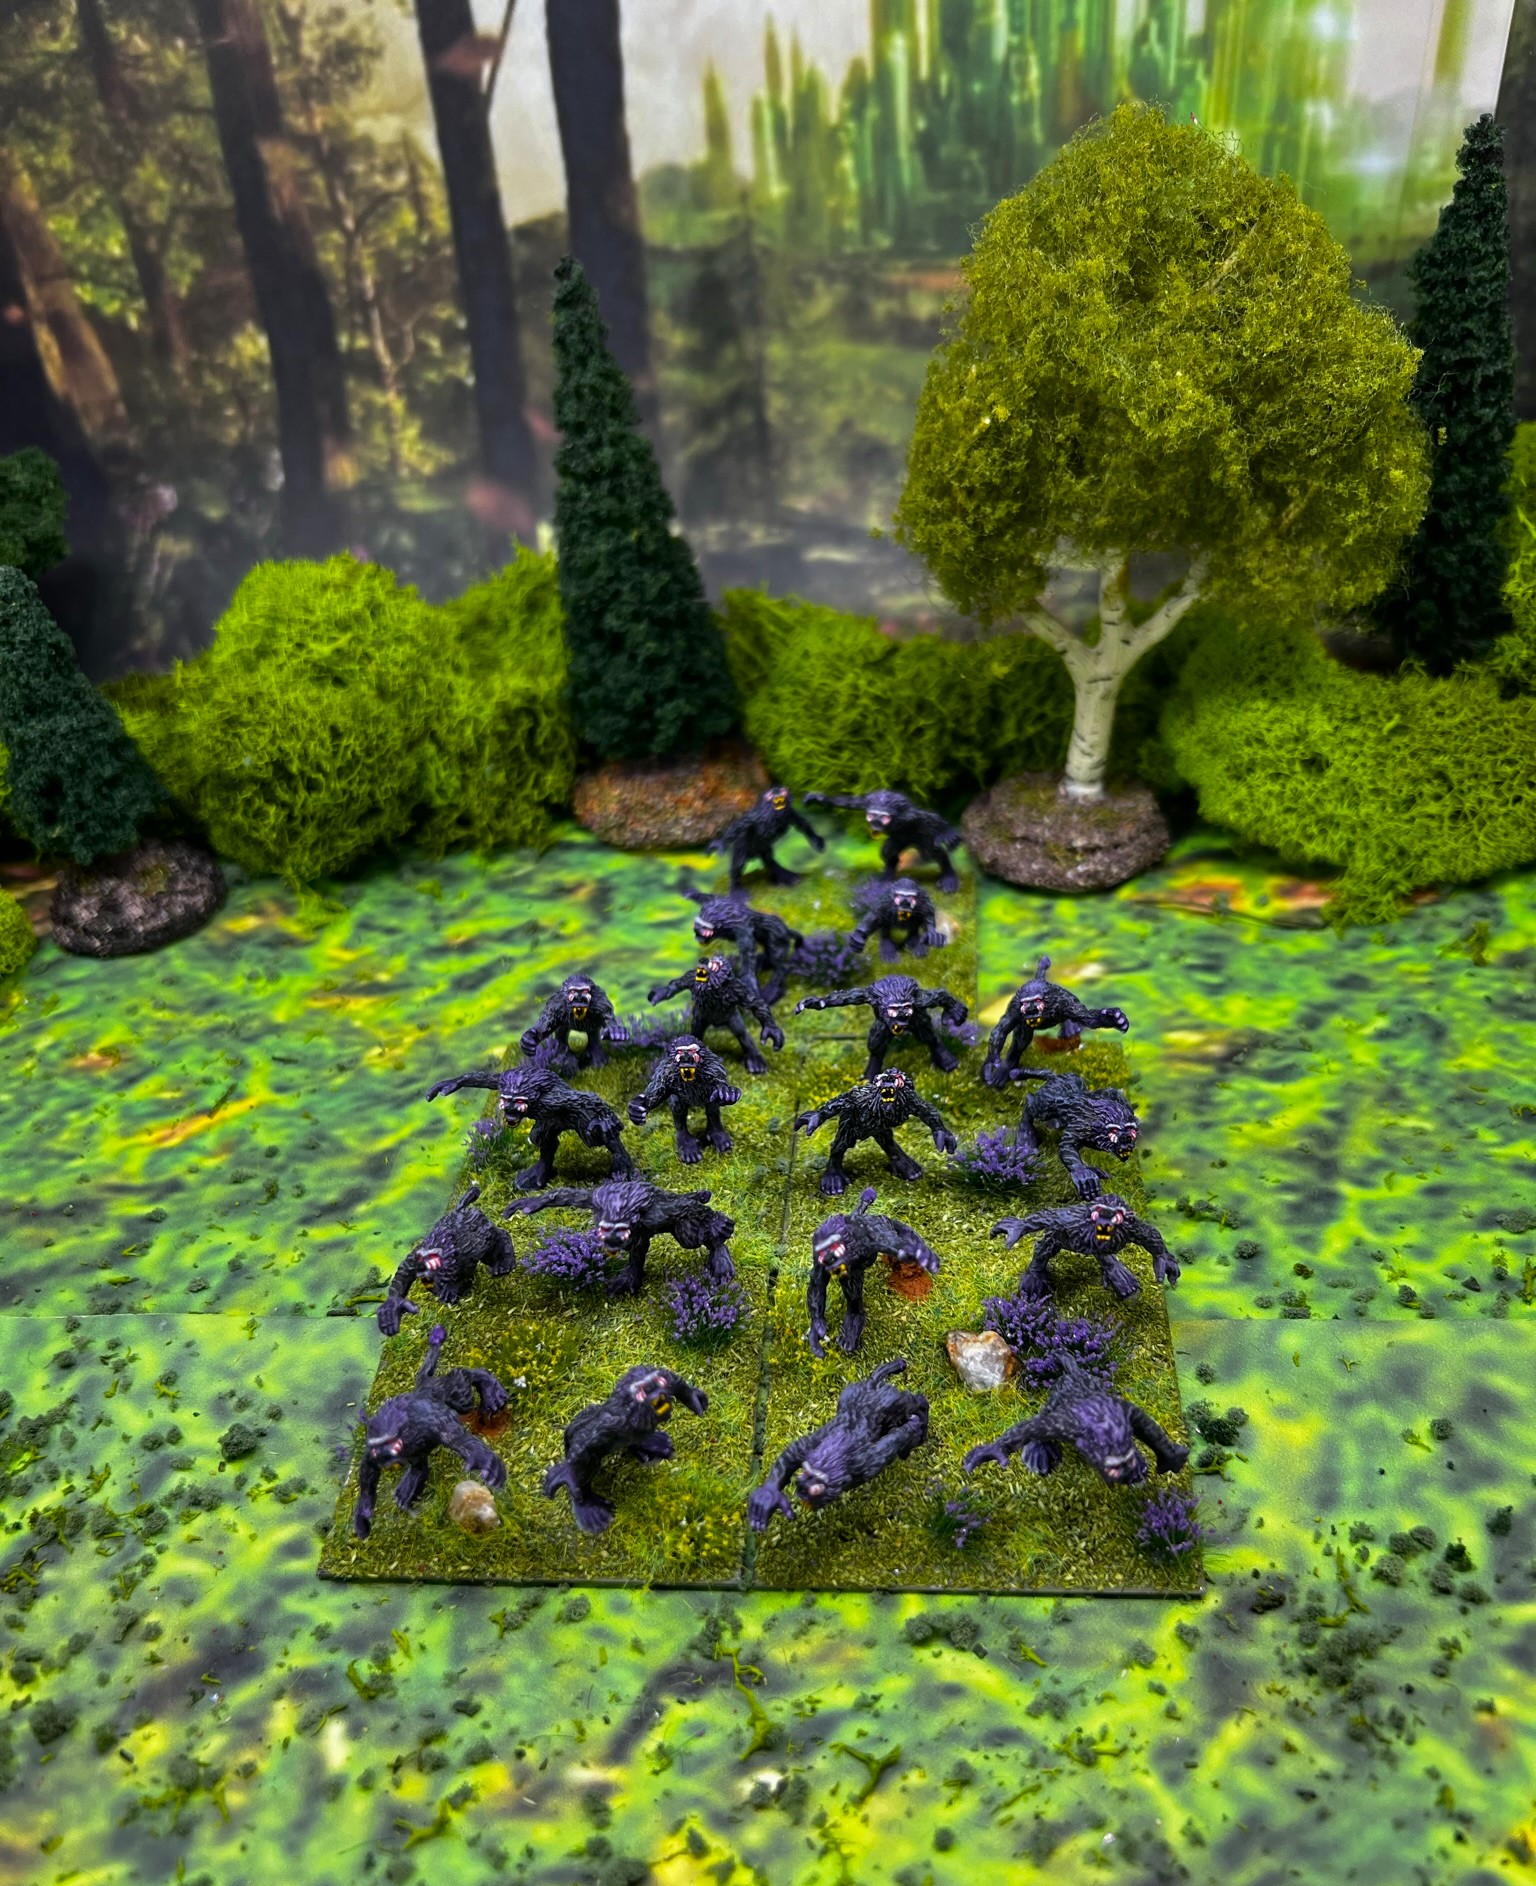
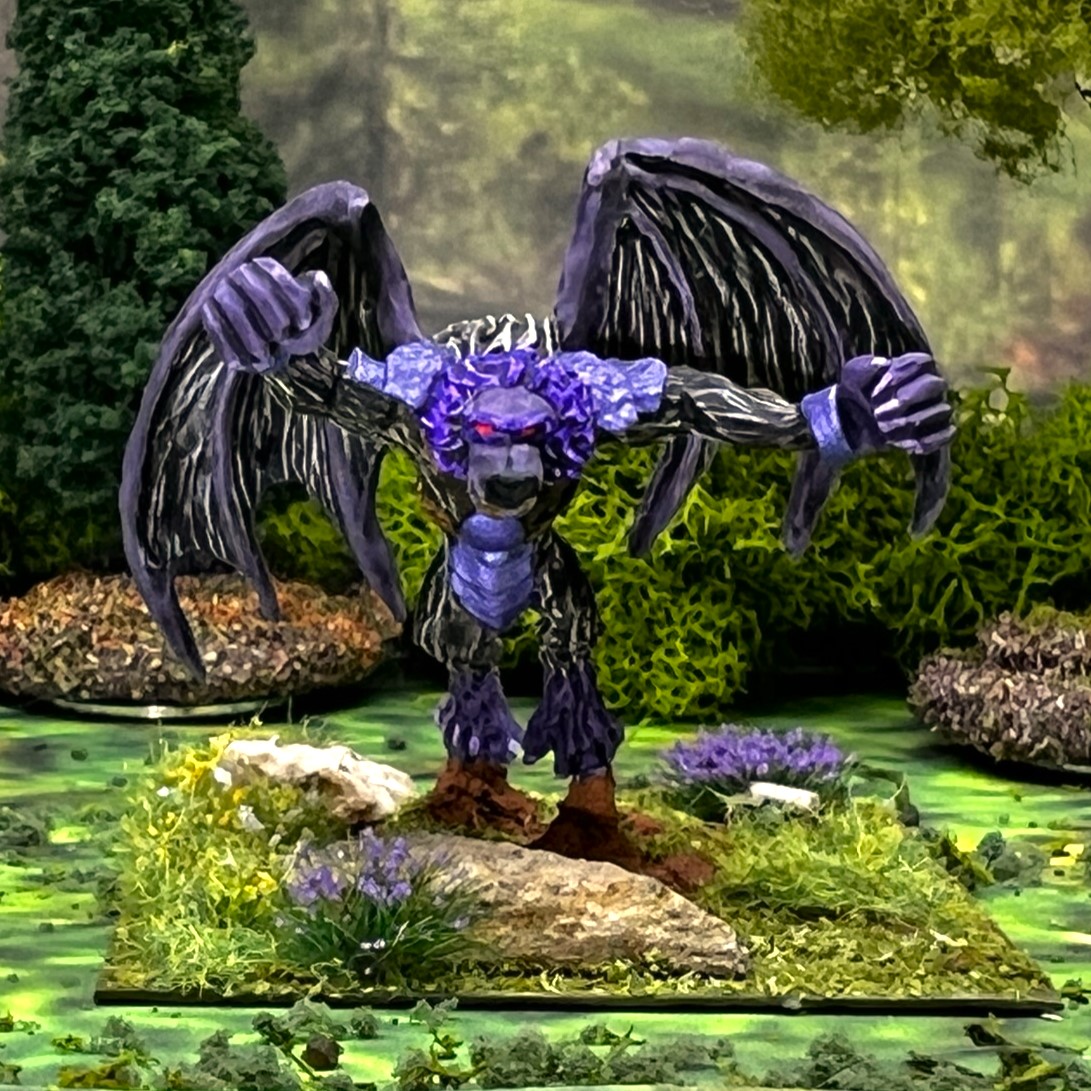
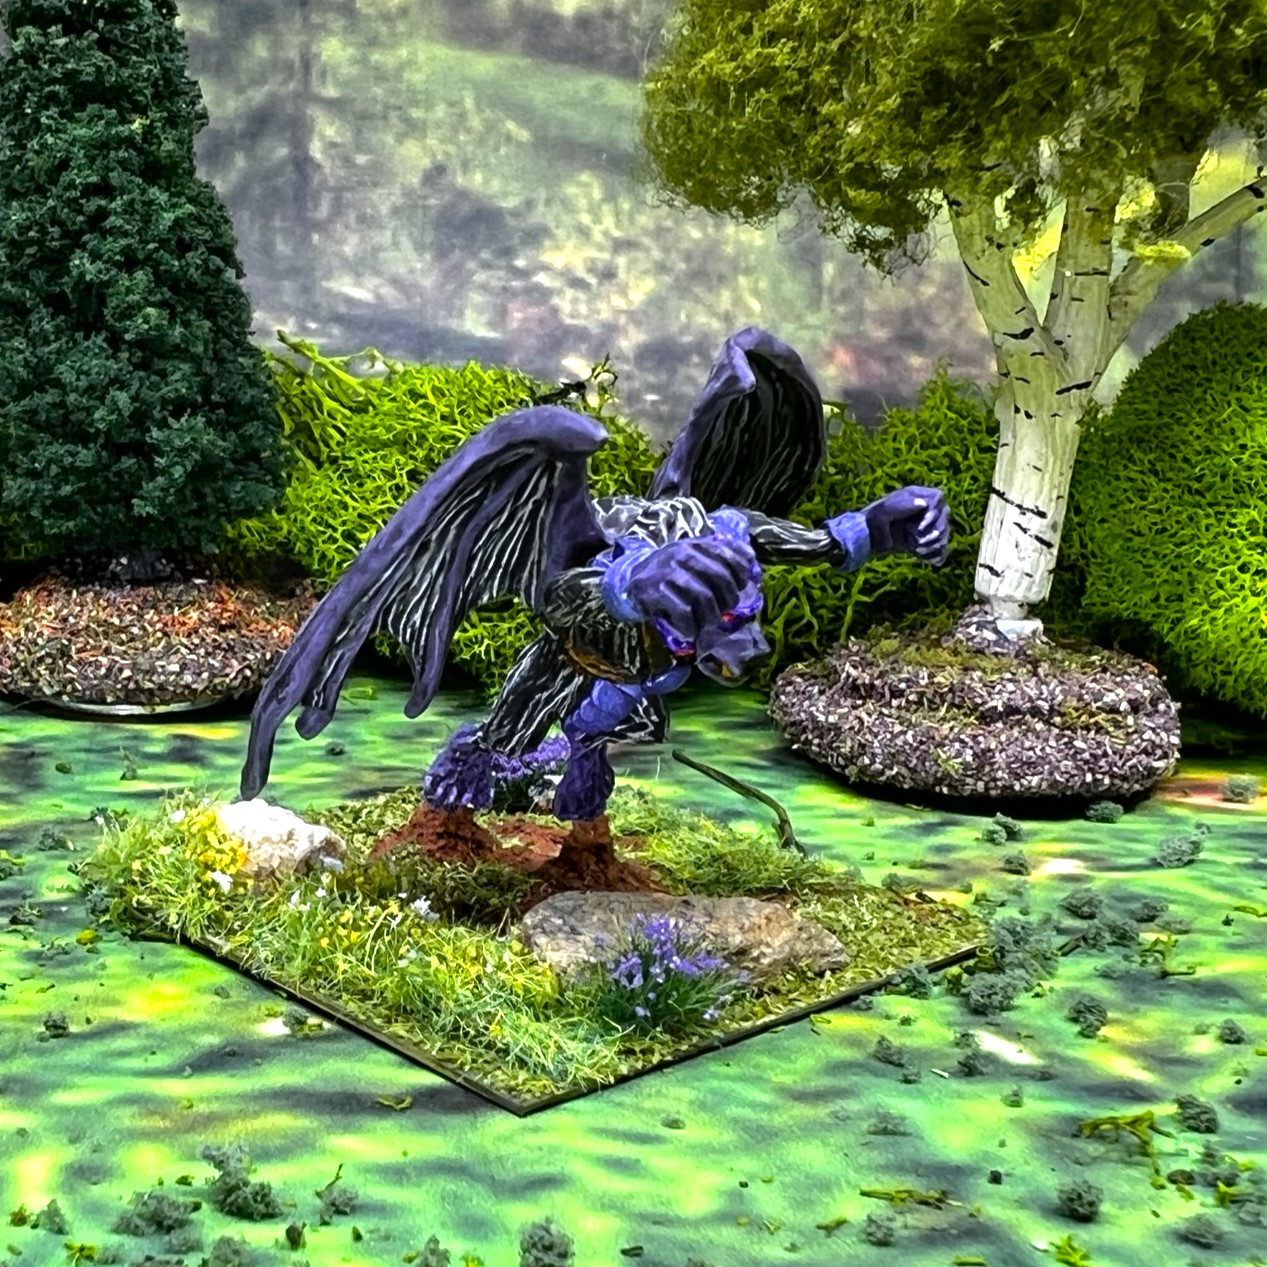
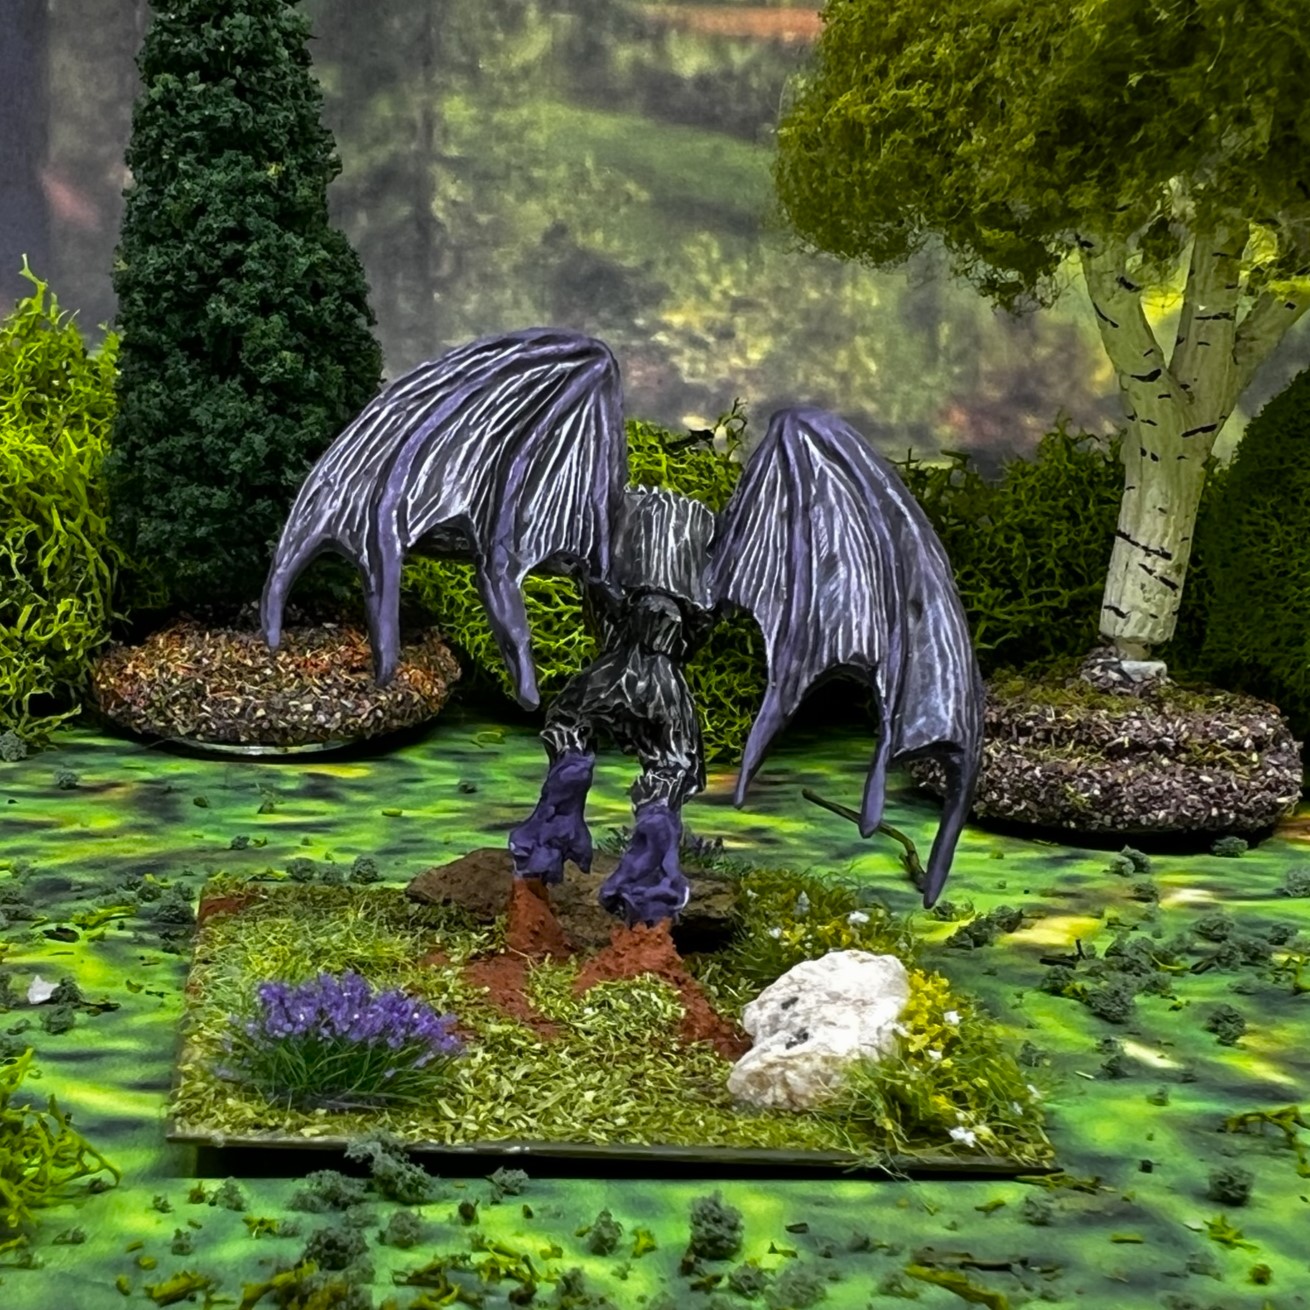
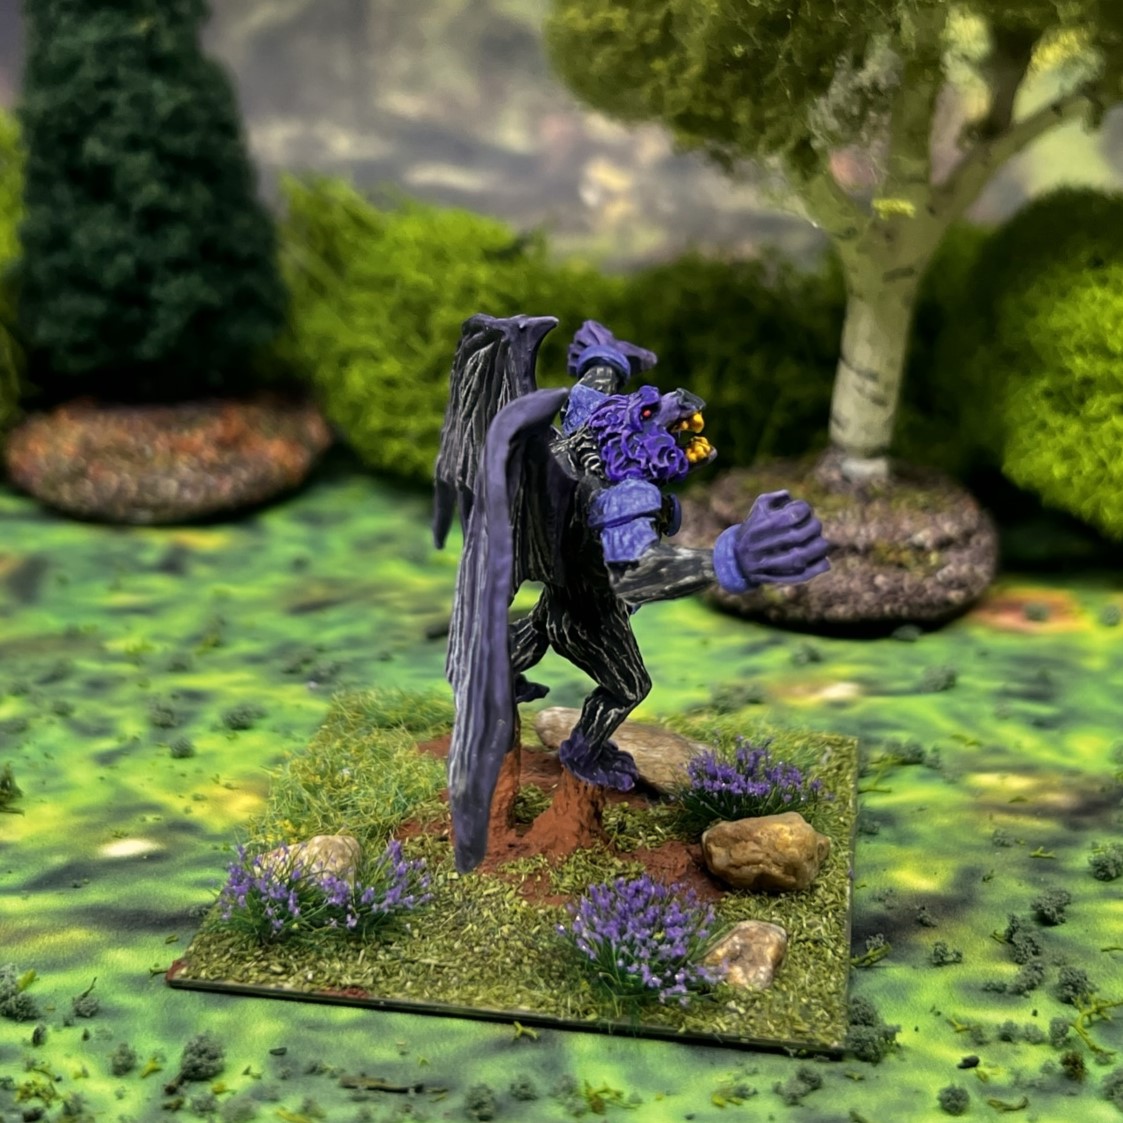
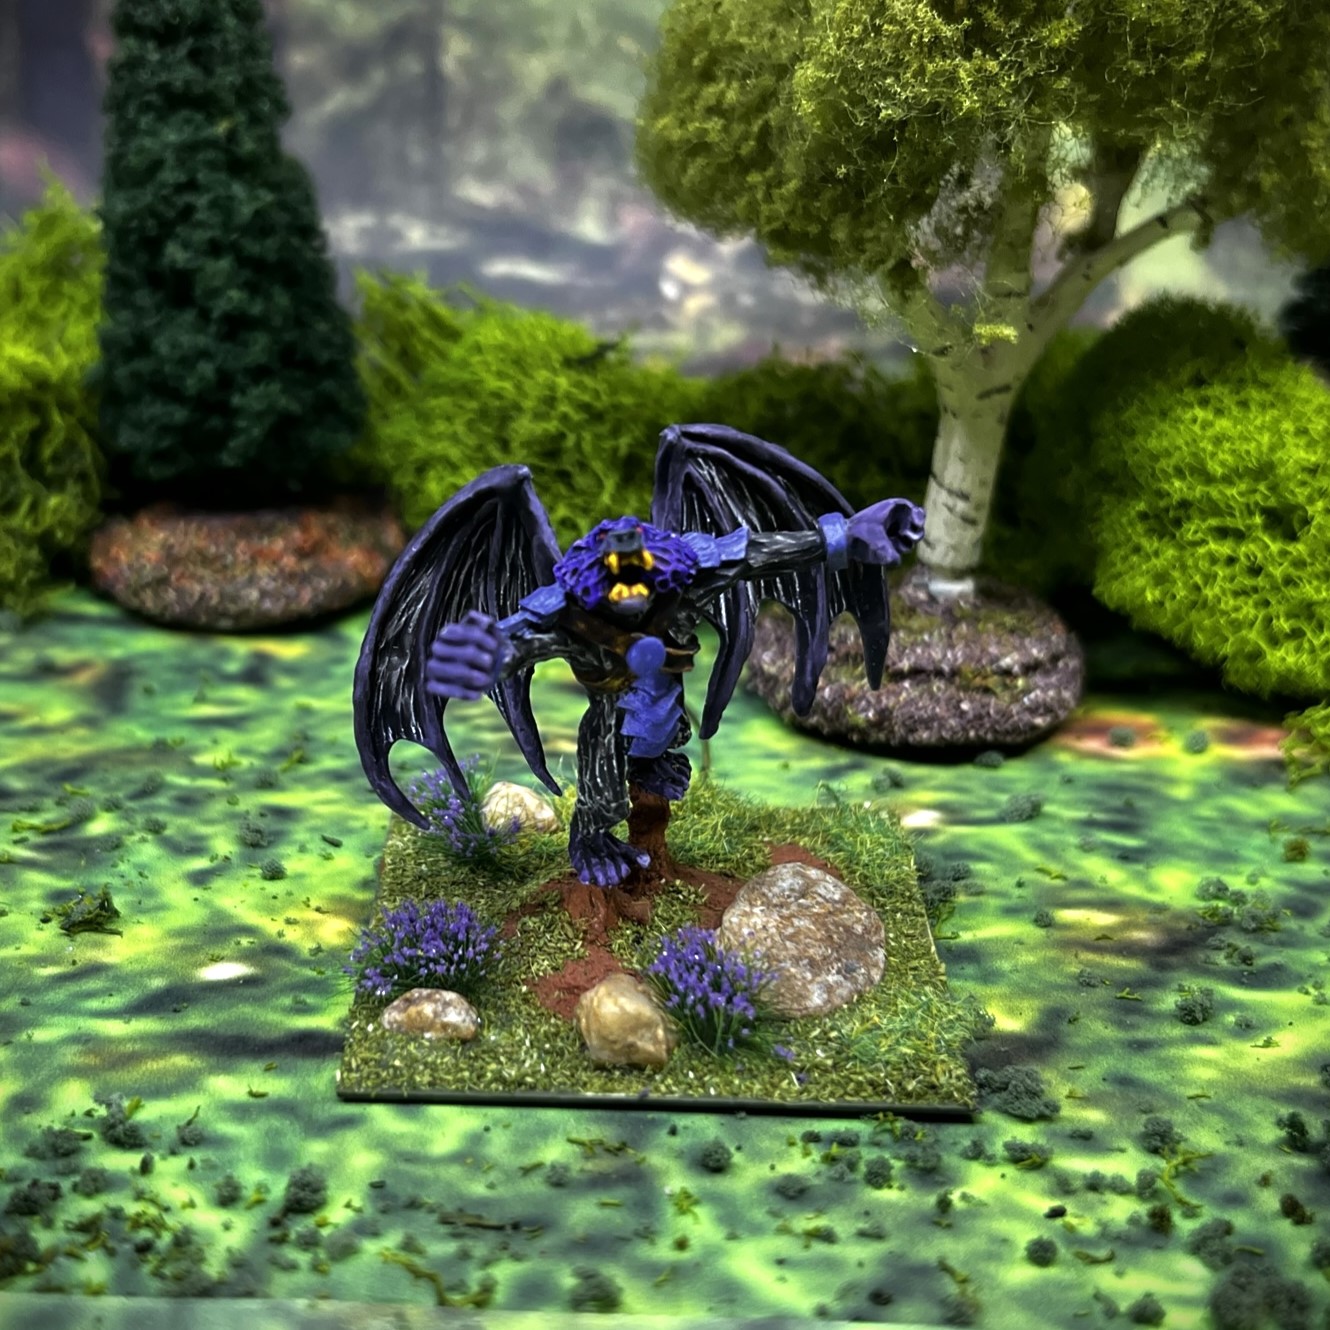
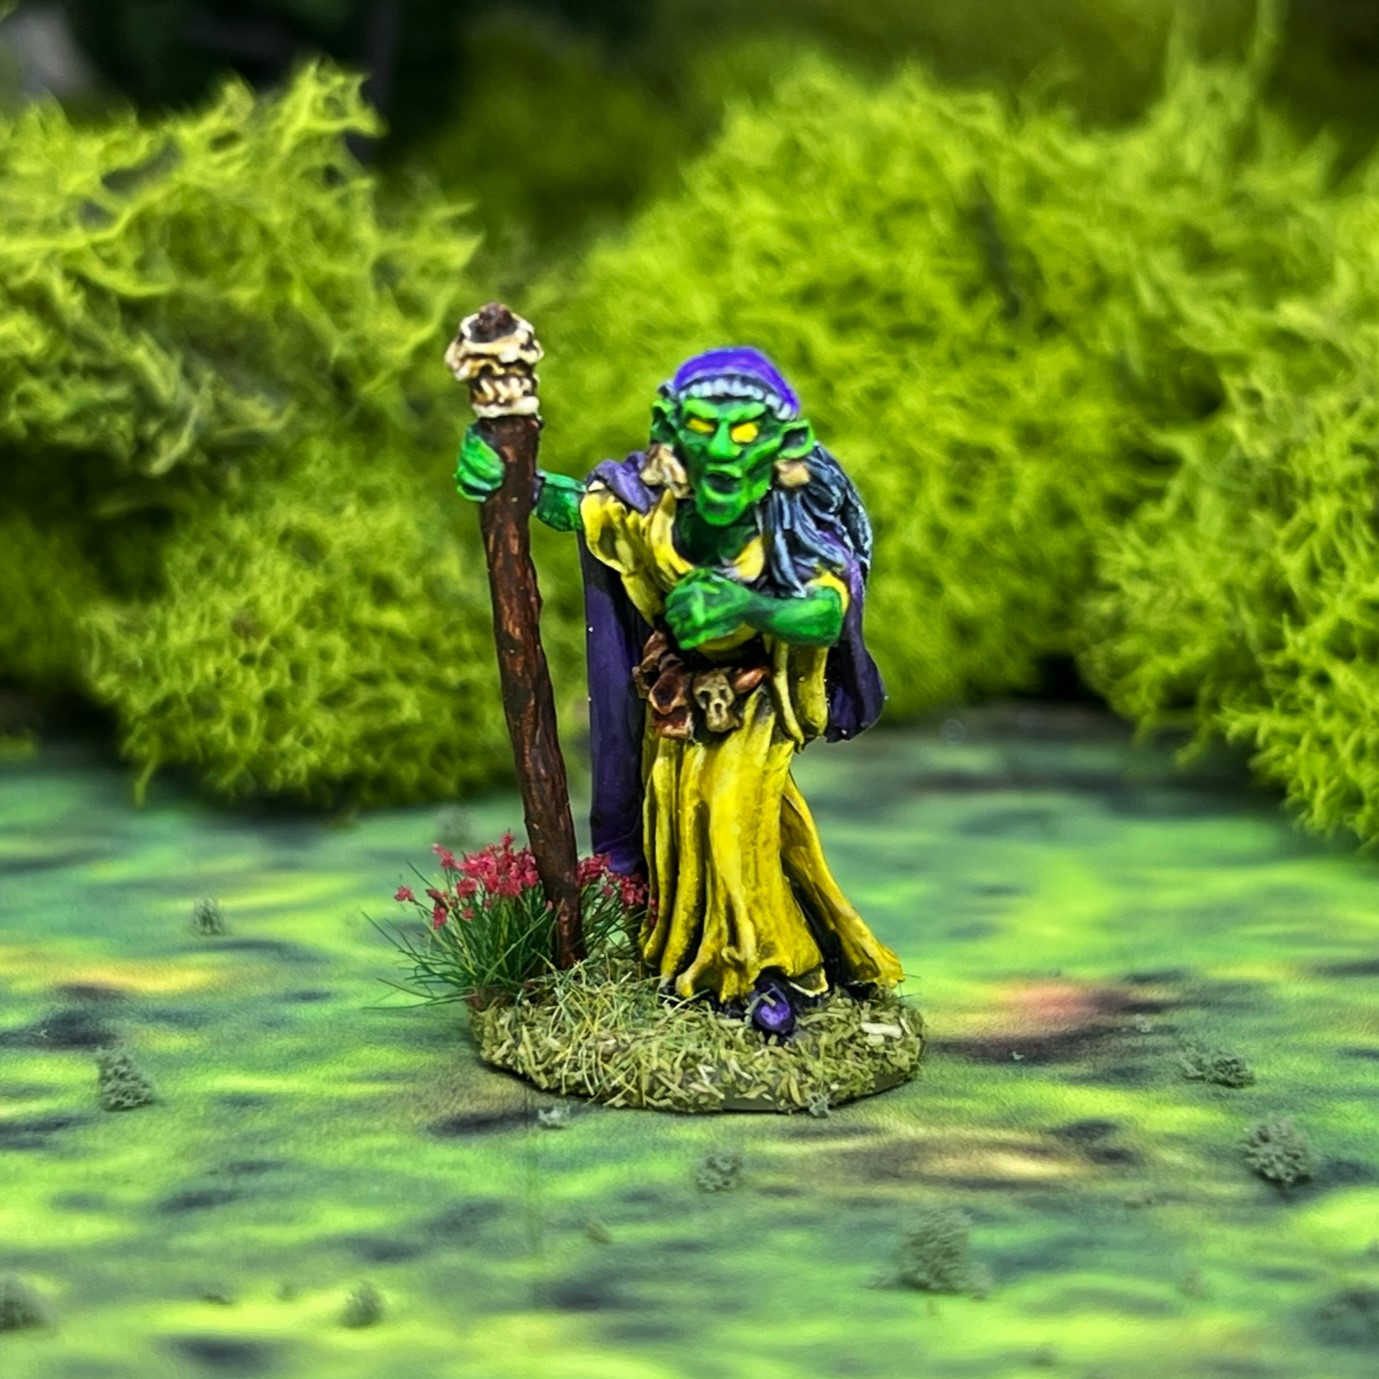
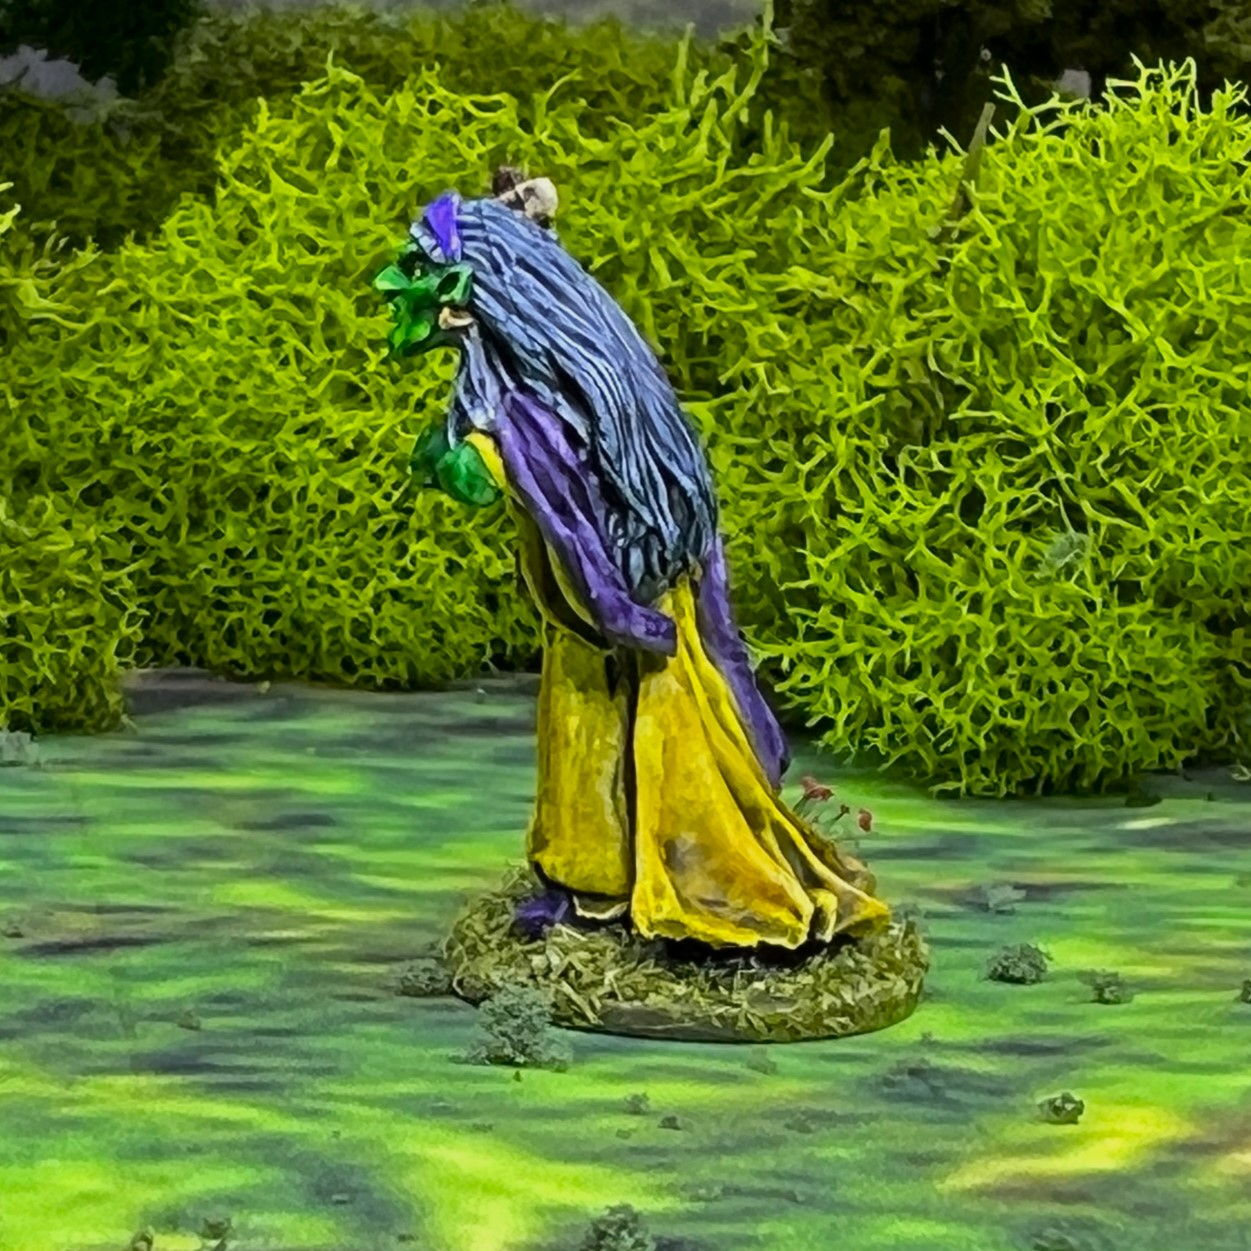
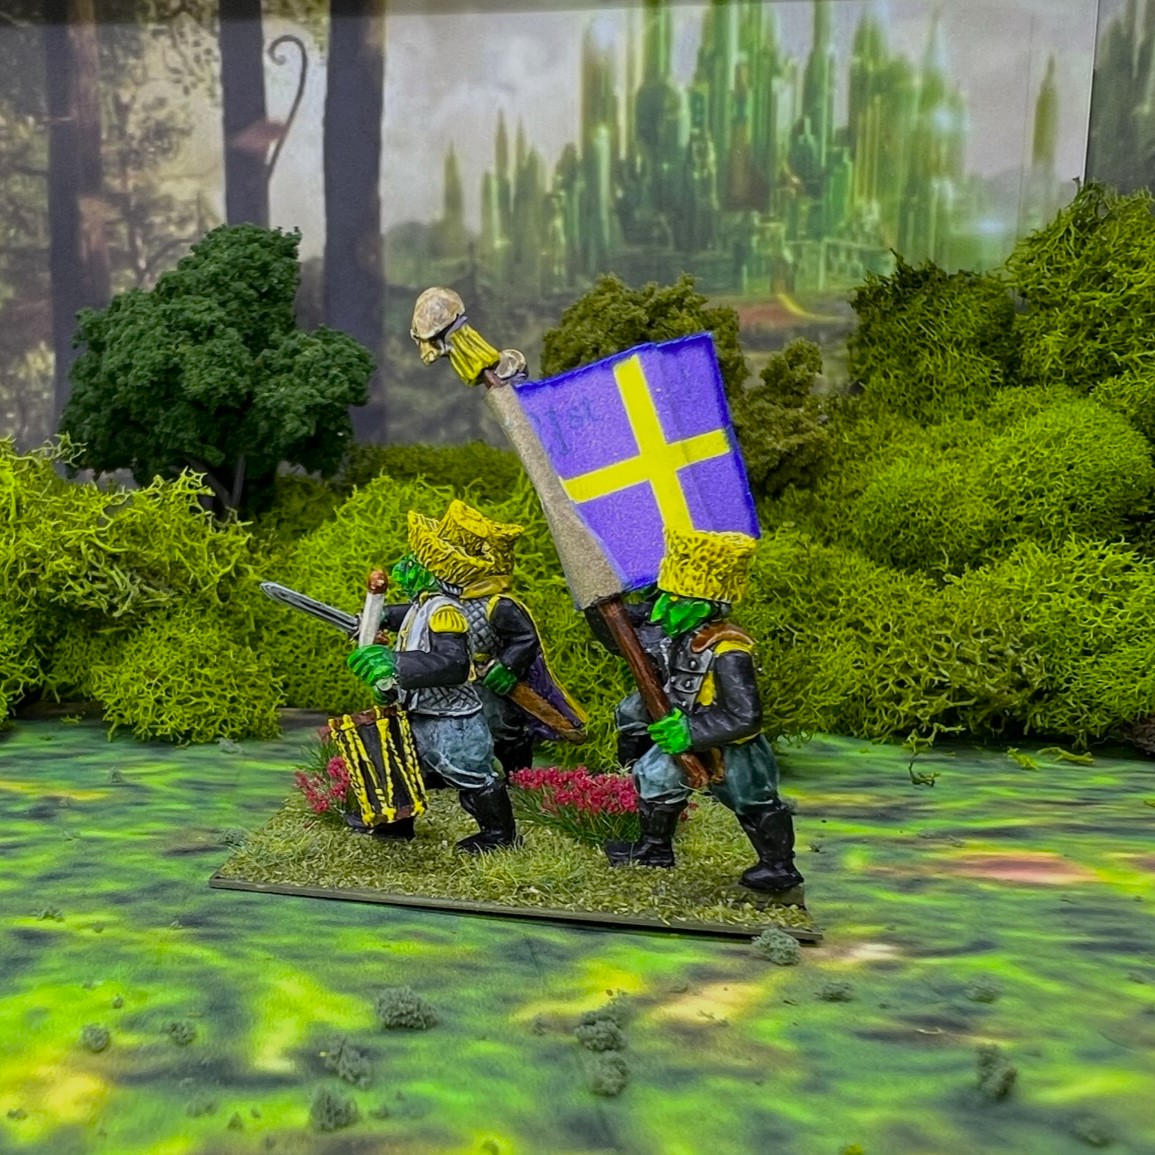
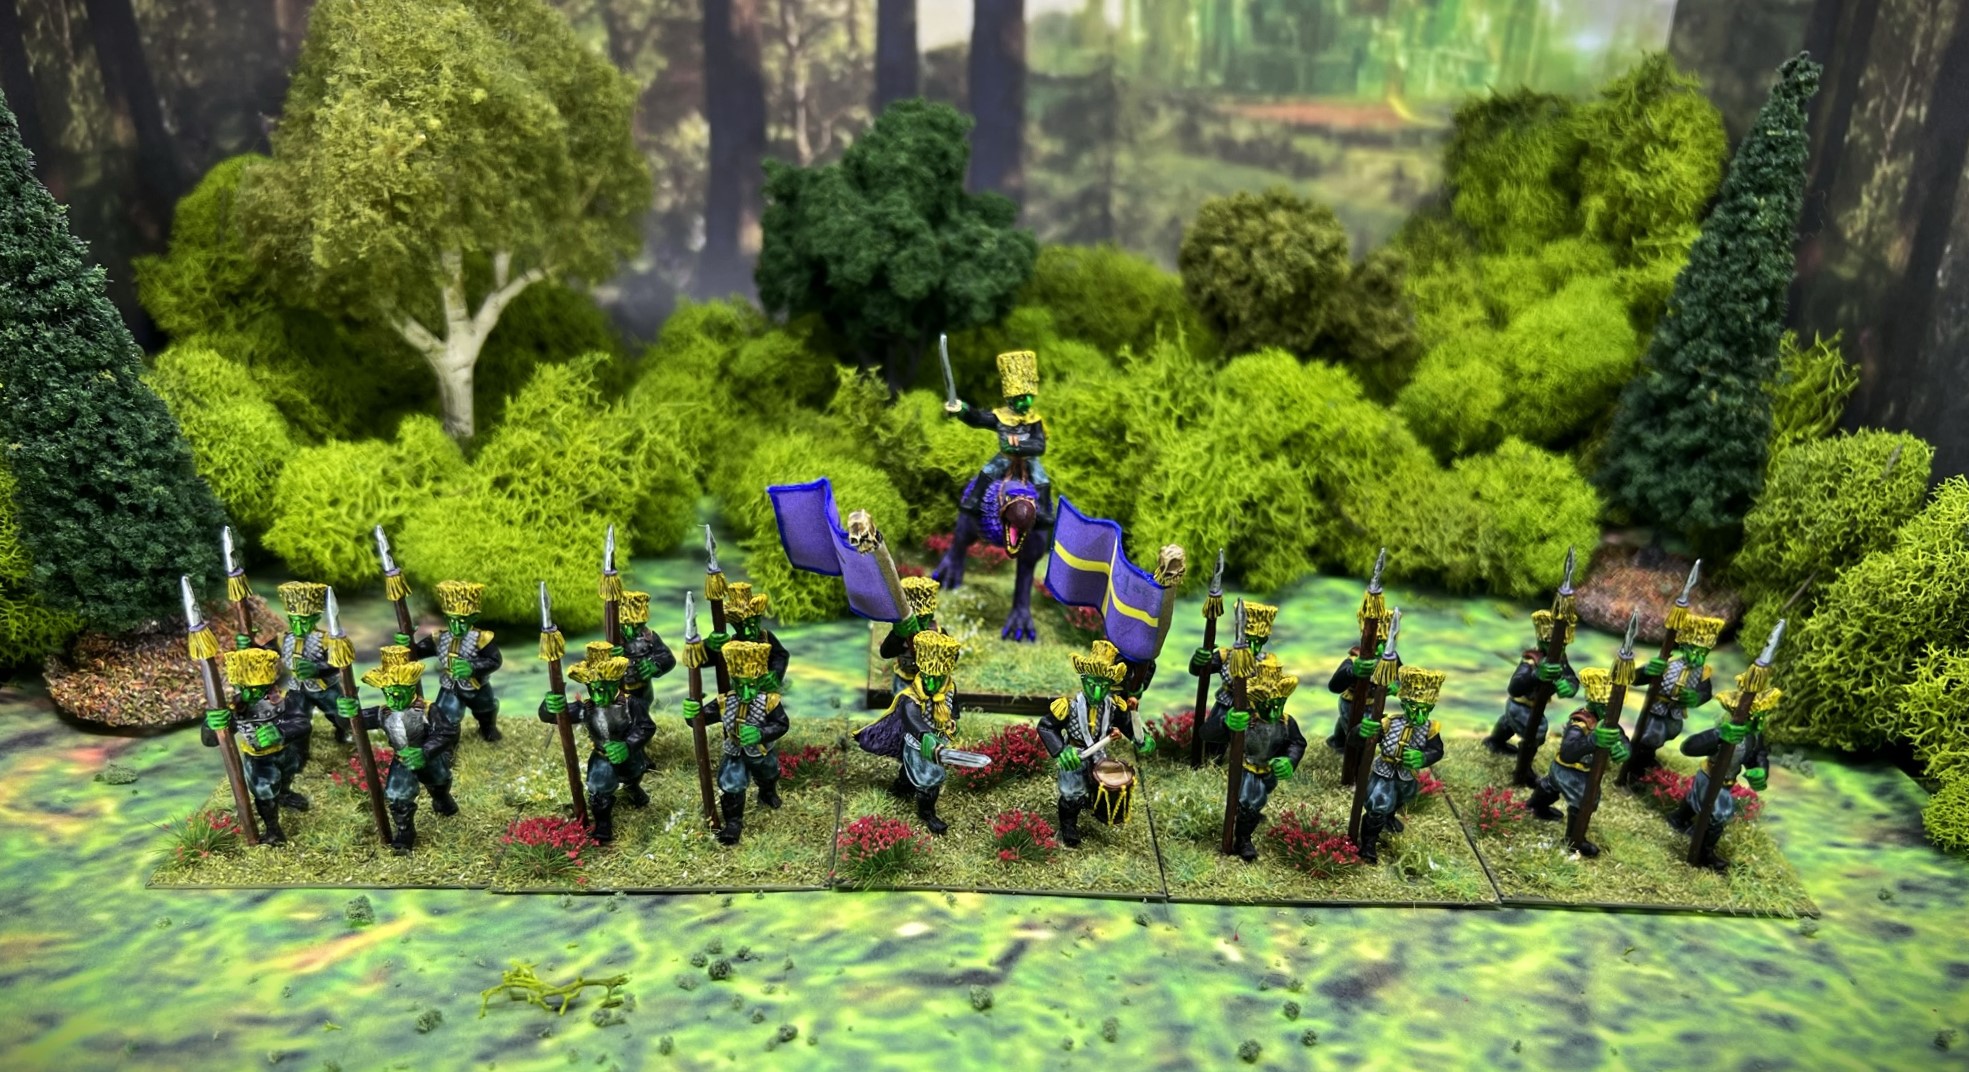
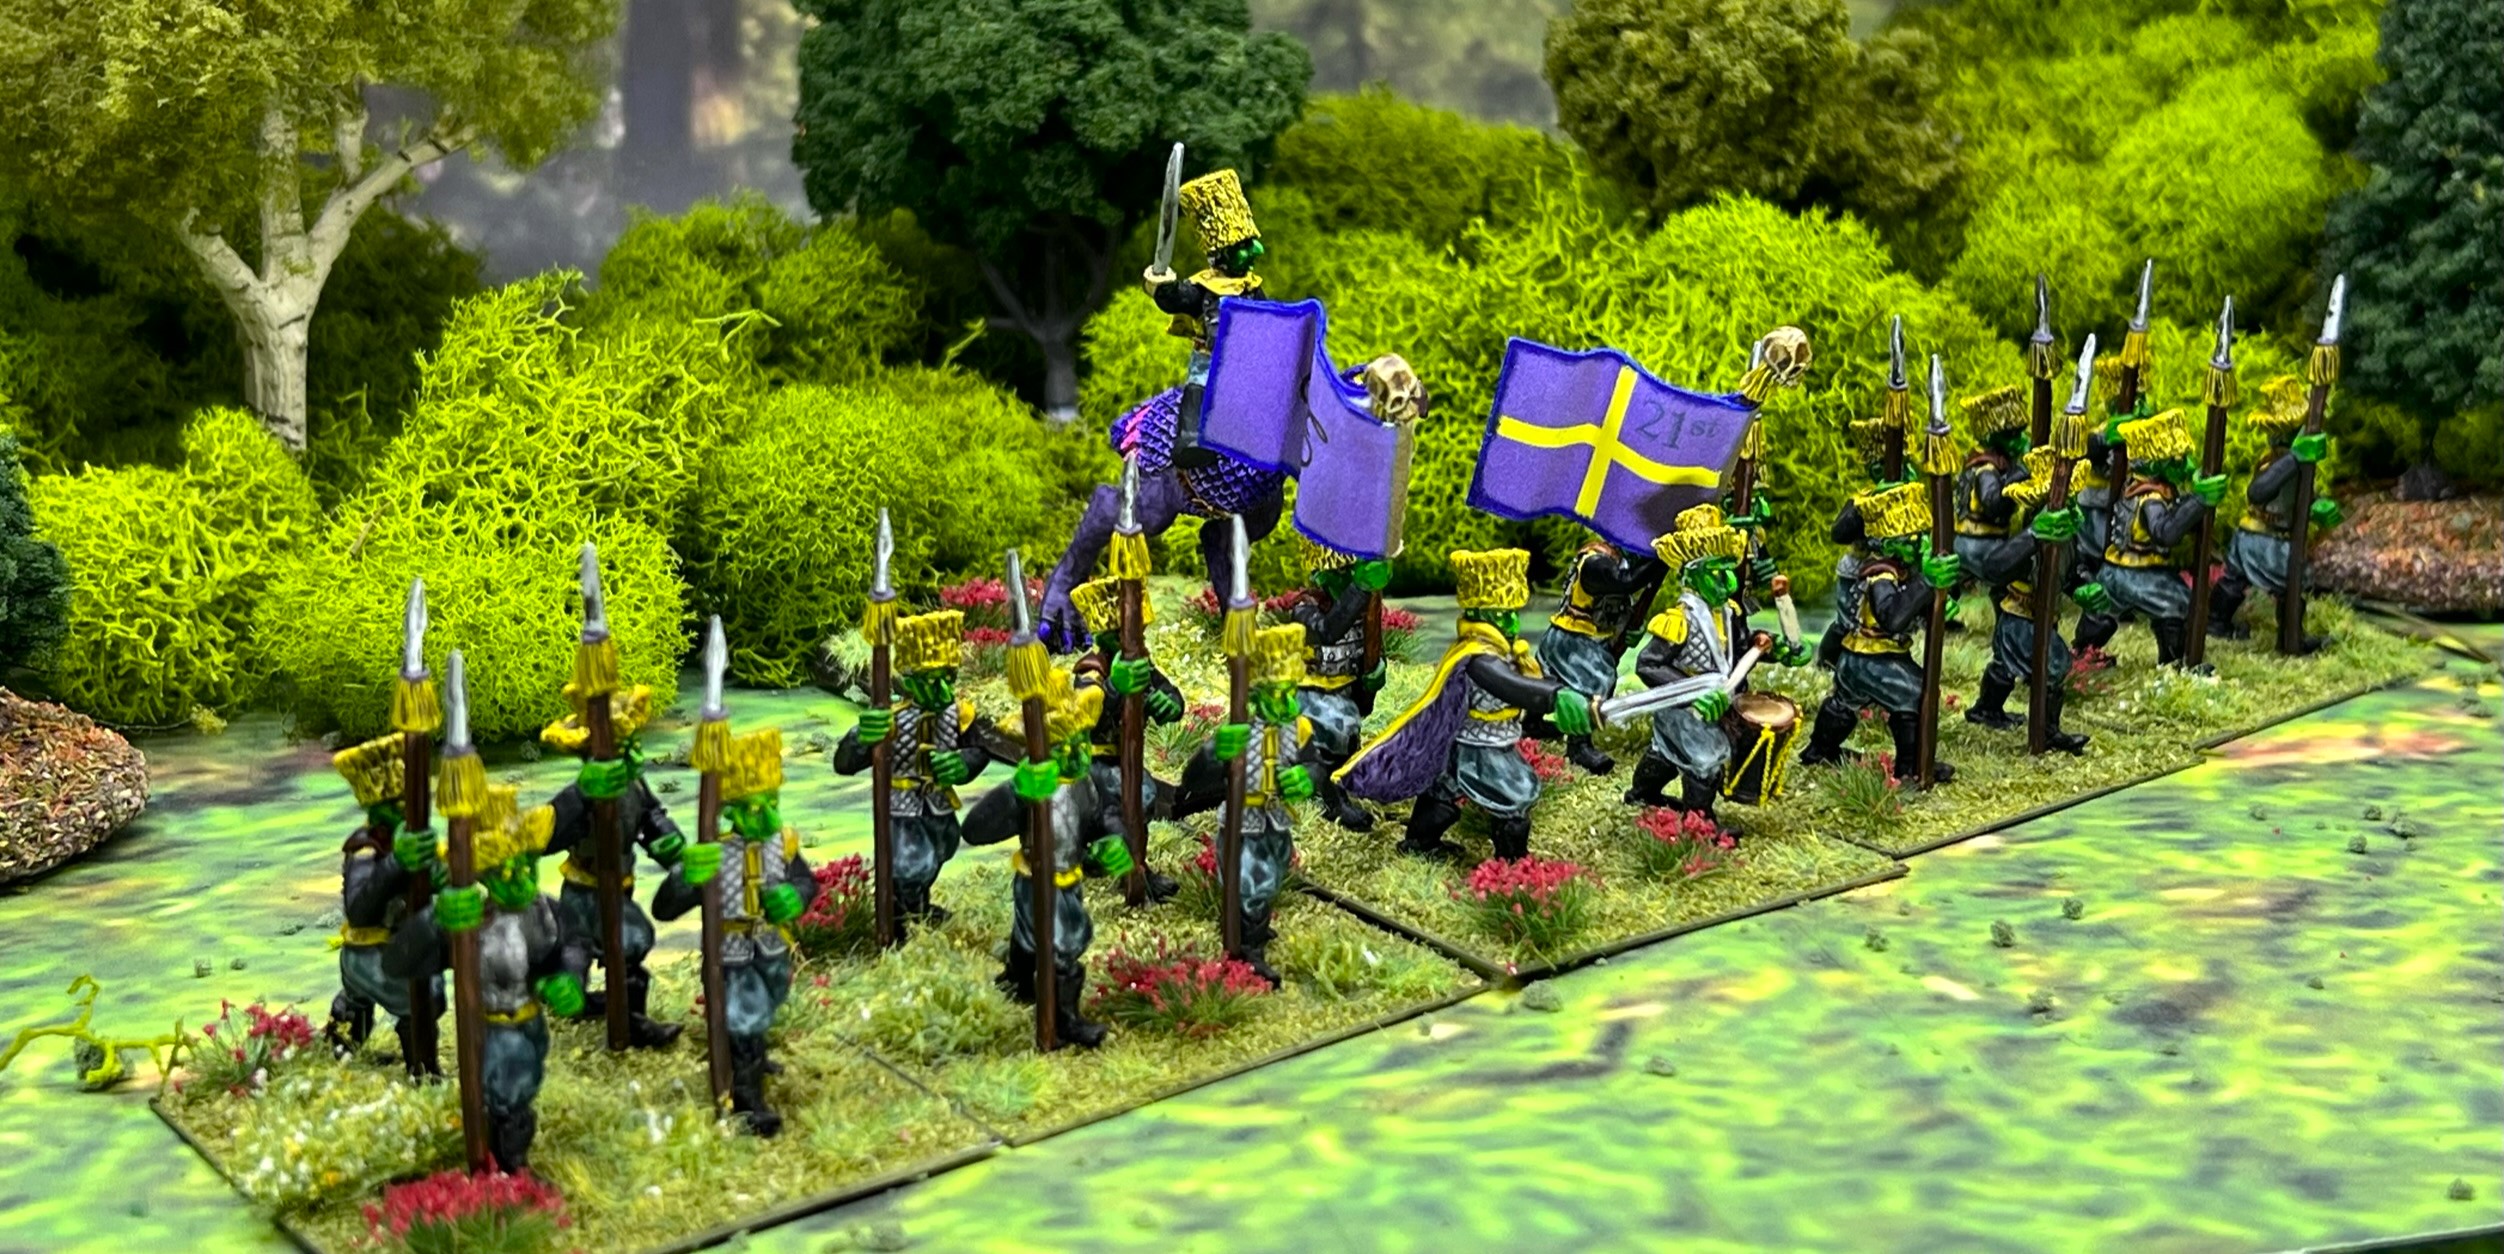
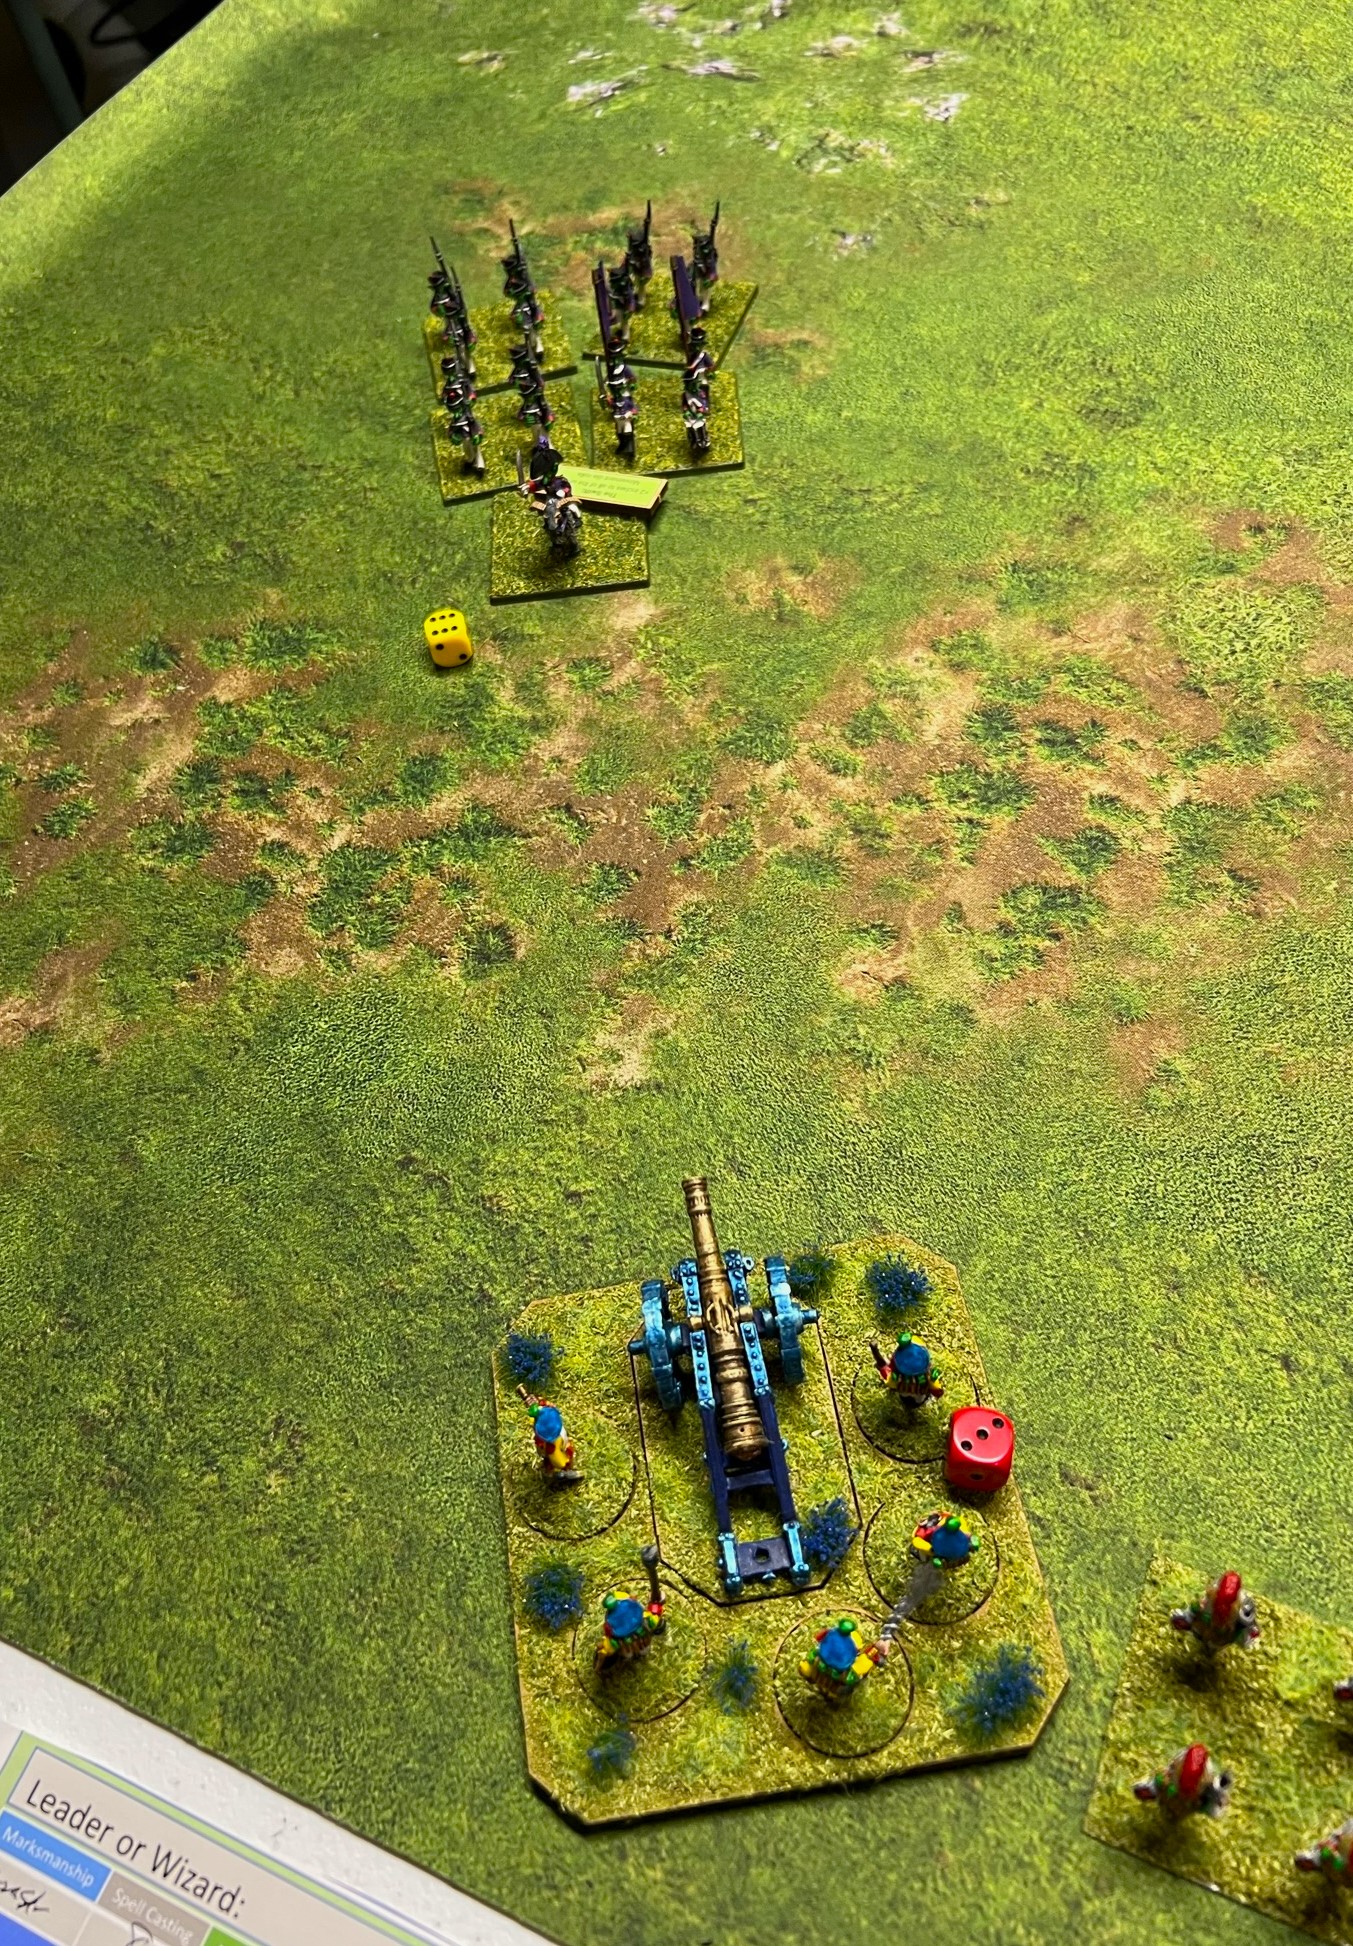
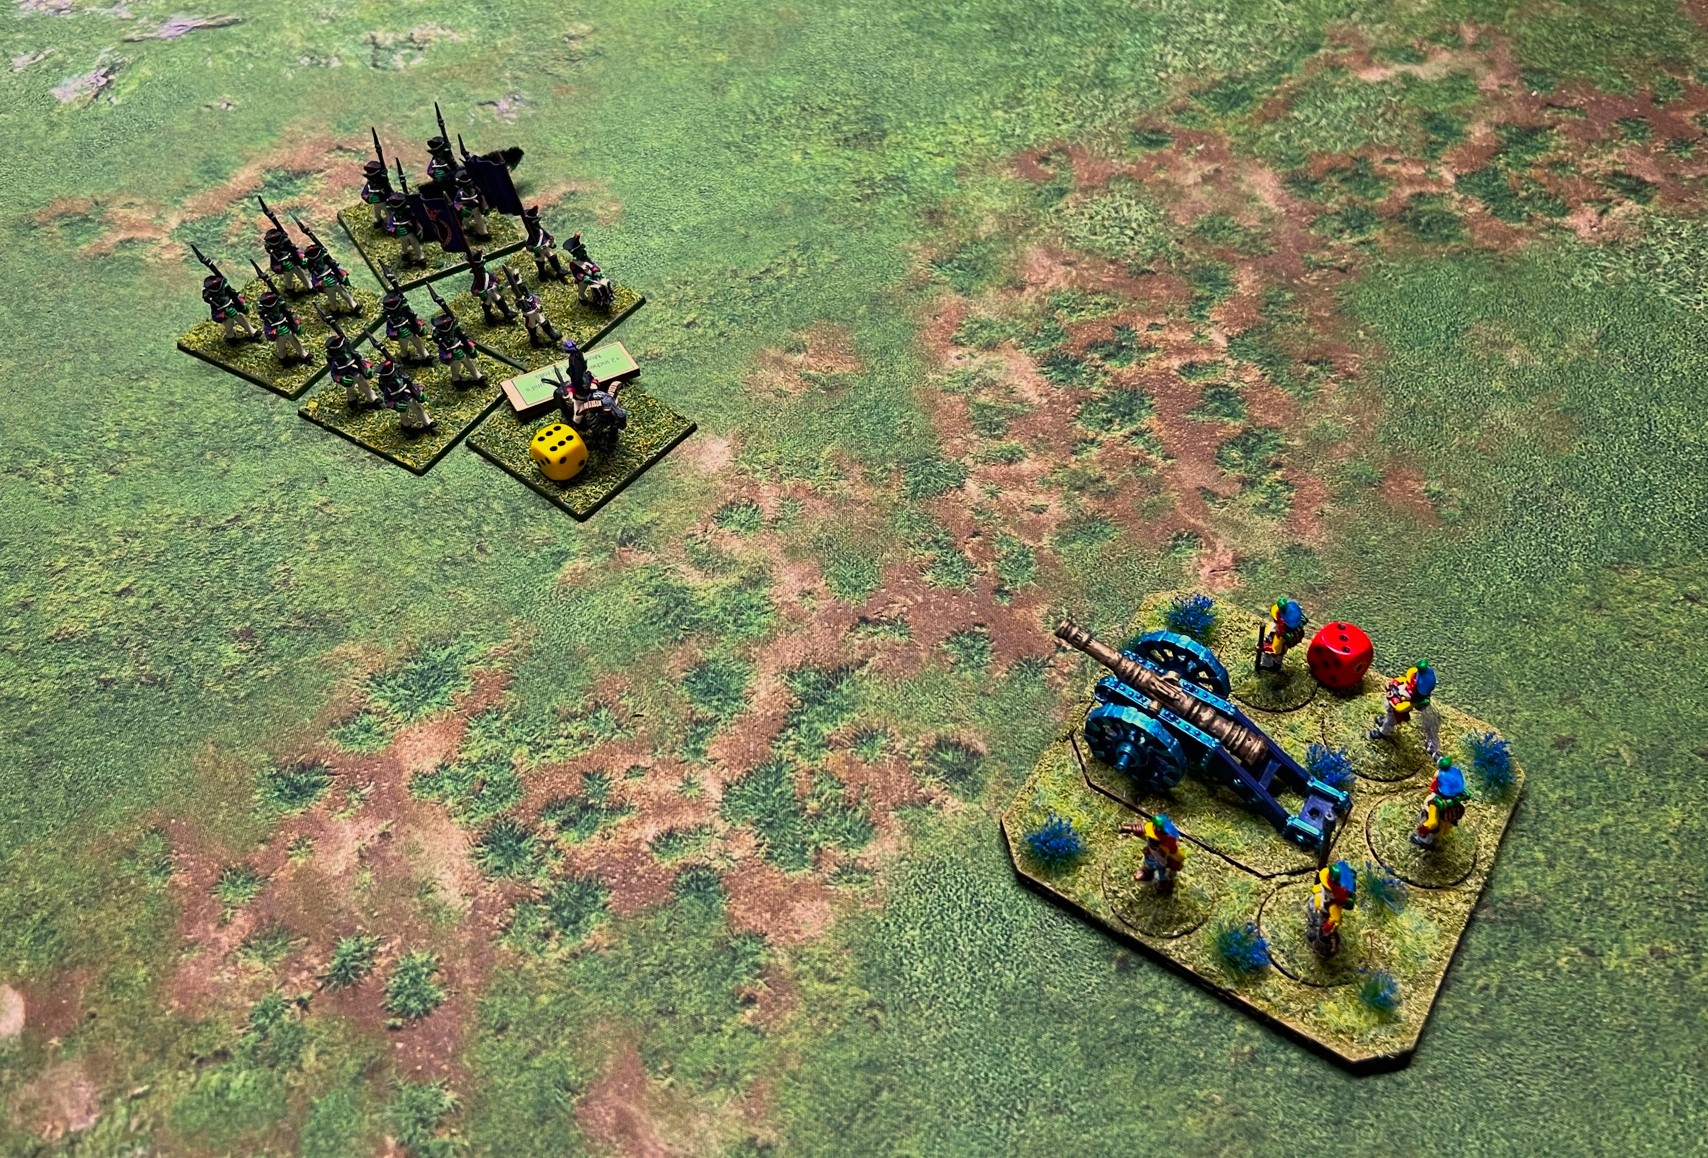
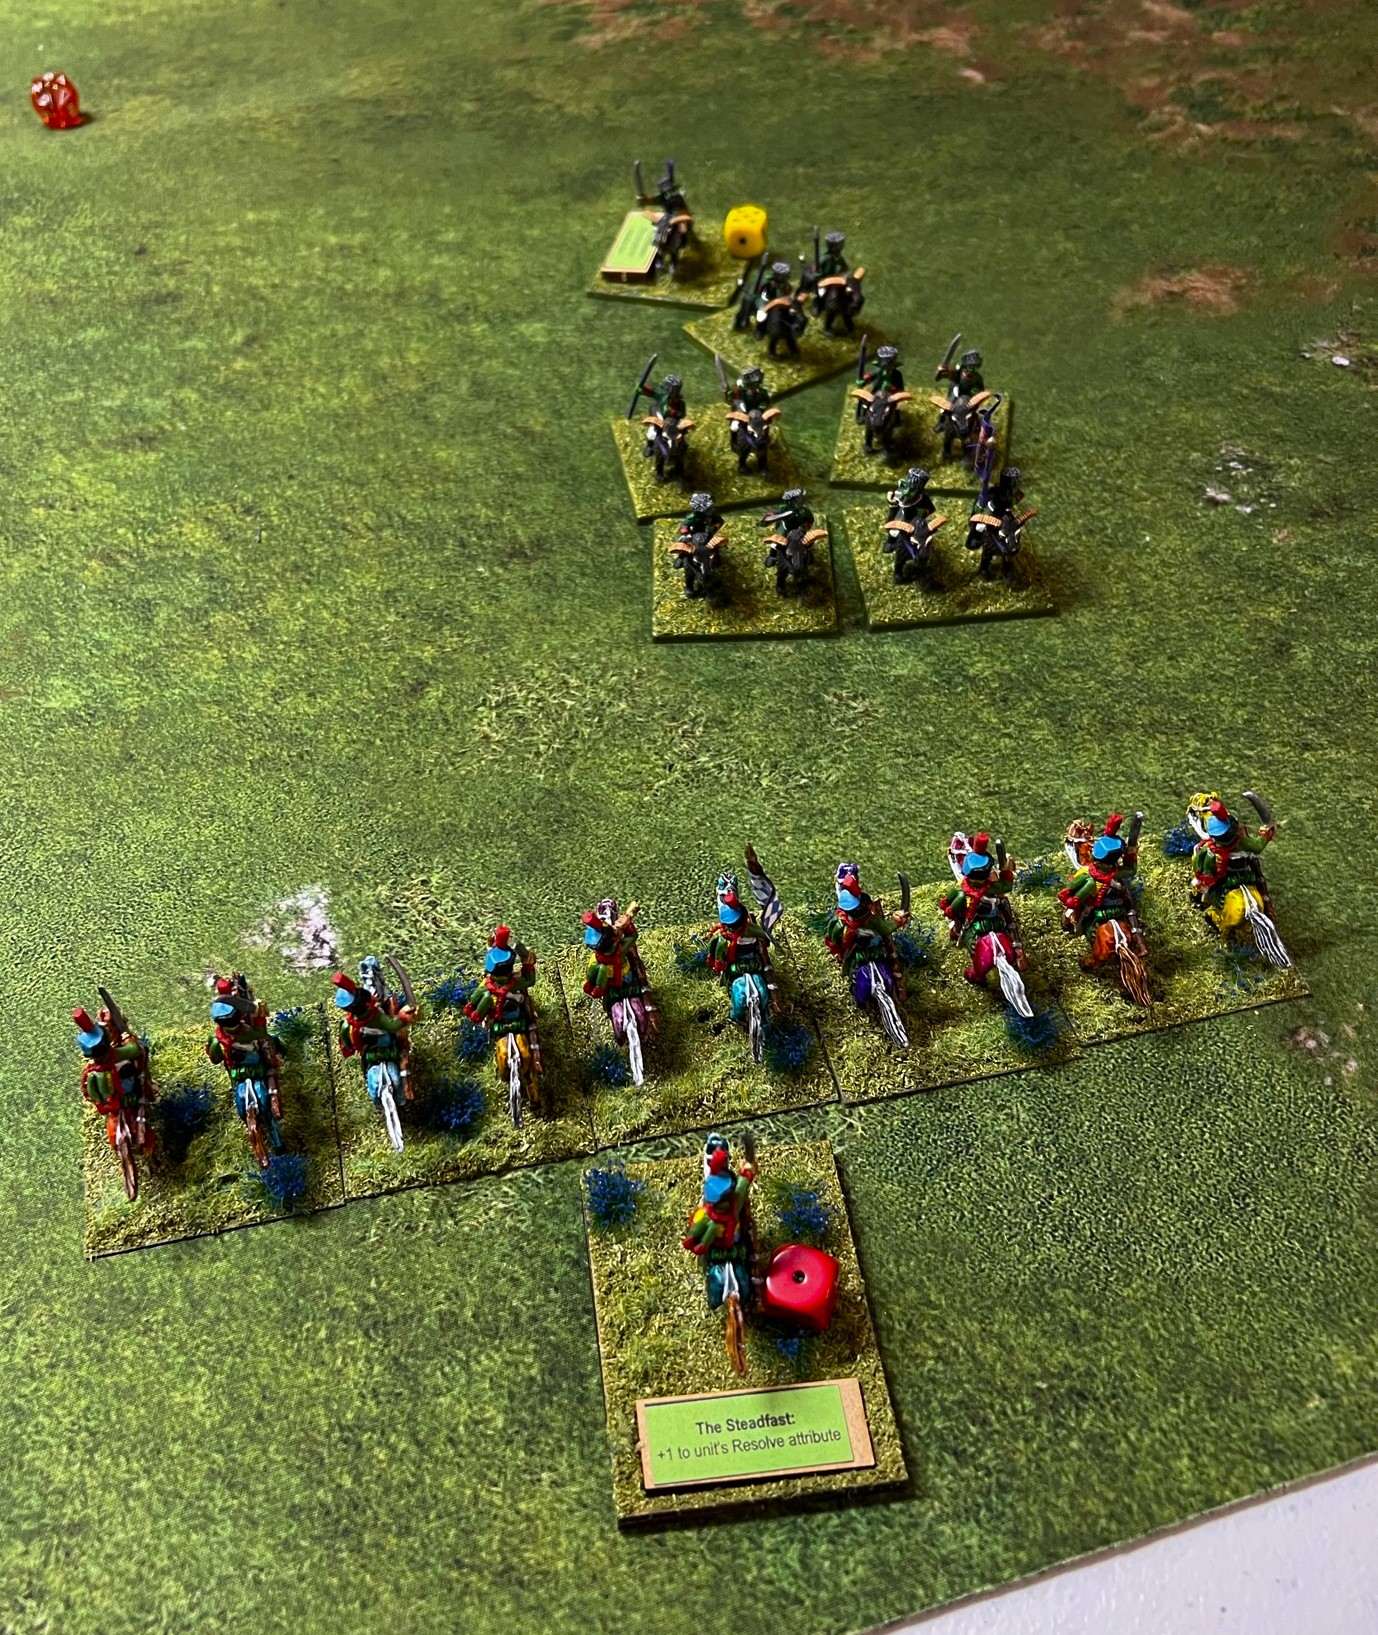
Eye Candy

The Summoning Bell – left side.
The Summoning Bell – right side.
The Summoning Bell – from the front.
The Summoning Bell – back side.
The Summoning Bell – close up on right side.
The Summoning Bell – close up on left side.
The Summoning Bell – close up of the crew. I like my skeletons grungy.

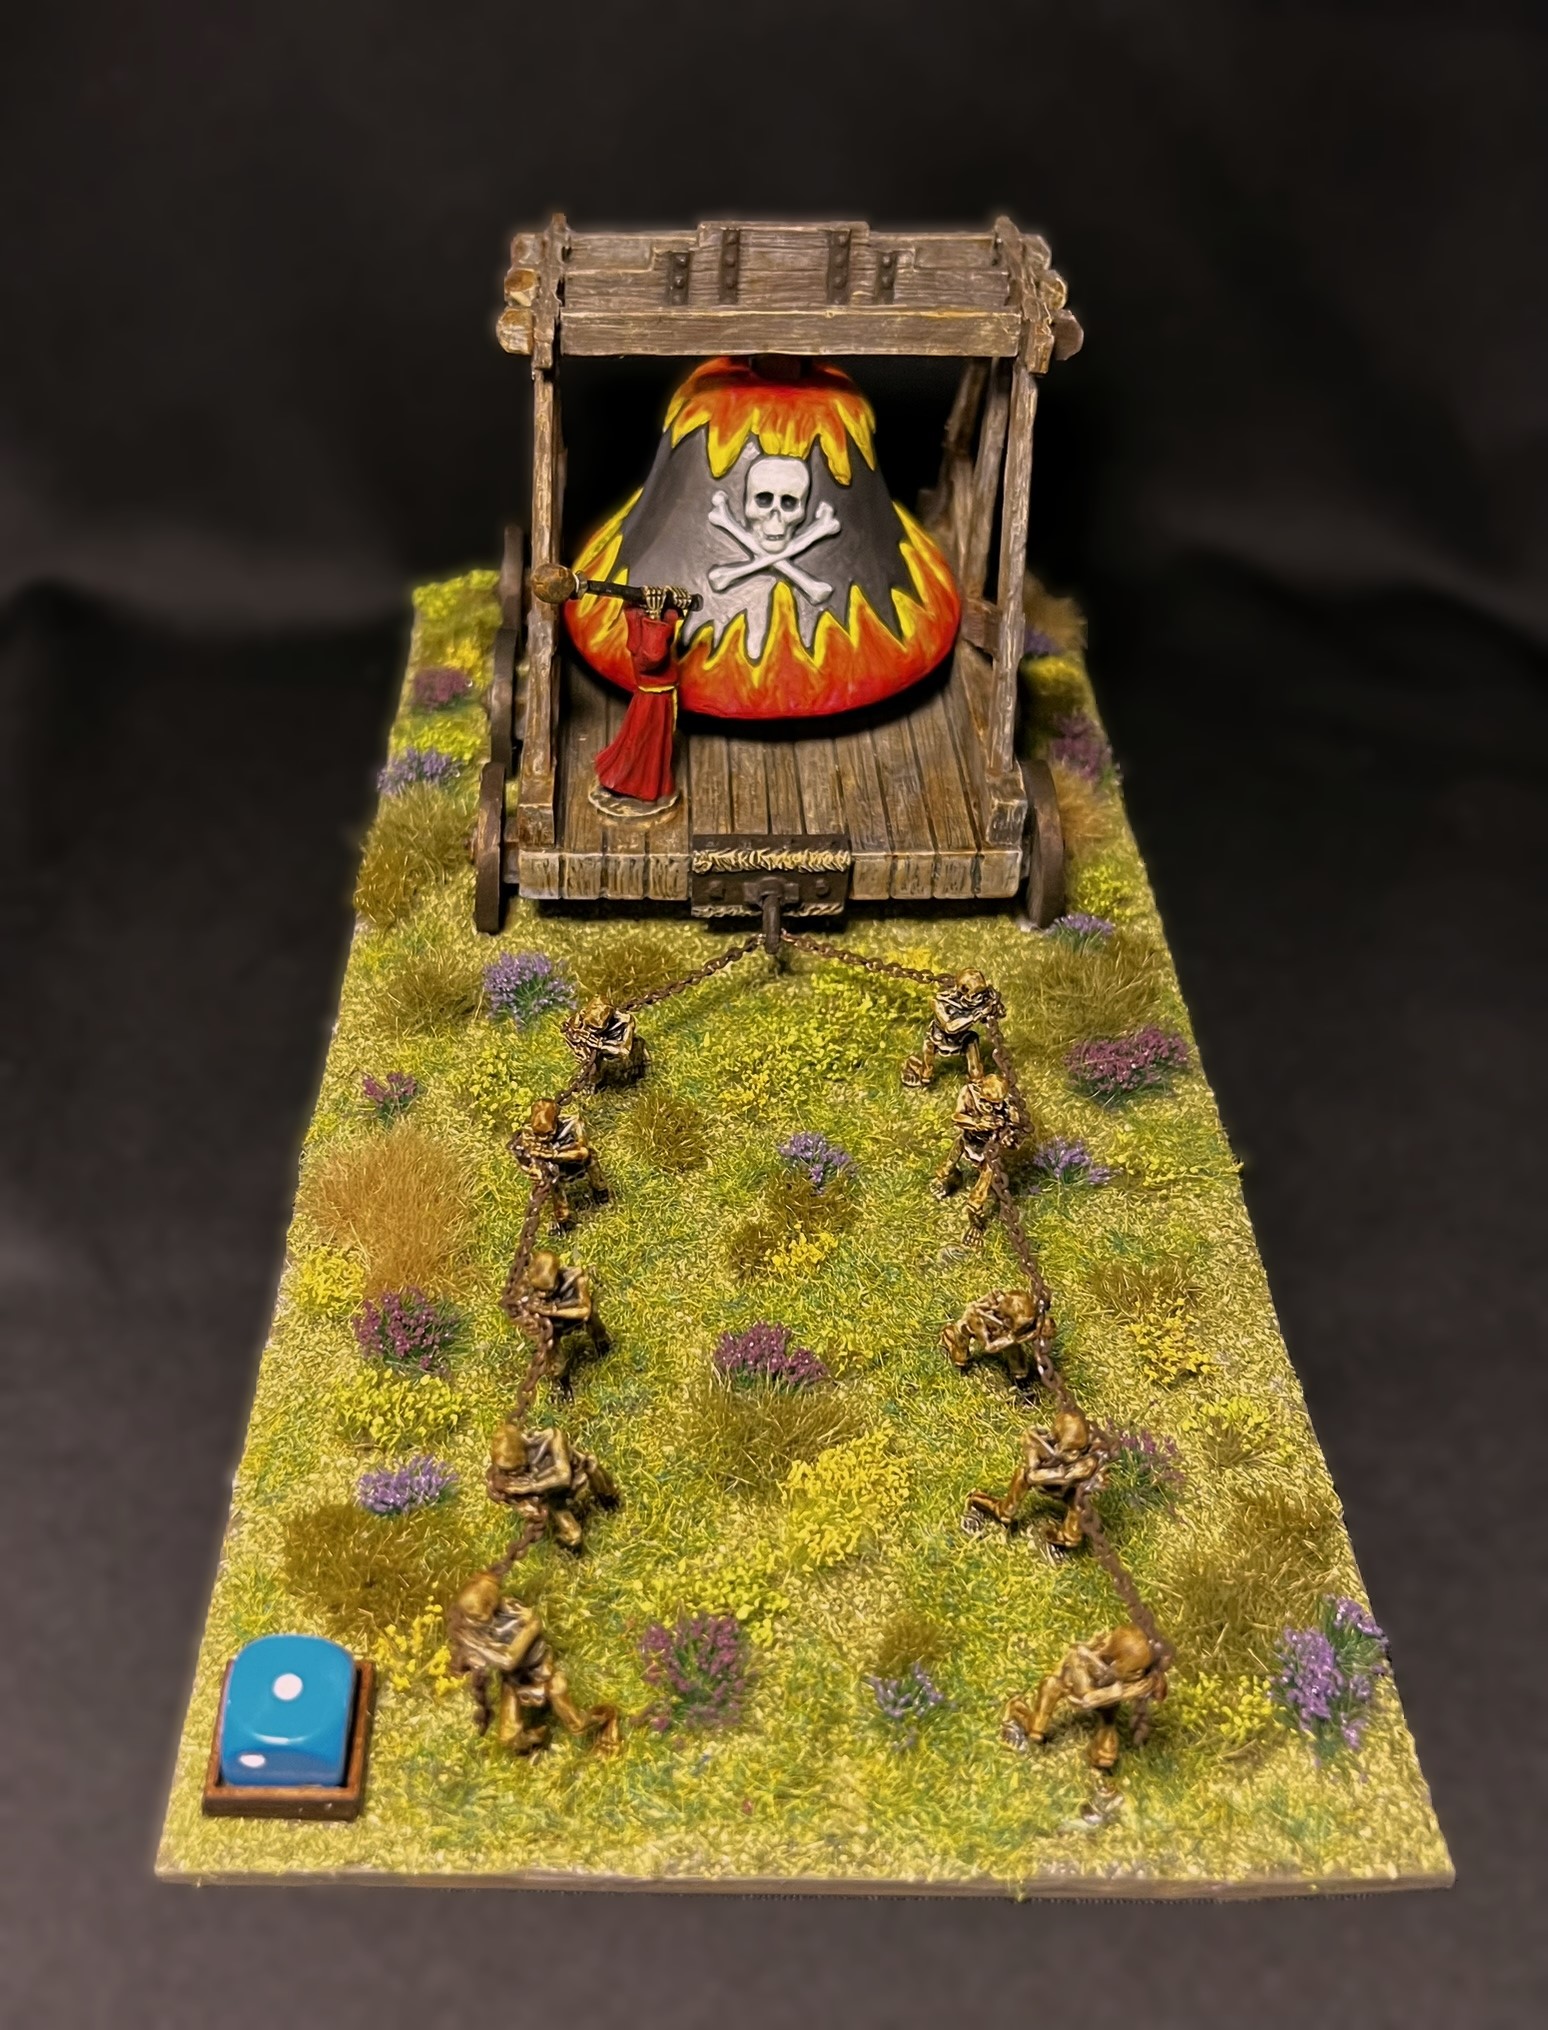
I appreciate your indulgence at all of these photos. I thought that this would be a unit where all the WIP might be more interesting or possibly helpful you, to the reader. You can let me know in the comments section. 

As mentioned above, the Summoning Bell is my final Winkie unit unit at this time. I think that this was an epic way to finish the faction off.

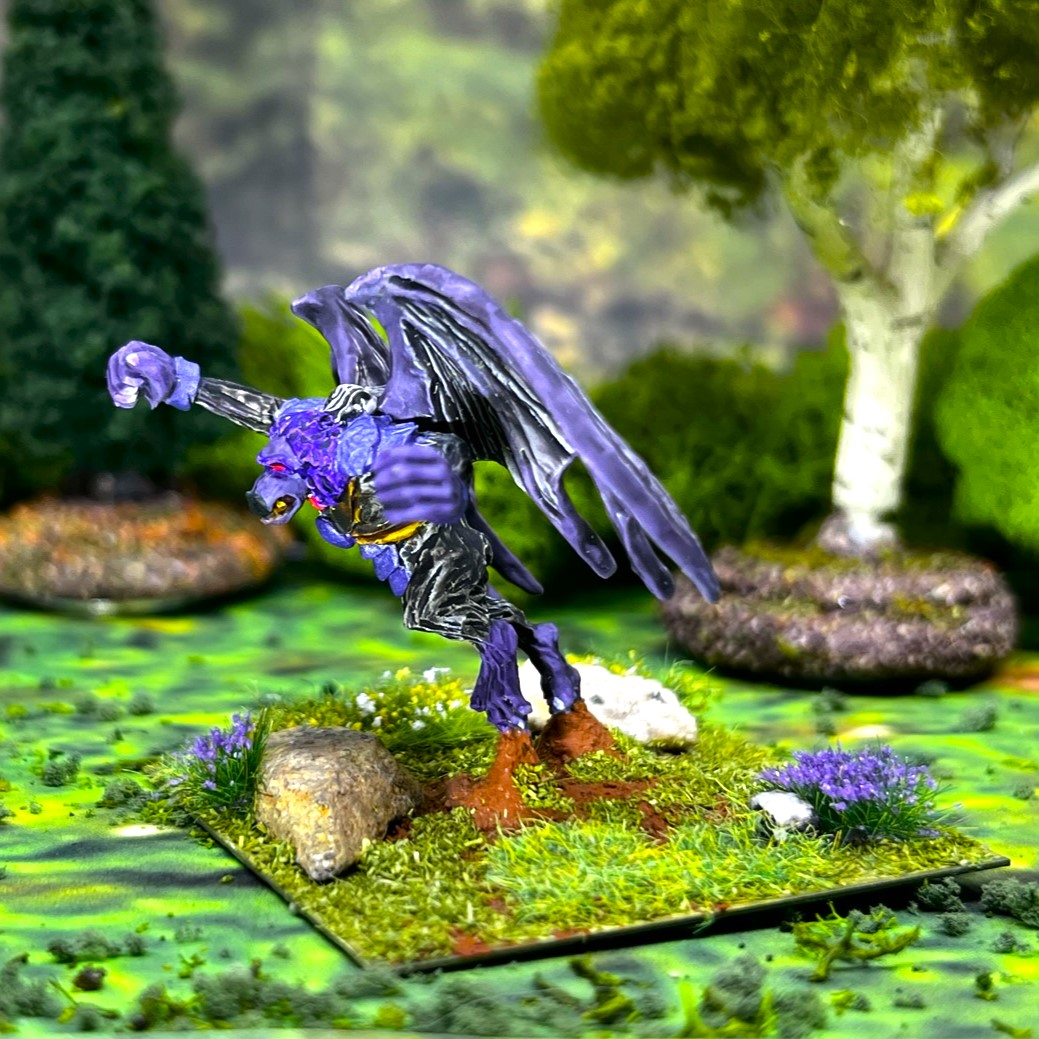
While I am counting it as a Winkie unit in my inventory – I will let the Gillikins use it too – especially in some of the convention games. I will be transitioning to a different faction next – but will also be busy getting stuff ready for the conventions that start next month. I hope that I can get more done for Dave’s challenge. 

As always, much thanks for looking!

And yes, I still have much more Ozz to come…

Miscellaneous details and references for those interested in that sort of thing:

For all of my previous posts on Wars of Ozz games, figures, units, and other related projects – please see this page.

PAINTS, INKS, GLAZES, SHADES, WASHES, PIGMENTS, FLOCKING, GLUES AND MORE THAT I USED ON THE SUMMONING BELL:

  1. Plastruct 2.5mm polystyrene sheet
  2. Vallejo Surface Primer “Black”
  3. Green Stuff (kneadatite)
  4. Gorilla Glue
  5. Poster Tack
  6. Beach Landing Jewelry Chain
  7. Vallejo Mecha Weathering “Rust Texture”
  8. Vallejo Mecha Weathering “Dark Rust Wash” (wash)
  9. Vallejo Mecha Weathering “Light Rust Wash” (wash)
  10. Citadel “Dryad Bark”
  11. Vallejo Mecha Color “Off White”
  12. Citadel “Ushabti Bone”
  13. Army Painter “Speed Paint – Pallid Bone 1.0”
  14. Army Painter “Speed Paint – Speed Paint Medium 1.0”
  15. Citadel “Contrast Paint – Baal Red”
  16. Battlefront “Sherman Drab”
  17. Vallejo “Thinner Medium”
  18. Citadel “Longbeard Grey” (dry)
  19. Vallejo Model Air “Black ” (metallic)
  20. Army Painter “Light Tone” (wash/shade)
  21. Vallejo Mecha Color “Dark Steel”
  22. Citadel “Contrast Paint – Magmadroth Flame”
  23. Citadel “Contrast Paint – Bad Moon Yellow”
  24. Reaper MSP “Pure Black”
  25. Citadel “Contrast Paint – Apothecary White”
  26. Citadel “Contrast Paint – Snakebite Leather”
  27. Citadel “Contrast Paint – Ratling Grime”
  28. Army Painter “Red Tone” (wash/shade)
  29. Paperclip wire
  30. Artillery Battery MDF sabot base frame piece from Old Glory/Wars of Ozz Miniatures
  31. Steel Eyelet
  32. Vallejo Ground Texture “Rough Grey Pumice”
  33. Vallejo “Flow Improver”
  34. Vallejo “Airbrush Thinner”
  35. Vallejo Mecha Varnish “Matte Varnish”
  36. Pendraken 12mm dice frames
  37. Elmer’s PVA Glue
  38. Gamers Grass “Dense Green Wild 6mm Tufts” (flocking)
  39. Gamers Grass “Dry Green XL Wild 12mm Tufts” (flocking)
  40. Gamers Grass “Beige XL Wild 12mm Tufts” (flocking)
  41. Gamers Grass “Wild Shrubs” (flocking)
  42. Army Painter “Yellow/Meadow Flowers” (flocking)
  43. Gamers Grass “Yellow Flowers” (flocking)
  44. Shadow’s Edge Miniatures “6mm Dark Forest Purple” (flocking)
  45. Shadow’s Edge Miniatures “6mm Dark Forest Plum” (flocking)
  46. Army Painter “Battlefield Field Grass” (flocking)

As you may want to check out the Wars of Ozz figures’ range – there are two places to get them and the rules (and I make no money from this btw). The game rules and the figures are available from the following two places:

In the US Old Glory has a site – Wars of Ozz Miniatures.

In the UK go to Sally 4th.

Winkie Medium Artillery Battery (Wars of Ozz)

Last year I painted up a Winkie Light Artillery Battery (WLAB). I thought it was high time that the Winkies got a longer-range artillery battery to start 2024. They were sick of the Munchkins out-ranging them. To that end, I painted up a Winkie Medium Artillery Battery (WMAB) – the subject of this post.

As described previously in my posts on the Winkies, they are much more interested in fighting hand-to-hand in melee with a foe versus shooting a weapon at one. I posted this on the WLAB post last year – but it bears repeating:

Winkies (the orcs of Ozz basically) are not overly bright in general, and certainly are not very educated. According to the Wars of Ozz rulebook,

“…Winkie artillery is something of an afterthought. Numerous battles and sieges have shown the usefulness of a strong artillery arm, but it is simply not a glorious or honourable role according to the Winkie mindset. Few Generals are chosen from the ranks of the artillery. Chieftains’ sons would much rather be leading a regiment of spearmen or jaegers. The artillery requires too much thinking, the guns can’t compete with the workshops of the Munchkins, and there is too much heavy lifting to be glorious. Consequently, the commanders of the batteries are an eccentric lot. They range from brilliant to simply odd. Except for the master gunners, most of the crew are conscripts secretly happy to be well back from the front line.”

Wars of Ozz by John R. “Buck” Surdu, Section 2.2.2.5, page 25

The WMAB is SKU #OZZ-307. It, like the WLAB, has 5 figures plus the gun in total. I again used an MDF sabot base for all of the figures. The battery is 28mm in scale, and the figures are metal. It is worth 5 points – one more than a WLAB and the same cost as a regular Winkie infantry unit. It does outrange the WLAB. In the game, light artillery has a short/long range combination of 6″/18″ versus that of a medium battery like this which has a short/long range of 8″/24″. It can take 5 hits – represented by the 5 figures – though when it gets to 4 the unit is eliminated.

The WMAB has the exact same uniform colors as the WLAB. I started painting the unit in parallel with Evora’s BodyGuard Infantry Regiment. This is my fourth unit for Dave Stone’s “PAINT WHAT YOU GOT CHALLENGE 2023/2024” painting challenge that runs from December 26th, 2023 to February 29th, 2024. It’s also going to play a major role in many of my upcoming games for the multiple gaming conventions that I plan on supporting as a GM. At present, that support level is now at 25 four-hour games just through May across 4 different conventions in Massachusetts, Maine, and New Hampshire (TotalCon38, HAVOC, Mayhem, and HUZZAH!.

First, I’ll share some (well VERY few) WIP shots, then some eye candy of the WMAB.

WIP shots…

The WMAB as received.

Regarding my painting, I mostly followed my usual process, except I did the gun first. It came out too coppery versus brass at first – and Army Painter “Talos Bronze”, while a nice metallic speed paint, is indeed very copper-colored. A switch to a craft metallic paint - Martha Stewart Crafts “Brushed Bronze” – did the trick.  I could have gone with steel, but I like the look of bronze cannon.

The crew was easy to do:

And here is the WMAB finished on its magnetized MDF sabot base:

The WMAB!

Now for some WMAB…

Eye Candy

The WMAB – frontal view.
WMAB – view of the left front.
Right front view of the WMAB.
A view of the top of the battery.
As with all of my artillery units, the magnetized MDF sabot base allows for the gun to be turned around 180 degrees so as to designate it being limbered.

Group shot

The two Winkie artillery batteries are shown here below. As the crews are uniformed identically , I gave the WMAB red flowers on their bases to differentiate them from the WLAB bases’ yellow flowers.

The Winkie Medium Artillery Battery on the left and the Winkie Light Artillery Battery on the right.

The WMAB represents my penultimate Winkie unit at this time (I love that word but I hardly ever get to use it!). I do hope that you enjoyed seeing it and reading the post. Next up will be my final Winkie unit and yet another entry for Dave’s challenge – and soon. Thanks for looking!

And yes, I still have much more Ozz to come…

Miscellaneous details and references for those interested in that sort of thing:

For all of my previous posts on Wars of Ozz games, figures, units, and other related projects – please see this page.

PAINTS, INKS, GLAZES, SHADES, WASHES, PIGMENTS, FLOCKING, GLUES AND MORE THAT I USED ON THE WINKIE MEDIUM ARTILLERY BATTERY:

  1. Gorilla Glue
  2. 1/2″ x 1/2″ square steel bases from Wargames Accessories (#16)
  3. Artillery Battery MDF sabot base from Old Glory/Wars of Ozz Miniatures
  4. P3 “Brown Ink” (ink)
  5. 1 1/4″ x 1″ steel base from Wargames Accessories (#FOW1)
  6. 1/8″ neodymium magnets
  7. Everlast steel ABA 3/4″ washers
  8. Elmer’s PVA Glue
  9. Red Sharpie pen
  10. Poster tack
  11. Vallejo Premium Primer “White”
  12. Vallejo “Flow Improver”
  13. Vallejo “Airbrush Thinner”
  14. Citadel “Nuln Oil” (wash)
  15. Vallejo Model Color “White”
  16. Citadel “Contrast Paint – Ironjawz Yellow”
  17. Citadel “Contrast Paint – Baal Red”
  18. Army Painter “Speed Paint – Talos Bronze 2.0”
  19. Vallejo Model Air “Black ” (metallic)
  20. Martha Stewart Crafts “Brushed Bronze”
  21. Citadel “Cryptek Armourshade” (wash/shade)
  22. Citadel “Nuln Oil GLOSS” (wash/shade)
  23. Army Painter “Battlefields Grass Green” (flocking)
  24. Vallejo Mecha Varnish “Gloss Varnish”
  25. Reaper MSP “Pure Black”
  26. Vallejo Model Color “Wood Grain”
  27. Vallejo Mecha Color “Off White”
  28. Citadel “Contrast Paint – Ork Skin”
  29. Citadel “Contrast Paint – Snakebite Leather”
  30. Vallejo Model Air “Bright Brass”
  31. Citadel “Contrast Paint – Apothecary White”
  32. Citadel “Contrast Paint – Contrast Medium”
  33. Army Painter “Red Tone” (wash/shade)
  34. Citadel “Contrast Paint – Striking Scorpion Green”
  35. Vallejo Mecha Color “Green Fluorescent”
  36. Citadel “Contrast Paint – Striking Scorpion Green”
  37. Vallejo Model Ink “Black Green” (ink)
  38. Battlefront “Sherman Drab”
  39. Vallejo “Thinner Medium”
  40. Citadel “Contrast Paint – Basilicanum Grey”
  41. Citadel “Retributor Armour”
  42. Vallejo Model Air “Wood”
  43. Citadel “Contrast Paint – Black Legion”
  44. Citadel “Seraphim Sepia” (wash/shade)
  45. Army Painter “Speed Paint – Aztec Gold 2.0”
  46. Citadel “Warpfiend Grey”
  47. Citadel “Agrax Earthshade” (wash/shade)
  48. Vallejo Mecha Varnish “Matte Varnish”
  49. Pendraken 12mm dice frames
  50. Army Painter “Yellow Flowers” (flocking)
  51. Shadow’s Edge Miniatures “6mm Wild Flowers Primrose Tufts” (flocking)
  52. Gamers Grass “Yellow Flowers” (flocking)
  53. Army Painter “Battlefield Field Grass” (flocking)
  54. Small stones
  55. Army Painter “Lowland Shrubs” (flocking)
  56. Twigs
  57. Citadel “Blood for the Blood God”
  58. Gamers Grass “Green Meadow Tufts” (flocking)
  59. Pillow batting (for smoke)

As you may want to check out the Wars of Ozz figures’ range – there are two places to get them and the rules (and I make no money from this btw). The game rules and the figures are available from the following two places:

In the US Old Glory has a site – Wars of Ozz Miniatures.

In the UK go to Sally 4th.

Evora’s Bodyguard Infantry Regiment (Wars of Ozz)

According to the canon of the world of the Wars of Ozz, Evora was the first witch to appear after the founding of Ozz. She had the power to raise massive skeletal armies of the dead (which were sadly plentifully available in the apocalyptic era after the end of the Last Great War). Despite their combat prowess, the Winkies at that time were not unified in any major way, so Evora was able to conquer them, subjugate them, and carve out her empire from their lands. In early 2023, I painted up an Evora figure that you can read about here. 

Evora’s capital and court were centered on the Yellow Castle. One of the regiments available to her Winkie army is called, unsurprisingly, Evora’s Bodyguard Infantry Regiment (let’s shorten that to EBIR). I saw the unit on the Wars of Ozz website, and decided that it would be a good regiment to add to my Winkie army.

According to the rules, the EBIR is a very potent unit. As befits the Winkie ethos of warfare, they fight only with melee weapons – in this case big honking thrusting spears and swords. With regards to Melee, the EBIR has the same attribute as other Winkie Infantry Regiments – that of 7/10, which is very good. Where the EBIR differs is in its Resolve and Elan attributes – as well as with regards to its point cost. The Resolve value (the measure of the unit’s desire to stick in a fight) for the EBIR is a whopping 9/10 versus a regular Winkie Infantry Regiment’s 6/10. The Elan attribute for the EBIR (the desire to take the fight to the enemy) is the strongest possible at 10/10 versus a regular Winkie Infantry Regiment’s already strong 8/10. This is greater than any other unit in the game (outside of the Whim Whim Janissaries which also has an Elan of 10/10). The EBIR is expensive however, at 6 points, while a normal Winkie regiment will cost 5 points. There can only be one EBIR in any brigade. As with most other Ozz infantry regiments, they are based 4 apiece to a 2″ square base – so five bases for the regiment plus the regimental commander on his own separate MDF base. 

The unit (not the commander) is very Egyptian-looking – almost as if it were recruited from fanatics – which I suppose one must be to get into it. Very much the troopers look like cultists – dressed in robes for the most part, with a mix of Aztec-like cotton armor vests, steel scale, or mail armor. The soldiers have ancient Egyptian-style hats festooned with some sort of an idol. They all have very large shields which looked to be made of wicker. Some have boots, and some are in sandals (why I don’t know – combat flip flops?!). Most surprising were the canon colors. As Winkies are very yellow-oriented with regards to color, one might expect that the EBIR would be yellow too.

Nope.

Orange coats, purple facings, and grey trousers! Clearly the Madness Bombs color mania struck here!

No assembly was required for the unit other than to mount the shields, to add the flags, and to assemble the regimental commander and his Zilk (carniverous bird) mount. As I always do, I mixed and matched the figure types and poses such that no two bases of the five in the regiment were identical in terms of the figures. The SKU for the regiment is OZZ-301. There are 21 figures for the regiment – this includes the mounted regimental commander and 20 trooper figures. All of the figures are metal and 28mm in size. I decided to stay with more orange instead of any yellow as I thought that looked better and would be in canon agreement. The contrast between the orange and the purple was interesting.

This is my third unit for Dave Stone’s “PAINT WHAT YOU GOT CHALLENGE 2023/2024” painting challenge that runs from December 26th, 2023 to February 29th, 2024. It’s also going to play a major role in many of my upcoming games for the multiple gaming conventions that I plan on supporting as a GM – right now at a schedule of 25 four-hour games just through May across 4 different conventions.

As I have mentioned previously, I am still recovering from pre-Christmas knee surgery, but now my painting opportunities have been better. I tried to take a few more WIP shots for this project. I’ll share those and then some eye candy.

WIP shots

Evora’s Bodyguard Infantry Regiment – after cleanup of any mold lines and washing. Yes, 17 shields to paint up. I started work on December 29th.
The unit primed in white with the shields primed separately. Note that there are 16 shields, not 17! Later in the project, I would find that one rogue shield had disappeared under a paper towel and had to be painted separately.
Early painting – using my normal habit of applying a dark wash over the white and dry brushing white over that before adding colors. I found that these figures had several more difficult-to-access painting areas (those that were hard to paint without getting paint where I did not want it) – than most other Ozz figures. This was mainly due to the arm and head positions – not a terrible challenge, but I thought that it took me more time to paint.

By January 4th I had pinned and assembled the regimental commander and his mount, and painted it as you see below. I had started to get some orange onto the troopers as you see on the left below.

Jan 5th progress.

January 8th saw us getting about a foot of snow. This snow interrupted my work as even in my gimping state I could use the snowblower (slowly and methodically). Luckily, Lynn has no fear of hard shovel work. Once done, we lit the fire pit briefly.

I was back in the saddle painting through the 8th of January.

By the 9th of January, I had the regiment painted, shields attached, and varnished on their specimen jars. I drilled though the shields and tried to get them multiple gluing points in terms of attachment for the sake of durability on the tabletop. Again, these were BIG shields. Next, I needed to mount the figures on the bases and get the flocking done. Glue does take time to dry…always…

Mounting the figures on their steel and MDF bases.

I then applied the flocking and flags. For the flocking, I decided that purple and orange flowers with green grass and undergrowth would work. At least the flip flops were less visible!

Flags to cut out with the flocked command base.

I was finally done on Jan 10th. 

The EBIR completed.

Eye Candy

Select and click on any photo for a better look.

Regimental Commander Base

Base 1

Base 2

Base 3

Base 4

Command Base

Group Shots

The EBIR in line formation with the regimental commander leading the way.
Top view of the flocking.
The EBIR in column moving to the left.
The EBIR in column moving to the right.

Admittedly, early work on the color scheme and the painting and shield difficulties I encountered were dampening my enthusiasm for this unit. However, once I completed it, I found that I really do like it.

I’d be very interested in your feedback on the unit and its colors as they are far from run of the mill. Ozz is supposed to be colorful – and these guys certainly fit that bill.

I do hope that you enjoyed seeing the EBIR and reading the post. Next up will be a new Winkie artillery unit for Dave’s challenge – and soon. Thanks for looking!

And yes, I still have much more Ozz to come…

Miscellaneous details and references for those interested in that sort of thing:

For all of my previous posts on Wars of Ozz games, figures, units, and other related projects – please see this page.

PAINTS, INKS, GLAZES, SHADES, WASHES, PIGMENTS, FLOCKING, GLUES AND MORE THAT I USED ON EVORA’S BODYGUARD INFANTRY REGIMENT:

  1. Rectangular Brigade MDF base (used as a Regimental base) from Old Glory
  2. 2″ square steel bases from Wargames Accessories (#21)
  3. 1.25″ x 1″ square steel base from Wargames Accessories (#FOW1)
  4. #19 x 1/2″ steel nail (for pinning)
  5. Paper clip wire (for pinning)
  6. 3/4″ Everbilt steel washers (ABA)
  7. Gorilla Glue
  8. Poster tack
  9. Elmer’s PVA Glue
  10. Black Sharpie pen
  11. Vallejo Premium Primer “White”
  12. Vallejo “Flow Improver”
  13. Vallejo “Airbrush Thinner”
  14. Secret Weapon Washes “Heavy Body Black” (wash)
  15. Citadel “Nuln Oil” (wash)
  16. Vallejo Model Color “White”
  17. Citadel “Contrast Paint – Snakebite Leather”
  18. Citadel “Contrast Paint – Contrast Medium”
  19. Army Painter “Speed Paint – Purple Swarm 2.0”
  20. Citadel “Seraphim Sepia” (wash/shade)
  21. Army Painter “Purple Tone” (shade/wash)
  22. P3 “Brown Ink” (ink)
  23. Army Painter “Speed Paint – Enchanted Steel 2.0”
  24. Citadel “Contrast Paint – Apothecary White”
  25. Reaper MSP “Pure Black”
  26. Citadel “Warpfiend Grey”
  27. Vallejo “Thinner Medium”
  28. Vallejo Model Color “Wood Grain”
  29. Vallejo Model Color “English Uniform”
  30. Vallejo Mecha Color “Off White”
  31. Army Painter “Speed Paint – Nuclear Sunrise 2.0”
  32. Army Painter “Speed Paint – Talos Bronze 2.0”
  33. Vallejo Mecha Color “Magenta Fluorescent”
  34. Citadel “Contrast Paint – Ironjawz Yellow”
  35. Citadel “Retributor Armour”
  36. Citadel “Ushabti Bone”
  37. Vallejo Model Air “Wood”
  38. Army Painter “Speed Paint – Pallid Bone 1.0”
  39. Vallejo Model Air “Steel”
  40. Martha Stewart Crafts “Brushed Bronze”
  41. Citadel “Contrast Paint – Ork Skin”
  42. Citadel “Contrast Paint – Striking Scorpion Green”
  43. Vallejo Mecha Color “Green Fluorescent”
  44. Vallejo Model Ink “Black Green” (ink)
  45. Vallejo Mecha Color “Blue Grey”
  46. Army Painter “Blue Tone” (shade/wash)
  47. Army Painter “Speed Paint – Moonlake Coral 2.0”
  48. Army Painter “Speed Paint – Speed Paint Medium 1.0”
  49. Citadel “Nuln Oil GLOSS” (wash/shade)
  50. Battlefront “Sherman Drab”
  51. Citadel “Agrax Earthshade” (wash/shade)
  52. Vallejo Mecha Varnish “Gloss Varnish”
  53. Vallejo Mecha Varnish “Matte Varnish”
  54. Pendraken 12mm dice frames
  55. Army Painter “Battlefield Grass Green” (flocking)
  56. Army Painter “Battlefield Field Grass” (flocking)
  57. Small stones
  58. Twigs
  59. Army Painter “Lowland Shrubs” (flocking)
  60. Gamers Grass “Green Meadow Tufts” (flocking)
  61. Army Painter “Battlefield XP Woodland Tufts” (flocking)
  62. Shadow’s Edge Miniatures “6mm Dark Forest Dark Purple Tufts” (flocking)
  63. Gamers Grass “Orange Flowers” (flocking)
  64. Blue Sharpie pen
  65. Brown Sharpie pen
  66. Flags printed on card stock

As you may want to check out the Wars of Ozz figures’ range – there are two places to get them and the rules (and I make no money from this btw). The game rules and the figures are available from the following two places:

In the US Old Glory has a site – Wars of Ozz Miniatures.

In the UK go to Sally 4th.

General Zephaph the Skull Crusher & his Standard Bearer (Wars of Ozz)

Winkies are the orc analogues of the world of Ozz. I have not recently added any Winkie units to that faction’s forces – in fact not since last March July when I finished up the Winkie Light Cavalry (on carniverous giant birds called Zilks). My current Winkie forces have been adequate up until recently. My forces are composed of 43 points worth as listed below.

  1. Winkie Infantry Regiment – 5 points
  2. Winkie Sharpshooters Regiment – 6 points
  3. Winkie Light Cavalry Riding Zilks – 5 points
  4. Winkie Light Artillery Battery – 4 points
  5. Great Flying Apes Regiment – 6 points
  6. Lesser Apes Regiment – 4 points
  7. 1st Skeleton Regiment – 5 points
  8. 2nd Skeleton Regiment – 5 points
  9. Evora the Witch – 3 points
  10. Unnamed Brigade commander – 0 points (free!)

As I mentioned in my last post, for the most part, most brigades in the Wars of Ozz are 20-30 points. As with my Munchkin additions, I have decided to get to the point where I could field two full Winkie brigades. This means that I would need to add more troops and field another Brigade commander – especially if I could also use that commander as a Division or Army Commander for the Winkies. Currently, I only have the one unnamed brigade commander. So that I can deploy two full Winkie brigades, I have started to build:

  1. Evora’s Body Guard with Command – 6 points
  2. Winkie Medium Artillery – 5 points
  3. General Zephaph the Skull Crusher – 2 points
  4. Taskmaster and the Summoning Bell – 3 points
  5. 8 Lesser witches (these could go to any faction, at 2 each = 16 points)

This would give me more troops, but the Winkie leadership deficit remains. When I built my Winkie Infantry Regiment, the baggie was missing a single standard bearer. Russ Dunaway of Old Glory was decent enough to replace the figure for me. Then about two weeks later, a second standard bearer showed up in the mail. I guess maybe he wanted to make sure I got the missing figure – but now I had an extra. As I thought about getting annother figure to act as a brigade or army commander, I thought “wouldn’t it be cool to have a standard bearer for an army commander?”. I could base two figures on an MDF base as an army commander – all I needed was a Winkie figure and an army banner. For the latter, thanks to Buck Surdu, who created an Army banner with an “E” for Evora the Witch on it (Empress of the Winkies), and for the former…

Enter General Zephaph the Skull Crusher, SKU# OZZ-312, worth 2 points. It is a nice bulky figure, looking very much as one would expect from a Winkie general. He is armed with a massive mace, and has a huge bulky hat and appropriate clothes. The figure is cast in metal and 28mm in size. In the game, he would be based on his own individual MDF leader base, but I did add the standard bearer. No assembly was required other than for the MDF base.

Brigade leaders control dice pools for their units. General Zephaph has no combat values other than what he can do if he is attached to a unit. Here, he gives an attached unit two abilities – first, Superior Resolve (which means that the unit would be less likely to cut and run away from a fight) and second, one ability that is determined at random in each game. This is why he costs 2 points. His luck is 7/10, which is average for most leaders.

WIP Shots

As I followed the same basic painting pattern that I usually use, WIP shots here will be few. I used a lot of yellows, as that is the Winkie faction’s color.

Starting off- two figures and an MDF base.
Clean up any mold lines and flash (there were very few issues), and mount for painting.
Prime in white, wash with a dark wash, then dry brush in white before adding any other colors.
All painted up and ready for varnishing, basing, and flocking.

I now can share some…

Eye Candy

A topside rear view showing the data placard and the banner. I extended out the pendraken die frame with a little extra MDF.
The view of the stand from the front. The general’s face is pretty well obscured by his hat!
Right front view of the base. Yes – those are yellow flowers for the Winkie general.
Right side view showing the big banner that Buck designed – I really like it.
Angled view of the back showing some more details.

As a bonus, here is the general at the last game – being defeated by Colonel Sourdough (played by Mike as you see below).

Mike (the Munchkin player with Colonel Sourdough) watches General Zephaph (played by Brad) on the hill as he leads the assault on the Munchkins. It would not go well for the Winkies.

That’s all I have for Genearl Zephaph the Skull Crusher. Thanks to Russ and to Buck for making this possible! I may add another Winkie Brigade/Army leader in the future, but for now I will be set.

Next up I will be sharing several Lesser Witches who could be part of any faction’s forces.

And yes, I still have more Ozz to come…

Miscellaneous details and references for those interested in that sort of thing:

For all of my previous posts on Wars of Ozz games, figures, units, and other related projects – please see this page.

PAINTS, INKS, GLAZES, SHADES, WASHES, PIGMENTS, FLOCKING, GLUES AND MORE THAT I USED ON GENERAL ZEPHAPH THE SKULL CRUSHER AND HIS STANDARD BEARER:

  1. Round MDF base from Old Glory
  2. 1.25″ x 1″ square steel base from Wargames Accessories (#FOW1)
  3. Elmer’s PVA Glue
  4. 3/4″ Everbilt steel washer
  5. Poster tack
  6. Vallejo Premium Primer “White”
  7. Vallejo “Flow Improver”
  8. Vallejo “Airbrush Thinner”
  9. Secret Weapon Washes “Heavy Body Black” (wash)
  10. Vallejo Model Color “White”
  11. P3 “Brown Ink” (ink)
  12. Vallejo Model Air “Gun Metal”
  13. Citadel “Contrast Paint – Ork Skin”
  14. Citadel “Contrast Paint – Ironjawz Yellow”
  15. Citadel “The Fang”
  16. Citadel “Contrast Paint – Nazdreg Yellow”
  17. Army Painter “Speed Paint – Dark Wood 2.0”
  18. Army Painter “Speed Paint – Runic Grey 1.0”
  19. Army Painter “Speed Paint – Glittering Loot 2.0”
  20. Army Painter “Speed Paint – Poppy Red 2.0”
  21. P3 “Red Ink” (ink)
  22. Reaper MSP Colors “Pure Black”
  23. Vallejo Mecha Color “Metallic Blue”
  24. Army Painter “Speed Paint – Hardened Leather 1.0”
  25. Army Painter “Warpaints – Shining Silver”
  26. Army Painter “Speed Paint – Pallid Bone 1.0”
  27. Army Painter “Speed Paint Medium 1.0”
  28. Citadel “Contrast Paint – Striking Scorpion Green”
  29. Vallejo Mecha Color “Green Fluorescent”
  30. Vallejo Model Color “Dark Sea Grey”
  31. Battlefront “Sherman Drab”
  32. Vallejo “Thinner Medium”
  33. Pendraken 12mm dice frame
  34. Army Painter “Battlefields Field Grass” (flocking)
  35. Vallejo Mecha Varnish “Gloss Varnish”
  36. Vallejo Mecha Varnish “Matte Varnish”
  37. Gamers Grass “Yellow Flowes” (flocking)
  38. Printed Avery label
  39. Army Painter “Battlefields Meadow Flowers” (flocking)
  40. Shadow’s Edge Miniatures “Green Tufts” (flocking)
  41. Army Painter “Battlefield Field Grass” (flocking)
  42. Shadow’s Edge Miniatures “6mm Dark Forest Light Blue Tufts” (flocking)
  43. Black Sharpie pen
  44. Brown Sharpie Pen
  45. Winkie Flags from Buck Surdu printed on card stock
  46. Vallejo Game Ink “Black Ink” (ink)

Again, as you may want to check out the Wars of Ozz figures’ range – there are two places to get them (and I make no money from this btw). The game rules and the figures are available from the following two places:

In the US Old Glory has a site – Wars of Ozz Miniatures.

In the UK go to Sally 4th.

2 Regiments of Skeletons (Wars of Ozz)

In the game of Wars of Ozz, there are skeletons that can be part of Winkie brigades. They can be part of other types of brigades as well as allies, though they must be purchased at a higher point cost. There are additional nuances to their use as well.

During my last few games of Wars of Ozz, I had GM’d games with Arella the Witch, the Gillikin Leader. She acted as both a witch and a leader. As a witch, she has a “Raise the Dead” spell that according to the Wars of Ozz rulebook:

When successfully cast, this spell creates one base of skeletons that touches the witch or wizard’s base. This skeleton base gets its own command die. The skeleton base may be combined with other skeleton bases in contact with the wizard or witch to create a “regiment” of skeletons. The witch or wizard may not have more than 5 skeleton bases in the game at the same time.

Wars of Ozz rulebook, page 109, section 8.8, Consolidated Magic Tables

Other witches or wizards (such as lesser ones) may also possibly get this spell when they are set up at the beginning of the game. So, anyone could have skeletons in their forces.

Additionally, as part of the game there is a “Summoning Bell” that could be owned by either Arella or her sister, Evora the Witch, the Empress of the Winkies (but not both). Evora does not have the “Raise the Dead” spell that Arella has in her spell list, but could use the bell. The rules discuss the history of the bell in section 2.2.2.2 on page 24. Its use is more fully described in the Winkies section 4.3.1 as follows:

Evora the Witch created the Summoning Bell. The Winkies and Gillikins often wrestle for control of the bell…the Summoning Bell is led by ‘the Taskmaster’ and is pulled by skeletons…as long as (it is) within command radius of Arella or Evora (it) may execute the equivalent of the ‘Raise the Dead’ spell…

Wars of Ozz rulebook, page 82, Section 4.3.1, The Summoning Bell

The section goes on to describe that if Arella has the Bell she can both attempt to throw the “Raise the Dead”spell and have the bell generate even more skeletons as well.

I do not yet have my Summoning Bell painted, but you can see it on the website here. It’s in my painting queue but not likely next up.

However, I do have Arella and I did need to have skeletons for her in case that she did throw the “Raise the Dead” spell in one of my games. I also knew that having a regiment of skeletons would work to expand my available forces – but also that having two regiments would be even better!

I had some experience in painting skeletons as seen in The Nightmare Legion (my first blog post way back in 2015) and in Grenadier Models Dart Thrower and Undead Crew (130), circa 1984 (from my blog in 2016). Painting skeletons is relatively straighforward, but this time I would try to add the new tool of speed paints to these. Basically, I airbrush primed the skeletons in black, then heavy dry brushed them in white. Then to get a sepia tone on the bones I went with Army Painter “Pallid Bone” Speed Paint 1.0 that I cut 50% with Army Painter “Speed Paint Medium 1.0”. This gave me the tone I wanted without getting too dark. Then I tried to rust up and age all the weapons. As is my habit, for those interested, I do list all of the paints and more that I used on this project at the end of the post.

For the SKU OZZ-314, there are 20 figures – with no regimental commander, so with two regiments that was 40 figures for this project – all cast in metal and 28mm in size. The skeletons are of course infantry and are less affected by musketry (but not cannon). The skeletons are based 4 apiece to a 2″ square base – so five bases for each 20-figure regiment.

The figures came in two pieces – and some minor assembly was required as there was an upper and a lower torso . Assembly was indeed facilitated by my having forceps that could stay clamped down for a brief time on the figures while the Gorilla Glue set.

A skeleton regiment is better than average with a Melee value of 6/10, and an Elan value of 6/10 as well. Where they really shine is at Resolve (not running away from a fight) – with value of 9/10. The unit costs 5 points for the Winkies, and 6 points for everyone else (Winkies get a discount). They are armed with an assortment of swords, hatchets, axes, and pole weapons – all of which I aged and/or rusted up, as you will see shortly. You will also see how I based them so as to mix and match the poses and the warriors’ weapons and the figure types such that no two bases in each regiment were identical.

For basing, I wanted to differentiate between the two regiments for the tabletop. As the Gillikins are purple-oriented, and the Winkies are yellow-oriented, I went with these colors as themes with the flocking. I also incorporated some spikey green flora to hide the middle of the bases where there was a depression between the figures’ bases after early flocking. On one base of each regiment, I affixed two Pendraken 12mm dice frames – one on top of the other – to hold activation dice. Now I’ll share some WIP shots showing what I just discussed.

WIP Shots

As received.
Each of the two regiments ready for assembly after filing off any mold lines and flash and a giveing the figures a good washing to remove any oils.
Thank you Mr. Forceps! No sticky fingers!
Airbrush primed in black.
Dry brushed in white.
Example of an individual skeleton after being dry brushed.
After the 50% Pallid Bone Speed Paint.

You can see three examples of the Speed Paint effect below. Yes, this is 1.0 and I do have 2.0 as well – but I thought the “Pallid Bone” looked better on swatches.

After varnishing the regiments with my airbrush, and letting that cure, it was basing time. Given the figures are mounted on 2″ square bases, the flocking needed to be done sequentially for best results.

First, I needed determine which types of figures were EXACTLY the same. Many of these had to be differentiated by the placement of the feet on the bases (as differences were slight). The figures did bend easily so between that and affixing different heads it was simple to create unique bases for each regiment.
Then it was time to mock these up on bases before gluing them down. I also needed to find space for the dice frames on one base.
As you can see, I traced out the approximate positions for each figure then glued two at a time to each base. After that had dried, I then flocked the areas outside the two glued figures and the open spaces on the bases. When that had dried, I mounted the remaining two figures per base and continued flocking. I needed to wait for each step of gluing to dry.
The regiments flocked with their final glued flocking in the process of drying.

Now, I will throw you, my readers, a bone – or rather several bones – it’s time for…

Eye Candy

Regiment 1

Base 1A

Base 1B

Base 1C

Base 1D

Base 1E

Skeleton Regiment 1 Group Shot

Regiment 2

Base 2A

Base 2B

Base 2C

Base 2D

Base 2E

Skeleton Regiment 2 Group Shot

Both Regiments Group Shot

These were fun and very quick to do – I started on Sunday November 12th and took the photos of the finished regiments on November 16th. I’m still working on the right combination of lights for my photo booth but am getting a bit better.

Like other units I have shared, these skellies will make excellent allies to other brigades on the tabletop.

My next post will be a surprise to us all as I have actual gaming to do now!

And yes, I still have more Ozz to come…

Miscellaneous details and references for those interested in that sort of thing:

For all of my previous posts on Wars of Ozz games, figures, units, and other related projects – please see this page.

PAINTS, INKS, GLAZES, SHADES, WASHES, PIGMENTS, FLOCKING, GLUES AND MORE THAT I USED ON THE FIGURES FOR THESE TWO SKELETON REGIMENTS:

  1. Gorilla Glue
  2. 3/4″ steel washers
  3. Poster tack
  4. Vallejo Black Surface Primer
  5. Vallejo “Flow Improver”
  6. Vallejo “Airbrush Thinner”
  7. Vallejo Model Color “White”
  8. Army Painter “Speed Paint Medium 1.0”
  9. Army Painter “Speed Paint – Pallid Bone 1.0”
  10. Vallejo Model Color “Dark Sea Grey”
  11. Army Painter “Speed Paint – Runic Grey 1.0”
  12. Army Painter “Speed Paint – Gravelord Grey 1.0”
  13. Vallejo Model Air “Bright Brass”
  14. Vallejo Model Air “Black Metallic”
  15. Vallejo Model Air “Steel”
  16. Vallejo Mecha Color “Dark Steel”
  17. Citadel “Nuln Oil” (wash)
  18. Battlefront “Tommy Green”
  19. Vallejo “Thinner Medium”
  20. Vallejo Mecha Weathering “Rust Texture”
  21. Vallejo Mecha Varnish “Matte Varnish”
  22. Vallejo Mecha Weathering “Dark Rust Wash”
  23. 2″ square steel bases from Wargames Accessories (#21)
  24. Elmer’s PVA Glue
  25. Pendraken 12mm dice frames
  26. Army Painter “Battlefield Field Grass” (flocking)
  27. Battlefront “Sherman Drab”
  28. Gamer’s Grass “Spikey Green” (flocking)
  29. Army Painter “Wilderness Tufts – 4mm” (flocking)
  30. Army Painter “Meadow Flowers (yellow)” (flocking)
  31. Gamer’s Grass “Yellow Flowers” (flocking)
  32. Shadow’s Edge Miniatures “Dark Forest Plum Flowers” (flocking)
  33. Shadow’s Edge Miniatures “Dark Forest Purple Flowers” (flocking)

Again, as you may want to check out the Wars of Ozz figures’ range – there are two places to get them (and I make no money from this btw). The game rules and the figures are available from the following two places:

In the US Old Glory has a site – Wars of Ozz Miniatures.

In the UK go to Sally 4th.

My Wars of Ozz Meeting Engagement Game at HAVOC through the Eyes of One of my Players

At the HAVOC gaming convention in Marlborough, Massachusetts I ran four games – two Wars of Ozz and two Feudal PatrolTM games between March 31st and April 2nd. Hopefully shortly, I will be sharing some of my own pictures and a few links about HAVOC in future posts – BUT FIRST

My first Ozz game was on Friday night, and I had a full table of 6 players – all new first-timers to the game. During that game, one of my players, my friend Bradley Gosselin, took copious notes and photos of that game. I noticed him doing this and assumed that he wanted to really learn the rules. To my humble surprise, he said, no, he was hoping to do a battle report and that I would be welcome to using it in my blog! It’s not often that one of my players does me such an awesome honor – and so – thanks Brad – here is your wonderful report – I could not have done better!

Game Set Up

There were two brigades facing each other – Winkies and Munchkins. Each base/stand of troops or artillerist taken out is worth 1 point to the other side. The deployment is randomly determined.

Turn 1

Turn 2

Turn 3

Turn 4

So, in the end the Munchkins prevailed over the Winkies! Thanks Brad for all the work on this (and he might have more on other HAVOC games – stay tuned). The players had a good time and really picked up the rules quickly.

The game was quick and bloody (as it’s supposed to be). Though both sides did well – the Munchkins did a wee bit better.

Winkie Light Cavalry Regiment & Winkie Brigade Commander (Wars of Ozz)

With it being my late winter-early spring “wargaming convention season”, I have been working on multiple projects simultaneously. As I mentioned in my last post Jungle Bases from Wargames Terrain Workshop, I’d be sharing a post on my Winkie cavalry which I finished recently – along with the Winkie Brigade Commander on his specially-shaped MDF base.

All are riding Zilks, which are carnivorous huge birds. The SKU# is OZZ305 and can be seen here. The figures come in two pieces (rider torso and a zilk combo rider’s legs combo). I had ordered/selected OZZ304 during the Kickstarter a while back, but got shipped OZZ305. The OZZ304 SKU is for the Winkie Heavy Cavalry – but they are the same price and I had no problem with having them in my brigade. There are 10 figures based on five 2″ square bases, plus the Regimental Commander on his own MDF base.

The Winkie Light Cavalry costs one point less than the Winkie Heavy Cavalry (6 vs 5) – and only loses one point of Melee (8 versus 9) and Elan (8 versus 9), so it’s still a pretty potent unit to have. Plus, I needed a Brigade Commander which came in the Kickstarter, so all is good by me.

According to “The History of Ozz”, after the Madness Bombs fell at the end of the Last Great War, Ozz was founded. East of the Emerald City, Evora the Wicked Witch of the East, conquered and molded the Winkies into her own fighting force. Winkies are believed to be mutated humans, perhaps even descended from genetically-created super soldiers at the end of the Last Great War.

As for the Winkie Cavalry, according to The Wars of Ozz:

After Evora lost her first battle to goat-riding raiders from the Great Endless Desert, she suddenly wanted cavalry. Perhaps inspired by the Madness, she had a vision of zilk-riding lancers sweeping down on her enemies. There were only two problems with this. First, the Winkies were not a mounted people. Second, nobody had ever thought of riding a zilk – – and with good reason. Zilks or “terror birds”, weren’t ridable – they were giant, carnivorous, two-legged birds of the high mountain valleys. Simply getting close to one was risking death.

Of course, after a few executions, nobody wanted to tell Evora it couldn’t be done. An expedition was mounted and a herd of zilks was corralled and broken to saddle. The Winkie survivors had the honour of being the first commanders of the Zilk Squadrons. For the rank and file soldiers being promoted to Zilk trooper is seen as a punishment rather than an honour. Everyone knew a terror bird would find a way to kill its rider sooner or later. Since drilling was almost impossible and the riders could barely get their mounts to cooperate on the field, Zilk regiments were and are poorly trained. Still, if the riders can get them to go in a straight line, the Zilks can land a charge with a powerful impact.

Wars of Ozz, section 2.2.2.3, page 25

I designated this Zilk Regiment the 20th Winkie Light Cavalry Regiment (WLCR). It, and the Brigade Commander, joins Evora, the 21st Winkie Infantry Regiment (WIR), the Winkie Sharpshooters, and the Winkie Light Artillery Battery in my Brigade. Plus the Brigade has available the Lesser Apes and the Great Flying Apes.

As discussed on previous posts, the Winkies (the orcs of the Ozz world) consider melee as their preferred means of combat. No missile weapons here!

I began prepping the unit back on Monday, February 13th by cleaning up and filing off as many mold lines as I could without taking off any details. I then washed the figures with soap and water to remove any oils left over from the casting process. I decided to paint the riders and the mounts separately as I thought that might be easier given the proximity that the Winkie lances would be to the Zilk mounts. After drilling with a pin vise, I carefully put small balls of poster tack into the wells where the riders would be affixed – so as to prevent any primer from compromising future glue adhesion when I was assembling them. I then applied primer with an airbrush, followed by a wash of Citadel “Nuln Oil”. As usual, I will list all the paints I used on this project at the end of this post for those interested in that sort of thing. There were 82 this time!

One different approach that I took on for this project was to have every zilk be painted totally differently from every other zilk in terms of a painting scheme. To accomplish this, I chose a range of pastel craft paints from Michaels and mixed them with Vallejo Thinning Medium. These are shades that I would not normally use – and I used these pastels for the legs and necks, and married those to other paints (mainly contrast and speed paints) on the beaks, claws and feathers. I used a lot of different paints here! For that reason, I definitely needed another Excel spreadsheet – like this one:

Let’s move on to some WIP. Click any picture to get a better view.

WIP shots…

The Winkie Light Cavalry Regiment and the Brigade Commander at the start of the project.
Here the figures are prepped for priming – note I used some ad hoc drilled out popsicle stick jigs (with poster tack in the holes) to hold and work on the riders until their mounts were done and I had painted the lances.

Below is my progress through 2/20:

With TotalCon37 looming, I pushed as far as I could before I needed to pack the car with all my Aztec, Maya, and Conquistador stuff. When I returned, I jumped back into working simultaneously on them and the Jungle Bases.

By 3/1 I had the riders mounted and had readied the figures for varnishing.
The varnished (and dried) figures are glued to their bases and ready for flocking.

I chose a variety of tufts and grasses for flocking – plus some small rocks from near my driveway that I washed. After that, all I needed to add was the 20th colors – purple just for Roger!

I finally found a way to glue the guidon close to the pole – with these tweezers as clamps.

Now that you have seen the WIP, how about some…

Eye Candy

Winkie Brigade Commander

This figure had its own mount – and is free to have in your force in the game. The Brigade commander will have attribute tabs (which is why there is a tab well at the back of the figure). Early on I decided to freehand the stripes on all of these zilk-mounted warriors. His colors are unique in the brigade – I went with a red and yellow theme here.

2oth Winkie Light Cavalry Regiment

There are 5 stands of 2 figures each plus a regimental commander – and I tried to pose, paint, and arrange them as differently as possible. As with all zilk-mounted regimental commanders the one here goes on an MDF stand with a removable tab for an attribute tab in the game if needed. All have white hats per The Wars of Ozz.

Regimental Commander Stand

Stand 1

Stand 2

Stand 3

Stand 4

Command Stand

Group Shots

The WLCR in line with the Regimental Commander in front and the Brigade Commander in the rear.
Side view or the WLCR in column with the regimental commander up front.
Angled shot of the group giving an idea as to the color variations when grouped together.

I thought by having these with a lot of color that they would be wonderful attacking the Munchkin Light Cavalry!

This completes (for now) my Winkie Brigade. Next, I will be moving on to the Land of Harvest faction as well as some terrain for Ozz. But first, I am going to Cold Wars – where these Winkies will see battle!

Winkie Brigade (less apes) in a box
Yes, another spreadsheet showing what I have for Winkies.

And yes, I still have more to come…

Miscellaneous details and references for those interested in that sort of thing:

For all of my previous posts on Wars of Ozz games, figures, units, and other related projects – please see this page.

PAINTS, INKS, GLAZES, SHADES, WASHES, PIGMENTS, FLOCKING, GLUES AND MORE THAT I USED ON THIS WINKIE LIGHT CAVALRY REGIMENT & THE WINKIE BRIGADE COMMANDER:

  1. Regimental MDF base from Old Glory/Wars of Ozz Miniatures
  2. Mounted Brigade Commander MDF base from Old Glory/Wars of Ozz Miniatures
  3. Elmer’s PVA Glue
  4. Paper clip wire pieces
  5. Gorilla Glue
  6. 1 1/4″ x 1″ steel base from Wargames Accessories (#FOW1)
  7. Poster tack
  8. Vallejo Premium Primer “White”
  9. Vallejo “Flow Improver”
  10. Vallejo “Airbrush Thinner”
  11. Citadel “Nuln Oil” (wash)
  12. Vallejo Model Color “Glossy White”
  13. Vallejo Model Color “White”
  14. Vallejo “Thinner Medium”
  15. Citadel “Contrast Paint – Ironjawz Yellow”
  16. Americana “Bubblegum Pink”
  17. Vallejo Mecha Color “SZ Red”
  18. Craftsmart “Natural Buff”
  19. Citadel “Daemonette Hide”
  20. Citadel “Tesseract Glow”
  21. Citadel “Contrast Paint – Doomfire Magenta”
  22. Vallejo Game Air “Hot Orange”
  23. Craftsmart “Neon Yellow”
  24. Citadel “Contrast Paint – Black Legion”
  25. Vallejo Mecha Color “Fluorescent Magenta”
  26. P3 “Sulfuric Yellow”
  27. Vallejo Model Color “Light Orange”
  28. Craftsmart “Neon Pink”
  29. Craftsmart “Grape Taffy”
  30. Craftsmart “Lilac”
  31. Craftsmart “Wisteria Blue”
  32. Craftsmart “Robin Egg Blue”
  33. Craftsmart “Beach Glass”
  34. Craftsmart “Bright Mint”
  35. Craftsmart “Light Pistachio”
  36. Craftsmart “Rose”
  37. Citadel “Contrast Paint – Snakebite Leather”
  38. Citadel “Contrast Paint – Contrast Medium”
  39. Battlefields “Black”
  40. Citadel “Contrast Paint – Space Wolves Grey”
  41. Army Painter “Speed Paint – Holy White”
  42. Citadel “Contrast Paint – Baal Red”
  43. Citadel “Contrast Paint – Asurman Blue”
  44. Citadel “Contrast Paint – Volupus Pink”
  45. Citadel “Contrast Paint – Gryph-Charger Grey”
  46. Citadel “Contrast Paint – Shyish Purple”
  47. Citadel “Contrast Paint – Sigvald Burgundy”
  48. Citadel “Contrast Paint – Terradon Turquoise”
  49. Citadel “Contrast Paint – Aethermatic Blue”
  50. Citadel “Contrast Paint – Striking Scorpion Green”
  51. Citadel “Contrast Paint – Dark Angels Green”
  52. Citadel “Contrast Paint – Iyanden Yellow”
  53. Vallejo Model Air “Bright Brass”
  54. Vallejo Model Color “Wood Grain”
  55. Citadel “Seraphim Sepia” (wash)
  56. Citadel “Ironbreaker”
  57. Vallejo Model Air “Gun Metal”
  58. Citadel “Contrast Paint – Ork Skin”
  59. Vallejo Model Air “Armour Brown”
  60. Vallejo Model Air “Steel”
  61. Secret Weapon Washes “Parchment”
  62. Citadel “Lamenters Yellow” (glaze)
  63. Citadel “Nuln Oil GLOSS” (wash)
  64. Vallejo Game Ink “Black Green”
  65. Vallejo Game Ink “Red”
  66. PS Model Color “British Brown Drab”
  67. P3 “Blazing Ink” (ink)
  68. Army Painter “Purple Tone” (wash/shade)
  69. Citadel “Contrast Paint – Imperial Fist”
  70. Vallejo Model Color “Light Brown”
  71. Citadel “Contrast Paint – Skeleton Horde”
  72. 2″ square steel base from Wargames Accessories (#21)
  73. Vallejo Mecha Varnish “Gloss Varnish”
  74. Vallejo Mecha Varnish “Matte Varnish”
  75. Black Sharpie pen
  76. Army Painter “Battlefields Grass Green” (flocking)
  77. Army Painter “Battlefield Field Grass” (flocking)
  78. Army Painter “Battlefields Field Grass” (flocking)
  79. Shadow’s Edge Miniatures “6mm Dark Forest Red Tufts” (flocking)
  80. Small stones
  81. Army Painter “Battlefields Meadow Flowers” (flocking)
  82. Winkie Flags from Buck Surdu printed on card stock

Again, as you may want to check out the Wars of Ozz figures’ range – there are two places to get them (and I make no money from this btw). The game rules and the figures are available from the following two places:

In the US Old Glory has a site – Wars of Ozz Miniatures.

In the UK go to Sally 4th.

Lesser Apes & Great Flying Apes (Wars of Ozz)

Whenever I think of seeing the classic 1939 movie The Wizard of Oz, on TV in the ’60’s as a kid, I think the most striking aspect for me was appearance of the Flying Monkeys. Of course back then, our TV’s were not always in color, so I did not even know that most of the film was even in color for a few years! Still, those aviator primates were impressively done for 1939 movie and scary enough for me at 4 or 5 years old.

Now, the world of the Wars of Ozz is not the same as that tread by Dorothy. In this world, the Winkies have allies in the form of Lesser Apes and Great Flying Apes due to the efforts of Evora:

One of Evora’s diplomatic coups was convincing the King of the Flying Apes to send her tribute in exchange for leaving his land in the Cold Barren Mountains unmolested. By their agreement each year he sends a number of Great Flying Apes and their cousins, the Lesser Apes, to serve in her armies and follow her commands for the course of the year. While it might seen like a very unfair arrangement, it has kept the rest of the apes safe from her armies, provided an easy way to train his soldiers, and given the old ape king a convenient way to manoeuvre his rivals out of his lands.

Wars of Ozz, section 2.2.2.4, page 25

Both of these ape regiments are available to any force in Ozz, BUT they are cheaper to incorporate into Winkie Brigades. Therefore, I just had to add both to my current Winkie forces – and potentially others in the future if they can pay. The Lesser Apes and Great Flying Apes cost the Winkies 4 and 6 points respectively, while costing other factions an additional 2 points each for each. The Great Flying Apes ignore any terrain effects, and can of course fly over an enemy, land, and try to hit the enemy’s rear. They also will be useful in attacking the Munchkin’s Aerostat Corps Balloon (mine is in the painting queue as well). The Lesser Apes move through woods with no penalty.

As they are kin, I thought it made sense to share both of these together in one blog post.

I decided to paint both regiments at the same time so that their colors could be somewhat aligned. The color theme that I chose for both was purple. While Gillikins are very purple, I thought that a bunch of “grape apes” would look decidedly different on the tabletop versus plain old brown or grey. I ended up experimenting with two paints a lot here – Citadel “Dreadful Visage” and “Ratling Grime” contrast paints. I found that “Dreadful Visage” used over white left a nice shade of purple – more like a light glaze. I also used it over other shades of purples and the “Ratling Grime”. The “Ratling Grime” is more of a cross between dirty black and brown – and I liked it as a base to dry brush over with “Warpfiend Grey”. I also used purple contrast paints and inks. Overall, this gave me the purplish look I wanted.

Besides, the Lesser Ape figures have tails – yet look otherwise like gorillas. They are deployed on 5 two-inch square bases in groups of four figures. The Lesser Apes are SKU #OZZ309, and are made up of twenty 28mm ape figures in several different poses.

The Great Flying Apes are SKU #OZZ308. The figures are large 28mm scale figures deployed one per each two-inch square base. Their faces and poses are varied – but are more dog-like or baboon-like. They needed assembly (two pieces). As you’ll see, I took the approach of painting prototypes for each type of ape and adjusting their looks to suit me.

Neither regiment gets a separate regimental commander or command stand/flag. These two regiments join Evora, the 21st Winkie Infantry Regiment, the Winkie Sharpshooters, and the Winkie Light Artillery Battery in my Brigade.

And, importantly, I am entering both of these Ape Regiments for Dave Stone’s “Paint What You Got 2022/2023” challenge!

Below you will see some WIP shots, and then some eye candy diorama-type shots. The units were both primed earlier on January 7th, but the painting and flocking mainly went from January 20th to January 27th. This was again was a good pace for me (25 figures in 7 days). Below you’ll see the WIP shots – click on any to get a better view.

WIP shots…Lesser Apes

My process for the Lesser Apes was to try to paint up a few and see what I liked and what I did not with end results. I ended up going with a mandrill look on their cheeks – which I liked a lot better than my initial more monocolor try – though painting vermilion and white lines on little ape cheeks is a bit tedious (but rewarding too). As I painted these, I also started one of the Great Flying Apes so as to align their color schemes. I used a various assortment of purples and purplish grays – all are listed at this post’s end if you’re interested in that.

January 20th progress on prototype stand – no cheeks yet.
By Jan 21st, I had 6/20 painted – but I thought they needed more than the yellow fangs…
White and red mandrill cheeks and brows were added on Jan 21st and I went back and corrected the previously painted figures to this scheme.
January 22nd progress – 6 fully done and 4 more partially.
January 24th progress – 14/20.
Jan 25th – all are painted minus varnishing
After varnishing a few figures in this pose I added some “earth” texture paint under their left legs.
January 27th – done and ready for eye candy shots!

Lesser Apes Eye Candy

I arranged these such that each stand had different poses in different positions. There are 5 stands of 4 figures each.

Stand 1

Stand 2

Stand 3

Stand 4

Stand 5

Lesser Apes Group Shot

The Lesser Apes in line formation.
The Lesser Ape Regiment in column formation.

On to the WIP shots for the Great Flying Apes – click on any to get a better view.

WIP shots…Great Flying Apes

These are very large figures!

January 23rd work.
January 25th progress – note the different poses.
Close up of January 25th progress on one figure.
Later on January 25th, I collected rocks from near my driveway (the non-frozen ones), and began to add them and some texture paint to the bases.
Then on Jan 26th I applied the varnish to the model. I used a craft metallic purple paint for the armor – and I like how it came out.
A panoramic shot of the finished figures before I removed them from the poster tack/specimen jar combos.

Now for more eye candy – this time for the Great Flying Apes!

Eye Candy Great Flying Apes

Stand 1

Stand 2

Stand 3

Stand 4

Stand 5

Great Flying Apes Group shots

Panoramic shot of the Great Flying Apes in line formation.
The Great Flying Apes in column formation.

Family Photo!

A gathering of Apes!

I appreciate your taking a look at this post – as always I appreciate your interest and readership – and hope that this kept you entertained. This makes 52 Wars of Ozz figures that I have painted for January, and 146 since November.

And yes, again, I still have more to come…

Miscellaneous details and references for those interested in that sort of thing:

For all of my previous posts on Wars of Ozz games, figures, units, and other related projects – please see this page.

PAINTS, INKS, GLAZES, SHADES, WASHES, PIGMENTS, FLOCKING, GLUES AND MORE THAT I USED ON THE LESSER APES AND THE GREAT FLYING APES:

Please note that any paints used on both Ape units in bold, otherwise they were just used on the Great Flying Apes except as annotated.

  1. Gorilla Glue
  2. 2″ square steel base from Wargames Accessories (#21)
  3. Poster tack
  4. Vallejo Premium Primer “White”
  5. Vallejo “Flow Improver”
  6. Vallejo “Airbrush Thinner”
  7. Citadel “Nuln Oil” (wash)
  8. Vallejo Model Color “White”
  9. Citadel “Contrast Paint – Sigvald Burgundy”
  10. Citadel “Contrast Paint – Contrast Medium”
  11. PS Model Color “British Brown Drab”
  12. Citadel “Daemonette Hide”
  13. Citadel “Contrast Paint – Dreadful Visage”
  14. Citadel “Contrast Paint – Ratling Grime”
  15. Citadel “Warpfiend Grey”
  16. Vallejo Game Ink “Red”
  17. Army Painter “Purple Tone” (wash/shade)
  18. Vallejo Game Ink “Violet” (on Great Flying Apes only)
  19. Citadel “Contrast Paint – Black Legion”
  20. Vallejo Game Ink “Yellow”
  21. Citadel “Seraphim Sepia” (wash/shade)
  22. Vallejo Model Air “White Grey”
  23. Citadel “Contrast Paint – Luxion Purple”(on Great Flying Apes only)
  24. Craftsmart “Amethyst” (on Great Flying Apes only)
  25. Vallejo Model Color “Vermilion” (on Lesser Apes only)
  26. Citadel “Contrast Paint – Snakebite Leather” (on Great Flying Apes only)
  27. Citadel “Blackfire Earth” (texture)
  28. Elmer’s PVA Glue
  29. Assorted small rocks and stones
  30. Vallejo Mecha Varnish “Gloss Varnish”
  31. Vallejo Mecha Varnish “Matte Varnish”
  32. Army Painter “Battlefields Grass Green” (flocking)
  33. Army Painter “Battlefield Field Grass” (flocking)
  34. Army Painter “Battlefields Field Grass” (flocking)
  35. Shadow’s Edge Miniatures “6mm Dark Forest Purple Tufts” (flocking)
  36. Army Painter “Battlefields Meadow Flowers” (flocking)

Again, as you may want to check out the Wars of Ozz figures’ range – there are two places to get them (and I make no money from this btw). The game rules and the figures are available from the following two places:

In the US Old Glory has a site – Wars of Ozz Miniatures.

In the UK go to Sally 4th.

Evora the Witch and a Winkie Infantry Regiment (Wars of Ozz)

Progress continues on my Winkie brigade. This time, I added both Evora the Witch and a Winkie Infantry Regiment to my Winkie forces.

Evora is a “named witch” in the game and costs 3 points. With that, she comes with her own advantages. First, she can act as an overall leader (at above brigade level) with the attributes of “Decisiveness” (this gets an additional activation die in the die pool which increases battlefield flexibility and options) and “Organizational Skill” (which allows her to give pre-game 4 extra points to a subordinate brigade for units or allies) . Second, she comes with free spells – four in fact:

  1. Fire Ball – as an offensive spell
  2. Blood Lust – allows her to force a unit to close with the enemy by automatically passing their next Test of Elan.
  3. Poppies – allows her to create a 6″ square field of poppies that would cause any unit passing through to lose half its movement.
  4. Fear – this is cast on an enemy unit and would cause that unit to lose either a point of Elan or Resolve (spell caster’s choice) on its next activation.

Having automatic spells is helpful as an “unnamed Wizard/Witch” costs 2 points and has to randomly roll for spells – or buy more with points if the rolled ones are not what the player wants. Evora is metal and 28mm, with a SKU of OZZ300.

According to “The History of Ozz”, after the Madness Bombs fell at the end of the Last Great War, Ozz was founded.

Sometime after Ozz was founded, things began to change. Rumours reached the West that a group of mysterious women had appeared in the east. By all accounts, they had powers to rival the Wizard (of Ozz)…The first witch to appear was Evora in the far east. With her power, especially her ability to raise legions of skeletal soldiers, she quickly dispatched the disunified Winkie warlords and forced the Winkies to submit to her rule…

Wars of Ozz, section 1.4, page 9

In addition to Evora, I also have added a Winkie Infantry Regiment (WIR), which I designated as the 21st. This 21st WIR joins Evora, the Winkie Sharpshooters, and the Winkie Light Artillery Battery in my Brigade.

As discussed on previous posts, the Winkies (the orcs of the Ozz world) consider melee as their preferred means of combat. As for most Ozz regiments, this Winkie Regiment (21st WIR) (SKU #OZZ302) has 21 figures in total. They are on 5 bases – 4 figures with spears per 4 stands, plus 4 figures on a single command stand, along with a regimental commander stand (MDF) riding on a zilk. The 21st WIR is 28mm in scale, and the figures are metal. It is worth 5 points.

I began prepping the unit back on Saturday, January 7th by filing off as many mold lines as I could without obliterating any details. I then washed the figures with soap and water, and then primed it. After this, applied a wash of Citadel “Nuln Oil” wash. As usual, I will list all the paints I used on this unit and Evora at the end of this post for those interested in that sort of stuff (and for my own use for later reference as well – I do like to refer back when I need to recreate a painting scheme).

The Ozz rules say that the WIR are:

“Very irregular, usually khaki trousers, but coats vary by regiment, but yellow is very popular. Armed with melee weapons only”

Wars of Ozz, Table 4-3, page 83

I decided that a few of the mold lines were too much for using khaki and so I decided a dark gray would work better. I also decided to go with black sleeves and yellow caps and shirts. For Evora, I went with a yellow and purple scheme. For the zilk, I went with a deep purple look. The 21st WIR figures had fur caps of two different types, plus three different kinds of armor – to include cotton armor like I had on my Aztecs and Conquistadores (and the Winkie Sharpshooters).

This time I did take more WIP shots), which I will share below, followed by some eye candy diorama-type shots. I managed to finish the unit to include flocking by January 16th, which was a good pace for me (22 figures in 9 days).

And, importantly, I am entering both Evora and the 21st WIR as my another individual and unit for Dave Stone’s “Paint What You Got 2022/2023” challenge!

On to the WIP shots – click on any to get a better view.

WIP shots…

The group after getting scrubbed and dried.

January 10th progress – trousers and sleeves.

More progress was made on January 12th below, especially on Evora and the zilk:

January 13th saw more work on highlighting, shading, and touch up. Evora still needed more paint too – all are as shown below:

On Saturday evening (January 14th , after my game with Chris), and on Sunday the 15th, I moved to finish the painting in preparation for varnishing and flocking:

Done and ready for glamor shots!

I ended up airbrush varnishing the 21st WIR with a both an initial gloss then a matte varnish so as to keep the colors bright but not shiny. I finished varnishing on January 15th, and mounting and flocking on January 16th. I chose the 21st Regiment flag for them because it was purple and 21 is 3 x 7 – so maybe three times lucky? Time will tell. As for mounting and flocking, I followed the same processes as I did for the Winkie Sharpshooters. The only real problem that I encountered was that the flags were a bit too big for the standard bearer’s staffs – but not so problematic that I felt the need to redo them. I used blue and brown sharpie pens to hide the cut white edges of the banners. Regarding the size challenge, yeah, I could have reprinted them, but I think the Winkies wanted not to have their banners smaller than the Munchkins (the Winkies subscribe to the “bigger being better” theory, especially with regards to the Munchkins). With that note, on to…

Eye Candy

Evora

I did enjoy painting her a lot. The yellow and purple gave her a distinct look, plus I love that she wears a Munchkin skull on her belt and has one on her staff.

21st Winkie Infantry Regiment

There are 5 stands of 4 figures each – 4 are similar and one is a command stand with an officer, 2 standard bearers and a drummer (for IRO our resident blog buddy drummer). Once again, I varied the flocking slightly but distinctly – with the hope of having some congruence among the bases and still some uniqueness for each individual base. The zilk-mounted regimental commander goes on an MDF stand with a removable tab for an attribute tab in the game if needed.

Regimental Commander Stand

Stand 1

Stand 2

Stand 3

Stand 4

Command Stand

Group Shots

The 21st Winkie Infantry Regiment in line formation with the Regimental Commander in the rear.
An angled shot of the 21st Winkie Infantry Regiment in line formation with the Regimental Commander in the rear.
The 21st Winkie Infantry Regiment in column formation with the Regimental Commander in the front.
The 21st Winkie Infantry Regiment in column formation with the Regimental Commander in the rear and accompanied by Evora the Witch.

Next, I will next deviate a bit from the Winkies and work on their notable allies, the Great Flying Apes and their cousins the Lesser Apes. Gotta have flying monkeys after all right? After that, I have the Winkie Cavalry (on zilks) to round out the brigade.

I appreciate your readership and hope that this was of interest.

And yes, I still have more to come…

Miscellaneous details and references for those interested in that sort of thing:

For all of my previous posts on Wars of Ozz games, figures, units, and other related projects – please see this page.

PAINTS, INKS, GLAZES, SHADES, WASHES, PIGMENTS, FLOCKING, GLUES AND MORE THAT I USED ON EVORA AND THIS WINKIE INFANTRY REGIMENT:

Please note that any paints used on both Evora and the infantry are in bold, otherwise they were just used on the infantry.

  1. Gorilla Glue
  2. Paper clip wire pieces
  3. 3/4″ steel washer (just Evora)
  4. 1 1/4″ x 1″ steel base from Wargames Accessories (#FOW1)
  5. Regimental MDF base from Old Glory/Wars of Ozz Miniatures
  6. Poster tack
  7. Vallejo Premium Primer “White”
  8. Vallejo “Flow Improver”
  9. Vallejo “Airbrush Thinner”
  10. Citadel “Nuln Oil” (wash)
  11. Vallejo Model Color “White”
  12. Citadel “Contrast Paint – Black Legion”
  13. Citadel “Contrast Paint – Contrast Medium”
  14. Vallejo “Thinner Medium”
  15. Vallejo Model Color “Wood Grain”
  16. Citadel “Contrast Paint – Gryph-Charger Grey”
  17. Army Painter “Speed Paint – Hardened Leather”
  18. Army Painter “Speed Paint – Holy White”
  19. Vallejo Model Air “Gun Metal”
  20. Citadel “Contrast Paint – Ork Skin”
  21. Army Painter “Speed Paint – Runic Grey”
  22. Vallejo Model Air “Armour Brown”
  23. Citadel “Contrast Paint – Ironjawz Yellow”
  24. Vallejo Game Ink “Yellow”
  25. Citadel “Daemonette Hide”
  26. Vallejo Model Air “Bright Brass”
  27. Vallejo Model Air “Steel”
  28. Americana “Bubblegum Pink”
  29. Citadel “Contrast Paint – Luxion Purple”
  30. Citadel “Contrast Paint – Sigvald Burgundy”
  31. Vallejo Mecha Color “Fluorescent Magenta”
  32. Citadel “Contrast Paint – Striking Scorpion Green”
  33. Vallejo Mecha Color “Green Fluorescent”
  34. Army Painter “Purple Tone” (wash/shade)
  35. Citadel “Cryptek Armourshade Gloss” (wash)
  36. Citadel “Nuln Oil GLOSS” (wash)
  37. Vallejo Model Air “White Grey”
  38. Citadel “Contrast Paint – Skeleton Horde”
  39. Vallejo Model Air “Sand/Ivory”
  40. Vallejo Game Ink “Black Green”
  41. Citadel “Lamenters Yellow” (glaze)
  42. PS Model Color “British Brown Drab”
  43. Vallejo Mecha Varnish “Gloss Varnish”
  44. Vallejo Mecha Varnish “Matte Varnish”
  45. 2″ square steel base from Wargames Accessories (#21)
  46. Elmer’s PVA Glue
  47. Army Painter “Battlefields Grass Green” (flocking)
  48. Army Painter “Battlefield Field Grass” (flocking)
  49. Army Painter “Battlefields Field Grass” (flocking)
  50. Army Painter “Battlefields Meadow Flowers” (flocking)
  51. Shadow’s Edge Miniatures “6mm Dark Forest Red Tufts” (flocking)
  52. Black Sharpie pen
  53. Blue Sharpie Pen
  54. Brown Sharpie Pen
  55. Winkie Flags from Buck Surdu printed on card stock

Again, as you may want to check out the Wars of Ozz figures’ range – there are two places to get them (and I make no money from this btw). The game rules and the figures are available from the following two places:

In the US Old Glory has a site – Wars of Ozz Miniatures.

In the UK go to Sally 4th.

Meeting Engagement – Munchkins vs. Gillikins (Wars of Ozz)

Last Saturday (January 14th) I was lucky to be able to have a game of Wars of Ozz with my friend Chris Comeau. We had each built brigades for the game – I had a Munchkin brigade of 27 points, and Chris had a Gillikin Brigade of 27 points. It was my first Ozz game outside of a convention, and it was Chris’ first ever. We decided to use the “Meeting Engagement” scenario on page 93 (section 6.1.4) with no terrain so that we could focus on playing the game and familiarizing ourselves with the rules. As I said, I have played several Ozz games with others who are more familiar with the rules, but I thought we could get more out of a simple set up. We had hoped to play in the new garage, but a nasty coating of ice on the stairs outside forced us into my cellar.

For scoring, each infantry or cavalry base lost would count as a point for the opposition, as would each artillery or individual figure taken out.

I will attempt here to provide a “cinematic” account of a pretty cool game – pictures do it best – though my cellar’s lighting was not optimal. Click on the pictures for a better view.

The Order of Battle

Chris’ Gillikin Brigade consisted of 5 units, 1 individual (Arella), and a Brigade Commander:

  1. Arella the Witch (individual figure) – 3 points
  2. Gillikin Brigade Commander (free)
  3. Less-Well Trained Gillikin Infantry Regiment – 4 points
  4. Less-Well Trained Gillikin Infantry Regiment – 4 points
  5. Gillikin Medium Artillery Battery – 5 points
  6. Gillikin Cavalry Riding Goats – 6 points
  7. Skeleton Infantry Regiment – 5 points

Mark’s Munchkin Brigade consisted of 4 units, 1 individual (Zoraster), and a Brigade Commander (Munchkin Mayor):

  1. Zoraster the Wizard – 3 points
  2. Munchkin Brigade Commander (Munchkin Mayor) – free
  3. Zoraster’s Guard Infantry Regiment – 8 points
  4. Colonel Tik-Tok’s Infantry Regiment – 6 points
  5. Munchkin Light Cavalry Regiment – 5 points
  6. Munchkin Medium Artillery Battery – 5 points

The deployment instructions call for each side to roll a die for each unit and individual, with the Brigade Commanders being placed in any desired zone. These units and individuals are then deployed on each side of the tabletop in six 10-inch deployment zones. The zones are centered on the middle of the tabletop, and no more than two units can be deployed in each zone (if you roll a number a thirds time you re-roll). We elected to have all of my units deploy first, then Chris’, but we could have also alternated our units. The results are seen below.

The initial deployment.

Both of our cavalry units by chance ended up on the far end of the tabletop. Munchkins are great marksmen, but not so great in melee – and they move somewhat slowly (short legs!). So, I decided to try to organize my forces around my firepower, but realigning my troops took a few turns as my two infantry regiments were in line and next to each other. Of course, there was no defensible terrain.

Chris decided to close on my positions while I reorganized.

This is the north end of the tabletop. On the left, one of Chris’ Gillikin Regiments moves up – it had luckily received a “Swift” characteristic at the game start – so it moved fast and Chris had them in column which gave them additional movement versus being in line. He moved up his medium battery to extreme range. His Skeleton Regiment moved up in front of his second Gillikin Infantry Regiment, which had his witch, Arella, close and behind the skeletons.
Meanwhile, I tried to align my forces on the north end to maximize firepower. My wizard, Zoraster, was on the far southern end with my light cavalry. This realignment went slowly.
The swiftly advancing Gillikin Infantry Regiment went straight for my artillery battery, while in the background, his battery prepared to fire at long range. I was not too concerned as at long range he needed to roll a “1” on each of his 5 D10 shots to hit me. My ease was misplaced as you’ll see.
Full view of initial movements.
The Gillikins charged my gun, but failed to have enough movement. This left them out of breath and disordered at close range. My gun was at this point however aimed at the Gillikin battery, but the prospect of disordered enemy infantry in column right in front of me was too tempting.
I rotated the battery and fired at the Gillikin infantry, immediately destroying one of its five bases (each base takes 4 hits before being destroyed). The Regimental Commander does not count as a combat base. That action only pushed them back and kept them disorganized.
I subsequently activated again, and this fire at the Gillikin infantry exacted three hits on another base.

On the southern end of the tabletop, a cavalry battle ensued. Chris similarly moved up his cavalry, while I kept mine ready to screen and engage with their carbines. I was able to fire at his approaching goat-riders, and that disrupted that effort.

My cavalry carbines disrupt the Gillikin goat-riders attack.

next

A mid-battle tabletop view. My forces are consolidating – if slowly. So far, I am holding my own.

Then, the Gillikins managed to reform their cavalry and with a good activation roll were able to charge my cavalry – my reaction test was to countercharge at reduced efficiency. The Gillikins lost another base, and damaged mine slightly, but as I was near the tabletop edge, I was in danger of having them eliminated. The Gillikins managed to hold it together, reform again on yet another activation, and hit my now-disorganized cavalry, routing them. They had one chance left to rally, but that would depend on the activation sequence of the dice. I had Zoraster nearby, and one of his spells was an automatic rally – I just needed him to act before the Gillikin goat riders hit the fleeing Munchkin cavalry…

That did not happen in time. The Gillikin cavalry hit the Munchkins, and my cavalry ran away and headed for greener and safer pastures. This left my right flank open to a weakened but still deployed Gillikin cavalry – that Chris kept at a safe distance from any of my remaining musketry for most of the rest of the game.

My cavalry is pushed back to the tabletop end.
The Munchkin Light Cavalry is routed – one chance to reform. Then the Gillikins drove them away.
The Gillikin cavalry is on the right. Zoraster, having been denied the chance to rally the Munchkin cavalry, moved to the safety of the rear of his remaining infantry and the medium battery.
I managed to get the infantry regiments in adjoining line formation facing the approaching skeletons. Unfortunately, Chris’ medium battery began hitting my battery, taking out one of its 5 bases (on left).

Seeing this, Chris reformed his infantry that had previously taken damage from my battery. Chris kept up his attacks with his medium battery – and despite being at long range, took out another two bases – leaving my battery nearly wiped out (2 out of 5 figures left). My medium battery gunners routed, abandoning the gun. The Gillikins sensed victory, and advanced, hoping to spike the gun and gain another victory point. They made it to the very front of the battery base.

The Munchkin gunners rout, abandoning the gun.

This time luck went on my side. Zoraster successfully threw a rally spell and the gunners were able to reman the gun and fire at point-blank range at the Gillikin infantry, sending them skedaddling!

Before the rally, the Gillikins hope to spike the gun…
…but the Munchkins rally, reman the gun, and drive off the Gillikins, who would flee the battlefield for good.

Then, unfortunately for me, the Gillikin Medium battery finished off my Medium battery with another hit.

Munchkin Medium Battery, RIP. Only the gun remains – while the Gillikin Infantry that it had dispatched run away.

I was down to two infantry regiments, plus a brigade commander and Zoraster. Zoraster successfully cast an “Uncanny Marksmanship” spell on Colonel Tik-Tok’s Infantry Regiment – which made their fire more effective against the advancing skeletons. Eventually, the skellies routed and disordered through the Gillikin Infantry Regiment following behind them.

After multiple musket volleys, Colonel Tik-Tok’s Infantry routs the skeletons.

Chris then moved Arella around and threw three fireballs at Zoraster’s Guard Infantry Regiment’s flank, finally inflicting two casualties on one base (the first two shots failed). Zoraster, with a “Heal” spell, then attempted to recover these losses.

Zoraster moves behind Zoraster’s Guard Infantry Regiment to try to cast a “Heal” spell.

On a D10, he needed a 7. He rolled a 10, which is a “catastrophic spell failure” 8 or 9 just fail). Then I needed to roll a D20 on the “Spell Failure” for the catastrophic failure (i.e. rolling a 10). I rolled a 14, with the result :

“The spell fails but a friendly unit of woodland creatures joins the player’s army at the beginning of the next turn”.

Page 109, Wars of Ozz Spell Failure table

I had no idea how to adjudicate this – and I phoned Chris Palmer – who also had no idea if it was a joke result or not. In any case, as I had no stats for any such unit, we treated the failure as benign.

But Huzzah! I got another activation, to try the same action again! Good!!

ARGH!!! I rolled ANOTHER 10!!! Catastrophic failure in a row!!!

Rolling on the “Spell Failure Chart”, I rolled a 20…the worst possible result..which said:

“Catastrophic failure: The spell-caster’s head explodes into a cloud of straw, bran, pins, and needles, killing him or her instantly. Remove the model from play.”

Page 109, Wars of Ozz Spell Failure table

Well, THAT was unfortunate!

The death of Zoraster.

The remaining Gillikin Infantry then charged into Colonel Tik-Tok’s Infantry Regiment in melee. After a couple of rounds, the casualties mounted on both sides. However, the Munchkins ended up taking too many casualties (including the now-attached Brigade Commander) and were wiped out. This left me with just Zoraster’s Guard Infantry, which tried to turn and avenge Tik-Tok’s loss.

Zoraster’s Guard Infantry (not well-named as now Zoraster was dead) tries to turn and hit the Gillikin Infantry.

It was not to be. Arella successfully hit the last regiment with another fireball in its rear and the resting goat riders finally made their move and charged into the rear of the regiment. This wiped out my last unit.

The games end – with my last regiment (Zoraster’s Guard Infantry) being driven down by goat riders.

Wow, what a game. It had more than a few twists and turns. In the end the score was 21-15, so the Gillikins were not unscathed. Still, it was a Gillikin victory over the Munchkins – nice job Chris! Hopefully we can throw down again soon and we can each get another brigade done too.

Postscript

After the game, I decided to take Dave Stone’s suggestion and add some blood to the wells of the artillery sabot bases for both the Munchkins (shown here in this game) as well as my Winkie Light Battery. The Citadel “Blood for the Blood God” paint did serve this purpose.

Munchkin Medium Battery with painted wells.
Winkie Light Battery with wells on sabot base painted for blood.

I hope you found this battle report fun!

Despatches from Fort Syllabub

An account of fictional adventures on the North West Frontier - and other times and places, real or imagined

Man of Tin blog

Toy soldiers, gaming, Imagi-Nations

Zauberwurfs Blog

Ein Blog über Tabletop und Miniature Wargames.

Frank Tank Rants

musings of a fat old bloke on tanks and wargames

Dragons of Lancasm

Games, miniatures, painting, books and more games

Tiny Painted Heroes

The Adventures of a lifelong Tabletop Gamer, Game Design hobbyist, and full-time Software Engineer

Steve's Paint Brush

Grimdark model making and mini painting

Wargamesculptors Blog

Life, Golf, Miniatures, & Other Distractions

Dead Dick's Tavern and Temporary Lodging

Life, Golf, Miniatures, & Other Distractions

Guru Pig - the gaming Guru

Guru's thoughts on wargaming, life, and the universe!

Wisely lead... without a head!

History, Miniatures and Wargaming

Kuribo's Painting

Fallout Wasteland Warfare, Warhammer, and Hellboy Painting, Terrain, Dioramas, and Battle Reports

Don't Give Greg Ideas

Seriously, just don't

War Across the Ages, and other dark horrors

A discussion of miniatures collecting, painting and gaming.

Classic Warhammer 40K

Painting diary focused on Warhammer 40K 2nd ed., 5th ed. WHFB, related GW games, and miscellaneous whimsy

Colonel Mustard

WW2 Modelling in 1/72 Scale

Bogenwald

Random painting and terrain making.

Pat's 1:72 Military Diorama's

Scale diorama tips and ideas

Arcade Dreams

Building the Arcade Dream

P.B.Eye-Candy

Phil's 20th century wargame pages

SP's Projects Blog

A futile fight against entropy or 'Every man should have a hobby'? Either way it is a blog on tabletop wargames, board games and megagames

30mmdave

Wargaming Plausible reality?

The Imperfect Modeller

Miniature Figure Painting and Diorama Modelling

Double Down Dice

Painting miniatures and rolling dice!

Just Needs Varnish!

My ongoing wargames projects!

miniaturepopcorns

Sculpting some worlds

Despertaferres

Wargaming with the ability of a dull nine year old

Dawn of the Lead

Miniature wargaming and the occasional zombie

Rantings from under the Wargames table

Wargames, Figures, Sculpting and Converting Miniatures

Simple as War

Miniatures & Terrains

Buck's Blog

Life, Golf, Miniatures, & Other Distractions

IRO aka Imperial Rebel Ork

- I model - therefore I am -

Azazel's Bitz Box.

Painting, Modelling, Miniatures, 1:6, Games... Whatever else I find interesting.

diggingforvictoryblog

Smallholding and Wargaming.......not always at the same time!

Shamutantis

Nørdblog numero uno