Well, not exactly…more like into one of my storage boxes to await a future game…but now that I have your attention, welcome!
A completed slinger from this project. Nine of the 18 figures that I will discuss and display here are armed with slings. In my game, these Aztec slingers are very accurate – and very dangerous. Most Aztecs learned how to take small game with slings from a very young age. The Conquistadores described taking many grave injuries and casualties from slingers like these.
I just finished adding 18 Aztec Novice Warriors to my forces for games of Feudal Patrol™ – using the “Civilizations Collide” supplement that I have discussed previously on several posts (you can see list of these posts at the end of this post if you’d like to see what you’ve missed). I had needed to add some more novices to pair up with veterans for the game. Aztec veteran warriors would have novices attached to them for training and development in the tactics and techniques of Mesoamerican warfare. Aztecs preferred capturing their enemies versus killing them – after all, they wanted live captives for sacrifice.
Under veteran tutelage, novices would try to capture enemy warriors. Their success at this would allow them to gain rank as well as increased Aztec societal and cultural prestige (depending upon the number and quality of the captured enemy warriors). This increase in rank would also be shown by the warriors having the right to wear different and fancier uniforms. Of course the captured warriors would be most often sacrificed alive on the altar of Huitzilopochtli in the Aztec capital of Tenochtitlan.
Returning to the gaming project, I now have figures for 30 novices and 27 veterans, which should put me in good stead game-wise. These figures came from Badger Games and were manufactured by Wargames Foundry. The 18 figures discussed here came from two blisters of AZ016 “Novice Warriors I” and one of AZ028 “Novice Warriors III”. All were sculpted by Josef Ochmann. I previously painted up 12 from AZ018 “Novice Warriors II” that I posted about here. These were similar to those models, and most of this group are armed with slings. Unfortunately, for the non-slingers, there were no other weapons in the AZ028 blister, just shields. Not a problem, as I had some Outpost Wargames Services extra weapons and some extra shields already painted up for any non-slingers (Badger also sells OWS). I am sure that Badger would have taken care of it if I let them know (they are great), but I had the situation under control.
I must say that the Foundry mold lines here on some of the models were a greater problem than those I have painted before from OWS. I tried my best to fix what I could without destroying the figures, but there’s only so much one can file away before the cure becomes worse than the disease. I am going to jump right into some pictures and then as usual some references for those interested in that sort of detail.
Mounted and ready for painting.Early flesh tone work.Completed.Completed and removed from the specimen jars – ready for eye candy!
Because I had bought two 6-figure blisters of AZ016, I wanted to paint them differently enough so that they would be interesting on the tabletop. I will show the similar poses together, and then the single poses.
I have numbered my novices AN1 to AN30, with this project concerning AN13 to AN30.
AN13 and AN19 – armed with a tepoztopilli (obsidian-edged thrusting spear pronounced tay-pose-toe-pee-lee) and a shield, but no other armor.
AN 13 and AN19 figures from the front.AN13 and AN19, the view from the side.
AN14 and AN20 – armed with a cuauhololli (round-headed wooden club – pronounced kwa-ho-lolly) and a shield, but no other armor.
AN14 and AN20 from the front.AN14 and AN20, reverse angle. As these are all novices, I did not give them overly fancy shields.
AN15 and AN21 – armed with a cuauhololli (round-headed wooden club) and a shield, and quilted cotton armor called ichcahuipilli (pronounced each-ca-we-pilli).
From the front, AN15 and AN21. I painted the shields and ichcahuipilli drawstrings differently.AN15 and AN21 from the shield side. AN21 has feather frets on his shield.
AN16 and AN22 – armed with slings, no shield, and no armor.
AN16 and AN22 looking very choreographed from the front. Note the blue and red arm rings and earrings as differentiators for the tabletop.AN16 and AN22 looking no less choregraphed from the back!
AN17 and AN23 – armed with slings, no shield, and no armor.
AN17 and AN23 looking a bit more ominous than the previous pair of slingers. I did not like the size of these figures’ left hands. A shield could have hidden that but I did not think that having slingers should be so equipped. AN17 and AN23 reverse view.
AN18 and AN24 – armed with slings, no shield, and no armor.
AN18 and AN24. These were my favorite sculpts from the AZ016 blister. I really thought the faces were great.AN18 and AN24, reverse view.
AN25 – armed with a sling, no shield, and no armor. This is the first figure from the AZ028 blister.
AN25 looks for a target.AN25 reverse angle.
AN26 – armed with a sling, no shield, and no armor.
AN26 from the front. The figure is similar to, but not exactly the same, as AN17 and AN23, but I am hoping that the yellow earrings will stand out on the tabletop.AN26, reverse angle.
AN27 – armed with a sling, no shield, and no armor.
AN27 from the front, with some yellow color for his hairband and earrings. I liked the sculpting of his face too.AN27 from the back side.
AN28 – armed with a macuahuitl (an obsidian-edged club/broadsword), a shield, and no armor.
AN28 from the front, moving to attack. This is the only figure in this group to be armed with the common macuahuitl (pronounced ma-kwa-wheat). The macuahuitl came from a previously painted OWS kit. You can see an interesting video on this weapon later in this post.AN28 from the side, ready to hack and slash.
AN29 – armed with a tepoztopilli and a shield, and quilted cotton armor (ichcahuipilli).
AN29 front. This was my least favorite figure of all of these – I just did not like the face, though here it looks ok. The weapon is also from OWS.AN29 from the side.
AN30 – armed with a bow, no shield, and no armor.
AN30 from the side. I really liked this figure, plus he is now the only Aztec I have with a bow. Bows were much more the choice of peoples like the Tlaxcalans (as shown here), but Aztecs did use bows at times too.AN30 showing the side with the quiver.
That’s a lot of troops – and this month (October 2020) I have painted 42 in total after adding these 18 – a record for me. And I still have 2 days left, but likely this is it for October. I am nearly through what I need to paint for the Aztecs – then I can move on to the Spanish.
And as for the video I promised, here it is below. A group in Baltimore built a macuahuitl. I found it interesting, even though they did not know the correct pronunciation of macuahuitl! There’s obviously an old gamer there as shown by the paints used. Enjoy!
That’s all for this post. I’d be interested in your thoughts on this post and the project in general. Let me know in the comments section, share this post if you’d like, and as always, thanks for looking!
Project production to date – 121 figures…and counting!
Miscellaneous details and references for those interested in that sort of thing:
Posts on games, units, and other projects for my 16th Century Spanish Conquest supplement for Feudal Patrol™ – “Civilizations Collide”
18 Aztec Novice Warriors for Feudal Patrol Walk into a Bar (this post) – 18 Novice Warriors
Please let me know your thoughts and feedback in the comments section – I really appreciate learning any impressions or thoughts in general (or specific) that you have.
Ral Partha had a historical line of 25mm figures that were cast and sold back in the 1980’s. One of them was the “1200 A.D” line, which included Aztec figures, and one of their blister packs was “Aztec Warrior Priests”. It had 6 figures with two poses. Also supplied were 3 different weapons, and shields for each figure.
On my previous post on Tlaxcalans, I mentioned that I needed to have some warrior priests for their army. Unfortunately, I could not find a suitable 28mm version for the Tlaxcalans. I do have some Wargames Foundry Aztec Warrior Priests in the painting queue but they were not going to be right as Tlaxcalans in my view.
I did have (among several other blisters from that era) a single blister pack of 6 figures of Ral Partha 42-302. Now these were Aztecs, not Tlaxcalans, and 25mm size, not 28mm. Generally 28mm figures are 1:61-1:68 range, and 25mm figures are 1:68-1:71 range in scale. So from a gaming distance, I think that they will work. I have already incorporated other 25mm figures such as the historical Eagle Warriors from Tin Soldier and the ahistorical Ral Partha Arrow Warriors into my Aztec forces for the upcoming launch of Buck Surdu’s Feudal PatrolTMskirmish tabletop war game. (as a side note – my Civilizations Collide supplement will cover this period, and will be a free download from the website).
Getting back to filling the Tlaxcalan ranks with some Warrior Priests – I chose to paint the 42-302 figures up in Tlaxcalan colors and war paint. It allowed me to make use of the figures – which have been waiting 32 years to be painted anyways – and to not add any more to my unpainted stuff. Sometimes you just have to find a way to liberate the unpainted hordes! When they get deployed in my supplement, Warrior Priests are add-on troops that get individually attached to units. They have the ability to help keep a unit they are attached to from breaking morale, and also can cause a defeated non-Spanish enemy to be more likely to want to flee the battlefield.
Contents of Ral Partha 42-302
Ral Partha 88 on base
Ral Partha 88 on weapons/shields sprue
This blister pack was waiting 32 years to be painted
The six figures were more than enough to round out my Tlaxcalans. It’s always a challenge to go smaller than usual in painting, and these figures were no exception. One initial issue was the height, which I “leveled” by adding a 3/4″ x 1/8″ small washer on the 1″ washer base. This was to make the height disparity less noticeable. I also gave the somewhat pliable weapons a light coat of Gorilla Glue to stiffen them up a bit
Primed, mounted, and ready for painting.
A second challenge was capturing the delicate details on the figures. Here, I decided to steal an idea I have seen on Chris Palmer’s blog on the H.A.W.K.’s combined blog site – that is to prime figures white and use a dark wash over that to help with details. I think it helped – see the examples of WIP below.
The wash showed details that I could better shade and highlight
This worked well under the contrast paint.
Here is a second example:
The Tlaxcalans favored red loincloths and headbands – so those were easy to add. The war paint design mix that I used was similar to my previous group – a red-striped over white design or a black mask (or none at all). As for shield, I perused Steven’s Balagan and my Osprey books for inspiration (while modifying the colors a bit).
The shields as completed – I used different contrast paints for the feathers and denoted on the plate (because I might forget when I went to paint the other sides!).
Three of the models had a lovely little (ok, tiny) engraved skull at their waists on a bone necklace. I was unaware of this engraved skull aspect of Mesoamerican “art”. You can see a modern interpretive example from Amazon here and shown below:
Maybe not a Mother’s Day present…
I tried out my new Army Painter drybrush (the smallest one) and was very happy how well it performed, especially on the skulls. The bristles are round and it is just the right stiffness. Here is the link and the photo below if you are interested:
I bought this set and liked them.
Back to painting the models, my goal was to get a nice blending on the flesh before varnishing the figures. They do end up shiny from the Army Painter Flesh Wash, but with matte varnish the shine goes completely away.
Before varnishing – a bit shiny. You can see the extra washer here too.
Once I added the extra washer, you could see that the elevation on the base could pose a flocking issue – such that it would look “rounded” under the flocking. To deal with this, I glued some very small pieces of modeling talus on the washers to more or less camouflage the underlying round shapes. I would leave some of that exposed as well once flocked.
A model with the added talus pieces.
So let’s see the finished models! As usual, I gave each a number for future reference and creation of gaming aids:
Eye Candy
TWP1 – armed with a tepoztopilli (obsidian-edged thrusting spear), and no war paint. Interestingly this pose of the two types in the blister was a lefty!
TWP2 – armed with a cuauhololli (round-headed club), with no war paint.
TWP3 – armed with a macuahuitl (obsidian-edged club/sword), again no war paint.
TWP4 – armed with a tepoztopilli (obsidian-edged thrusting spear), and the red-stripes-over-white war paint. This pose of the two types in the blister was right-handed!
TWP5 – armed with a cuauhololli (round-headed club), wearing the black mask war paint.
TWP6 – armed with a macuahuitl (obsidian-edged club/sword), and the red-stripes-over-white war paint.
I think that they can safely share the same gaming tabletop!
Here are the three left-handed figures together.Here are the three right-handed figures together.All of Ral Partha 42-302.
This project also allowed me to help with one of my favorite websites, the Lost Minis Wiki, which is a fantastic resource for OOP stuff, especially from the 1970’s and 1980’s. Here is the entry photo for this blister.
So, my Tlaxcalan forces are done – I have now 32 figures for their army. When added to the 71 Aztecs that I have done, that brings me to over 100!
All of my Tlaxcalan troops.
Thanks for taking a look – below you’ll find my updated details list for the overall project and this particular one (paints, etc. used).
Miscellaneous details and references for those interested:
Posts on games, units, and other projects for my 16th Century Spanish Conquest supplement for Feudal Patrol™ – “Civilizations Collide”
Total figures to date for this project: 103 figures: 71 Aztecs, 32 Tlaxcalans
PAINTS, INKS, GLAZES, SHADES, WASHES, PIGMENTS, FLOCKING, GLUES AND MORE THAT I USED ON THESE TLAXCALAN WARRIOR PRIESTS:
Gorilla Glue
1/8″ x 1″ Everbilt Fender Washers
1/8″ x 3/4″ Everbilt Fender Washers
Plastic plates
Poster tack
Vallejo “Surface Primer – White Primer”
Vallejo “Flow Improver”
Vallejo “Airbrush Thinner”
Testors “Universal Acrylic Thinner”
Citadel “Nuln Oil” (shade)
Vallejo Model Air “Weiss” (off-white)
Vallejo Game Air “Dead White”
Vallejo Game Air “Black”
Army Painter “Tanned Flesh”
Vallejo Game Color “Bronze Fleshtone”
Vallejo Model Color “Sunny Skin Tone”
Citadel “Contrast Paint – Darkoath Flesh”
Battlefront “Chocolate Brown”
Army Painter “Flesh Wash” (wash)
Citadel Air “Evil Sunz Scarlet”
Citadel “Contrast Paint – Wyldwood”
Battlefront “Sicily Yellow”
Citadel “Contrast Paint – Black Templar”
Vallejo Model Air “Tire Black”
Citadel “Contrast Paint – Terradon Turquoise”
Citadel “Contrast Paint – Skeleton Horde”
Citadel “Contrast Paint – Contrast Medium”
Battlefront “Wool Brown”
Army Painter “Red Tone” (shade)
Citadel “Agrax Earthshade” (shade)
Vallejo Model Color “Glossy Black”
Citadel “Contrast Paint – Blood Angels Red”
Citadel “Contrast Paint – Iyanden Yellow”
Citadel “Contrast Paint – Apothecary White”
Citadel “Contrast Paint – Warp Lightning”
Citadel “Contrast Paint – Aethermatic Blue”
Citadel “Contrast Paint – Akhelian Green”
Citadel “Contrast Paint – Ultramarines Blue”
Citadel “Contrast Paint – Leviadon Blue”
Secret Weapon Washes “Sunshine” (ink)
Citadel “Ushabti Bone”
Citadel “Seraphim Sepia” (shade)
Vallejo Model Color “Dark Blue”
Vallejo Model Air “Moon Yellow”
Vallejo Game Air “Satin Varnish”
Vallejo Mecha Color “Turquoise”
Citadel “Caliban Green”
E6000 Epoxy
4Ground small talus pieces
Elmer’s PVA Glue
Army Painter “Brown Battlefields” (flocking)
Vallejo “Dark Yellow Ochre” (pigment)
Vallejo “Burnt Umber” (pigment)
Citadel “Steel Legion Drab”
Citadel “Tallarn Sand”
Citadel “Karak Stone”
Americana “Desert Sand”
Vallejo Mecha Varnish “Matt Varnish”
Army Painter “Grass Green” (flocking)
Please let me know your thoughts and feedback in the comments section – I really appreciate learning any impressions or thoughts in general (or specific) that you have.
The Tlaxcalans were a Nahua people that were at a constant state of war with the Aztecs of the Triple Alliance for decades. The Aztecs never fully conquered the Tlaxcalans, as they found them to be a far more useful source of slave labor, sacrificial victims, and resources than as a vassal state. The Aztecs were able to take these captives and supplies by allowing the Tlaxcalans to merely exist – and by challenging them repeatedly to a series of “Flower Wars”. Flower Wars were basically ritualized arranged gang-like “throw downs” where usually the Aztecs would emerge victorious, as they were a larger and far more powerful empire based in Tenochtitlan. Certainly, with this level of abuse, there was no love lost between the Tlaxcalans and the Aztecs.
Into this theater of conflict came a new revolutionary factor in the early 16th century. Hernan Cortes and his Conquistadores arrived in Mesoamerica in February of 1519. In September of that year, he encountered the Tlaxcalans and briefly fought them – as the Tlaxcalans were unaware of who the Conquistadores were or from whence they came. Both sides came to peace terms relatively quickly after some tough fighting – during which mutual respect was gained for their respective courage and capabilities in battle. The Tlaxcalans informed Cortes of the vast riches (especially in terms of gold) of Tenochtitlan and their emperor, Montezuma II. The Tlaxcalans happily joined the Spanish on their march to Tenochtitlan and indeed were staunch allies for them. Indeed, without the Tlaxcalans who formed the bulk of Cortes’ forces, the Spanish would never have been able to defeat the Aztecs during their conquest of New Spain.
I have been working on building Aztec, Tlaxcalan, and Spanish forces for the upcoming launch of my rules supplement for Buck Surdu’s Feudal PatrolTMskirmish tabletop war game. My supplement will be a free download from the website and will be called Civilizations Collide. The supplement will cover many aspects of the Spanish Conquest to include the Aztecs, the Inca, the Maya, and more. Back in August, I began to work on the Tlaxcalans. I was working on my Tlaxcalan Archers, (which you can read about here), and quickly realized that the level of detail that I wanted to achieve on these figures could not be achieved if I was to work on too many at a time. Therefore, I broke up the project into two phases. The first phase was the completion of the 8 Tlaxcalan Archers. For the second phase – which this post concerns – I had 18 figures, all from Outpost Wargames Services via their US distributor, Badger Games. Eight were from TX2 “Tlaxcalan Novice Warriors in Padded Vest”; eight were from TX3b “Elite Warrior in Feather Costume”; and two were from TXC01 “Tlaxcalan Captain and Conch Blower. These are all 28mm in scale and metal. Still, this two-phase approach took me a lot longer than I had expected to take to finish these – primarily as there were (as you will see) multiple shields, weapons, and backbanners to paint and assemble. As source materials I used both multiple Osprey books and especially the two blog posts from Steven’s Balagan blog on Tlaxcalan painting and especiallyhis post on shield painting and design. These are fantastic resources and I recommend them highly for anyone interested in the period in addition to the Osprey books. I also recommend Badger Games as a source for these figures as well as those they sell from other manufacturers.
I will generally show some WIP stuff and discuss some of the aspects and challenges of the project and how I dealt with them. I’ll end with a recap of where the overall project progress is now, and what paints and stuff I used here. I did not take as many WIP shots as I normally do because while I have tackled more figures at a time previously, this project phase kept me very busy (and as this was during golf season, that took some hobby time too!). If WIP shots are not for you, just scroll down to the “Eye Candy” section to see how they all came out. With all of the photos – just click on them if you want a bigger view.
TX2 “Tlaxcalan Novice Warriors in Padded Vest” WIP Shots
The TX2 baggie of Novice Warriors as received
The painting plan for the Tlaxcalan Novices. I did find that I needed to change the weapons selection after painting as some of them did not fit quite well into the figures’ hands or did not look as good. I chose specific shield designs from Steven’s Balagan and the Osprey books. The numbers you see are applied to the base bottoms and help with my ability to make game menus and aids later on.
Here you see the novices mounted on 1″ steel washers on specimen jars with poster tack for ease of painting. I also labeled them (and all the figures) with their numbers, their future weapons, and their planned shields. The Tlaxcalan Archers behind them were completed in phase 1 (a previous post described them.
I chose to try to paint all of the separate components (figures, shields, weapons) before assembly. I did find that I had a bit of difficulty getting certain the weapons to fit easily to some models so I ended up switching between issuing a macuahuitl (broadsword/club-type with obsidian edges) or a tepoztopilli (obsidian-edged thrusting spear) for a few. I should have tried to widen the figures’ hands a bit more than I did. Certainly, I think using Citadel “Apothecary White” contrast paint on the white ichcahuipilli (quilted cotton vest armor) was a big win.
TX3b “Elite Warrior in Feather Costume” WIP Shots
The TX3b as received.
Tx3b painting and assembly plan
I used a plastic plate for getting to both sides of the shields and macuahuitls.
The Tlaxcalan Elites would be a bigger challenge – primarily because in addition to the figures, weapons, and shields, each had a huge (and relatively heavy model-wise) feather backbanner. I ended up using a wooden jig to hold them during the project in between painting colors. According to my research, there were other types of backbanners – and even this type (TX3b) was supposed to have the white egret backbanner as an option. All I had were 8 of the same type of backbanners- so I diverged a bit with color selections on the center section to aid with tabletop identification. I also decided to paint them a bit differently. I used Citadel “Nuln Oil” as a wash immediately after priming white. This allowed me to get better shading – especially with subsequent uses of contrast paints on the feathers. After I painted the backbanners, I applied a satin varnish to preserve the brighter colors as I used a final matte varnish at the end of the assembly. Clearly, between the costume and the feathered backbanner, these elites had a lot of “battle plumage”! Historically, fighting in melee with the backbanner on must have been tough. I do wish I had had one of the egret backbanners, but not enough to buy any more…yet.
My painting holder/jig for the backbanners – this is early in the project.
Here the backbanners are done and ready to be assembled onto the figures.
I did paint the elite figures a bit differently as well. I find that dry brushing over contrast paints leads to too much abrasion and wear on the contrast-painted areas. These Tlaxcalan elites have a nice feathered costume, and I wanted to bring that aspect out. So, I painted the figures’ flesh first, then similarly applied Citadel “Nuln Oil” as a wash. Then I dry brushed the costume with Citadel “Hexos Palesun”, followed by an wash-like application of Citadel “Iyanden Yellow” contrast paint thinned with Citadel “Contrast Medium”. My only change going forward would be to paint the flesh base after as of course I had to cover up some errant dry brushing.
Left is an elite figure after dry brushing but before adding the contrast paint. The right one has had the contrast paint added as I described above.
A finished Tlaxcalan Elite figure – more to see in “Eye Candy” below.
TXC01 – “Tlaxcalan Captain with Conch Blower”
Finally, I wanted to add some leadership for the group. For painting, I followed a similar path as described above for the elites and the novices.
TXC1 as received. I ended up giving both a tepoztopilli (spear).Gotta have a plan!Fast forward – and the Captain completed. I do like the way he came out – and more eye candy below.
Notes on Painting Shields, Assembly, and Basing
As discussed, this project took a lot of time on details. Each figure had its own distinctive shield design. After free-handing these, I used a satin varnish similar what I did on the backbanners.
To me, this is small!
My fave shield design – though maybe mine is too happy?
Steve’s Balagan was invaluable.
The Elite and Command Group’s completed shields
The shields were affixed with a “sandwich” of E6000 epoxy and Gorilla Glue. The weapons were attached with Gorilla Glue. Assembling the backbanners was trickier. They weighed a lot, and I wanted to make sure that they would be set up for both tabletop survival and looking good. I used Gorilla Glue on them, and then finished off the mount with green stuff. This necessitated yet another wait for curing. I primed the green stuff black and left it black as I liked it better than the brown I originally planned. Better yet, it is solid, and will support the figure as it is picked up!
Figures painted – need weapons, shields, backbanners, and bases flocked and finished!
The top mount is done with green stuff and the bottom is mid-application.
After the green stuff has been sculpted.
As for basing, I probably do too much, but I think bases are so important. This time I did the bases before affixing any weapons, shields, or backbanners. I used Army Painter Brown Battlefields with PVA (Elmer’s) glue. I then add two kinds of Vallejo pigments with Vallejo airbrush thinner. Once that is dry (again a wait) I drybrush the base with four different shades of tan. After varnish, the last step is to add some static grass with PVA, and gently vacuum that mix (once a bit tacky) so that the grass gets a little frilly.
The absolute last thing I do after final matte varnish is added and static grass is to highlight the obsidian-edged weapons with some Vallejo Model Color “Glossy Black”.
DONE!!! Now let’s do some eye candy!
Eye Candy
For shots here, I got a new background from previous posts – and added some cacti that I had flocked and washed. Hope it adds to the shots!
Tlaxcalan Novices
TXN1 – has the red-striped-over-white war paint and is armed with a macuahuitl.
TXN2 – has the red-striped-over-white war paint and is armed with a tepoztopilli. Also has the “thick-lipped” shield.
TXN3 – has the black mask war paint and is armed with a macuahuitl.
TXN4 – has the black mask war paint and is armed with a macuahuitl.
TXN5 – has the red-striped-over-white war paint and a different head cover, and is armed with a macuahuitl.
TXN6 – has the red-striped-over-white war paint and a different head cover, and is armed with a tepoztopilli.
TXN7 – has the black mask war paint and is armed with a macuahuitl.
TXN8 – has no war paint and is armed with a tepoztopilli.
Tlaxcalan Elite Warriors
TXE1 – has no war paint and is armed with a macuahuitl. The center of his backbanner is tan.
TXE2 – has no war paint and is armed with a macuahuitl. The center of his backbanner is yellowish-tan.
TXE3 – has the red-striped-over-white war paint and is armed with a macuahuitl. The center of his backbanner is yellowish-tan.
TXE4 – has the black mask war paint and is armed with a tepoztopilli. The center of his backbanner is light green.
TXE5 – has the red-striped-over-white war paint and is armed with a tepoztopilli. The center of his backbanner is tan.
TXE6 – has the black mask war paint and is armed with a macuahuitl. The center of his backbanner is bright white.
TXE7 – has the red-striped-over-white war paint and is armed with a tepoztopilli. The center of his backbanner is bright white.
TXE8 – has no war paint and is armed with a macuahuitl. The center of his backbanner is light green.
Tlaxcalan Command Group
TXC1 – Tlaxcalan Captain, with no war paint, armed with a tepoztopilli. His backbanner has a serpent on it.
TXC2 – Conch Blower, with no war paint, armed with a tepoztopilli.
Tlaxcalan Command Group
Next up I need to add some warrior priests for the Tlaxcalans – and I have some old Ral Partha ones that will do the trick – I hope – stay tuned!
Miscellaneous details and references for those interested:
Posts on Games and Units for my 16th Century Spanish Conquest Supplement for Feudal Patrol™ – “Civilizations Collide”
Total figures to date for this project: 97 figures: 71 Aztecs, 26 Tlaxcalans
PAINTS, INKS, GLAZES, SHADES, WASHES, PIGMENTS, FLOCKING, GLUES AND MORE THAT I USED ON THESE TLAXCALAN NOVICE AND ELITE WARRIORS AND THE COMMAND GROUP:
Gorilla Glue
1/8″ x 1″ Everbilt Fender Washers
Plastic plates
Poster tack
Vallejo “Surface Primer – White Primer”
Vallejo “Flow Improver”
Vallejo “Airbrush Thinner”
Testors “Universal Acrylic Thinner”
Citadel “Nuln Oil” (shade)
Battlefront “Wool Brown”
Citadel “Contrast Paint – Wyldwood”
Citadel “Contrast Paint – Contrast Medium”
Army Painter “Tanned Flesh”
Vallejo Game Air “Black”
Citadel “Agrax Earthshade” (shade)
Citadel “Contrast Paint – Basilicanum Grey”
Citadel “Contrast Paint – Volupus Pink”
Vallejo Game Air “Dead White”
Citadel Air “Evil Sunz Scarlet”
Vallejo Model Air “Weiss” (off-white)
Citadel “Averland Sunset”
Vallejo Game Color “Bronze Fleshtone”
Vallejo Model Color “Sunny Skin Tone”
Citadel “Contrast Paint – Darkoath Flesh”
Army Painter “Flesh Wash” (wash)
Army Painter “Red Tone” (shade)
Citadel “Caliban Green”
Vallejo Model Air “Tire Black”
Citadel “Contrast Paint – Apothecary White”
Citadel “Contrast Paint – Blood Angels Red”
Vallejo Model Air “Moon Yellow”
Citadel “Contrast Paint – Warp Lightning”
Battlefront “Chocolate Brown”
Citadel “Biel-Tan Green” (shade)
Citadel “Seraphim Sepia” (shade)
Citadel “Contrast Paint – Iyanden Yellow”
Citadel “Hexos Palesun”
Vallejo Game Color “Livery Green”
Citadel “Auric Armour Gold”
Citadel “Nuln Oil GLOSS” (shade)
Citadel “Contrast Paint – Terradon Turquoise”
Citadel “Contrast Paint – Snakebite Leather”
Citadel “Hexwraith Flame”
P3 “Sunshine” (ink)
Secret Weapon Washes “Blue” (wash)
Vallejo Model Color “Dark Blue”
Citadel “Contrast Paint – Talassar Blue”
Vallejo Game Air “Escorpena Green”
Vallejo Model Air “Cockpit Emerald Green ‘Faded’”
E6000 Epoxy
Elmer’s PVA Glue
Army Painter “Brown Battlefields” (flocking)
Vallejo “Dark Yellow Ochre” (pigment)
Vallejo “Burnt Umber” (pigment)
Citadel “Steel Legion Drab”
Citadel “Tallarn Sand”
Citadel “Karak Stone”
Americana “Desert Sand”
Green Stuff
Reaper MSP “Black Primer”
Vallejo Mecha Varnish “Matt Varnish”
Vallejo Model Color “Glossy Black”
Army Painter “Grass Green” (flocking)
Thanks for looking!!! Please let me know your thoughts and feedback in the comments section – I really appreciate hearing what you think.
The time had come for me to get some opponents painted up to oppose the Aztecs of the Triple Alliance from Tenochtitlan (now Mexico City). In this case, these opponents are the Tlaxcalans, a Nahua ethnic group that never was conquered by the Aztecs. They did briefly fight Hernan Cortez and his conquistadors before allying with them against their longtime-hated enemy, the Aztecs. They were noted as being a major part of Cortes’ forces, and for having excellent archers. In my Tlaxcalan figures, have a group of veteran archers, a group of novices, a small command group, and a group of elite warriors for games of FeudalPatrol™ using my supplement called Civilizations Collide. All will eventually be shared here. They all are 28mm scale metal models from Outpost Wargames Services acquired from Badger Games in the US.
After the Zoom play test that I had described here, it was time to get some Tlaxcalans into the fray! I start her with TX4 “Tlaxcalan Archers”, an 8 figure set.
The TX4 “Tlaxcalan Archers” baggie of 8 figures as received from Badger Games.
I chose to start with these archers as they had no shields to paint (time saver) – but also because the Tlaxcalans had a couple of very interesting types of war paint on their faces. From the Osprey plate in one of my books, one style resembled a black “superhero mask” around the eyes. The other one was a series of fine red stripes on a white background. Not all Tlaxcalans had war painted faces, so I could mix in some regular tanned skin as well. Given that some of the 8 figures were similar, this would aid in tabletop differentiation as well. Lastly, painting this unit would allow me some good practice on the faces with war paints as well as the common color themes of the Tlaxcalans according to the Osprey plates (which themselves were based on the various historical codices of the period). I chose to paint 4 figures with the black mask war paint, 2 with the white and red-striped painted war paint, and 2 with no war paint at all.
It would be appropriate for me to make a few more points on paints here. While I do list all the paints that I used at the end of this post for those interested (and for me when I forget and want to know I ended up using when I have another similar future project!), I want to share a few key items.
First, I tried a new tanned flesh paint that I really liked – Army Painter “Tanned Flesh”- and it worked well. I thinned it appropriately as a base coat and used other lighter paints, contrast paints, and washes over it as shades and highlights. Second, I also want to give credit to Faust at Double Down Dice as I had not tried Citadel “Gore-Grunta Fur” for wood – as I did here for bows. I had seen his work on his blog here and was impressed enough to give it a shot. Third, I used Citadel “Averland Sunset” and Vallejo Model Air “Black” to recreate a slightly different color pattern on the quivers to represent them being made from jaguar hides. And lastly, I gave the steel washers a different color – Citadel “Caliban Green” – than the tan undercoat that I had given the washers under my Aztecs. It only shows on the rim of the bases, but I think will help with tabletop differentiation. Many of the poses are similar, and a few are the same (6 poses and 8 figures).
I assign each figure a number – which helps with the painting plan as well as for later when prepping for games. The numbers go on a spreadsheet and are also on the bases of the figures. I did drop the dash though!
Overall, I loved the figures, but painting them was a bit more challenging than I had thought. The main difficulties were around getting the flesh to where I was happy (again working with a new flesh tone), and the bright reds, black hair, and dark flesh next to bright whites – especially on the headbands. You can judge my efforts, though I did not do as many WIP shots here. You can click on all the images here for a better view.
Before warpaint…
Add white…
Add tiny stripes…
And you have the mask done!
The sequence of face painting that I used for the striped war paint.
Here you see the black mask war paint and the effort on the jaguar-hide quiver. In the game, I give the Tlaxcalans a high rate of fire with their bows.
So let’s get a look at the completed models!
TXB1 – has quilted armor (ichcahuipilli), a feather-decorated helmet, and the black mask war paint.
TXB2 – has an ichcahuipilli, but no helmet and the red striped war paint.
TXB3 – has no armor, no helmet and no war paint!
TXB4 – also has no armor, no helmet but does have the imposing black mask war paint.
TXB5 – also has no armor, and no helmet but does have the stylish white and red-striped war paint!
TXB6 – yes, he’s painted exactly the same as TXB4! Why? I guess I have no good reason!
TXB7 – a slightly different pose from TXB1. Has quilted armor (ichcahuipilli), a feather-decorated helmet, and the black mask war paint.
TXB8 – this is the exact same pose as TXB7. Has quilted armor (ichcahuipilli), a feather-decorated helmet,but no war paint.
Close up shot of the completed TXB5
Close up shot of TXB1.
All 8 figures assembled for battle
I hope that you found this post enjoyable. Let me know – and stay safe out there!
Miscellaneous details and references for those interested:
Posts on Games and Units for my 16th Century Spanish Conquest Supplement for Feudal Patrol™ – “Civilizations Collide”
Last Saturday morning I had the chance to GM and play…(wait for it)…a real tabletop wargame!!! We were able to play a game of Feudal Patrol™ via Zoom. This game is a member of the Combat Patrol™ WWII family of games, and will be available soon from On Military Matters in the US and Sally 4th in the UK. The players were all alone at home and included myself (in Massachusetts), Buck Surdu (in Florida), Dave Wood (in Maryland), Greg Priebe (also in Maryland), and Chris Abbey (in the UK). Buck hosted the Zoom meeting, and I ran the game with some of my Aztec figures in my cellar that followers of this blog have seen completed such as my last one here.
The scenario is called “Raid to Satisfy Huitzilopochtli”. Huitzilopochtli was a major deity in the Aztec religion, and was particularly noted as a god of war and sacrifice. The scenario uses the supplement I wrote for FeudalPatrol™ called Civilizations Collide. It takes 60 points of attackers against 26 points of defense. However, this being an Aztec attack on another Mexica town, the focus is on capturing incapacitated warriors and dragging them back for sacrifice on the altar of Huitzilopochtli. Of course, the defenders would be trying to take captives to satisfy their particular deity as well. My rules focus on this, and other aspects of Mesoamerican warfare – to try to create an authentic feel – and a different wargaming experience. Even the difficult-to-pronounce names of the weapons (macuahuitl, tepoztopilli, cuauhololli, atlatl, sling (well not that one)) add to the feel. I aimed to create a scenario that is similar to a “Flower War” – where both sides deployed for a ritualized pre-arranged showdown.
The attackers would split their forces equally between Zones #1 and #2, which would also be where they would need to drag their captives.
The defenders would get more victory points for the same achievements – such as taking captives or incapacitating an enemy figure. One interesting aspect of the Aztec supplement rules is that as you take out an enemy you must take troops away from the battle to drag the incapacitated figure back to a prearranged spot for your side. Which means that as you achieve success on the battlefield, you lose troops for “captive duty” as it were.
The score sheet and possible points available for success for each side.
Dave, Buck and I were on the attack – and Buck and Chris defended. At first, the defenders were a bit concerned with the seemingly overwhelming odds facing them. But they had the advantage of choosing to deploy after the attackers, as well as the chance to use the defensive terrain around the fields.
Logistically, I had two cameras logged in for the game – one from my iPad and one from my iPhone. I had acquired a nice inexpensive tripod from Xenvo via Amazon called a “Lobsterpod” that worked really well. I moved the figures based on the gamers commands and the game moved along fairly well on the Zoom platform, though not as fast as if the players were all in the same room. Of course, the option to actually see my figures in all their “glory” was compromised (I’m pretty proud of them) – but hey – they are on my previous blog posts for all my readers to see so no problem, right? I only used Aztec figures, but later I will be able to augment the defenders with Tlaxcalans (when I get them painted). I planned here and for the future to allow the gamers to pick their figures beforehand from a menu of available ones, and organize their forces prior to a game.
I set up the tabletop as shown below – some of my 15mm Normandy hedgerows served well as protection around the fields. The walled section of the village is pretty basic here as it does not come into the game except as a collection point for captives.
This view is from the defenders’ side. The defenders’ walled village is in the middle on the right and served as the point for their captives to be collected for sacrifice/slavery.
The attackers tried to flank the enemy on both sides of the board while simultaneously making a frontal assaults to tie the defenders down at the wall. The attackers got a bit unlucky (to say the least) as a veteran/novice “twinned” unit (Dave) moved slowly (even at a sprint). Buck took a unit of Jaguar Warriors straight at Chris’ Arrow Warriors (yes I know they may not have been historical – think of them as elite atlatl troops with limited ammunition), and got mauled – losing two Jaguars Warriors to the defenders as potential sacrifices. On the other flank, I faced off against Greg, and despite his having a terrible early morale result that dispersed his troops, he was able to inflict good damage on my greater numbers. In the end, the defenders were able to do enough damage and take enough prisoners on the attackers for a pretty convincing victory. All agreed that the scenario was well-balanced, and all seemed to have a good time.
Buck took some screen shots that I will share below (click on them for a better view) – and he also wrote a blog post on the battle that you can read here.
The battle begins…
Approching the defenders…
The gamers are focused.
I kept busy moving around the table.
Dave attempts to flank while Buck assaults.
Greg and I get in a big scrum.
The defenders take prisoners.
The attackers vainly try to pursue the captors.
The assault on the defenders’ right devolves further.
Mark’s Warrior Priest and other Aztecs stopped by Greg.
At this point, the defenders have triumphed by great play.
I used color-coded and numbered magnets to try to keep the forces straight, and it worked. But magnets in melee do attract…so next time I will use poster tack and small hole punched card of different colors. A gaming challenge is to make sure that the Aztecs and other forces are identifiable for the player, either in remote mode or live. The card solution should be an easy fix.
Here are some shots that I took after the game:
Greg and I battle at the wall.
Buck’s Jaguar Warriors head for a brutal end on the sacrificial altar.
Buck’s captured Jaguar Warriors.
You can see the magnets I used – nice try but will not be using again.
Buck’s command group attempts to rally his forces.
Lastly, here are the gamers:
Great fun group!
My thanks to all who participated. It was a nice test of my scenario and the special rules I wrote for Civilizations Collide, which will be a free download from the game’s website when it goes live in September. I must say it was a gratifying experience, and one that I hope to repeat.
I intend to buy Zoom if there is enough interest and host some more games – at least until we are clear of the COVID-19 virus. I could see my running more FeudalPatrol™ games, and even What a Tanker games. If you would be up to a remote game, let me know in the comments section – maybe we can make it happen!
Check out the links for FeudalPatrol™ – its a great and easy card-based system that is really a great step forward.
An army needs a leader! My Aztecs troops will be used in skirmish warfare games of Feudal Patrol™ (check out these two links on the game here and here).
Feudal Patrol™ will launch very soon (very exciting!).
In the game, the basic unit is an Element of 5 figures, including a front-line leader. Up to four Elements will constitute a Warband, and up to four Warbands will make up a Battle Group. Similarly, up to four Battle Groups will constitute an Army. Most games will never be composed of an Army as the system is designed for skirmish level war gaming. Still, it could be used for big battles effectively.
At the highest level of course was the “huey tlatoani” or “Great Speaker” – the emperor of the Aztecs. Under him as the head of the War Council and the supreme field commander was the Cihuacoatl, also called the Snake Woman”. This was not a woman – but always a man – despite the name. Cihuacoatl was also a goddess of fertility and childbirth in Aztec mythology. Yes, it’s a bit confusing, and I’ll leave that right there.
As I previously posted, Badger Games was kind enough to offer me an Outpost Wargames Services baggie of OWS AZG001 – General as Snake Woman priestess w/drummer. It consisted of an Aztec/Mexica General replete with back ornament and a standard of Quetzalteopamitl (serpent of precious feathers). Back in the day, both were adorned with lots of gold and quetzal feathers. A wonderful image is found on plate A of Pohl’s Aztec, Mixtec, and Zapotec Armies. It was a nice chance to work on two figures at a time instead of 21!
The model was fairly straightforward, though I needed to make a rig of clothespins, poster tack, and specimen bottles (seen below) to paint the back ornament and the banner. Mold lines were easy to deal with on these, and the details were nice.
As received in baggie…
Hmmm, how to handle for painting?
Here you can see the set-up I used to paint the set. The old clothes pins worked well as shown.
The challenges here necessitated using slightly larger washers as bases – and 1.25″ washers along with some smaller ones and some plastic card were needed (a list of materials is at the end of this post for those who are interested). As far as painting, care had to be taken with the components so as to not damage them during the build as well as to protect their paint jobs. A little varnish along the way helped here. The other major challenge was on the generals face painting. The details (such as the white markings on the lower blackened part of the face) here were the smallest I have ever attempted on 28mm figures.
Back ornament
Quetzalteopamitl banner
Drum
Drummer – the matte varnish would take care of the shiny flesh wash
I wanted the warpaint to look as if it was over flesh – so I painted the face first, then painted the warpaint designs (including the tiny white circles and dots).
Various components in mid-project states.
Aztec Snake Woman
Drummer
After assembly and awaiting the E6000 epoxy to harden overnight.The figures complete and ready for some eye-candy shots.Frontal shotBack shot – you can see the back ornament mounting here.Right side – I really enjoyed painting the drum for some reason!Left side shot. The shield design is from the Osprey plate, which in turn had its basis in the Codices. The back ornament and the banner helped with command and control of troops, as did the drum of course.
I hope that you found this interesting. I am moving on to working on other troops – and A GAME (remotely run) next week with players in 3 US states and the UK – more to follow soon!
Until next time – take care and stay safe all!
Miscellaneous details and references for those interested:
Posts on Units for my 16th Century Spanish Conquest Supplement for Feudal Patrol™ – “Civilizations Collide”
Aztec Snake Woman and Drummer (this post) – 1 Aztec General and 1 drummer
When one looks at the historical images of various Aztec warriors of the 16th Century, some of the most striking ones are those of the Jaguar Warriors. The Jaguar Warriors were true elite warriors, similar to the Eagle Warriors in having high and noble status in Aztec culture. They wore elaborately decorated suits (tlahuitli) that affected a jaguar-like look, replete with head-encompassing hardwood helmets (cuacalalatli) carved to be jaguar-like in appearance. Their spotted gaudy suits were worn over quilted cotton armor vests called ichcahuipilli, which provided a degree of additional protection to the Jaguar Warrior.
The Jaguar Warriors’ actual designation was cuauhocelotl. This was an elite warrior classification level that one earned by capturing at least four enemy warriors for use as sacrificial victims on the altar or as slaves. Aztec warfare valued capturing an enemy warrior over killing one outright in battle. Attaining Jaguar Warrior status had its privileges, such as being able to drink pulque (a fermented drink made from agave), and to have and keep concubines.
In battle, they were armed with atlatl (spear throwers), macuahuitl (obsidian-edged wooden clubs or broadswords), or tepoztopilli (obsidian-edged thrusting spears). As Jaguar Warriors are iconic in Aztec warfare, I knew I needed to have some for my Aztec forces for the upcoming launch of Buck Surdu’s Feudal Patrol™ game, especially for the supplement that I wrote for the Spanish Conquest I called Civilizations Collide. With all of their colorful suits and shields, so I was excited to paint some up and add to my troops that I have previously described in this blog.
From Badger Games, I had purchased a couple of 28mm scale metal Wargames Foundry blisters: AZ012 “Heroes of Tenochtitlan” and AZ015 “Chimalpopoca’s Jaguar Warriors”. In AZ012 there were 6 figures – 3 Aztec veterans, 2 Jaguar Warriors, and a Warrior Priest. I would need at least 5 for the basic unit in Feudal Patrol™ (that being a Warband), so I thought that AZ015 would round that out as that blister pack was supposed have six Jaguar Warriors. Surprise – after opening it I found that there were seven! Bad news, however – the AZ015 blister pack had only 3 weapons, those being all atlatls in hands that needed to be mounted to arms – and only two of the 7 included figures were so designed. The other 5 figures were thus without weapons.
I contacted Badger Games and they were fantastically accomodating. They agreed to send me a pack of 8 Outpost Wargames Services Jaguar Warriors (AZ5), as well as another pack that I’ll describe in a future post. These AZ5 Jaguar Warriors come in various poses. Of note Badger also removed the AZ015 SKU from their website and contacted Wargames Foundry to advise them that every pack of AZ015 that they had had been similarly packed incorrectly. That’s exceptional follow through on their part and I appreciated that.
The downside was was that I had to wait another week+ to get going again on the project. When the OWS pack arrived, I was happy to see that there were two weapons (8 macuahuitl and 8 tepoztopilli) available for each of the 8 AZ5 Jaguar Warriors. This meant that I had plenty of extra weapons to arm the AZ015 Jaguar Warriors! All I needed to do was convert two AZ015 figures to hold an atlatl by cutting off their hands and replace with one of the three atlatls that came with the pack.
The Wargames Foundry AZ015 “Chimalpopoca’s Jaguar Warriors” improperly packed blister as received. As a side note, Chimalpopoca was an Aztec emperor in the 15th Century.
Now I had not 8, but 21 figures for this project, which was definitely not my goal at the start! Still, with this many figures, and permutations of shield design, weaponry, and colors, I needed a plan. So I made one – as shown below. Also, the WF and OWS sculpts were different of course, and I wanted a variety of Jaguar Warrior tlahuitli and cuacalalatli both for ease of play and to be historically accurate. The best resources were this were the plates in my Osprey books and two Steven’s Balagan blog posts (THANK YOU STEVEN FOR SHARING!). Both are phenomenal and invaluable (especially for shield design examples) – here they are:
Books:
Pohl, John M. D. (1991). Aztec, Mixtec, and Zapotec Armies – Men-at-Arms.London: Osprey Publishing.
Pohl, John M. D. (2001). Aztec Warrior, AD 1325-1521. Oxford: Osprey Publishing.
Pohl, John M. D. (2005). Aztecs & Conquistadores. Oxford: Osprey Publishing.
As far as my painting plan, I should mention that I have a numbering system for all of my figures for Civilizations Collide. This system will allow me to have a points-based menu (like a “take-out menu”) for the gamers. At the beginning of a game, they will be able to use the menu choose how to spend their available scenario points by choosing specific troops for their side by checking them off on a menu that I will provide. I have an Excel spreadsheet with the figure values and designations that I will use to make the menu. Also, I will print out a disc to glue under each figure’s base with that information as well. This, I hope, will make the gaming experience better and very easy.
The pictures below show my initial organizational plan for arming the figures – I did have another corresponding Excel plan (not shown) where I planned the base colors and the specific shield designs for each of the figures.
The WF “Heroes of Tenochtitlan” AZ012 blister figures initial plan. The “AV25” for example means that it was an “Aztec Veteran #25”. JA1 means “Jaguar Warrior #1”, and so on. I later changed the Warrior Priest designation to AWP1.
The AZ015 WF “Chimalpopoca’s Jaguar Warriors” blister showing OWS weapons, the conversion of JA9 and JA9, and all the shields to paint from both WF blisters.
The OWS AZ5 pack of 8 and their shields. I found both these and the WF sculpts to be fun to paint. As this post goes on, you can be the judge of their different styles.
After I completed the plan, I mounted the figures in my usual way. I labeled the bottom of the washers under the figures with the figure number and I similarly labeled each of the specimen jars. I also organized the shields as shown below – plus I also had painted shields from previous projects available. I decided to first do their flesh and weapons, and then move on to do each figure in order and separately. This way I would gain experience (and hopefully improve) with painting the patterns on the tlahuitli and cuacalalatli, especially the jaguar-specific aspects. This approach did help me maintain focus on the figures. I ended up with fewer WIP pics, but this was a big varied project. Hell, most of these figures had not one – but two sets of eyes. It took about a month-and-a-half! Of course, the July 4th holiday weekend did keep me out of the painting mode – as did some golf.
Mounted for painting
Early painting of flesh
More early flesh painting
I did change my approach to the flesh painting a bit. Trying to get that right on dark flesh was a challenge. The list of paints I used was extensive given the breadth of the figures needs, but for flesh I mainly moved more to using Citadel “Darkoath Flesh” over a Vallejo “Sunny Skin base” with Vallejo Model Color “Medium Skin Tone” as highlights. I also experimented with Vallejo Model Color “Mahogany”.
Below are some examples of mostly completed and unvarnished figures which were awaiting shields, flocking, and of course varnishing.
WF Aztec Warrior Priest with a macuahuitl
WF Jaguar Warrior JA4 with OWS tepoztopilli
WF Jaguar Warrior JA5 with atlatl
WF Jaguar Warrior JA8 with atlatl – this was a conversion
OWS Jaguar Warrior figures JA12 and JA13. The figures are the same pose, but I armed JA12 with a macuahuitl and JA13 with a tepoztopilli. Note that I also gave them both different painting schemes.
Painting of the figures was followed by my working on the shields. Using my plan I was able to finish them all after a few days and they are shown below with a ruler for scale.
I then mounted the shields, flocked the bases, varnished them, and applied static grass.
All ready to get off the painting mounts.
Now comes the fun part – sharing the final products. Each of the figures is shown below – and I gave each blister a different photo background.
“Heroes of Tenochtitlan” (AZ012) Blister Pack (Wargames Foundry)
Aztec Veteran Warrior AV25
The first of three Aztec Veteran Warriors in the blister. I experimented with darker skin tones on this figure. The background photos are of a young Mexican cornfield.
Aztec Veteran Warrior AV26
This Aztec Veteran Warrior was a more interesting sculpt for me than the previous one.
Aztec Veteran Warrior AV27
This was the only figure of all of these that had an already-affixed shield.
Jaguar Warrior JA1
I looked to create a true jaguar coloring with this figure, though he came off a bit dark. in these photos.
Jaguar Warrior JA2
The blue and spot patterns were from an Osprey plate. The shield was one of the more difficult freehands to do. The blue color is purposefully dark as were the Osprey images.
Warrior Priest AWP1
I enjoyed painting this guy and his shield. Again, the details came from an Osprey plate. The white-dotted tlahuitli and shield were supposed to be emblematic of the stars in the night sky. Warrior Priests have special rules in my supplement and in general help keep an attached unit in the fight longer (better morale). I have more of these to do – eventually…
Some shields were simple wicker-covered designs like this one has. The background for this blister is a Sonoran Desert shot. The rosettes (jaguar spot patterns) were a challenge on all of these figures.
Jaguar Warrior JA4
I tried a lighter base on the tlahuitli here.
Jaguar Warrior JA5
Another Osprey plate-inspired base color. I love his facial expression.
Jaguar Warrior JA6
Painting a complex design on a wicker-type shield is definitely harder! The OWS tepoztopilli’s definitely worked well with the WF figures.
Jaguar Warrior JA7
Another blue-themed WF figure with a simple shield and OWS tepoztopilli.
A lighter pattern with the OWS shield. These shields were smooth and easier to design and paint patterns. The sculpts have their own distinct character – less fine detail than the WF ones, but no less visually impressive to me. However, I did really find the OWS sculpts to have easier tlahuitli to paint as they were far more amenable to dry brushing and shading. The background photo for all of these is an Aztec temple.
Jaguar Warrior JA11
One of the fun aspects here was being able to use so much yellow on most of these. Yellow is a tough color to use (I find) on minis, and it’s a common color for the Aztecs shields and tlahuitli. JA10 and JA11 are the same sculpt – I just added different weapons and used dissimilar paint and shield schemes.
Jaguar Warrior JA12
This sculpt seemed to be almost more dog-like with its cuacalalatli (hardwood helmet).
Jaguar Warrior JA13
JA12 and JA13 are the same sculpt, with different colors, weapons, and shields.
Jaguar Warrior JA14
I liked his charging into action pose! I wonder if the tails cased problems in melee for those who had them?
Jaguar Warrior JA15
Another red-themed warrior.
Jaguar Warrior JA16
Just two pics here as he’s one of the few with his shield facing front. Got the shield design from multiple places.
Jaguar Warrior JA17
More like a snow jaguar – but an available pattern. Checkerboard shields are fun!
“Jaguar Warriors” Blister Pack assembled
And next here you have all 21 gathered:
Hopefully you enjoyed the pics and this post – and if you have feedback, a favorite among these, or a least favorite – positive feedback or devastating criticism – I’m up for all of the above.
With many conventions cancelled, and even gaming club get-togethers not happening, it may be a while before these Aztecs get into a fight. I guess that just leaves more time to complete them – and eventually some Conquistadores and Tlaxcalans as foes.
This project hopefully counts as an entry for me for Azazel’s illustrious “The Jewel of July 2020: Community Painting Challenge” under the “Heroes” category – just that there’s 21 of them! By the way, it’s been mercifully extended until the end of August if you want in – check it out at the link.
I’m also reading this book as more research:
Until next time – take care and stay safe all!
Miscellaneous details and references for those interested:
Posts on Units for my 16th Century Spanish Conquest Supplement for Feudal Patrol™ – “Civilizations Collide”
A June and July Jaguar Warrior Frenzy (plus some Aztec Veterans and a Warrior Priest to Boot) (this post) – 3 Aztec Veteran Warriors, 17 Jaguar Warriors, 1 Aztec Warrior Priest
Readers of this blog have seen that I have been building a large force (Aztecs, Conquistadores, and others) for the 16th Century Spanish Conquest of Mesoamerica for the upcoming game of Buck Surdu’s Feudal Patrol™. This game is exciting for me as I got to write the supplement for this period (“Civilizations Collide”). I invested in a number of figures, and I have a need to push myself production-wise, without sacrificing quality. I had two blisters each (AZ017 “Ixtlilxochitl’s Veteran Warriors” and AZ023 “Cuauhtli’s Veteran Warriors”) from Wargames Foundry.
Those Aztec names just roll off of your tongue so easily don’t they! There were two Ixtlilxochitl’s – Ixtlilxochitl I was a Chichimec leader who fought against the Aztecs of the Triple Alliance, and Ixtlilxochitl II was his grandson who fought against Montezuma II. So they were Aztecs – just not the ones that fought Cortes and the Conquistadores. Cuauhtli means “Eagle”, but these so designated are not Eagle Warriors. So, the names chosen by Wargames Foundry for the blisters sound Aztec, but are a bit off historically. Still, the sculpts are great.
These metal figures were sculpted by Josef Ochmann and are 28mm in scale. They are available in the US from Badger Games and from Wargames Foundry internationally. Each of the two blister packs had 6 figures leaving me with 24 figures – with 12 of them being duplicates. Similar to what I did with the Novice Warriors, I decided to differentiate them by both a color theme and by their shield designs.
As I had finished 24 figures previously, this project would effectively double my Aztecs – hence I am doubling down.
I also had a few technical goals here for this project. One was to improve upon my painting of flesh tones on the models. The second goal was to attempt to improve my shields by freehand painting historically accurate and authentic shield designs. The last goal was to try better to use contrast medium to thin contrast paints on these figures. As always, dear reader, you may be the judge and jury on that – and I am open to how well or how poorly you think I did here. I find that sometimes when I am doing a platoon-sized project, I can easily overlook mistakes that would not be overlooked when doing a smaller group or even an individual figure. Hopefully, I was able to catch any errors.
This will be a photo-heavy post. I’ll share some WIP and some eye candy of the finished figures, along with the list of paints used here. To do 24 figures at a time can make quite a list as you will see at the end of this blog post.
Figure Prep and Priming
Ixtlilxochitl’s Veteran Warriors blisters
Cuautli’s Veteran Warriors blisters
The group here is mounted for painting. I label the vials and the base bottoms, and I had a matrix for keeping the colors straight on all of these so as to make them realistic enough and to help with tabletop identification. I needed this as historically each Aztec warrior’s uniform was unique to the status of that warrior, and based upon his individual accomplishments in battle, as opposed to the unit to which he belonged. The elite units were the exception to this – these are of course veterans warriors, not elites.
Ixtlilxochitl veterans early flesh painting
Cuauhtli veterans early flesh paintin
May 17th progress
May 17th progress
May 29th progress
May 29th progress
I must give a nod and thanks to my blog buddy Azazel’s suggestion as to how to use contrast medium, I did the above. Basically I placed a drop of the contrast medium next to some of the contrast paint on the palette, and drew them together to get the shade I wanted. I did this with flesh here (also used Gulliman here as the main flesh contrast paint instead of Fyrestarter) as well) – and it really was helpful. Check out Azazel’s blog too – his stuff is really good!
There were a few problematic mold lines – most I caught and filed/fixed but some were on the figure’s faces like below. To eradicate some mold lines, I would have had to nuke the face, which I did not want to do. In the end, I think I minimized most of the more egregious mold lines.
Mold line on face I missed
Same model, no facial mold line!
The shields that came with the blisters was more than sufficient. For the 24 figures, I needed an additional 18 shields for figures that did not have one. I also had leftover shields from the Novice Warrior project that I saved – so I ended up painting 29 shields. It was a good chance to try some new techniques and practice with some different Aztec designs (of which there are many luckily). The most difficult type to paint were the type that were cloth-covered types with “crenelated” surfaces (as on those the paint flows into the shields’ low areas). I also had to be careful when painting both sides so as to protect the previous coats of paint. Using diluted satin varnish between side swapping helped to protect the work, but I still did need to go back over the shields and touch them up. In the end, I was happy with the results and will save the extras for future use.
I used a plate and poster tack to prime
Then I took each type and painted them separately on smaller plates.
My shields completed and ready to mount. Thankfully, I got a shipment of Windsor & Newton brushes (0000) which was a must for my freehand work here!
The group shown here freshly off of their specimen jars. They have been flocked and are ready for some eye candy shots.
Eye Candy
First, here are Ixtlilxochitl’s Veteran Warriors – there are 6 poses with two of each painted. One was “blue-themed” and one was “red themed”, mainly to add to tabletop differentiation in addition to the shields.
Ixtlilxochitl’s Veteran Warrior 1 – armed with an atlatl
Ixtlilxochitl’s Veteran Warrior 2 – armed with a macuahuitl
Ixtlilxochitl’s Veteran Warrior 3 – armed with a cuauhololli
Ixtlilxochitl’s Veteran Warrior 4 – armed with a macuahuitl
Ixtlilxochitl’s Veteran Warrior 5 – armed with a macuahuitl
Ixtlilxochitl’s Veteran Warrior 6 – armed with a tepoztopilli
Here are the warriors from the “blue-themed” blister pack of Ixtlilxochitl’s Veteran Warriors assembled for battle.
The “red-themed” blister pack of Ixtlilxochitl’s Veteran Warriors defending the temple.
Ixtlilxochitl’s Veteran Warriors (all 12).
Secondly, here are Cuauhtli’s Veteran Warriors – there are also 6 poses with two of each painted. Once again, I painted 6 as “blue-themed” and 6 as “red themed” in addition to the shields.
Cuauhtli’s Veteran Warrior 1 – armed with a macuahuitl
Cuauhtli’s Veteran Warrior 2 – armed with a macuahuitl
Cuauhtli’s Veteran Warrior 3 – armed with a macuahuitl
Cuauhtli’s Veteran Warrior 4 – armed with a macuahuitl
Cuauhtli’s Veteran Warrior 5 – armed with a tepoztopilli
Cuauhtli’s Veteran Warrior 6 – armed with a macuahuitl
Cuauhtli’s Veteran Warriors in the “blue theme” moving out.
Cuauhtli’s Veteran Warriors in the “red theme” form up for battle.
All 12 Cuauhtli’s Veteran Warriors in the desert.
I enjoyed painting these – though I do not think that I will be doubling down with a project of 48 at a time – “a man’s gotta know his limitations” as Dirty Harry so eloquently said.
Here’s the 24 all together:
Oh yeah, I also just got a set of Feudal Patrol™ cards from Buck as a gift – try and guess which deck backings are my current favorites?
Hope that you enjoyed the post and the minis – if not, let me know – if yes, the same.
Until next time – take care and stay safe all! Posts on Units for my 16th Century Spanish Conquest Supplement for Feudal Patrol™ – “Civilizations Collide”
In building a set of troops for the Spanish Conquest, I came across a couple of blisters of 25mm Ral Partha figures called “Aztec Arrow Knights”. These were in my lot of unpainted lead for the period, sculpted by R. Kerr, and dated from 1988. The blisters held 6 figures armed with huge feathered arrows – think javelins with fletching. As I thought that they were interesting potential elite troops with unique weapons, I decided to add one of the two blisters to my Aztec forces, keeping the other in reserve for future painting.
The blister pack – waited 32 years to be opened.
As I discussed previously, I had been doing research on the Aztecs. I looked for suitable color plates or guides to paint up this unit. To my surprise, there is a bit of mystery and possibly even controversy about Arrow Knights. History provides little evidence in the codices as to their existence – though there are clues here and there.
Possible Arrow knight on the right?
Is there a giant arrow here?
I suppose it’s not out of the question that an elite unit of Aztec warriors specializing in launching massively huge javelin-like arrows could have existed. Perhaps there was some confusion with the atlatl (ot-la-t) a spear-throwing device? Just because old Ral Partha made these does not mean that they did exist – but for the purposes of my games and my Aztec Army – they do now.
Atlatl use.
Of course, painting them would be up to me for choosing the colors. The only picture that I found was from a computer gaming site – and it did not match any of the plates. I did like the markings known as “hawk scratches”. I decided that I would give the unit a coloration similar to the cuahchic elites – that being a yellowish suit of tanned hide that would have been worn over their quilted-cotton armor ichcahuipilli (each-ca-we-pee-lee).
From the internet – not likely historically correct but a start.
It was fun to break into this old blister from Ral Partha’s “1200 A.D.” line. The figures were all in the same pose, but I figured that I could orient their arrows in slightly different positions, use slightly different colors on each , and give different shields to each for aesthetics and ease of tabletop identification and playability. A familiar challenge was that the arrows were all lead – and vulnerable to bending and breaking. I also wanted them to have two big arrows – one to throw and one to use in melee.
The problem with doing this were twofold. First, I did not want to sculpt 6 little extra arrows – and second the little 25mm hands were too small to accommodate even the arrows provided. My solution was to use some steel wire pikes I had gotten from Iron Winds Metals during my Rooman War Party project. I cut the pikes to size and used super glue to affix them to the arrows. They would be the “second” arrow, albeit without fletching or another obsidian head. I think it worked – and you can be the judge.
One of the shield and weapon sprues with the “RAL PARTHA 1988” on it.
The arrows shown here reinforced by the steel wire.
The Arrow Knights after affixing their “double arrows” to their hands and the figures themselves to the 1″ steel washers. I would paint the shields separately.
Close up shot before painting.
Early flesh painting May 4th
Moving on to headdresses and other colors
I used a series of yellow and tan inks, washes, and glazes over the hard-lined “hawk scratches” to get a good color that would darken appropriately but still show the markings.
Close up shot mid-stage before darkening.
After shields affixed and washes applied.
Close up of Arrow Knight prior to flocking. I did like how the faces came out, and the uniforms as well.
I flock the bases with Army Painter “Brown Battlefields”, then add pigments before varnishing. After varnishing, I add static grass. Here you see the pigments wet with Vallejo “Airbrush Thinner” which hardens up nicely. Sometimes I drybrush the bases as well, but I opted this time not to and to instead use more pigments.
Dried and ready for varnishing in the spray booth.
Next, I’ll share some close up eye candy shots of each, a scale comparison, and some group shots.
Arrow Knight #1
Arrow Knight #2
Arrow Knight #3
Arrow Knight #4
Arrow Knight #5
Arrow Knight #6
Scale Comparison
Just for scale comparison – the Arrow Knight is on the left, a 28mm Wargames Foundry Novice Warrior is in the center, and a 25mm Tin Soldier UK Eagle Knight is on the right. I think they will work fine on the tabletop together.
Group Shots
Good view of the six different shields together.
I am also adding a new feature here. I want to be able to share related posts on the larger Aztec project with folks who have not seen all of the previous posts. Additionally, I need a way to help me keep track of my progress! Therefore, the list of links below will accomplish both for me.
Posts on Units for my 16th Century Spanish Conquest Supplement for Feudal Patrol™ – “Civilizations Collide”
As shown in my last post, I have started building forces of appropriate figures for tabletop wargames using the soon-to-be published Feudal Patrol™. These are Aztecs and other troops from the era of the Spanish Conquest in the 16th Century. This is a major project for which I eventually hope to have over 150 painted figures. I have a ways to go, as this project brings that total to a mere 18. Still, the journey of 1,000 miles begins with a single step…
I acquired a large lot of Aztec figures on eBay probably 4 or 5 years ago. Most of them 25mm scale, and from Ral Partha dating from around 1988. In the lot were also two baggies of 3 Aztec Eagle Warriors (#25 AZ4) – ostensibly 25mm as shown on the Tin Soldier UK website. I was not familiar with Tin Soldier UK, but they have a pretty nice range of figures worth checking out. Of course, 28mm is the scale that I am going for – and sometimes 25mm can work for 28mm. While I was waiting for my order of new 28mm stuff to arrive (which I received this week), I decided to paint up some of the older figures and see if they could work with my 28mm figures visually. To my eyes, the Tin Soldier UK Eagle Warriors looked close enough to 28mm to work.
The Tin Soldier UK baggies of Eagle Warriors. Note the noodle-like tepoztopilli (obsidian-bladed thrusting spears) – more on that in a bit.
The Aztecs had two main elite unit types – the Jaguar Warriors, and the Eagle Warriors (sometimes referred to as the Eagle Knights). There were also the lesser-known Arrow Knights, which I will post about next time. To be an Eagle Warrior, one had to have captured up to 20 enemy for sacrifice or equivalent deeds of valor (well, in the eyes of Aztec society anyways). They were full-time professional warriors and along with the other elites were equivalent to nobility among the Aztecs.
Normally, Aztec Eagle Warriors would be armed with melee weapons, in particular the macuahuitl obsidian-edged club/sword. All of these 6 had the same pose and were armed with tepoztopilli (obsidian-bladed thrusting spears). They also had the weapons in a throwing versus a thrusting pose. Therefore, I decided to go through the 25mm Ral Partha Aztecs that I had and see if I could get any macuahuitl or cuauhololli (round-headed club) as extra weapons. The extra Ral Partha macuahuitl were way too small and bendable, but there were some cuauhololli that would work. I ended up using two of the cuauhololli and four of the tepoztopilli as weapons for the six. My plan was to orient each of their weapons slightly differently and also to have different shield patterns and different colors for authenticity and ease of tabletop play.
Now, as for the spaghetti-like tepoztopilli, they needed a solution as they were made from lead and were as floppy and vulnerable to bending as most leaden miniature spears are unfortunately, especially those from the 1980’s and earlier. The odd thing is that the model shown on the website indeed does have a macuahuitl instead of a tepoztopilli! My guess is that they redid the mold at some point as these model thrusting spears were too weak for use in gaming. In any case, I decided to try using a thin layer of Apoxie Sculpt on the shafts. Apoxie sculpt is easy to use and can be made more workable when used with wet fingers – and it gets hard as a rock when it cures in 24 hours. This process gave me much improved tepoztopilli, but still the underlying lead made them somewhat (though less) vulnerable to bend.
This bendy tepoztopilli will not do!
From the Tin Soldier UK website – I definitely would have preferred this macuahuitl as a weapon for the models – but it is available now.
My set up for firming the tepoztopilli shafts – first I straightened them with a pair of needle-nosed pliers then rolled on wet Apoxie Sculpt. Insert crass joke here…
New shafts reinforced with the Apoxie Sculpt after a 24 hour cure.
The models themselves were not too difficult to assemble. I did need to clean up the mold lines and the hands needed to be drilled out carefully to hold the weapons. I did pull out some of the molding rubber out of one model’s eyes, but overall I was happy with the quality of the castings. I definitely liked that the shields were not separate.
I made a unit plan as there were many ways to do the unit – and I wanted to have something to refer to along the way. In particular, one of my goals for this project was to give each Eagle Warrior a different shield design – and for that design to be historically correct. Over at Steve’s Balagan, I found his blog to be a wonderful resource for Aztec and other shields.
Eagle Warriors primed and the painting plan – I did end up deviating a bit as I observed the colors of the models.
Most pictures that I have found on Eagle Warriors showed them in golden brown outfits – but some mention that there were possibly red, green, and blue ones as well. I decided to make three in golden brown, and then make the others in red, green, and blue. The accouterments and shields would also add to the differentiation on the tabletop. Unlike the novices, the pics that I saw of Eagle Warriors all had orange loincloths, so that feature was common here.
By April 29th, I had the basic colors down. Citadel contrast paints were useful with these models, as their details for the most part were not really suited for dry brushing as opposed to shading.
Progress by April 30 – still needed to paint the shields and weapons.
Close up of April 30 progress.
My next big challenge was painting designs on the shields. My handwriting is awful, and hand-drawing designs on shields has not been a strength for me – and these are tiny. I decided to let the engineer in me break out. I used an art template to trace a 9/32″ circle on a piece of paper, and then I cut that out. It proved useful in helping me to lightly sketch the designs on the shields in pencil – as guides for painting. I tried several designs that I saw on Steve’s Balagan blog.
Putting the template on the shield for marking up designs.
I wanted to get these done for the weekend, and my wife helped fuel my push with a home-made pizza (that tasted even better than it looked!).
Fuel for the finish!
Below are a couple of WIP shots after I finished painting the shields – for me, this was a result that I was surprised to see.
Close up of Eagle Warriors 1, 2, and 3 showing shield details.
Close up of Eagle Warriors 4, 5, and 6 showing shield details.
On May 1, I finished them with flocking and varnishing, ending with some static grass (all the materials I used are listed at the end for those interested). This counts hopefully as my second entry into Ann’s Immaterium Painting Challenge “Paint the Crap you Already Own”.
The Aztec Eagle Warriors ready to come off their painting posts.
Here are some close up and group shots of the project:
Eagle Warrior 1, with tepoztopilli:
Eagle Warrior 2, with tepoztopilli:
Eagle Warrior 3, with tepoztopilli:
Eagle Warrior 4, with tepoztopilli:
Eagle Warrior 5, with cuauhololli:
Eagle Warrior 6, with cuauhololli:
Lastly, a couple of group shots:
Eagle Warriors attacking!
Close up shot – do you have a fave?
As for scale – here is a comparison between a 25mm Eagle Warrior and a 28mm novice warrior – I think they will be OK. Do you?
What do you think? Always wondering that – so let me know below in the comments section. Now it’s back to painting more figures during the lockdown and beyond…
PAINTS, INKS, GLAZES, SHADES, WASHES, PIGMENTS, FLOCKING, GLUES AND MORE USED ON THESE AZTEC EAGLE WARRIORS:
Apoxie Sculpt (White)
Gorilla Glue
1/8″ x 1″ Everbilt Fender Washers
E6000 Epoxy
Poster tack and plastic plates
Vallejo “Surface Primer – White Primer”
Vallejo “Flow Improver”
Vallejo “Airbrush Thinner”
Testors “Universal Acrylic Thinner”
Vallejo Model Air “Weiss” (off-white)
Battlefront “Wool Brown”
Battlefront “Dark Leather”
Citadel “Contrast Paint – Gryph-Hound Orange”
Vallejo Model Color “Sunny Skin Tone”
Citadel “Contrast Paint – Skeleton Horde”
Citadel “Contrast Paint – Blood Angels Red”
Citadel “Contrast Paint – Creed Camo”
Citadel “Contrast Paint – Aethermatic Blue”
Vallejo Model Color “Basic Skin Tone”
Citadel “Contrast Paint – Fyreslayer Flesh”
Citadel “Contrast Paint – Iyanden Yellow”
Army Painter “Light Tone” (shade)
Vallejo Mecha Color “Turquoise”
Vallejo Game Air “Black”
Vallejo Model Air “Moon Yellow”
Vallejo Model Air “Armour Brown”
P3 “Sunshine Yellow” (ink)
Vallejo Model Color “Red”
Vallejo Model Color “Black Grey”
Vallejo Model Color “Sunny Skin Tone”
Battlefront “Chocolate Brown”
Vallejo Mecha Color “Brown”
Citadel “Contrast Paint – Flesh Tearers Red”
Vallejo Game Air “Escorpena Green”
Vallejo Model Color “Dark Blue”
Citadel Air “Evil Sunz Scarlet”
Citadel “Contrast Paint – Wyldwood”
Citadel “Balor Brown”
Vallejo Model Color “Glossy Black”
Citadel “Seraphim Sepia” (shade)
Elmer’s PVA Glue
Army Painter “Brown Battlefields” (flocking)
Vallejo “Dark Yellow Ochre” (pigment)
Vallejo “Burnt Umber” (pigment)
Americana “Desert Sand”
Vallejo Mecha Varnish “Matt Varnish”
Army Painter “Grass Green” (flocking)
Thanks for looking – please let me know your thoughts and feedback!

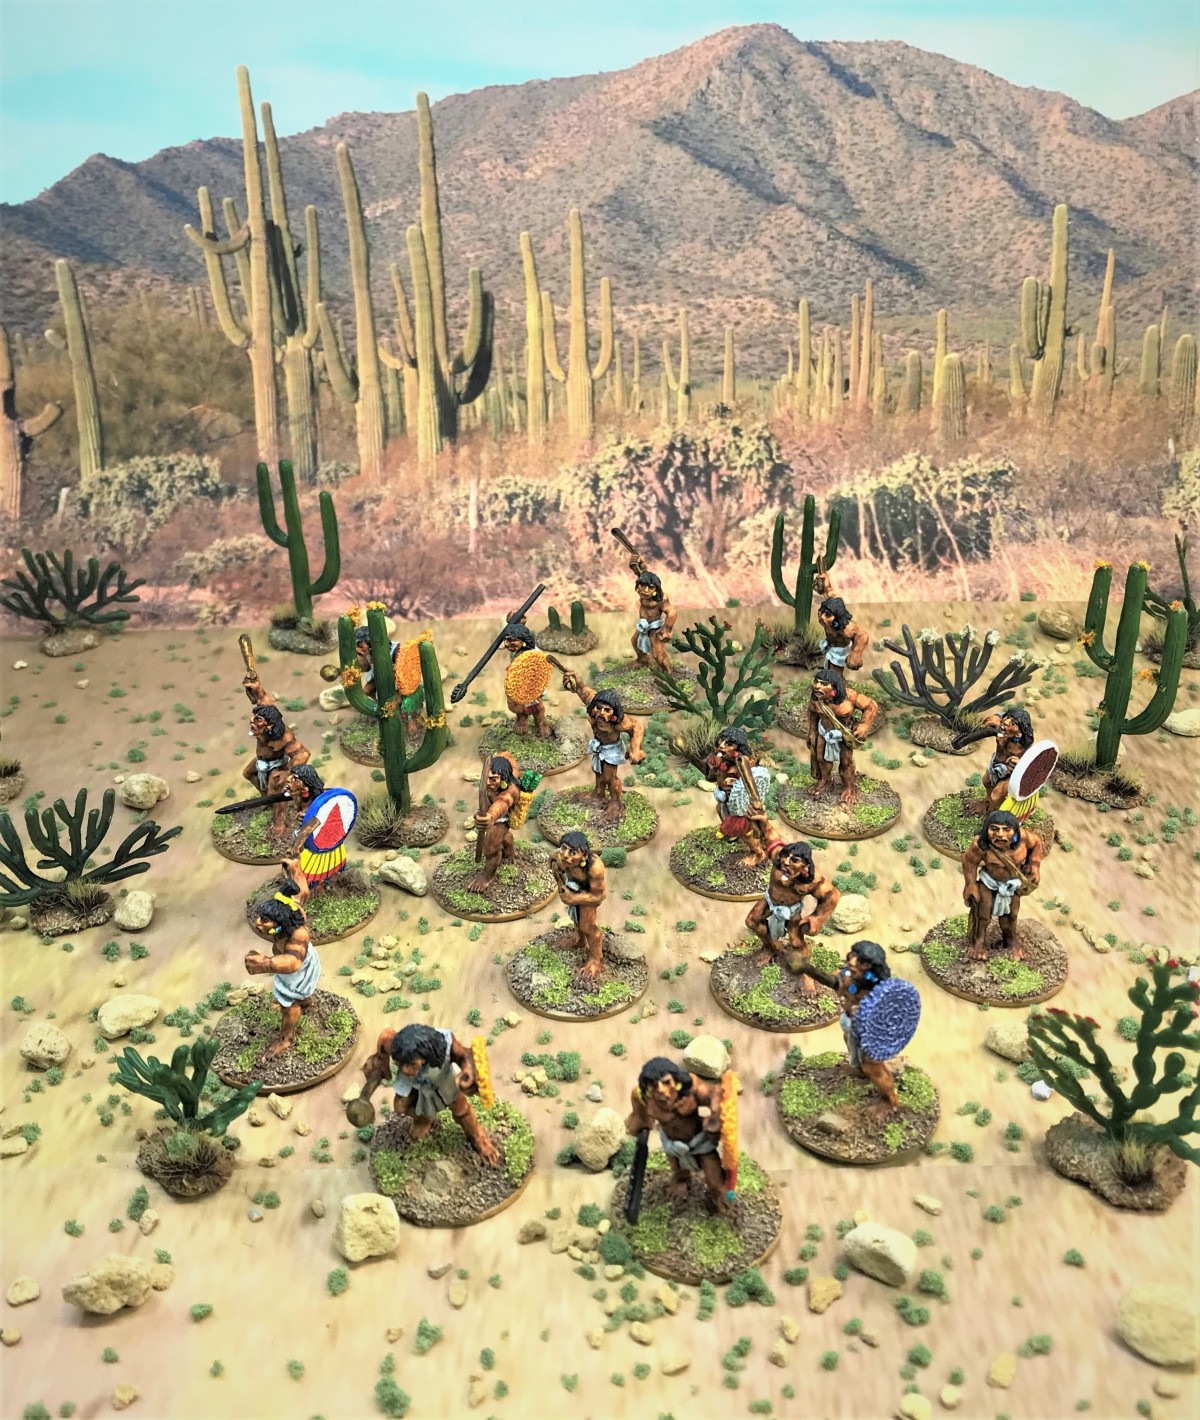


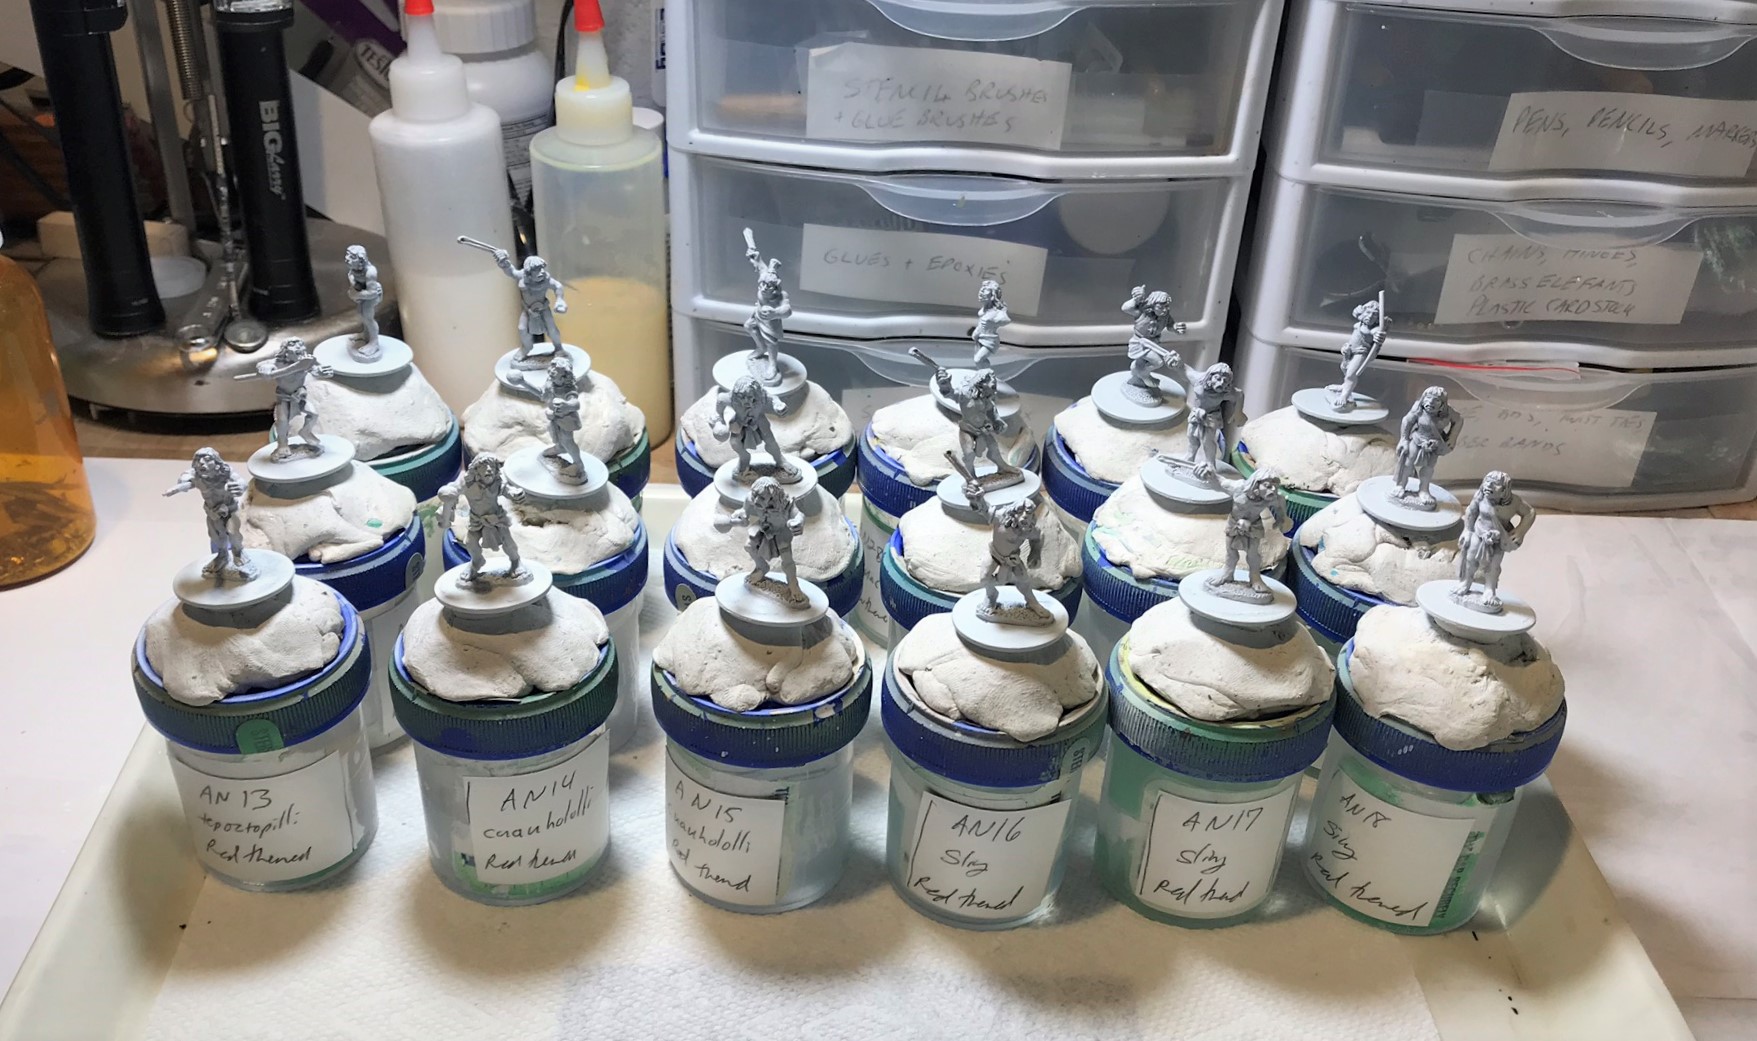
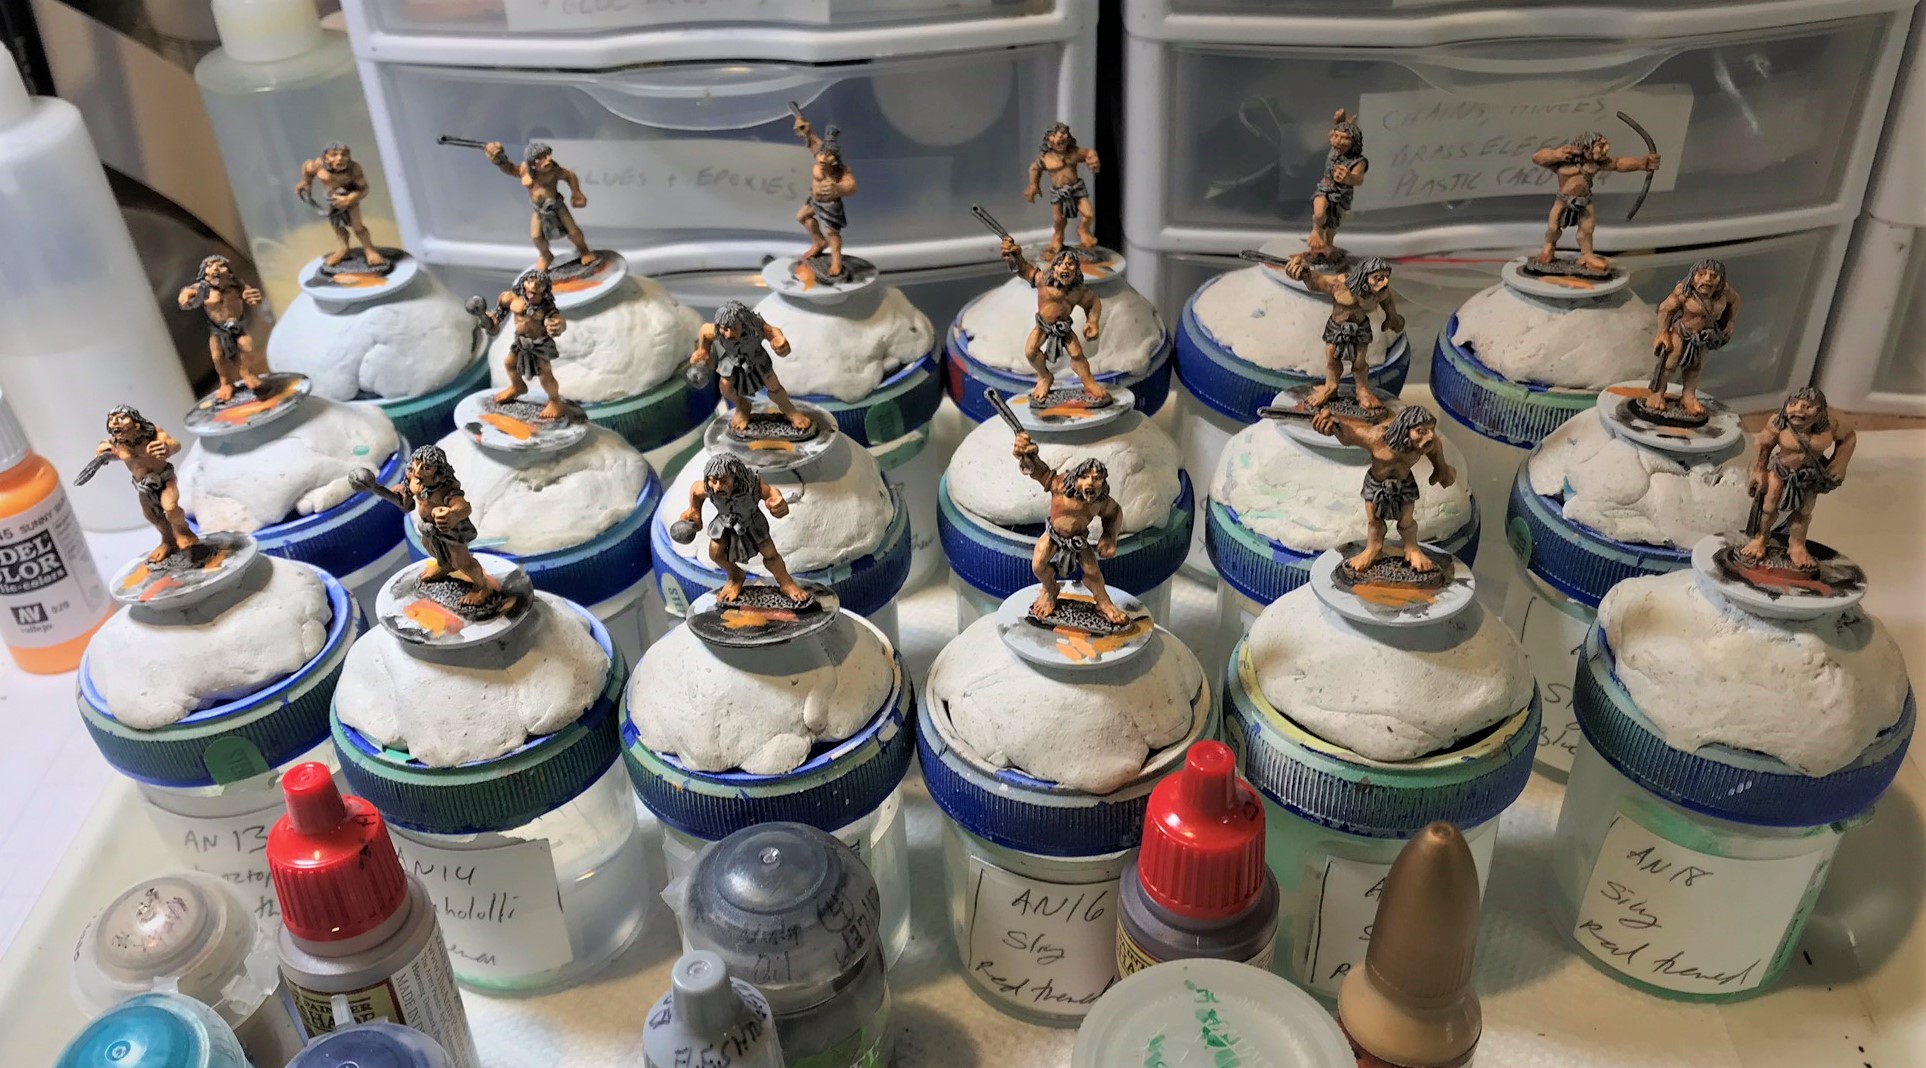


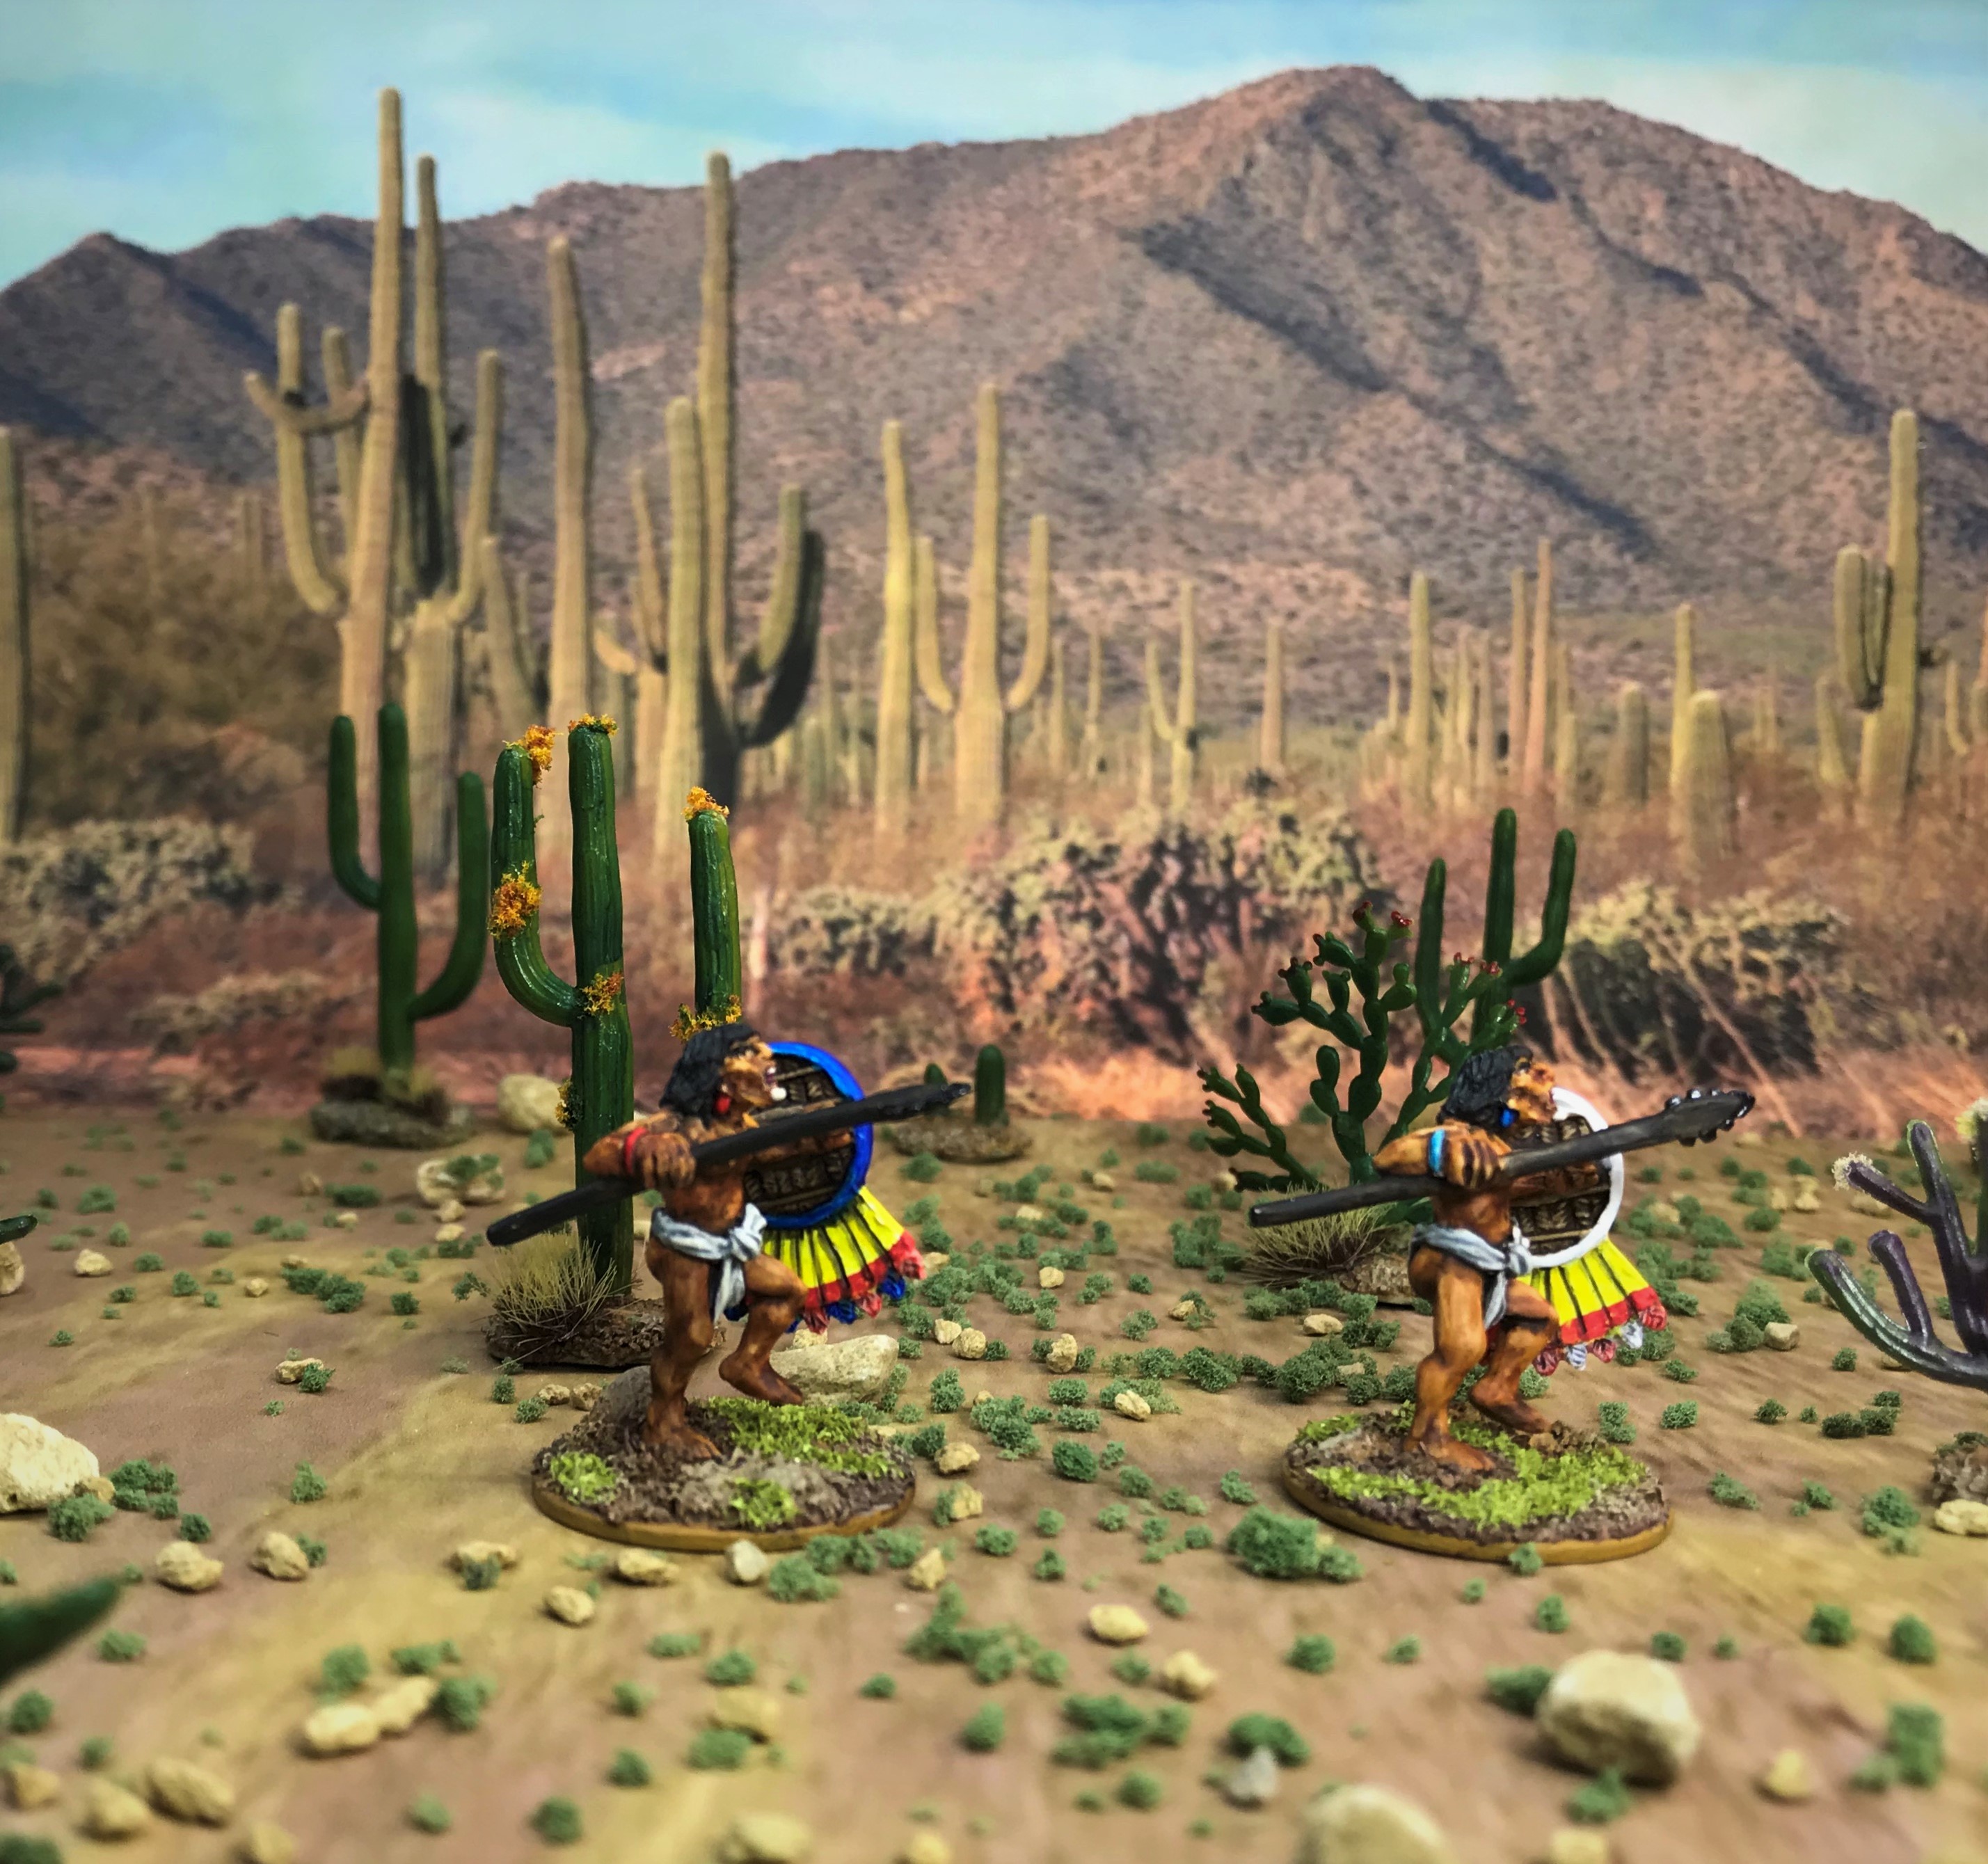


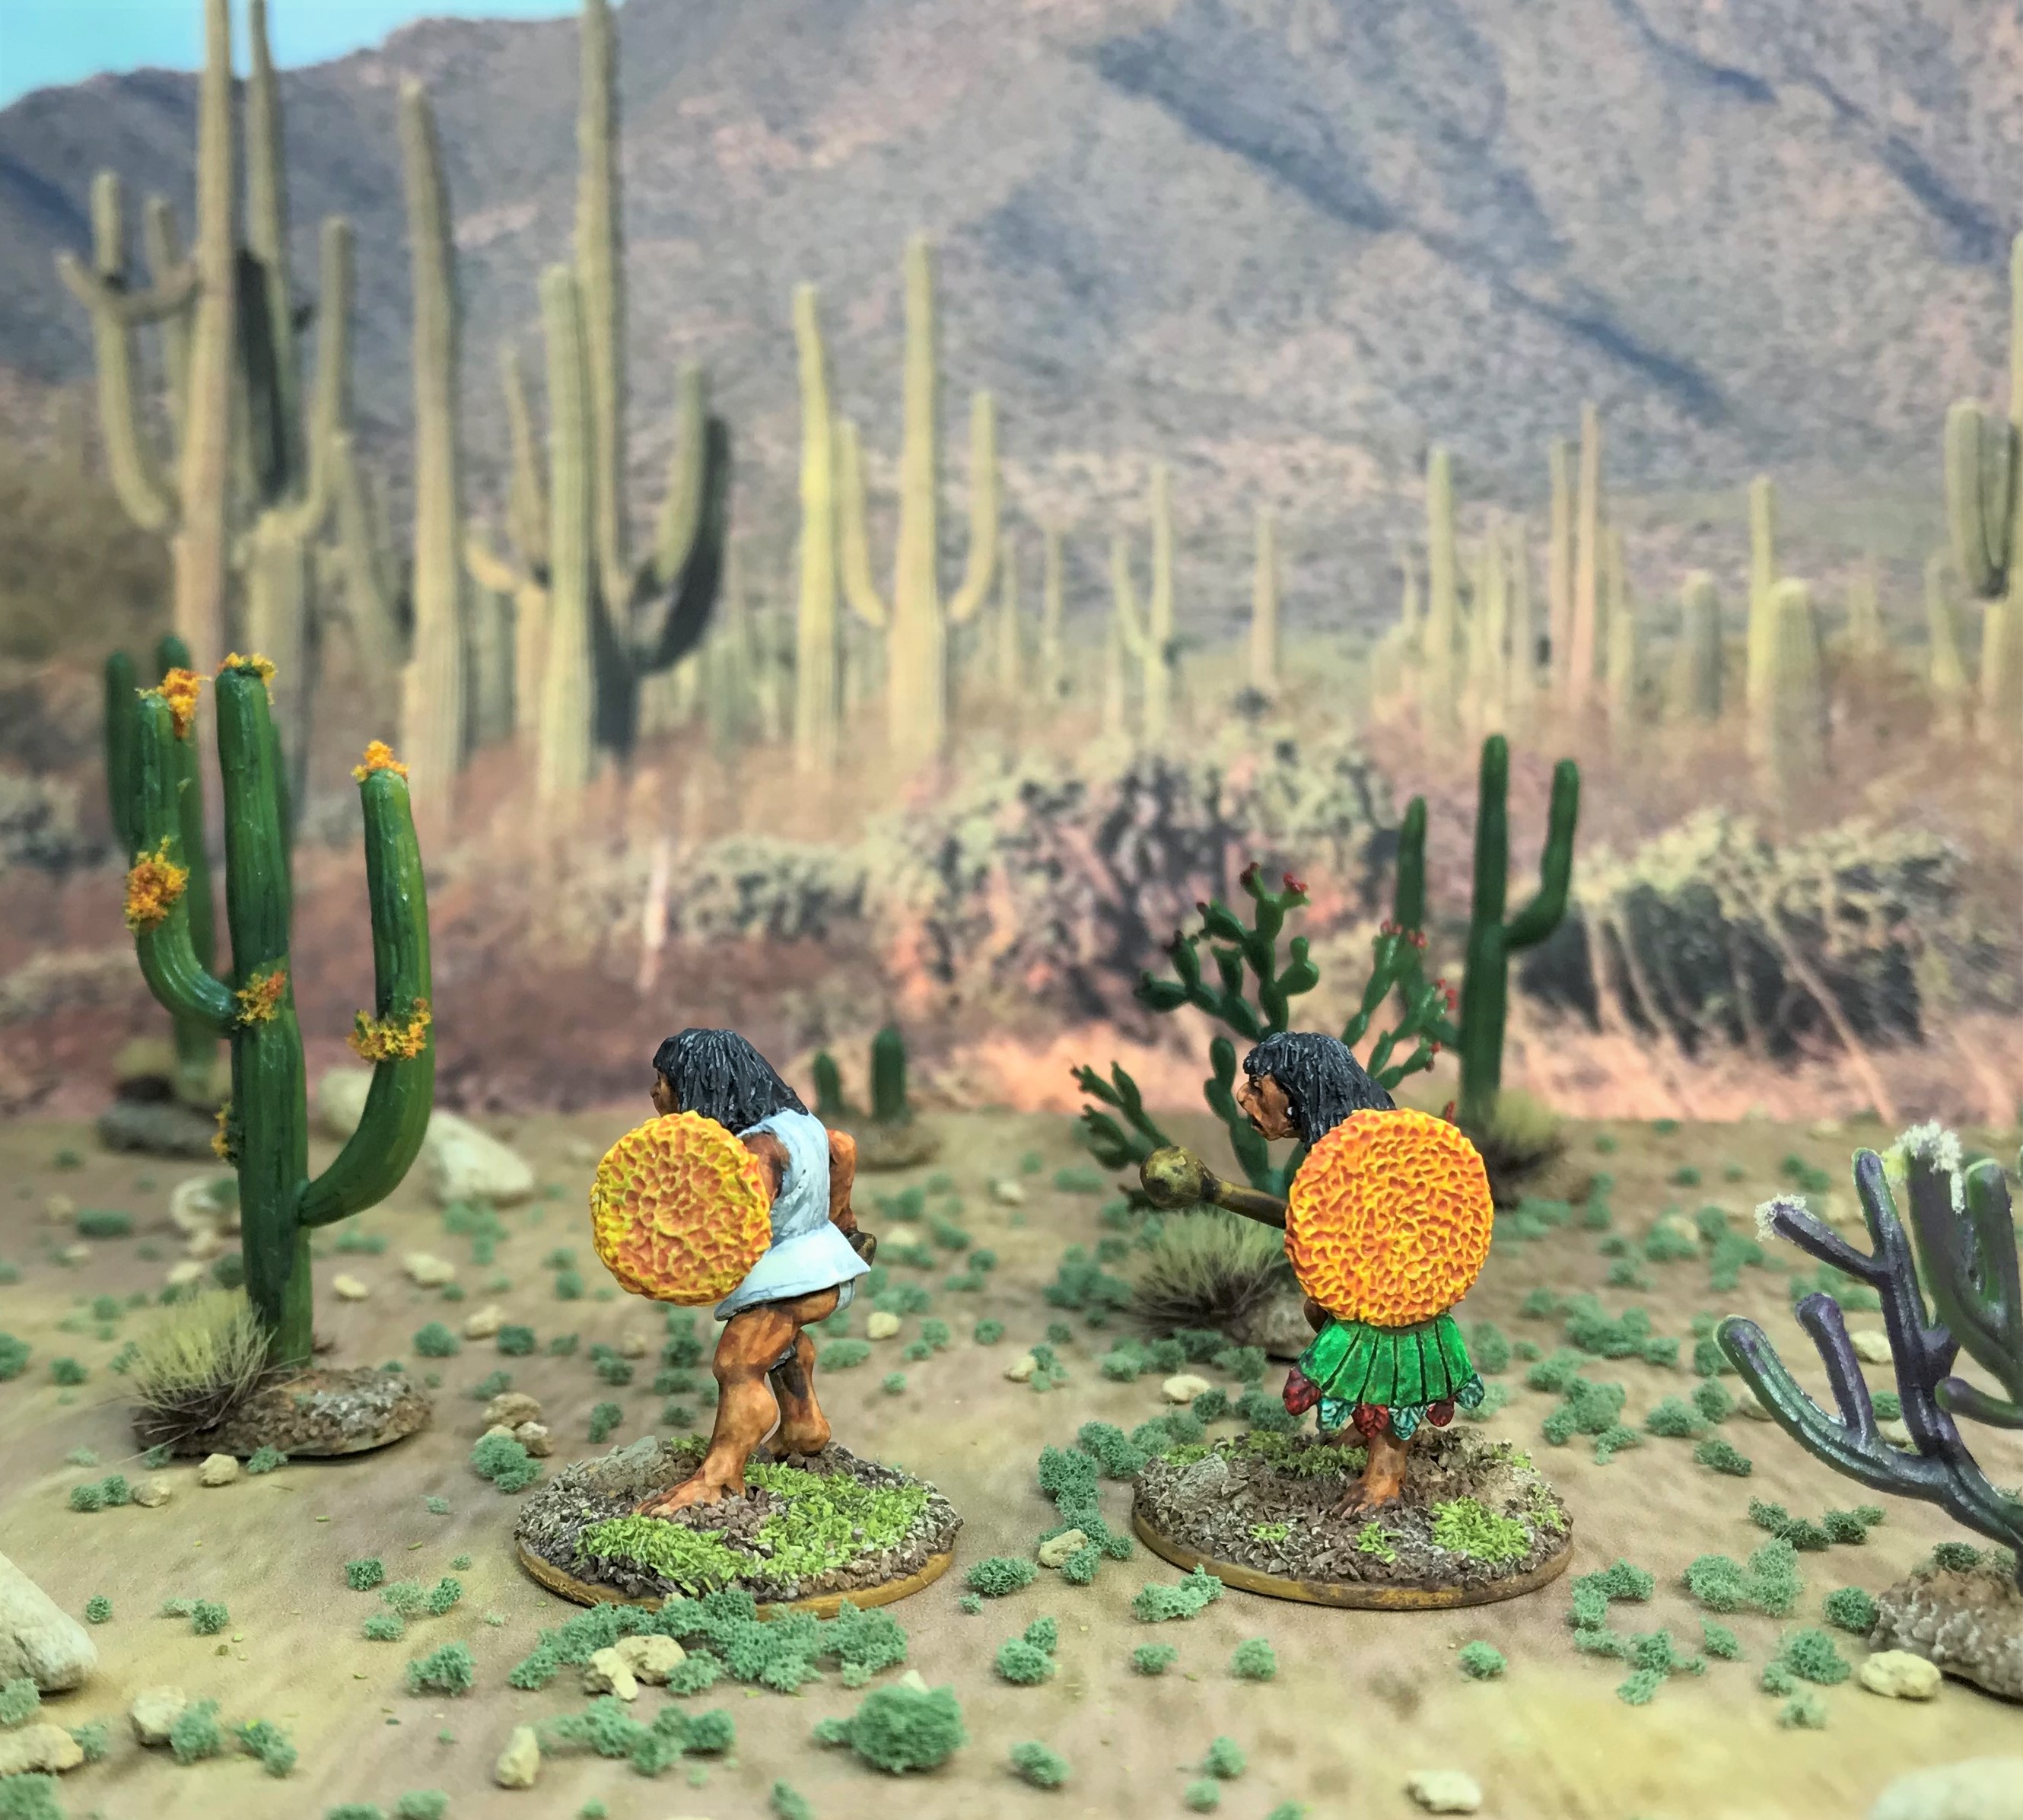


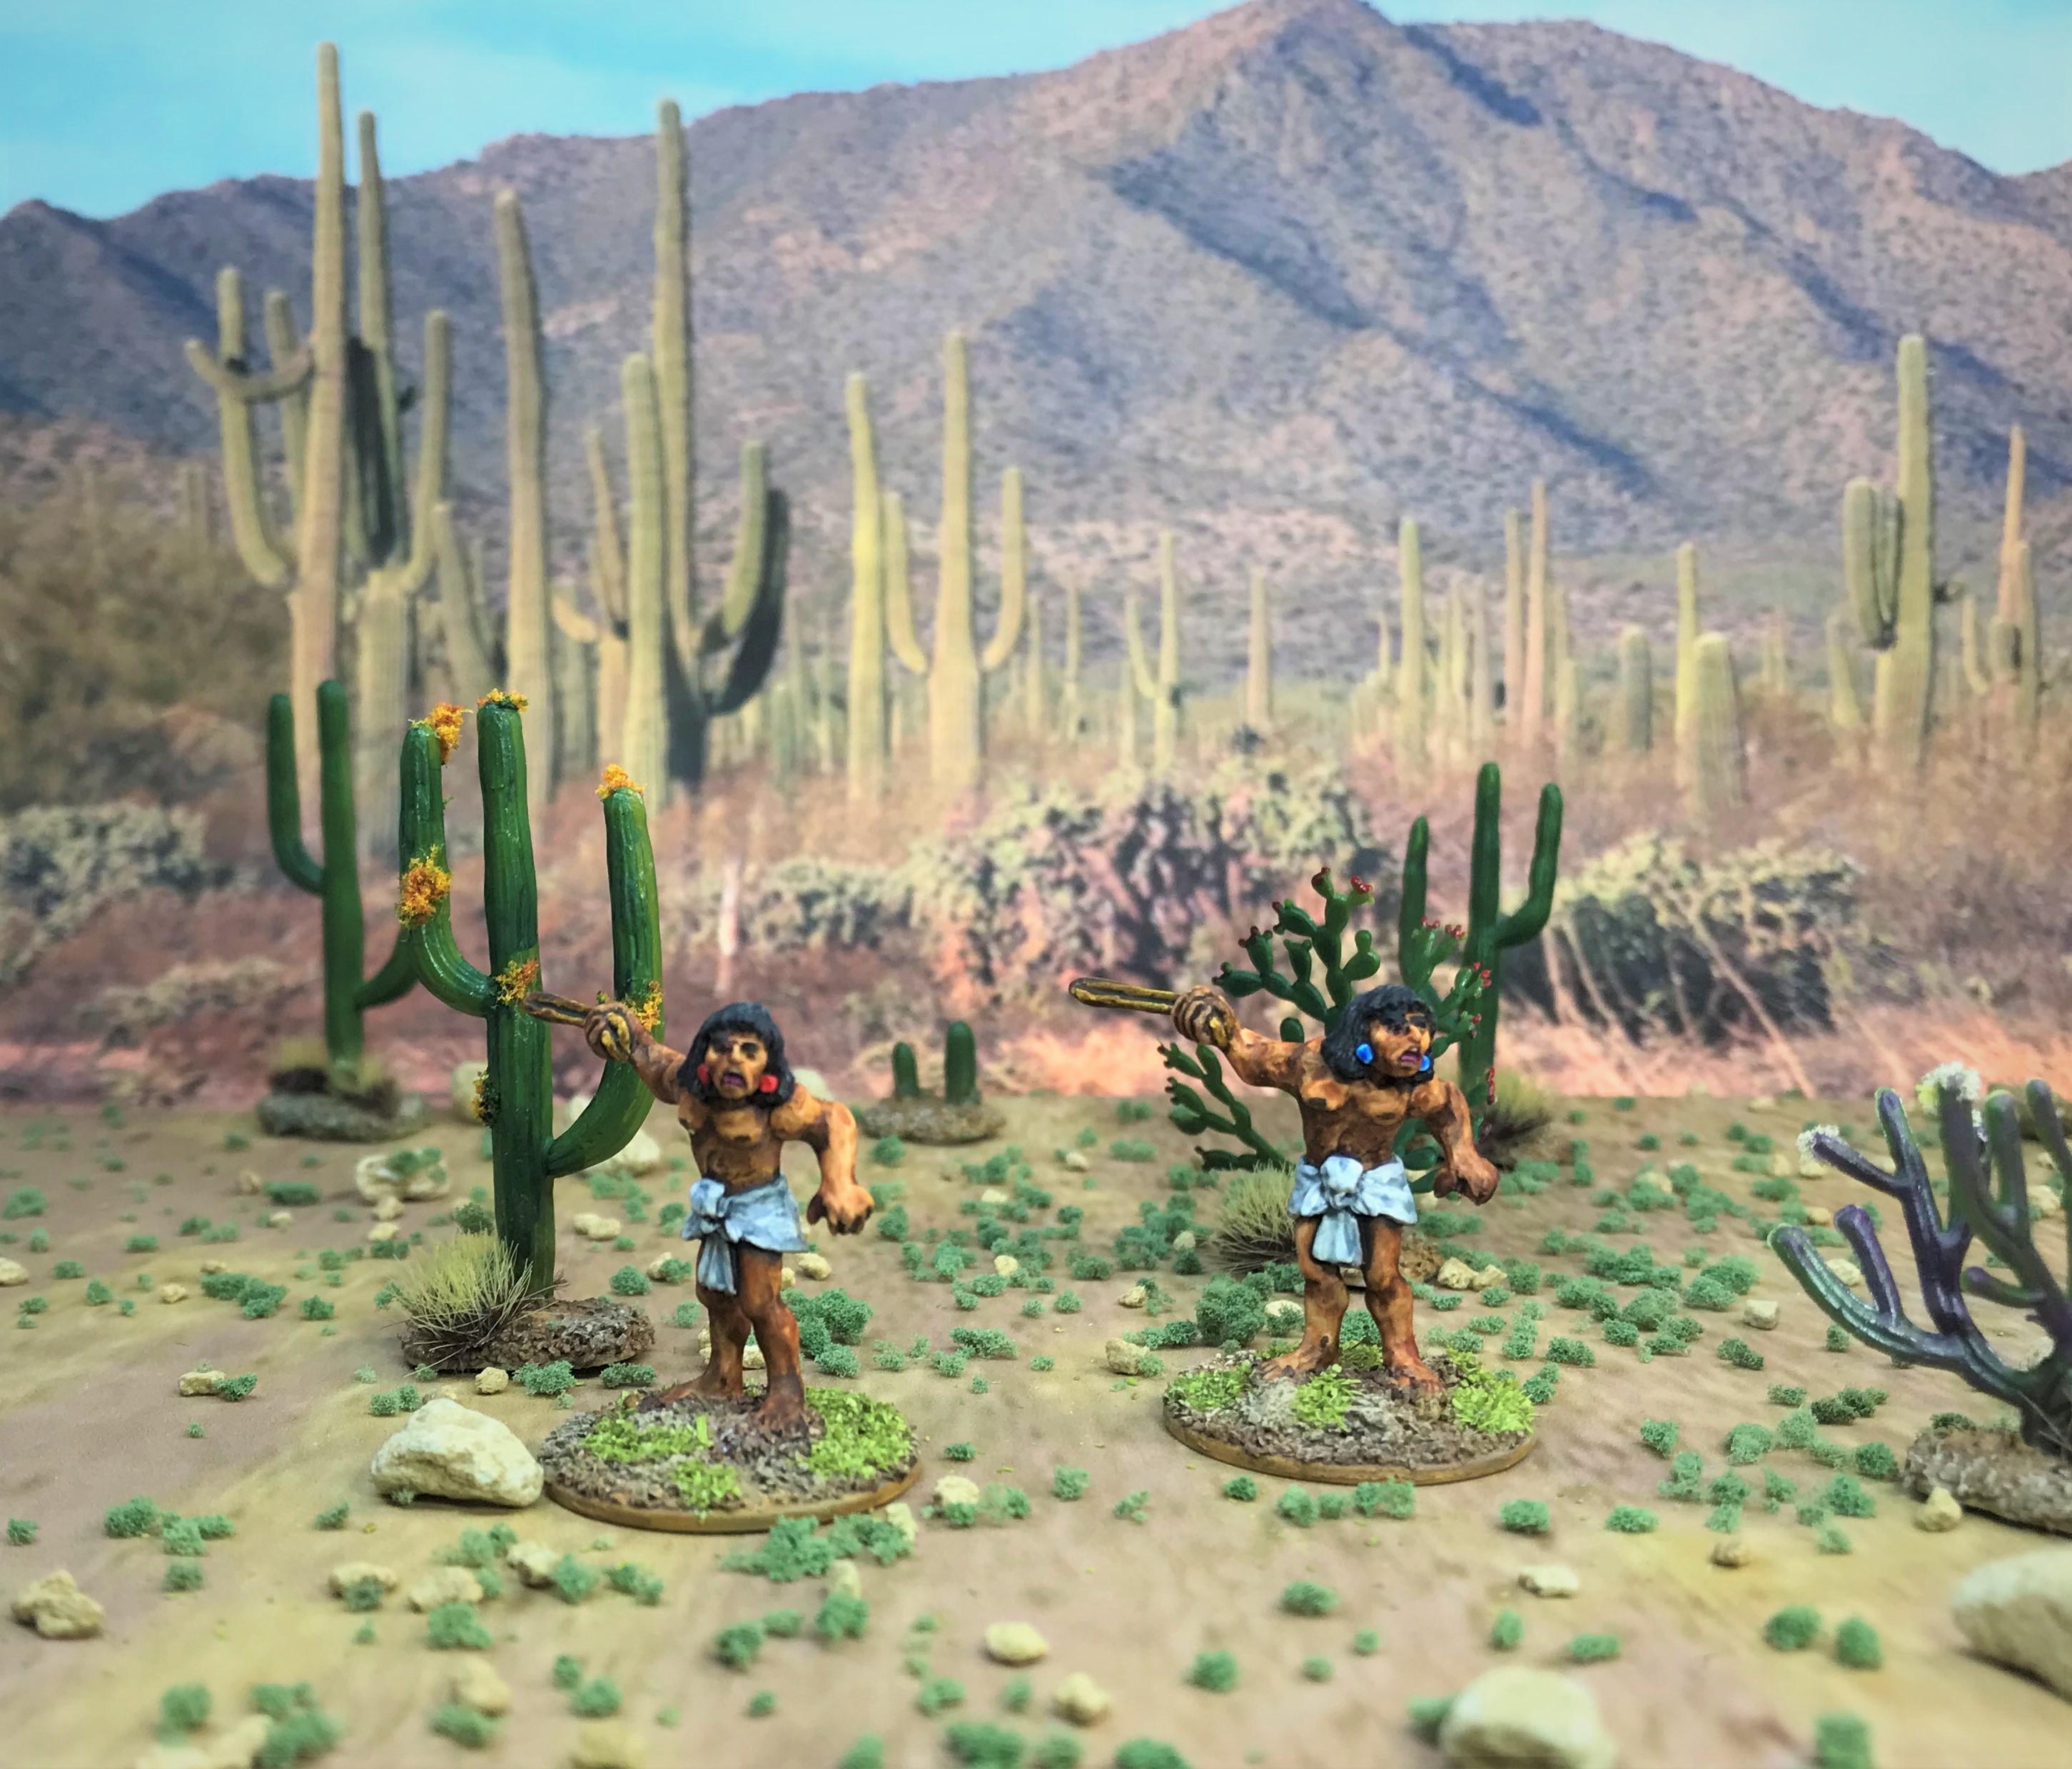


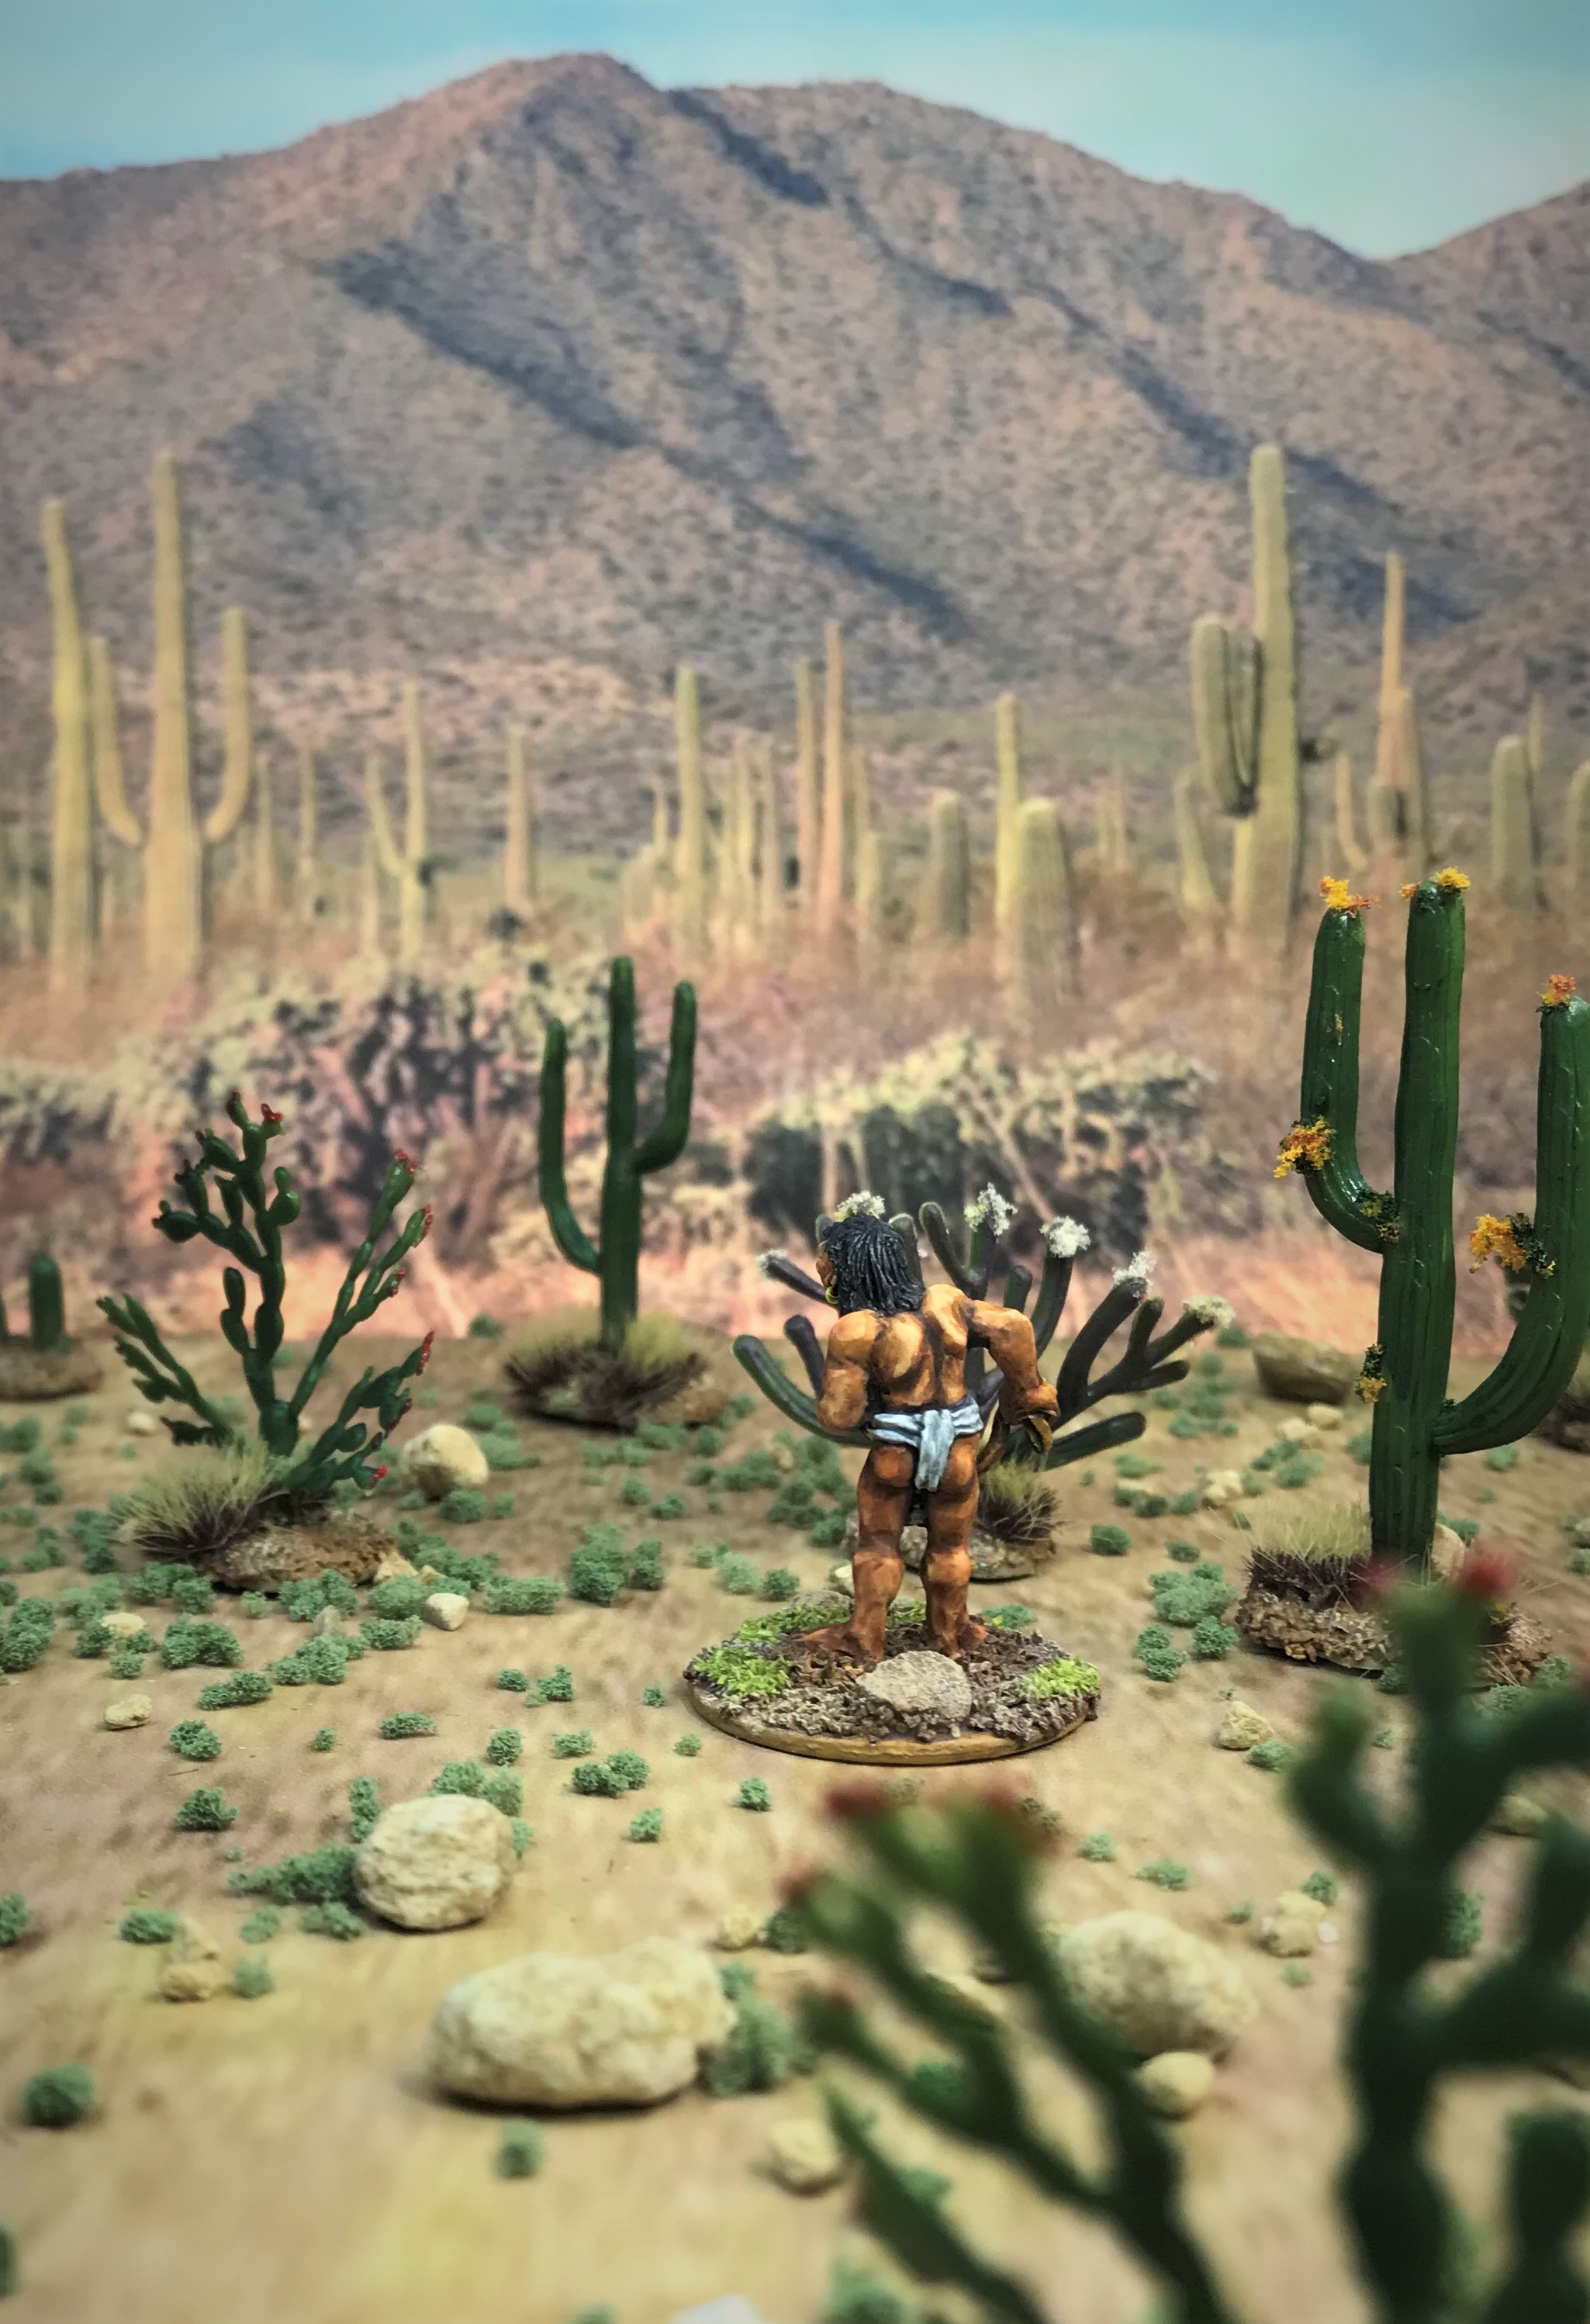

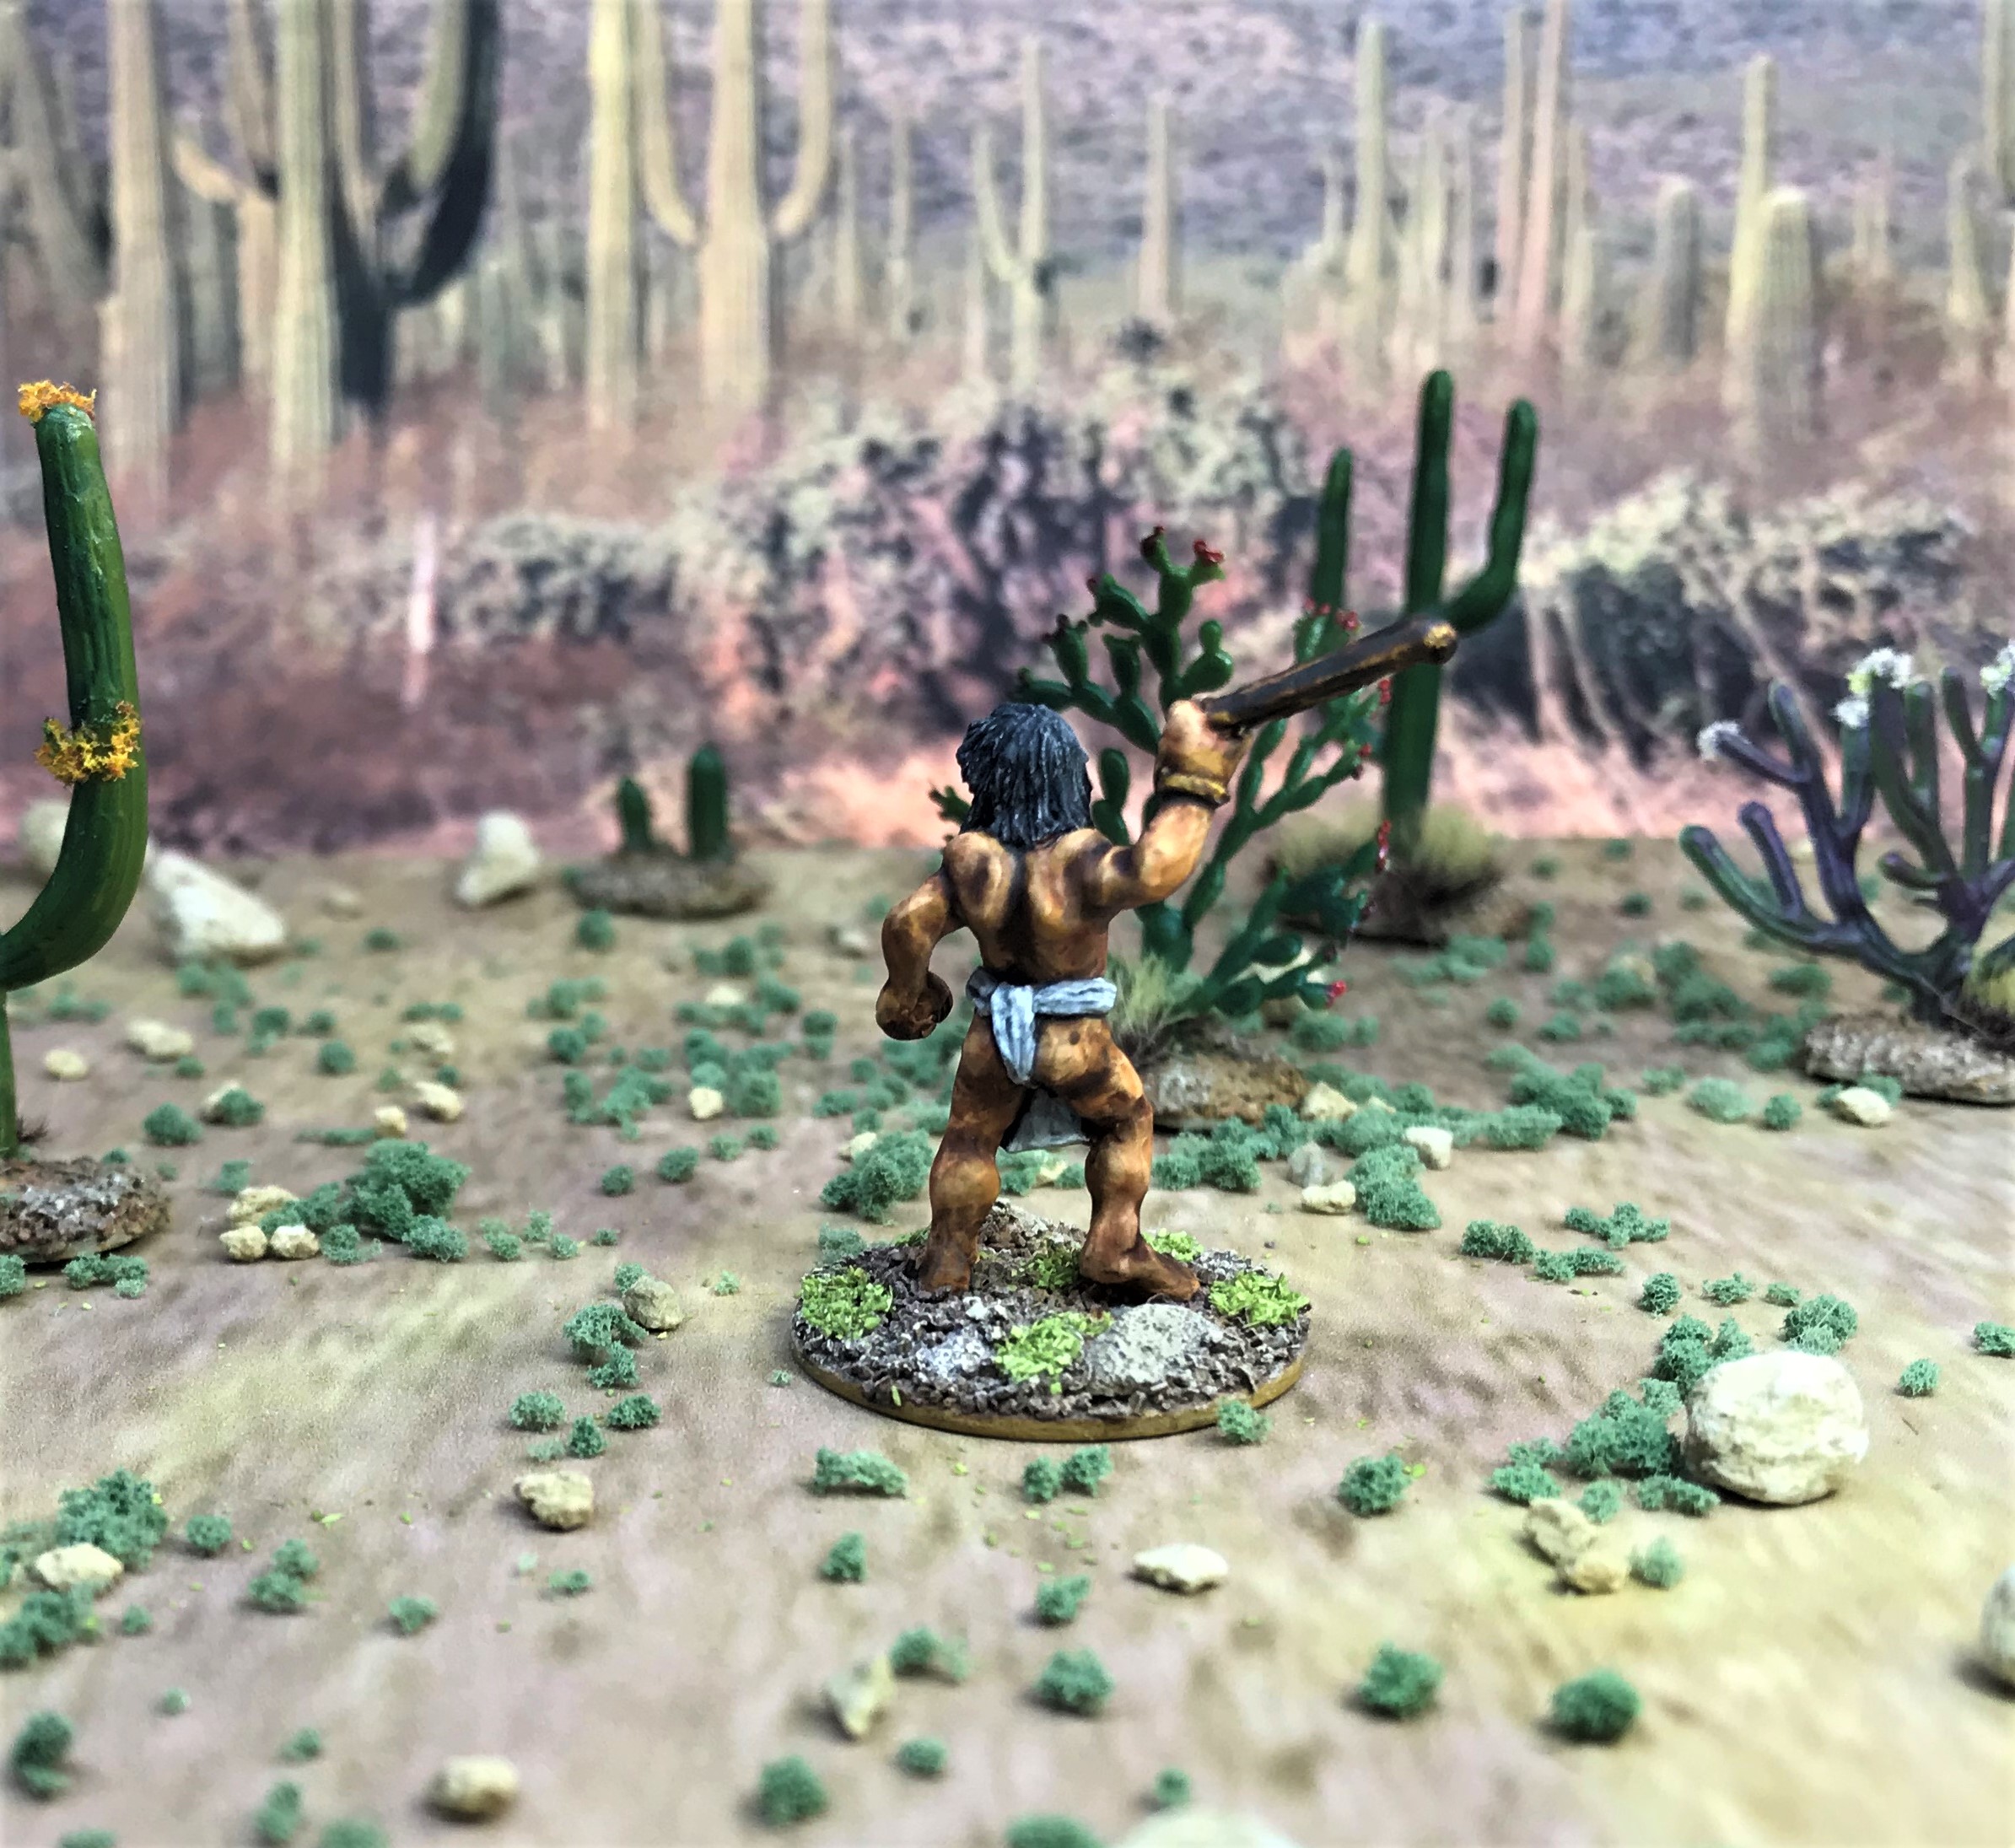

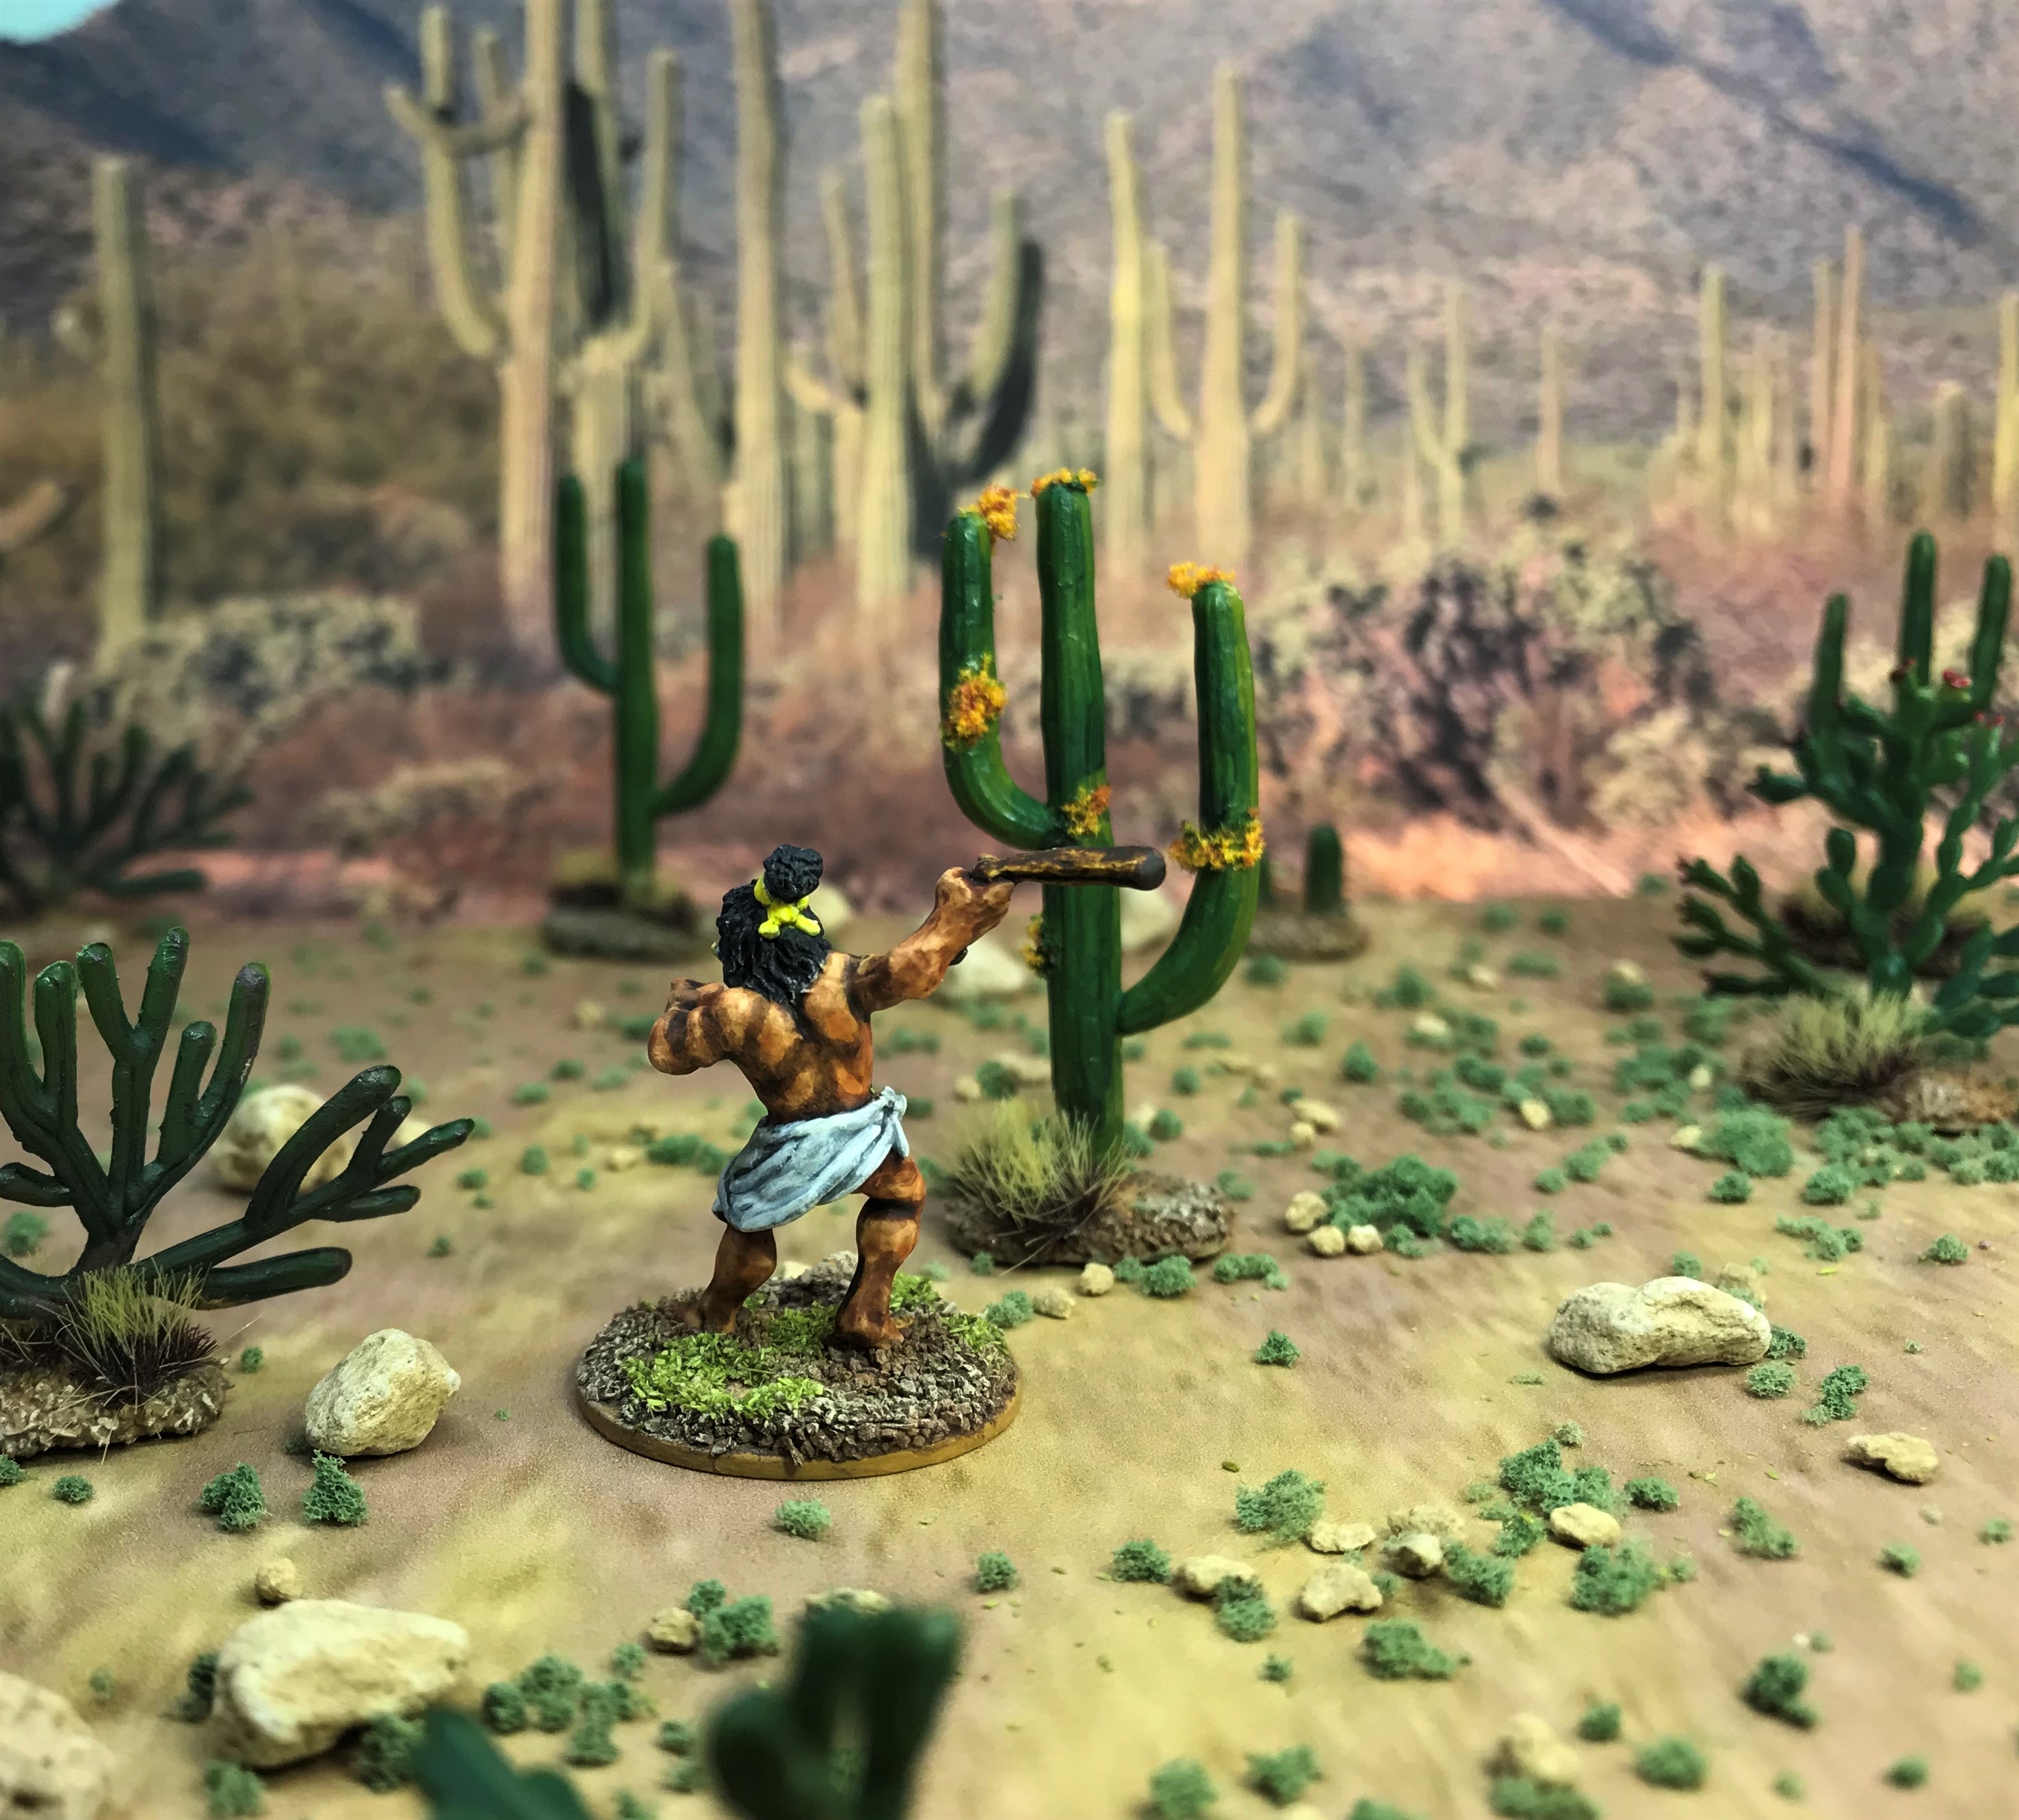

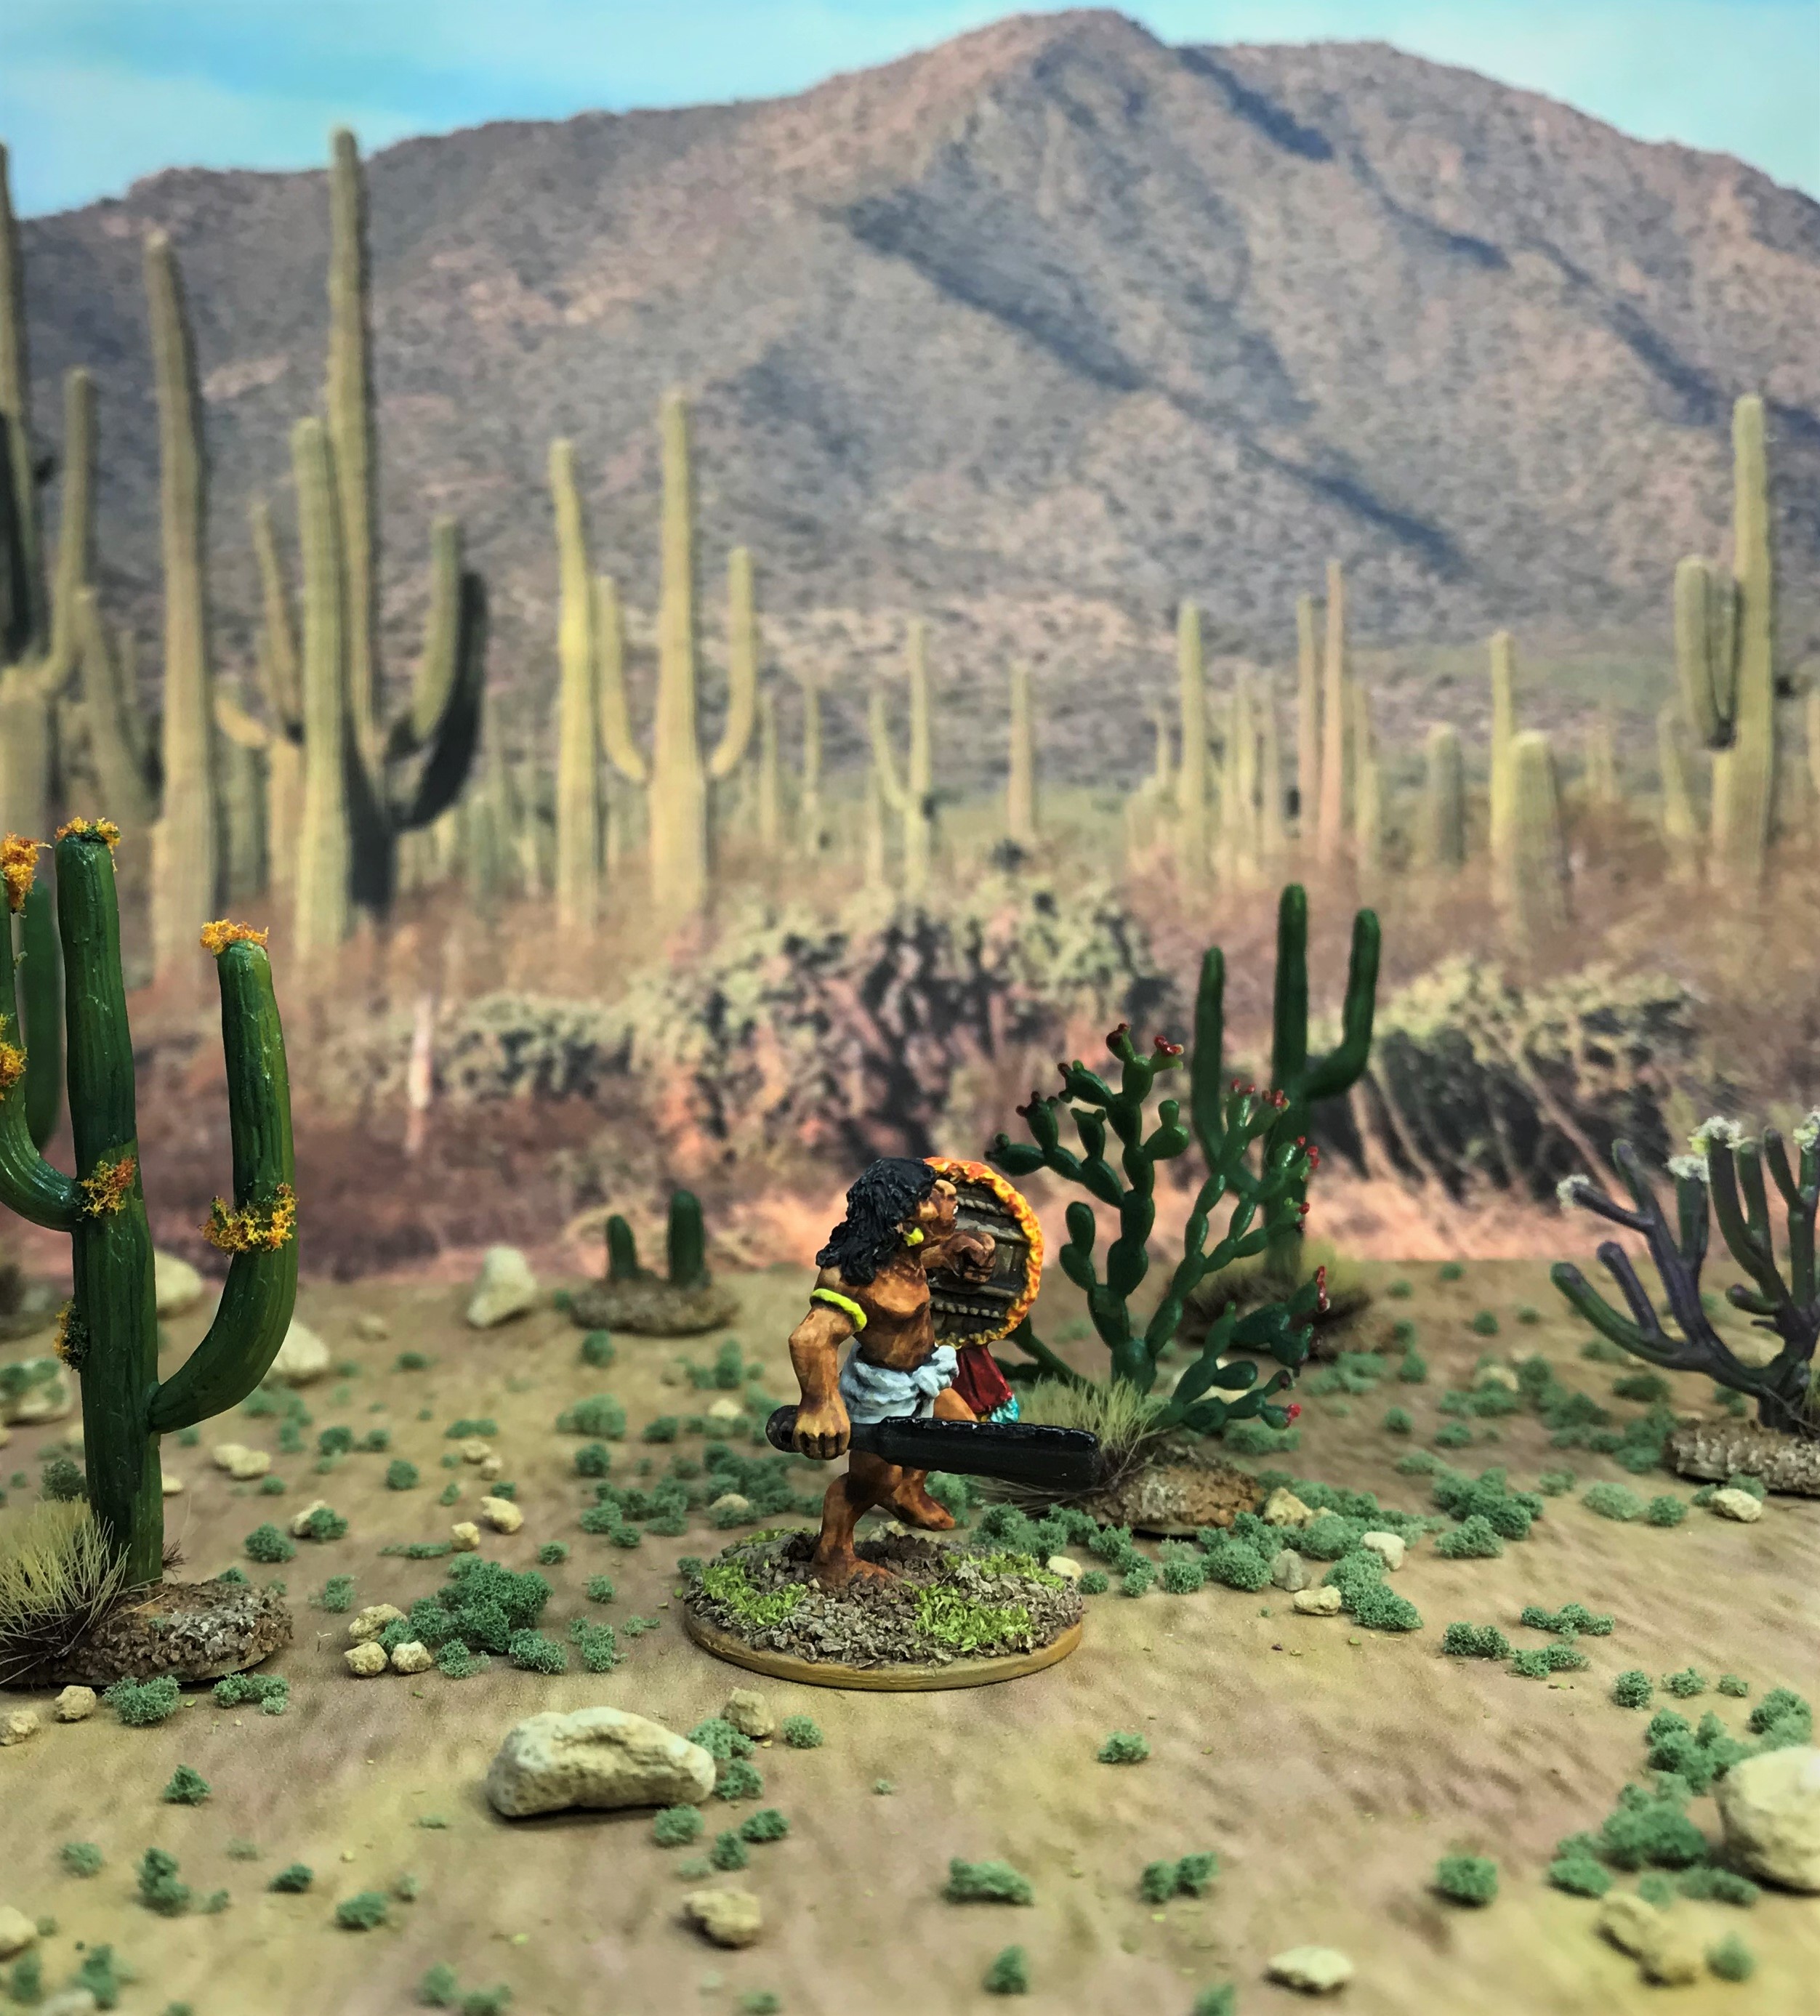


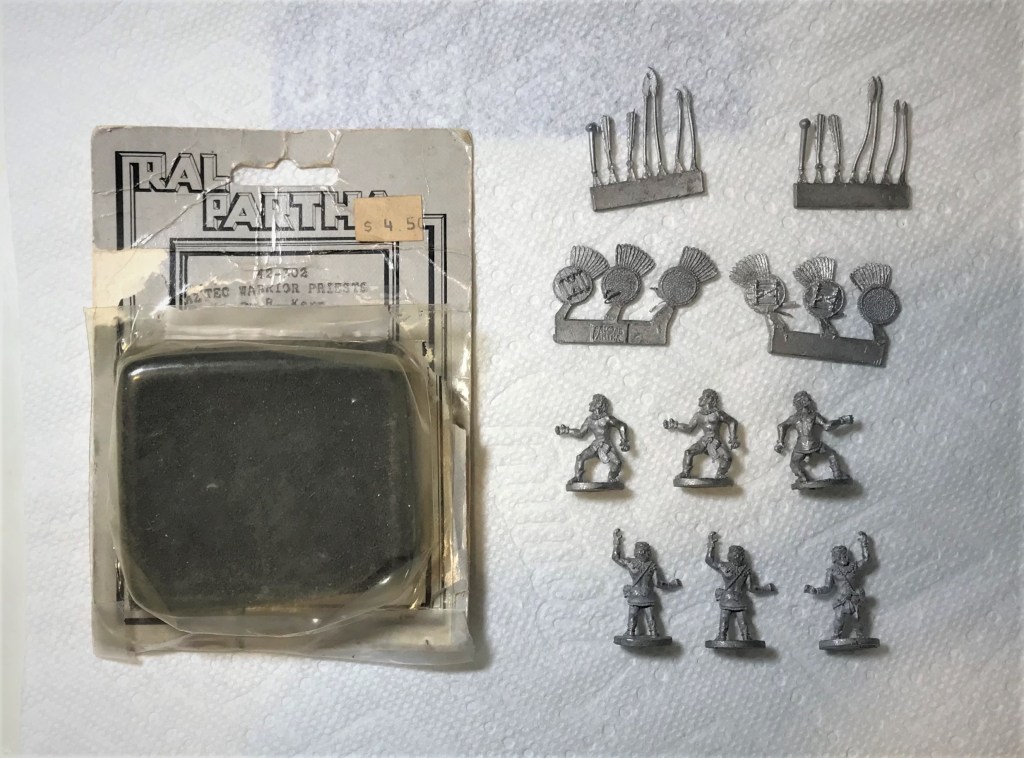


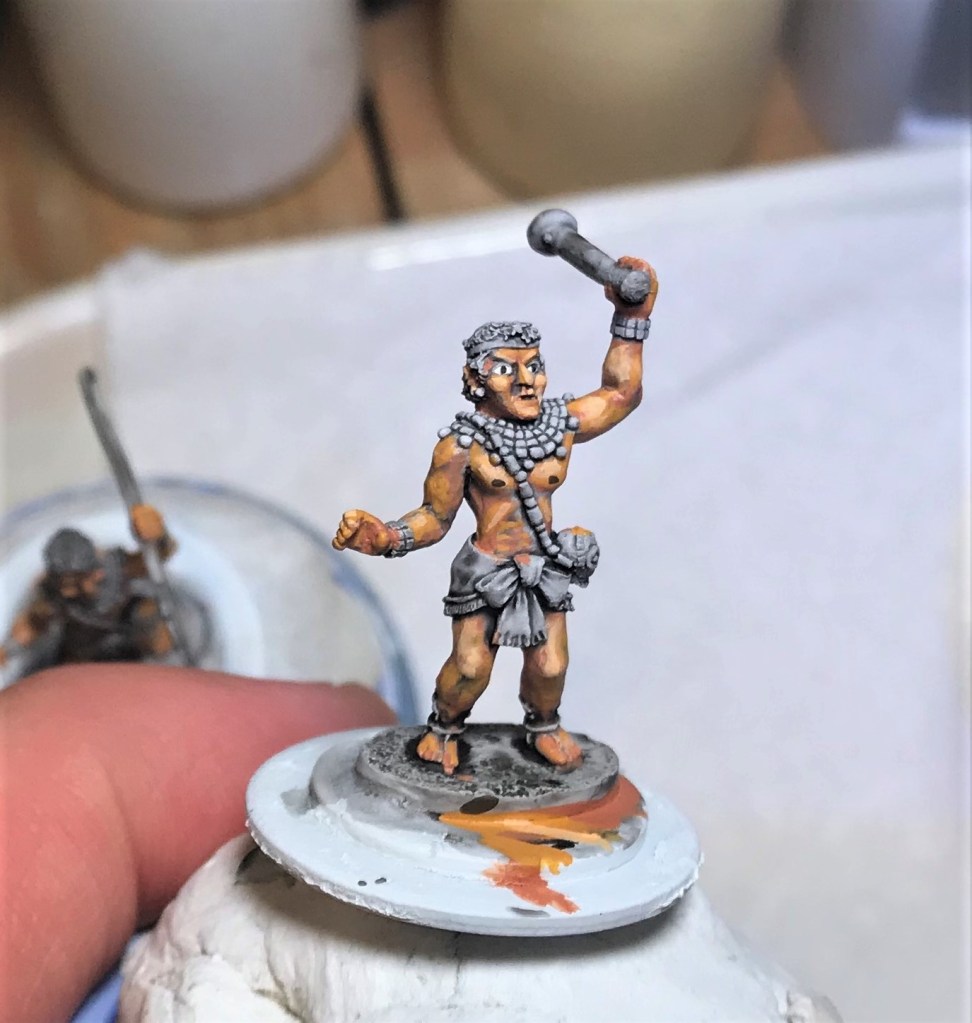
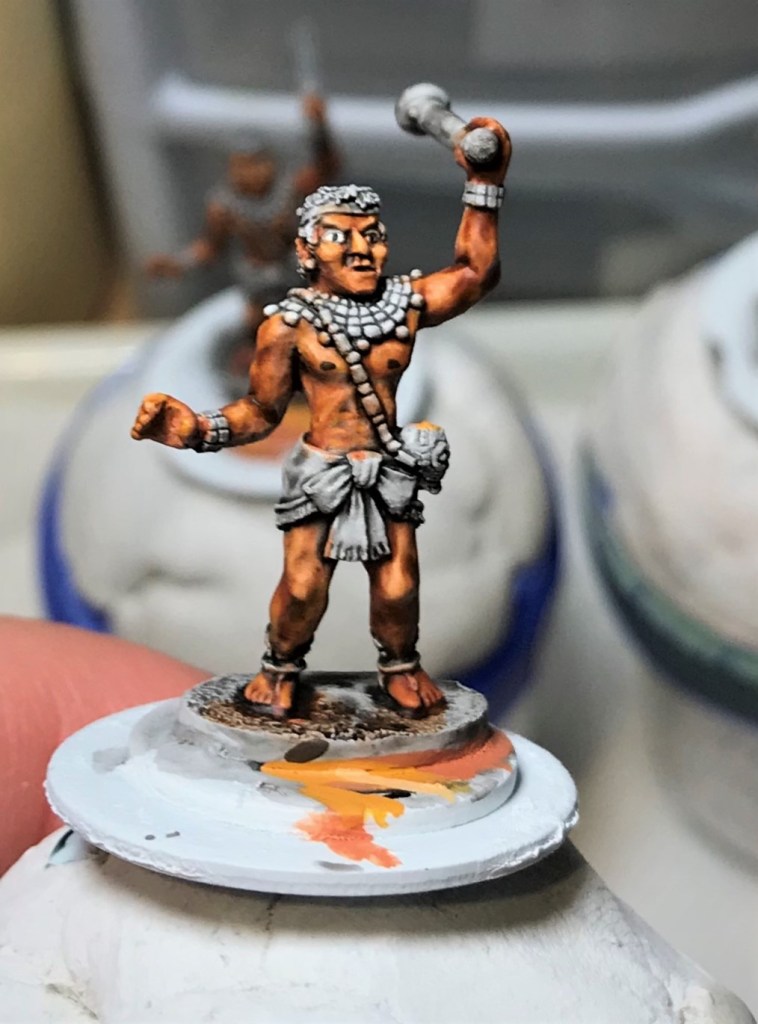

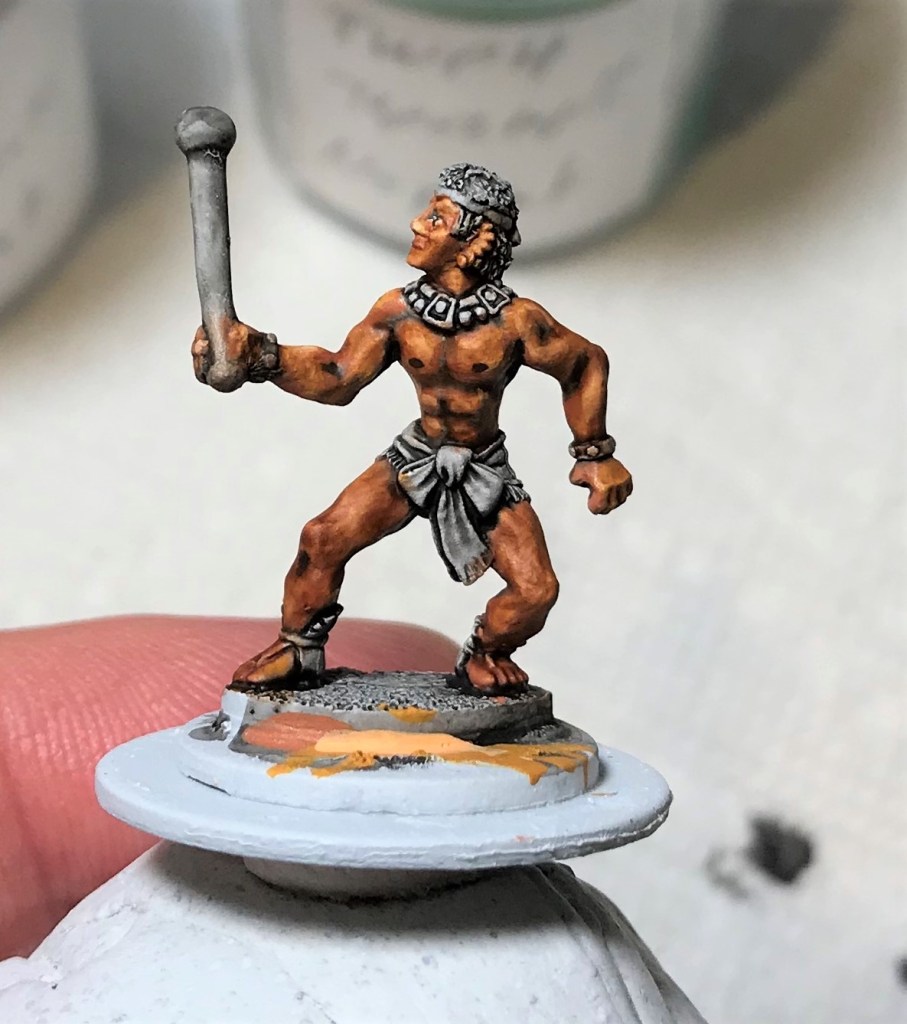


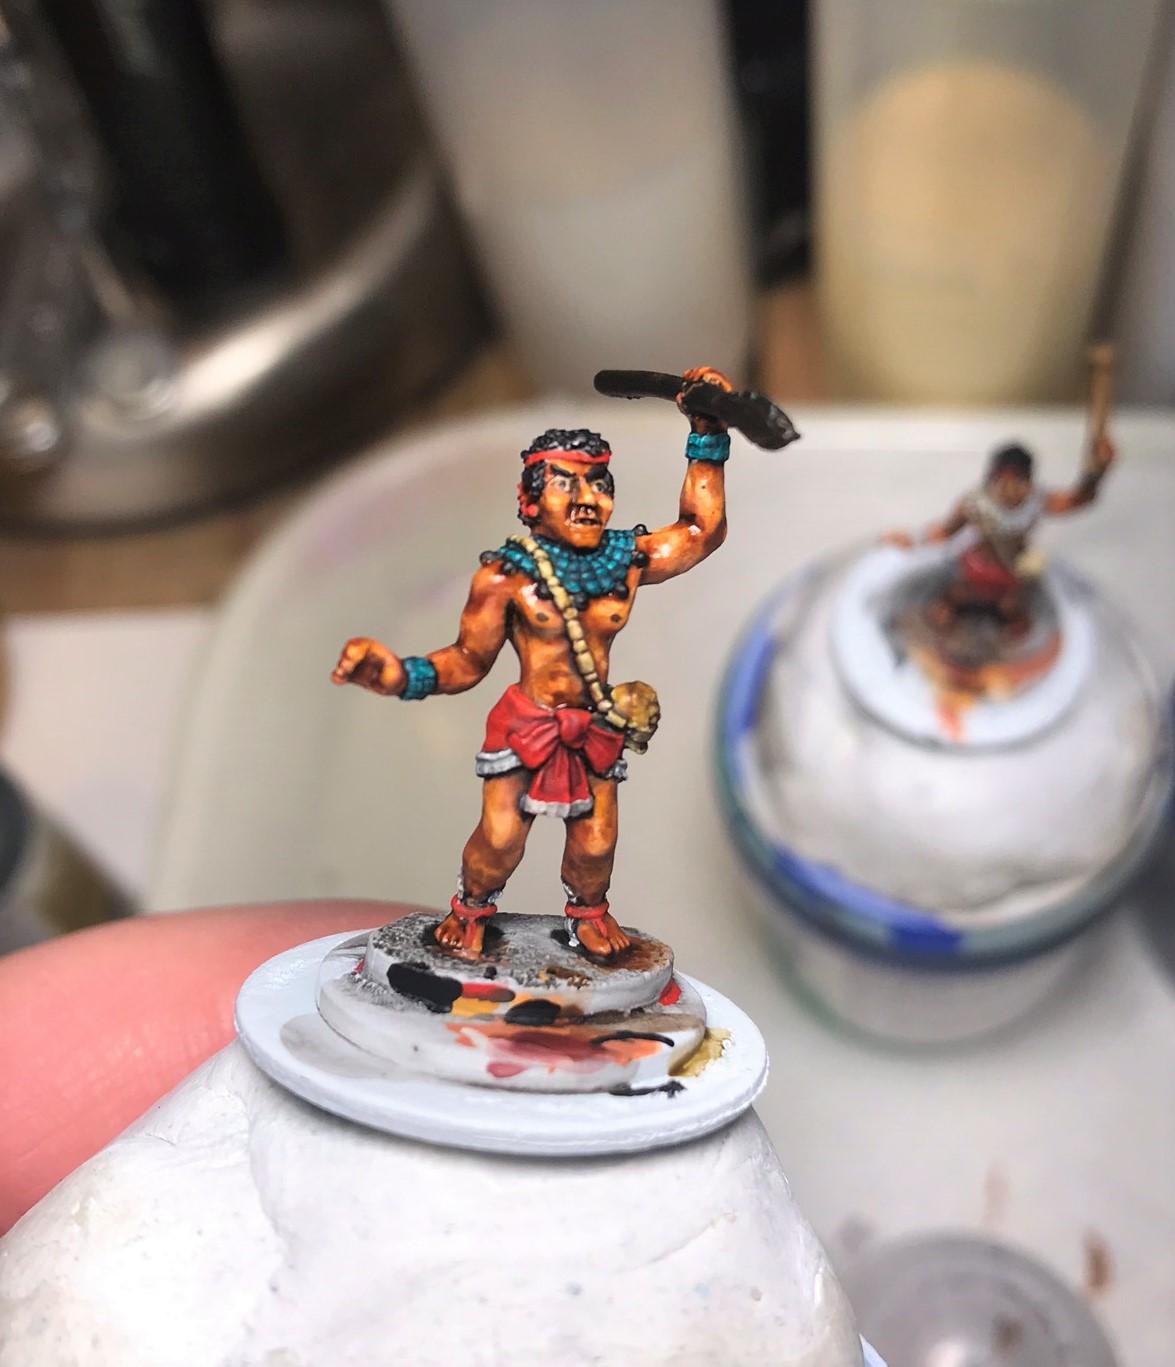
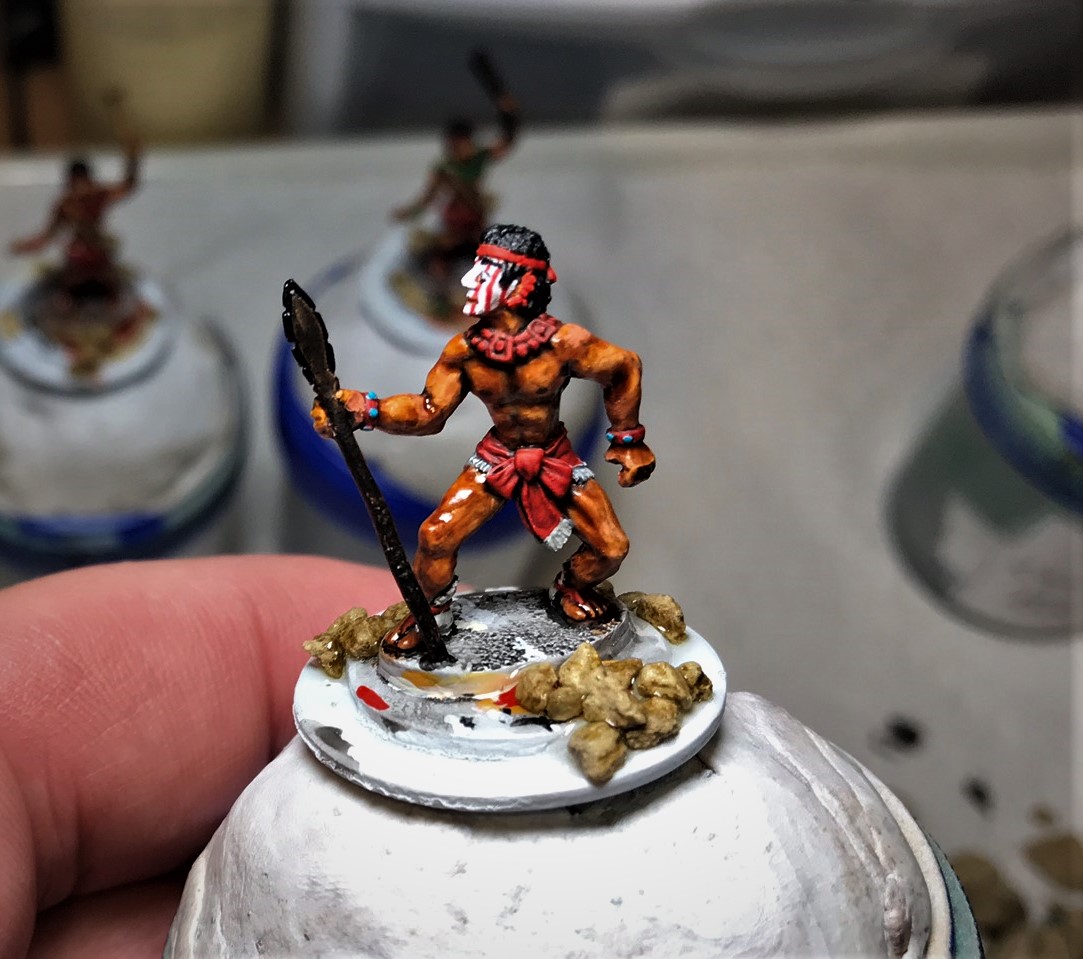


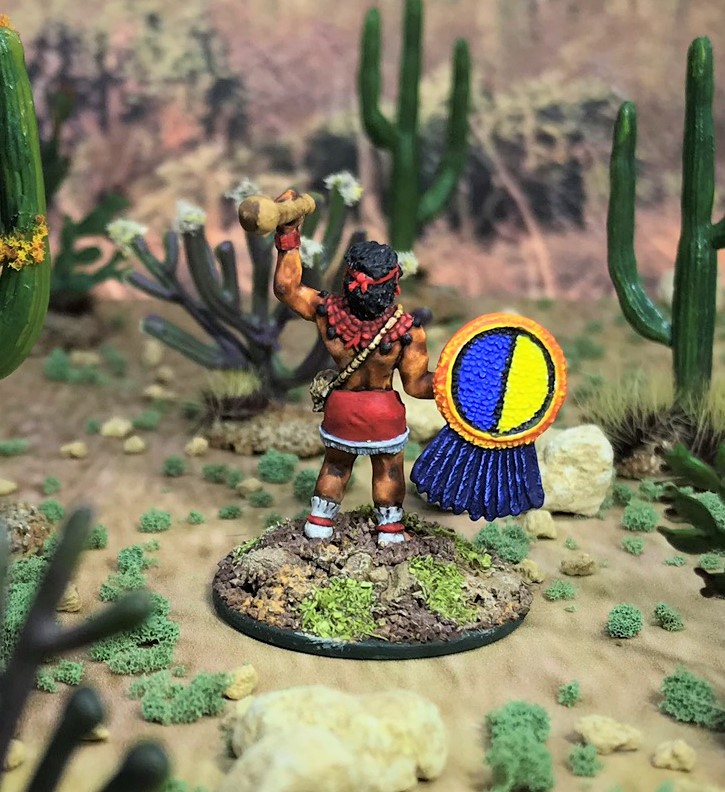


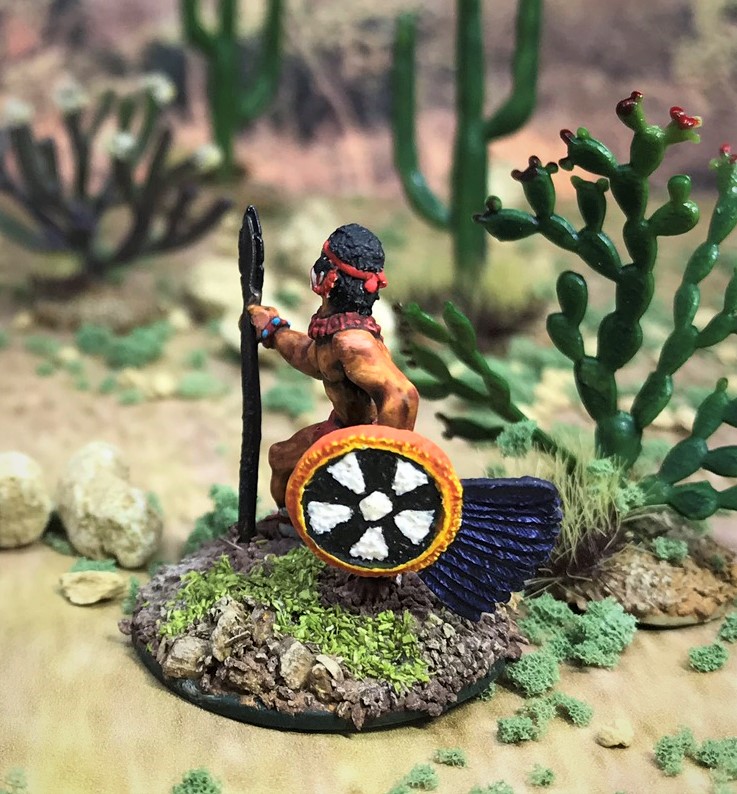
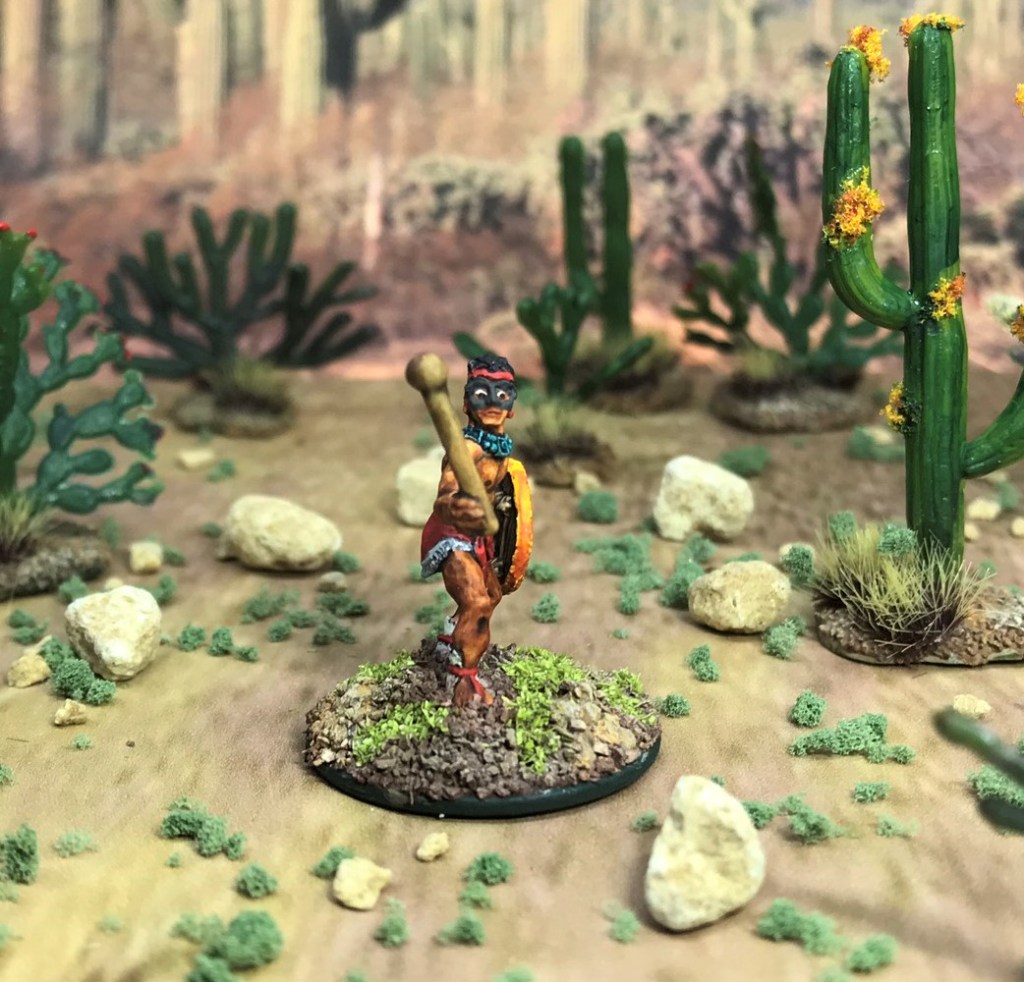

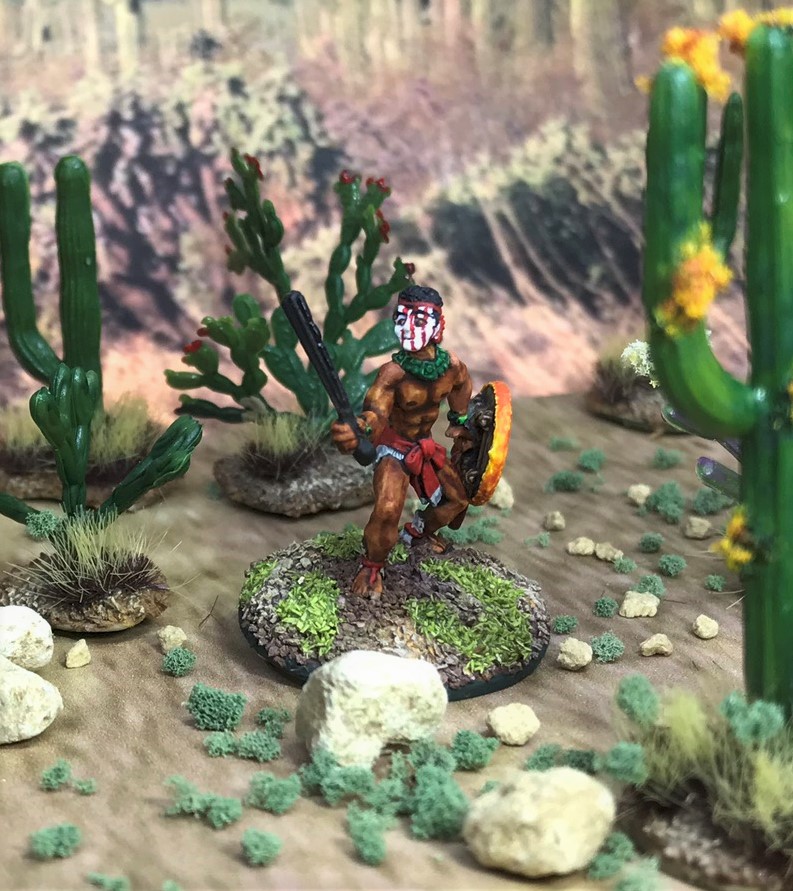
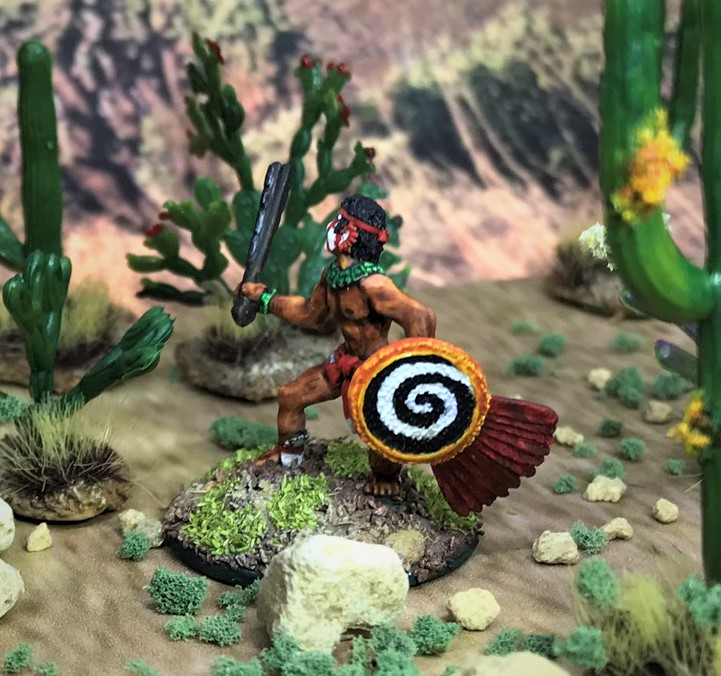
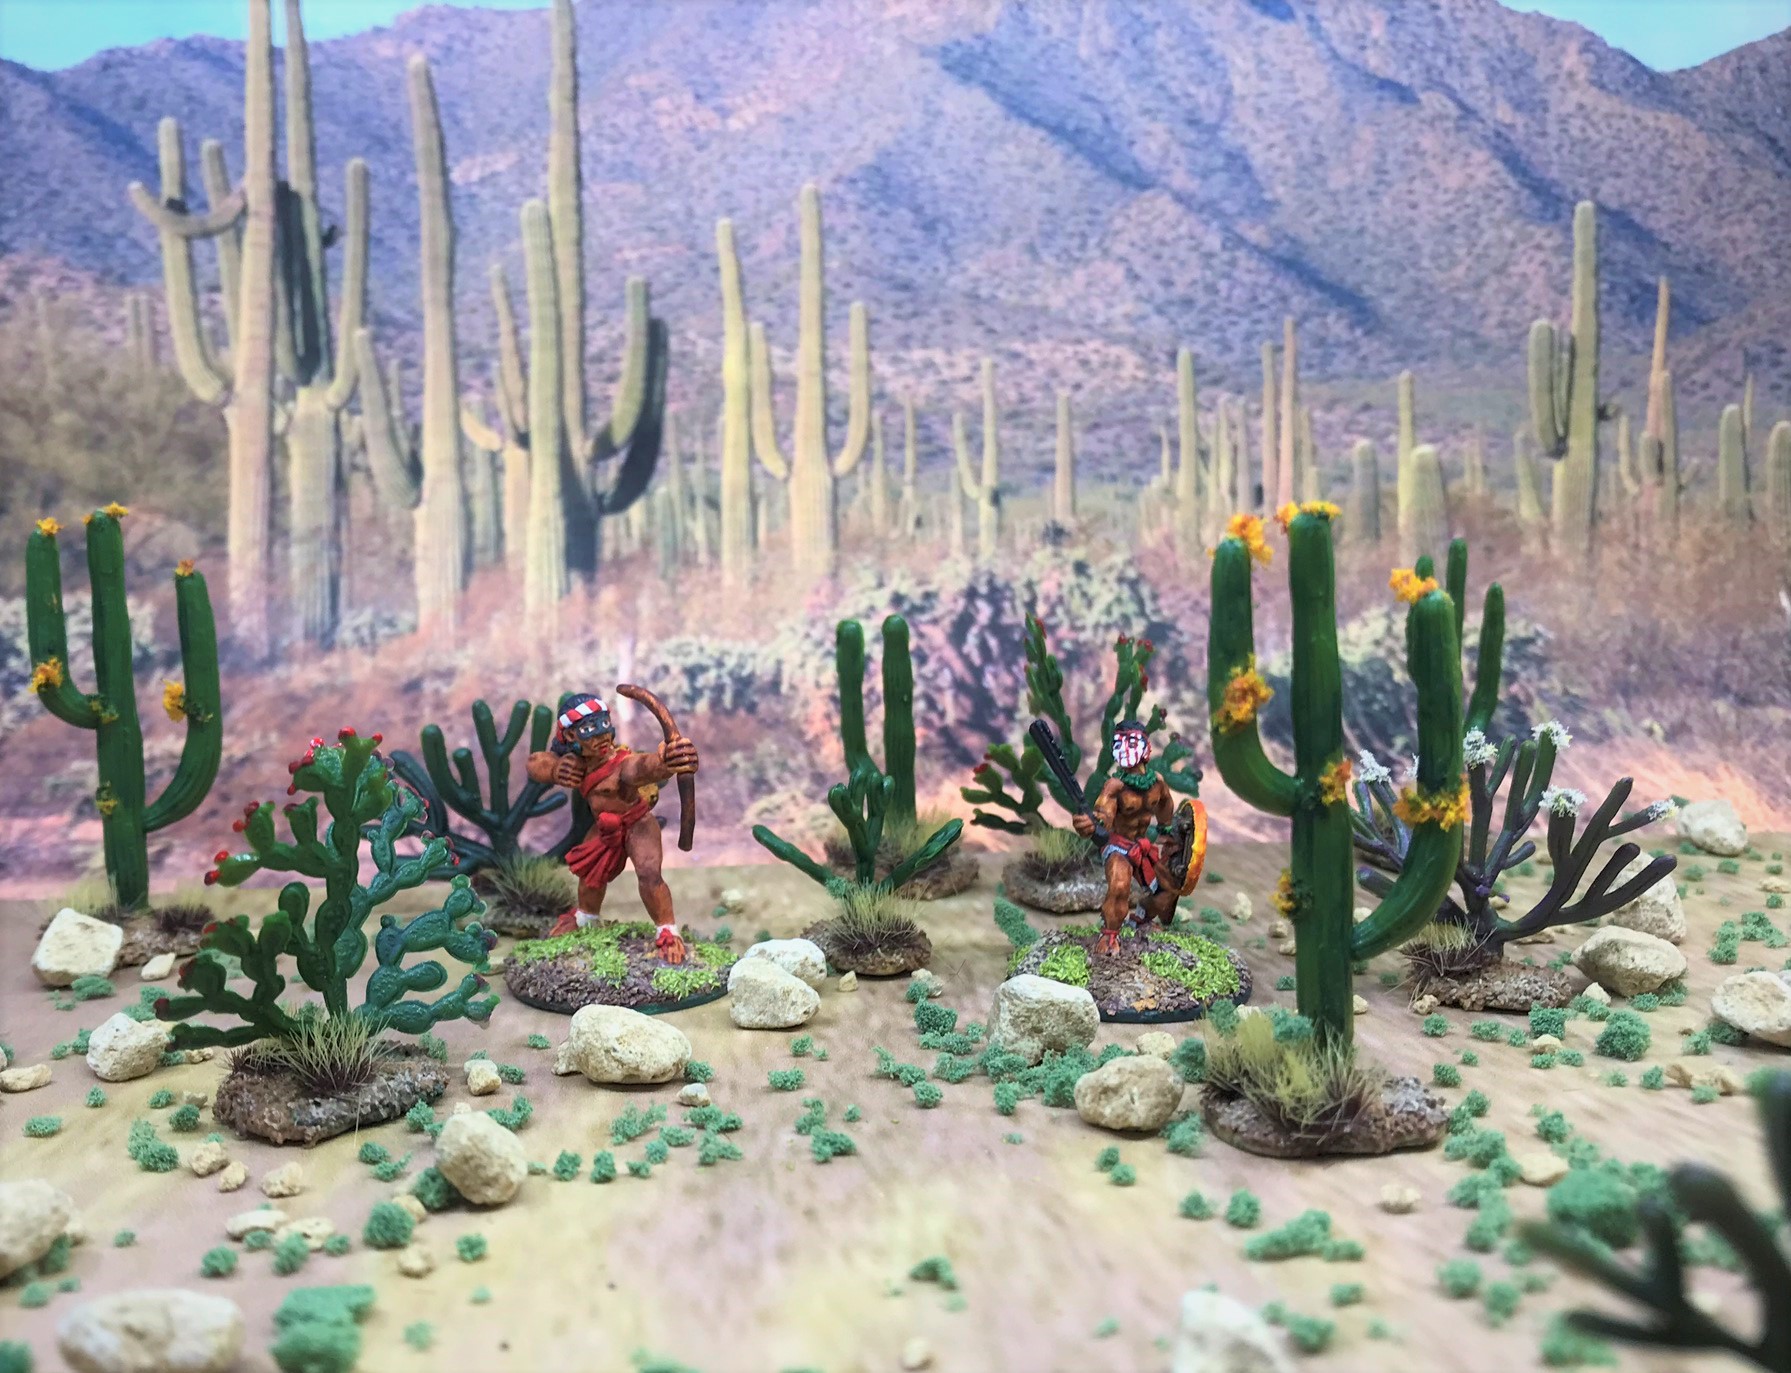


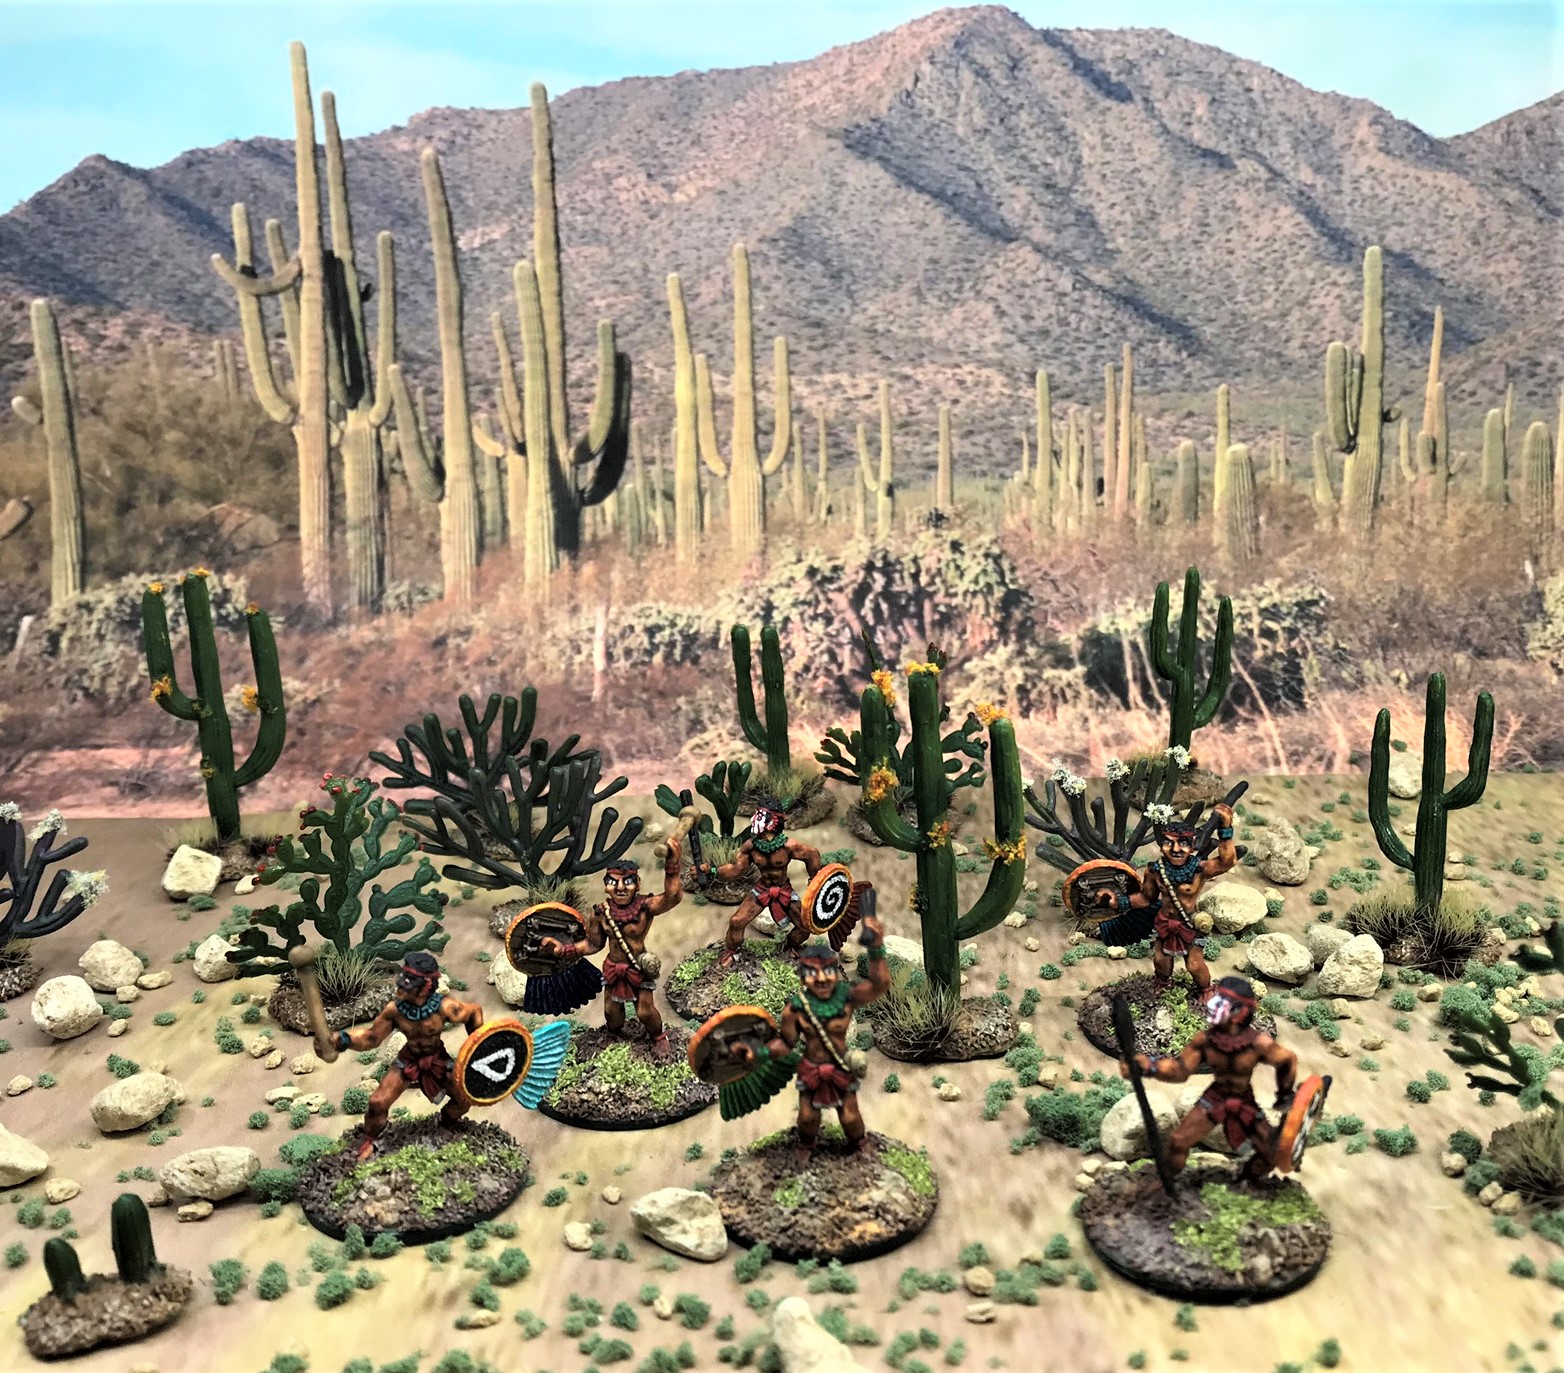
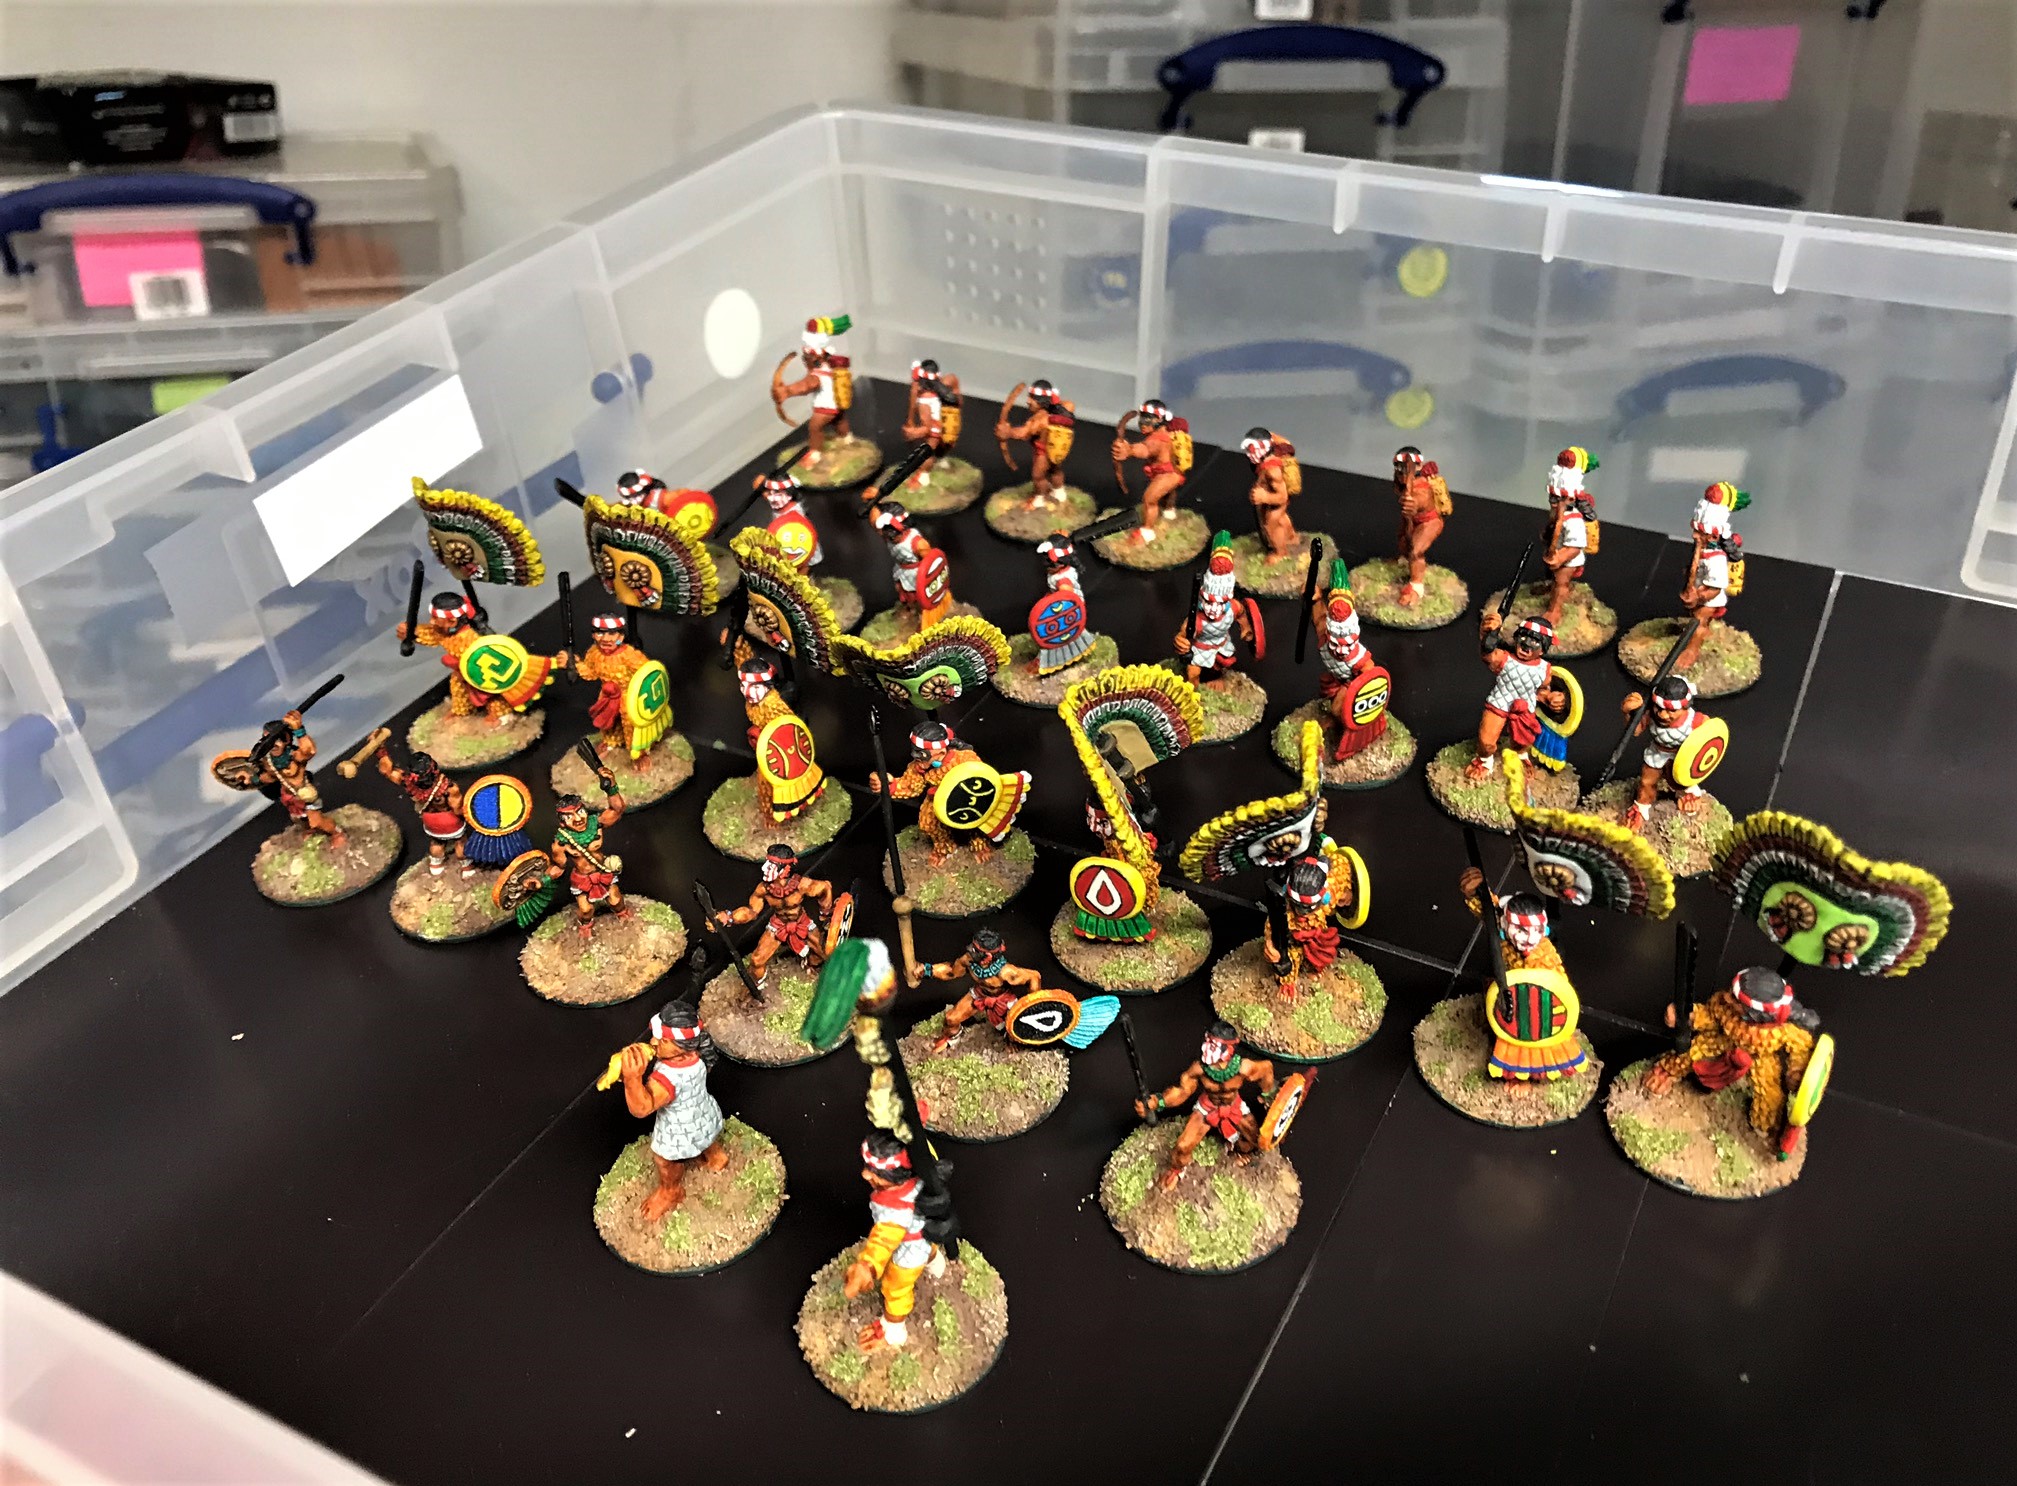
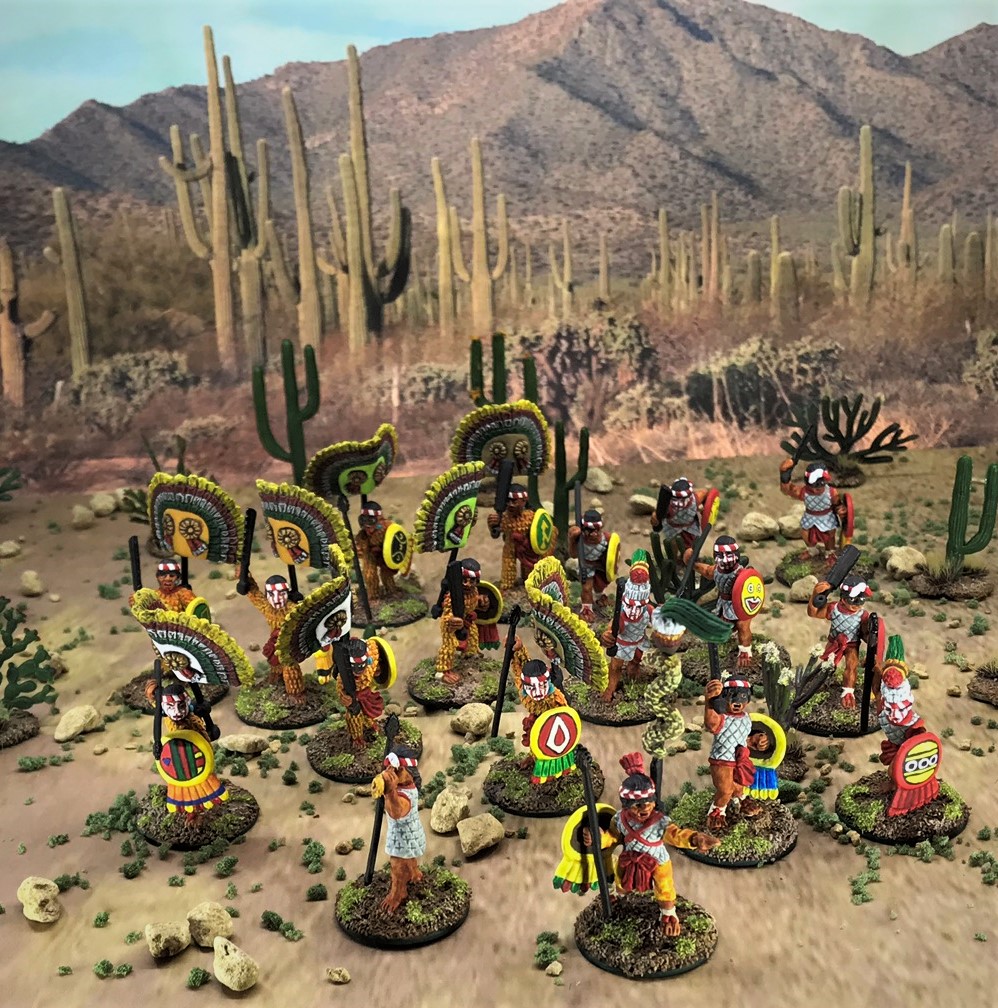


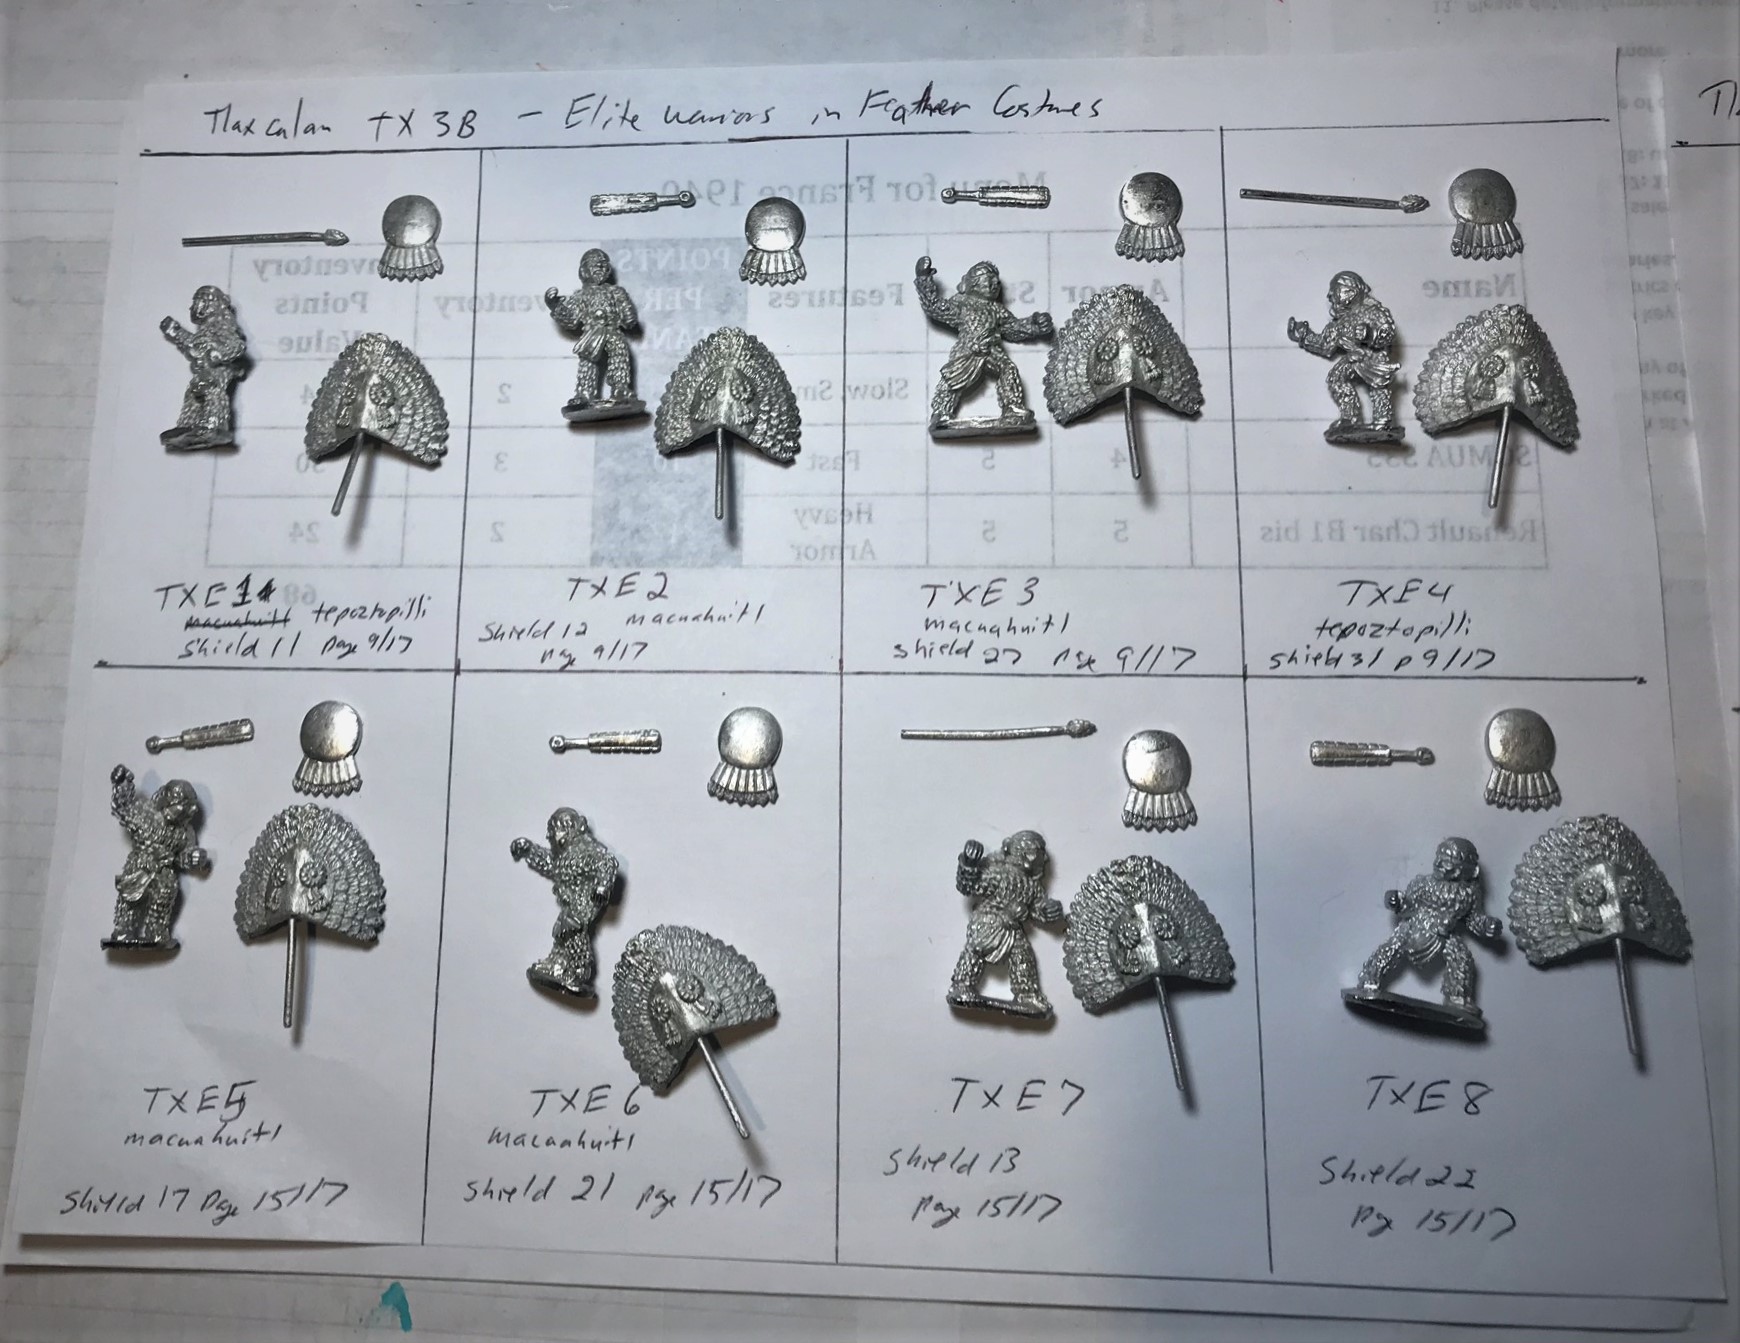


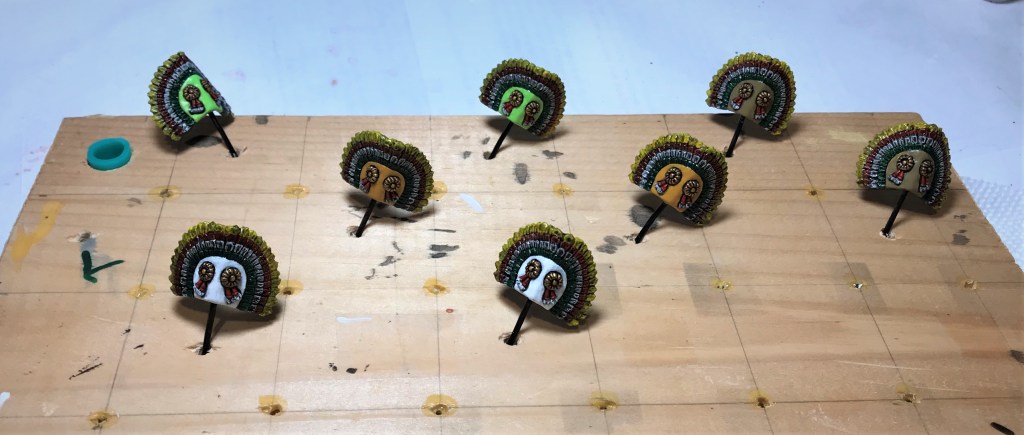
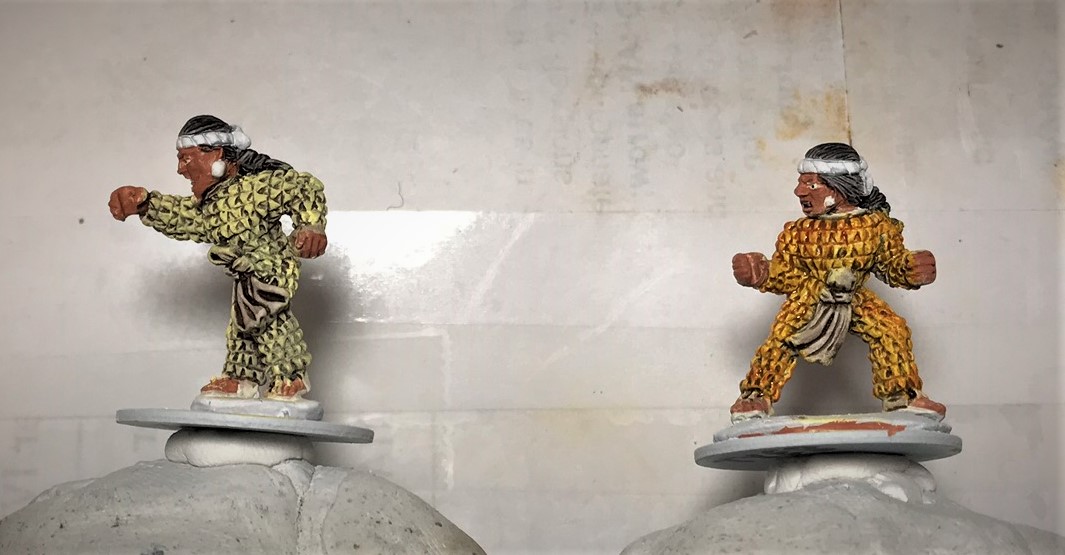


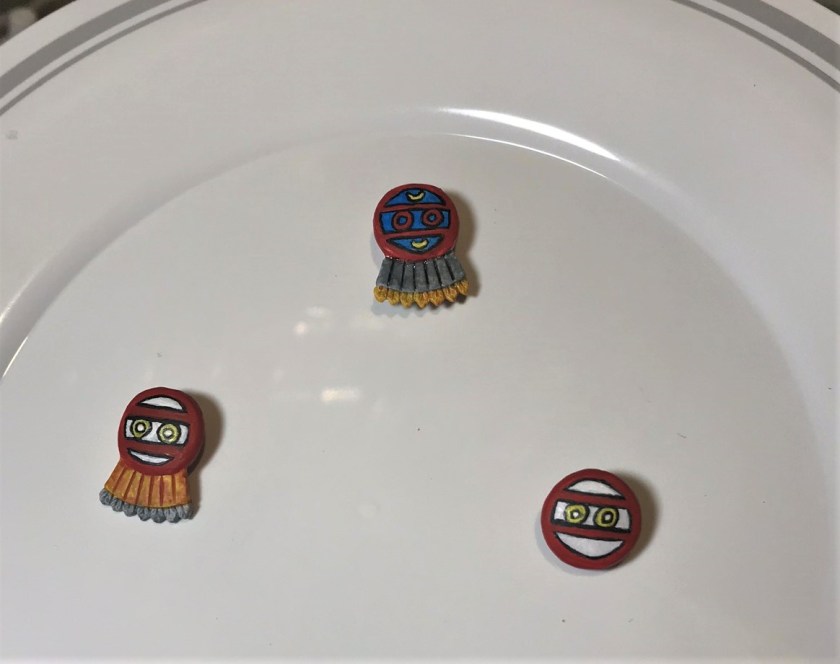

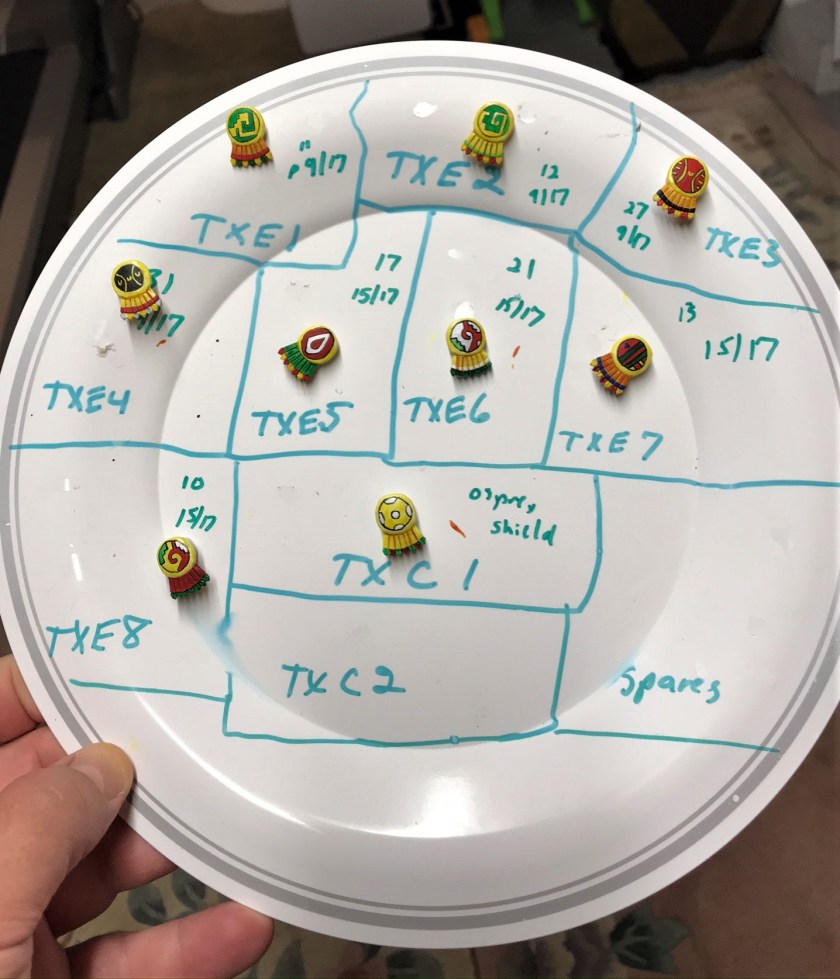


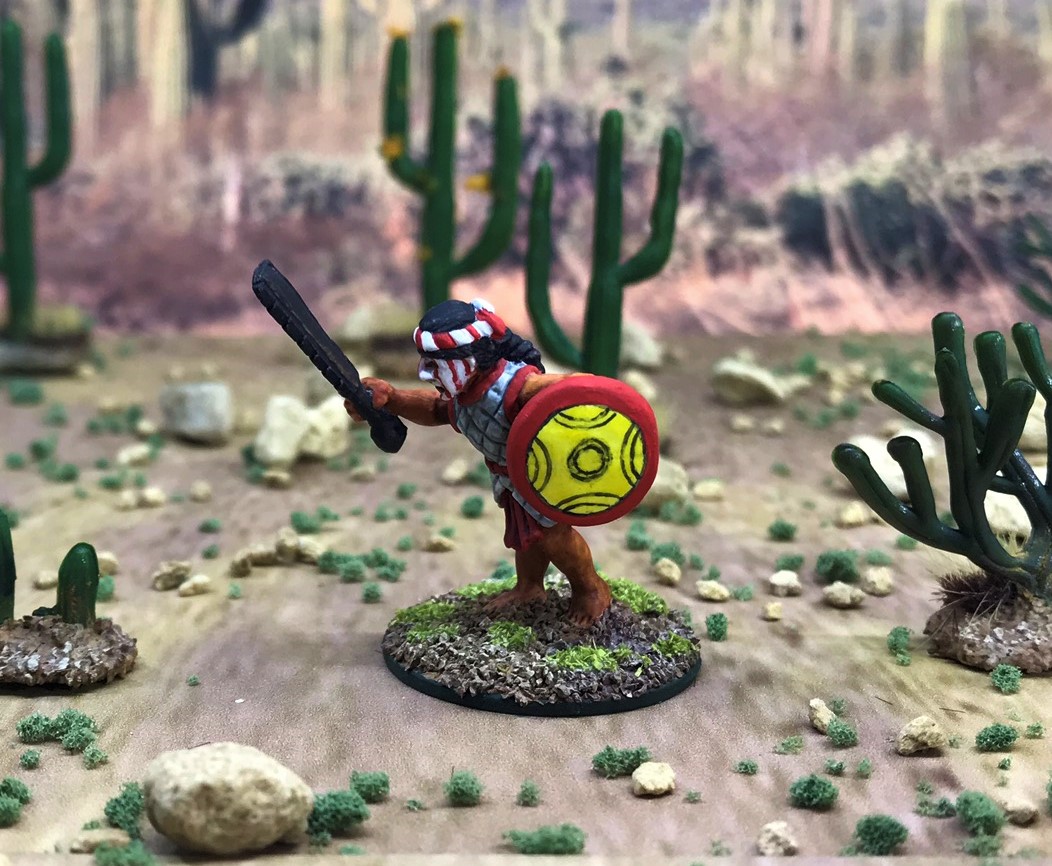

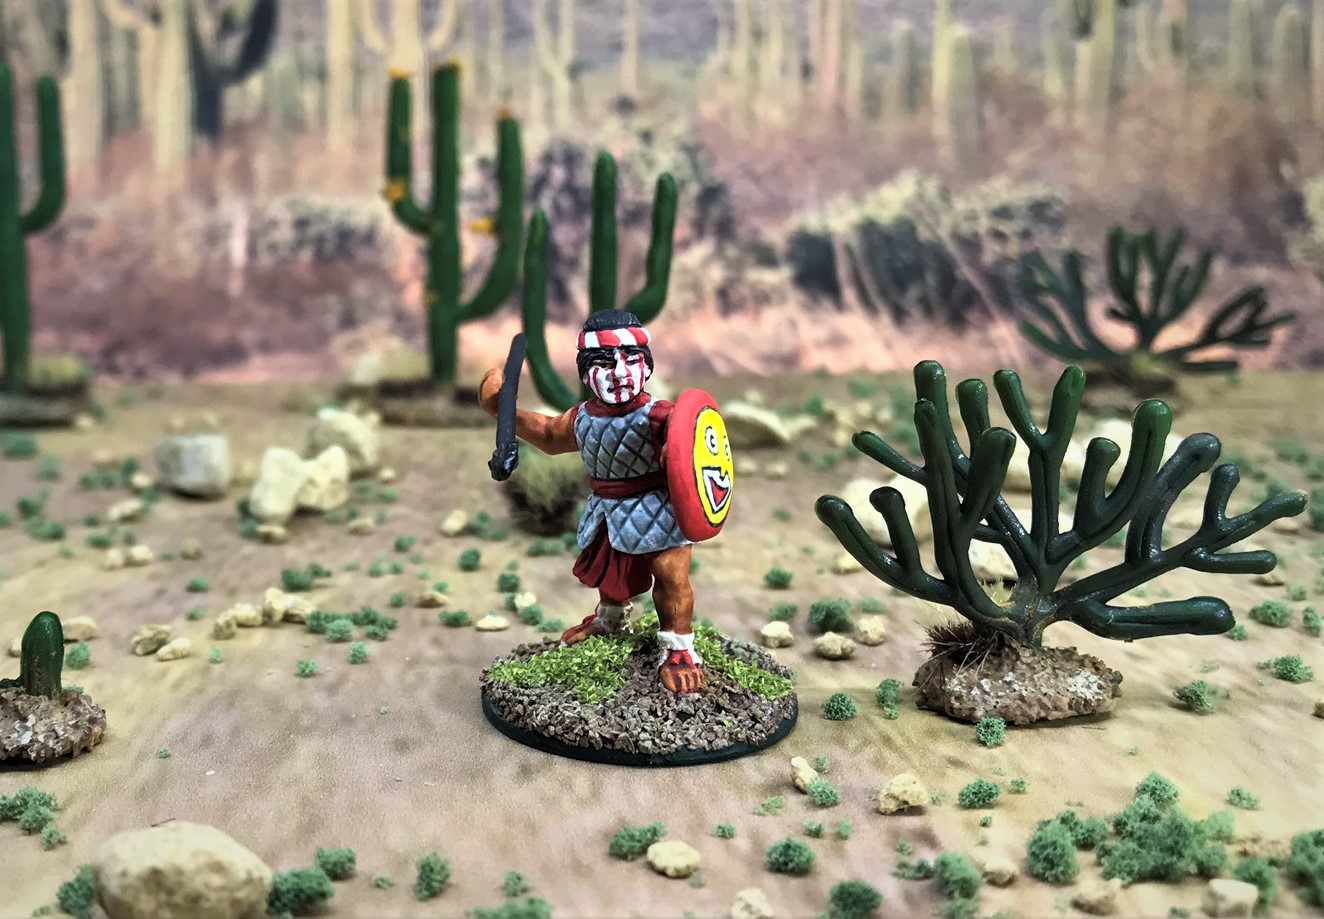

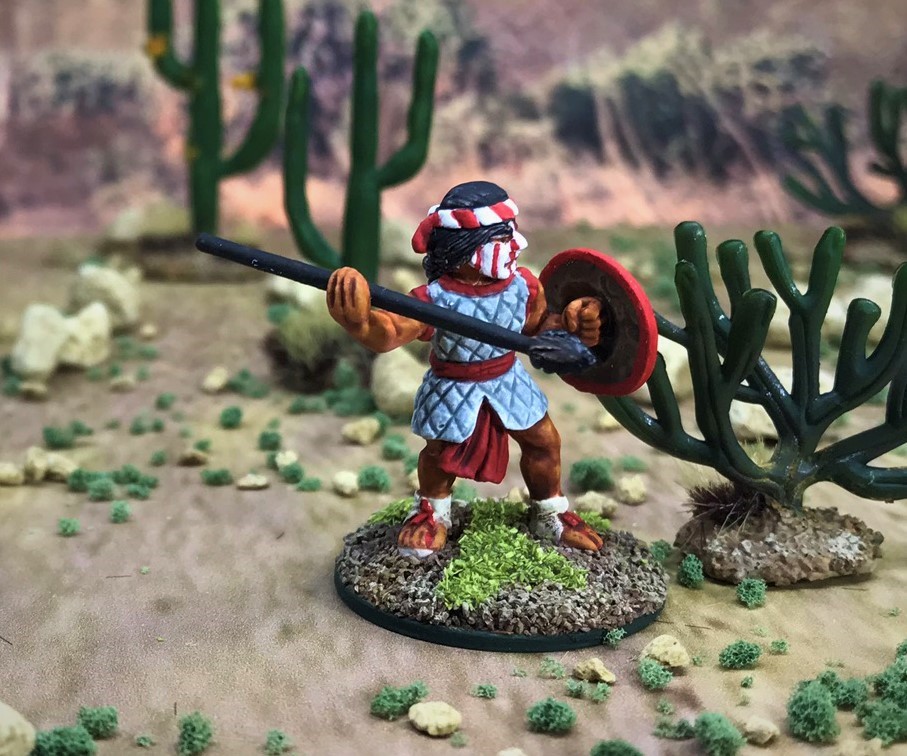

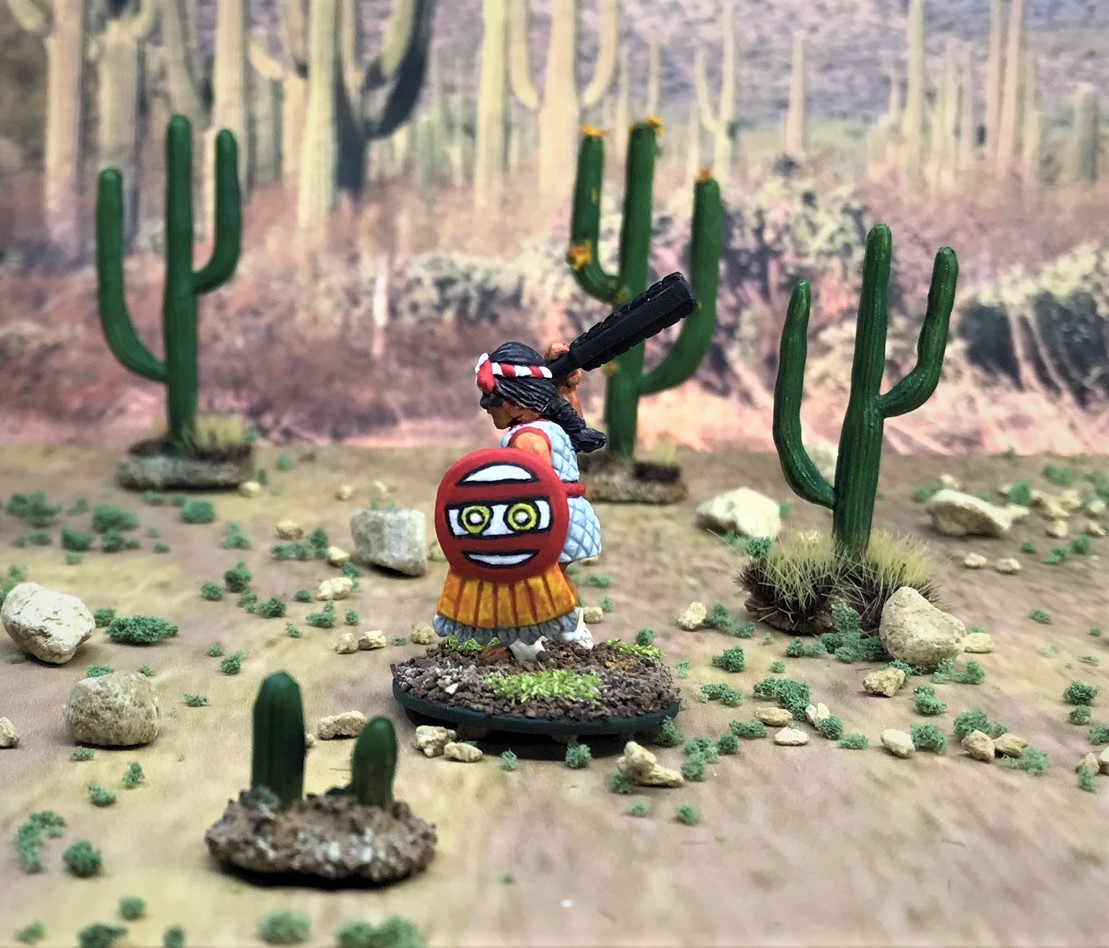
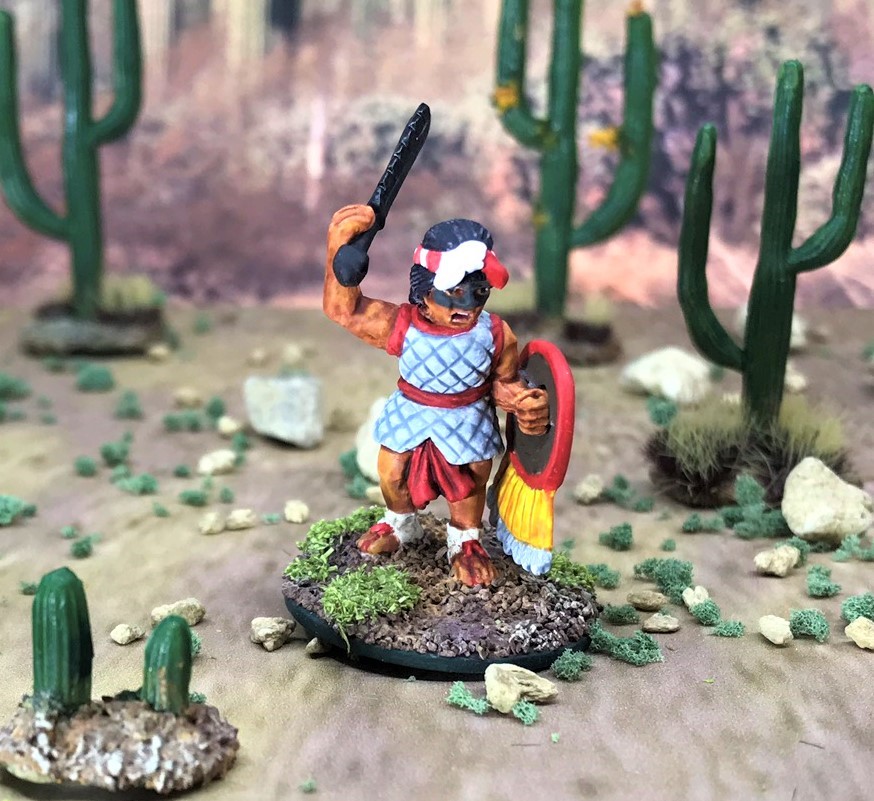


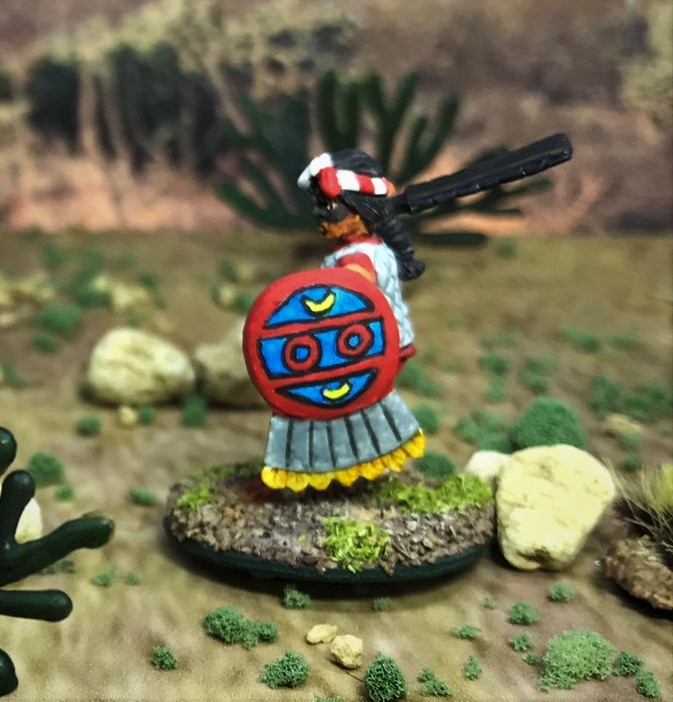

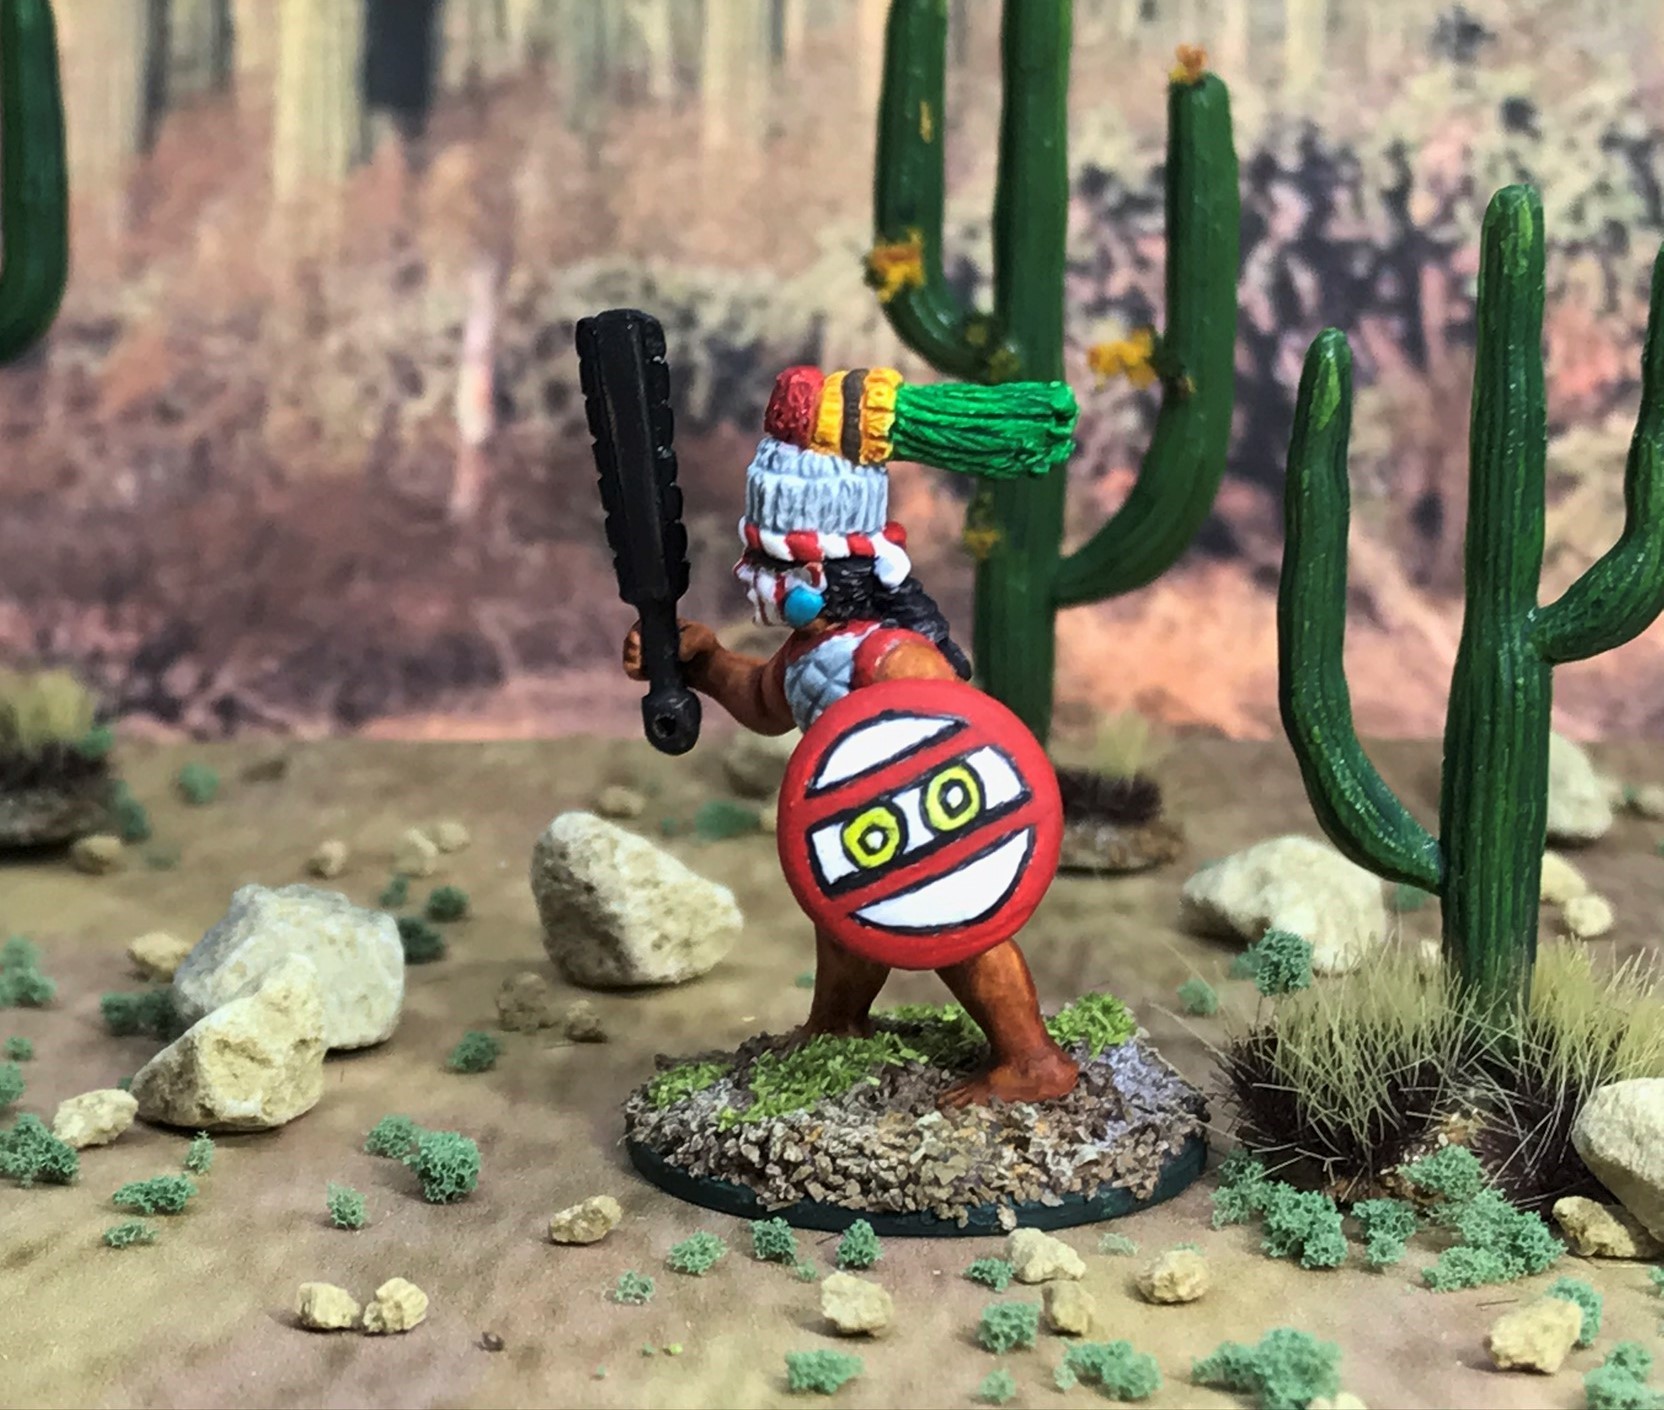

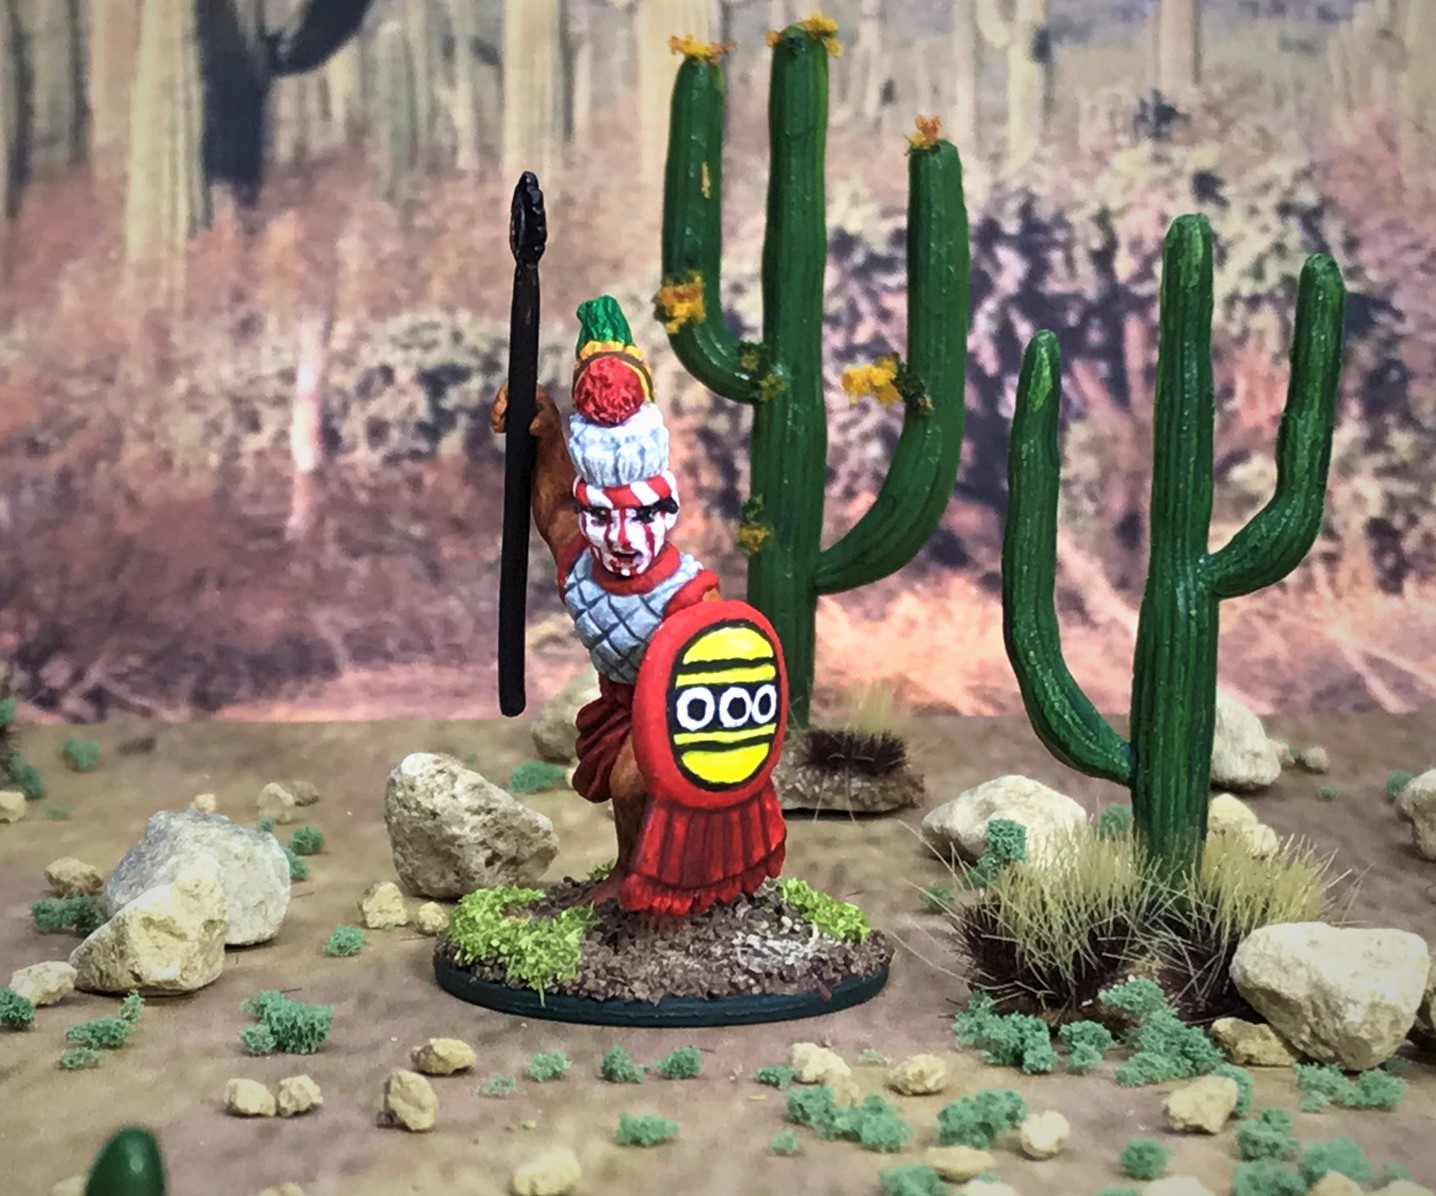
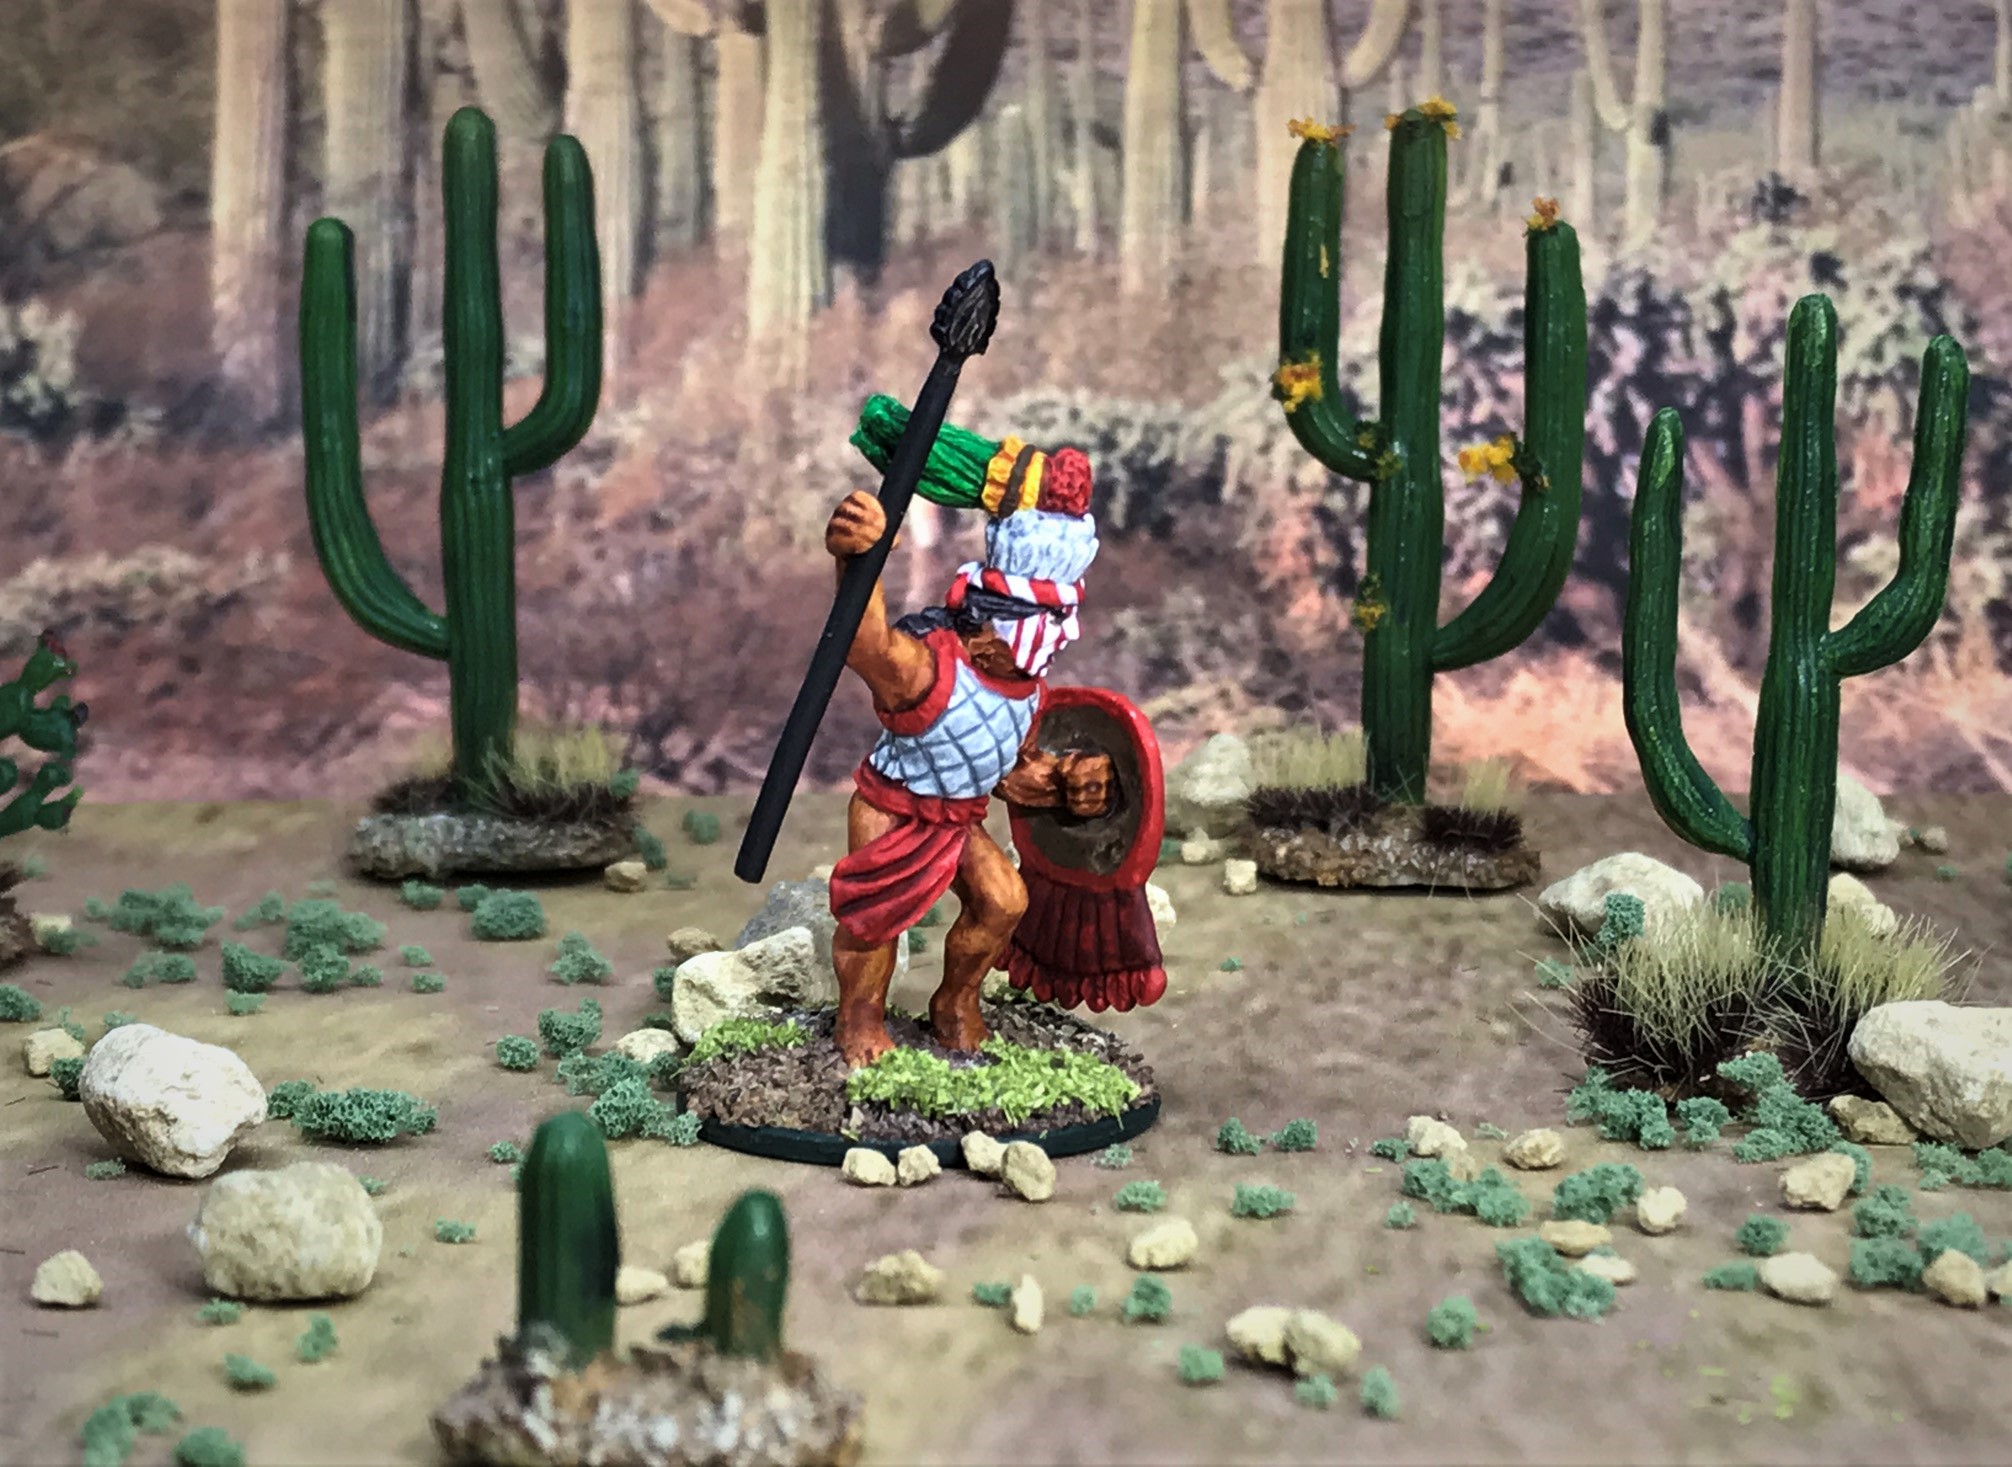


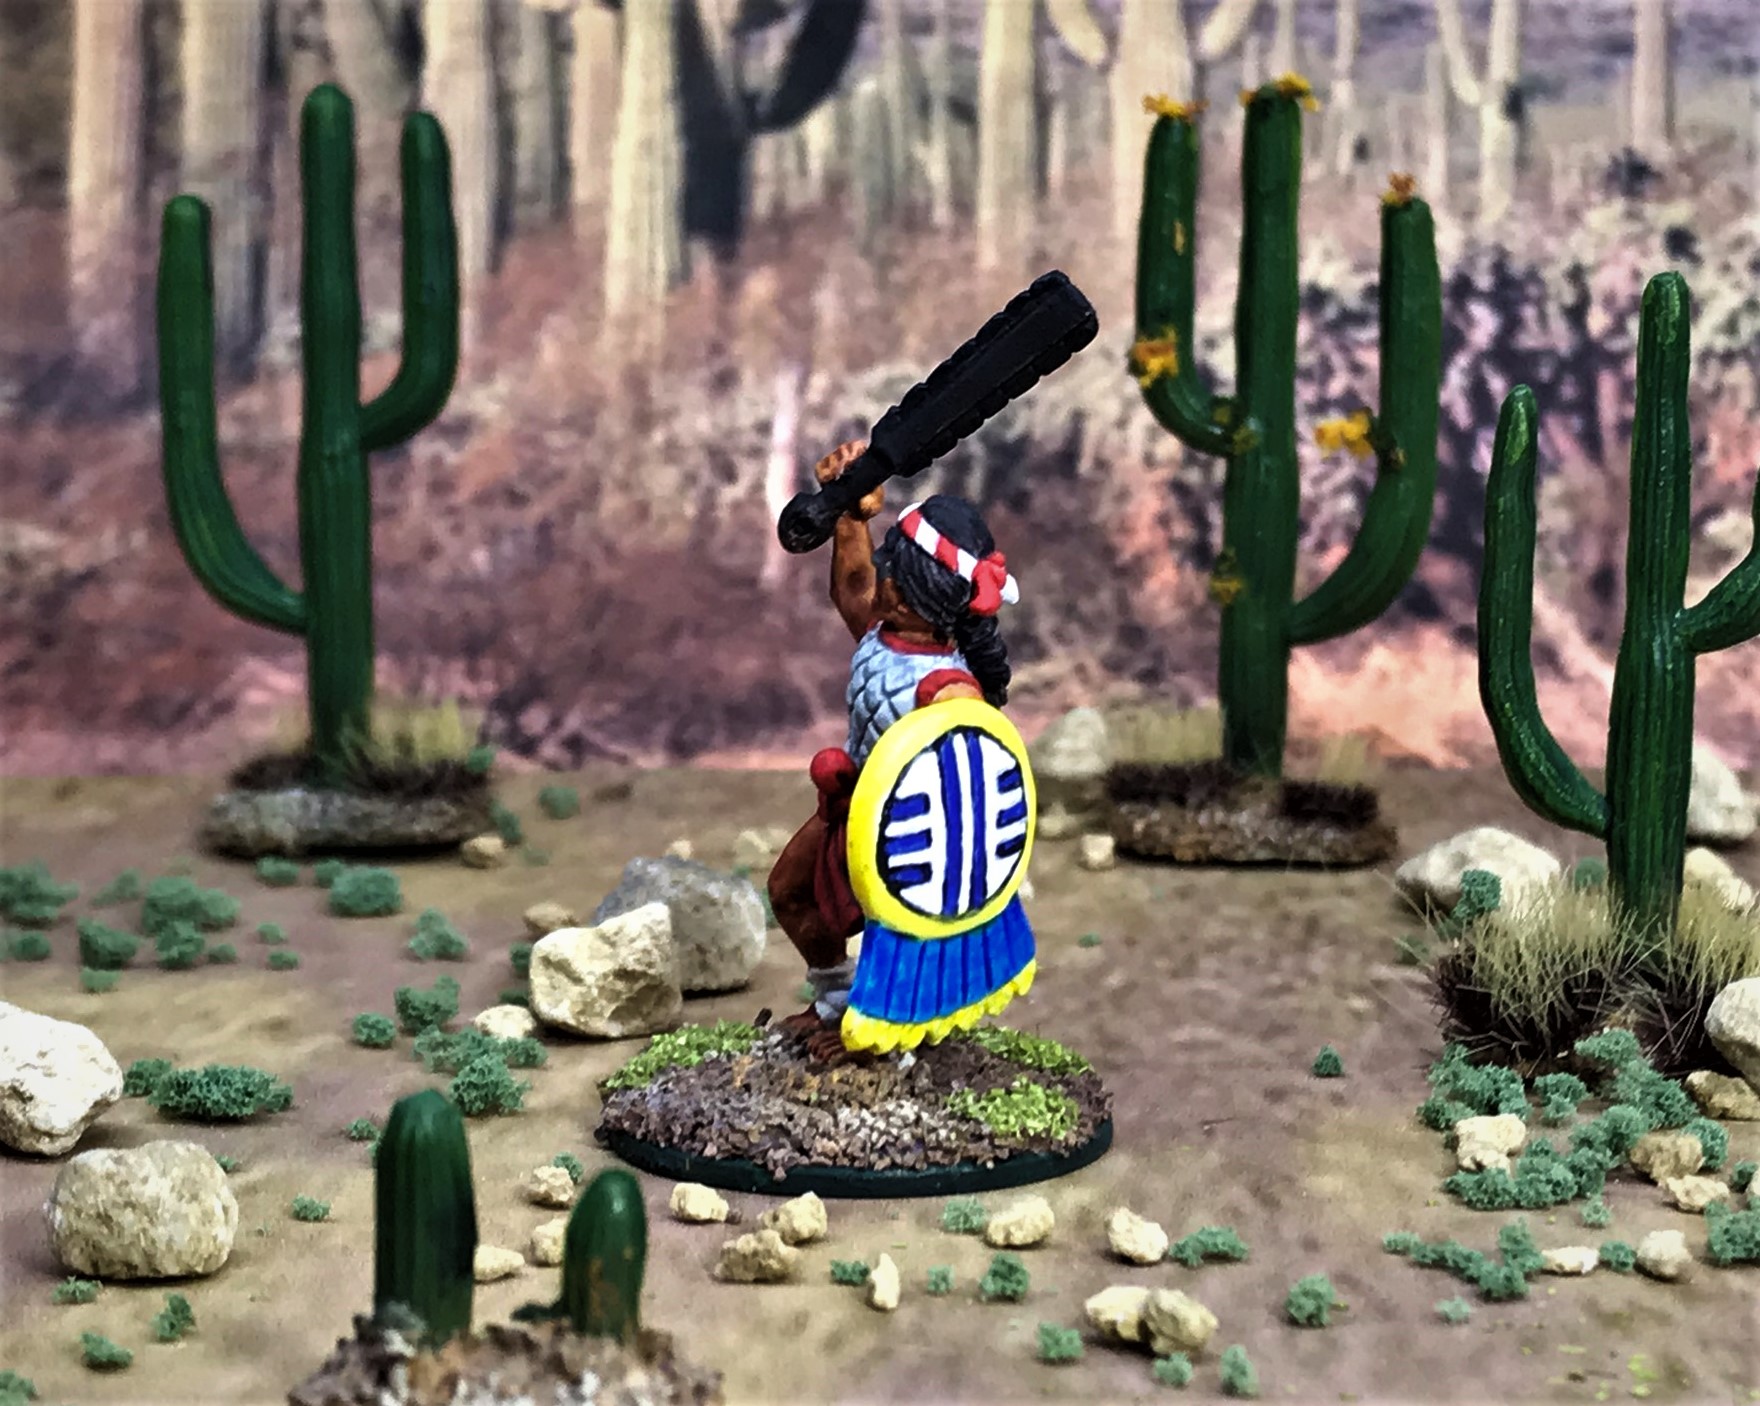


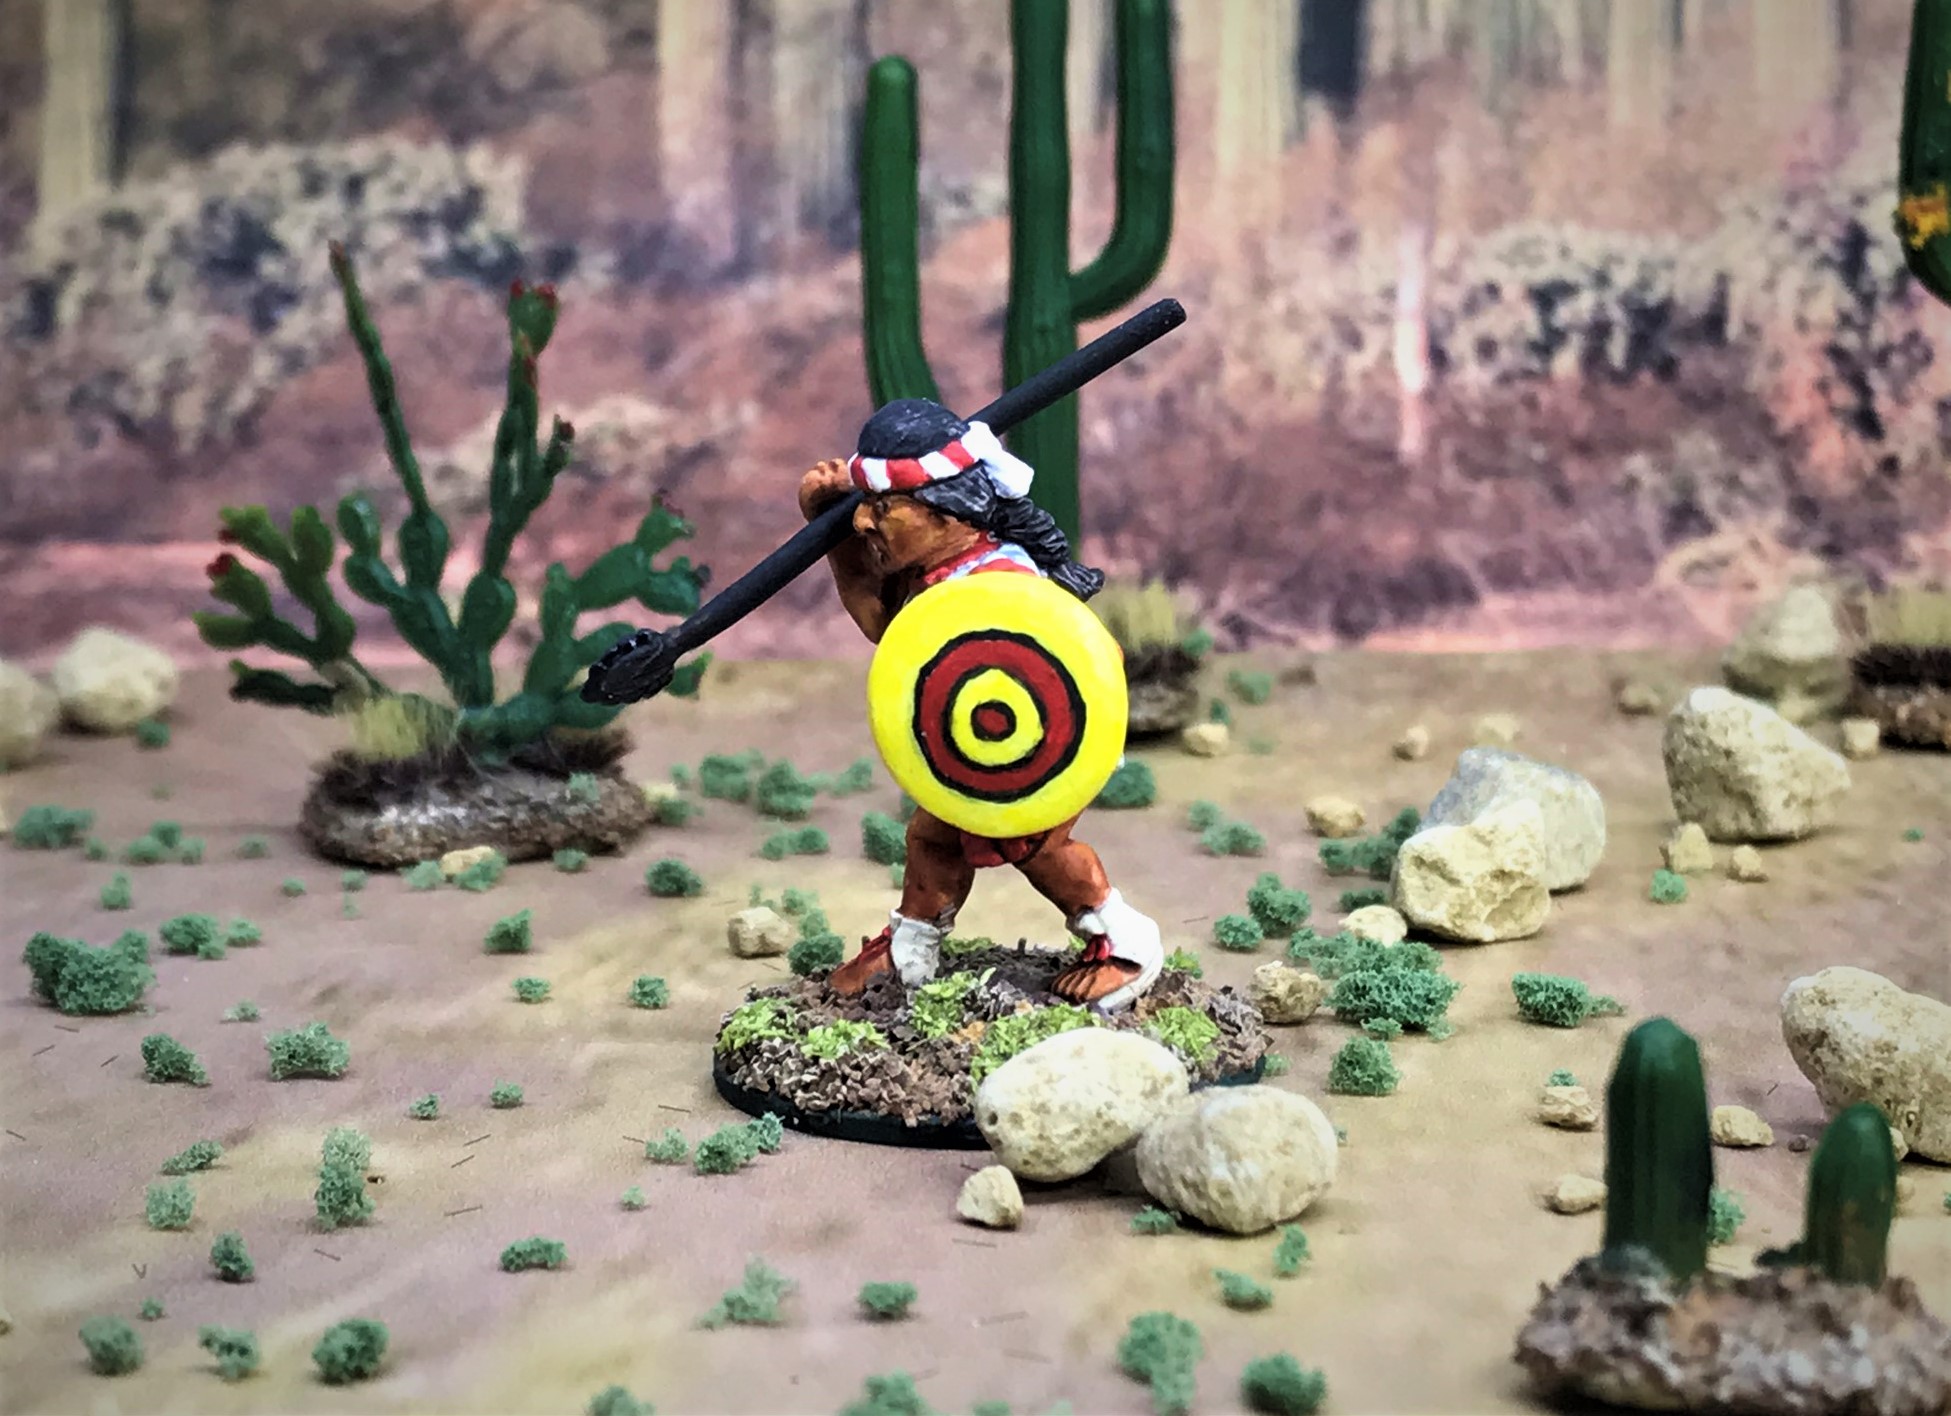


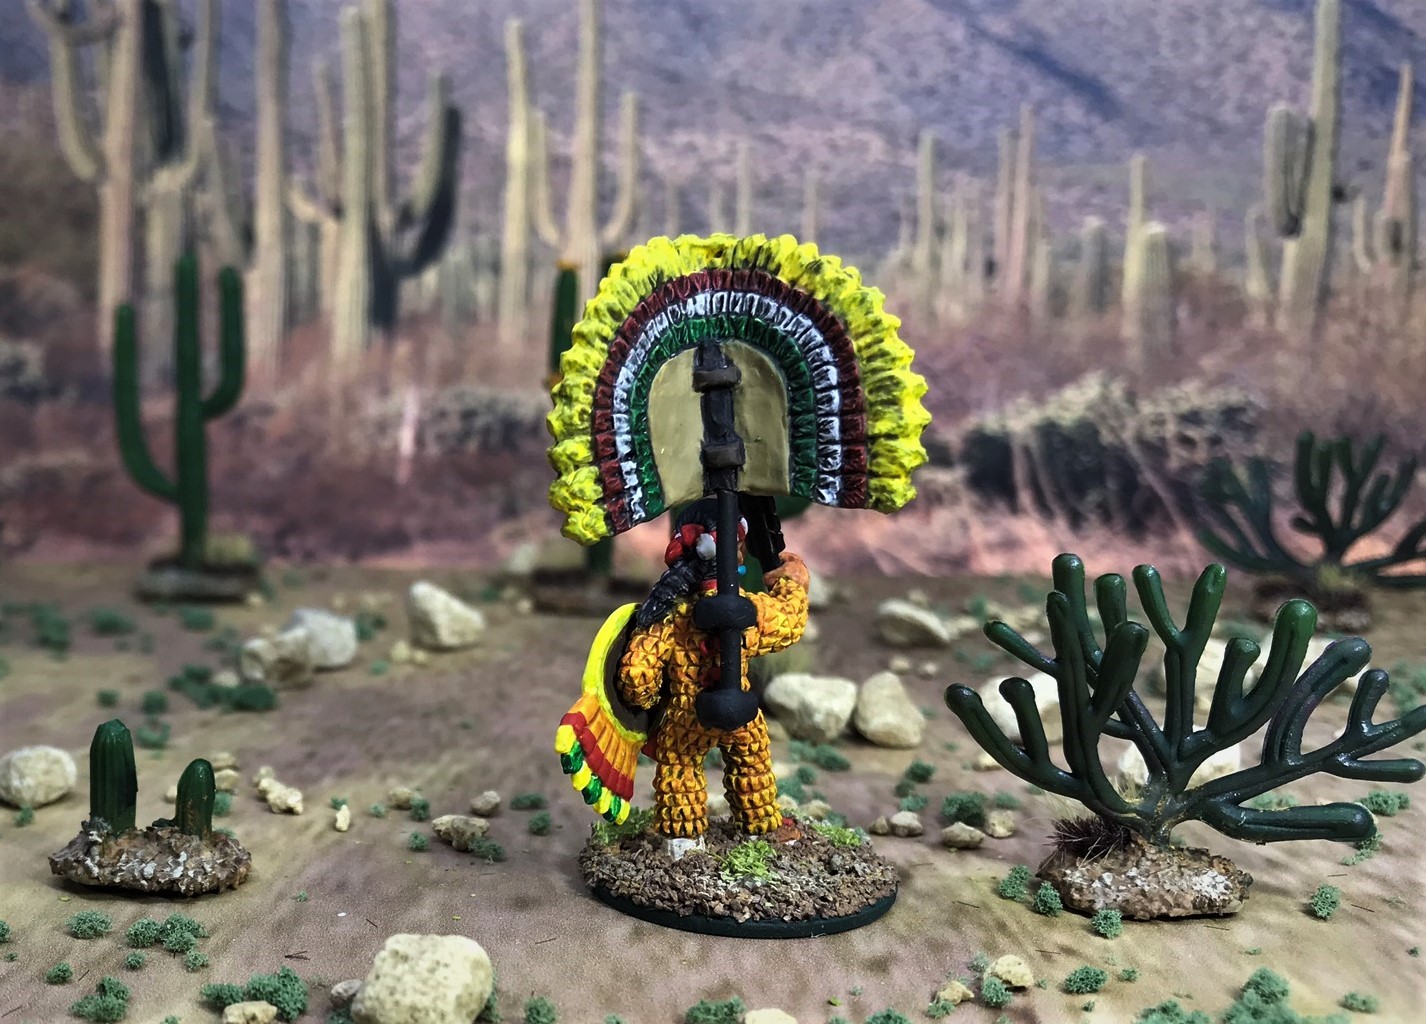


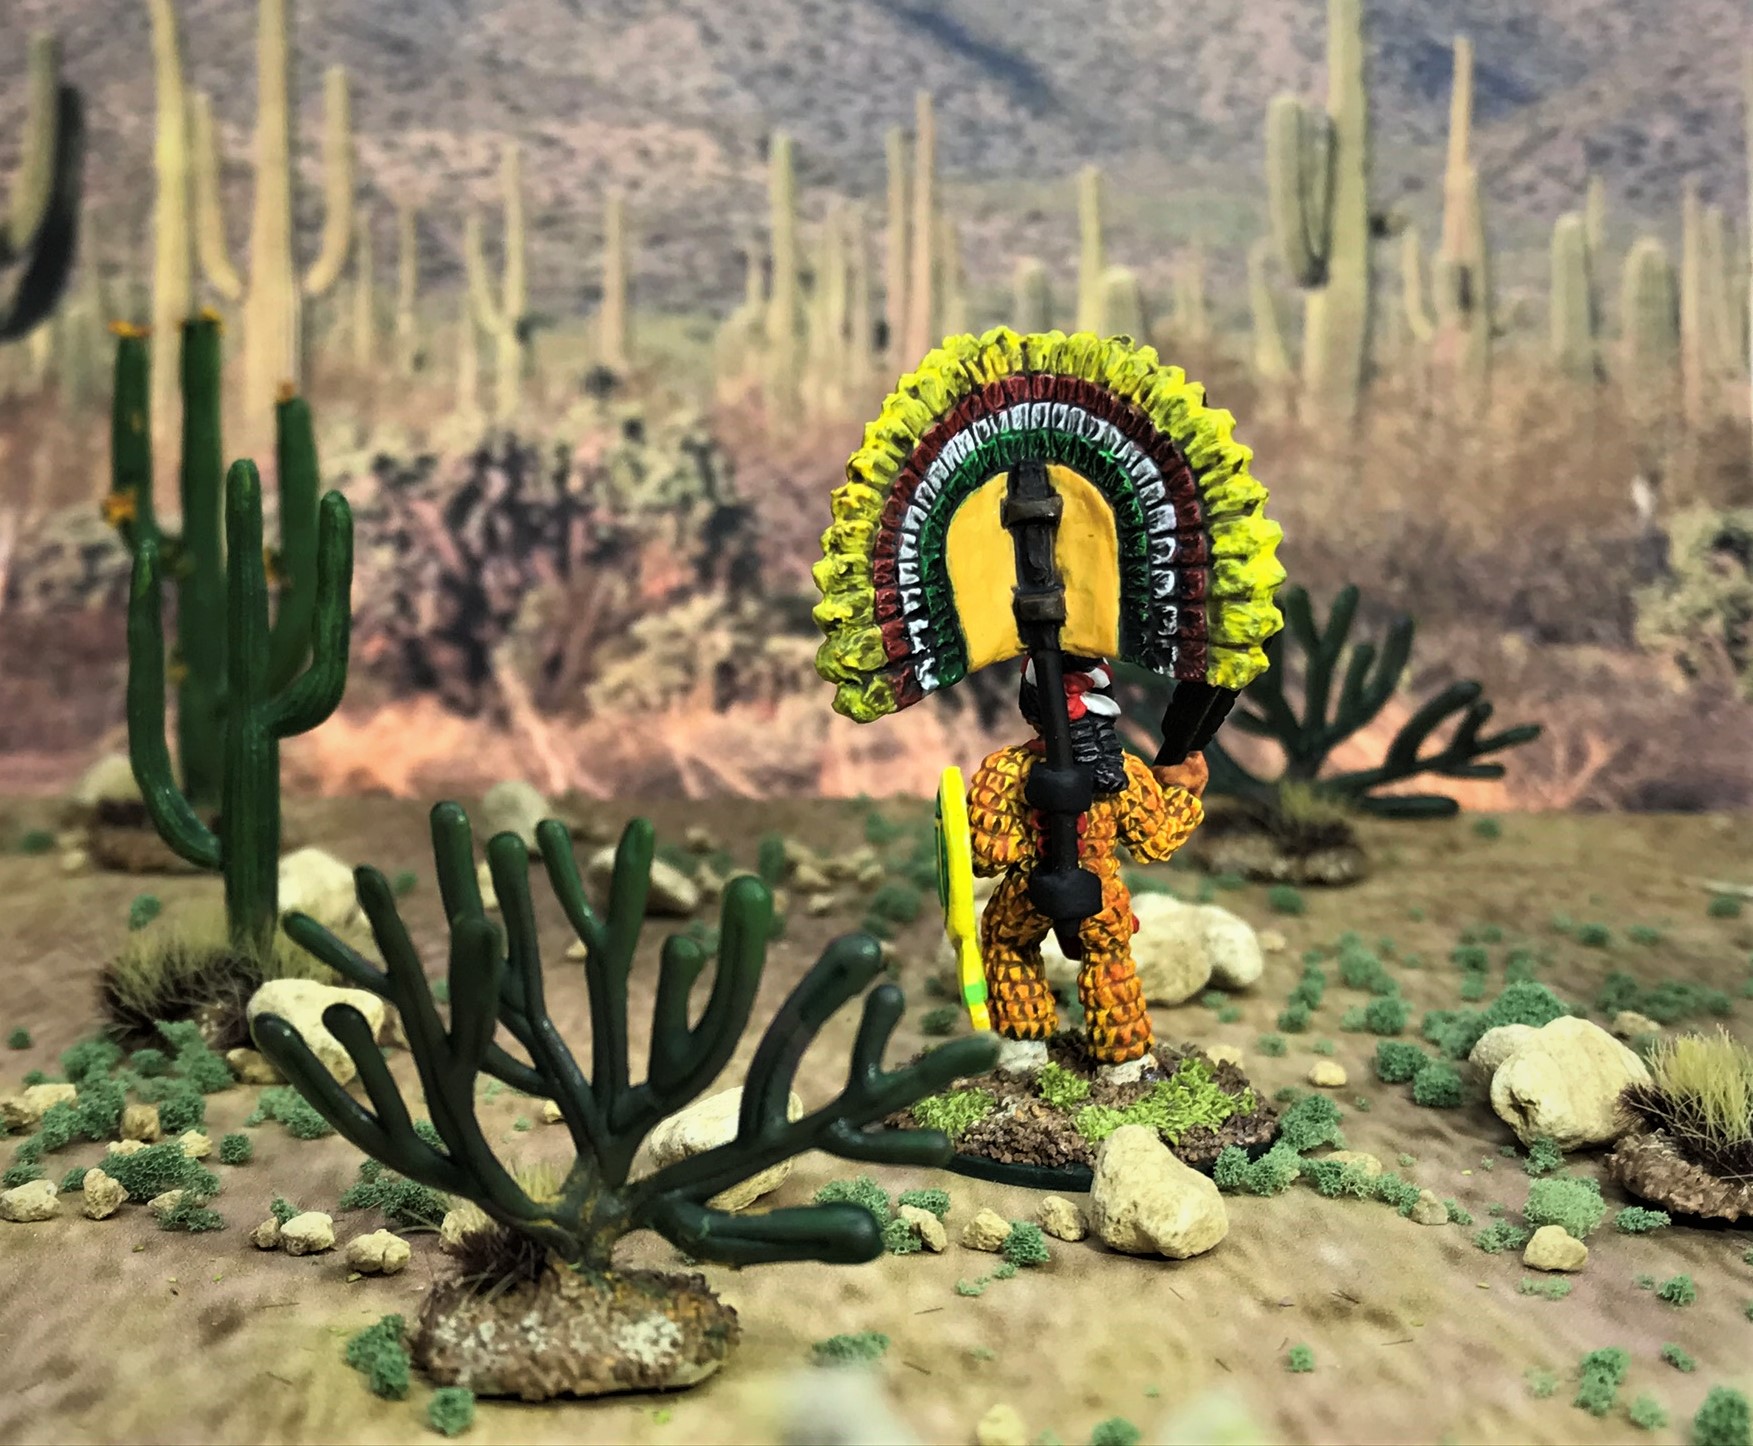


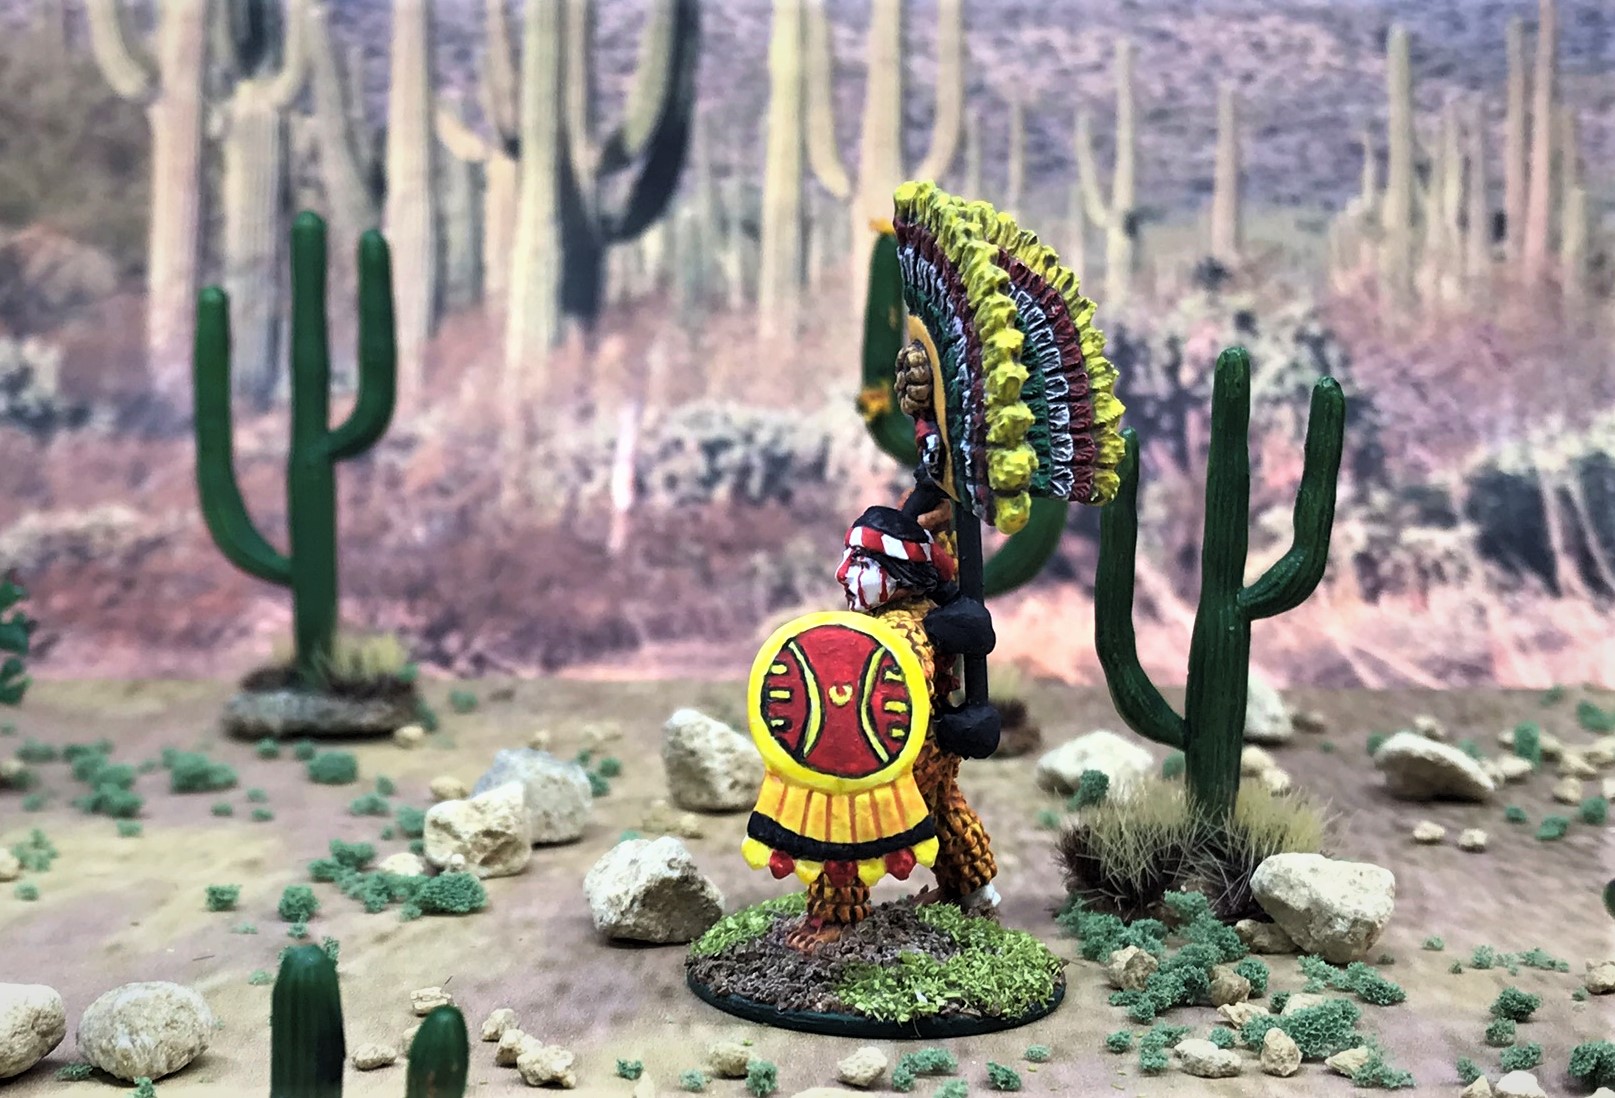
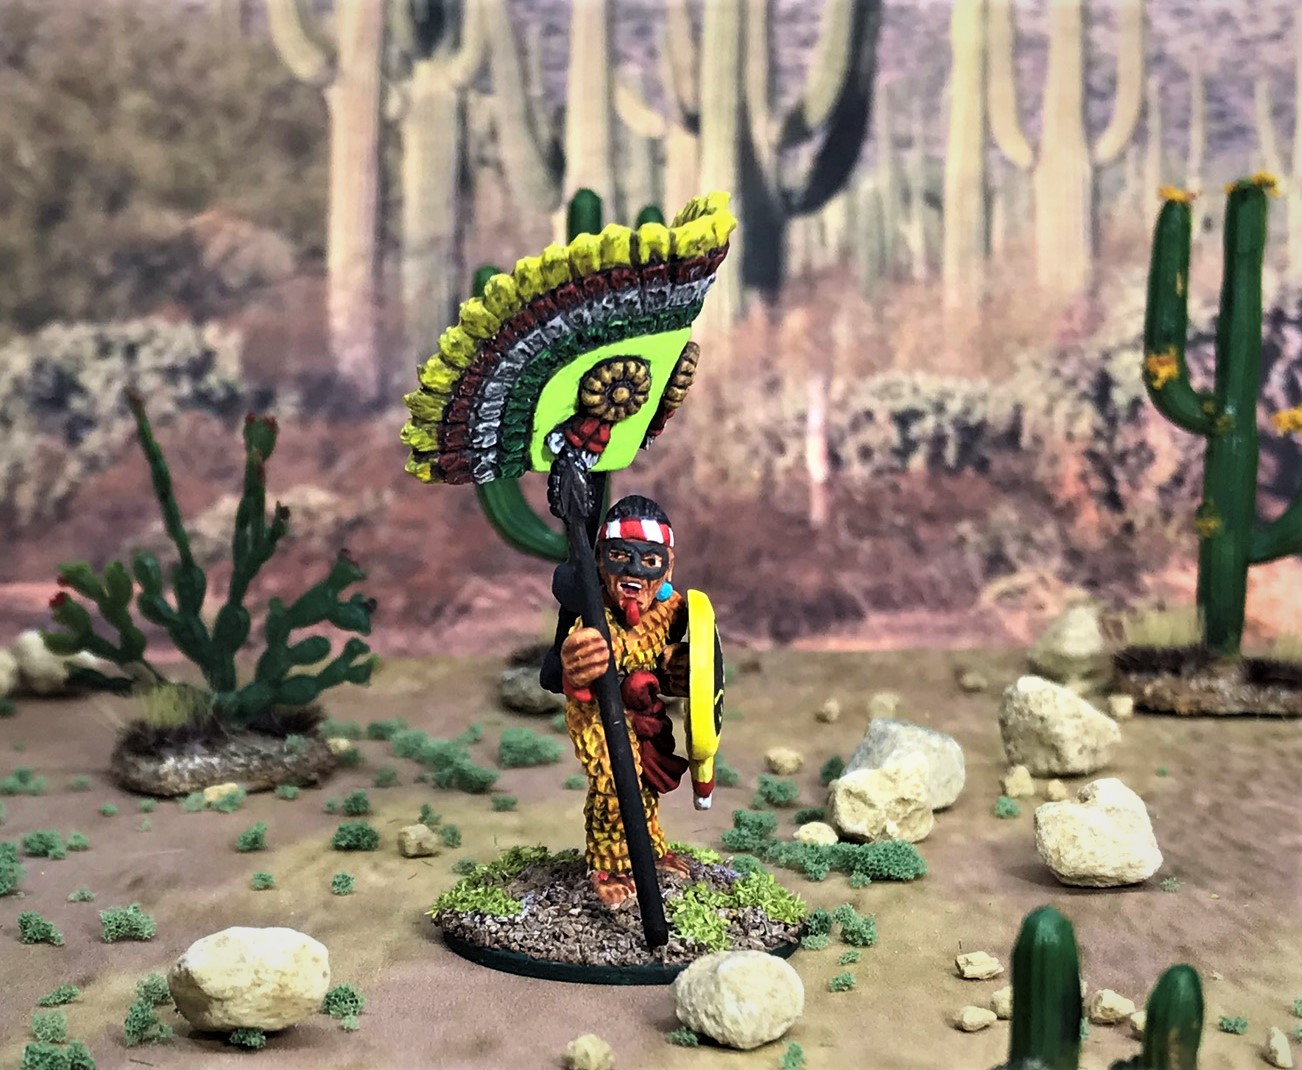
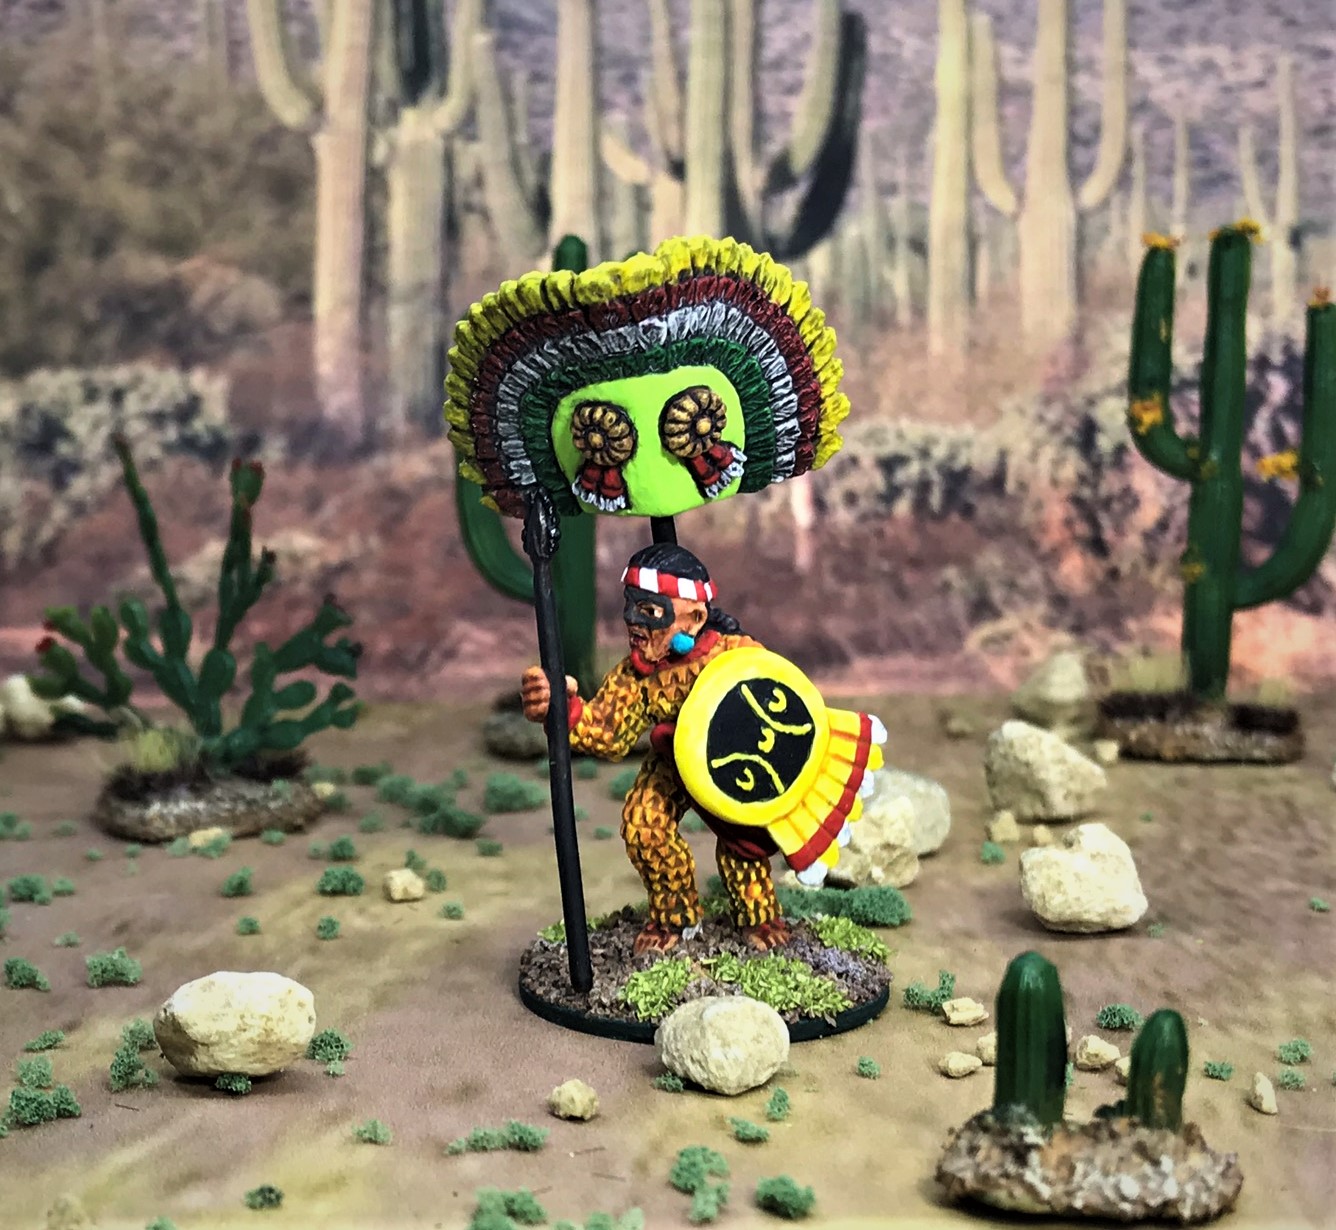
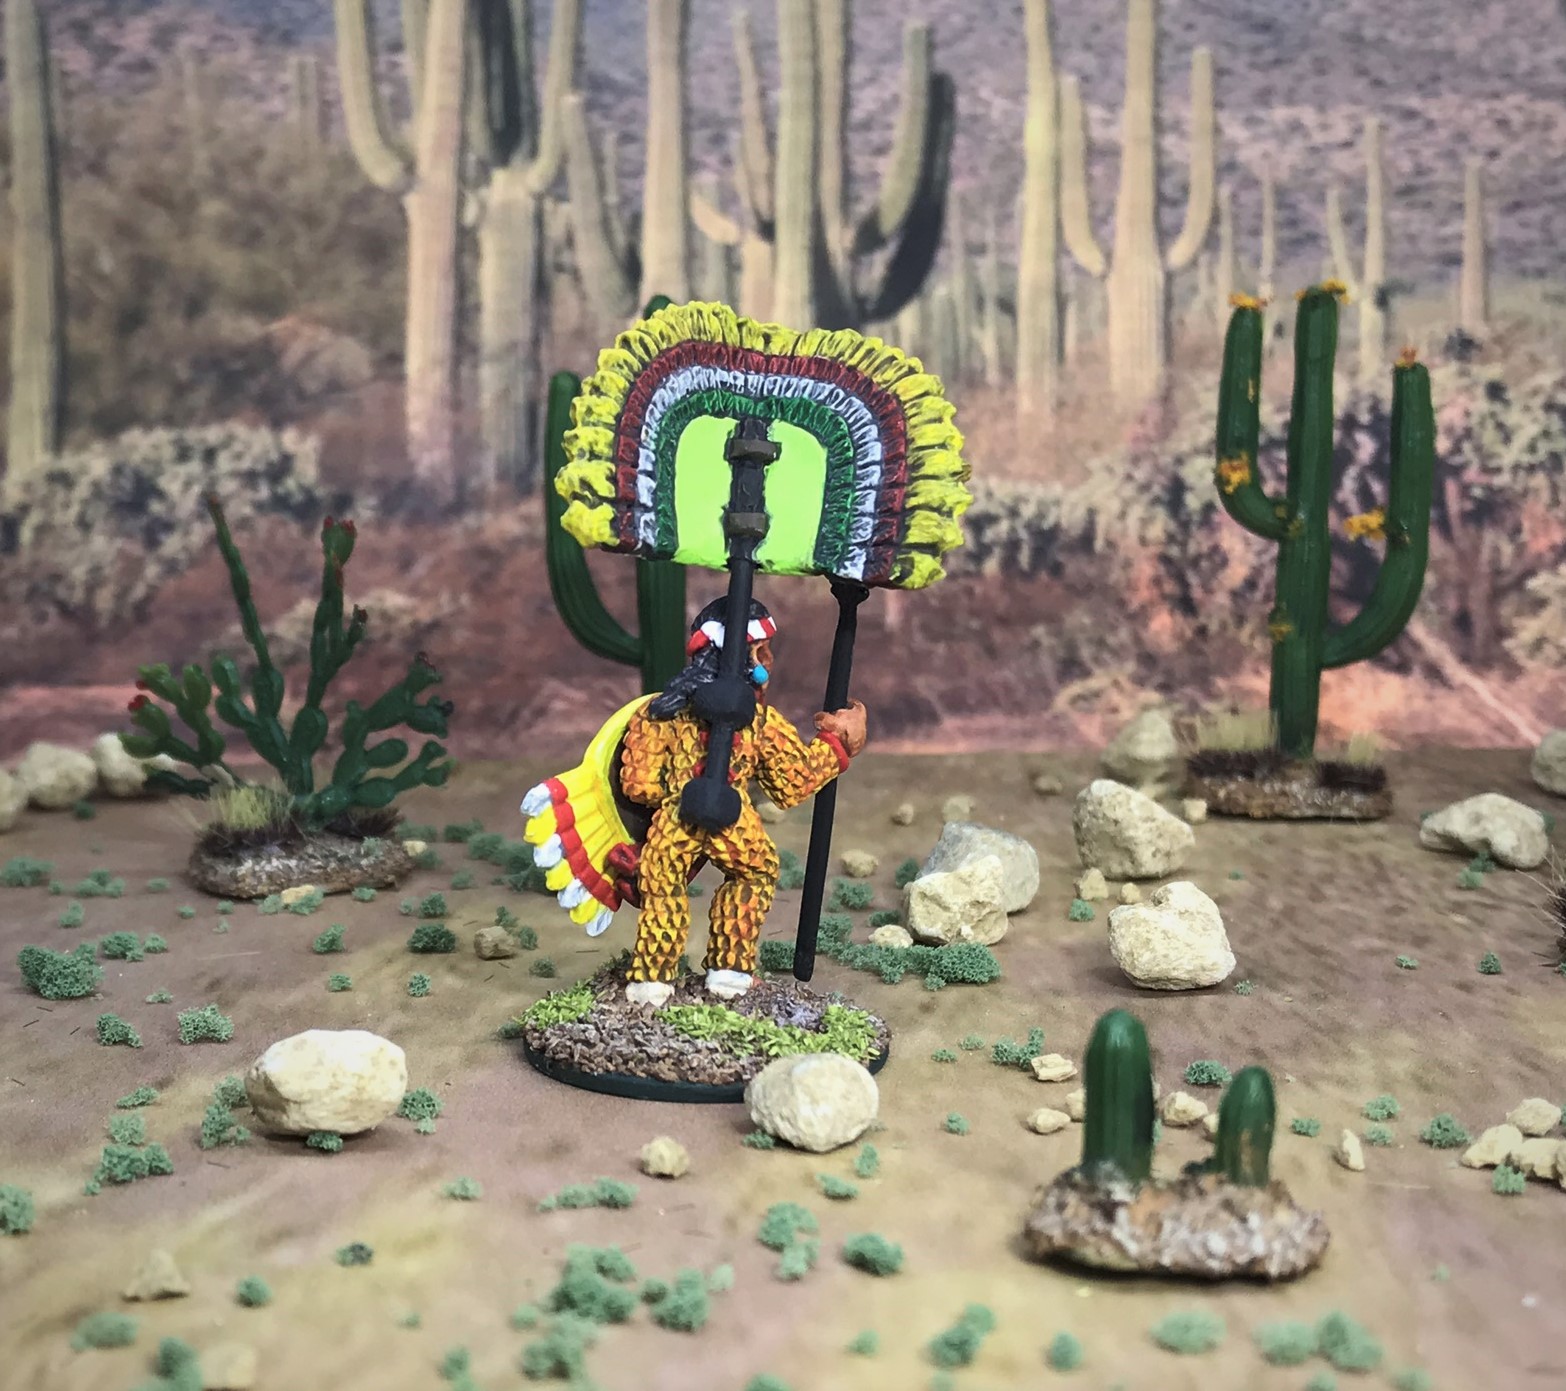

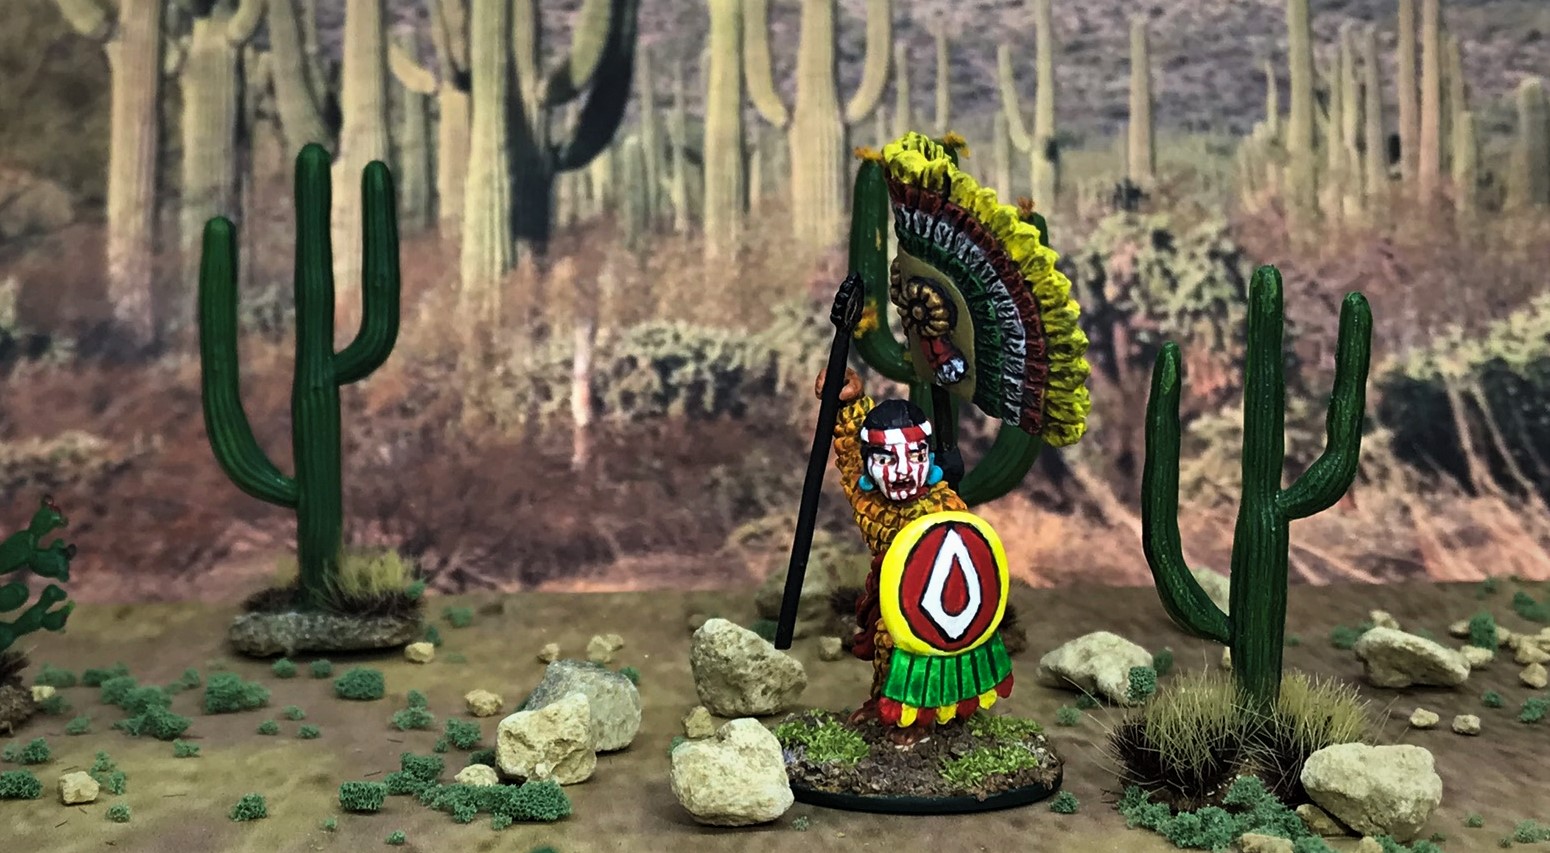


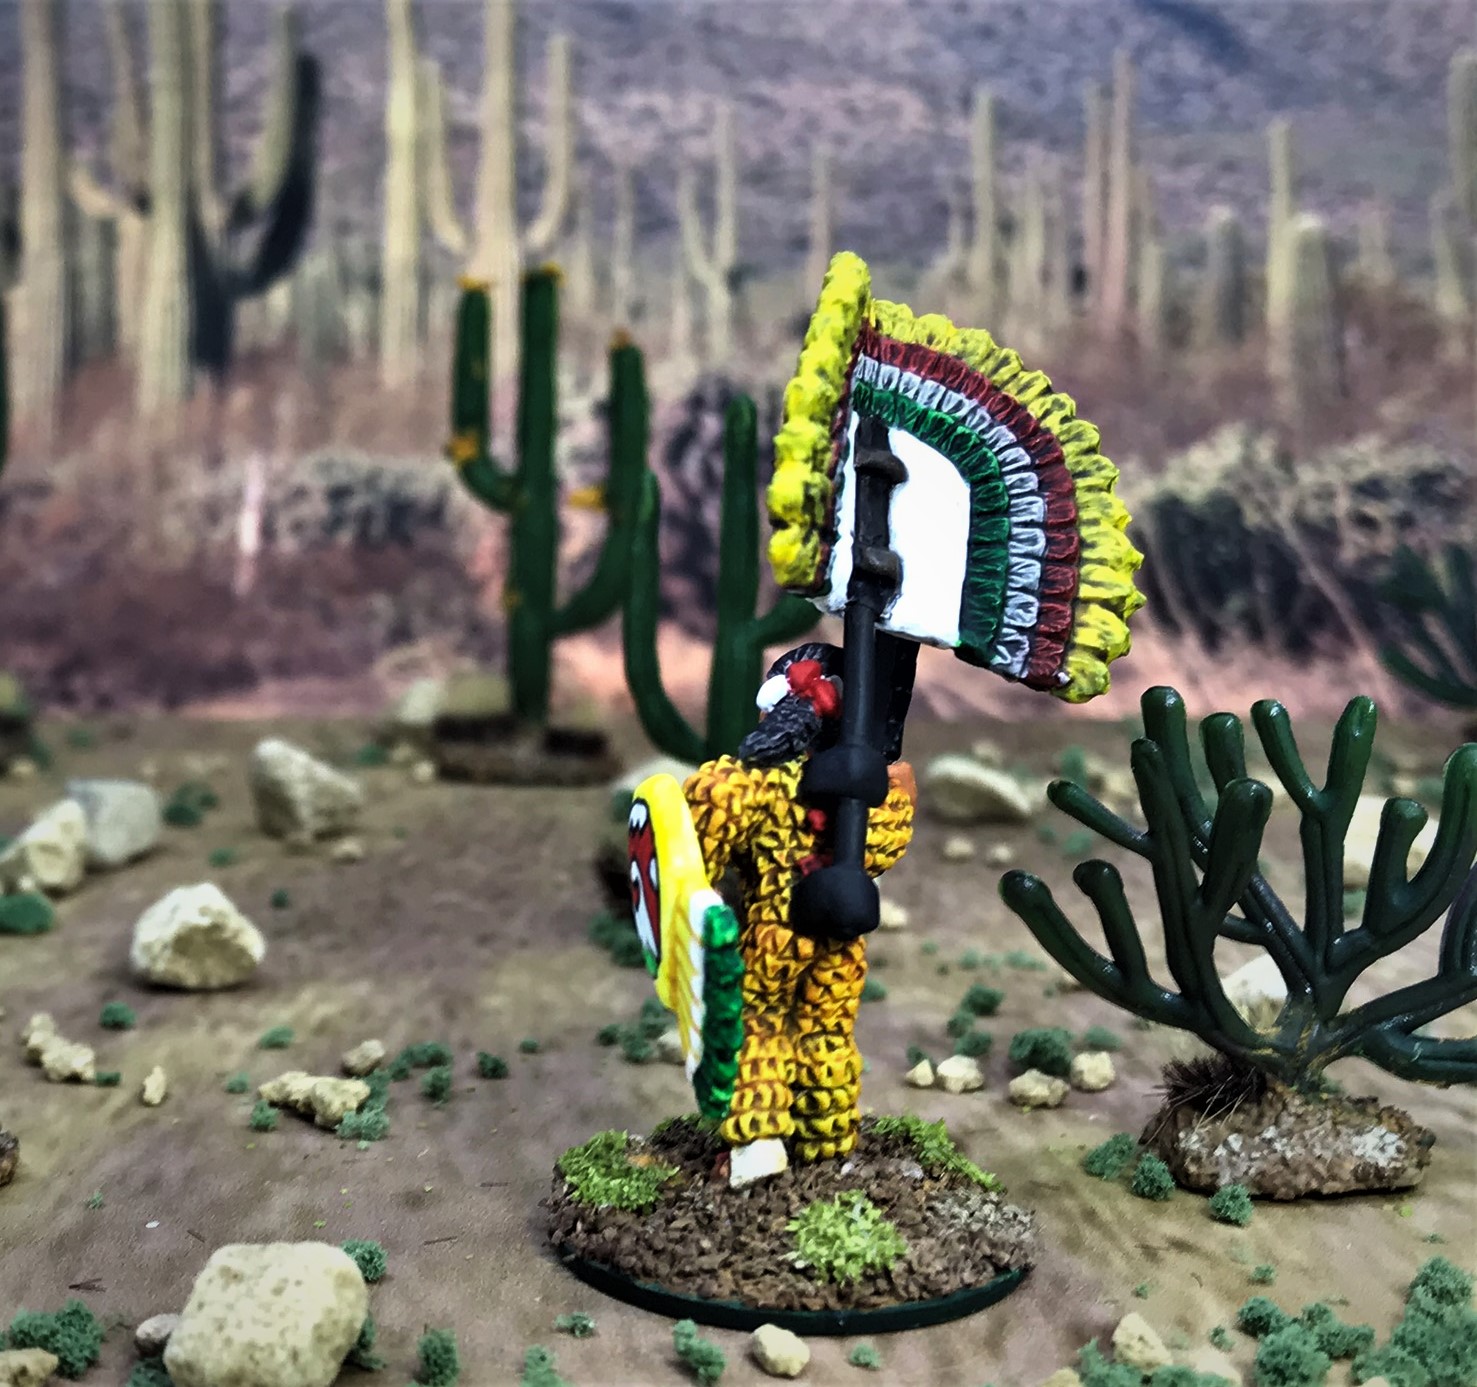

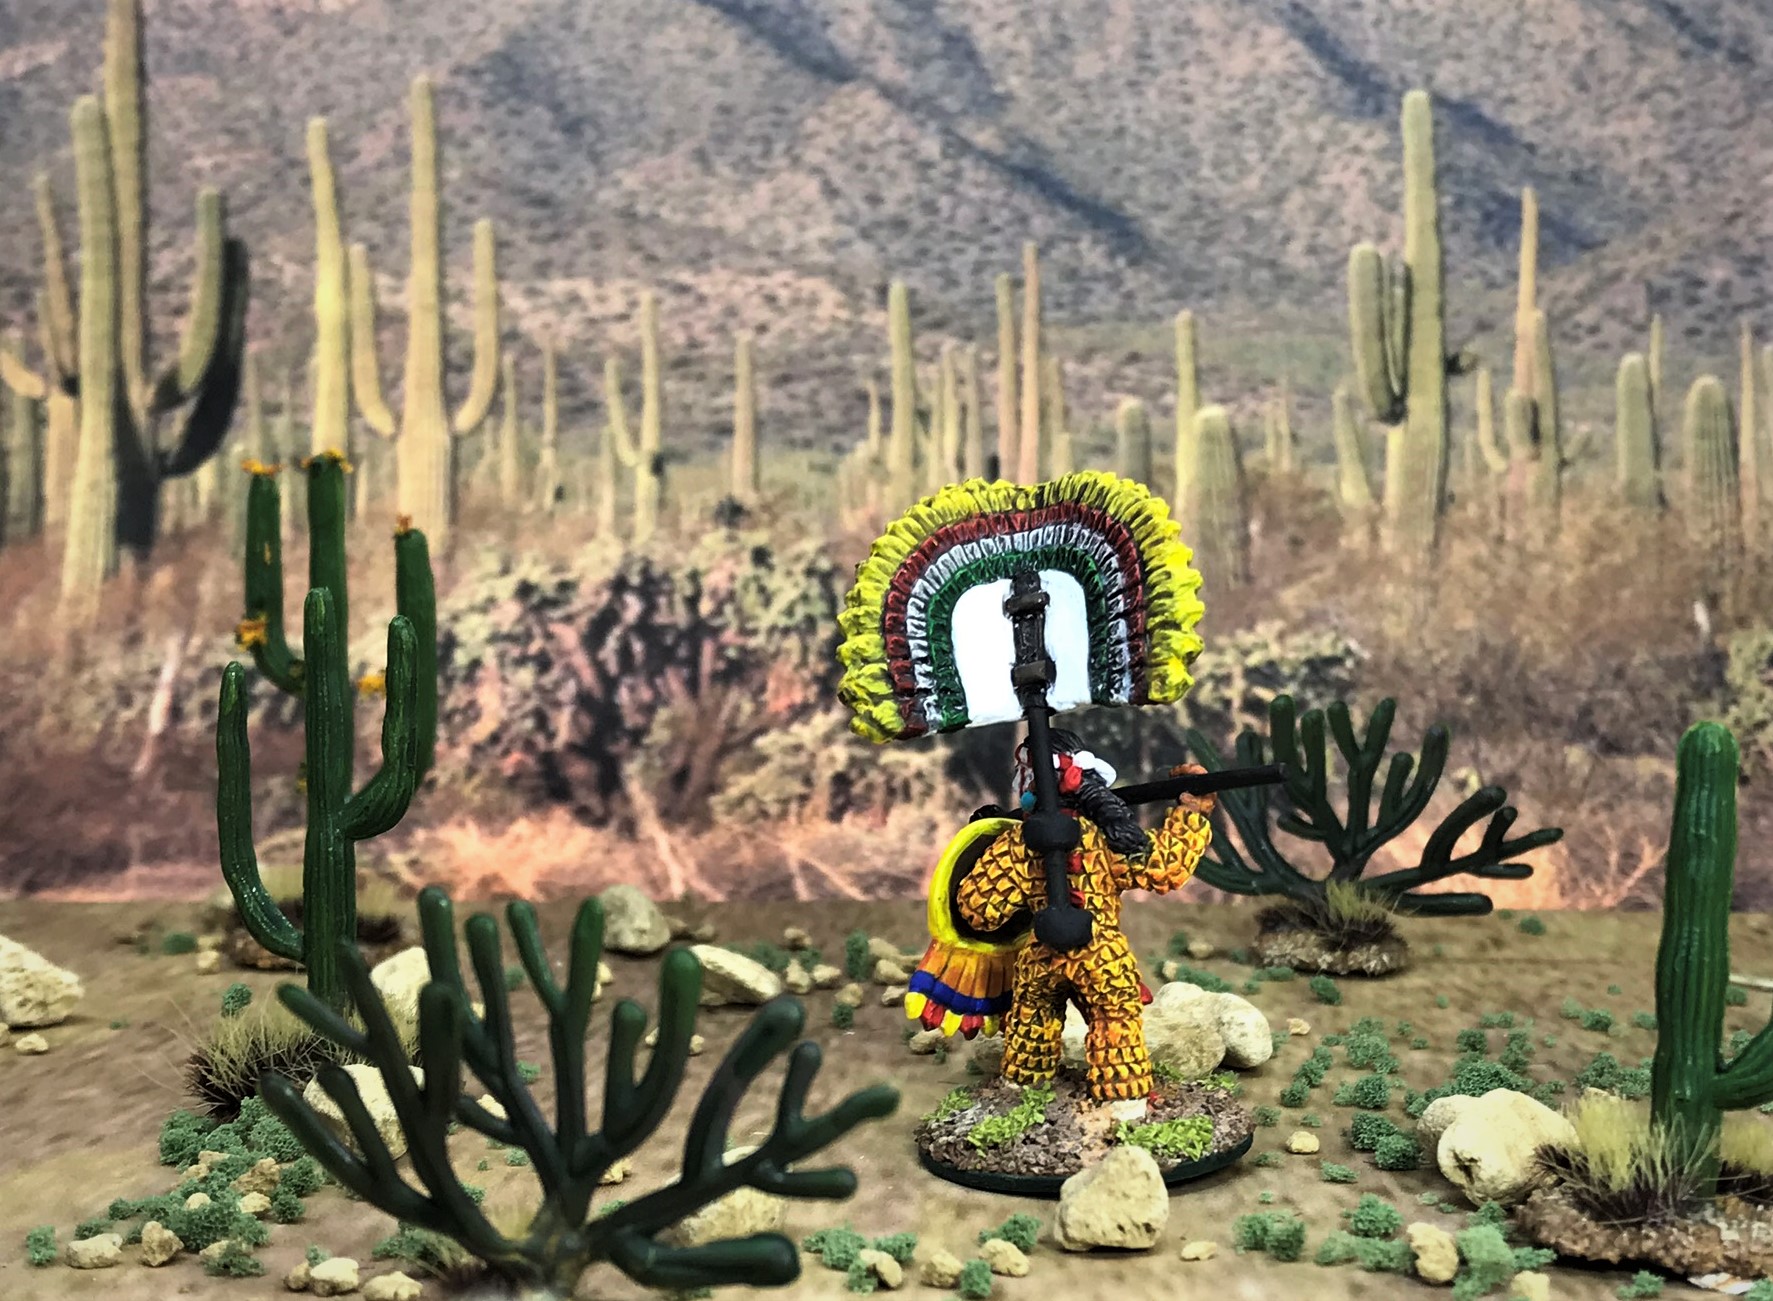
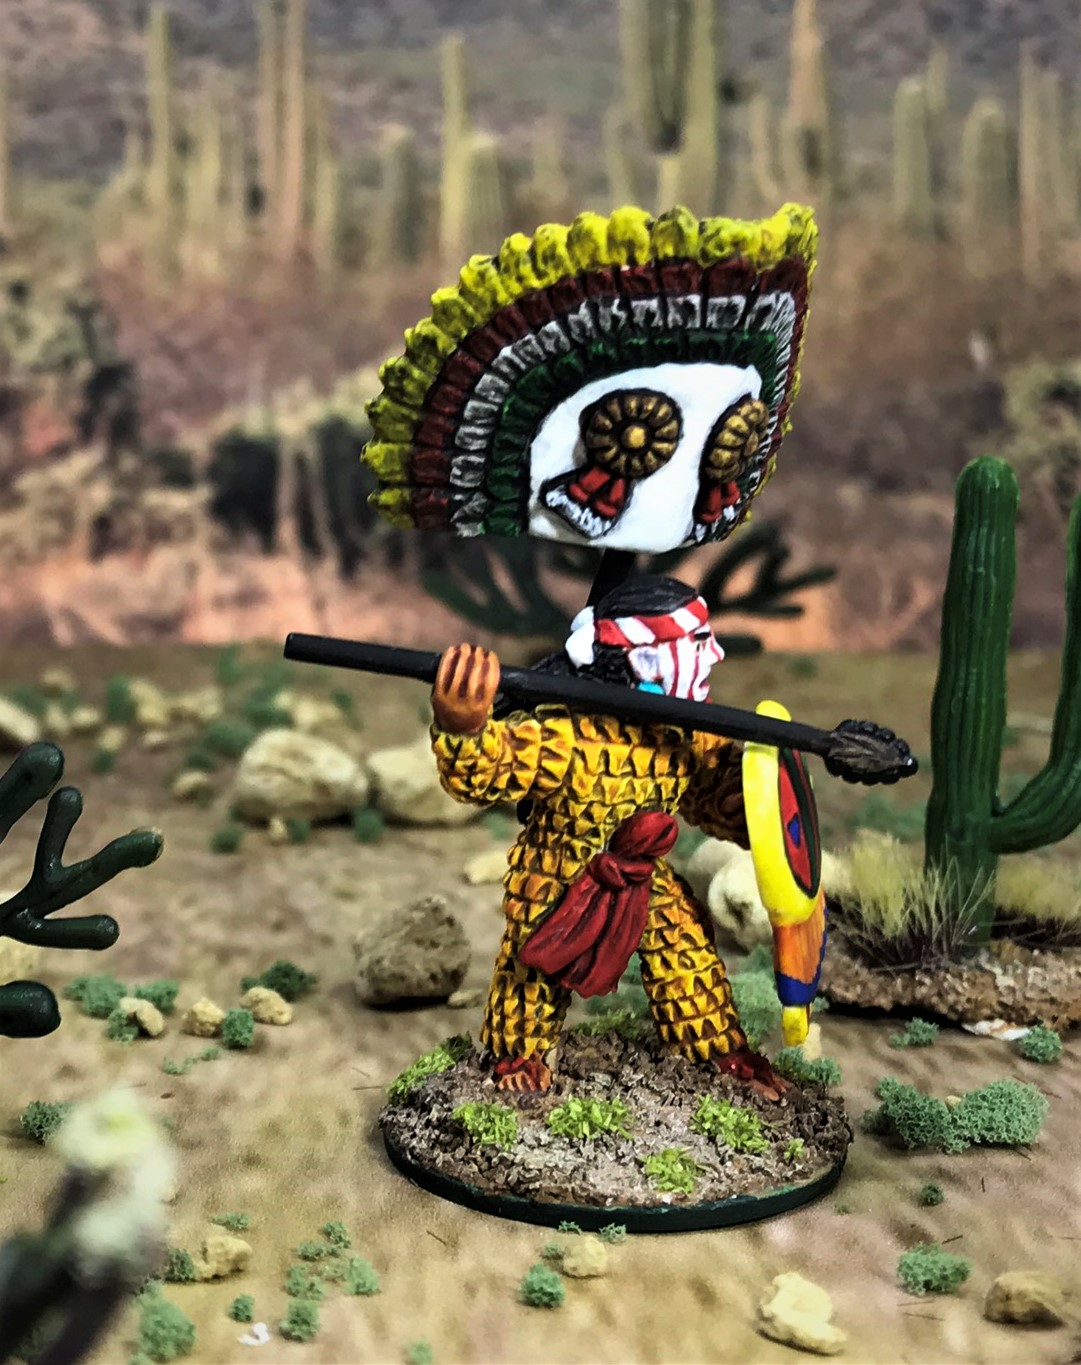
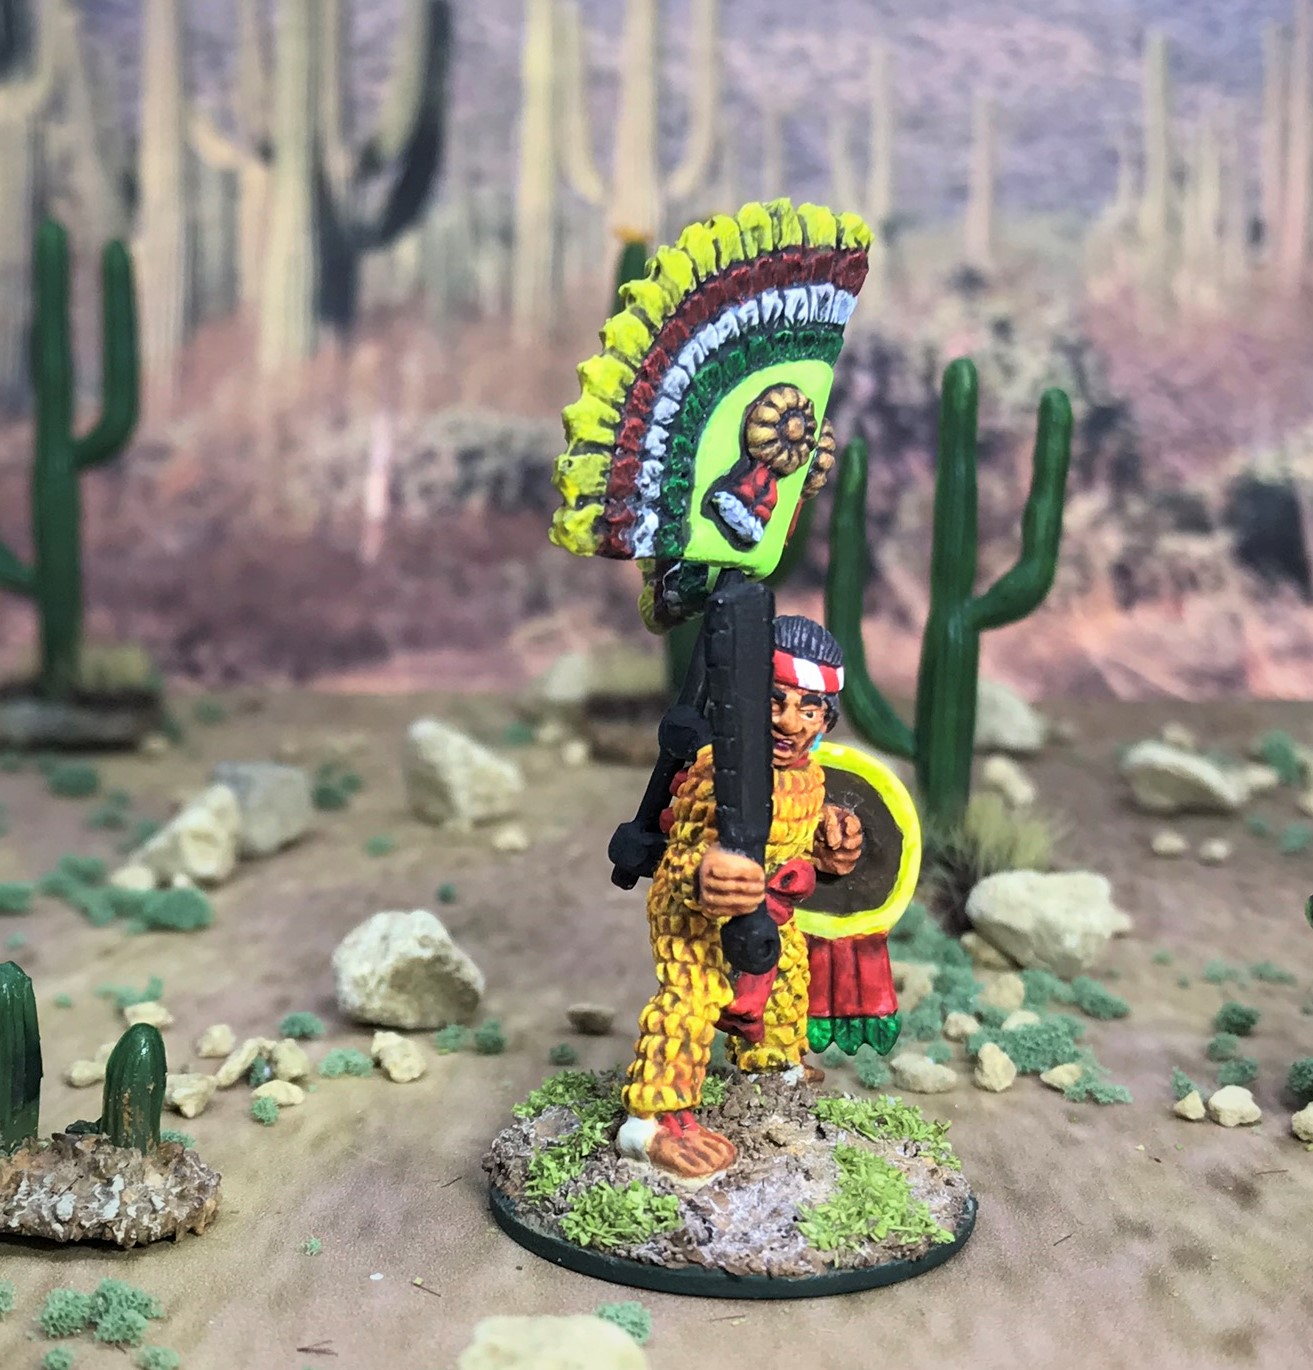

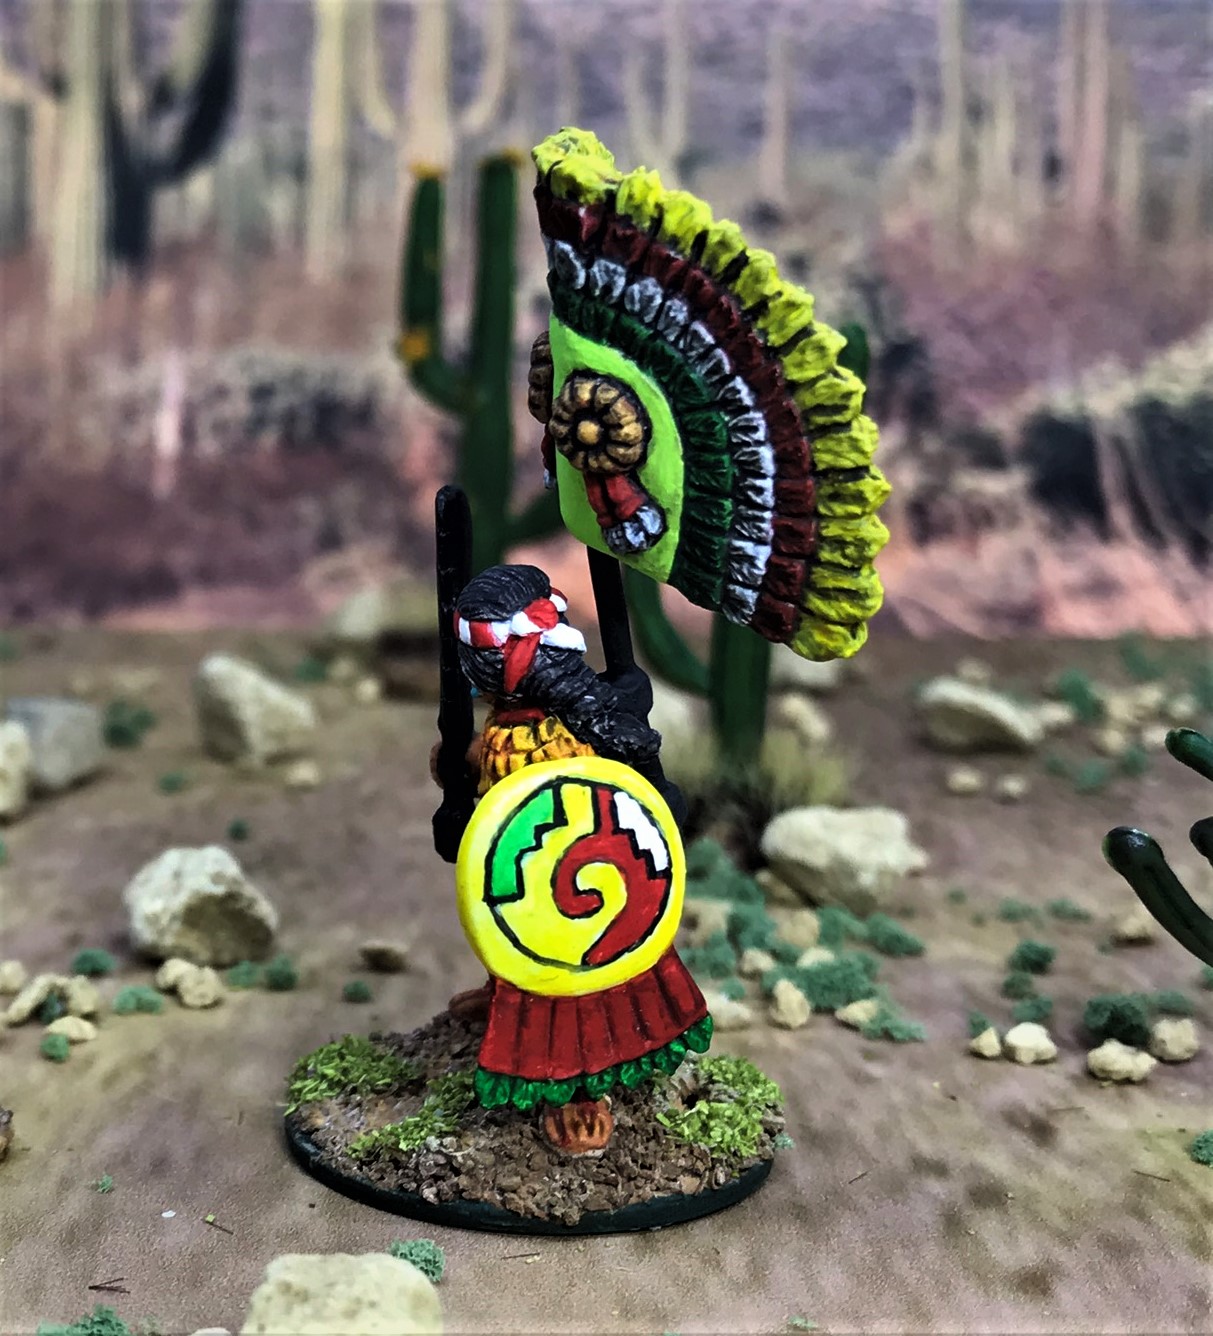


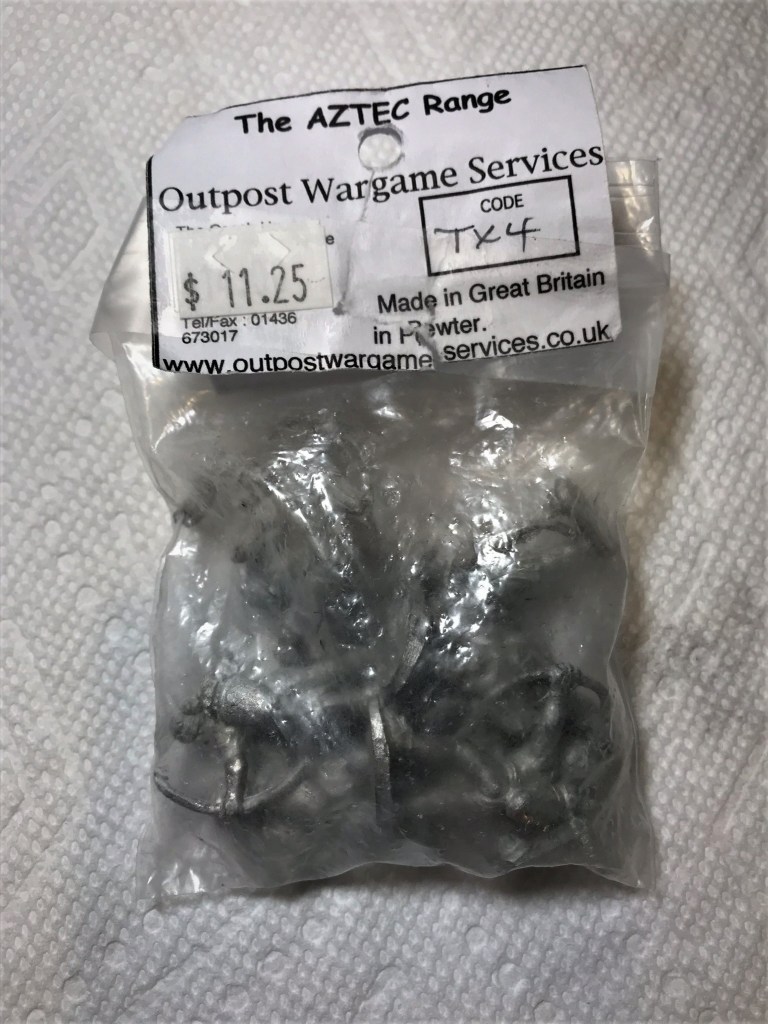

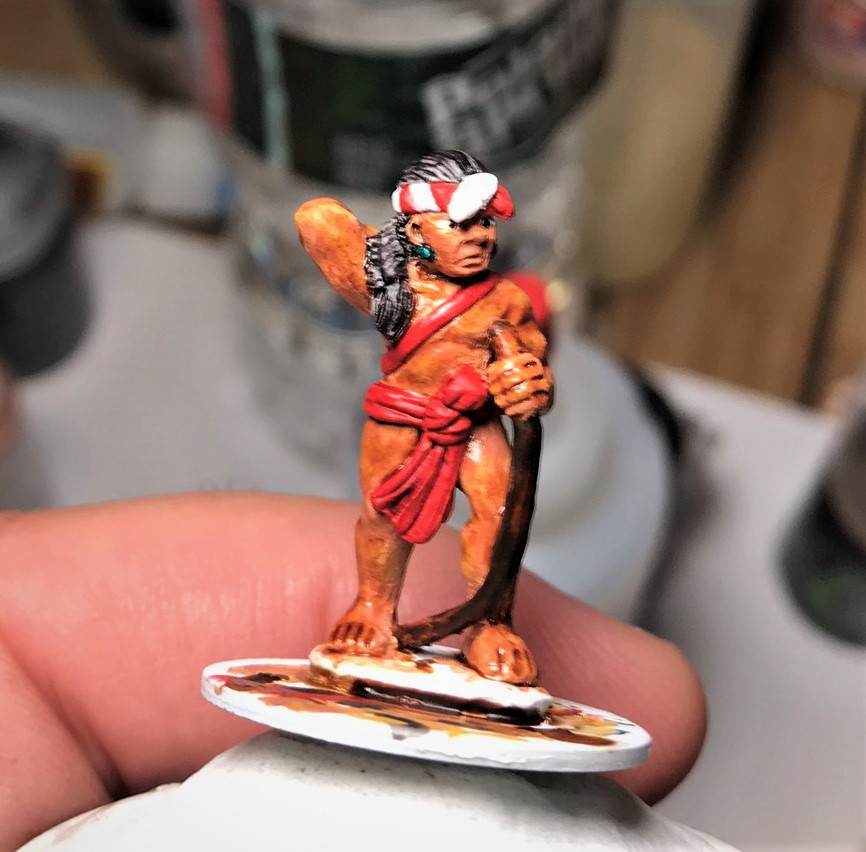
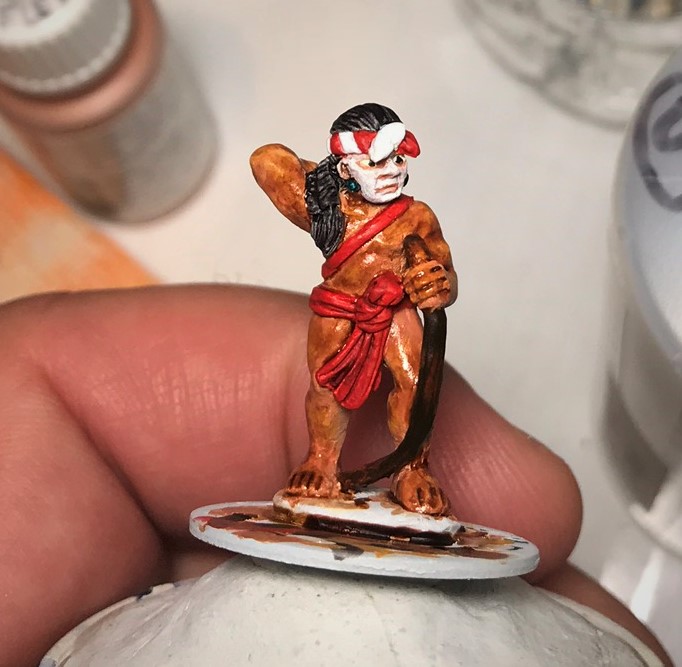
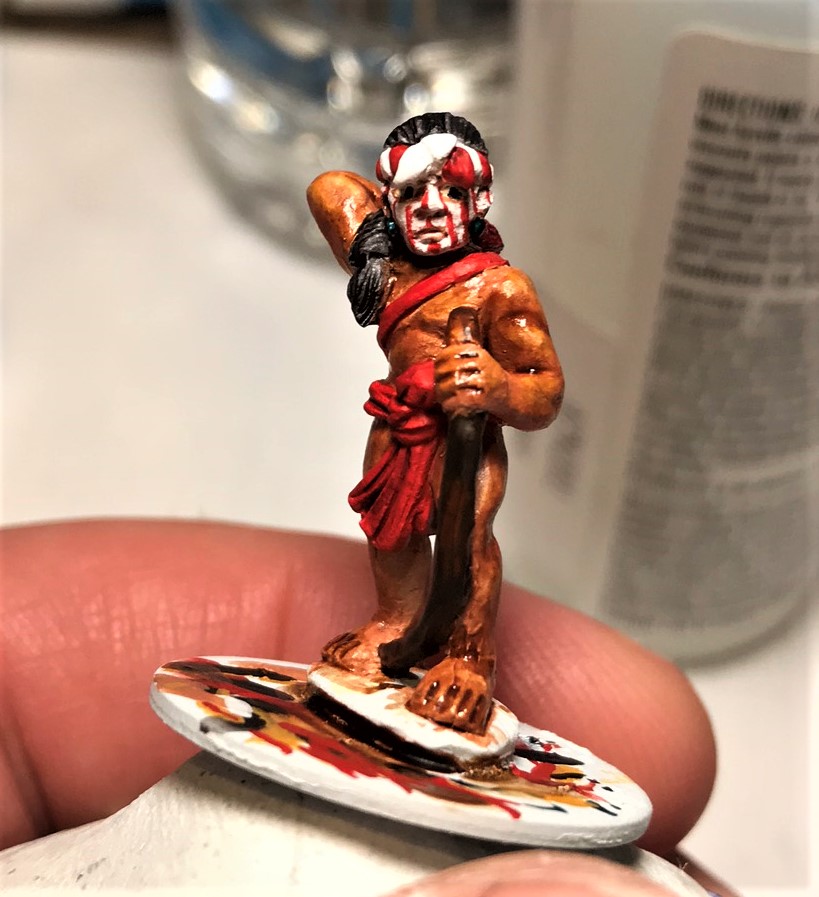
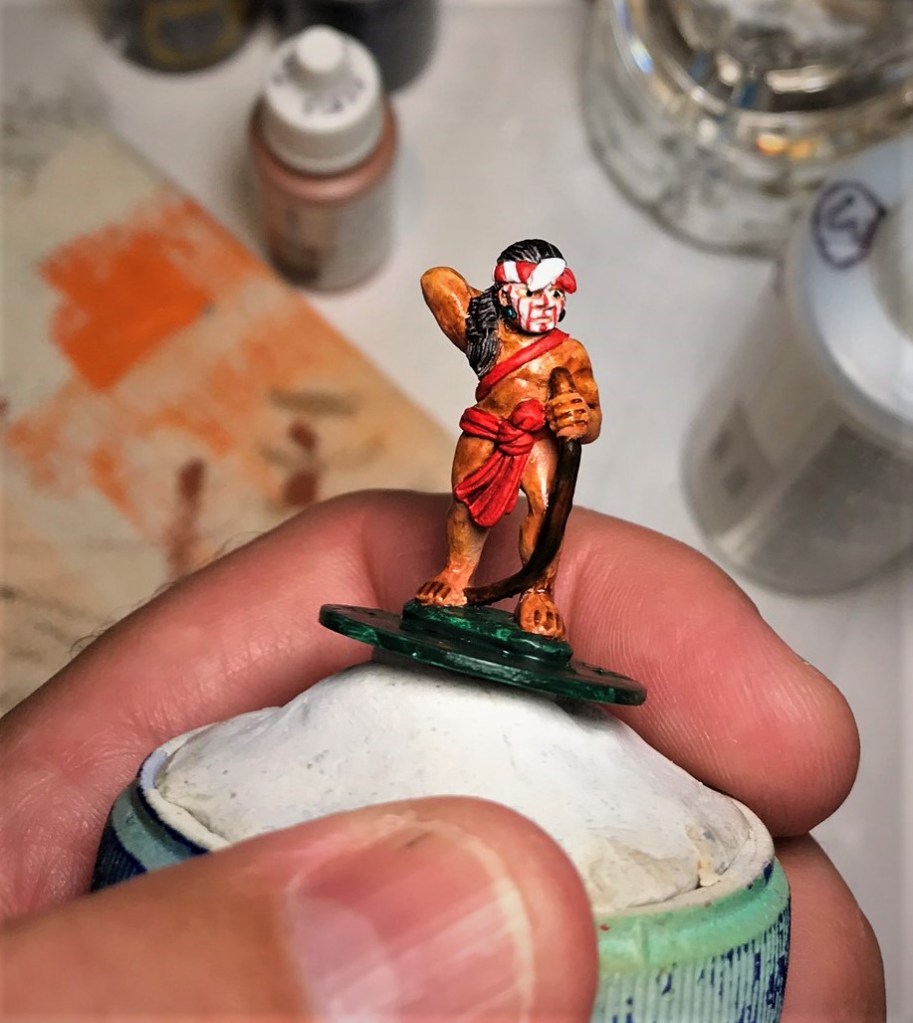
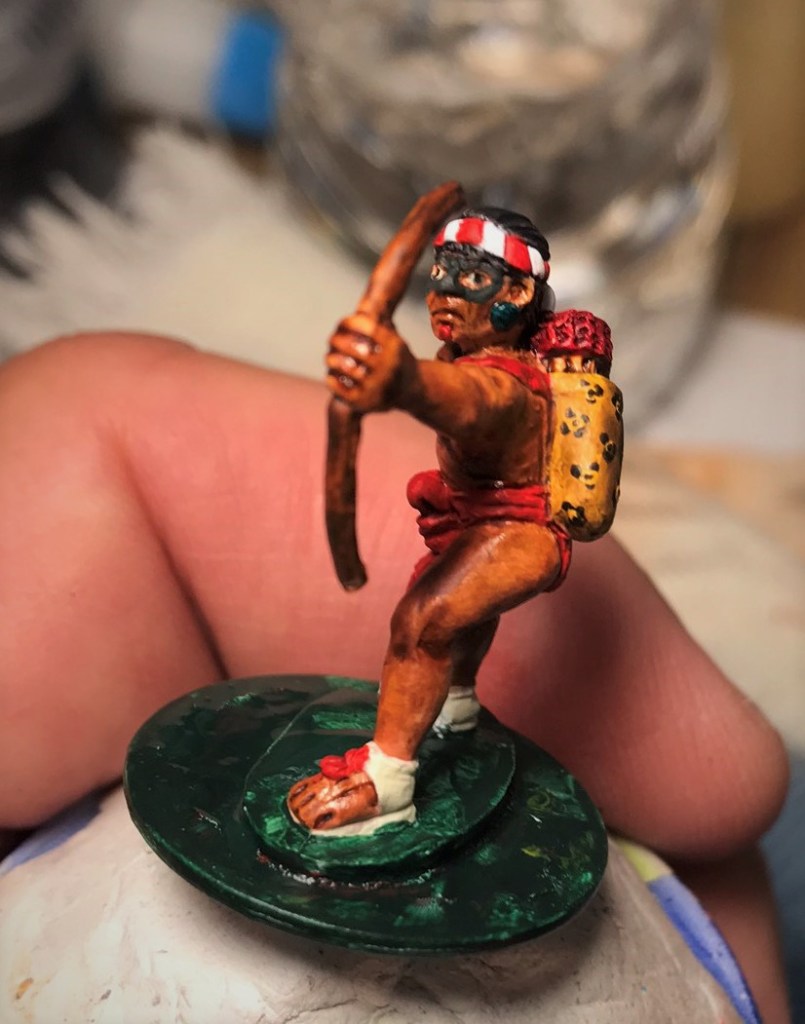
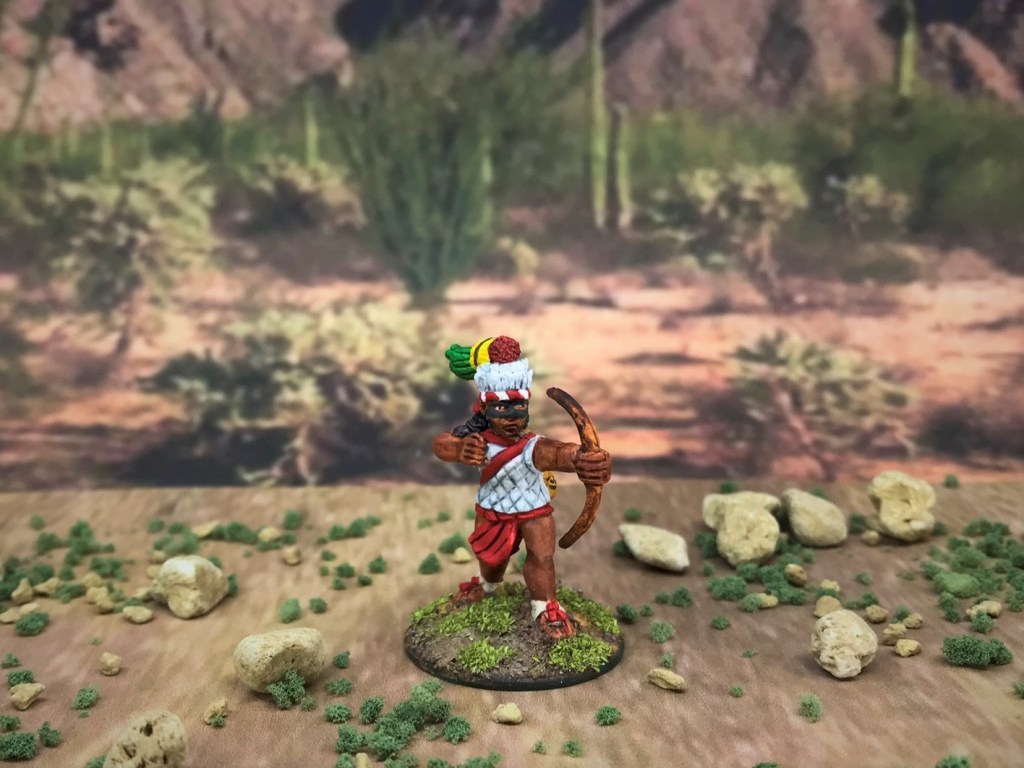
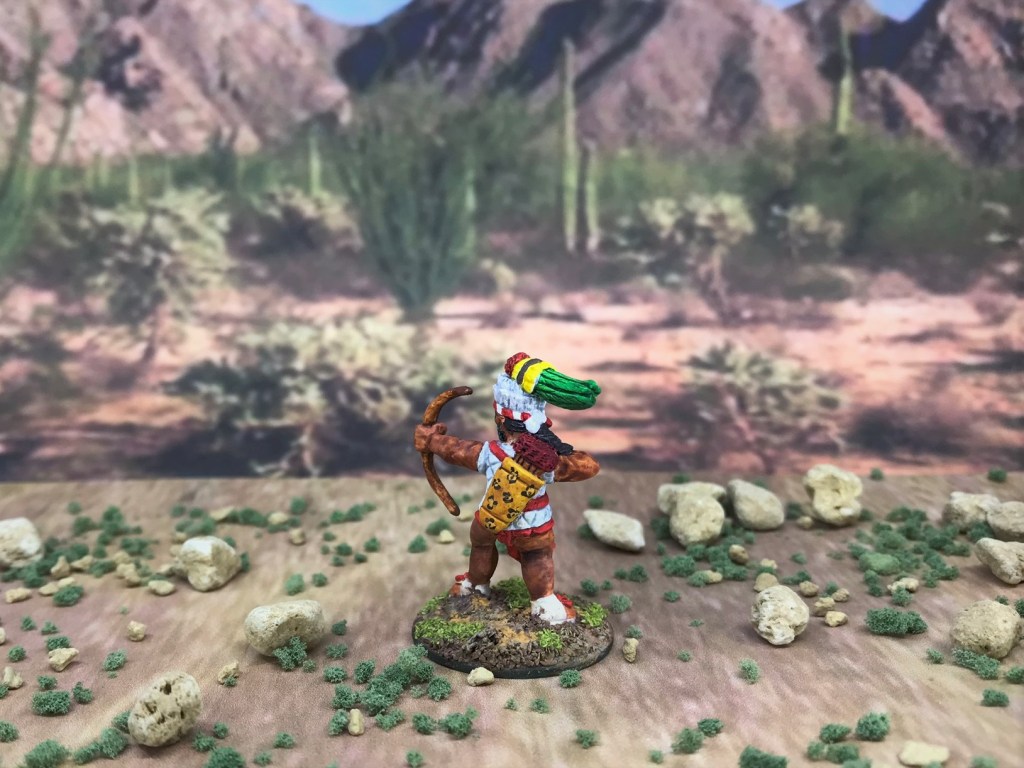
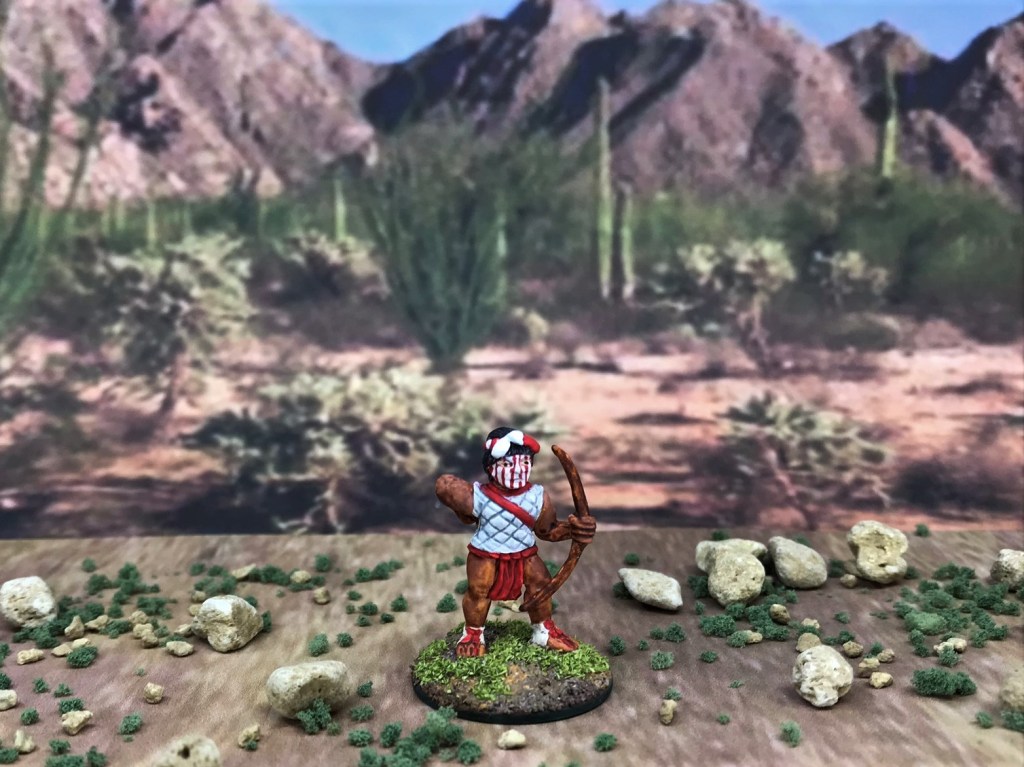
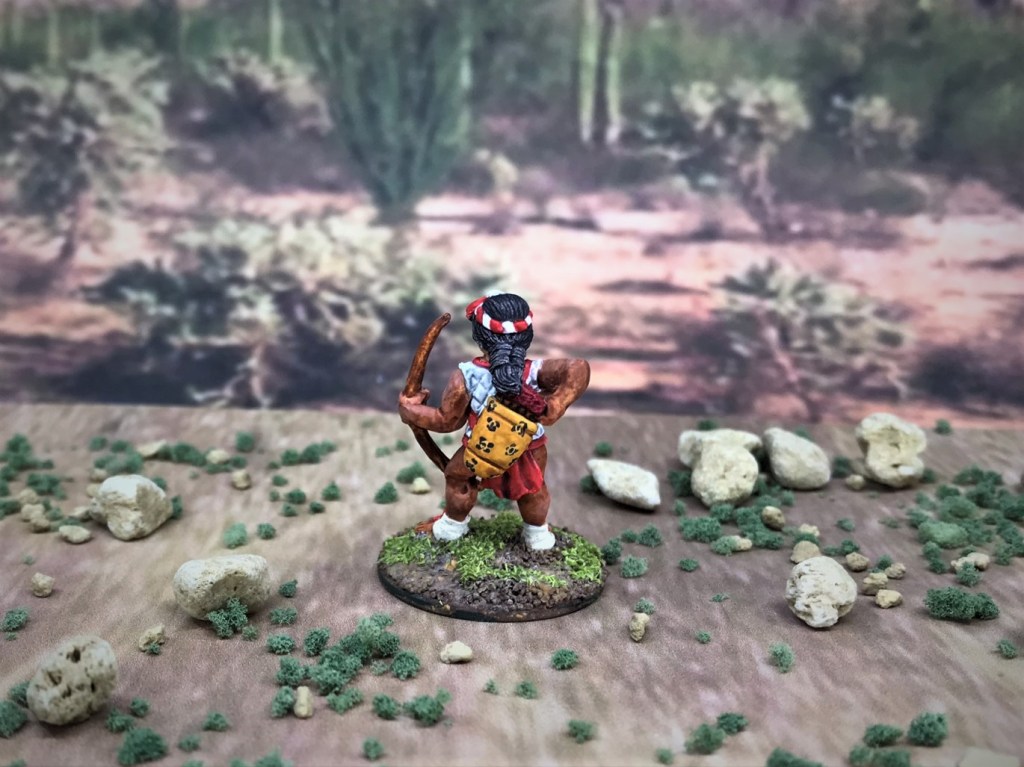
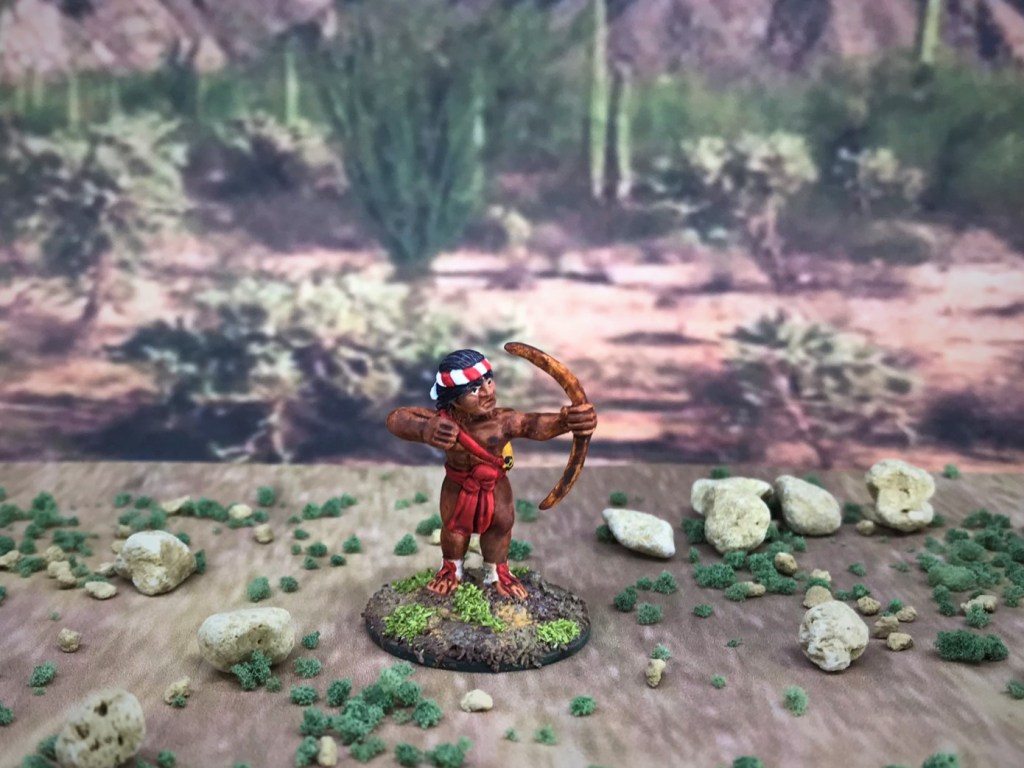
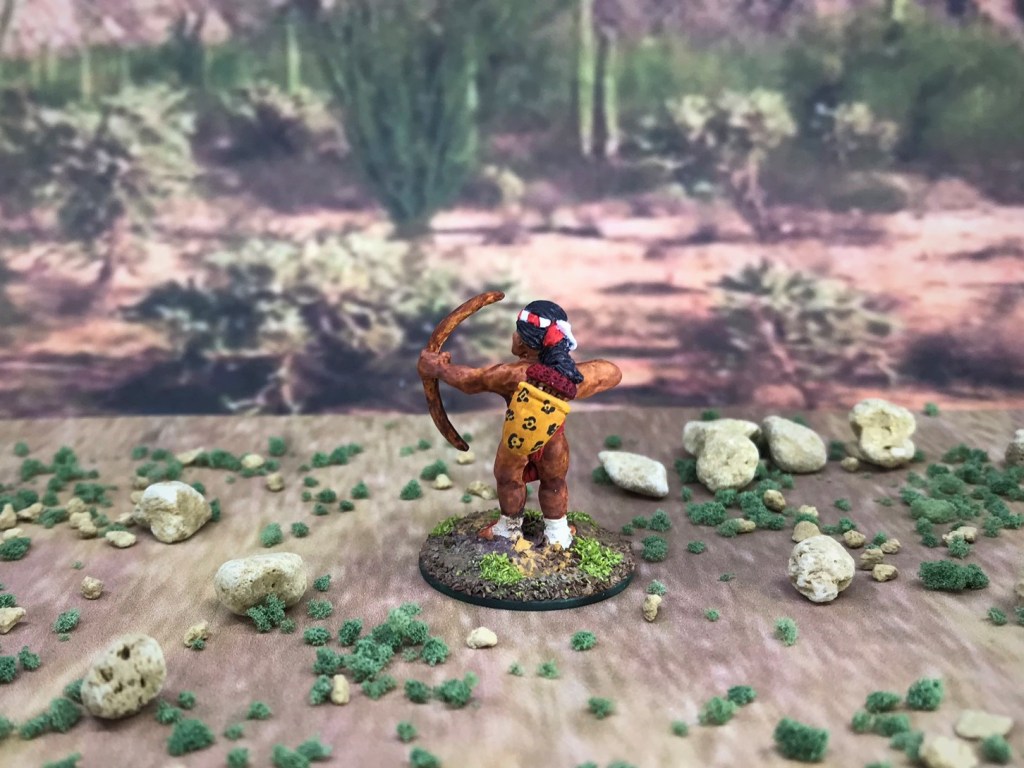
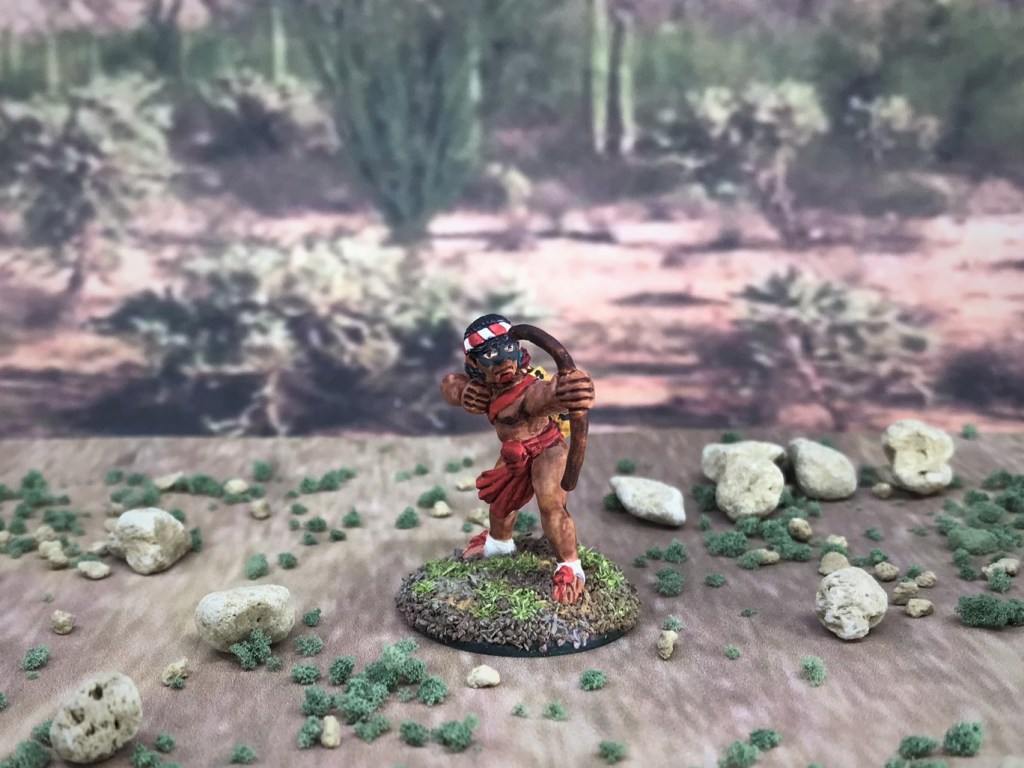
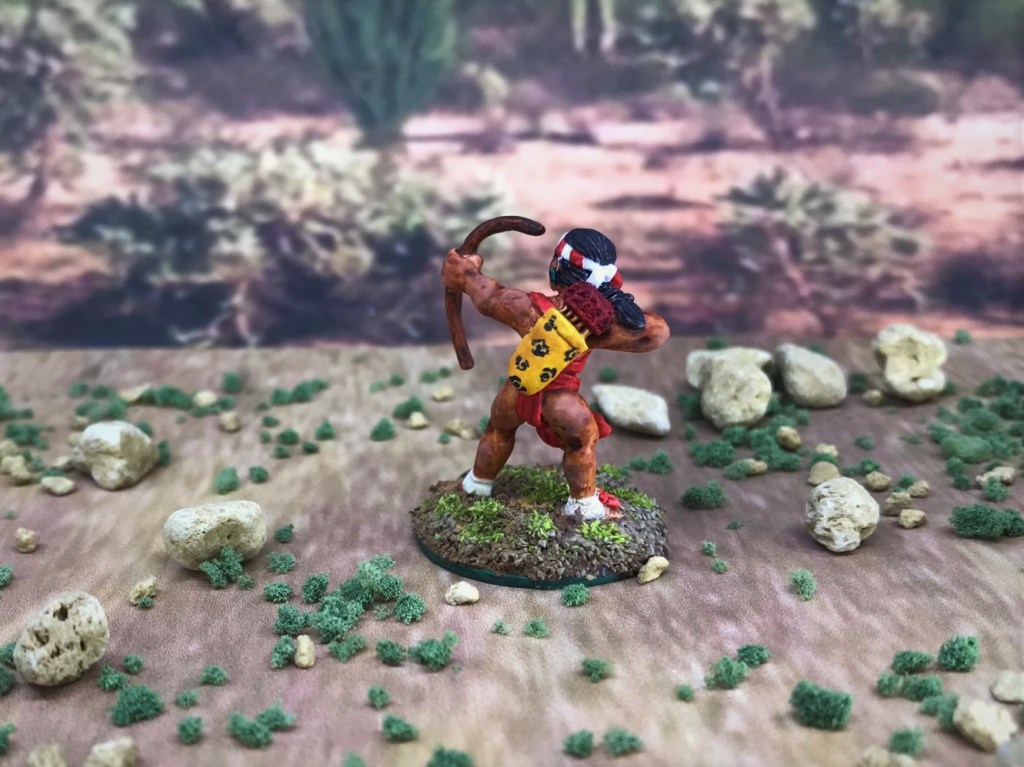
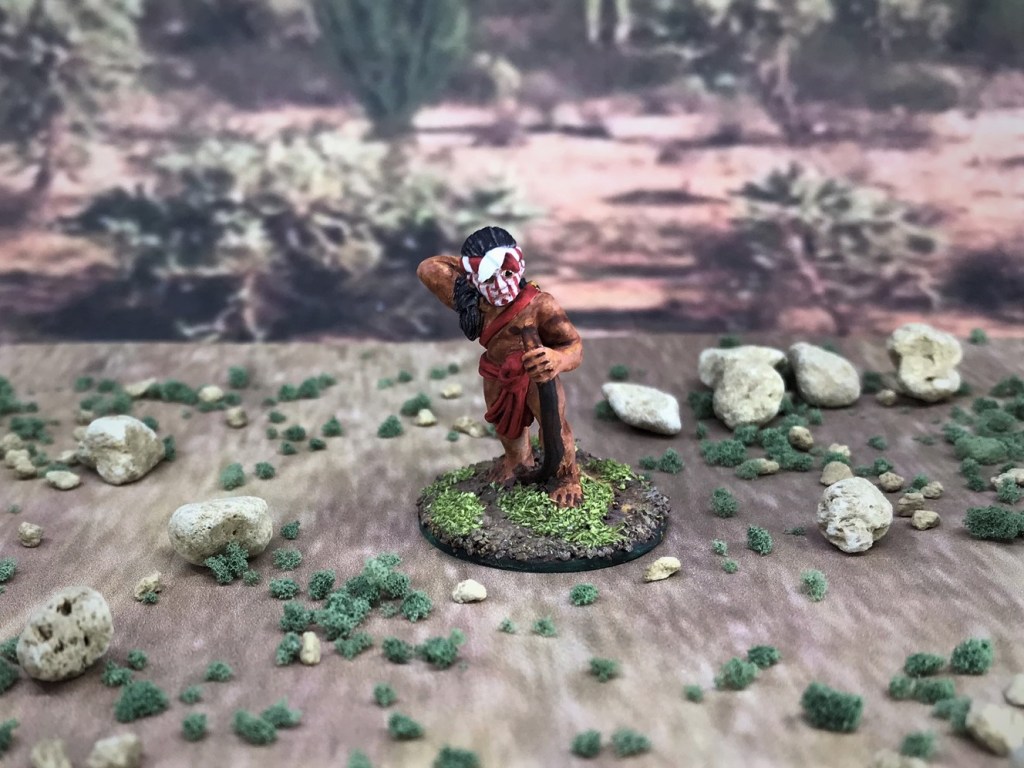
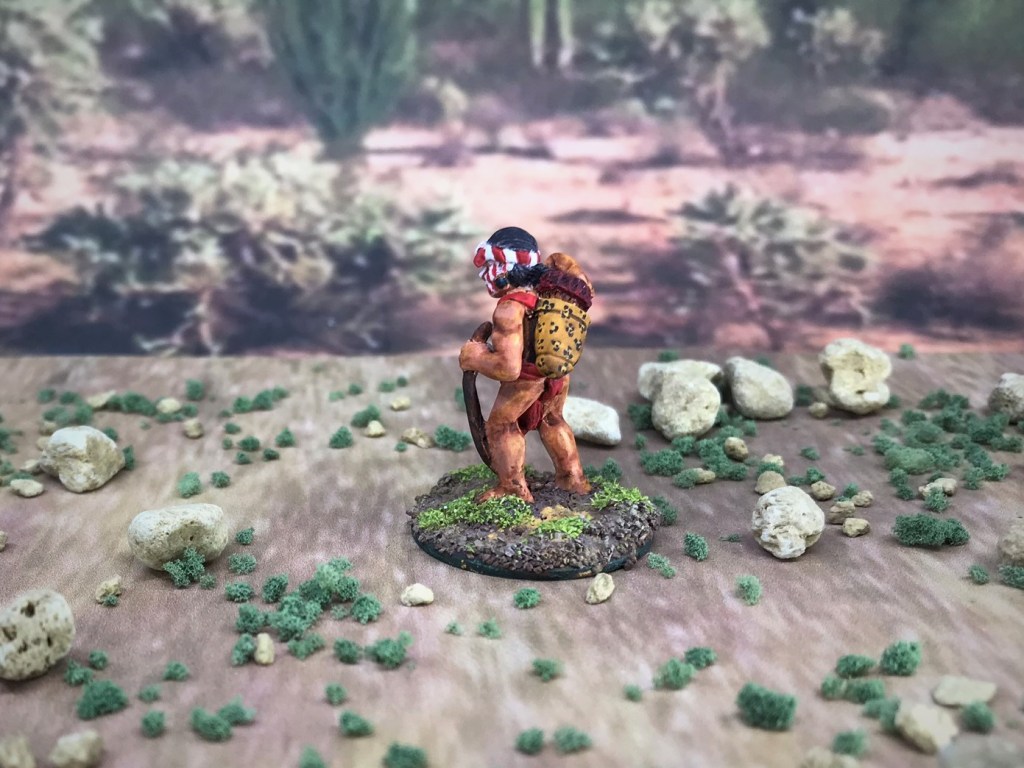

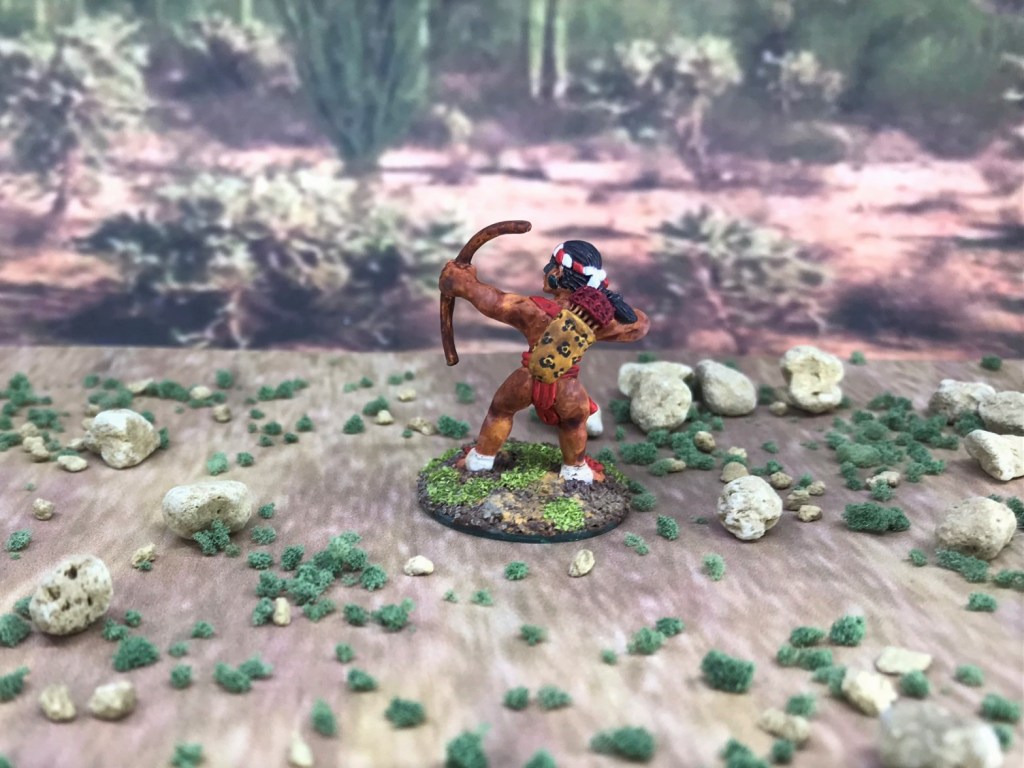
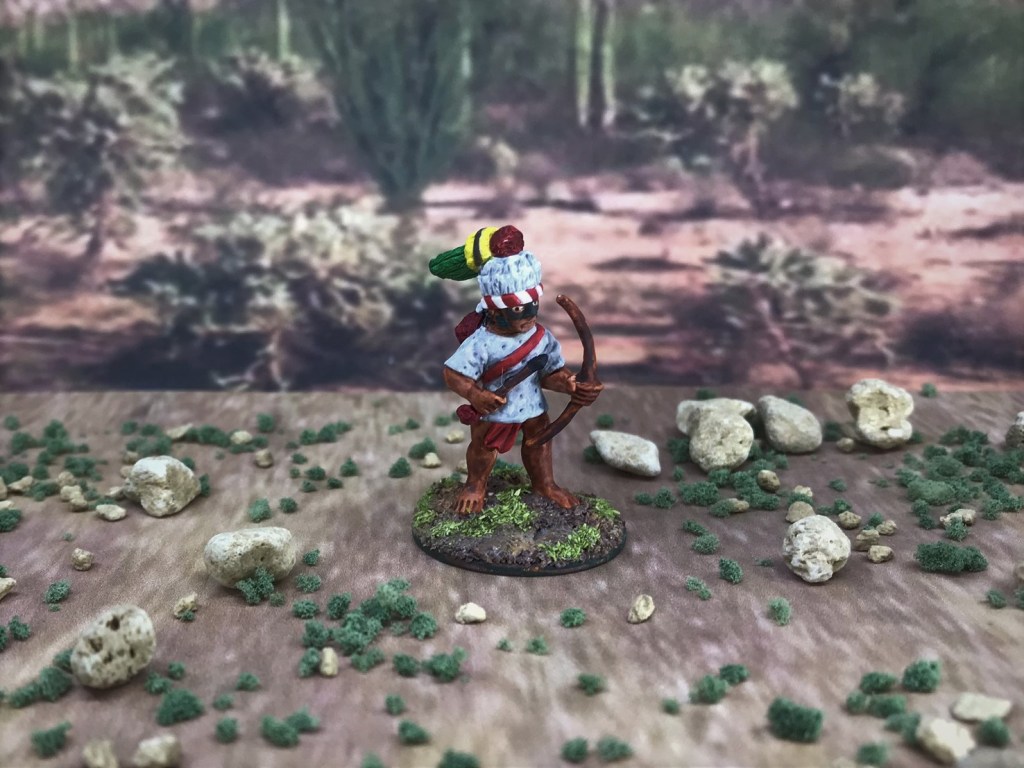
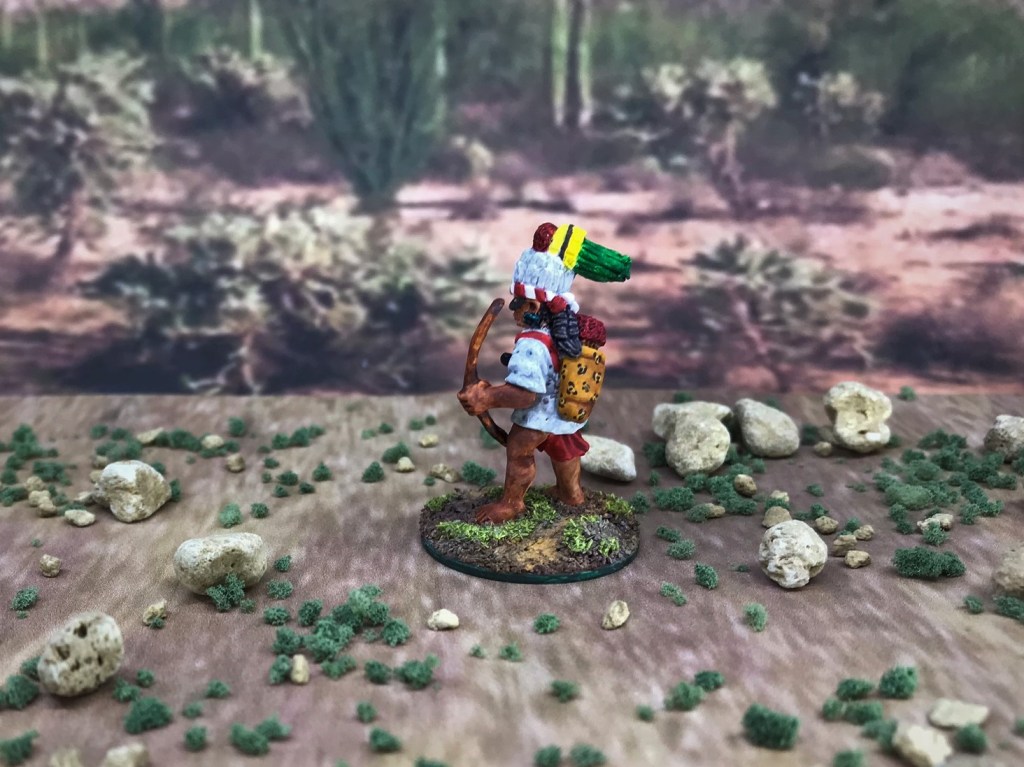
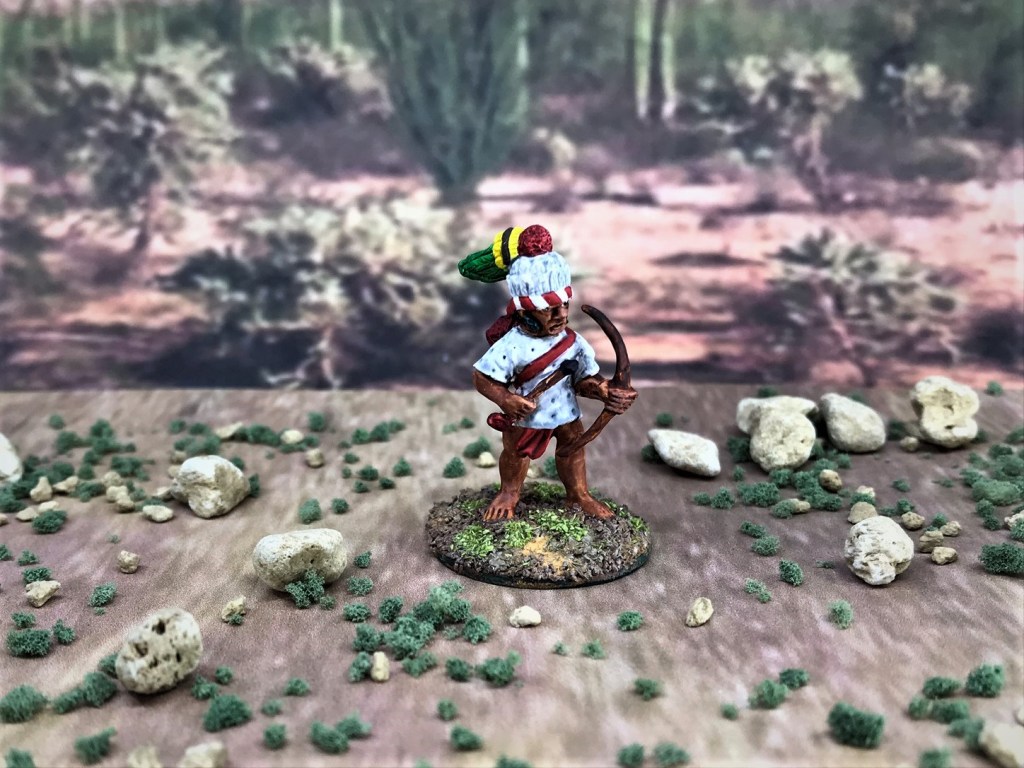

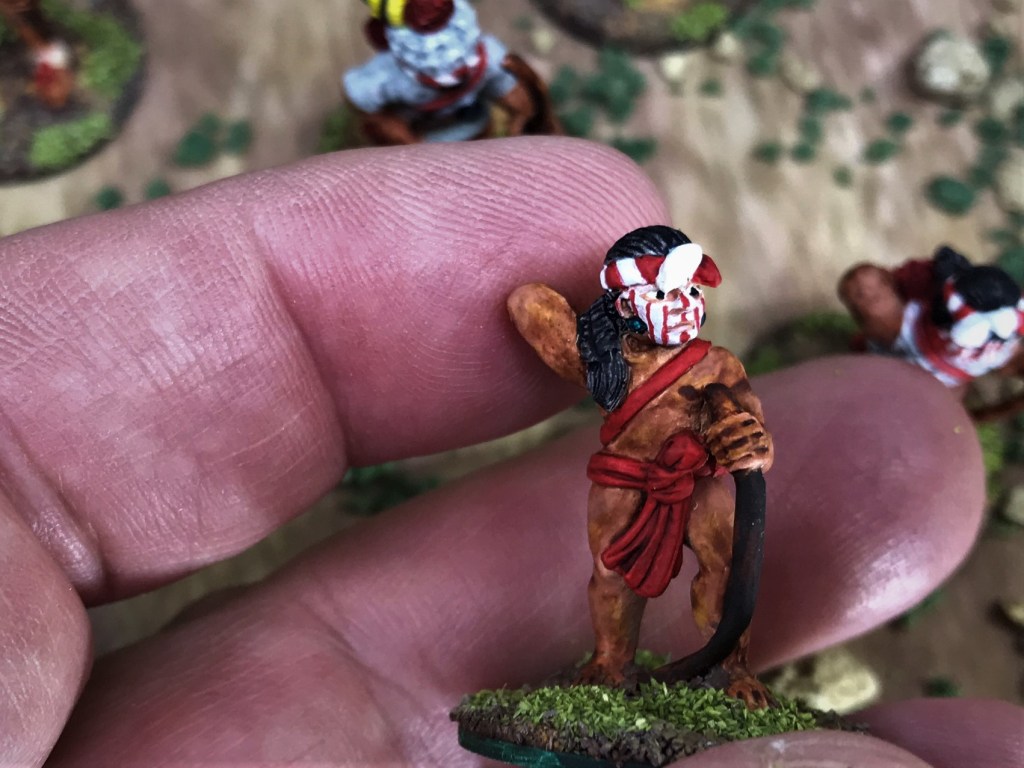

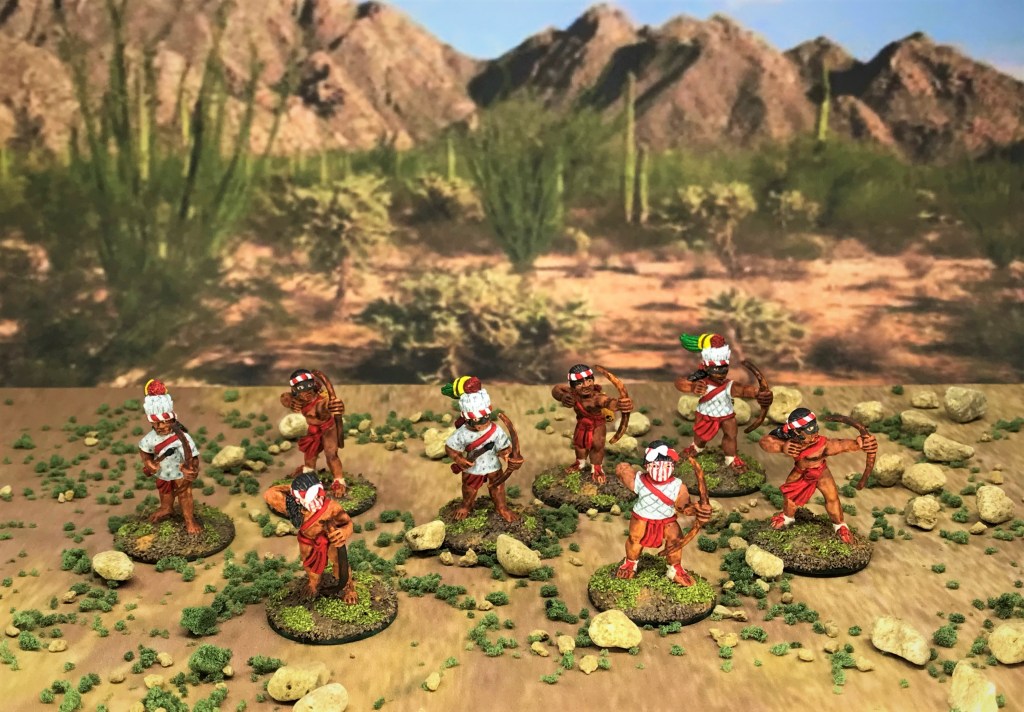

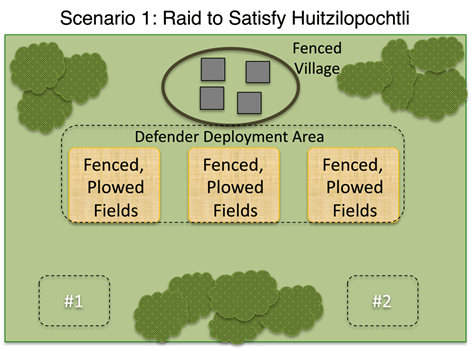


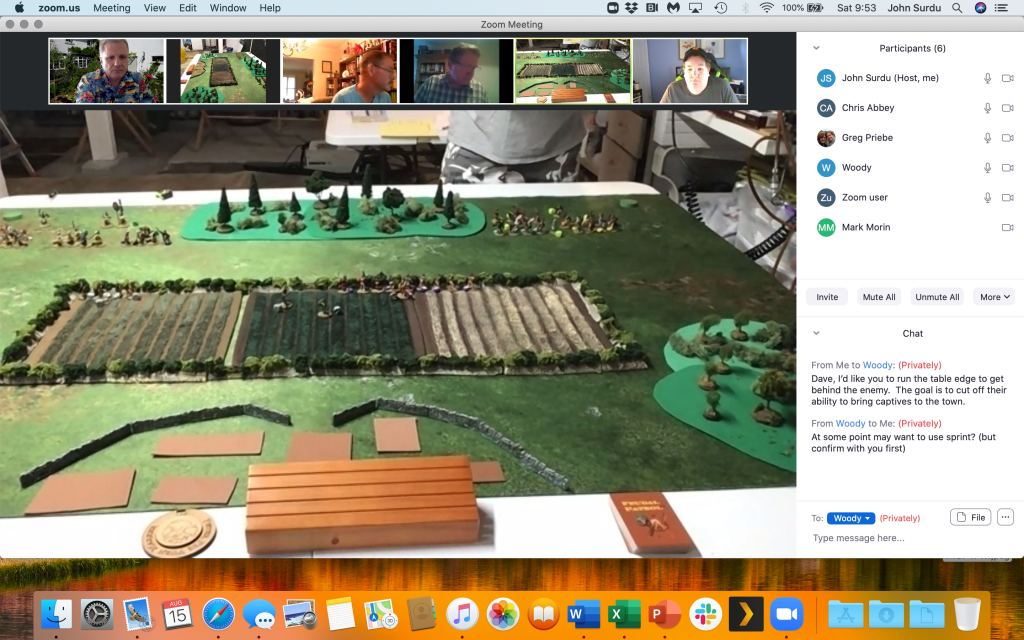


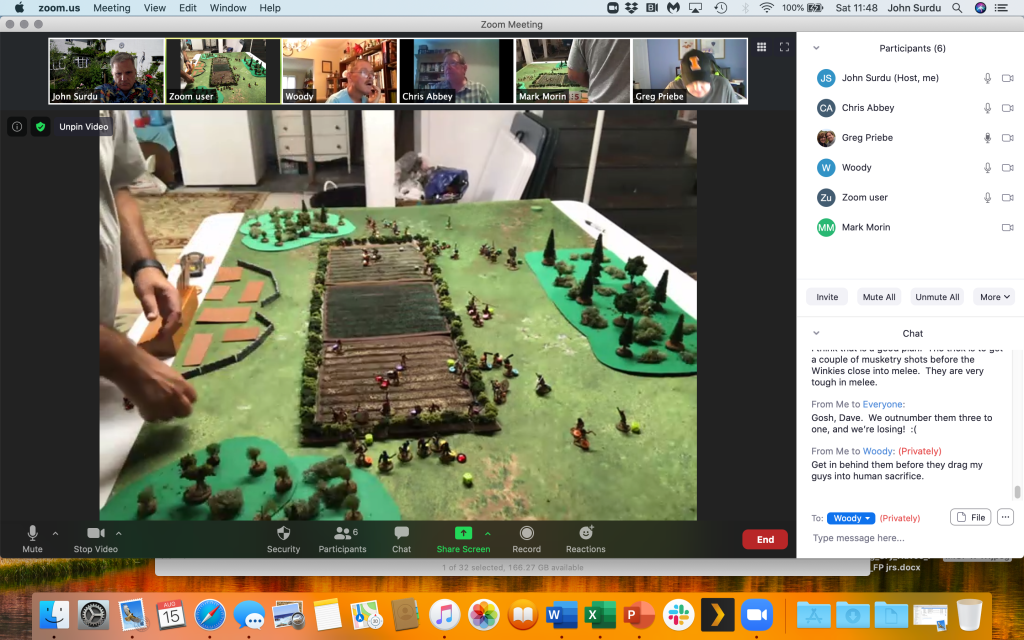


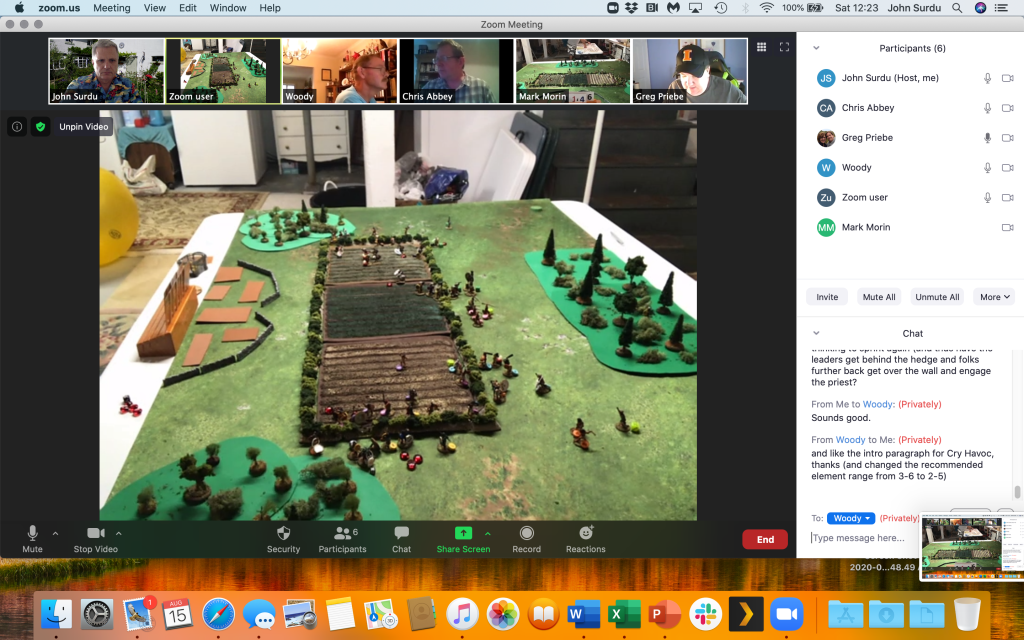
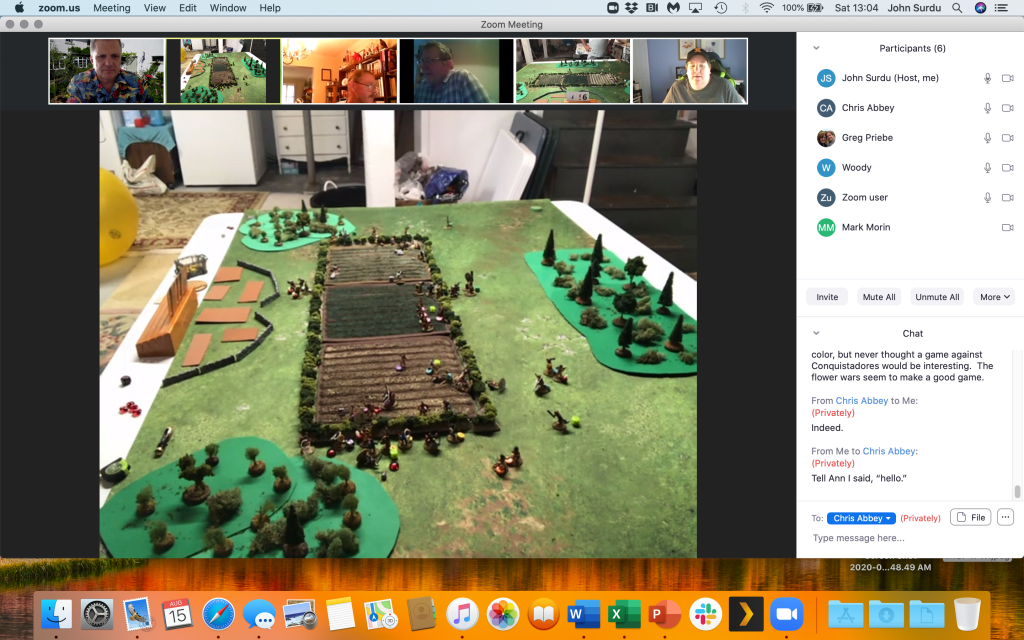

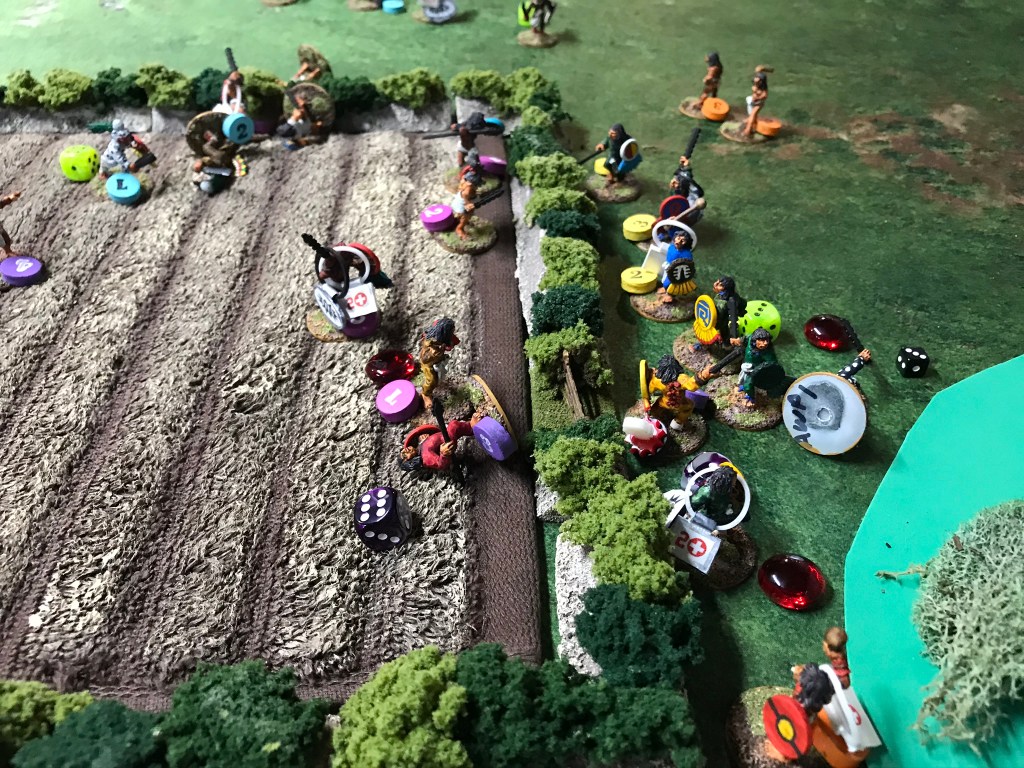
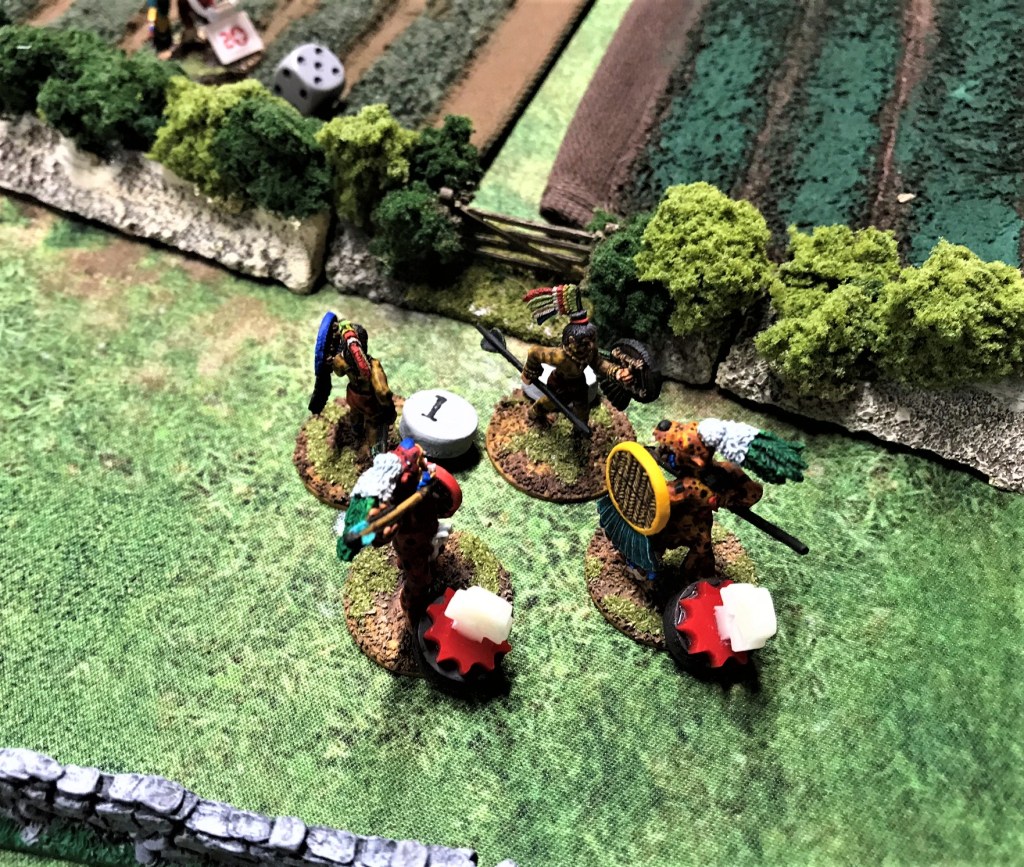

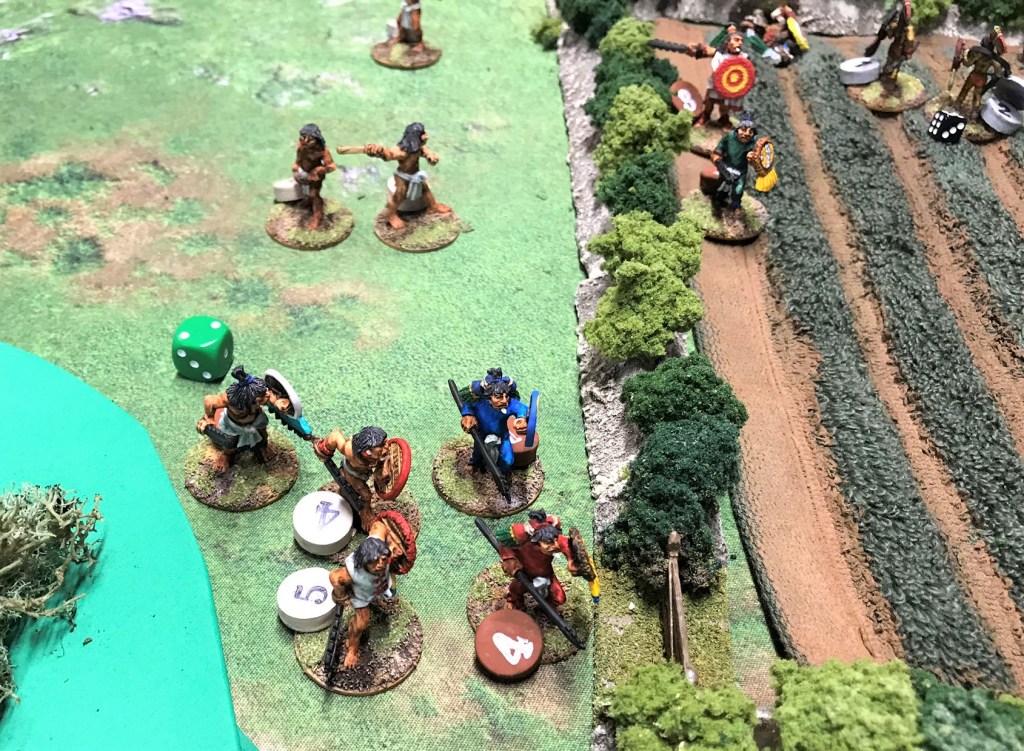
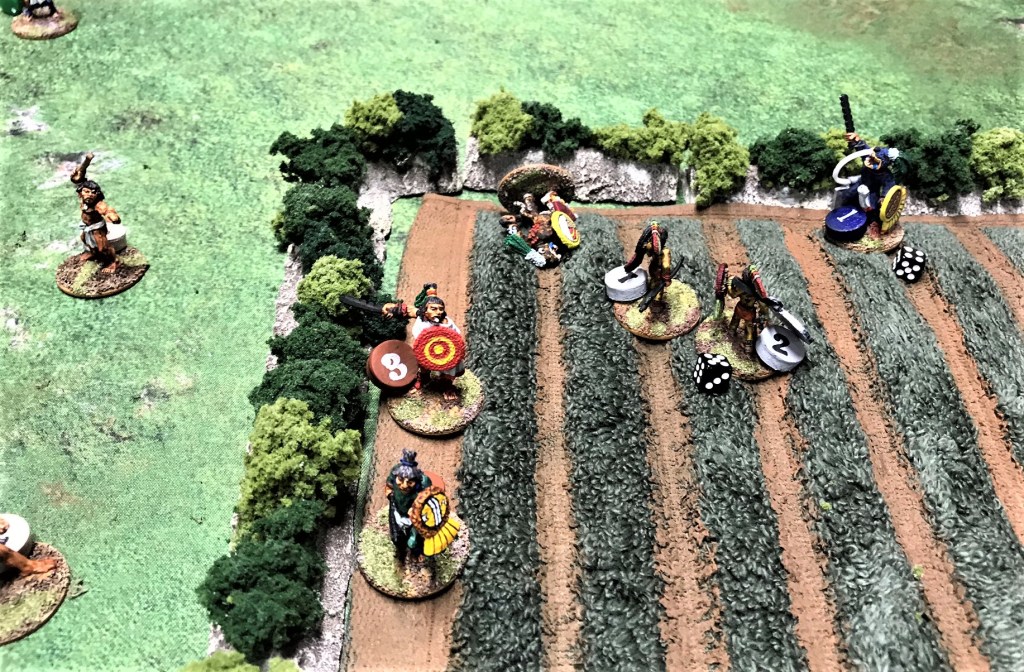
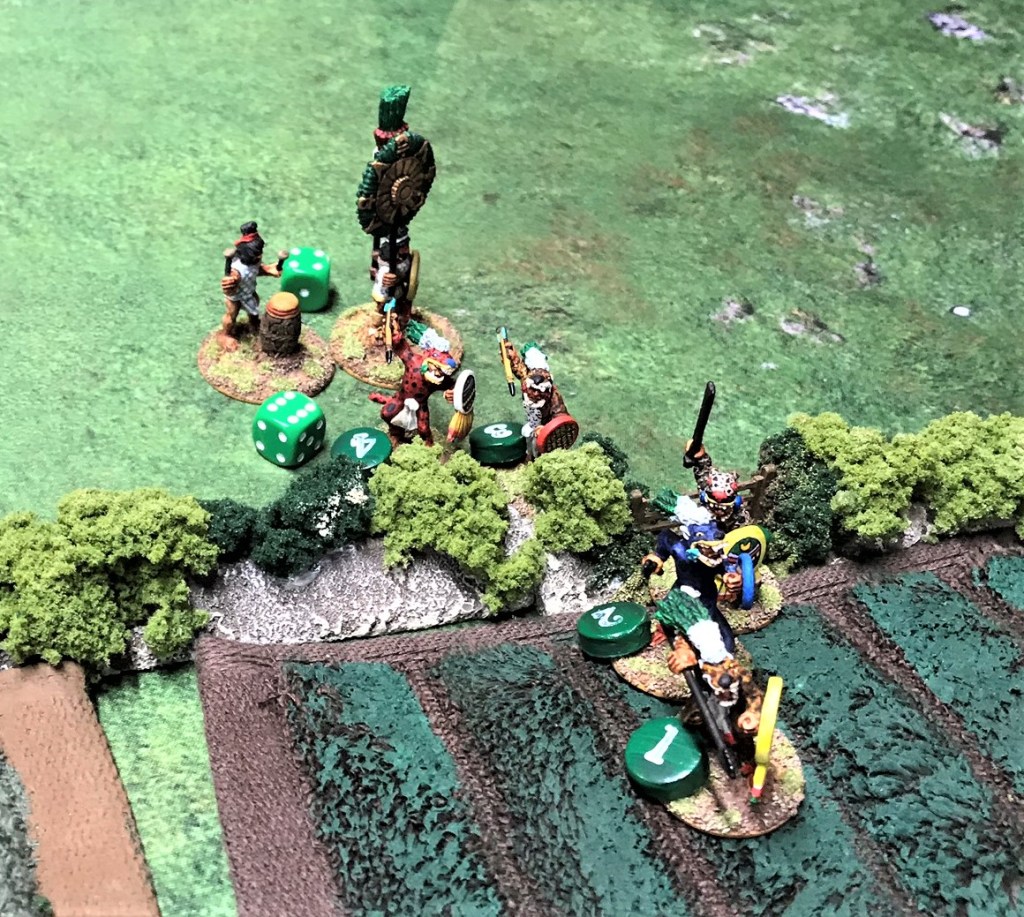
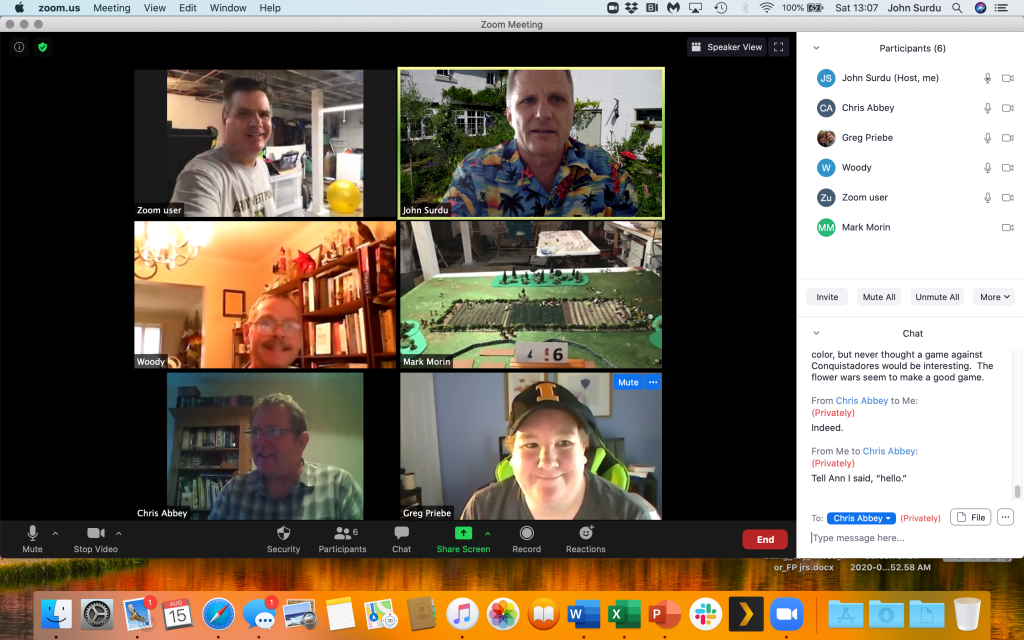


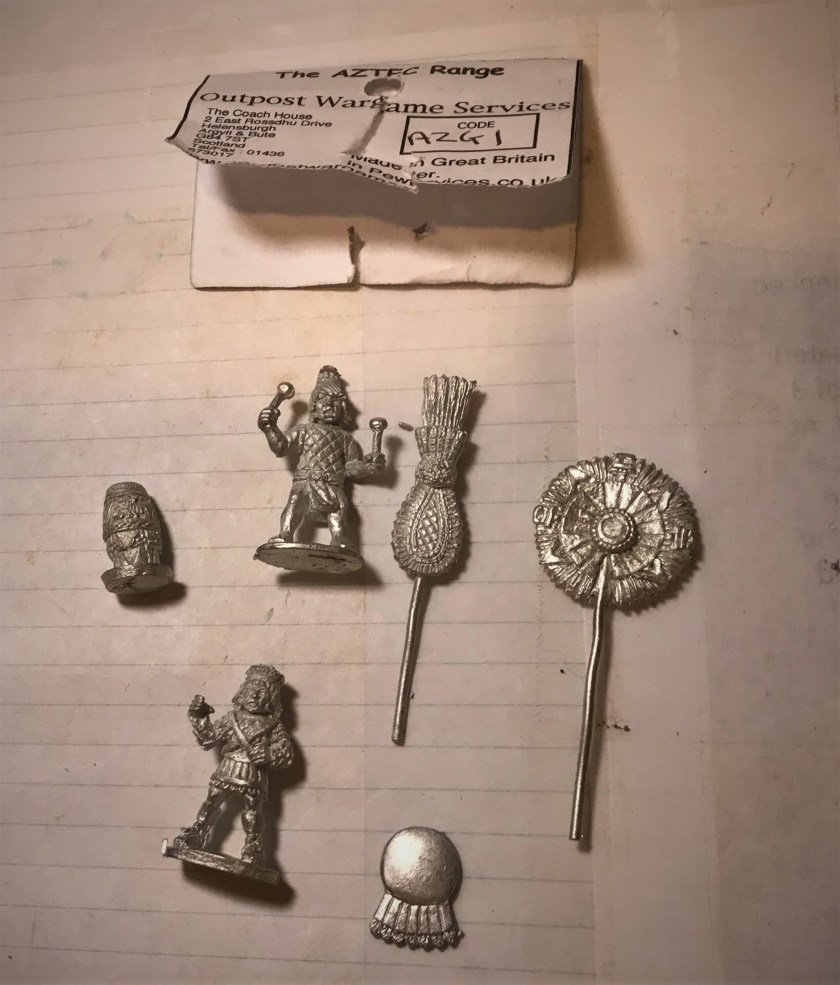

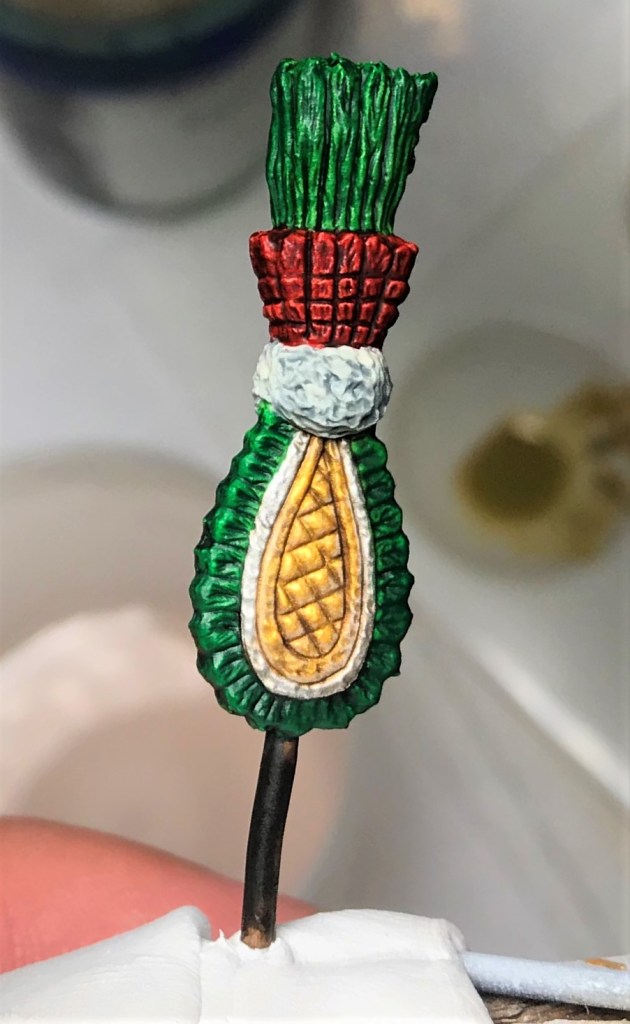
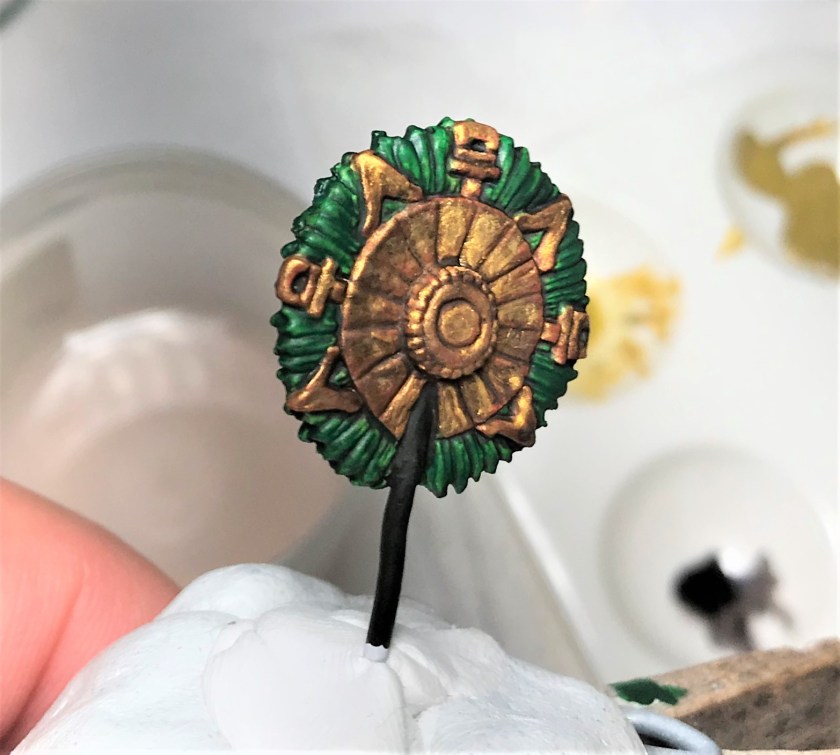
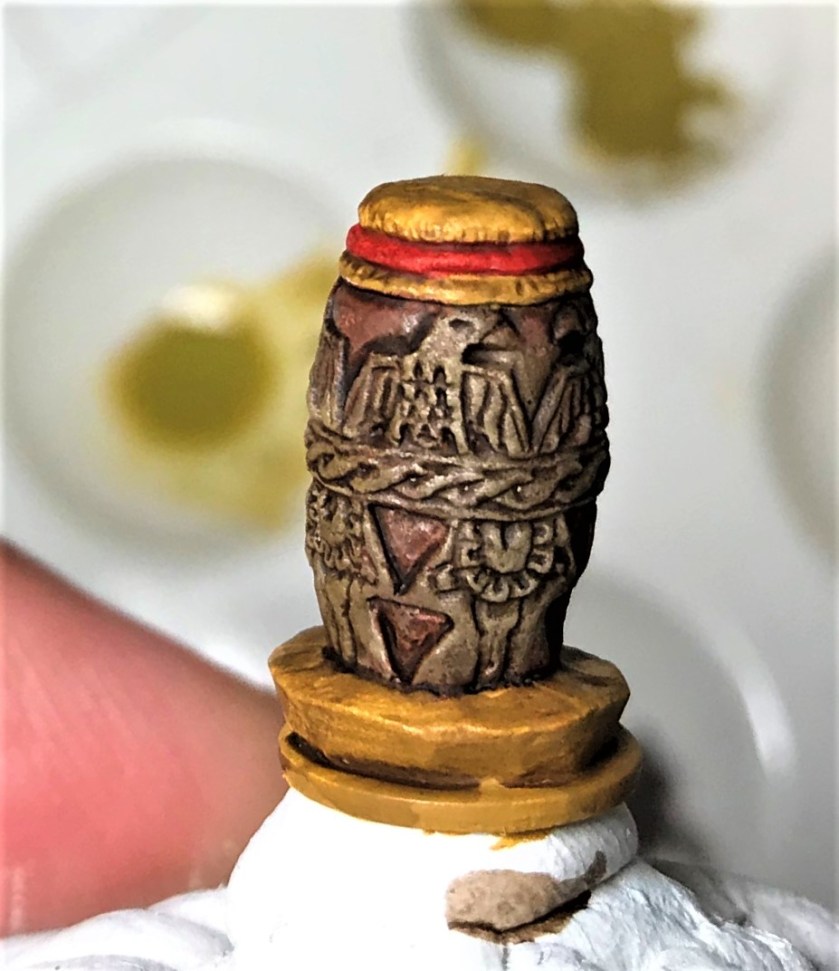
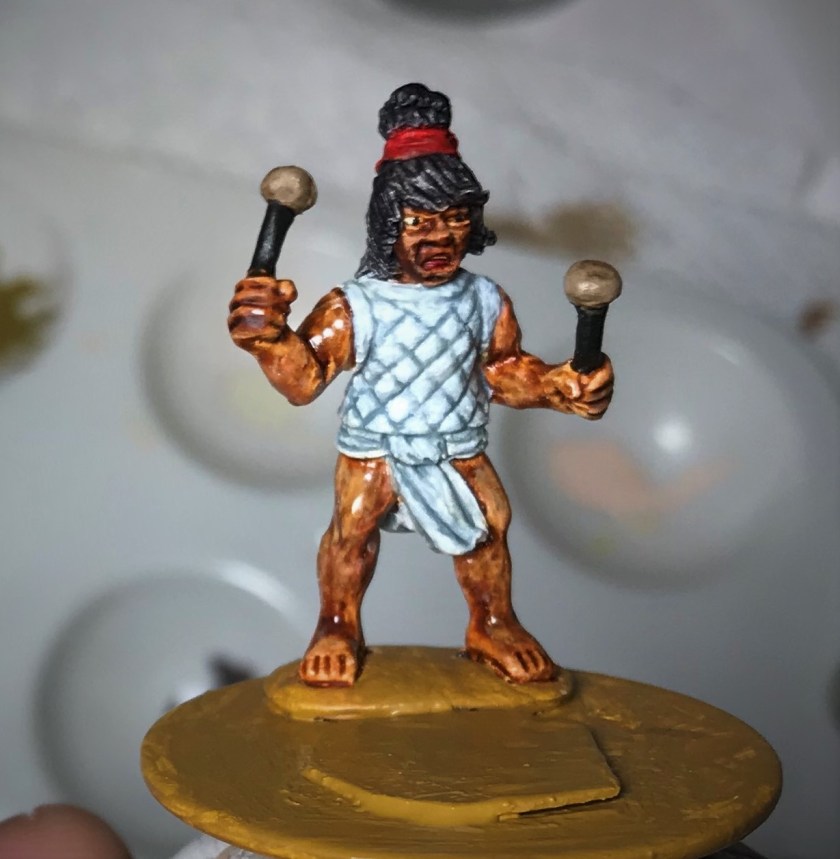


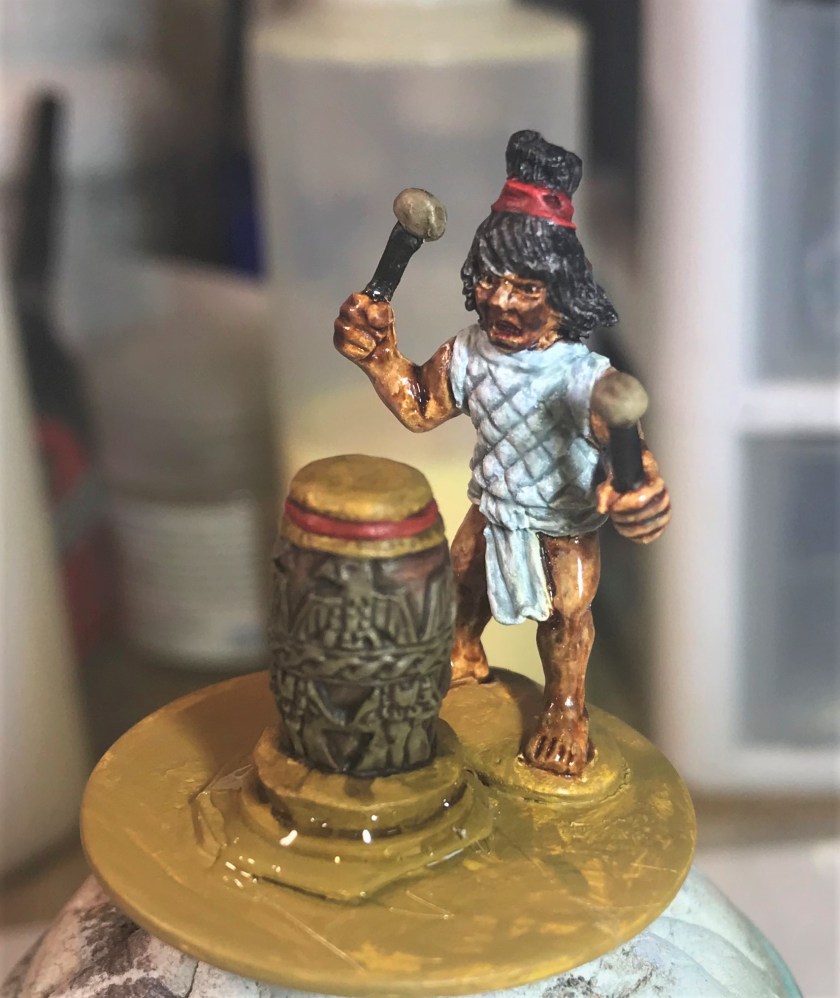
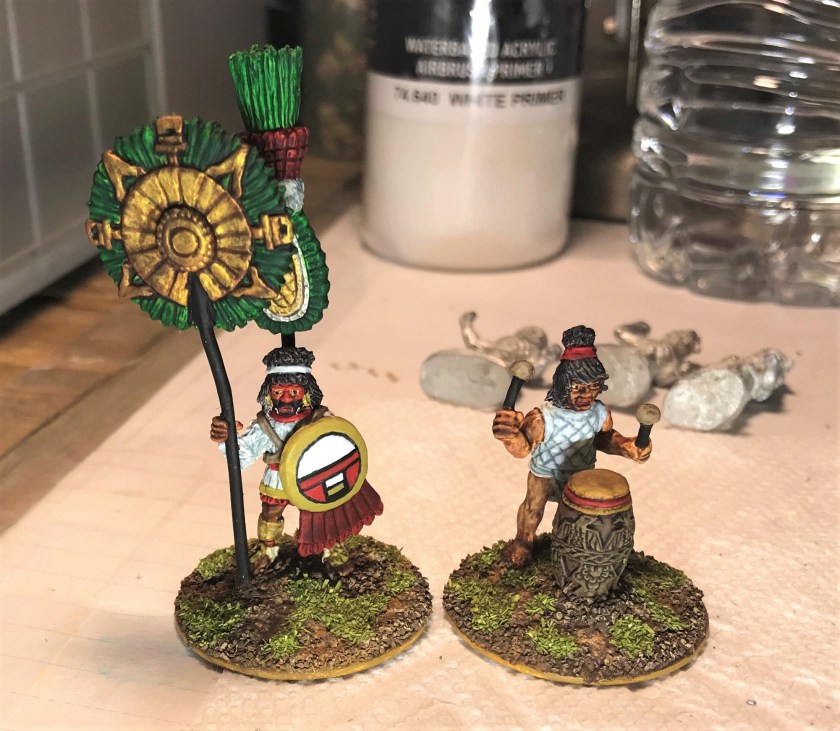
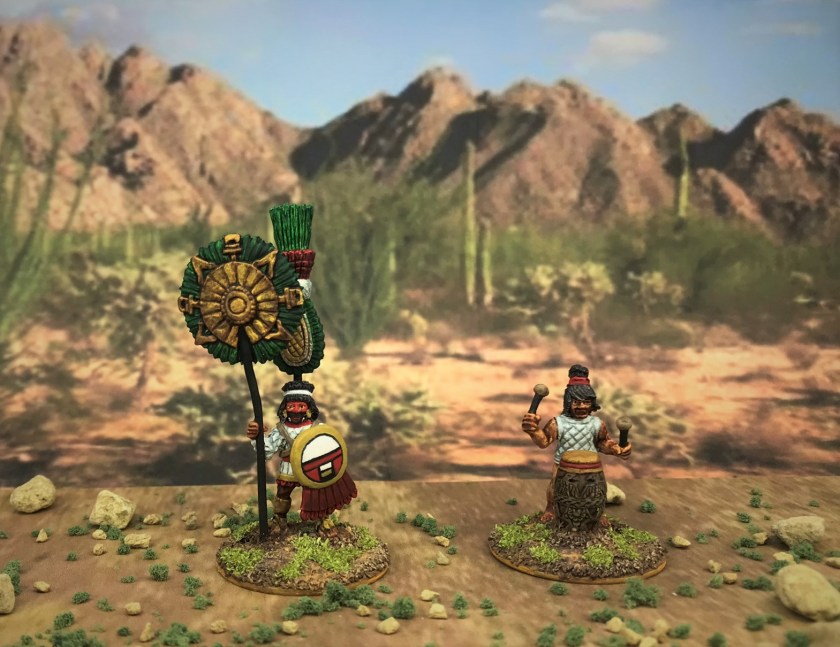

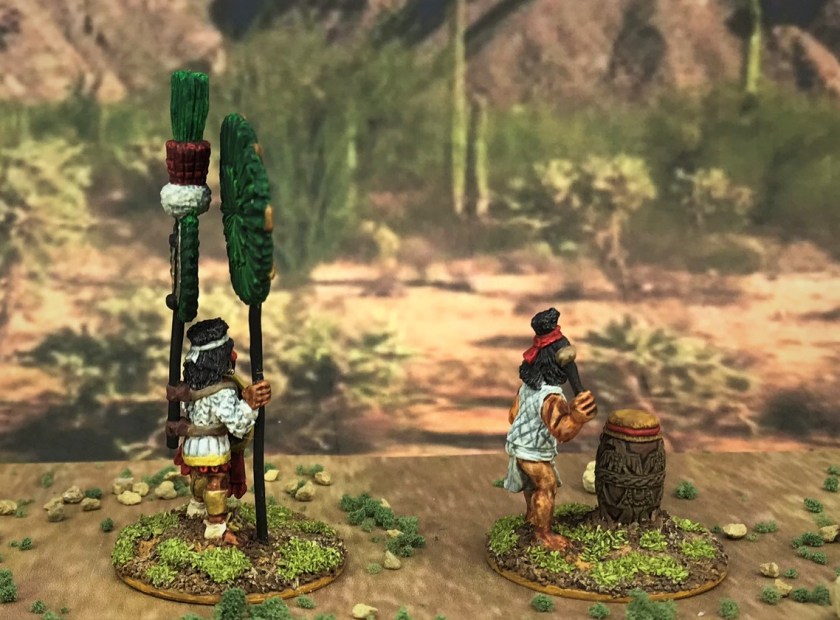
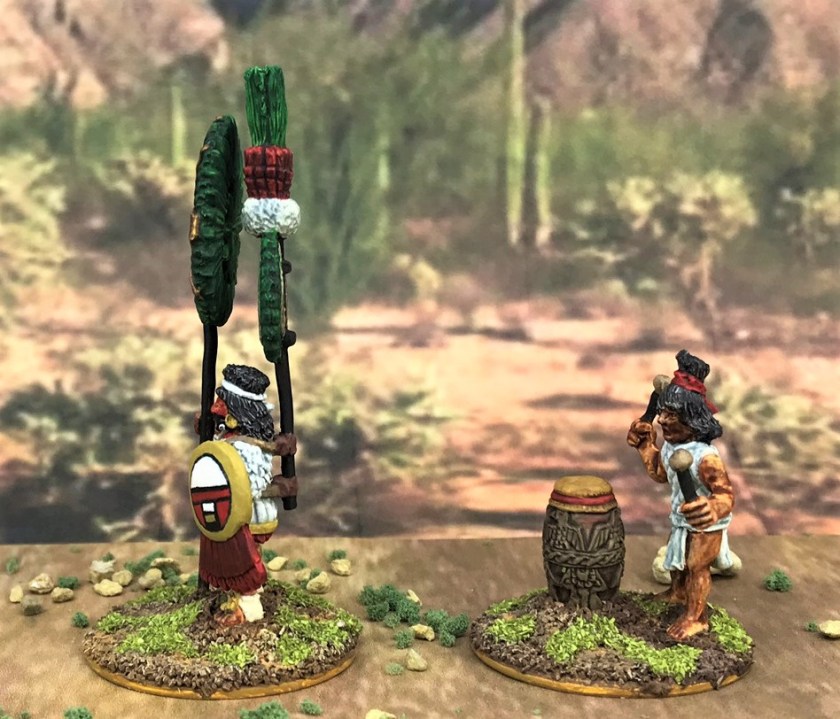

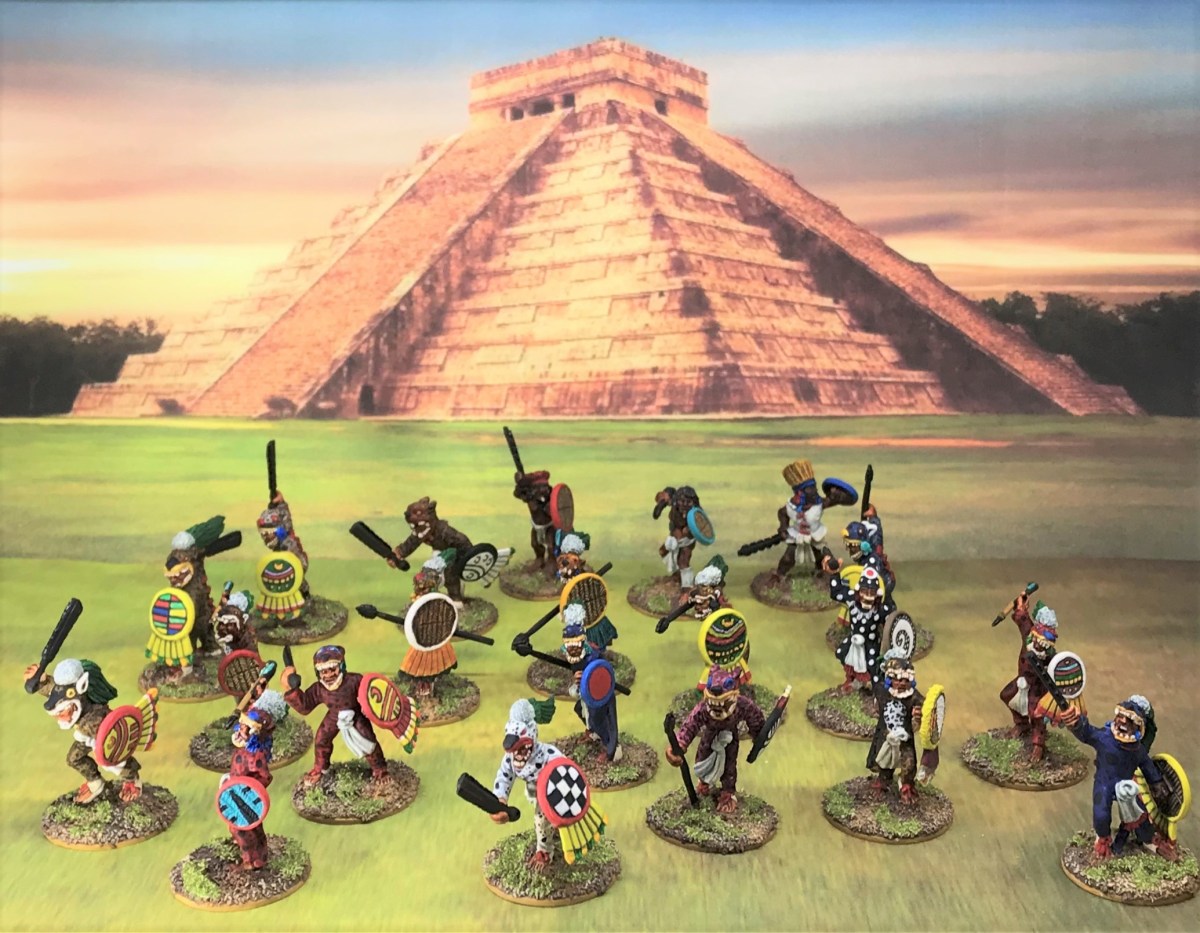


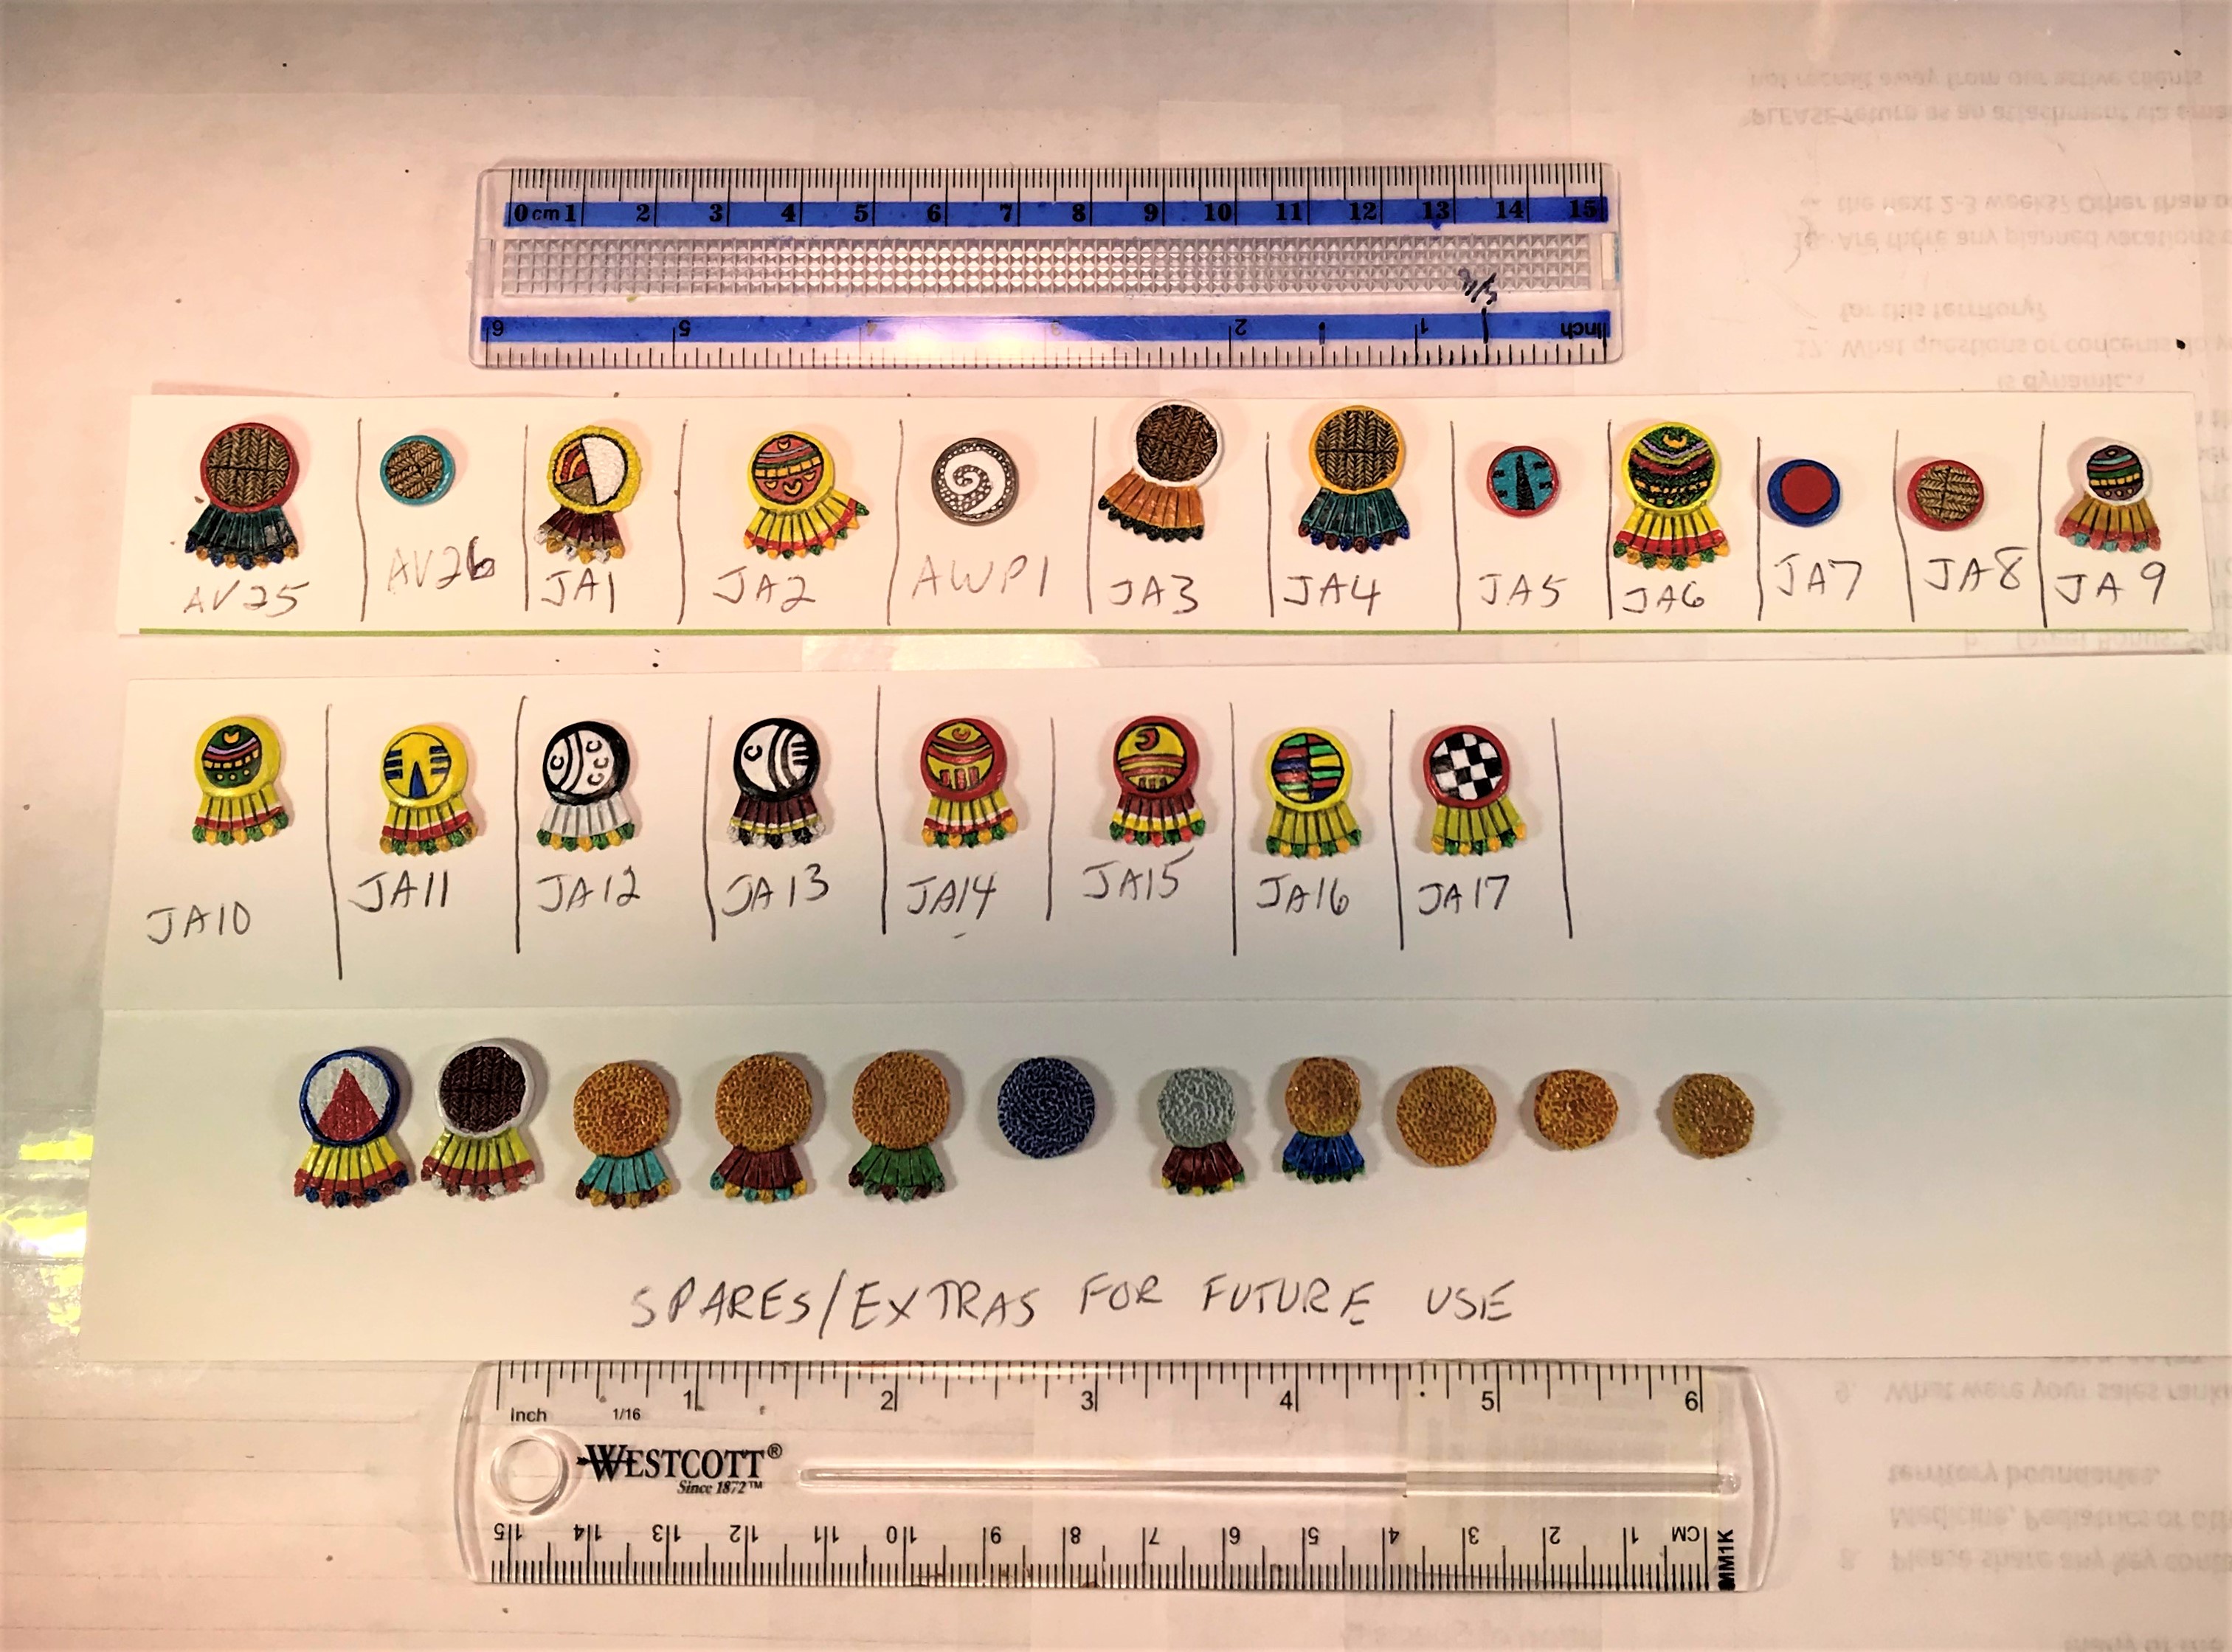


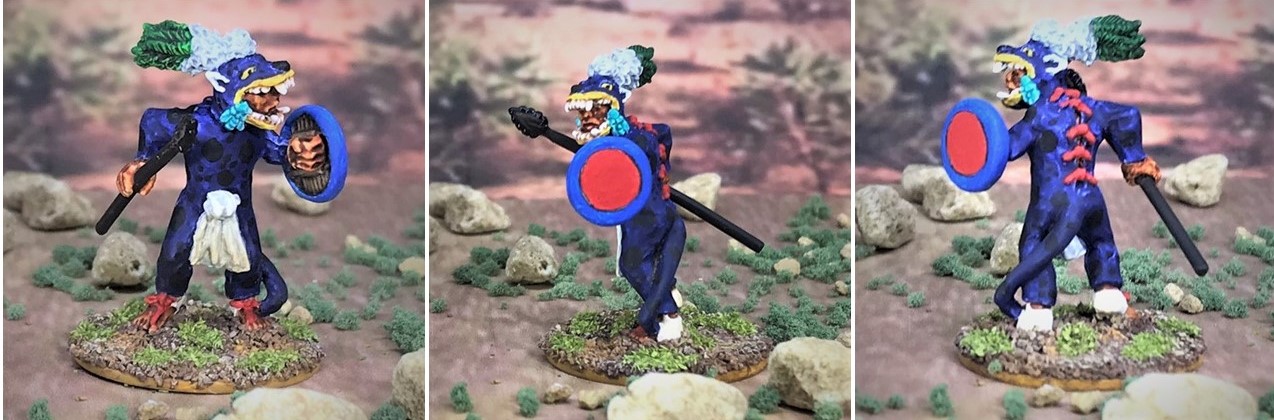
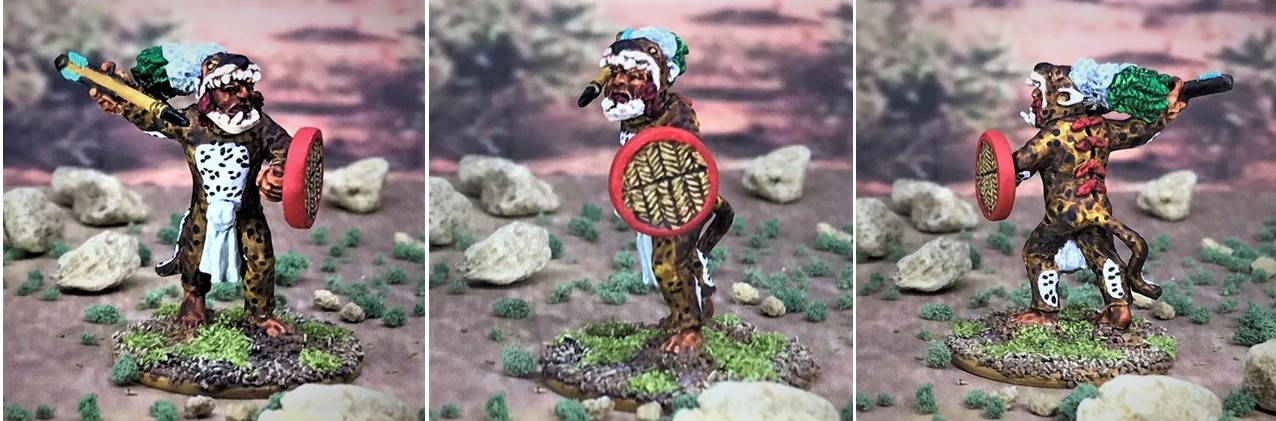


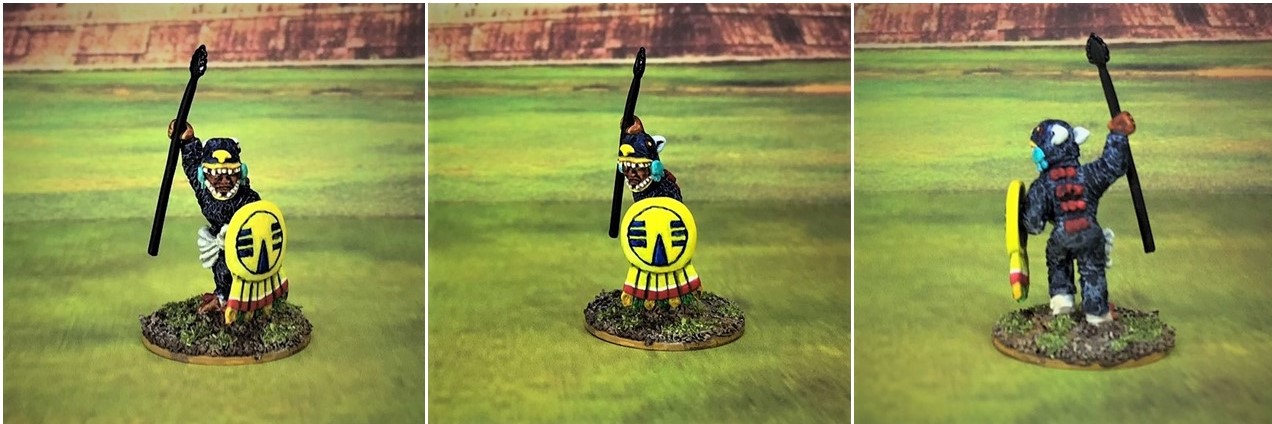
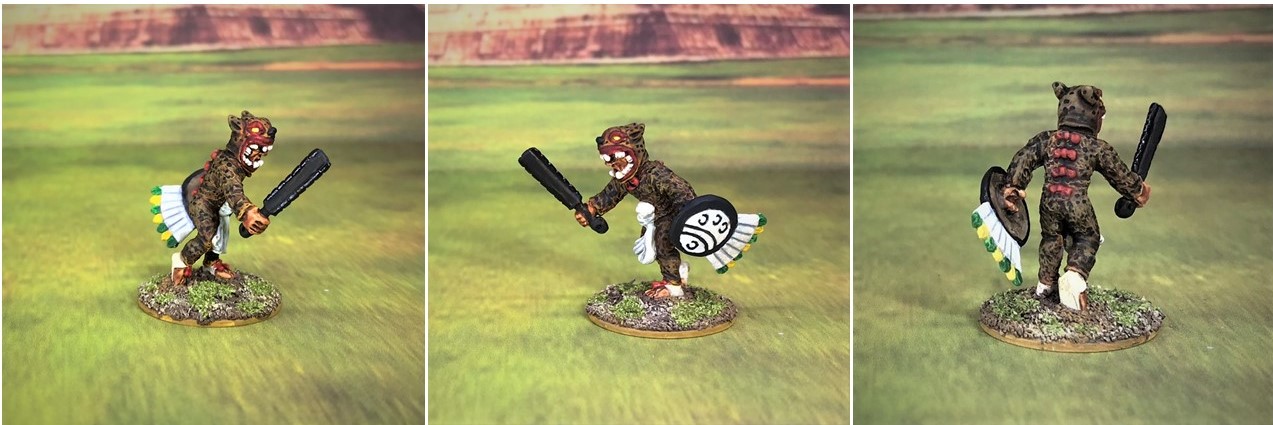
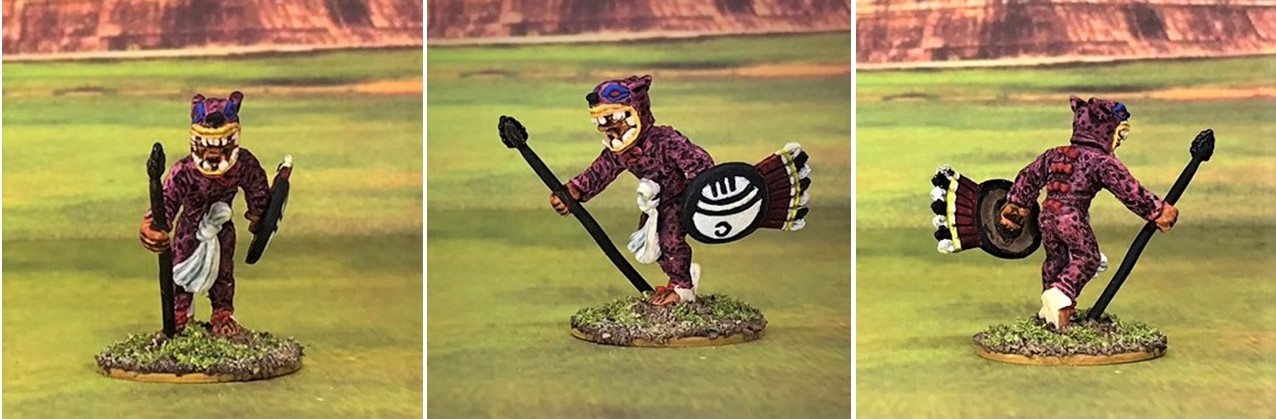
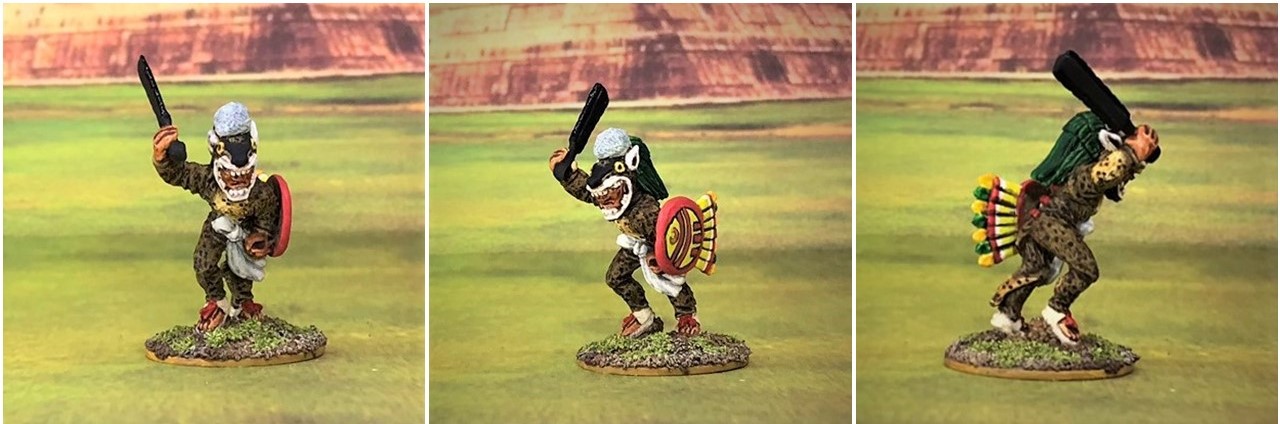


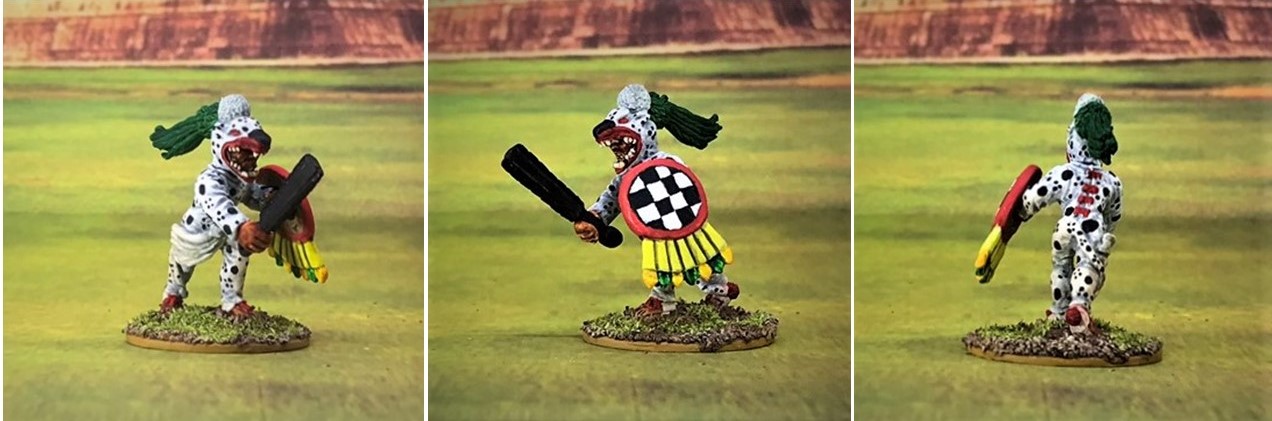
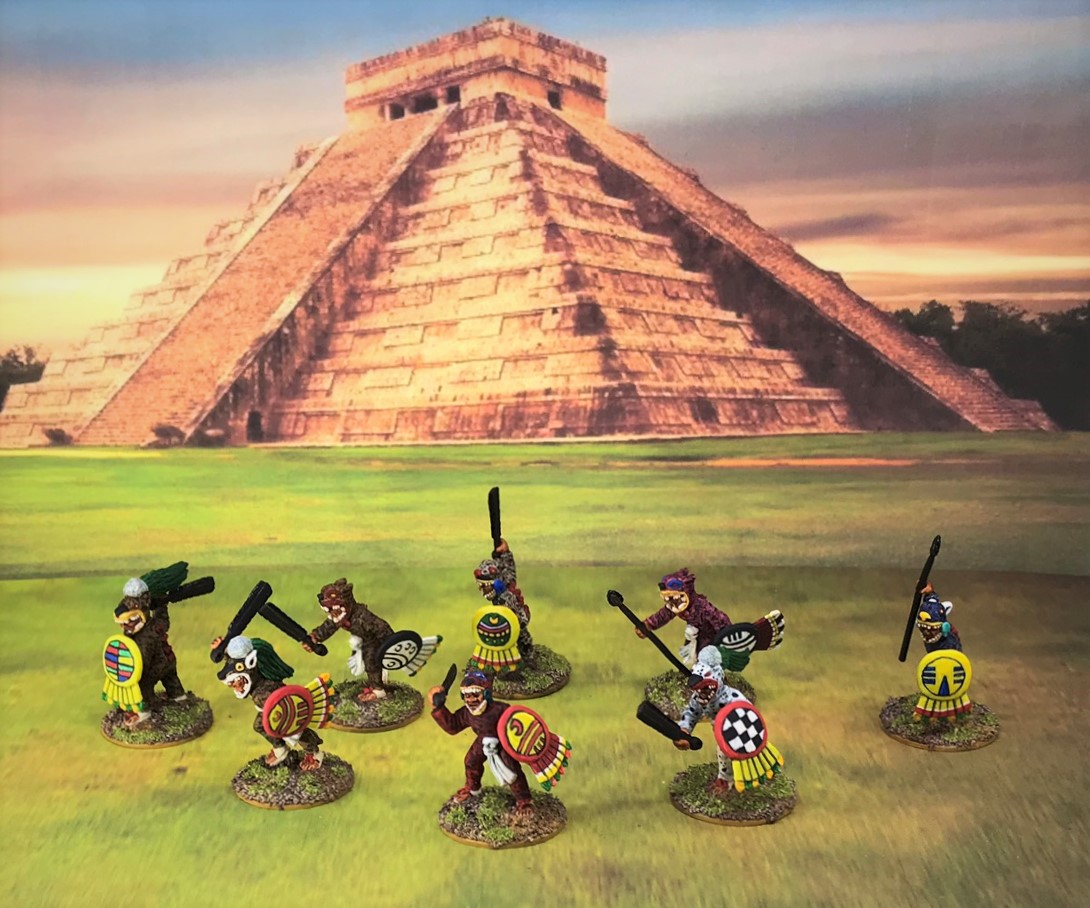

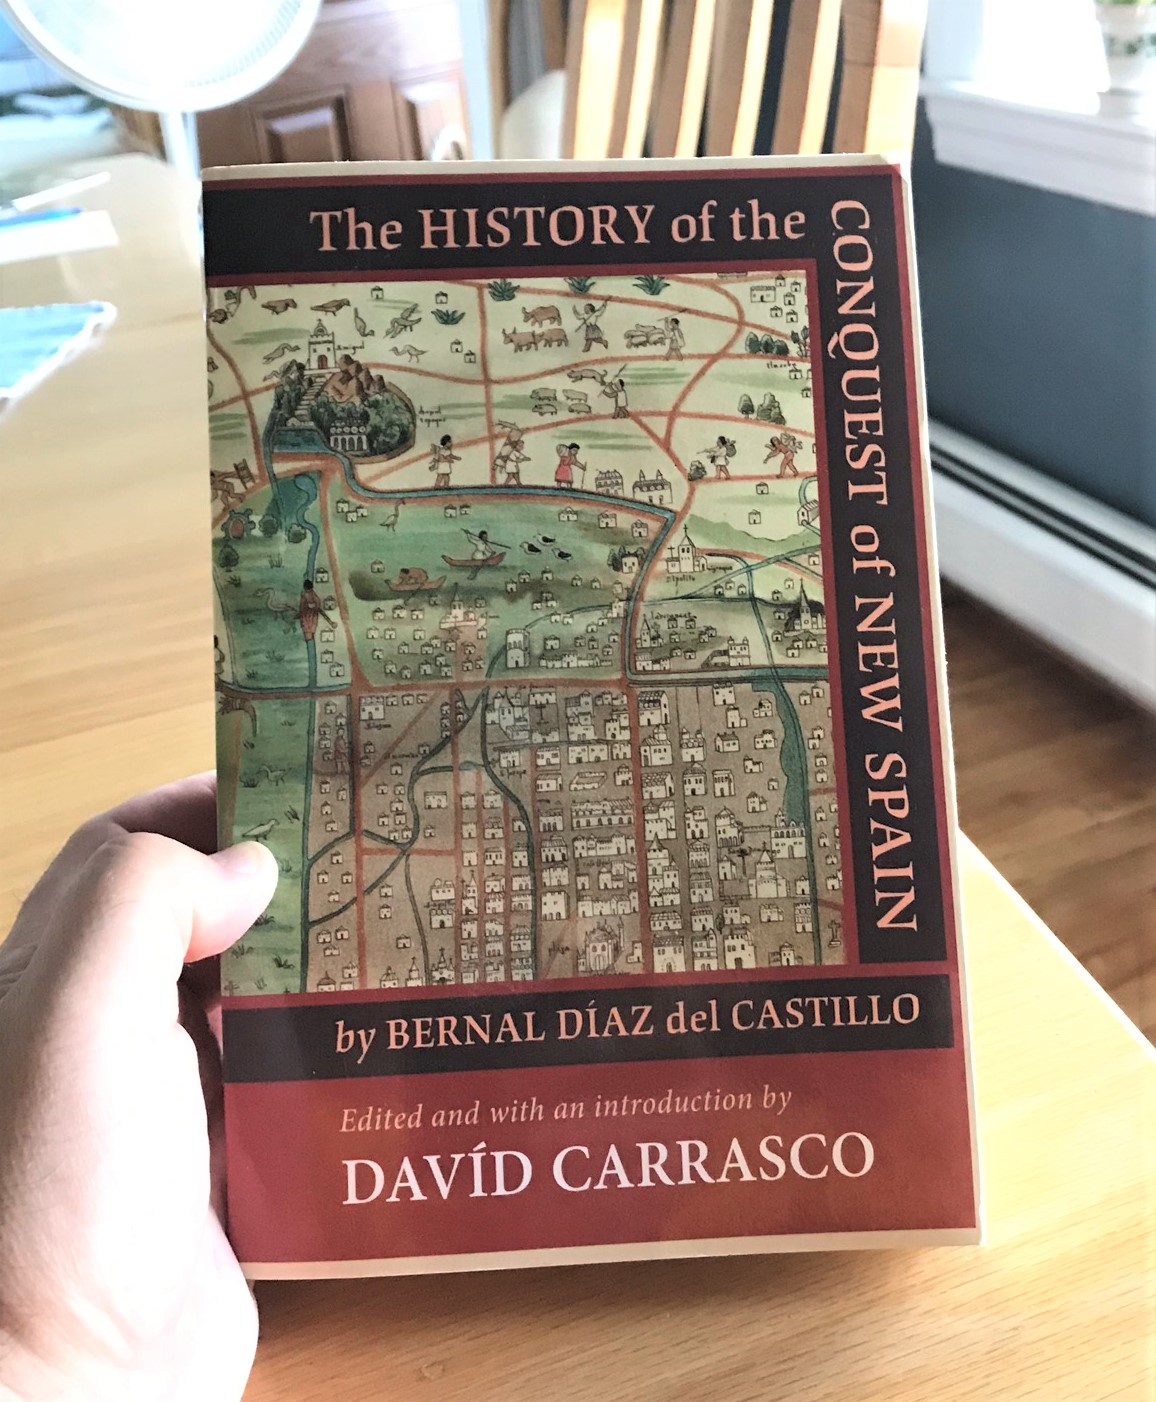
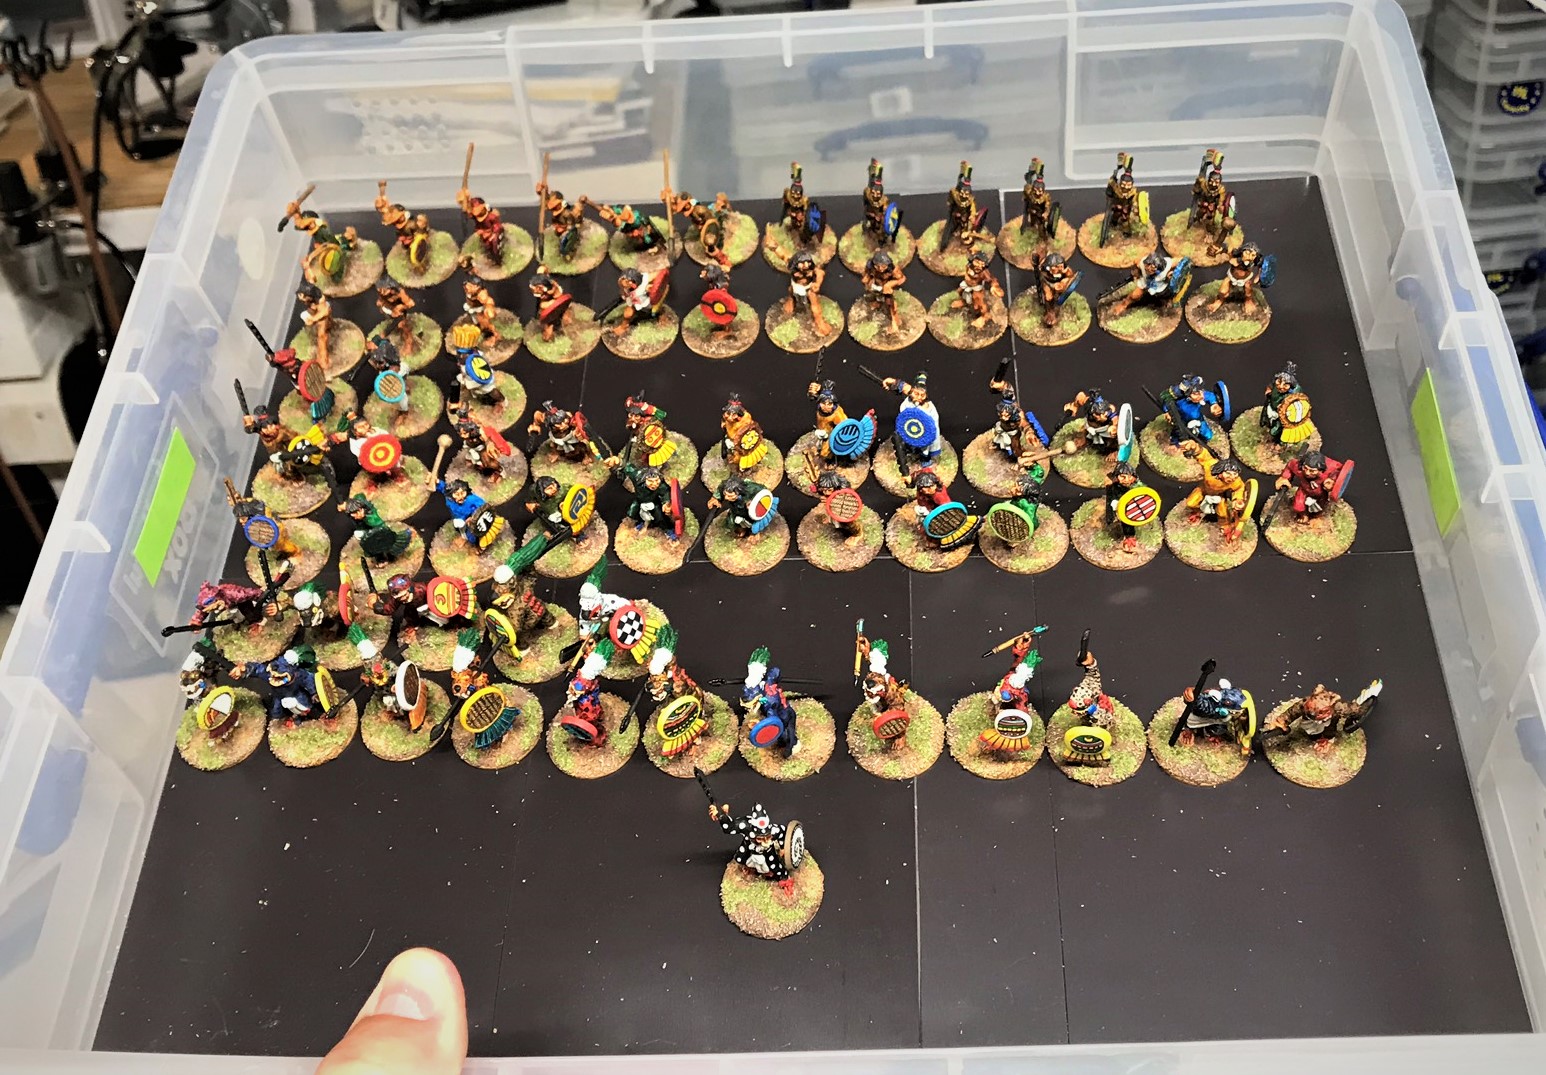


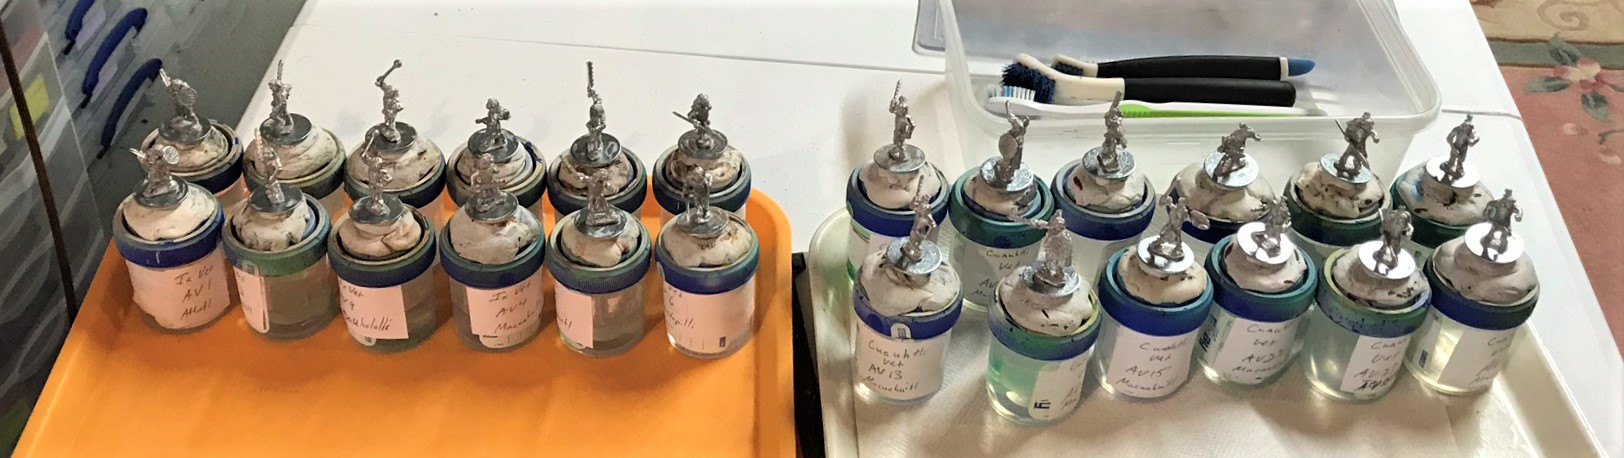


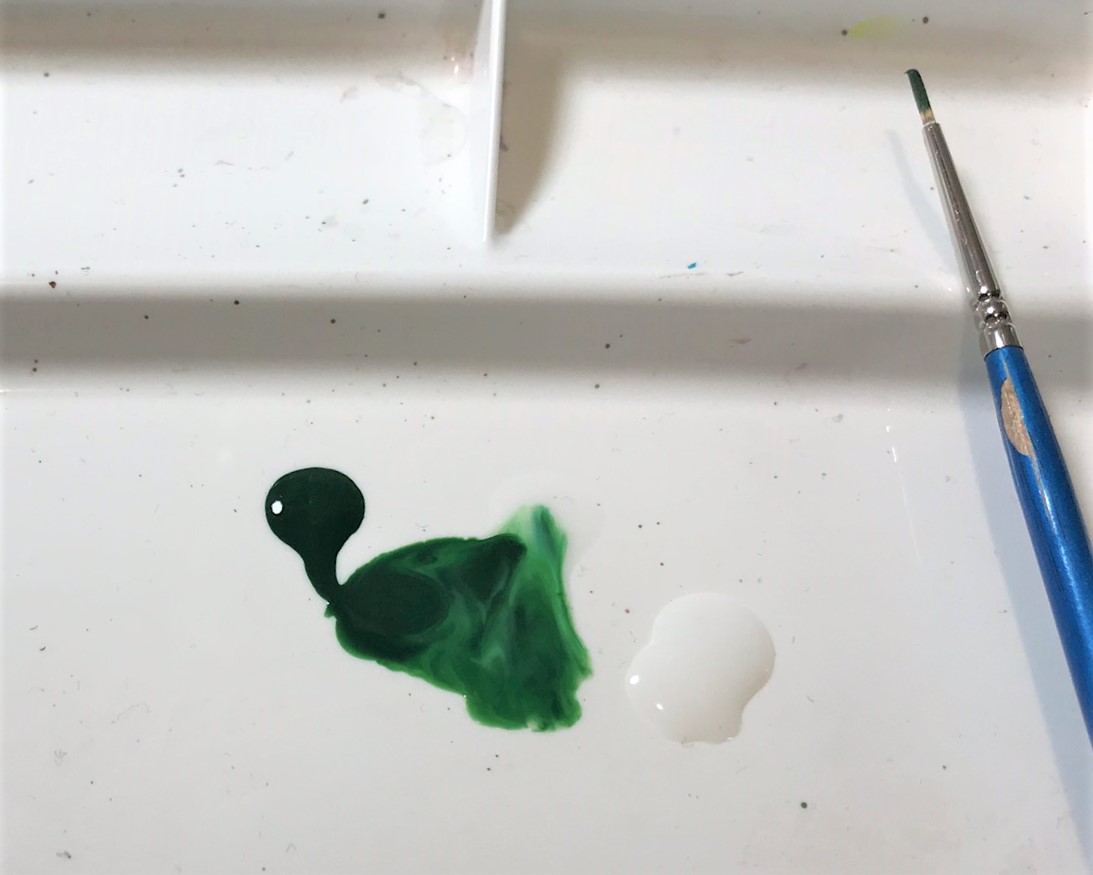


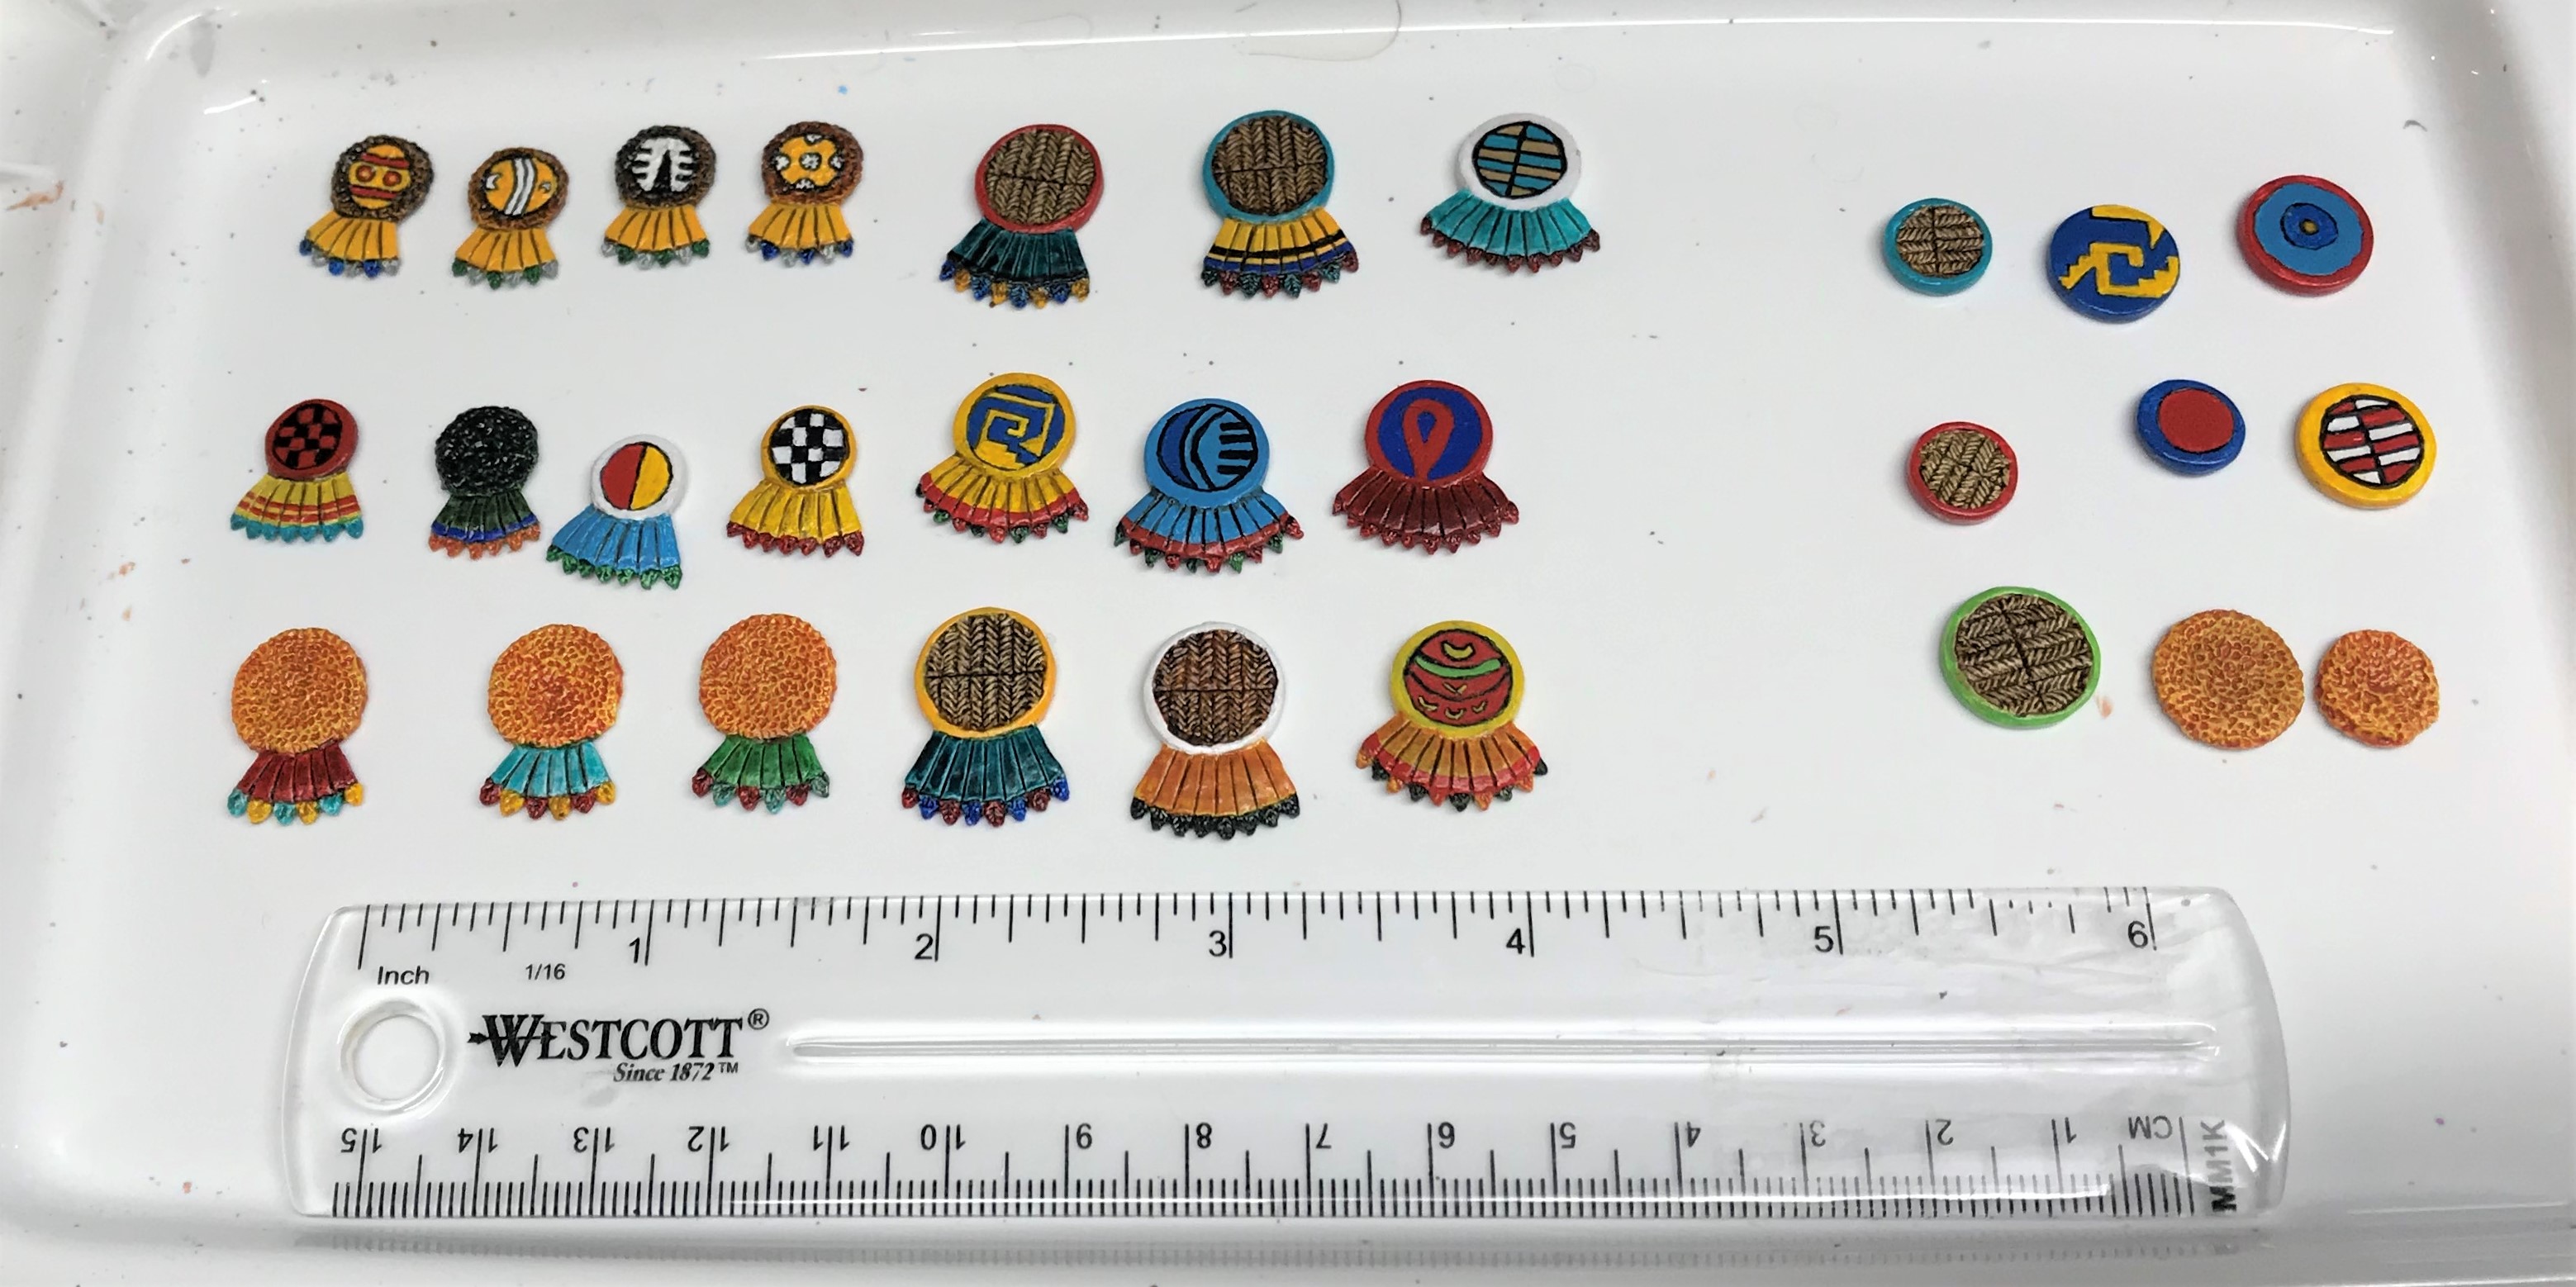
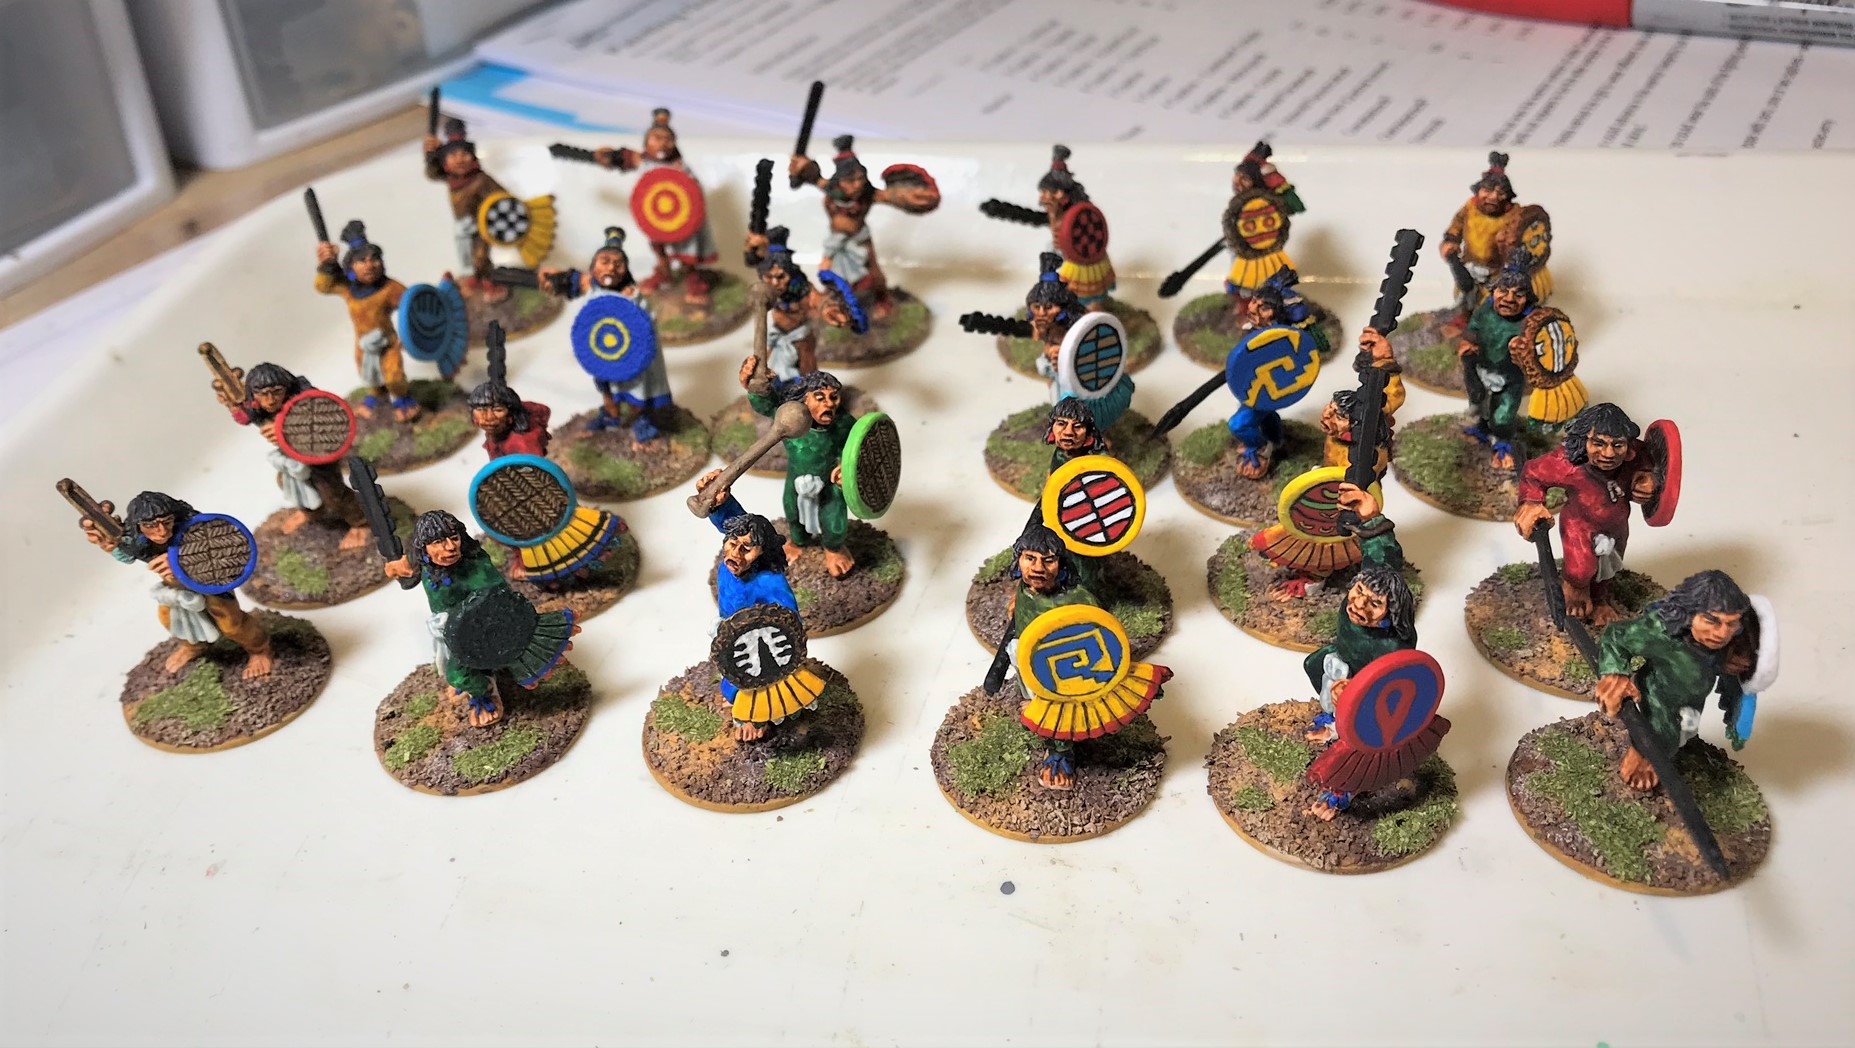


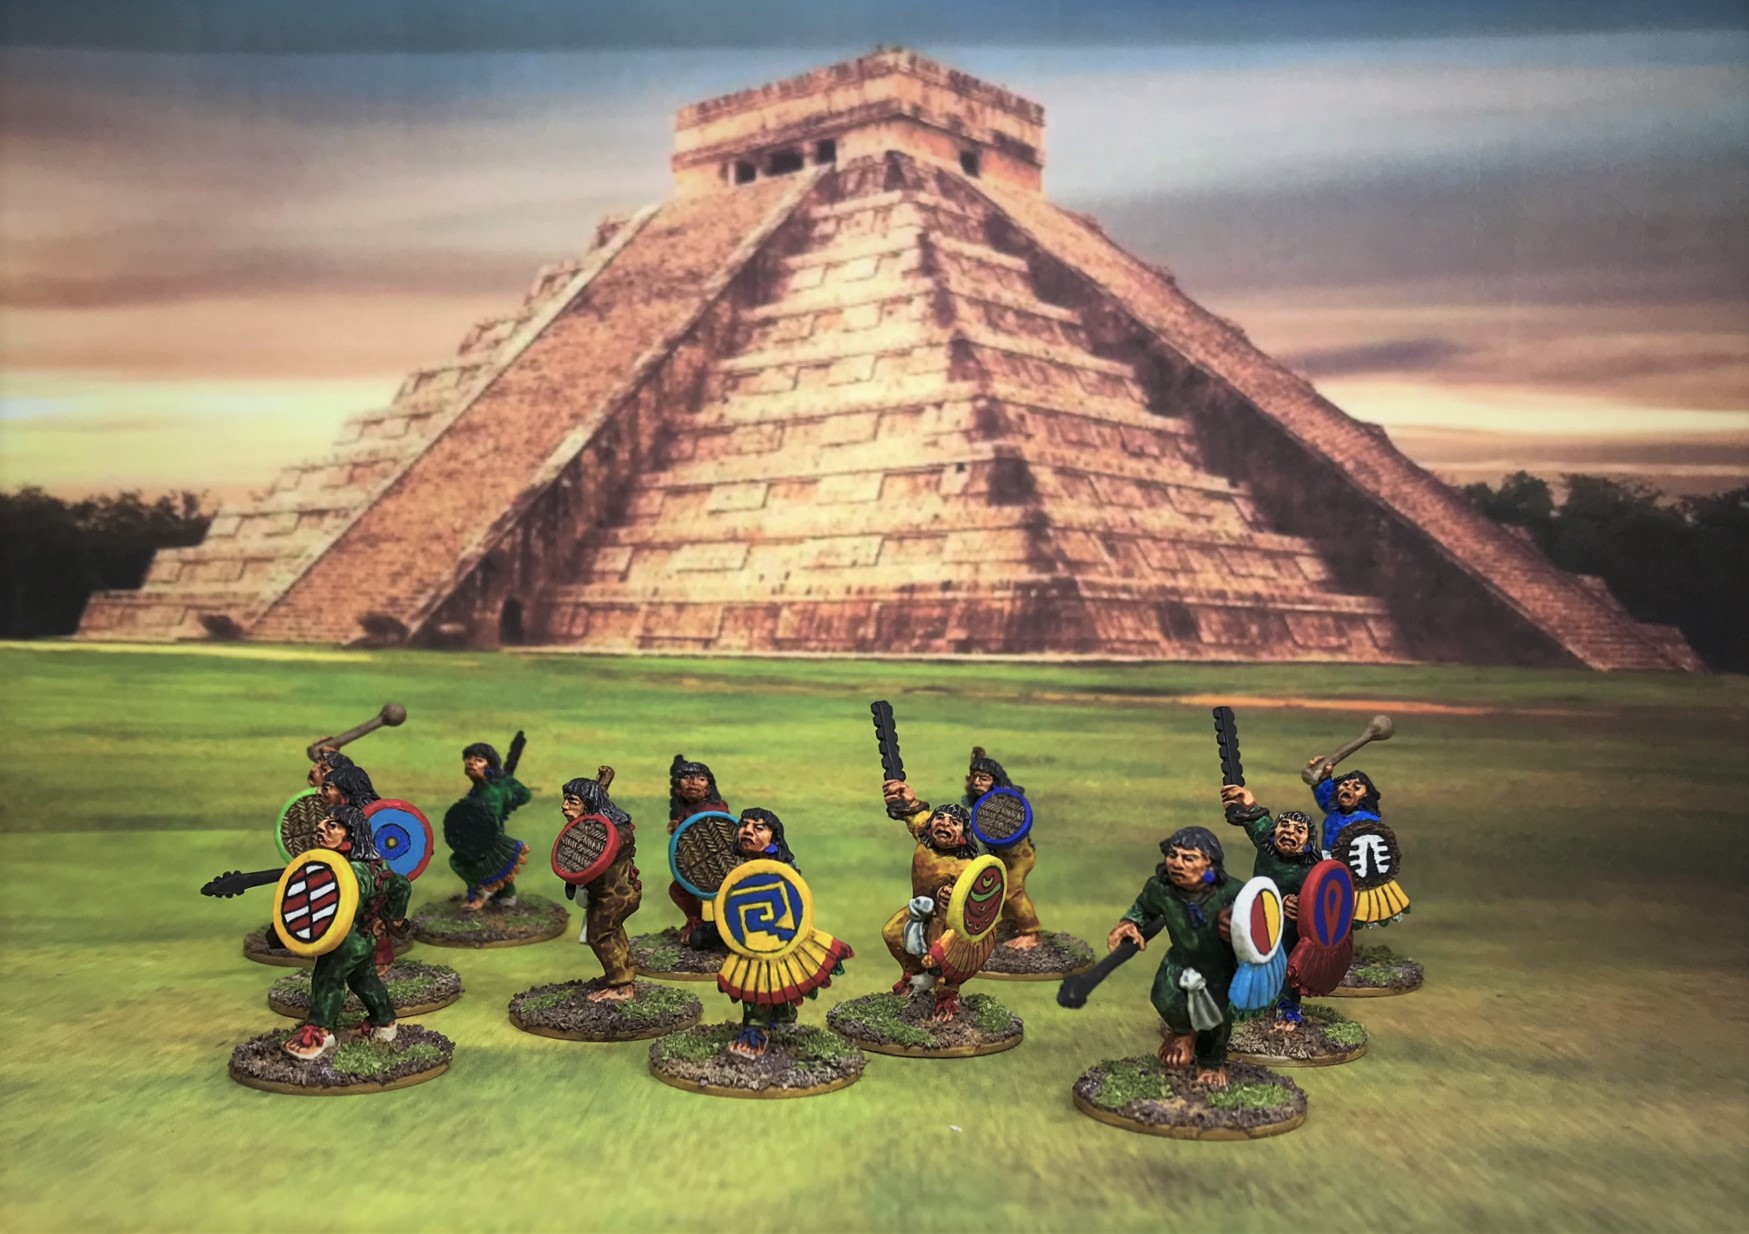


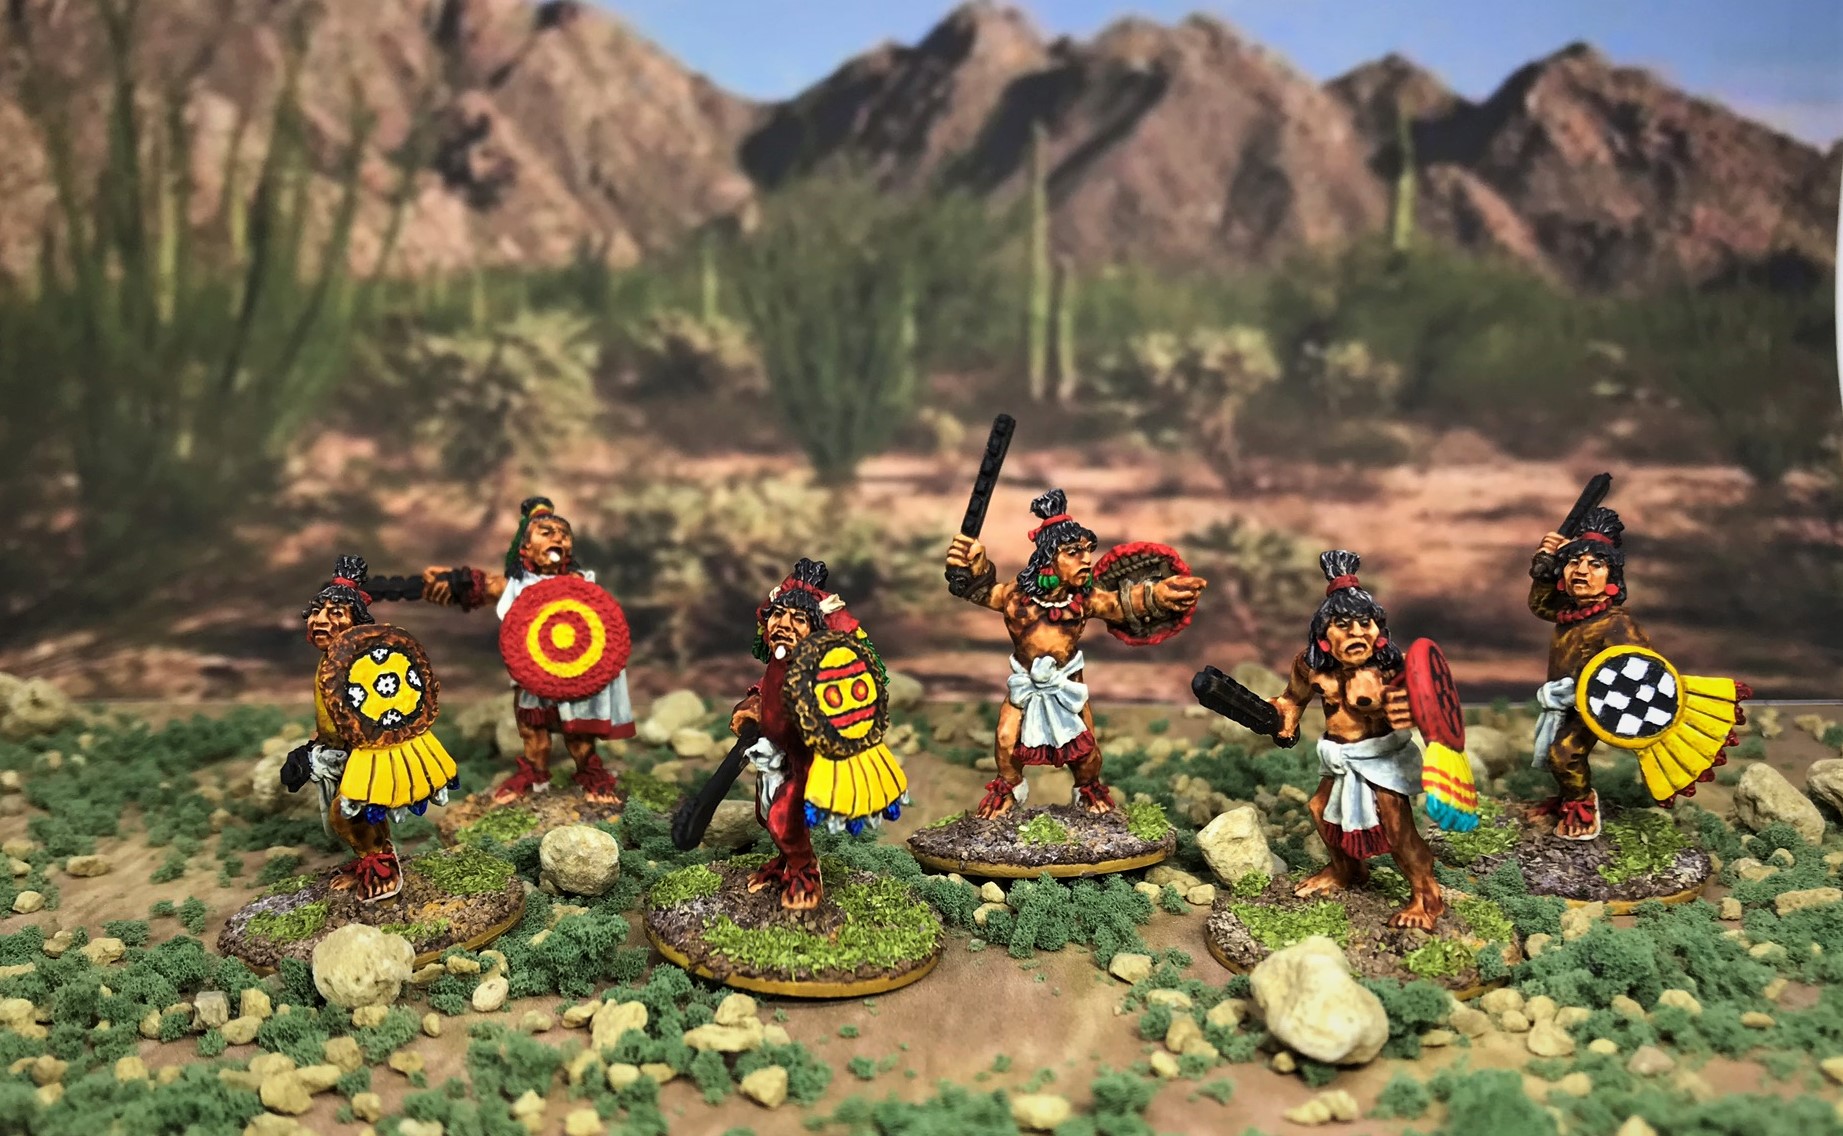

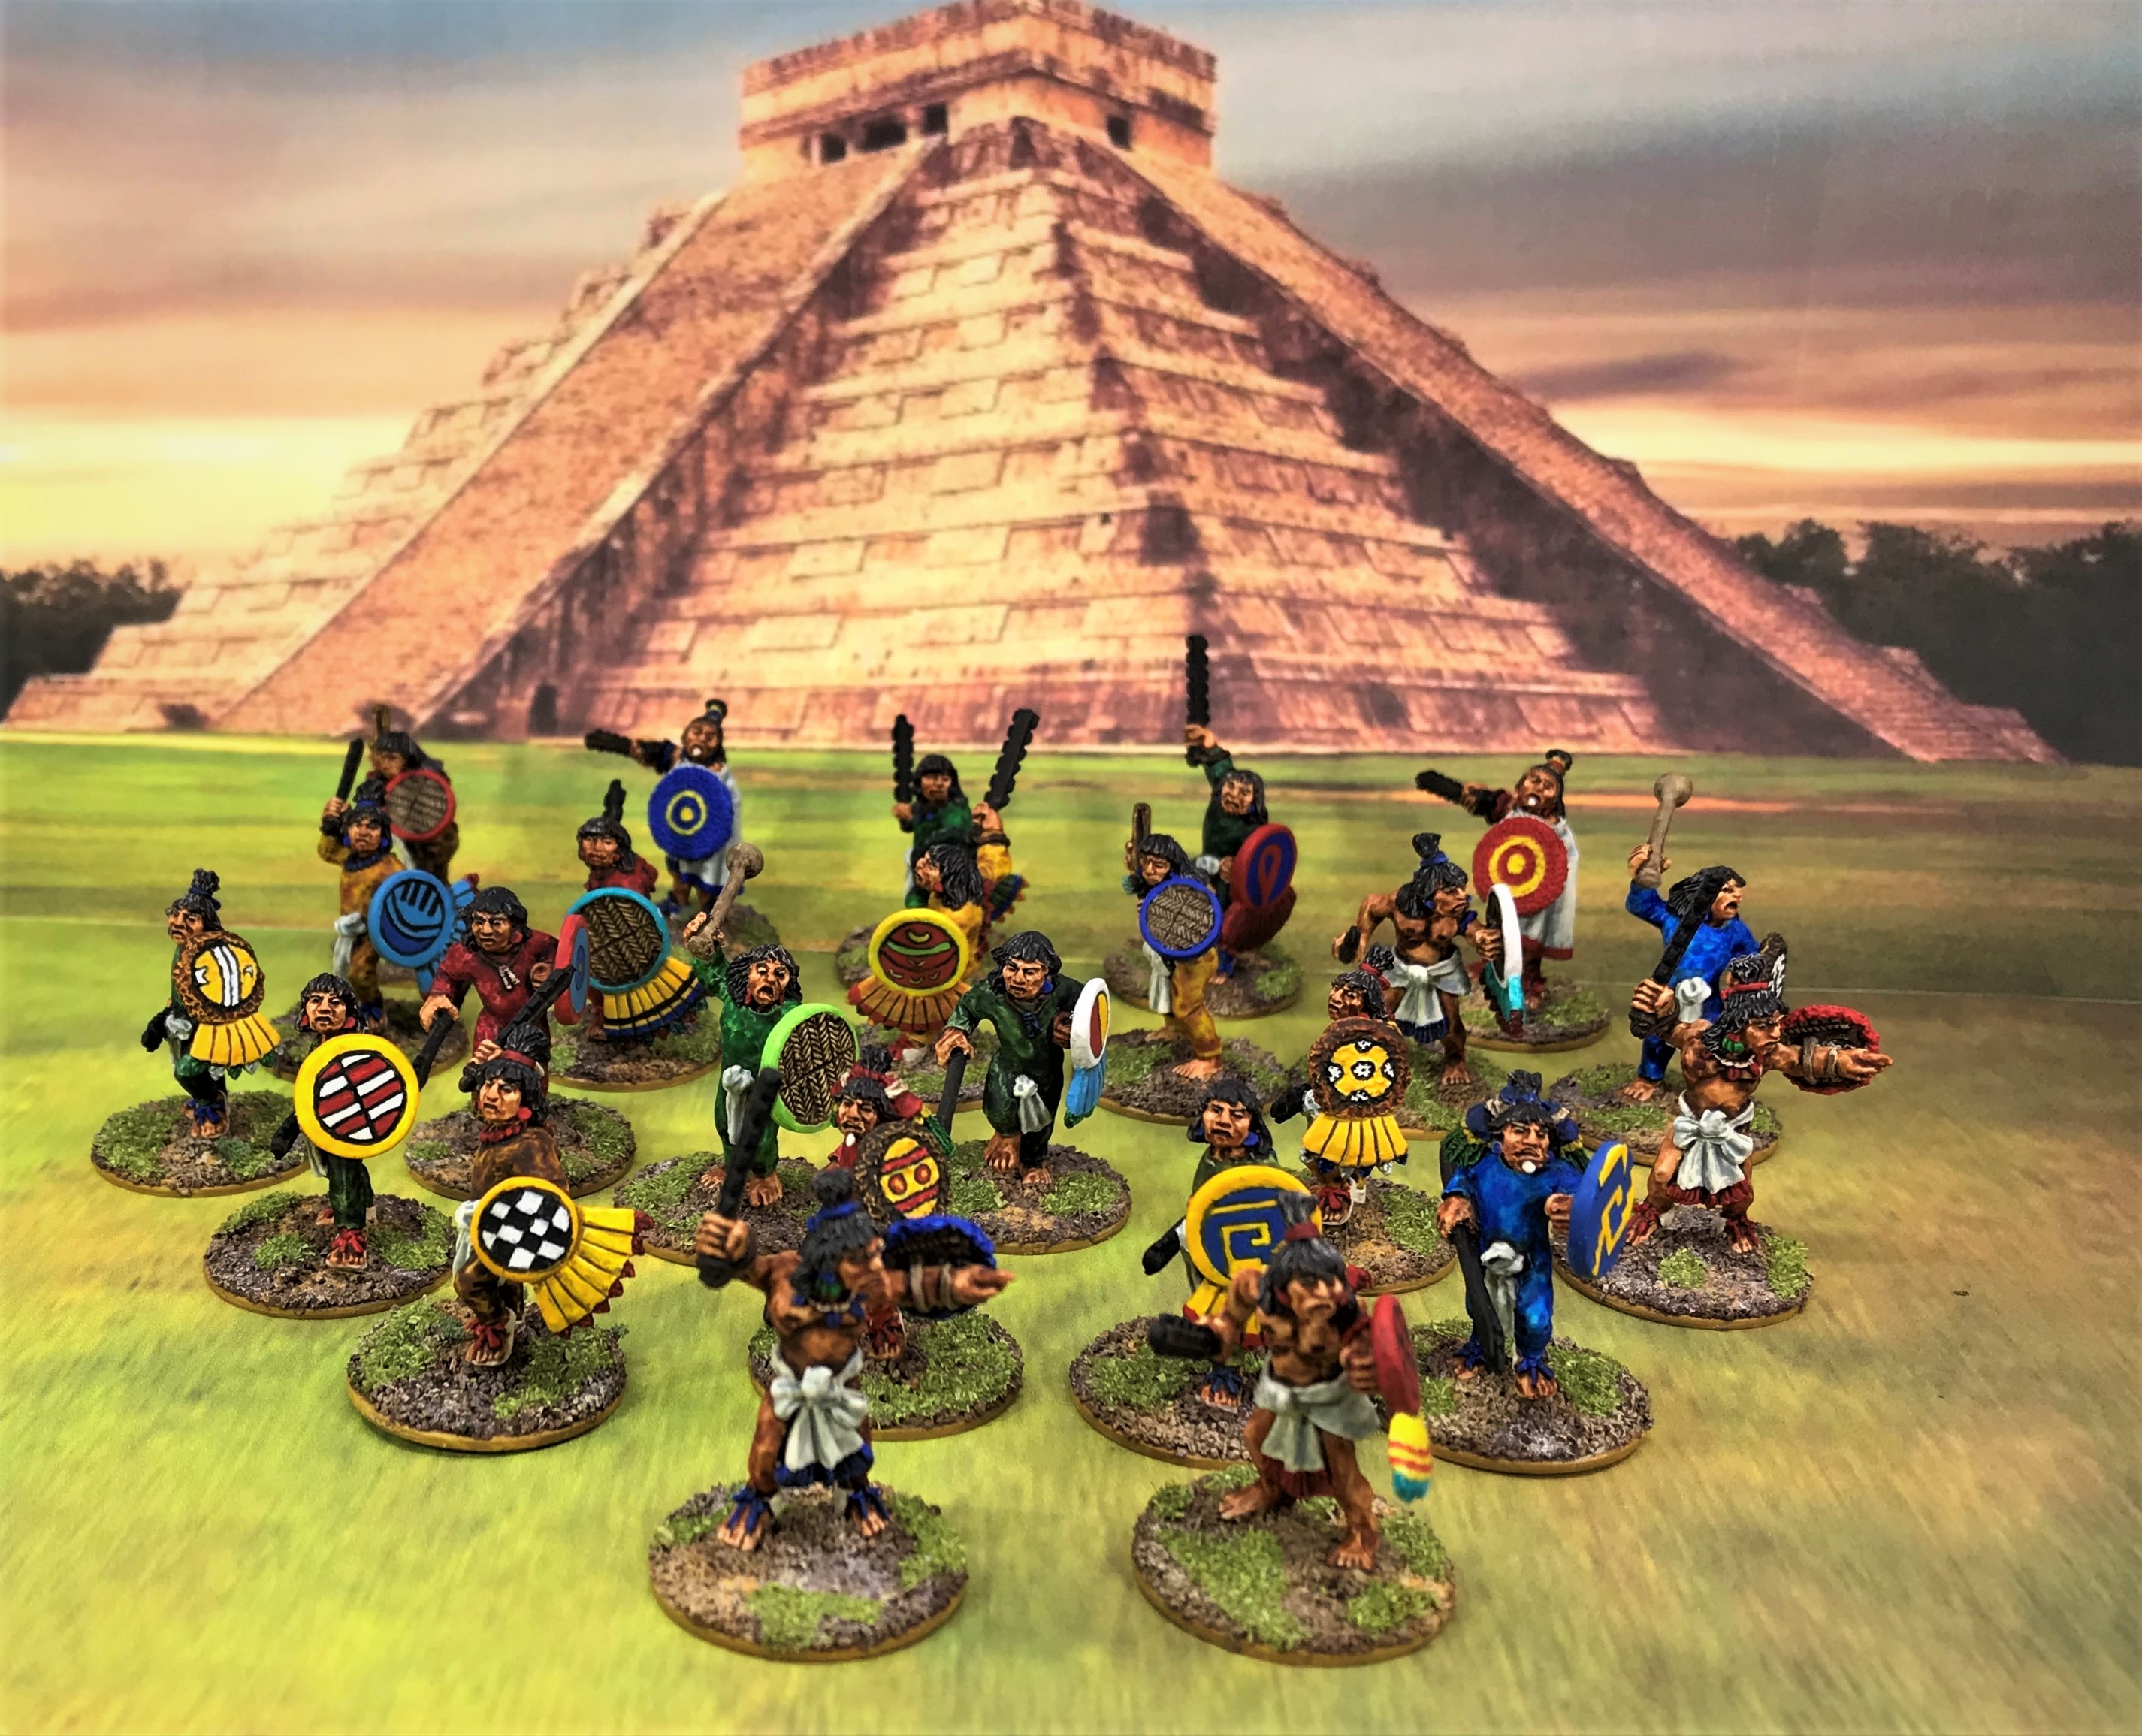
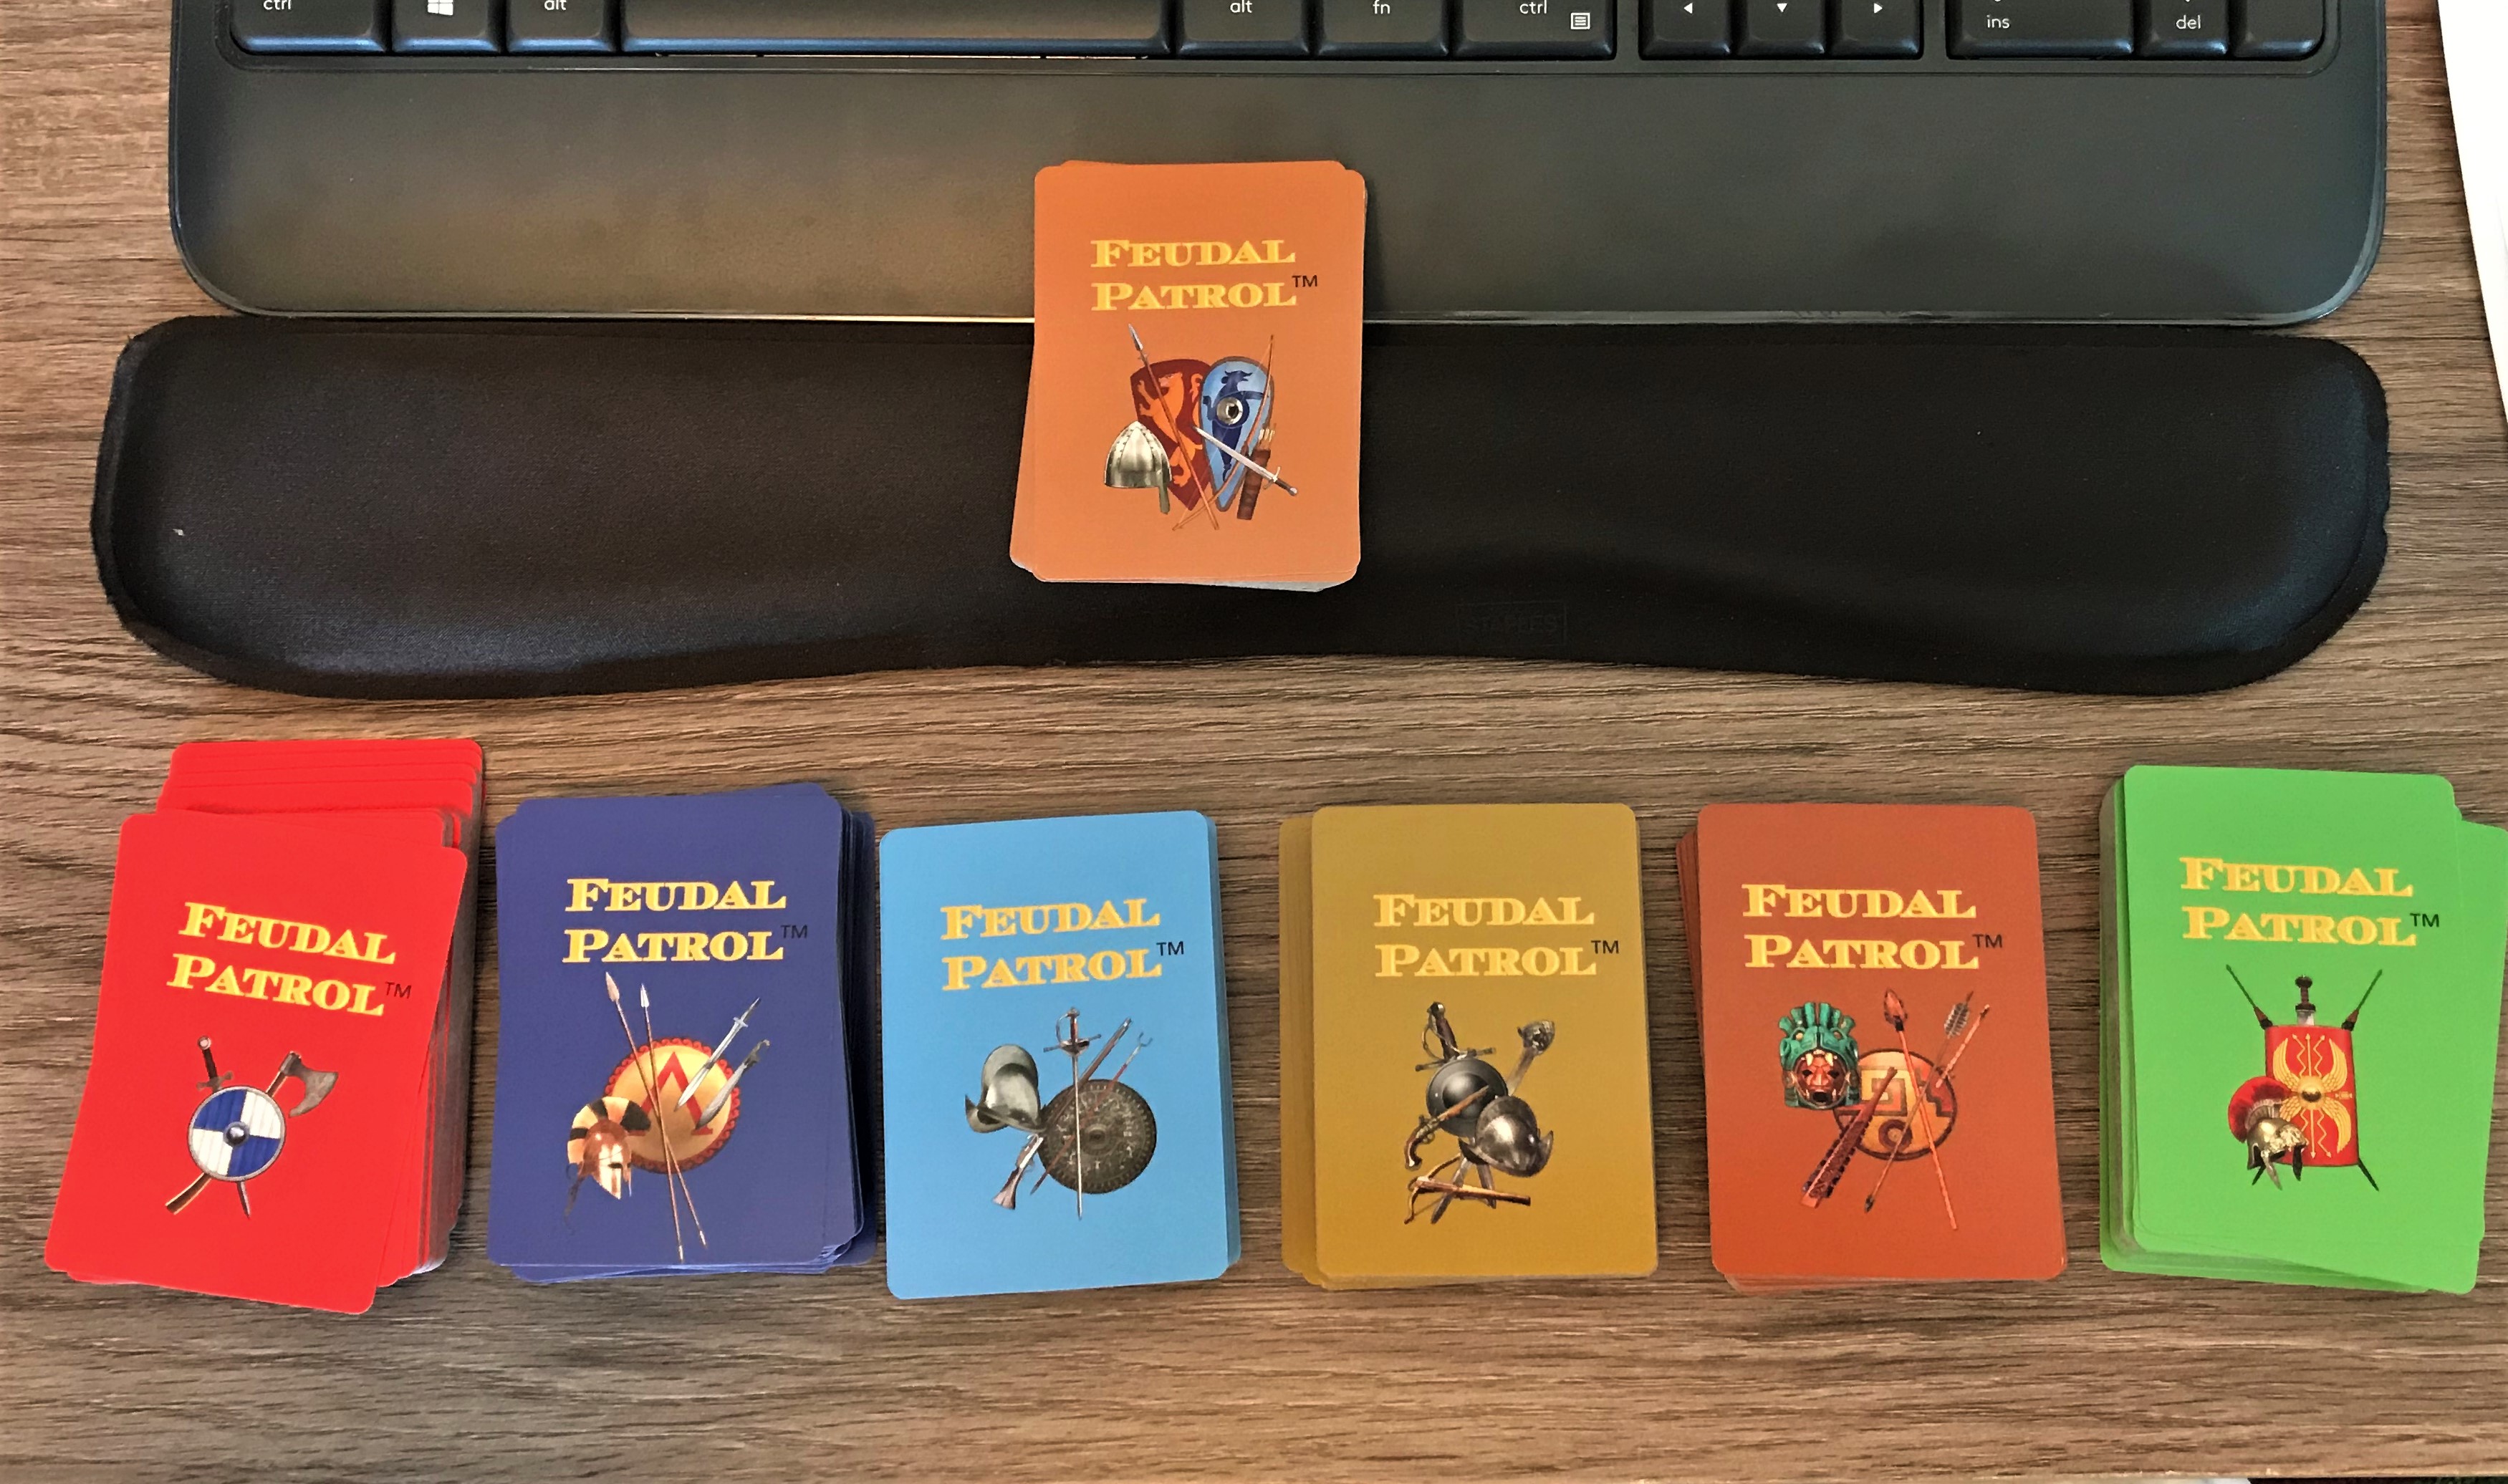

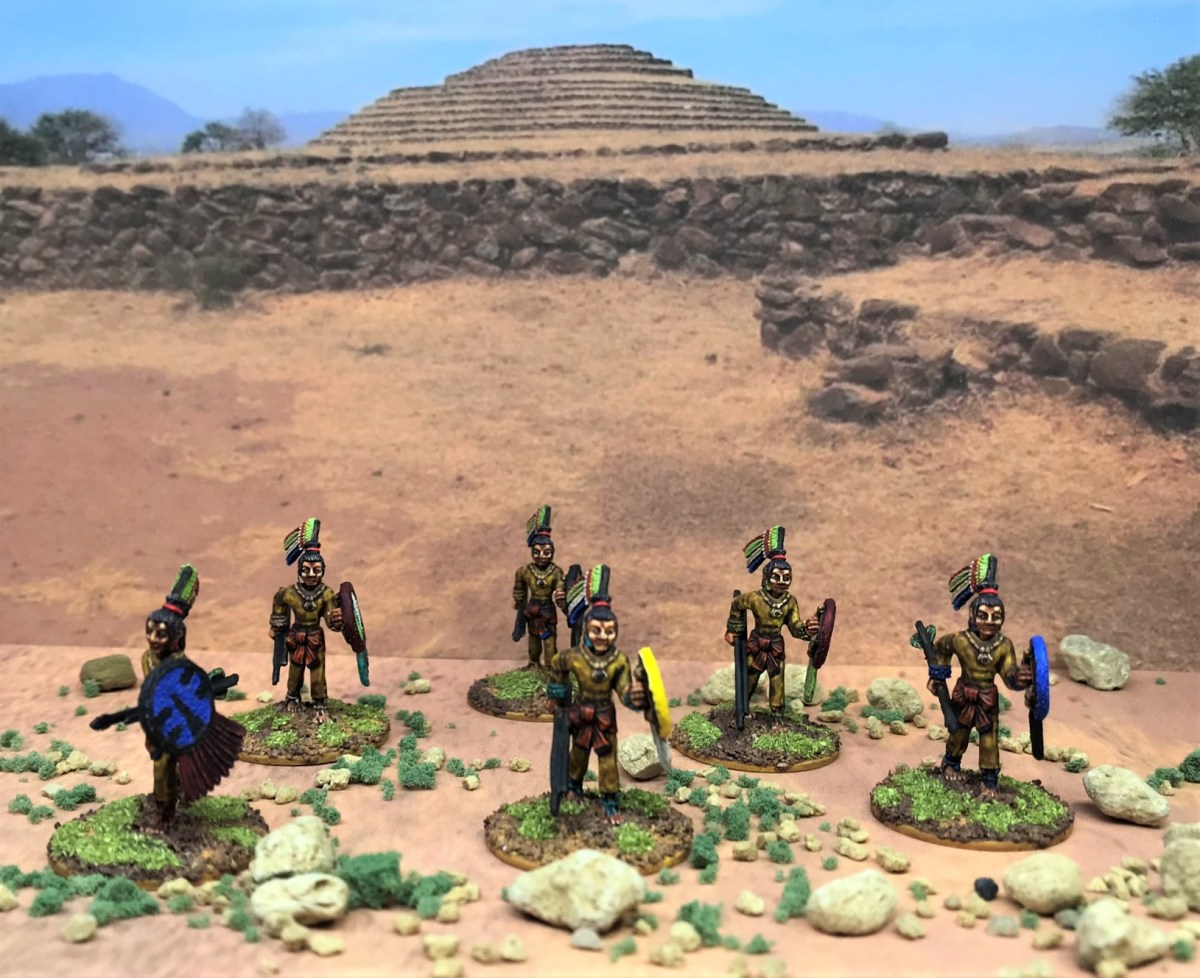


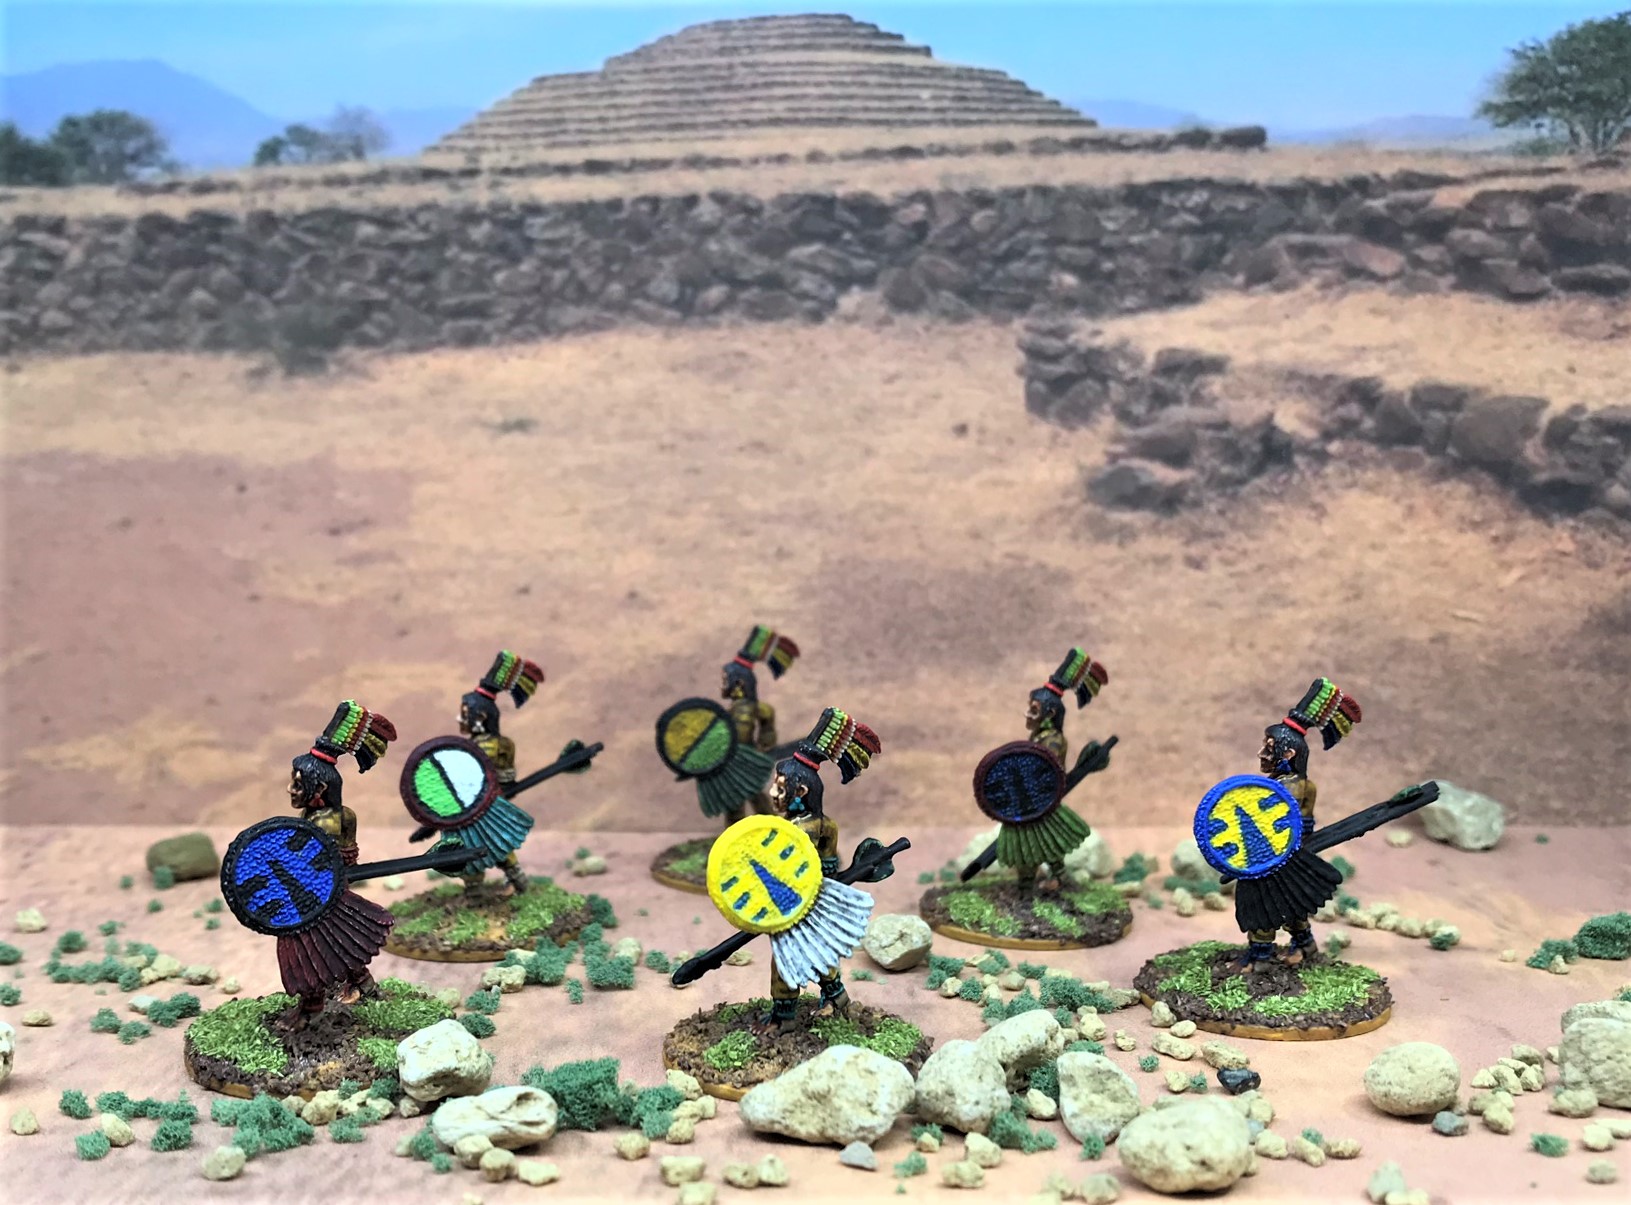


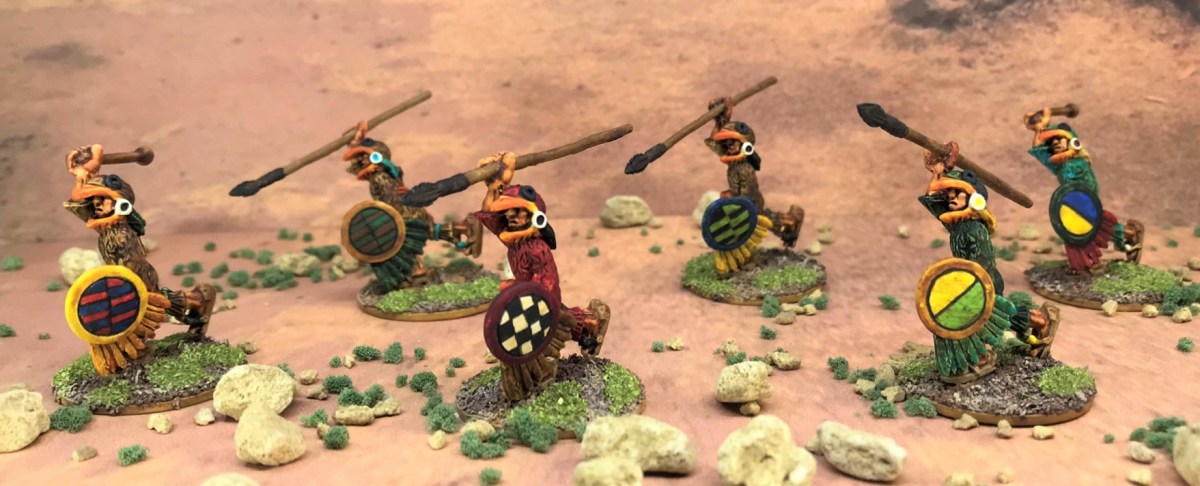
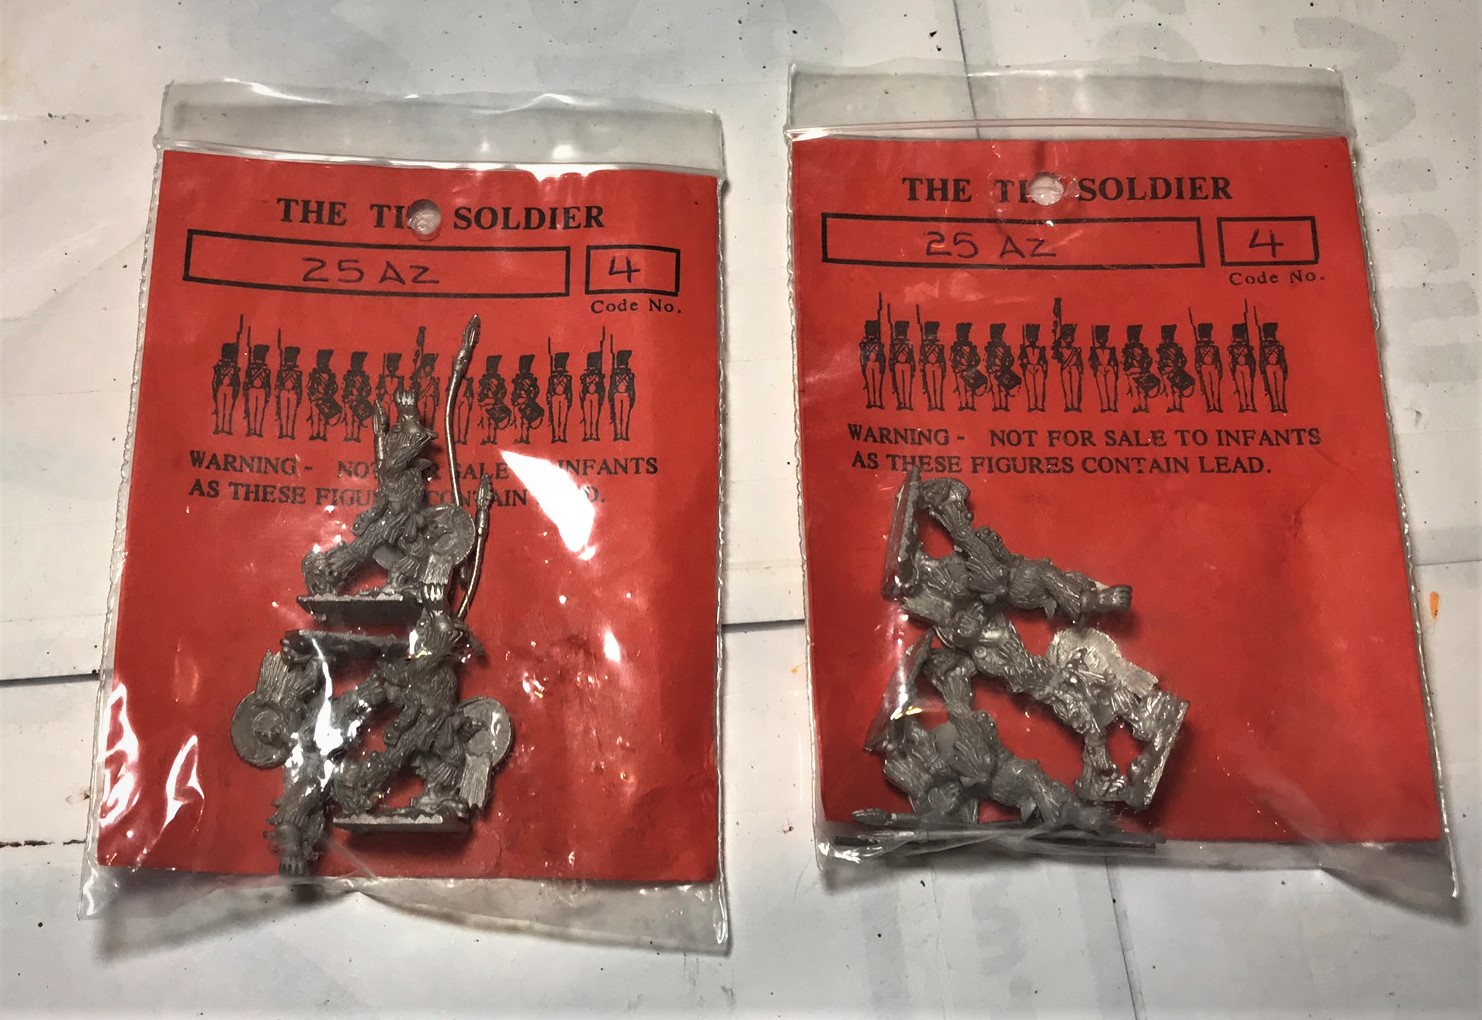


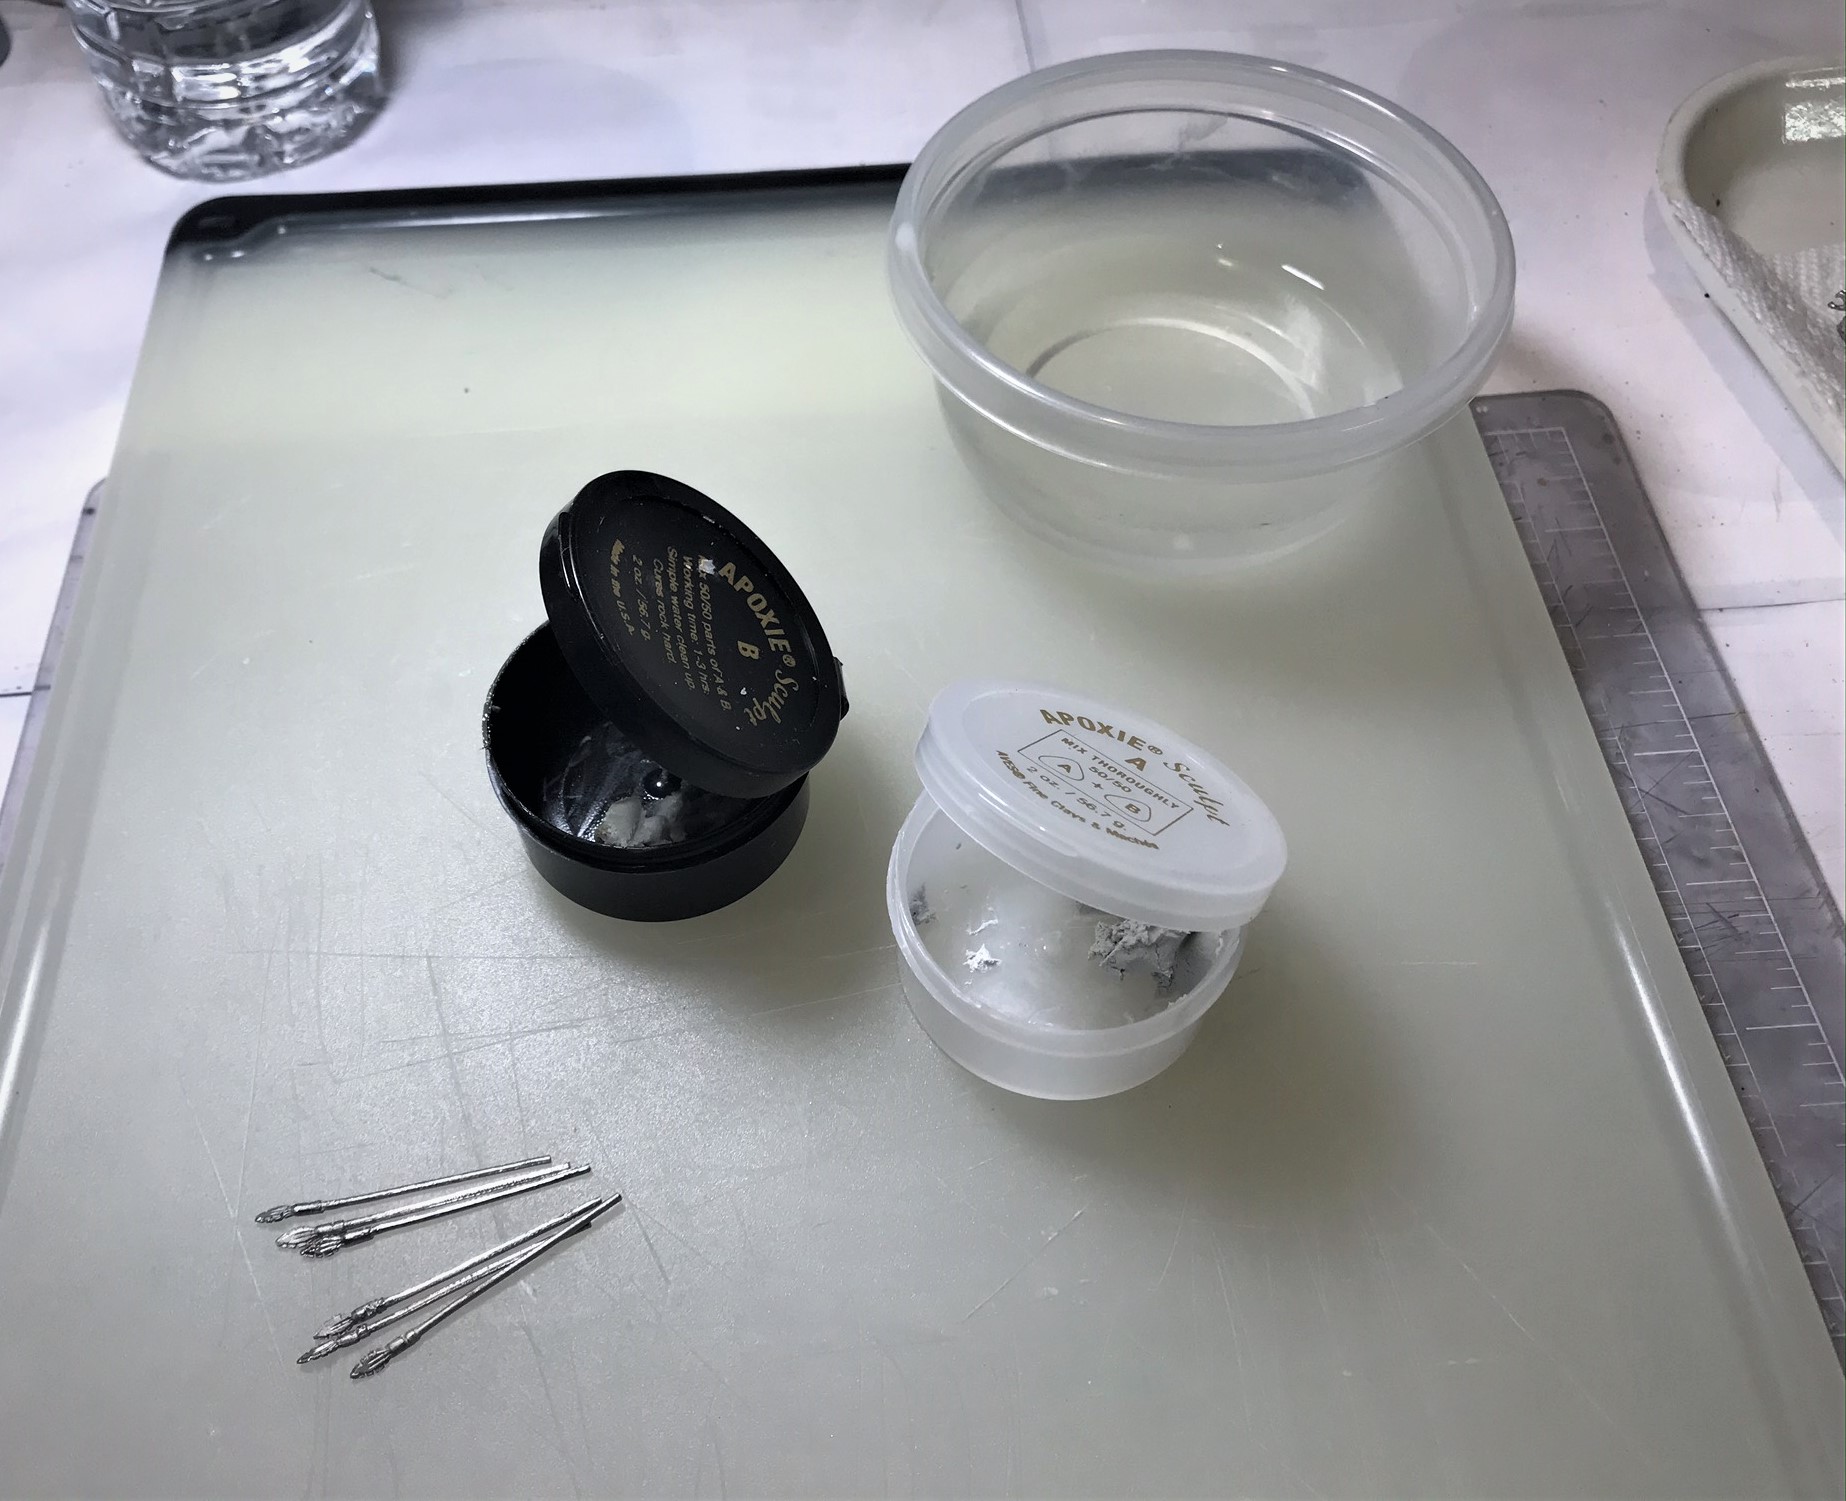


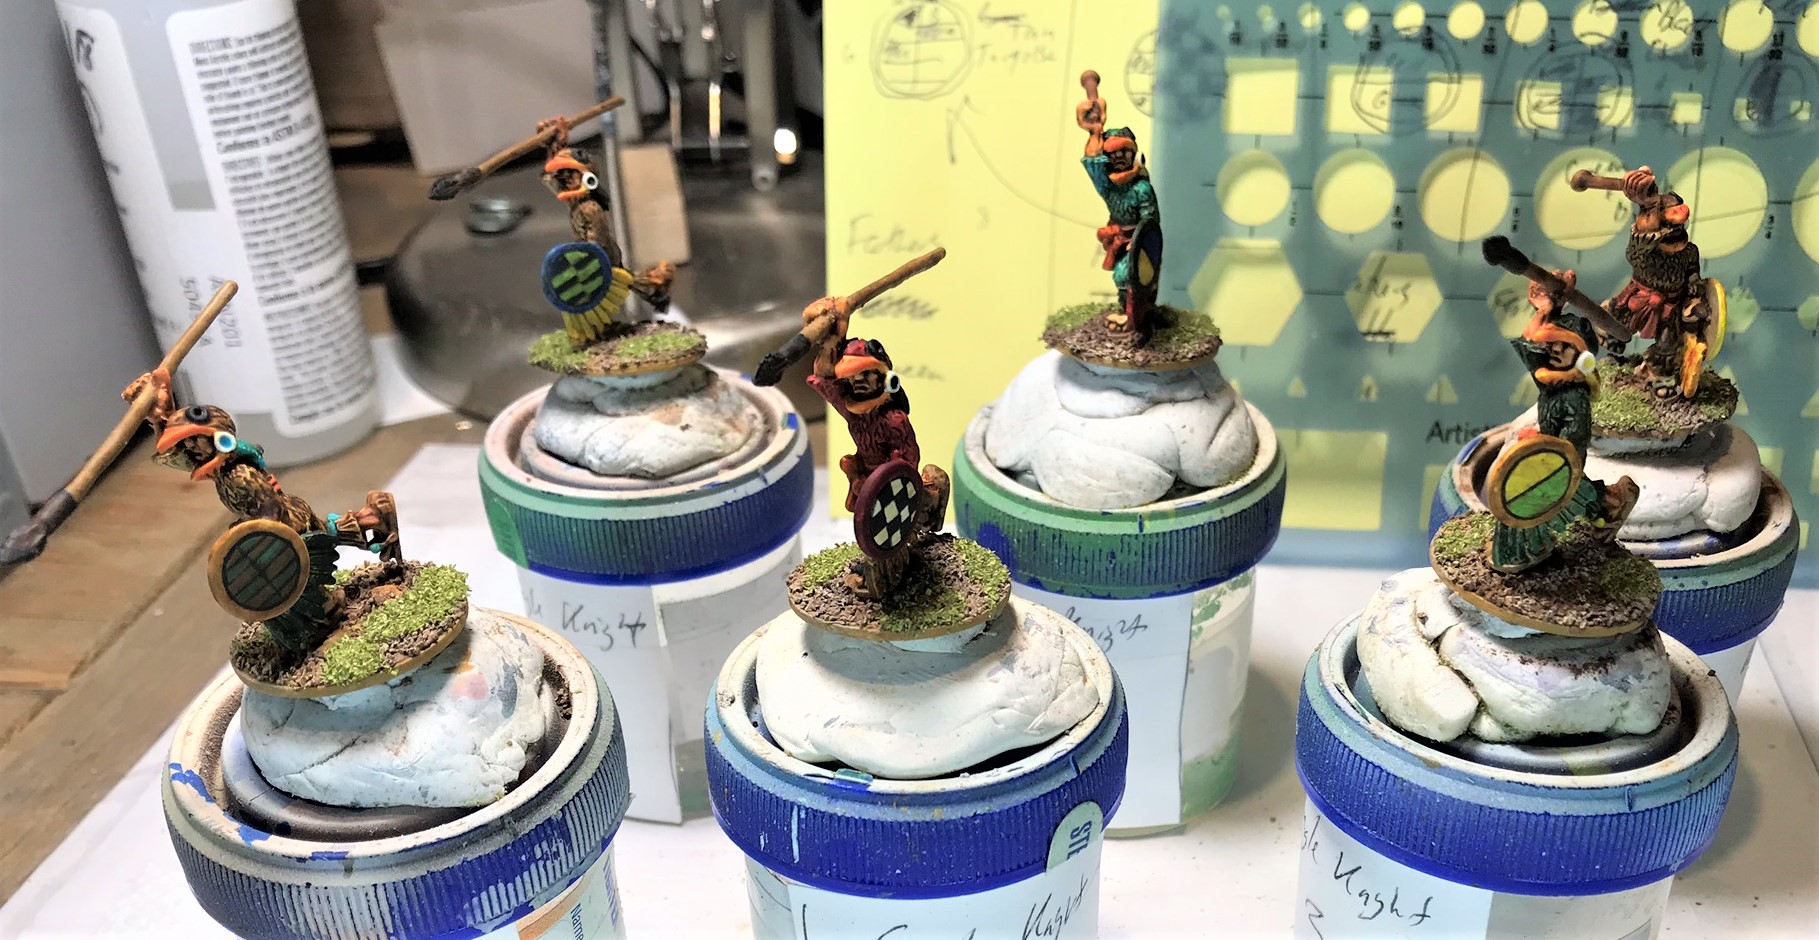


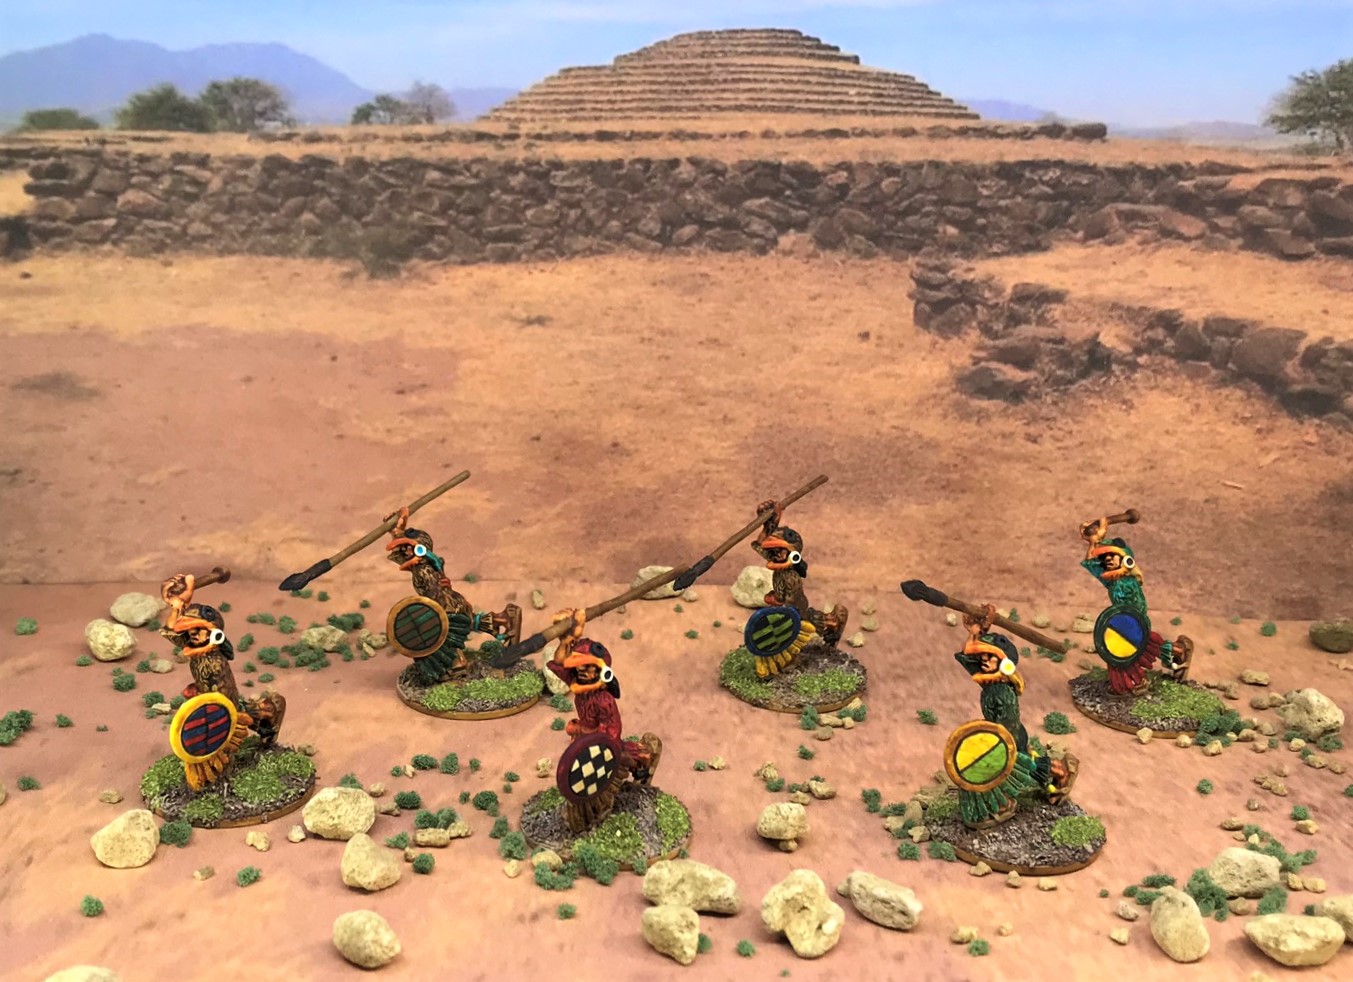


