The last Wars of Ozz unit of 2023! Fittingly, it is also my last Munchkin unit – at least for the near future. As I shared in my last post on the Munchkin Landwehr, I am still recovering well from my knee surgery, and I have able to work on a few things. The Munchkin Light Artillery Battery was one of those.
A year ago, I painted up a medium battery for the Munchkins. That unit, with it’s 8″ short and 24″long range, has had the longest range of any of my Ozz units in 2023. To level the playing field/tabletop – and to provide a bit more variety for scenarios, I have decided to get the Munchkins this Light Battery – and to get the Winkies their own medium battery as well (coming soon I hope). Maybe at some point I’ll address this shortfall for the Gillikins, but not now! Again, Dave Stone is also currently is painting challenge “PAINT WHAT YOU GOT CHALLENGE 2023/2024”. This is my second unit for that challenge.
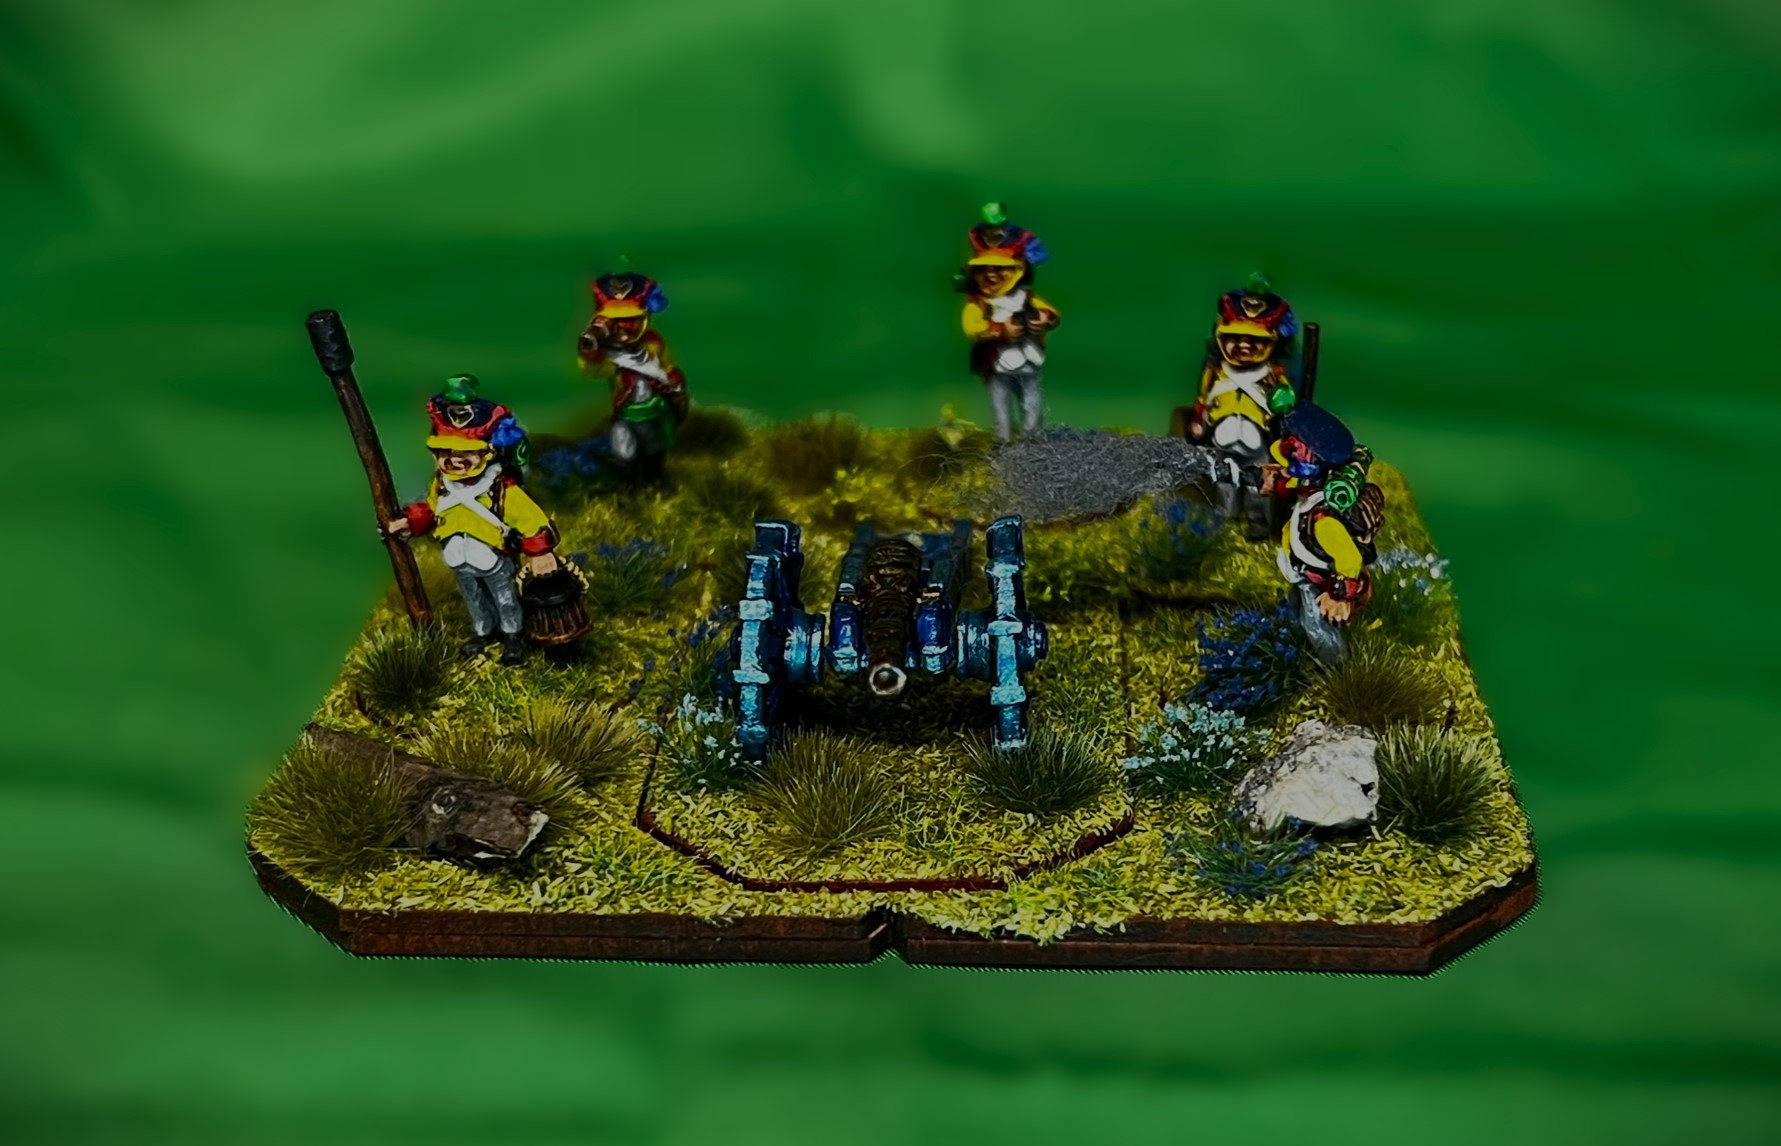
The Munchkin Light Artillery Battery (MLAB) has a short range of range of 6″ and a long range of 18″. Otherwise, the stats for the MLAB and crew are the same as the larger MMAB except for cost. Both units are good at missile combat with either their cannon or their carbines – with a Marksmanship value of 6/10. As for Melee (which is obviously not ideal for artillery), the MLAB and MMAB are both below average at 4/10 as one would expect. The Resolve value (the measure of the unit’s desire to stick in a fight) for both types is great at 7/10, and as for Elan (the desire to take the fight to the enemy), both are at an average 5/10. The MLAB is cheaper at 4 points, versus the MMAB cost of 5 points. Having two types of artillery give a lot of flexibility to a player or to myself as a GM.
The MLAB’s SKU is #OZZ-106. All of the figures are metal and 28mm in size. Artillery batteries in Wars of Ozz games are composed of 5 figures plus the gun. While an infantry or cavalry regiment has 5 bases – each of which can take 4 hits per base – a battery can only take 5 hits (one per figure). Each hit removes a figure and loses a die for the unit when it fires. The scale is 28mm and these figures are metal.
As with the Landwehr, I did not take many WIP shots, but I’ll share what I have and then go into some eye candy.
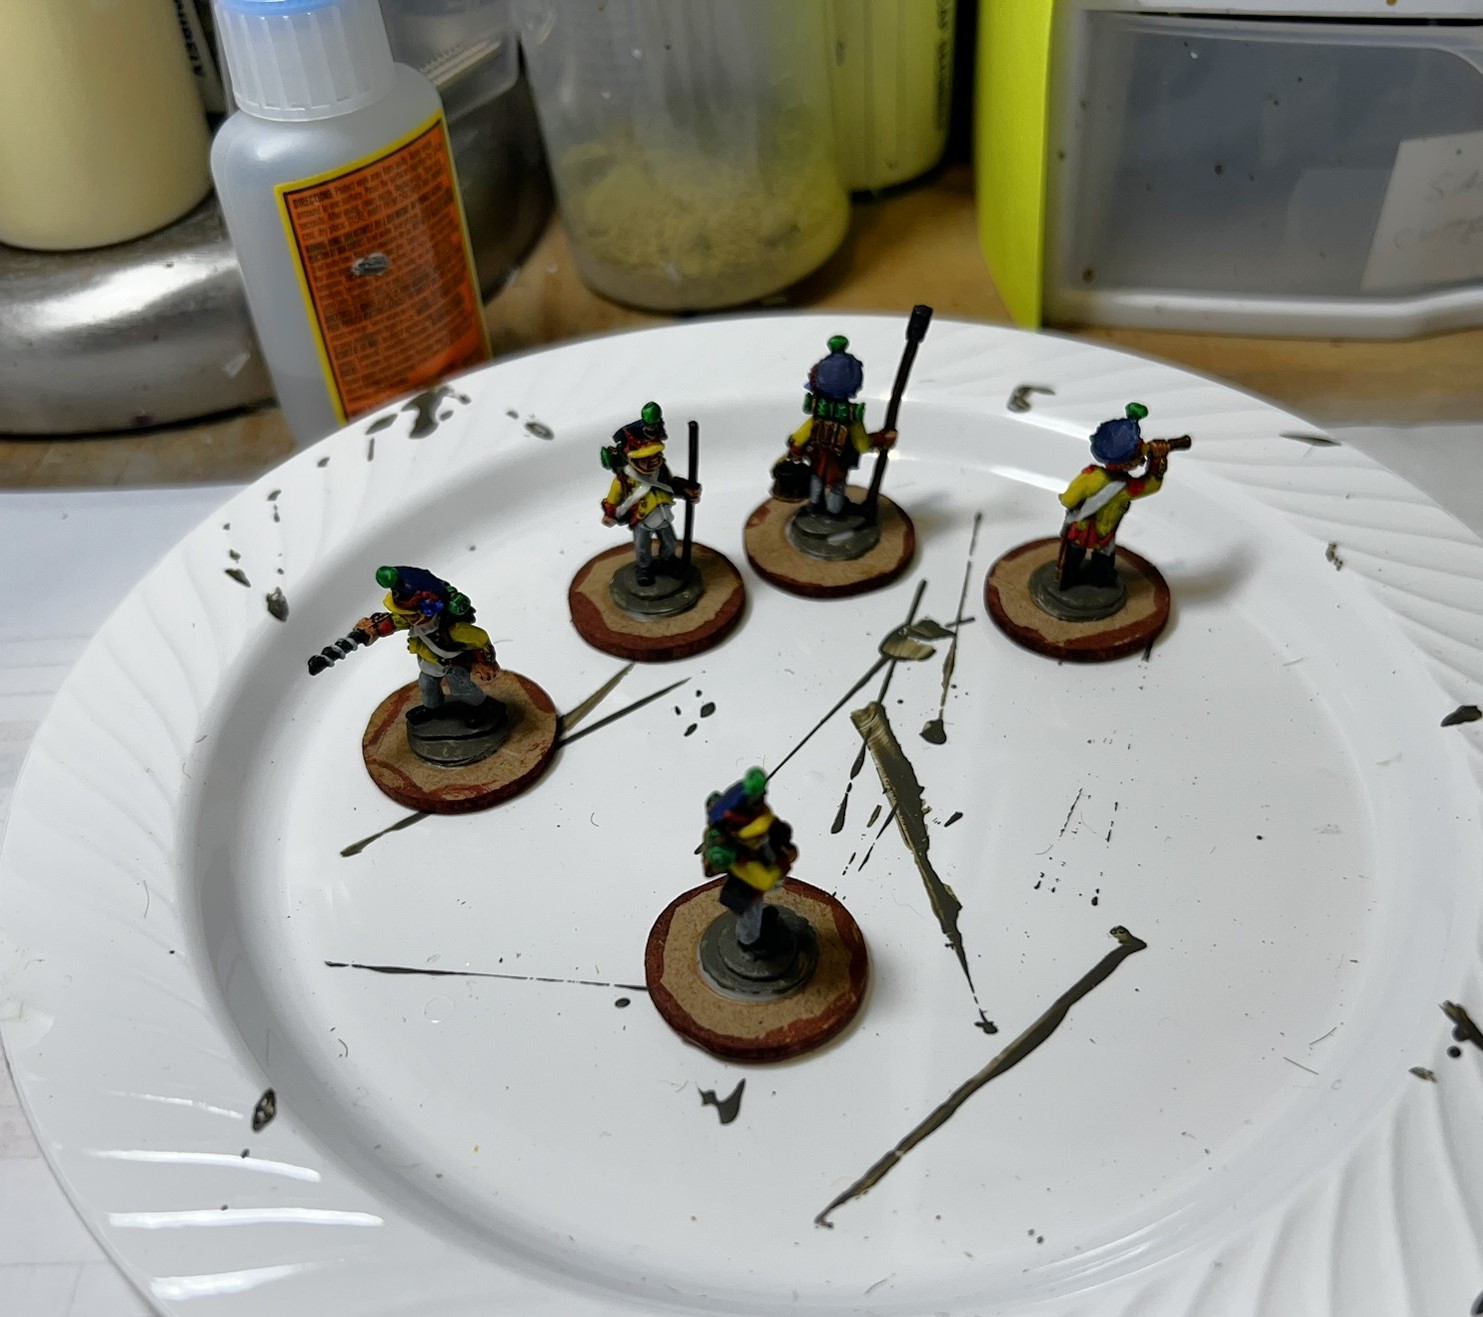
WIP shots…
Painted MLAB figures gluing to MDF sabot base inserts.
After varnishing and flocking.
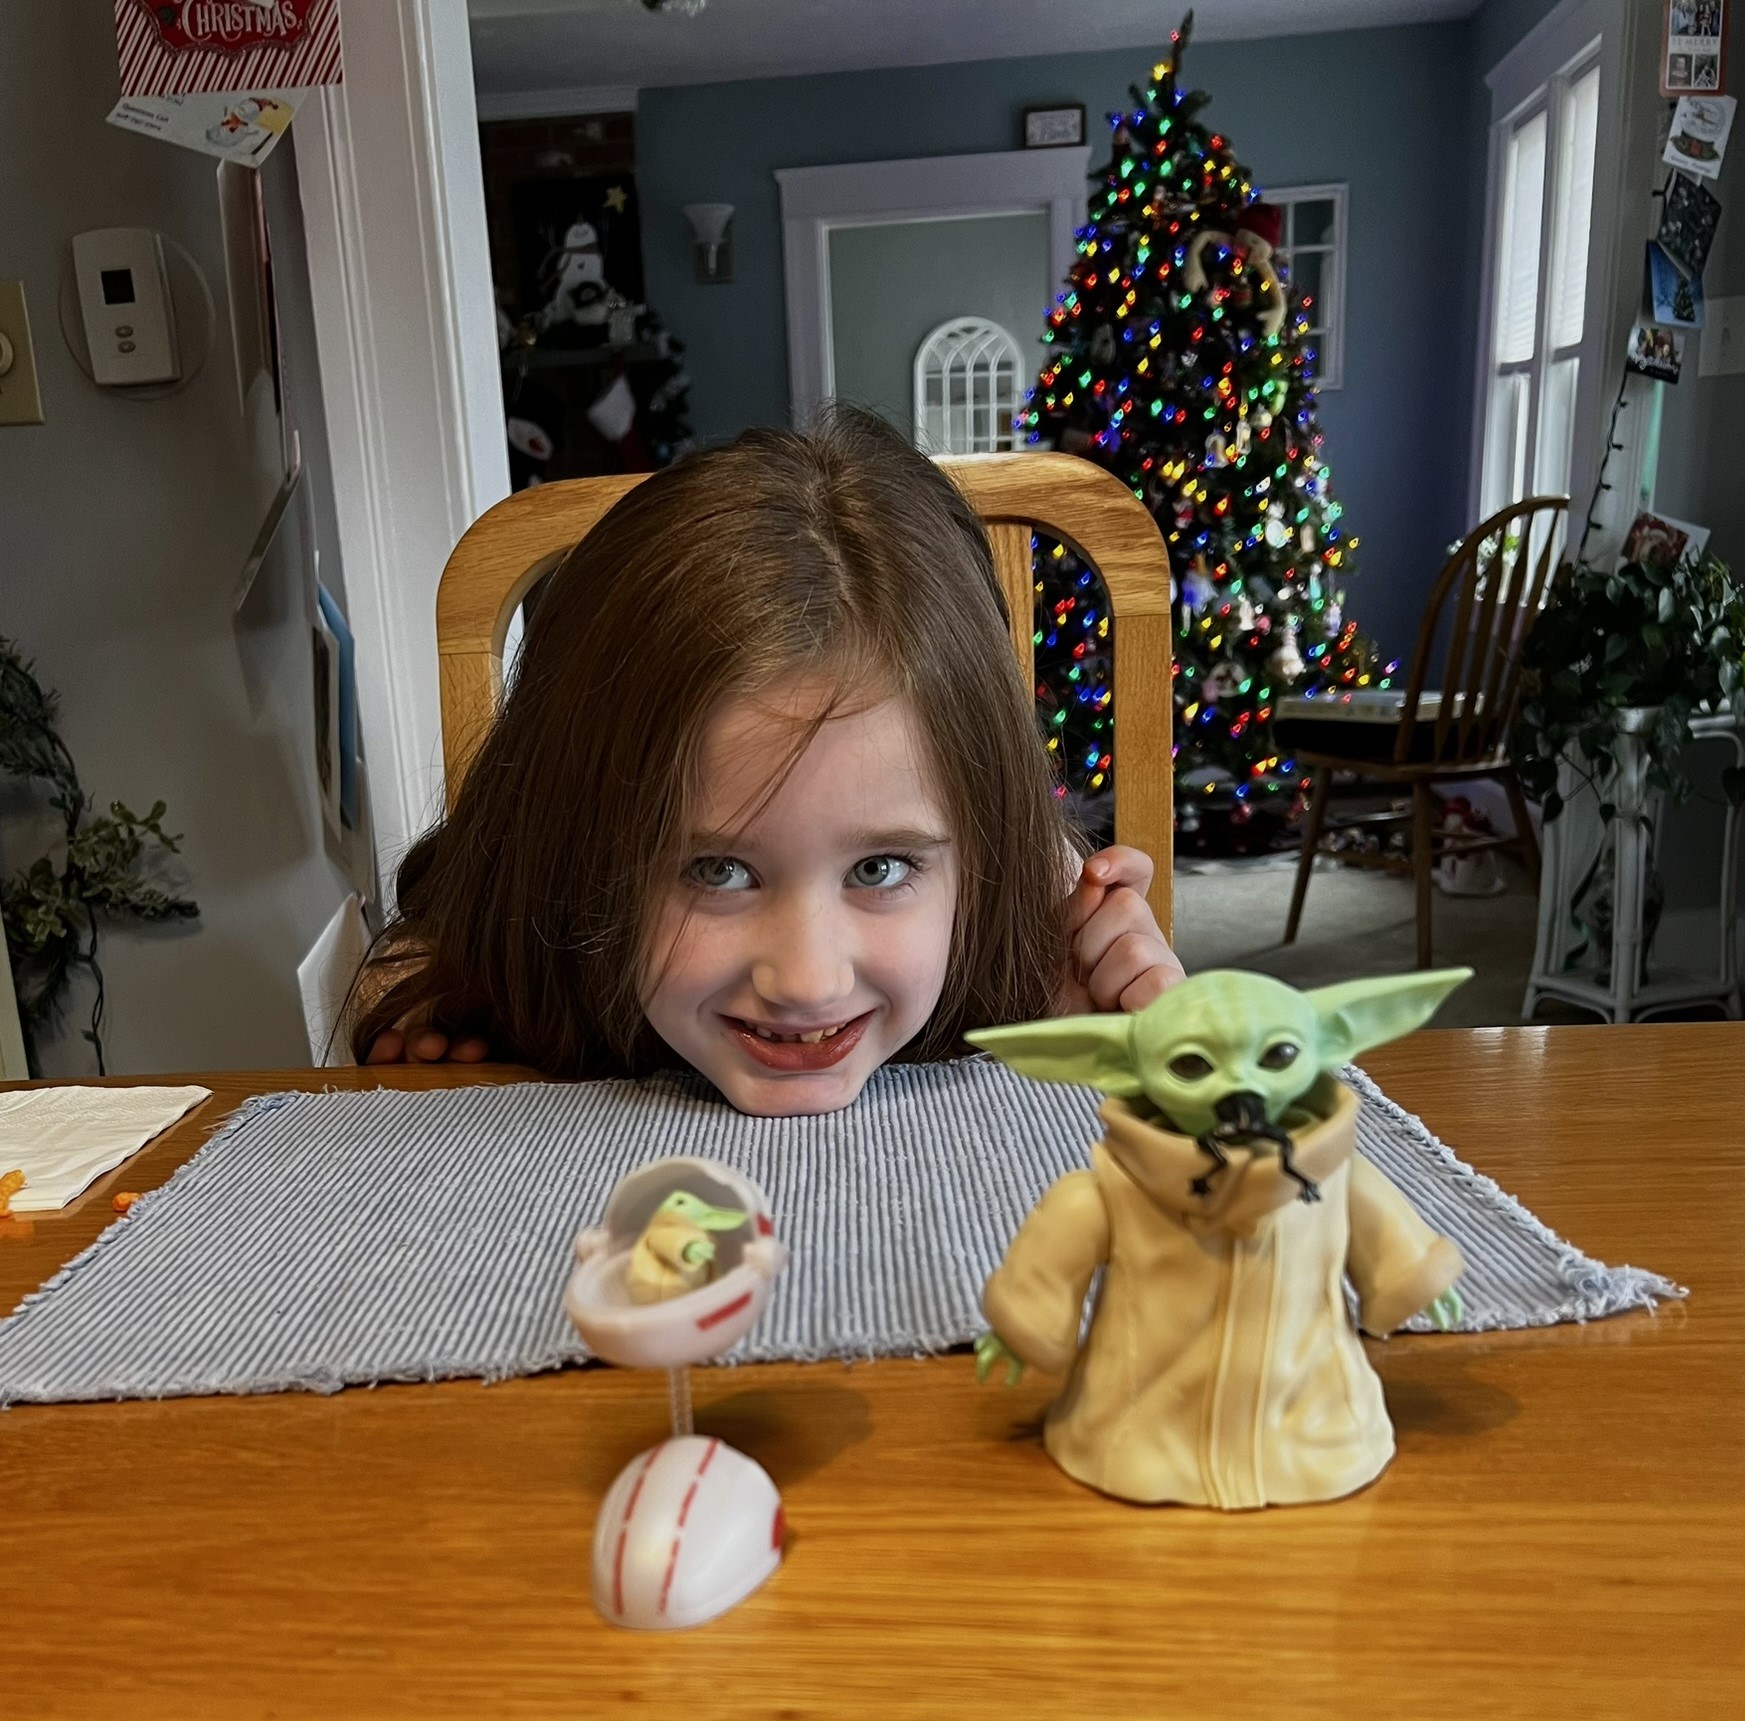
This was also a time to work on models with my grandaughter post-Christmas. We built a Pokemon Mew model, and then a Grogu. She just turned 7, so I was impressed with how well she did. Yes, this was fun too!
Back to the MLAB, here are some…
Eye Candy
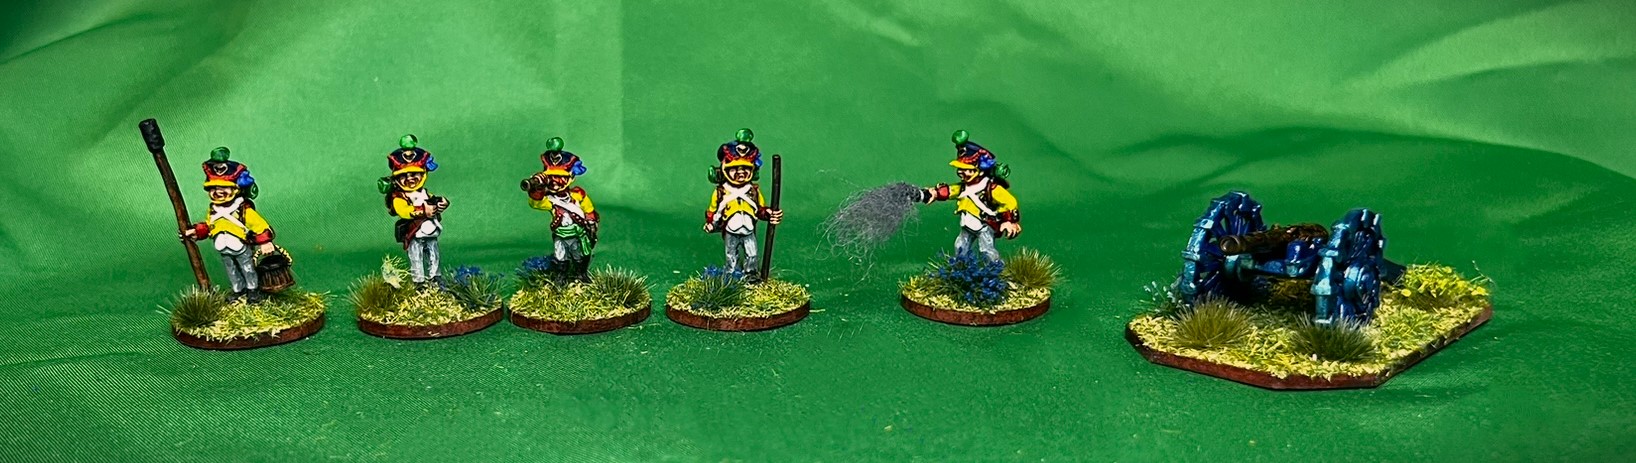
The crew and gun without the sabot base.
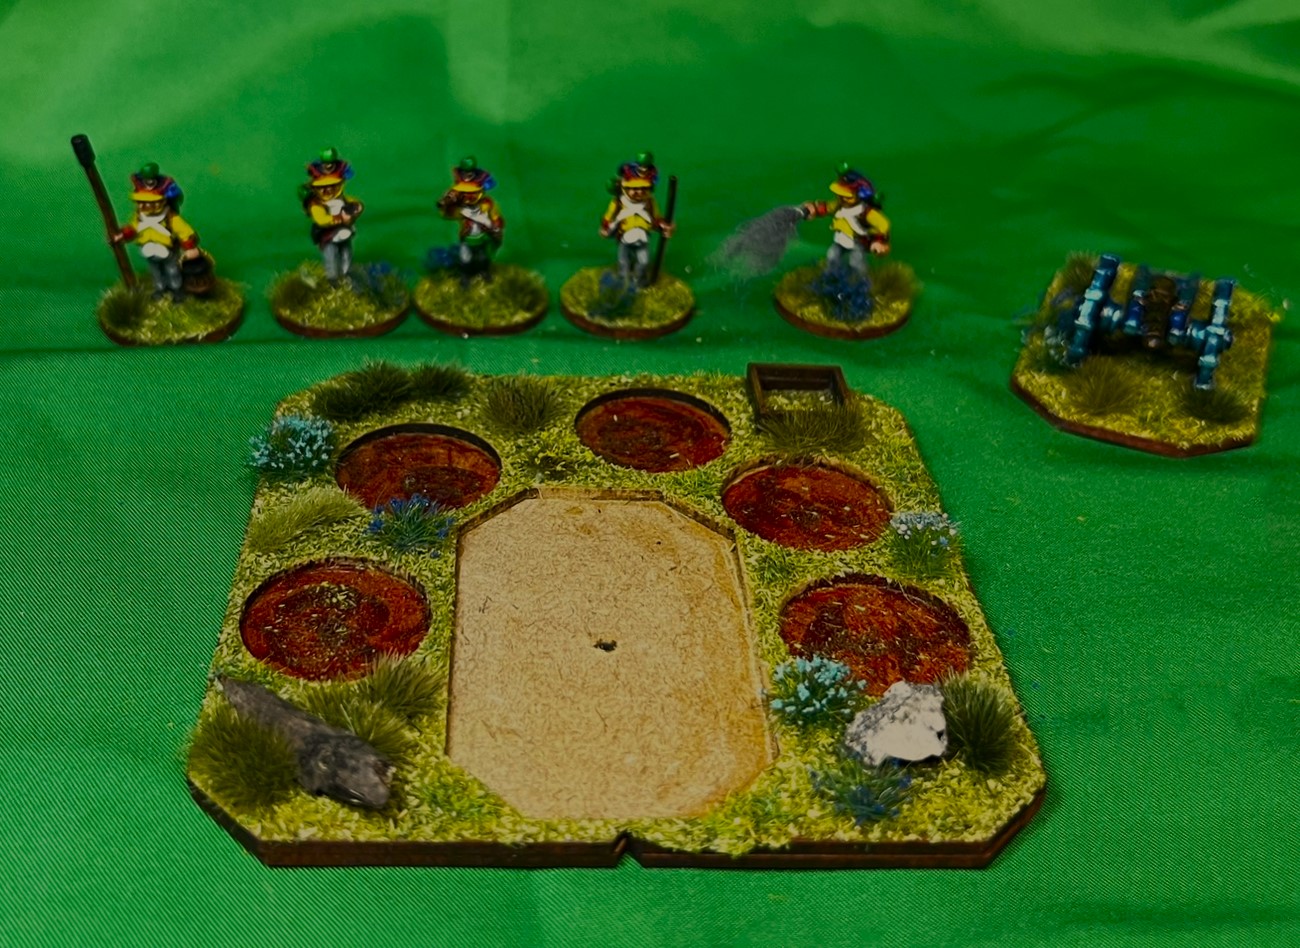
Detail of the MDF sabot base, showing the bloody spots for future casualties as the figures get removed.
The MLAB on its base, frontal view.
The MLAB on its base, left front view.
The MLAB on its base, right side view.
The MLAB on its base, top view.
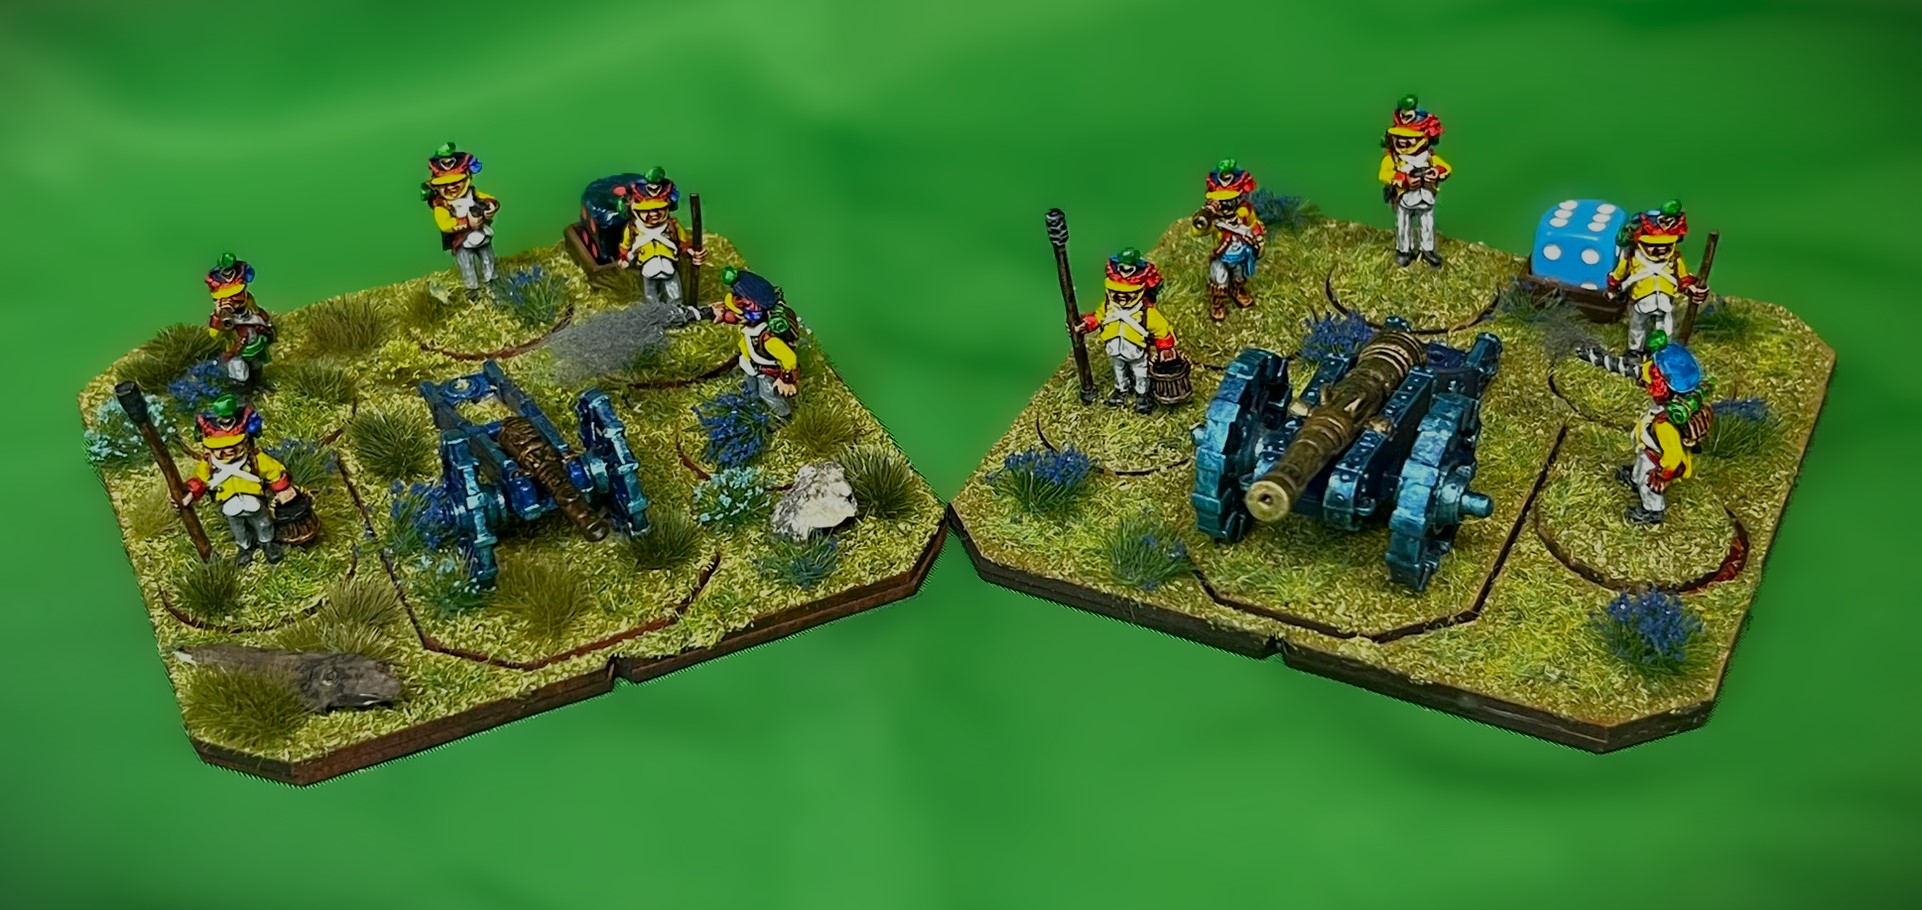
Both the MLAB and MMAB for comparison.
This project’s completion brings my completed forces for the Munchkins to 8 units and 3 individuals (not counting the 4 Adventurers of Ozz):
I appreciate your looking at this artillery unit. Next up I’ll be doing my annual 2023 year end round-up and 2024 goal-setting post. That’s mainly for me to hold myself accountable! (somebody has to…)
Thanks for checking this post out and please let me know what you think in the comments section. Yes, I still have more to come…
Miscellaneous details and references for those interested in that sort of thing:
For all of my previous posts on Wars of Ozz games, figures, units, and other related projects – please see this page.
PAINTS, INKS, GLAZES, SHADES, WASHES, PIGMENTS, FLOCKING, GLUES AND MORE THAT I USED ON THIS MUNCHKIN LIGHT ARTILLERY BATTERY:
MDF Artillery sabot base from Wars of Ozz Miniatures
Elmer’s PVA Glue
1/2″ x 1/2″ square steel bases from Wargames Accessories (#16)
1 1/4″ x 1″ square steel bases from Wargames Accessories (#FOW1)
Poster tack
Vallejo “Flow Improver”
Vallejo “Airbrush Thinner”
Vallejo Premium Primer “White”
Secret Weapon Washes “Heavy Body Black” (wash)
Citadel “Nuln Oil” (wash)
1/8″ neodymium magnets
3/4″ steel washers
Vallejo Model Color “White”
The Armory “Dark Blue”
Vallejo “Thinner Medium”
Army Painter “Speed Paint – Hoard Bronze 2.0”
Army Painter “Speed Paint – Crusader Skin 1.0”
DecoArt “Peacock Pearl”
Gorilla Glue
Citadel “Nuln Oil GLOSS” (wash/shade)
Vallejo Model Color “Dark Prussian Blue”
Army Painter “Blue Tone” (wash)
P3 “Brown ink” (ink)
Citadel “Contrast Paint – Contrast Medium”
Citadel “Contrast Paint – Apothecary White”
Vallejo Mecha Color “Off White”
Citadel “Contrast Paint – Bad Moon Yellow”
Citadel “Contrast Paint – Baal Red”
Citadel “Contrast Paint – Karandras Green”
Pendraken 12mm dice frame
Army Painter “Speed Paint – Hardened Leather 1.0”
Vallejo Model Color “Wood Grain”
Army Painter “Speed Paint – Glittering Gold 2.0”
Vallejo Mecha Color “SZ Red”
Martha Stewart Crafts “Brushed Bronze”
Vallejo Model Air “Steel”
P3 “Midland Flesh”
Citadel “Blood fro the Blood God”
Army Painter “Speed Paint – Royal Robes 2.0”
Citadel “Contrast Paint – Aggaros Dunes”
Army Painter “Flesh Wash” (wash)
Battlefront “Sherman Drab”
Vallejo Mecha Varnish “Gloss Varnish”
Vallejo Mecha Varnish “Matte Varnish”
Army Painter “Battlefield Grass Green” (flocking)
Small stones
Twig
Pillow batting
Gamers Grass “Green Meadow Set”
Army Painyer Battlefield XP “Woodland Tufts”
Army Painter “Battlefields Field Grass” (flocking)
Shadow’s Edge Miniatures “6mm Dark Forest Dark Blue Tufts” (flocking)
Shadow’s Edge Miniatures “6mm Dark Forest Light Blue Tufts” (flocking)
As you may want to check out the Wars of Ozz figures’ range – there are two places to get them and the rules (and I make no money from this btw). The game rules and the figures are available from the following two places:
As I have been recovering from pre-Christmas knee surgery, my painting opportunities have been touch and go. As my painting habit is to do so while standing up at a workbench, I have needed to pay attention to my body and go carefully. I do not paint while sitting. The good news (at least for me) is that I recovery is going well and that I have been able to work in painting figures here and there.
Luckily for me, Dave Stone is also currently running another of his painting challenges. It is called the “PAINT WHAT YOU GOT CHALLENGE 2023/2024”, and it runs from December 26th, 2023 to February 29th, 2024. It’s always fun to be part of his challenges – and it’s a lot of work on his part to collect and collate all the entries from around the globe (and it is much appreciated Dave!). My plan is to complete as many Wars of Ozz units and individuals as possible – both for the challenge – and for the multiple gaming conventions that I plan on supporting as a GM.
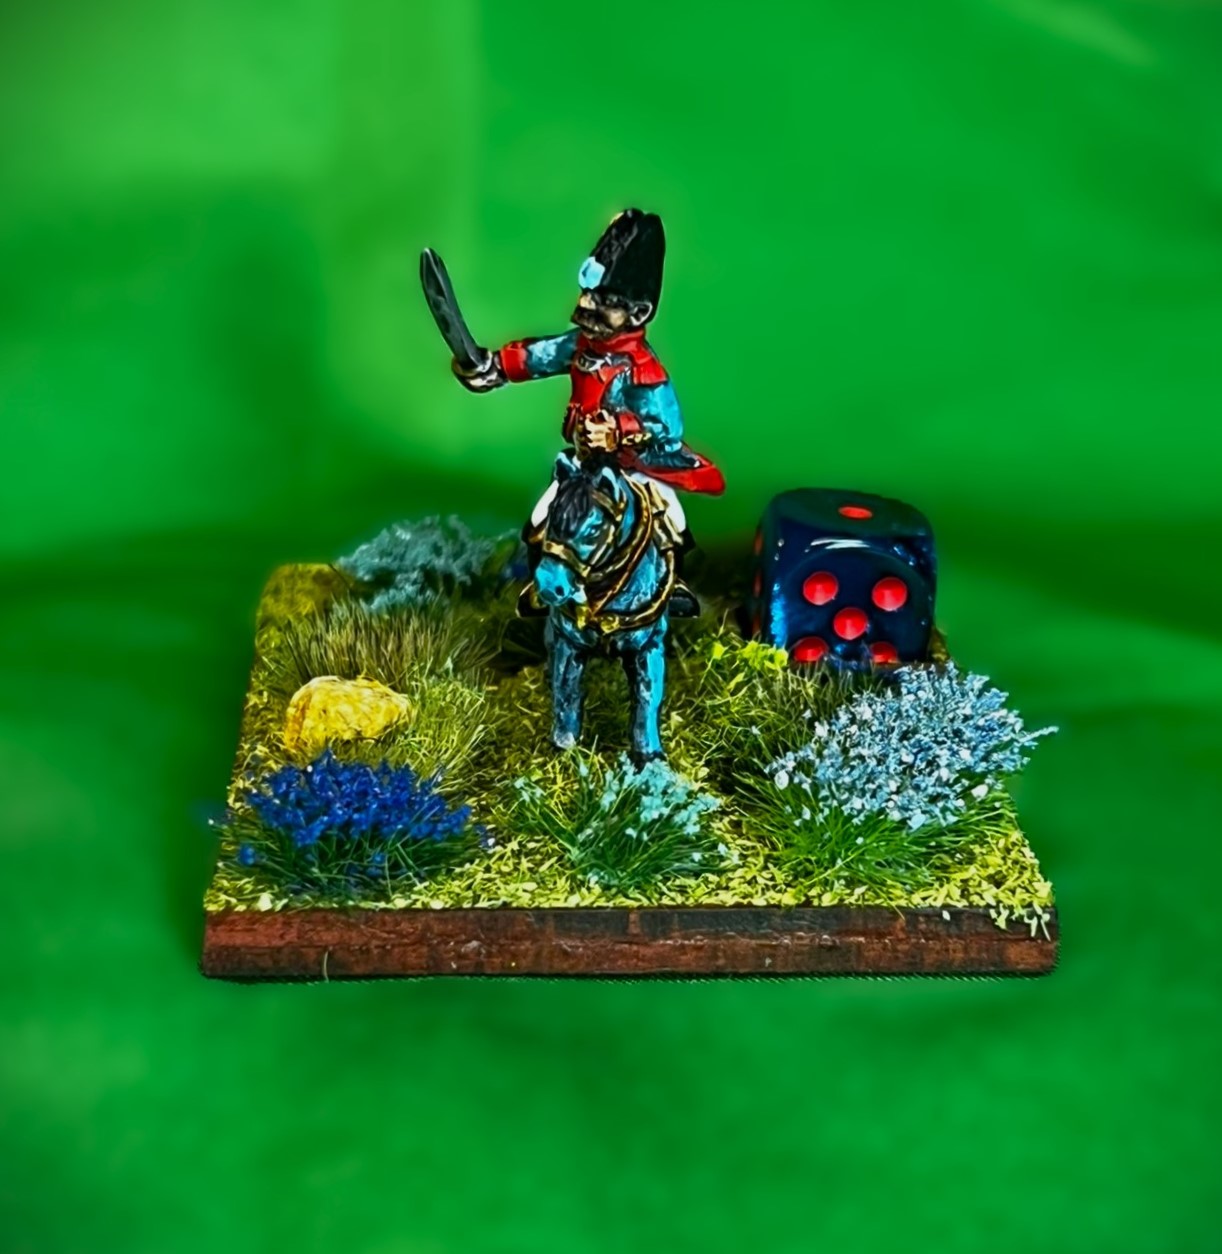
My first entry in the challenge is the subject of this post – and it is a very nice Munchkin Landwehr Infantry Regiment. I had been wanting to get another “cheaper” infantry unit for my Wars of Ozz games. This would enable me to round out my Munchkin forces to about 2 brigades which gives me more flexibility and variety for game play. In the game, Munchkin Landwehr units are basically militia/national guard-type units. What is nice is that there are two types of Landwehr infantry regiments that are visibly indistinguishable from each other – but that have very different costs and stats. One type is called National Guard (Landwehr) and the other is called Dubious National Guard (Landwehr). The former is a better-trained unit, but one that is more expensive than the latter.
The better Landwehr regiment is good at missile combat with their muskets – having a Marksmanship value of 6/10. The Dubious Landwehr only has a Marksmanship value of 4/10 (they need time on the firing range). With regards to Melee, the better Landwehr are below average at 4/10, but the Dubious Landwehr are even worse at only a 3/10 (they need more hand-to-hand combat training). The Resolve value (the measure of the unit’s desire to stick in a fight) for the better Landwehr is okay at 6/10, but their lesser trained Dubious brother’s Resolve is a poor 4/10. As for Elan (the desire to take the fight to the enemy), the better Landwehr are an average 5/10, while the Dubious Landwehr cower on the tabletop at a 3/10. The only advantage that the Dubious Landwehr over regular Landwehr is in terms of point cost. A Dubious Landwehr Regiment can be had at 3 points, while a normal Landwehr regiment will cost 5 points. This gives a lot of flexibility to a player or a GM as a unit can be designated as either type at the game’s set up.
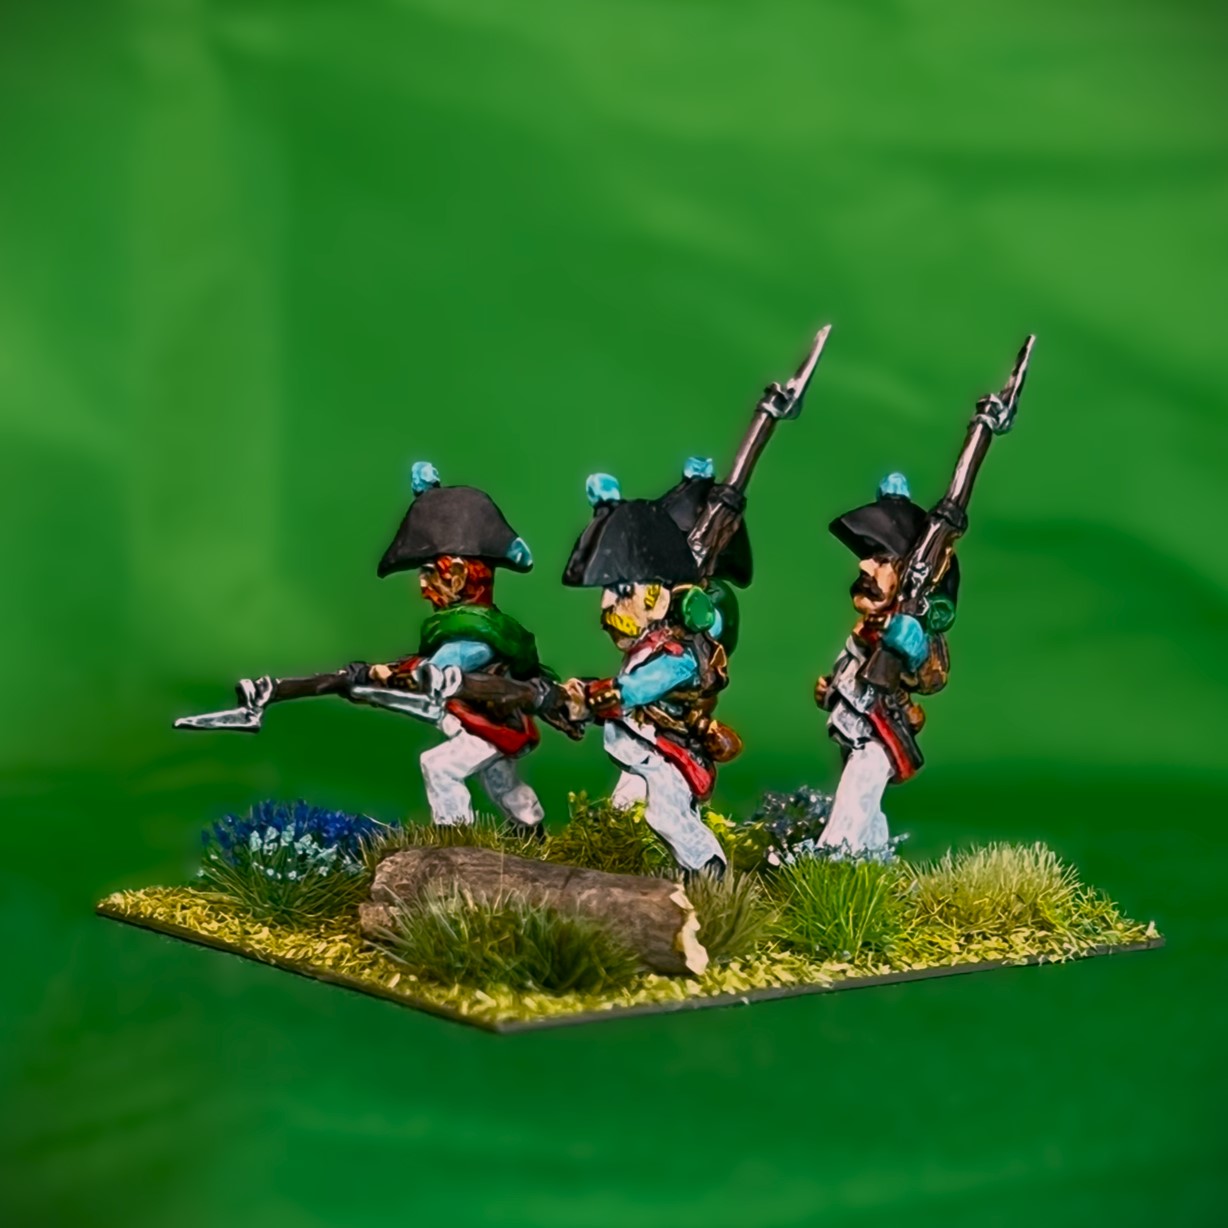
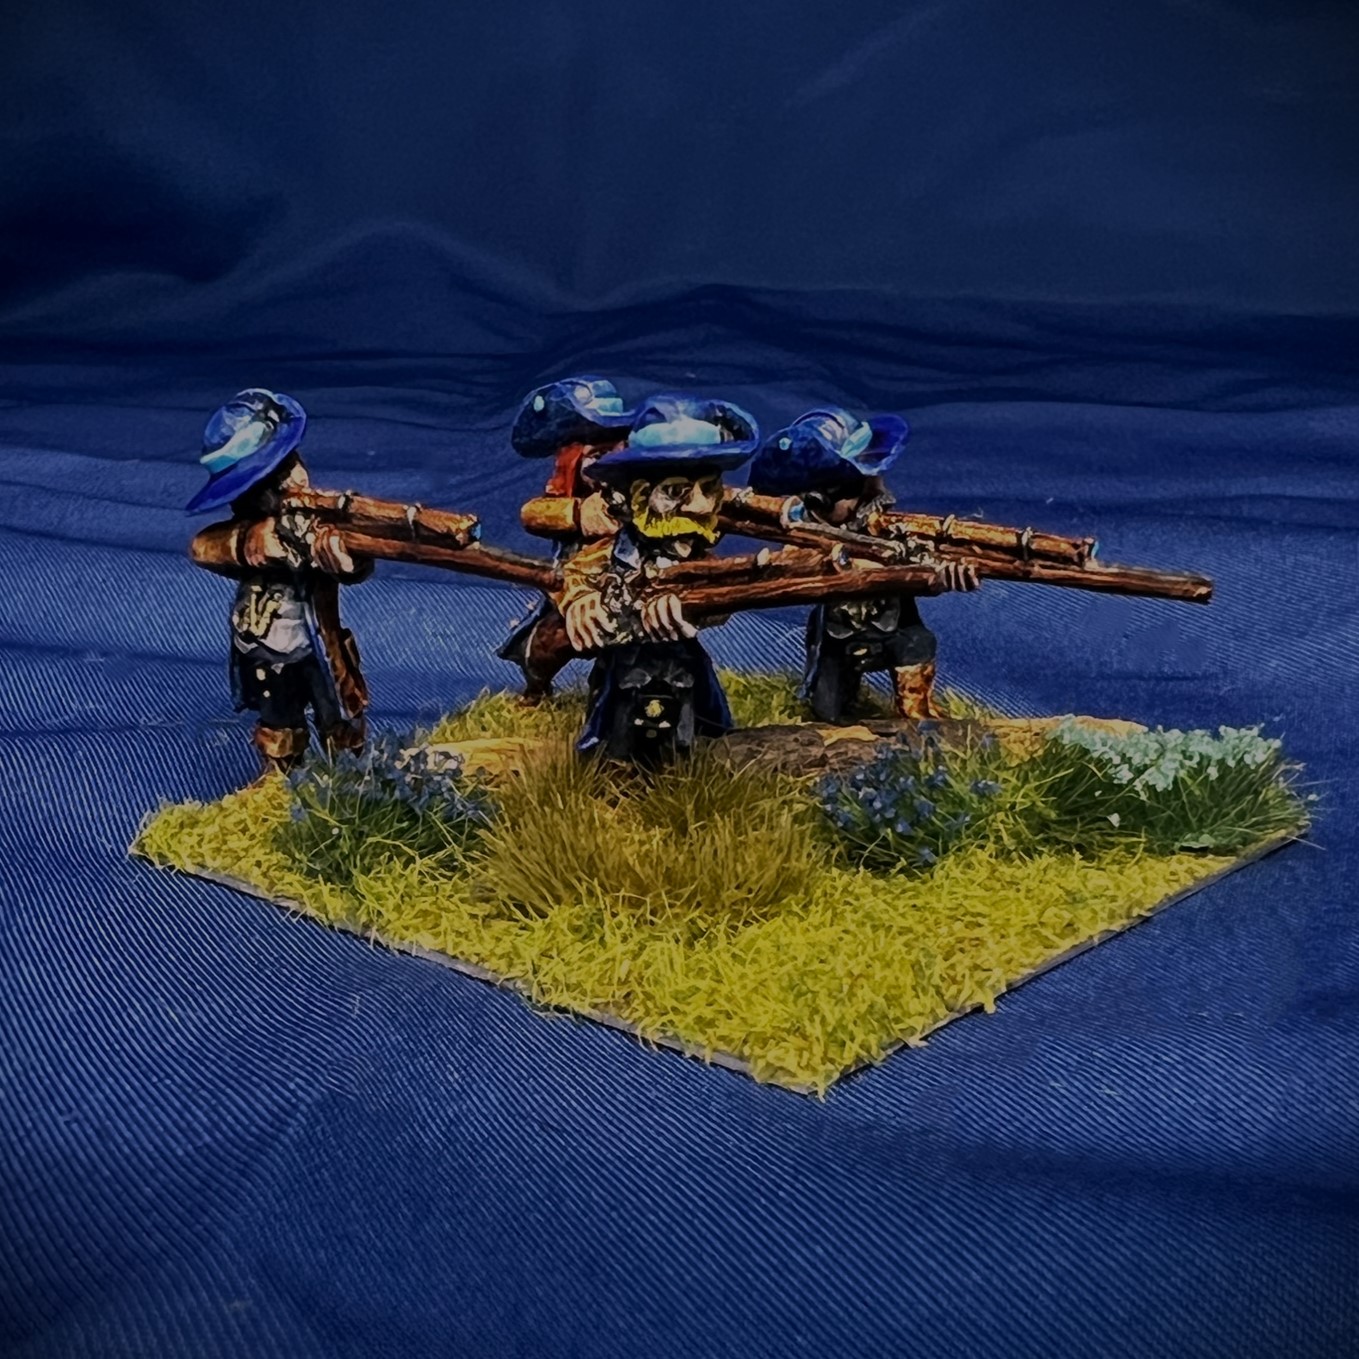
All of the figures are metal and 28mm in size. Interestingly, every convention game with Munchkin troops that I have ever set up in the past has attracted a passerby who thinks I have mixed scales on the tabletop! Yes, the Munchkins are indeed smaller, but 28mm!
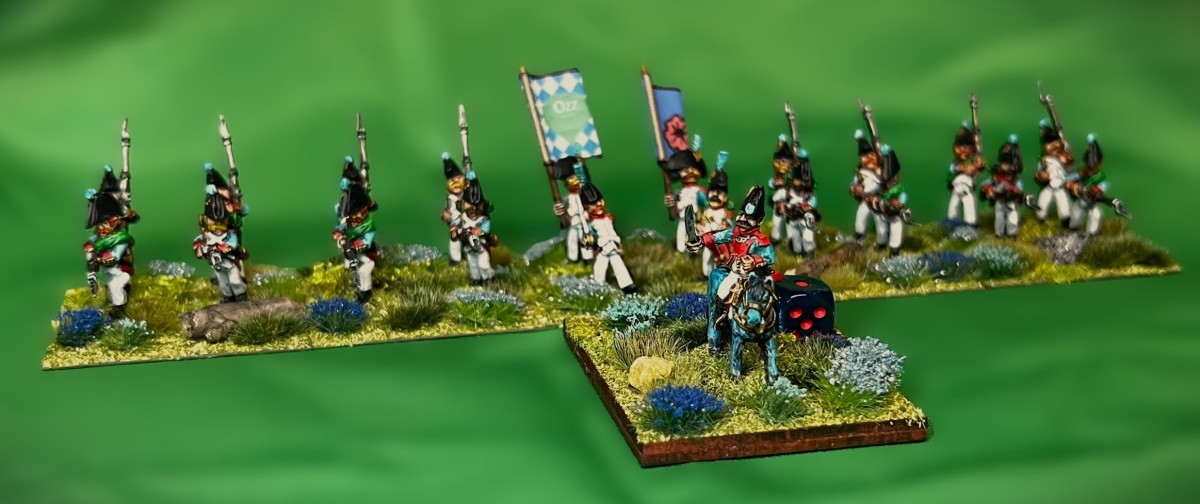
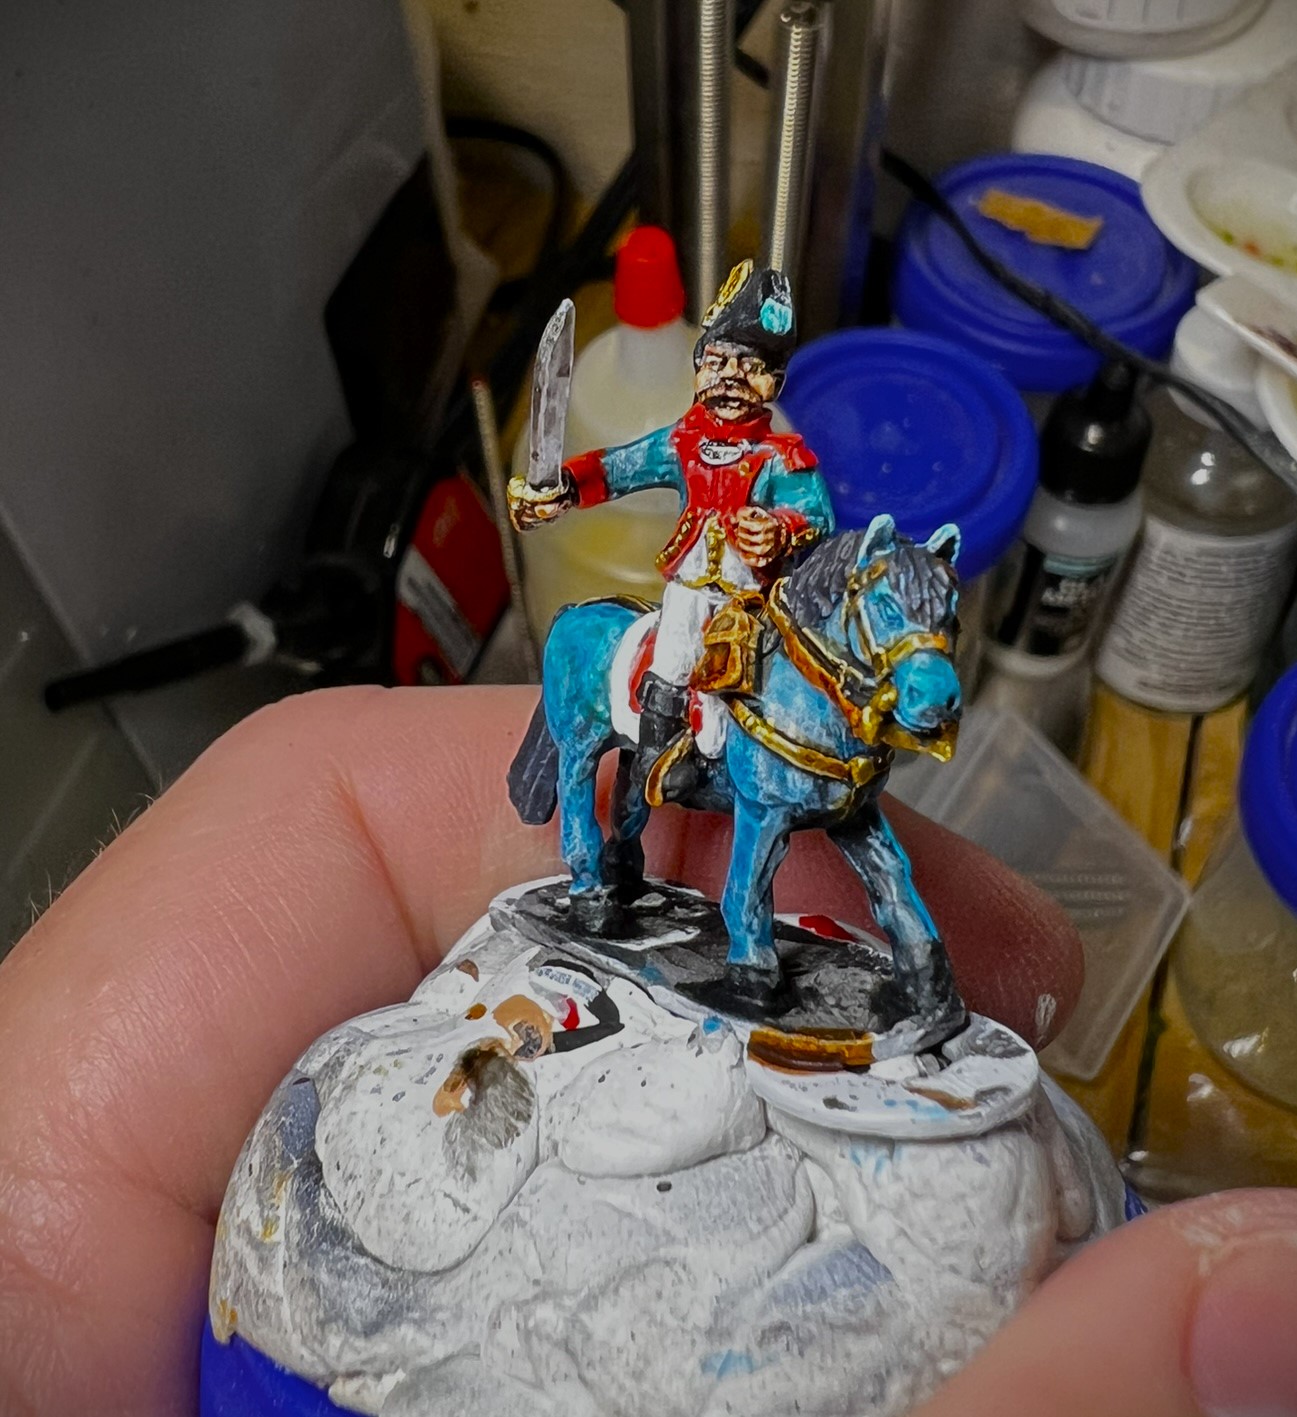
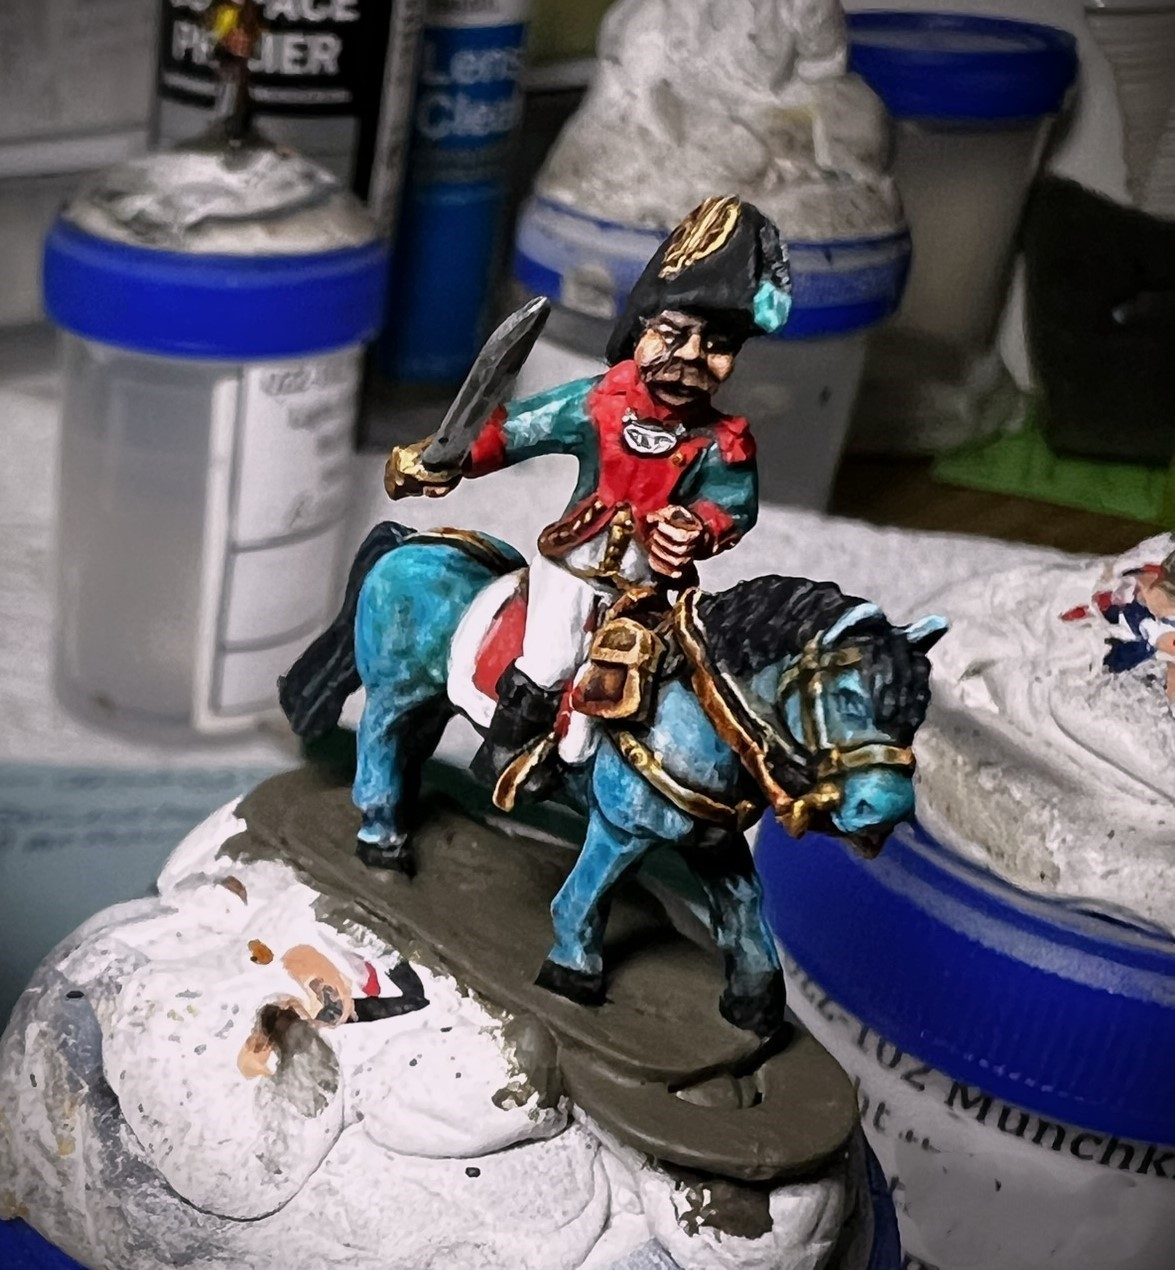
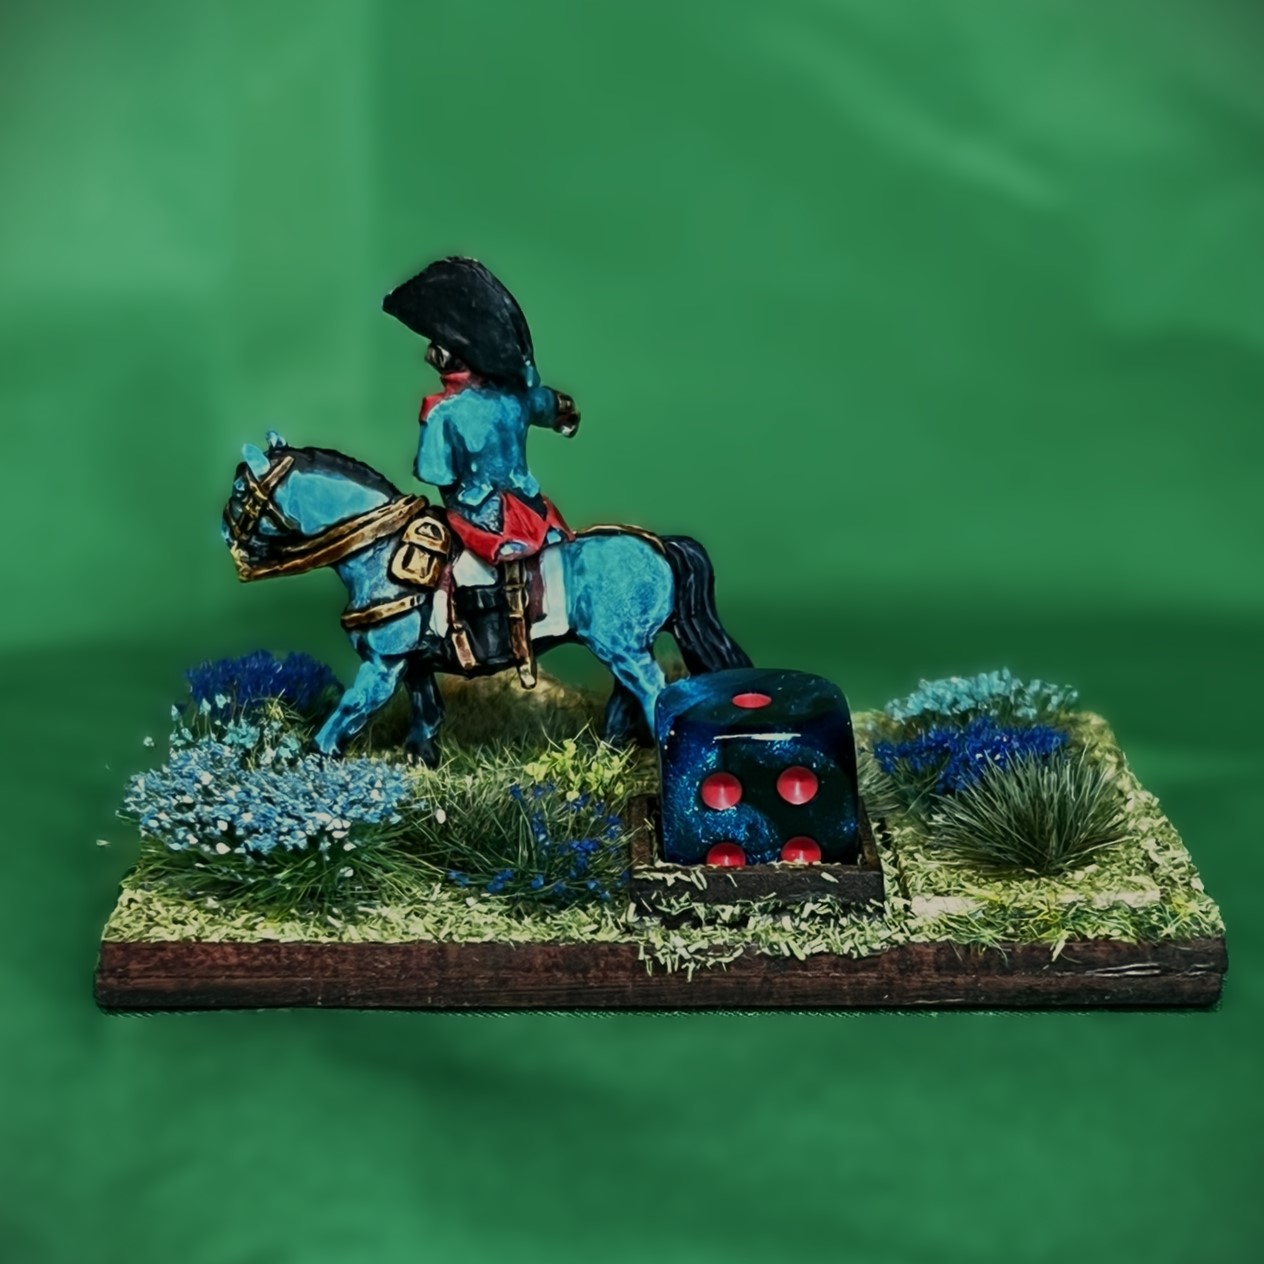
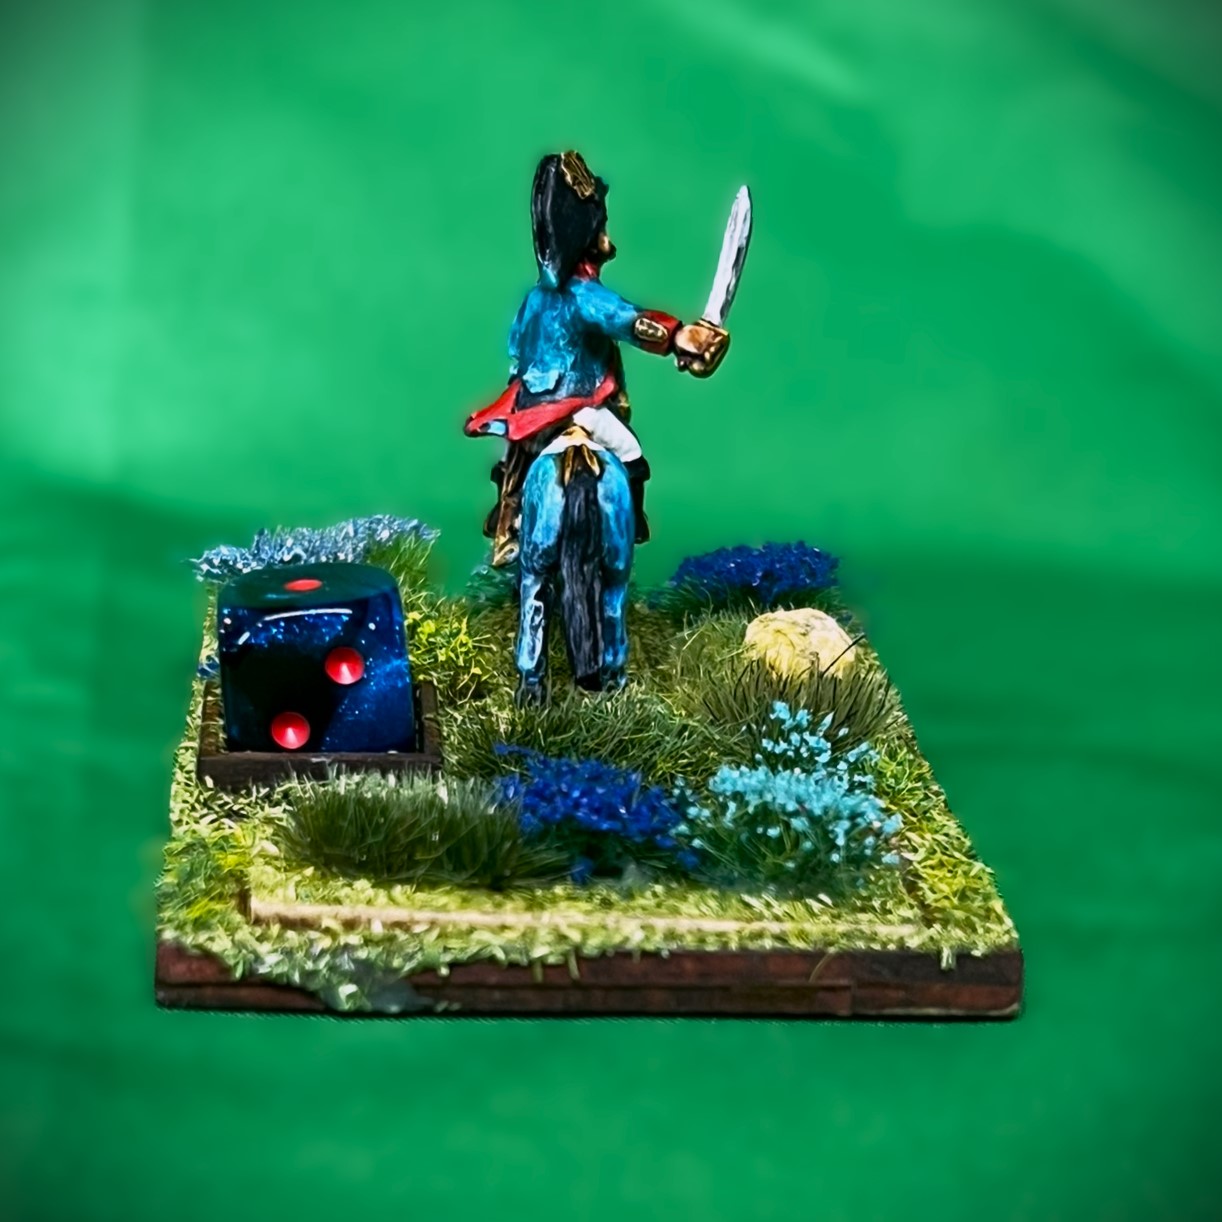
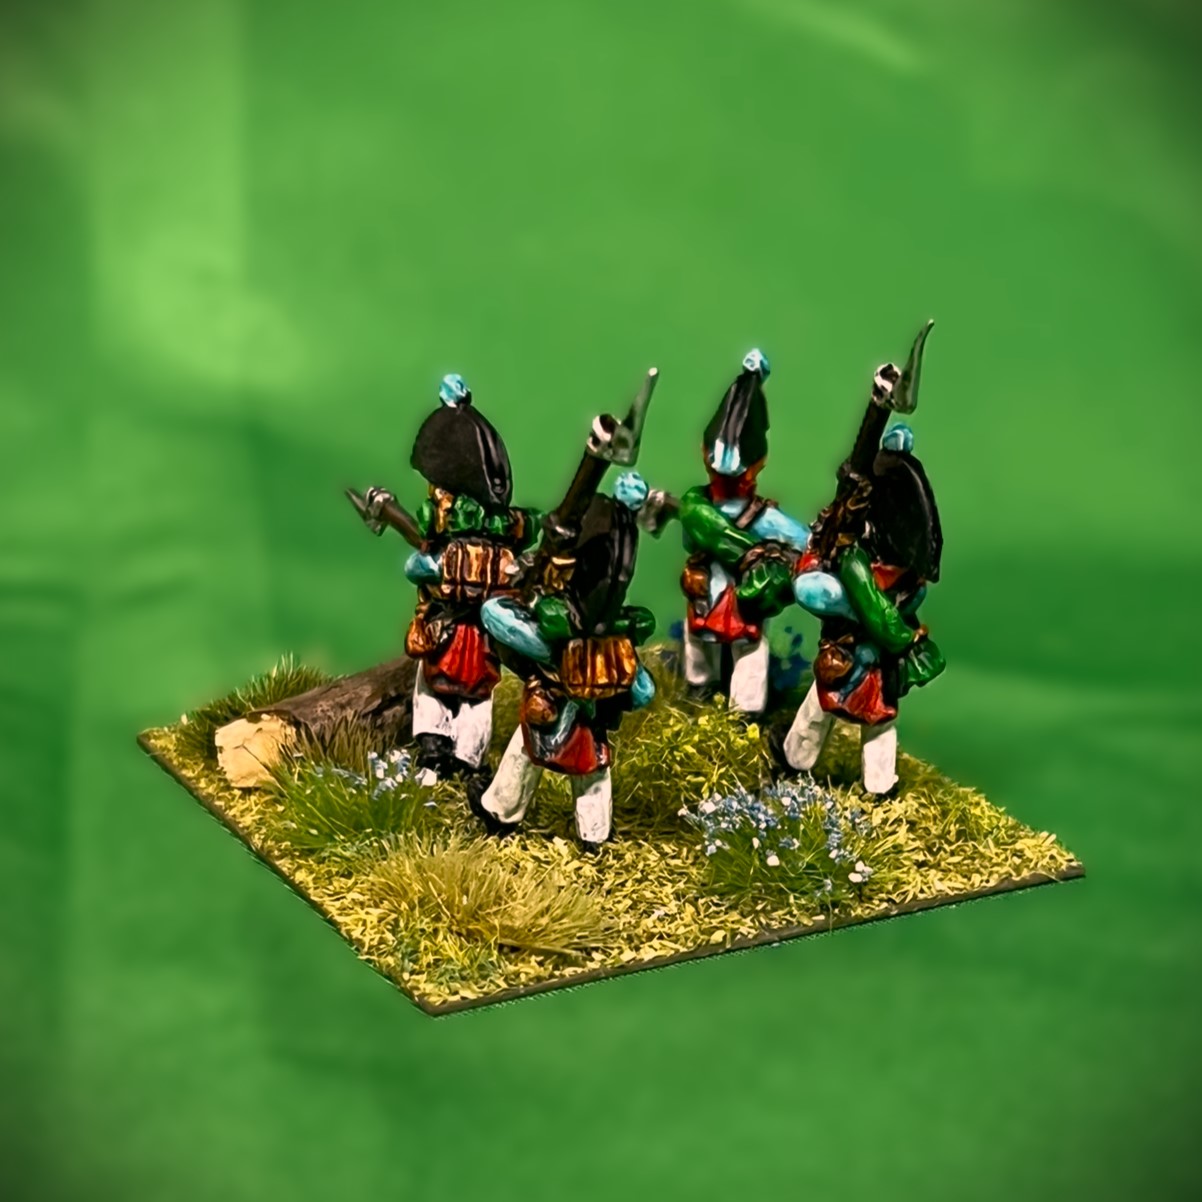
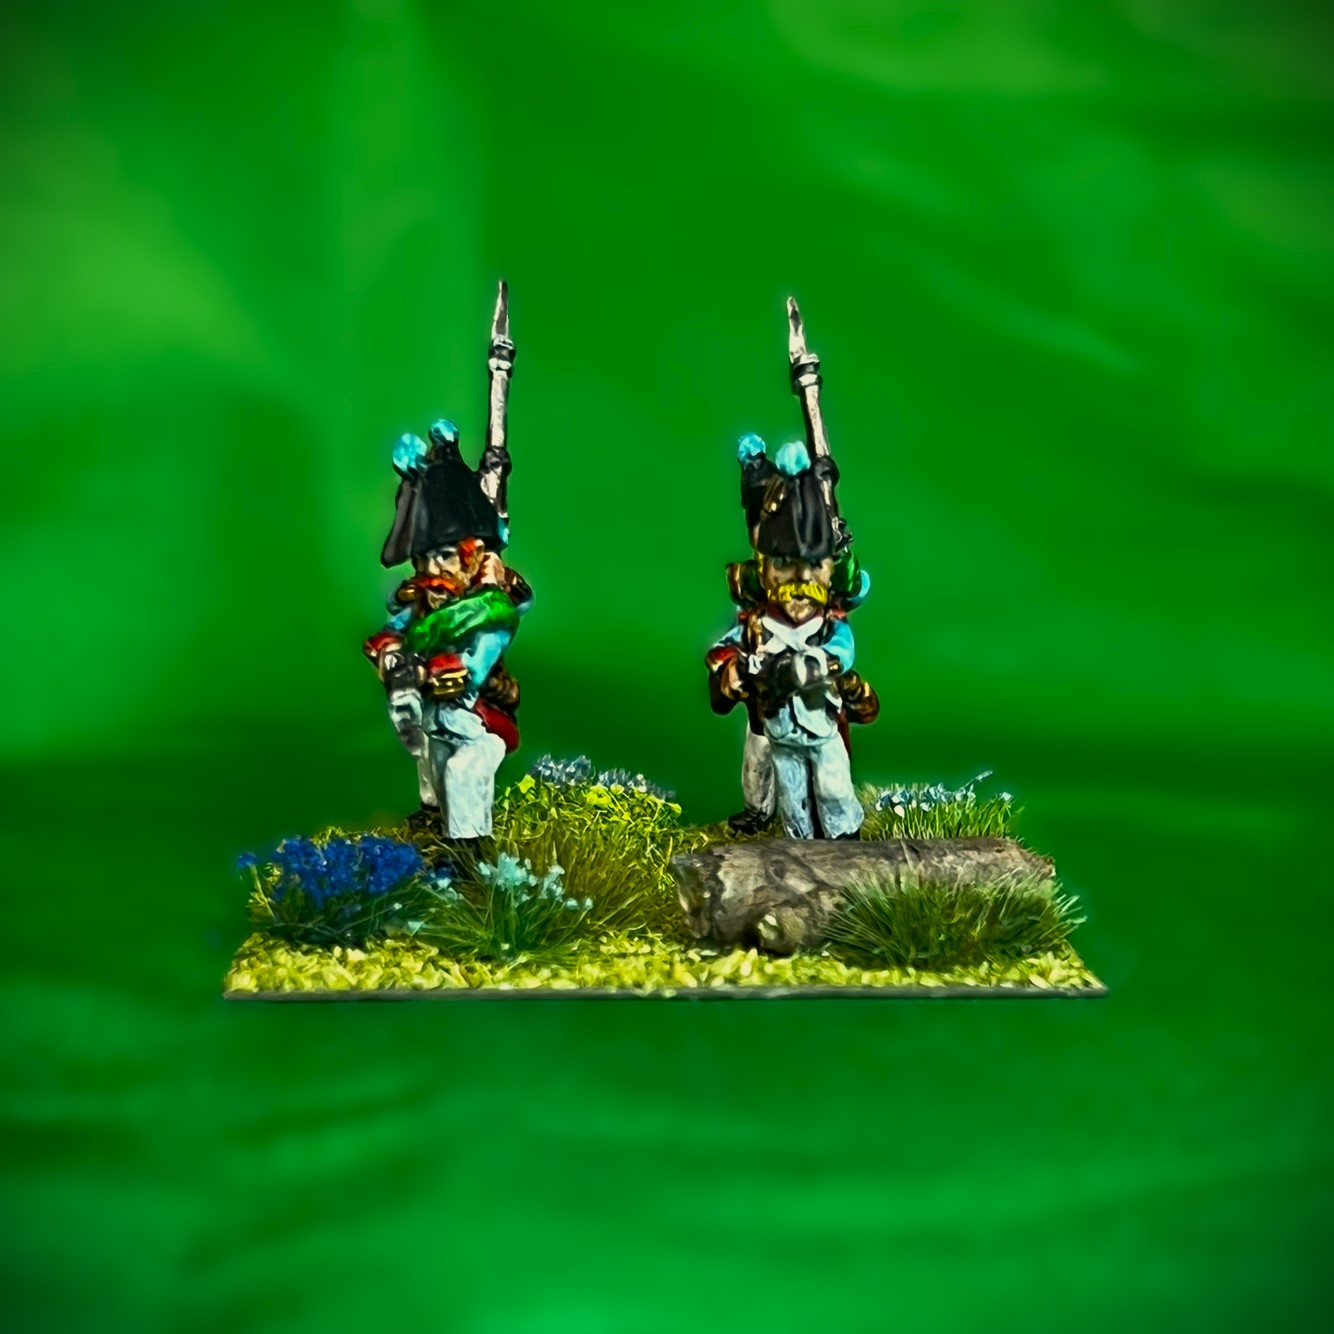
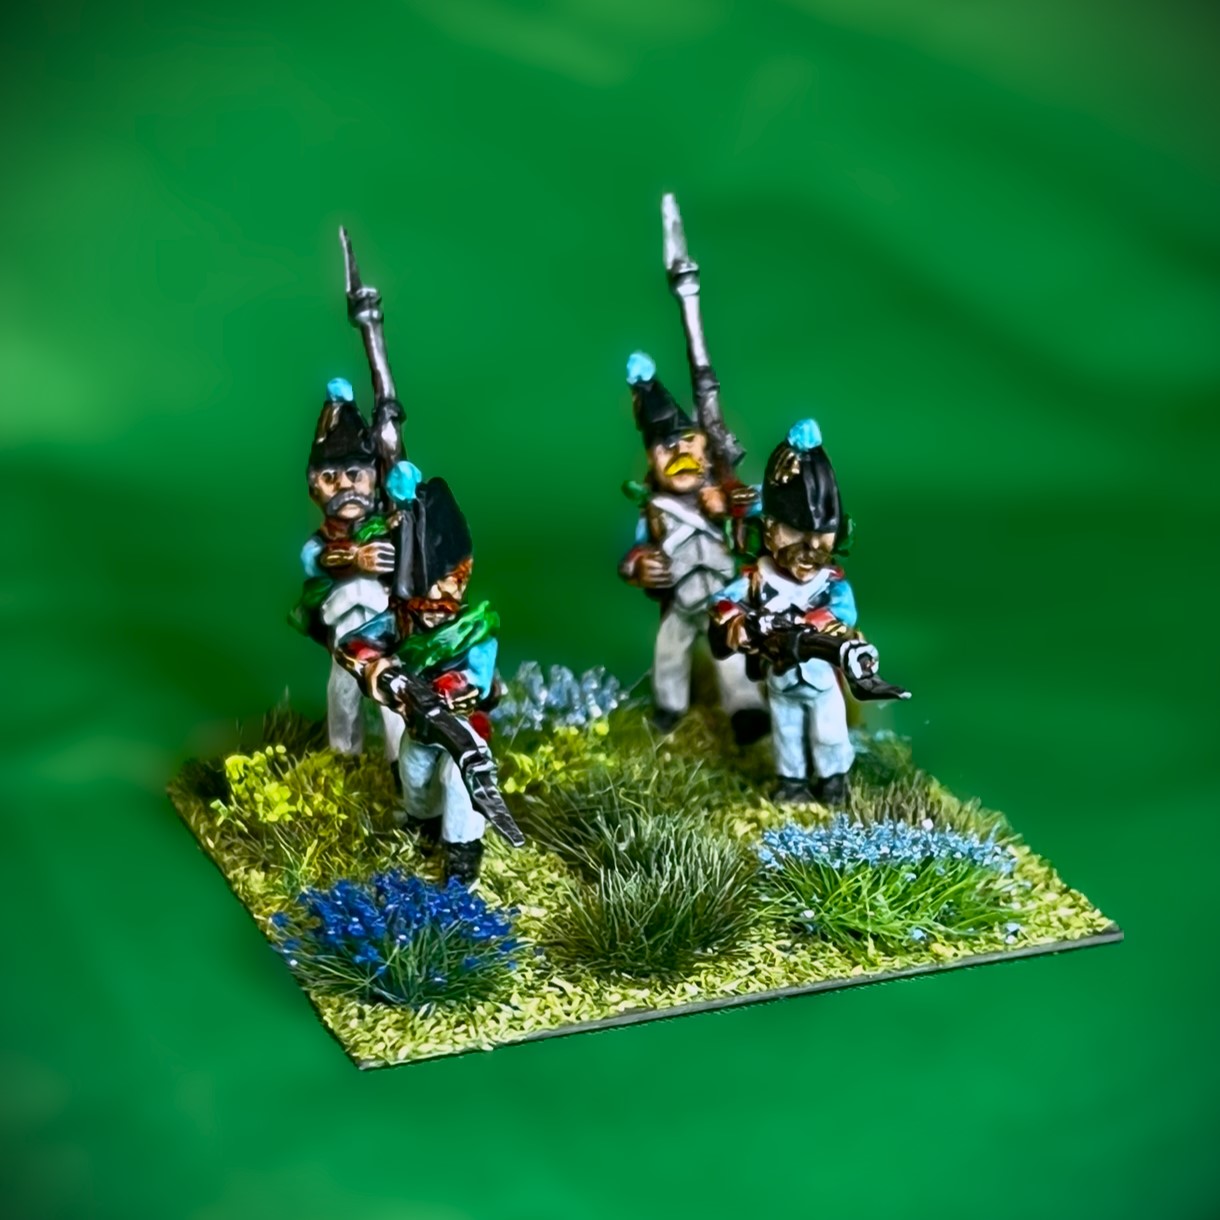
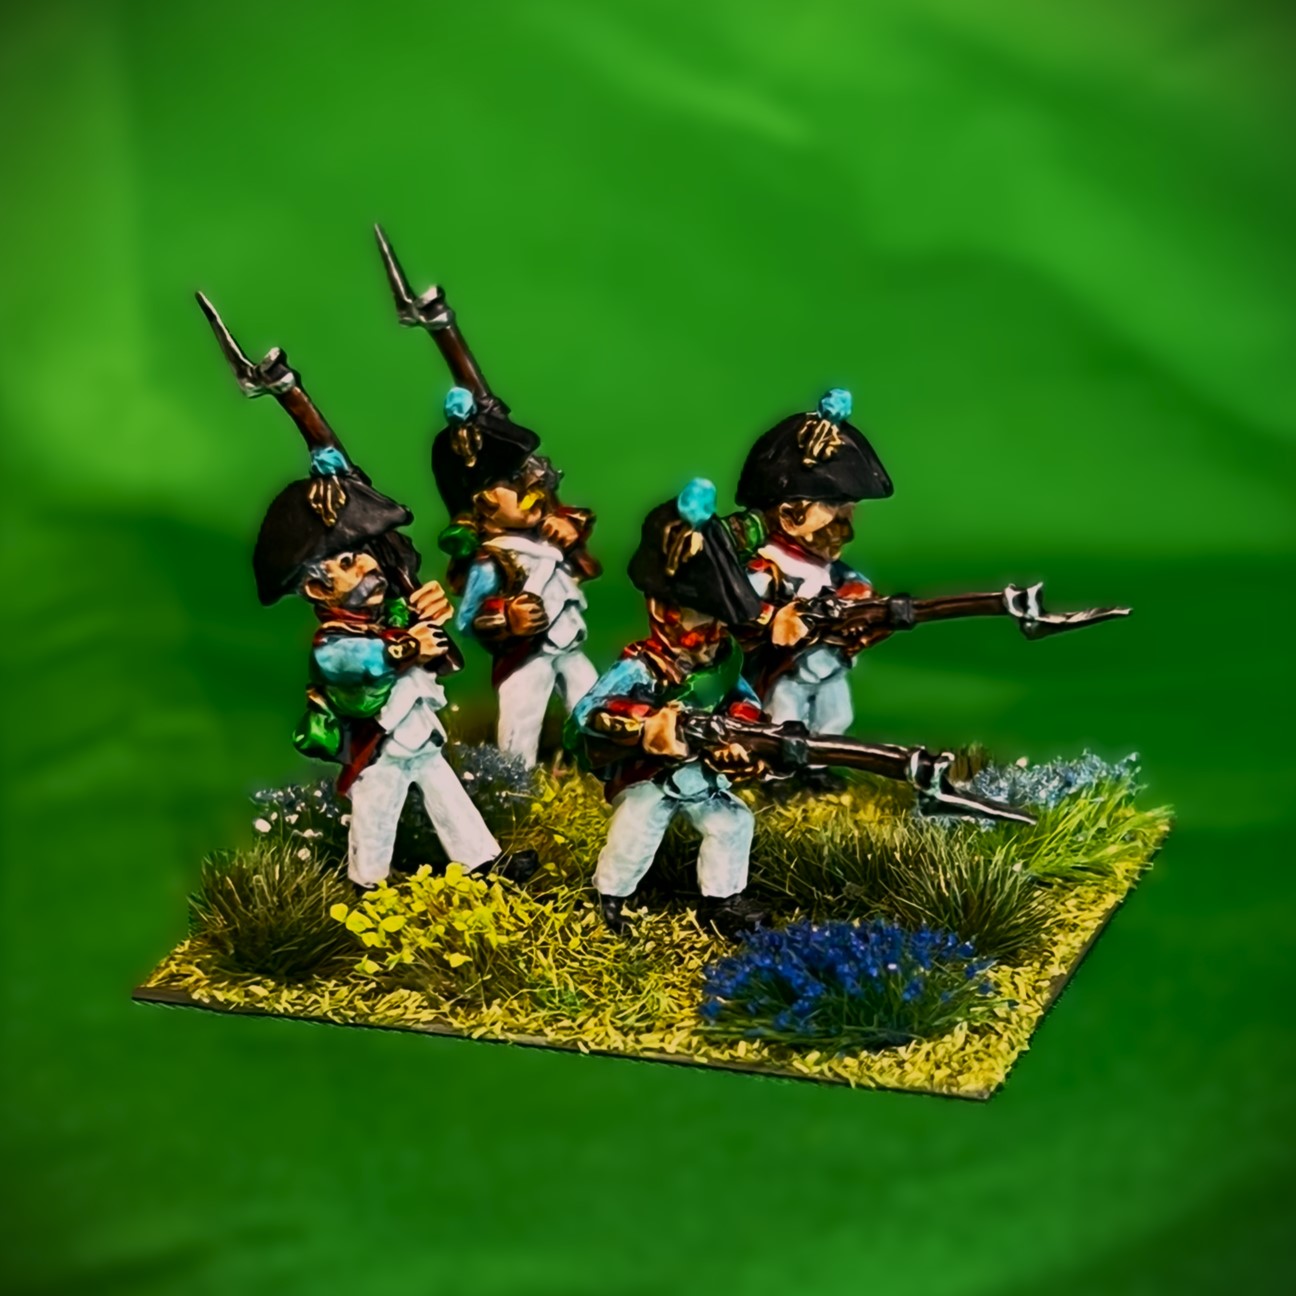
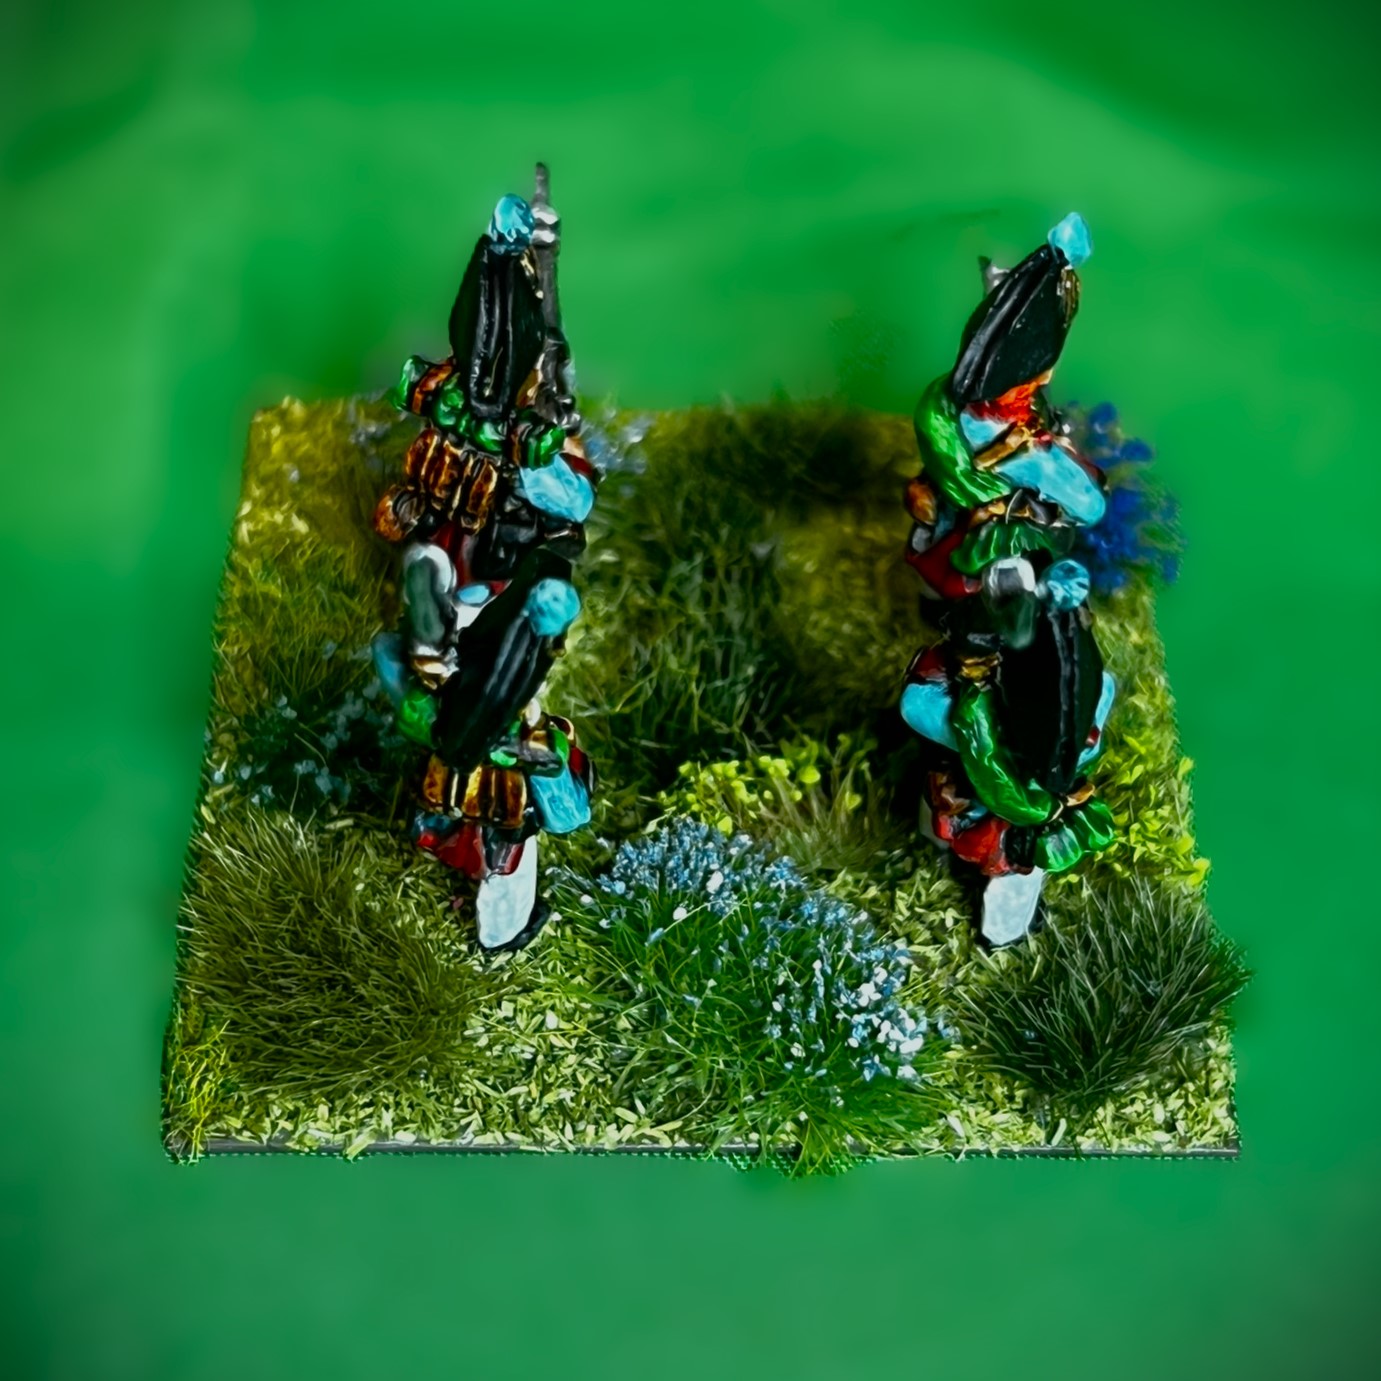
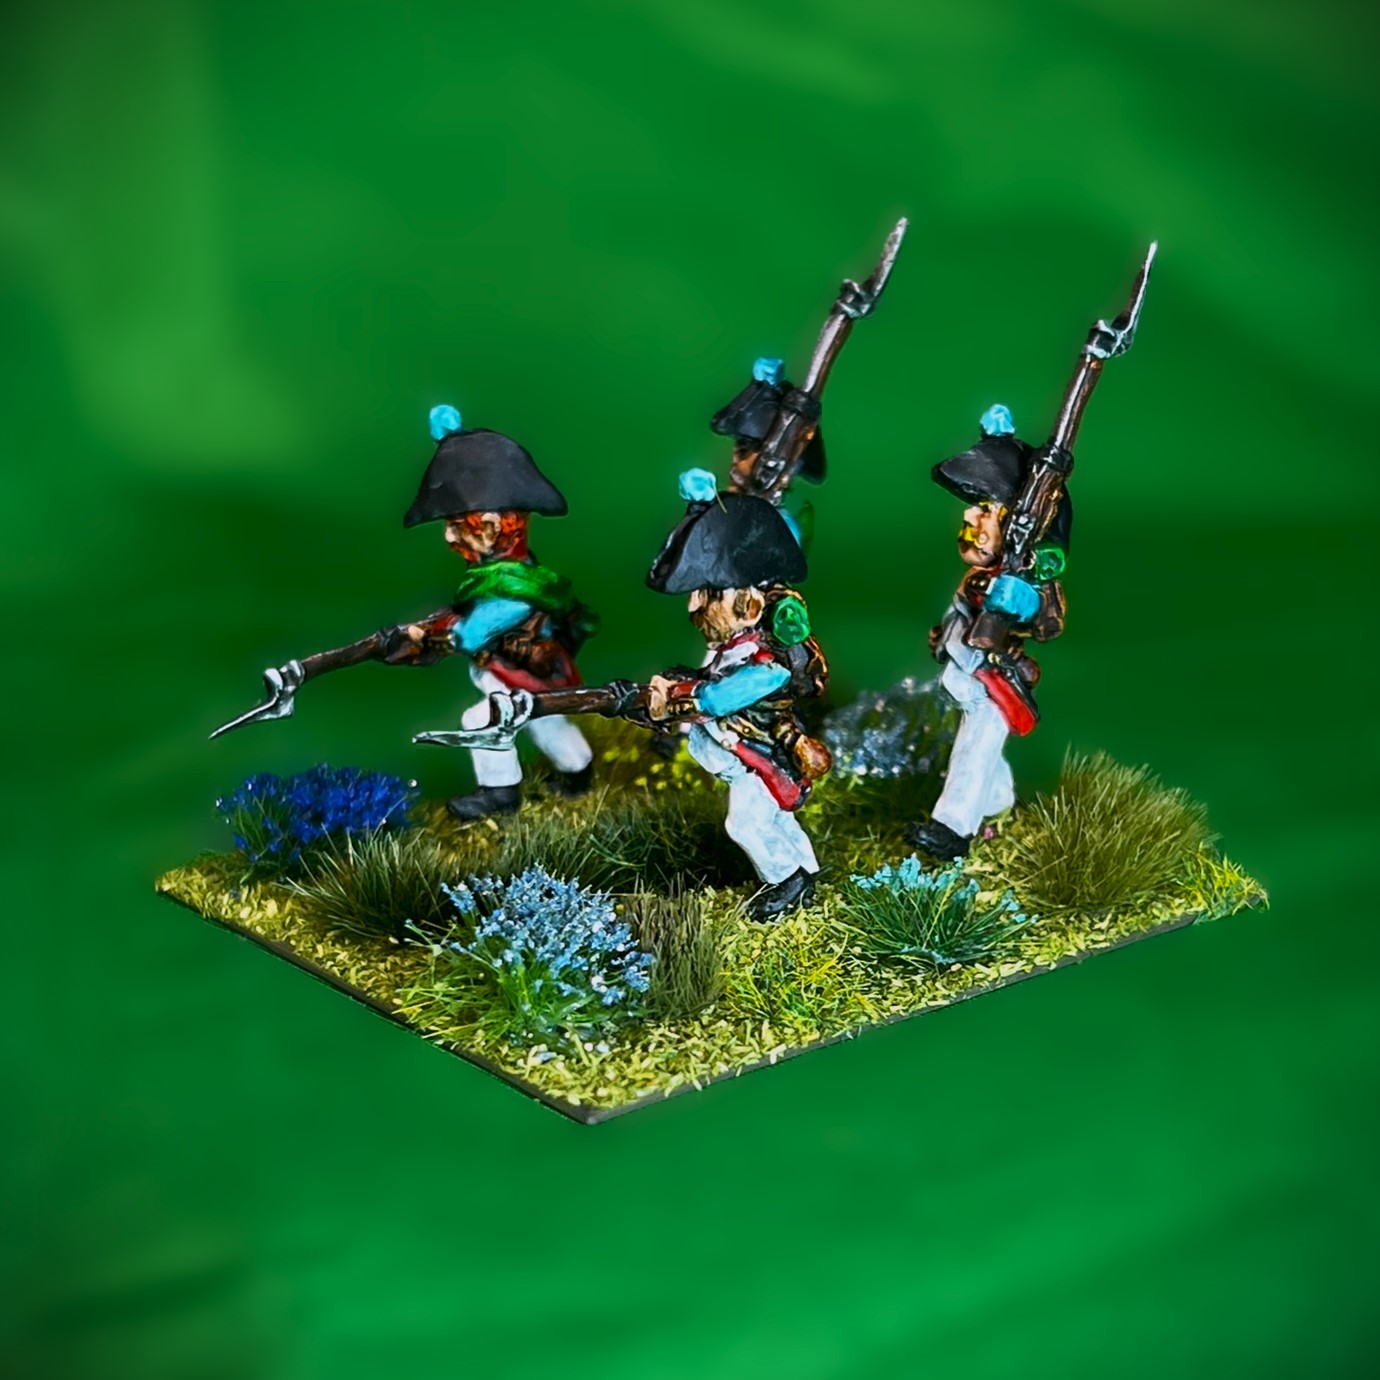
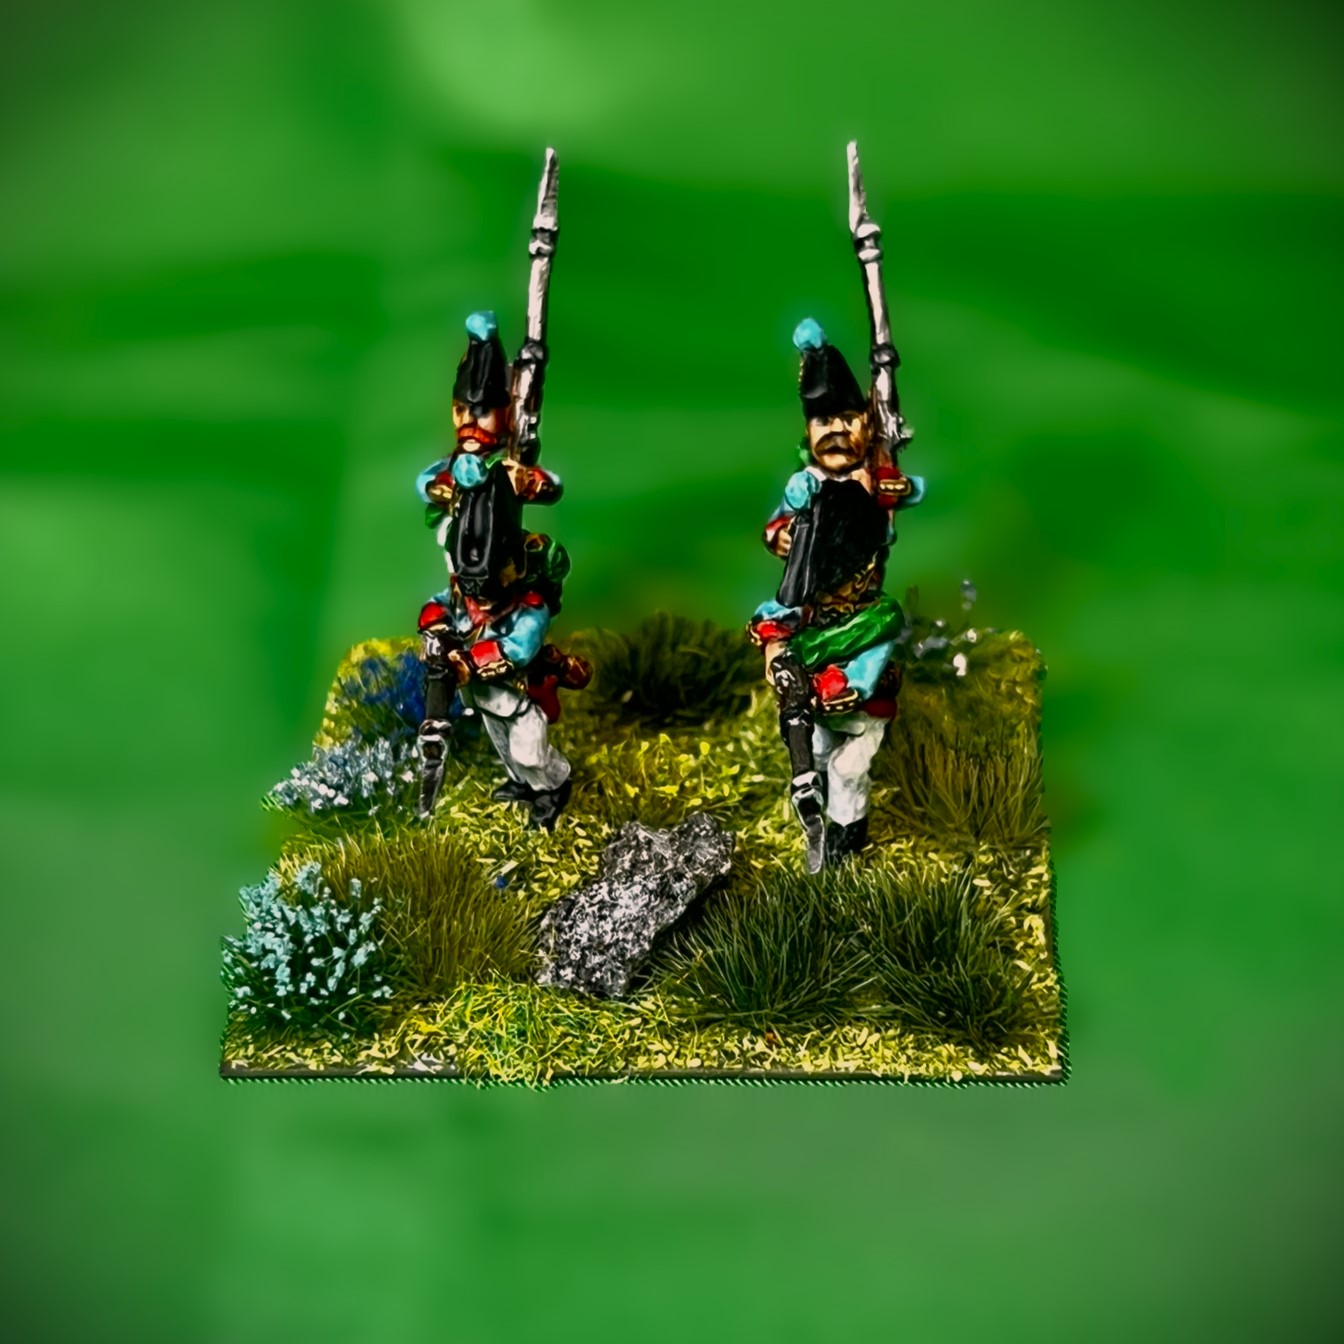
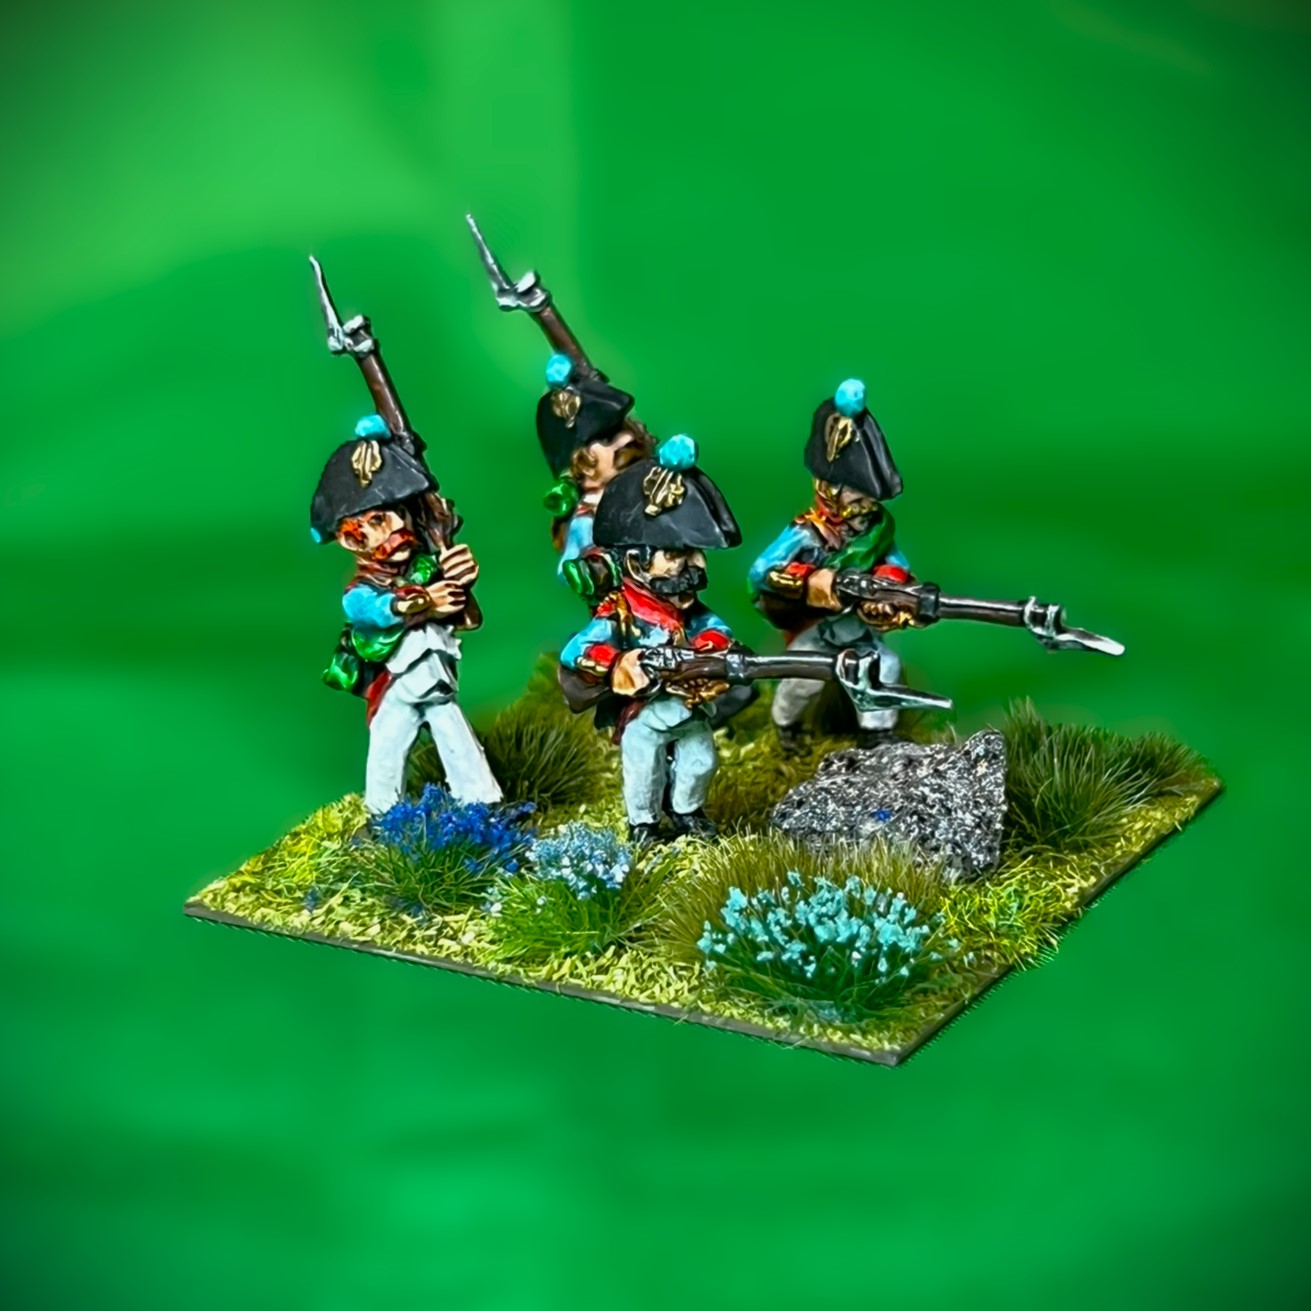
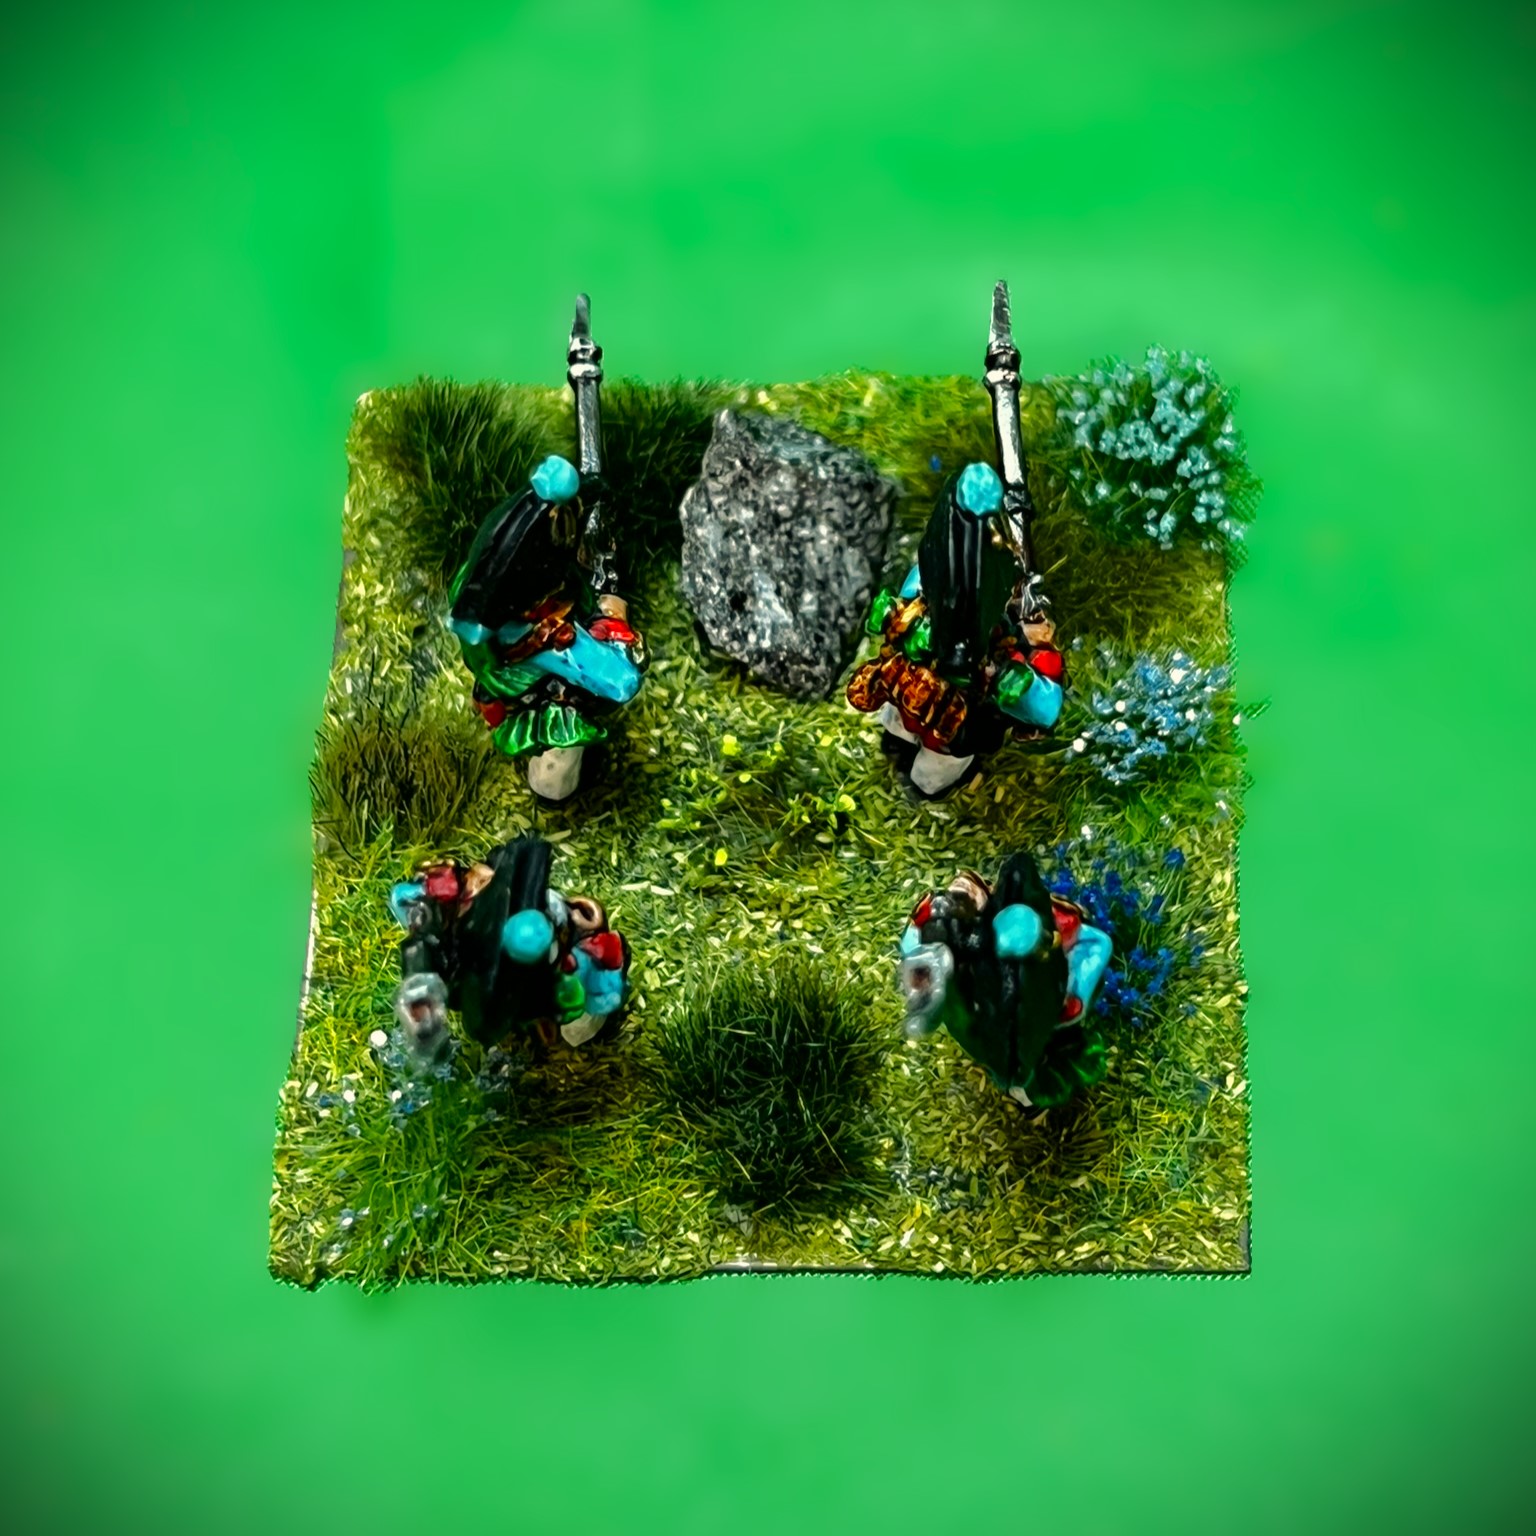
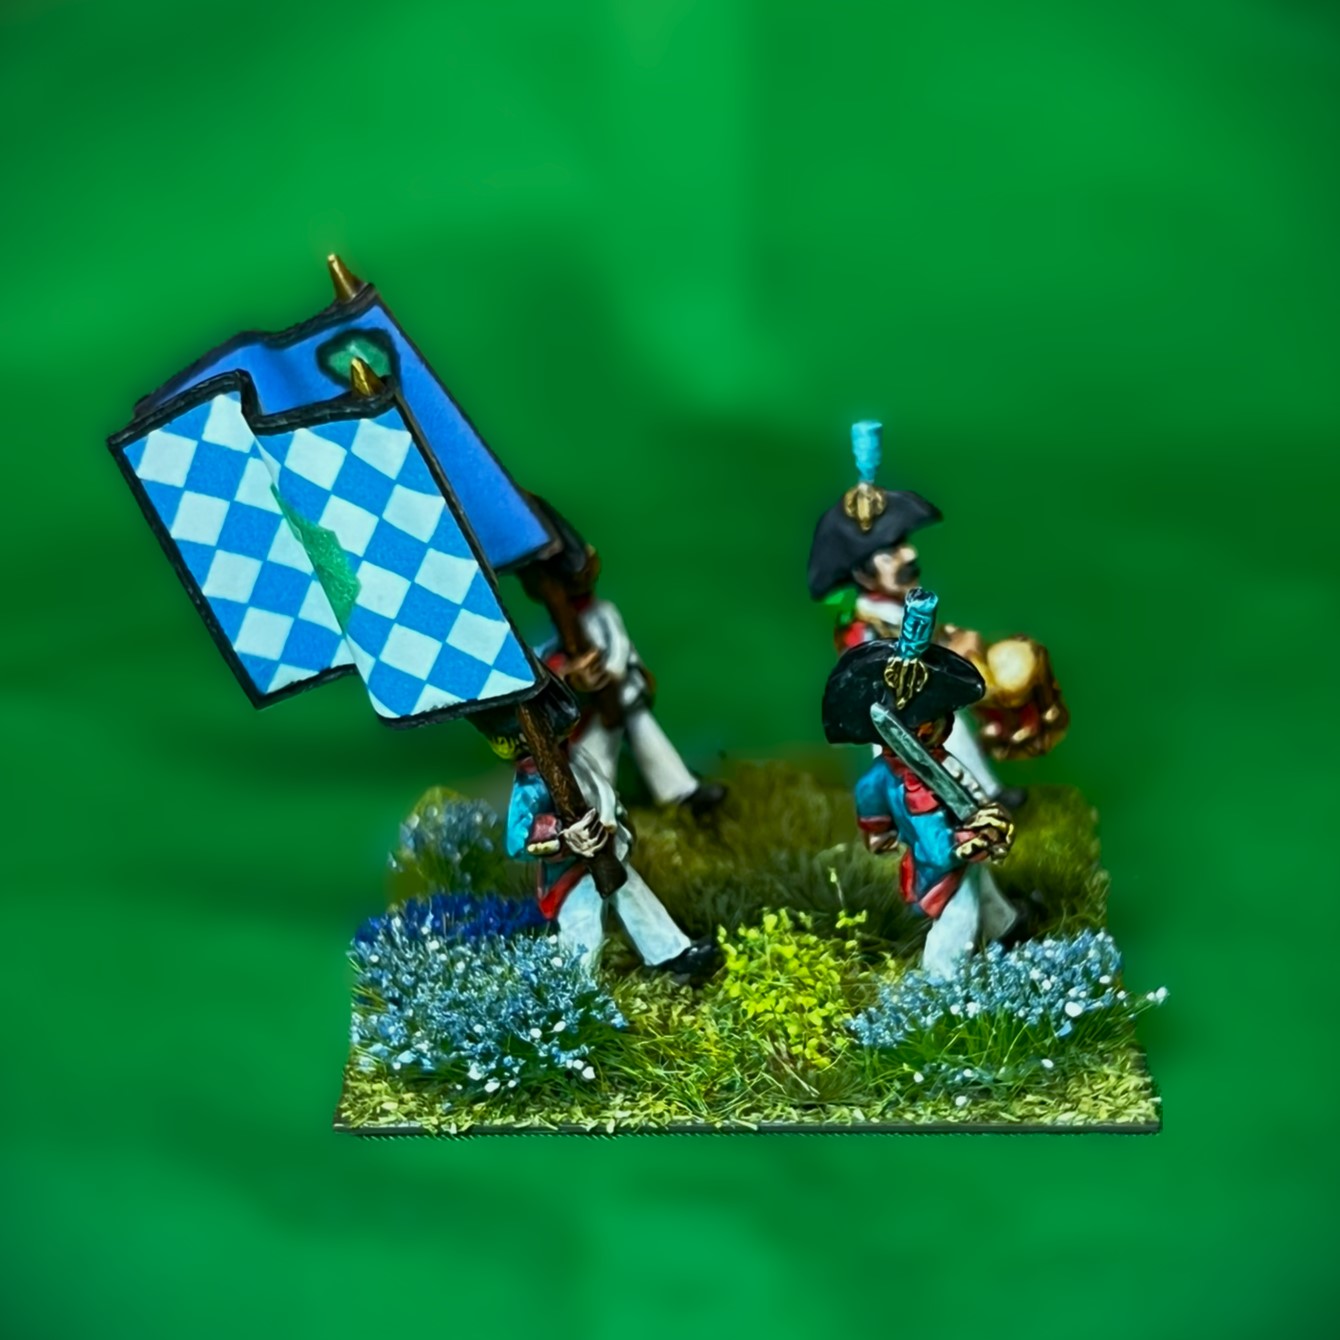
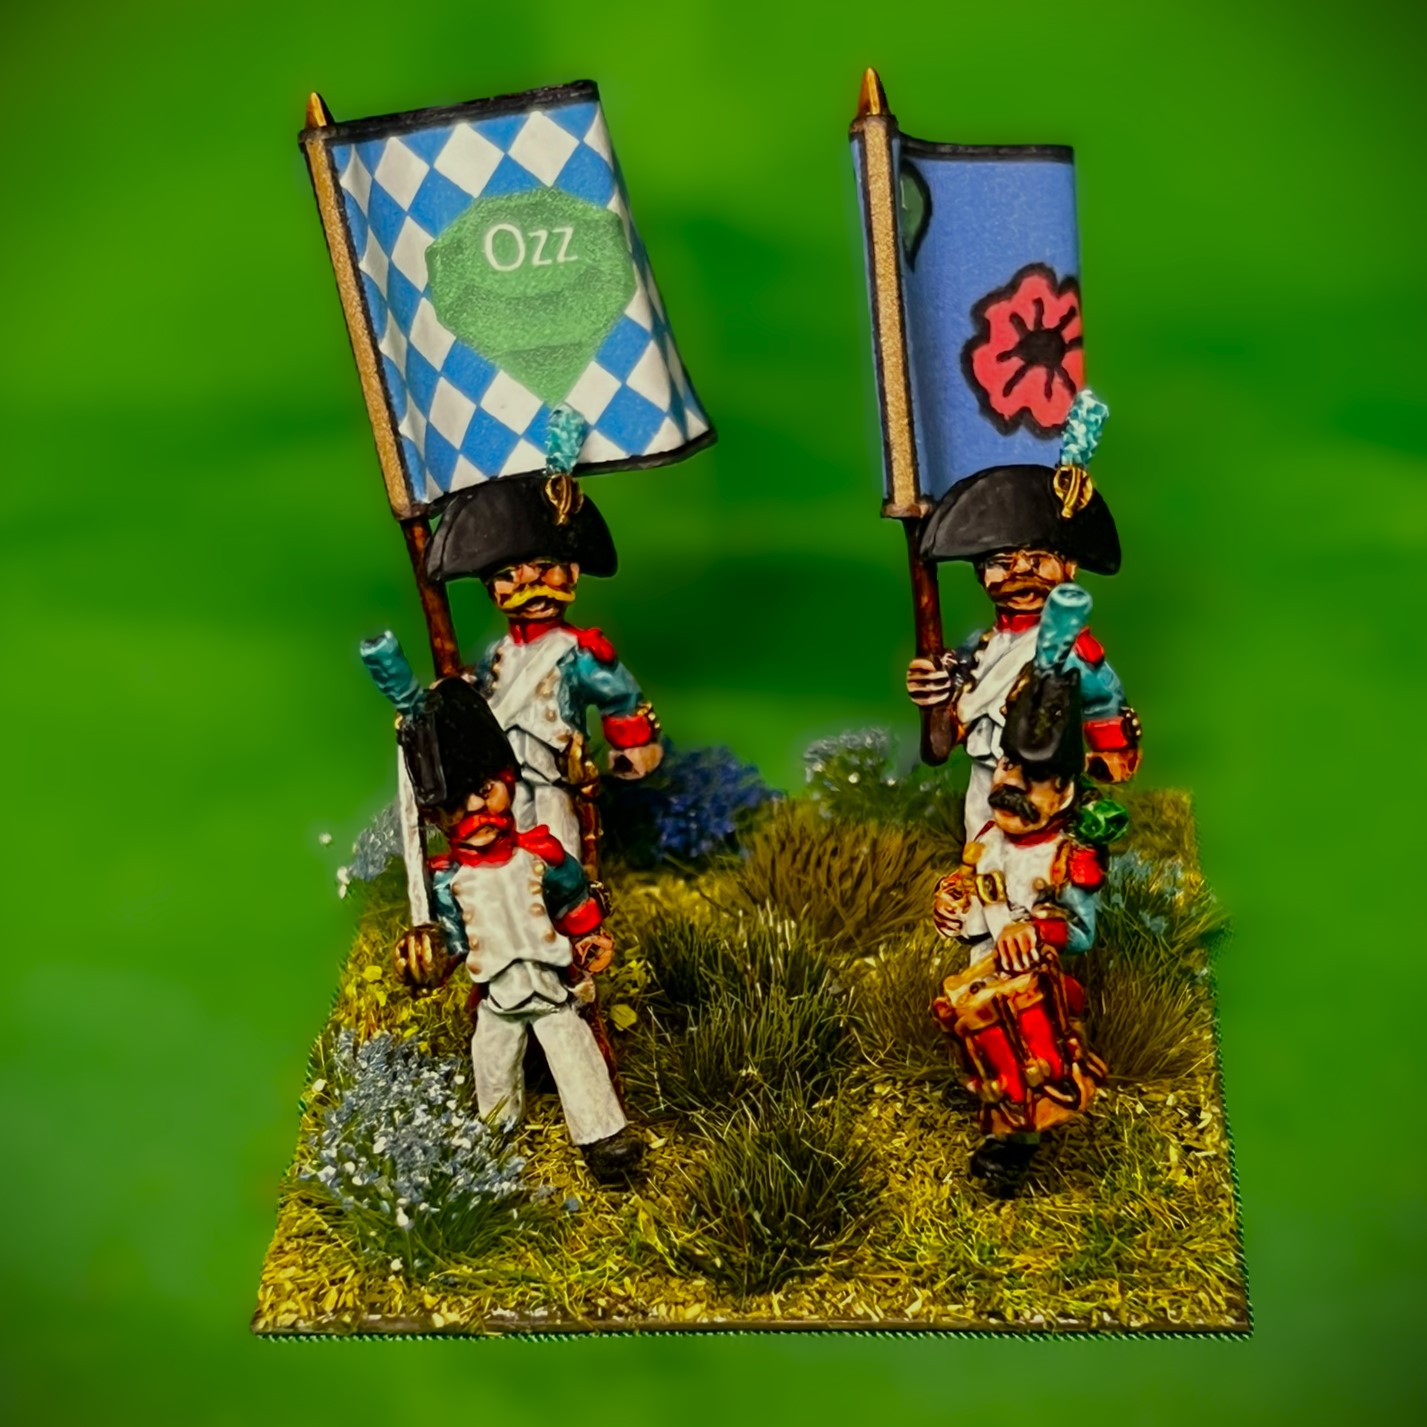
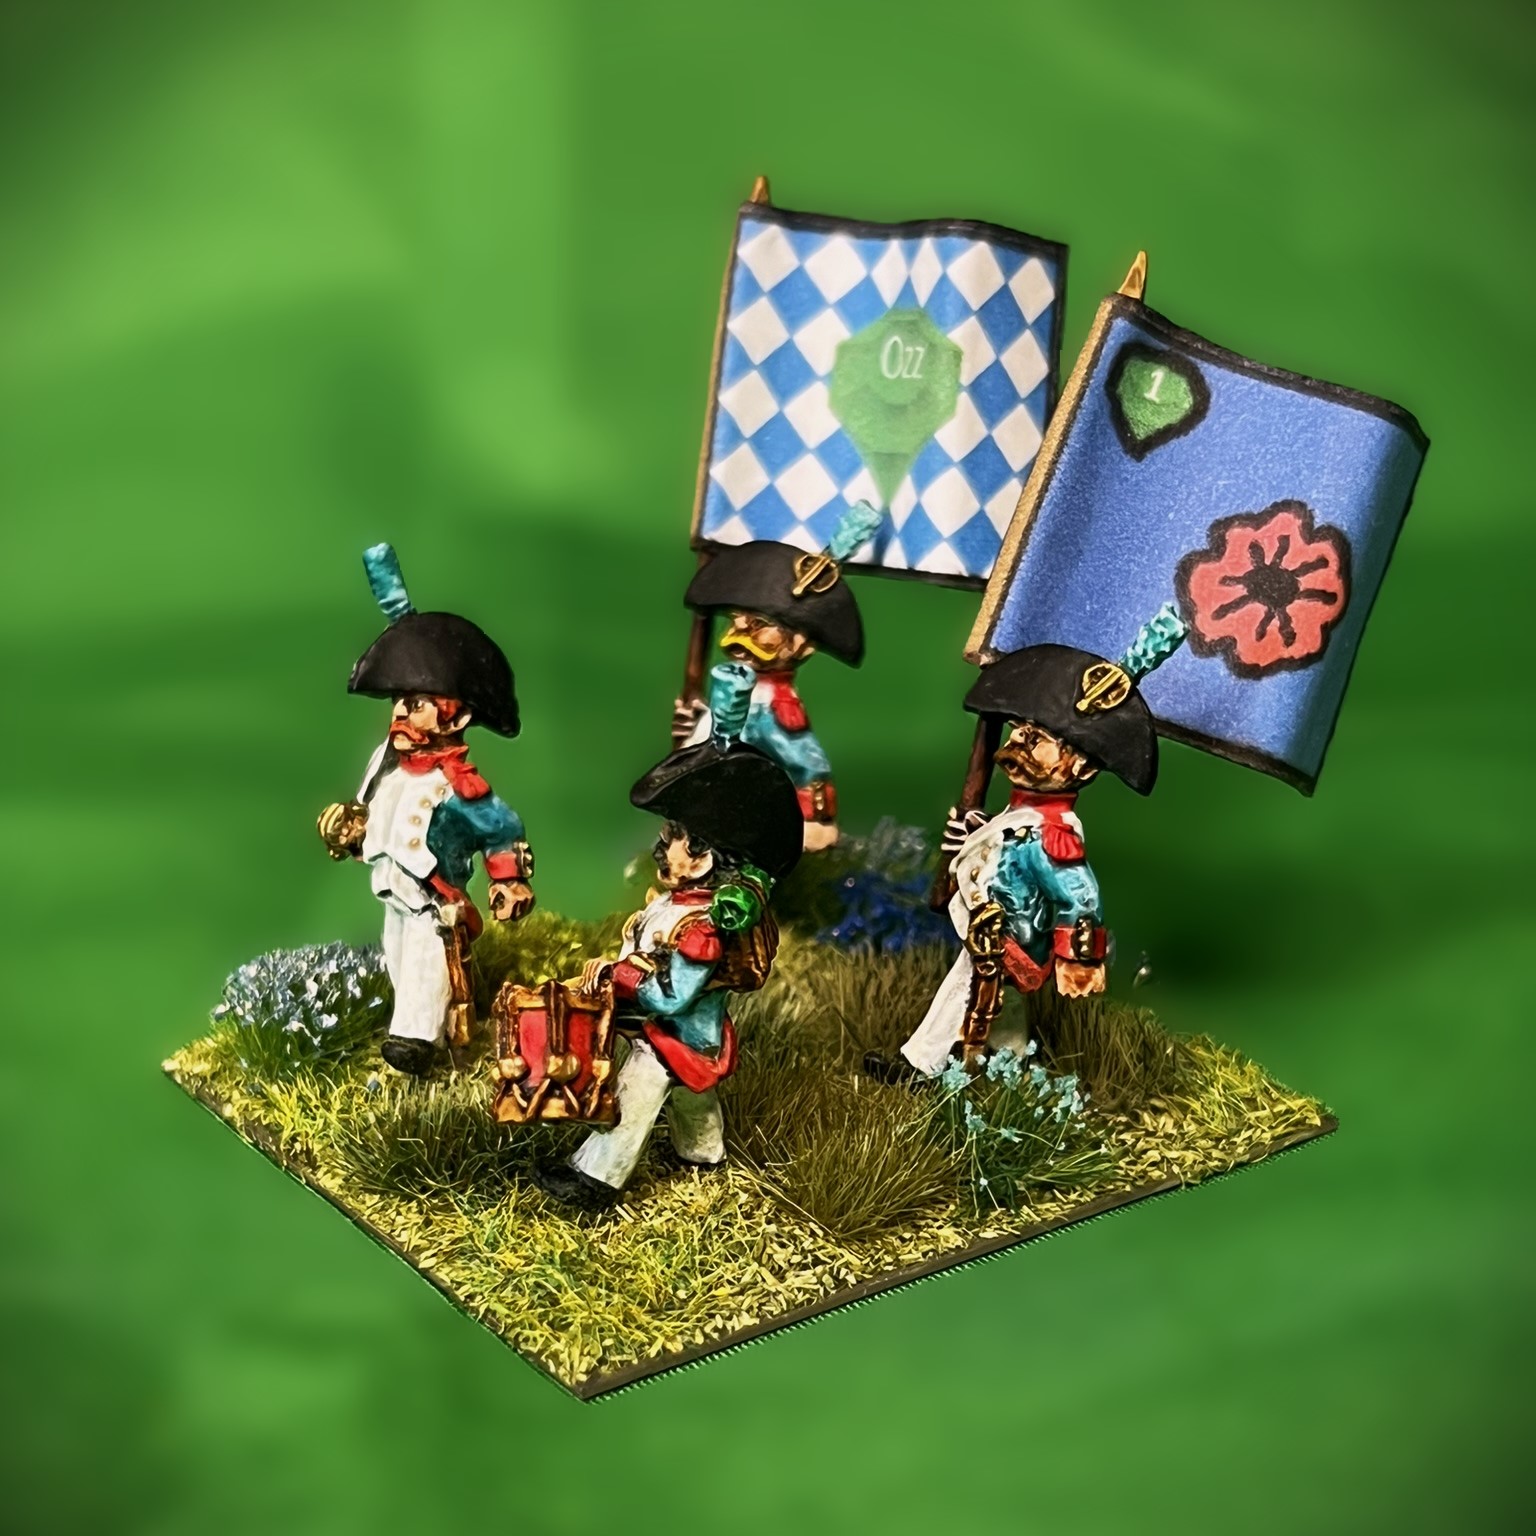
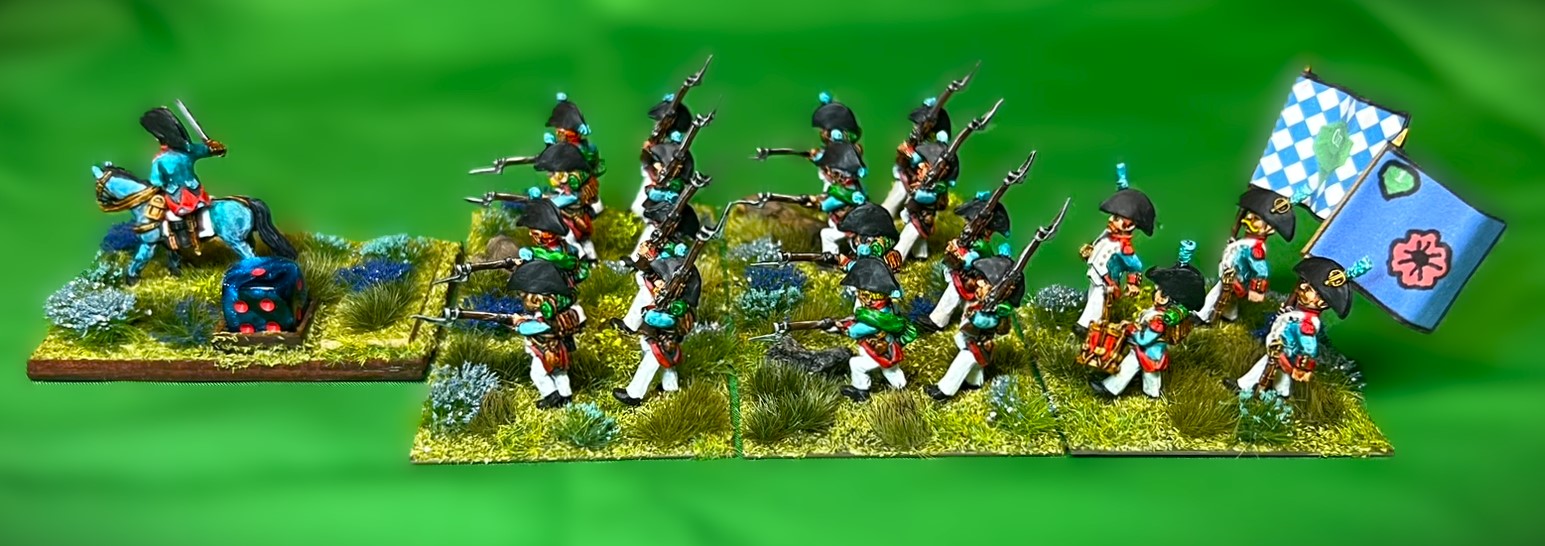
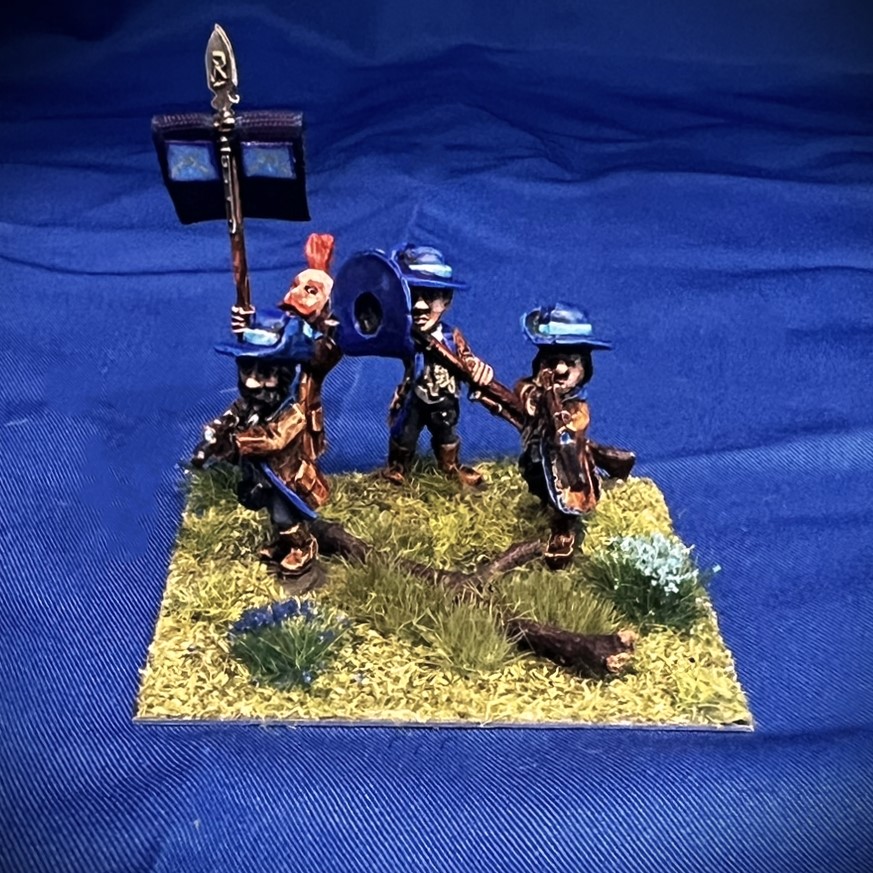
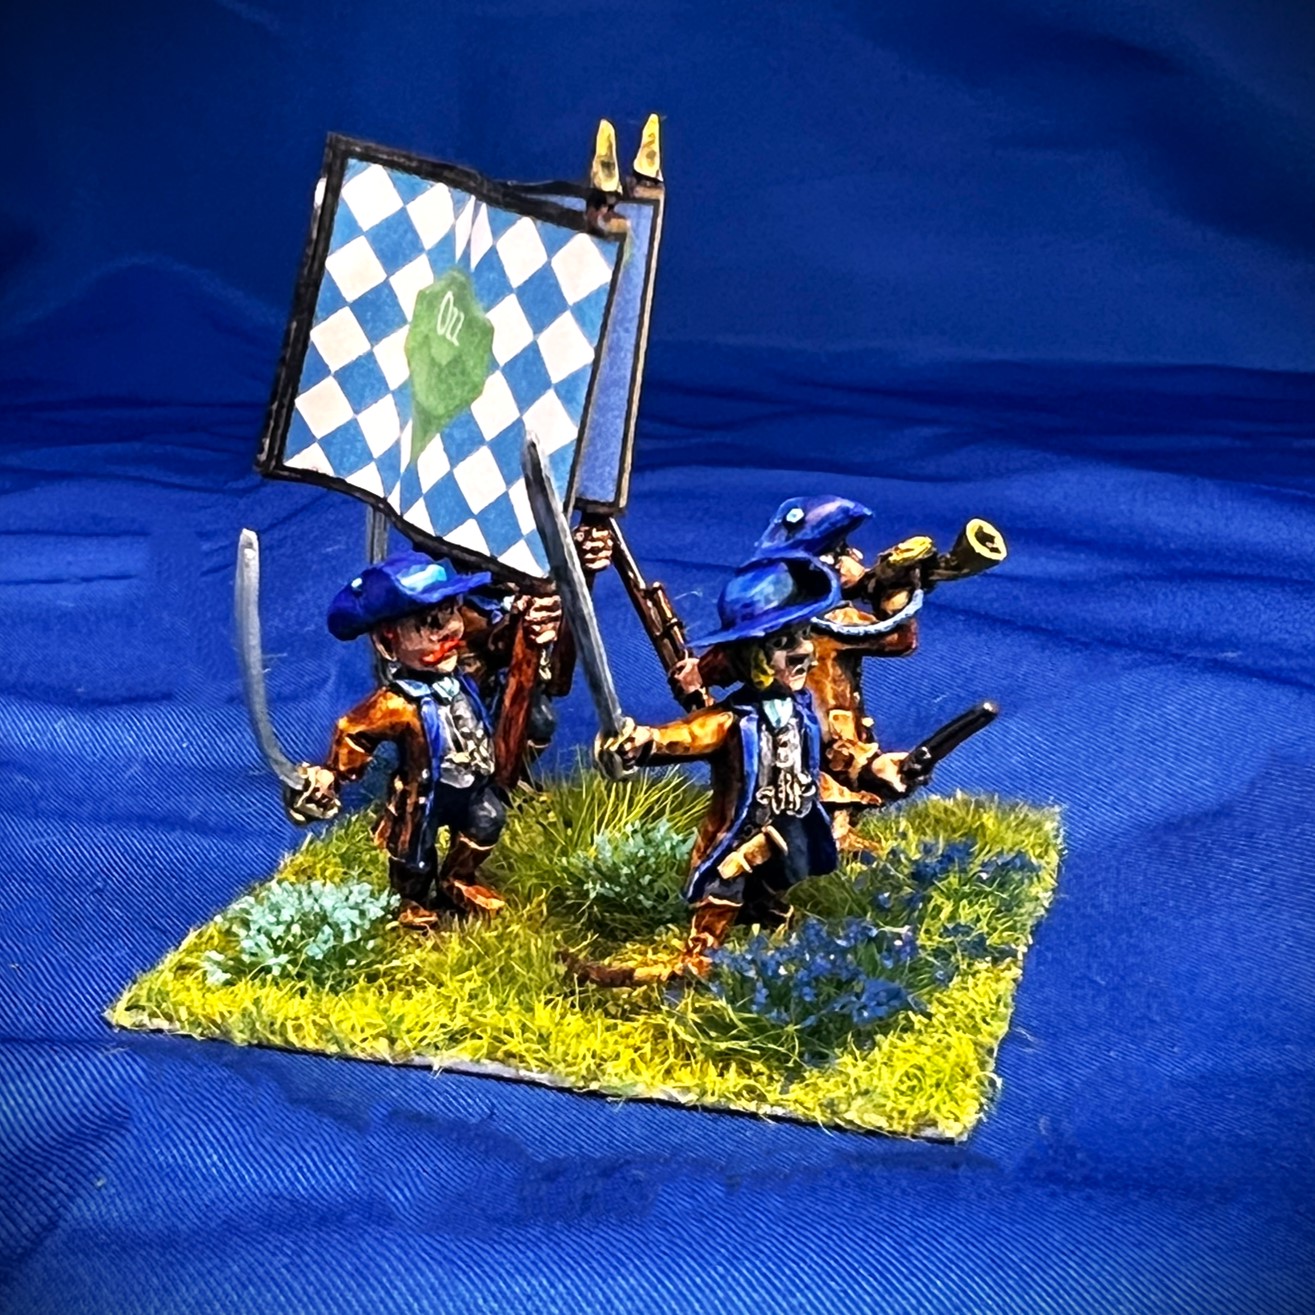
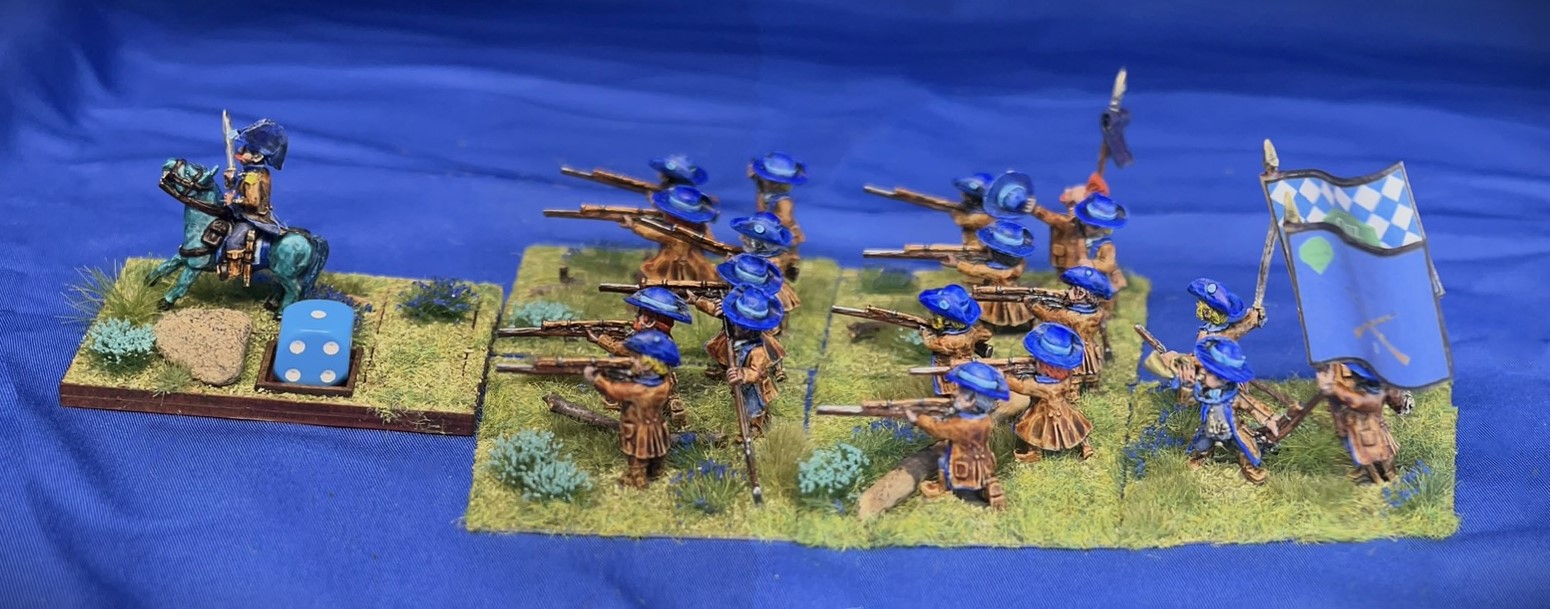
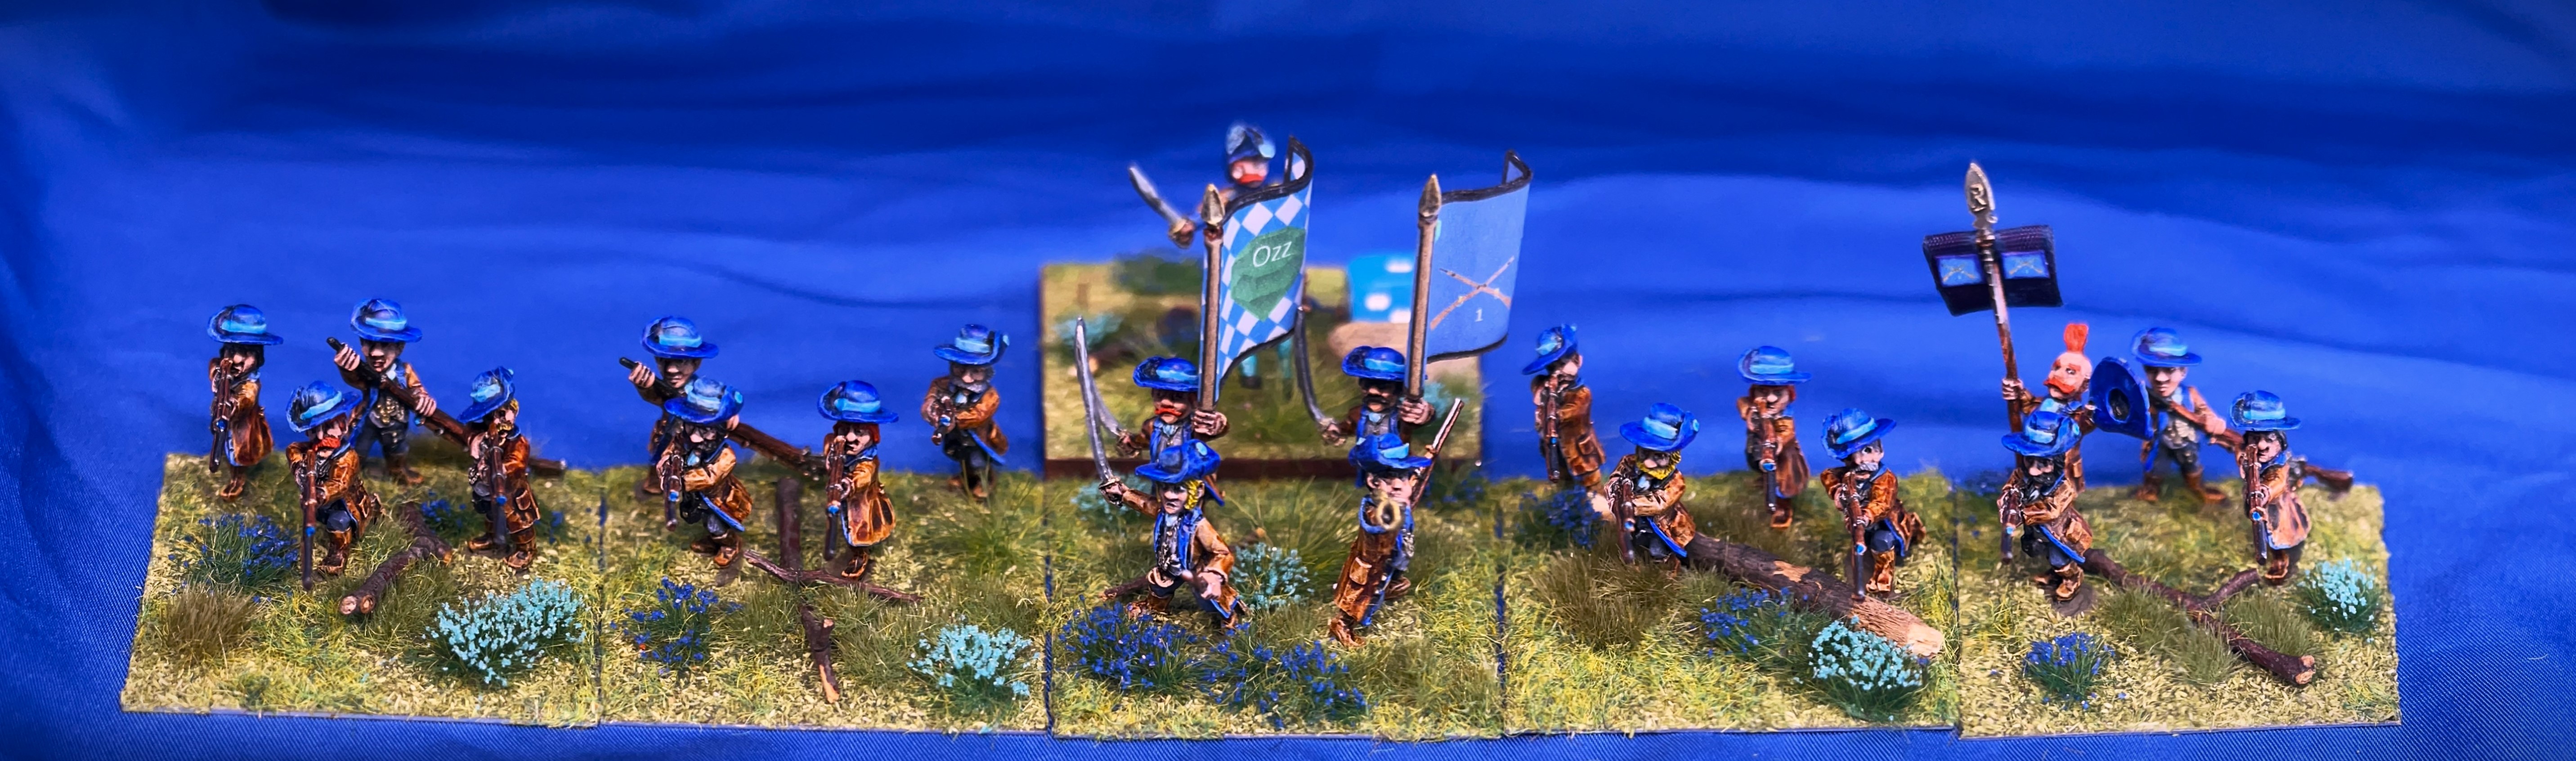
Like all other Ozz units, they are based 4 apiece to a 2″ square base – so five bases for the regiment plus the regimental commander on his own separate MDF base. I designated this unit as the 1st Poppy Fields Landwehr Infantry Regiment – mainly because I liked the regimental standard. No assembly was required for the unit other than to add the flags and to assemble the regimental commander. As I always do, I mixed and matched the figure types and poses such that no two bases of the five in the regiment were identical. The SKU for the regiment is OZZ-105. There are 21 figures for the regiment – this includes the mounted regimental commander and 20 figures. I think that the sculpts are phenomenally well done, especially the faces and weapons. They have a lot of character.
I did not take many WIP shots, but I’ll share what I have and then go into some eye candy.
WIP shots
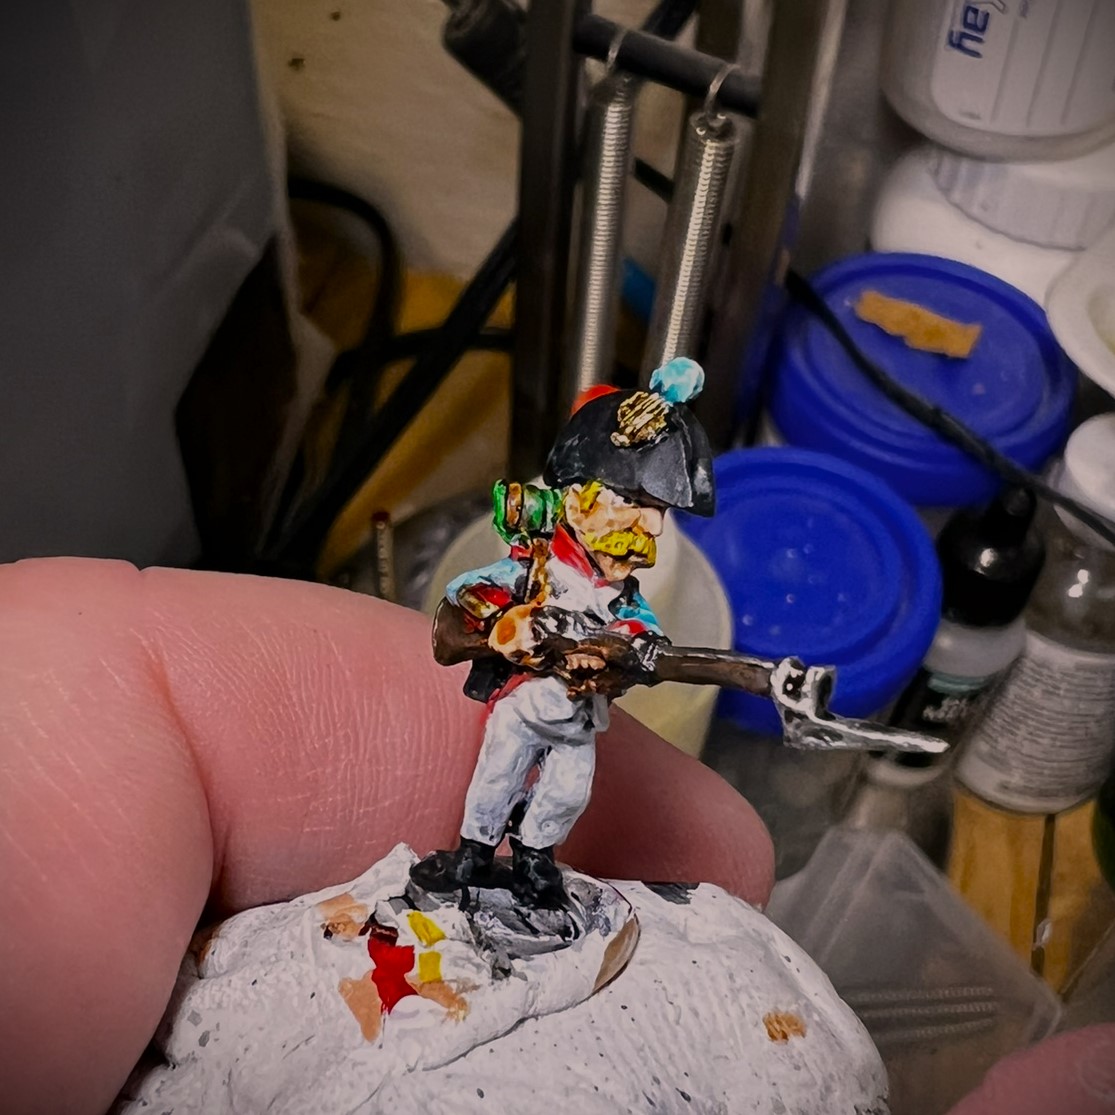
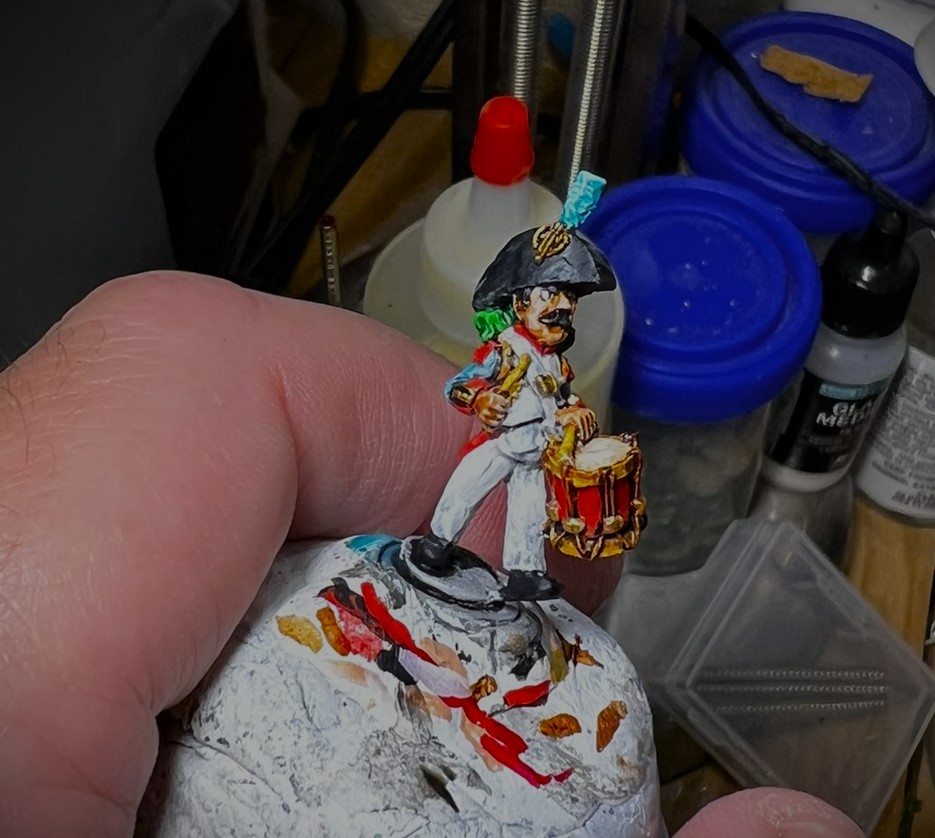
First, here are some shots of a few of the figures before I varnished them. And yes, the horse (really a pony) is of a different color (this is Ozz of course).
Of course, varnish improves everything! The next two images are post-varnish but pre-flocking. Note the variety of hair colors – and yes, I do paint the eyes. I am glad that I did here.
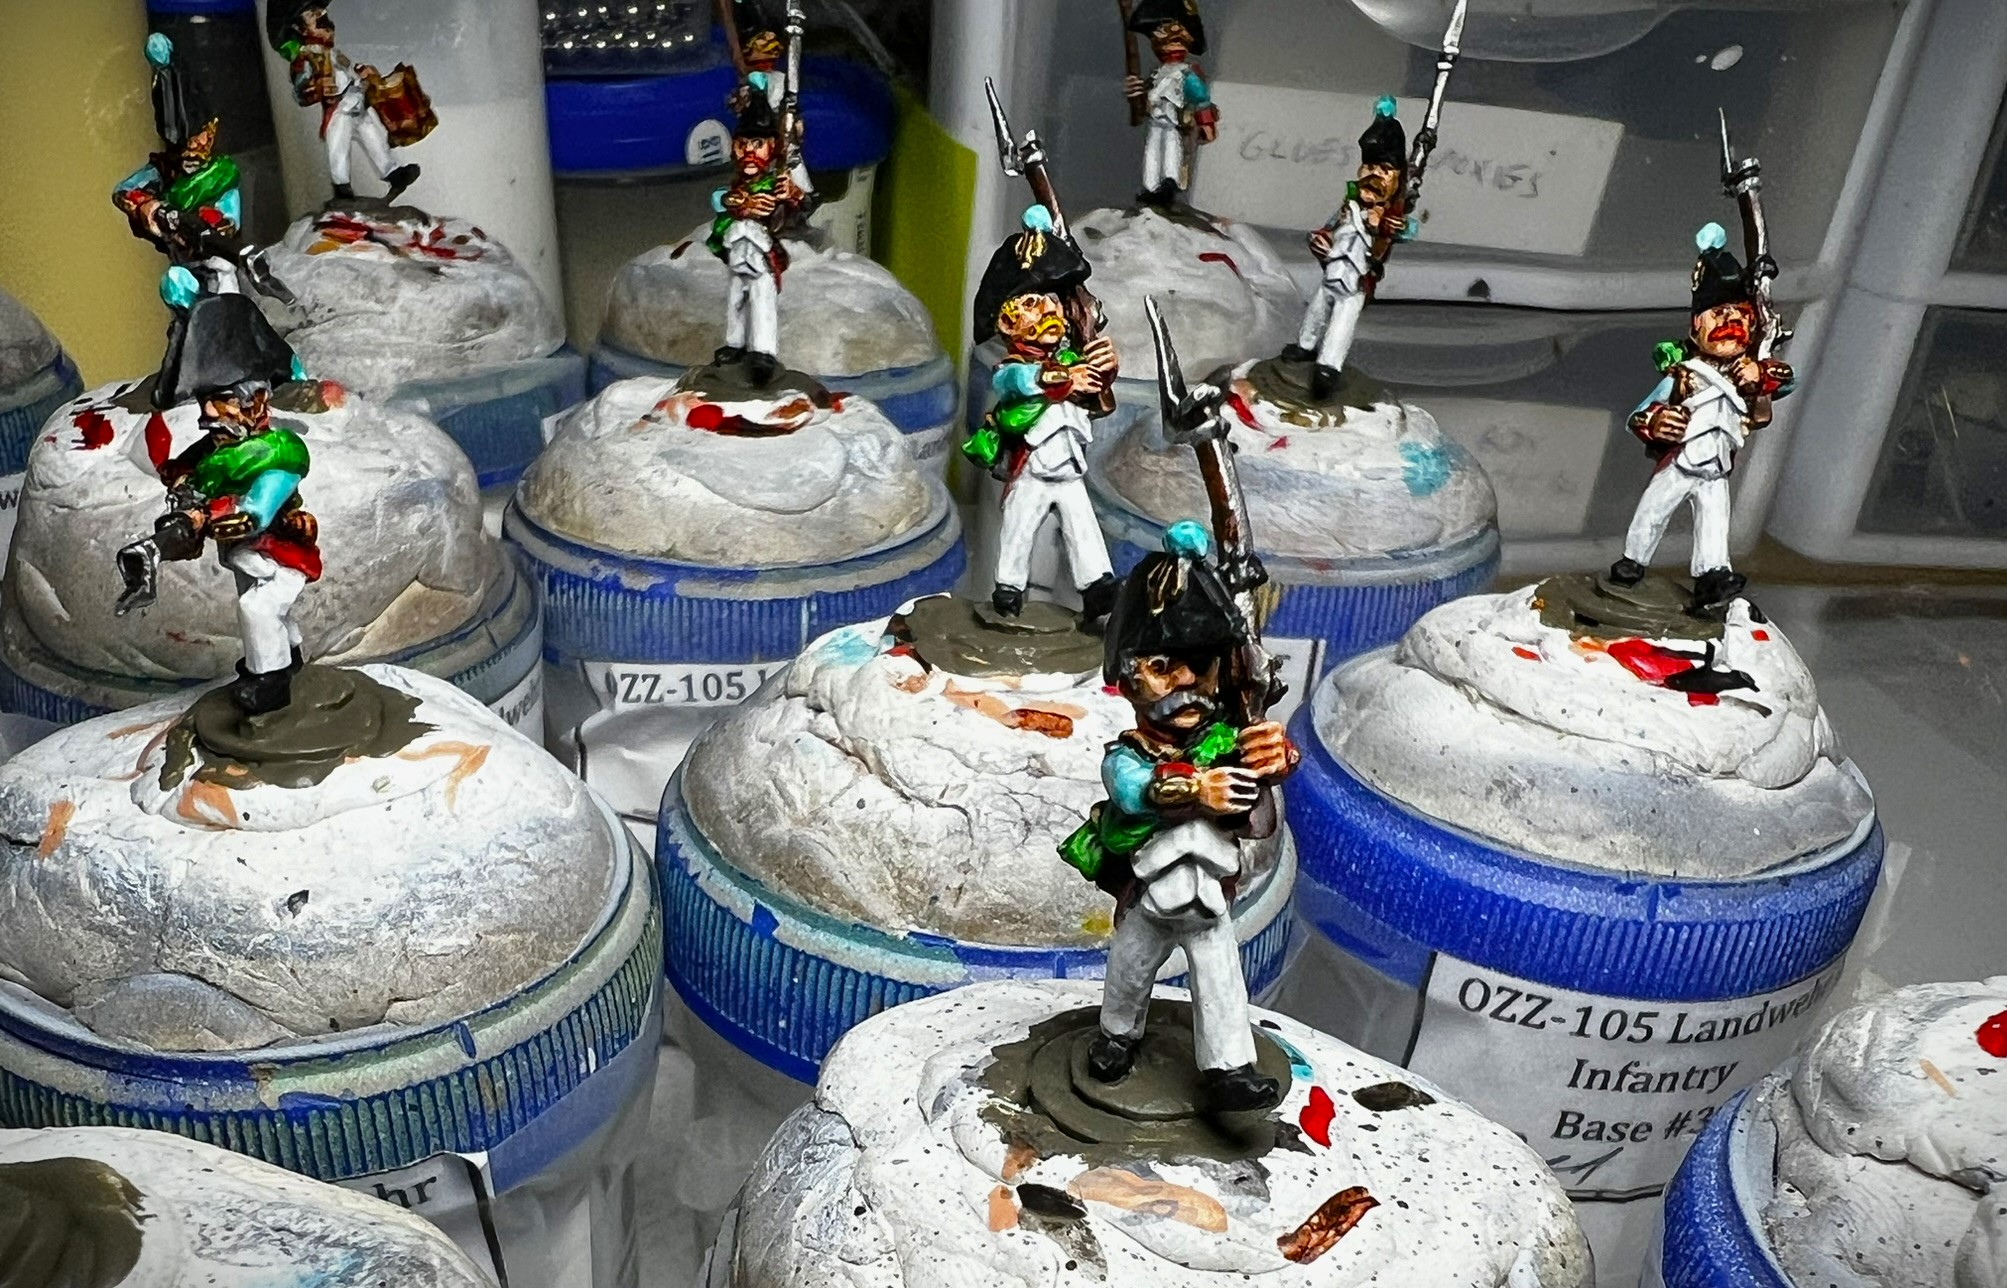
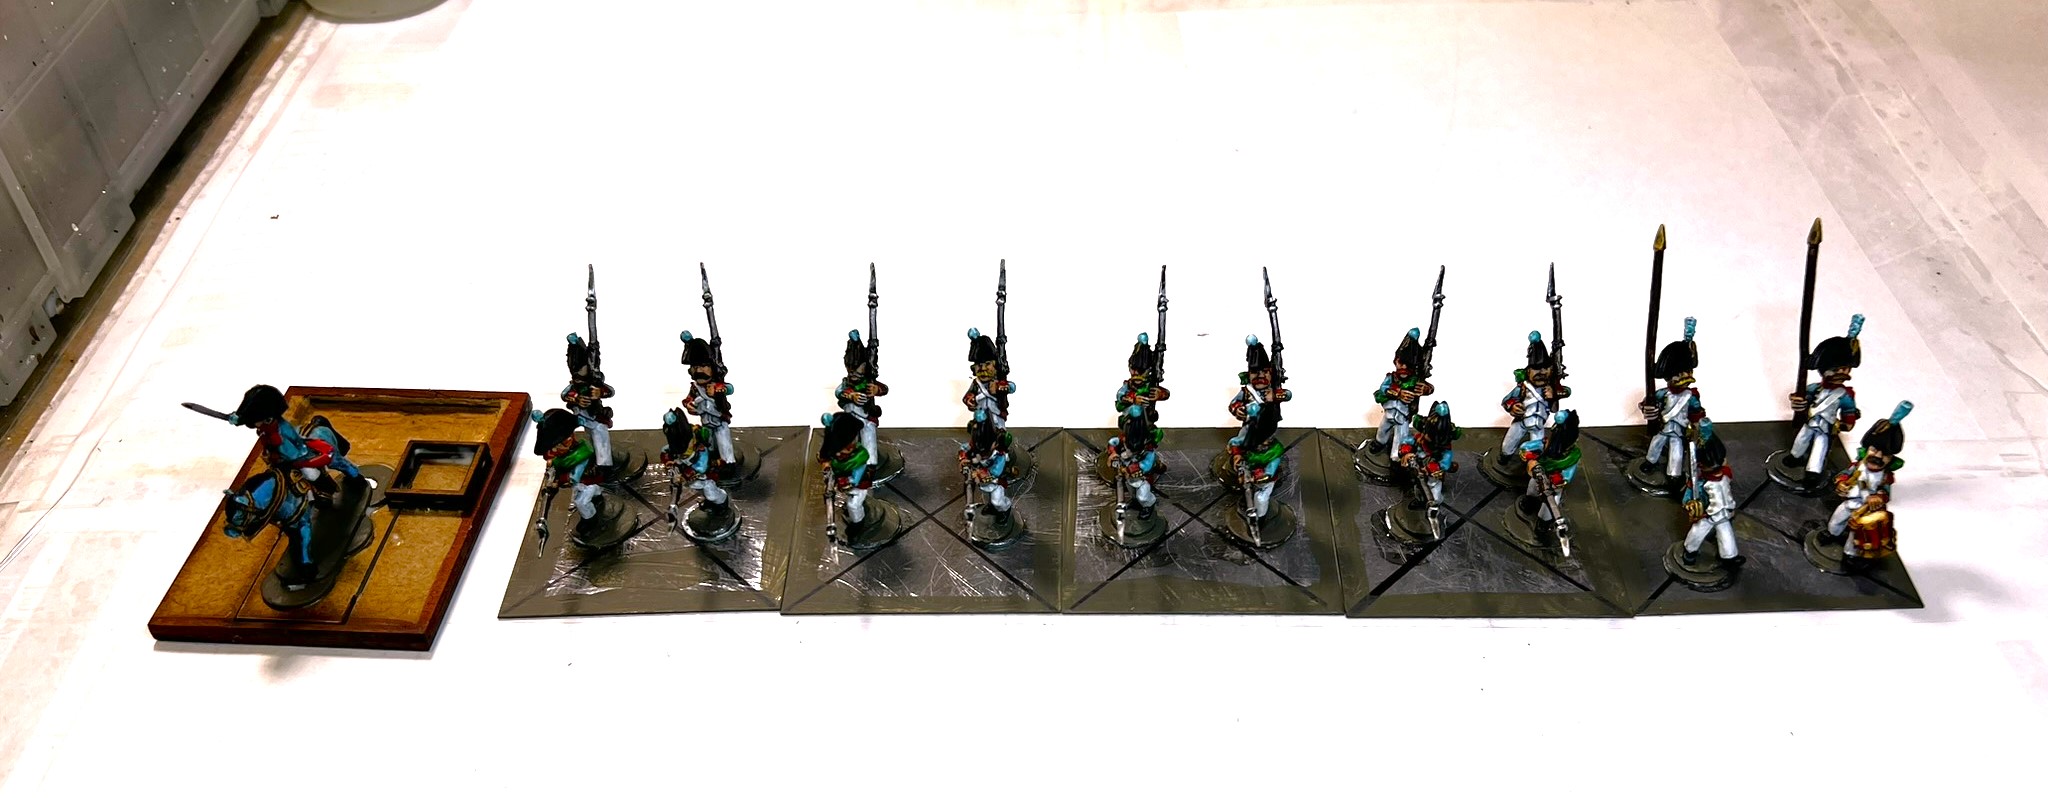
Then, I mocked up the varnished figures on their bases as shown below.
Mocked up on their respective bases.
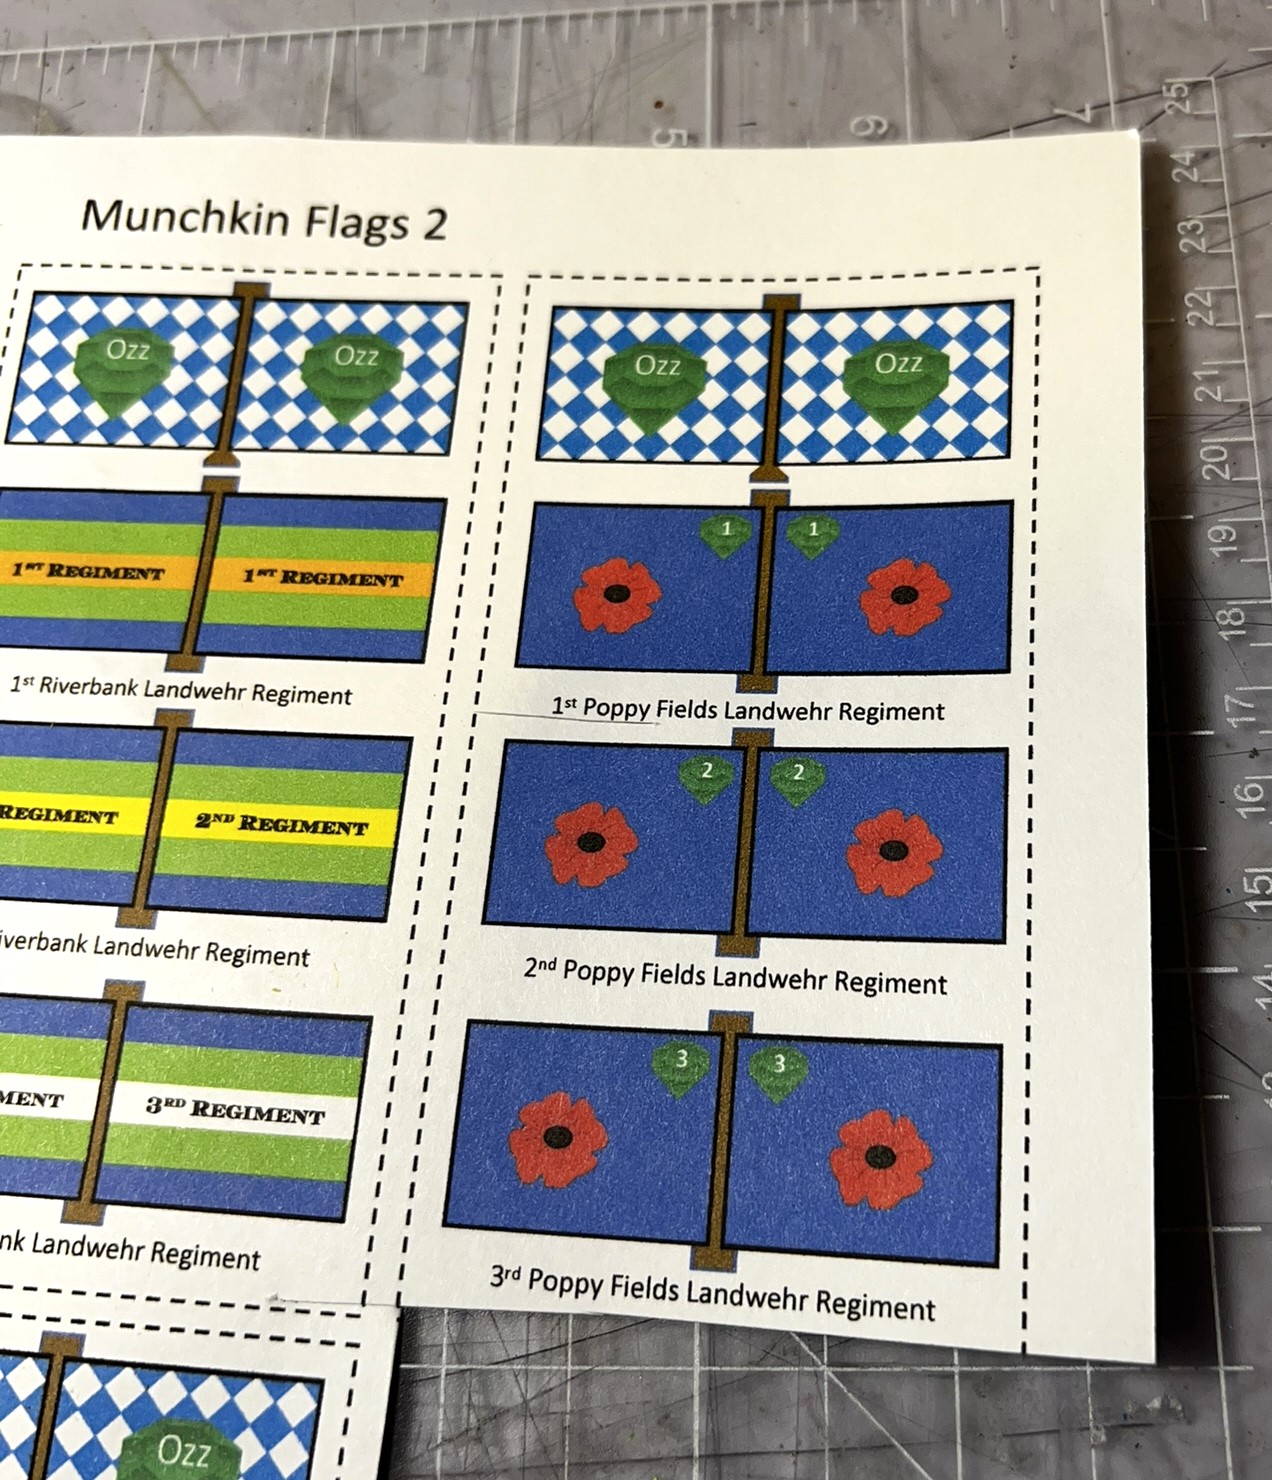
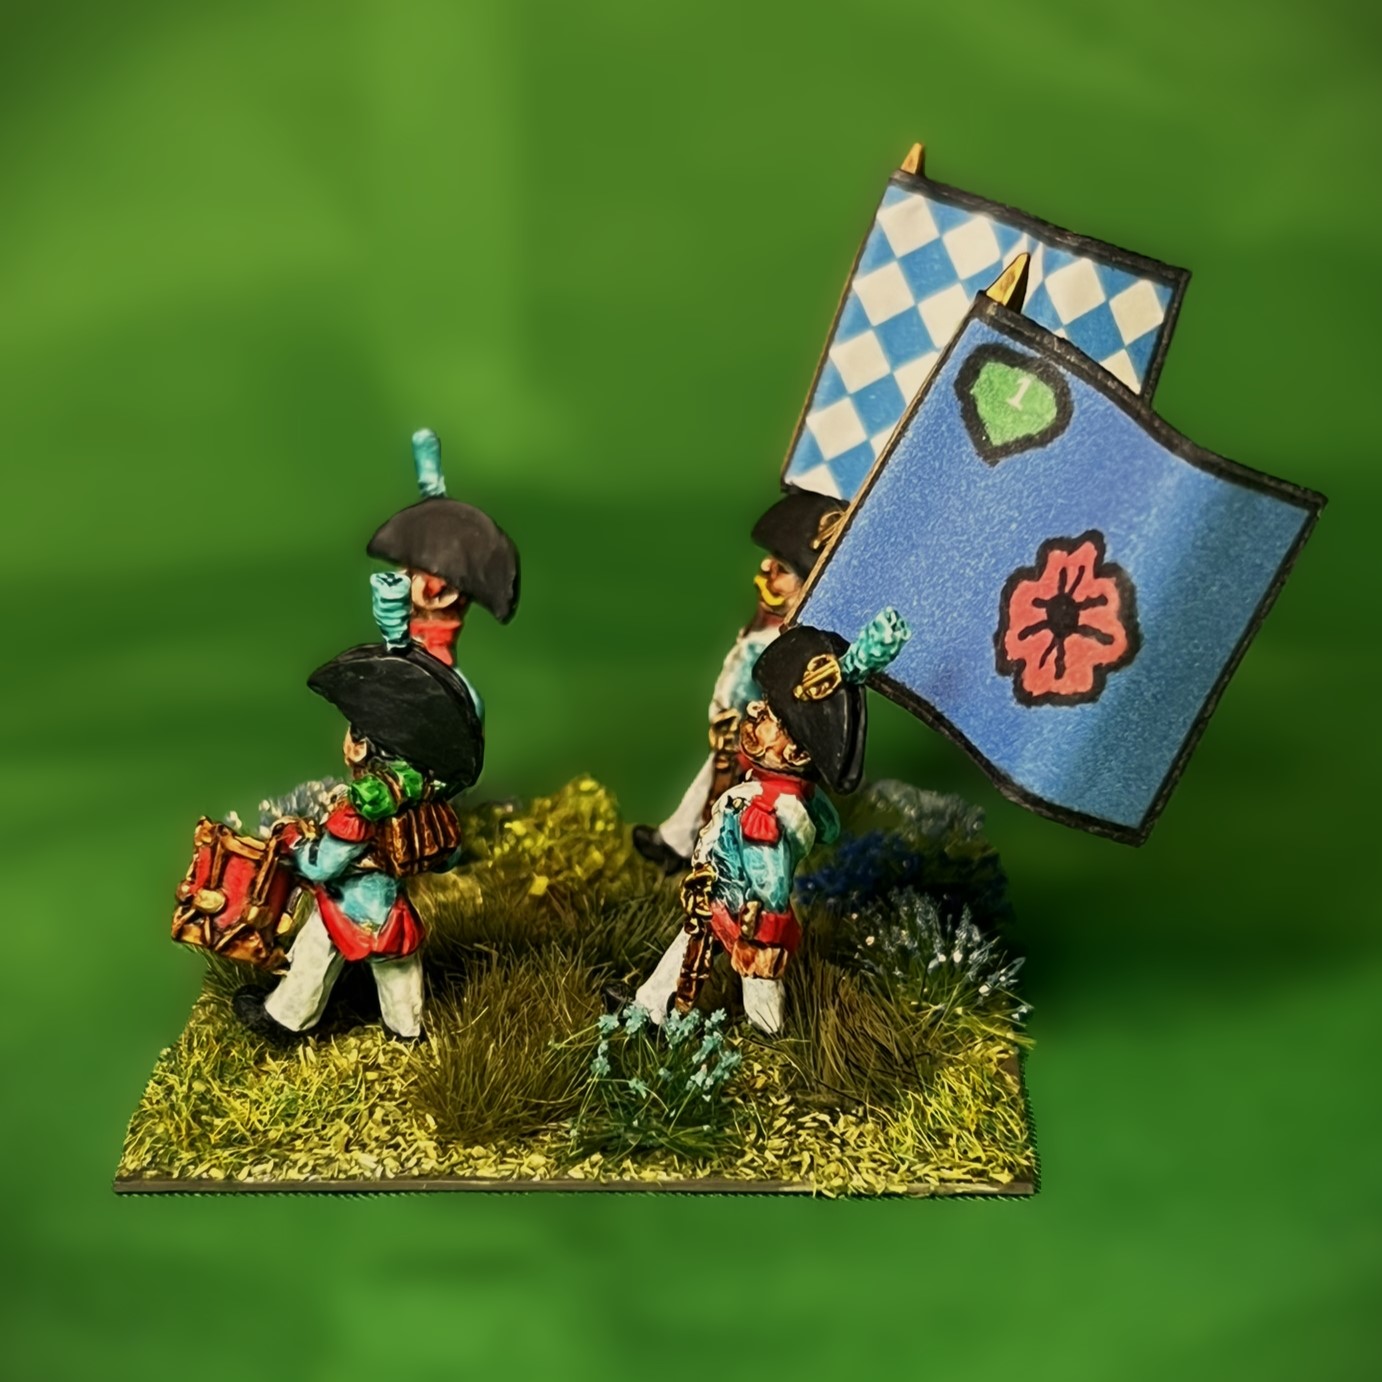
Then I needed to name the unit and cut out the standards. The Poppy Fields standard was my choice.
Lots of options for the Landwehr!
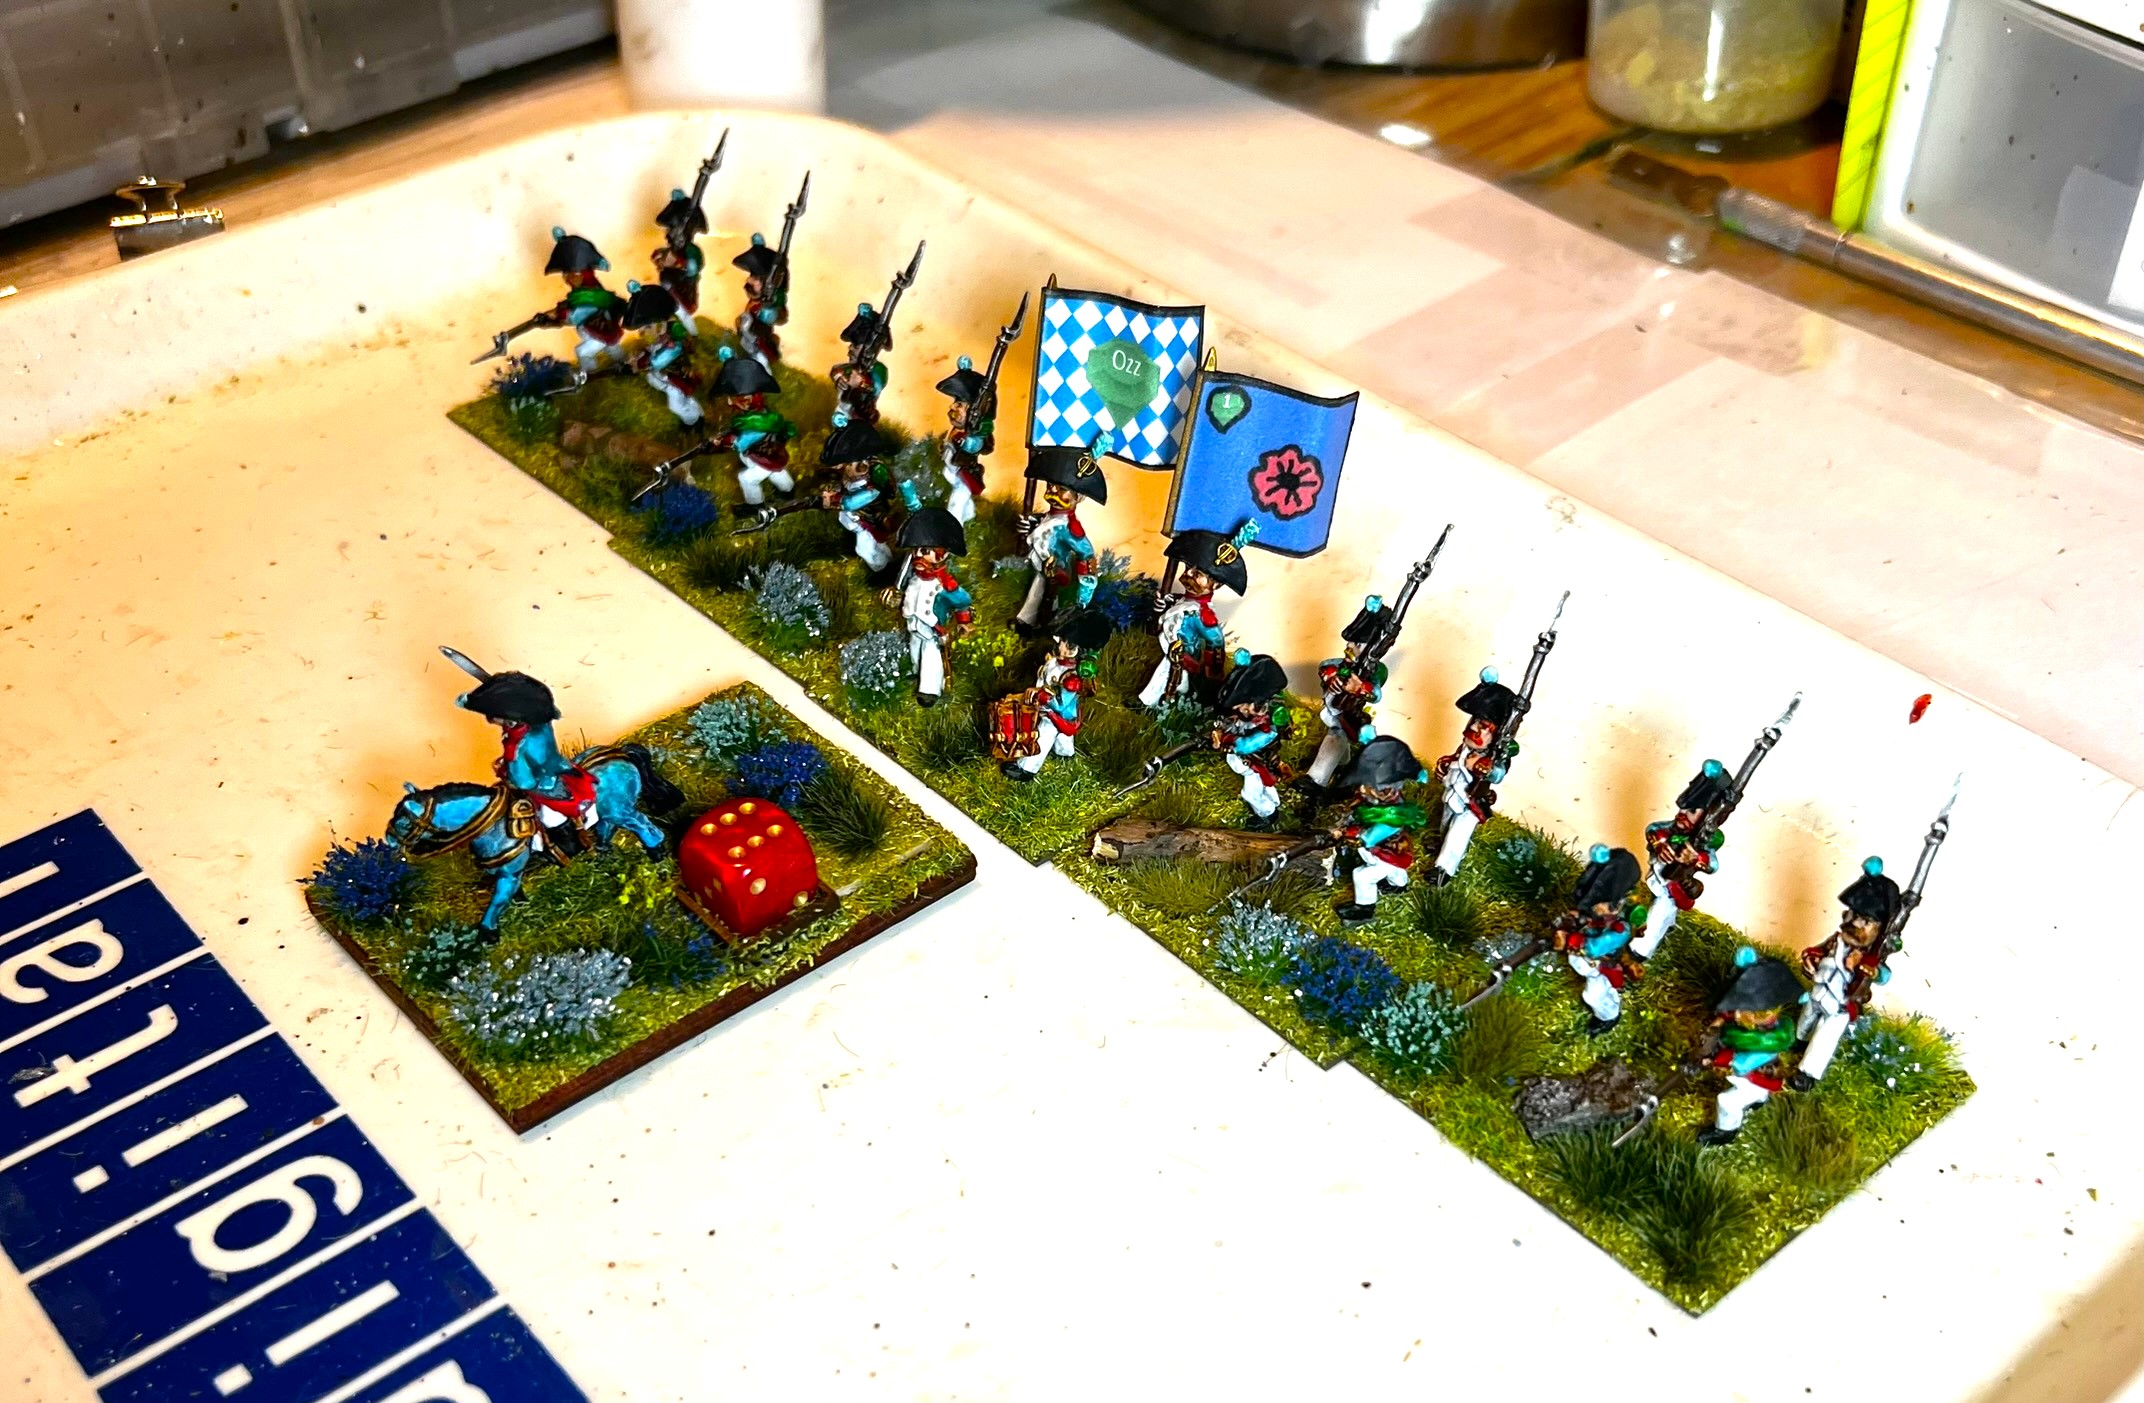
Flocked and with the Ozz and regimental standards mounted. I added a little extra “ink” from a fine-tipped black Sharpie to enhance the regimental standard and edge it & the Ozz standards.
Lots of blue flowers and tufts to create a field environment. Assembled and done – and ready for eye candy!
Eye Candy
Select and click on any photo for a better look.
Regimental Commander Base
Base 1
Base 2
Base 3
Base 4
Command Base
Here now are a few:
Group Shots
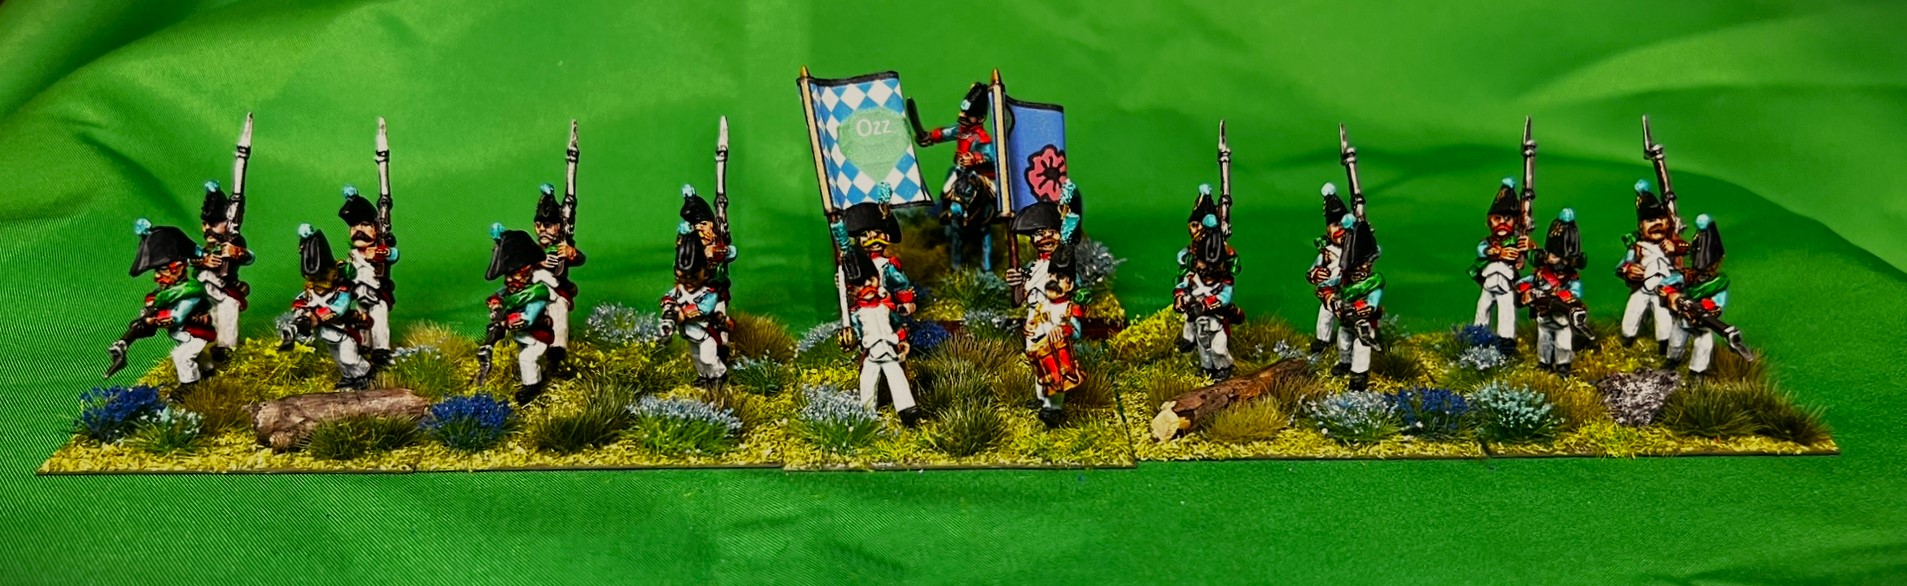
The 1st Poppy Fields Landwehr Infantry Regiment in line formation directly behind their commander.
The 1st Poppy Fields Landwehr Infantry Regiment in line formation in front of their commander.
The 1st Poppy Fields Landwehr Infantry Regiment in column formation directly behind their commander.
The 1st Poppy Fields Landwehr Infantry Regiment in column formation directly behind their commander – and now heading in the other direction!
In the long run, I’d be tempted to paint up another Landwehr unit. But for now, this will do. I have others to paint first.
I do hope that you enjoyed seeing this unit and reading the post. Next up will be another Munchkin artillery unit for Dave’s challenge – and soon. Thanks for looking!
And yes, I still have much more Ozz to come…
Miscellaneous details and references for those interested in that sort of thing:
For all of my previous posts on Wars of Ozz games, figures, units, and other related projects – please see this page.
PAINTS, INKS, GLAZES, SHADES, WASHES, PIGMENTS, FLOCKING, GLUES AND MORE THAT I USED ON THE 1ST POPPY FIELDS LANDWEHR INFANTRY REGIMENT:
Rectangular Brigade MDF base (used as a Regimental base) from Old Glory
2″ square steel bases from Wargames Accessories (#21)
1.25″ x 1″ square steel base from Wargames Accessories (#FOW1)
1/2″ Everbilt steel washers
3/4″ Everbilt steel washers
Gorilla Glue
Poster tack
Vallejo Premium Primer “White”
Vallejo “Flow Improver”
Vallejo “Airbrush Thinner”
Secret Weapon Washes “Heavy Body Black” (wash)
Citadel “Nuln Oil” (wash)
Vallejo Mecha Color “Off White”
P3 “Brown Ink” (ink)
Citadel “Contrast Paint – Karandras Green”
Army Painter “Speed Paint – Glittering Loot 2.0”
Citadel “Contrast Paint – Aethermatic Blue”
Citadel “Contrast Paint – Contrast Medium”
Citadel “Contrast Paint – Black Templar”
Vallejo Mecha Color “SZ Red”
Reaper MSP “Blue Liner”
Vallejo Model Color “Black”
Vallejo Model Color “White”
Army Painter “Speed Paint – Hardened Leather 1.0”
Army Painter “Speed Paint – Crusader Skin 1.0”
Vallejo Model Air “Steel”
Vallejo “Thinner Medium”
Citadel “Contrast Paint – Ironjawz Yellow”
Army Painter “Speed Paint – Fire Drake 2.0”
Citadel “Contrast Paint – Magmadroth Flame”
Vallejo Model Color “Light Brown”
Army Painter “Speed Paint – Ashen Stone 2.0”
Army Painter “Warpaint – Gun Metal”
Vallejo Model Air “Black Metallic”
Martha Stewart Crafts “Brushed Bronze”
P3 “Midland Flesh”
Vallejo Model Color “English Uniform”
Vallejo Model Color “Wood Grain”
Citadel “Contrast Paint – Pylar Glacier”
Vallejo Model Color “Light Flesh Tone”
Citadel “Seraphim Sepia” (wash/shade)
Citadel “Contrast Paint – Apothecary White”
Citadel “Nuln Oil GLOSS” (wash/shade)
Army Painter “Flesh Wash” (wash)
Black Sharpie pen
Blue Sharpie pen
Brown Sharpie pen
Battlefront “Sherman Drab”
Vallejo Mecha Varnish “Gloss Varnish”
Vallejo Mecha Varnish “Matte Varnish”
Elmer’s PVA Glue
Pendraken 12mm dice frames
Army Painter “Battlefield Grass Green” (flocking)
Small stones
Twigs
Gamers Grass “Green Meadow Tufts” (flocking)
Army Painter “Battlefield XP Woodland Tuft” (flocking)
Gamers Grass “Wild Tufts” (flocking)
Shadow’s Edge Miniatures “6mm Dark Forest Light Blue Tufts” (flocking)
Shadow’s Edge Miniatures “6mm Dark Forest Dark Blue Tufts” (flocking)
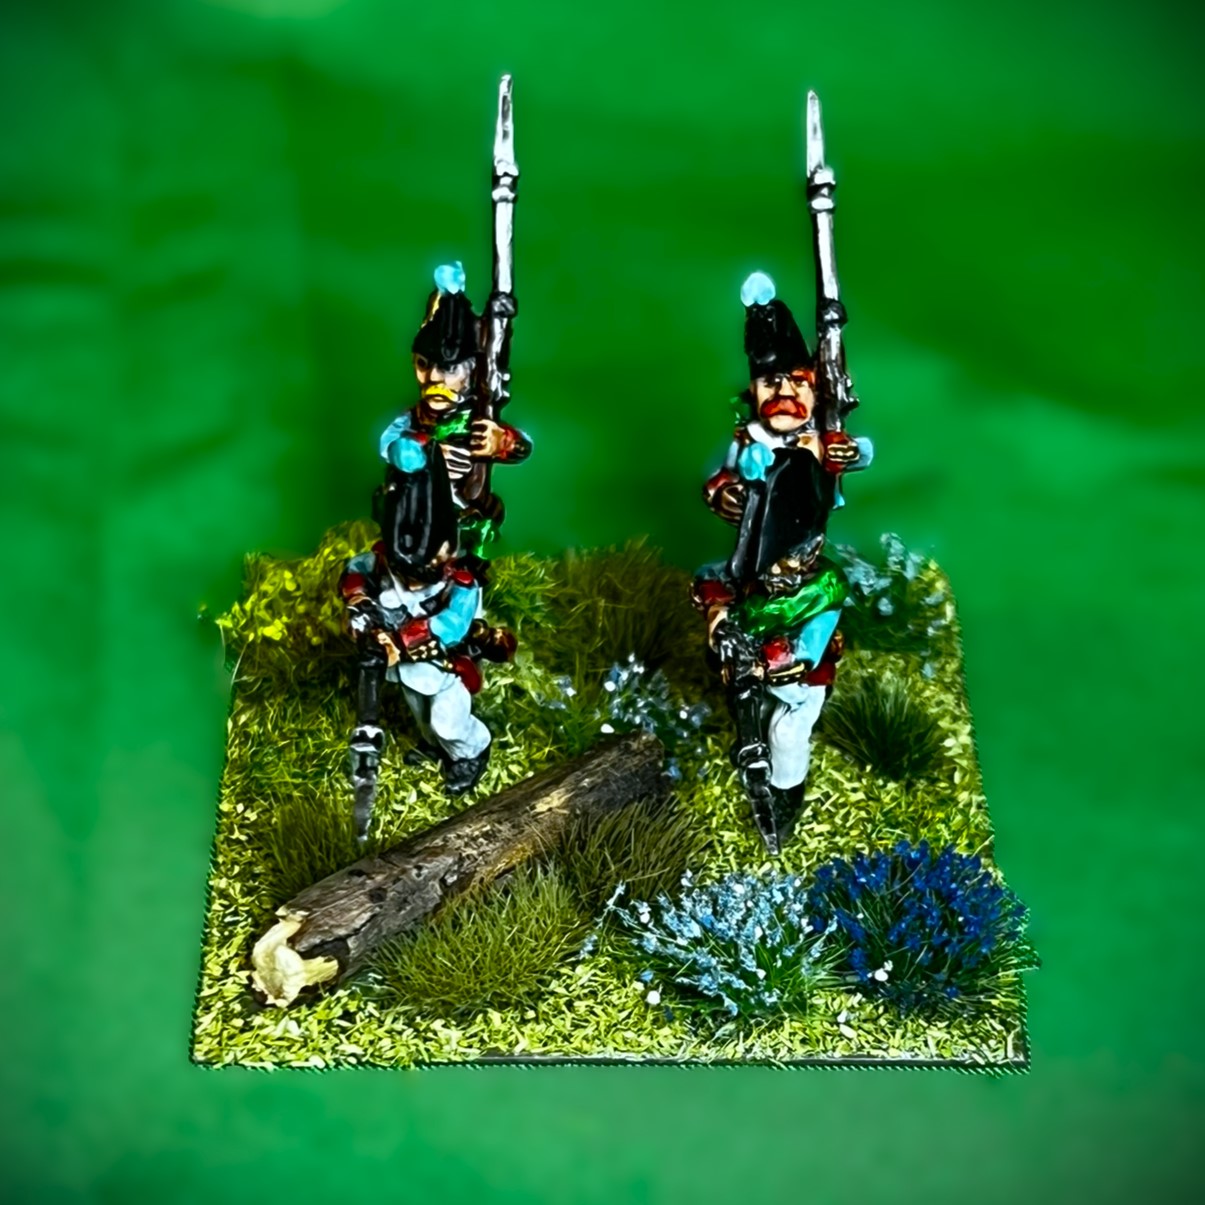
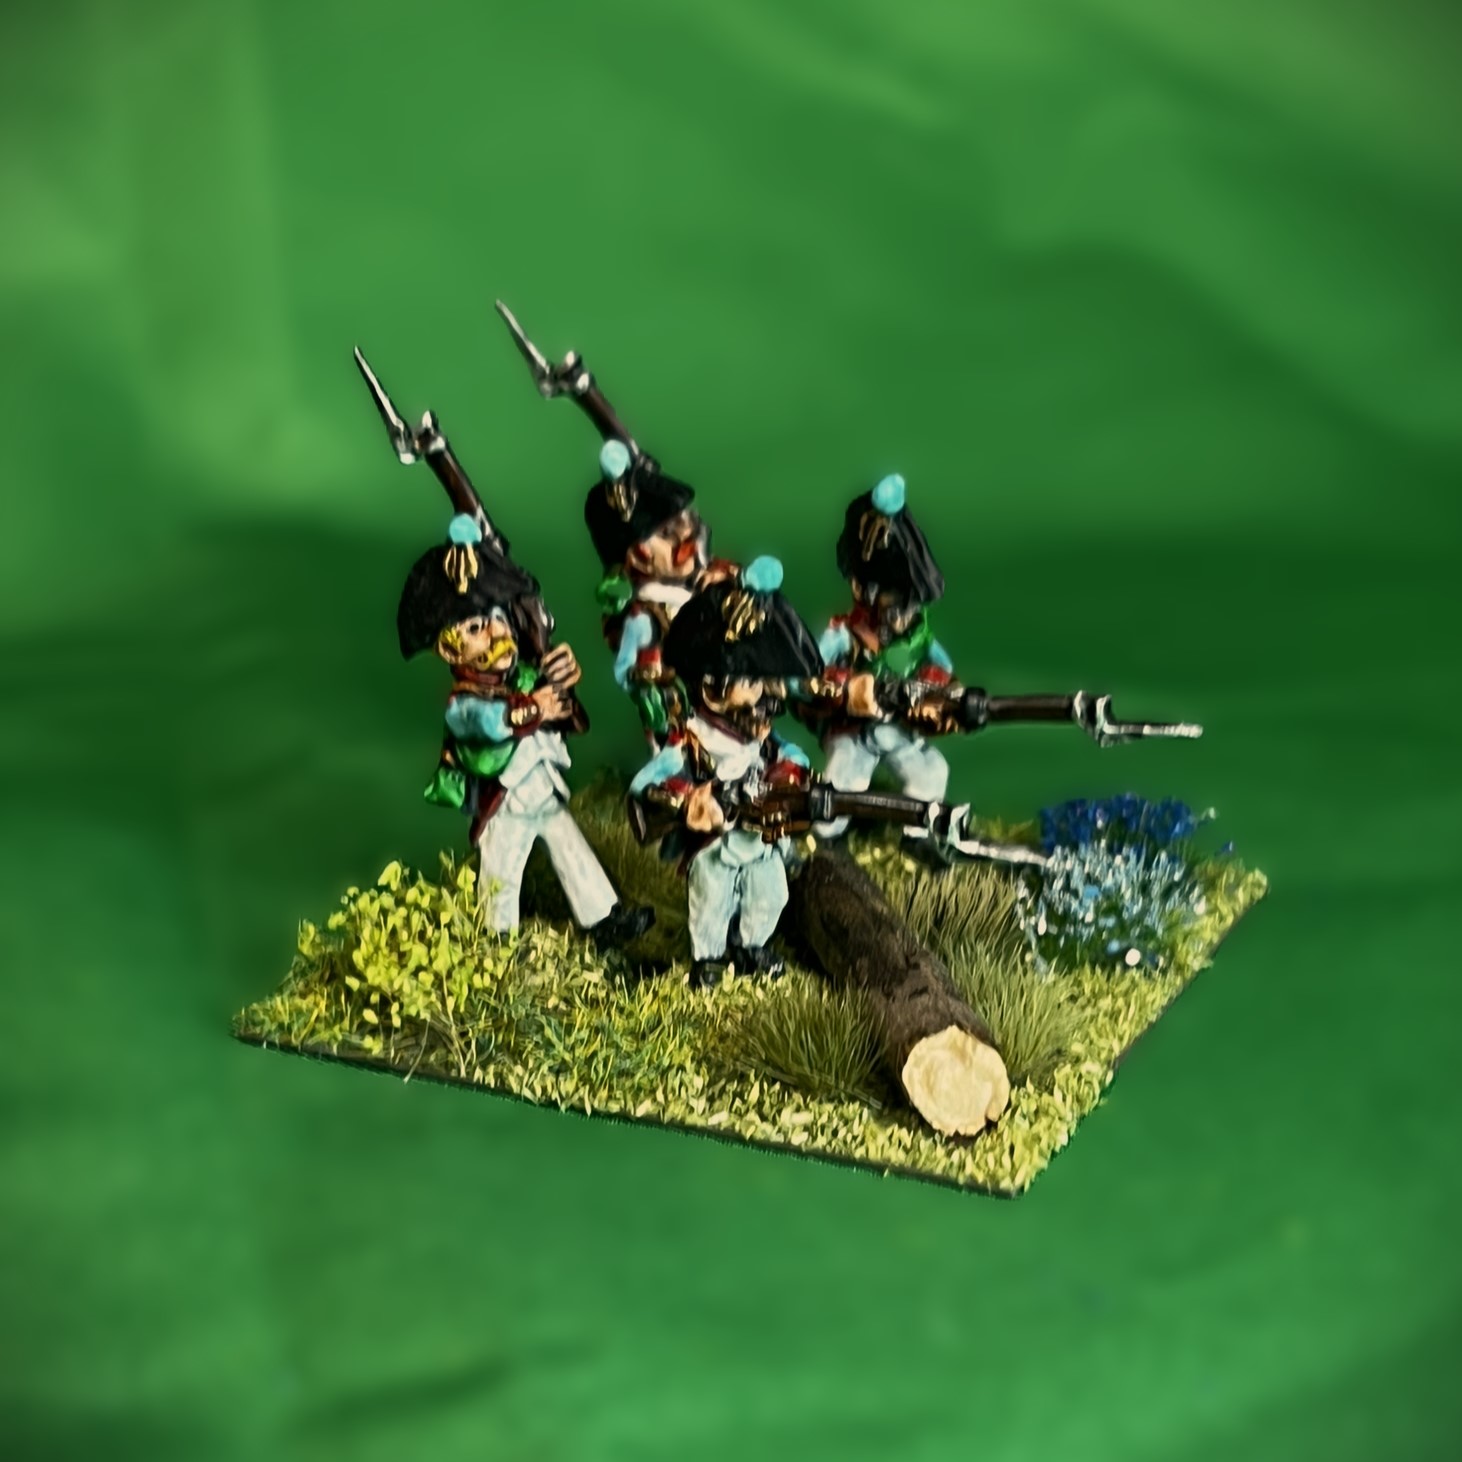
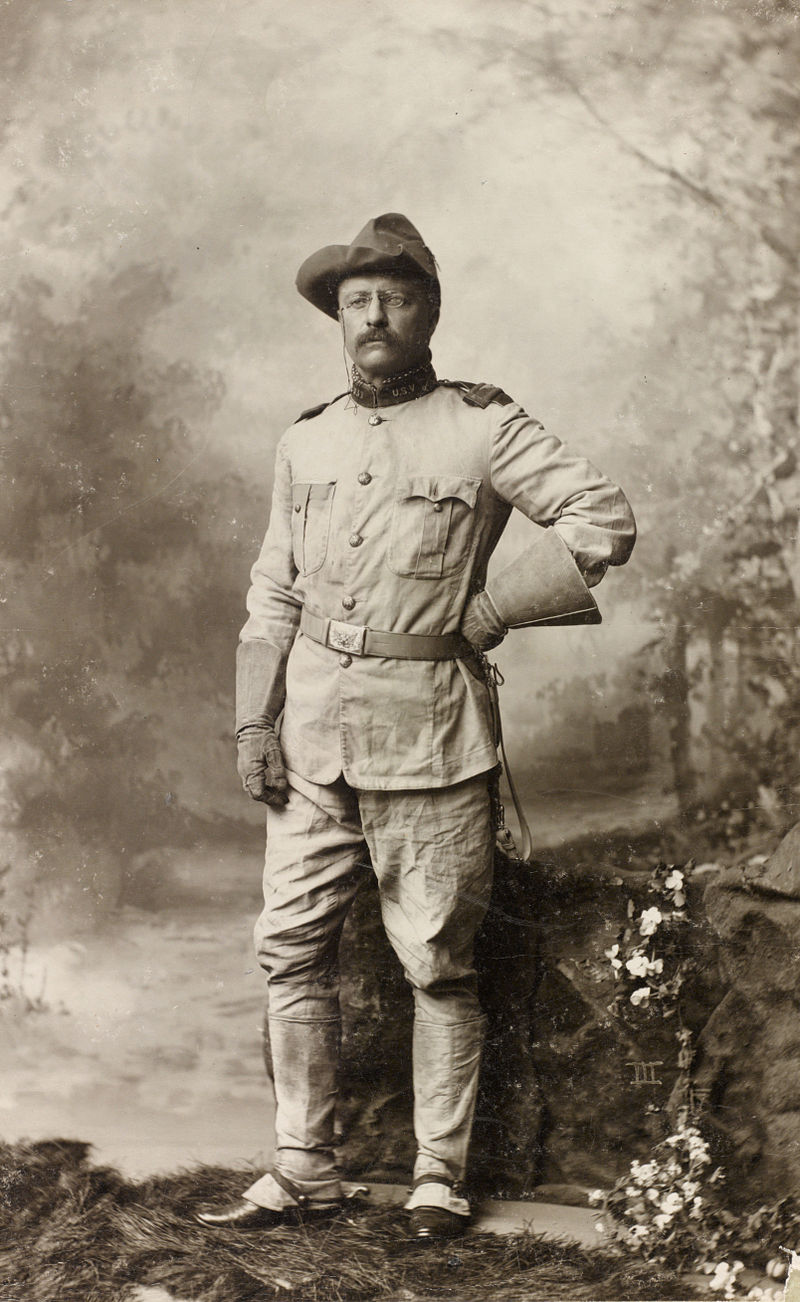
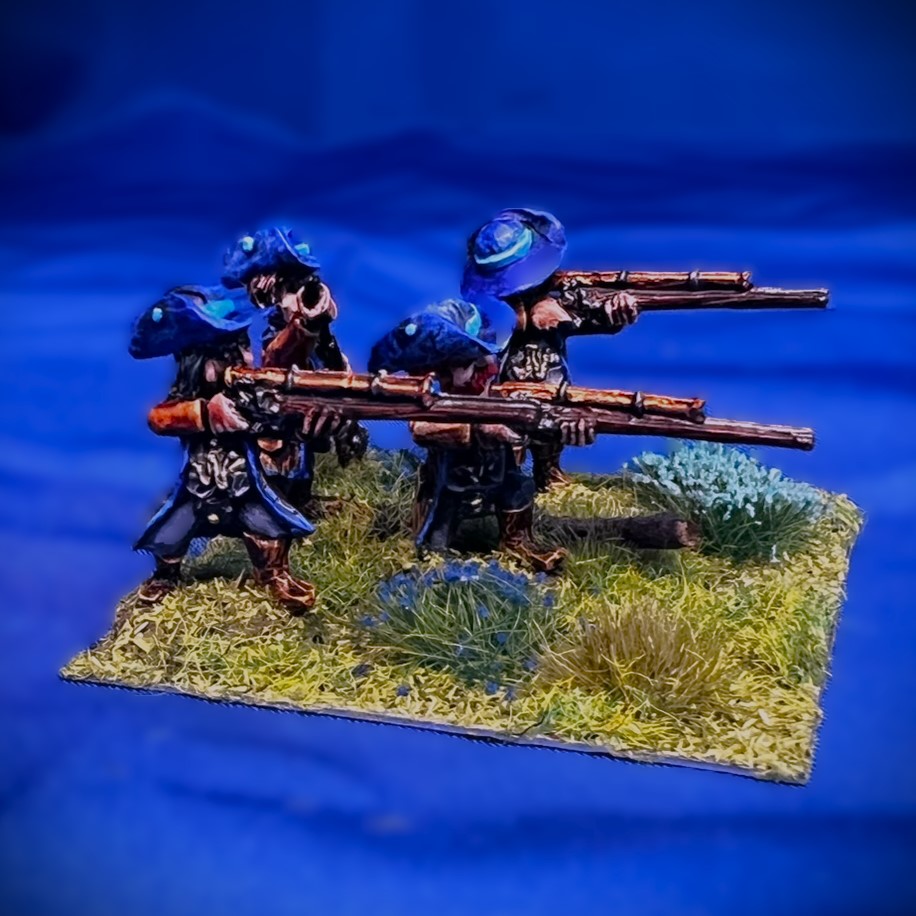
This regiment to me resembles the Munchkin equivalent of Teddy Roosevelt’s Rough Riders, especially with their hats. That historical unit was composed mostly of cowboys, which (as officially designated as the 1st United States Volunteer Cavalry) fought in Cuba in 1898 mostly without any mounts. As the Munchkin Sharpshooters are also dismounted save the regimental commander – the similarity for me holds – except for height.
Colonel Roosevelt in his Rough Rider uniform.
The 1st Munchkin Sharpshooter Regiment is SKU OZZ-116. There are 21 figures for the regiment – including the mounted regimental commander and 20 riflemen. Yes, these guys have RIFLES with scopes, not muskets. As such, their range is the same as troops with muskets, but they can fire at the equivalent of short range all the way out to long range. Normally, at greater than 7″, missile fire effective strength is halved. Not these guys! They can fire at full power out to 14″.
All of the figures are metal and 28mm in size. They are based 4 apiece to a 2″ square base – so five bases for the regiment plus the regimental commander on his own separate MDF base. No assembly was required for the unit other than to add the flags and for a small modification I made to an NCO figure that you’ll see below. The regiment is good at missile combat with their rifles – having a Marksmanship value of 6/10 with that great range. As for Melee, they are really weak with a poor value of 3/10 (maybe they needed bayonets!). Their Resolve value is okay at 6/10, but their Elan value is lousy at 4/10. The unit costs 6 points. As I always do, I mixed and matched the figure types and poses such that no two bases of the five in the regiment were identical.
I am currently expected to be waylaid because of minor knee surgery. So, in terms of painting and blogging, I decided to hurry up and paint these and post them now. I’ll be able to read your posts and replies of course, but the painting and blog creation booths are to be closed for a couple of weeks – so Merry Christmas to you all! I am hoping to participate in Dave Stone’s Wargamesculptors Blog “PAINT WHAT YOU GOT CHALLENGE 2023/2024” painting challenge as I should be ok by then.
Also, I did not take any WIP shots, so I’ll just go right into eye candy. Apologies as I had some struggles with my lighting – but I think the photos are getting a bit better, just not as consistent as I’d like.
Eye Candy
Regimental Commander Base
Base 1
Base 2
Base 3
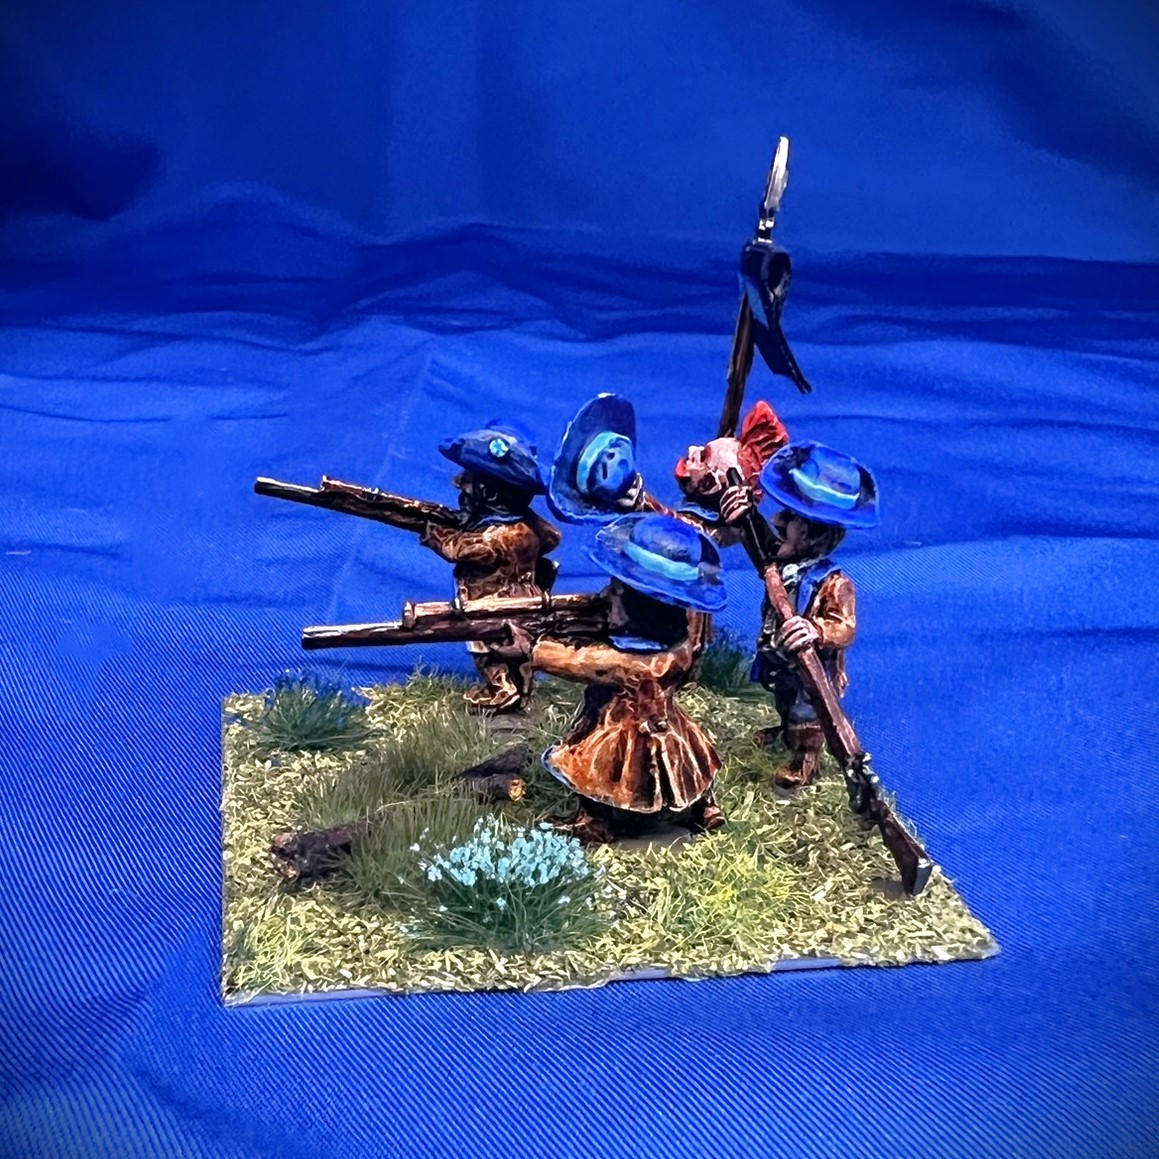
This base 3 had a unique figure – he is probably supposed to be an NCO. He is the bald guy. Instead of a rifle, he is holding what looks to be a guidon/spear/streamer signaling thing – and that looked too plain to me. So I added a couple of ribbons and a shrunken down pair of crossed rifle images with the “1” insignia on card stock to its cross bar.
The added ribbons – each of the two ribbon pieces is only 1/4″ wide by 1/2″ long. Note the tiny added crossed rifles with the “1”.
Base 4
Base 5 – Command Base
Group Shots
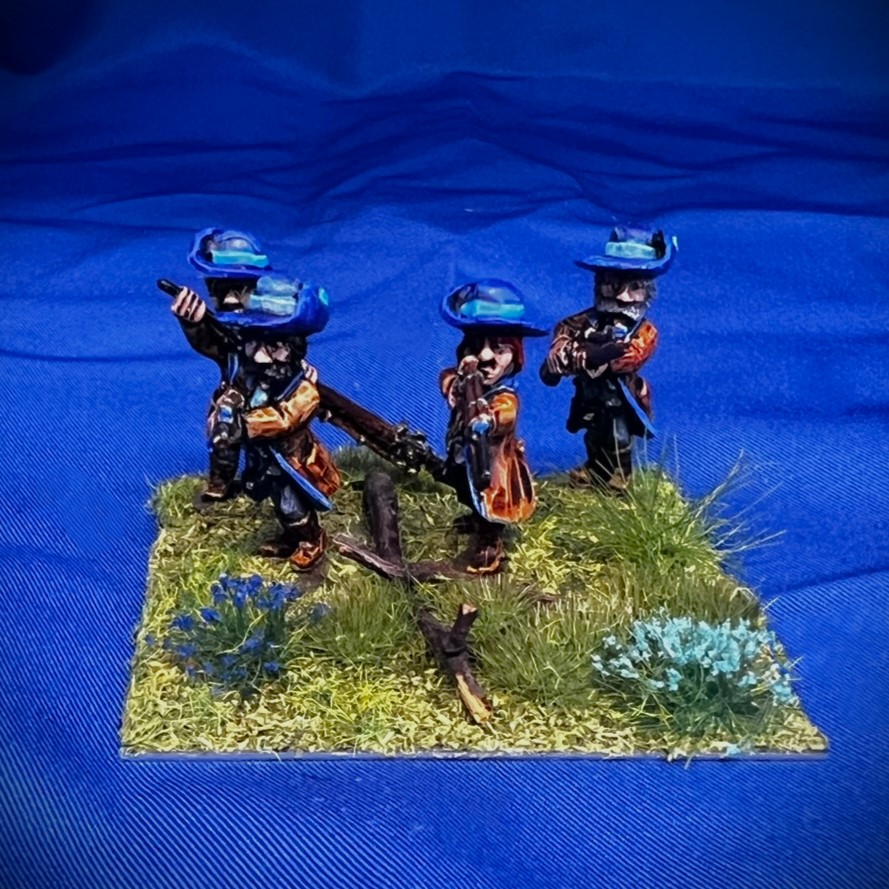
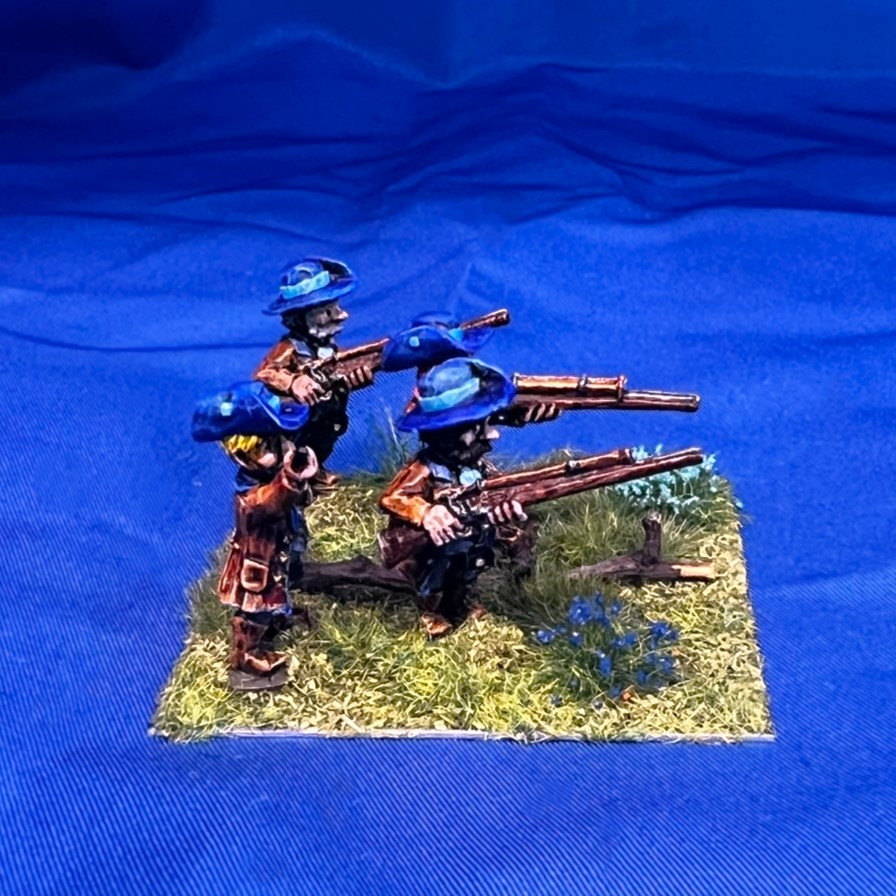
Top view of the 1st Munchkin Sharpshooter Regiment in line and ready to fire!
The 1st Munchkin Sharpshooter Regiment in column and on the march.
Frontal view of the 1st Munchkin Sharpshooter Regiment on line andready to fire!
I hope that you enjoyed seeing this unit – and I am happy that I was able to get this post in before I had to wait a while. I think when I recover I’ll be working on some Munchkin artillery and some Munchkin National Guard (Landwehr) for Dave’s challenge. Thanks for looking!
And yes, I still have much more Ozz to come…
Miscellaneous details and references for those interested in that sort of thing:
For all of my previous posts on Wars of Ozz games, figures, units, and other related projects – please see this page.
PAINTS, INKS, GLAZES, SHADES, WASHES, PIGMENTS, FLOCKING, GLUES AND MORE THAT I USED ON THE 1ST MUNCHKIN SHARPSHOOTER REGIMENT:
Rectangular Brigade MDF base (used as a Regimental base) from Old Glory
2″ square steel bases from Wargames Accessories (#21)
1.25″ x 1″ square steel base from Wargames Accessories (#FOW1)
1/2″ Everbilt steel washers
3/4″ Everbilt steel washers
Poster tack
Vallejo Premium Primer “White”
Vallejo “Flow Improver”
Vallejo “Airbrush Thinner”
Citadel “Nuln Oil” (wash)
Vallejo Mecha Color “Off White”
P3 “Brown Ink” (ink)
Army Painter “Speed Paint – Royal Robes 2.0”
Vallejo “Thinner Medium”
Citadel “Contrast Paint – Aethermatic Blue”
Citadel “Contrast Paint – Contrast Medium”
Vallejo Model Color “Black”
Citadel “Contrast Paint – Pylar Glacier”
Army Painter “Speed Paint – Crusader Skin 1.0”
Citadel “Contrast Paint – Magmadroth Flame”
Citadel “Contrast Paint – Ironjawz Yellow”
Army Painter “Speed Paint – Ashen Stone 2.0”
Citadel “Contrast Paint – Black Templar”
Army Painter “Speed Paint – Ruddy Fur 2.0”
Citadel “Contrast Paint – Cygor Brown”
P3 “Midland Flesh”
Citadel “The Fang”
Vallejo Model Air “Gun Metal”
Army Painter “Warpaint – Weapon Bronze”
Vallejo Mecha Color “Sky Blue”
The Armory “Dark Blue”
Vallejo Model Color “Wood Grain”
Army Painter “Speed Paint – Satchel Brown 2.0”
Army Painter “Speed Paint – Hardened Leather 1.0”
Army Painter “Speed Paint – Speed Paint Medium 1.0”
Yes, I understand – that was another less-than-short title – but I hope that you’ll find this post interesting as there will be a few surprises here – just wait!
First, it’s time to start with the lesser witches that I have just finished for my Wars of Ozz games. Lesser witches and wizards are cheaper than faction-based magic users – 2 points versus 3 points in cost. They do have to roll randomly for their available 2 spells (whereas faction-based witches and wizards get usually better spells automatically and then 3-4 of them to boot).
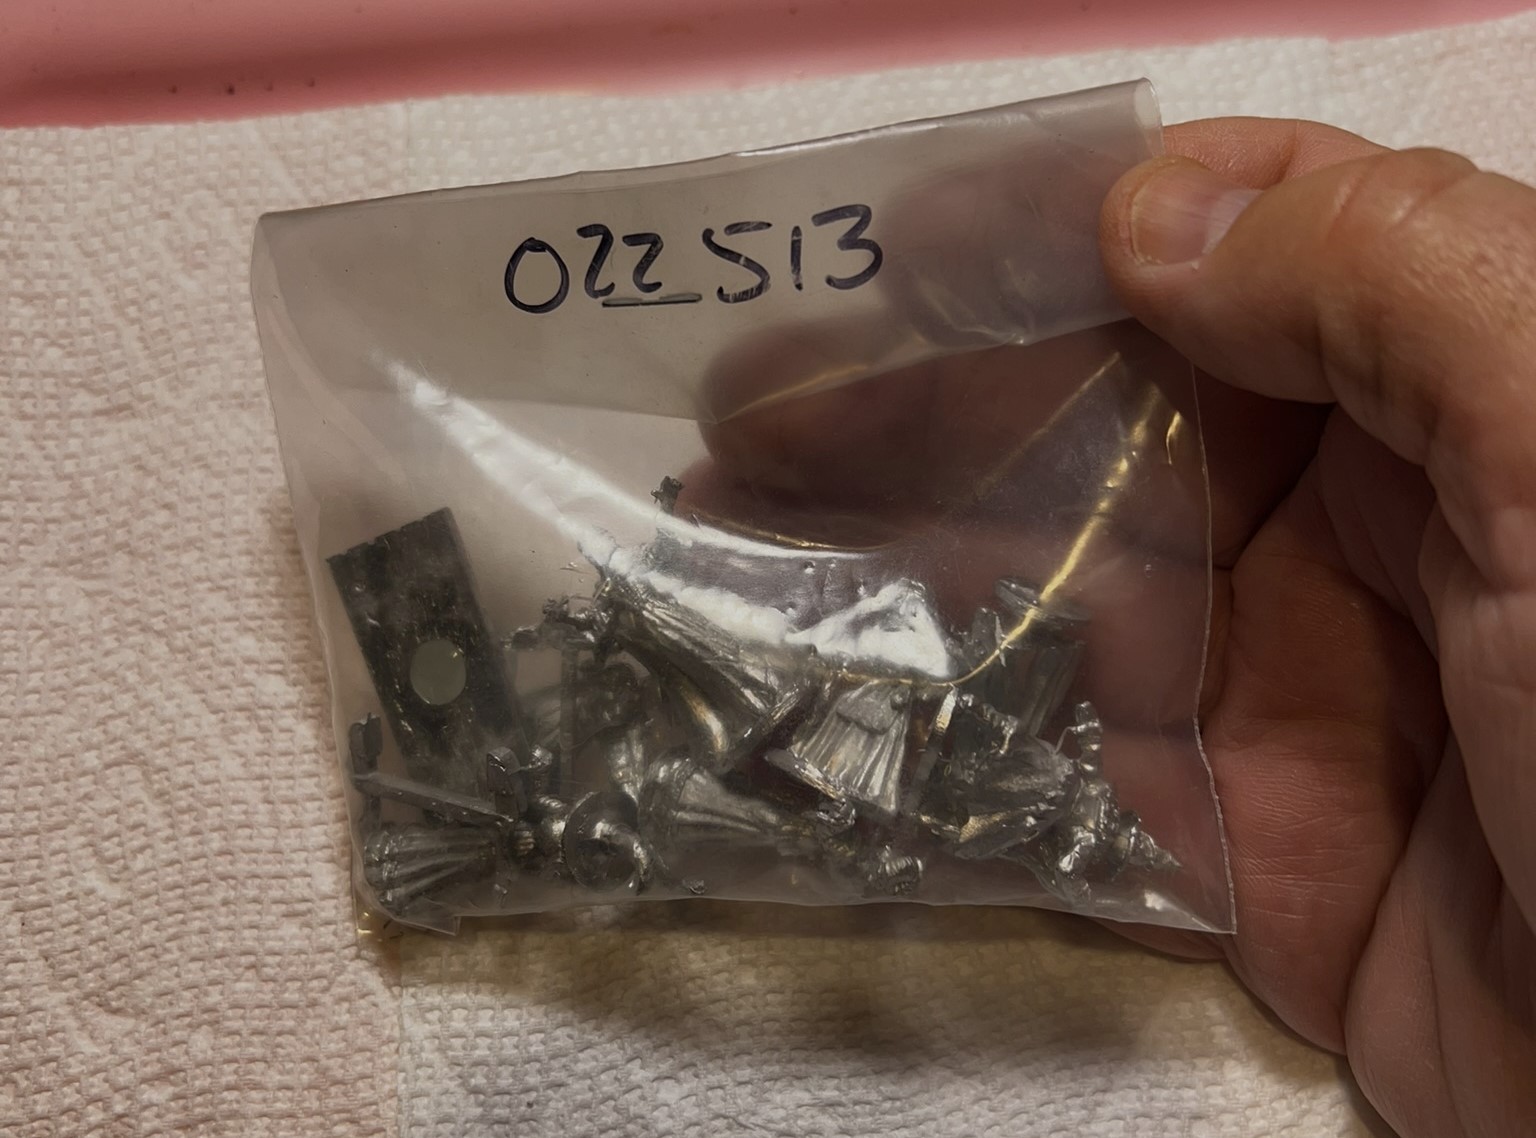
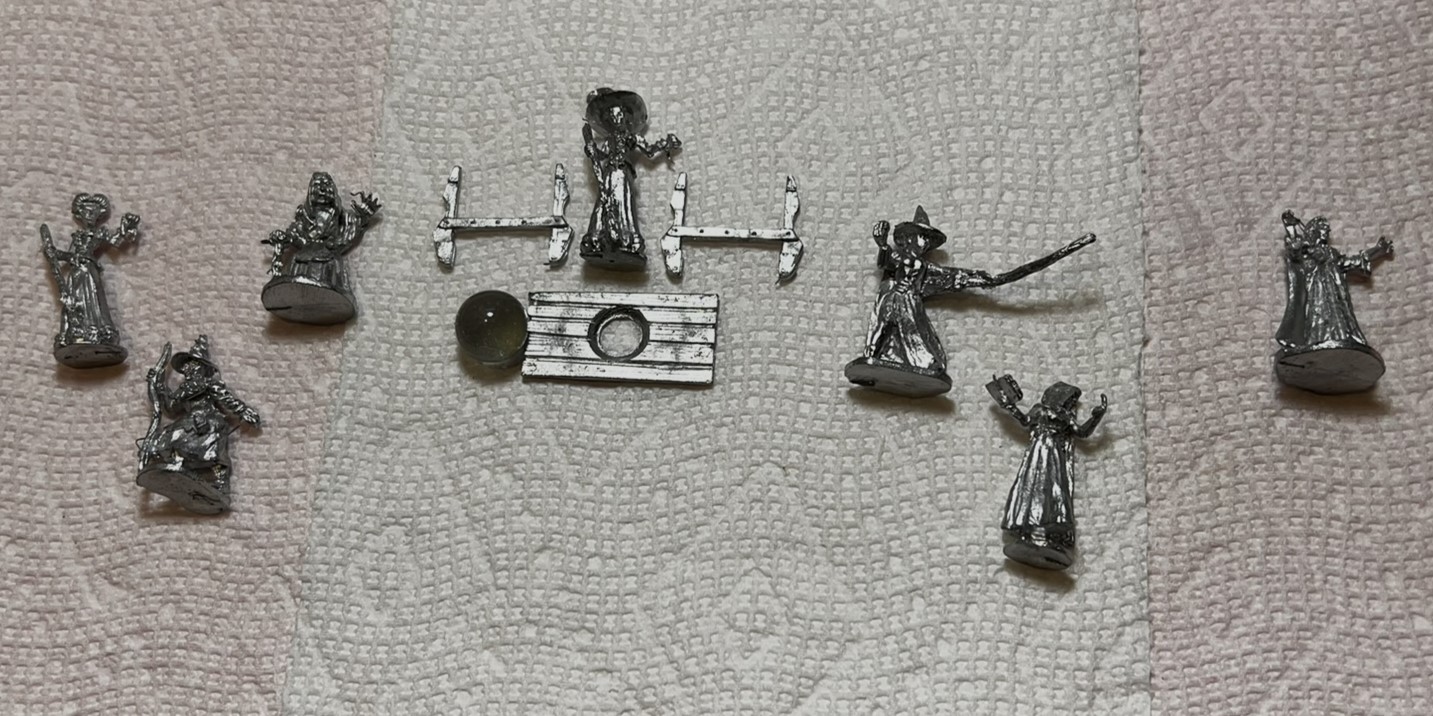
To add to the forces available, I chose to complete SKU #OZZ-513, Lesser Witches and Wizards. There are 7 witches (despite the name, there were no wizards that I could tell) in the kit. The figures are 28mm and in metal. Lesser witches could be a part of any faction, but only 1 per brigade is allowed. Lesser witches have a spell rating of 6/10, and a luck of 7/10. It would be possible therefore to have two witches in a brigade, one main and one lesser.
I previously did not have any “Lesser Witches”, so this addition will give me more flexibility in setting up games – as well as more variety for the players.
Currently, I am rushing to get all of the stuff I have in the queue painted and posted here – as I am headed for minor knee surgery next week. Therefore, my WIP shots for this SKU is a bit limited…
Lesser Witches WIP Shots
Website photoAs received.
Once again, I followed the same preparation and painting pattern as usual. Each witch has a different character – so I tried to vary how I painted, based, and indeed named them according to what I envisioned.
The SKU here shown after filing and washing the figures. One had a table and cool crystal ball.Assembled and ready to paint.Primed and dry brushed.
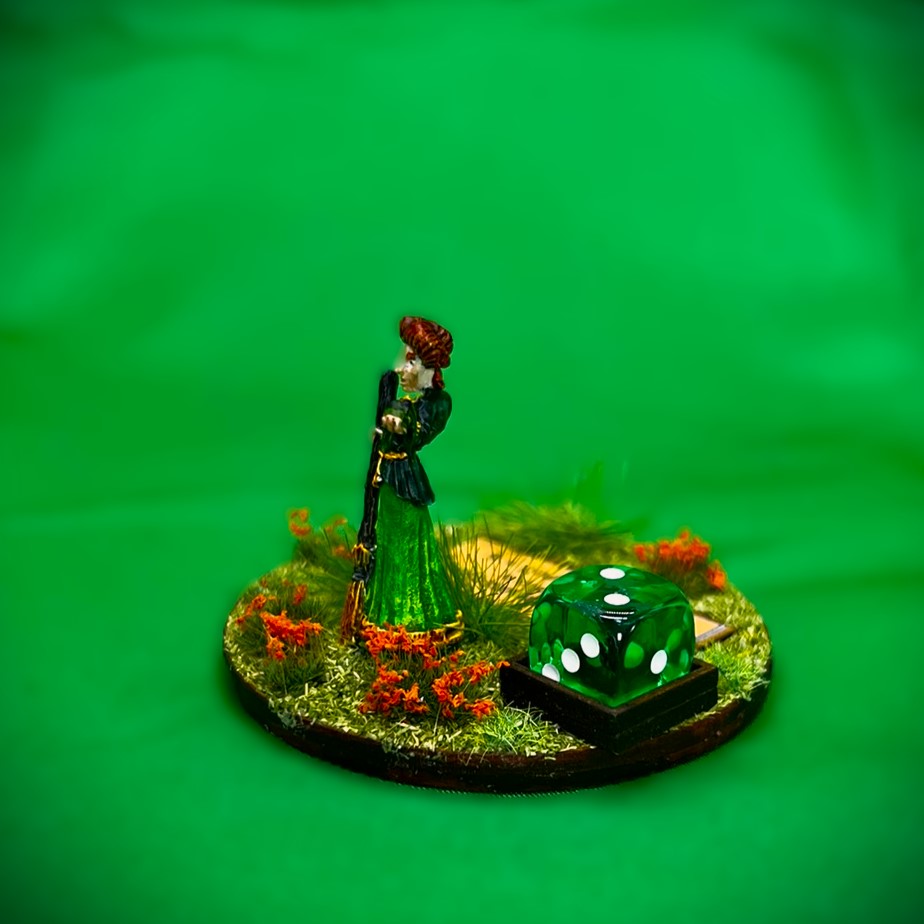
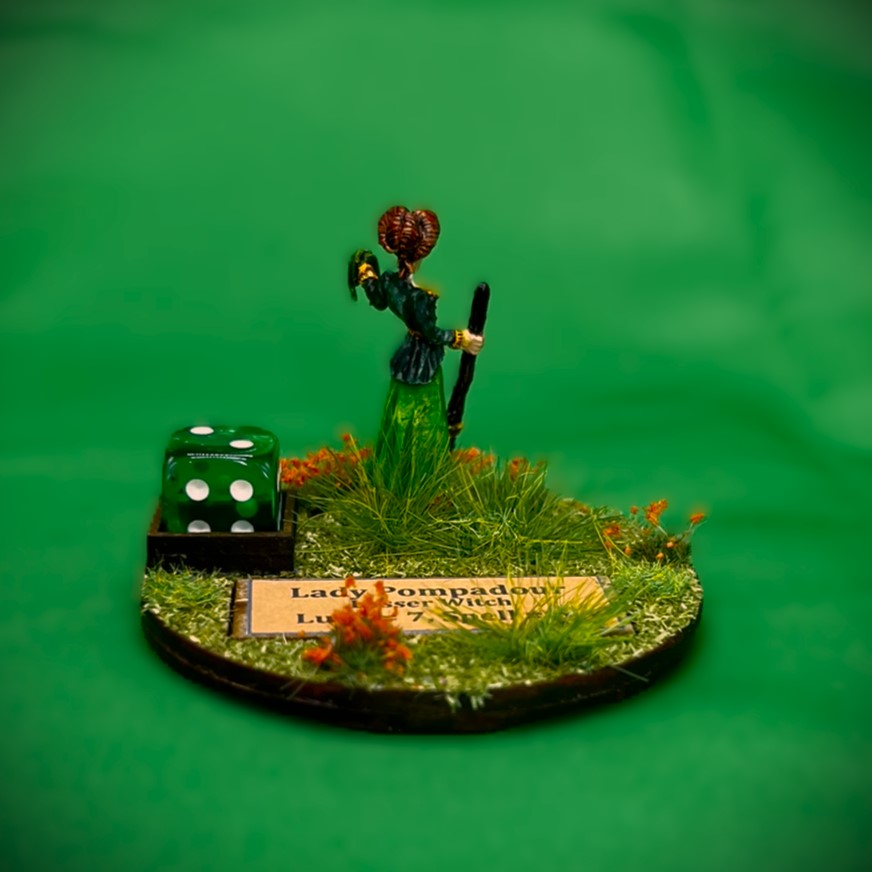
I started with the figures in order of the photo on the website. The first one I named “Lady Pompadour”.
Lady Pompadour painted.
As there are 7 witches (plus those surprises that I promised), let’s just move to them by name…
Lesser Witches and Wizards Eye Candy
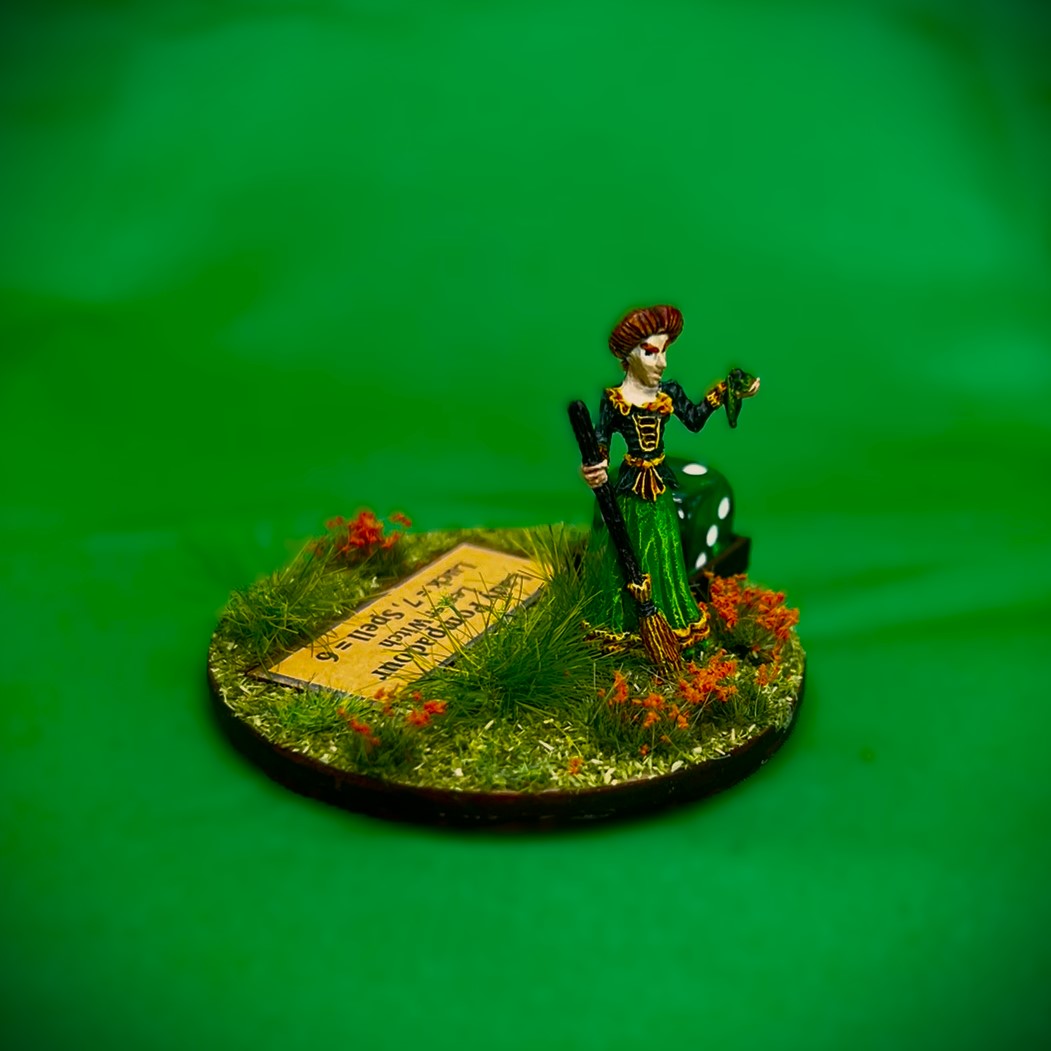
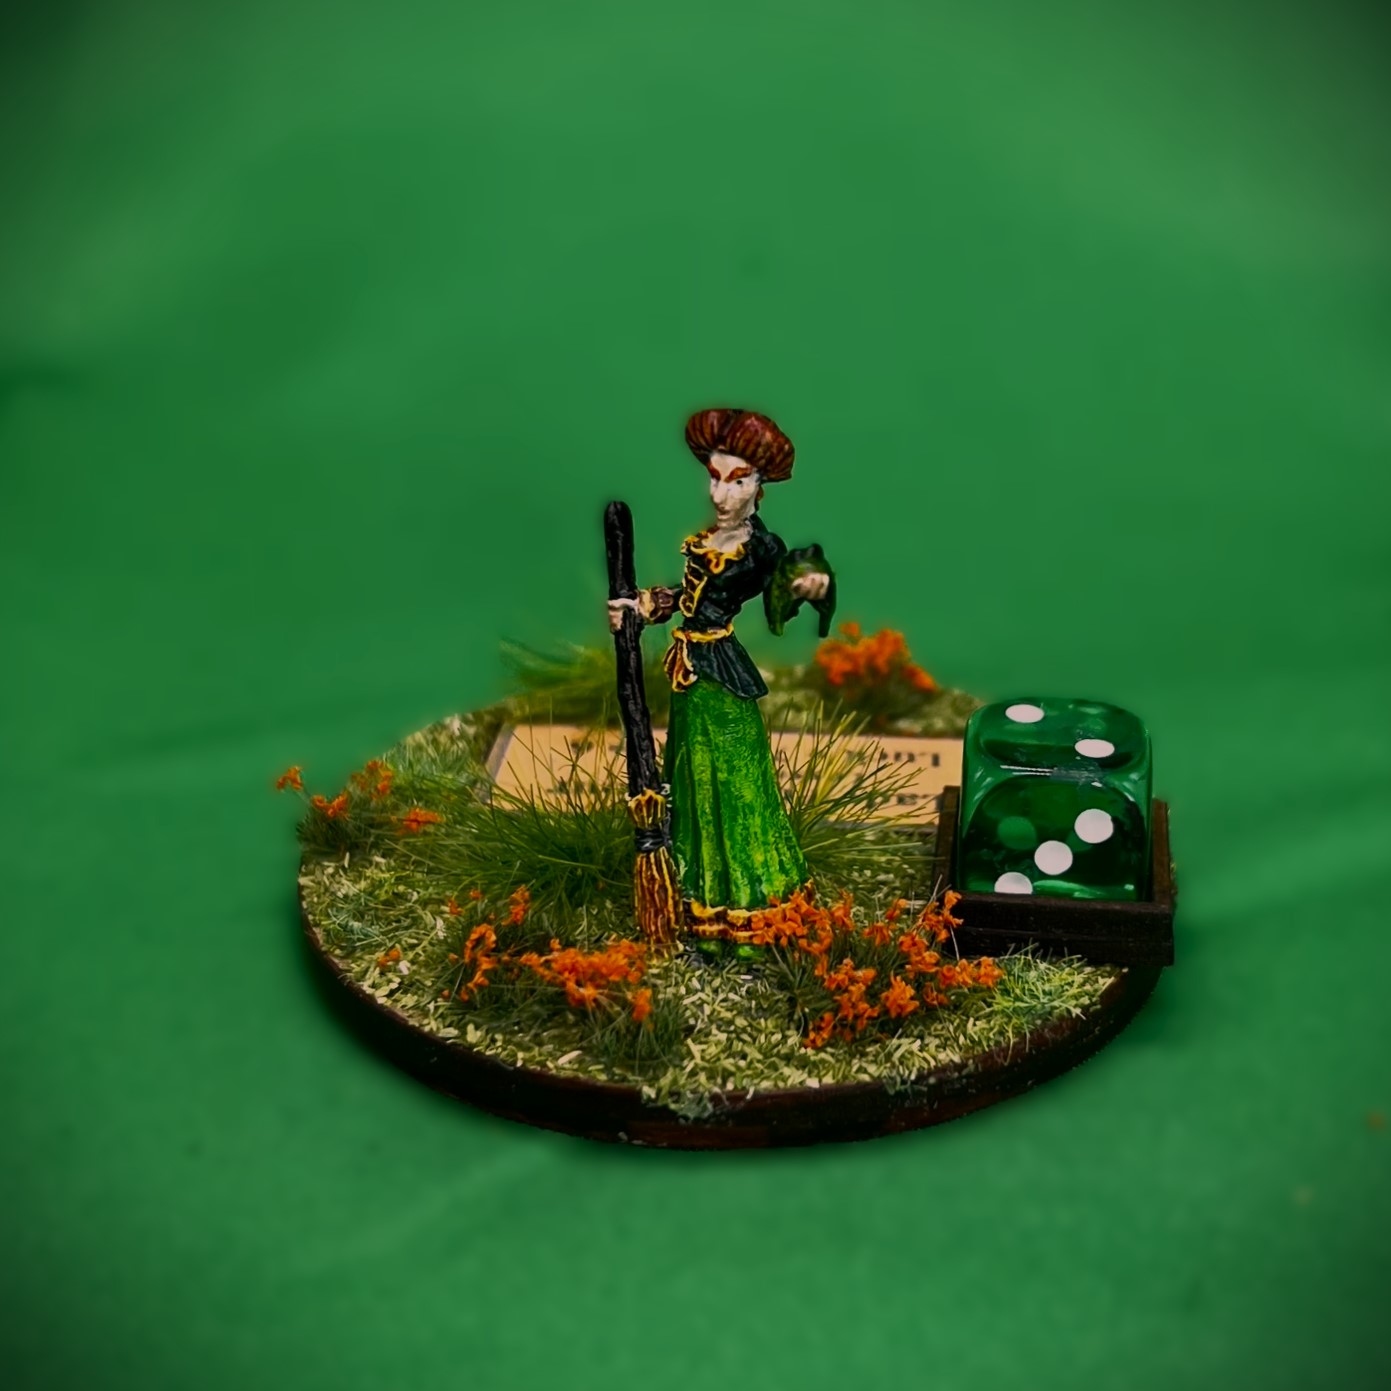
“Lady Pompadour”
Her hairstyle led me to her name. I thought her dress needed to be Ozz-green, as she is holding a frog.
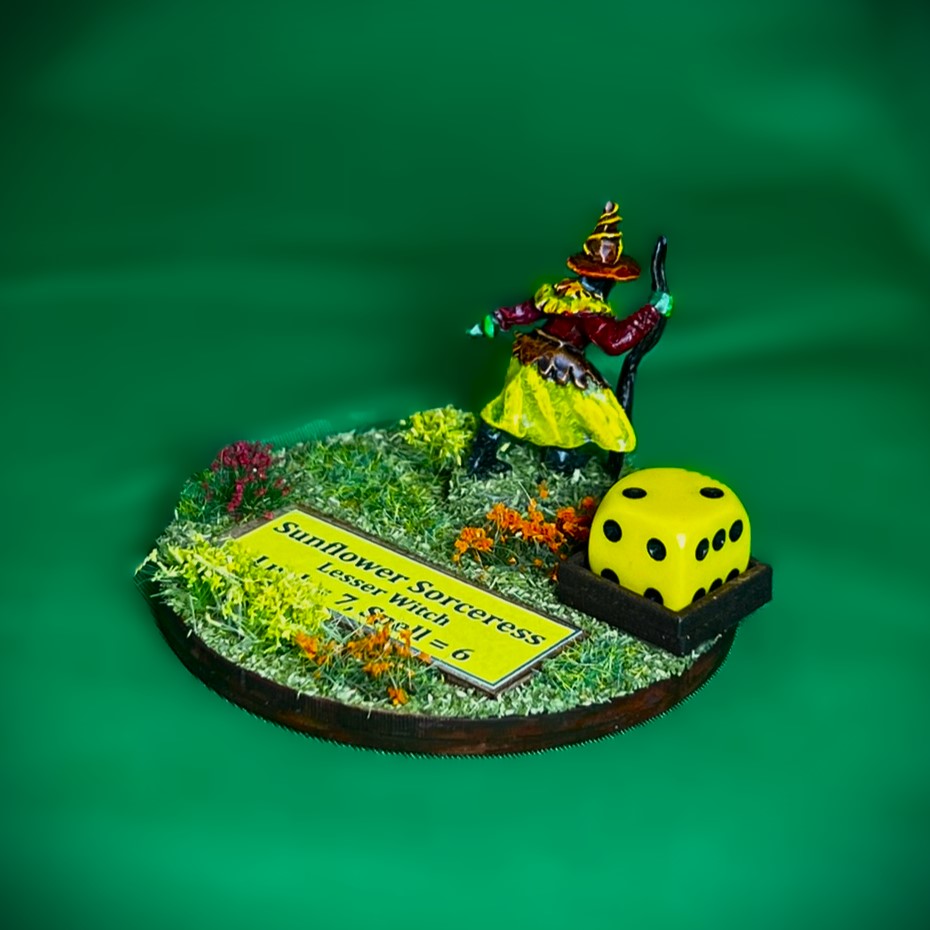
“Sunflower Sorceress”
This figure gave me pause at first – as I struggled to find a concept for her. Eventually, I decided that her clothing layers lookd like a flower – hence her name and color scheme. Her flesh could be Gillikin or Winkie in origin, but any brigade could have her sunny disposition.
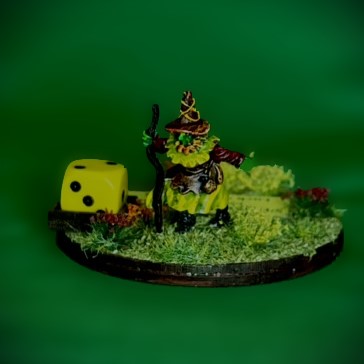
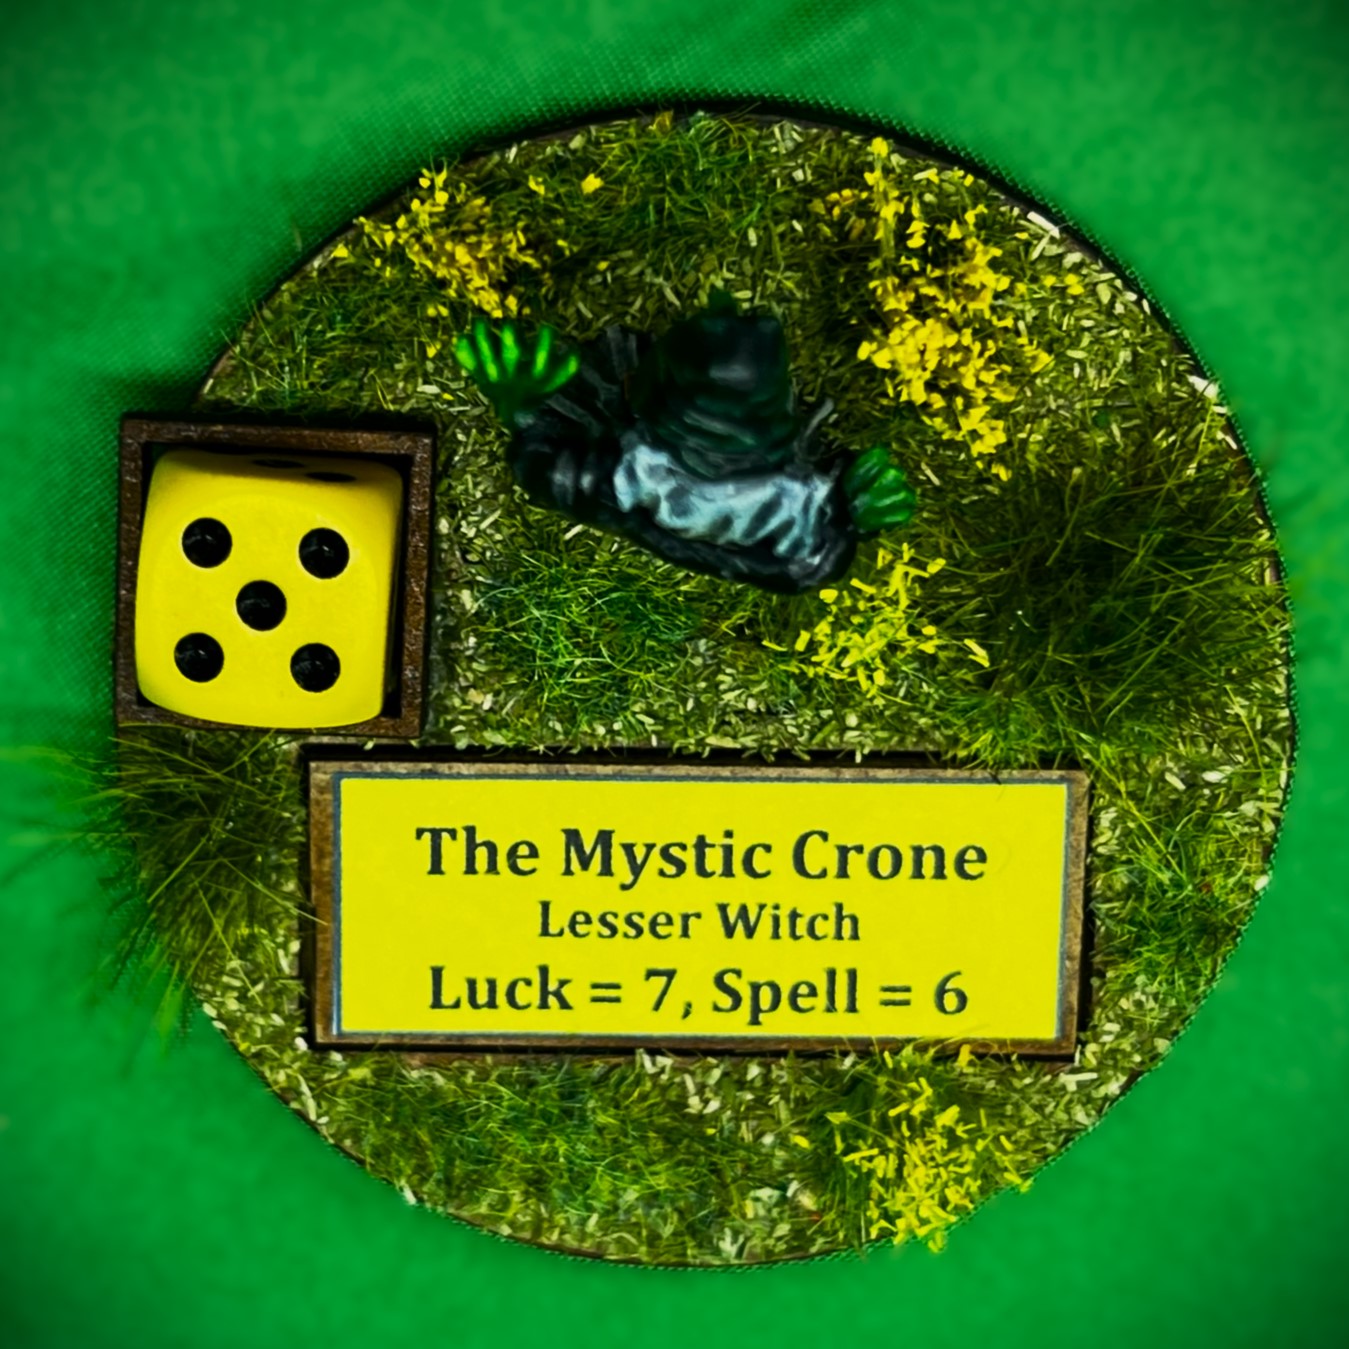
“The Mystic Crone”
This one was easy – looked like the stereotypical Hansel and Gretel witch from the forest. She’s also probably a Gillikin or a Winkie.
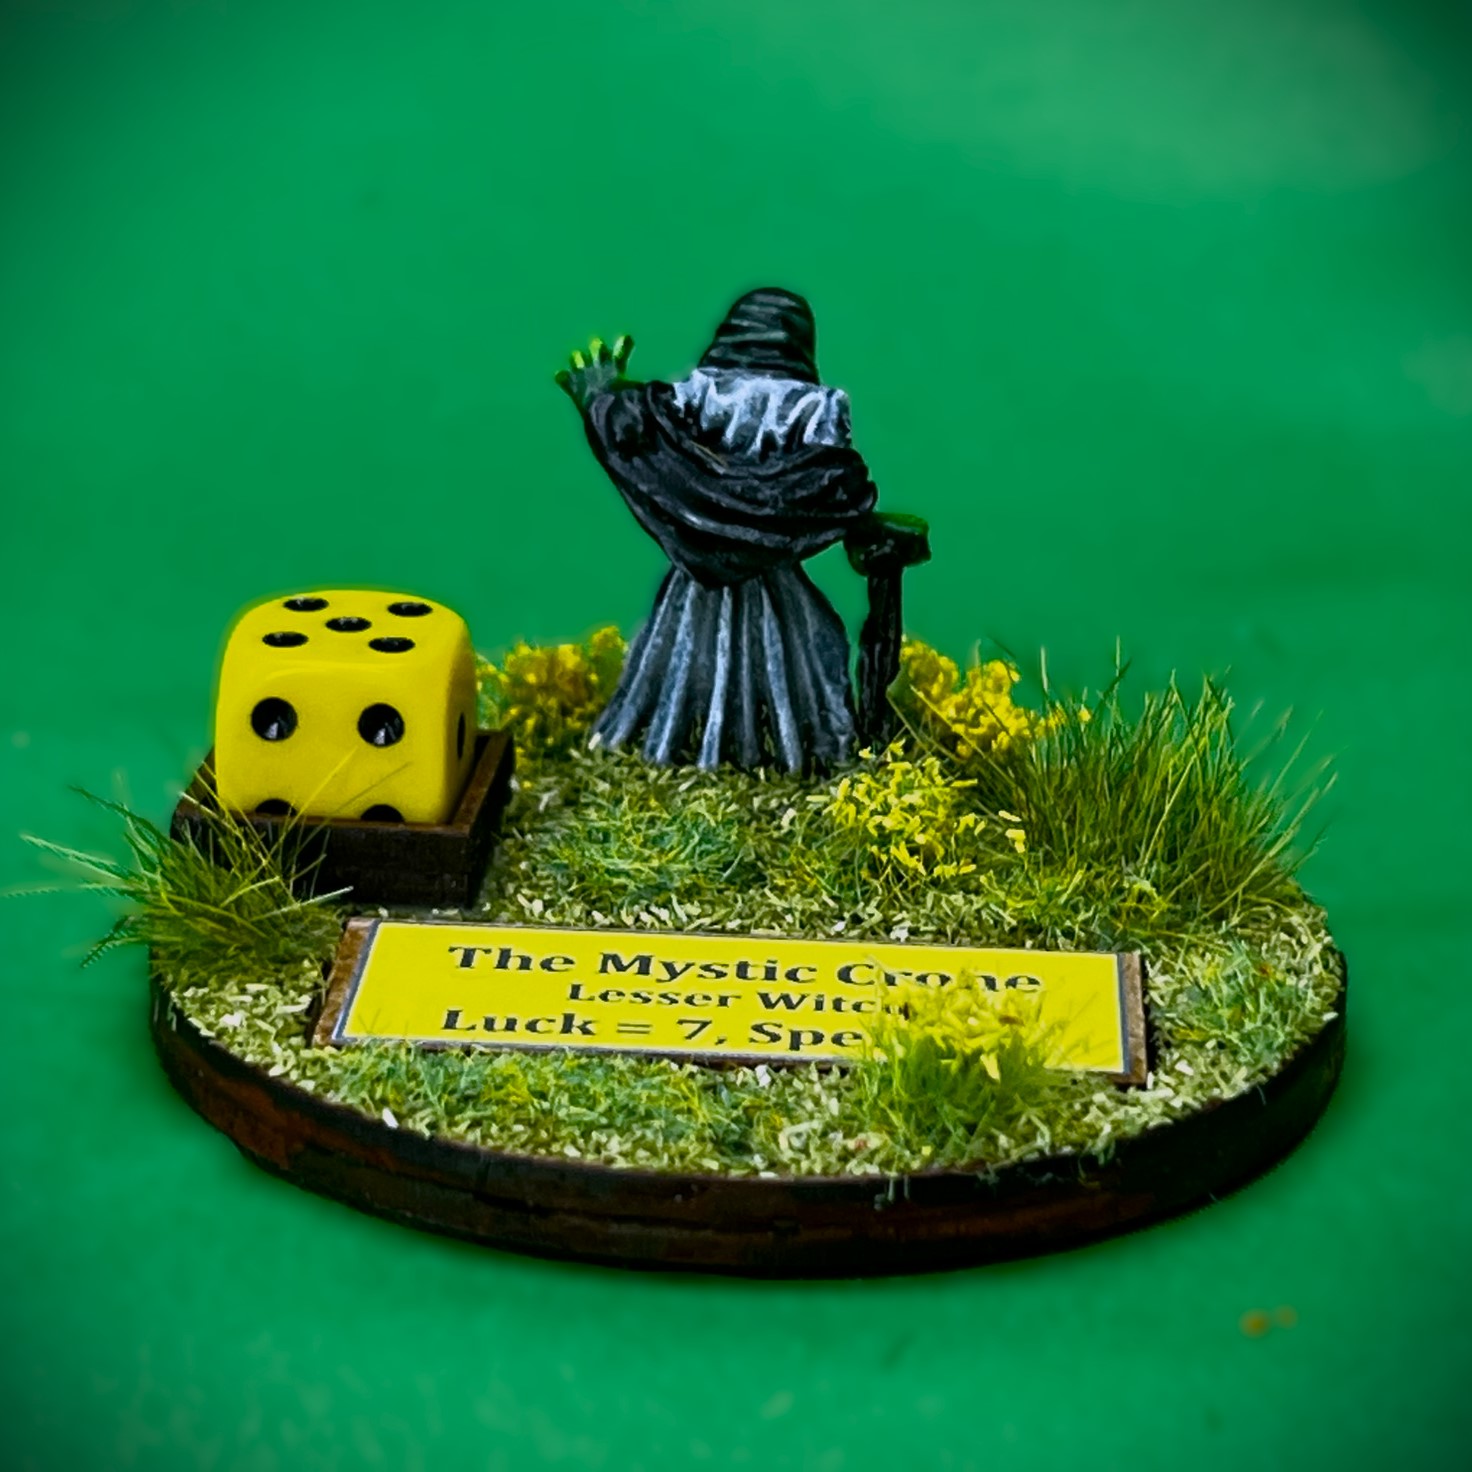
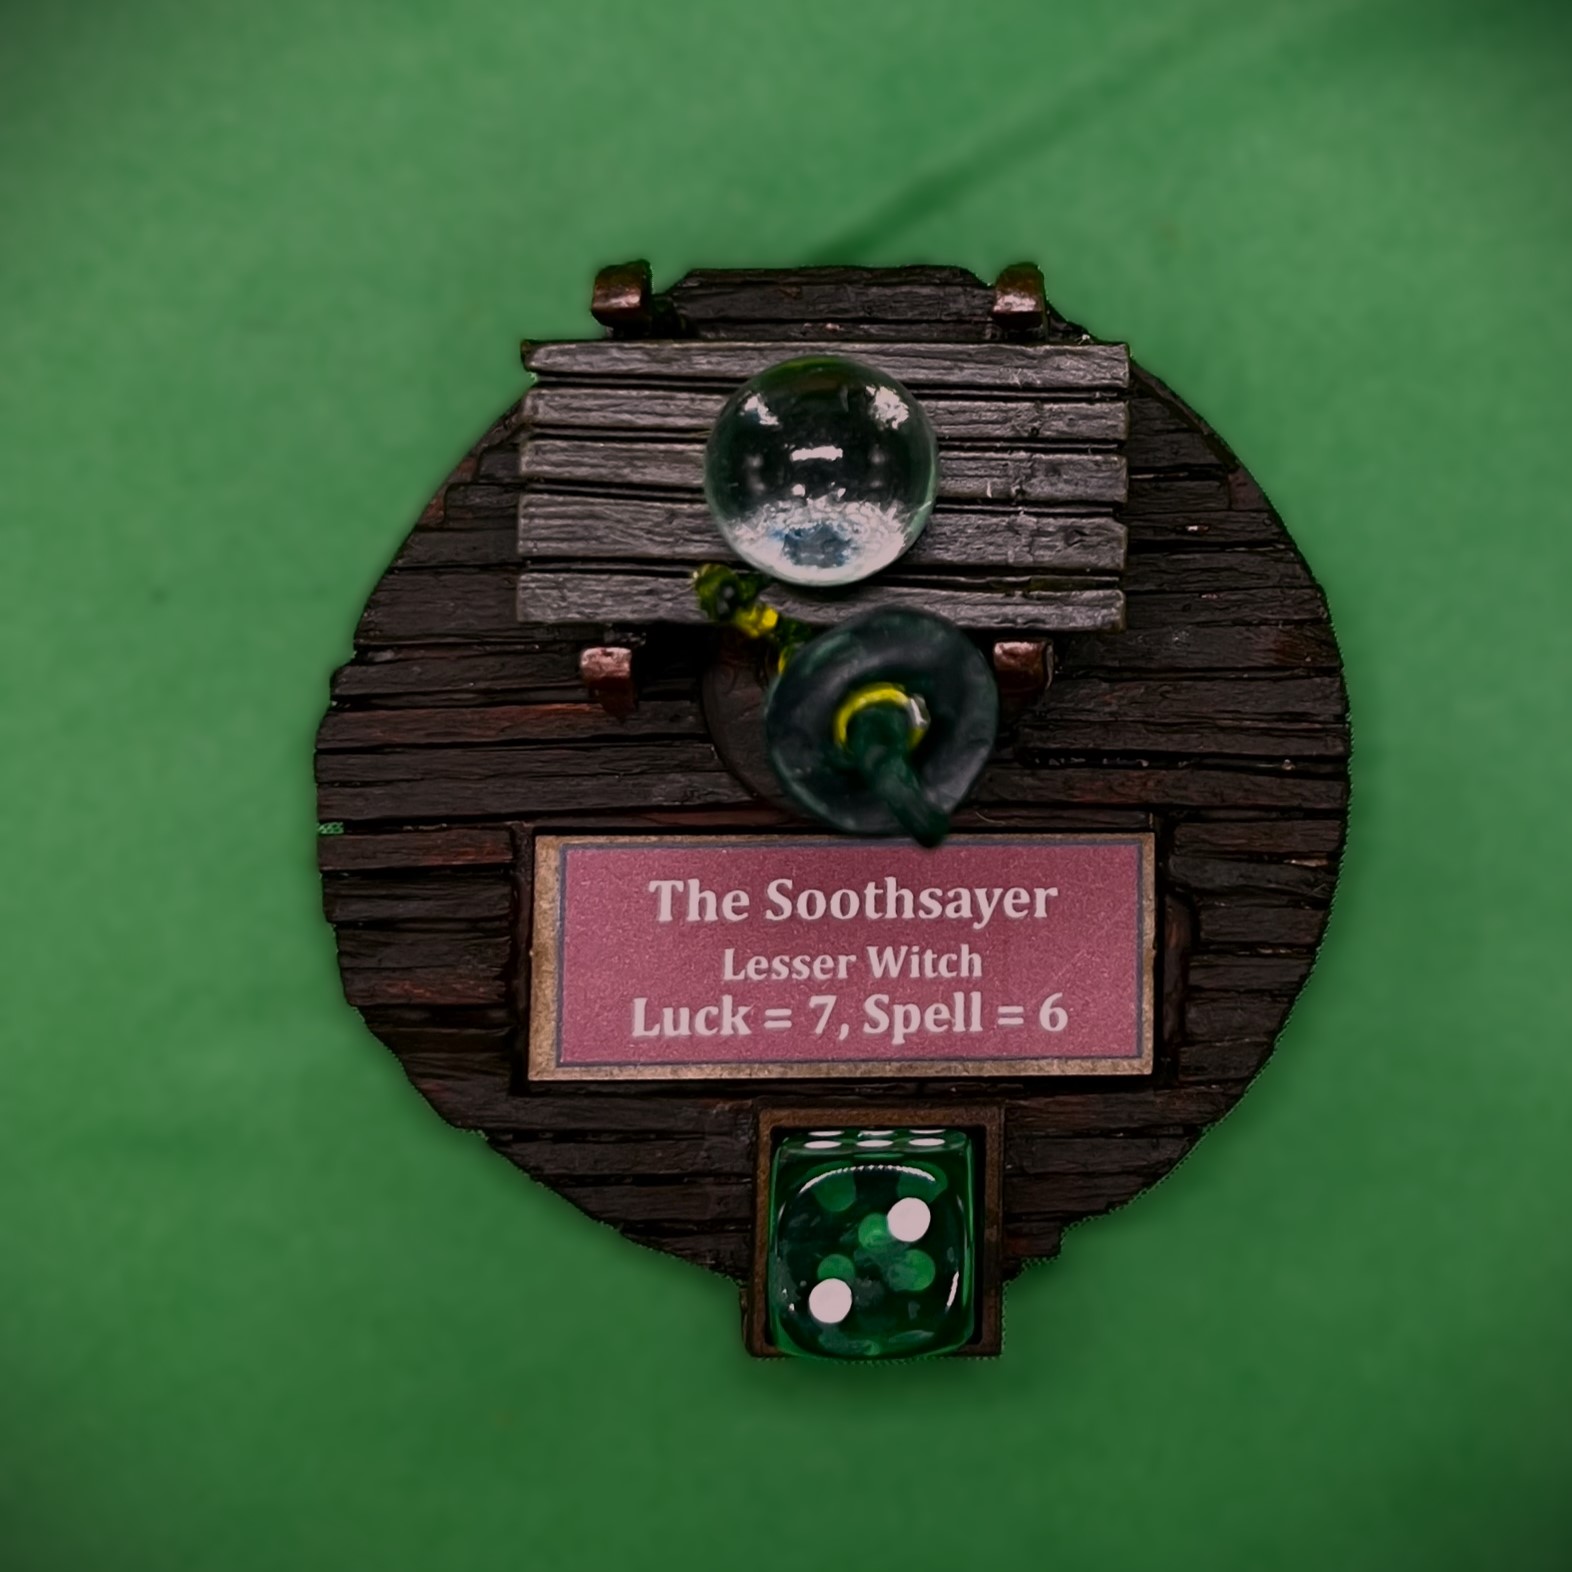
“The Soothsayer”
This figure had a table and the cool crystal ball – but I did not think it appropriate for her to be in a field for a base. Who brings a table to the field? Therefore, I took her MDF base and built a wooden floor with matchsticks. I did not glue in her crystal ball to the table because that might destroy its light bending properties – so I have a tiny little plastic baggie for that in her storage box. As for flesh, her face was not well-defined – so I went with a zombie-type flesh. Perhaps her fortune telling drew out much of her life force over the years. Whatever her origin, she’s a bit necrotic now. Like Lady Pompadour, she also holds a frog.
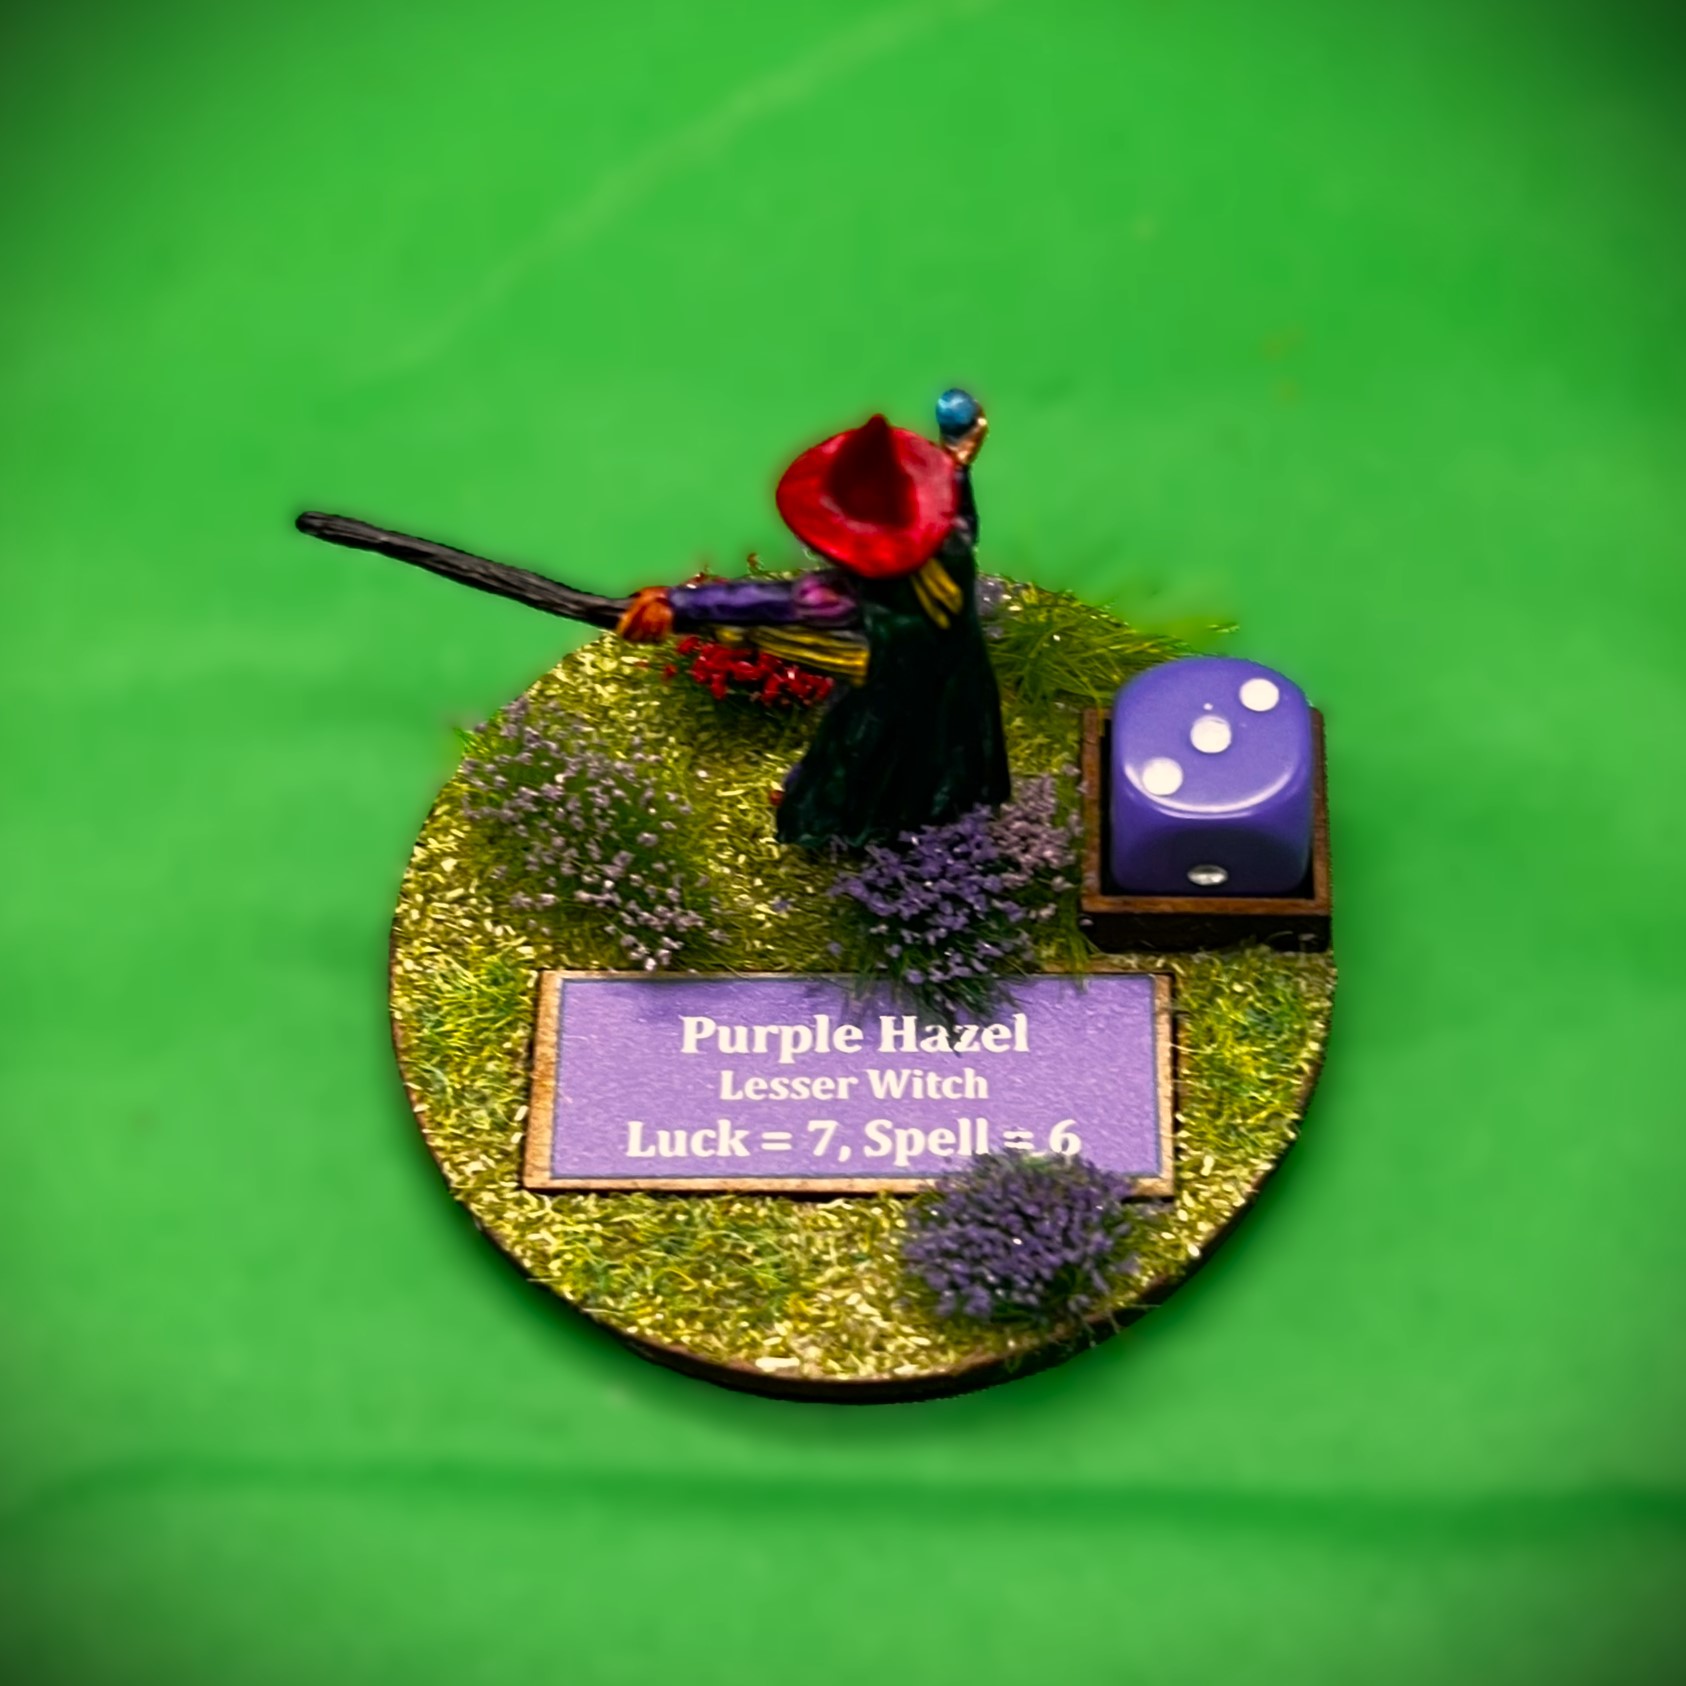
“Purple Hazel”
This is the same figure that I painted as “Lady Thistlethorne, Harvest Witch” for the Great Land of Harvest forces. Clearly, this figure had to have a much different look. You can’t get much more different here from my previous effort. Purple, pink, and red – and while I’m pretty sure she is not from is not from Electric Ladyland (apologies to Jimi Hendrix), for her name, I went with “Purple Hazel”. Yes, I know that song is not on that album. She has a little crystal ball in her hand, and a big broom. I went with a ruddy complexion as her facial features are not too pronounced. She’s probably Quadling in origin.
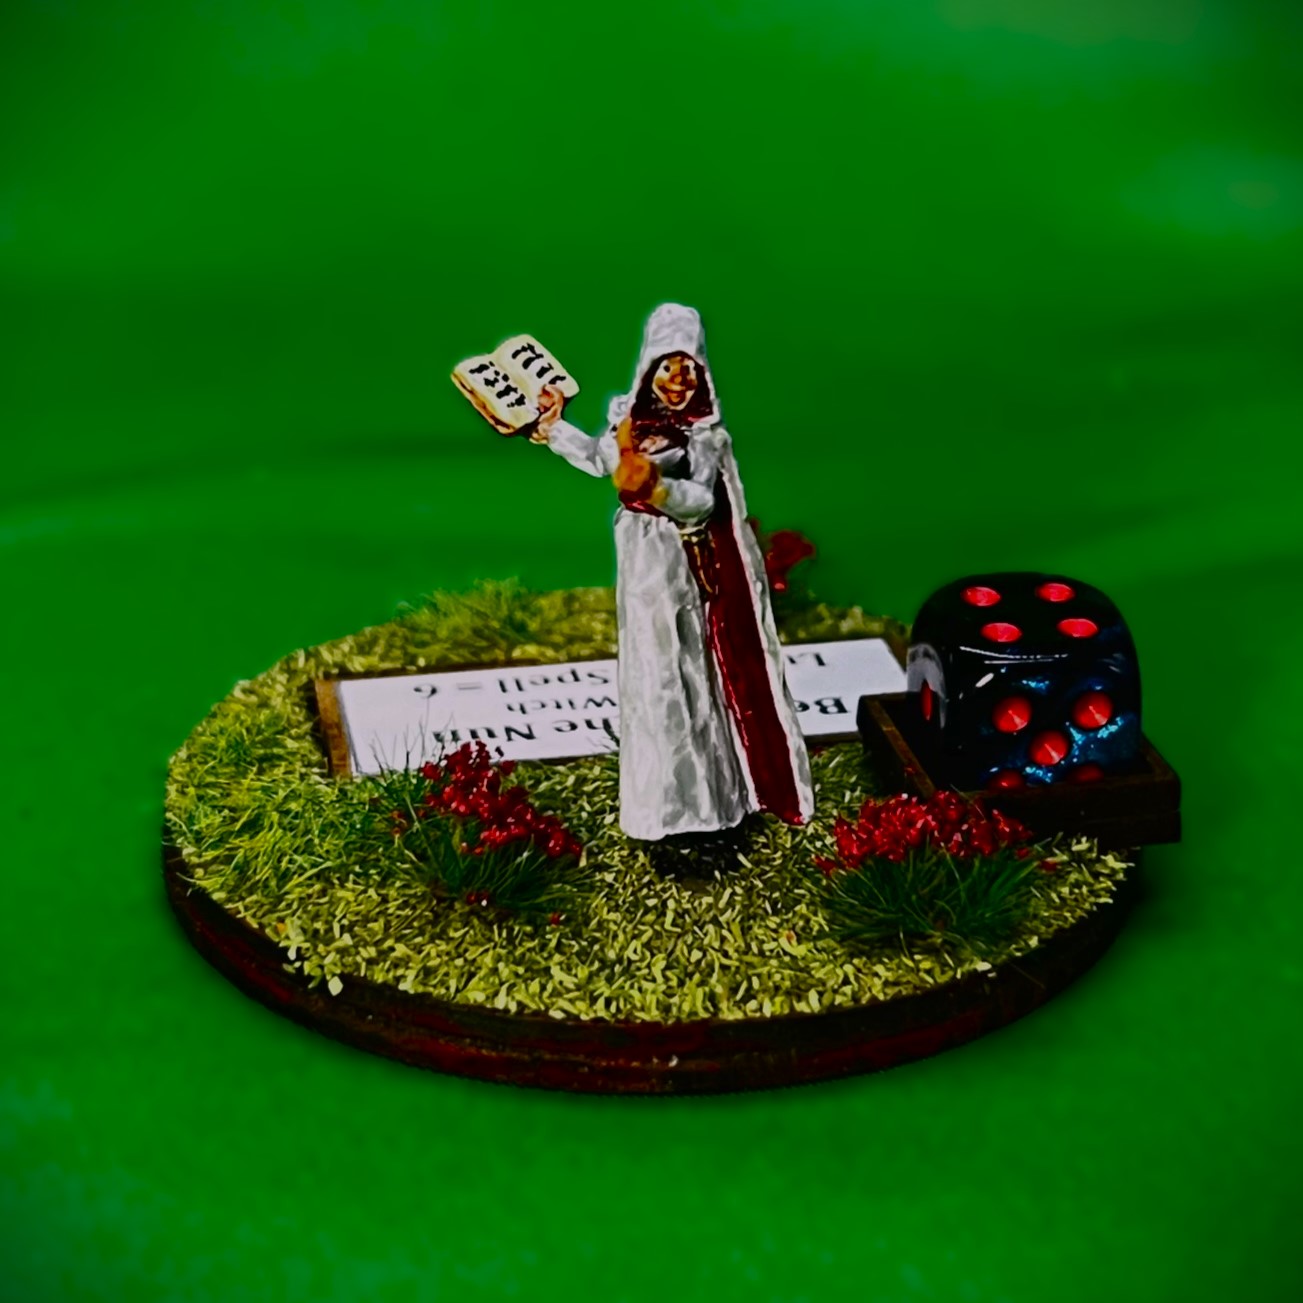
“Belinda the Nun”
I’m not sure that I could have come up with a different color scheme here for this model – the one on the website was white and red. As none of the other lesser witches were this different, I went with that scheme. Her beckoning long finger invites you to get closer while she holds the spell book. As for what cult she is a nun for, who knows! Maybe she’s just a devil woman, with evil on her mind… - apologies to Cliff Richard, circa 1976…
“Morta – Witch of the Undead”
This figure had the most facial detail. But, I thought, why not make her an Undead witch – hence the name “Morta – Witch of the Undead”. That’s acceptably creepy, and unlike the others. Her outfit made me think of a dress made from curtains from the 1970’s – so I purposefully painted it gaudy and a bit tacky. I’m pretty sure the undead have no fashion taste anyways.
Now that concludes the SKU, but not the witches – now it’s time for the first surprise! There is another witch! Here follows the story:
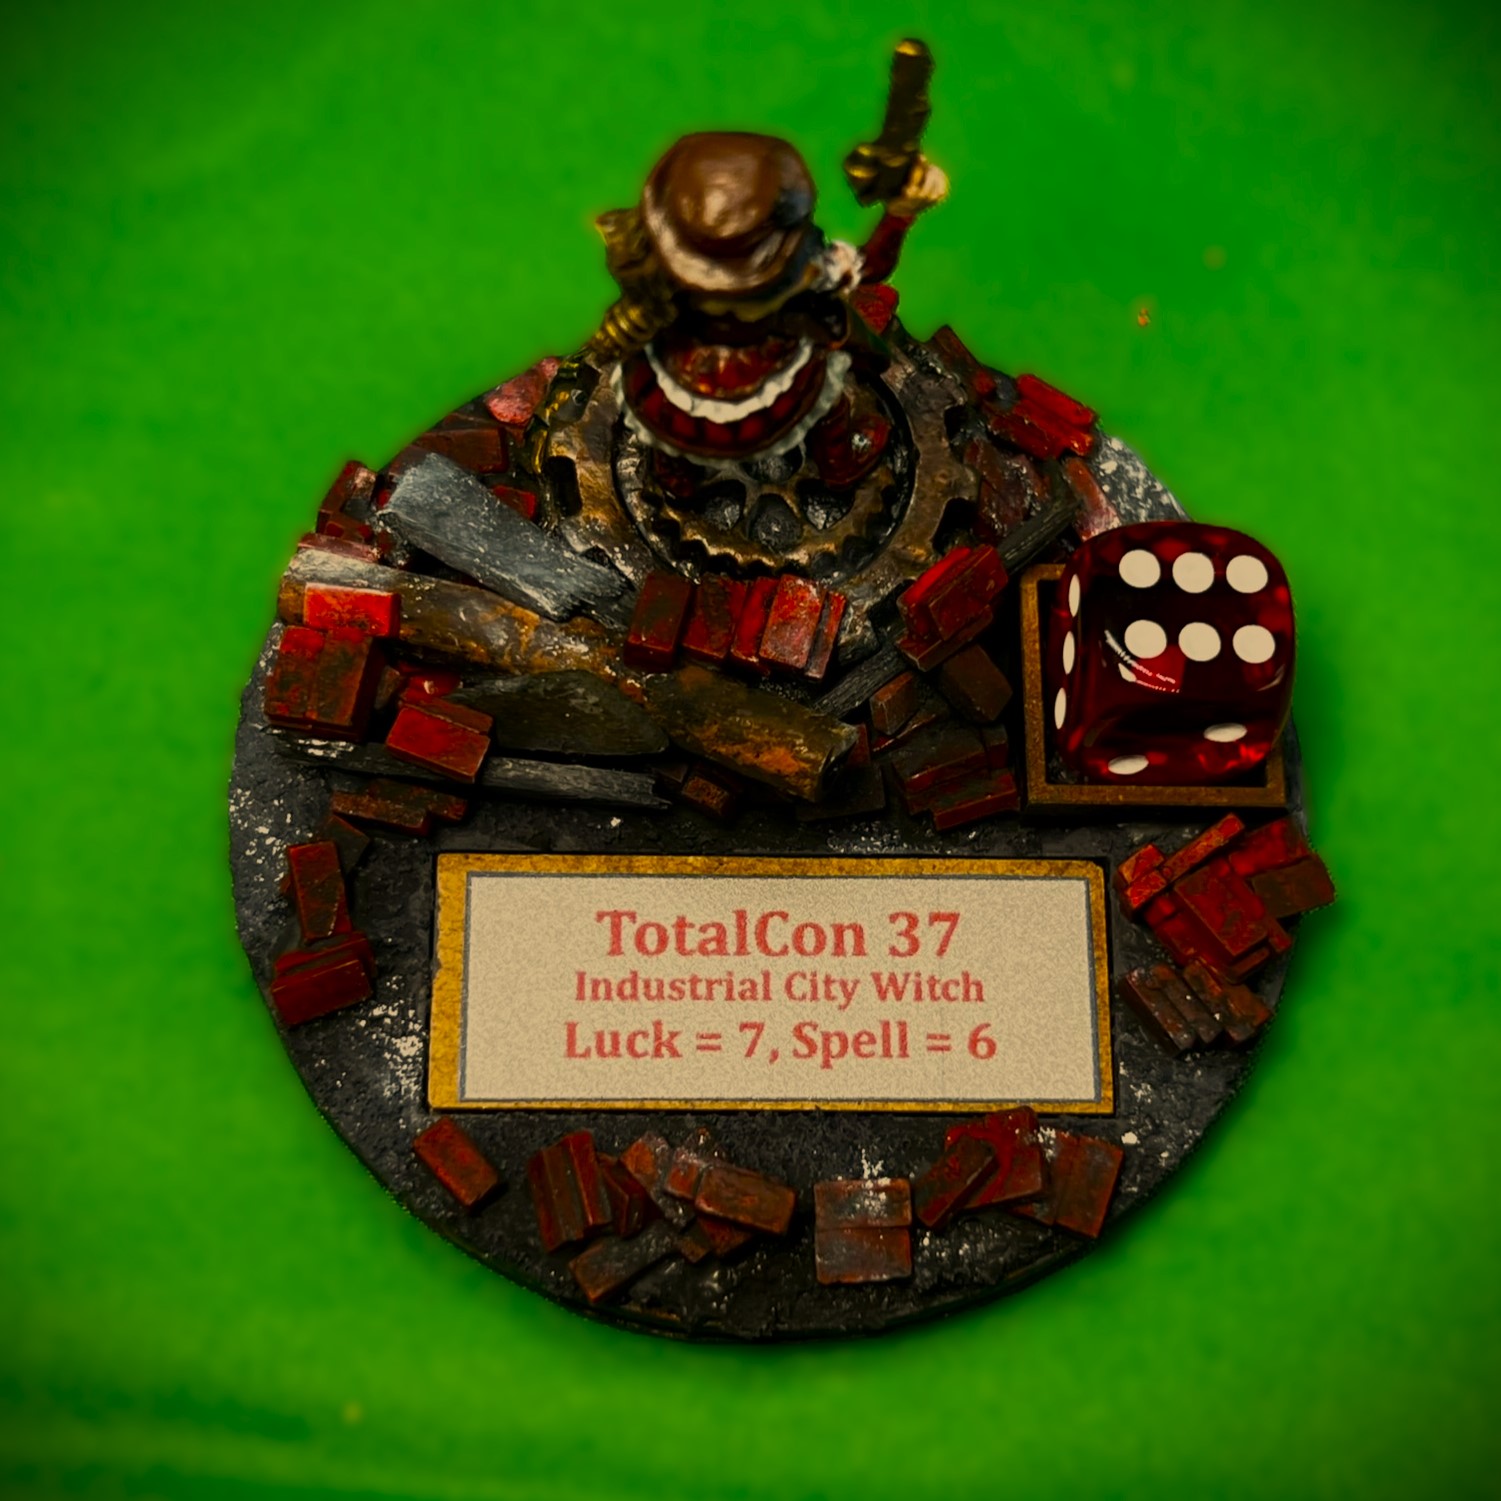
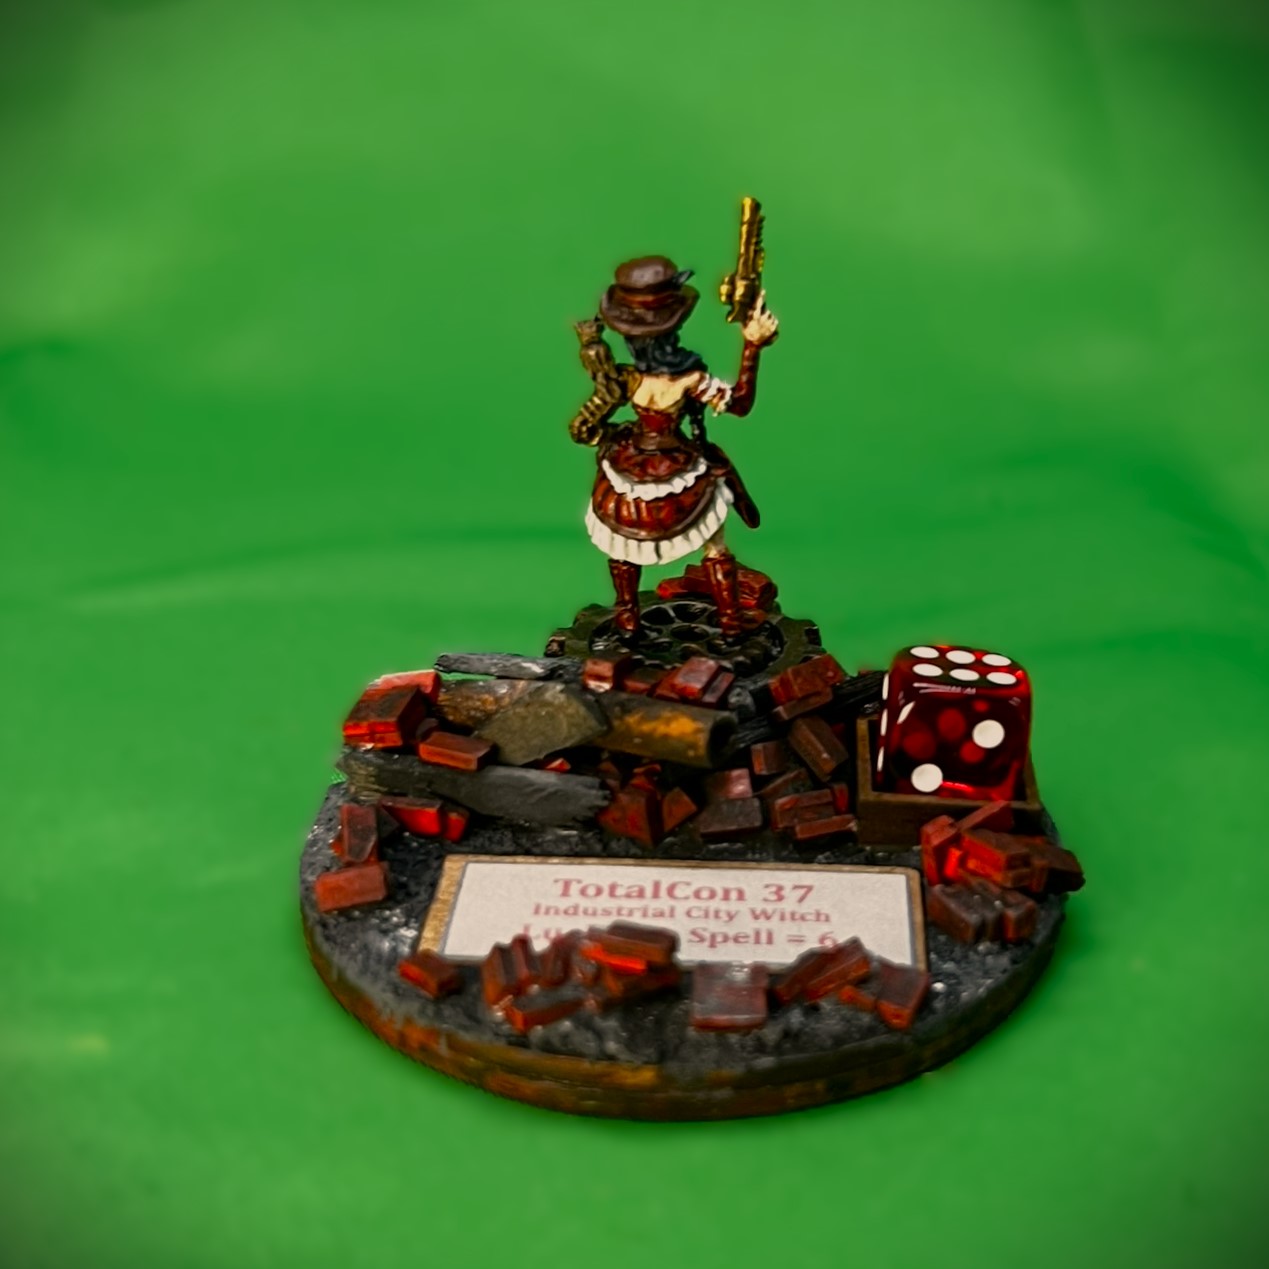
Last year at TotalCon 37, I got the miniature that the convention offered for sale at registration. It was a steampunk-themed woman with a pistol and a mechanical arm, with knee high boots, a miniskirt, and a mechanically-modified owl on her shoulder as a familiar. It was made by Dragonbait Miniatures. I kept the figure without any particular plan for her almost 9 months, until I painted up Professor Nitpick and his Mechanical Tin Axemen. Looking at the canon of the Industrial City, and that knowing that according to Russ Dunaway that old Nitpick will eventually have his own faction, I thought that this figure would be a good candidate for an ersatz lesser witch of the Industrial City. This way, when an official figure gets made, I can use her then as well. At Fall In, I got dispensation from Russ Dunaway to boot as for Ozz I do try to stay on canon.
As for her backstory – maybe she’s a survivor of all that the Madness Bombs did to the Industrial City, but one the Professor Nitpick helped with some arcane genetic manipulation or something similar? Now she serves Nitpick or anyone else who can help her keep up her fashion needs. She is a city girl after all, even if the city is in radioactive or mutagenic ruins. Anyways, here are some WIP shots of her – oh yeah, her name is “TotalCon 37” of course (it’s on her base, sounds fairly cyborg-y, so why not).
Industrial City Witch WIP
The TotalCon 37 flyer with the figure’s image. I used the same basic color scheme, except to give her rose-colored glasses.
As receivedHer gear-themed base with her name in front.Mounted for painting
I used the same basing scheme that I used for Professor Nitpick’s axemen regiment.
The painted figure pre-varnish in front of the image.
Now some eye candy for…
“TotalCon37, Industrial City Witch”
Here’s a group shot of all of the lesser witches:
But I promised a couple of surprises did I not? Well, the last was one that I’ll share was on me as well – and it involved one package with two painted and based figures in it.
My good friend Buck Surdu, the rules creator of Wars of Ozz, went on a website (I think Heroforge) and created two custom minis for Ozz.
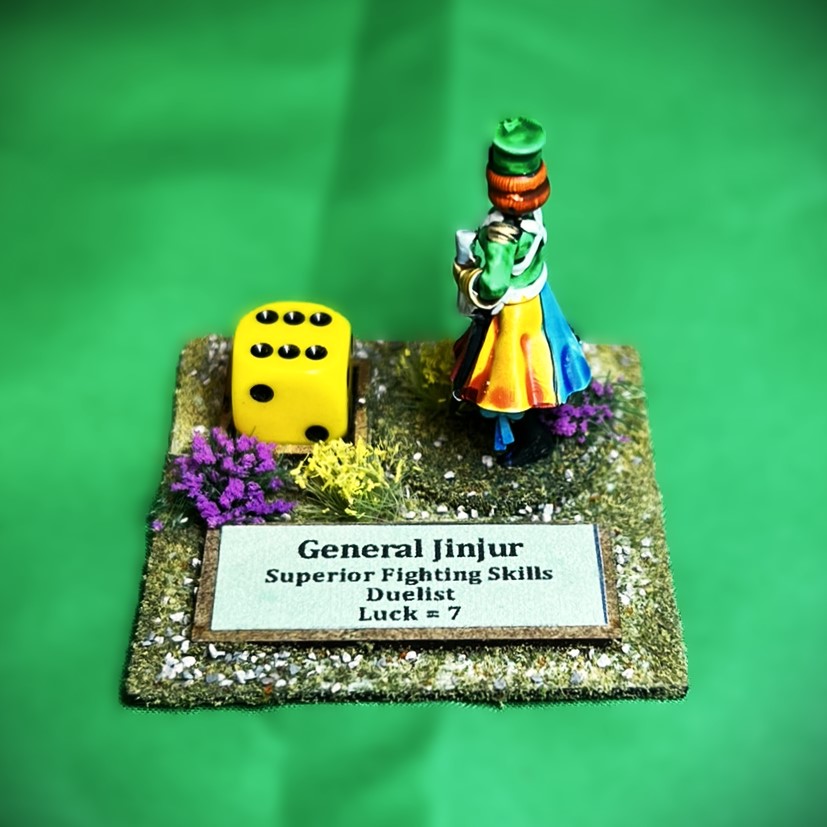
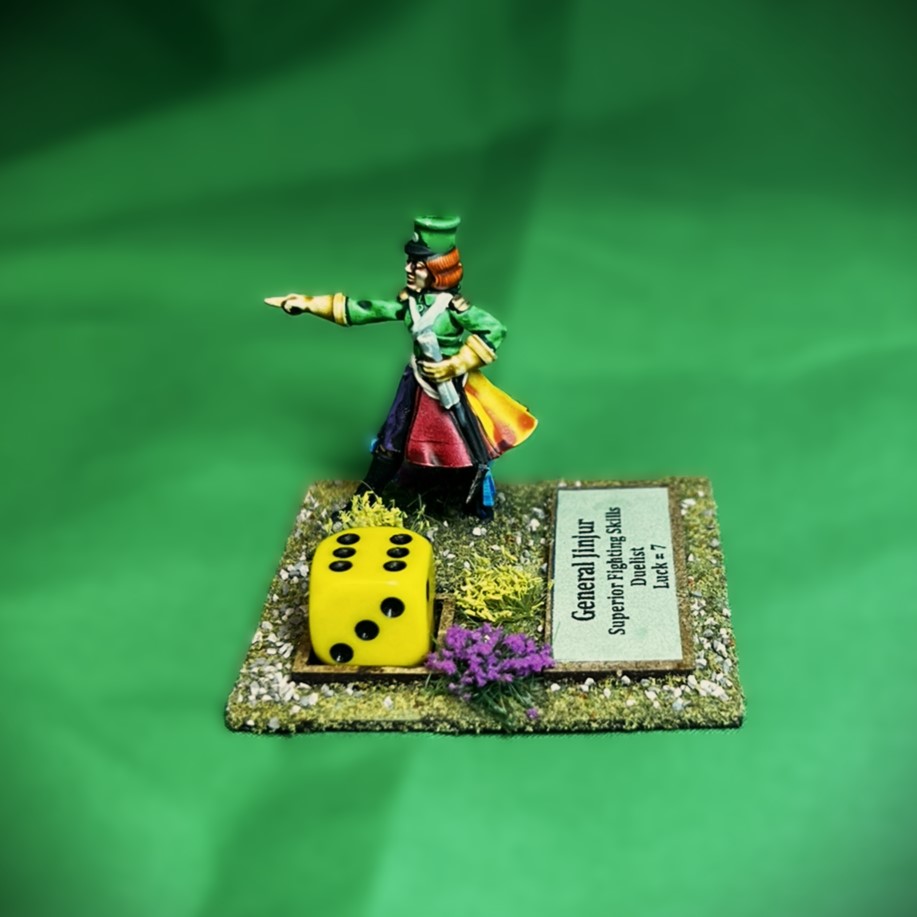
The first is inspired by the original Baum Oz books – General Jinjur, who in the books commands an army of knitting-needle-armed females from all races from all over the world of Oz. Hence her 4 – colored skirt (blue for Munchkins, red for Quadlings, yellow for Winkies, and purple for Gillikins). Here, she allows an attached unit to fight at +1, plus as a Duelist she can more easily dispatch an enemy attached leader in Melee with her unit (presumably with a knitting needle in the eye). I can use her as a Brigade commander for Jinjur troops or elsewhere. I love the way Buck painted her, plus the knitting needles!
“General Jinjur”
The second figure that Buck created and gifted me was inspired by, well, ME!
Buck and I had joked about how many Wars of Ozz games I have run at conventions and our club, as well as the sharing I have done on this blog. Somehow the moniker “Mark, the Herald of Ozz” came up at some point. So Buck created “Ma’k, the Herald of Ozz”. The “Ma’k” is a play of how I pronounce my first name as a good resident of central Massachusetts, or rather how it sounds to everyone outside of Massachusetts…
I’m biased, but I really LOVE this figure. First, he’s armed with a GOLF CLUB!! (looks like my Ping driver). Second, he allows a player to attach him to any unit and then CHOOSE the attribute that he gives an attached unit a +1. That’s pretty neat. Lastly, well, the gift warmed my heart.
“Ma’k the Herald of Ozz”
In any case, I am glad to have the both of them and will use them in my games – I do believe that Buck will be adding them to the army lists too – which you can see on the Wars of Ozz Facebook page here (you do have to join the private page to see them). THANK YOU BUCK!!
That’s up all for now. Next up I will be hopefully posting about a new Munchkin unit – assuming I have enough time before going under the knife.
As for this post, please feel free to vote for your favorite lesser witch in the comments section! I’d be interested in your favorite witch, favorite name, favorite outfit, or anything you’d care to share.
And yes, I still have much more Ozz to come…
Miscellaneous details and references for those interested in that sort of thing:
For all of my previous posts on Wars of Ozz games, figures, units, and other related projects – please see this page.
PAINTS, INKS, GLAZES, SHADES, WASHES, PIGMENTS, FLOCKING, GLUES AND MORE THAT I USED ON THE LESSER WITCHES:
Round regimental MDF base from Old Glory
1.25″ x 1″ square steel base from Wargames Accessories (#FOW1)
3/4″ Everbilt steel washer
Poster tack
Vallejo Premium Primer “White”
Vallejo “Flow Improver”
Vallejo “Airbrush Thinner”
Secret Weapon Washes “Heavy Body Black” (wash)
Battlefront “German Black Brown Camouflage”
Vallejo “Thinner Medium”
Vallejo Model Color “White”
P3 “Brown Ink” (ink)
Vallejo Model Color “Light Flesh”
Battlefront “European Skin”
Citadel “Contrast Paint – Ork Flesh”
Citadel “Contrast Paint – Plaguebearer Flesh”
Army Painter “Speed Paint – Fire Giant Orange 1.0”
Army Painter “Battlefields Field Grass” (flocking)
Printed Avery labels
PAINTS, INKS, GLAZES, SHADES, WASHES, PIGMENTS, FLOCKING, GLUES AND MORE THAT I USED ON THE FIGURES FOR TOTALCON 37:
Round regimental MDF base from Old Glory
1.25″ x 1″ square steel base from Wargames Accessories (#FOW1)
Elmer’s PVA Glue
Gorilla Glue
3/4″ steel washers
Poster tack
Vallejo White Surface Primer
Vallejo “Flow Improver”
Vallejo “Airbrush Thinner”
Secret Weapon Washes “Heavy Body Black” (wash)
Vallejo Model Color “White”
P3 “Brown Ink” (ink)
Army Painter “Speed Paint – Hoplite Gold 2.0”
Vallejo Model Color “Light Flesh”
Vallejo “Thinner Medium”
Battlefront “Dark Leather”
Vallejo Model Air “Brown”
Reaper MSP Core Colors “Pure Black”
Citadel “Contrast Paint – Imperial Fist”
Citadel “Balor Brown Air”
Battlefront “Battlefield Brown”
Army Painter “Speed Paint – Aztec Gold 2.0”
Citadel “Contrast Paint – Apothecary White”
Citadel “Contrast Paint – Contrast Medium”
P3 “Flesh Wash” (wash)
Vallejo Model Color “Medium Flesh Tone”
Battlefront “European Skin”
Citadel “Agrax Earthshade” (wash)
Citadel Technical “Spritstone Red”
Citadel “Nuln Oil GLOSS” (wash)
Citadel “The Fang”
Vallejo Model Air “Gun Metal”
Citadel “Astrogranite Debris” (texture)
Pendraken 12mm dice frame
Army Painter “Speed Paint – Talos Bronze 2.0”
Army Painter “Warpaints – Shining Silver”
Army Painter “Warpaints – True Copper”
Citadel “Contrast Paint – Ironjawz Yellow”
Vallejo Model Air “Black Metallic”
Small polystyrene tubing pieces
Popsicle stick shards
Juweela® 1:48/1:50 terracotta bricks
Army Painter Warpaints “Rough Iron”
Vallejo Mecha Weathering “Rust Texture”
Vallejo Mecha Weathering “Dark Rust Wash”
Vallejo “Pigment Binder”
Vallejo “Carbon Black” (pigment)
Vallejo “Old Rust” (pigment)
Vallejo “Titanium White” (pigment)
Vallejo Mecha Varnish “Gloss Varnish”
Vallejo Mecha Varnish “Matte Varnish”
Printed Avery label
Again, as you may want to check out the Wars of Ozz figures’ range – there are two places to get them (and I make no money from this btw). The game rules and the figures are available from the following two places:
Winkies are the orc analogues of the world of Ozz. I have not recently added any Winkie units to that faction’s forces – in fact not since last March July when I finished up the Winkie Light Cavalry (on carniverous giant birds called Zilks). My current Winkie forces have been adequate up until recently. My forces are composed of 43 points worth as listed below.
As I mentioned in my last post, for the most part, most brigades in the Wars of Ozz are 20-30 points. As with my Munchkin additions, I have decided to get to the point where I could field two full Winkie brigades. This means that I would need to add more troops and field another Brigade commander – especially if I could also use that commander as a Division or Army Commander for the Winkies. Currently, I only have the one unnamed brigade commander. So that I can deploy two full Winkie brigades, I have started to build:
8 Lesser witches (these could go to any faction, at 2 each = 16 points)
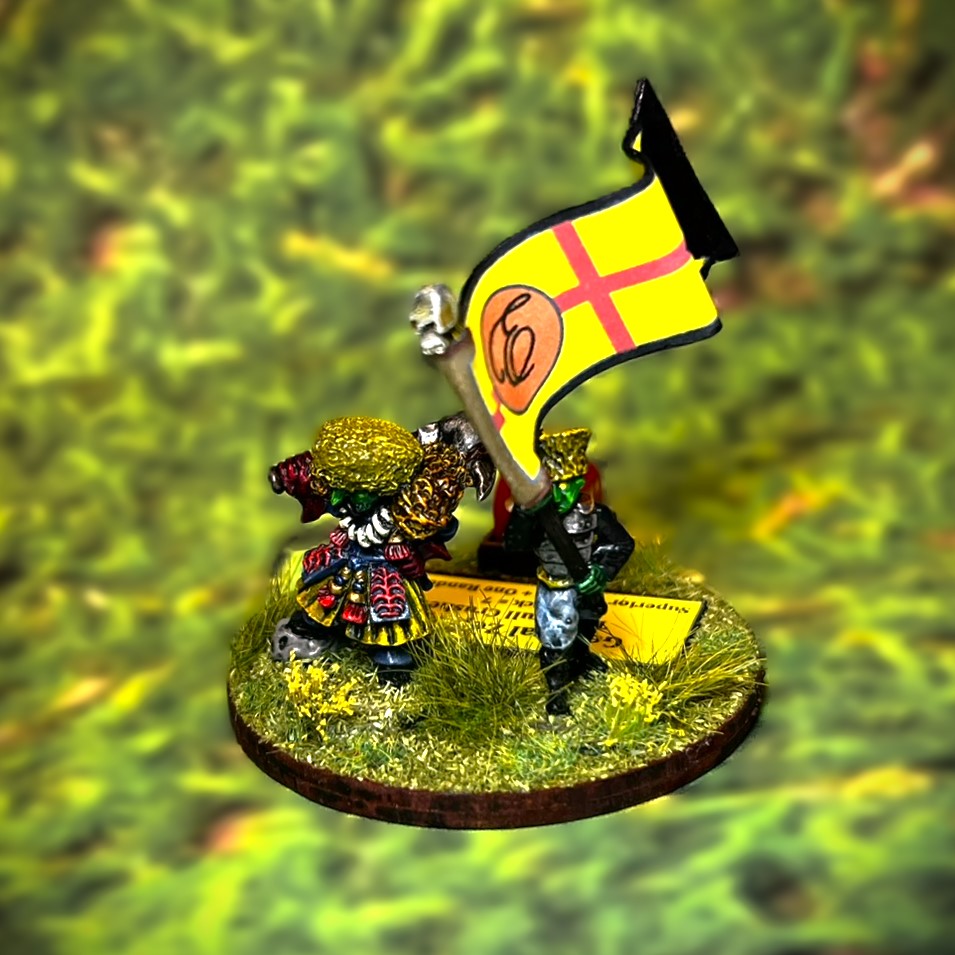
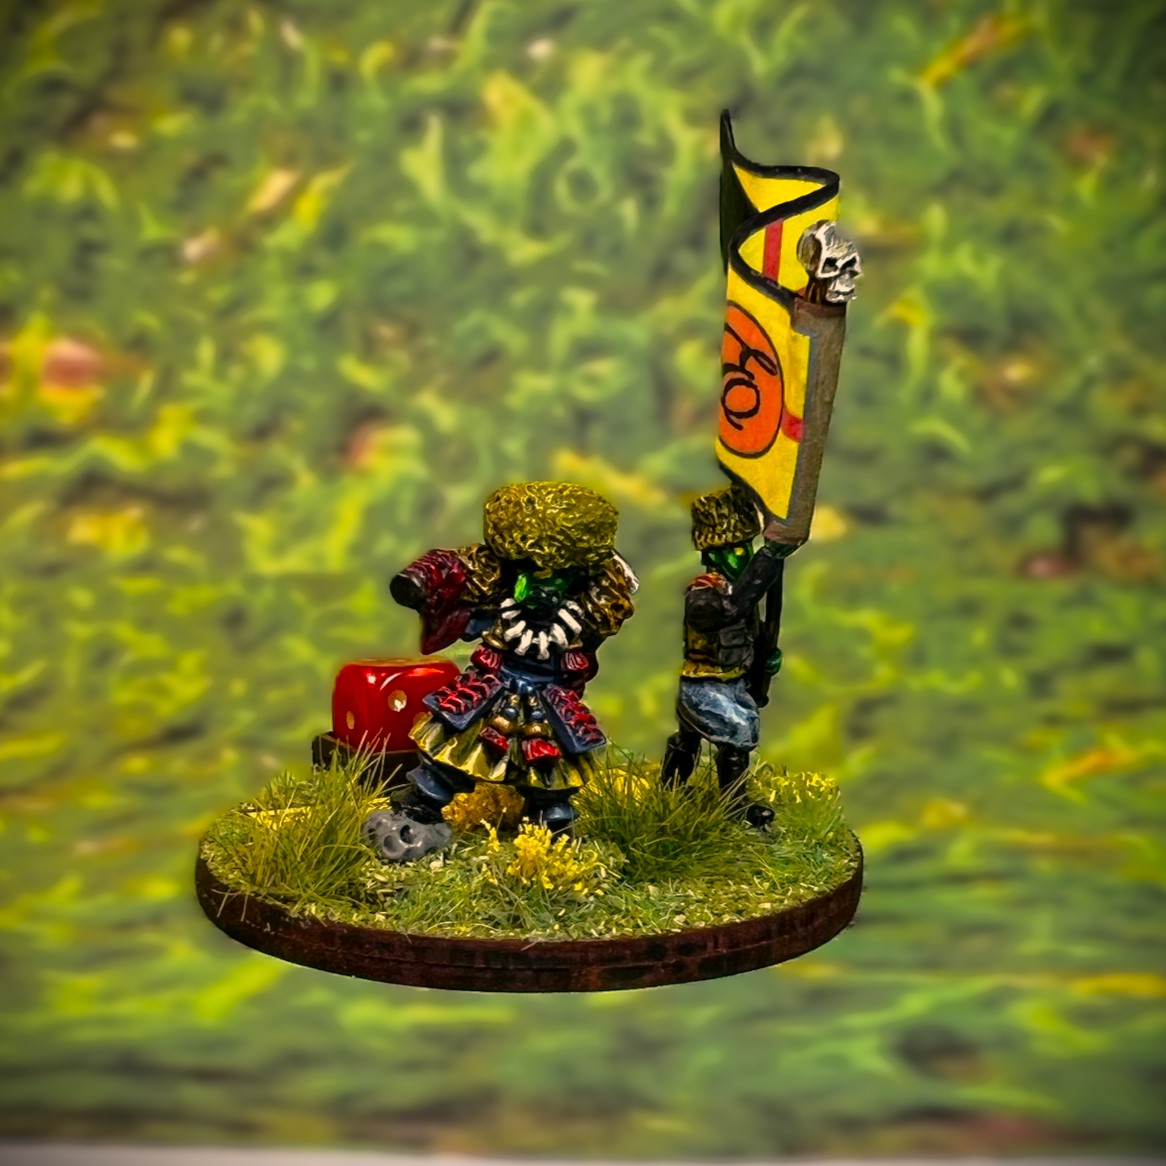
This would give me more troops, but the Winkie leadership deficit remains. When I built my Winkie Infantry Regiment, the baggie was missing a single standard bearer. Russ Dunaway of Old Glory was decent enough to replace the figure for me. Then about two weeks later, a second standard bearer showed up in the mail. I guess maybe he wanted to make sure I got the missing figure – but now I had an extra. As I thought about getting annother figure to act as a brigade or army commander, I thought “wouldn’t it be cool to have a standard bearer for an army commander?”. I could base two figures on an MDF base as an army commander – all I needed was a Winkie figure and an army banner. For the latter, thanks to Buck Surdu, who created an Army banner with an “E” for Evora the Witch on it (Empress of the Winkies), and for the former…
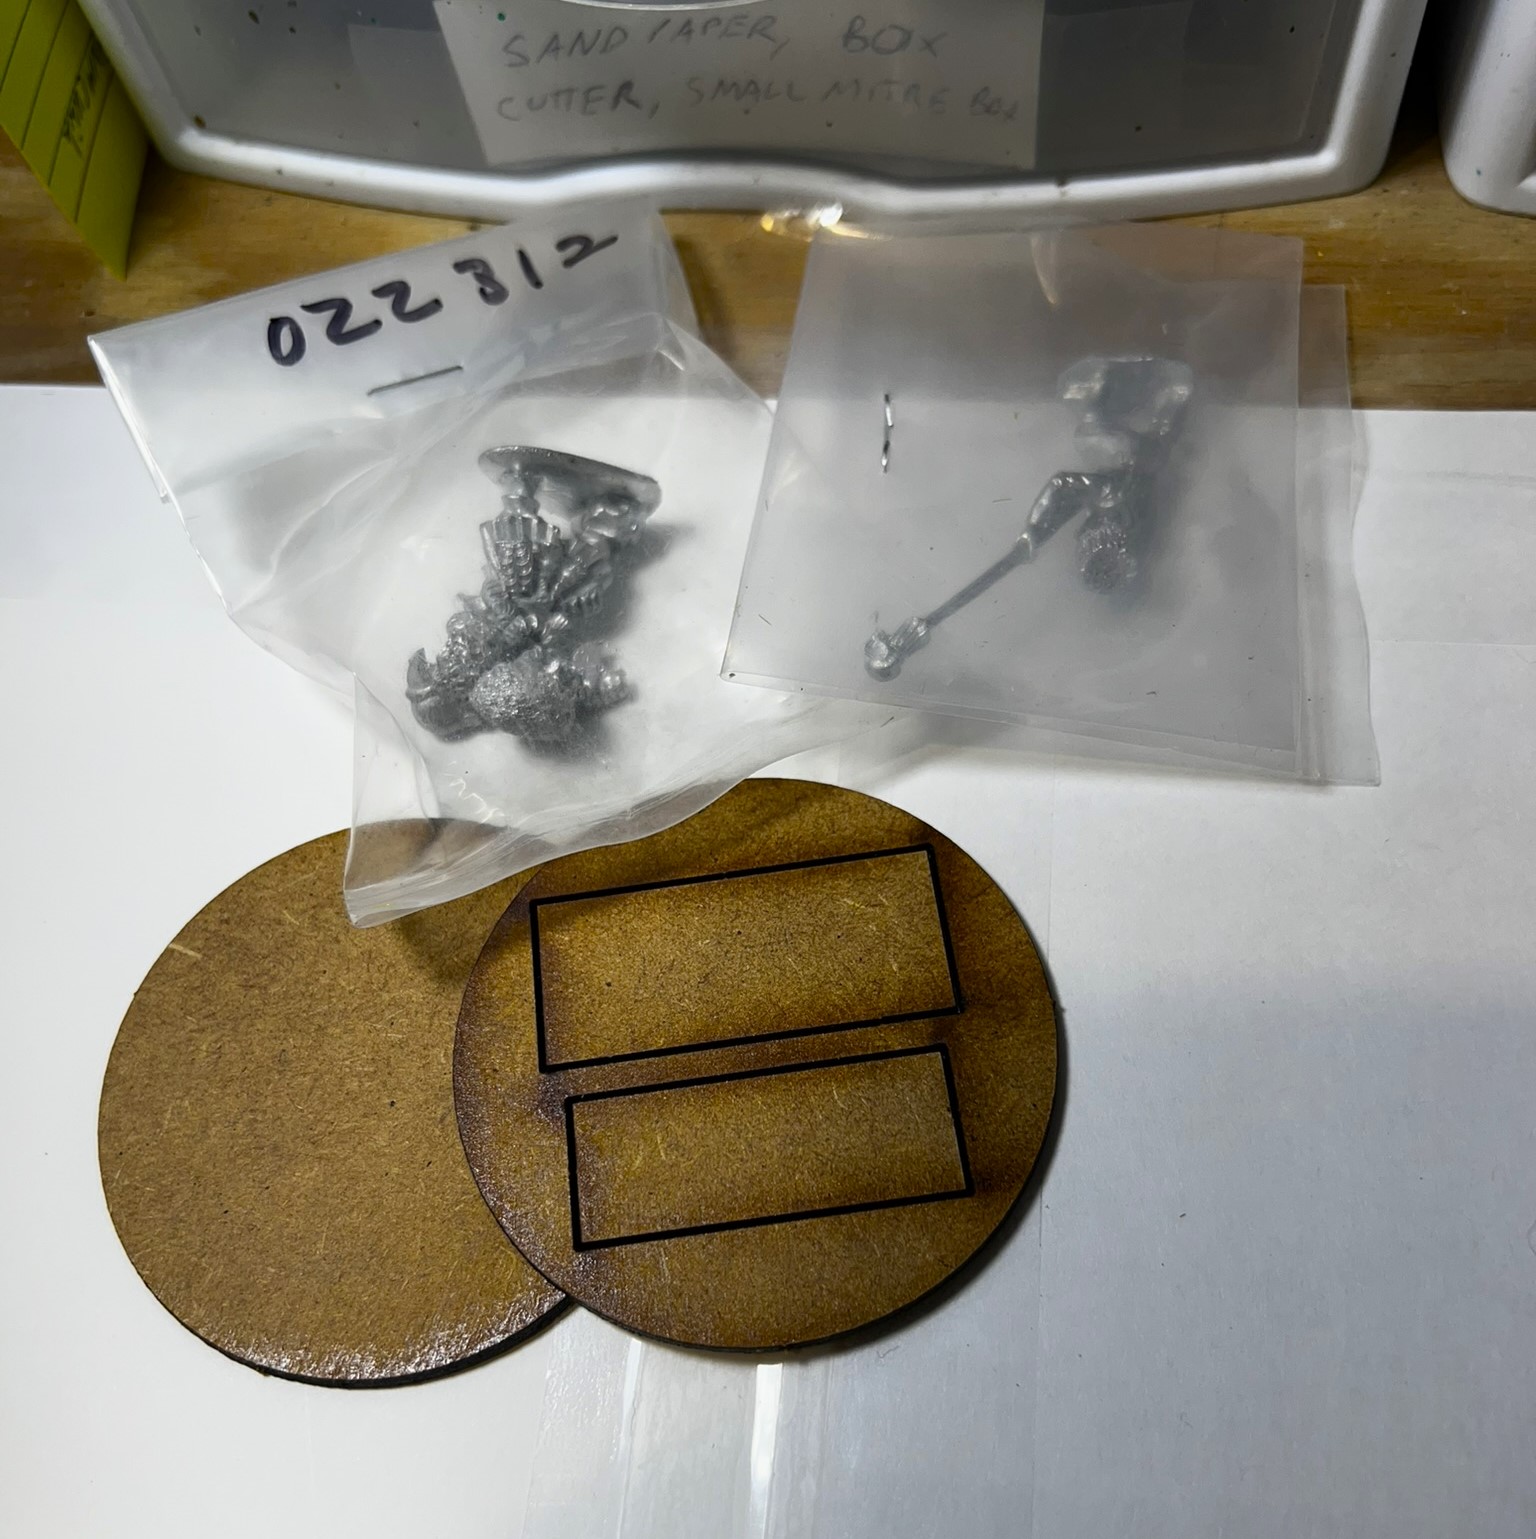
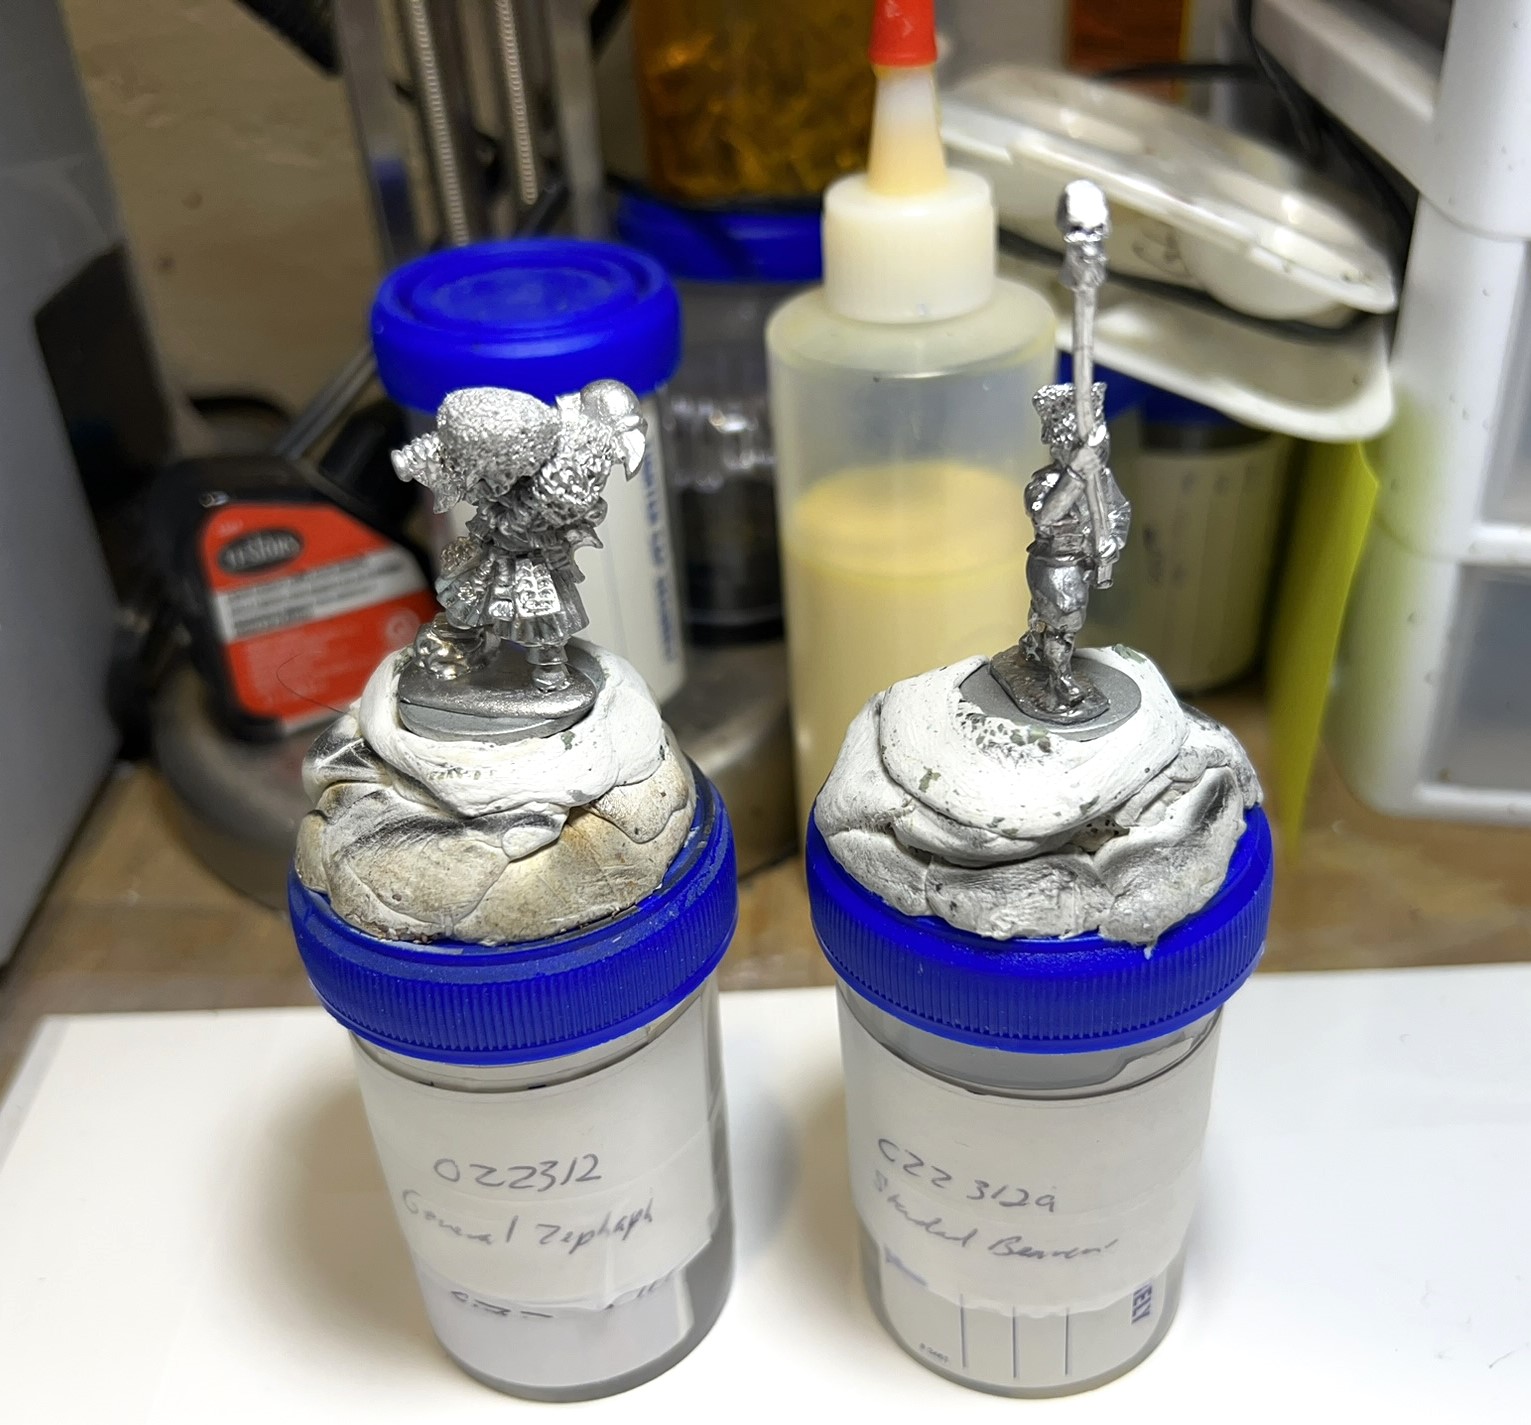
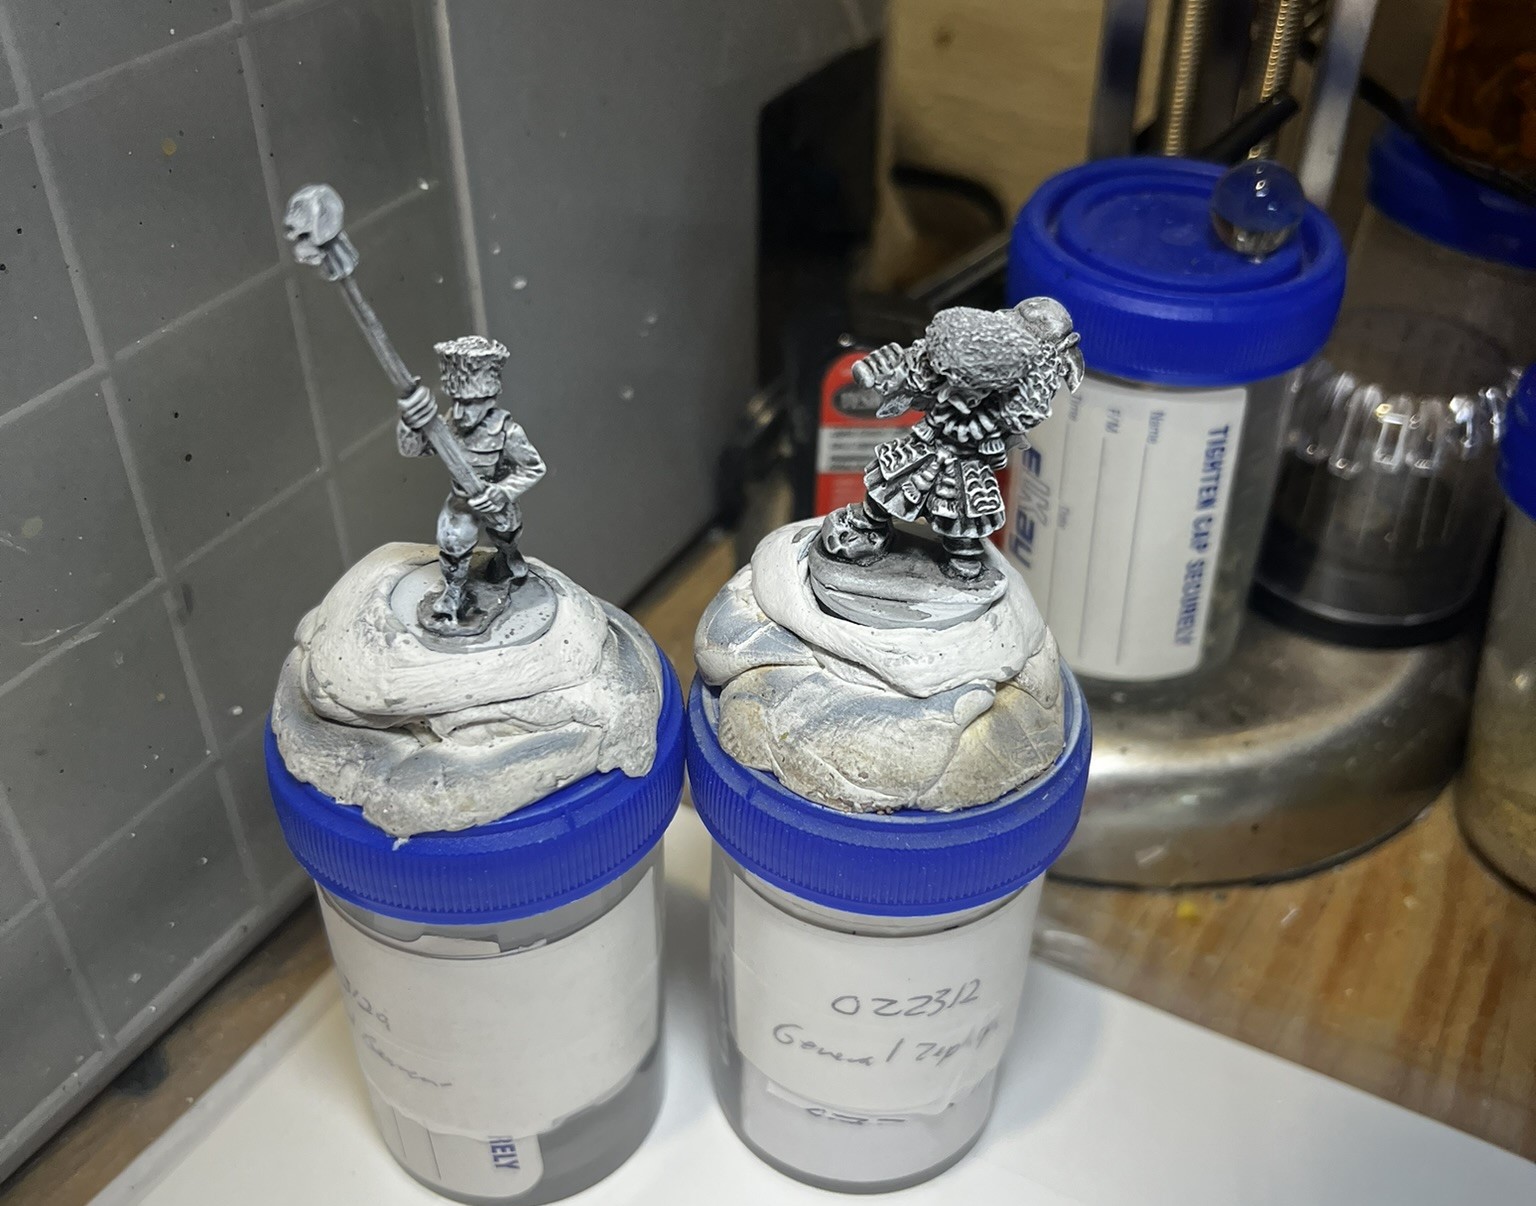
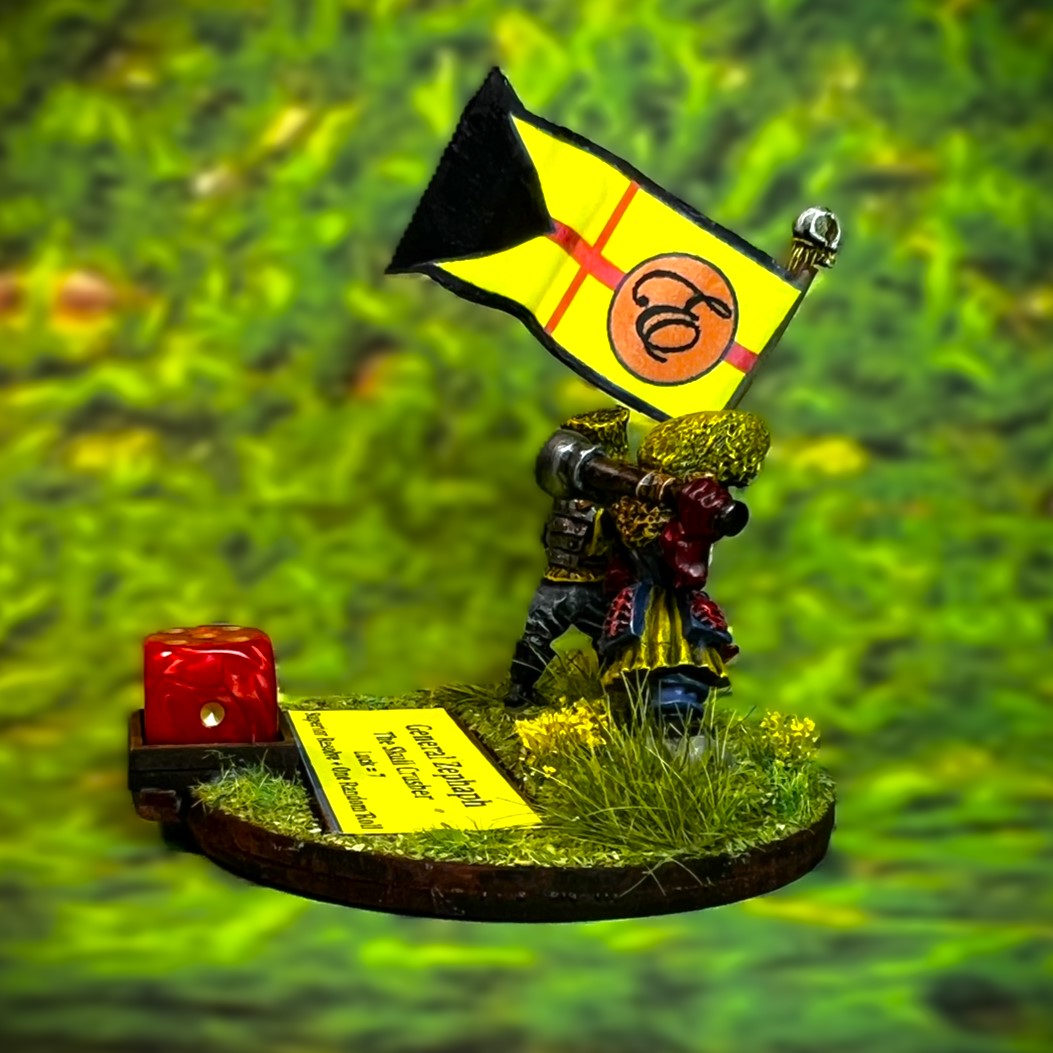
Enter General Zephaph the Skull Crusher, SKU# OZZ-312, worth 2 points. It is a nice bulky figure, looking very much as one would expect from a Winkie general. He is armed with a massive mace, and has a huge bulky hat and appropriate clothes. The figure is cast in metal and 28mm in size. In the game, he would be based on his own individual MDF leader base, but I did add the standard bearer. No assembly was required other than for the MDF base.
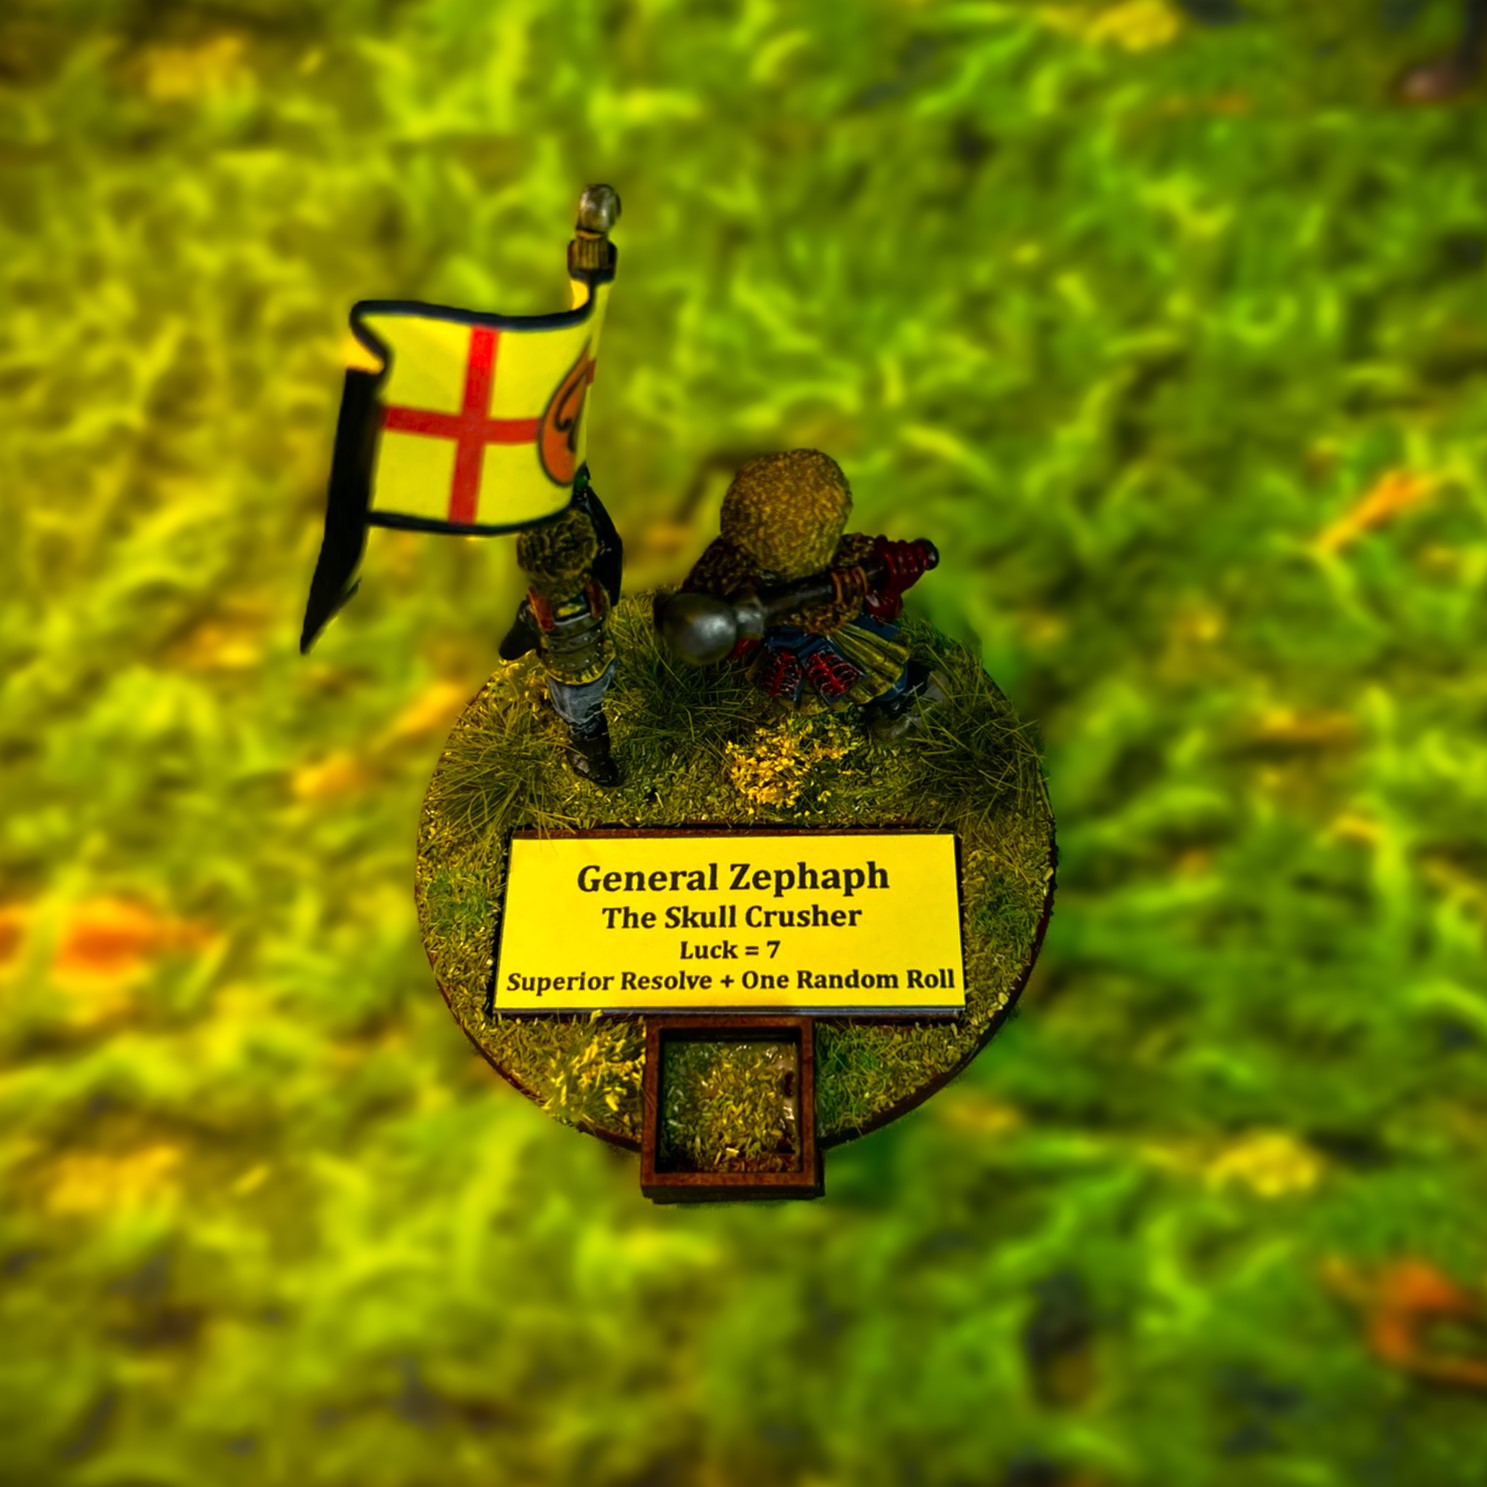
Brigade leaders control dice pools for their units. General Zephaph has no combat values other than what he can do if he is attached to a unit. Here, he gives an attached unit two abilities – first, Superior Resolve (which means that the unit would be less likely to cut and run away from a fight) and second, one ability that is determined at random in each game. This is why he costs 2 points. His luck is 7/10, which is average for most leaders.
WIP Shots
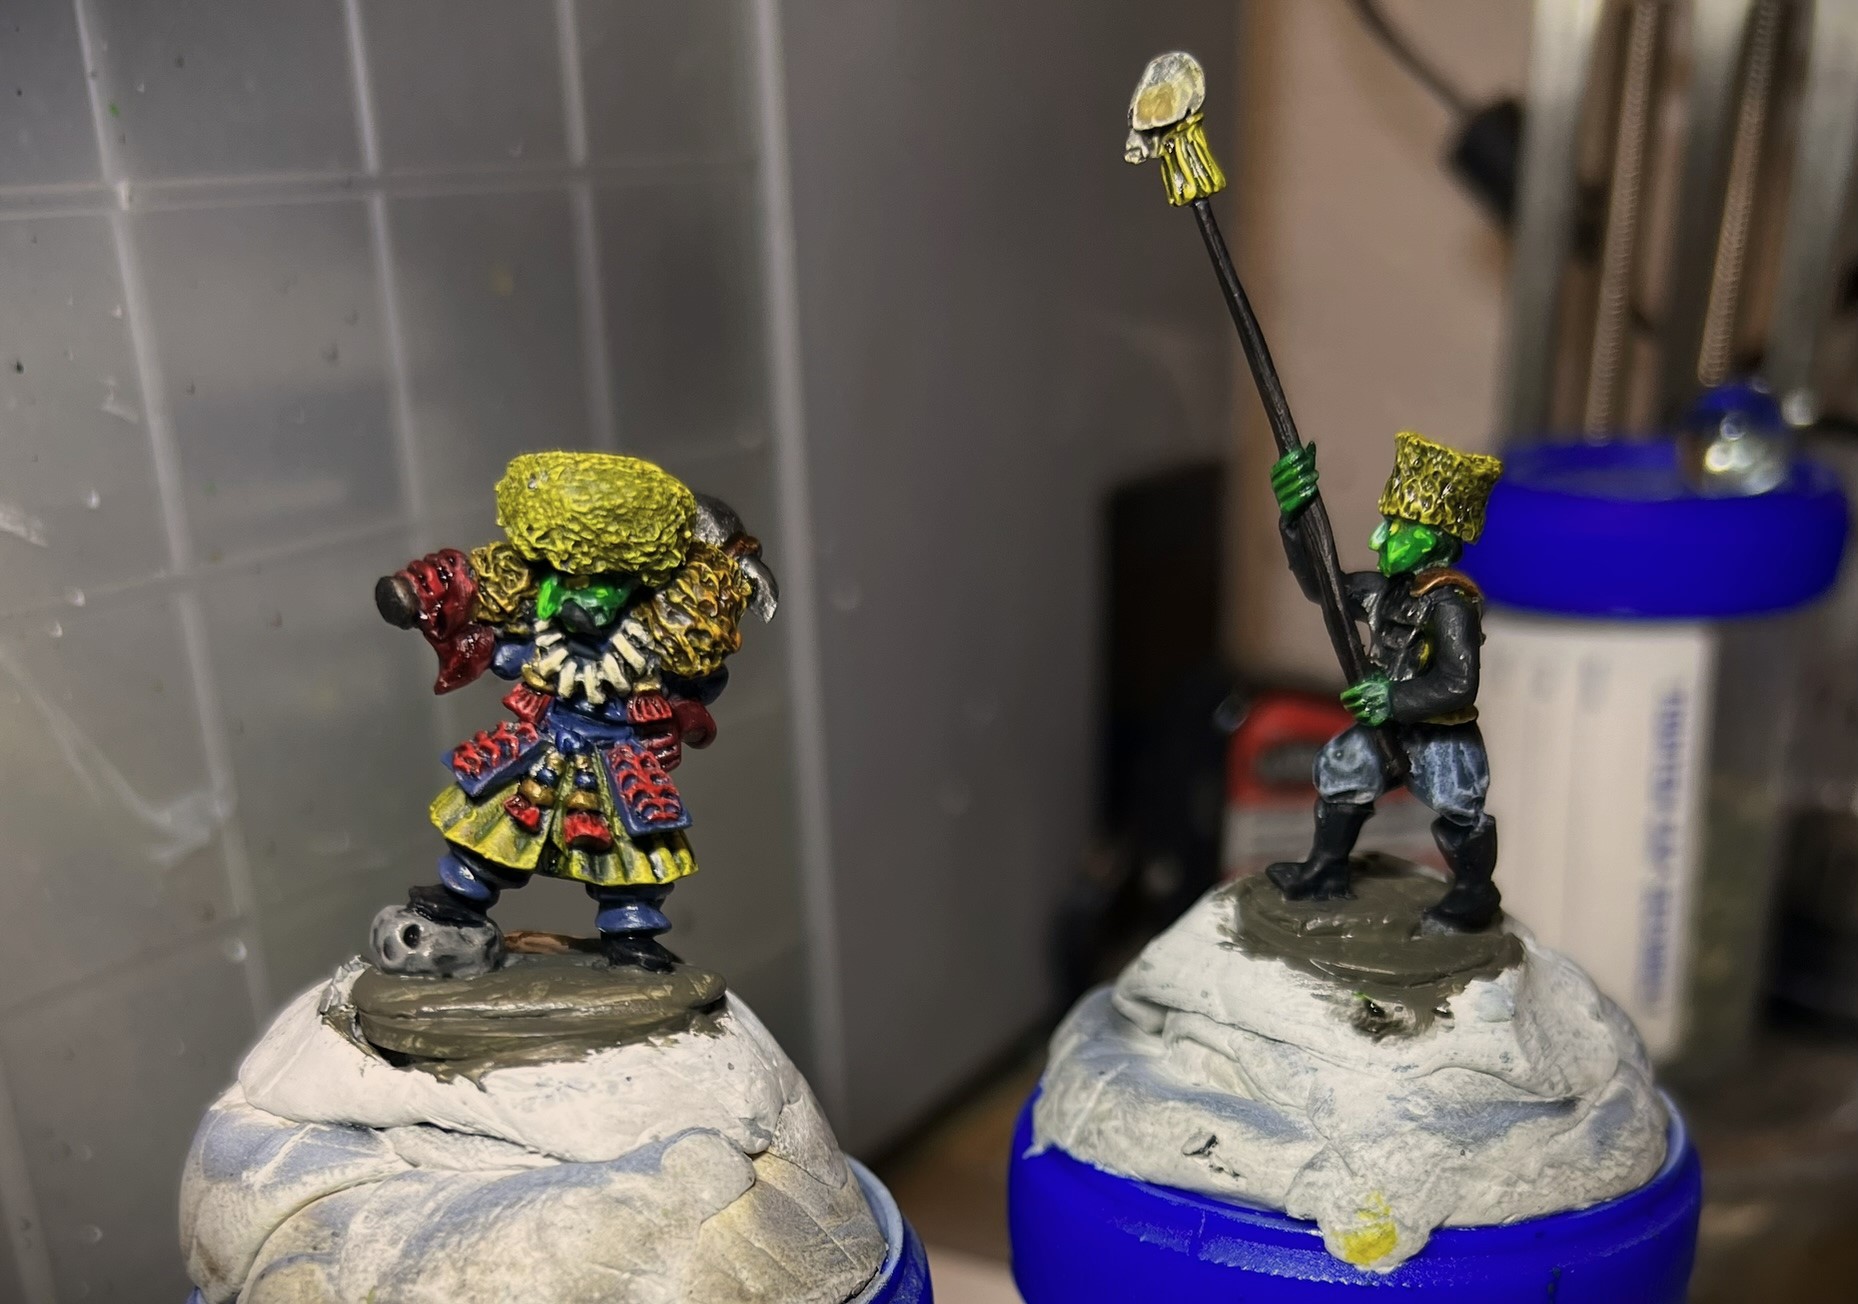
As I followed the same basic painting pattern that I usually use, WIP shots here will be few. I used a lot of yellows, as that is the Winkie faction’s color.
Starting off- two figures and an MDF base.Clean up any mold lines and flash (there were very few issues), and mount for painting.Prime in white, wash with a dark wash, then dry brush in white before adding any other colors.All painted up and ready for varnishing, basing, and flocking.
I now can share some…
Eye Candy
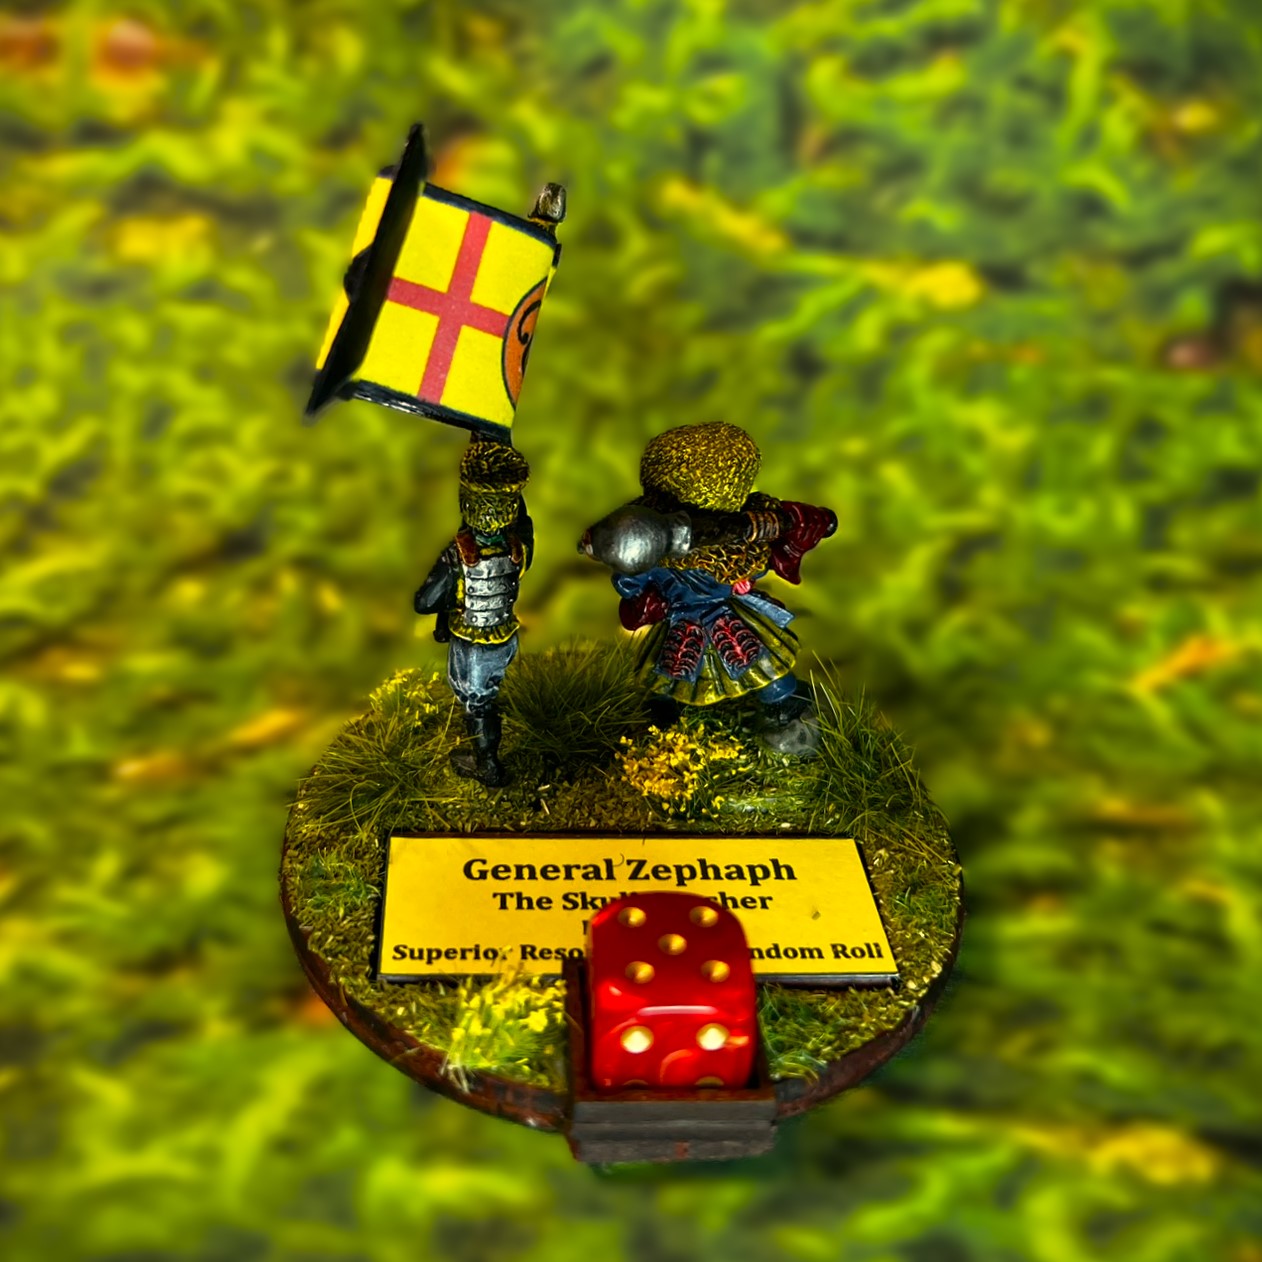
A topside rear view showing the data placard and the banner. I extended out the pendraken die frame with a little extra MDF.The view of the stand from the front. The general’s face is pretty well obscured by his hat!Right front view of the base. Yes – those are yellow flowers for the Winkie general.Right side view showing the big banner that Buck designed – I really like it.Angled view of the back showing some more details.
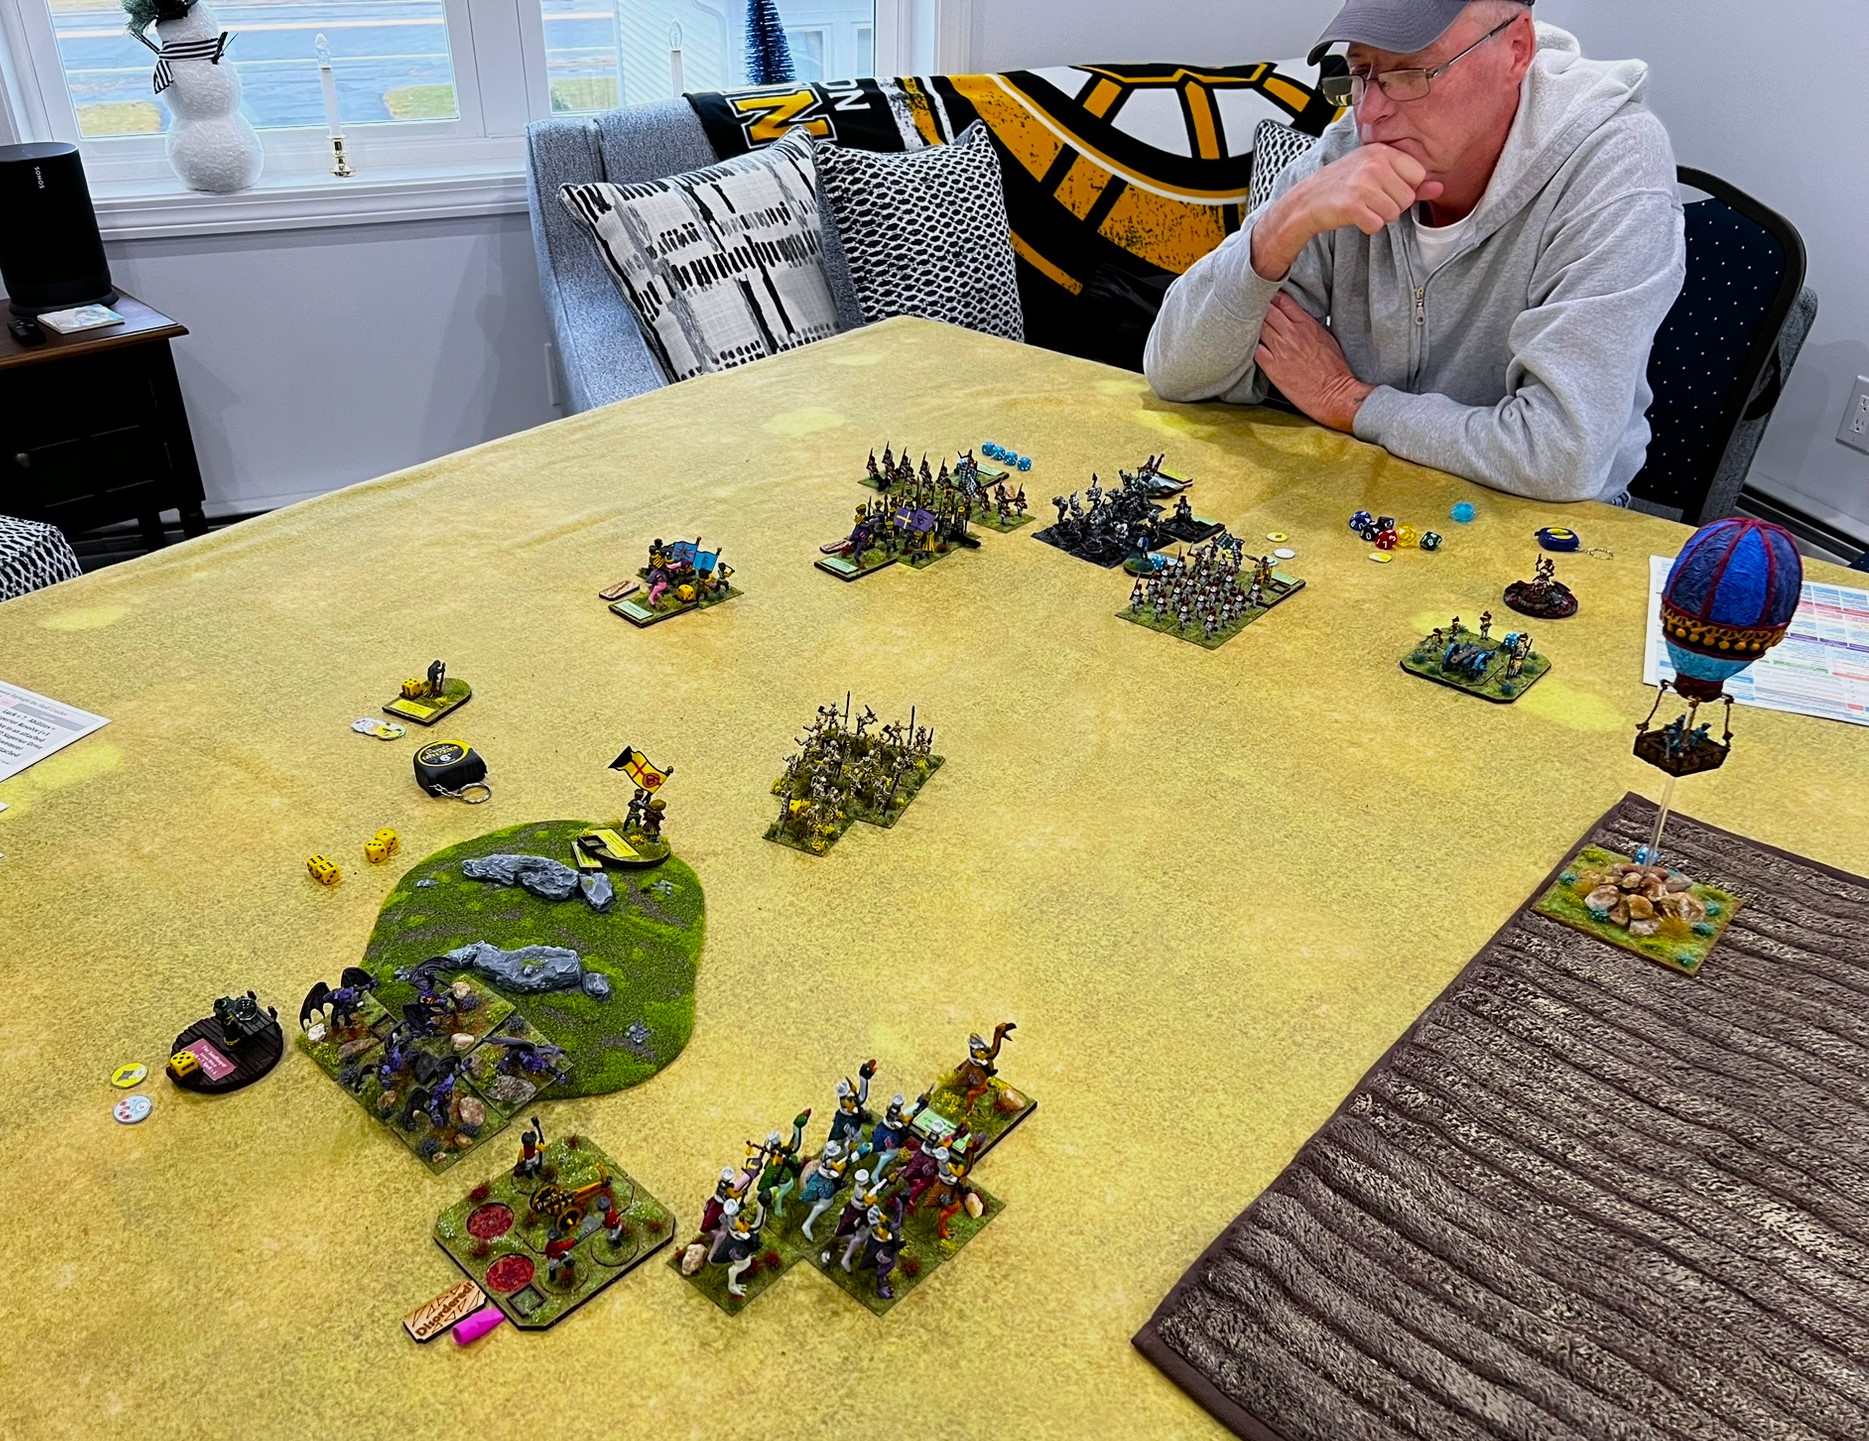
As a bonus, here is the general at the last game – being defeated by Colonel Sourdough (played by Mike as you see below).
Mike (the Munchkin player with Colonel Sourdough) watches General Zephaph (played by Brad) on the hill as he leads the assault on the Munchkins. It would not go well for the Winkies.
That’s all I have for Genearl Zephaph the Skull Crusher. Thanks to Russ and to Buck for making this possible! I may add another Winkie Brigade/Army leader in the future, but for now I will be set.
Next up I will be sharing several Lesser Witches who could be part of any faction’s forces.
And yes, I still have more Ozz to come…
Miscellaneous details and references for those interested in that sort of thing:
For all of my previous posts on Wars of Ozz games, figures, units, and other related projects – please see this page.
PAINTS, INKS, GLAZES, SHADES, WASHES, PIGMENTS, FLOCKING, GLUES AND MORE THAT I USED ON GENERAL ZEPHAPH THE SKULL CRUSHER AND HIS STANDARD BEARER:
Round MDF base from Old Glory
1.25″ x 1″ square steel base from Wargames Accessories (#FOW1)
Army Painter “Battlefields Field Grass” (flocking)
Vallejo Mecha Varnish “Gloss Varnish”
Vallejo Mecha Varnish “Matte Varnish”
Gamers Grass “Yellow Flowes” (flocking)
Printed Avery label
Army Painter “Battlefields Meadow Flowers” (flocking)
Shadow’s Edge Miniatures “Green Tufts” (flocking)
Army Painter “Battlefield Field Grass” (flocking)
Shadow’s Edge Miniatures “6mm Dark Forest Light Blue Tufts” (flocking)
Black Sharpie pen
Brown Sharpie Pen
Winkie Flags from Buck Surdu printed on card stock
Vallejo Game Ink “Black Ink” (ink)
Again, as you may want to check out the Wars of Ozz figures’ range – there are two places to get them (and I make no money from this btw). The game rules and the figures are available from the following two places:
I have not painted any Munchkins since last July when I built the Aerostat. Since the start of my Ozz journey, I have painted up a decent-sized Munchkin collection at this point, 33 points worth as shown below.
But, these are all – for the most part – pretty good units that have done well in recent games. I decided that it would be a good idea to add forces to the Munchkins to vary them from game to game or at least to create a wider range of player choices.
As most brigades are 20-30 points, I have decided that adding newer troops would also add this variety. To do this – and to have the capability of deploying two full Munchkin brigades, I have started to build:
8 Lesser witches (these could go to any faction, at 2 each = 16 points)
The additional three purely Munchkin units would bring me to 48 points just for them – but more importantly, their addition would leave them in need of another brigade and/or divisional commander figure. After all, the poor Munchkin Mayor would have his hands full with 50 points! (I did hint in my last post that I needed some of these).
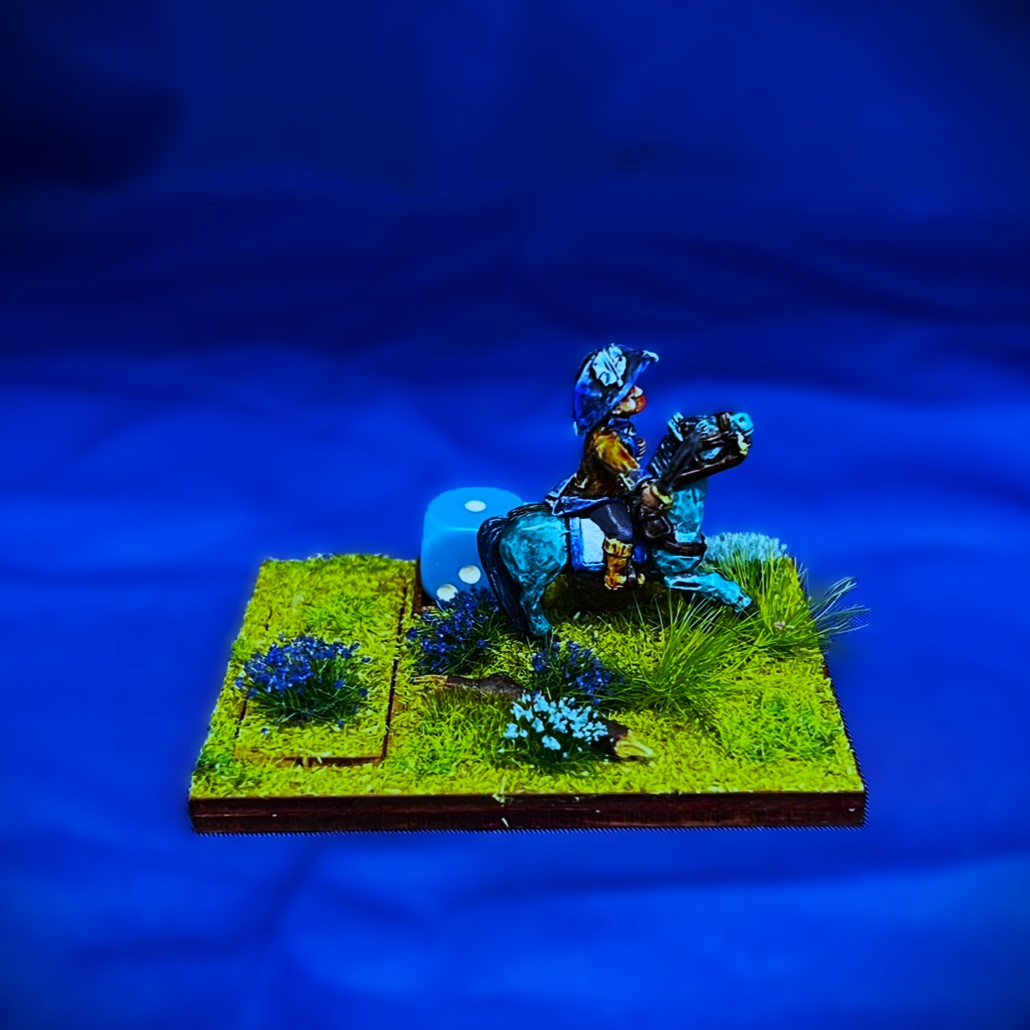
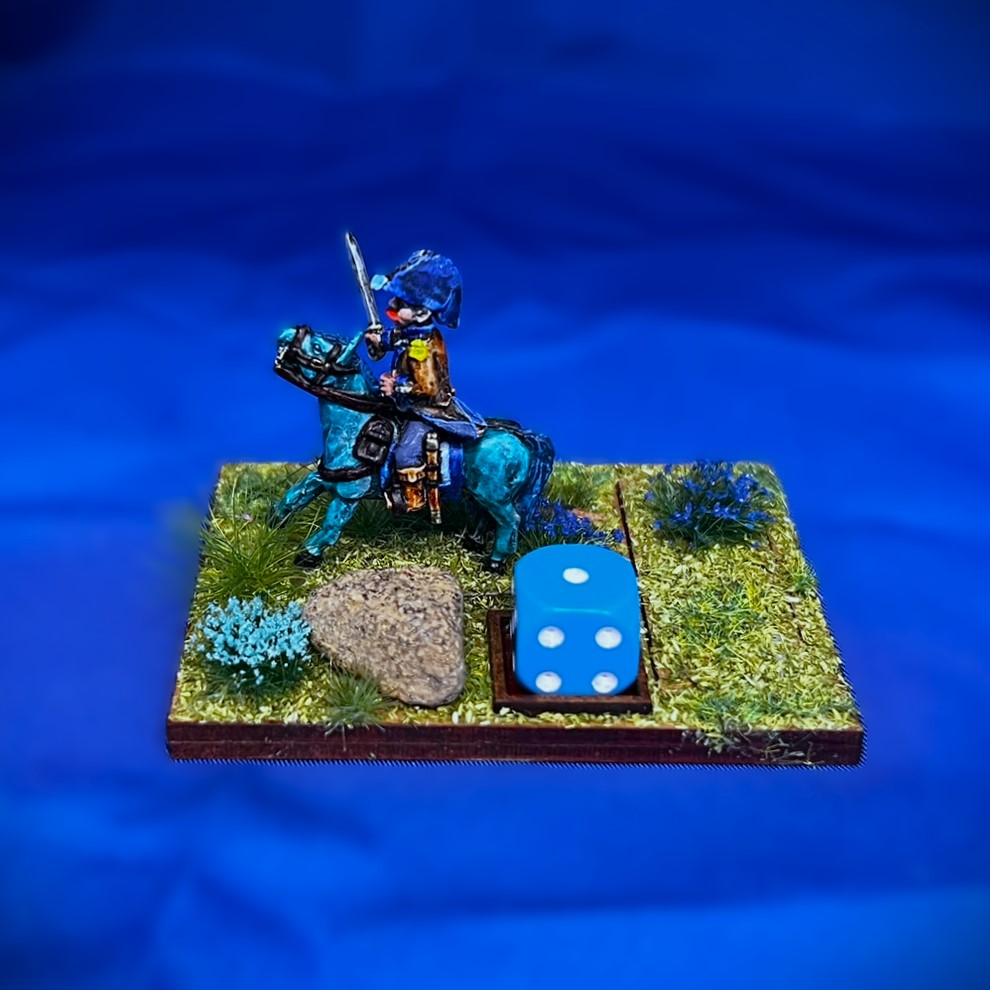
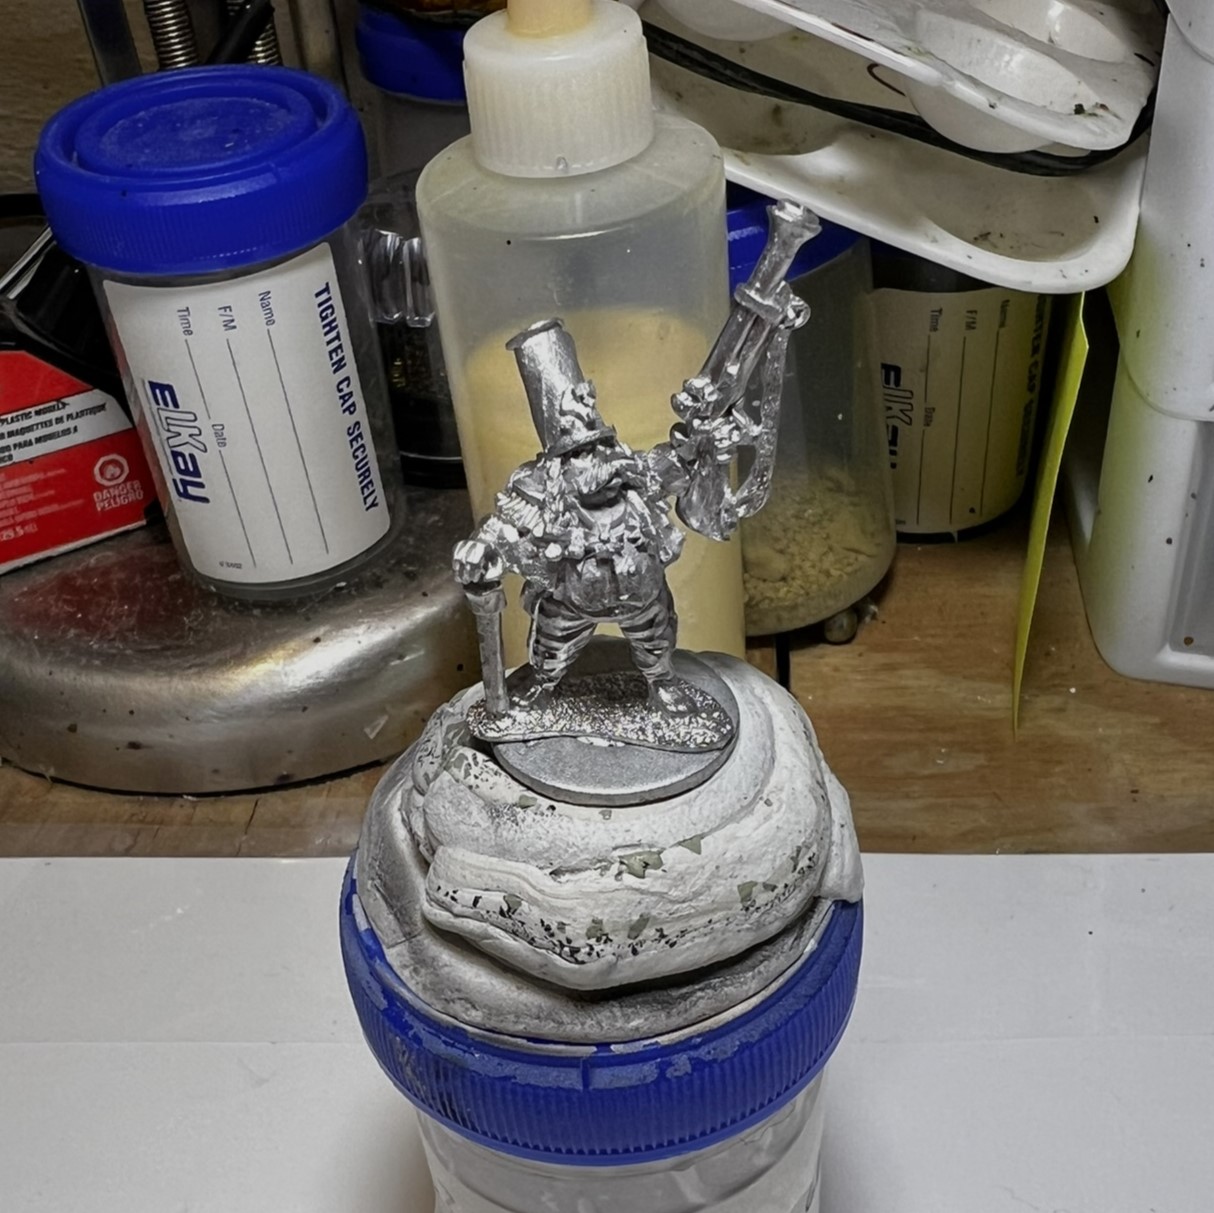
Enter Colonel Sourdough, SKU# OZZ-114, worth 2 points. It is a nice figure, with a lot of medals and a big blunderbuss/musket. He looks rather big for a Munchkin, but as a leader he looks the part. He is cast in metal and 28mm in size. In the game, he would be based on his own individual MDF leader base. No assembly was required other than for the MDF base.
Brigade leaders control dice pools for their units. Colonel Sourdough has no combat values other than what he can do if he is attached to a unit. In that case, he gives that unit Superior Fighting Abilities and one random ability that is determined at random in each game. This is why he costs 2 points. His luck is 6/10, which is lower than most leaders.
WIP Shots
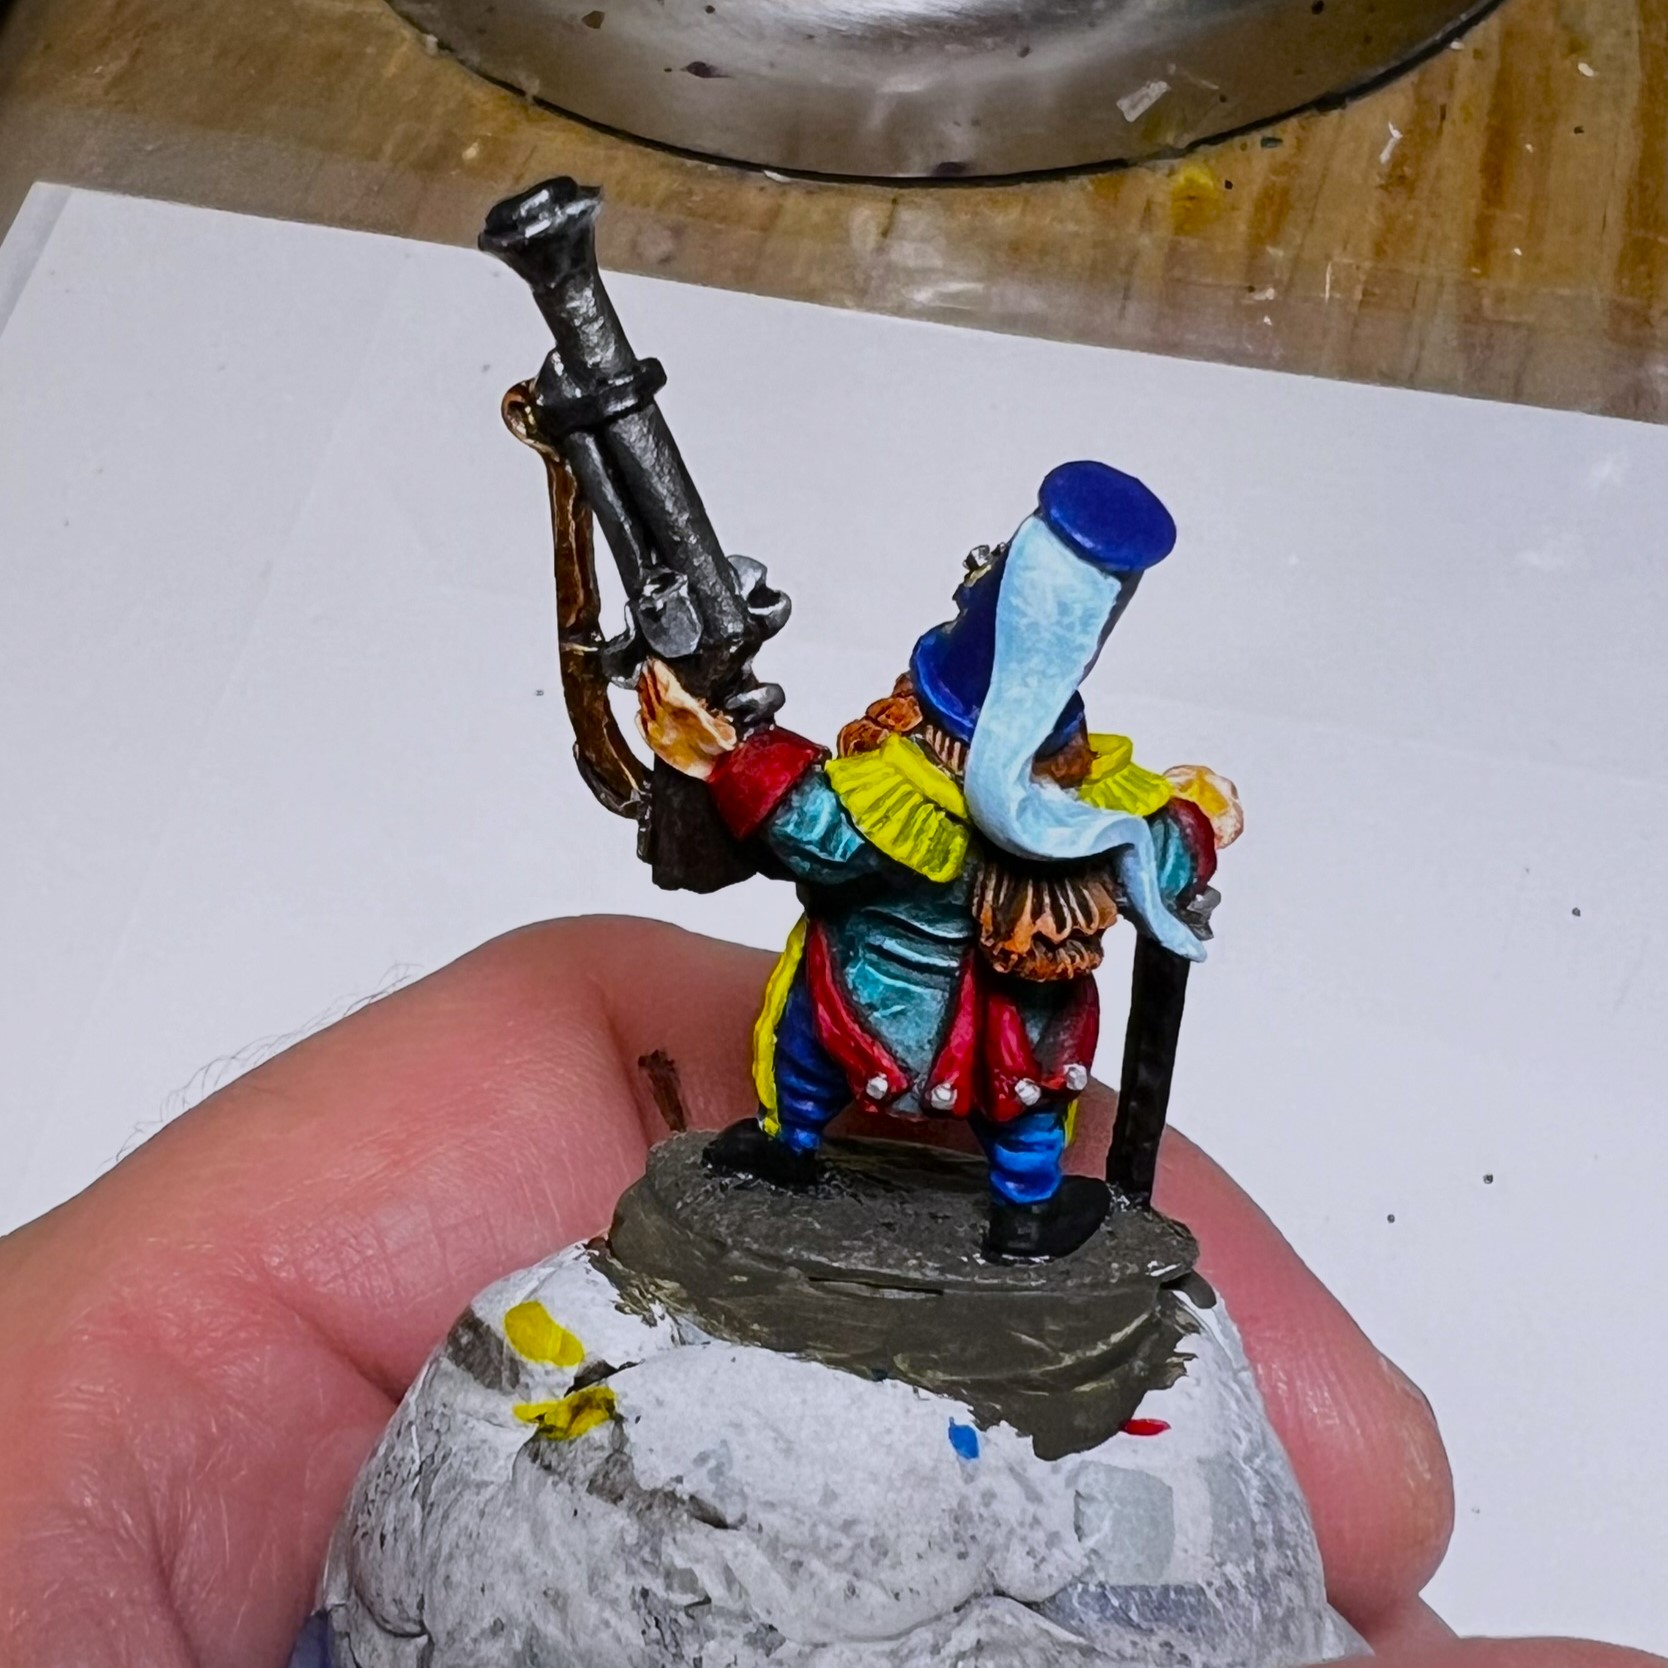
I followed the same basic painting pattern as is my habit, so WIP shots here will be brief. I used a lot of blues. I also thought that he could handle his alcohol – so ruddy faced he would be!
The Colonel and his MDF base (purchased separately).The Colonel mounted for paintingThe Colonel primed, washed with a dark wash (see the list of paints that I used at the end of this post if interested), and dry brushed white.Painted front pre-varnish and pre-basing……and the back view at the same point in time.
For the completed Colonel Sourdough, here is some…
Eye Candy
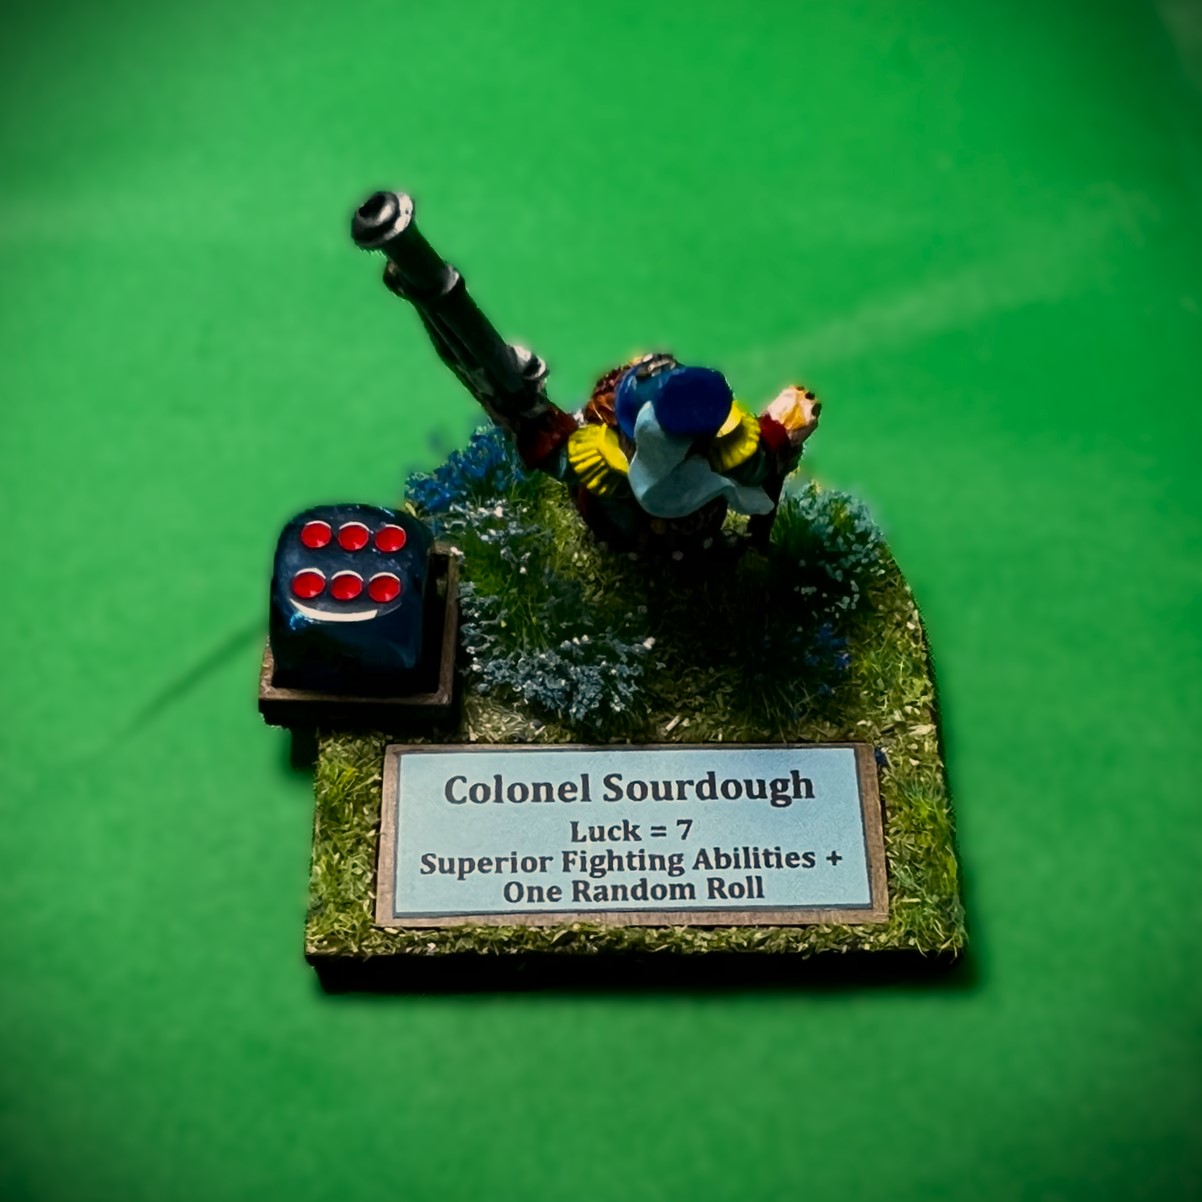
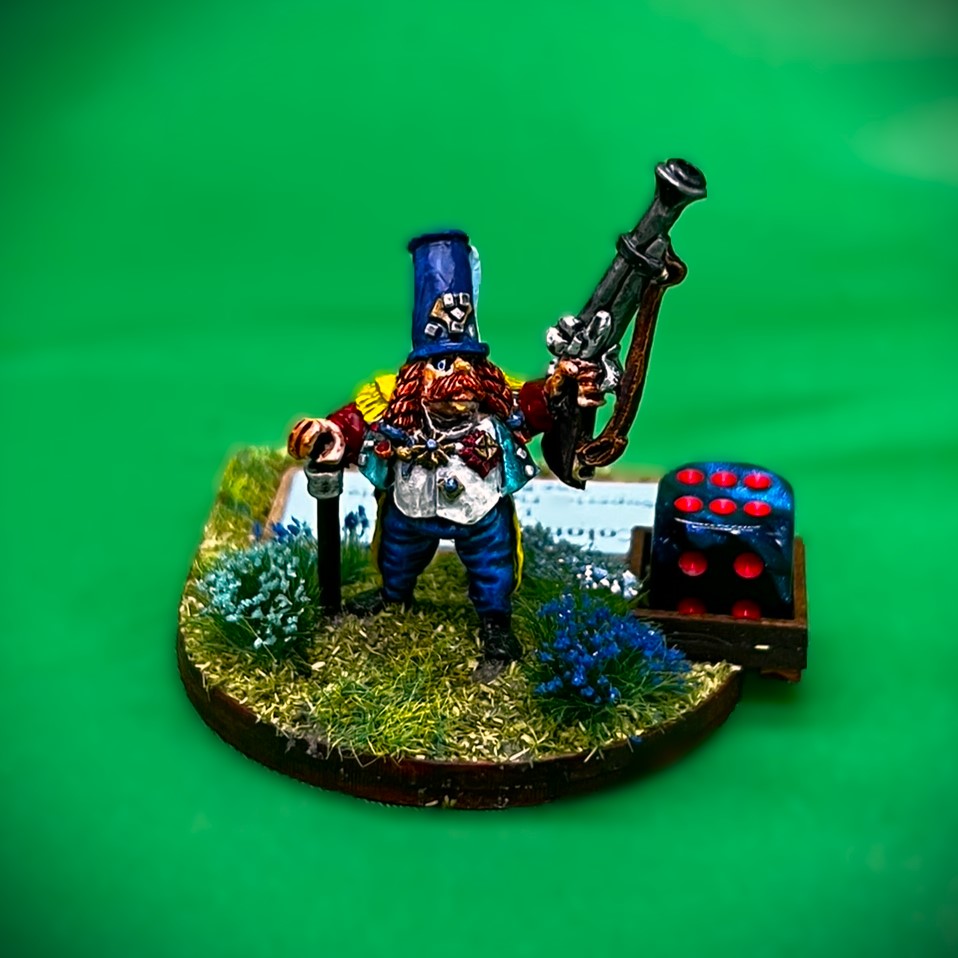
Colonel Sourdough top view showing the base that I built for him to include a label for the ease of play. The 12mm die gives an idea of his actual size.The frontal view – Munchkins are supposed to love blue.Left front view.Right front view.Rear view with better detail of the figure’s back.
That wraps up the good Munchkin Colonel. I may add another Munchkin Brigade/Army leader in the future, but for now I will be set.
Next up I will be sharing a similar addition for my Winkie forces. That’s only fair, right?
And yes, I still have more Ozz to come…
Miscellaneous details and references for those interested in that sort of thing:
For all of my previous posts on Wars of Ozz games, figures, units, and other related projects – please see this page.
PAINTS, INKS, GLAZES, SHADES, WASHES, PIGMENTS, FLOCKING, GLUES AND MORE THAT I USED ON COLONEL SOURDOUGH:
Regimental MDF base from Old Glory(I use regimental bases for brigade leaders and brigade bases for regimental leaders as they look and work better that way).
1.25″ x 1″ square steel base from Wargames Accessories (#FOW1)
Elmer’s PVA Glue
3/4″ Everbilt steel washer
Poster tack
Vallejo Premium Primer “White”
Vallejo “Flow Improver”
Vallejo “Airbrush Thinner”
Secret Weapon Washes “Heavy Body Black” (wash)
Vallejo Model Color “White”
P3 “Brown Ink” (ink)
Vallejo Model Air “Gun Metal”
Battlefront “European Skin”
The Armory “Dark Blue”
Army Painter “Speed Paint – Fire Giant Orange 1.0”
Army Painter “Speed Paint – Dark Wood 2.0”
Vallejo Mecha Color “Metallic Blue”
Citadel “Contrast Paint – Bad Moon Yellow”
Vallejo Mecha Color “Sky Blue”
Citadel “Contrast Paint – Aethermatic Blue”
Army Painter “Speed Paint – Poppy Red 2.0”
Citadel “Contrast Paint – Talassar Blue”
Vallejo Game Air “Dead White”
Army Painter “Speed Paint – Hardened Leather 1.0”
Army Painter “Speed Paint – Polished Silver 2.0”
Vallejo “Glaze Medium”
Army Painter “Warpaints – Shining Silver”
Vallejo Model Air “Black Metallic”
Vallejo Model Air “Steel”
Vallejo Model Air “Bright Brass”
Vallejo Model Color “Brown Rose”
Army Painter “Speed Paint – Crusader Skin 1.0”
Pendraken 12mm dice frame
Army Painter “Battlefield Field Grass” (flocking)
Vallejo Mecha Varnish “Gloss Varnish”
Vallejo Mecha Varnish “Matte Varnish”
Shadow’s Edge Miniatures “6mm Dark Forest Light Blue Tufts” (flocking)
Shadow’s Edge Miniatures “6mm Dark Forest Dark Blue Tufts” (flocking)
Army Painter “Battlefields Field Grass” (flocking)
Printed Avery label
Again, as you may want to check out the Wars of Ozz figures’ range – there are two places to get them (and I make no money from this btw). The game rules and the figures are available from the following two places:
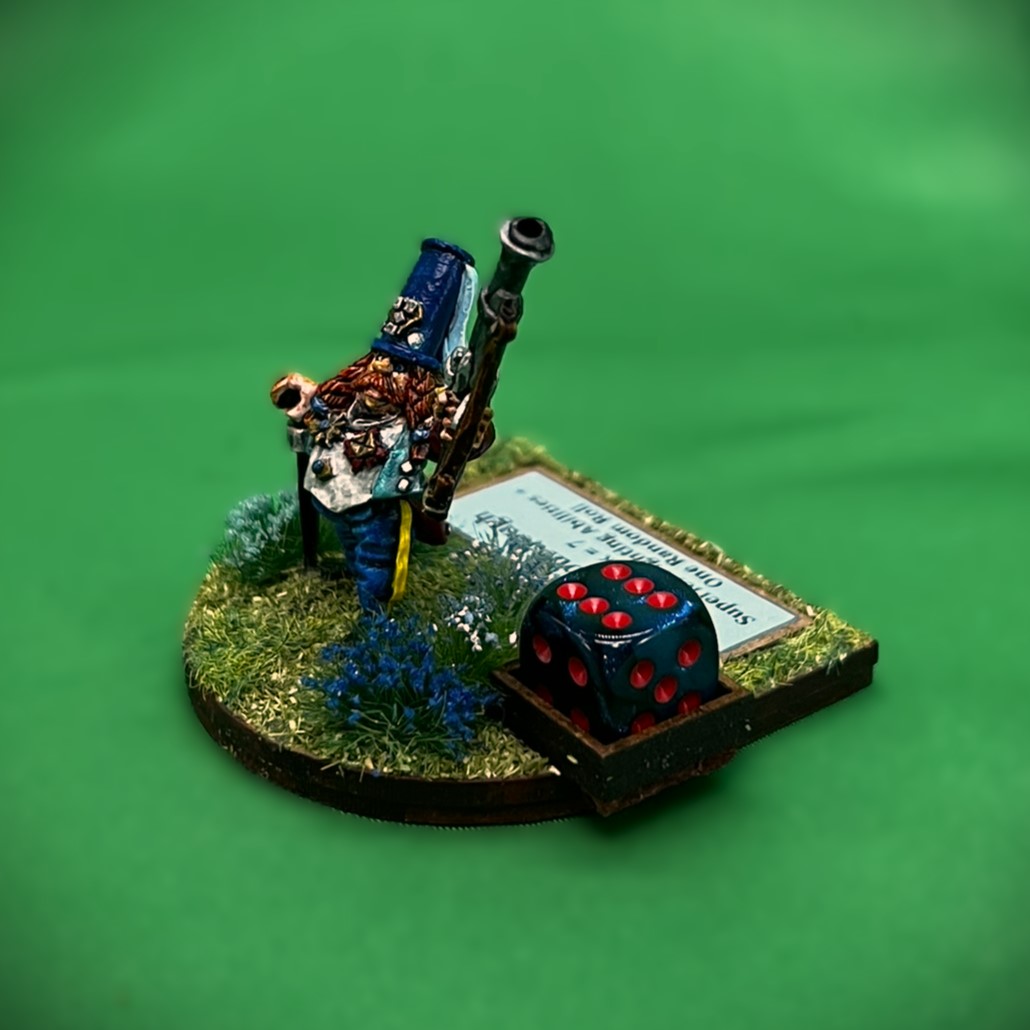
For all of the factions that I have in the game of Wars of Ozz, I want similar types of troops. That is, all should have access to infantry, cavalry, artillery, and magic users. Additionally, I want all factions to have at least some access to flying units. While I can add my Great Owls to any faction (as they belong to none and exist as potential allies), I wanted the Great Land of Harvest to have their own flyers – and they do – SKU #OZZ-526, “Great Flying Eagles”. I recently aquired this unit and wanted to get it battle-ready for upcoming club and convention games. And assembling them and painting them is the best way that I know of to acccomplish just that!
In OZZ-526, there are 10 figures – with no regimental commander. All of these are cast in metal and 28mm in size. Despite the fact that they are fliers, they are treated as infantry in the game. The eagles are based 2 apiece to a 2″ square base – so five bases for the 10-figure regiment.
Similar to the Great Owls figures, the figures come in three pieces. The eagles, a flight stand, and a log flight base. After some minor assembly, the unit was ready to prime and paint. I also bent the wings to provide them with a more movement-like appearance.
WIP Shots
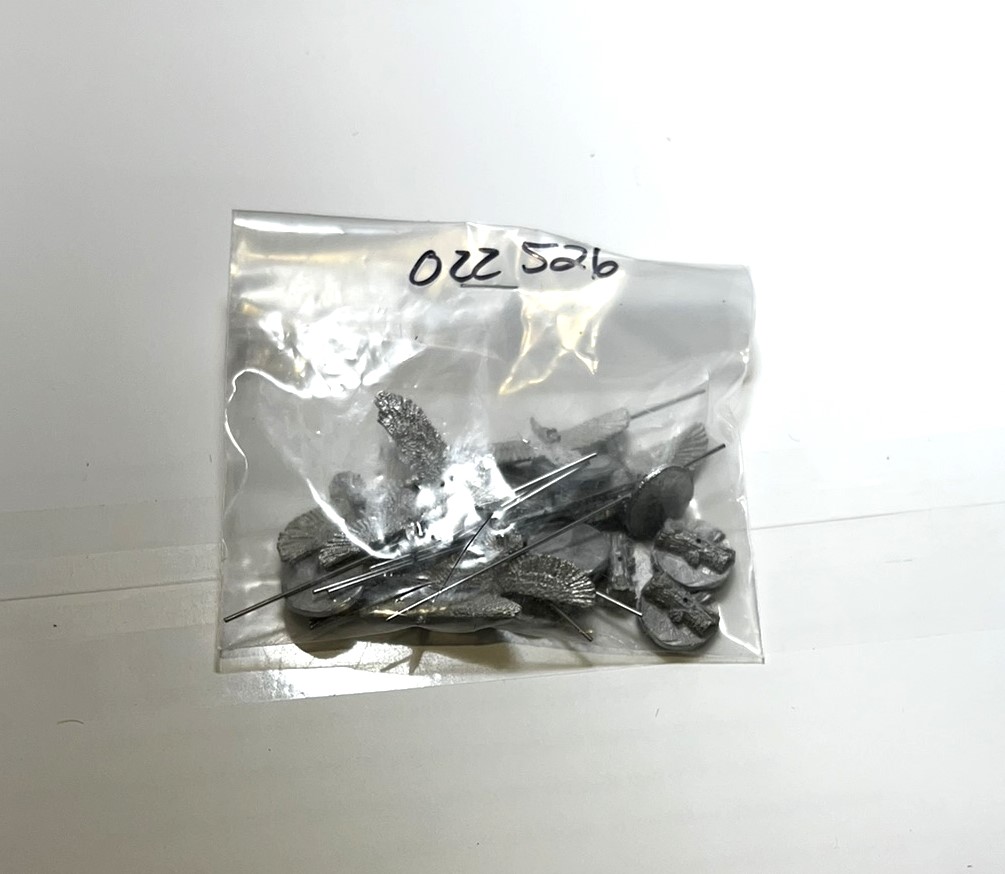
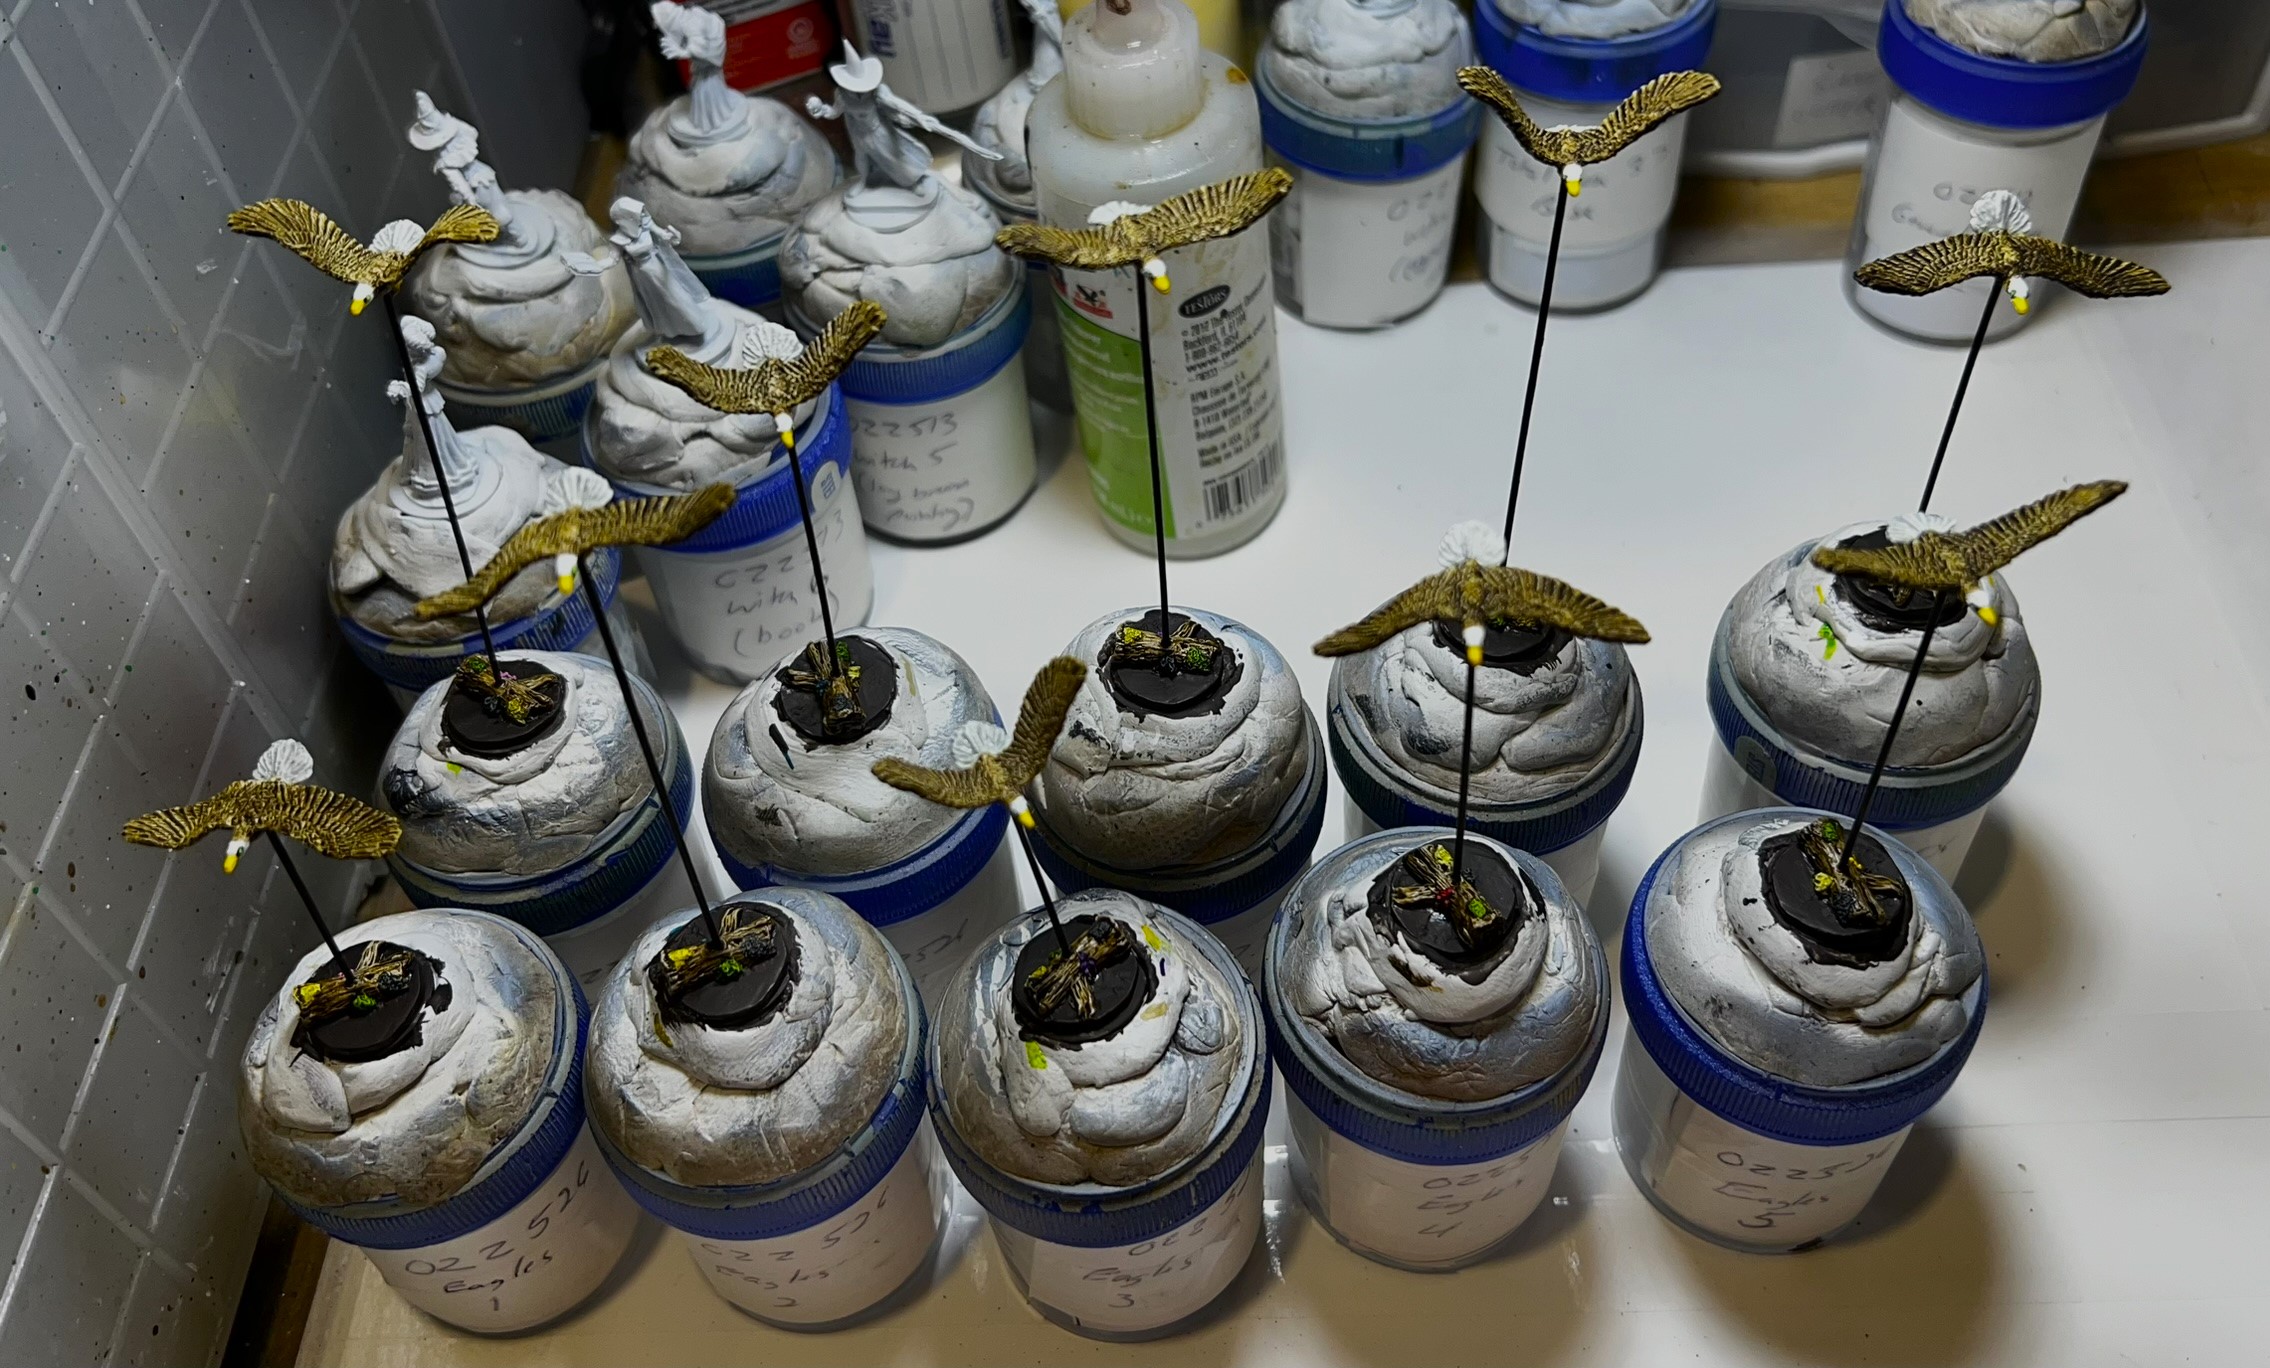
As received – note the bases and flight stands.The Great Flying Eagles (as opposed to the walking kind I guess), assembled and mounted for painting. You can see the bends I made in the wings.
Painting went fairly smoothly – I did deviate from the American Bald Eagle in terms of eye coloration – as all of my Great Land of Harvest troops have haunting green eyes – so would these birds. I also gave the bases more color with regards to the mushrooms, moss, and mold on the tree branch bases. My flocking approach was to have them resemble more of a woodland ground scheme (with no flowers) than a field.
After painting and awaiting varnish and flocking.
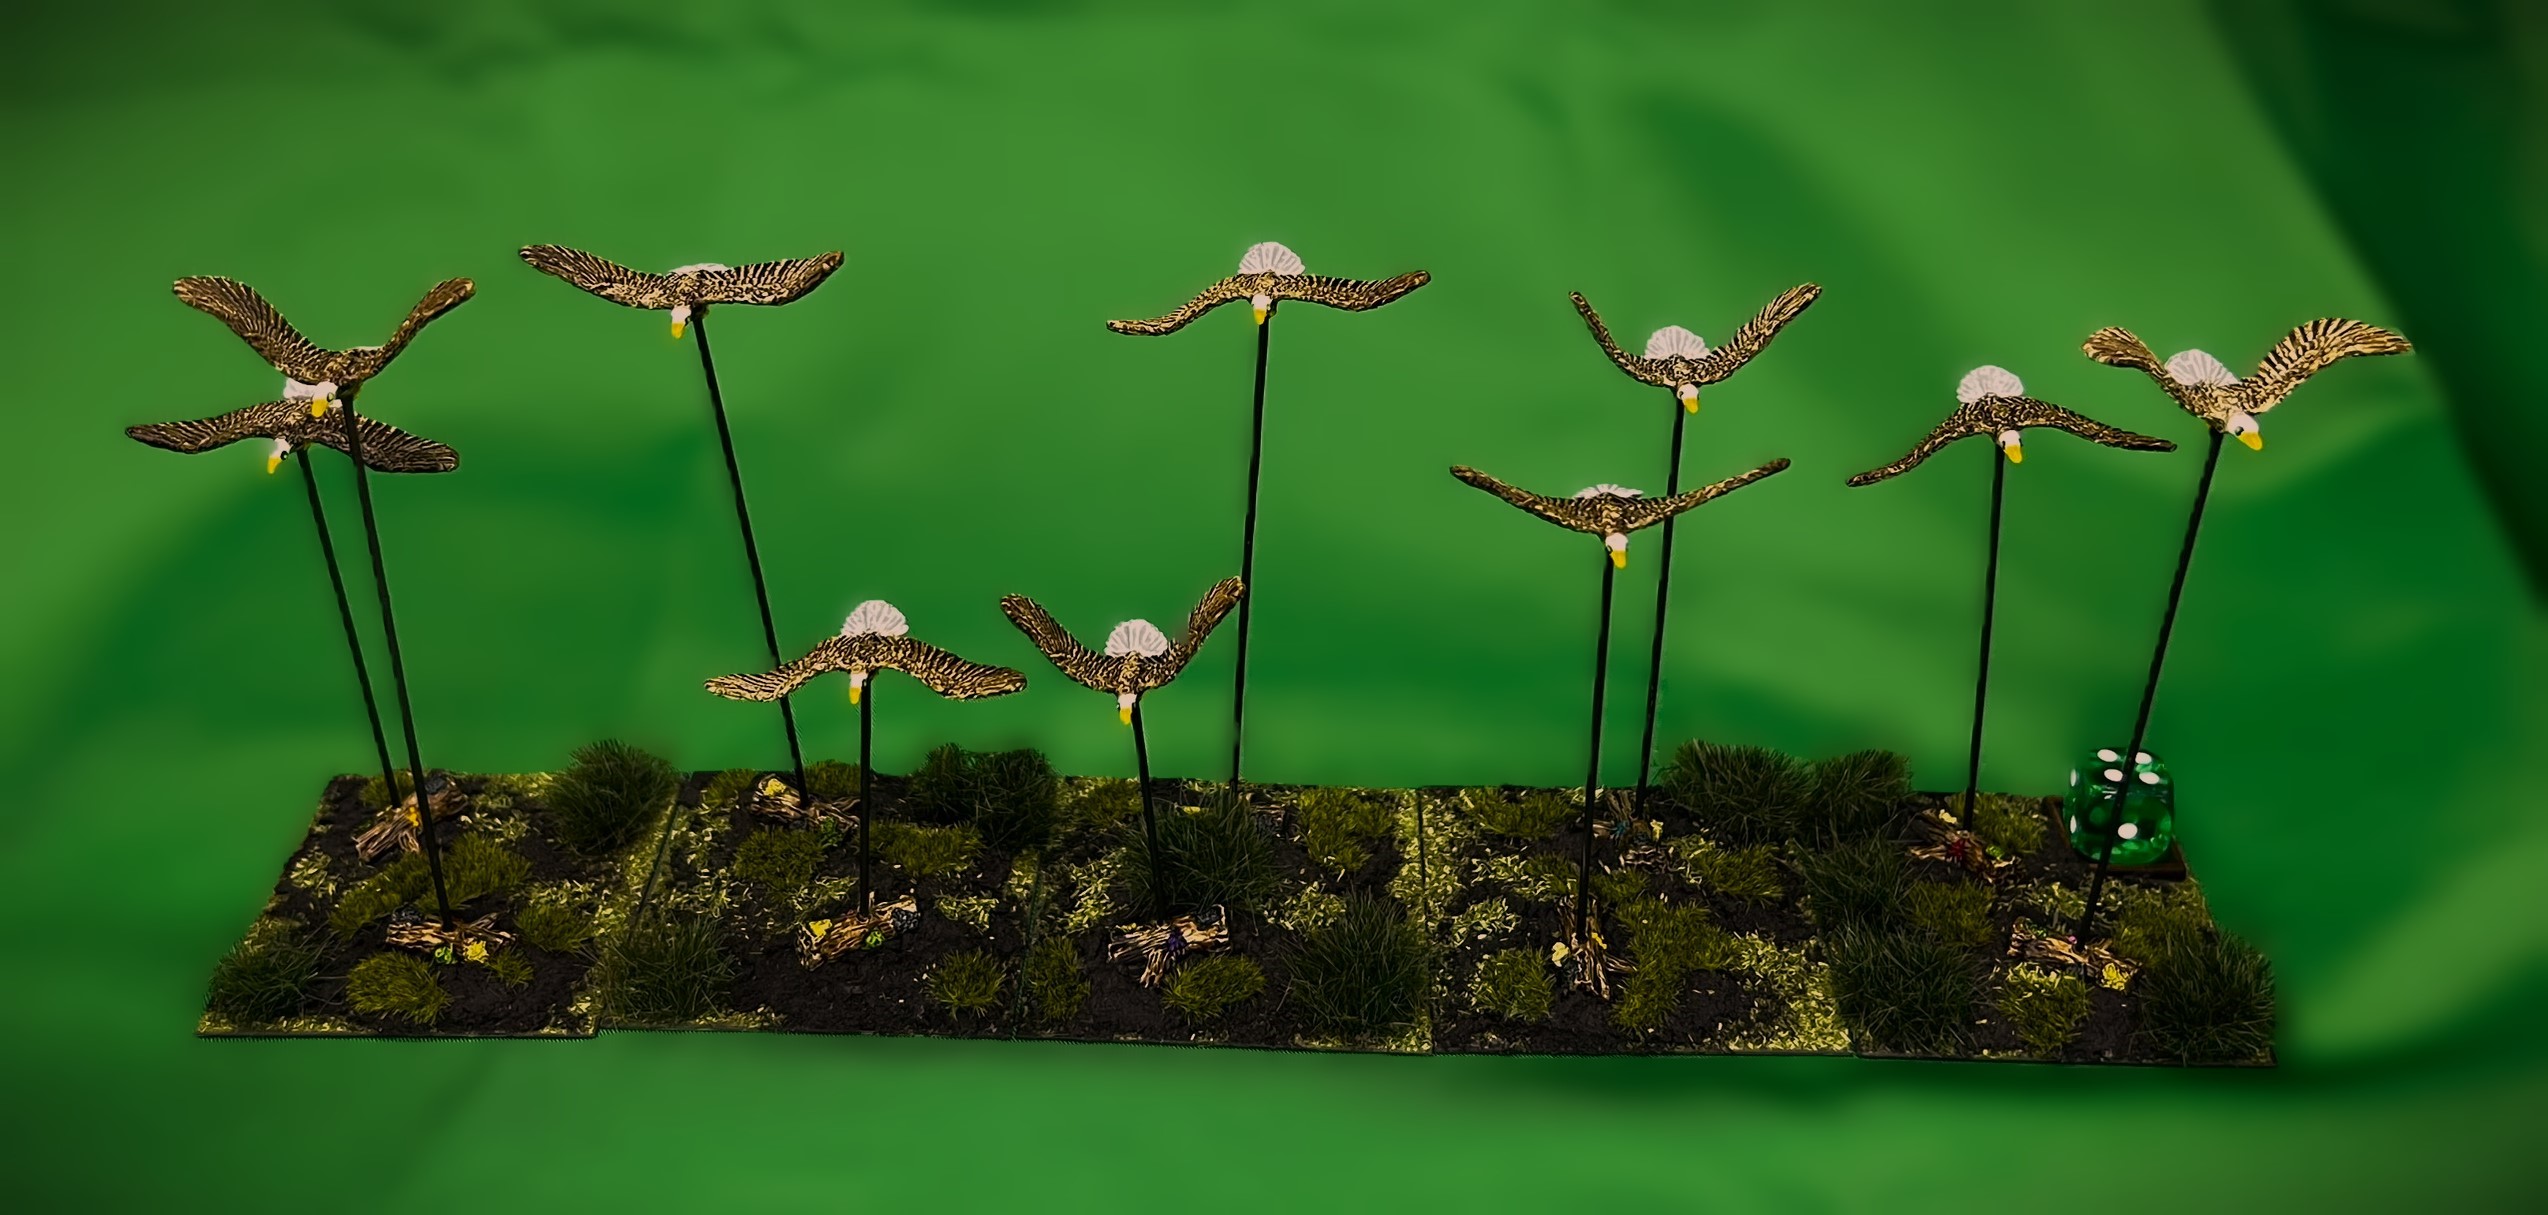
A Great Flying Eagle regiment has excellent mobility with a base movement of 4″. Plus, like all flyers, they can fly over an enemy and hit them from the rear. The regiment has a solid Melee value of 7/10, and a good Elan value of 6/10 as well. Where they are average is at Resolve (not running away from a fight) – with value of 5/10. The unit costs 4 points which is pretty cheap, and they can serve as allies to another faction per the rules.
Now, I for a brief show of some flying eye candy. As the figures are pretty uniform, I am sticking with larger group shots for this post.
Eye Candy
Group shot from the front.Side shot of the eagles in column formation.A top view of the eagles in column.
As with many Ozz units, these birds were fun and very quick to do.
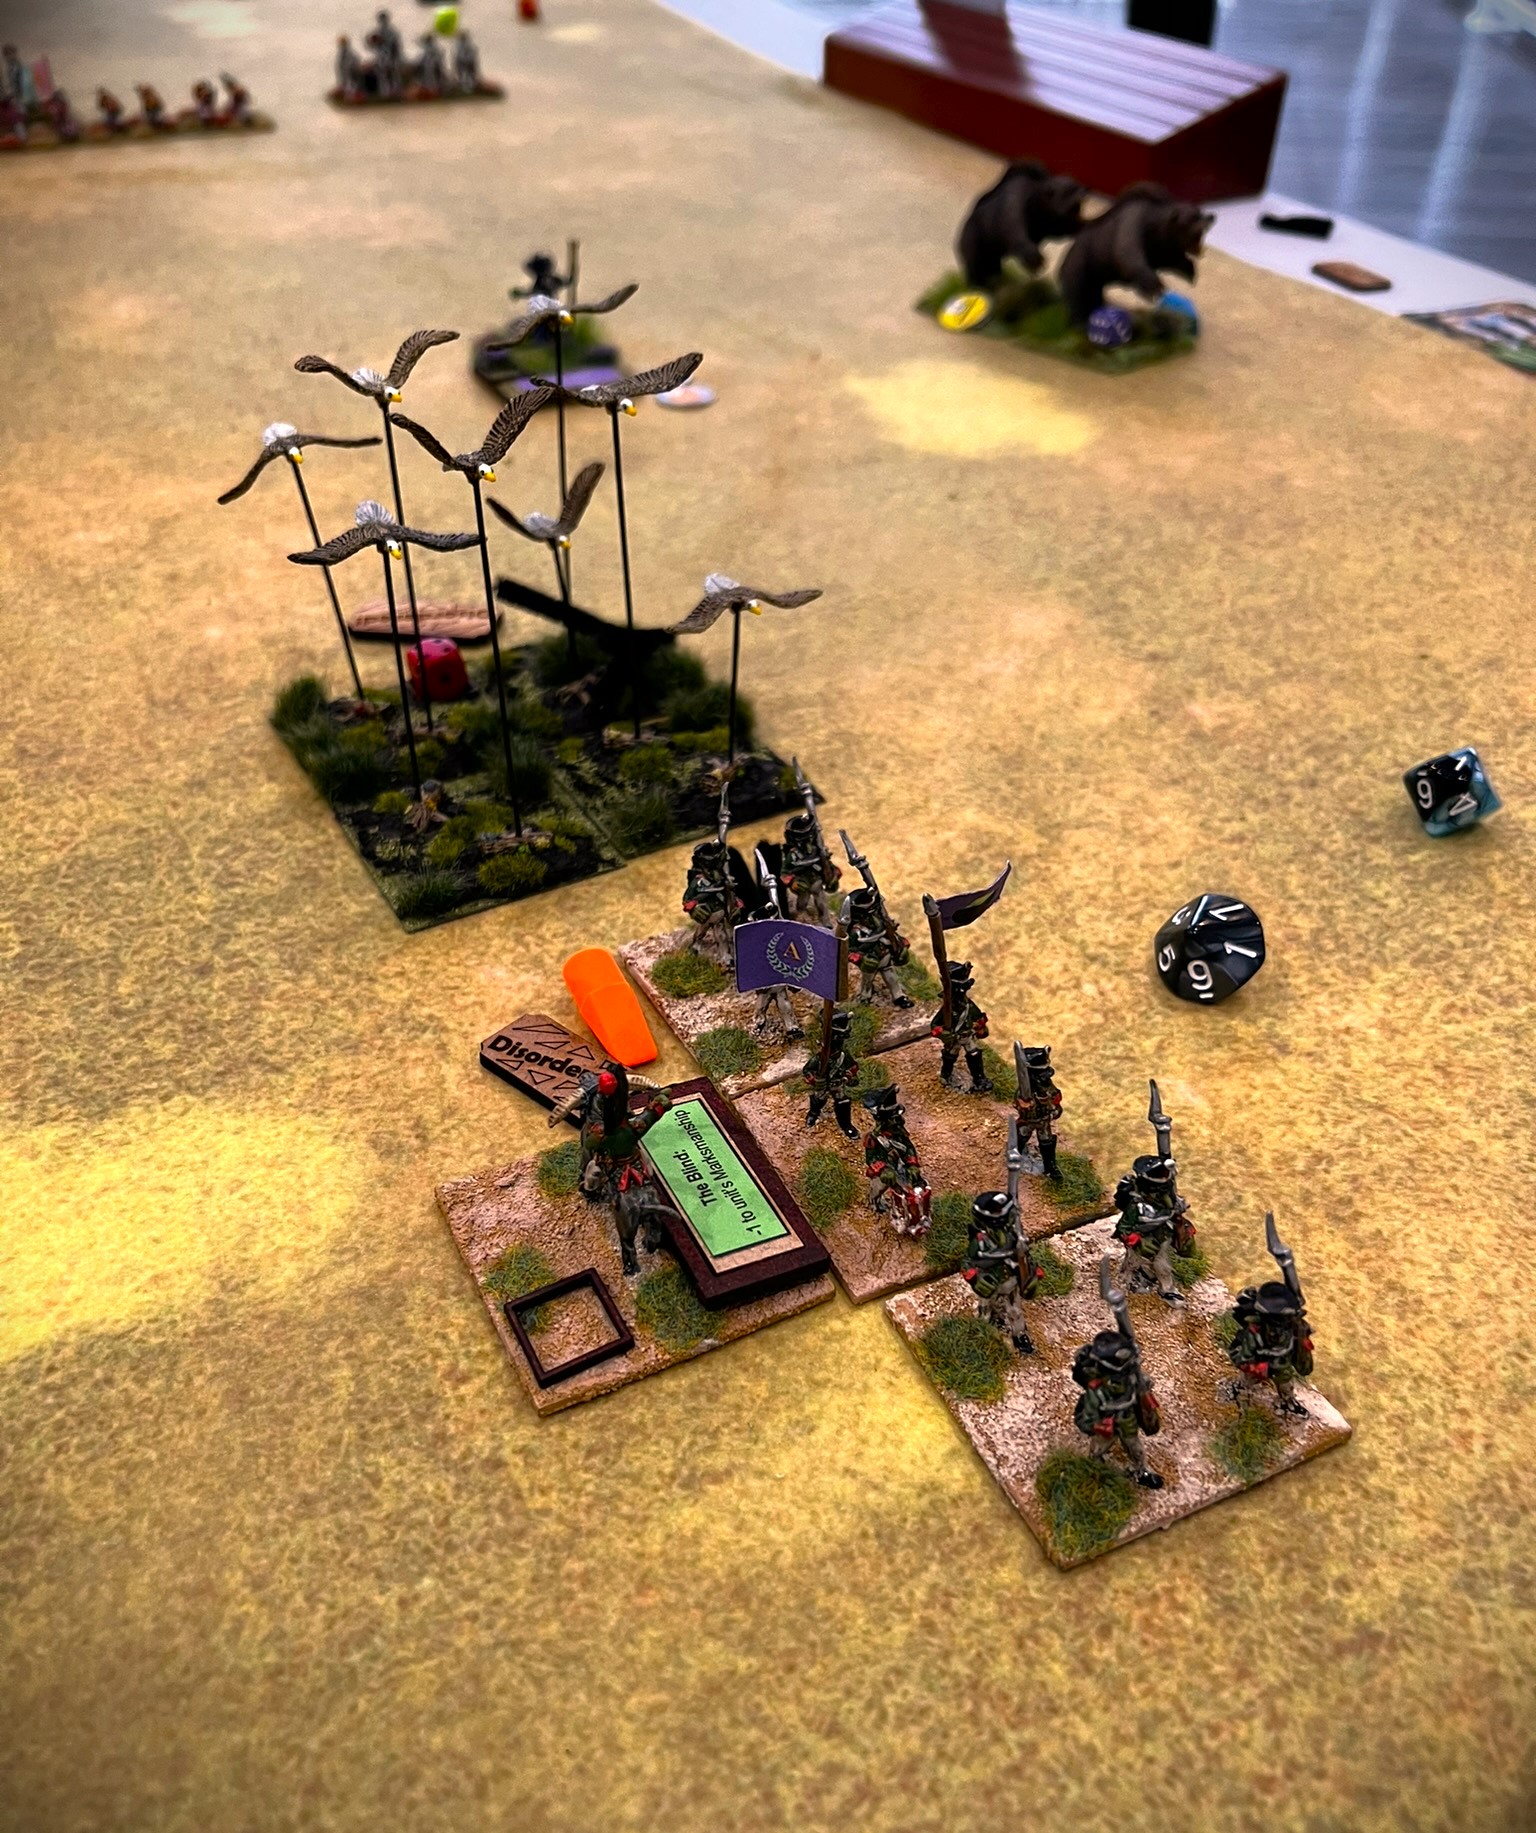
As a bonus shot, last weekend they saw their tabletop debut on the side of the Impkins as an ally. They routed a Gillikin Infantry Regiment – shown below routing from the eagles. The Gillikins were driven fom the field of battle by the eagles.
Even with a base loss, these eagles decimated this Gillikin Regiment.
Next up will be some thing new for my Ozz armies – lot’s of individual figures for leadership and magic!
And yes, I still have more Ozz to come…
Miscellaneous details and references for those interested in that sort of thing:
For all of my previous posts on Wars of Ozz games, figures, units, and other related projects – please see this page.
PAINTS, INKS, GLAZES, SHADES, WASHES, PIGMENTS, FLOCKING, GLUES AND MORE THAT I USED ON THE FIGURES FOR THIS GREAT FLYING EAGLE REGIMENT:
Gorilla Glue
Everlast 3/4″ steel washers
War Games Accessories 2′ square steel bases (#21)
Poster tack
Vallejo Premium White Primer
Vallejo “Flow Improver”
Vallejo “Airbrush Thinner”
Battlefront “Sherman Drab”
Vallejo “Thinner Medium”
Battlefront “German Camouflage Black Brown”
Vallejo Model Color “White”
Citadel “Contrast Paint – Garaghak’s Sewer”
Citadel “Contrast Medium”
Reaper MSP Colors “Pure Black”
Citadel “Contrast Paint – Bad Moon Yellow”
Citadel “Ushabti Bone”
Army Painter “Speed Paint – Ghillie Dew 2.0”
Army Painter “Speed Paint – Burnt Moss 2.0”
Army Painter “Speed Paint – Malignant Green 2.0”
Army Painter “Speed Paint – Familiar Pink 2.0”
Army Painter “Speed Paint – Raging Sea 2.0”
Army Painter “Speed Paint – Purple Swarm 2.0”
Army Painter “Speed Paint – Poppy Red 2.0”
Citadel “Contrast Paint – Imperial Fist”
Army Painter “Speed Paint – Brownish Decay 2.0”
Army Painter “Speed Paint Medium 1.0”
Citadel “Agrax Earthshade” (wash)
Citadel “Tesseract Glow” (technical)
Citadel “Contrast Paint – Apothecary White”
Elmer’s PVA Glue
Army Painter “Battlefield Field Grass” (flocking)
Pendraken 12mm dice frames
Vallejo Mecha Varnish “Gloss Varnish”
Vallejo Mecha Varnish “Matte Varnish”
Citadel “Stirland Battlemire” (texture)
Gamer’s Grass “Strong Green XL” (flocking)
Gamer’s Grass “Green Moss 2mm” (flocking)
Again, as you may want to check out the Wars of Ozz figures’ range – there are two places to get them (and I make no money from this btw). The game rules and the figures are available from the following two places:
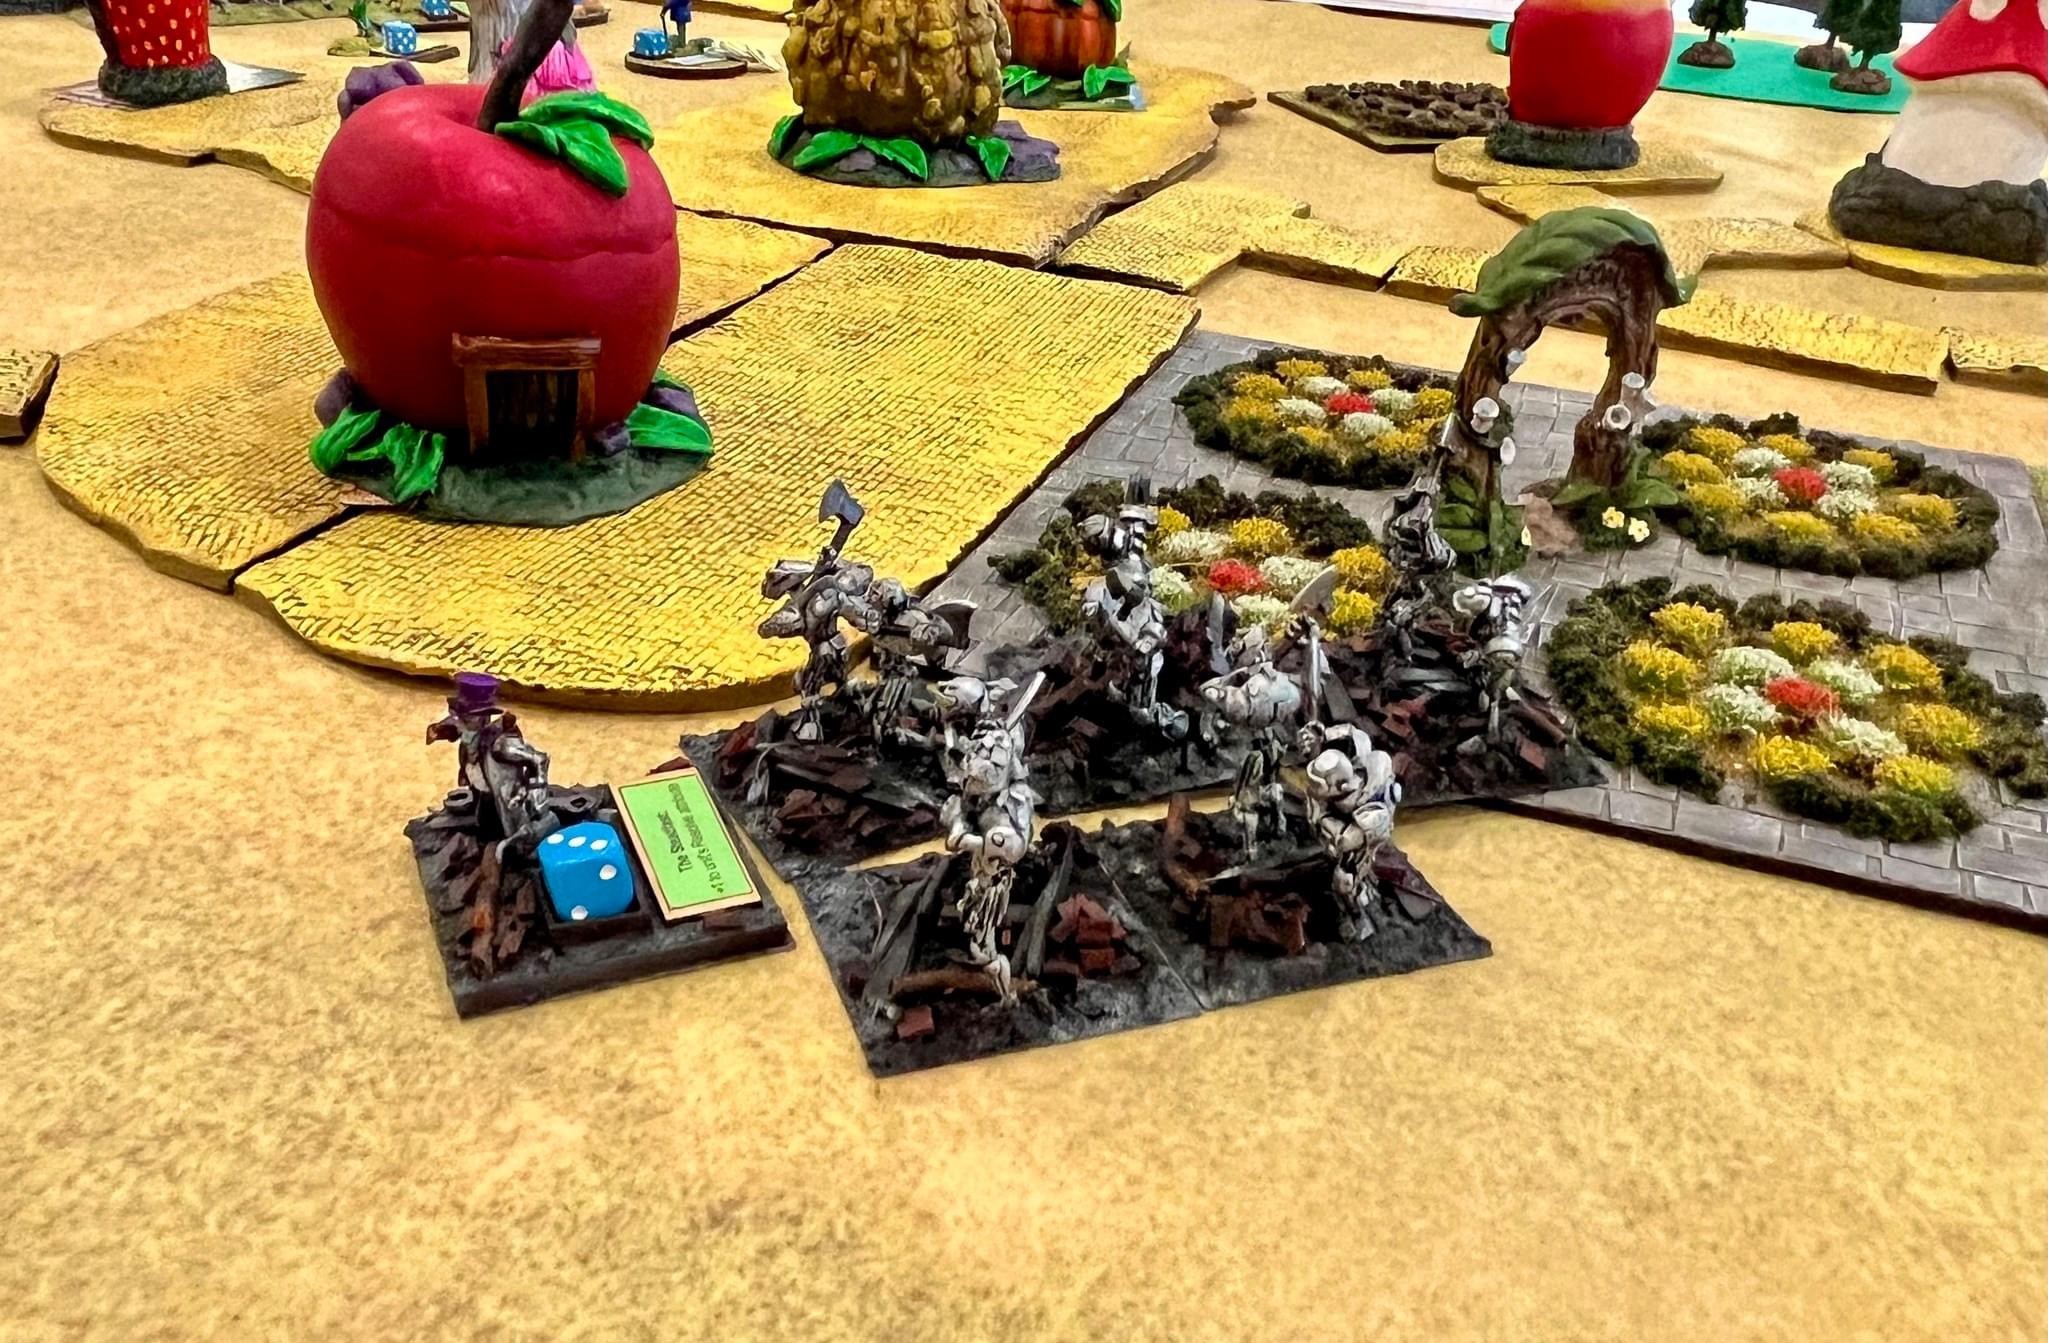
In the game of Wars of Ozz, there are skeletons that can be part of Winkie brigades. They can be part of other types of brigades as well as allies, though they must be purchased at a higher point cost. There are additional nuances to their use as well.
During my last few games of Wars of Ozz, I had GM’d games with Arella the Witch, the Gillikin Leader. She acted as both a witch and a leader. As a witch, she has a “Raise the Dead” spell that according to the Wars of Ozz rulebook:
When successfully cast, this spell creates one base of skeletons that touches the witch or wizard’s base. This skeleton base gets its own command die. The skeleton base may be combined with other skeleton bases in contact with the wizard or witch to create a “regiment” of skeletons. The witch or wizard may not have more than 5 skeleton bases in the game at the same time.
Other witches or wizards (such as lesser ones) may also possibly get this spell when they are set up at the beginning of the game. So, anyone could have skeletons in their forces.
Additionally, as part of the game there is a “Summoning Bell” that could be owned by either Arella or her sister, Evora the Witch, the Empress of the Winkies (but not both). Evora does not have the “Raise the Dead” spell that Arella has in her spell list, but could use the bell. The rules discuss the history of the bell in section 2.2.2.2 on page 24. Its use is more fully described in the Winkies section 4.3.1 as follows:
Evora the Witch created the Summoning Bell. The Winkies and Gillikins often wrestle for control of the bell…the Summoning Bell is led by ‘the Taskmaster’ and is pulled by skeletons…as long as (it is) within command radius of Arella or Evora (it) may execute the equivalent of the ‘Raise the Dead’ spell…
Wars of Ozz rulebook, page 82, Section 4.3.1, The Summoning Bell
The section goes on to describe that if Arella has the Bell she can both attempt to throw the “Raise the Dead”spell and have the bell generate even more skeletons as well.
I do not yet have my Summoning Bell painted, but you can see it on the website here. It’s in my painting queue but not likely next up.
However, I do have Arella and I did need to have skeletons for her in case that she did throw the “Raise the Dead” spell in one of my games. I also knew that having a regiment of skeletons would work to expand my available forces – but also that having two regiments would be even better!
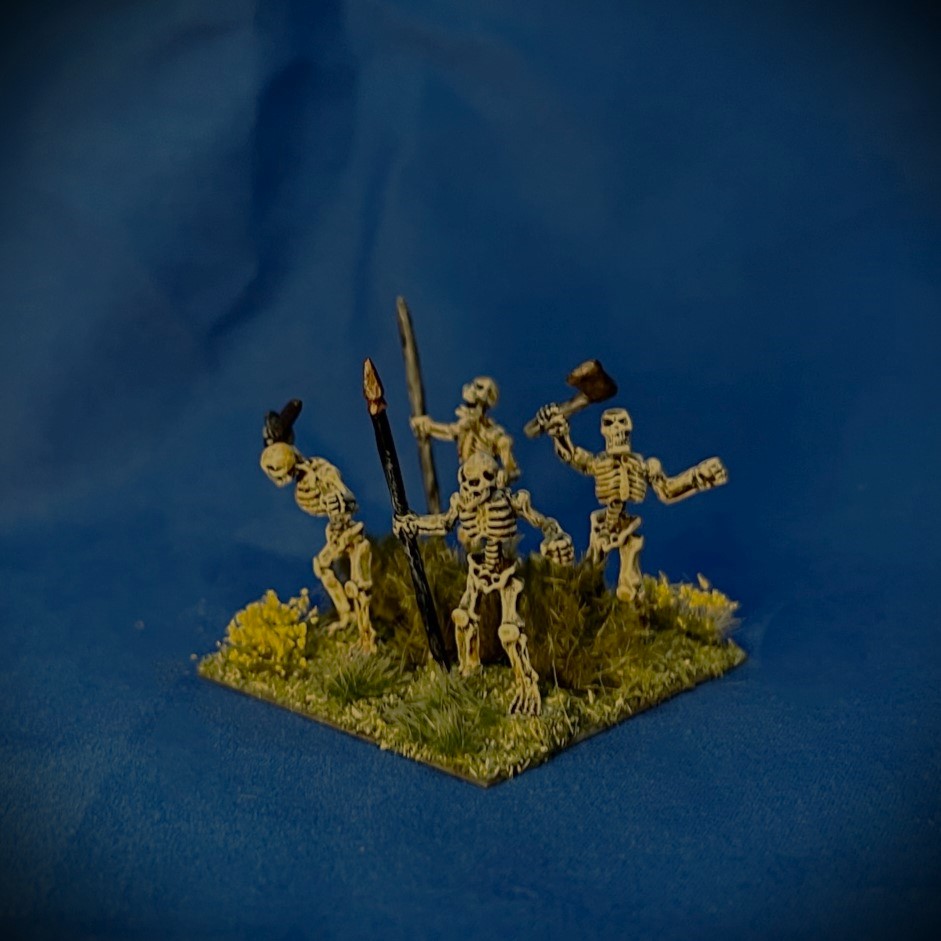
I had some experience in painting skeletons as seen in The Nightmare Legion (my first blog post way back in 2015) and in Grenadier Models Dart Thrower and Undead Crew (130), circa 1984 (from my blog in 2016). Painting skeletons is relatively straighforward, but this time I would try to add the new tool of speed paints to these. Basically, I airbrush primed the skeletons in black, then heavy dry brushed them in white. Then to get a sepia tone on the bones I went with Army Painter “Pallid Bone” Speed Paint 1.0 that I cut 50% with Army Painter “Speed Paint Medium 1.0”. This gave me the tone I wanted without getting too dark. Then I tried to rust up and age all the weapons. As is my habit, for those interested, I do list all of the paints and more that I used on this project at the end of the post.
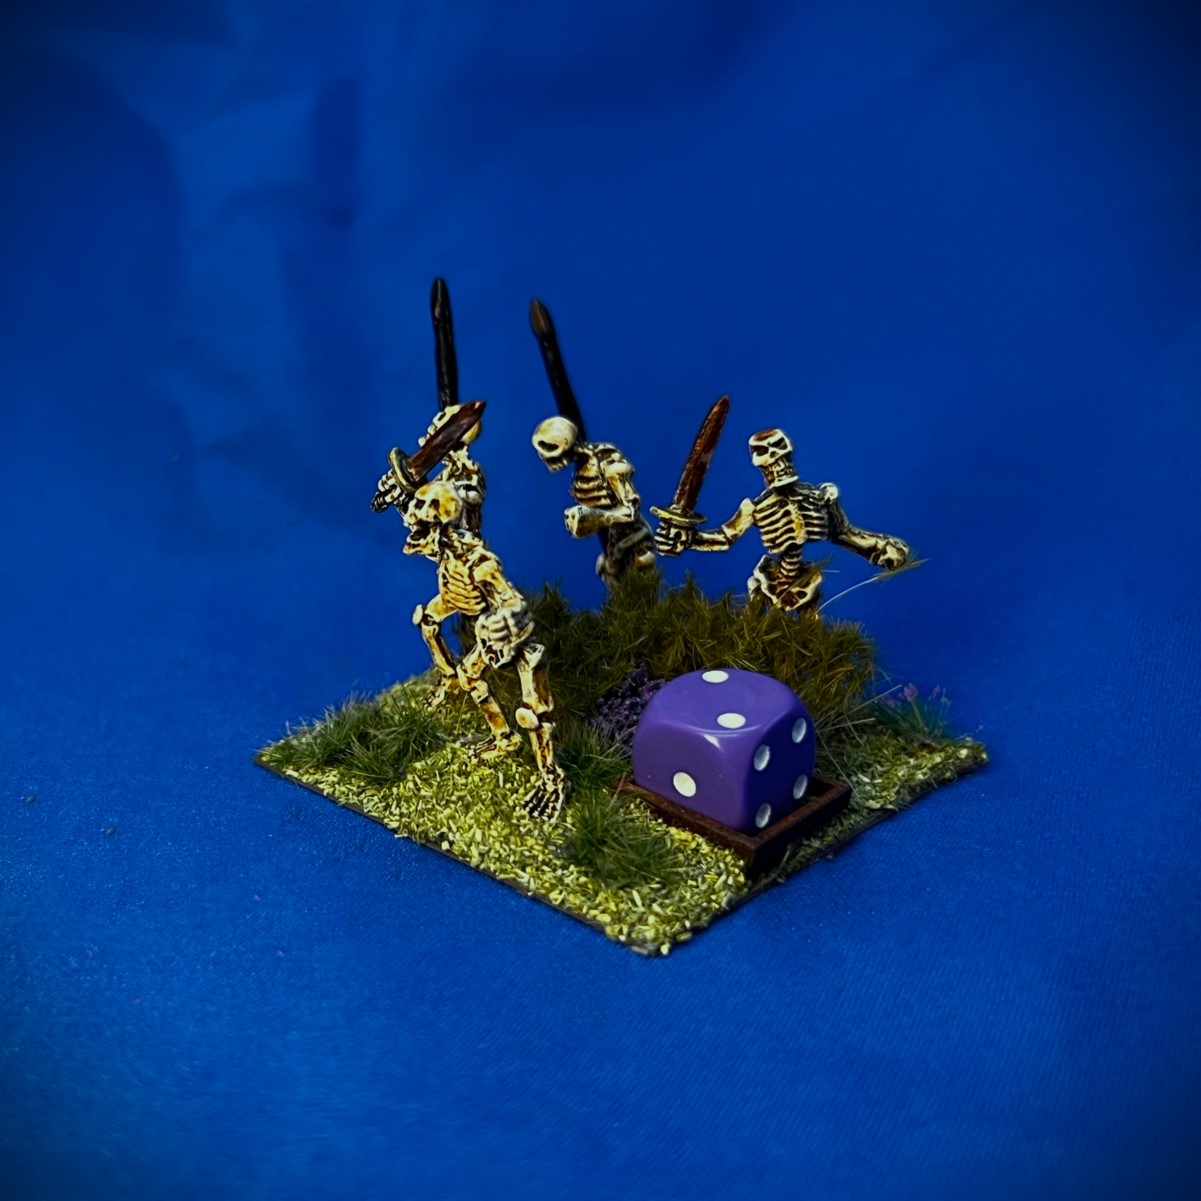
For the SKU OZZ-314, there are 20 figures – with no regimental commander, so with two regiments that was 40 figures for this project – all cast in metal and 28mm in size. The skeletons are of course infantry and are less affected by musketry (but not cannon). The skeletons are based 4 apiece to a 2″ square base – so five bases for each 20-figure regiment.
The figures came in two pieces – and some minor assembly was required as there was an upper and a lower torso . Assembly was indeed facilitated by my having forceps that could stay clamped down for a brief time on the figures while the Gorilla Glue set.
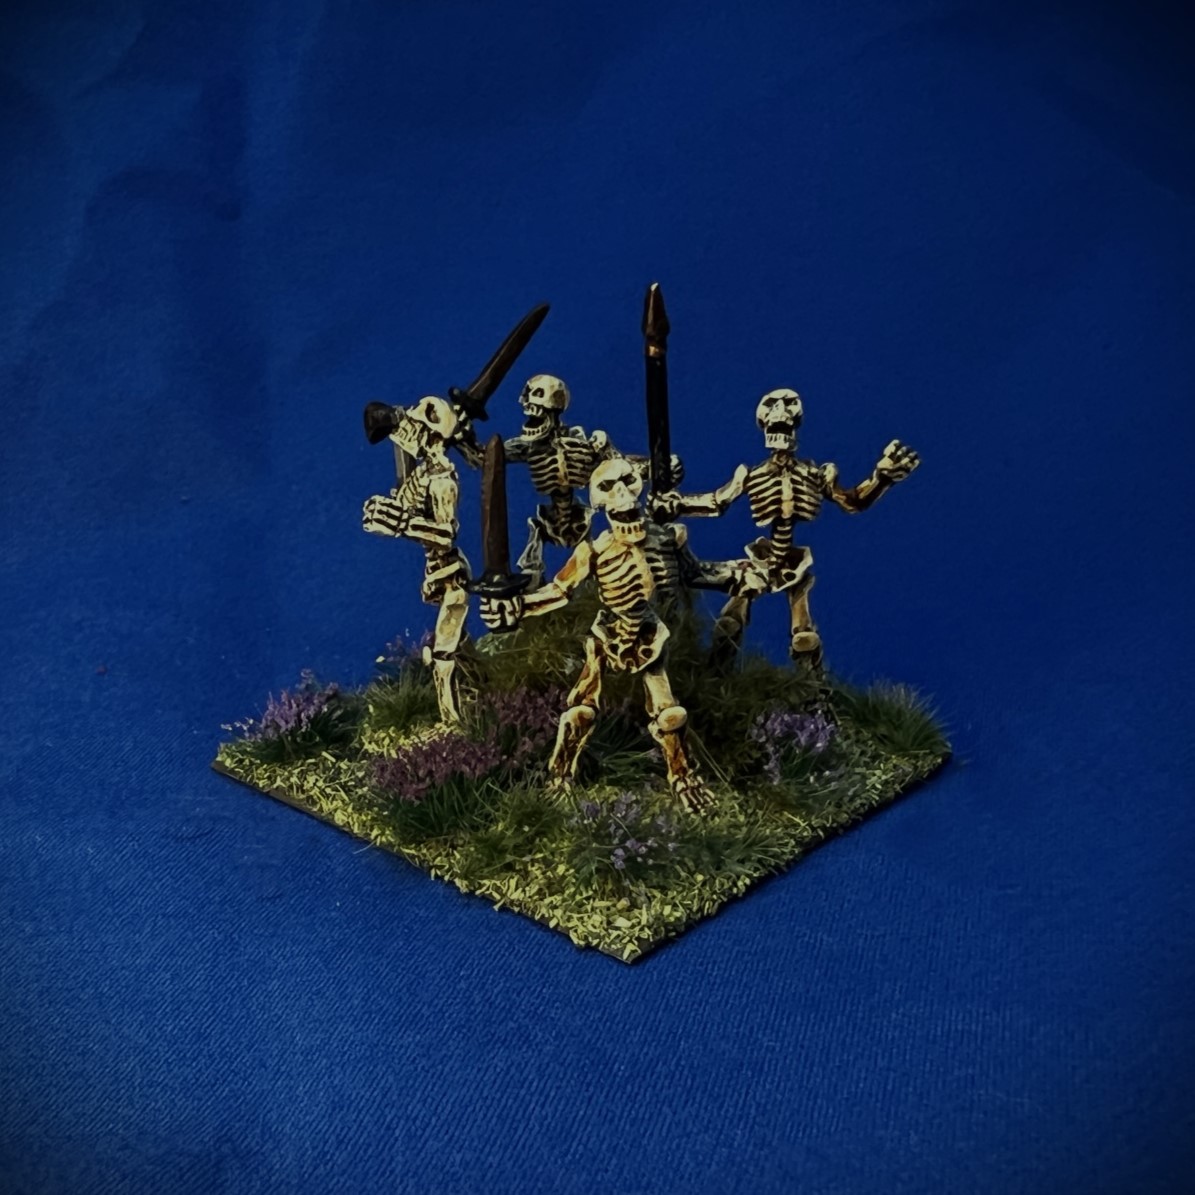
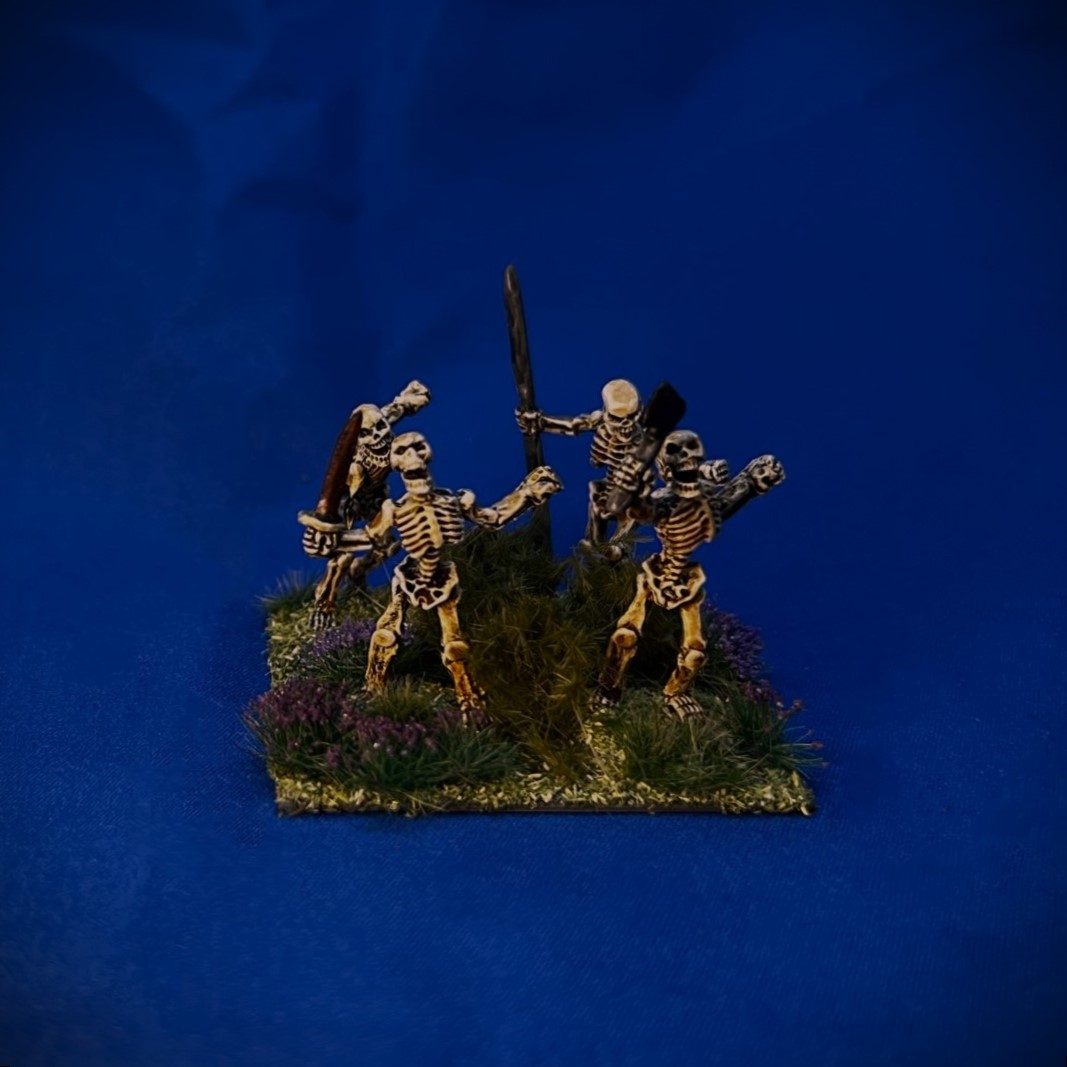
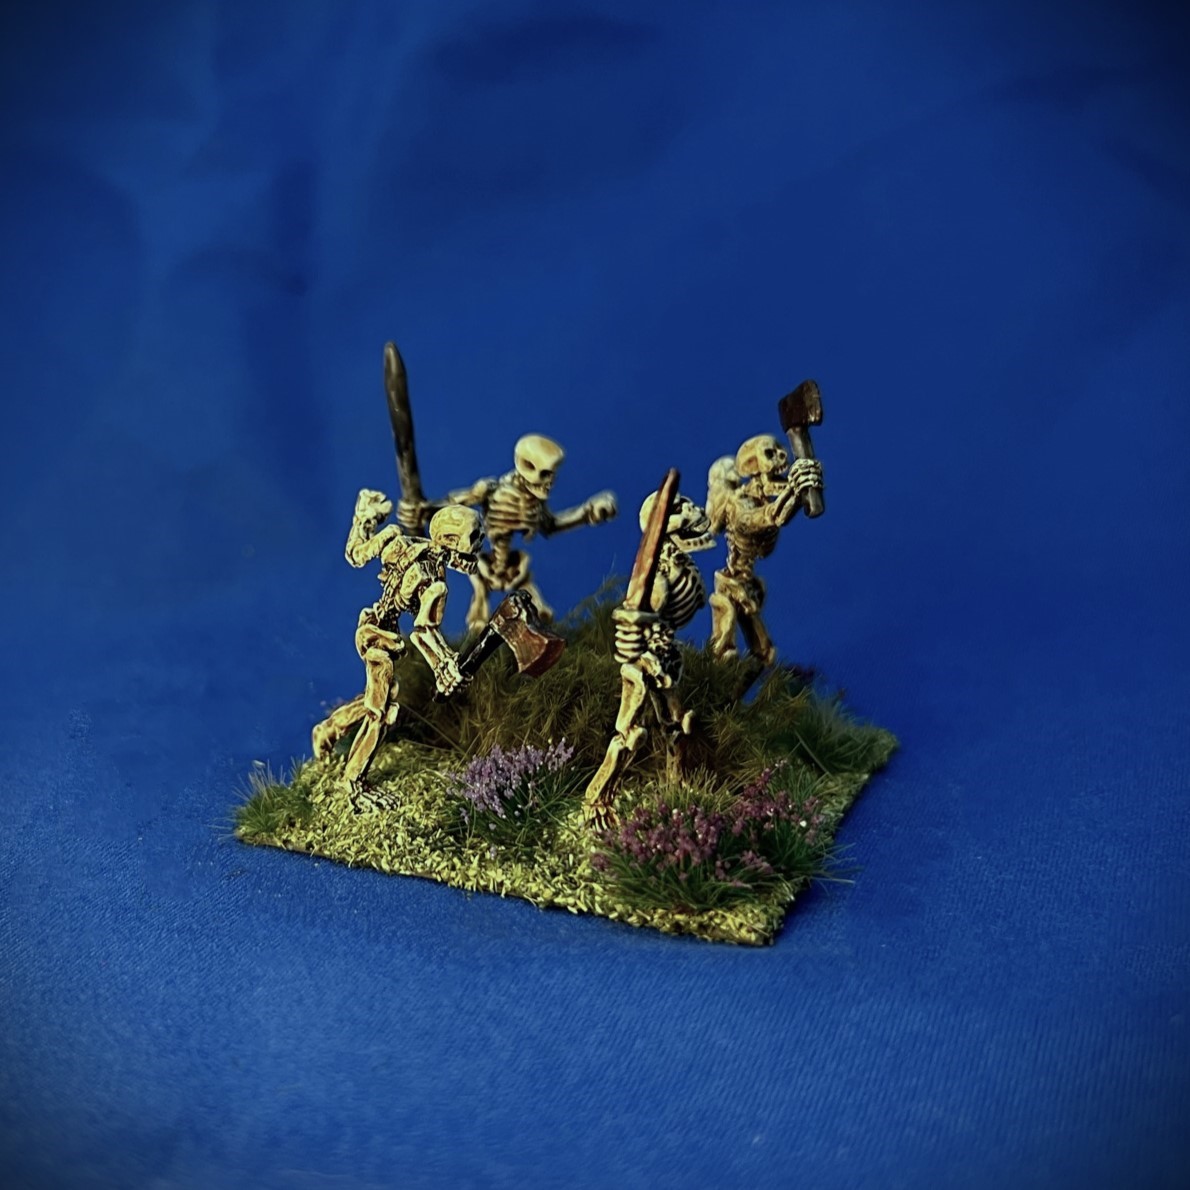
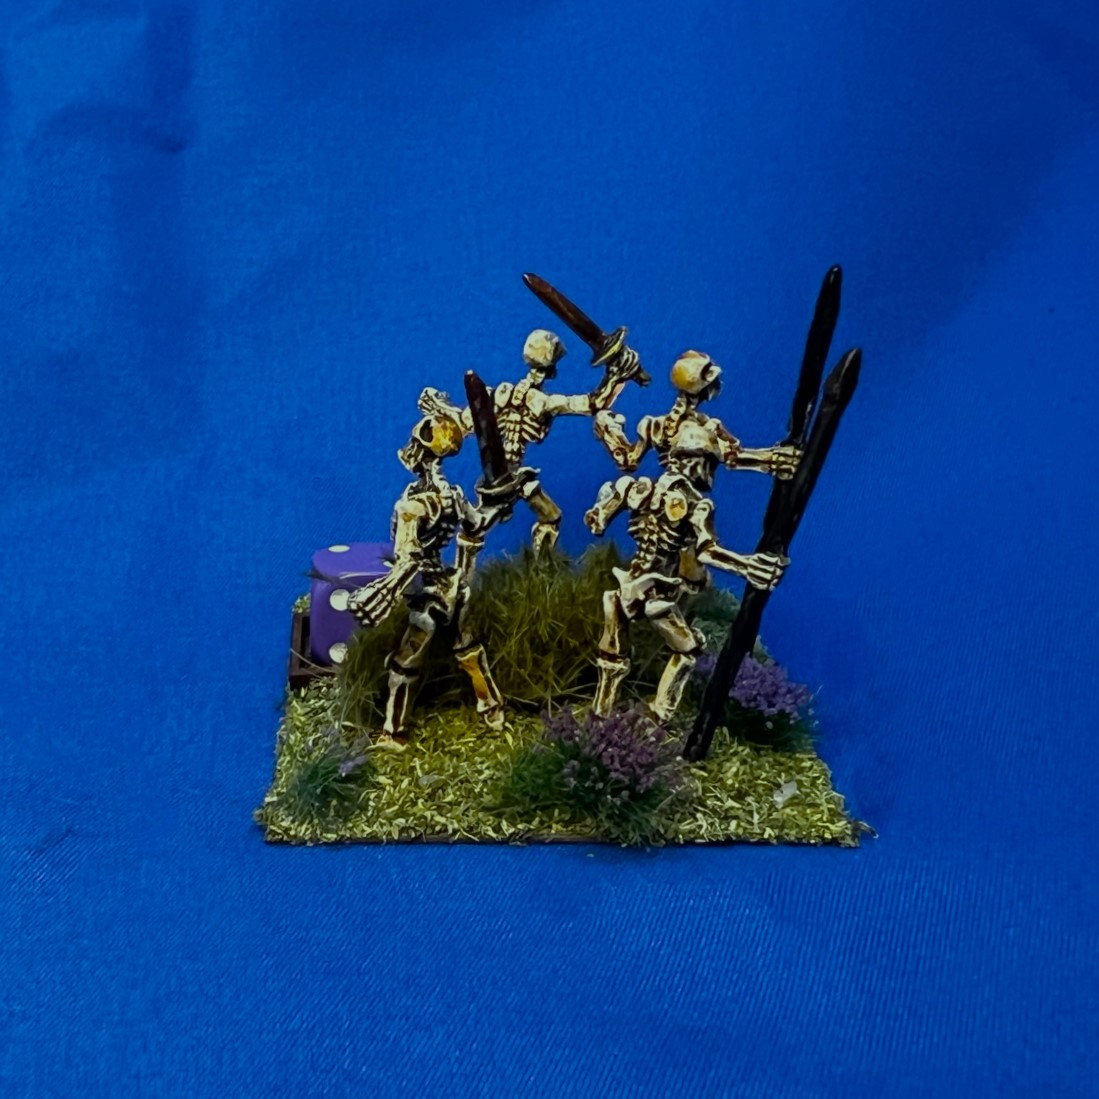
A skeleton regiment is better than average with a Melee value of 6/10, and an Elan value of 6/10 as well. Where they really shine is at Resolve (not running away from a fight) – with value of 9/10. The unit costs 5 points for the Winkies, and 6 points for everyone else (Winkies get a discount). They are armed with an assortment of swords, hatchets, axes, and pole weapons – all of which I aged and/or rusted up, as you will see shortly. You will also see how I based them so as to mix and match the poses and the warriors’ weapons and the figure types such that no two bases in each regiment were identical.
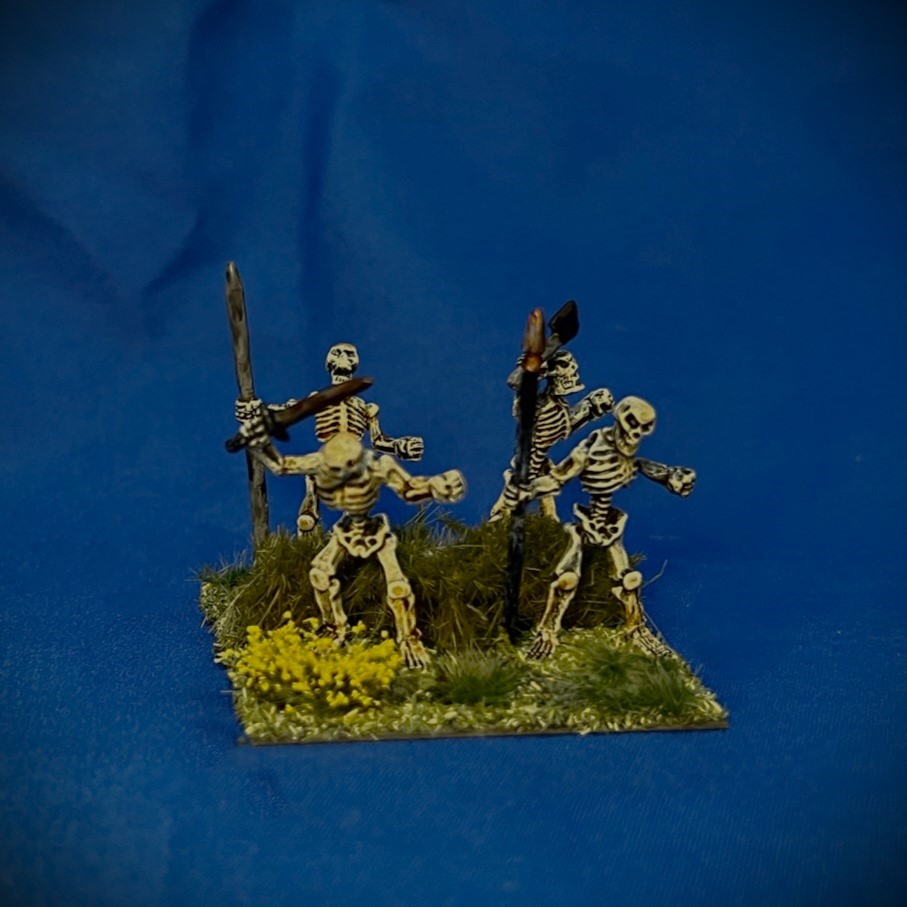
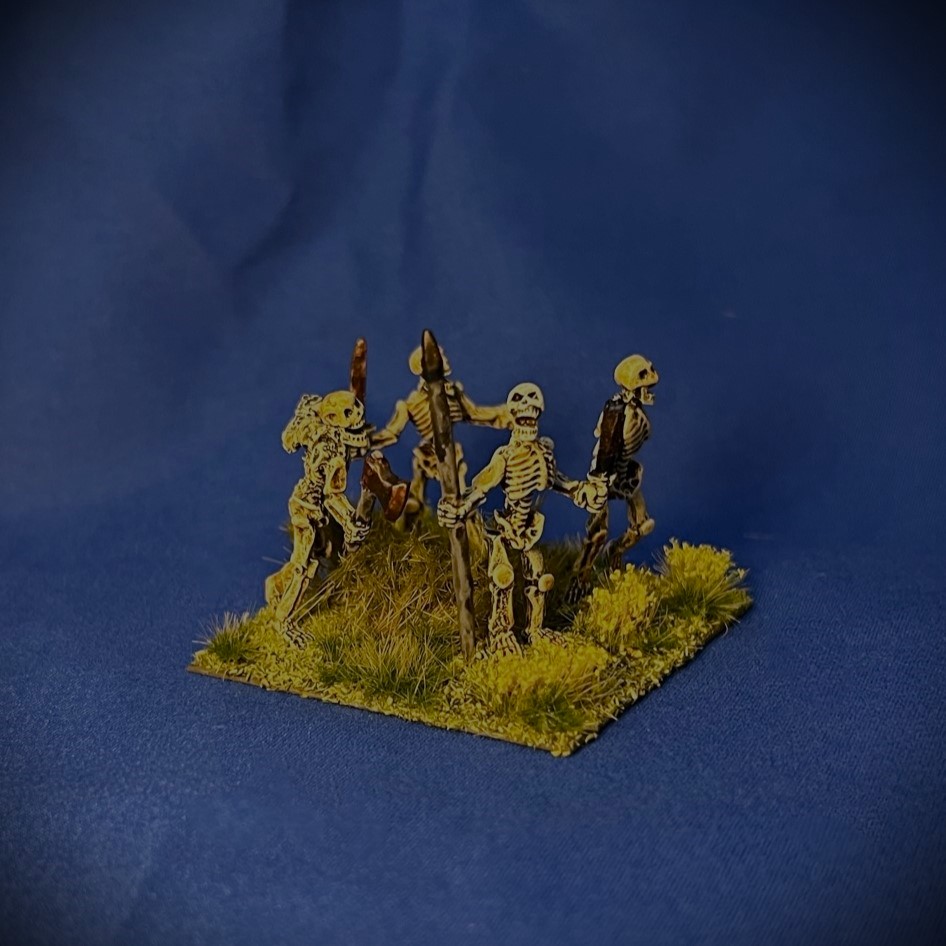
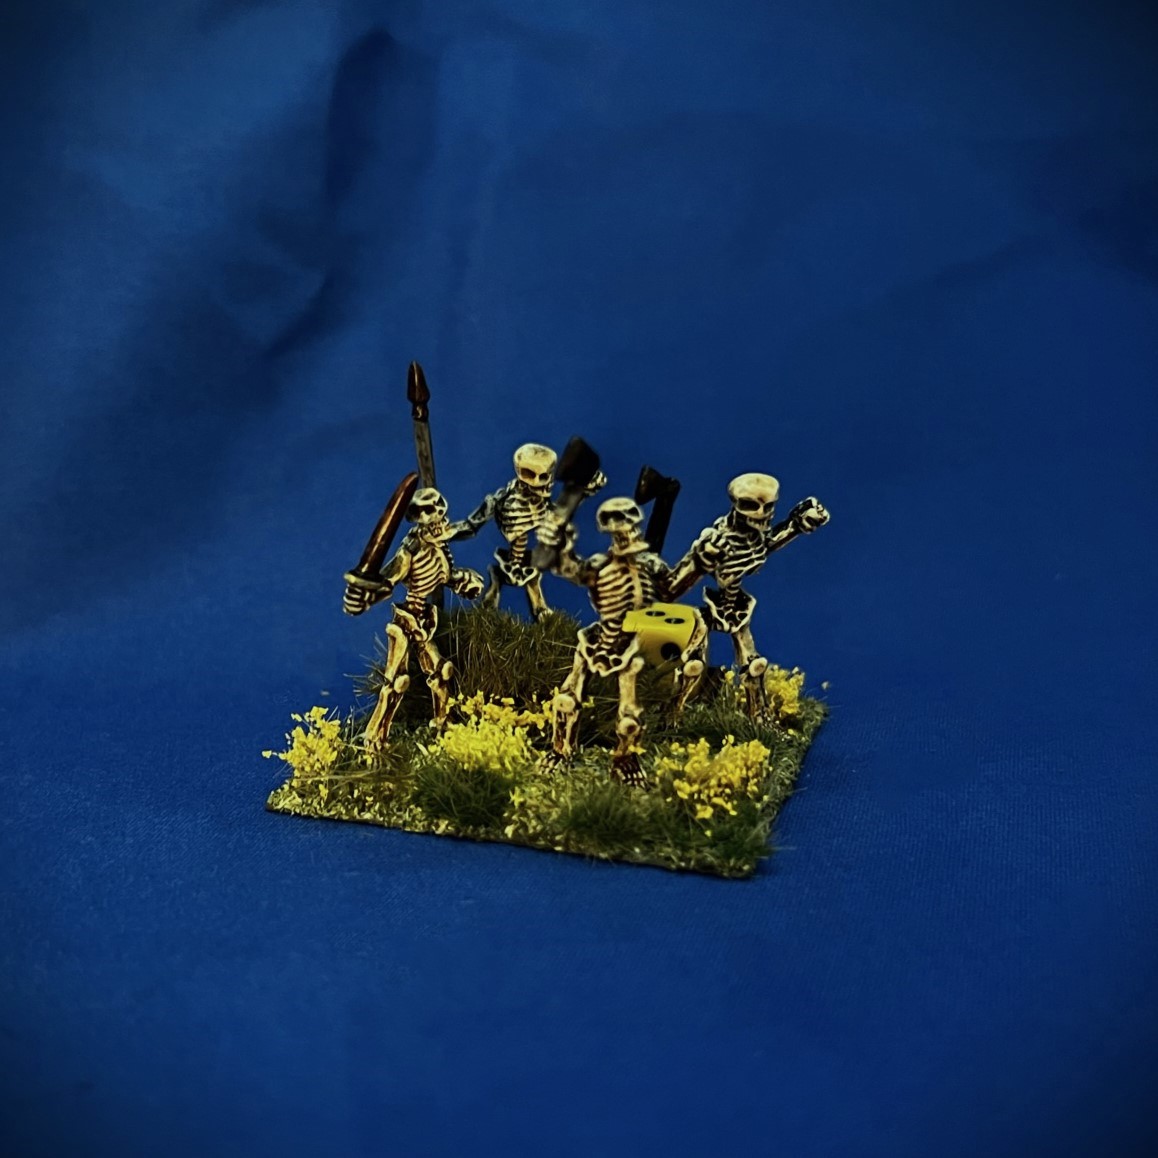
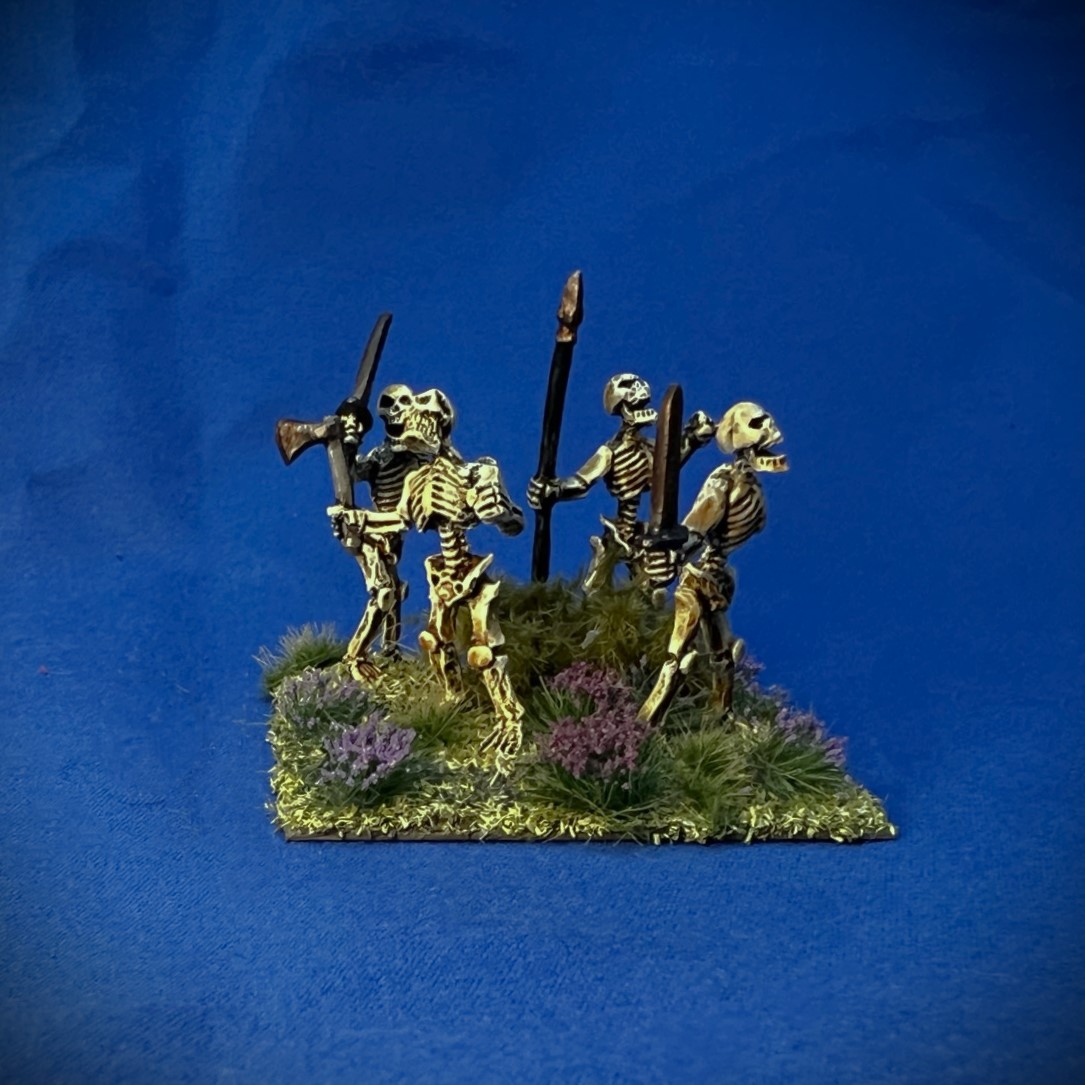
For basing, I wanted to differentiate between the two regiments for the tabletop. As the Gillikins are purple-oriented, and the Winkies are yellow-oriented, I went with these colors as themes with the flocking. I also incorporated some spikey green flora to hide the middle of the bases where there was a depression between the figures’ bases after early flocking. On one base of each regiment, I affixed two Pendraken 12mm dice frames – one on top of the other – to hold activation dice. Now I’ll share some WIP shots showing what I just discussed.
WIP Shots
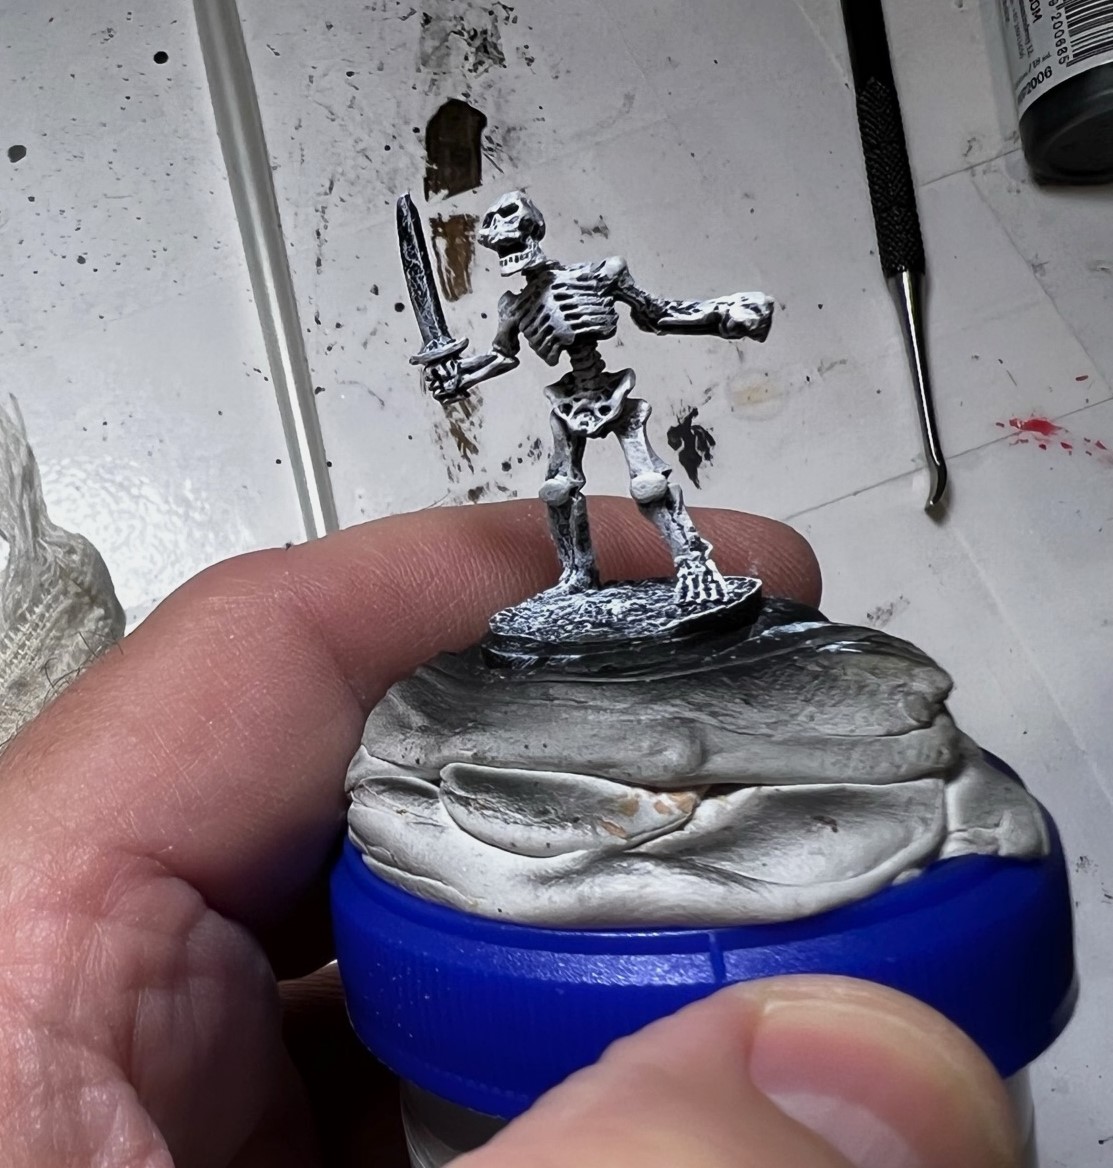
As received.Each of the two regiments ready for assembly after filing off any mold lines and flash and a giveing the figures a good washing to remove any oils.Thank you Mr. Forceps! No sticky fingers!Airbrush primed in black.Dry brushed in white.Example of an individual skeleton after being dry brushed.After the 50% Pallid Bone Speed Paint.
You can see three examples of the Speed Paint effect below. Yes, this is 1.0 and I do have 2.0 as well – but I thought the “Pallid Bone” looked better on swatches.
After varnishing the regiments with my airbrush, and letting that cure, it was basing time. Given the figures are mounted on 2″ square bases, the flocking needed to be done sequentially for best results.
First, I needed determine which types of figures were EXACTLY the same. Many of these had to be differentiated by the placement of the feet on the bases (as differences were slight). The figures did bend easily so between that and affixing different heads it was simple to create unique bases for each regiment.Then it was time to mock these up on bases before gluing them down. I also needed to find space for the dice frames on one base.As you can see, I traced out the approximate positions for each figure then glued two at a time to each base. After that had dried, I then flocked the areas outside the two glued figures and the open spaces on the bases. When that had dried, I mounted the remaining two figures per base and continued flocking. I needed to wait for each step of gluing to dry.The regiments flocked with their final glued flocking in the process of drying.
Now, I will throw you, my readers, a bone – or rather several bones – it’s time for…
Eye Candy
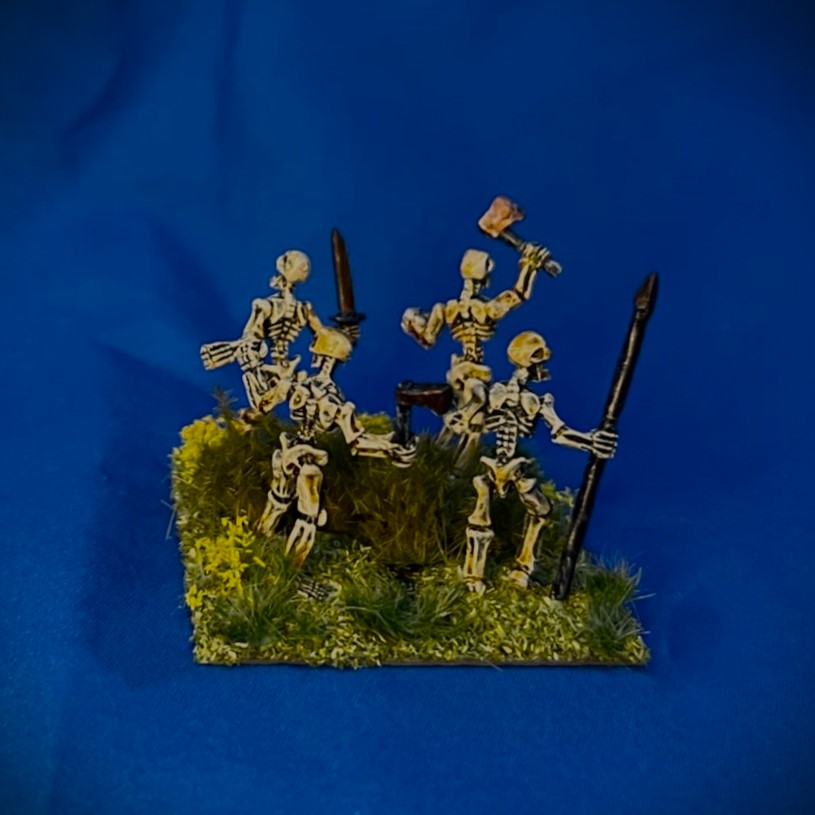
Regiment 1
Base 1A
Base 1B
Base 1C
Base 1D
Base 1E
Skeleton Regiment 1 Group Shot
Regiment 2
Base 2A
Base 2B
Base 2C
Base 2D
Base 2E
Skeleton Regiment 2 Group Shot
Both Regiments Group Shot
These were fun and very quick to do – I started on Sunday November 12th and took the photos of the finished regiments on November 16th. I’m still working on the right combination of lights for my photo booth but am getting a bit better.
Like other units I have shared, these skellies will make excellent allies to other brigades on the tabletop.
My next post will be a surprise to us all as I have actual gaming to do now!
And yes, I still have more Ozz to come…
Miscellaneous details and references for those interested in that sort of thing:
For all of my previous posts on Wars of Ozz games, figures, units, and other related projects – please see this page.
PAINTS, INKS, GLAZES, SHADES, WASHES, PIGMENTS, FLOCKING, GLUES AND MORE THAT I USED ON THE FIGURES FOR THESE TWO SKELETON REGIMENTS:
Gorilla Glue
3/4″ steel washers
Poster tack
Vallejo Black Surface Primer
Vallejo “Flow Improver”
Vallejo “Airbrush Thinner”
Vallejo Model Color “White”
Army Painter “Speed Paint Medium 1.0”
Army Painter “Speed Paint – Pallid Bone 1.0”
Vallejo Model Color “Dark Sea Grey”
Army Painter “Speed Paint – Runic Grey 1.0”
Army Painter “Speed Paint – Gravelord Grey 1.0”
Vallejo Model Air “Bright Brass”
Vallejo Model Air “Black Metallic”
Vallejo Model Air “Steel”
Vallejo Mecha Color “Dark Steel”
Citadel “Nuln Oil” (wash)
Battlefront “Tommy Green”
Vallejo “Thinner Medium”
Vallejo Mecha Weathering “Rust Texture”
Vallejo Mecha Varnish “Matte Varnish”
Vallejo Mecha Weathering “Dark Rust Wash”
2″ square steel bases from Wargames Accessories (#21)
Again, as you may want to check out the Wars of Ozz figures’ range – there are two places to get them (and I make no money from this btw). The game rules and the figures are available from the following two places:
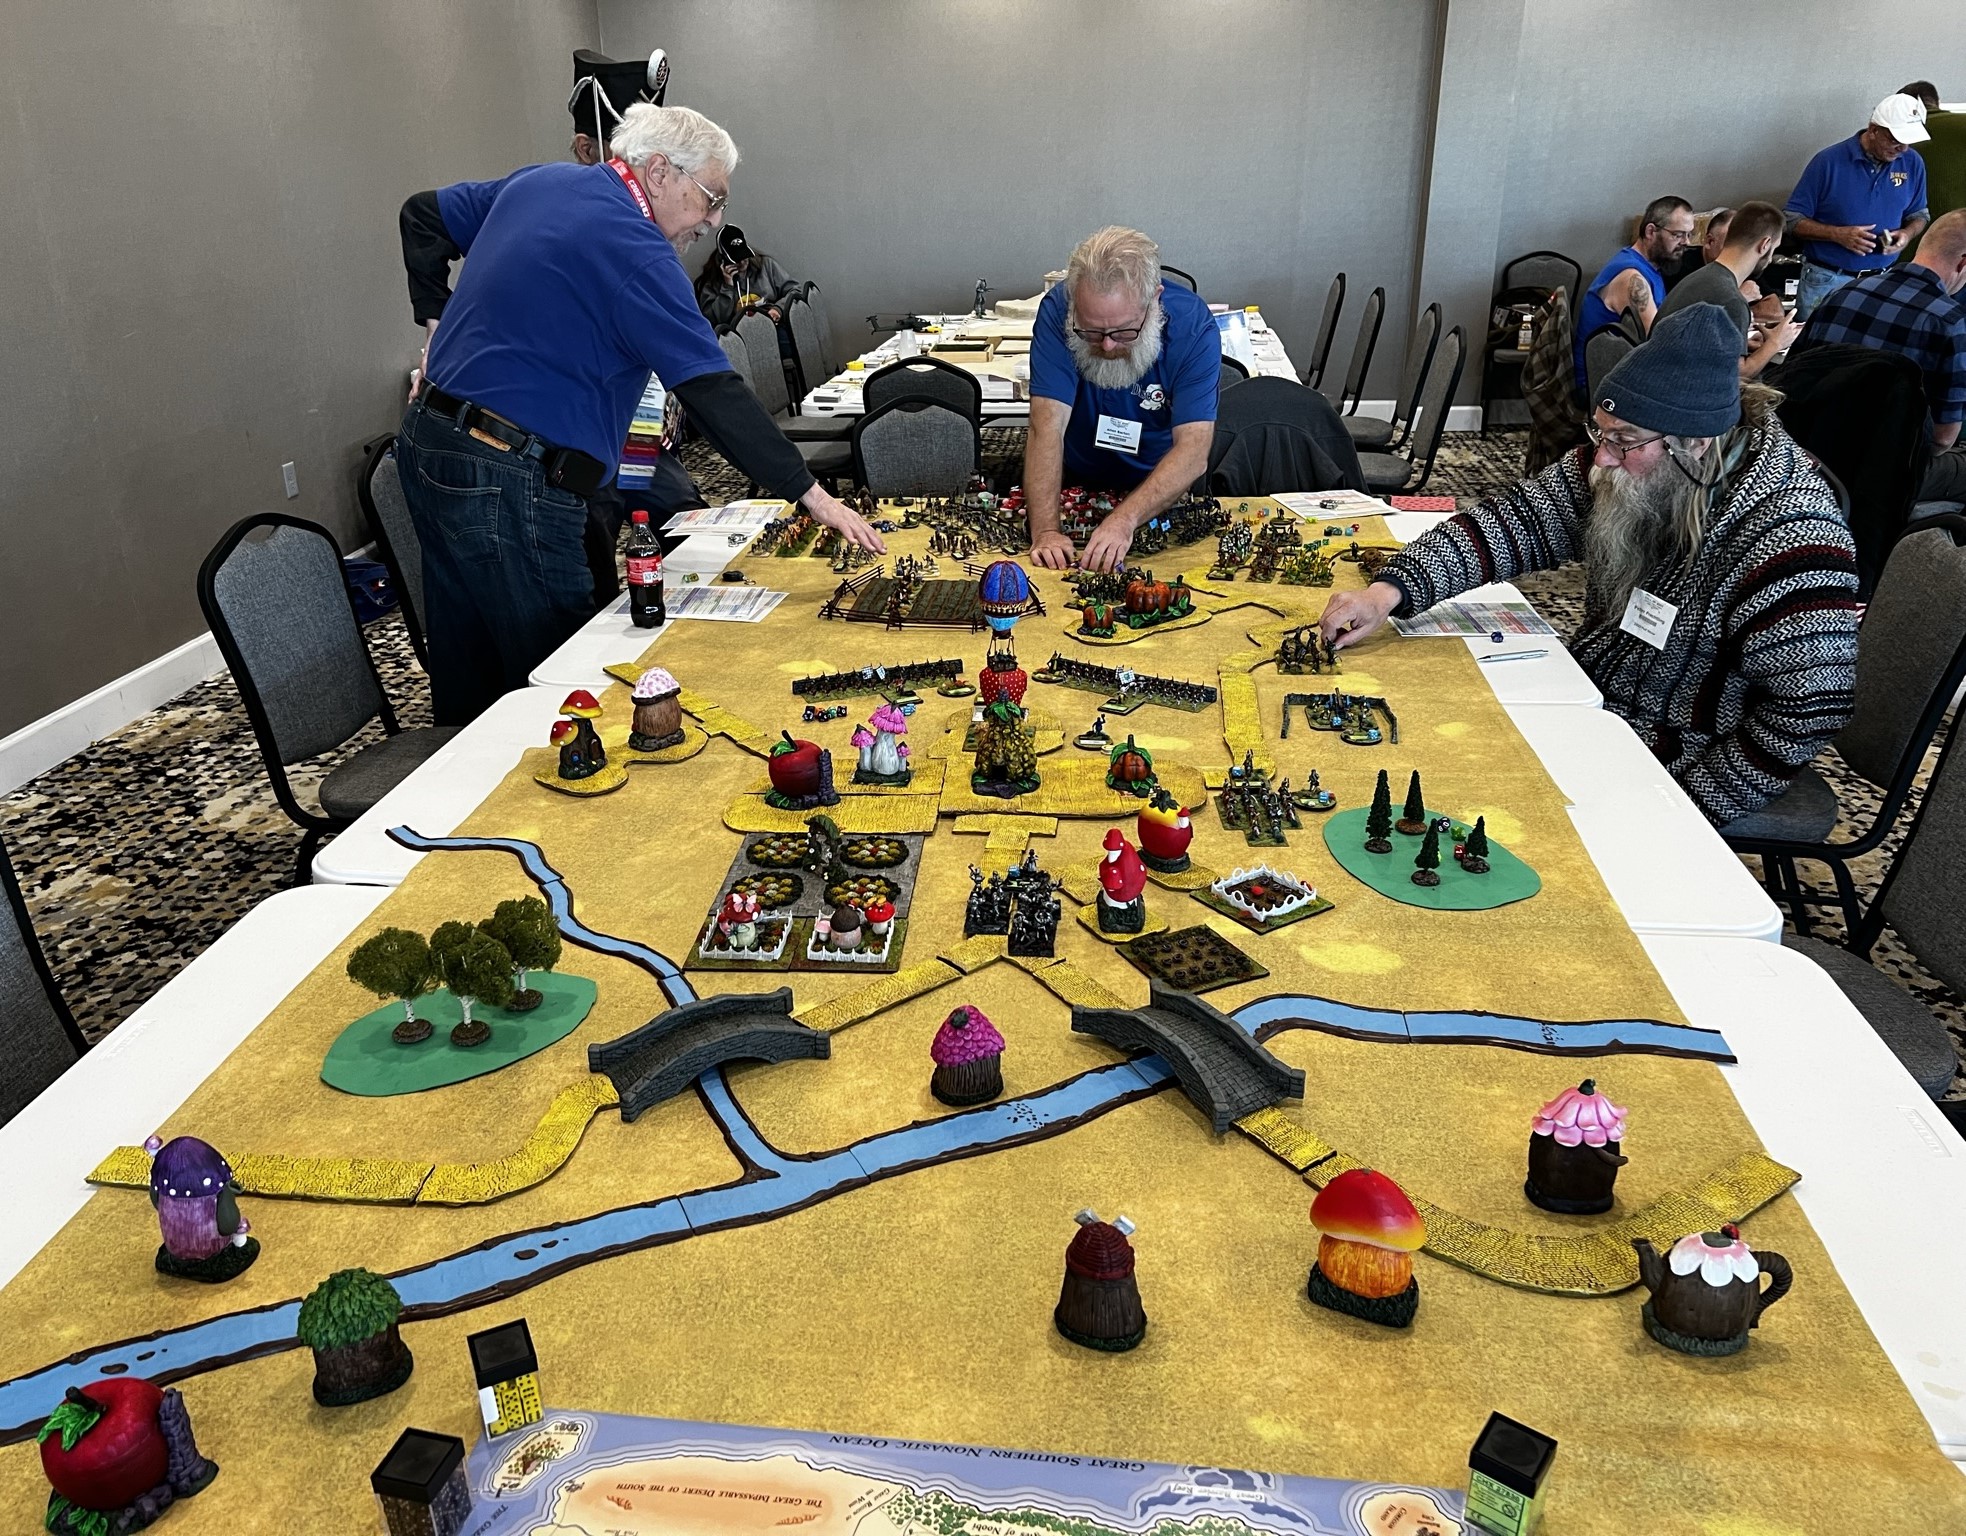
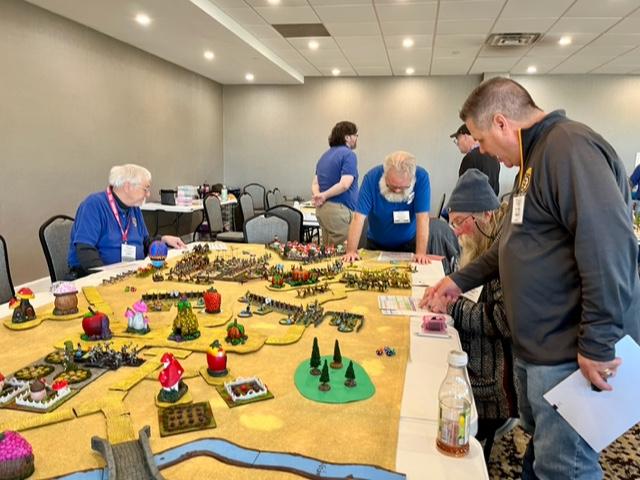
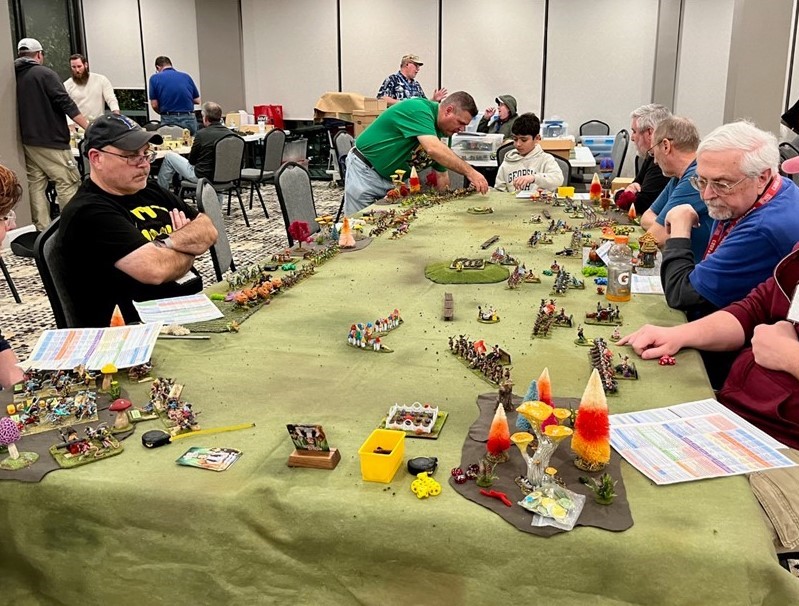
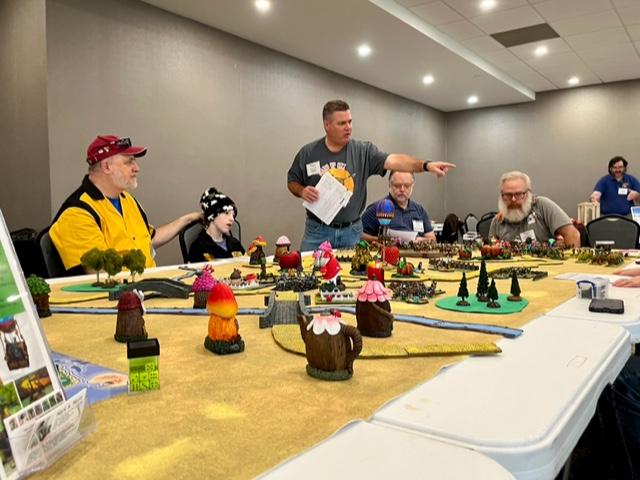
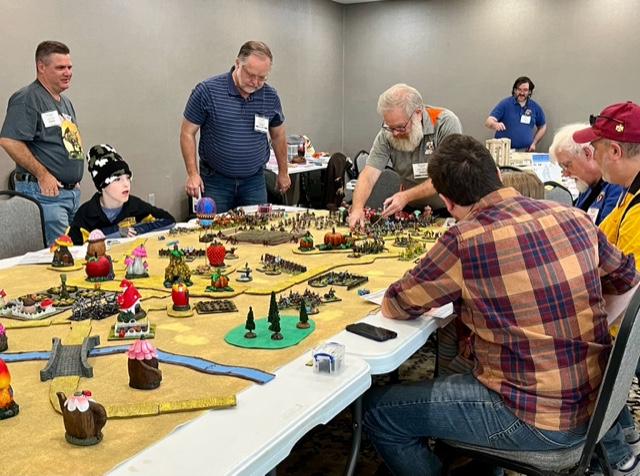
The 2023 HMGS Fall In!® was held in Lancaster, PA from November 2-5. I attended and was fortunate to run 2 Wars of Ozz games by myself, plus be a co-GM on 1 with Chris Palmer, play in one run by Dave Wood, and assist Dave in his Wars of Orcs and Dwarves game. All of these were run in the H.A.W.K.’s (Maryland’s Harford Area Weekly Kriegspielers) room. As always, I am appreciative of their adoption of a wandering New Englander like myself!
So, how am I to post all of the photos and links related to my experiences at the convention – given that the convention was spread out all over the convention center? This is especially challenging as I was pretty much lucky to find any time to hit the vendor’s hall, let alone be an effective photographer. I have decided to break out these photo sections and video links by game and by category. I hope it makes more sense this way. Just enjoy the eye candy – and I thank all who played in my games, collaborated with me, or helped me in any way. Special thanks go out to Chris Palmer, Dave Wood, Russ Dunaway, Buck Surdu, and all of the H.A.W.K.’s. So, let’s start!
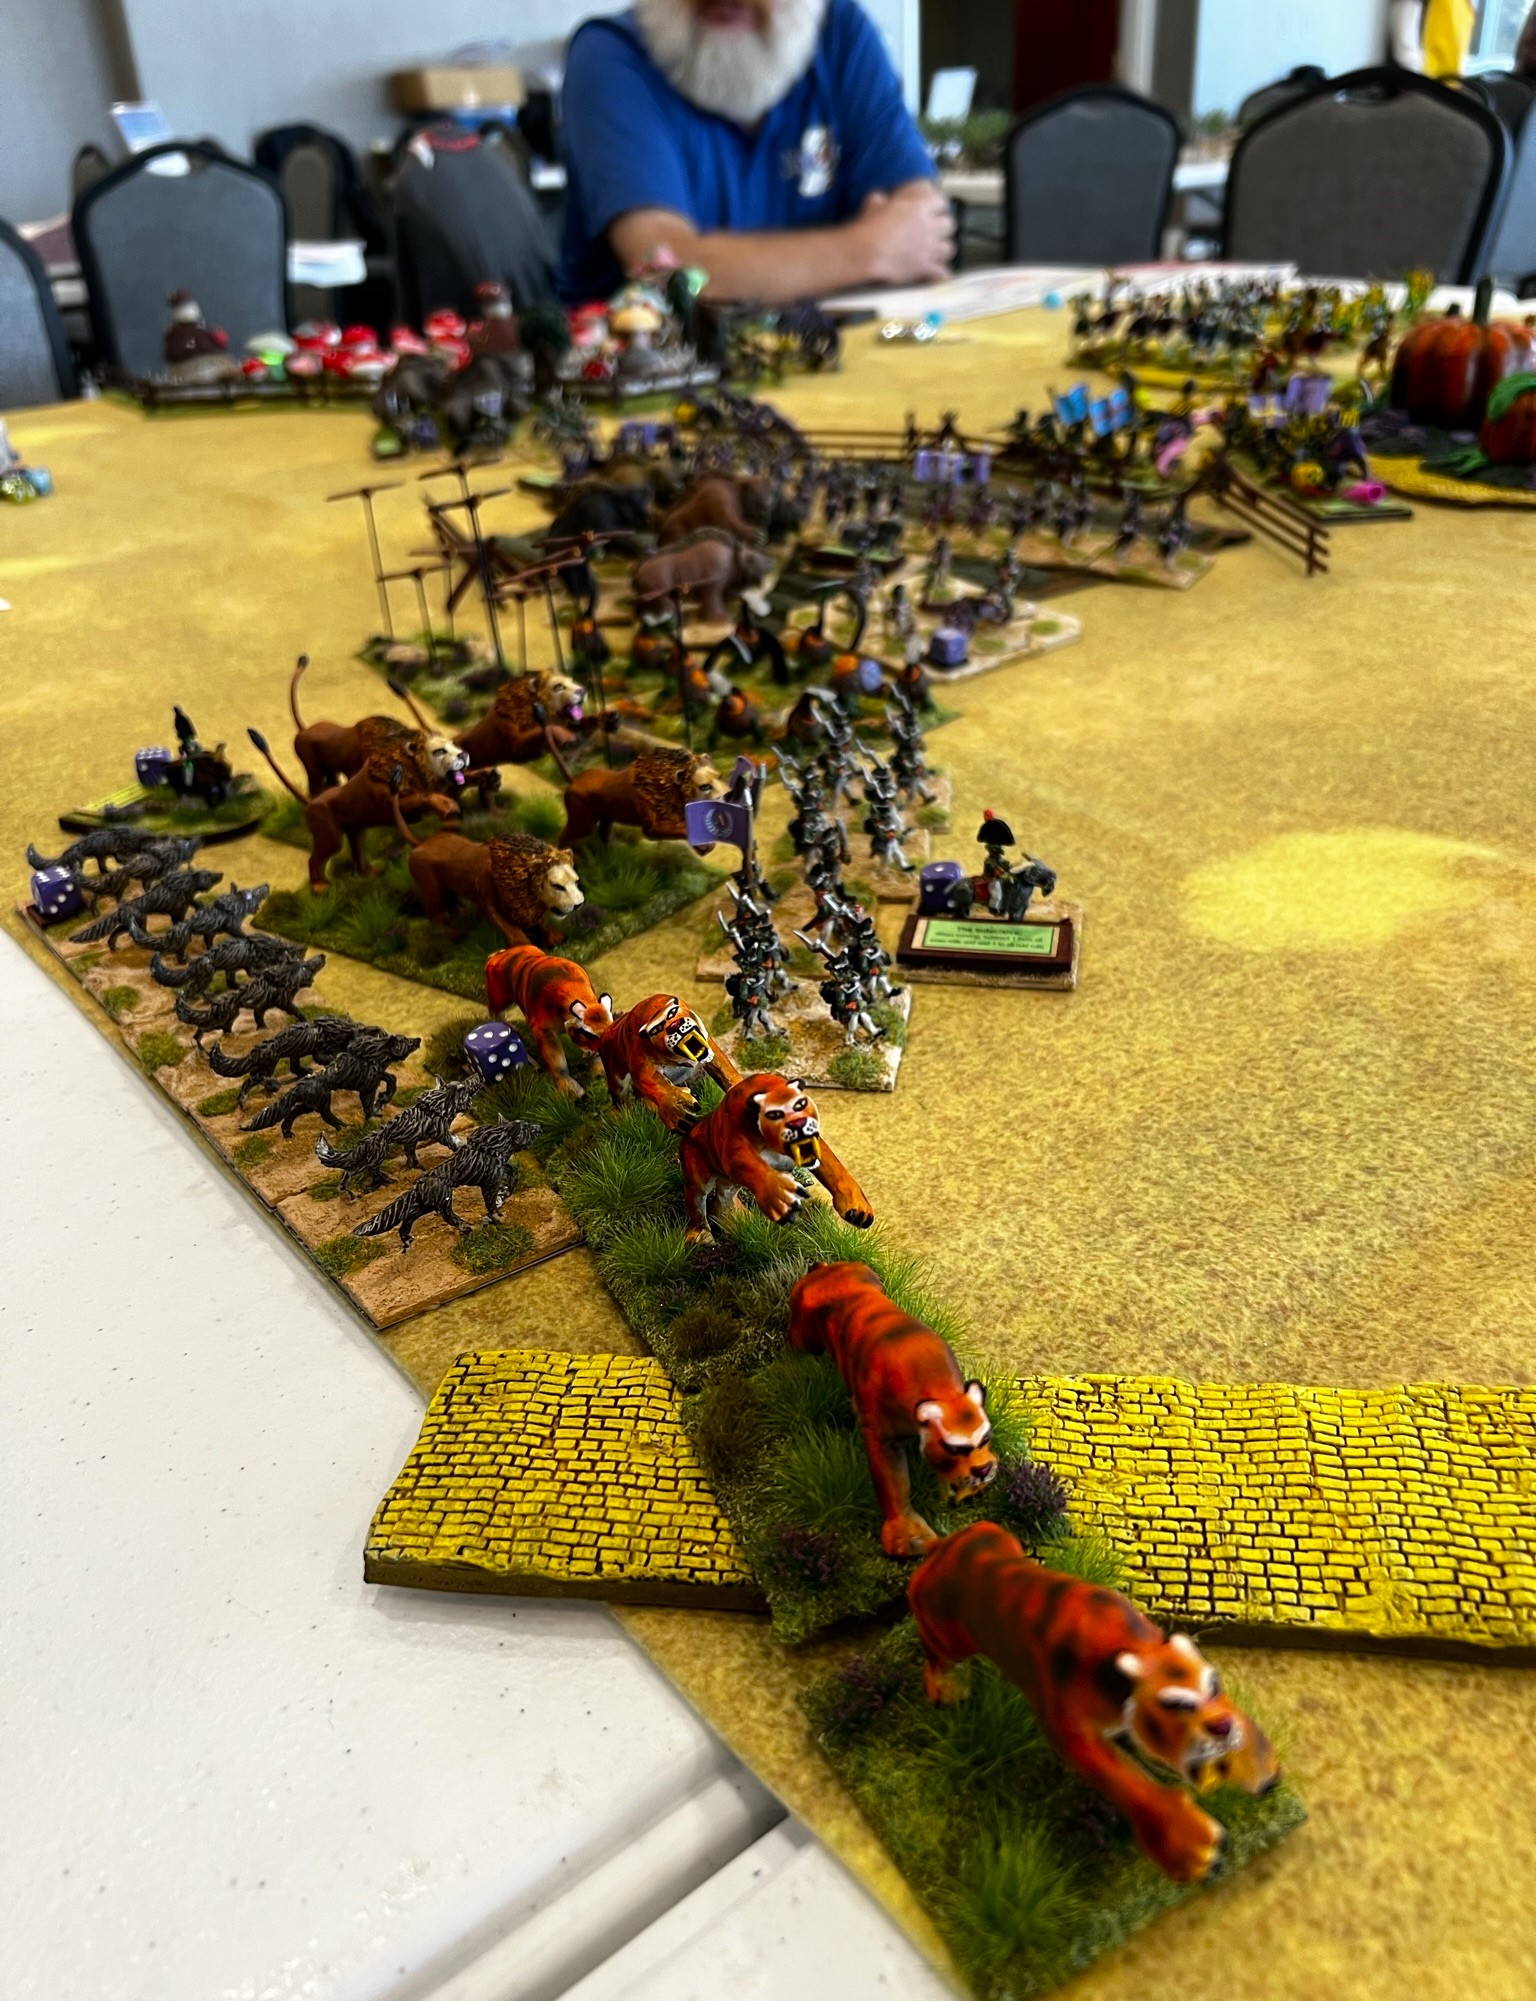
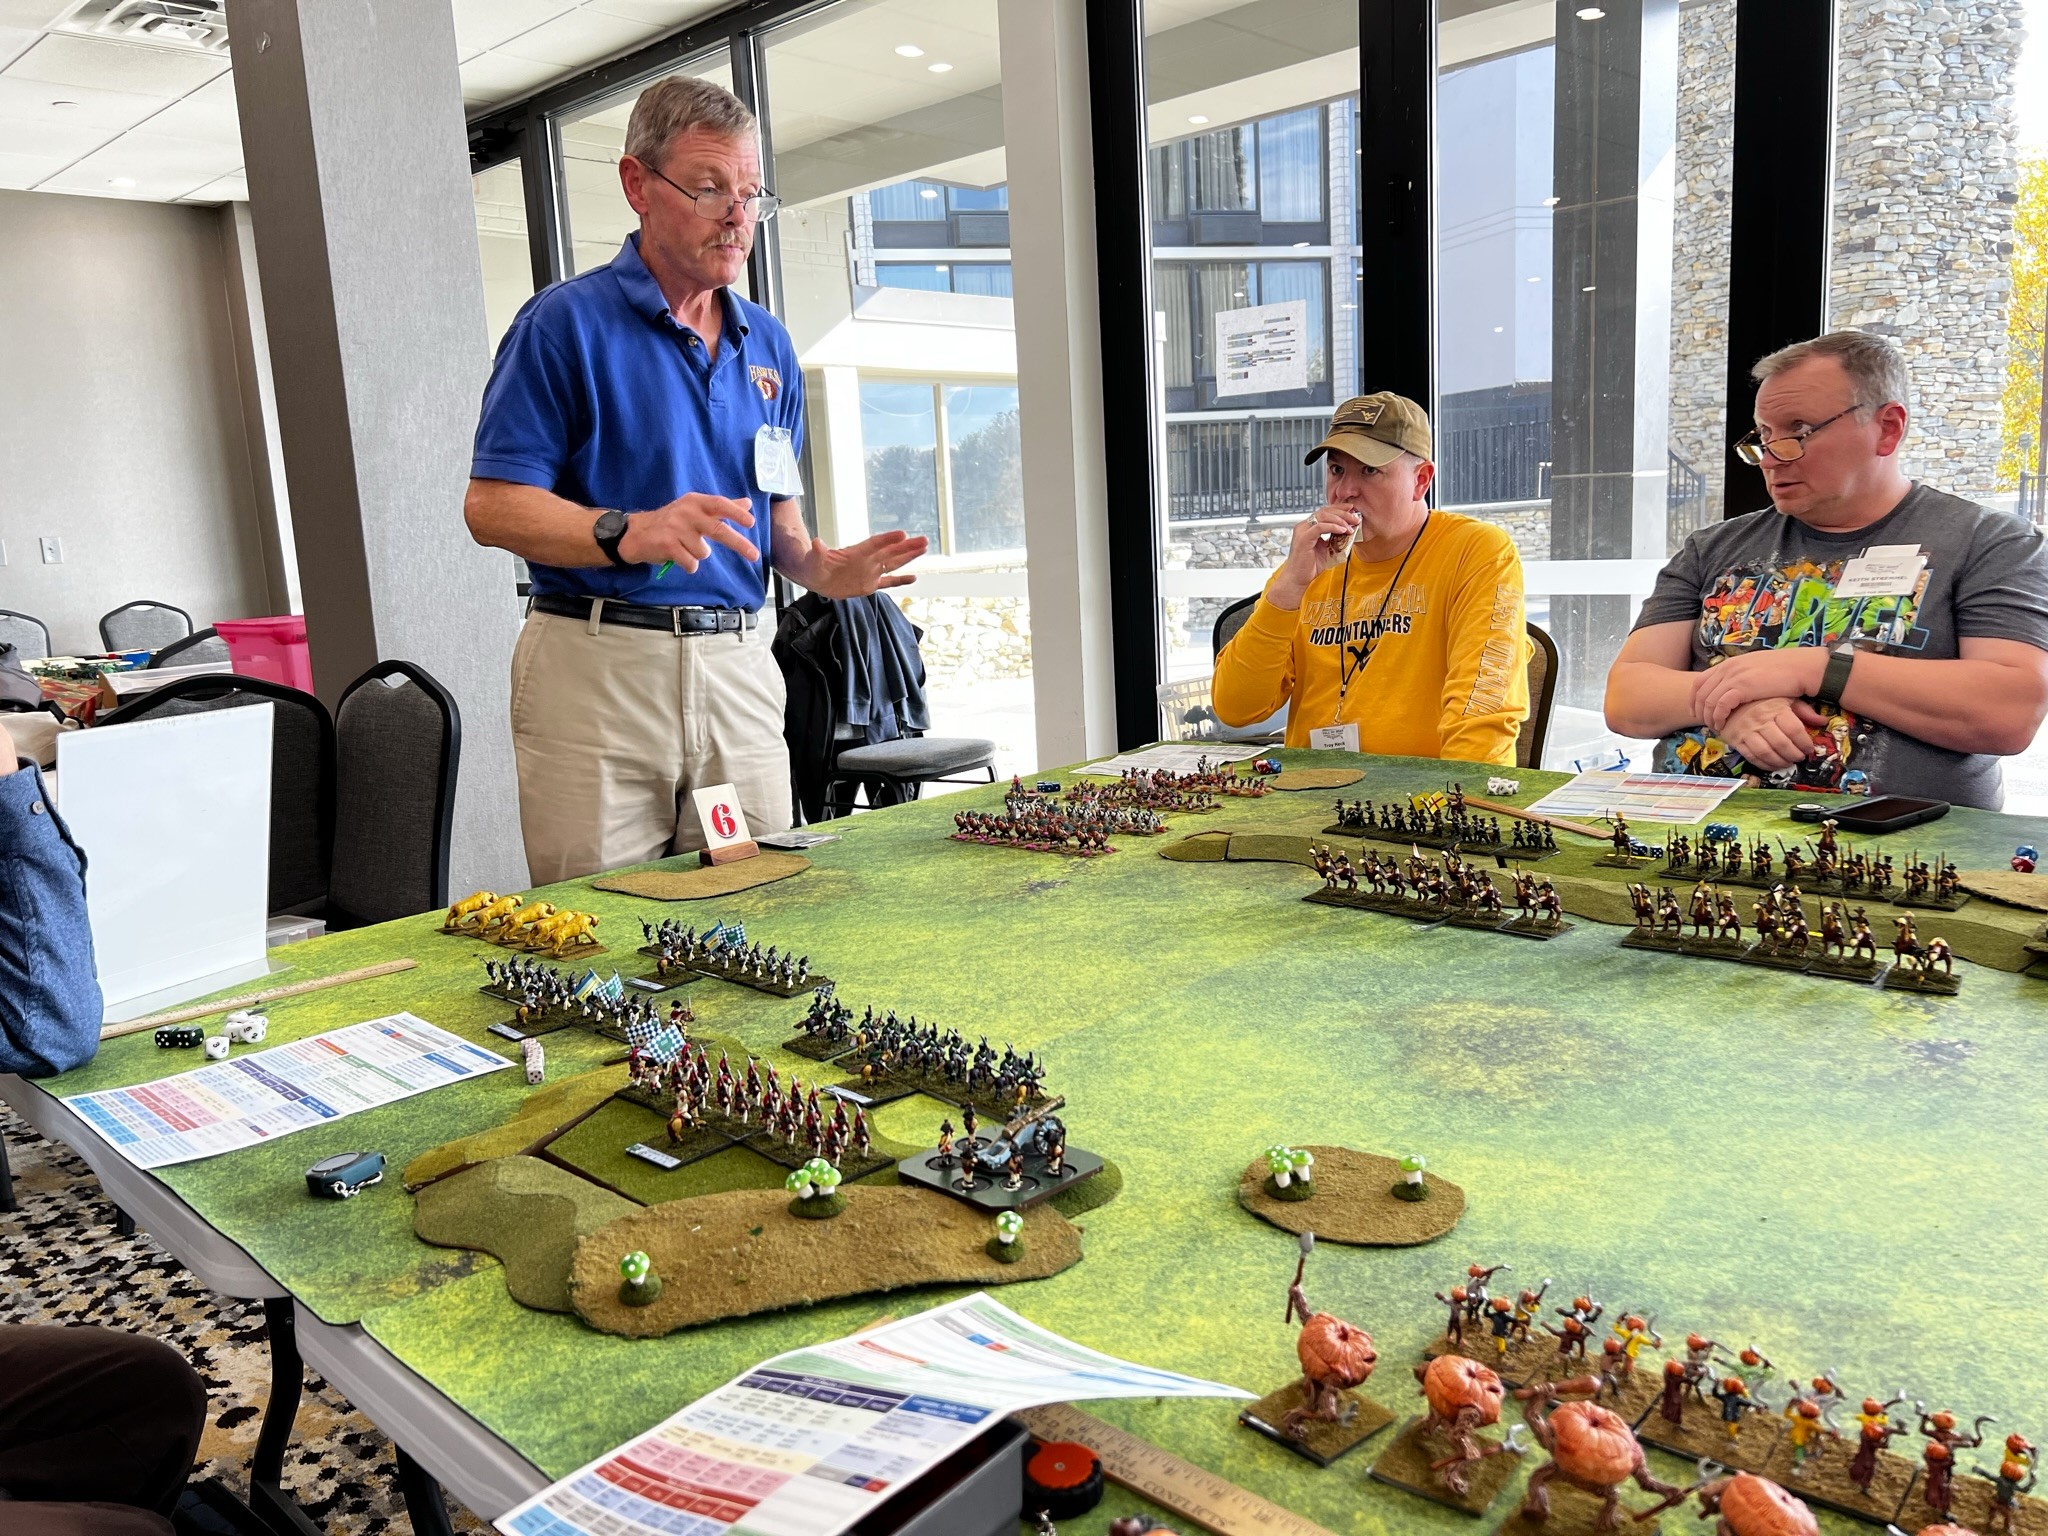
I arrived on Thursday afternoon after a 6-hour drive. I set up my game on Thursday night. On Friday morning, I ran my Wars of Ozz “Battle for Toto” scenario – the first iteration of two. Sign up was light, so I needed to play the Munchkin defenders as well as GM.
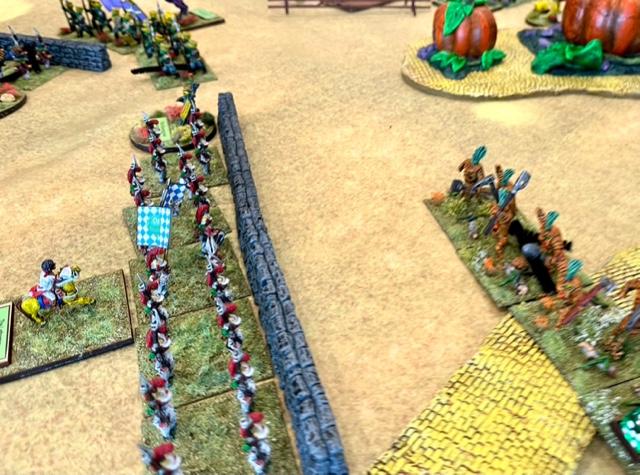
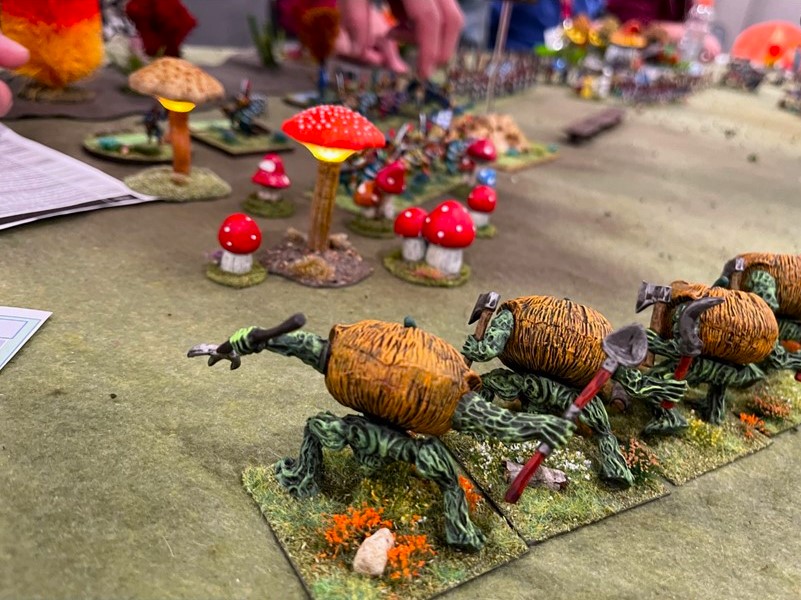
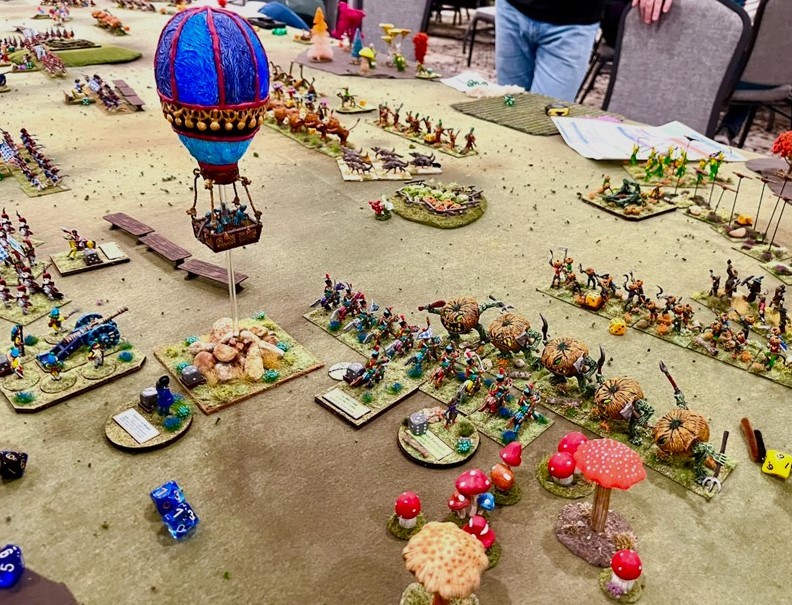
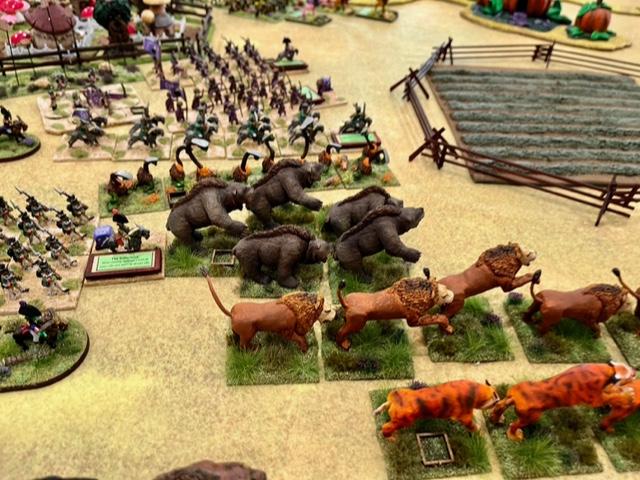
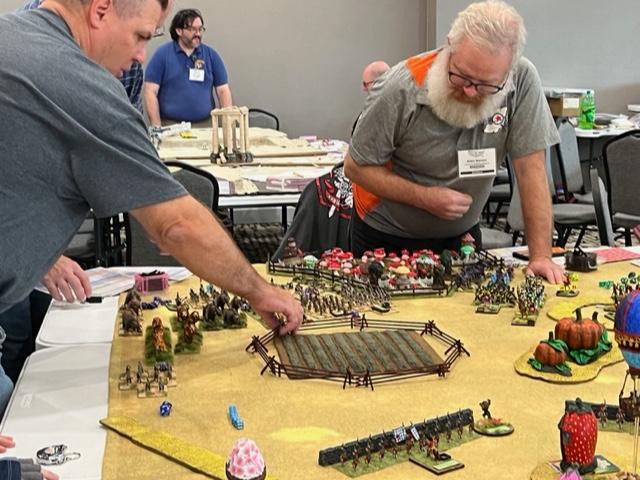
Bruce (Gillikin commander), Allen (Winkie commander), and Peter (Harvest commander) at the start. I acted as the Munchkin commander.Winkies and Harvest move up towards the Munchkin defenses.On the defender’s left, the Gillikin’s ally, the Great Menacing Hammerheads, breach a fenceline for a following light battery. In the rules, the Hammerheads don’t have that ability – but as a GM and former combat engineer, I had to give them to ability to destroy a fence. I mean, their heads are…hammers…The two “bad guys” advance – and at this point are collaborating against the Munchkins.Allen ponders his next move for his Winkies – can he trust the Gillikins not to stab him in the flank? In the event, he became the stabber!Bruce, not trusting the Winkies – turns his Gillikin longbowmen to face the Winkies…he said it was to make deployment room, but the Winkies felt threatened…No fighting between the bad guys yet – the advances continue. I GM the game. Photo from Chris PalmerAnother shot from Chris Palmer as I GM.Allen moves against the Winkies Lesser Apes with his Gillikin Goat Rider Cavalry. Photo by Chris Palmer.Colonel Tik-Tok faces an assaulting group of Carrot Creatures. Photo by Chris Palmer.The Carrot Creatures are held at bay, while the Munchkin Light Cavalry is disordered and routs from the field of battle. Photo by Chris Palmer.The two attackers turn on each other as the trust is over – or the need for victory points drove them to it! Gillikins and Winkies turn on each other along their flanks – and the Munchkins feel a sense of relief watching their enemies fight each other and not them.Not involved in the Winkie scrum – the Gillikin Beast Brigade (Dire Wolves, Dire Lions, Dire Tigers, and Dire Bears) move up to assault the Munckin Guard on their left so as to try to get into the town and search for Toto. Gillikin artillery and musketry begin to take a toll on the Munchkin Guard, who nevertheless hold as the Beast Brigade tries to get to the town.The scene at the end of the game. Toto remained safely in the town controlled by the Munchkins.The scorecard I used for the Friday morning game – Munchkins win!
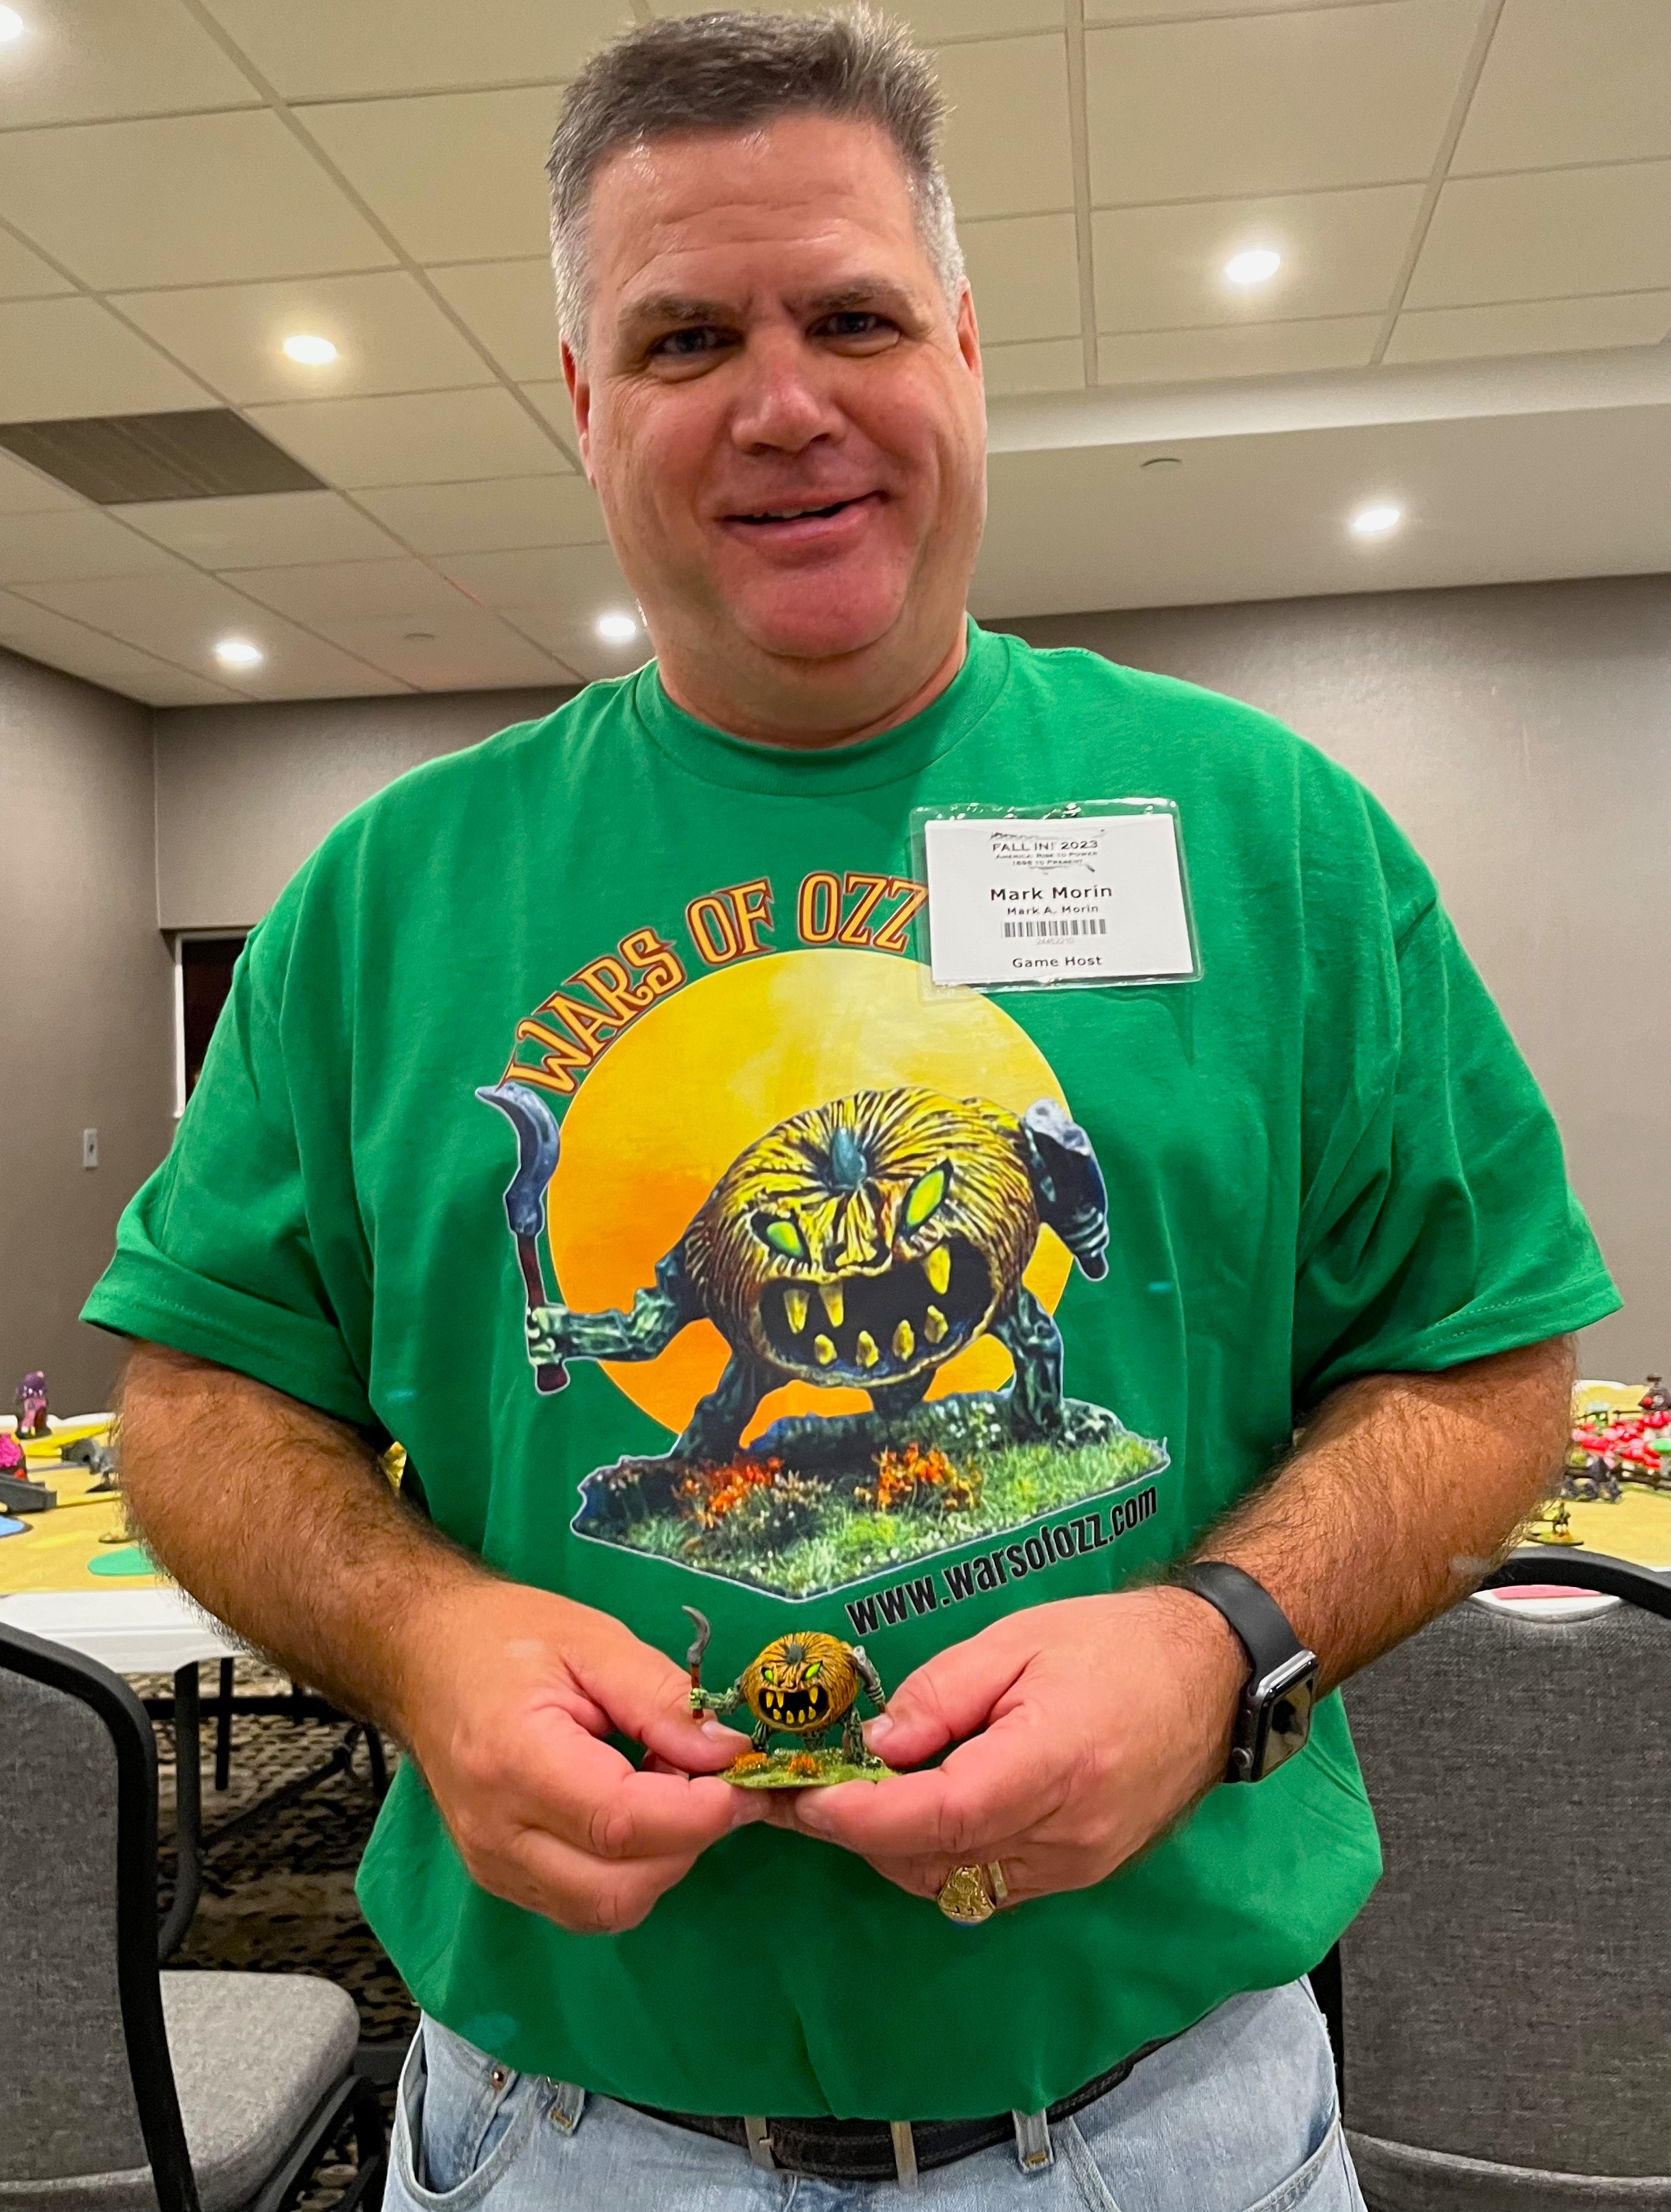
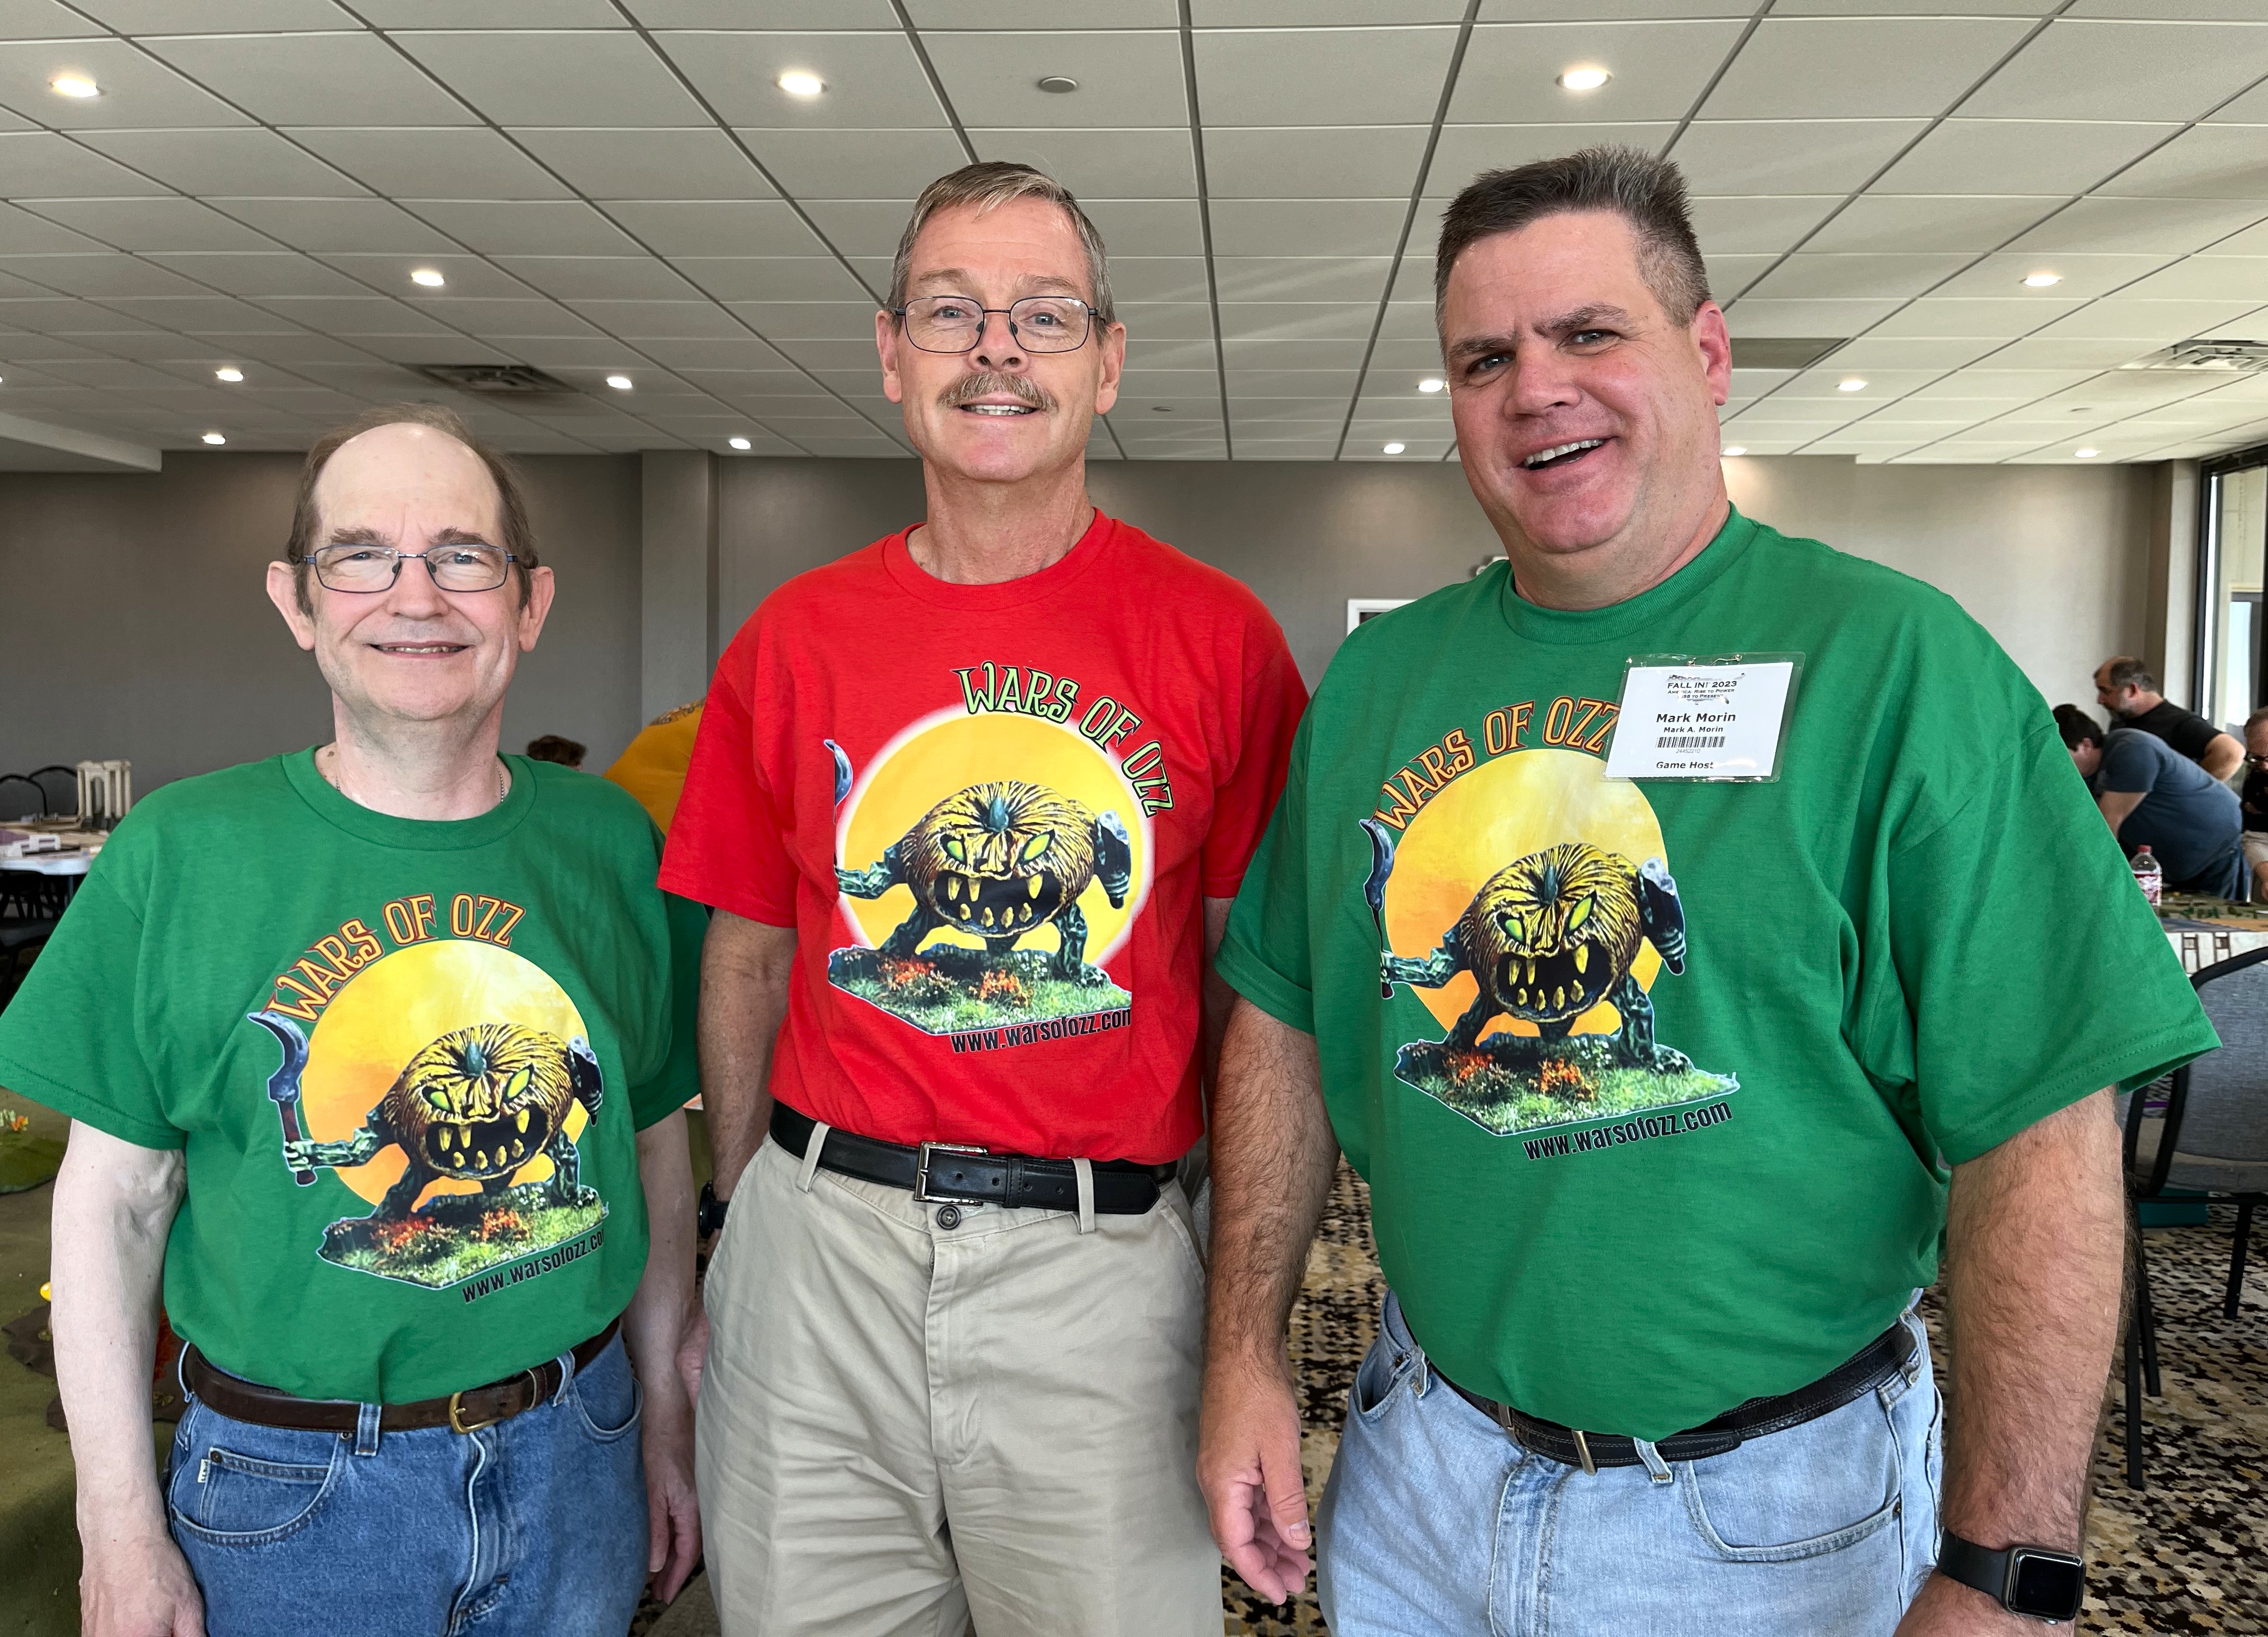
Then, on Friday afternoon, I got a chance to get to the vendor hall – and I was excited because Russ Dunaway had previously asked me for some photos of my Great Pumpkinhead models. I took a few in my photo booth – and he used them for T-shirts! When you have a t-shirt with one of your own favorite painted minis, well, that’s a no-brainer – got to get some! Russ did gift me with some as well – thanks Russ! They are available for purchase on the Wars of Ozz miniatures web site as well.
My Great Pumpkinhead life-size and his bigger image on my T-shirt!A fashion trend! Chris Palmer, Dave Wood, and myself, sporting the latest haute Ozz couture…
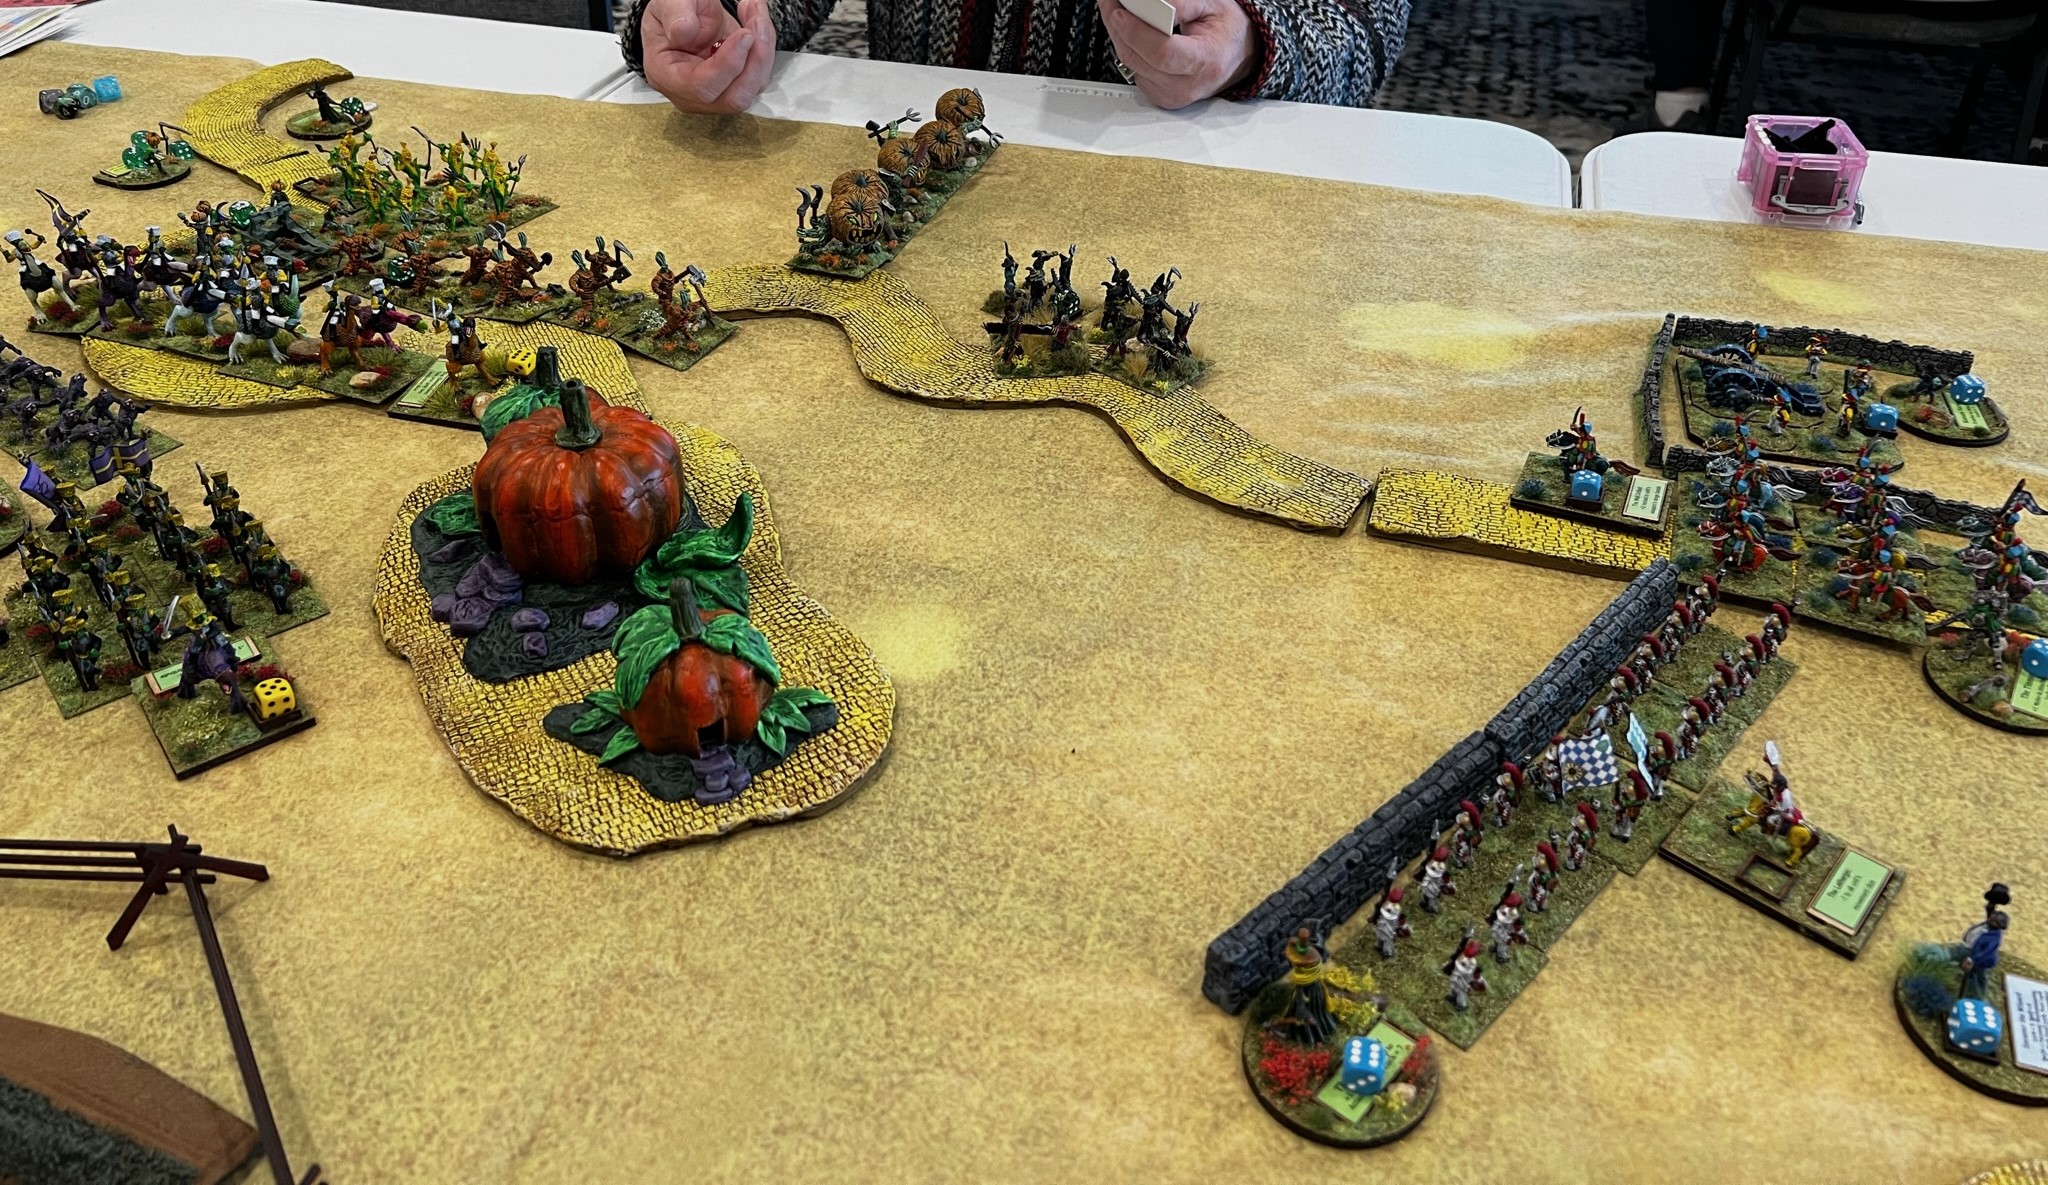
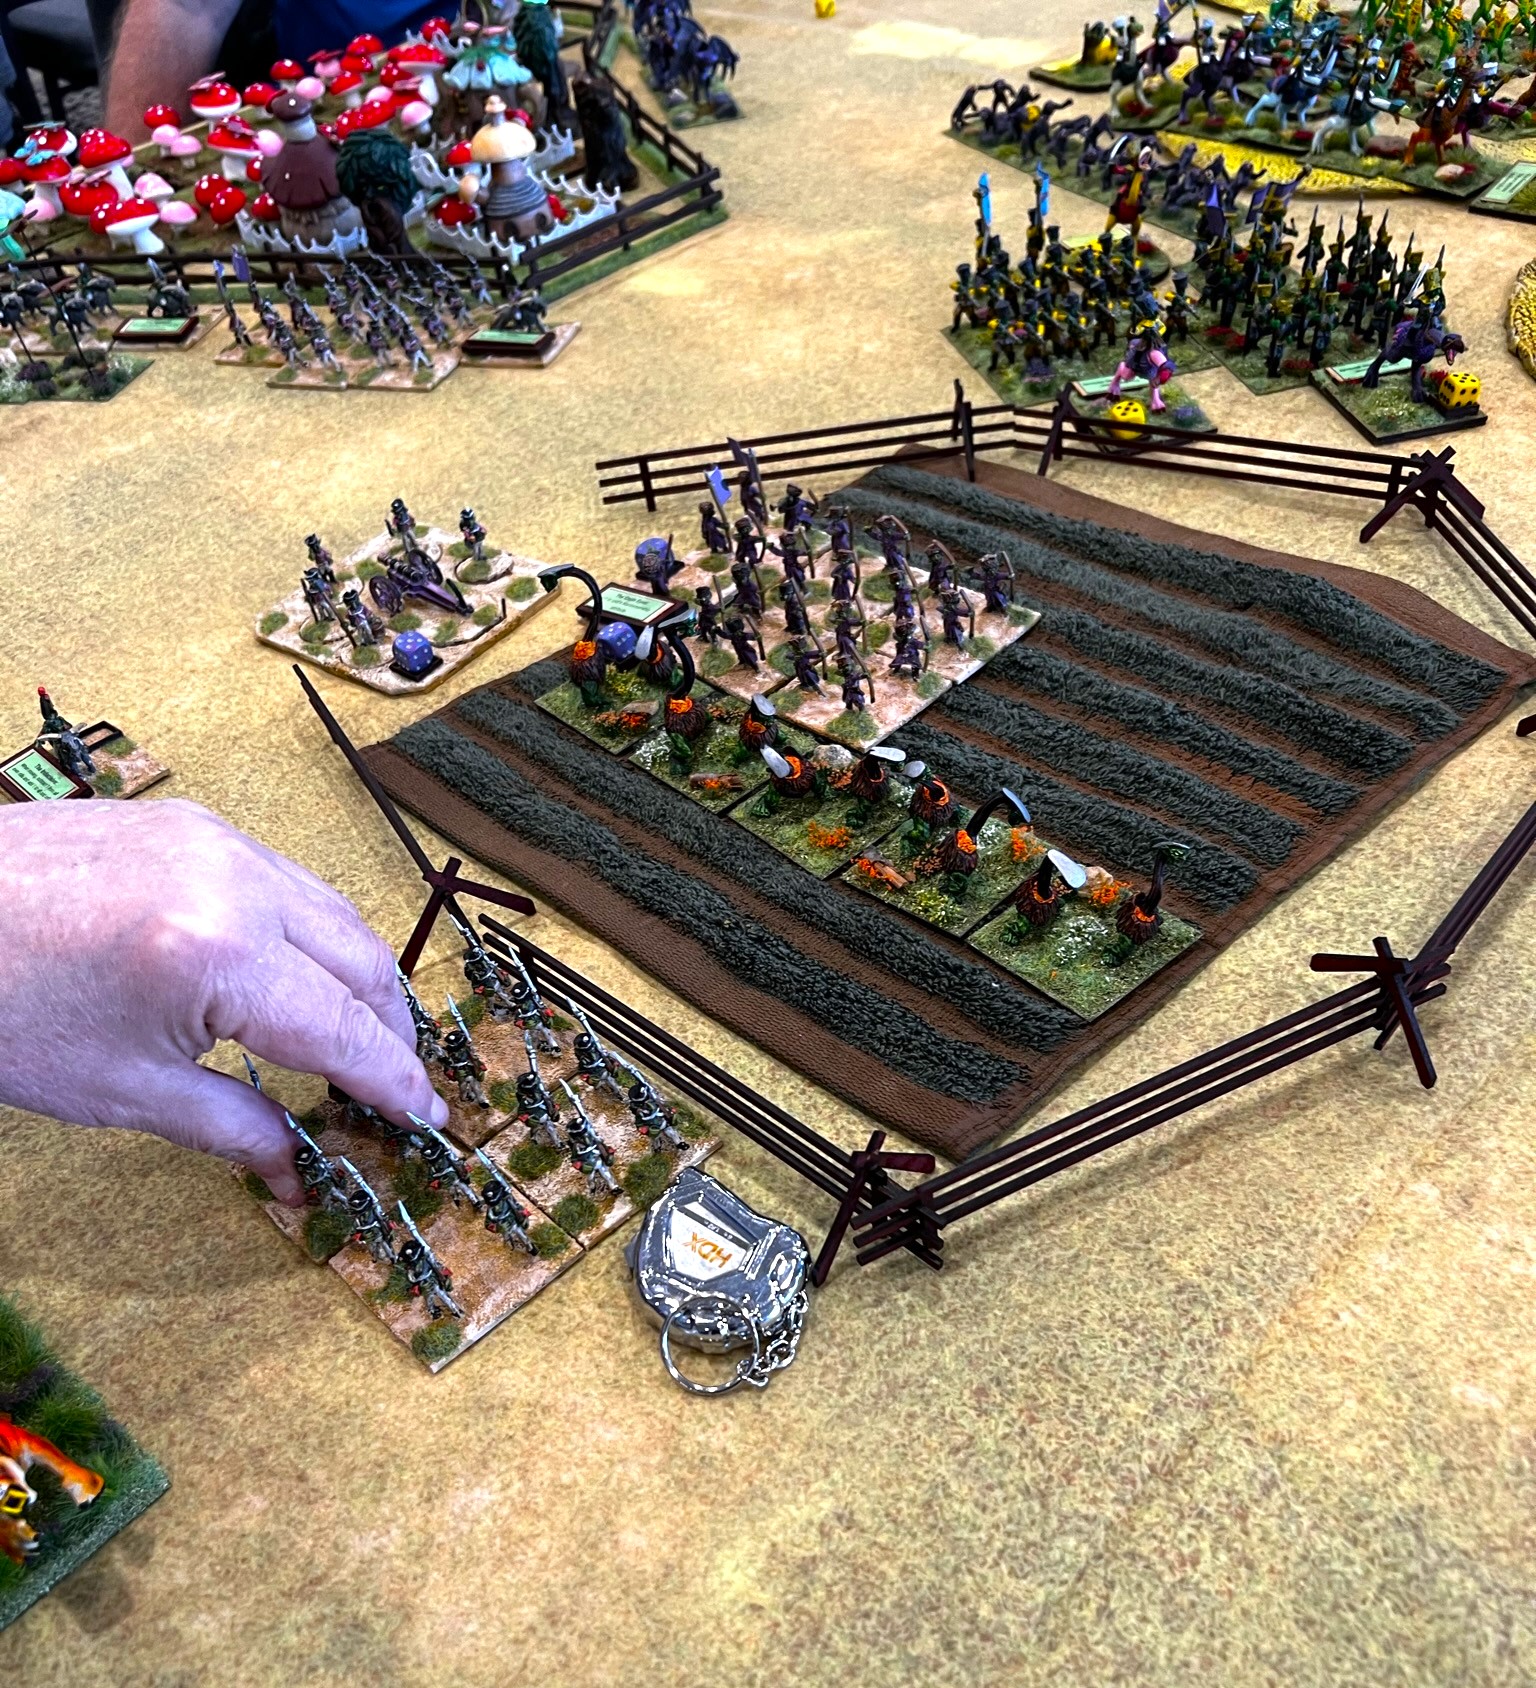
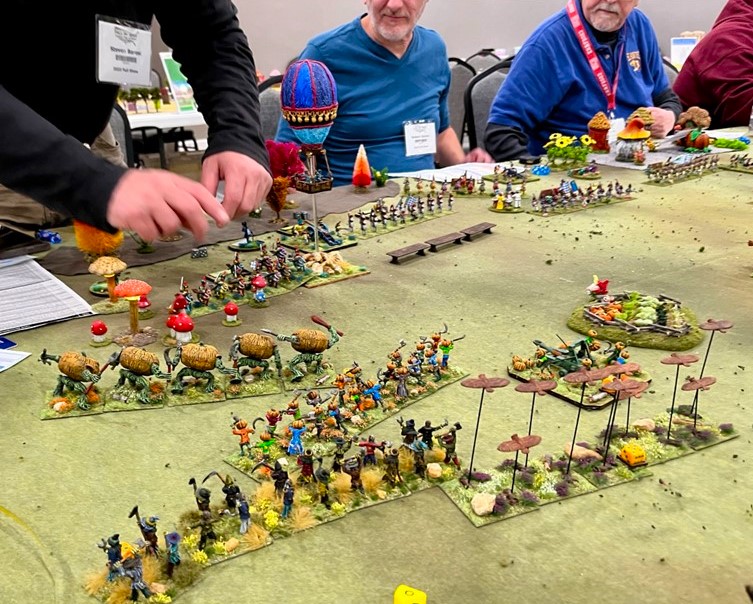
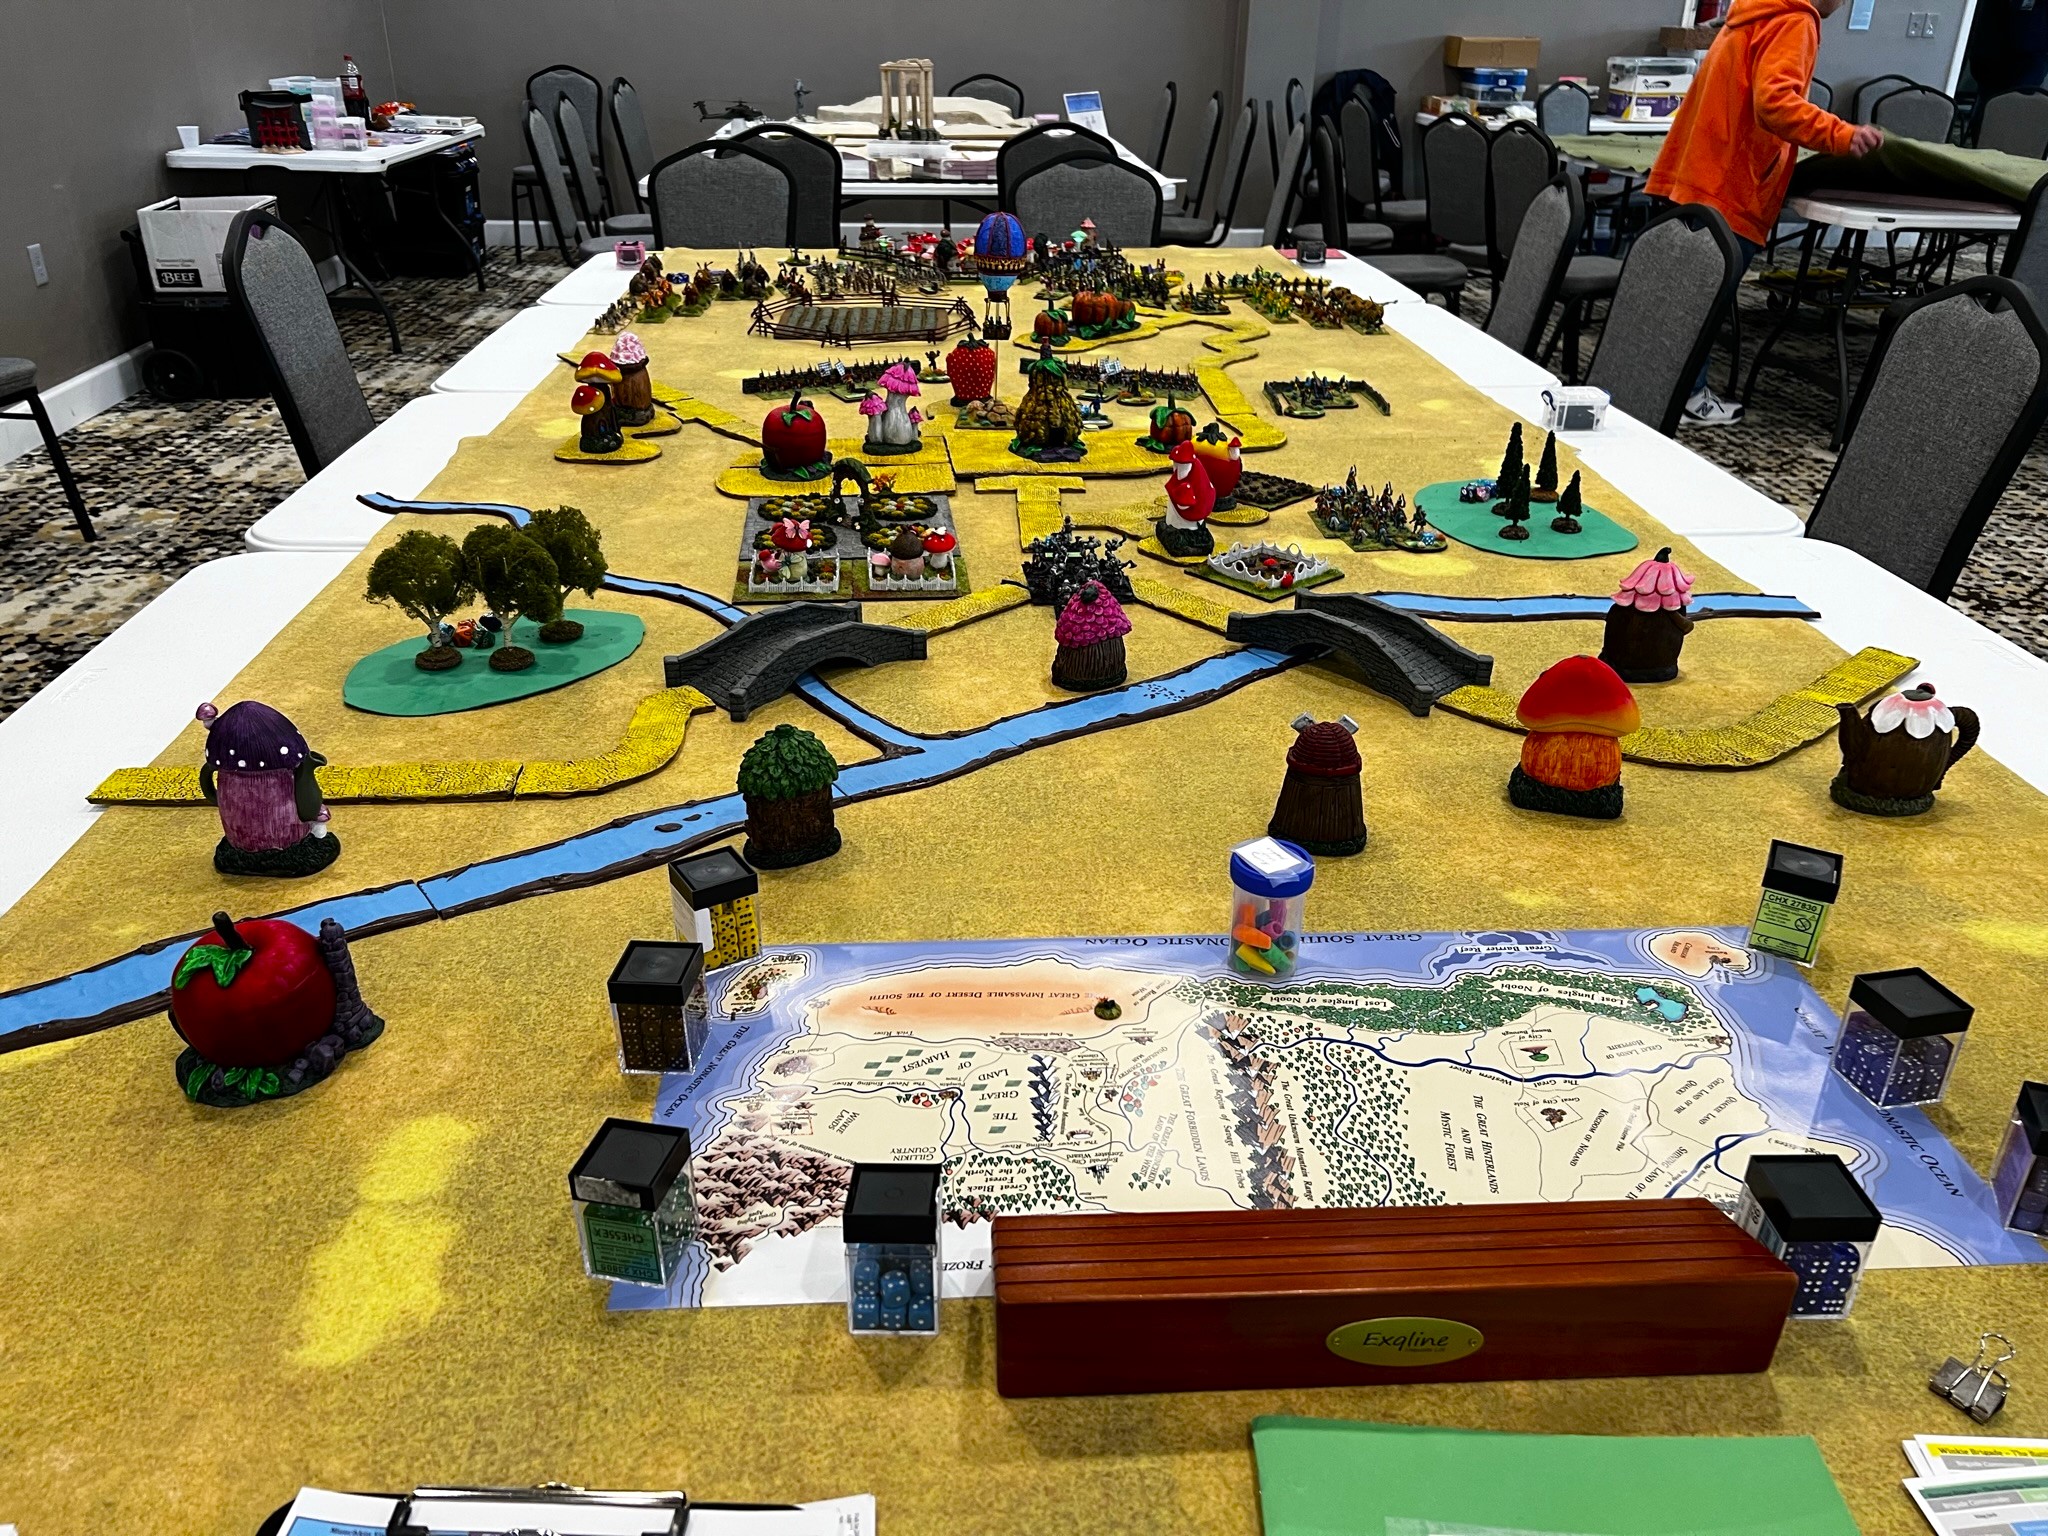
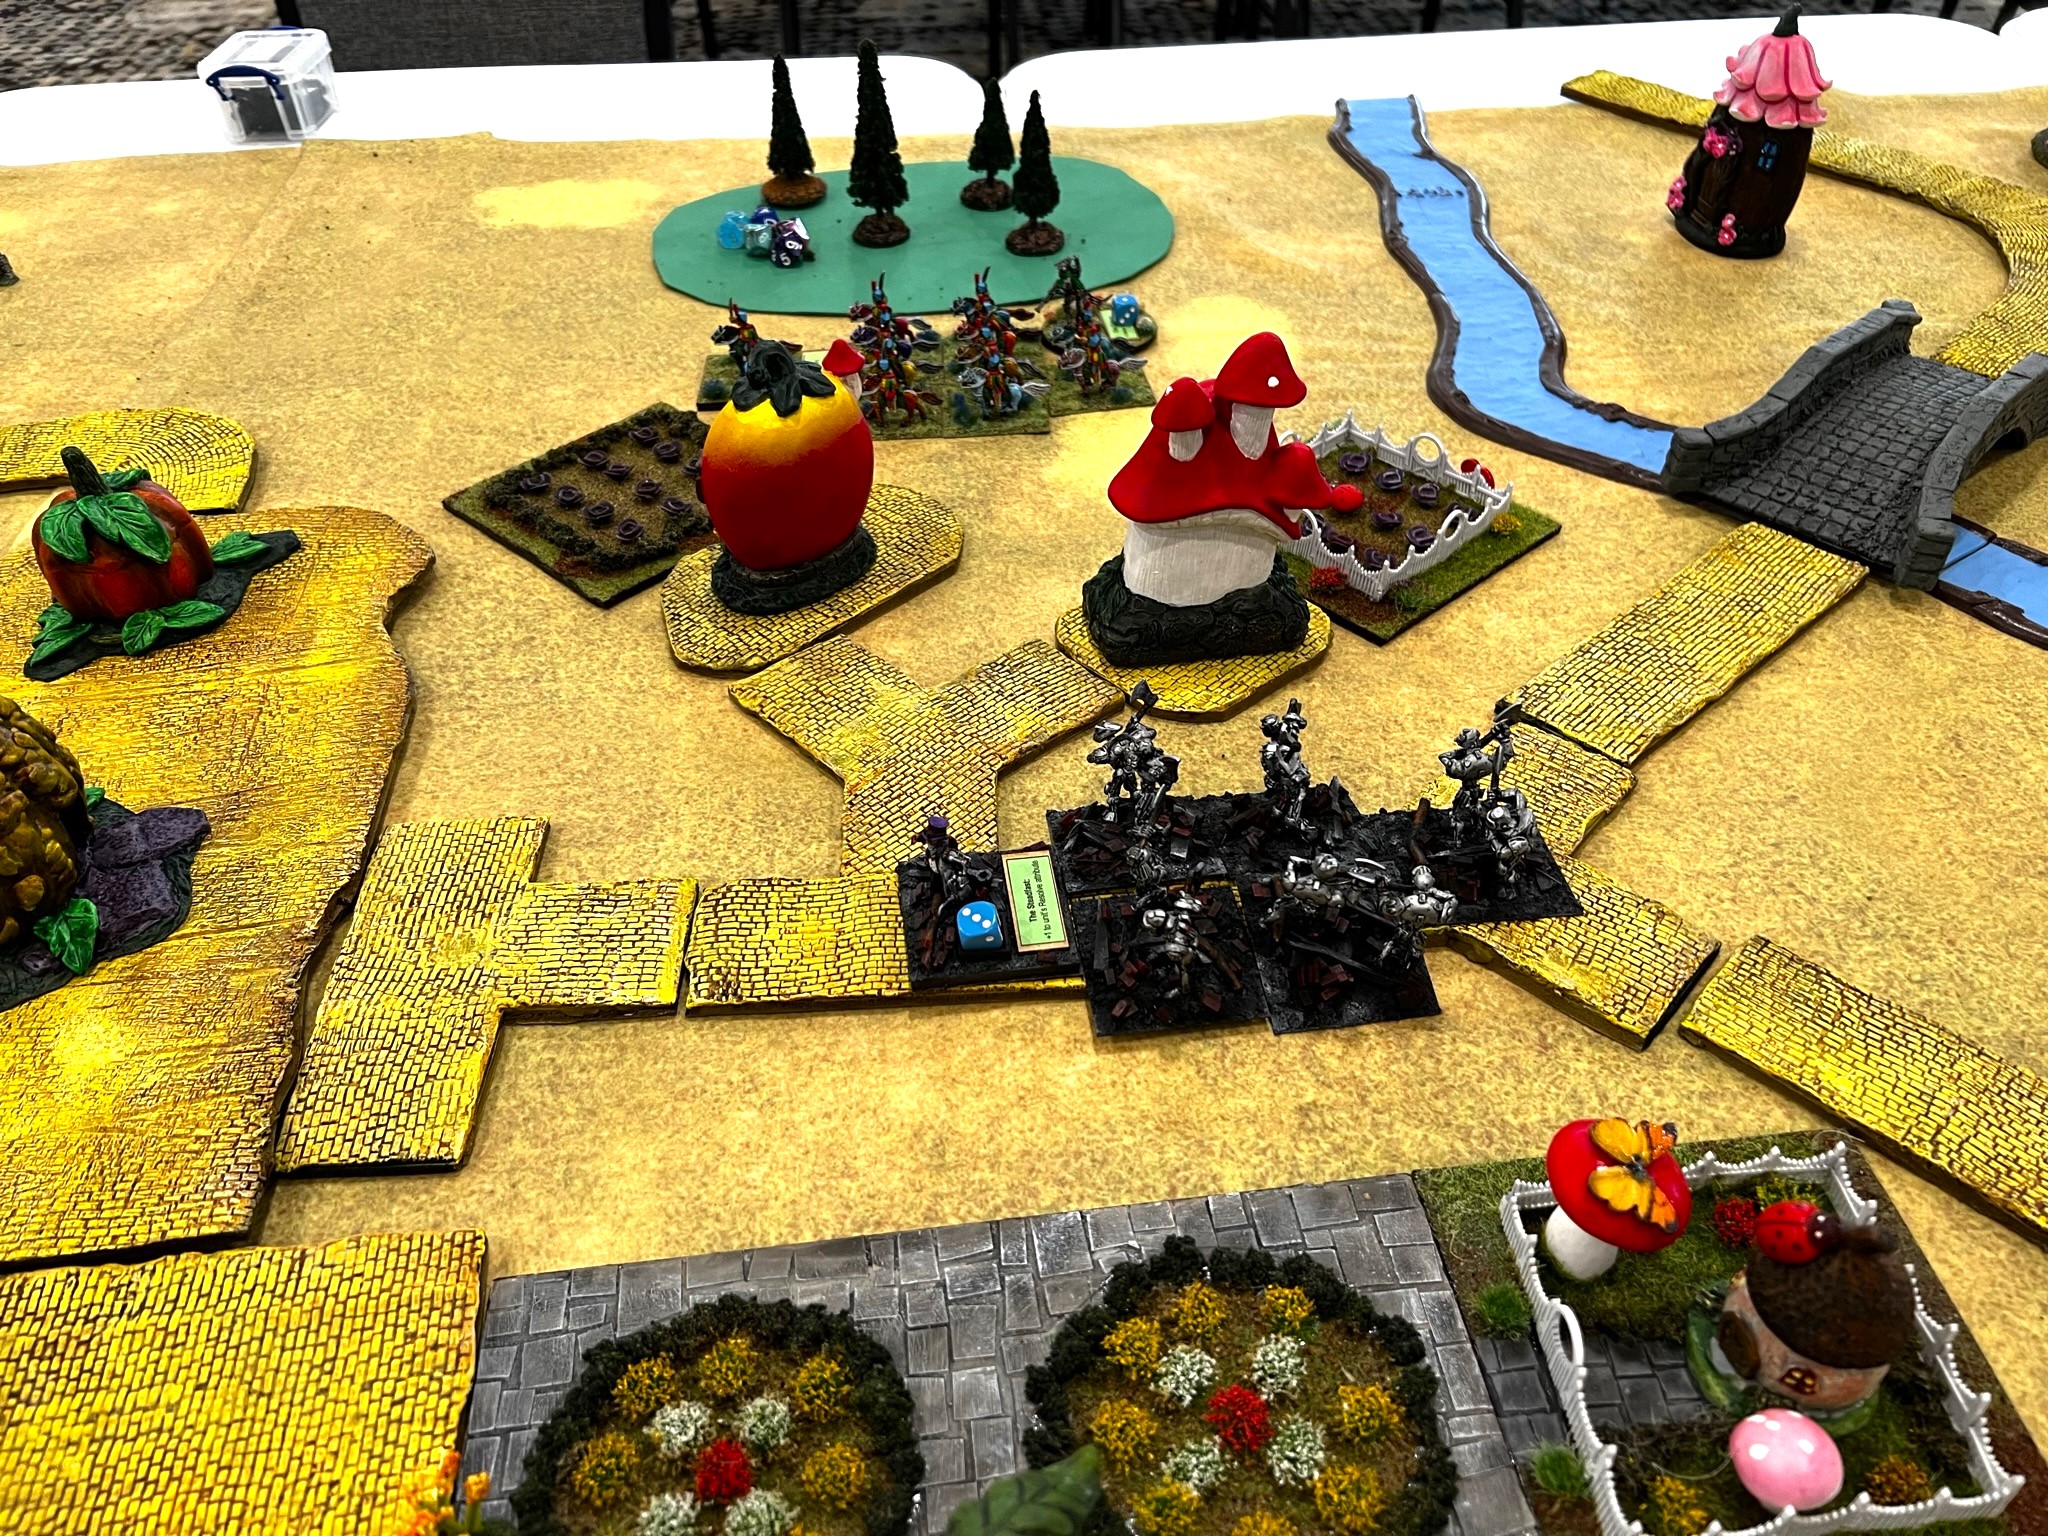
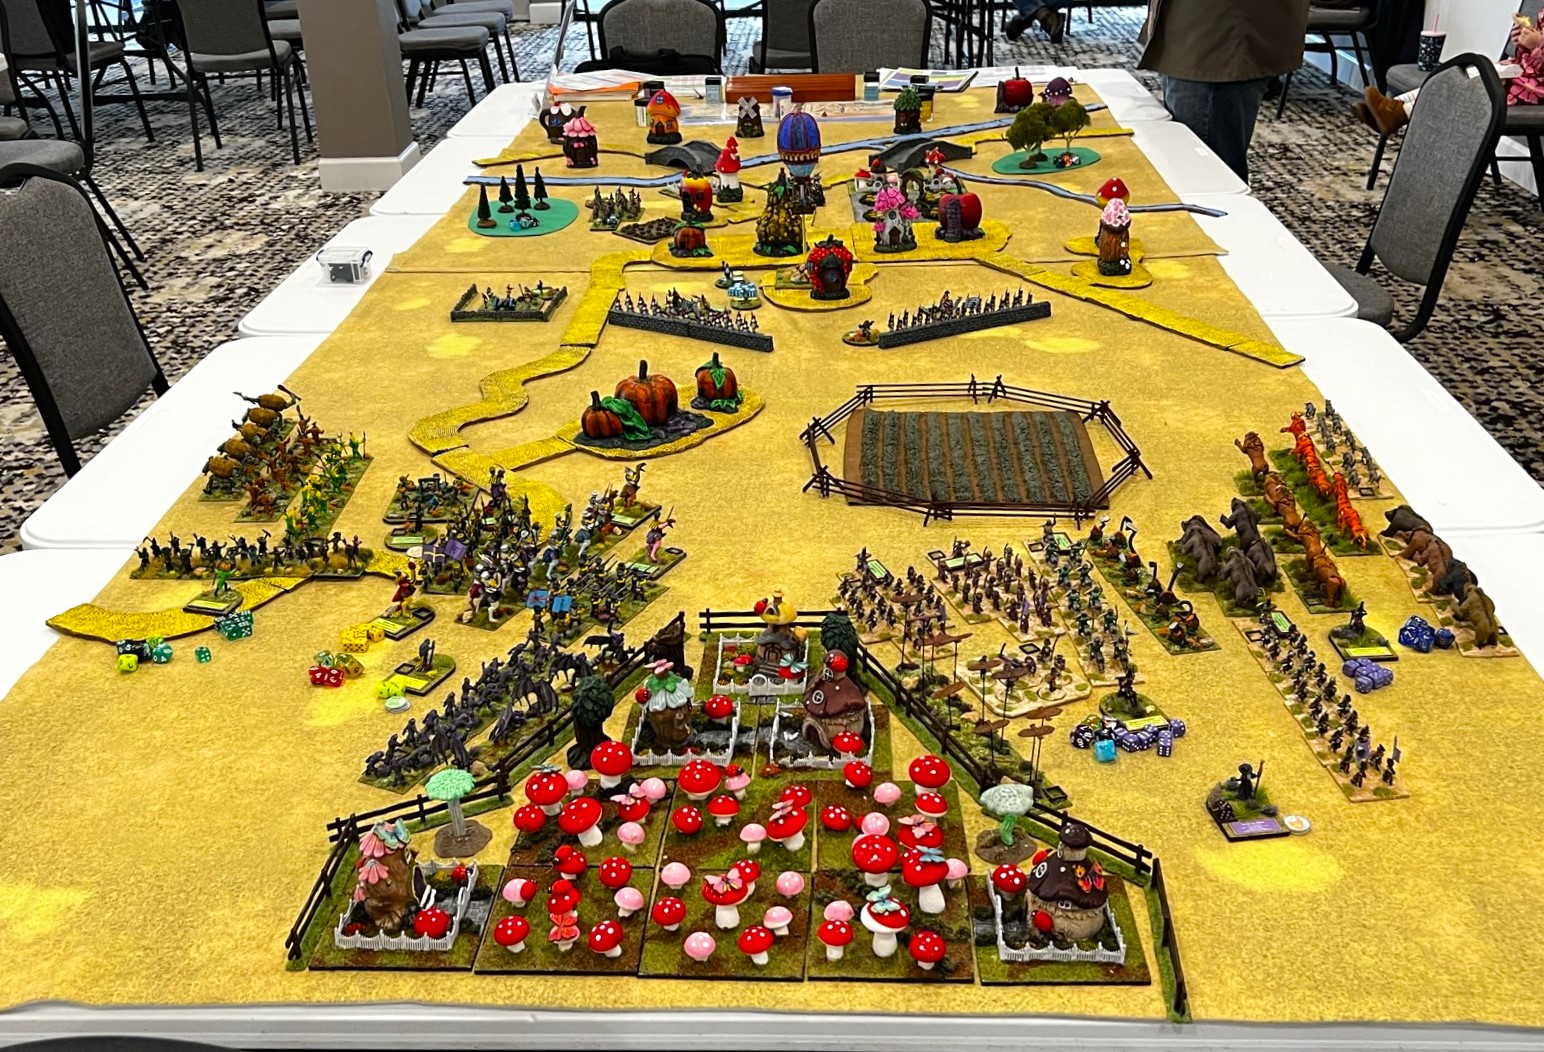
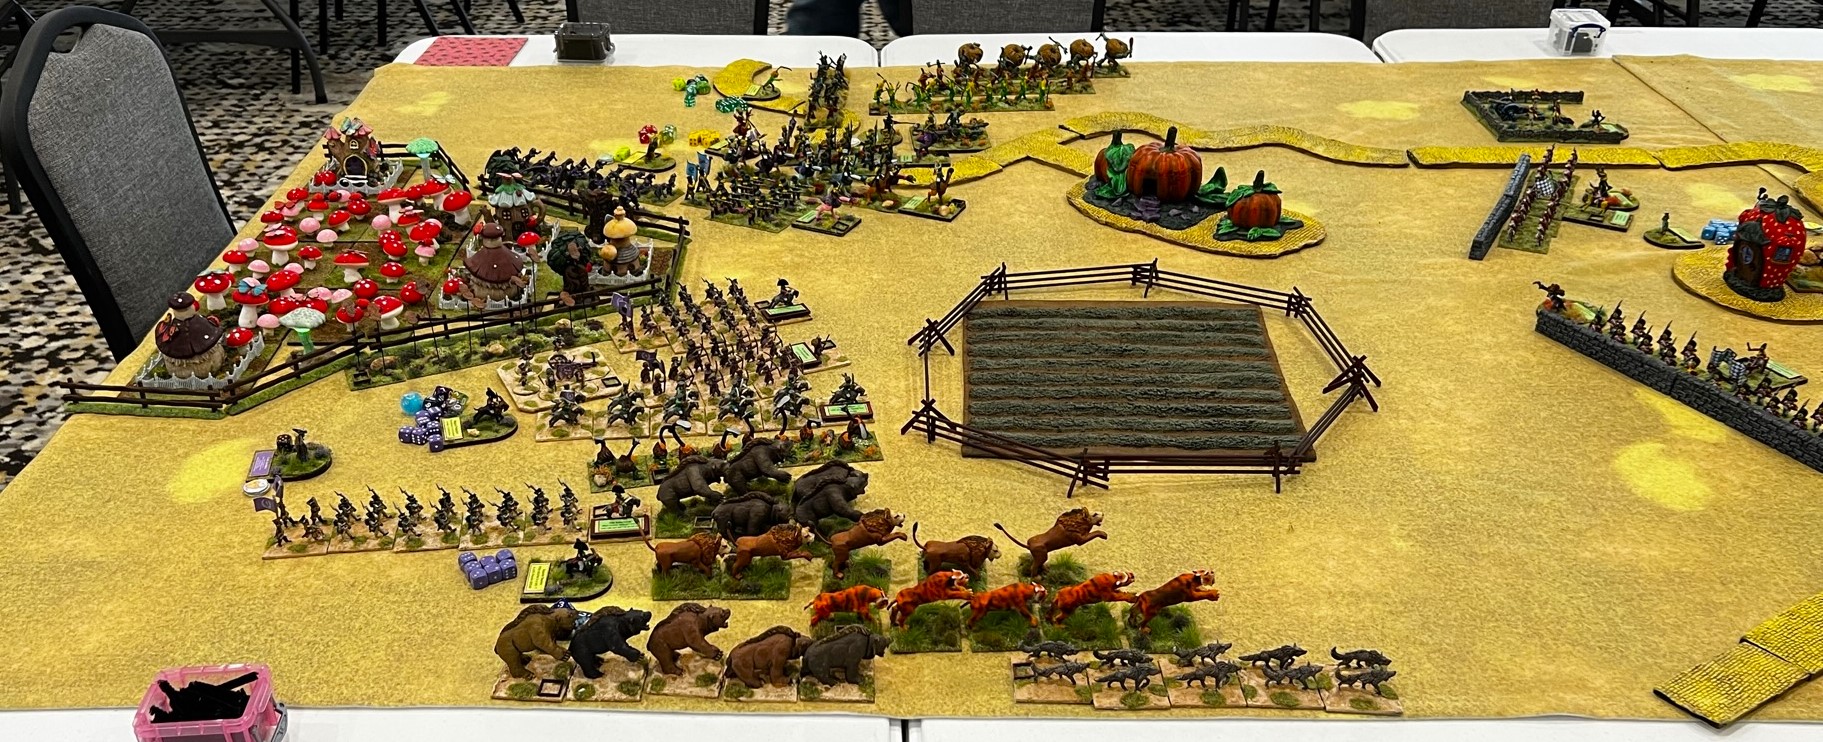
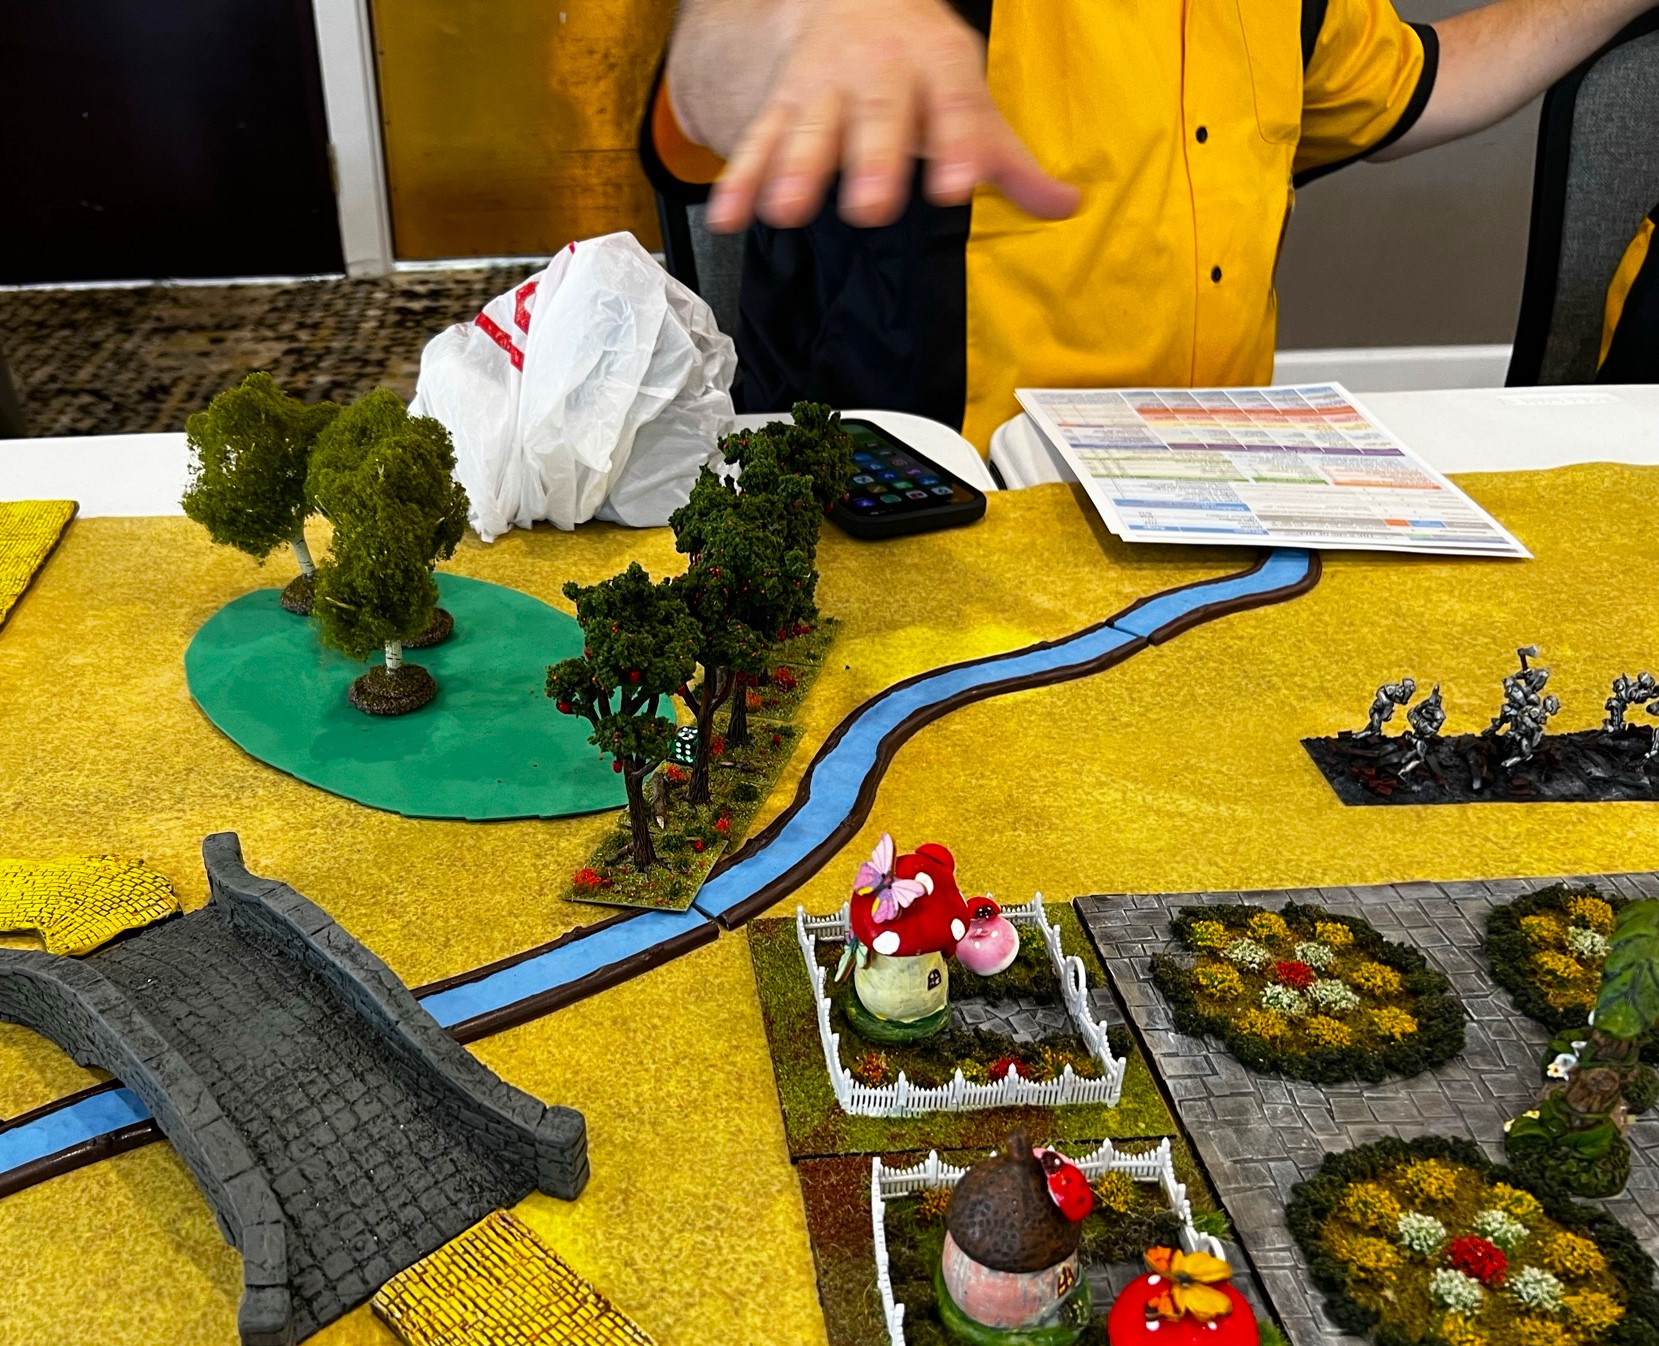
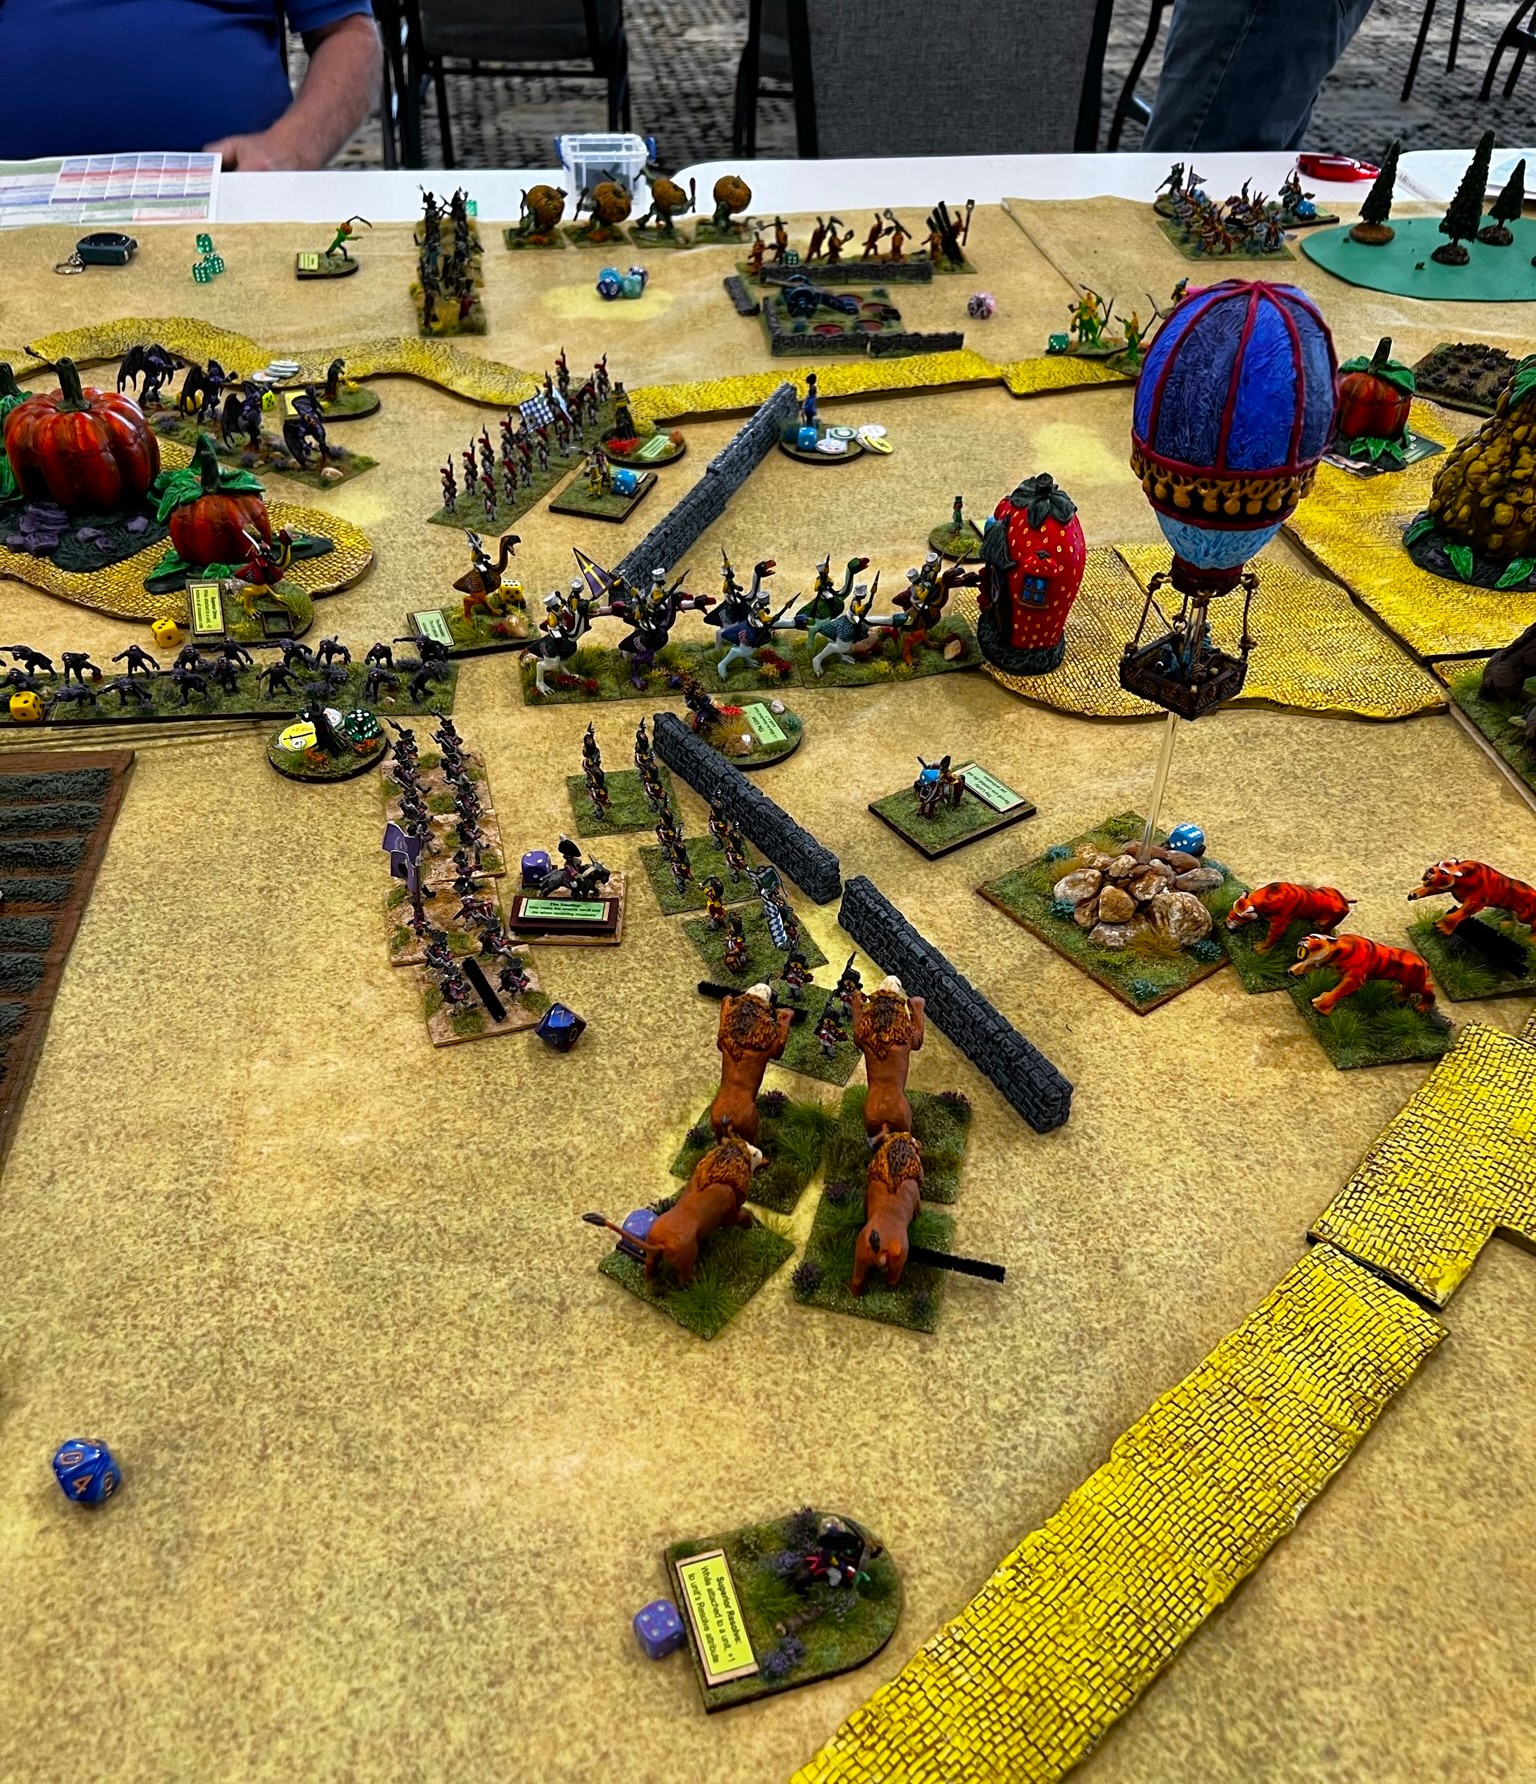
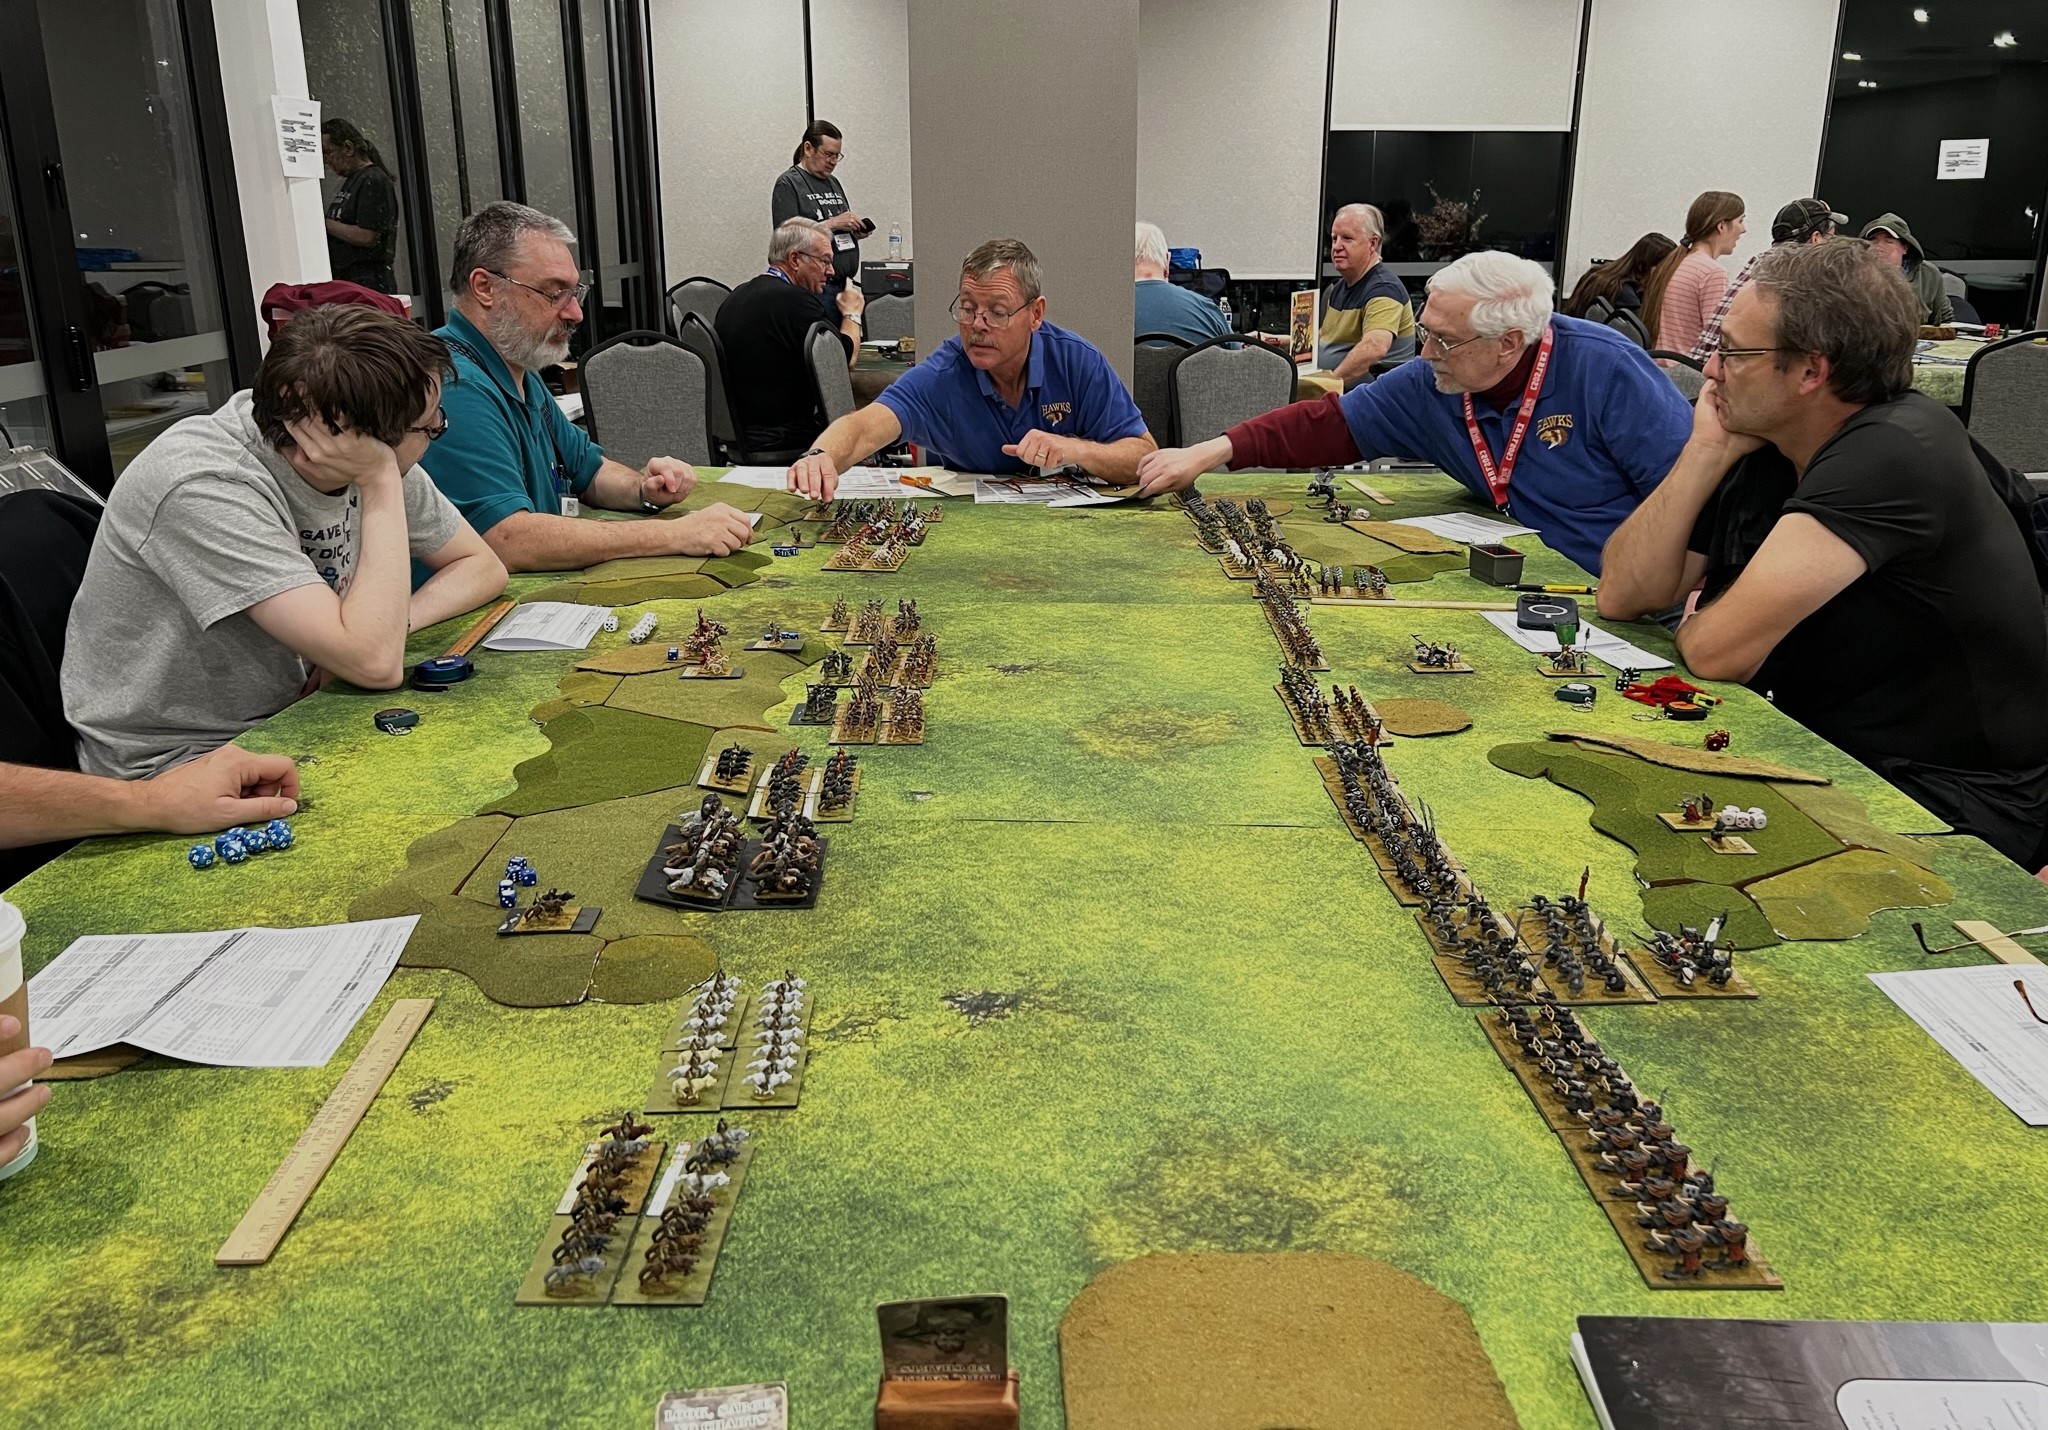
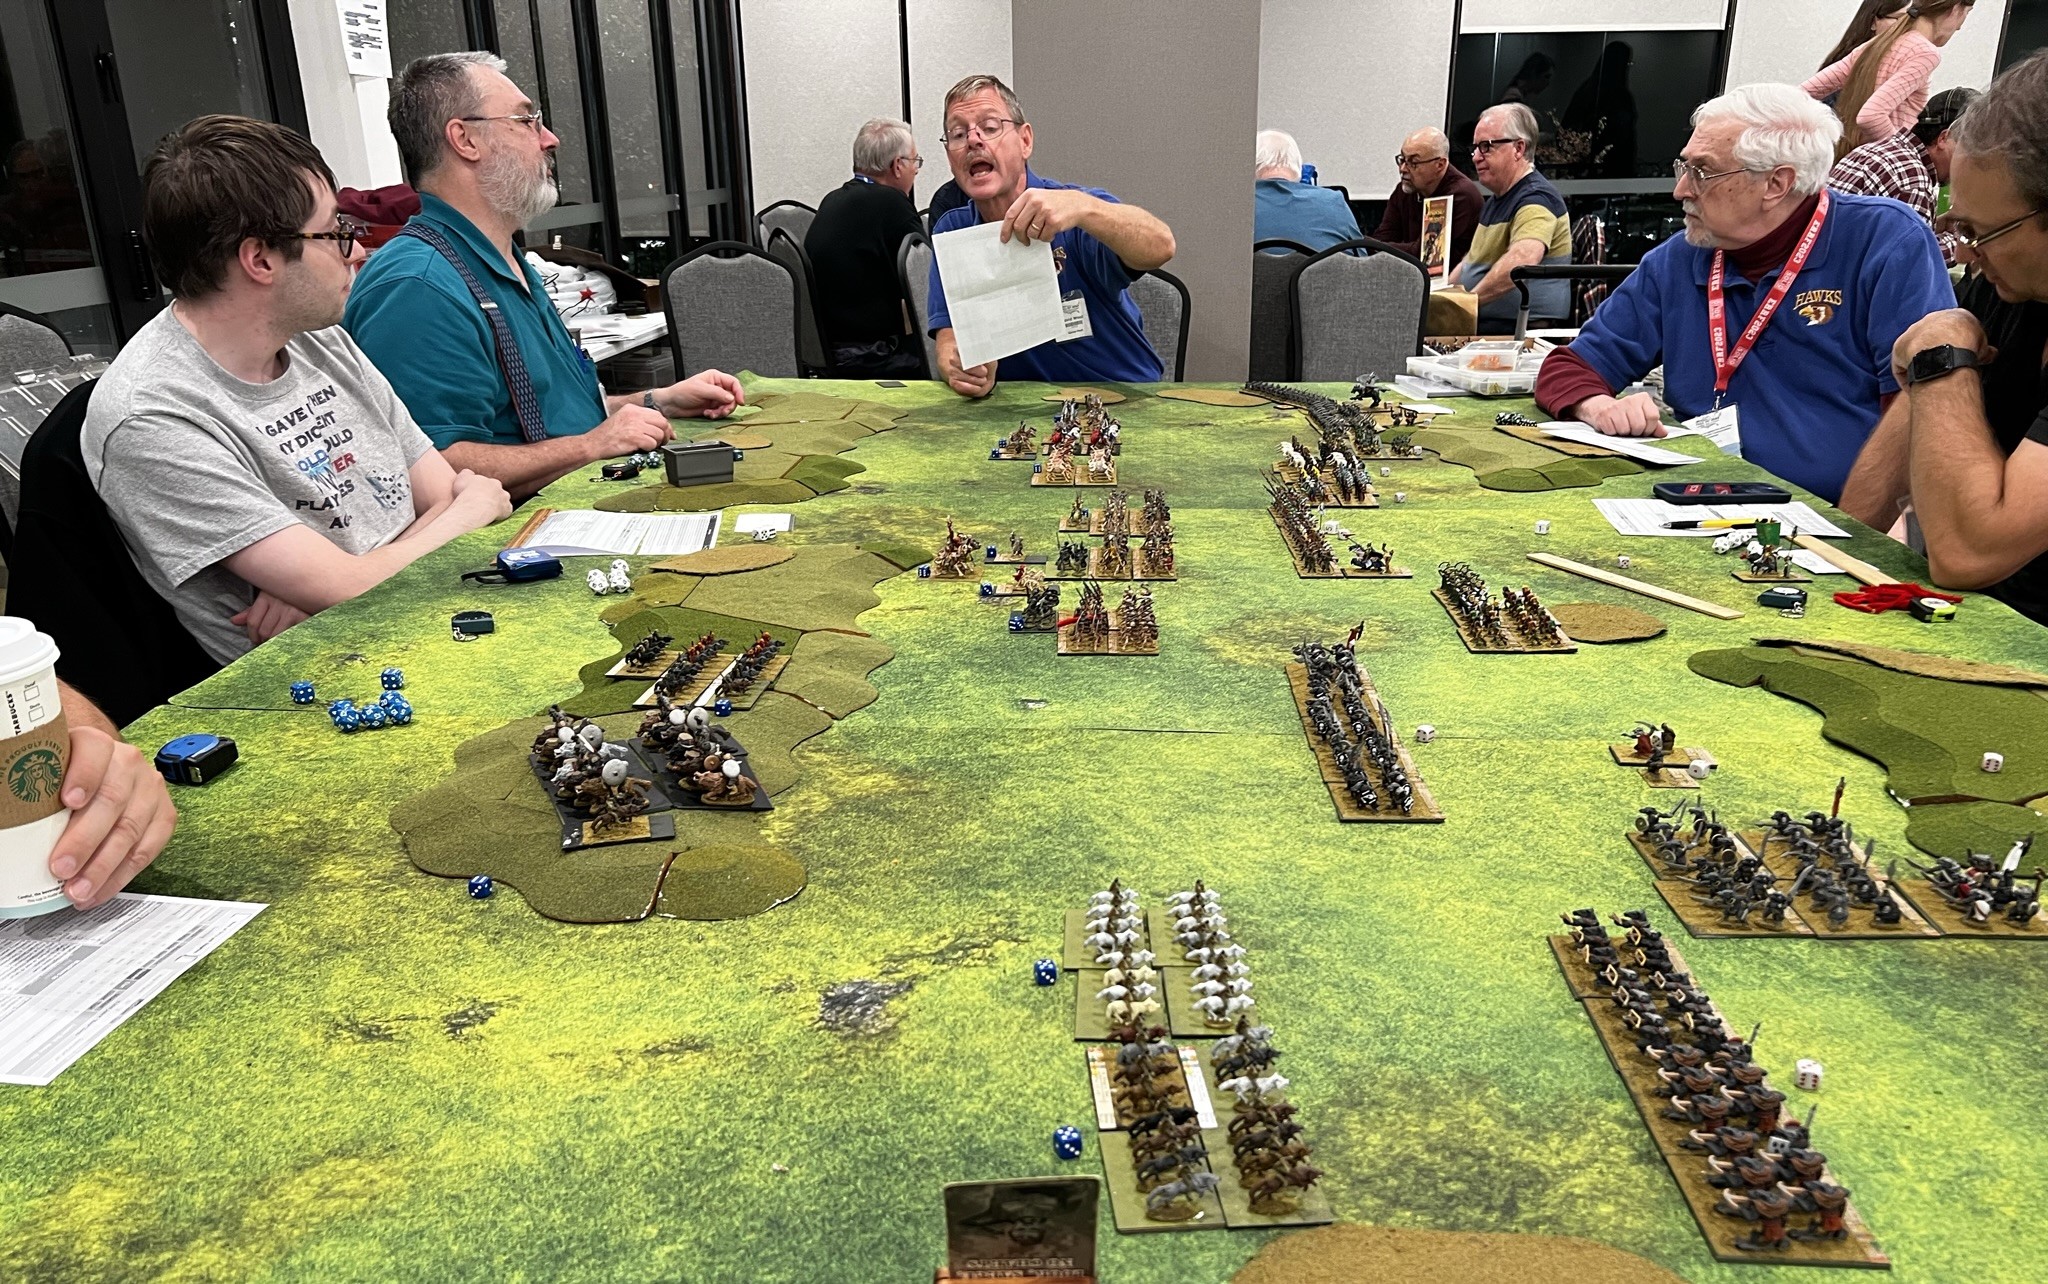
For Friday night, Chris Palmer and I combined forces (and figures) for a massive 8-player game of the Wars of Ozz. I acted as a player and a co-GM with Chris. Chris made some excellent posts on the Wars of Ozz Facebook page (CHECK IT OUT!) on this game – and with his permission I’ll share the photos and his descriptions of the game that he posted in the next section:
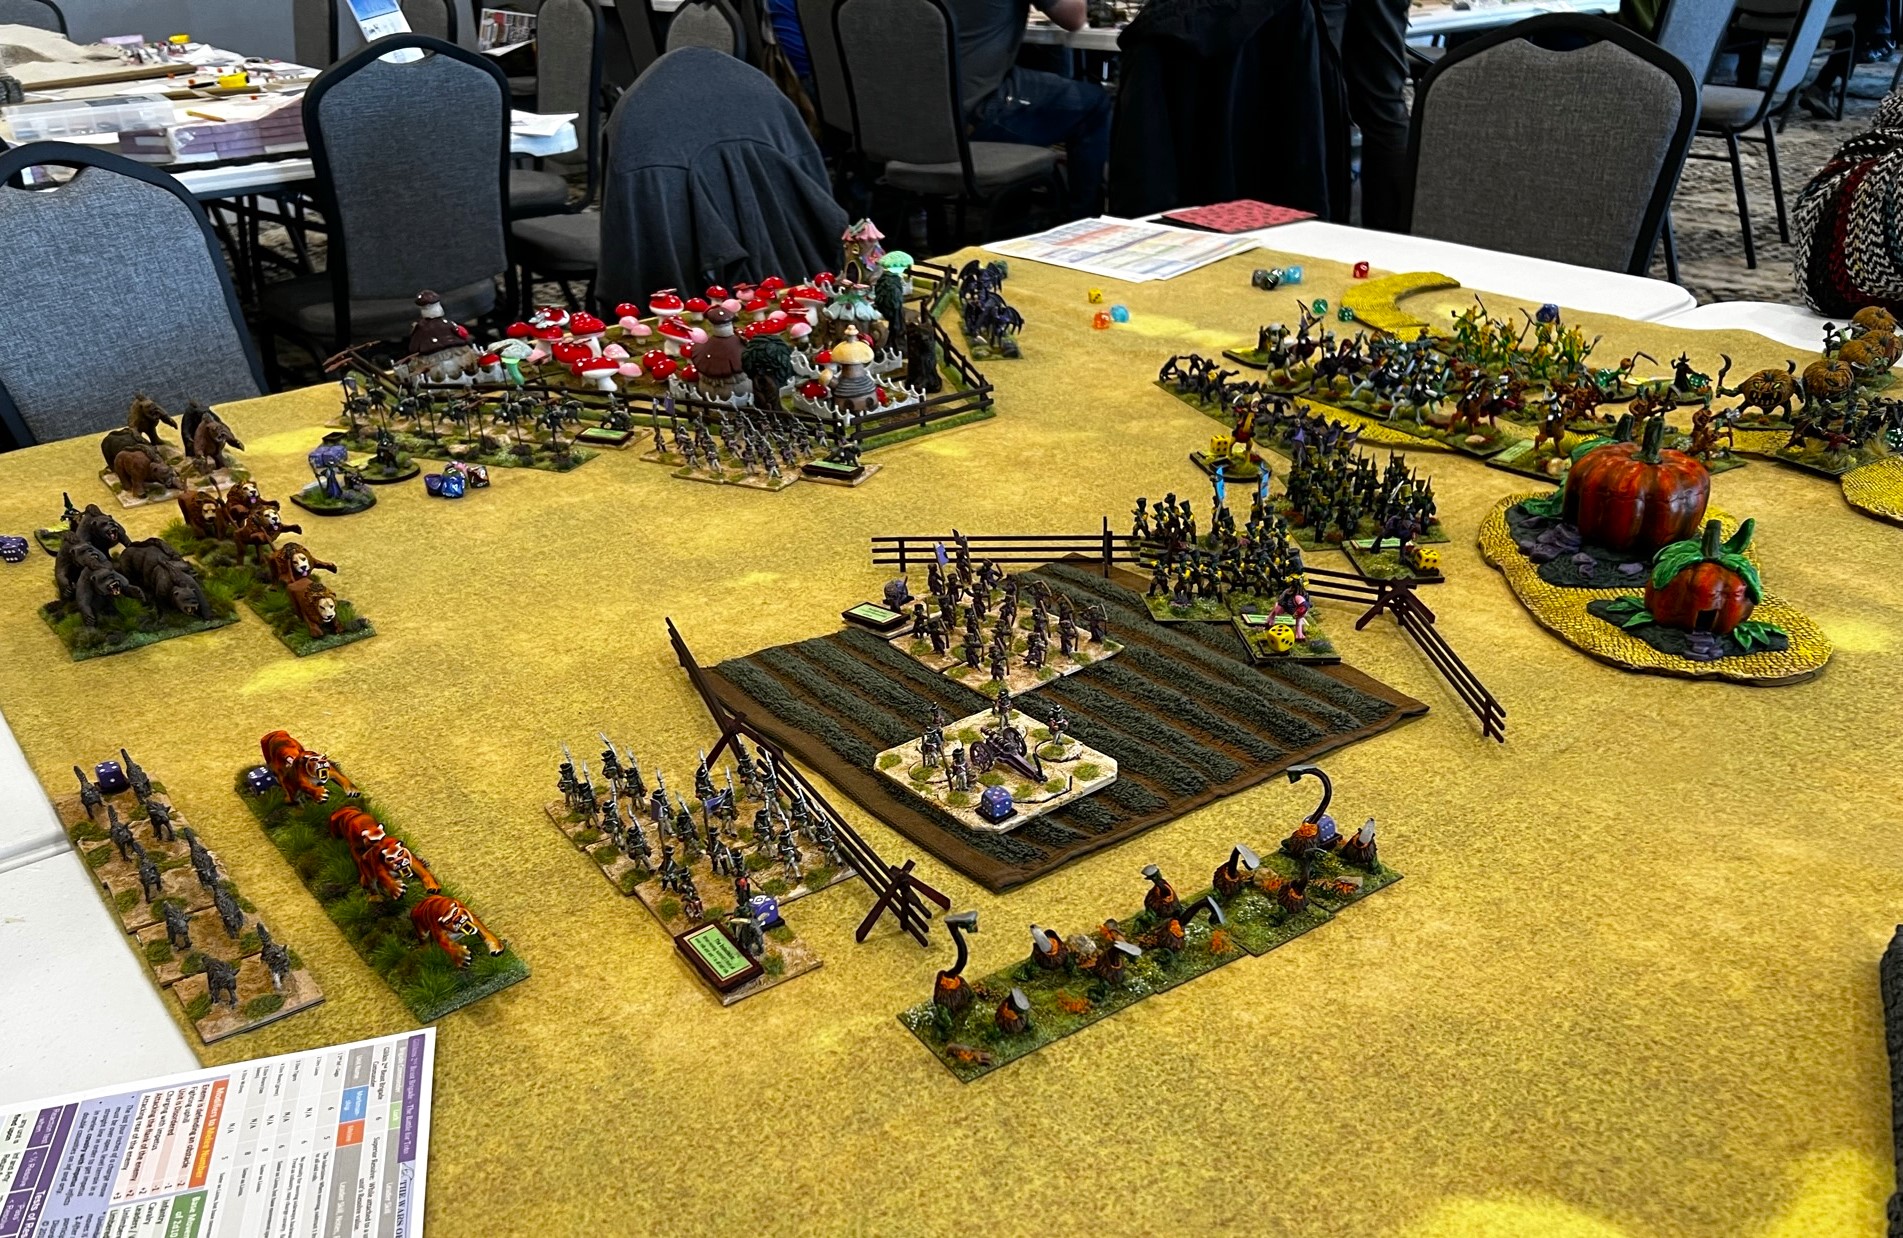
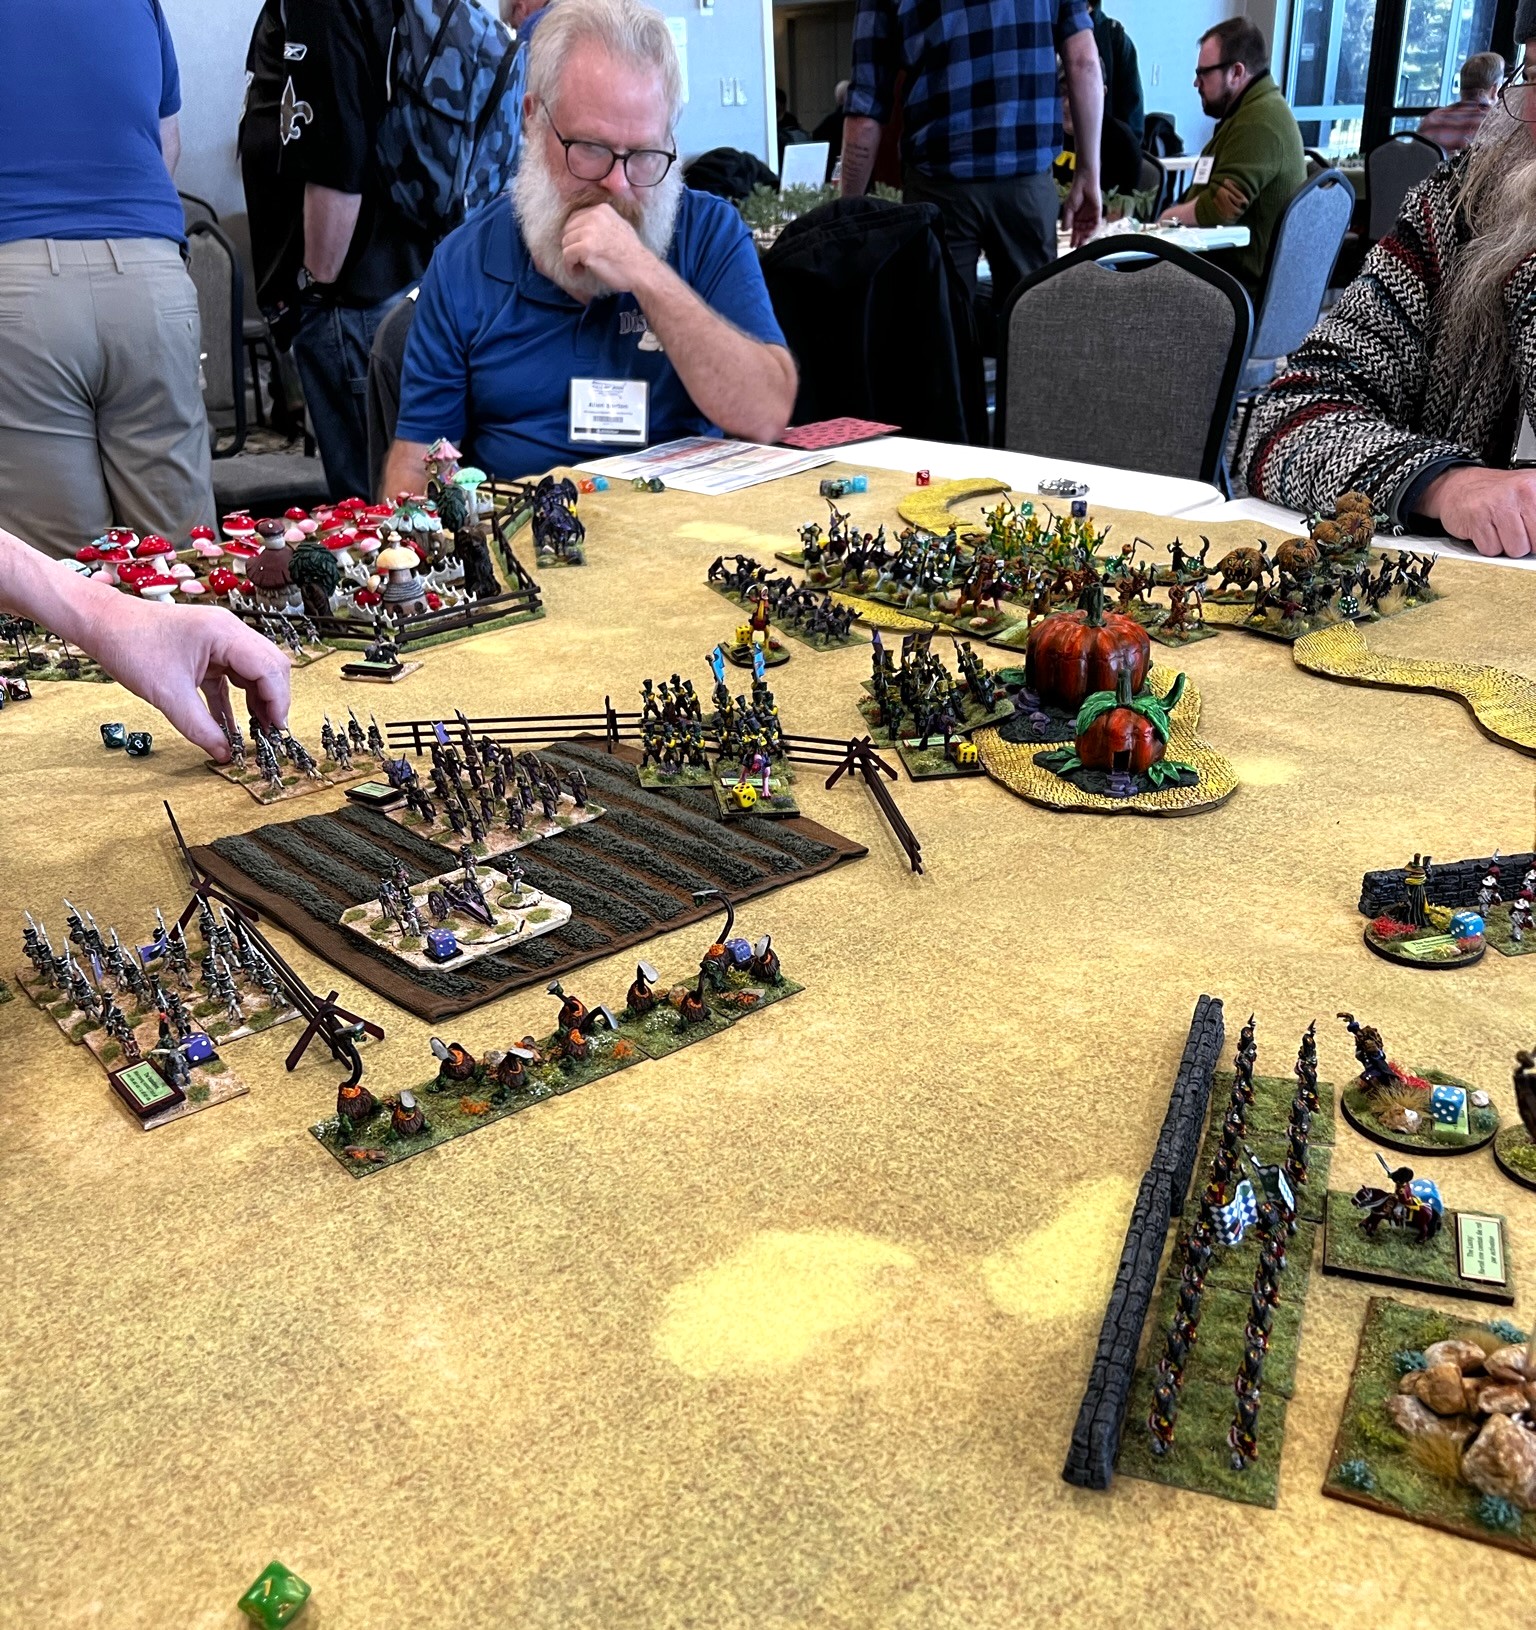
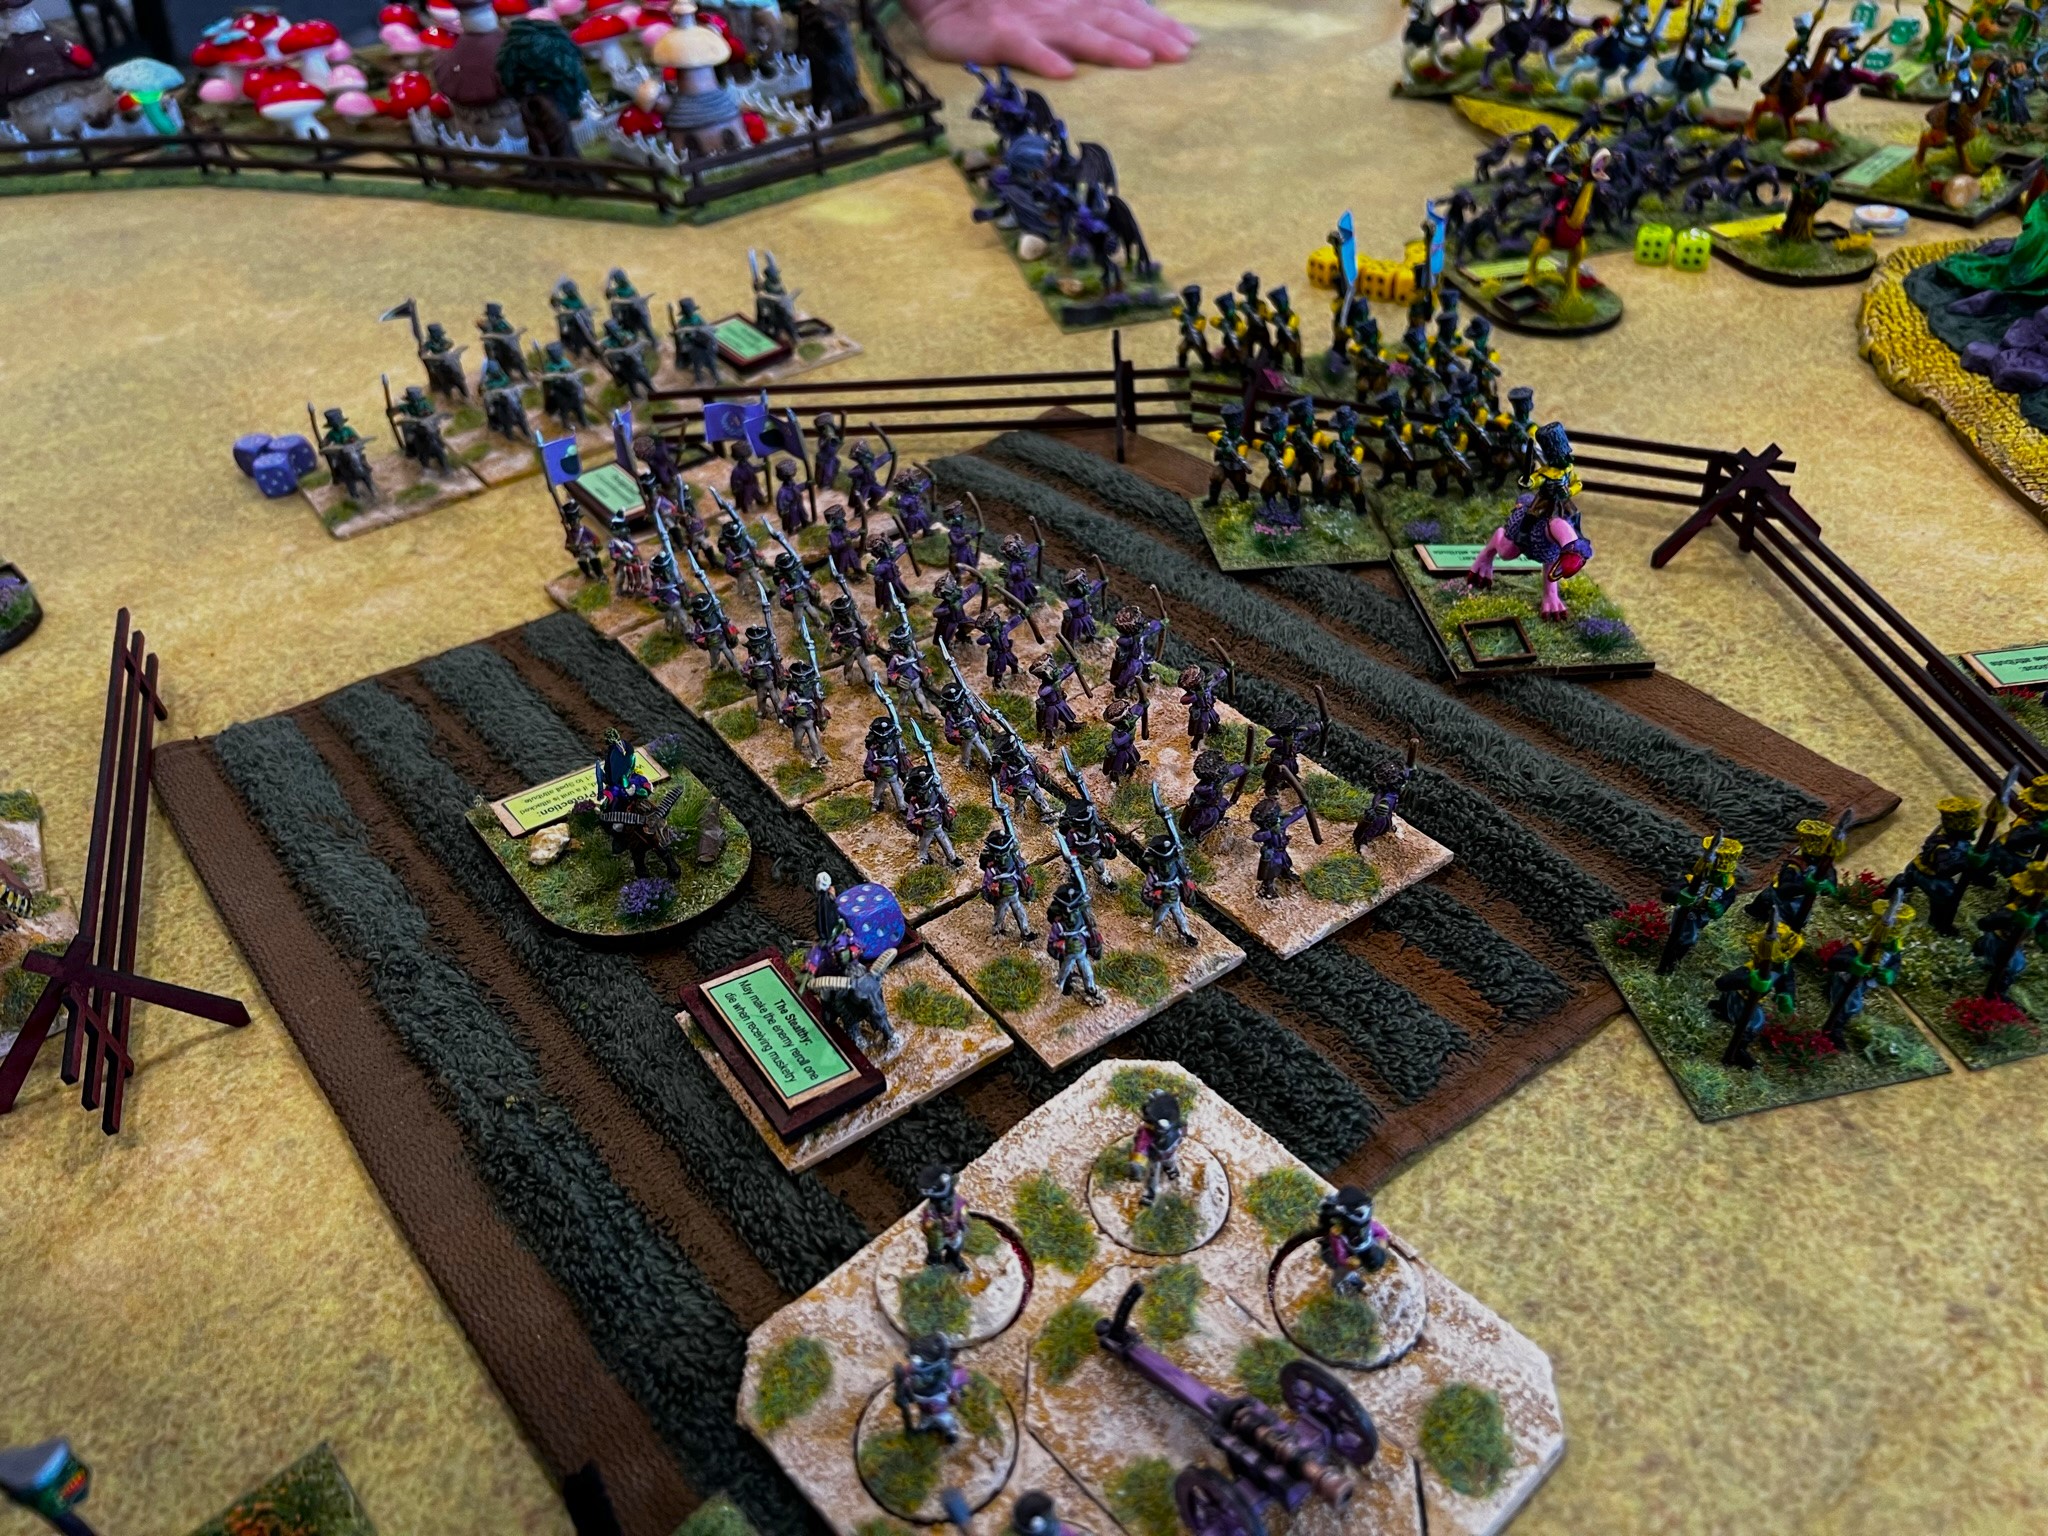
Saturday Night – A Wars of Ozz scenario – “The Vegetables are Revolting” – photos and write up by Chris Palmer
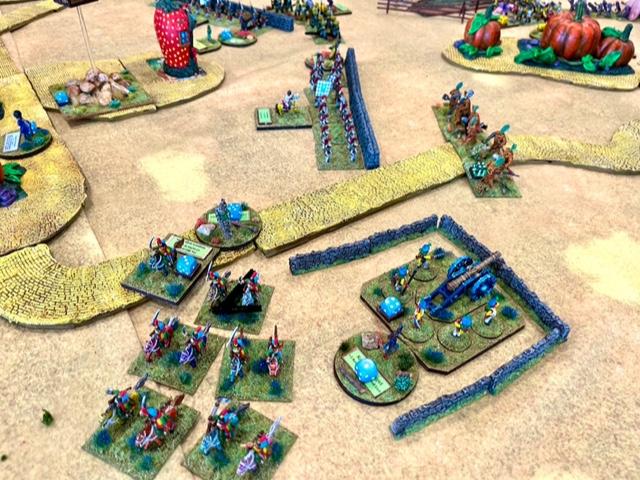
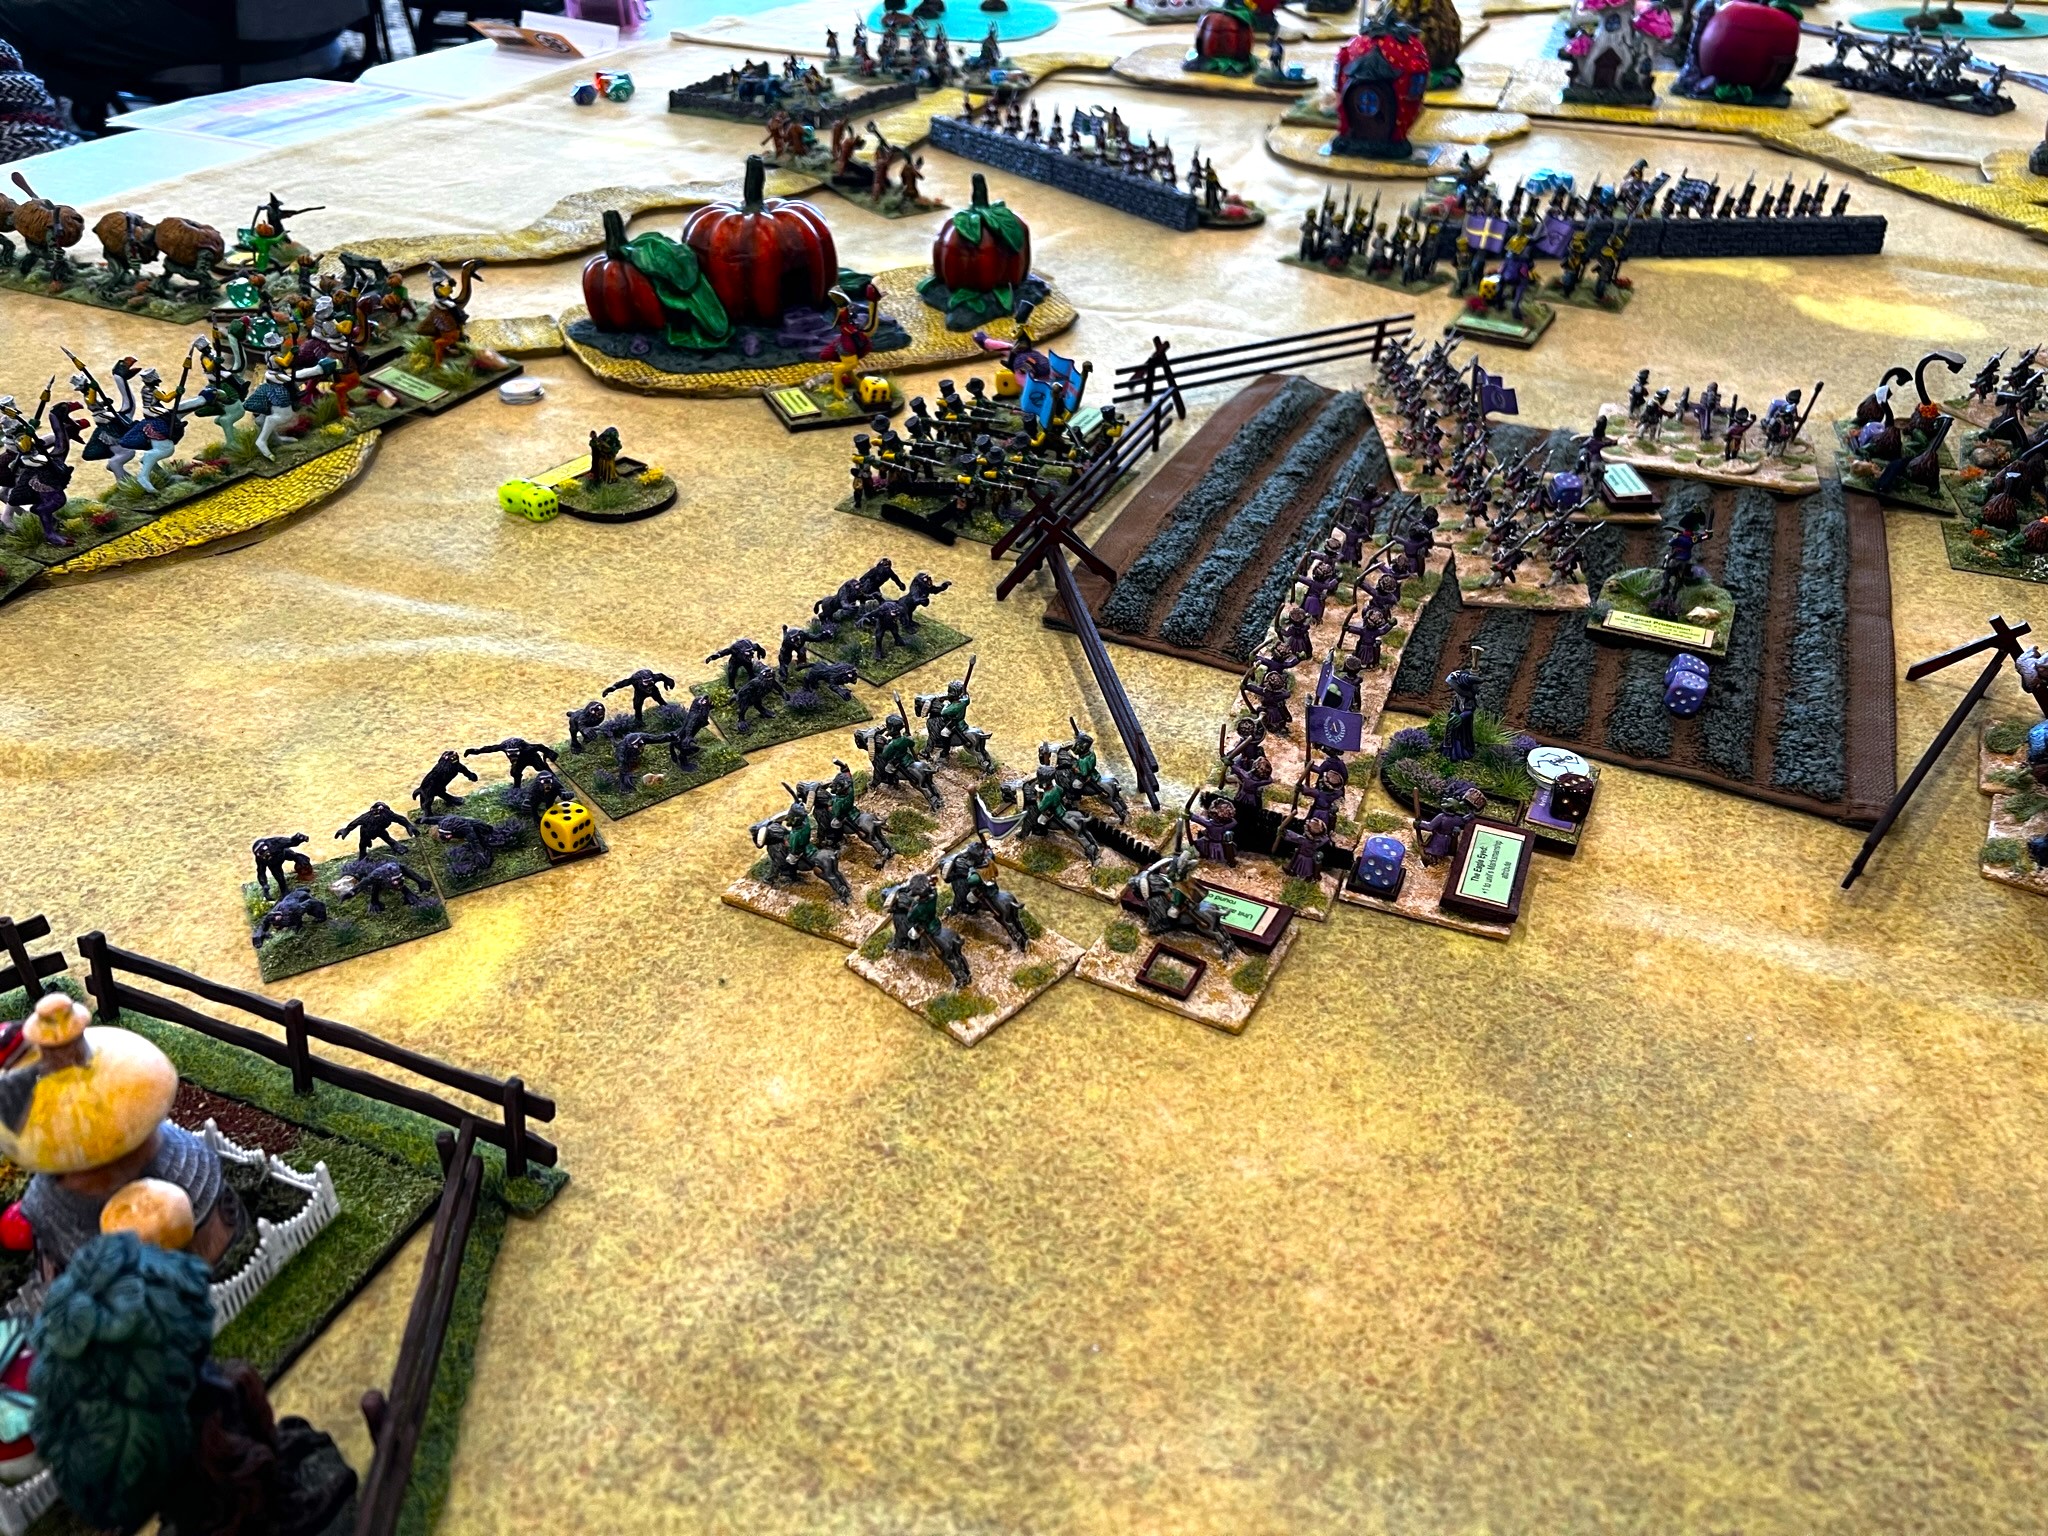
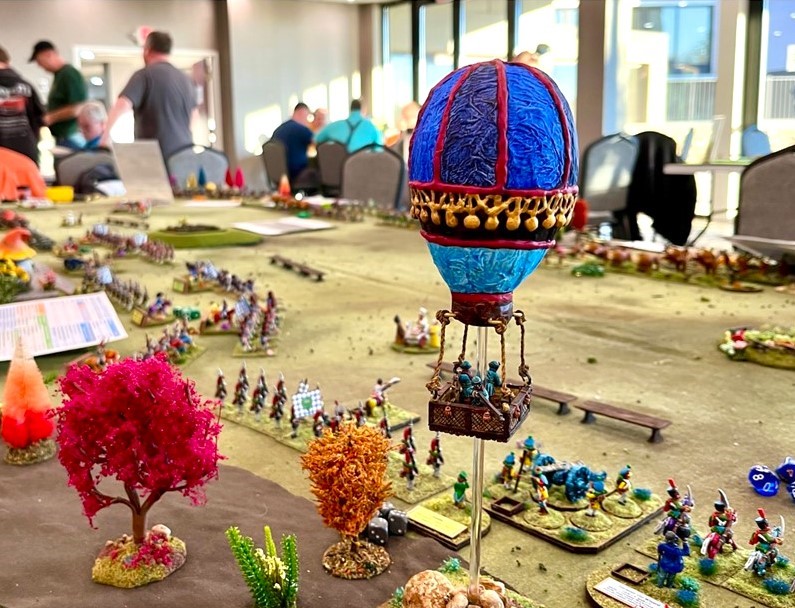
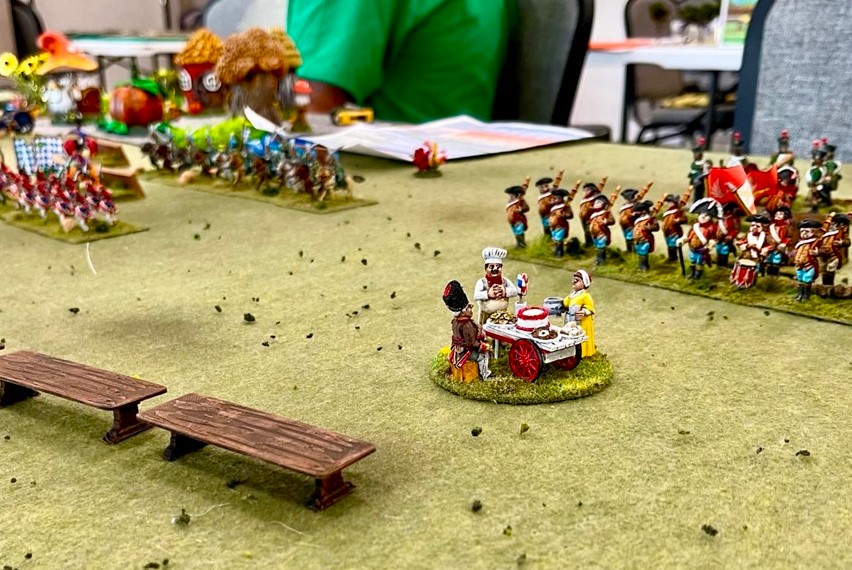
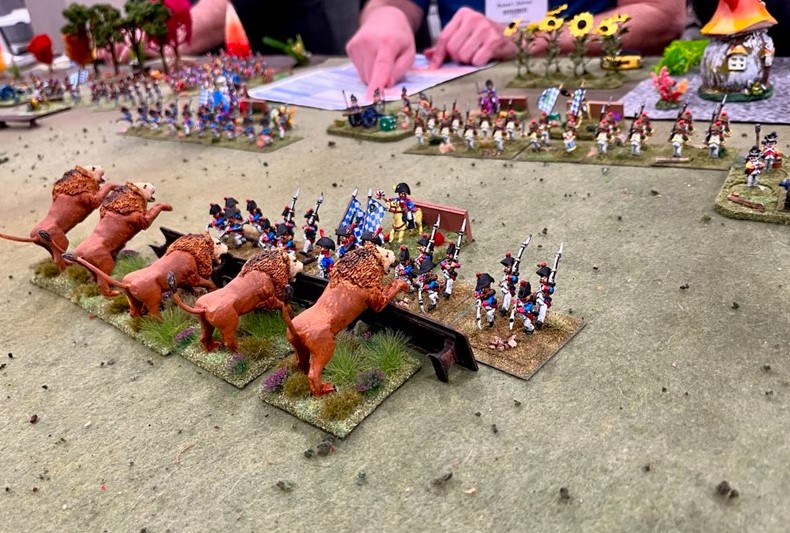
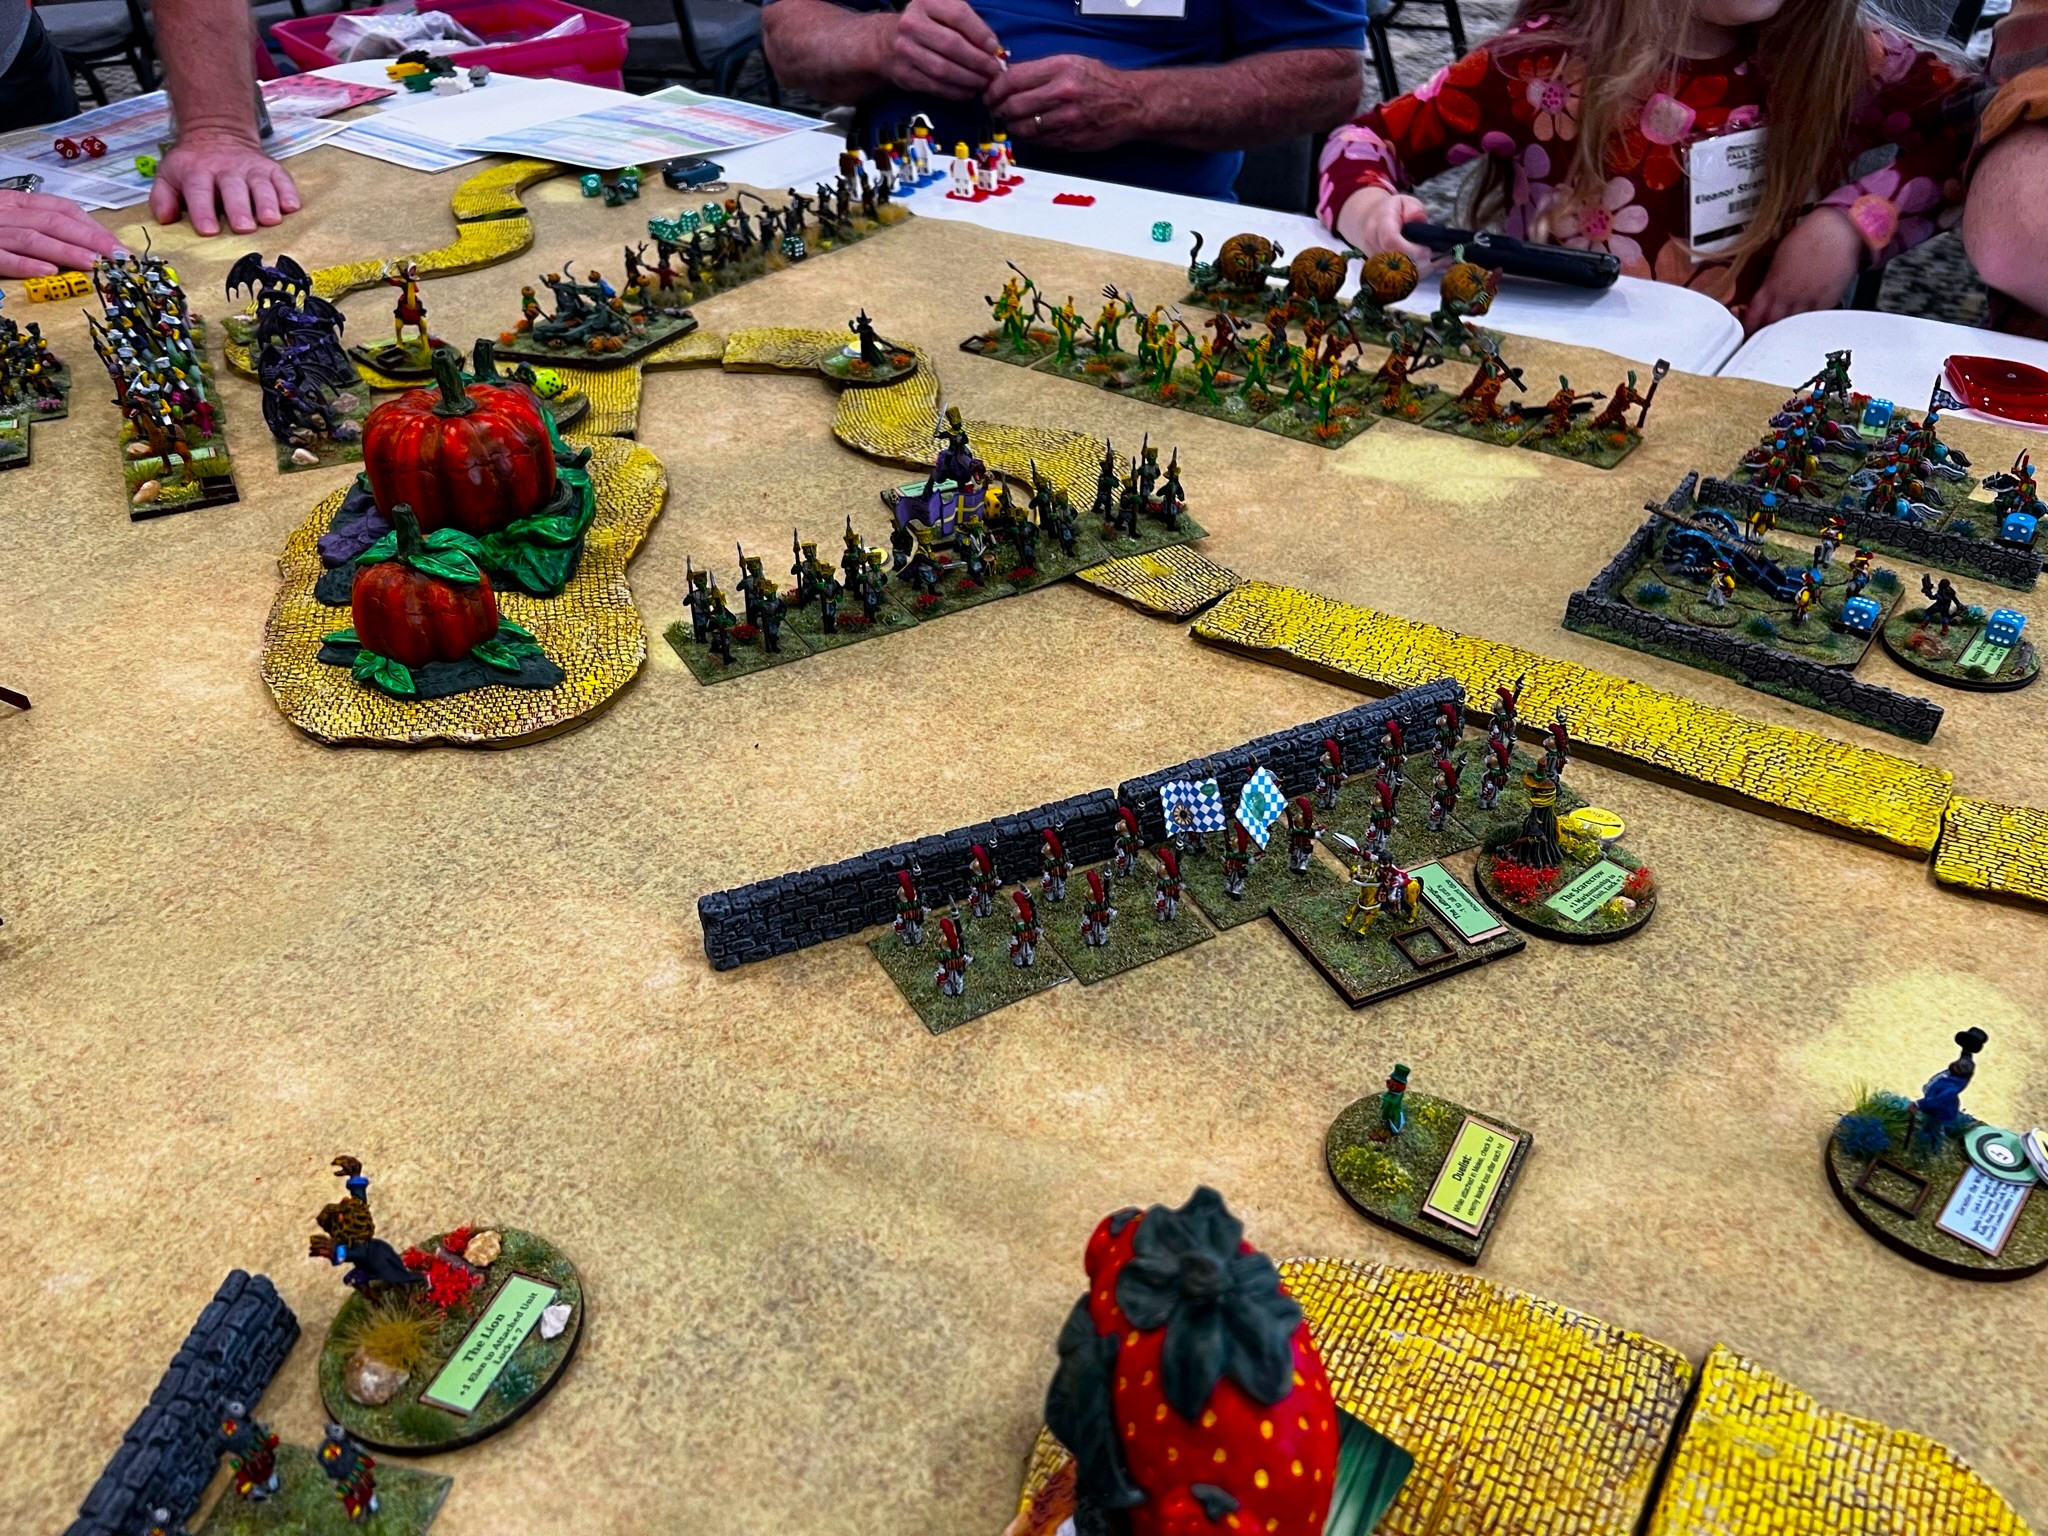
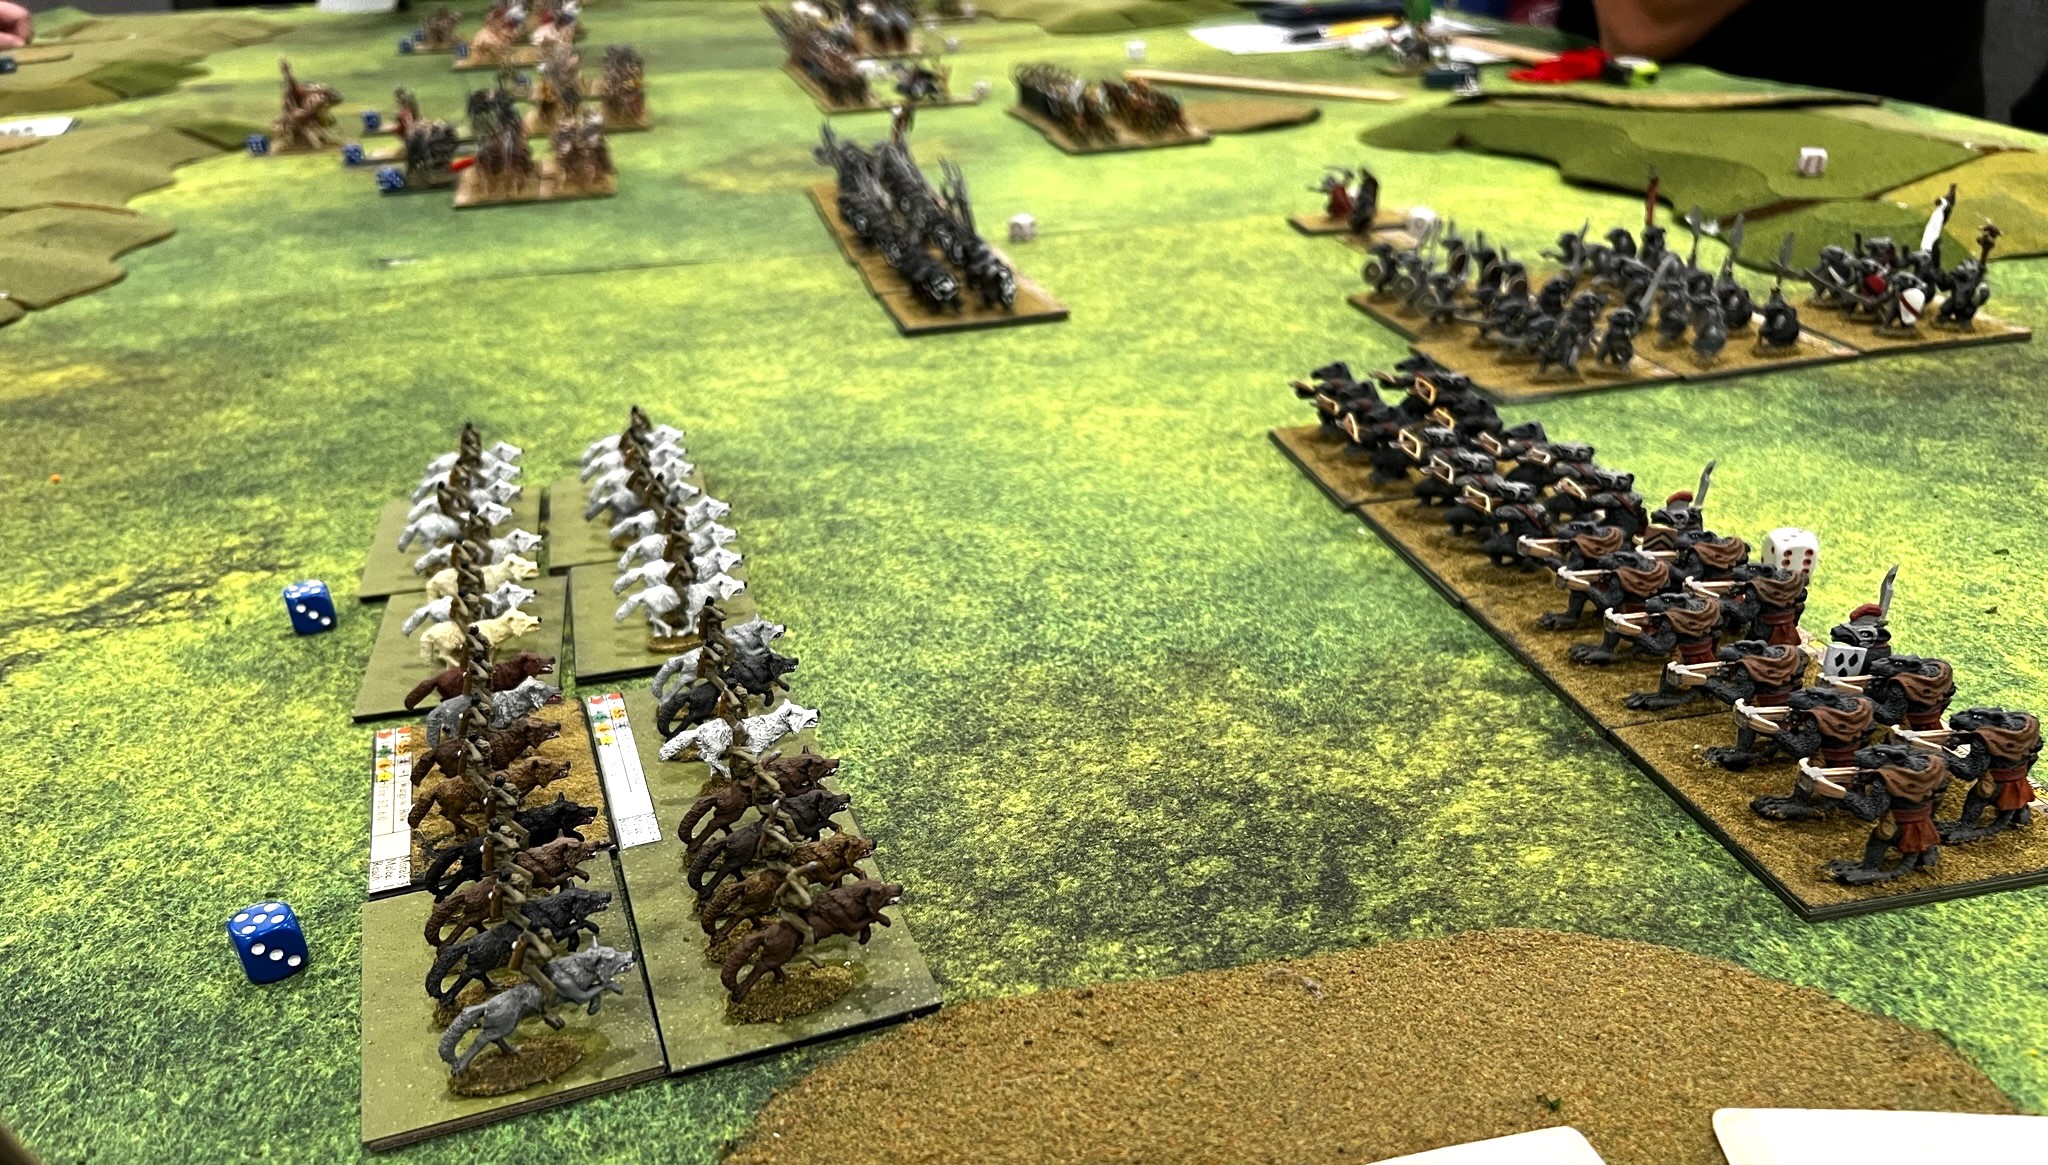
A birds eye view from the Munchkin Balloon gives us an overview of the table before the game began.Quadling troops linger around one of the Sweetie Carts at the game’s start.Harvest troops charge forward into the Munchkin right flank.Great Pumpkinheads prepare to march through a mushroom patch to get at the enemy.Another shot of the action on the left wing of the Harvest attack.On the defenders’ left flank The Quadlings quickly deploy into line to meet the oncoming enemy; as the Munchkins in the center take up a position on a nearby hill.Munchkin Light Cavalry bravely charge at the Great Pumpkinheads.Meanwhile, in a patch of woods on the defenders’ left, the Quadling Lancers discover a hidden group of Savage Apple Trees.Quickly forming their banquet tables into a barricade, a unit of Munchkin Landwehr attempts to fight off a charge by some Dire Lions.Another unit of Great Pumpkinheads charge at some Quadling Infantry.Assistant Gamemaster Mark Morin, helps two players work through a melee combat.A view of the battle lines midway through the game.Munchkin Light Cavalry charges the remnants of a unit of Corn Creatures.
That finished off Friday night. I can’t say enough about this game – so much fun, thanks Chris! My table for Saturday morning’s Battle for Toto was adjacent to this one – so I just brought over the figures that fought in this scenario, and I was ready for Saturday.
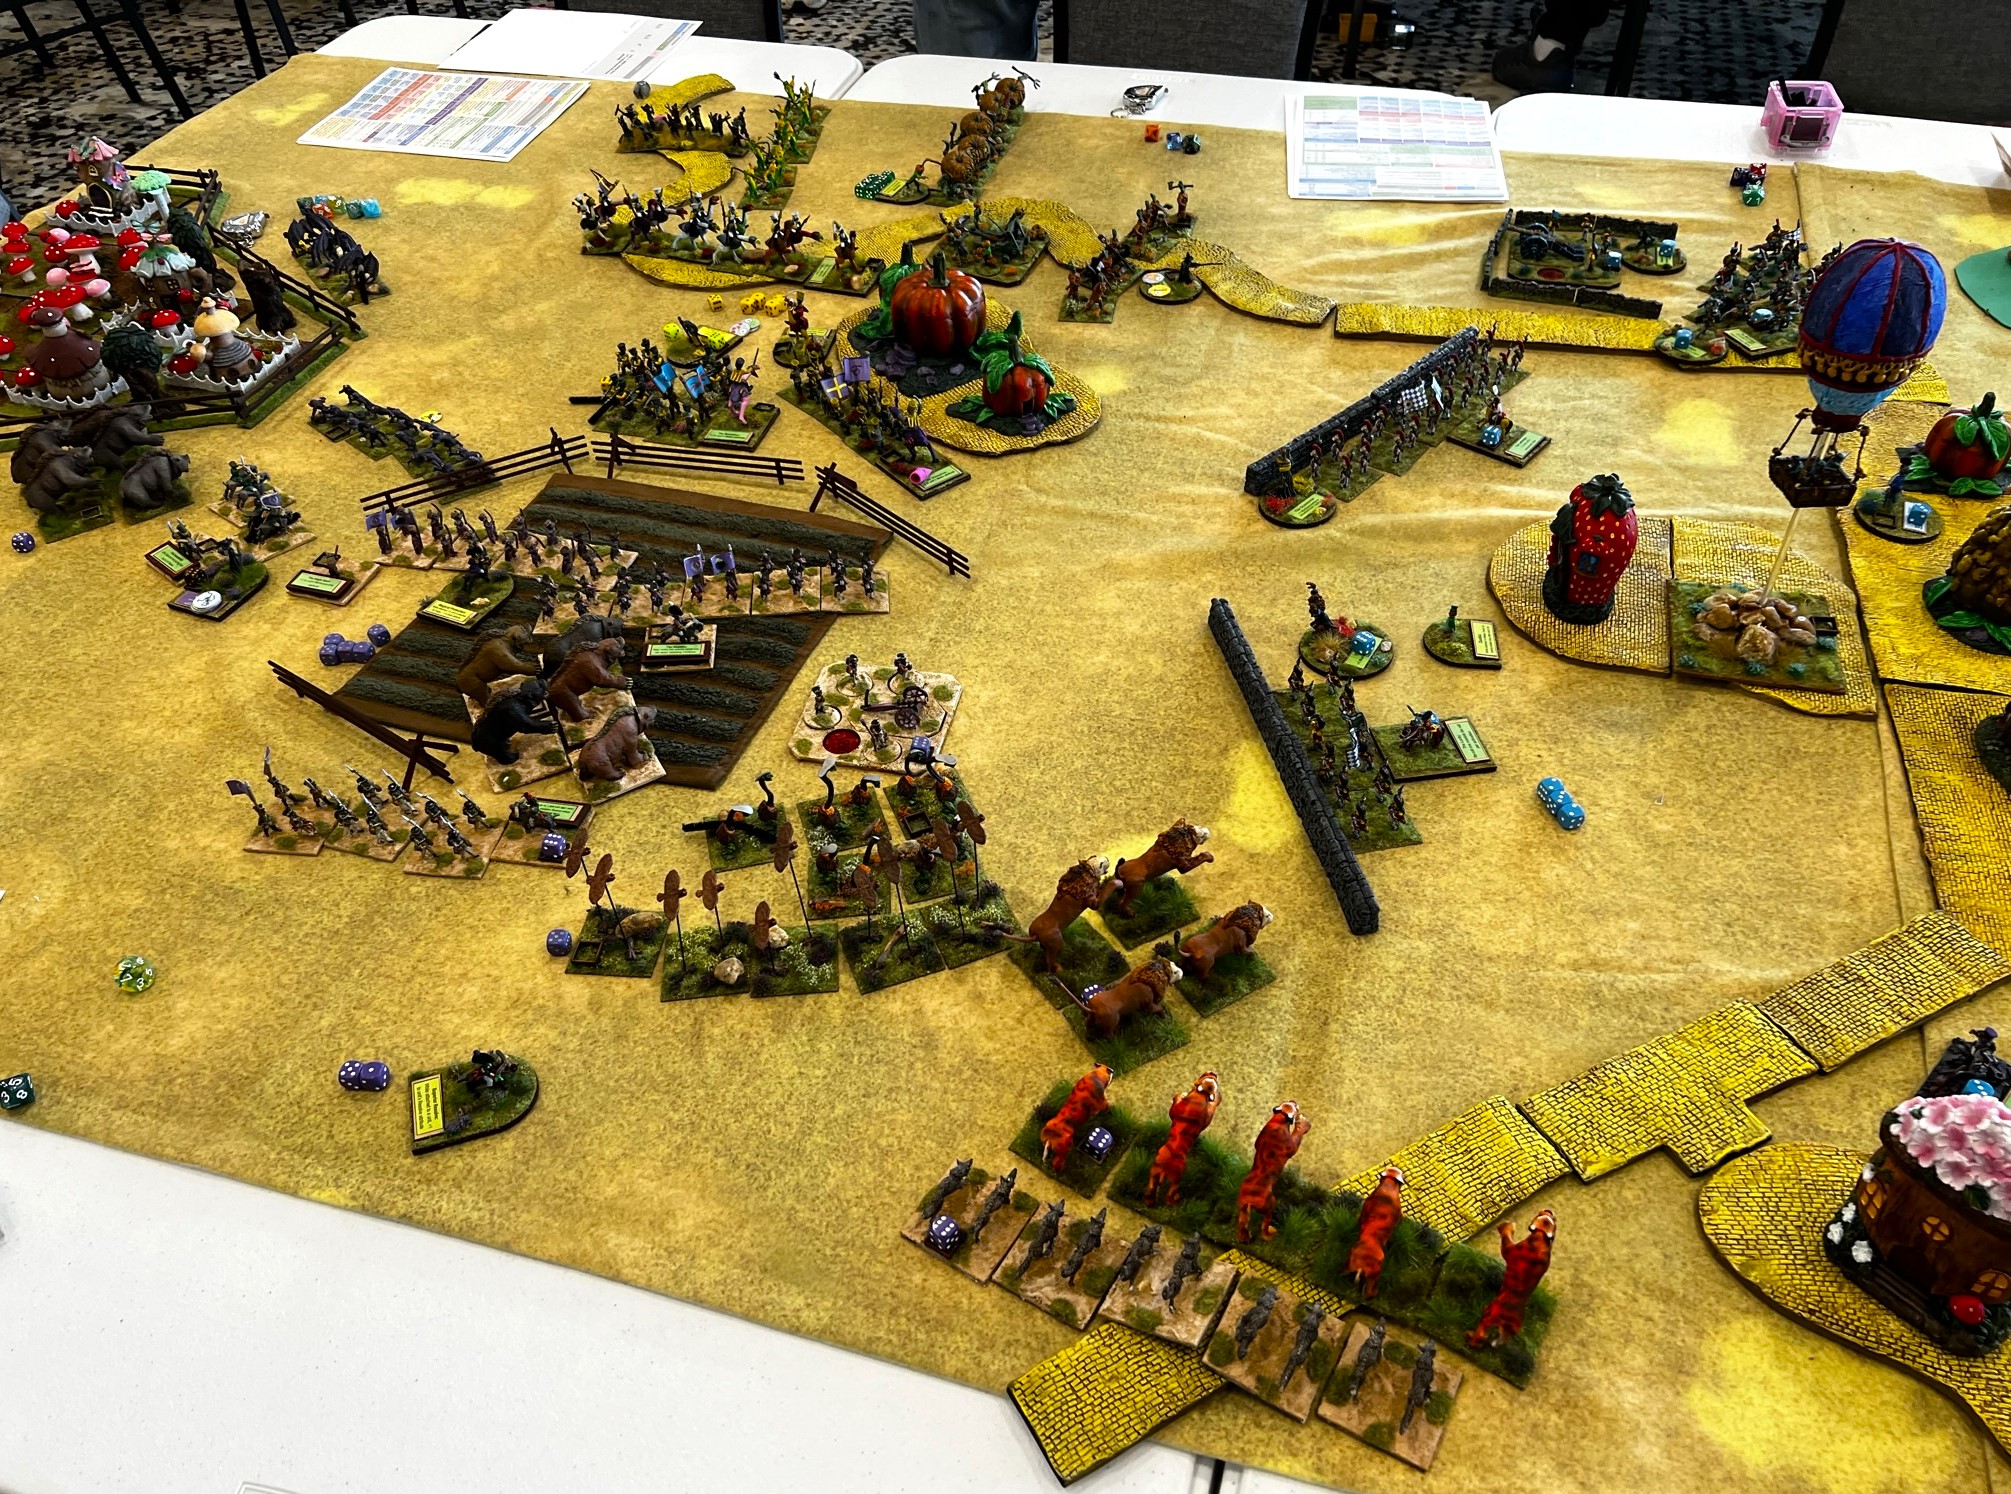
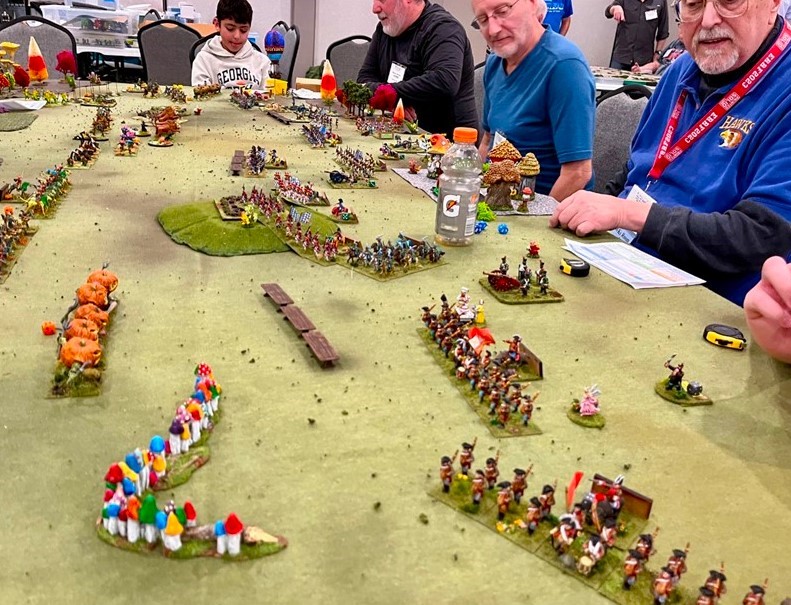
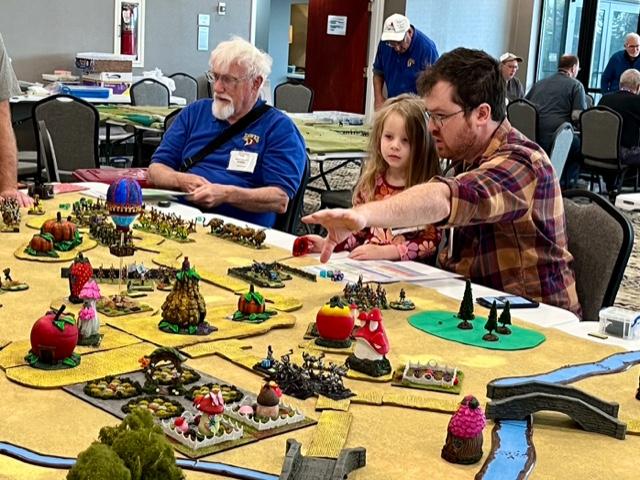
Saturday Morning – The Battle for Toto – My Pictures
View from the GM set up side.
I had a full table for Saturday morning – which was excellent!
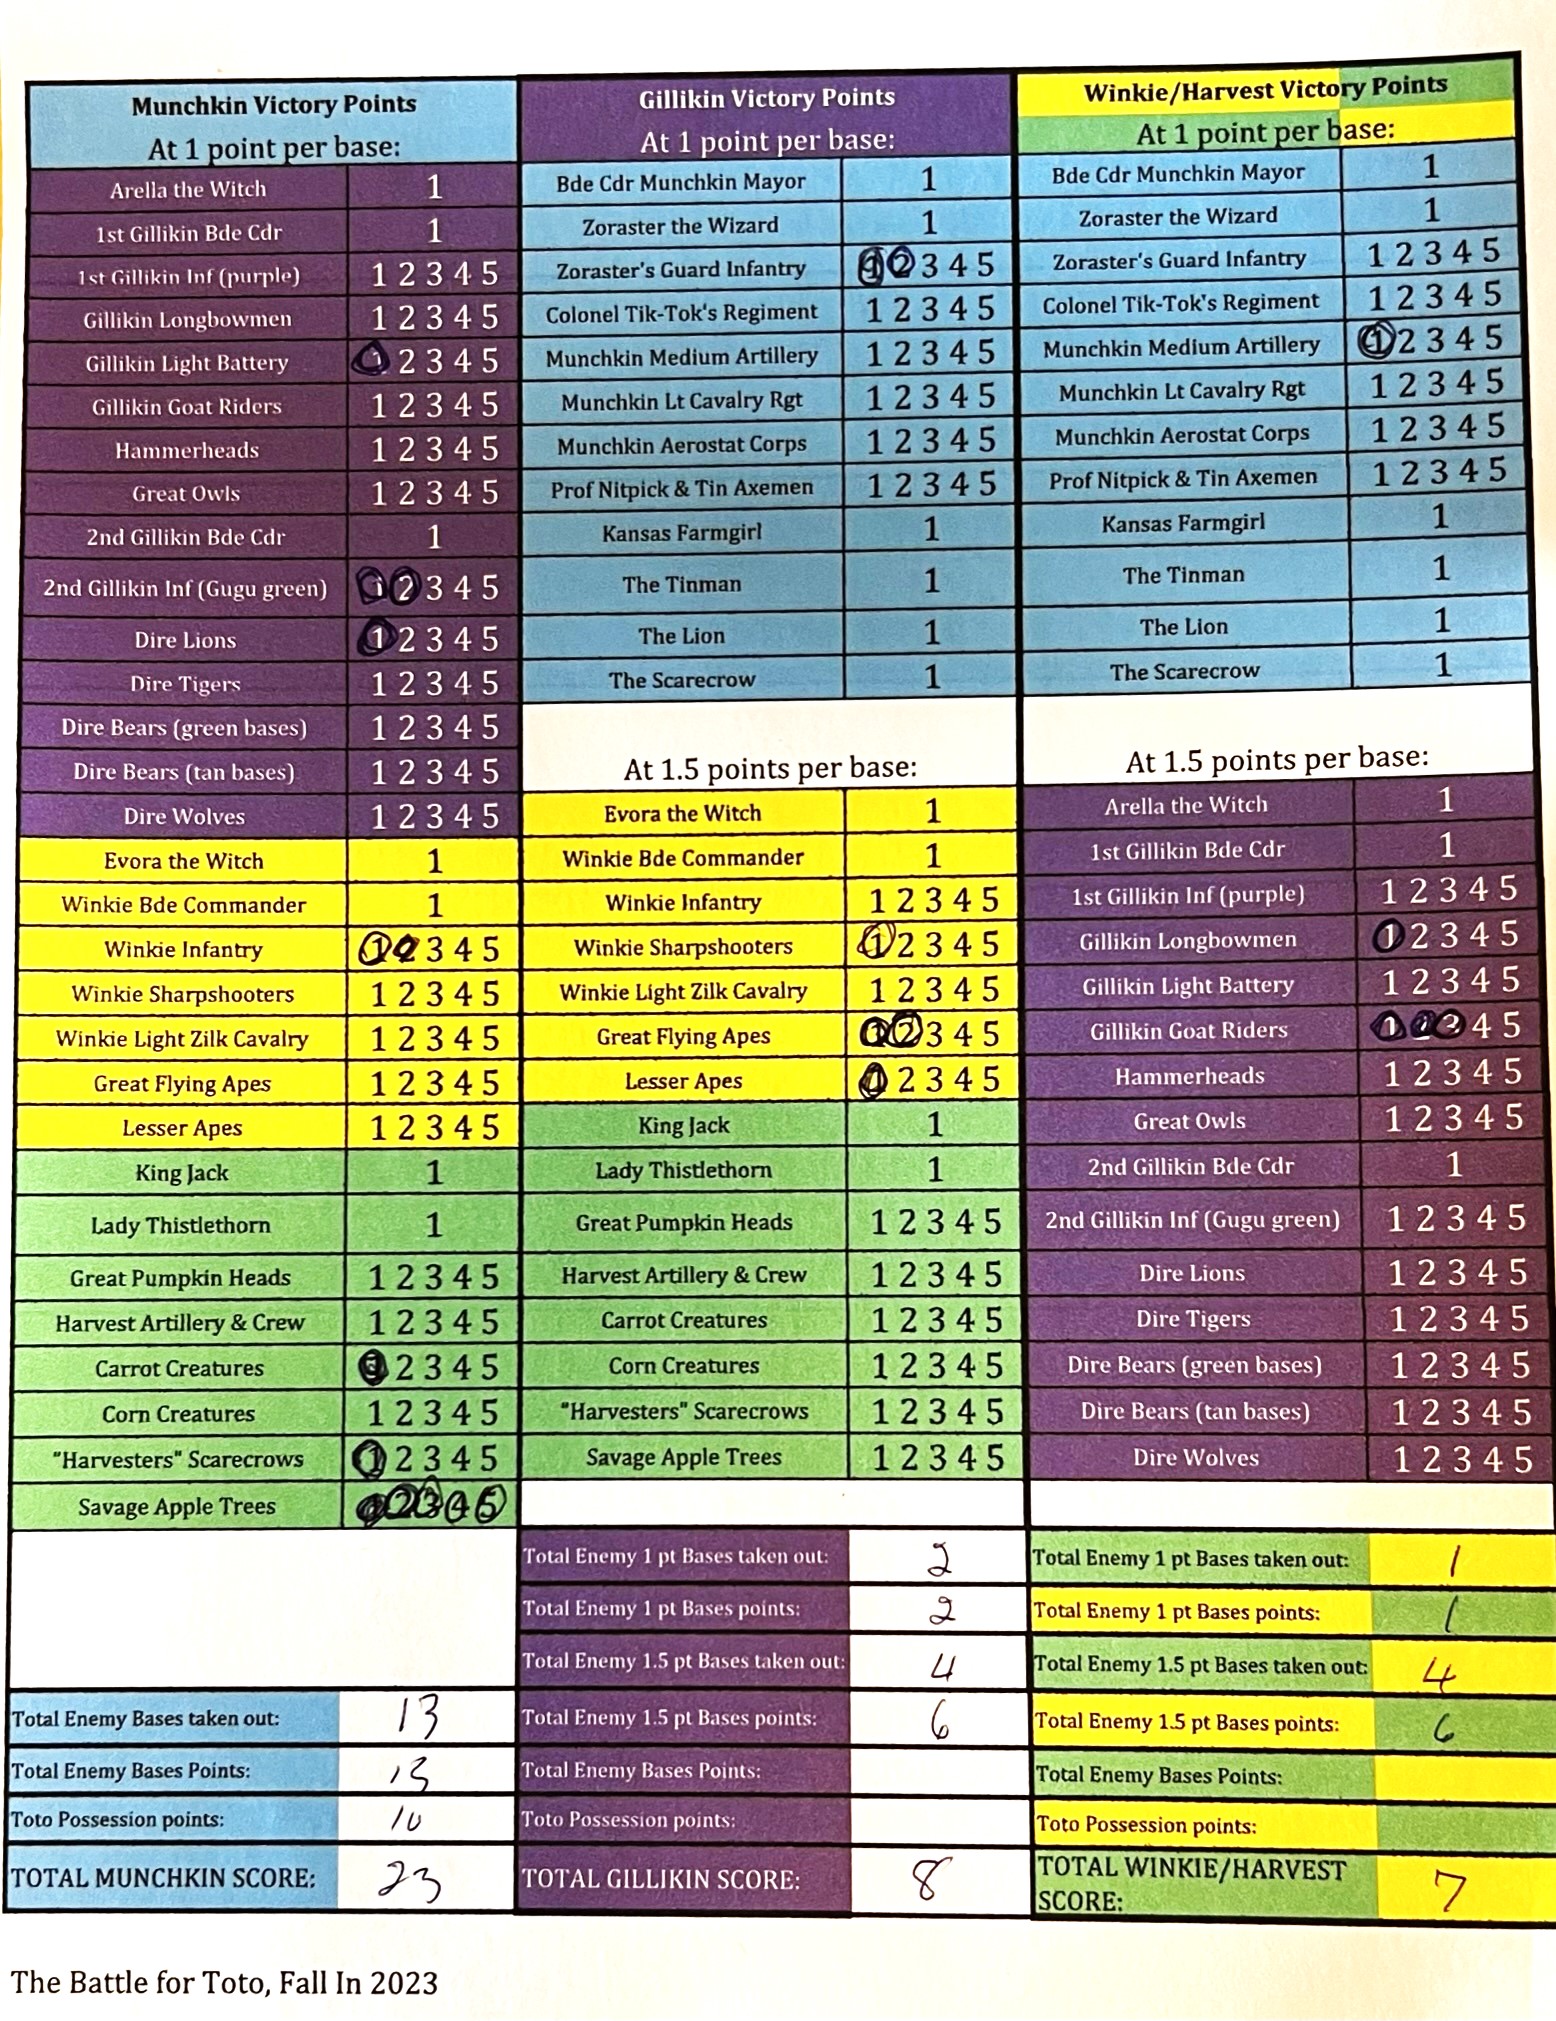
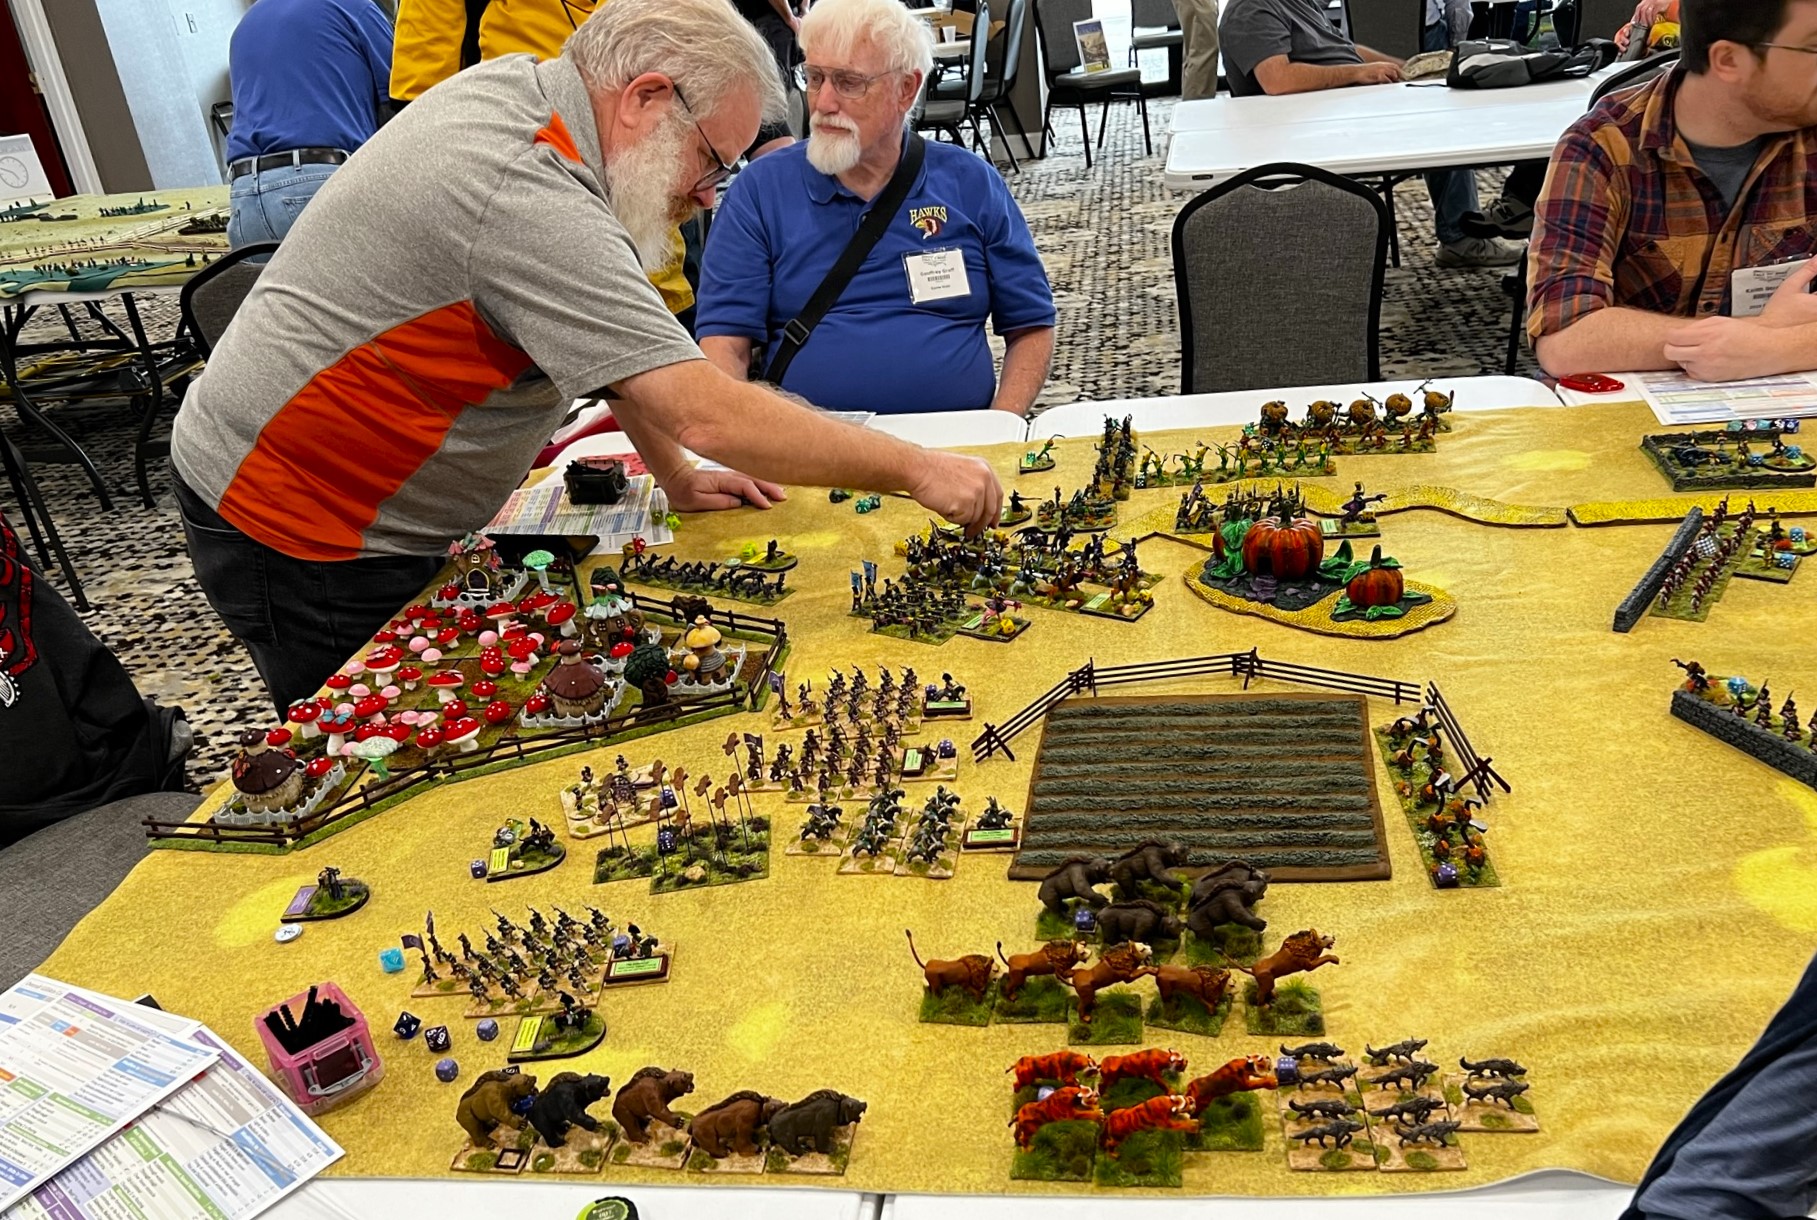
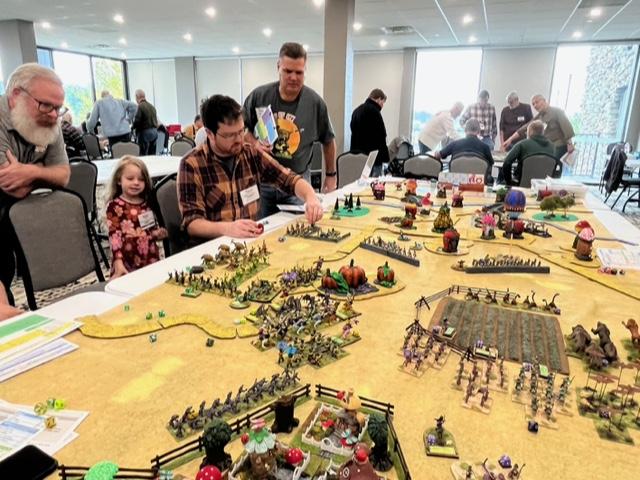
Professor Nitpick and his Mechanical Tin Axemen and the Munchkin Light Cavalry in reserve behind the main Munchkin defenses.A view of the game start – lots of terrain, yes? Some from our Aussie buddy Guru!The attackers move forward – have not fought each other yet.The attackers – Terry with the 2 Gillikin Brigades, Allen with the Winkie Brigade, and Geoff with the Harvest Brigade. Photo by Chris Palmer. Here you can see my Munchkin players – one on the right with his daughter and Mark and Charlie on the left. Photo by Chris Palmer.I brief the scenario. Photo by Chris Palmer.Gillikin forces. Photo by Chris Palmer.The dad (sorry that I forgot your names) and his daughter on the Munchkin side discuss strategy. Geoff prepares for war. Photo by Chris Palmer.Allen came back for a second try with the Winkies – while Geoff took over the Harvest Brigade in this game. I had two Munchkin players.I remove a fence section after the Great Menacing Hammerheads breach it. Photo by Chris Palmer.Harvest forces menace the Munchkin Medium Battery – supported by the Light Cavalry. Meanwhile, the Winkies deploy into line to hit Colonel Tik Tok’s infantry.The Corn Creatures make a devastating melee attack and overrun the Munchkin artillery and send them running for home.As the Corn Creatures overrun The Munchkin battery, Harvest tries to get to the the town. Mark and Charlie hold off the attackers as I assist the gamers. Photo by Chris Palmer.Mid-game action. Photo by Chris Palmer.Professor Nitpick moves up to support the Munchkins against the Gillikin assault. Photo by Chris Palmer.Savage Apple Trees show up unexpectedly in the Munchkin rear! They were too slow to affect the battle though.The Munchkin Guard loses discipline and abandons their wall for a charge at the Gillikin infantry. The Munchkin Aerostat provides covering fire, but the Winkies and the Gillikins are at the town – and the Gillikin Bears would seize Toto. The ballon would then fire at them, and they would run away. Still, the Dire Tigers would refind Toto and take possession of the little dog. While the Gillikins did get Toto for 10 points, they were light on taking out enemy as casualties. The Winkies/Harvest did take out a lot of Munchkins, but took just one Gillikin base. The Munchkins were victorious having made their enemies pay with 23 base losses. Had the game continued (time ran out) I believe that the game could have gone in any direction.
Thanks so much to all of the players. Mark and Charlie from Mark’s Game Room did play in this game as you see from the pictures. They also did a wonderful video recap of the ENTIRE convention (with a minor mention of this game at 8:48). Well worth a view – and a subscribe – CHECK IT OUT!:
Saturday Afternoon – Dave Wood’s Wars Of Ozz Game: Munchkins and Winkies
After a quick break, it was time for a Saturday afternoon game with Dave Wood – anothe Ozz game! I did not get many pictures, but here is one (yes just one):
I played on the defending Harvest side – and we on the Munchkin side achieved a minor victory over the attacking Winkies, Impkins and Gillikins. Dave did a nice job with 8 players!
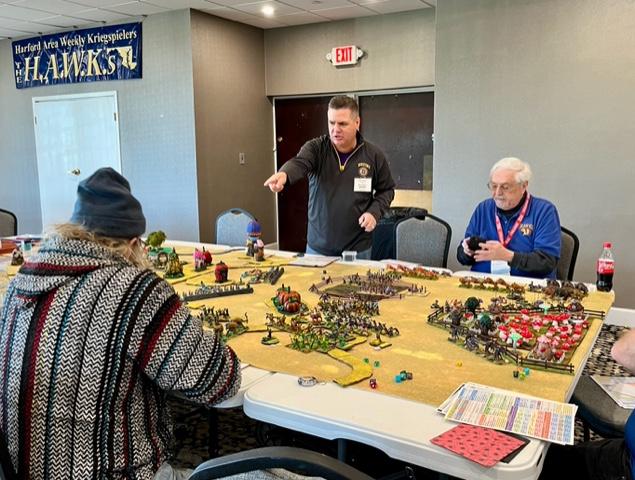
Saturday Night – Dave Wood’s Wars of Orcs and Dwarves Game: The Elves against the army of the Professor of Post-Mortem Communications (formerly called the Necromancer)
Glad Dave chose a short scenario title for a meeting engagement! Anyways, I was not able to initially play in this game as it was sold out. So, I helped him out as an assistant GM until late in the game when one of the Elven players left. It was a narrow bad guys victory – and to my teammates mea culpa as my unnecessary attacks cost us the one base loss. Hey, it was late!
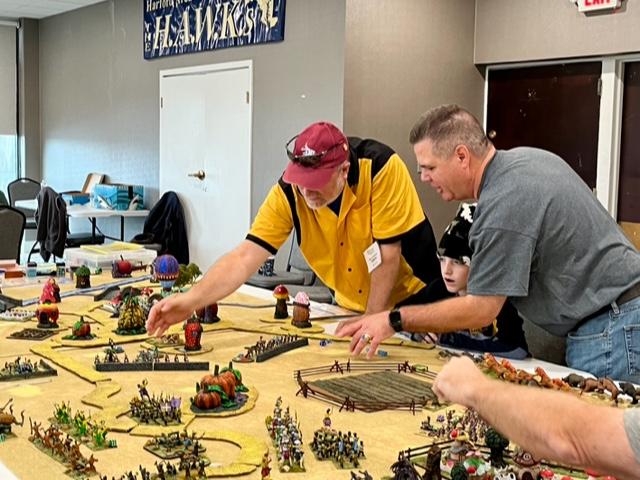
View of the game tabletop as Dave briefs the scenario.Mid-game action.Warg cavalry (old Ral Partha I think) facing Ratlings with crossbows.
I wish I took more photos – but I did not. Anyways, that’s the wrap for me on HMGS Fall In!® 2023. For me, it’s wargame season again as golf opprotunities have dwindled. Thanks so much to HMGS for a great convention!
For all of my previous posts on Wars of Ozz games, figures, units, and other related projects – please see this page.
Here, as promised in my last post, is the second Wars of Ozz unit that I finished in October 2023 in preparation for HMGS Fall In!®. It is OZZ-511, Professor Nitpick & His Mechanical Tin Axemen. According to the Wars of Ozz rulebook, in the world of Ozz, there is the “Industrial City”, a “haunted ruin”, inhabited by one man – Professor Nitpick. The section from the rules that describe him and the Industrial City are superb – just a short excerpt:
Before…this unnamed city was a powerhouse of production, one of the last great cities of the world. Now it is an unknown ruin, bombed into ruins…no building remains untouched, the result of a terrible vengeance for a crime of the citizens here. Some claim they started the Last Great War, others claim they invented the Madness bombs that stilll infect the land…no historical mention of the city survives…only one person…might know the crime that earned the city such punishment – the reclusive Professor Nitpick…
The Professor is a legend. According to him, he was born before the Last Great War, more than 300 years ago…the witches suspect Nitpick was actually created by the science-wizards of that time, an experiment to create a superman…(but) Nitpick is frail and certainly no superman…
…he is, however, a mad and ruthless genius…(who) remembers the old technology and…has created…his Auto-Mechanical Axemen. With them as his army, he has claimed the Industrial City as his private estate…
Wars of Ozz rulebook, section 2.6.2, page 43
The section goes on to describe how Professor Nitpick has been previously attacked by Evora the Witch, the Empress of the Winkies. Despite their martial prowess, her Winkies were trounced by Nitpick’s forces. Since then, no one has dared to approach the Industrial City to steal its secrets while Nitpick has his army on guard. Yet, in exchange for devices or artifacts, the Professor can be persuaded to join other armies in Ozz with his Mechanical Tin Axemen.
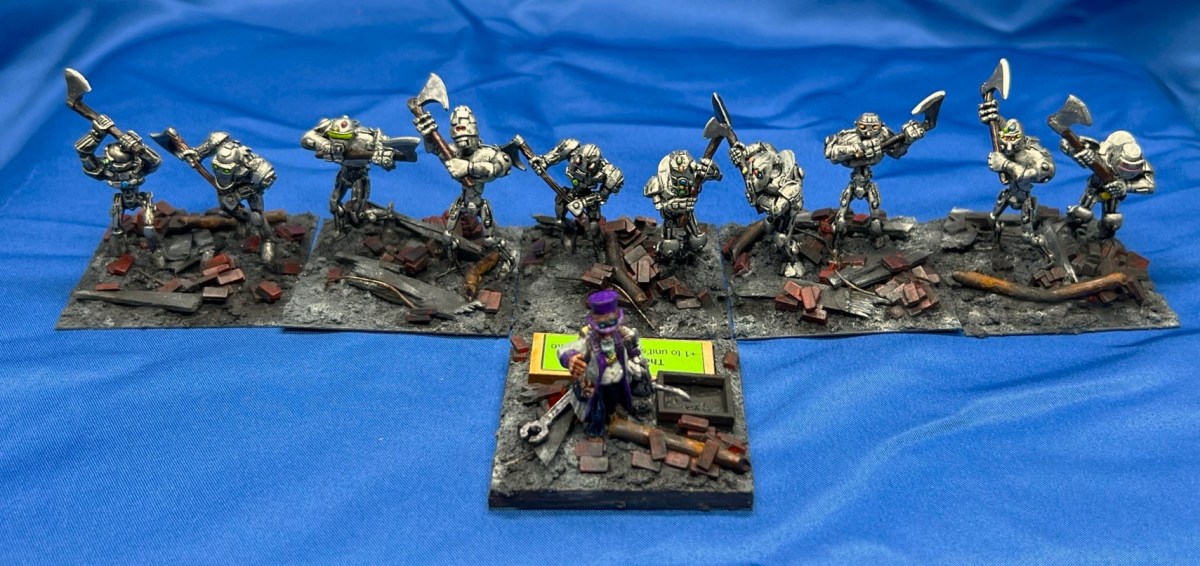
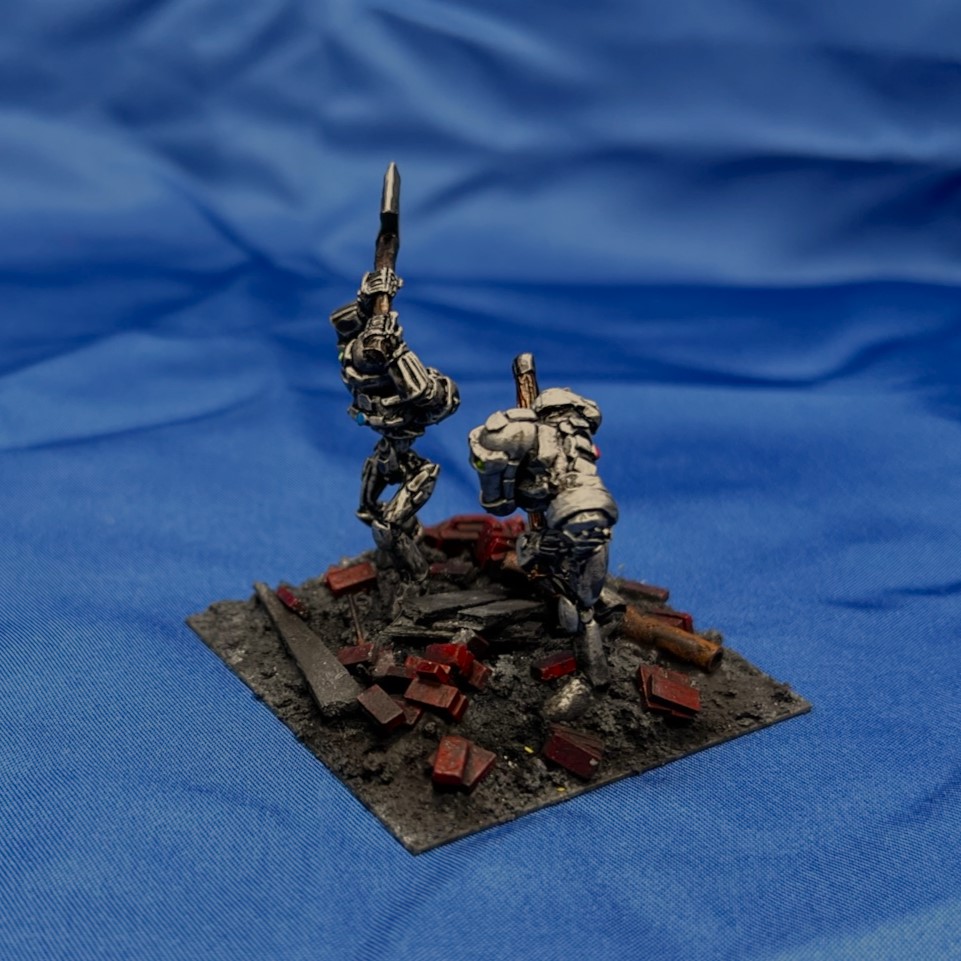
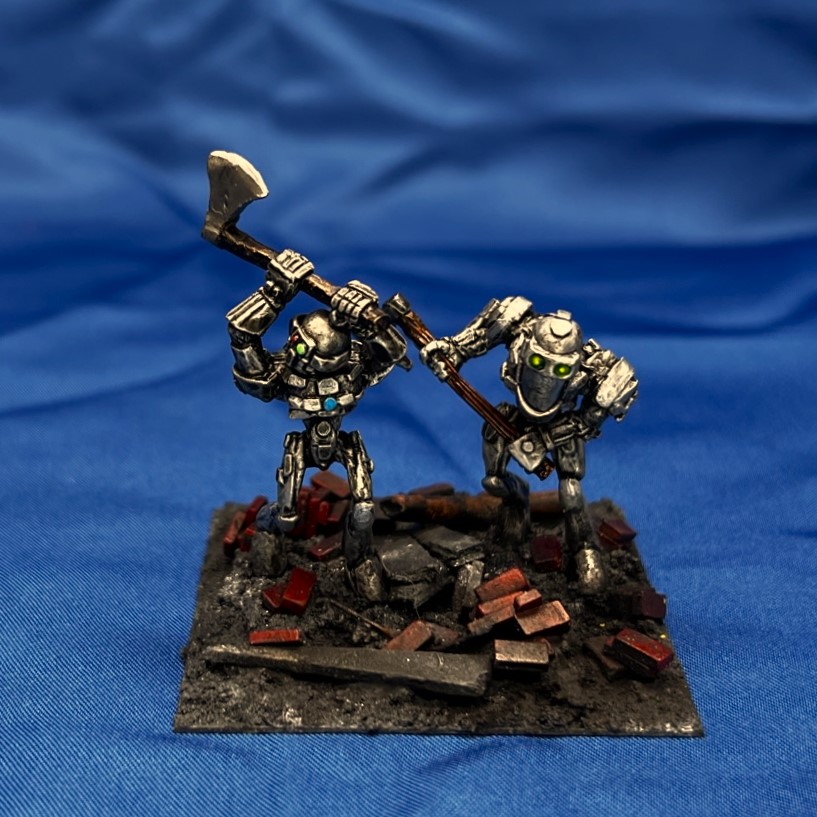
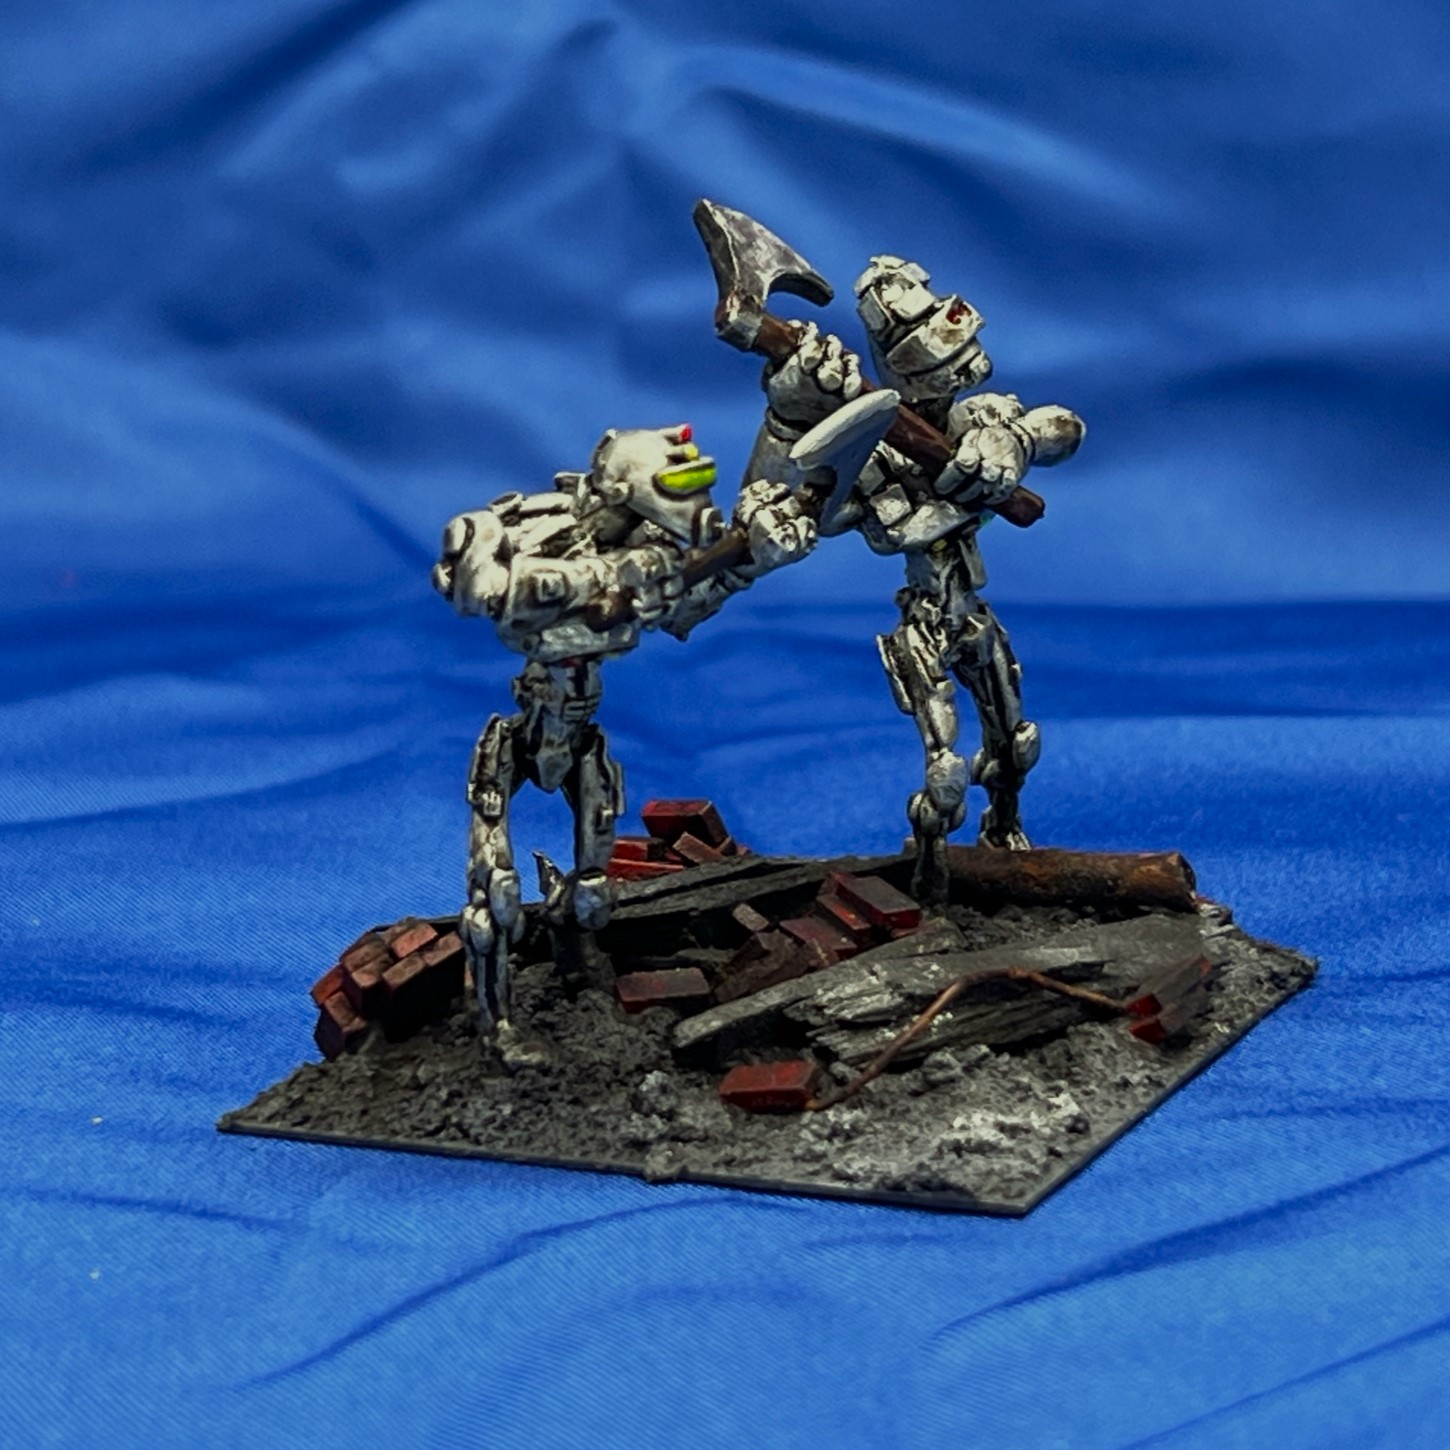
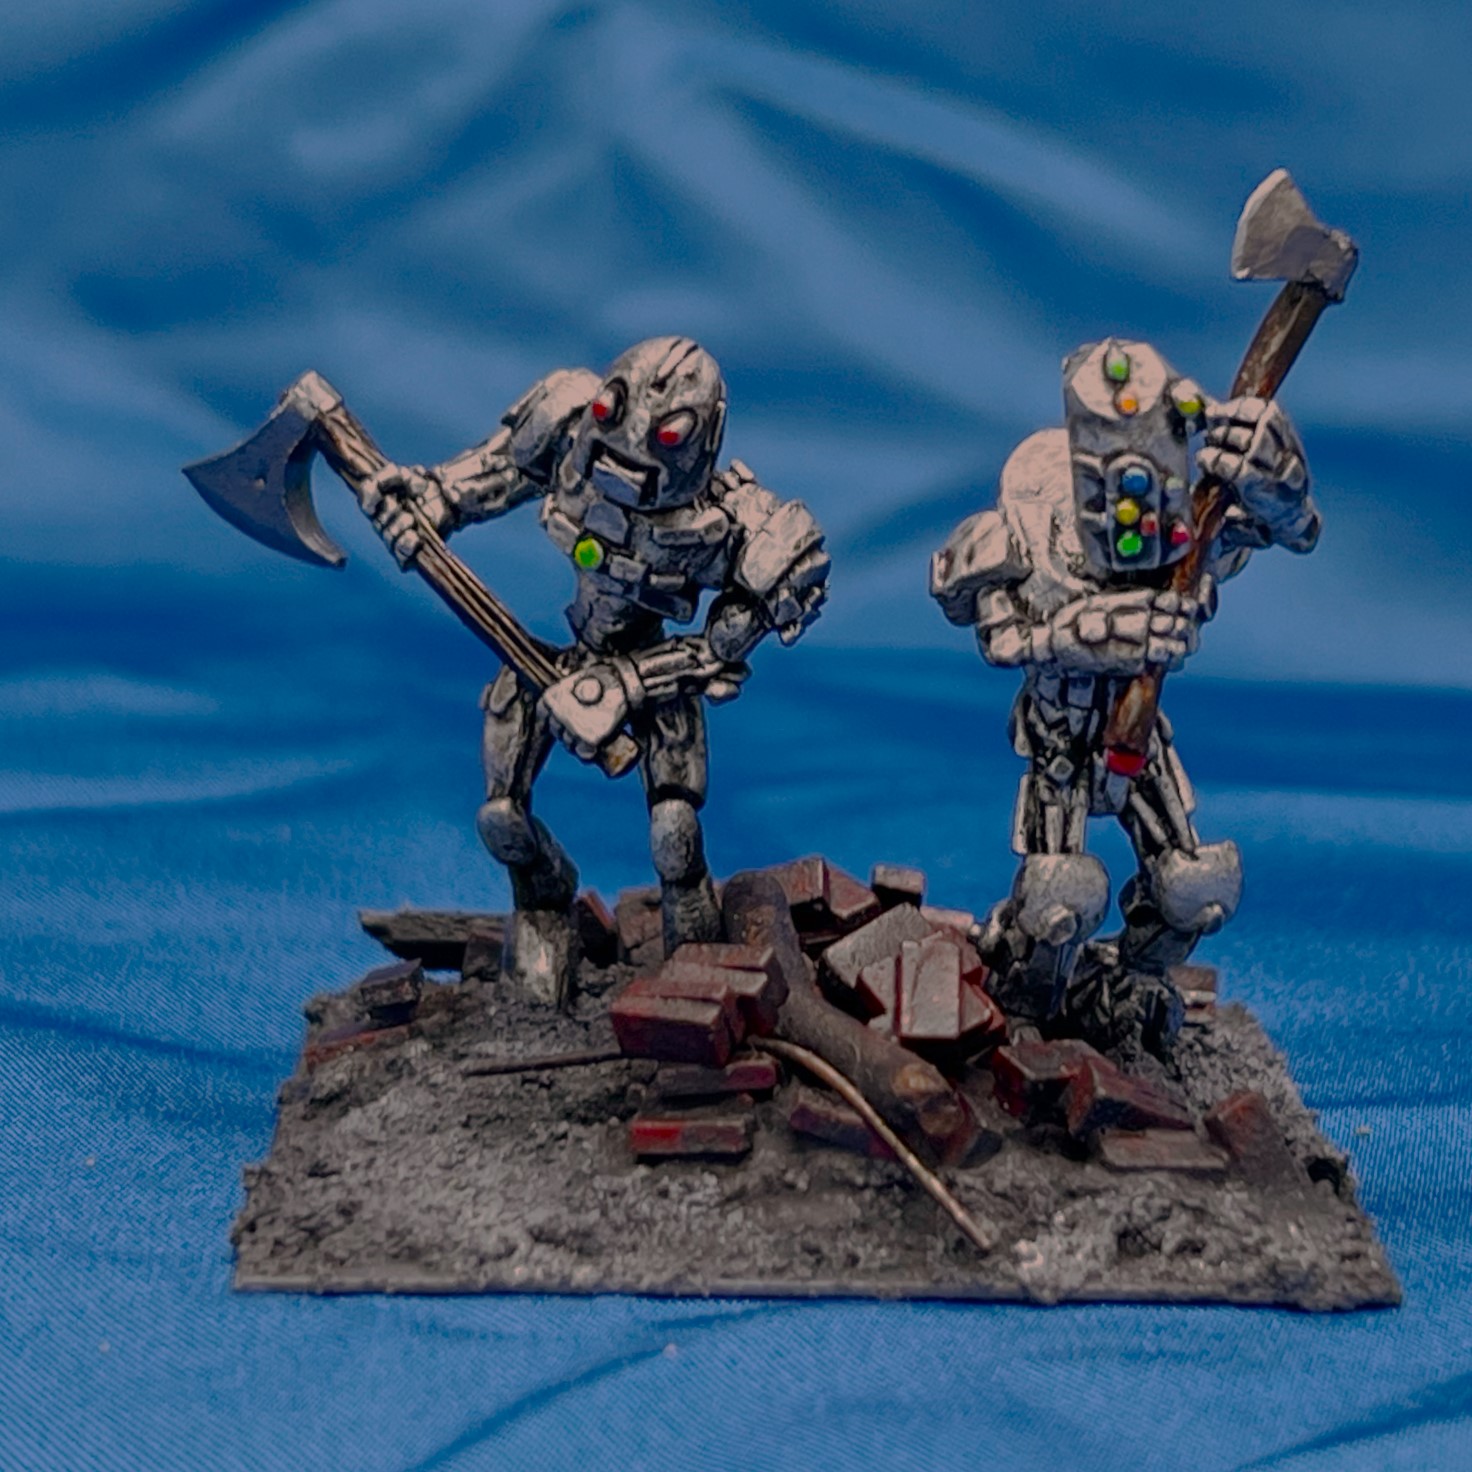
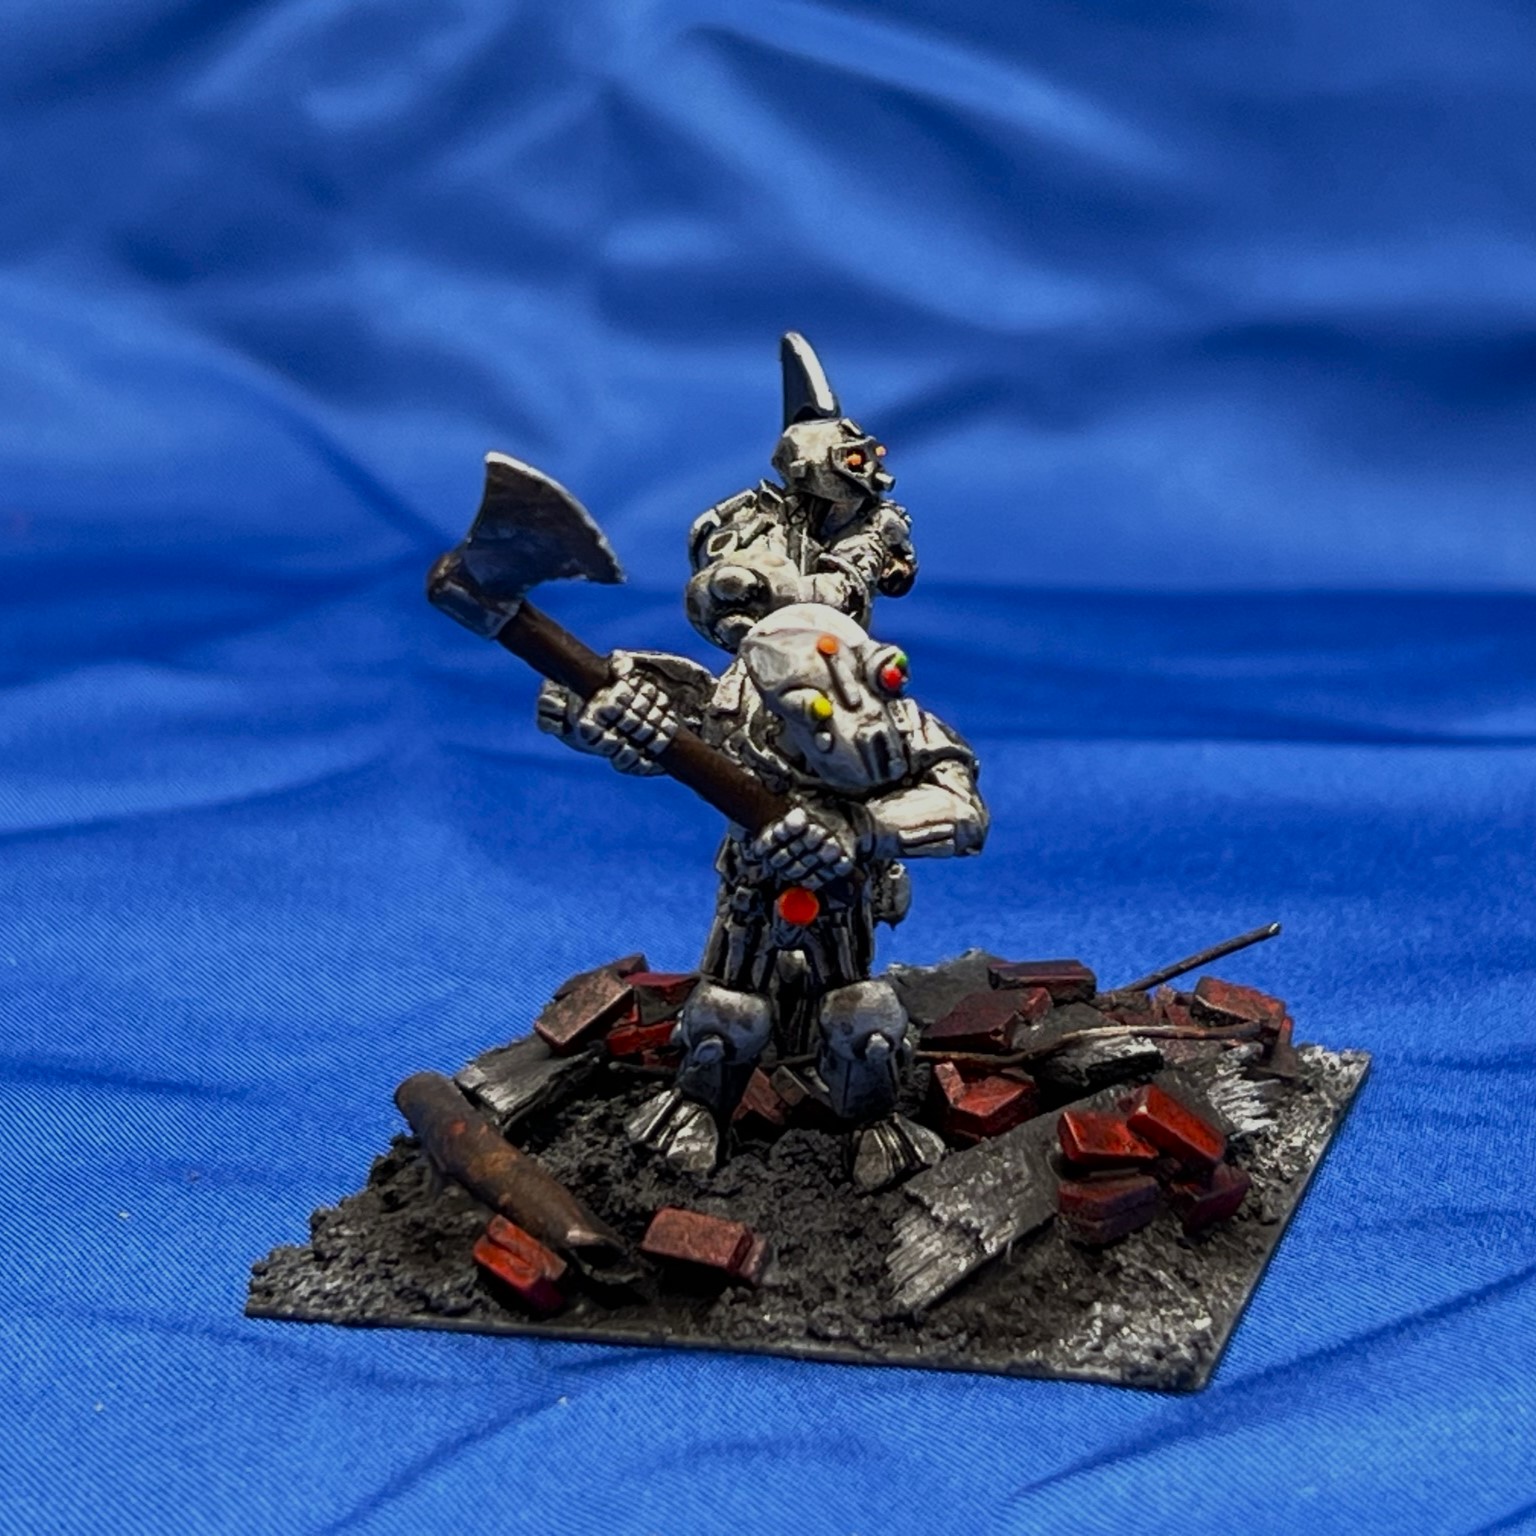
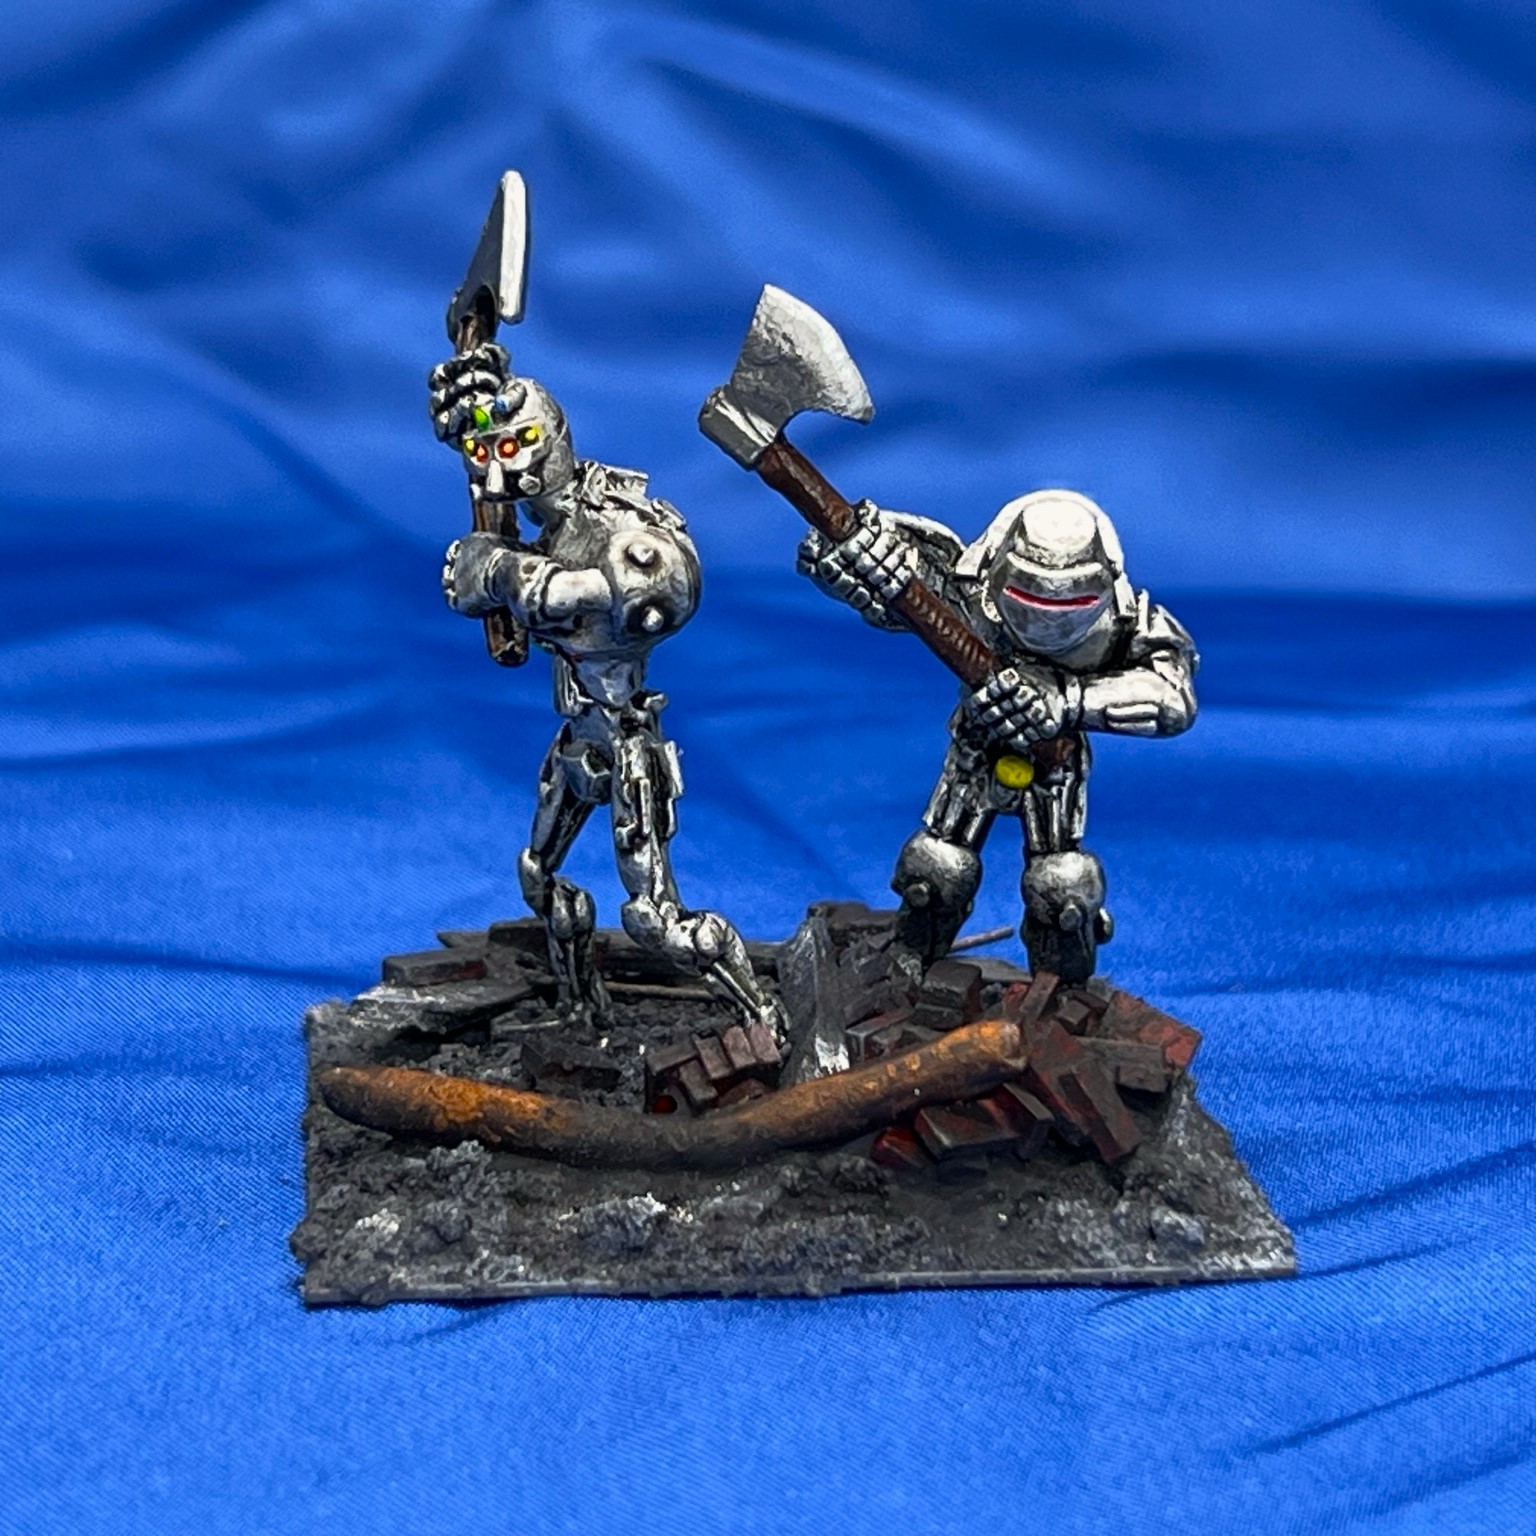
For the SKU Ozz-511, there are 11 figures – with Professor Nitpick as the regimental commander and 10 Axemen. All are metal and 28mm in size. The axemen look like very cool steampunk robots. In the game, they are infantry that, due to their sturdiness, lowers an attacking unit’s melee value by one – reflecting their armored nature.
In the game, the axemen are based 2 apiece to a 2″ square base – so five bases for the Mechanical Tin Axemen regiment plus Nitpick on his own regimental commander MDF base. Some minor assembly was required for the unit other than the basing – such as choosing and affixing which heads you prefer for the axemen (and there are several extra in the kit). The Professor Nitpick figure has an oil can and an oversized wrench. The regiment is exceptionally superb at combat with their axes – with a Melee value of 8/10, a Resolve value of 8/10, and an Elan value of 8/10 as well. The unit costs 6 points.
They are armed with a motley assortment of axes. As I have with other units, I based them so as to mix and match the poses and the figure types such that no two bases of the five were identical. I gave the Axemen the shaded metallic look similar to my Archive Warbots.
I definitely wanted them to appear as if they were truly in the ruined Industrial City in accordance with the Ozz canon (as opposed to the Oz of Baum). While that means that their bases will differ visually on the tabletop from grassland terrain and other typical Ozz terrain, I thought it appropriate to their origin and nature. To that end, as shown below, I added broken bricks, wooden debris, rusted pipes, and twisted rebar to this regiment’s bases. It was fun to do these bases with this theme as it’s been a while since I painted anything even close to it.
Let’s see some WIP shots and some more pics below!
WIP shots…
The unit is shown here getting cleaned up – you can see that there are several heads to choose from on the metal sprues.After assembly, I primed them in black so as to accentuate any recesses down the line. I primed the Professor in white.Simple dry brushing brought out the base metallic colors over the black primer.
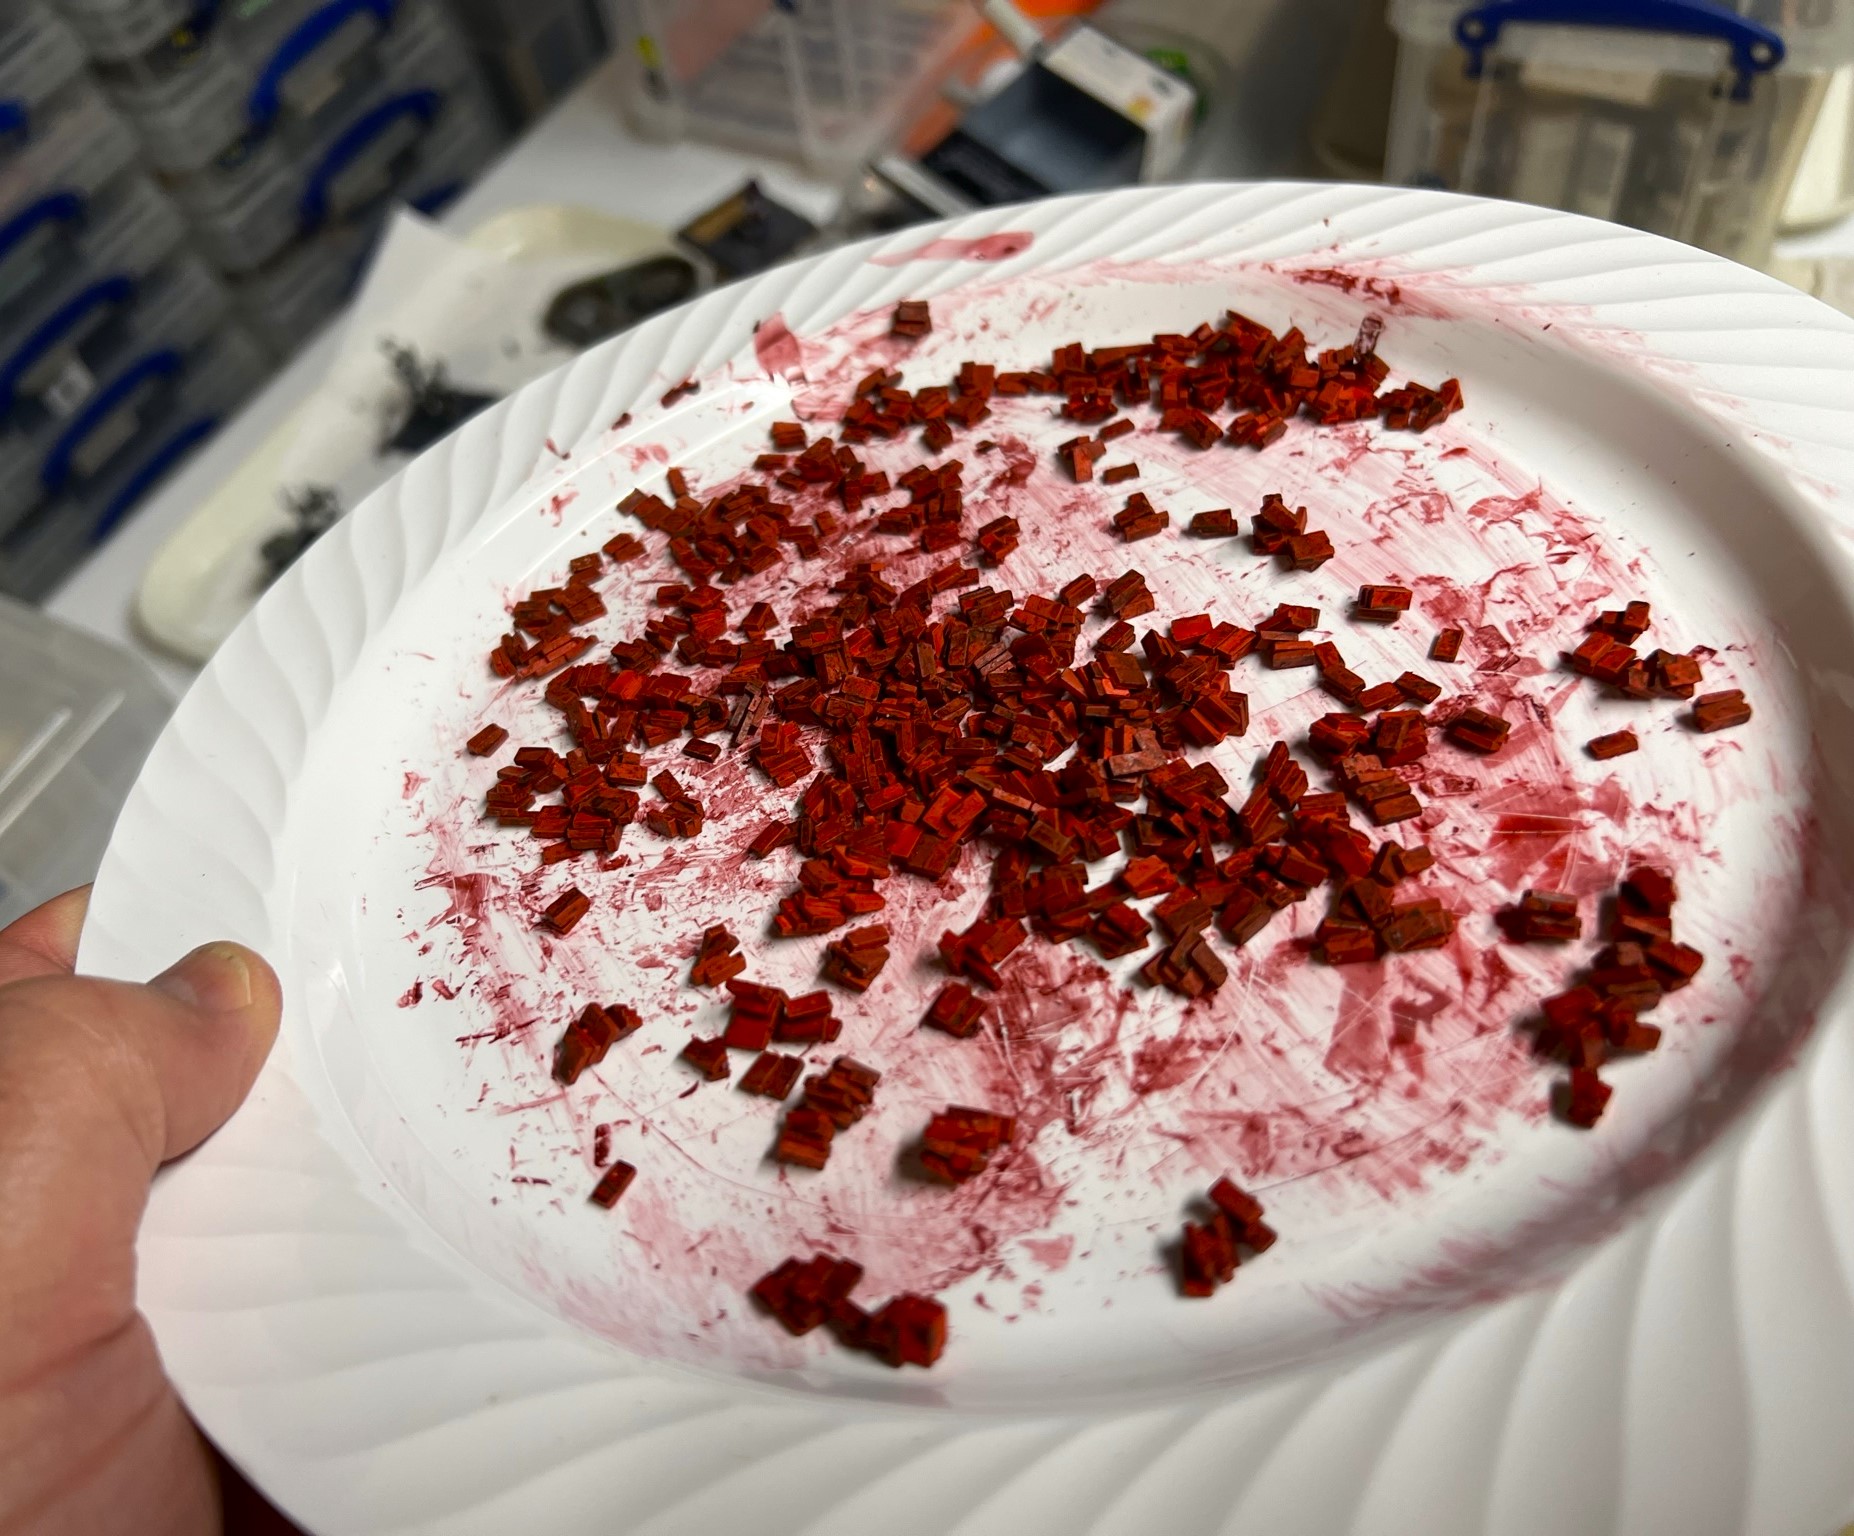
As for the bases, I had some bricks that I saw on The Imperfect Modeller’s blog. At least that is my memory – Dave may have just told me about them at some point. I bought some of these Juweela® 1:48/1:50 scale terracotta bricks a few years ago on Noble Knight games – in anticipation of a future need that I might have for rubble. And here the need for rubble had indeed arrived!
The box of 1,000 little bricks.
I took one of my old specimen jars that I use for mounting figures to paint the bricks (and btw contrary to any other assertions (Guru), my specimen jars are never used for actual specimens!!).
I dumped all of the 1,000 bricks in (no I did not count them) and added in red ink. I then swirled the bricks around in the jar before dumping them all out helter skelter on plastic plates. After having spread the bricks out, I let them dry – and they were indeed clumped together in a very rubble-like fashion. Perfect – and later I would give them a red-black ink treatment to boot to age the bricks and vary their color a bit.
The bricks after the first red ink application.The bricks are shown here after they got the red-black ink aplication. Note how they stuck together. Pigment additions would come later.
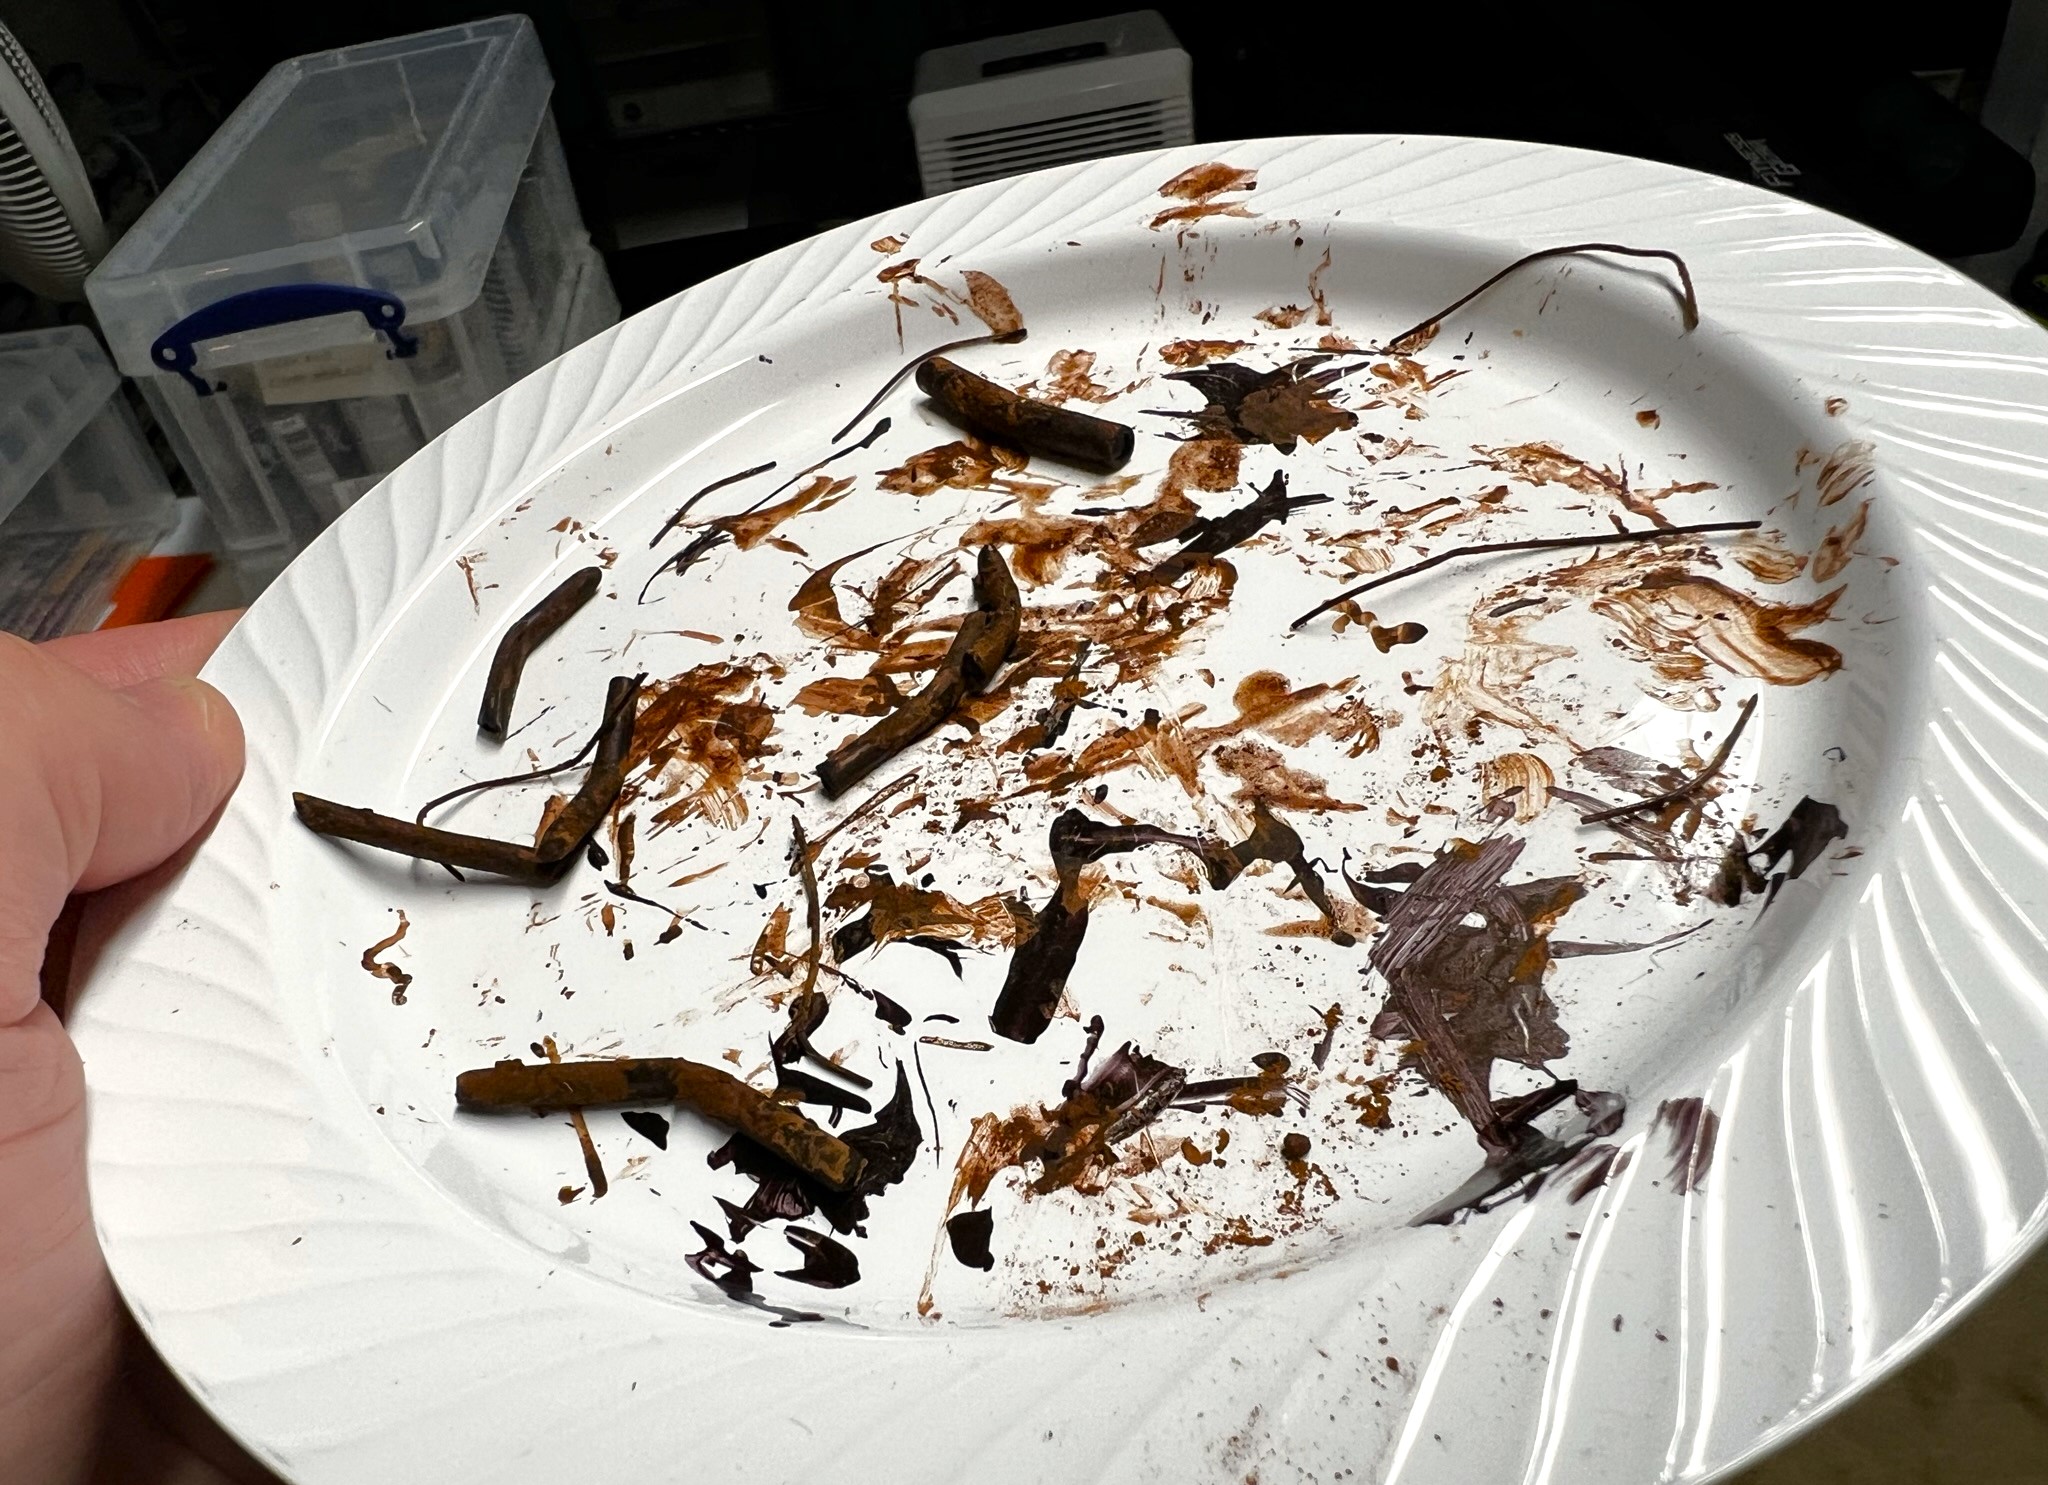
Then, I moved onto making some twisted rusty rebar and crushed and rusty pipes. I took some paper clip wire for the former and some plastic tubing for the latter, bending aand crushing both as needed. I then swirled the both of them in a specimen jar with some iron paint (Army Painter Warpaints “Rough Iron”) and some rust washes (Vallejo Mecha Weathering “Rust Texture” and Vallejo Mecha Weathering “Dark Rust Wash”). As with the bricks, I dumped them out on a plastic plate to dry – moving them around so that they did not stick to the plate. As before, pigment additions would come later. For those interested, I do list all of the paints and more that I used on this project at the end of the post.
The rebar and pipes after the iron paint swirling.The same materials after a rust wash swirl, plus a good application of rust pigments, after drying on a plate.
The last materials I wanted to add to my bases were pieces of broken and burned wood. For this I went with shards cut from popsicle sticks. Yet another swirl was done with a dark grey ink (Secret Weapon Washes “Stone”). I let these dry and again, pigments would come later, mainly soot and ash.
The broken and shattered lumber shards.
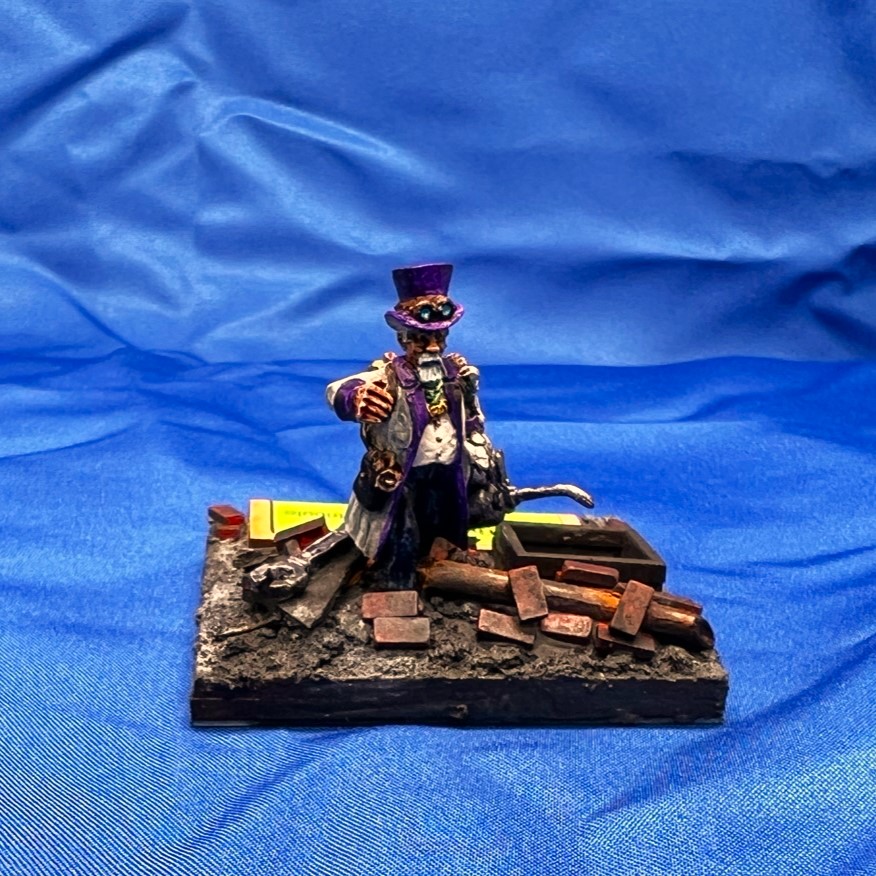
During this process, I continued to paint the figures – adding various lights and LED-like buttons to the axemen. I did not want to overwhelm the axemen figures with color – so the little lights were nice highlights. I gave Nitpick a somewhat “Willy Wonka” look with a white lab coat. For the bases, I used Citadel “Astrogranite Debris” on them as a base for the addition of all of the rubble in the future.
Professor Nitpick with a base of wet “Astrogranite Debris”.An 2″ steel axemen base with mostly dried “Astrogranite Debris”.
Now it was time to add the rubble in a haphazard way – as ruined-looking as possible. I did this by adding and gluing the brick clumps, individual bricks, wood shards, rebar, and rusty crushed pipes sequentially with PVA and letting them dry. I subsequently used pigments to make the wood look burned and ashy, as well as adding ashes and soot on the base with attention to the rubble of bricks, wood, pipes, and rebar.
Professor Nitpick on his ruined base with his oil can in his left hand. I put the massive wrench on the base to his right on a piece of burned wood. I added a Pendraken 12mm dice frame on the side for game use. This would all get an airbrush matte varnish application as well to knock down any shine. Similar to the previous shot, here you see an axemen base prior to varnishing, but with the base having been treated with rust, soot, and ash pigments.
Now, I can’t wait to share…
Eye Candy
Professor Nitpick
Base 1
Base 2
Base 3
Base 4
Base 5
Group Shots
A group shot with a better view of Professor Nitpick.A group shot from a slightly higher angle showing the bases and the axemen a little bit better.A top view showing the full bases as well as the Wars of Ozz leader ability placard I used for the regiment at Fall In. That placard can always be changed to another ability depending on what is drawn by chance. The slot in the MDF base allows for this.
I enjoyed painting and building this unit a lot – and am hopeful that more will be coming for Professor Nitpick’s forces in the future – perhaps even enough to be a faction in and of themselves. In the meantime, the regiment will make excellent allies to other brigades on the tabletop.
My next post will cover some photos from my games and experiences at HMGS Fall In!®.
And yes, I still have more Ozz to come…
Miscellaneous details and references for those interested in that sort of thing:
For all of my previous posts on Wars of Ozz games, figures, units, and other related projects – please see this page.
PAINTS, INKS, GLAZES, SHADES, WASHES, PIGMENTS, FLOCKING, GLUES AND MORE THAT I USED ON THE FIGURES FOR PROFESSOR NITPICK AND HIS MECHANICAL TIN AXEMEN REGIMENT:
Gorilla Glue
3/4″ steel washers
Poster tack
Vallejo White Surface Primer
Vallejo Black Surface Primer
Vallejo “Flow Improver”
Vallejo “Airbrush Thinner”
Vallejo Model Air “Steel”
Vallejo Model Air “Armour Brown”
Reaper MSP Core Colors “Blackened Brown”
Vallejo Model Color “Wood Grain”
Army Painter “Speed Paint – Dark Wood”
Army Painter “Speed Paint – Enchanted Steel”
Vallejo Mecha Color “Dark Steel”
Army Painter “Speed Paint – Broadsword Silver”
Vallejo Model Air “Gun Metal”
Citadel “Nuln Oil GLOSS” (wash)
Vallejo Game Air “Dead White”
Secret Weapon Washes “Blue” (ink)
Secret Weapon Washes “Just Red” (ink)
Vallejo Mecha Color “Green Fluorescent”
Secret Weapon Washes “Sunshine” (ink)
Vallejo Model Air “Fluorescent Red”
Vallejo Game Ink “Red” (ink)
Citadel Technical “Tesseract Glow”
2″ square steel bases from Wargames Accessories (#21)
MDF base from Wars of Ozz miniatures
Citadel “Astrogranite Debris” (texture)
Pendraken 12mm dice frame
P3 “Brown” (ink)
Secret Weapon Washes “Heavy Body Black” (wash)
Paper clip wire
Small polystyrene tubing pieces
Popsicle stick shards
Juweela® 1:48/1:50 terracotta bricks
Army Painter Warpaints “Rough Iron”
Vallejo Mecha Weathering “Rust Texture”
Vallejo Mecha Weathering “Dark Rust Wash”
Secret Weapon Washes “Stone” (wash)
Elmer’s PVA Glue
Vallejo “Pigment Binder”
Vallejo “Carbon Black” (pigment)
Vallejo “Old Rust” (pigment)
Vallejo Model Color “Black”
Battlefront “Dark Leather”
Army Painter “Speed Paint – Battleship Grey”
Army Painter “Speed Paint – Crusader Skin”
Army Painter “Speed Paint – Brazen Copper”
Army Painter “Speed Paint – Purple Swarm”
Army Painter “Speed Paint – Satchel Brown”
Army Painter “Speed Paint – Holy White”
Army Painter “Speed Paint – Cloudburst Blue”
Army Painter “Speed Paint – Aztec Gold”
Army Painter “Speed Paint – Hoplite Gold”
Vallejo “Titanium White” (pigment)
Vallejo Mecha Varnish “Matte Varnish”
Again, as you may want to check out the Wars of Ozz figures’ range – there are two places to get them (and I make no money from this btw). The game rules and the figures are available from the following two places: