

Followers of this blog have seen several posts showing my “rusty” preparations. I have been getting ready for my numerous games at 2026 tabletop wargaming conventions. That preparation involves painting up figures and terrain for scenarios that involve a good amount of ruins and wreckage.
In a previous post, I shared how I built transmission towers and rusty walls for a Wars of OzzTM game involving Professor Nitpik’s Industrial City (the Robotic Sanctum). I ran that game at Cold Wars and will share more about that convention shortly. The theme for Cold Wars this year was “The Wild West”, so I also had planned to run a game involving Space Cowboys (technically Archive Texican Space Rangers” from Star Rovers).
I don’t run western games, but I could cobble together a retro sci-fi game using Buck Surdu’s Combat Patrol:WWIITM gaming system (with my modifications). In my game Archive “Space Cowboys”, and uplifted kangaroos (“Space ‘Roos” ) combat blue-skinned “Retrovians” (from War Games Supply Dump). Both armies are searching for hidden ancient robots in the apocalyptic ruins of a long-dead civilization on a newly-colonized world called Dust.
To really make the ancient ruined industrial panorama that I wanted, I needed more buildings and structures than just my transmission towers, rusty walls, rusty generators and ruined chemical plant. I also wanted a lot of wreckage strewn about as terrain.
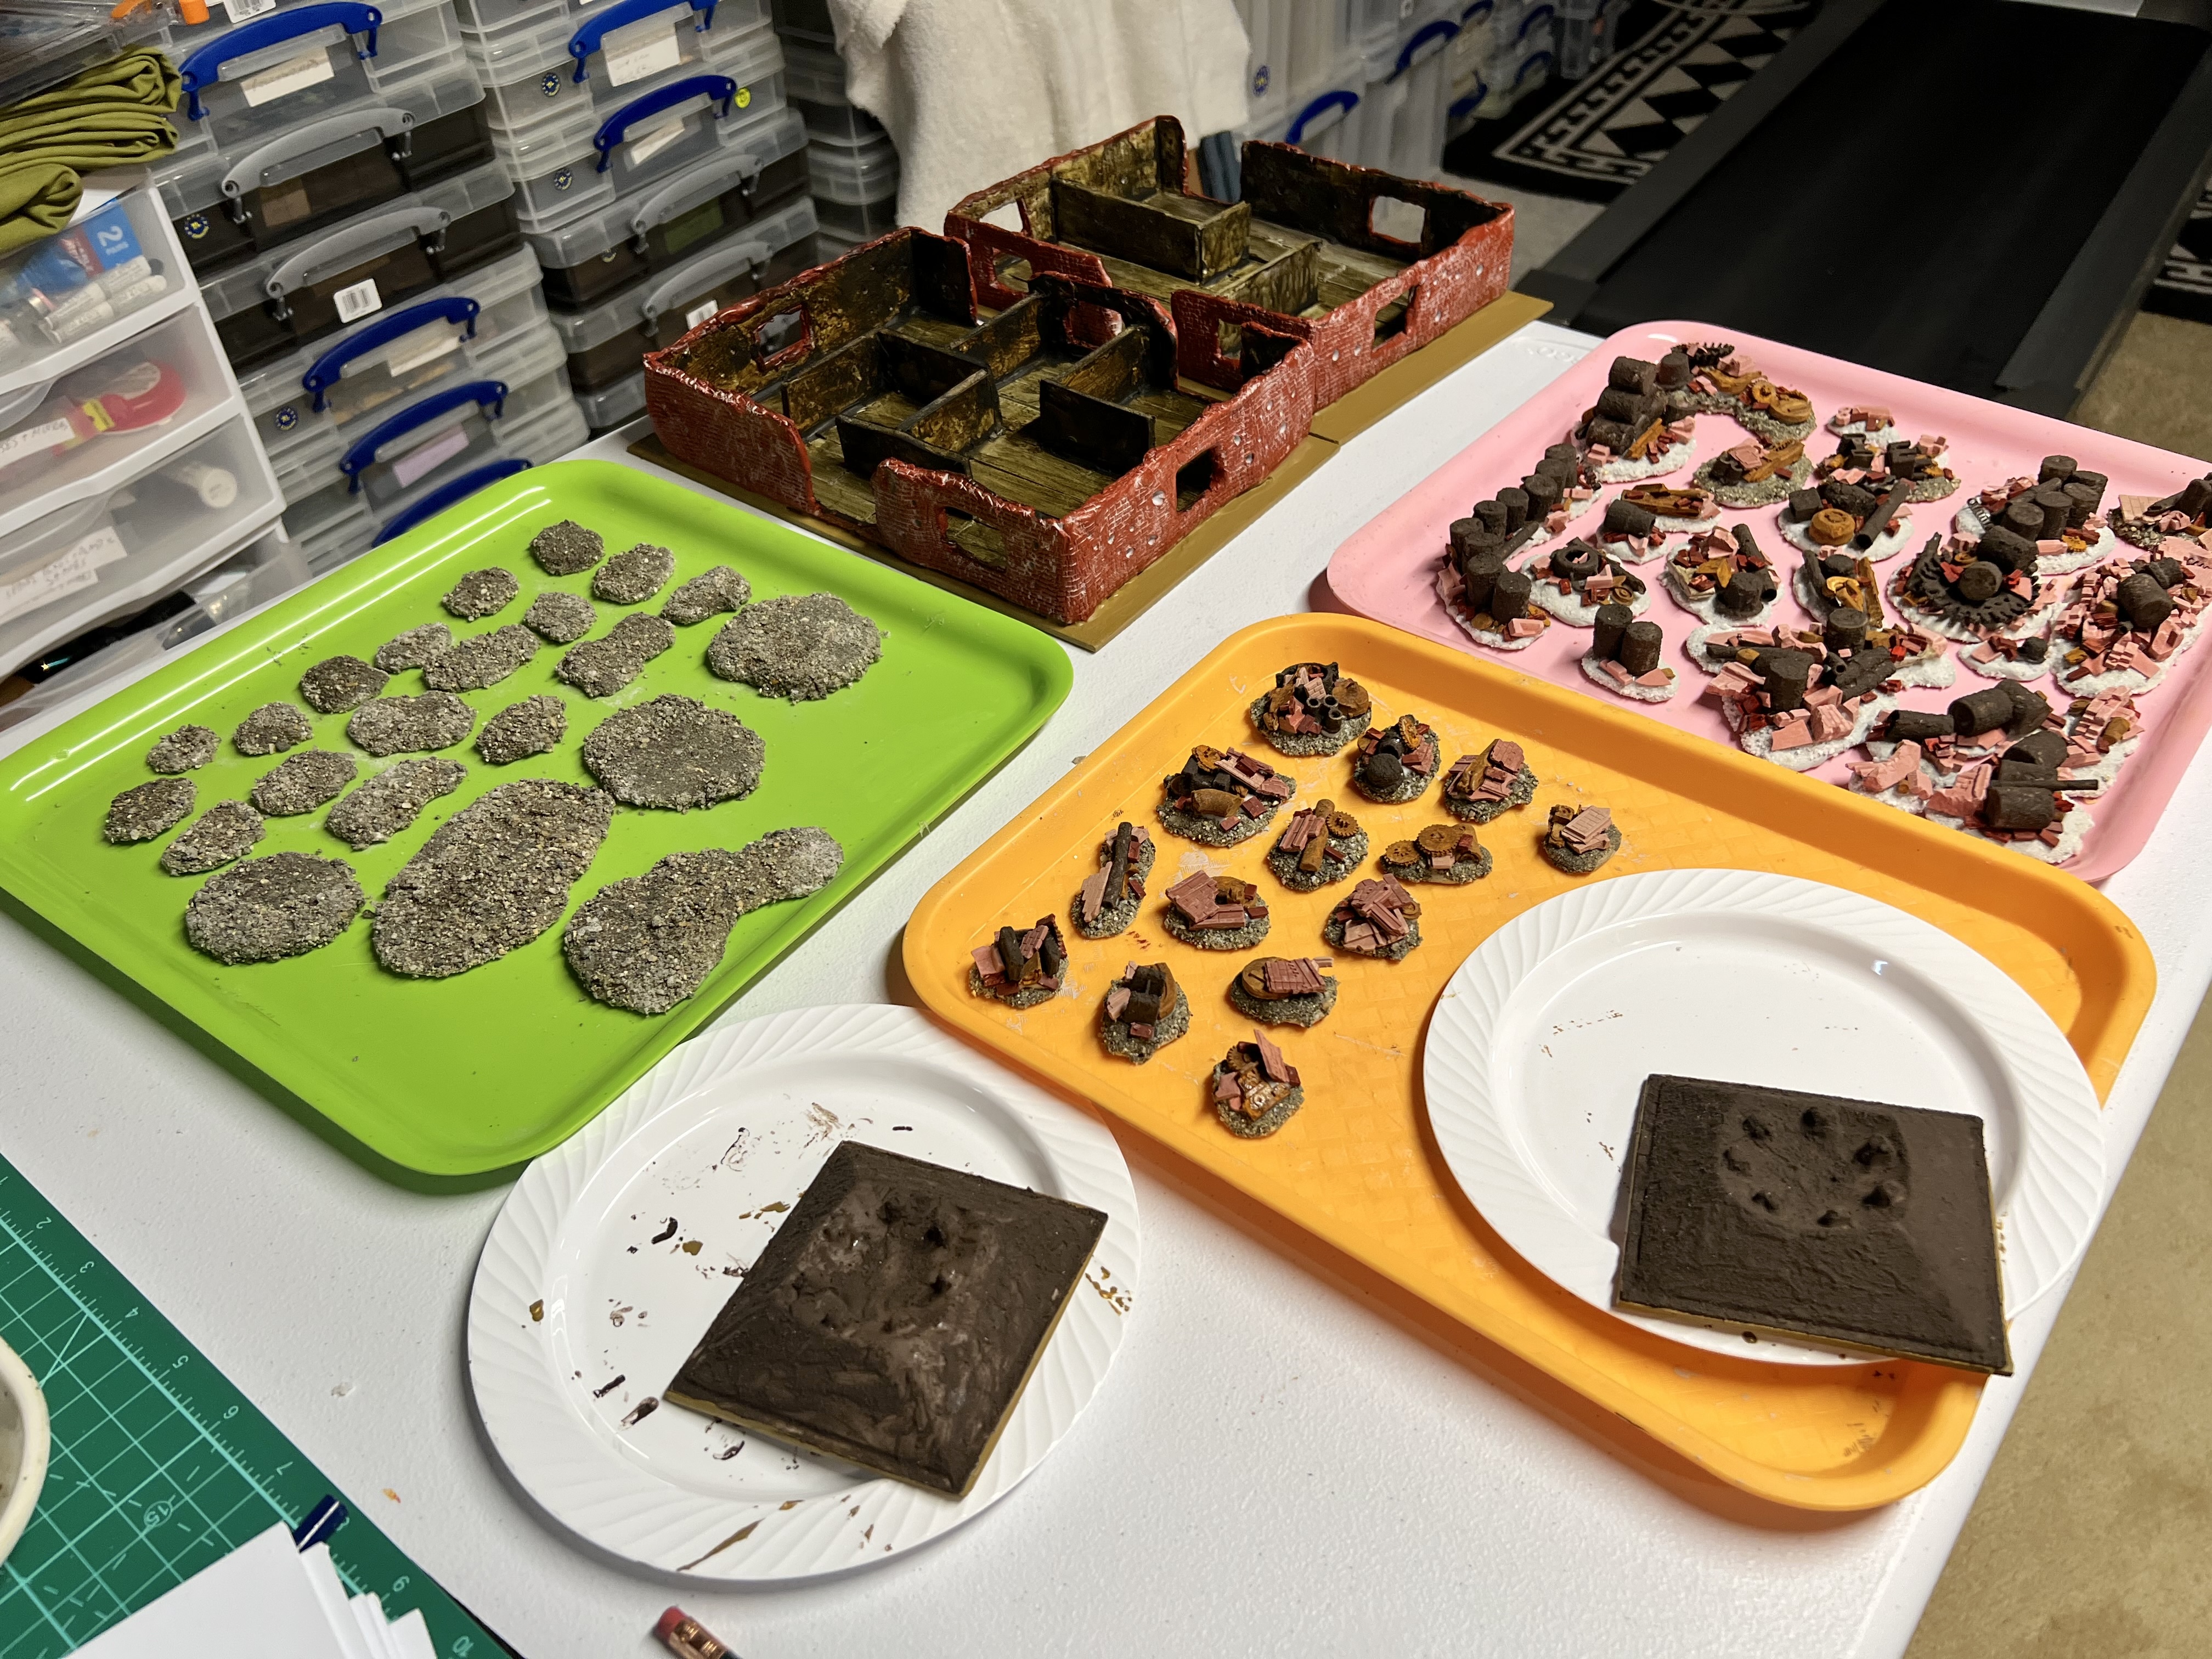
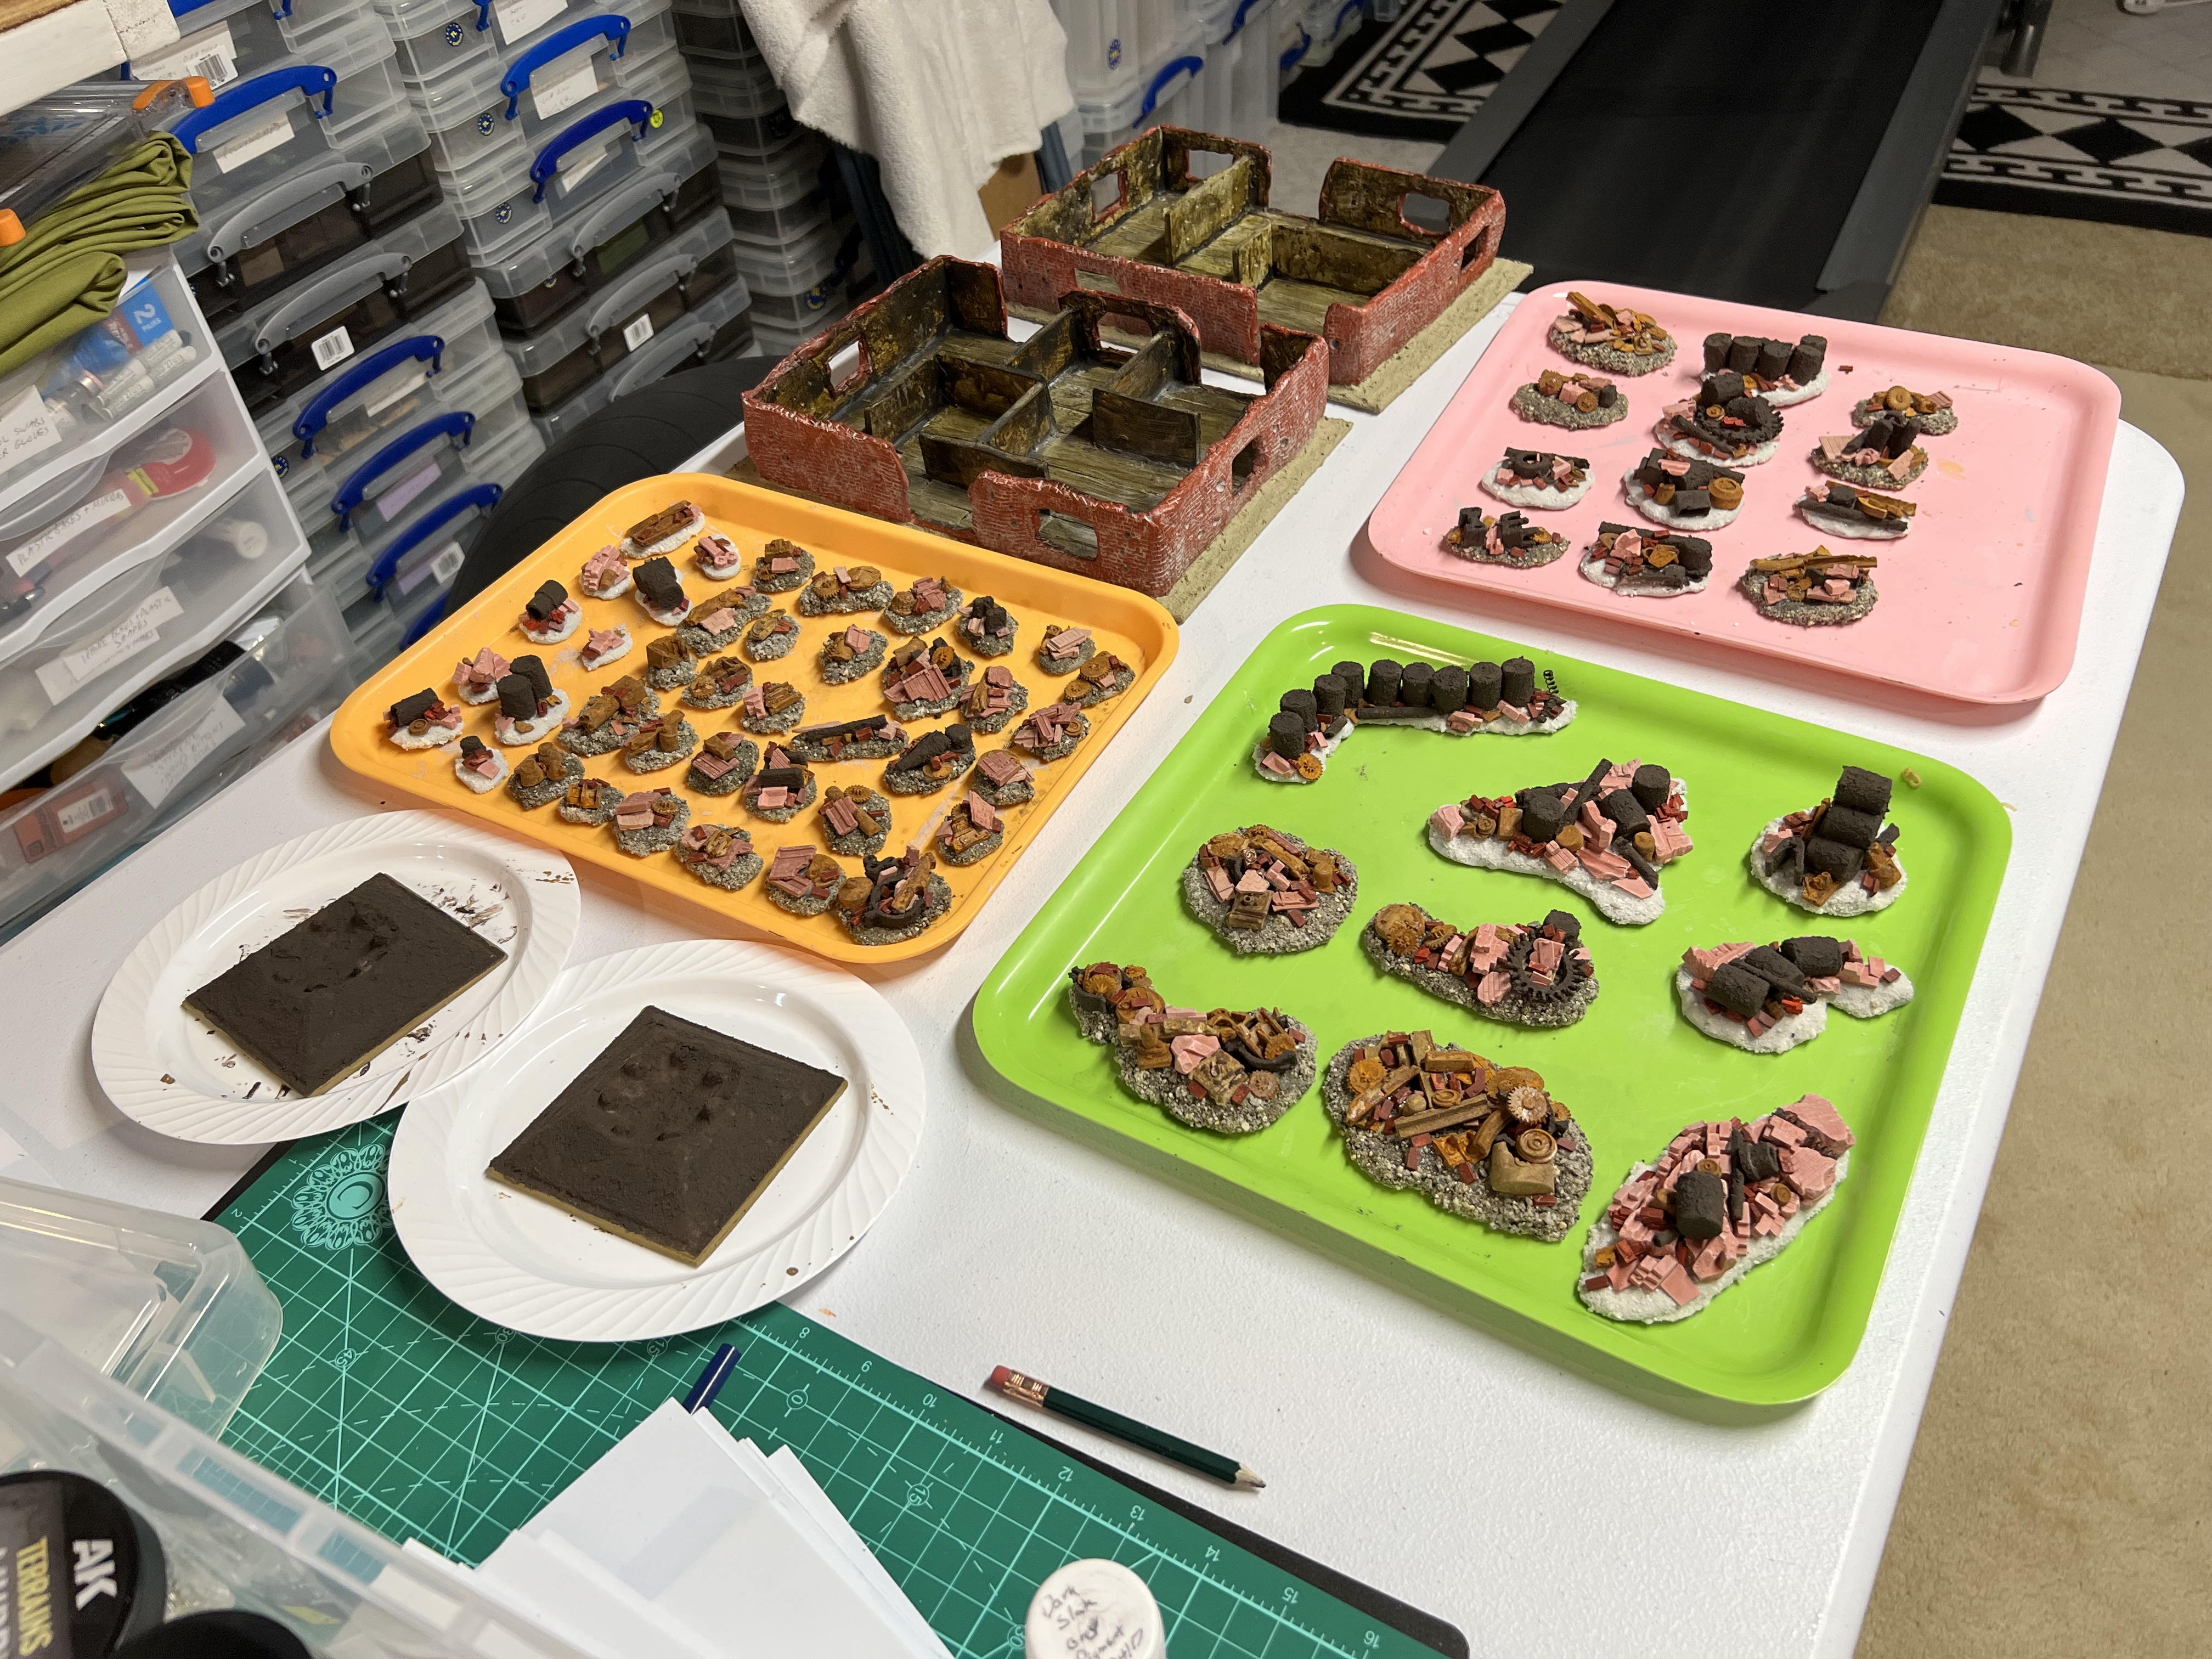
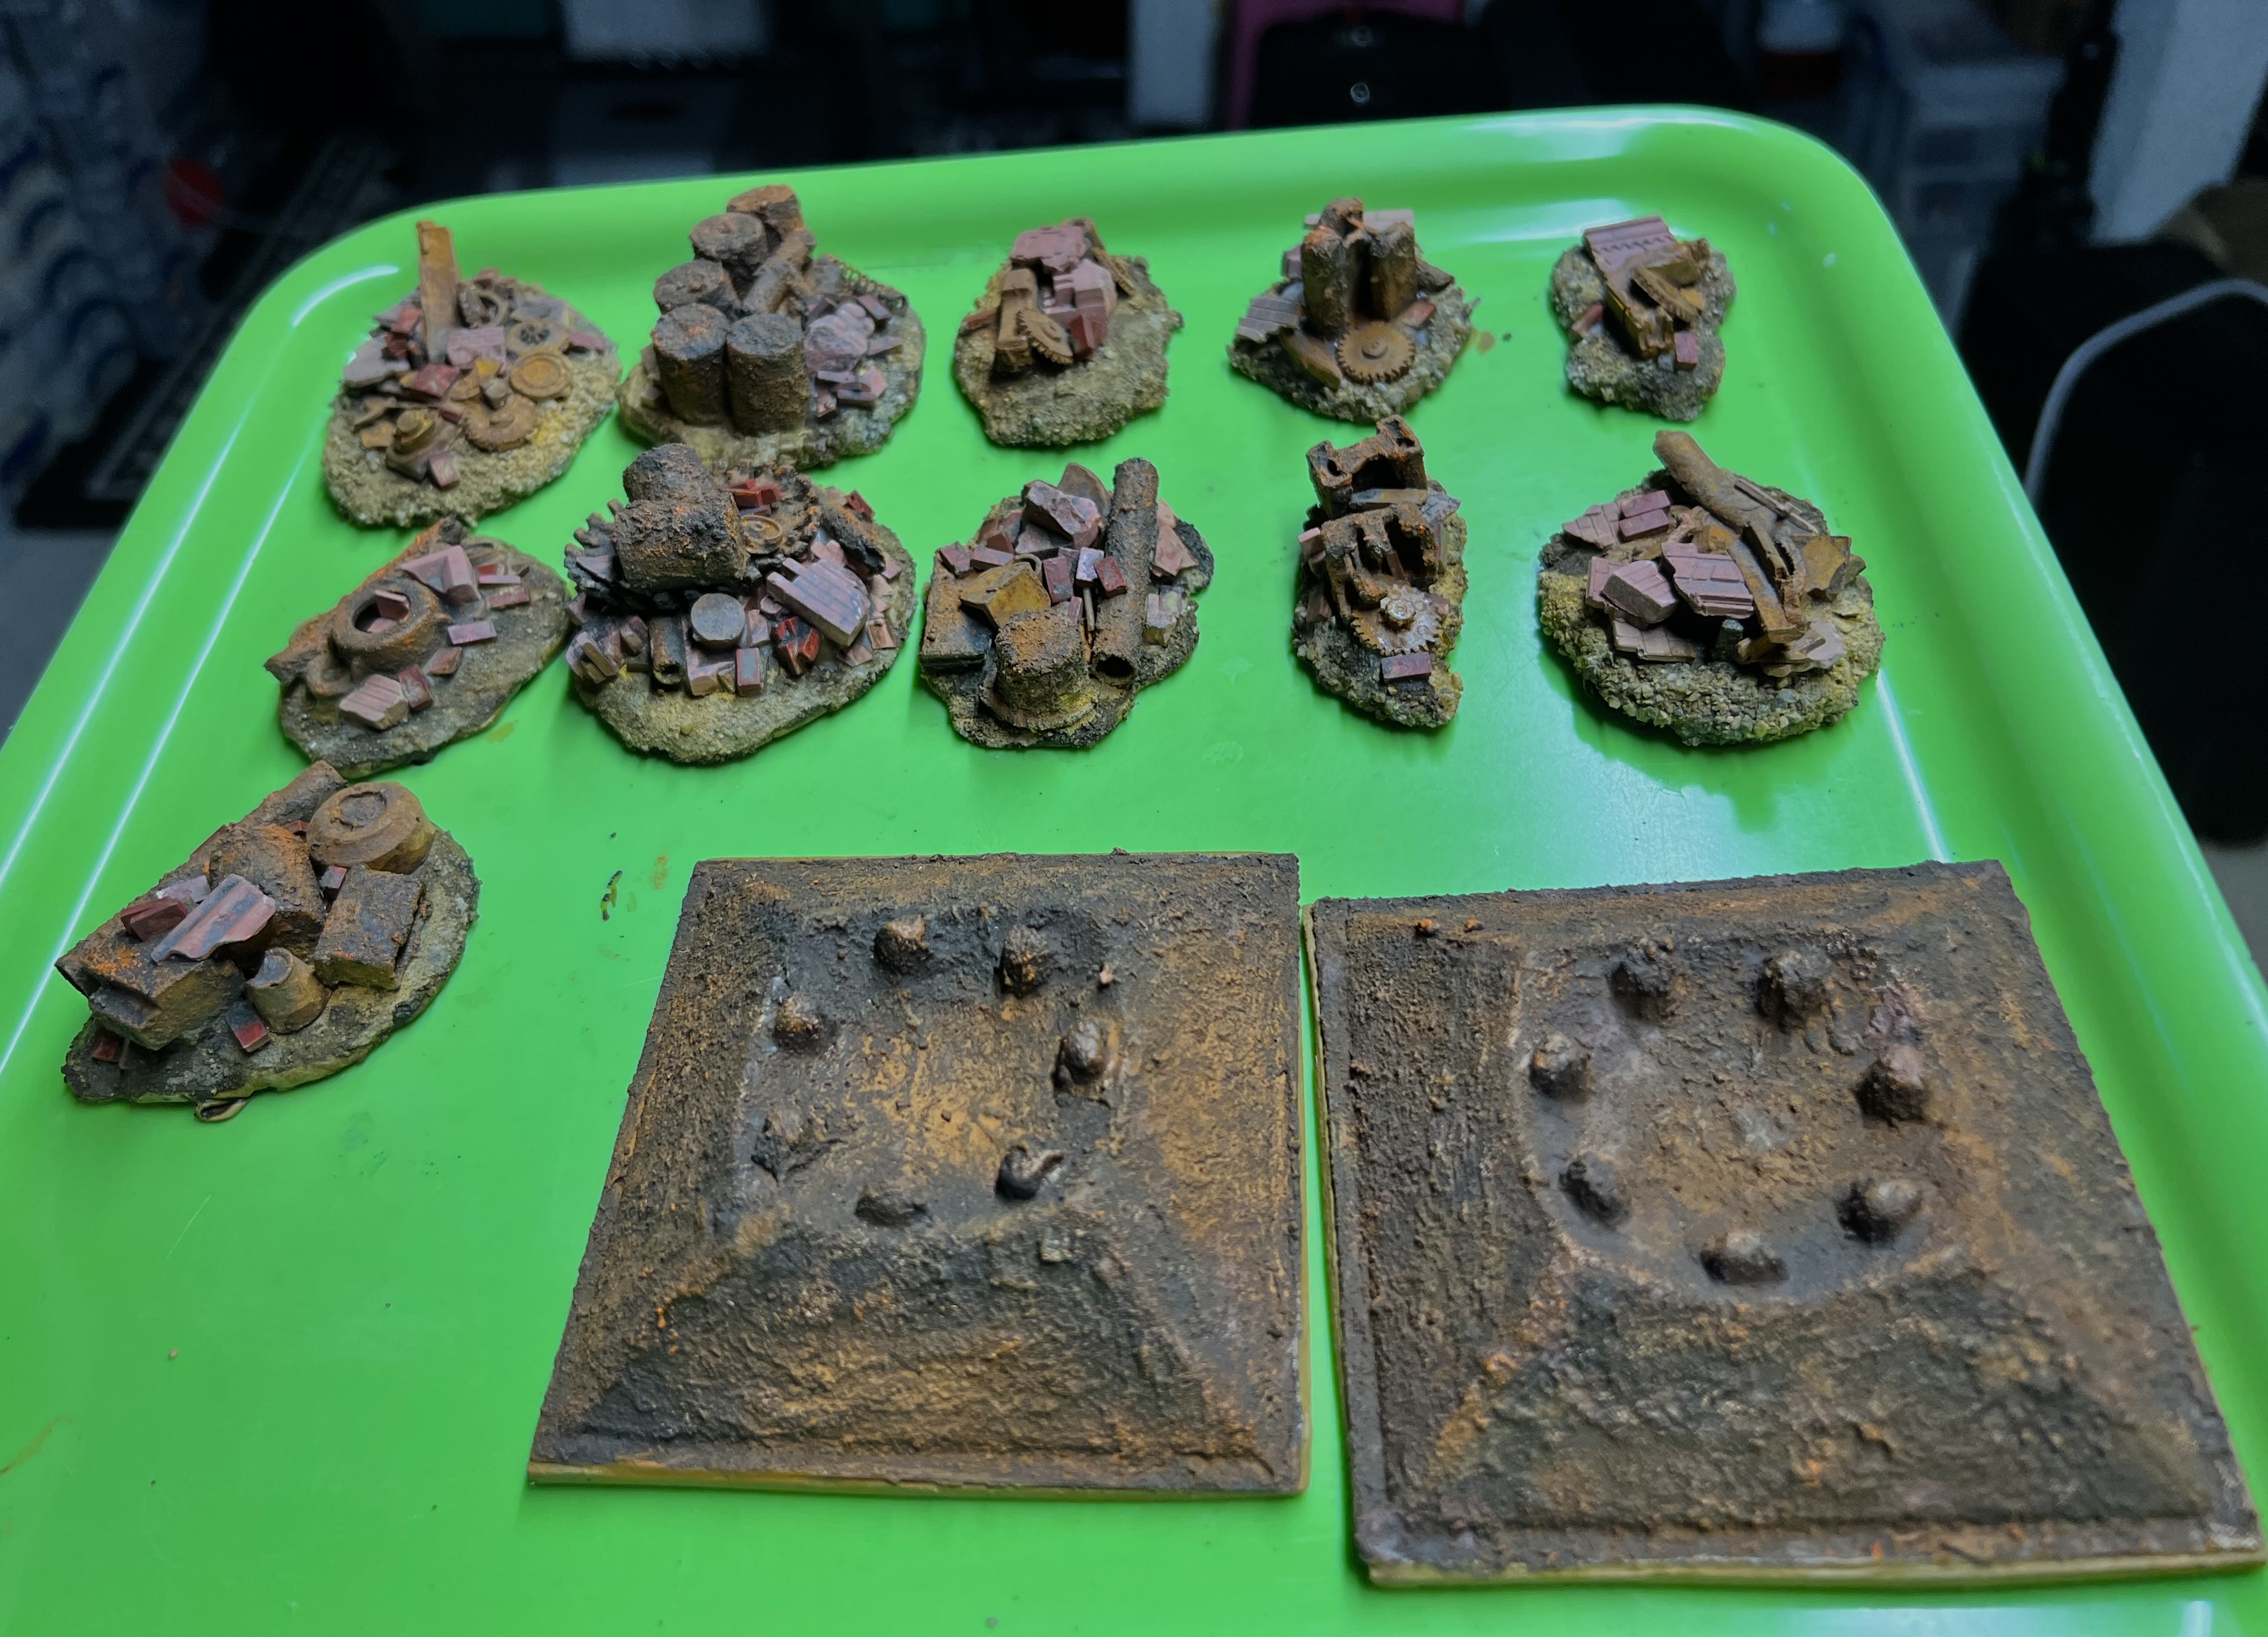
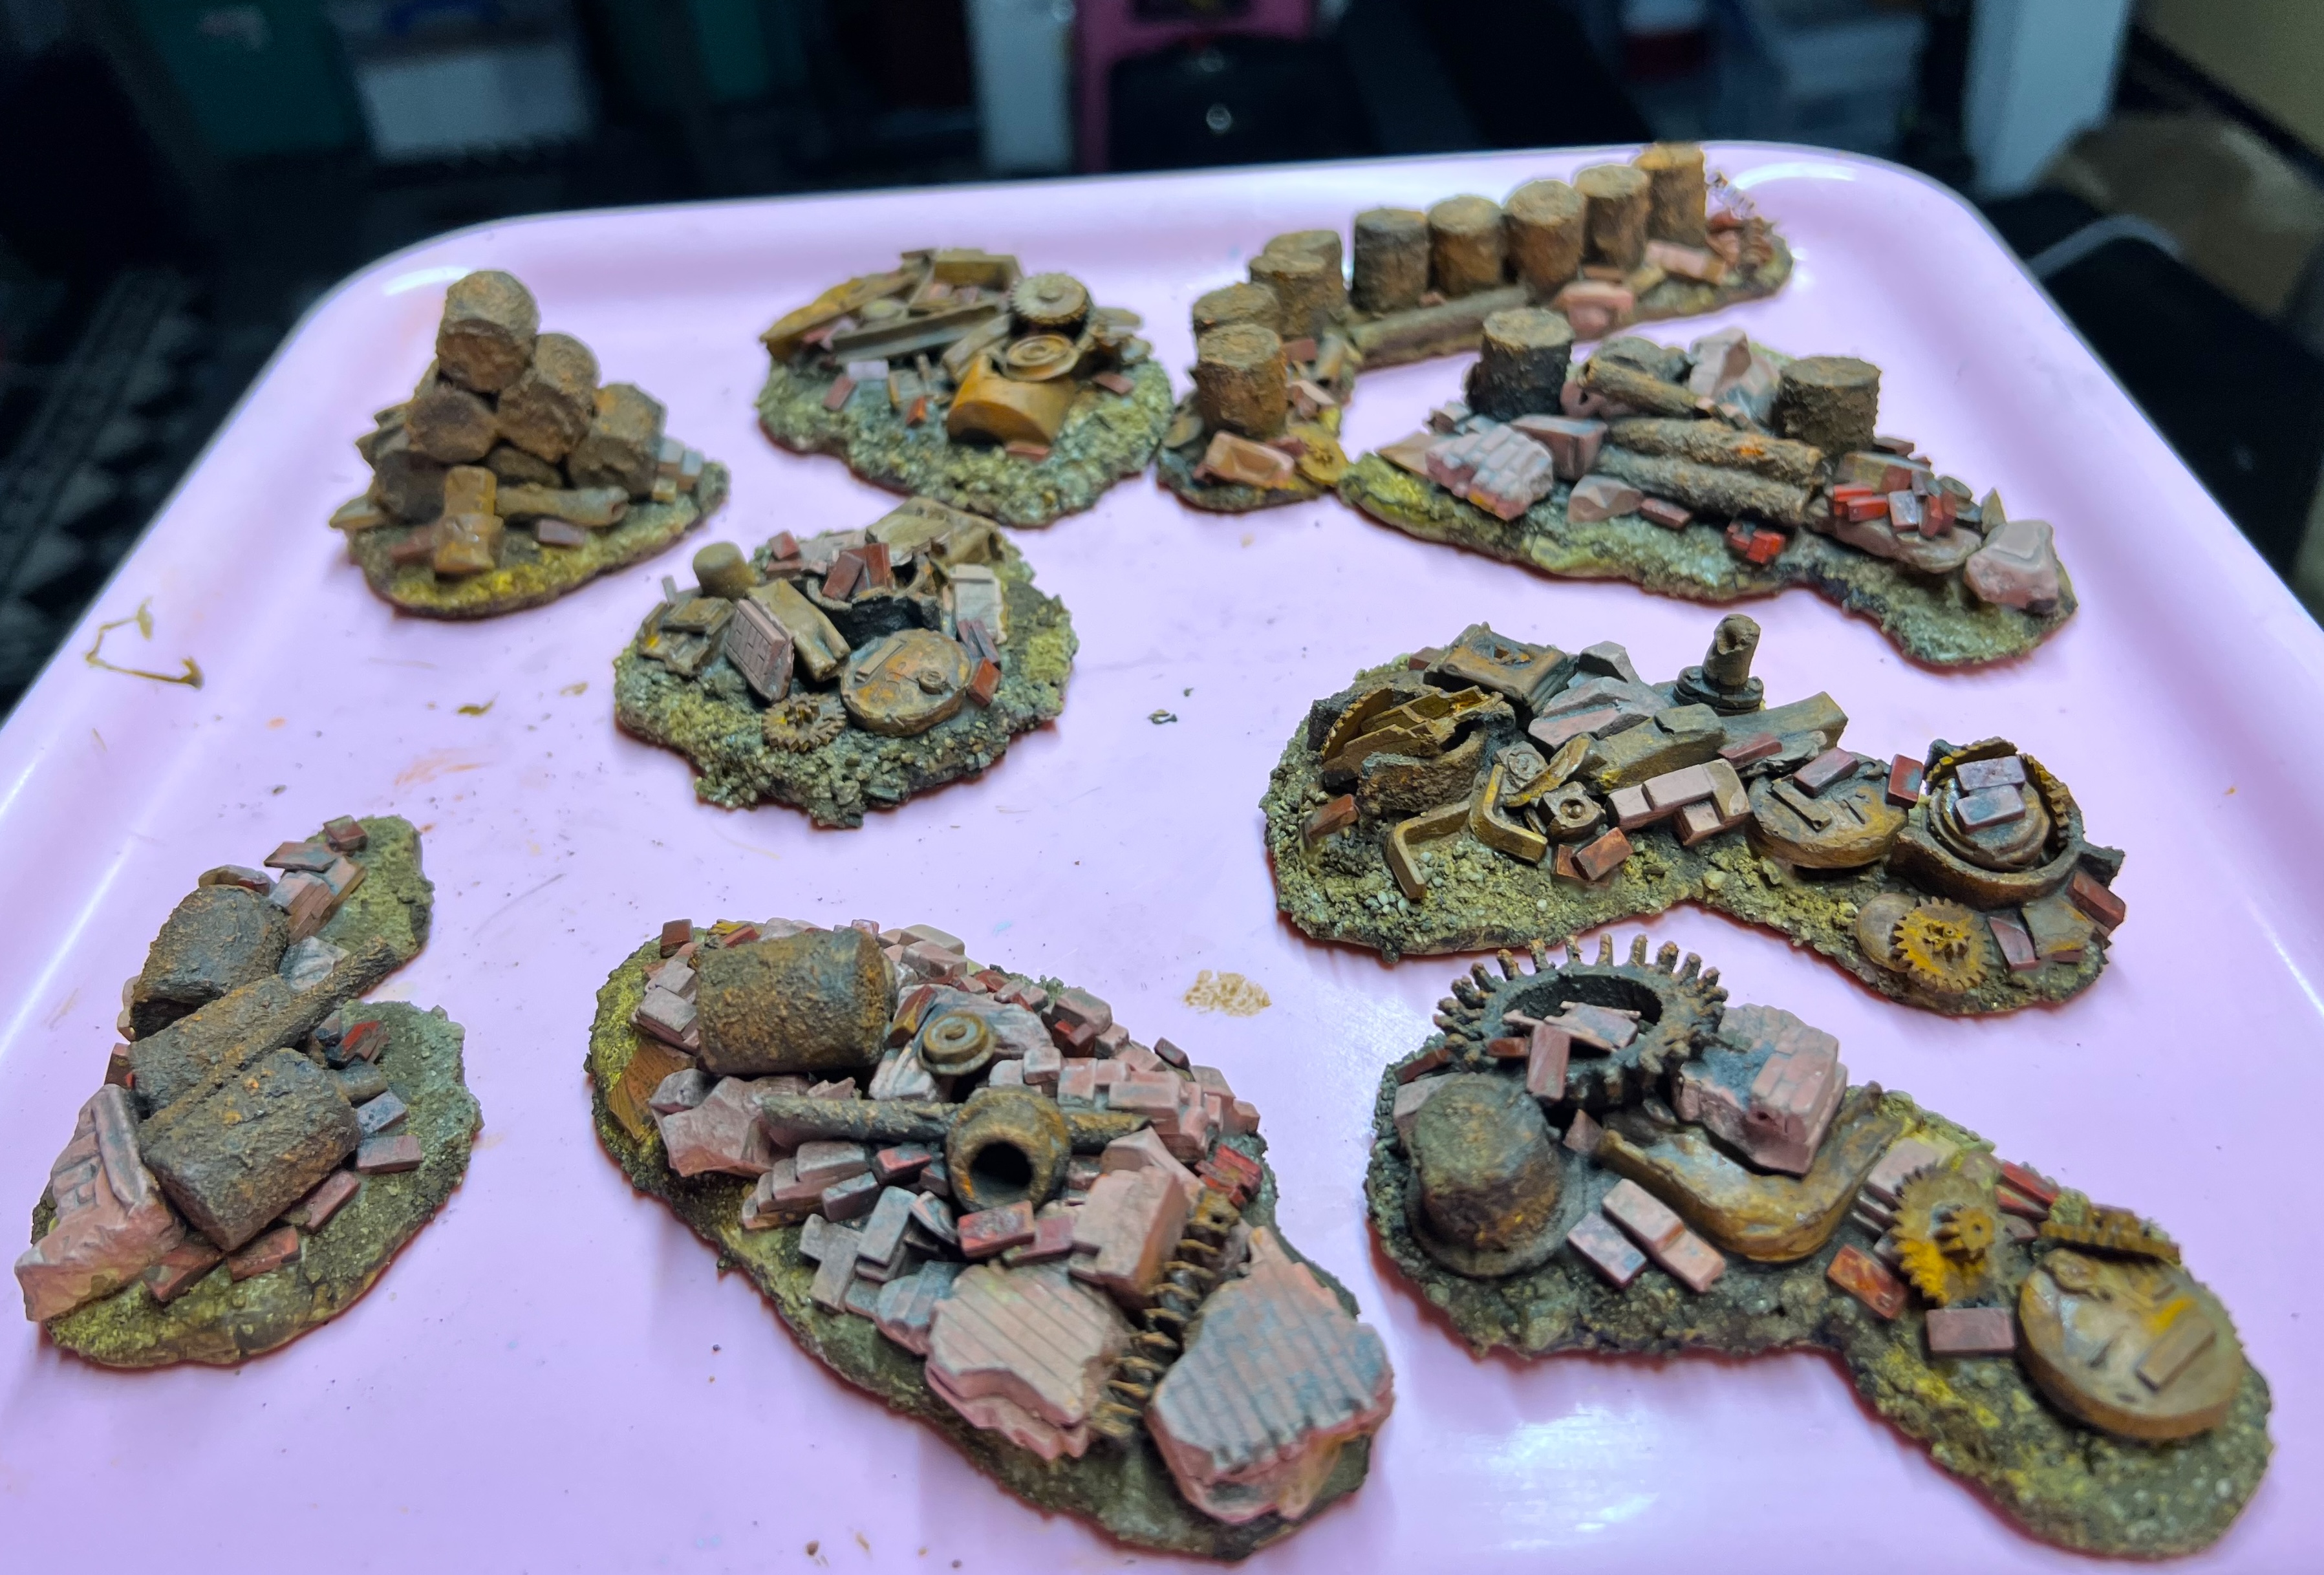
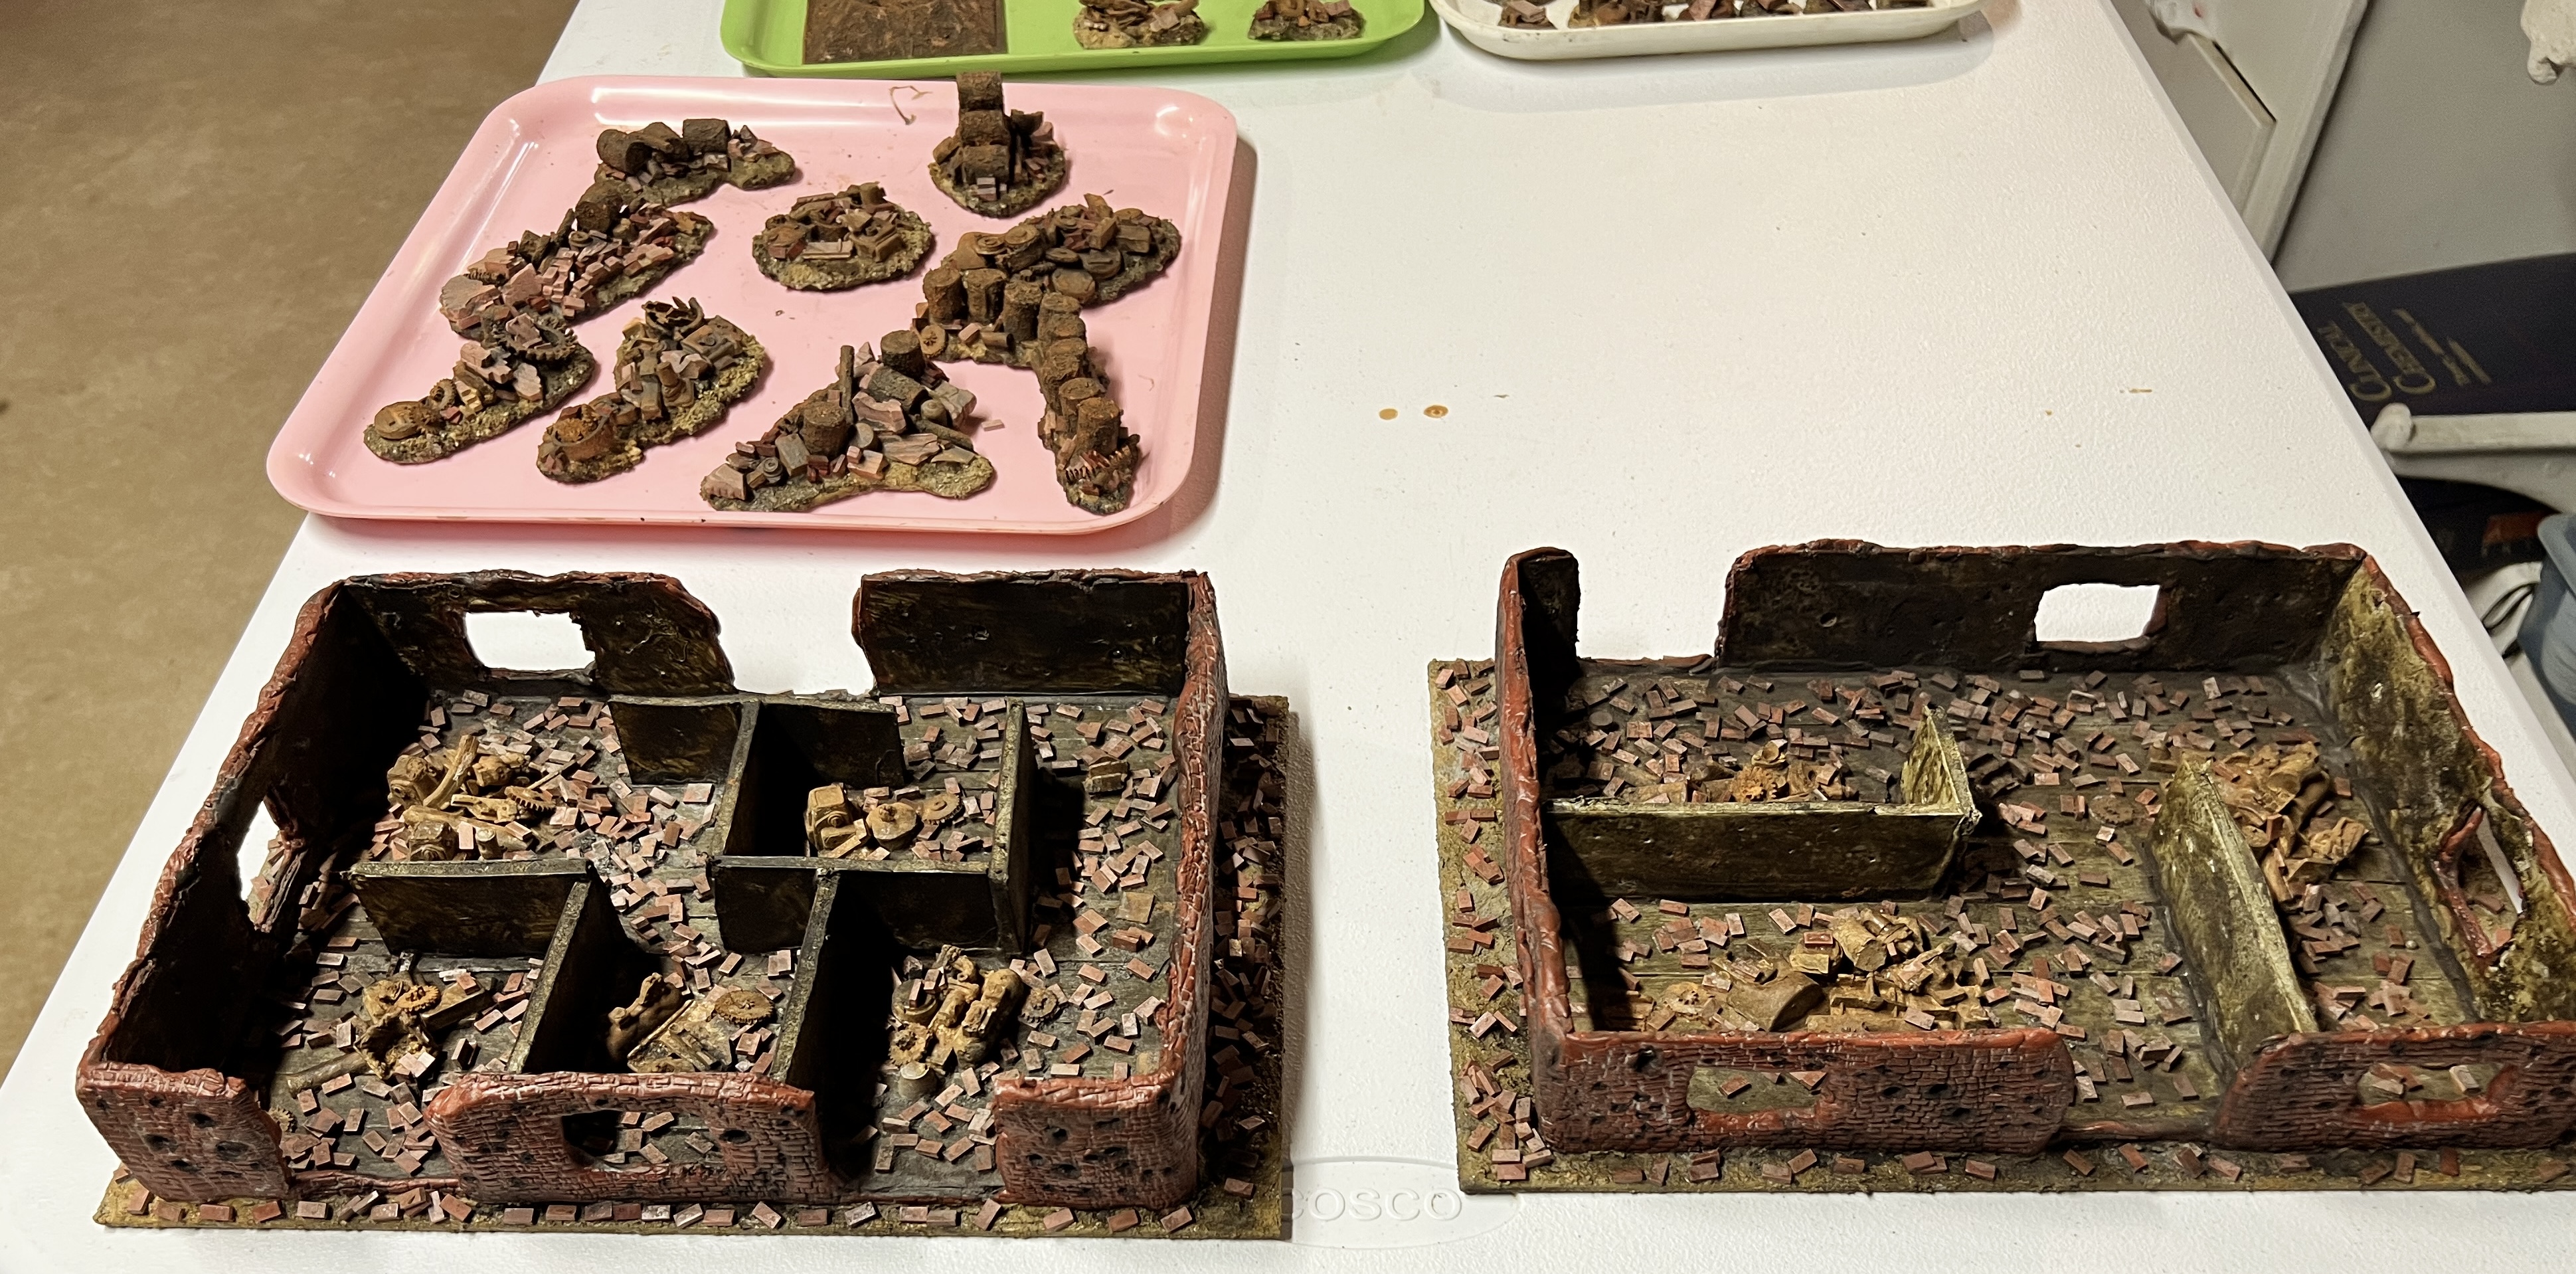
To those ends, I ended up making two ruined factory buildings, two industrial structures, and 61 scatter bases of industrial wreckage. These were all built at the same time. This enabled me to work around issues like drying and curing times as time was short. Oh yeah, and we had a few snow storms here in Massachusetts along the way that ate up some hobby time (not helpful at all).
I wanted to share my project and all its components here with you. As these were simultaneous efforts, you will see multiple project stages here. You may notice that I used a lot of repurposed bits of metal and plastic and Juweela products. The lists will be at the end of this post as is my habit. My concept was to achieve a Stalingrad-like look.
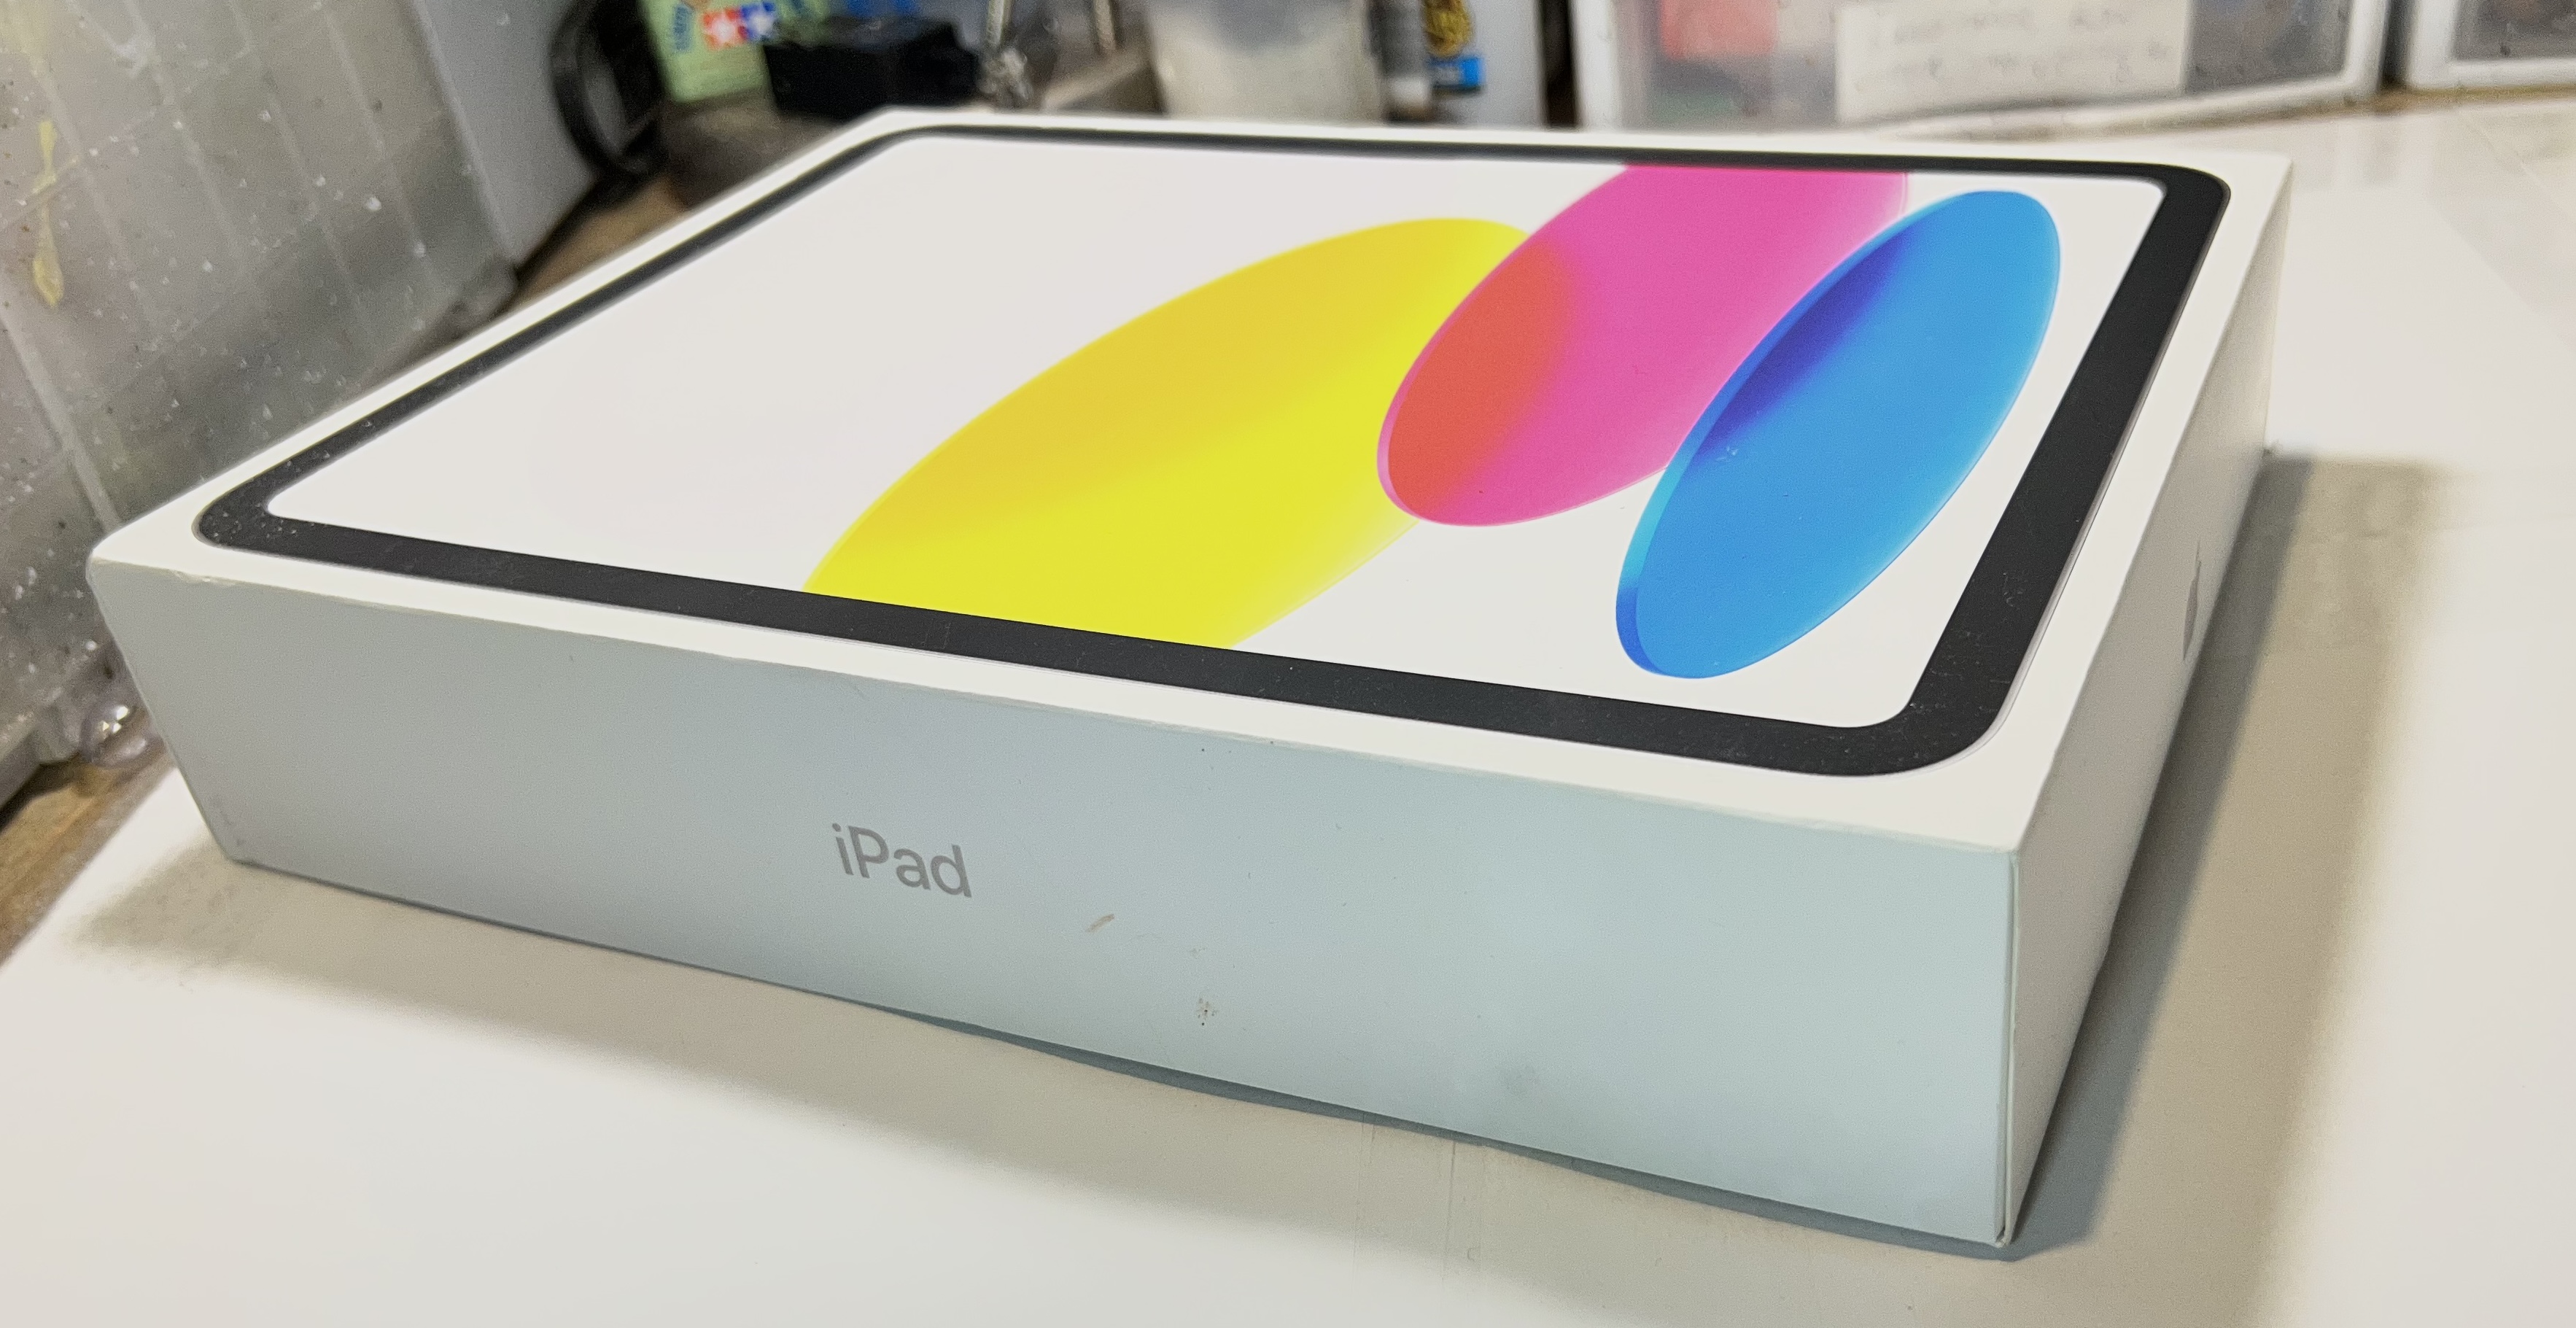
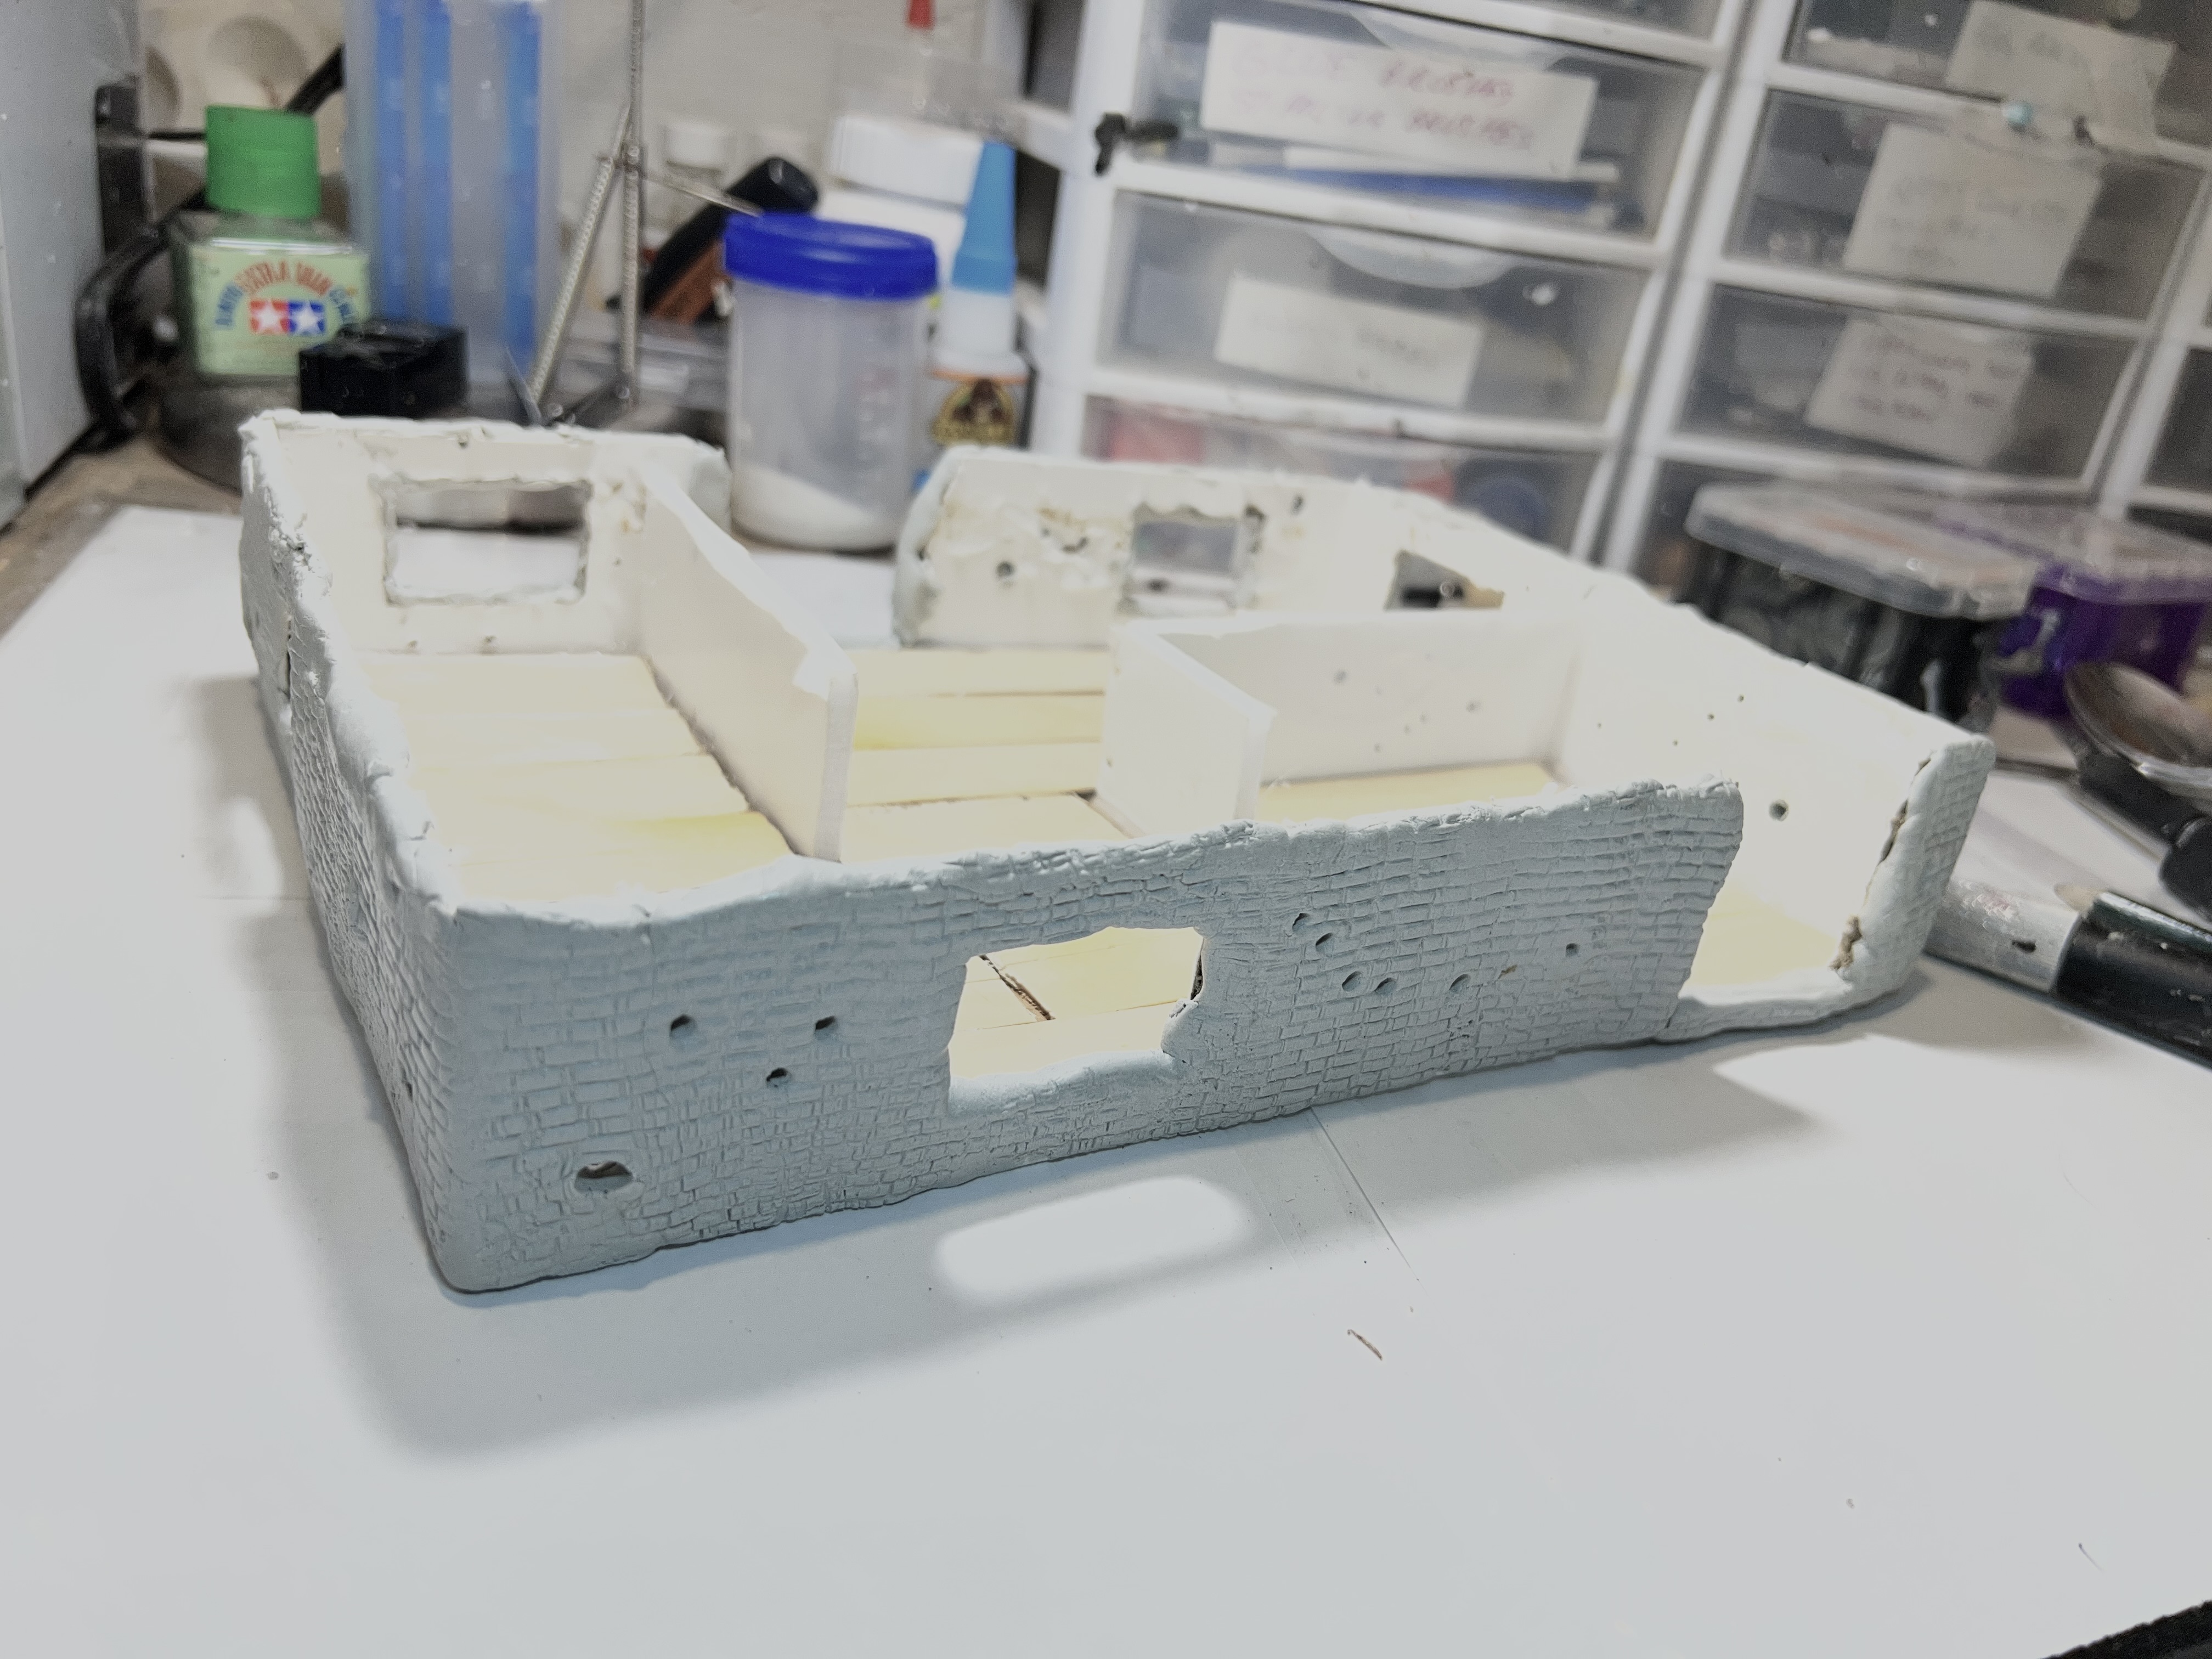
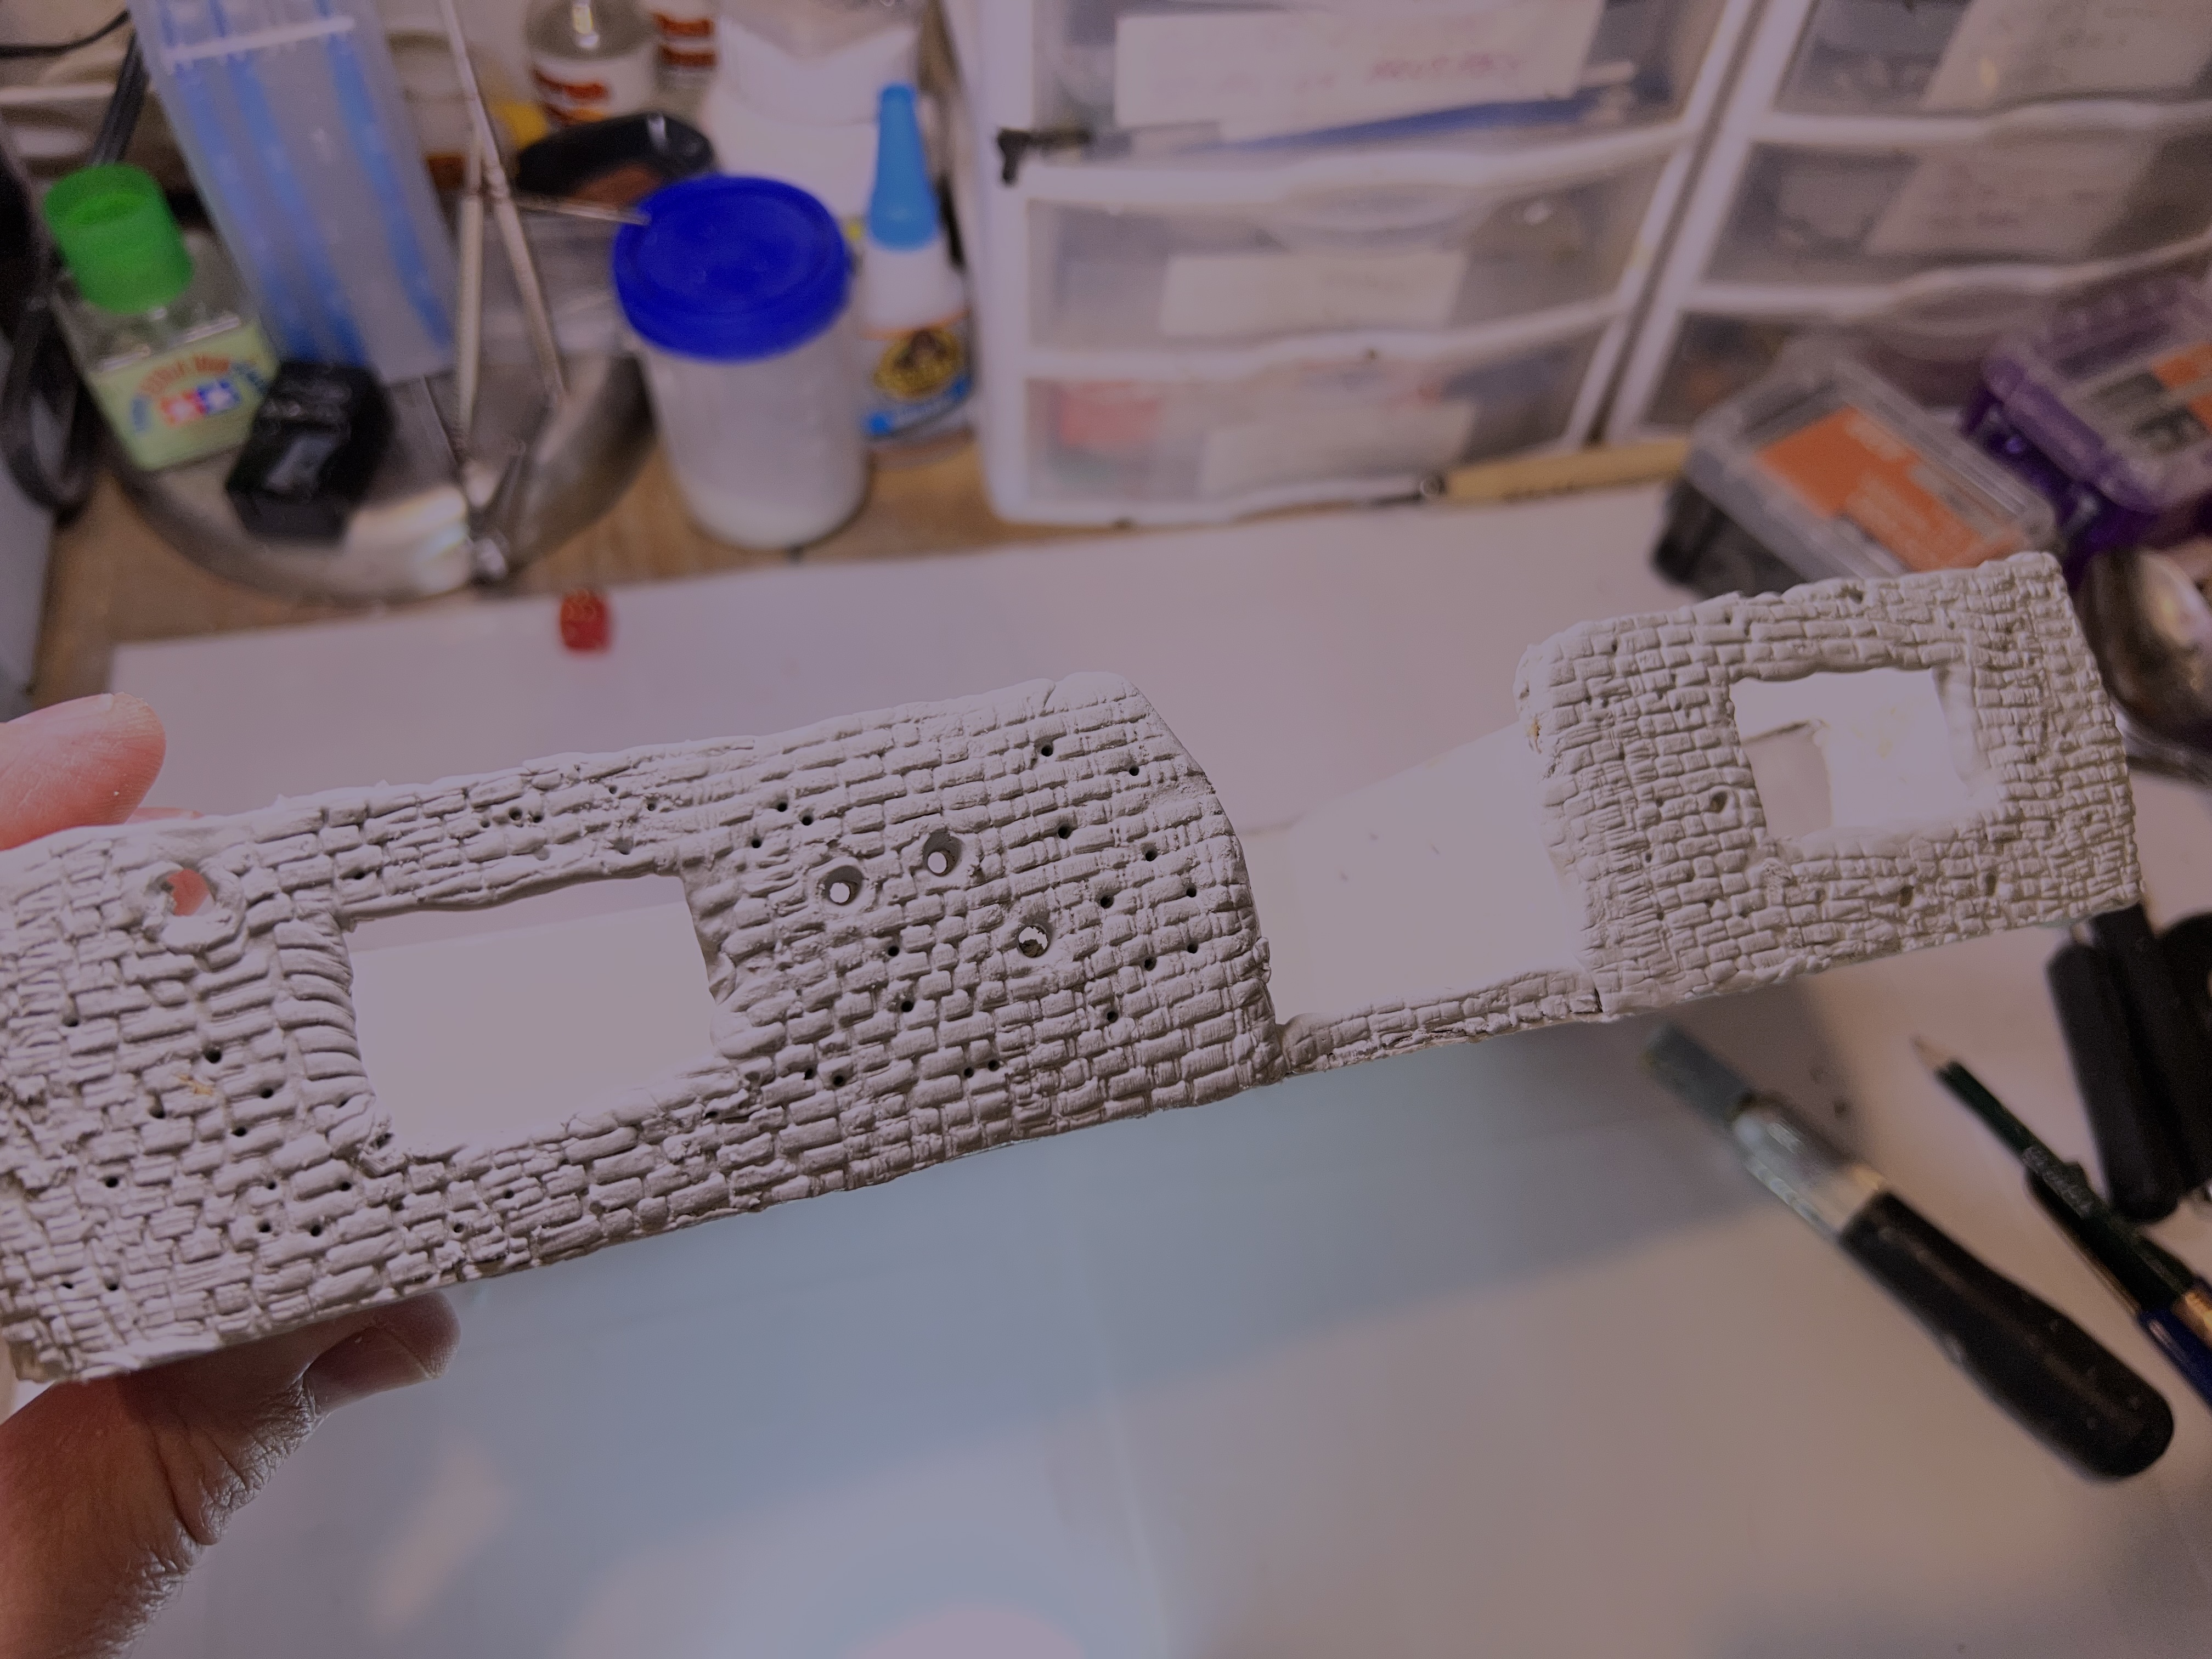
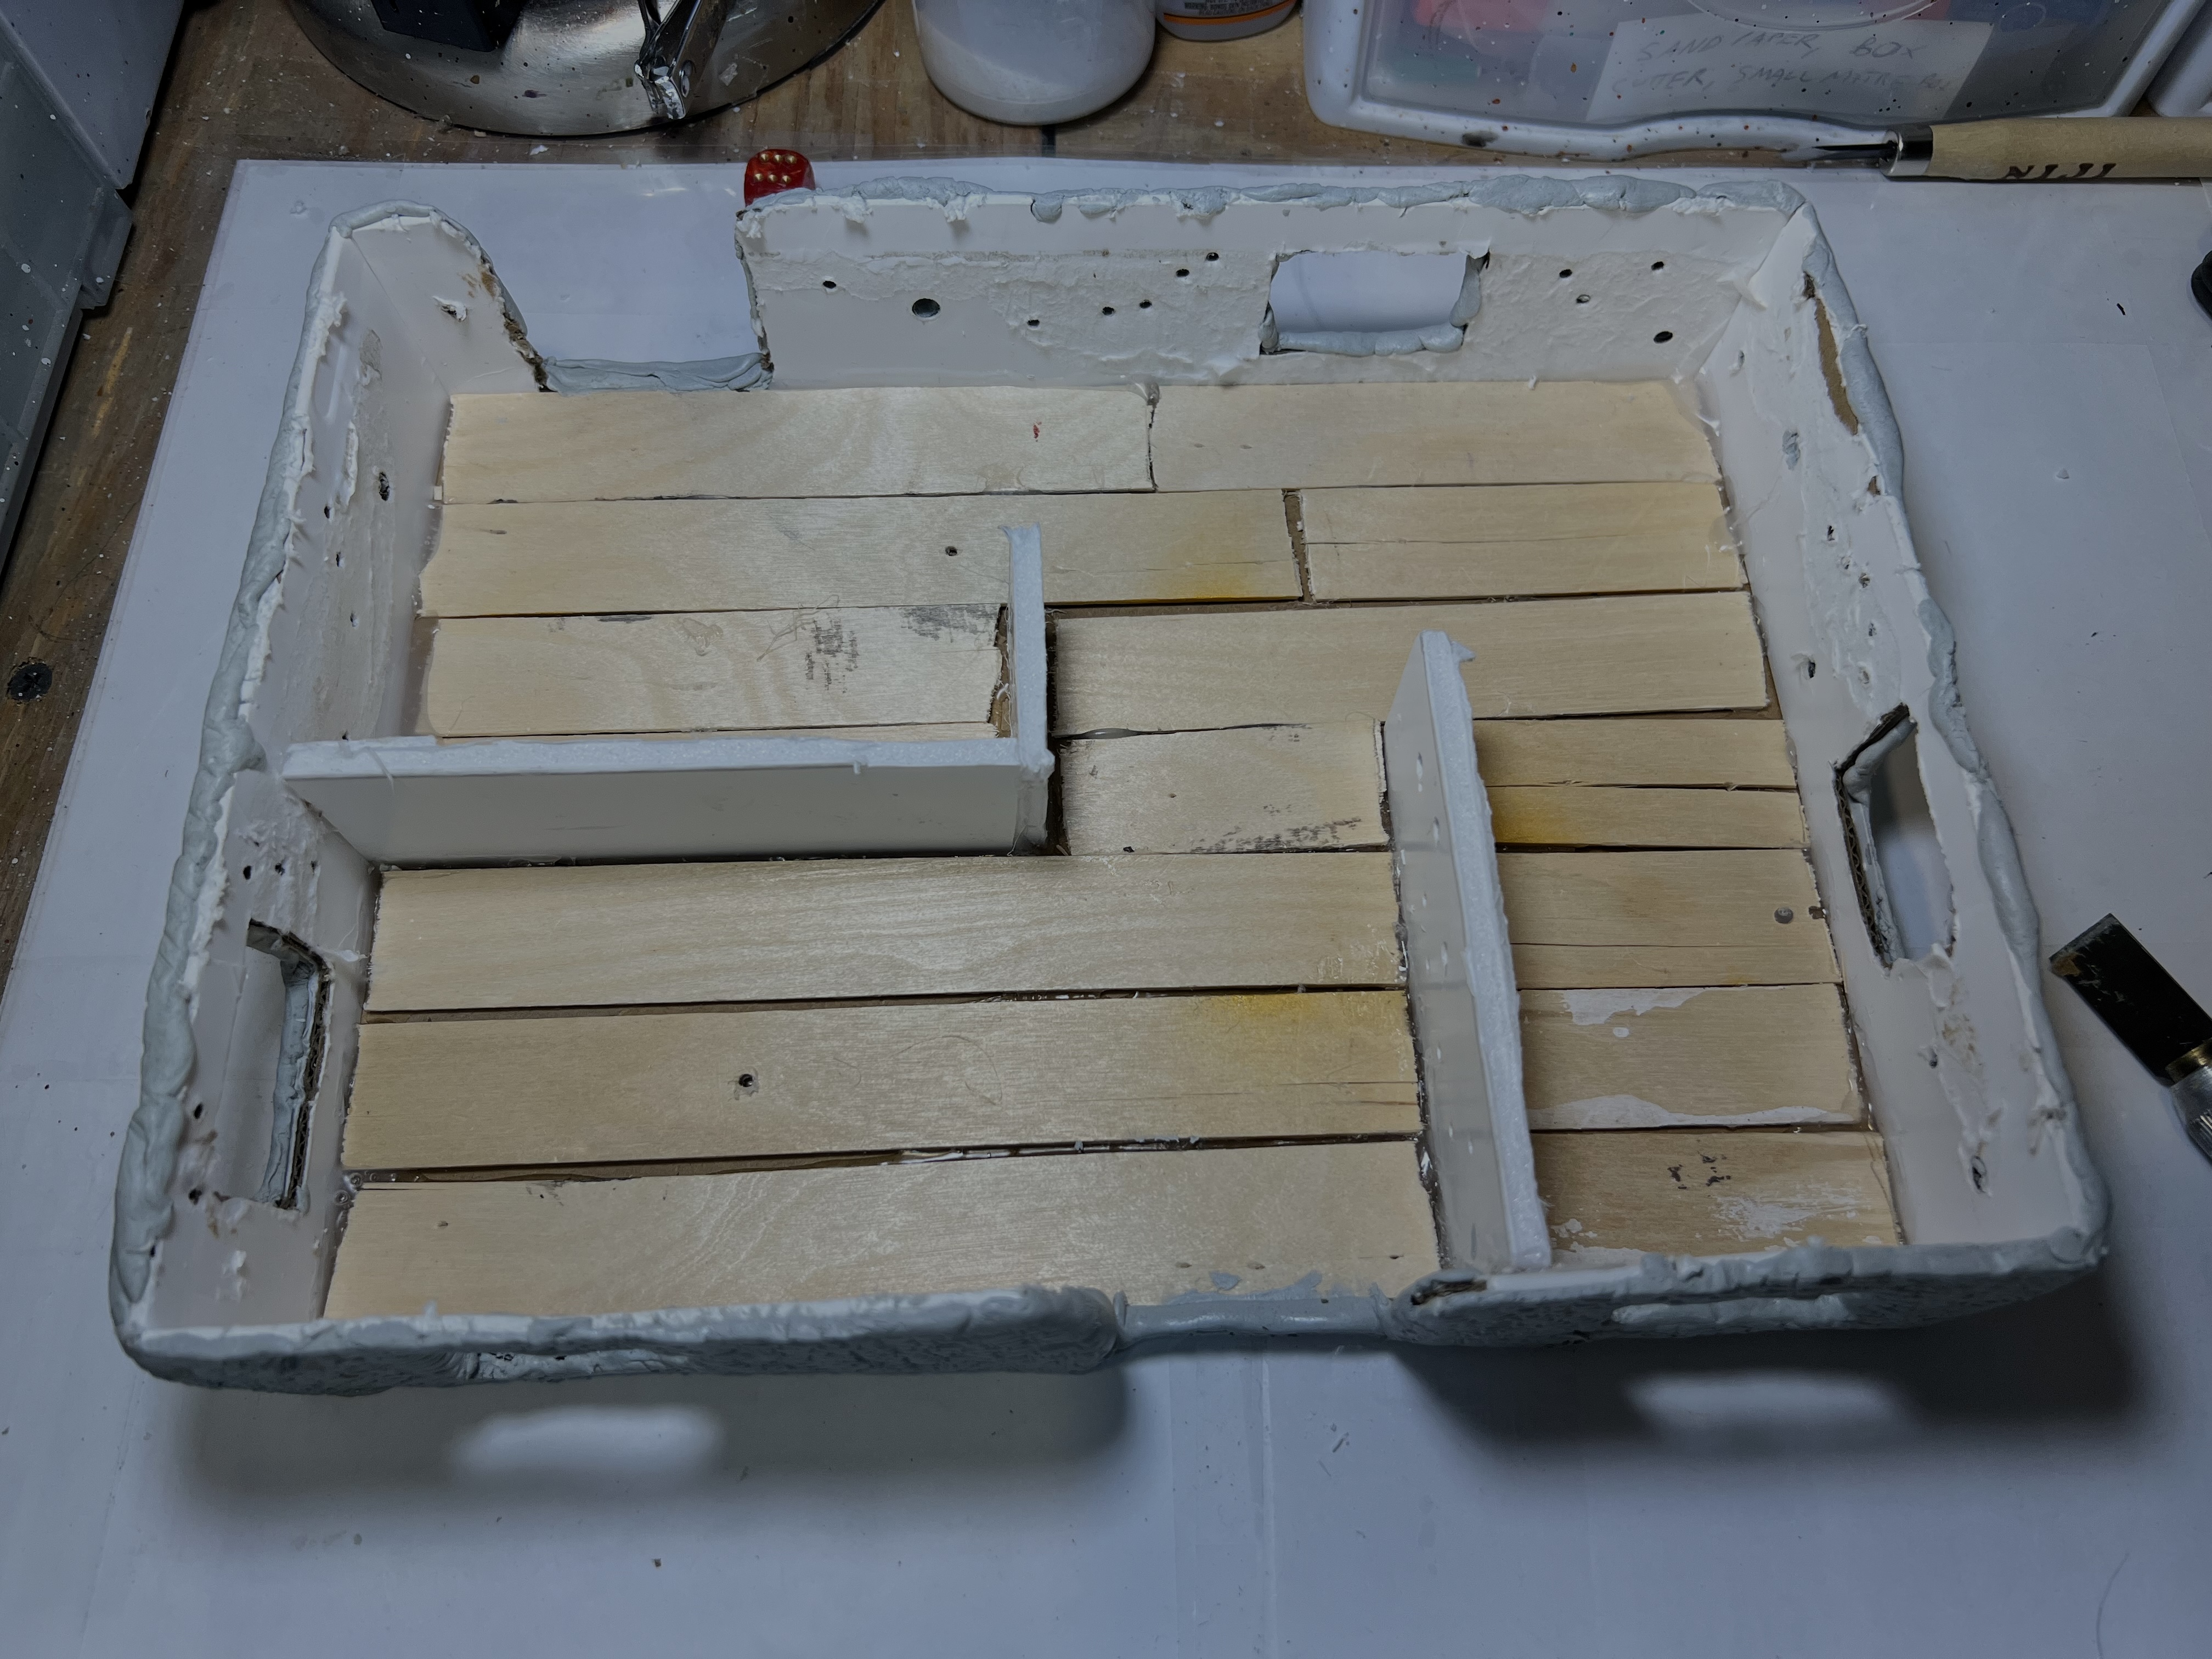
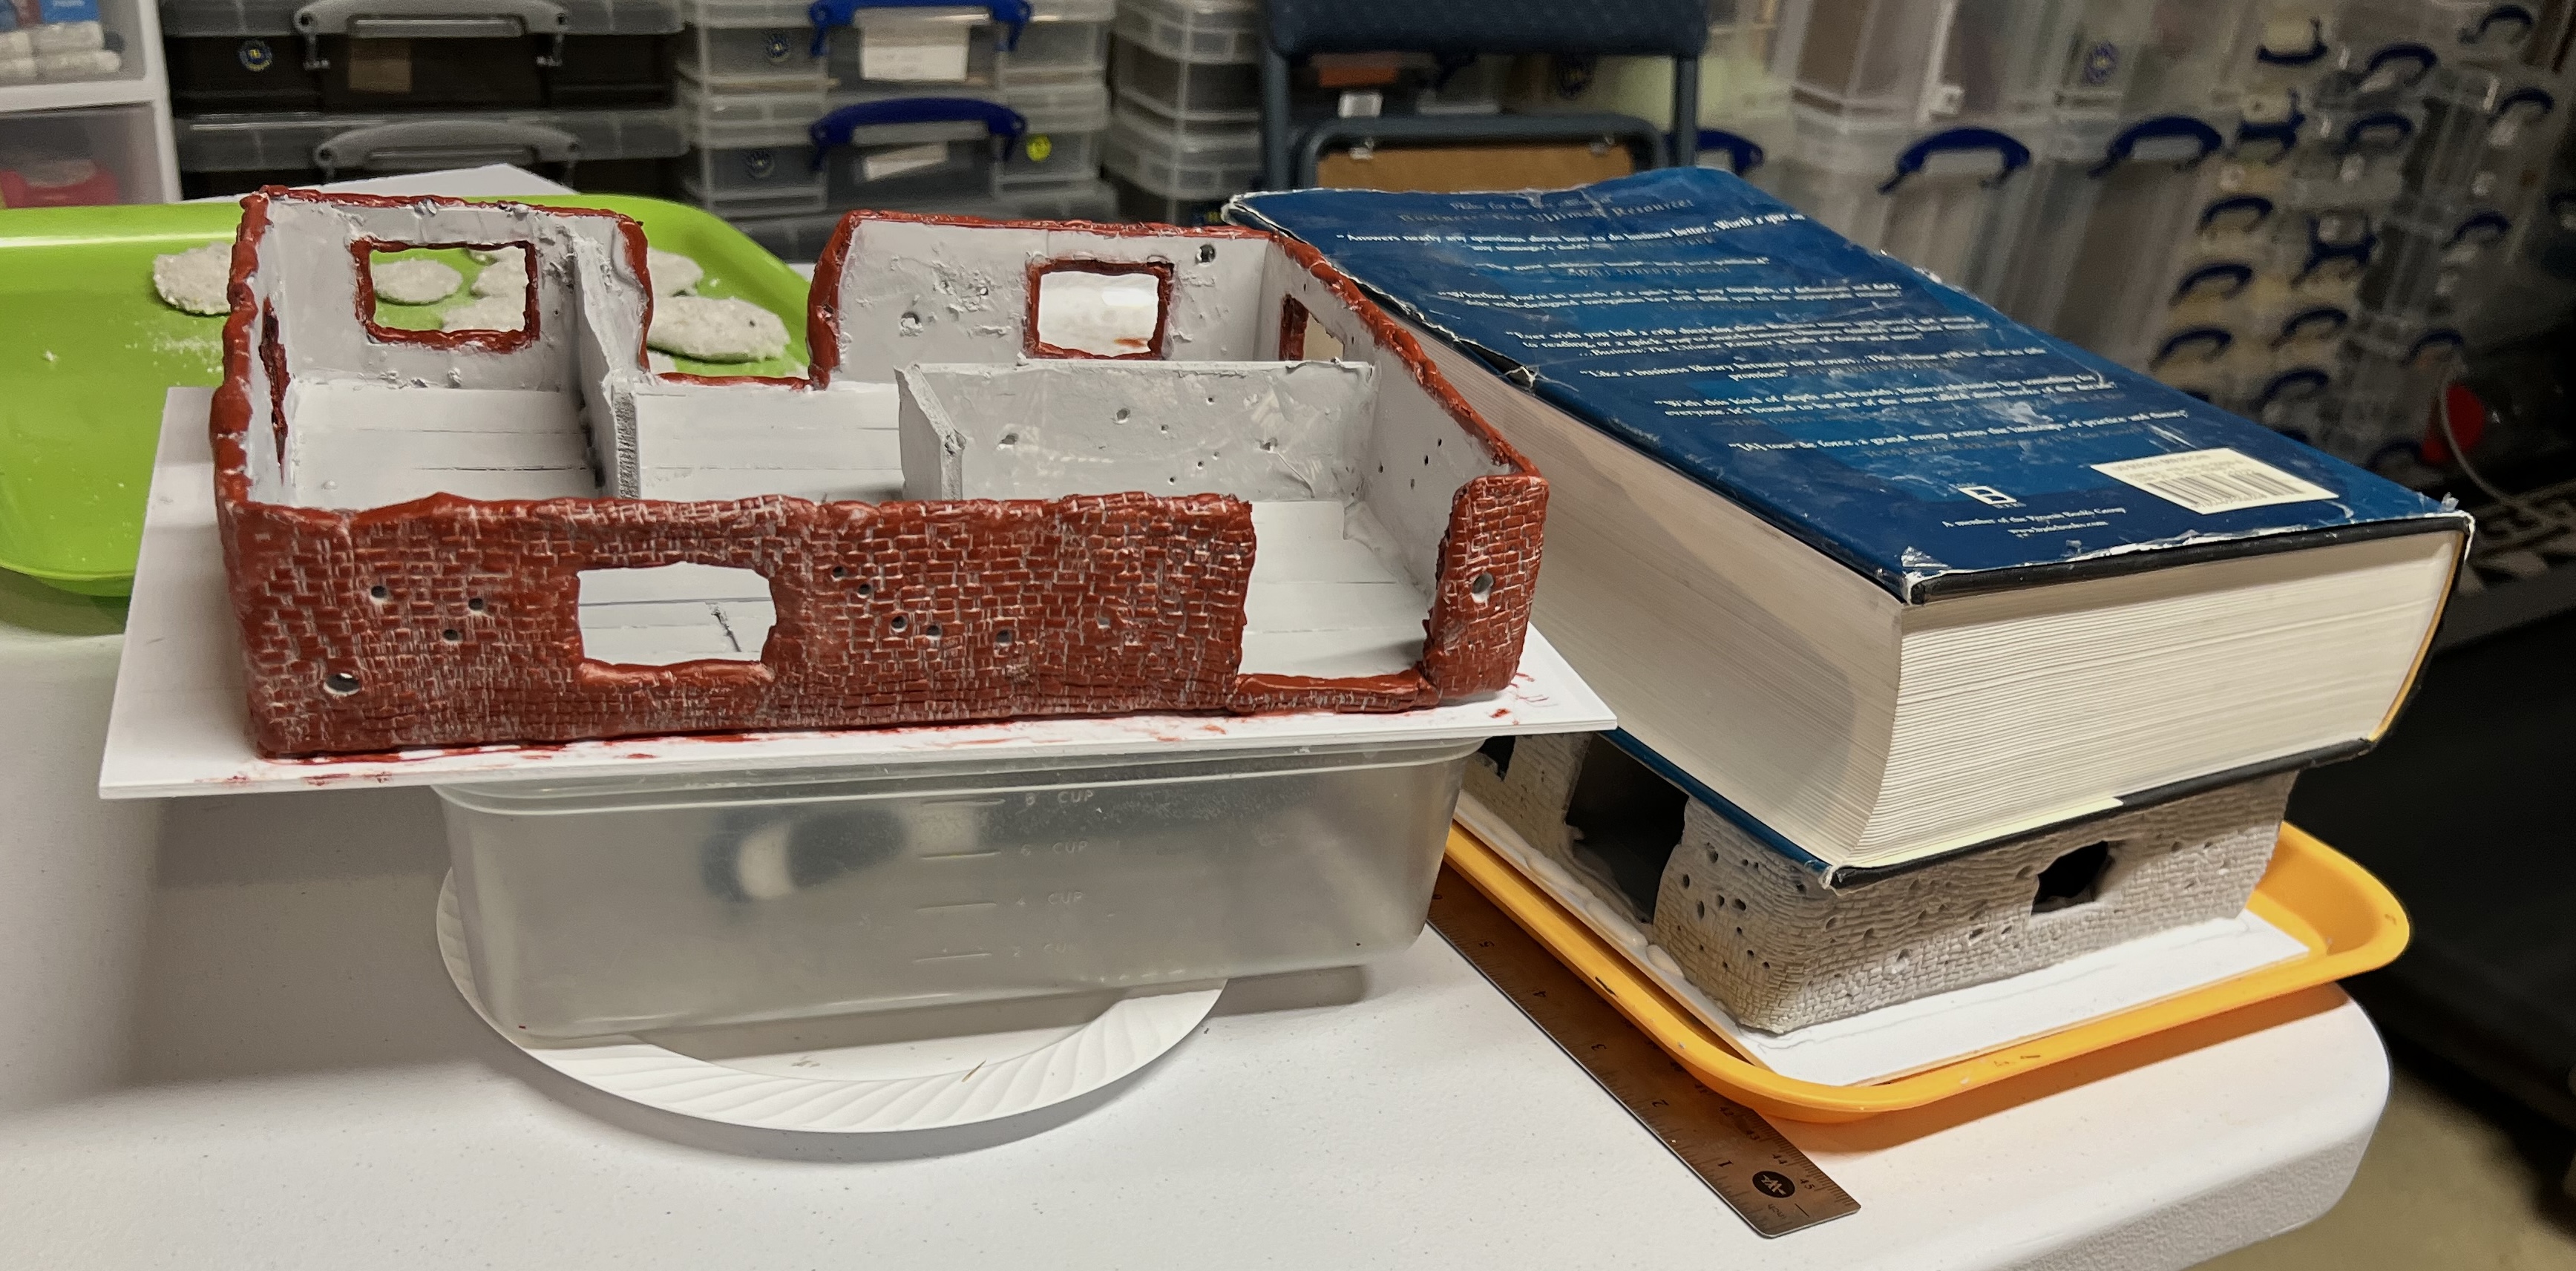
For the two buildings, I converted an iPad 16 box top and bottom. I used Apoxie Sculpt, steel washers, sand, multiple pieces of plastic, desiccant cylinders, and a lot of Juweela items to make the 61 scatter bases. And for two flat industrial structures, I reused two pieces of packing materials to repurpose them as flat rusted structures.
I sawed out windows and doors on both box pieces and made each a bit differently in terms of architectural arrangement. I then hot-glued foam board to make rooms. For flooring, I broke up old popsicle sticks. These I had used previously to mount figures for painting on other projects. Lastly, I drilled out holes in the walls to simulate old bullet holes.
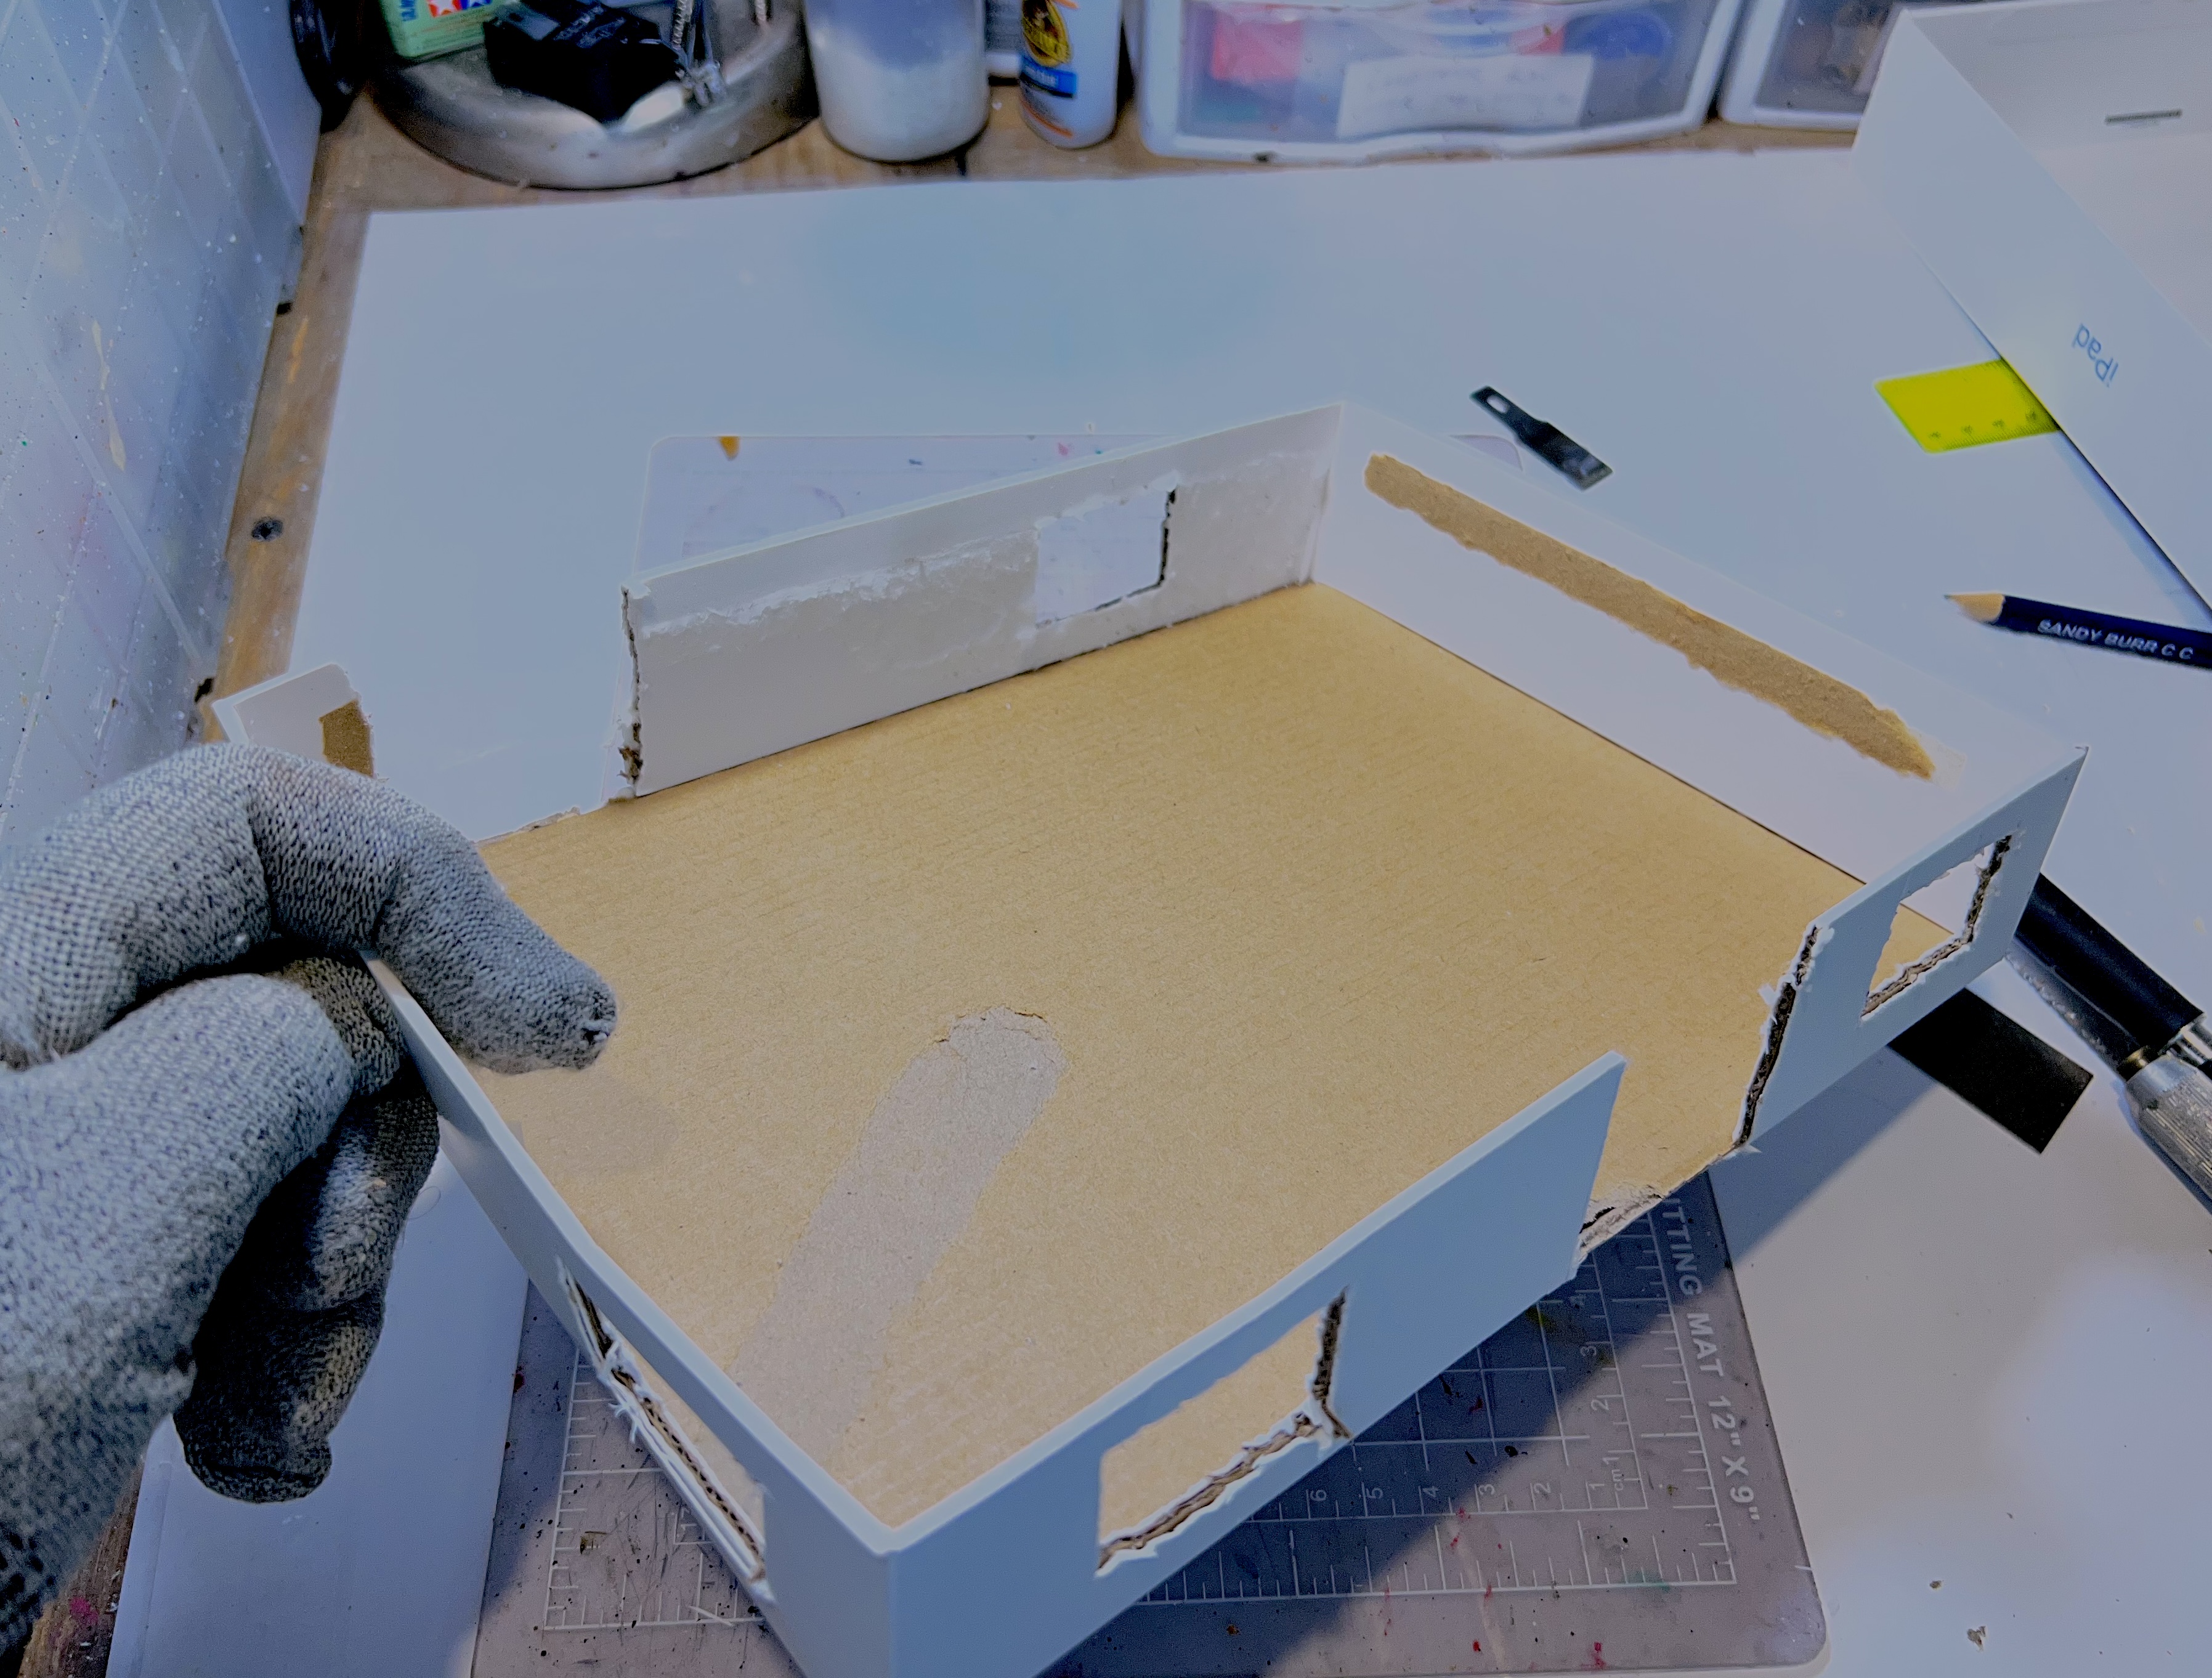

Then it was on to sculpting the outside walls. I did each building separately from here on so as to handle both curing times and to learn as I went as to best practices. Apoxie Sculpt and a Green Stuff World brick roller worked well.

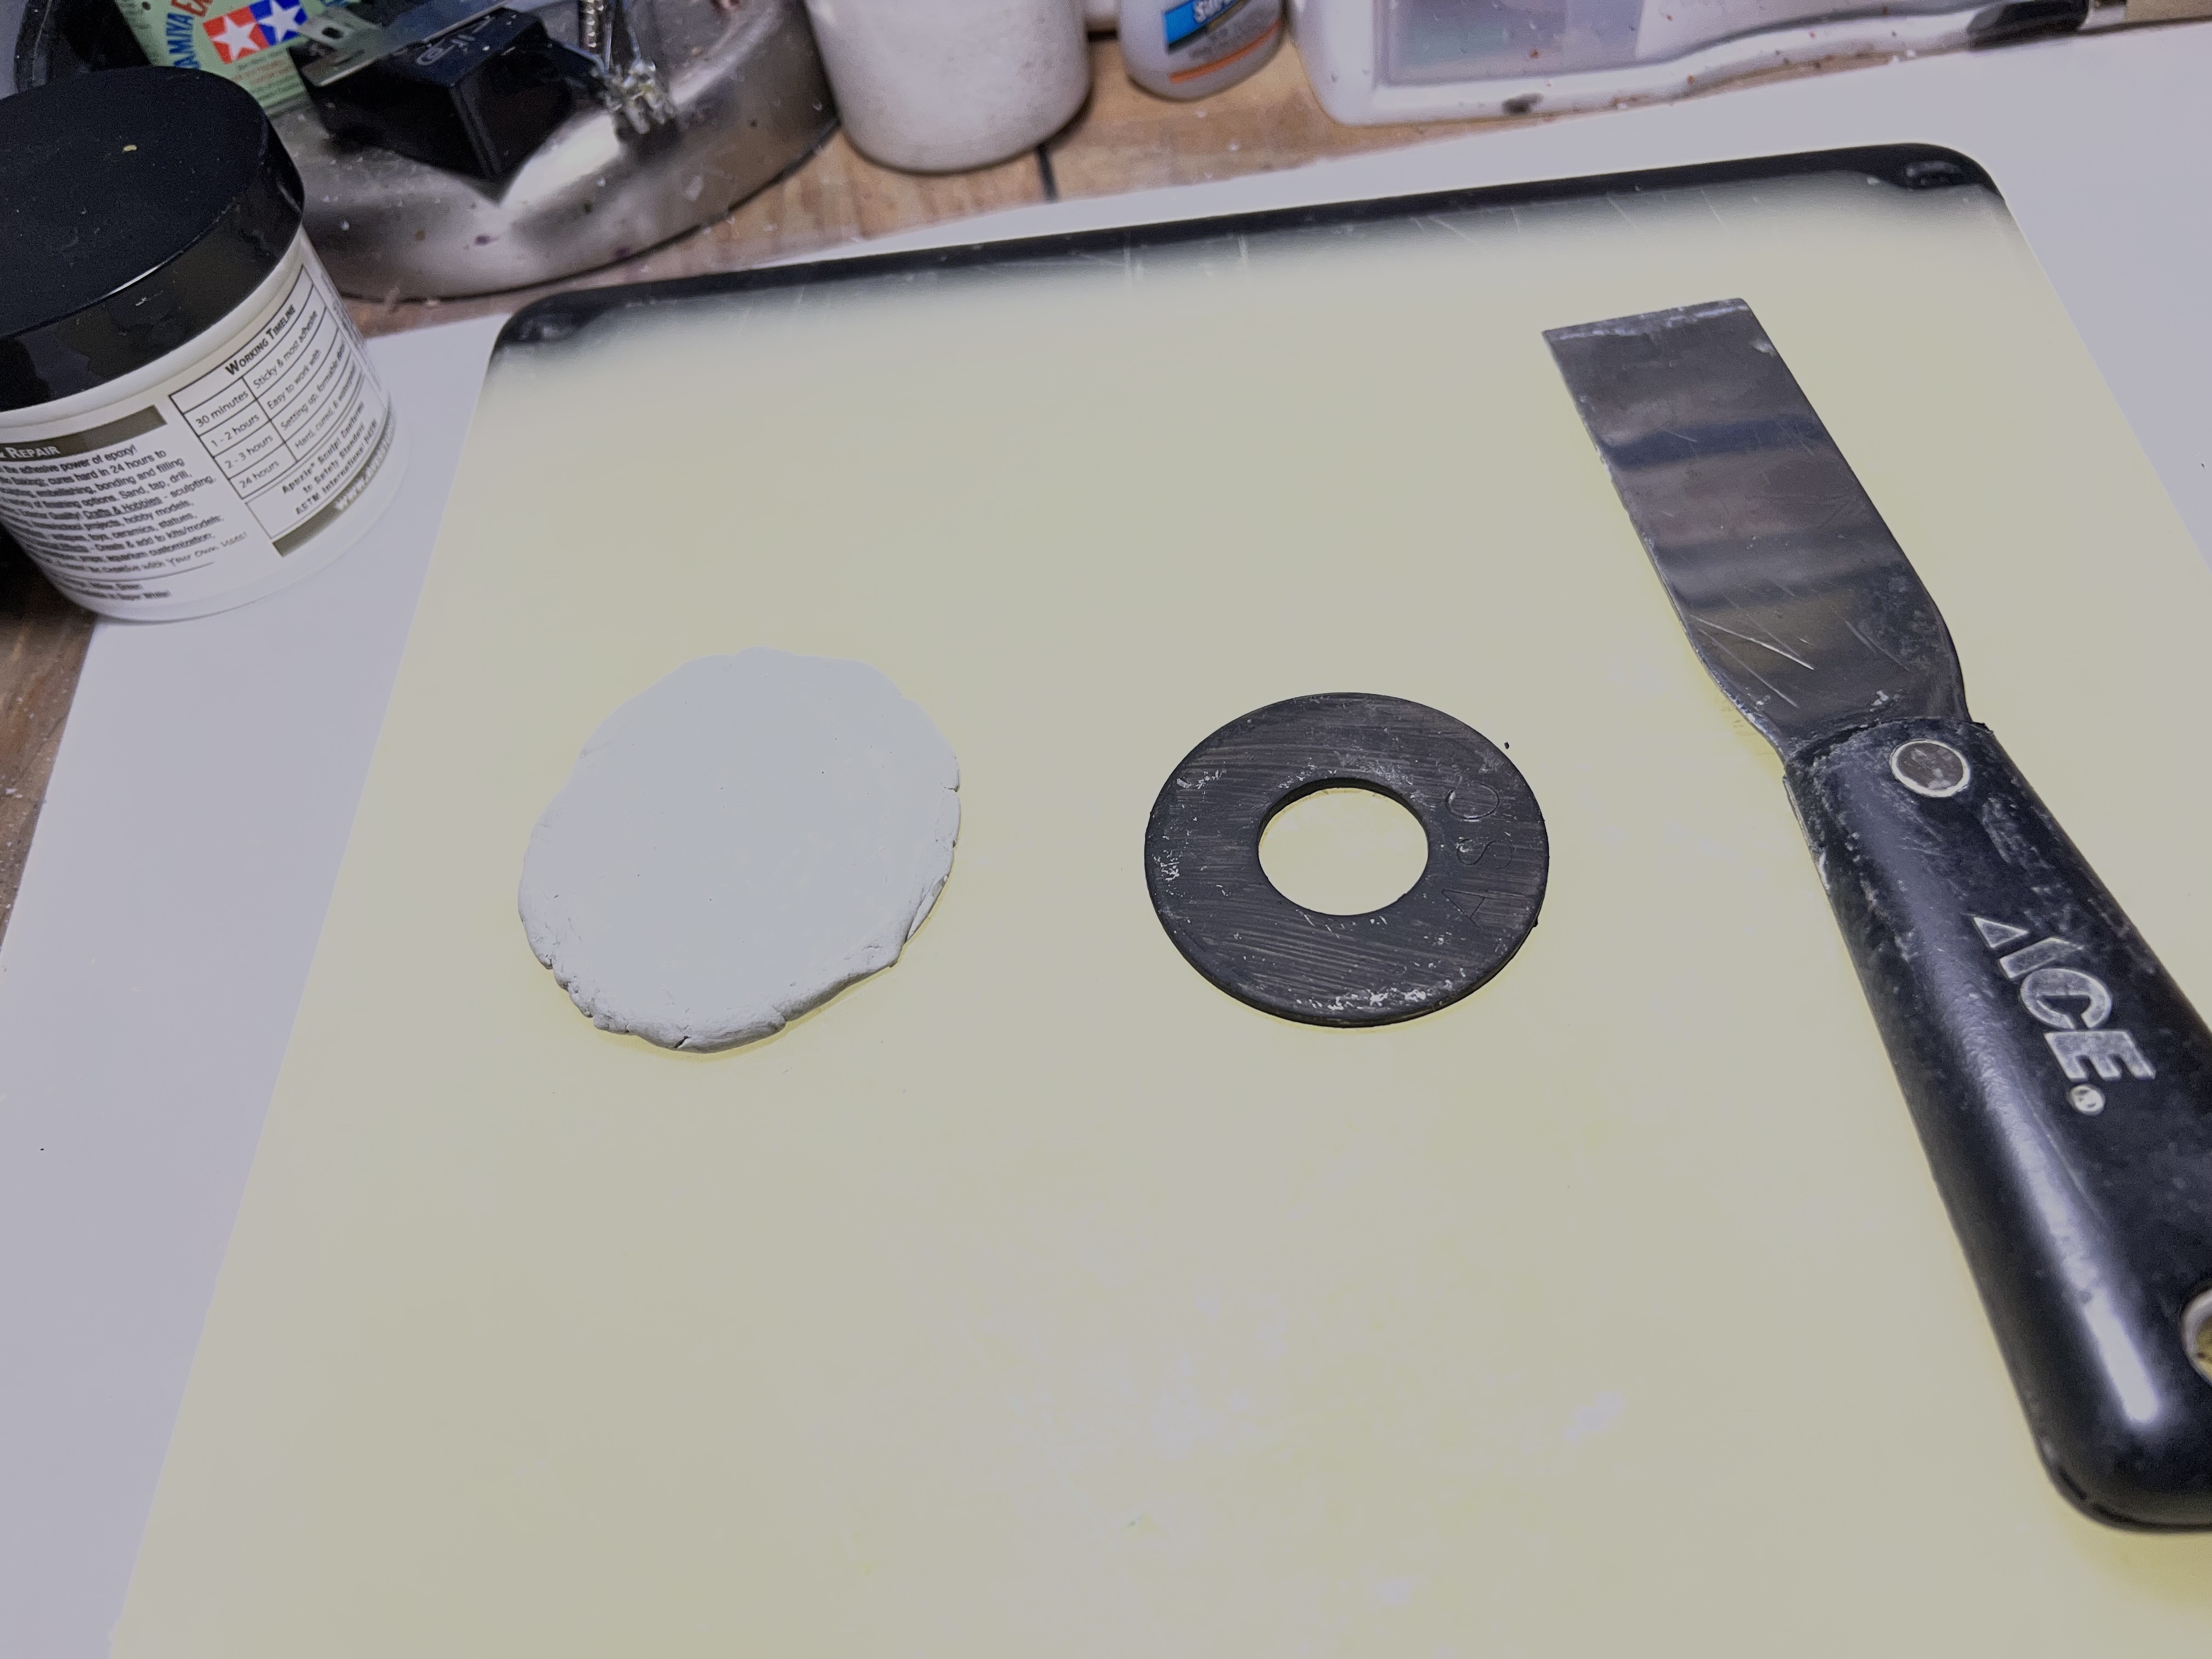
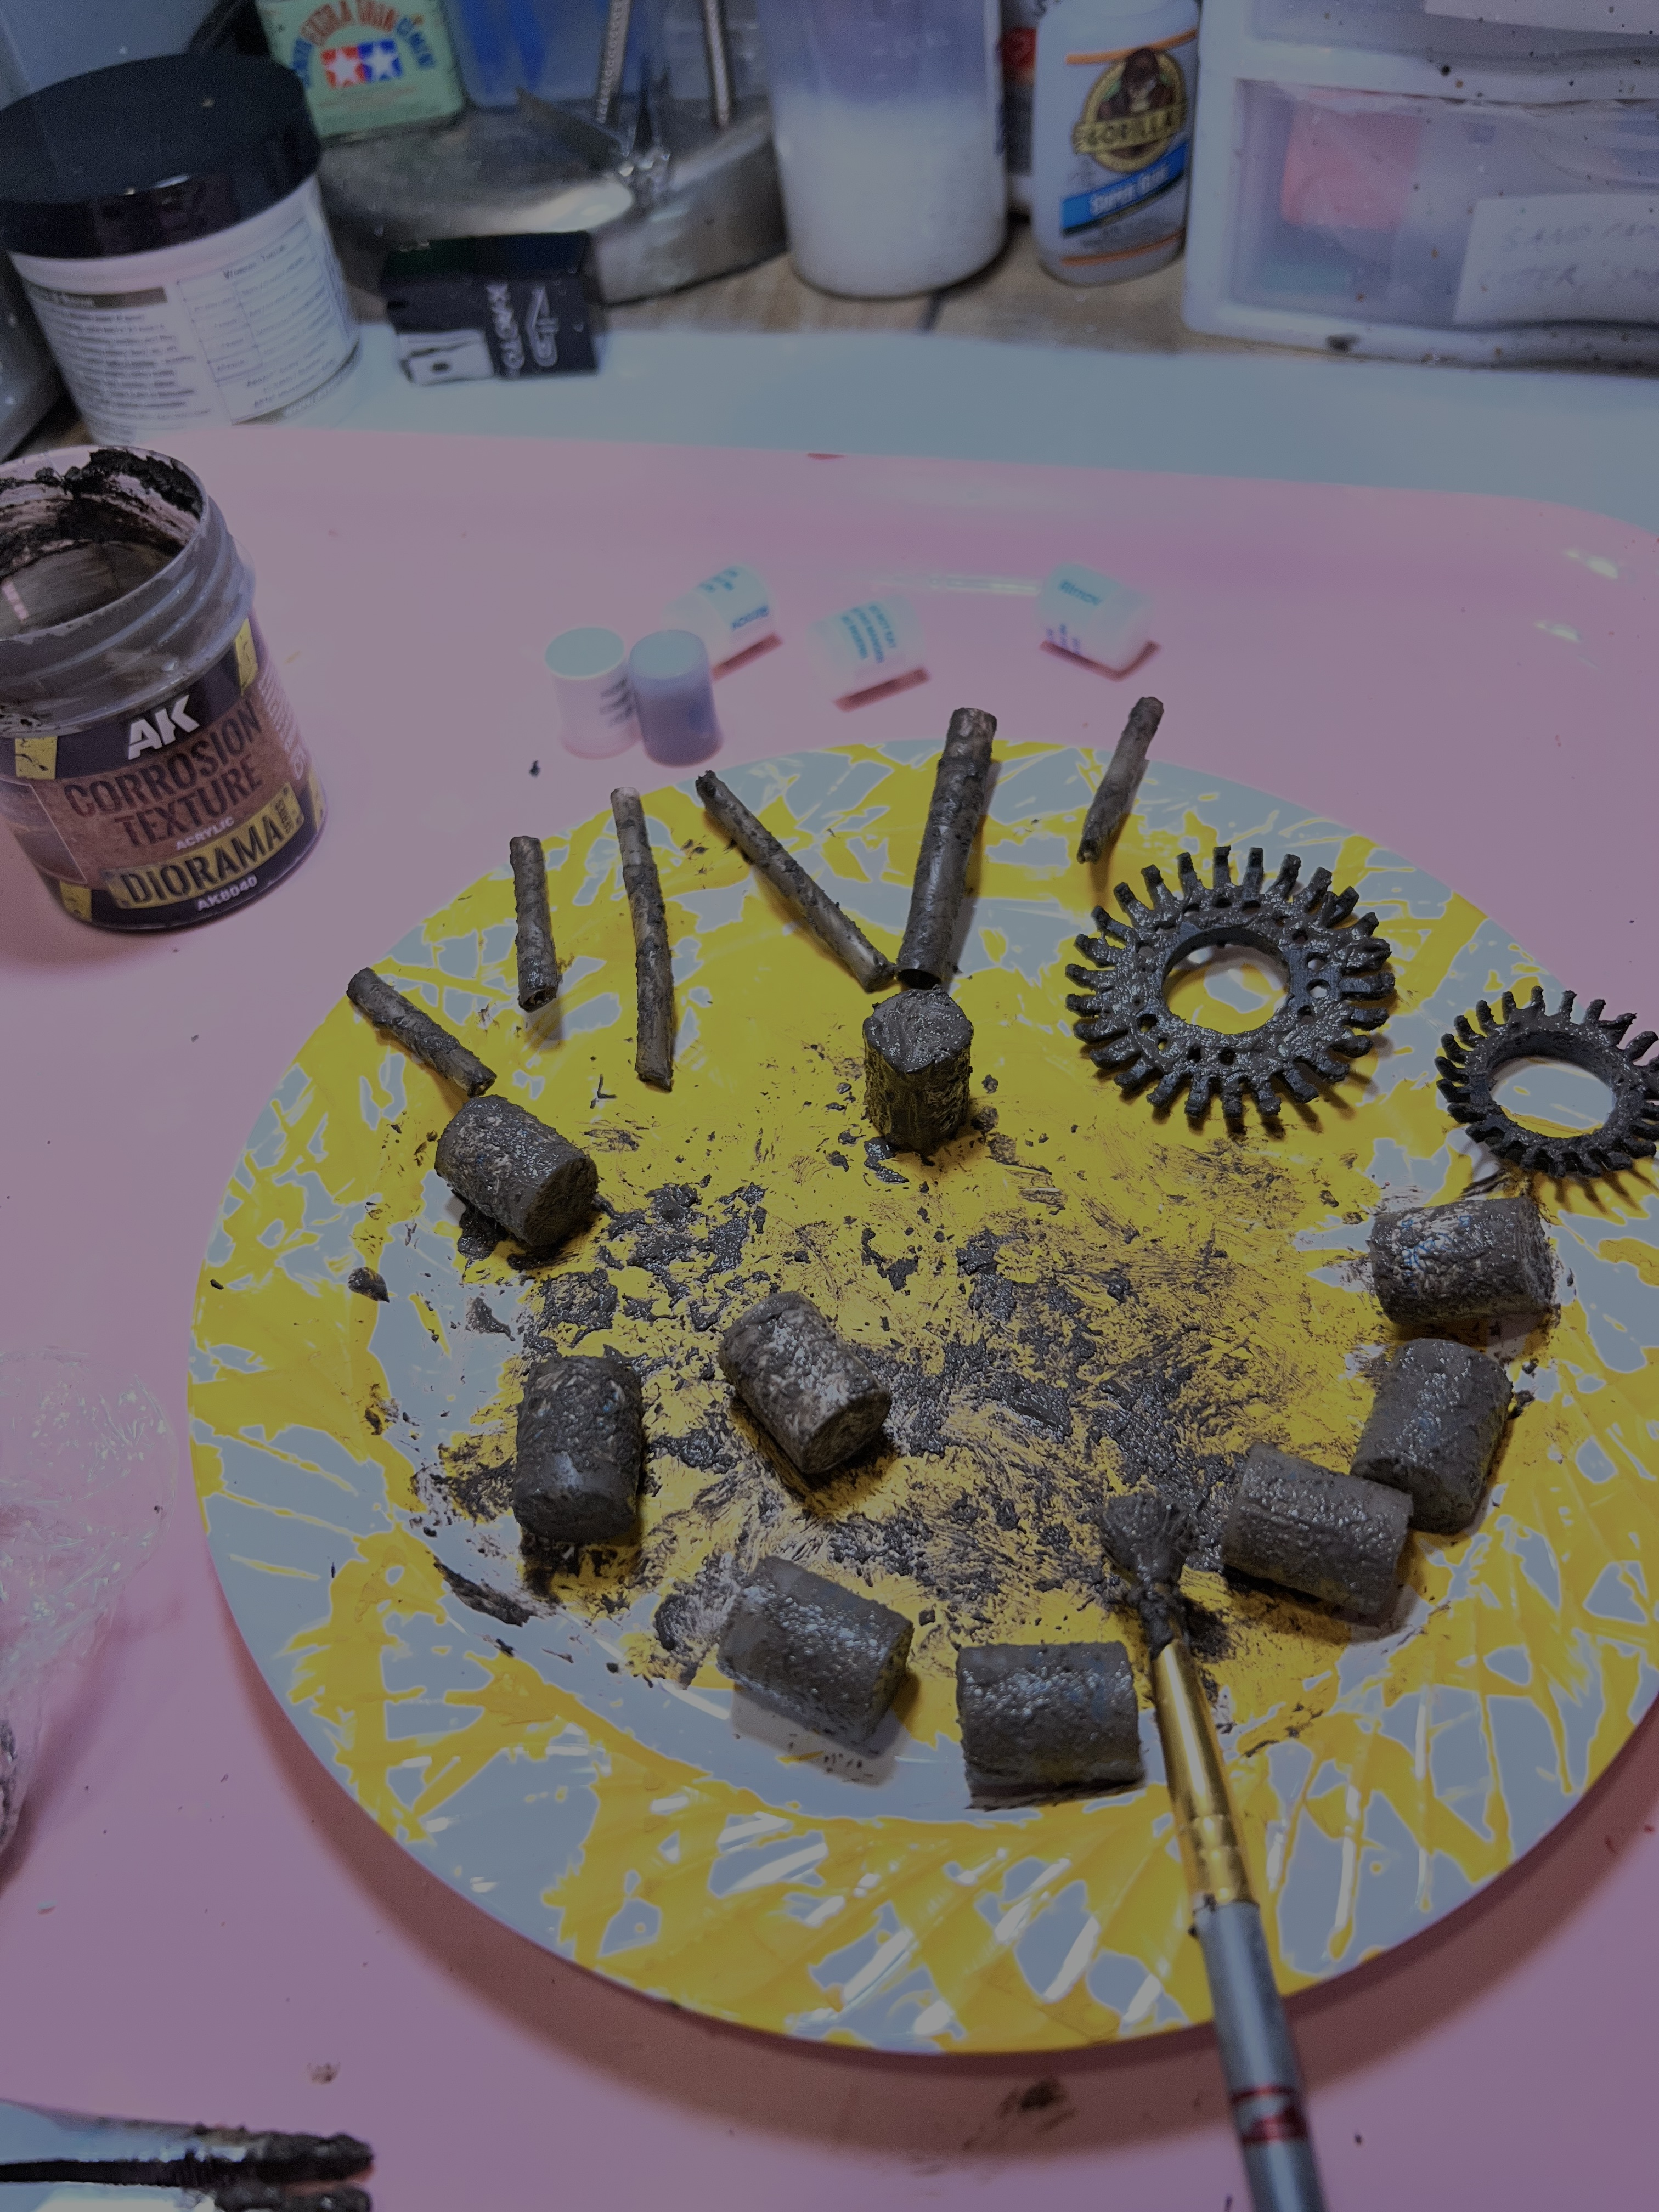
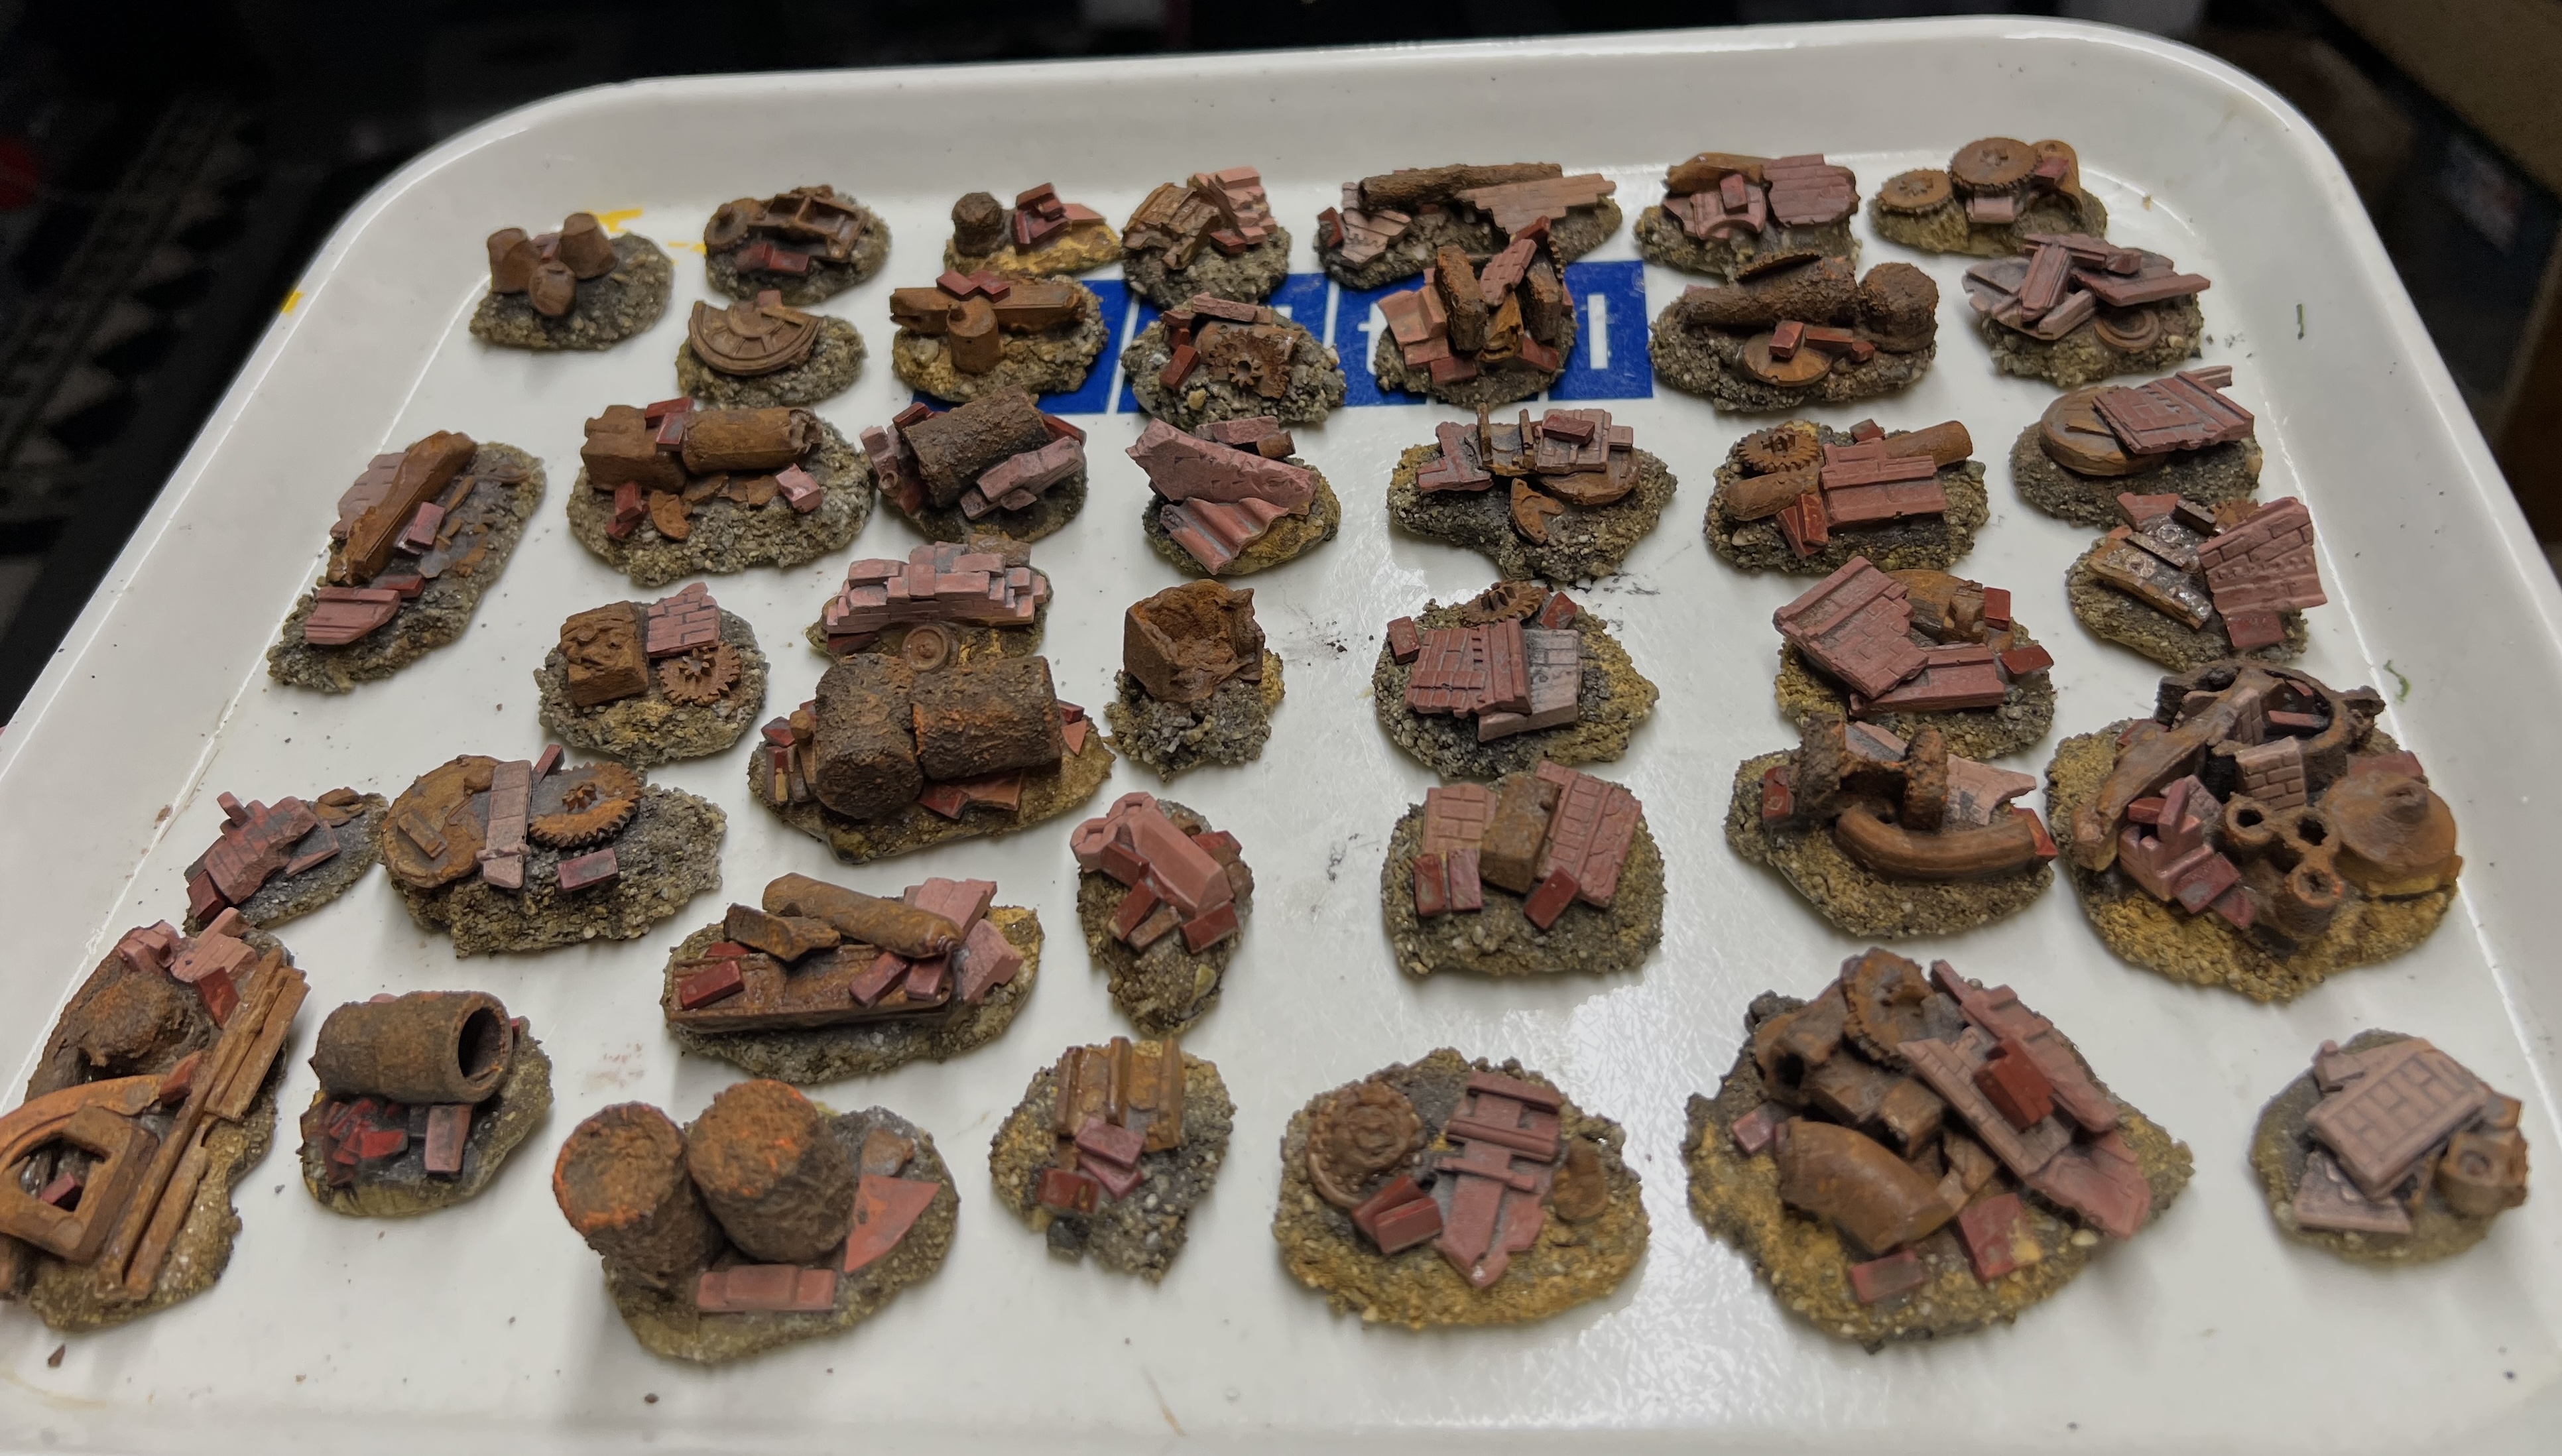
While the walls cured, I worked on the wreckage bases – also using Apoxie Sculpt. I made the bases differently in terms of both size and shape. It helped to use one or more steel washers underneath the base sculpts. Using different sizes helped to make the shapes varied.

As the corrosion texture paint takes time to dry as well, I started adding that to various pieces of debris that I had saved up. I like to use a cheap old brush that could serve no other purpose – especially as it usually destroys it. The corrosion paint needed to dry and then got a second application.
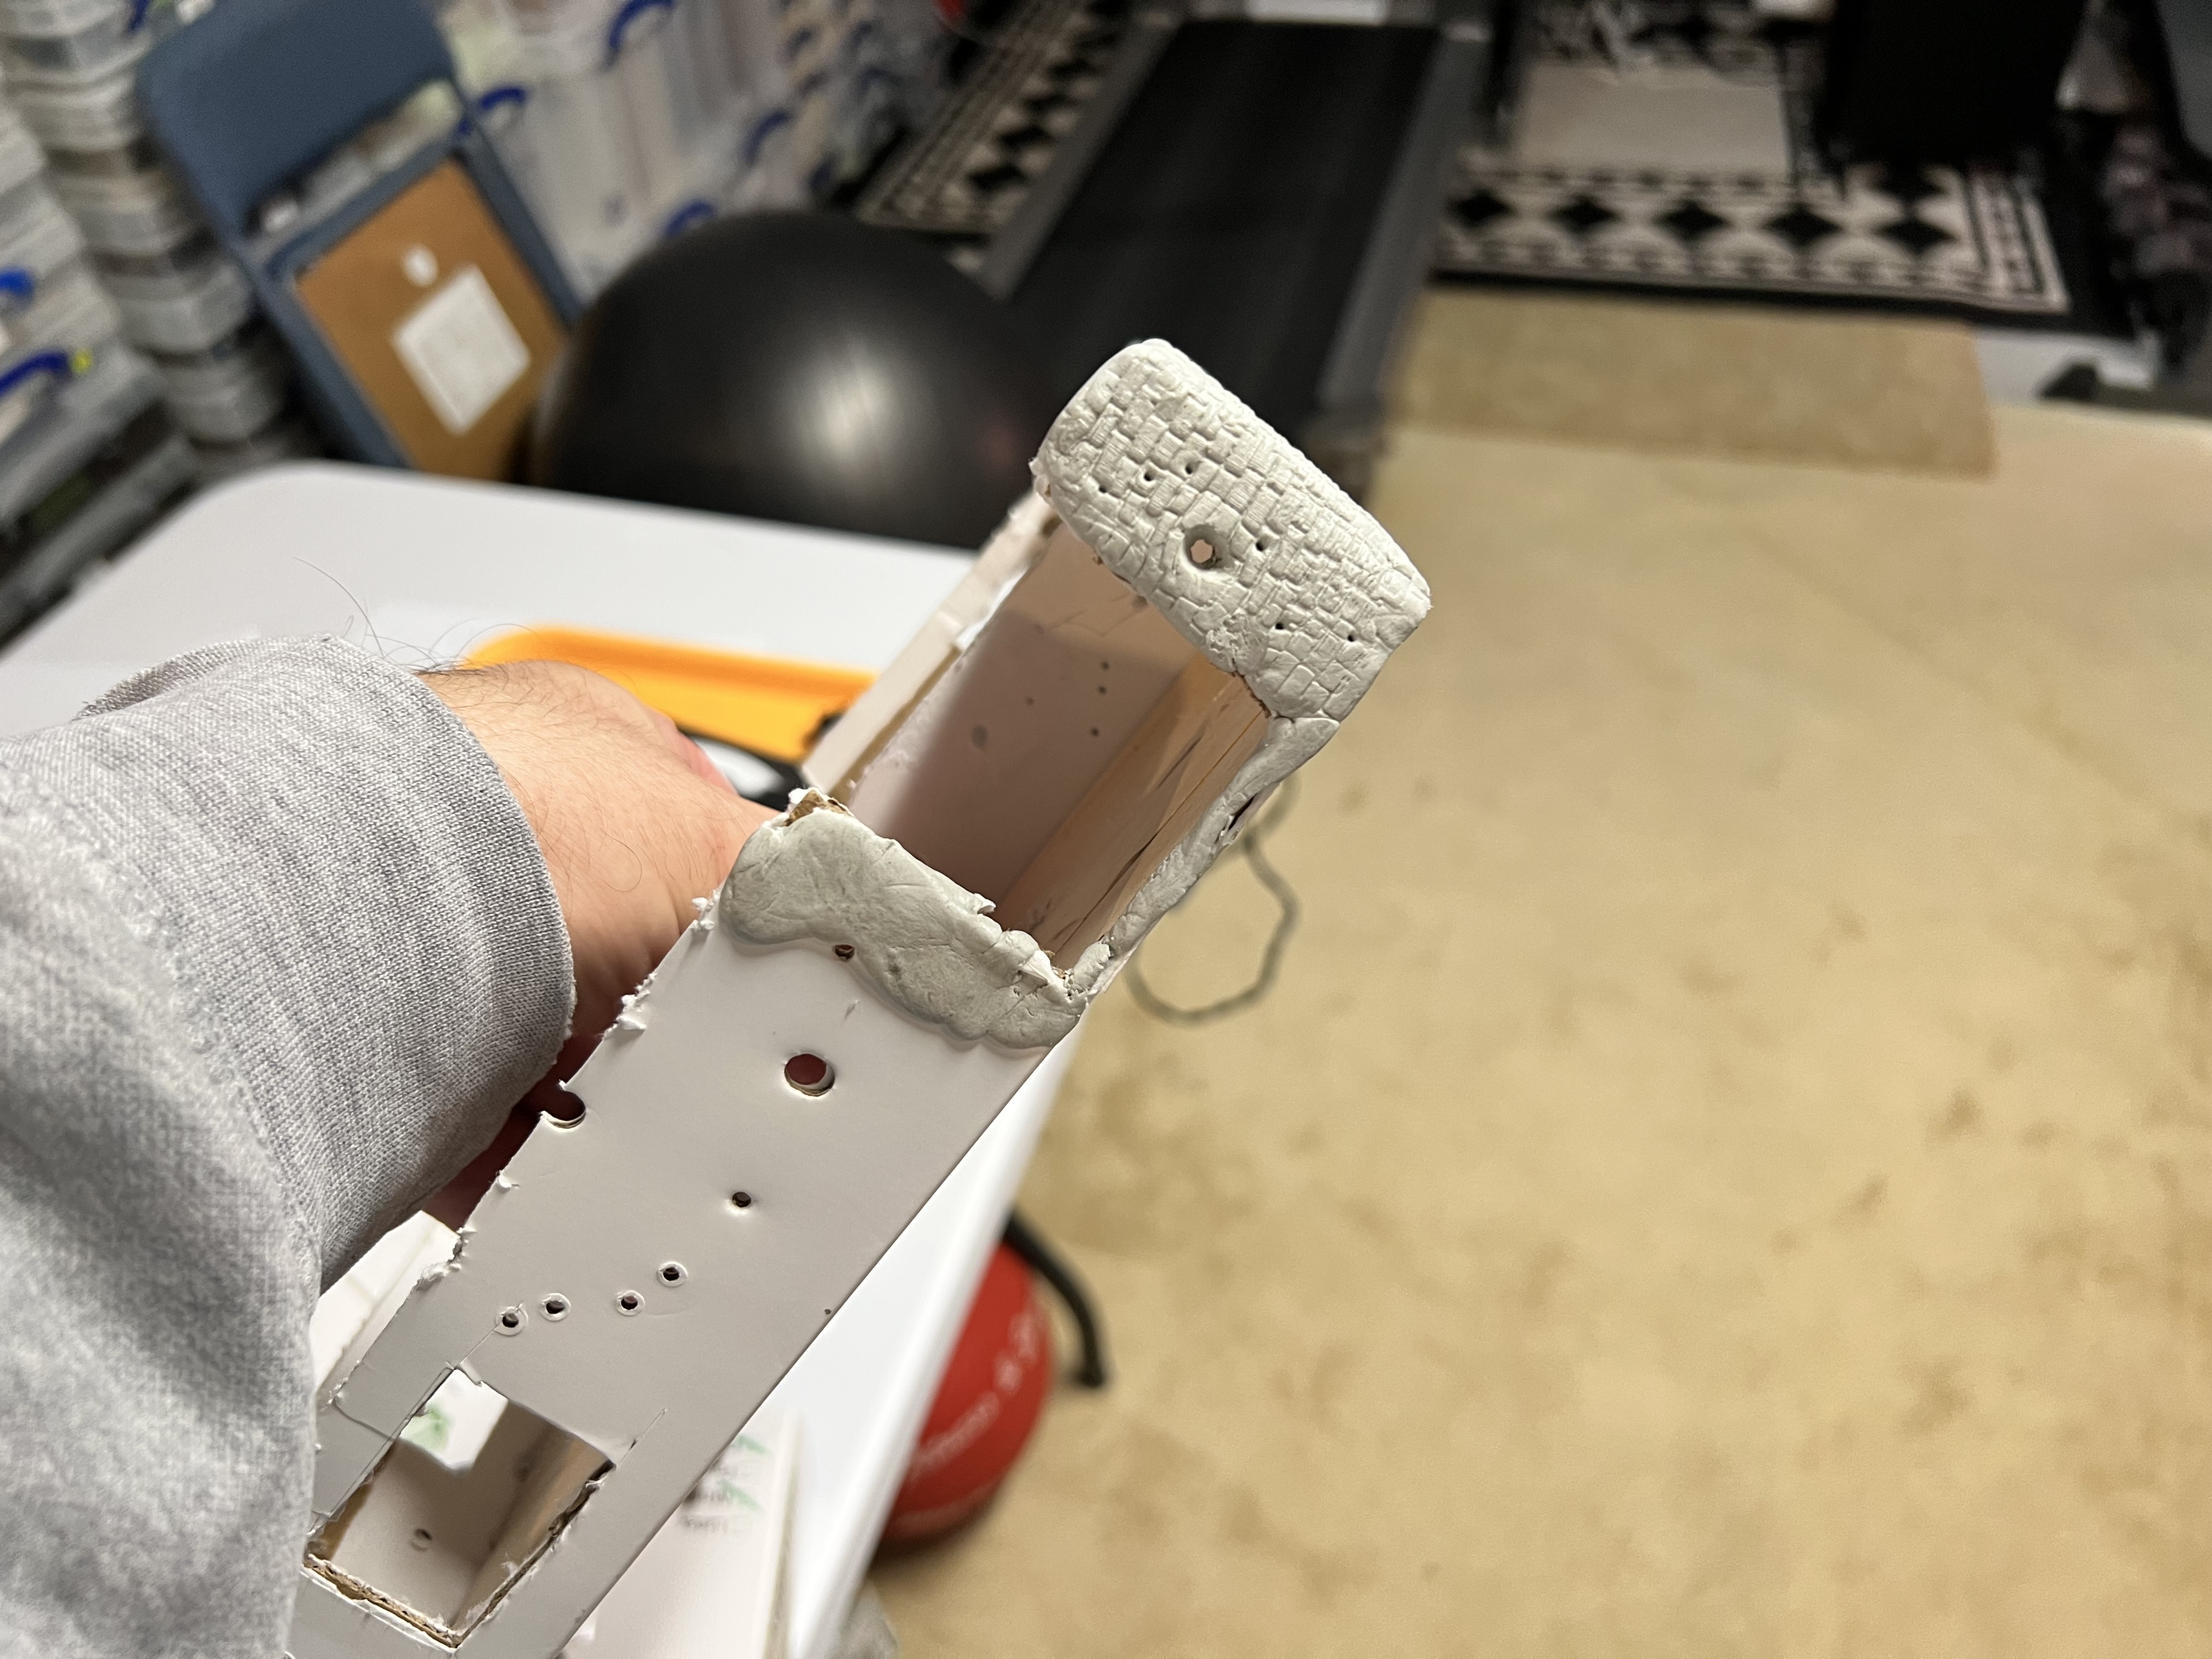
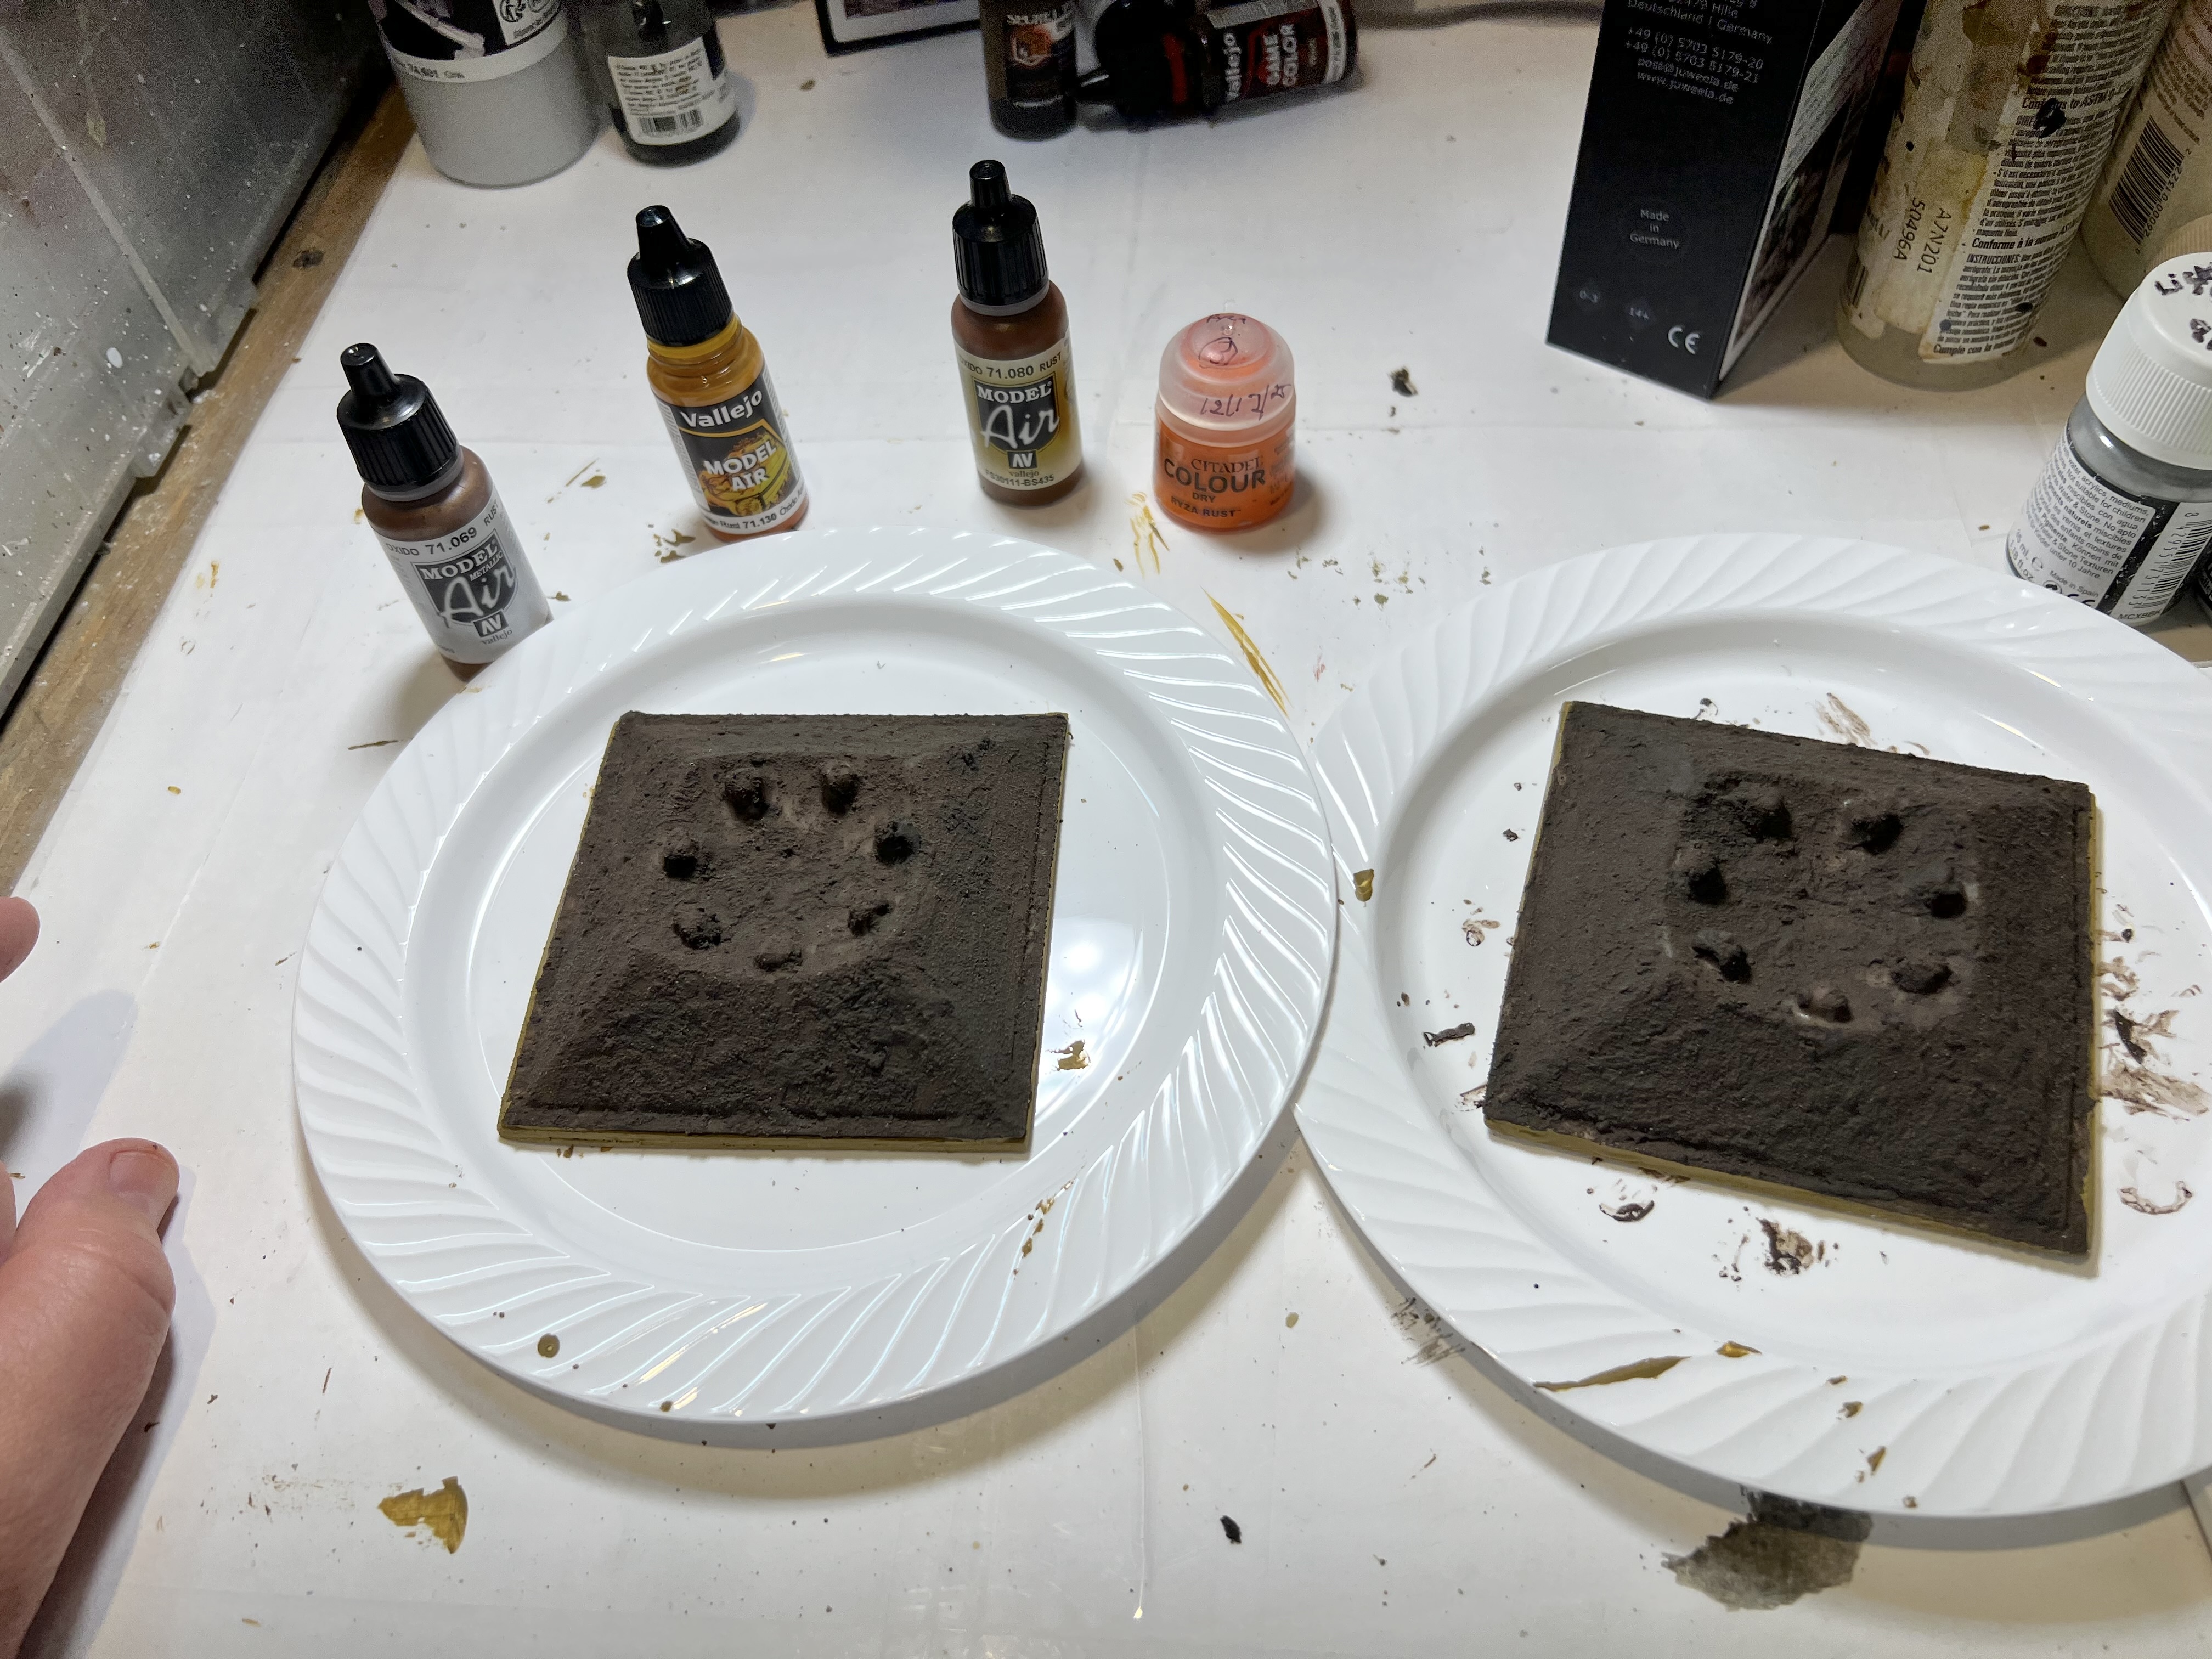
After a day, the Apoxie Sculpt on the first building had cured. But I wanted there to be a small outside rim to it that could hold wreckage and brick debris. While a sheet of polystyrene was gluing to its bottom, I worked on the second building.

As the first building had cured, I started to paint it. Then I was able to glue a polystyrene base to building number 2.
As I was again dealing with drying and curing times, I went back to work on the wreckage bases. I used up some white sand on the Apoxie Sculpt bases and applied with PVA. Once that had dried, I added as much wreckage as I could to each.
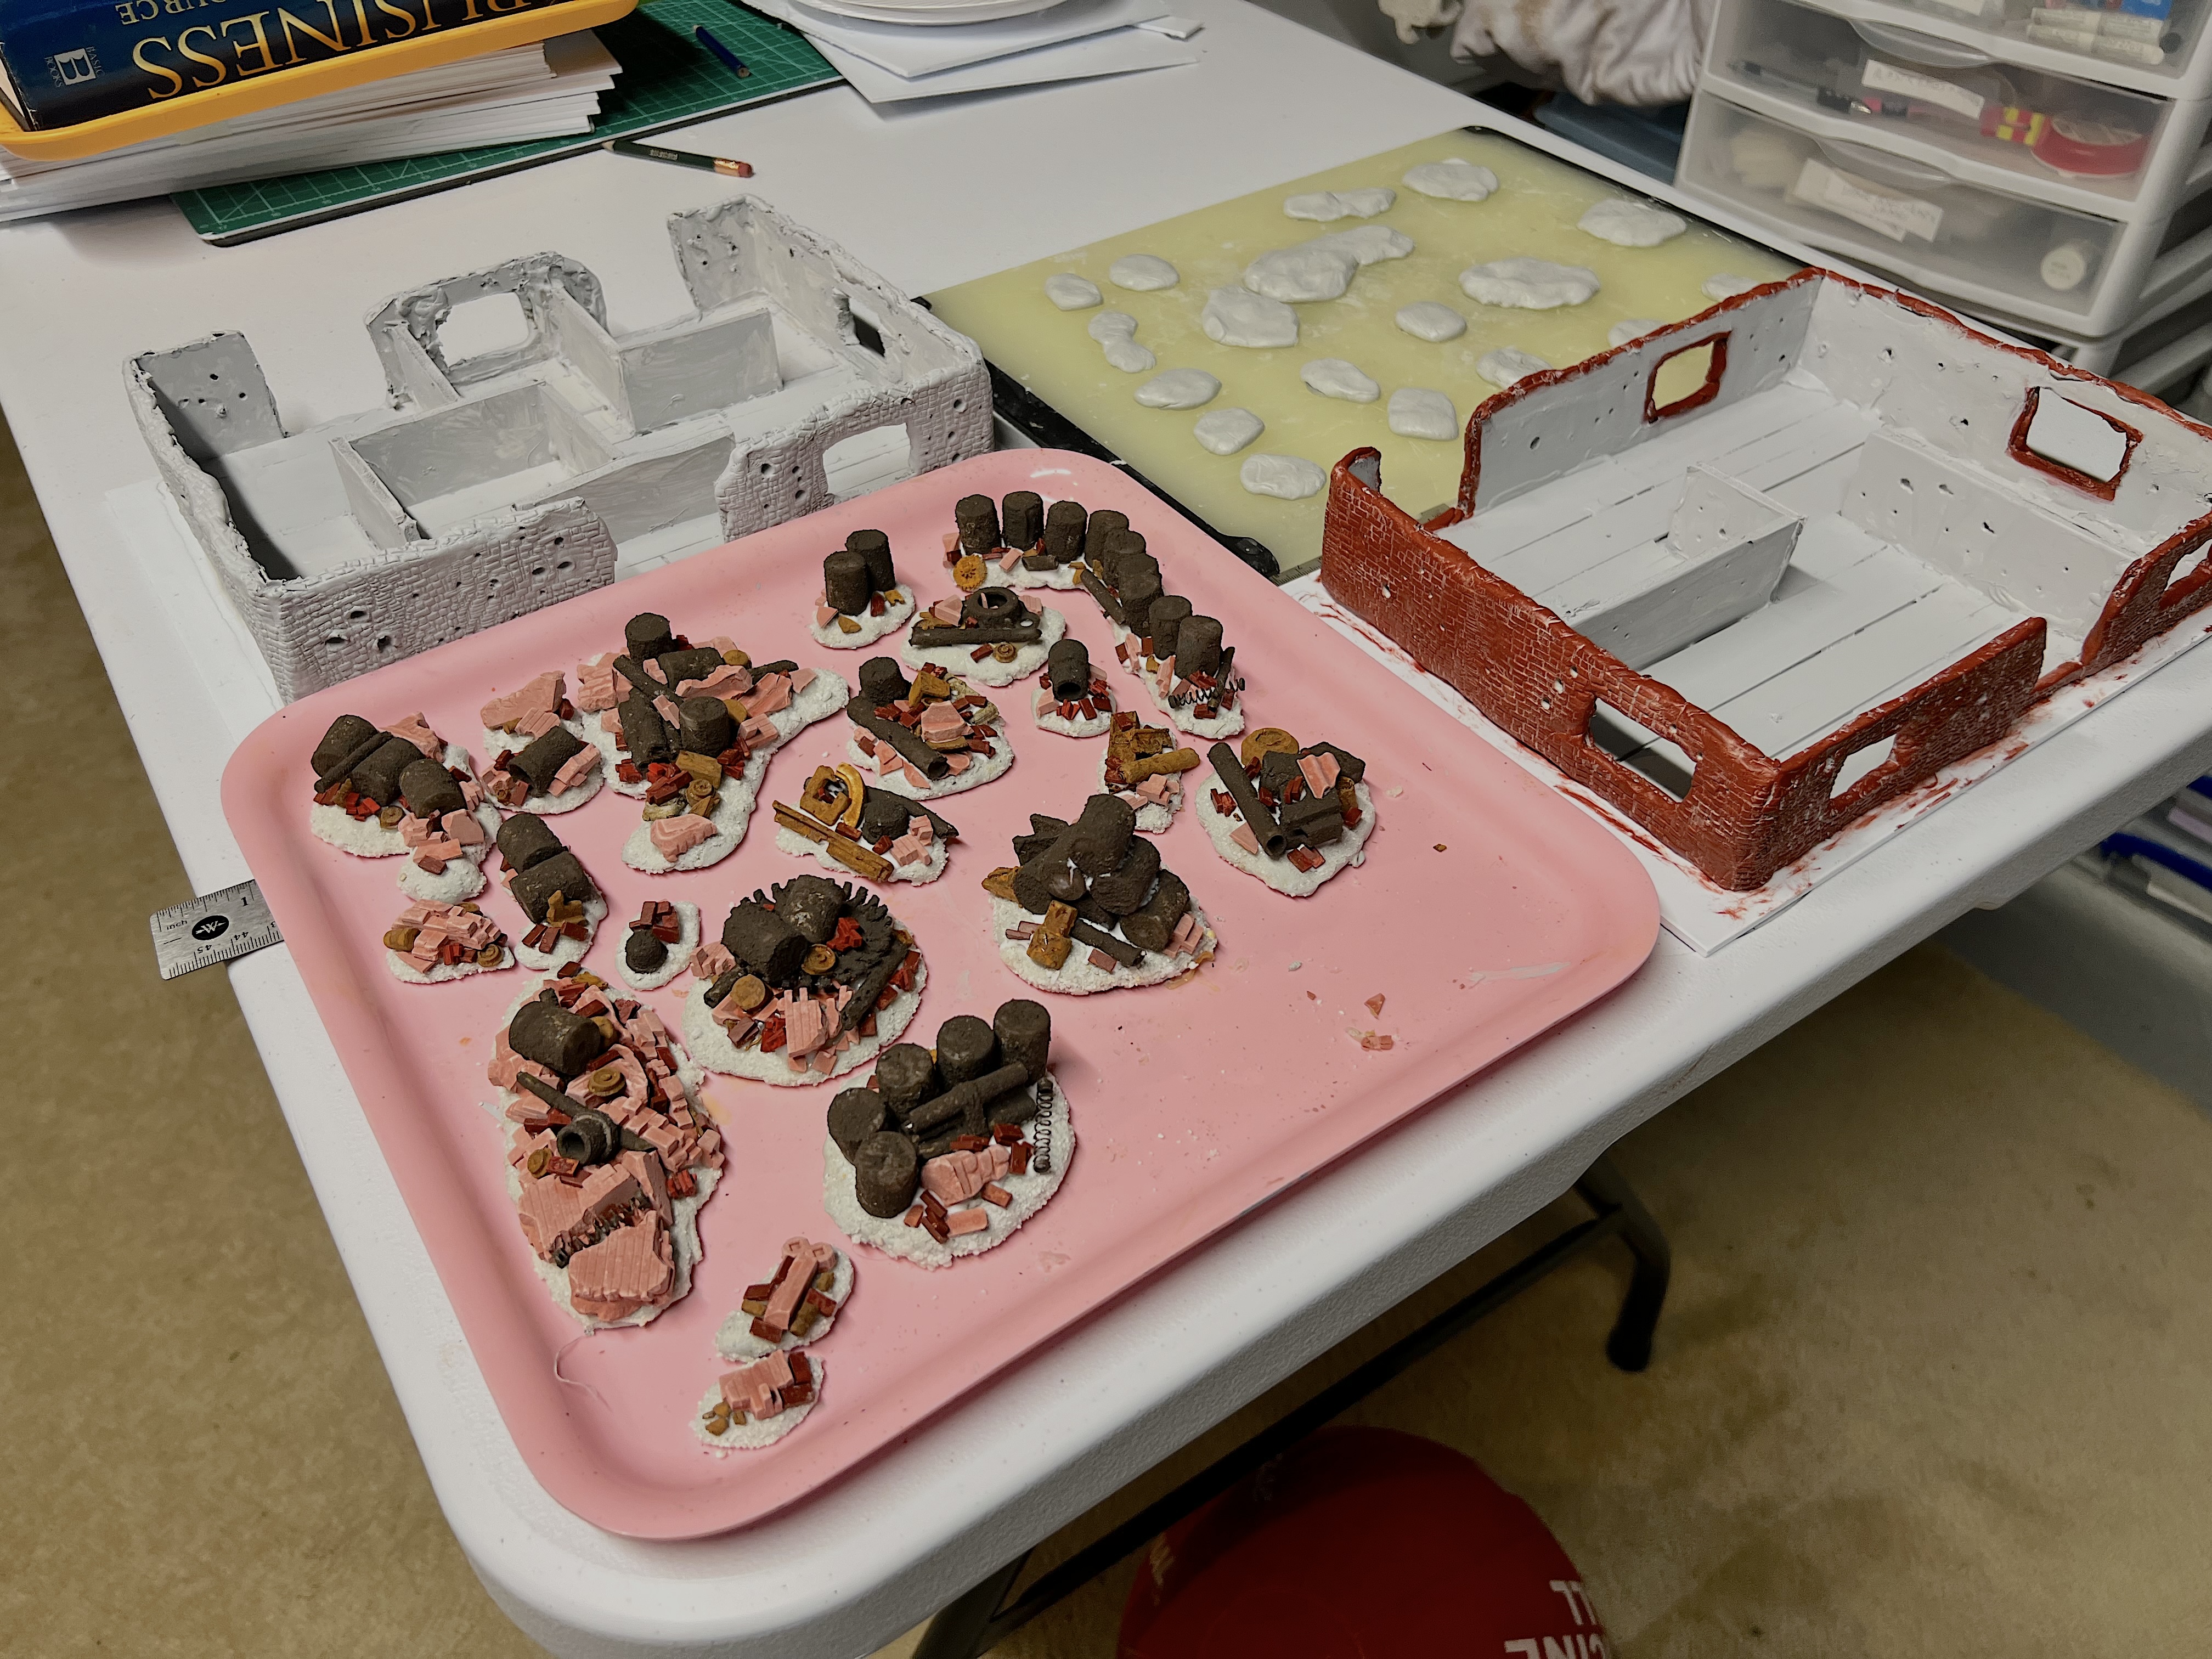
At this point, I added the flat clear plastic packing material to two square pieces of polystyrene by clamping and gluing them in preparation for corrosion texture. Then it was back to the wreckage bases. I had run out of white sand, so the next batch of wreckage bases got a PVA/grey sand application. As I used a lot pigments later, this made zero difference. At the same time, I also dirtied up the interior building walls and flooring using a sponge and various dark washes. The rim outside the buildings got a sandy texture paint covering.
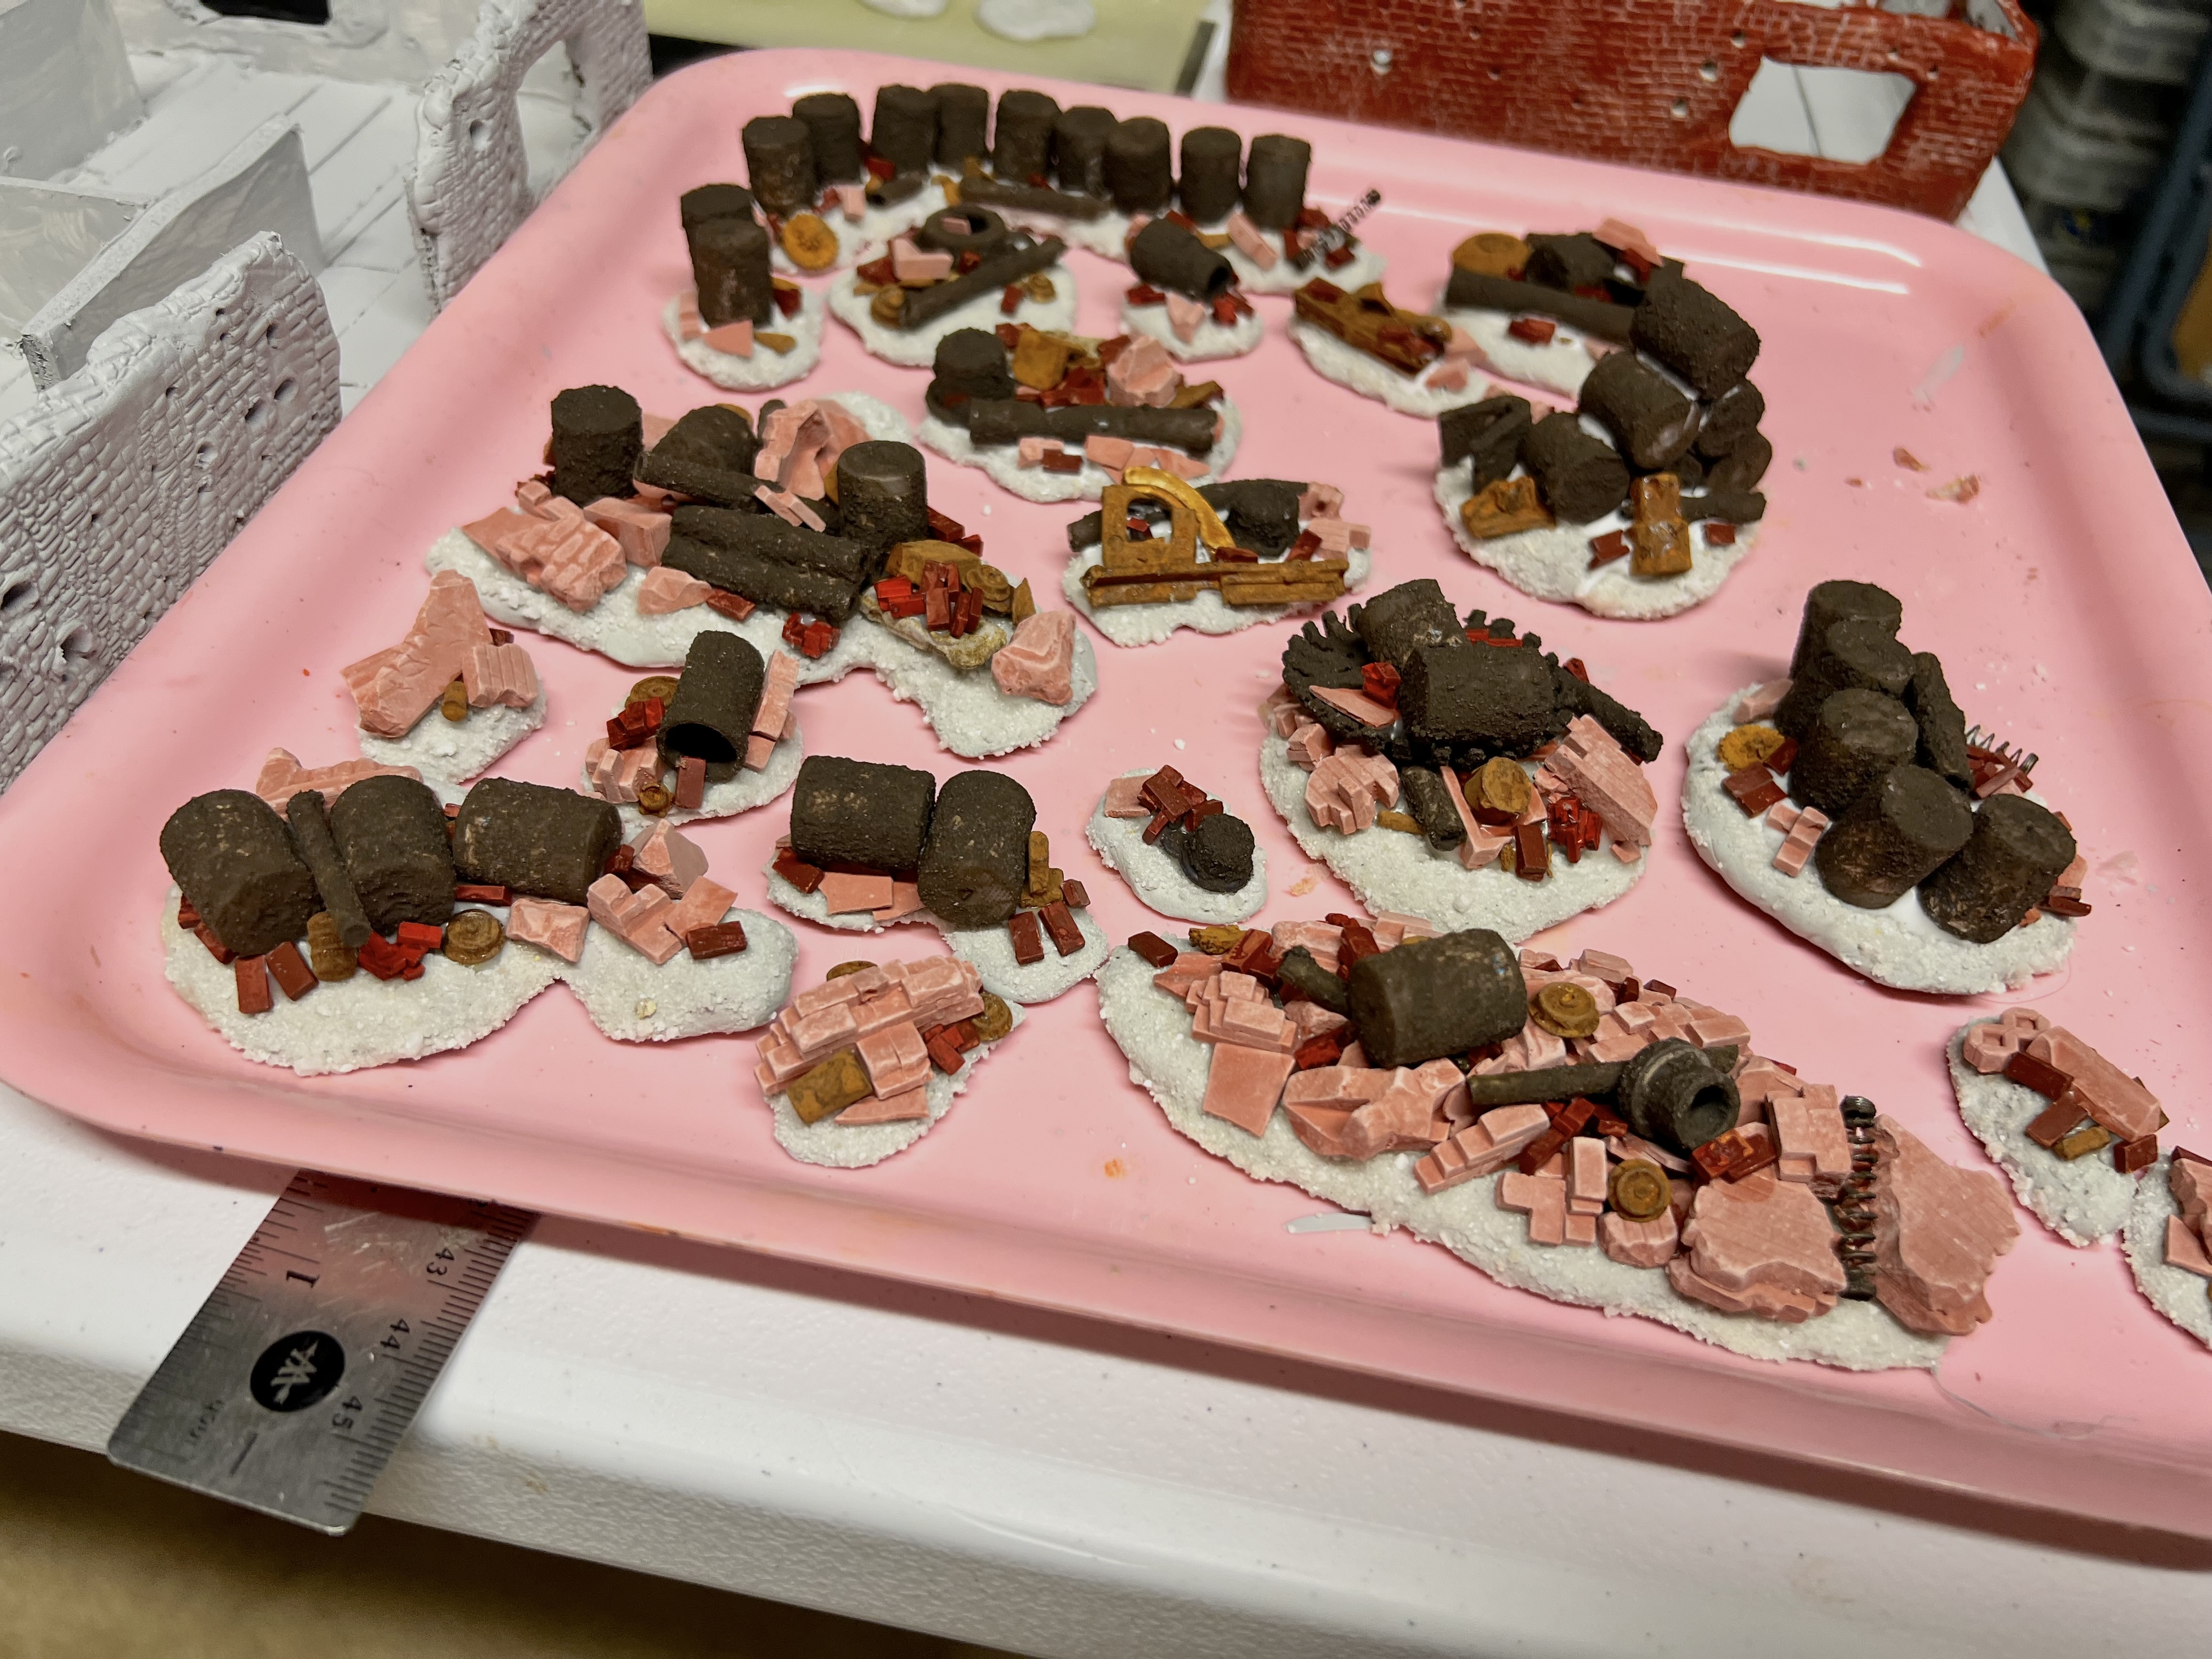
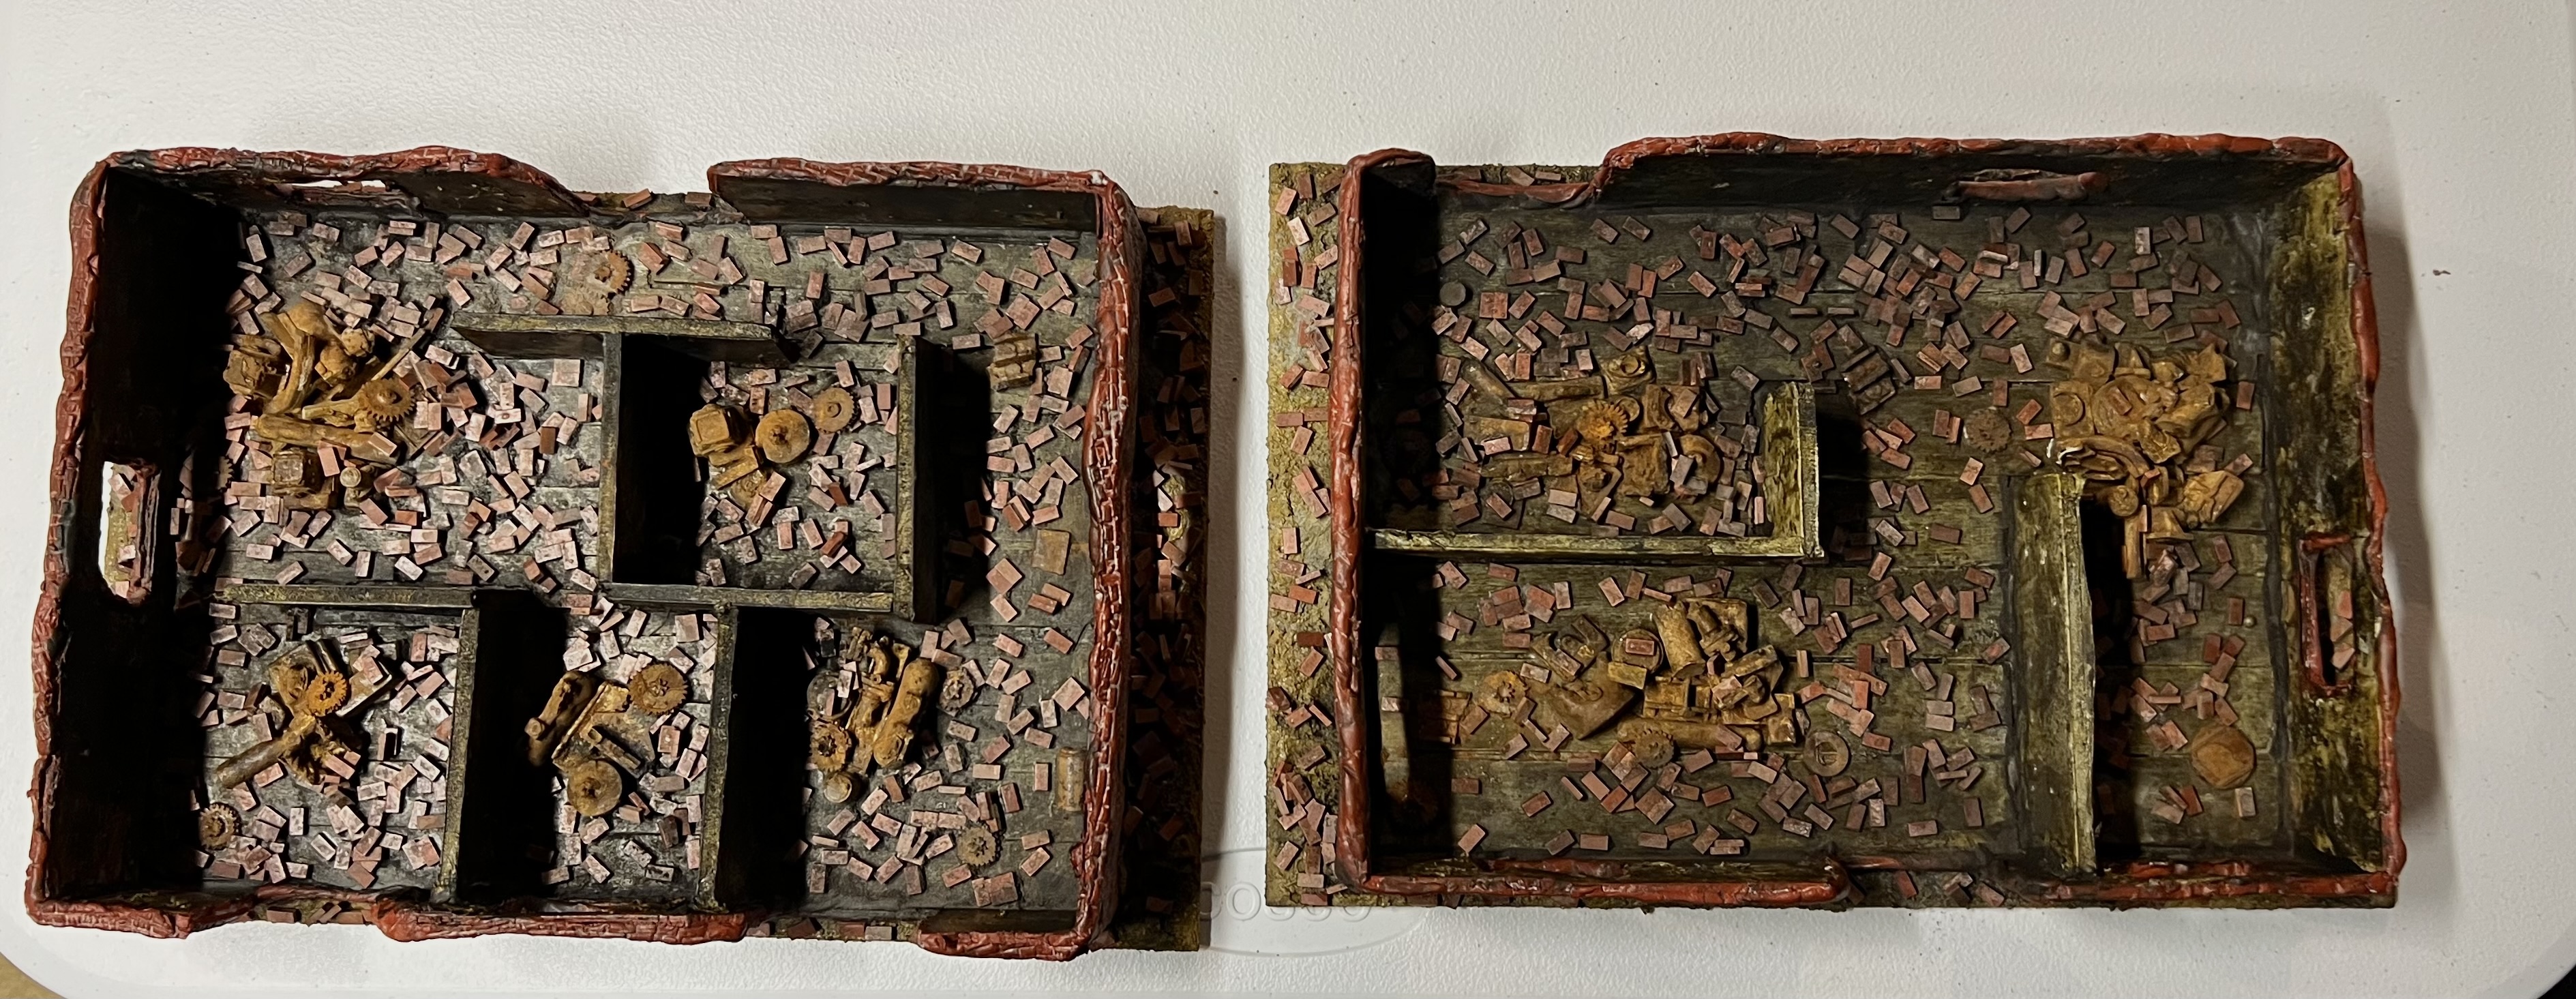
Below you can see the wreckage bases after I added pigments to them. I fixed the pigments with Vallejo Thinner applied with a spray from a lens cleaning bottle.
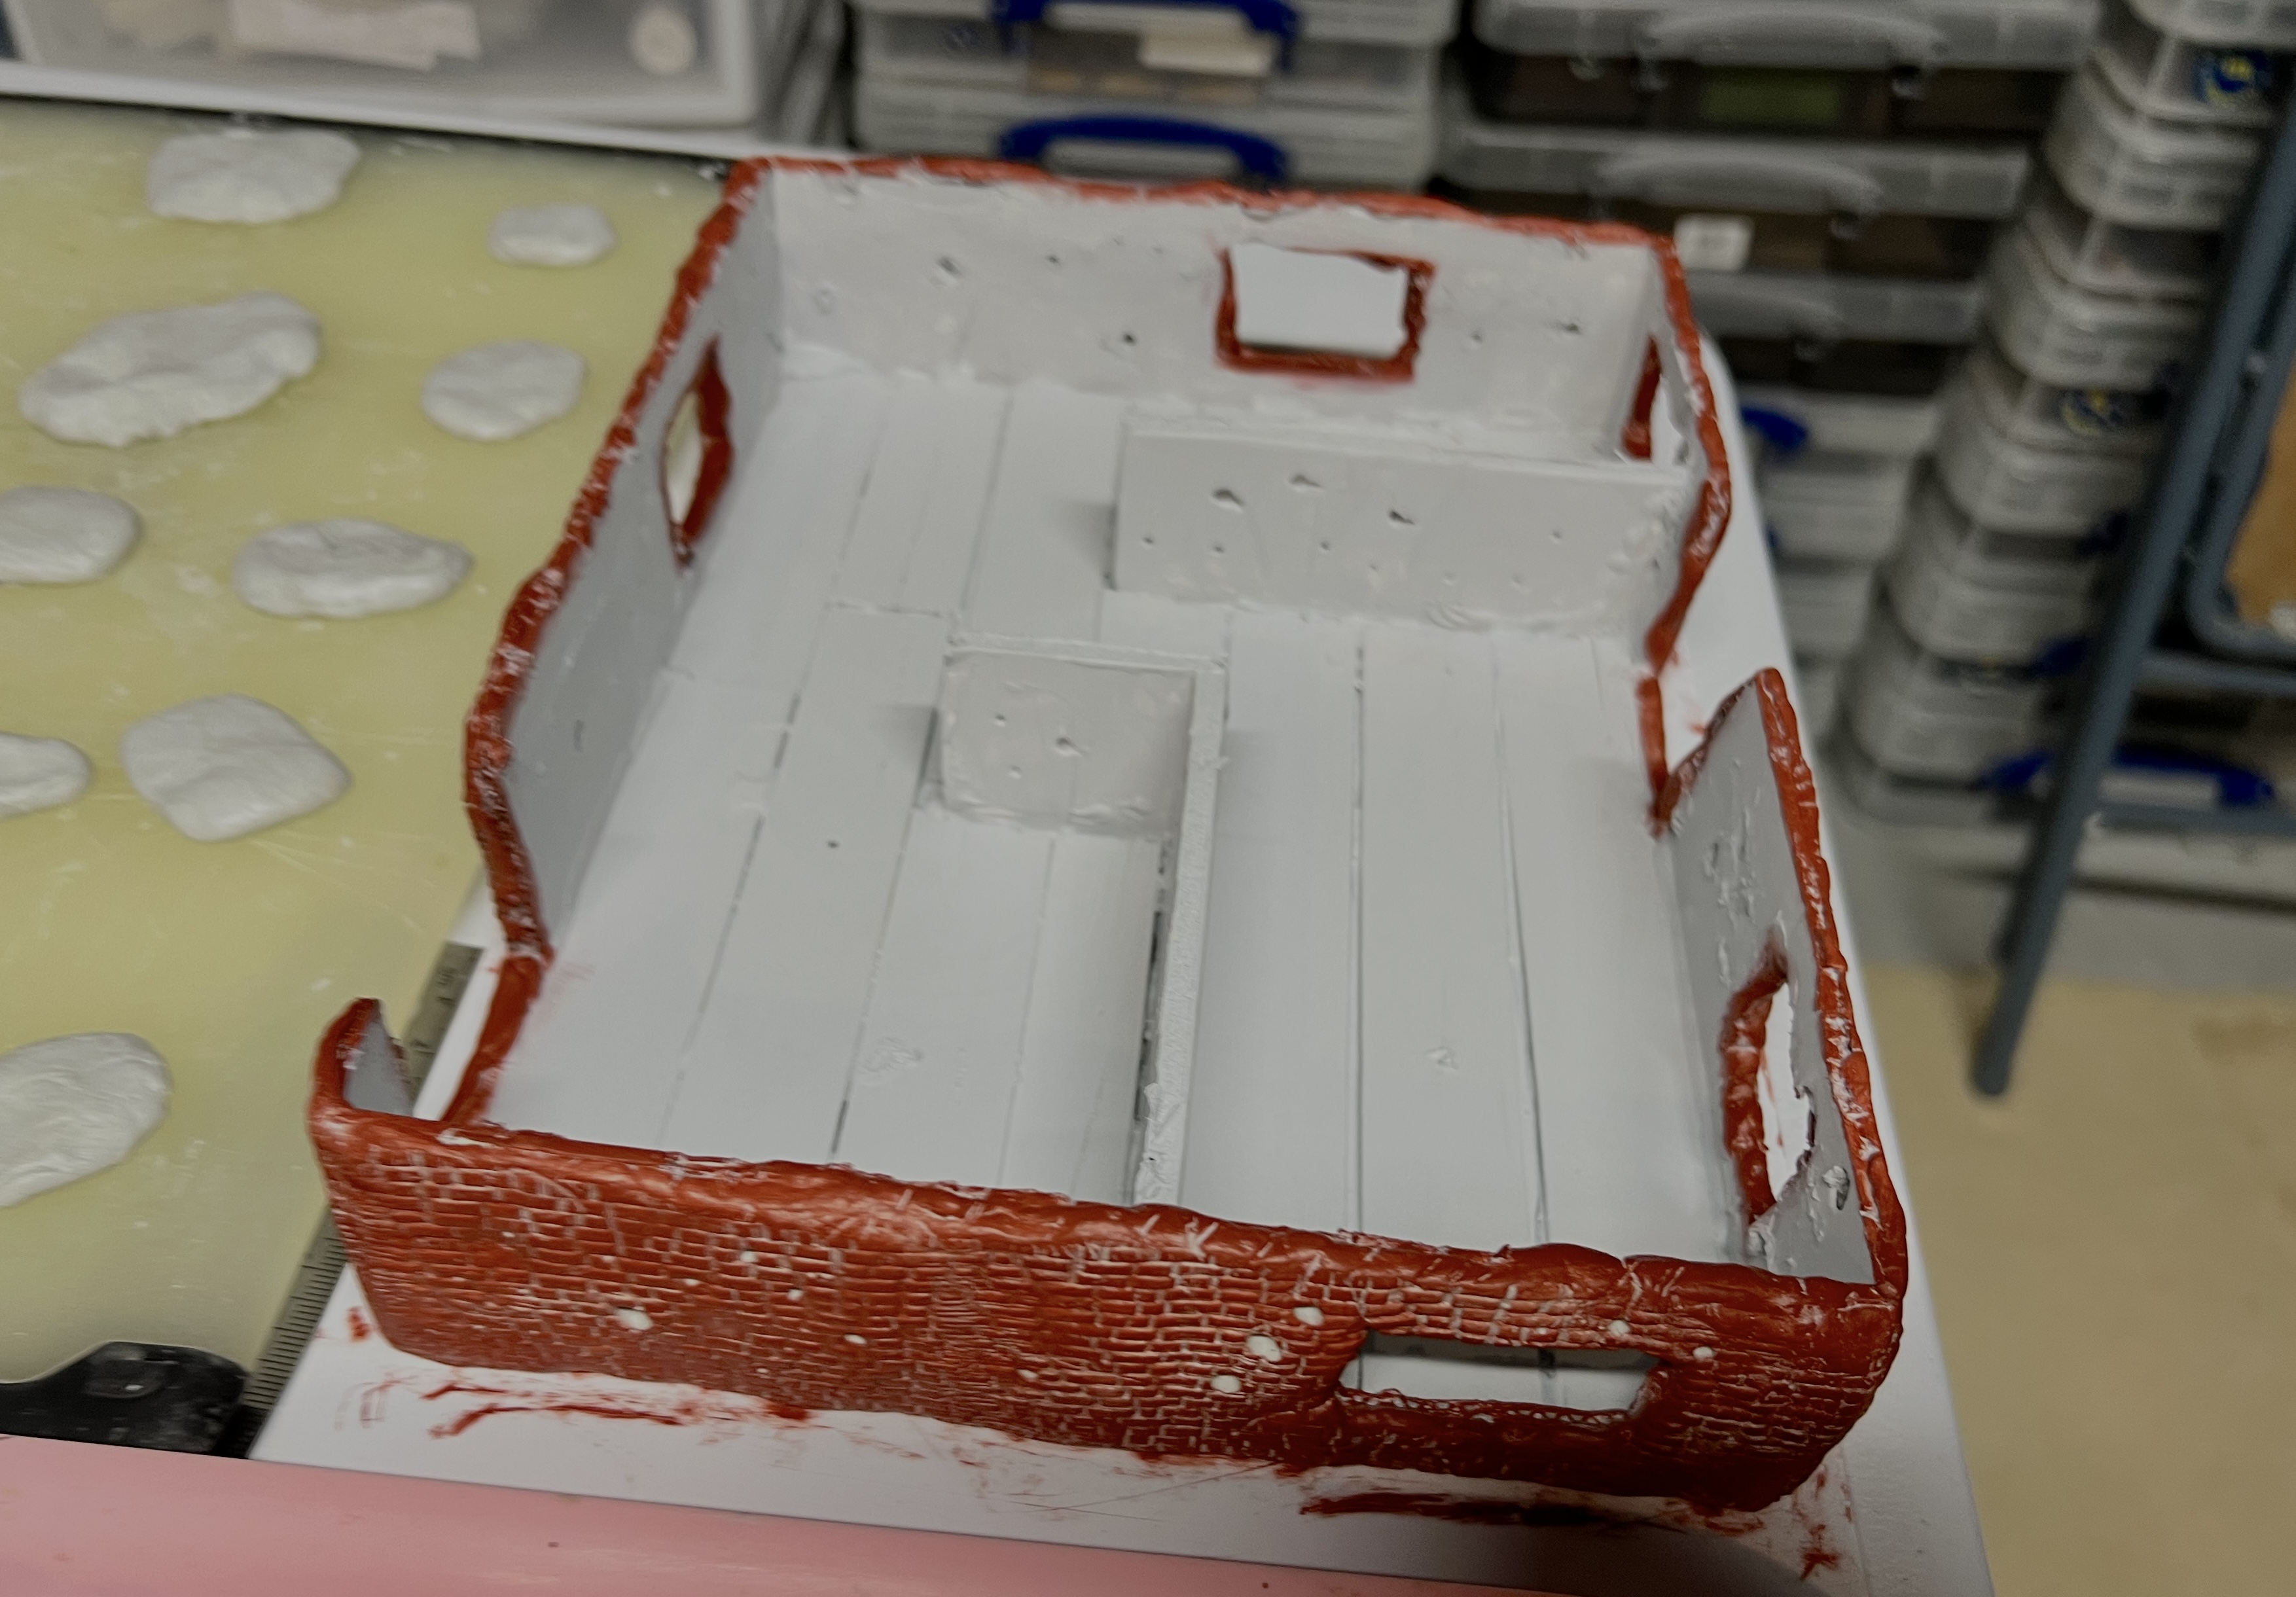
Next, I added rusty industrial wreckage and scattered bricks to the buildings’ interiors.
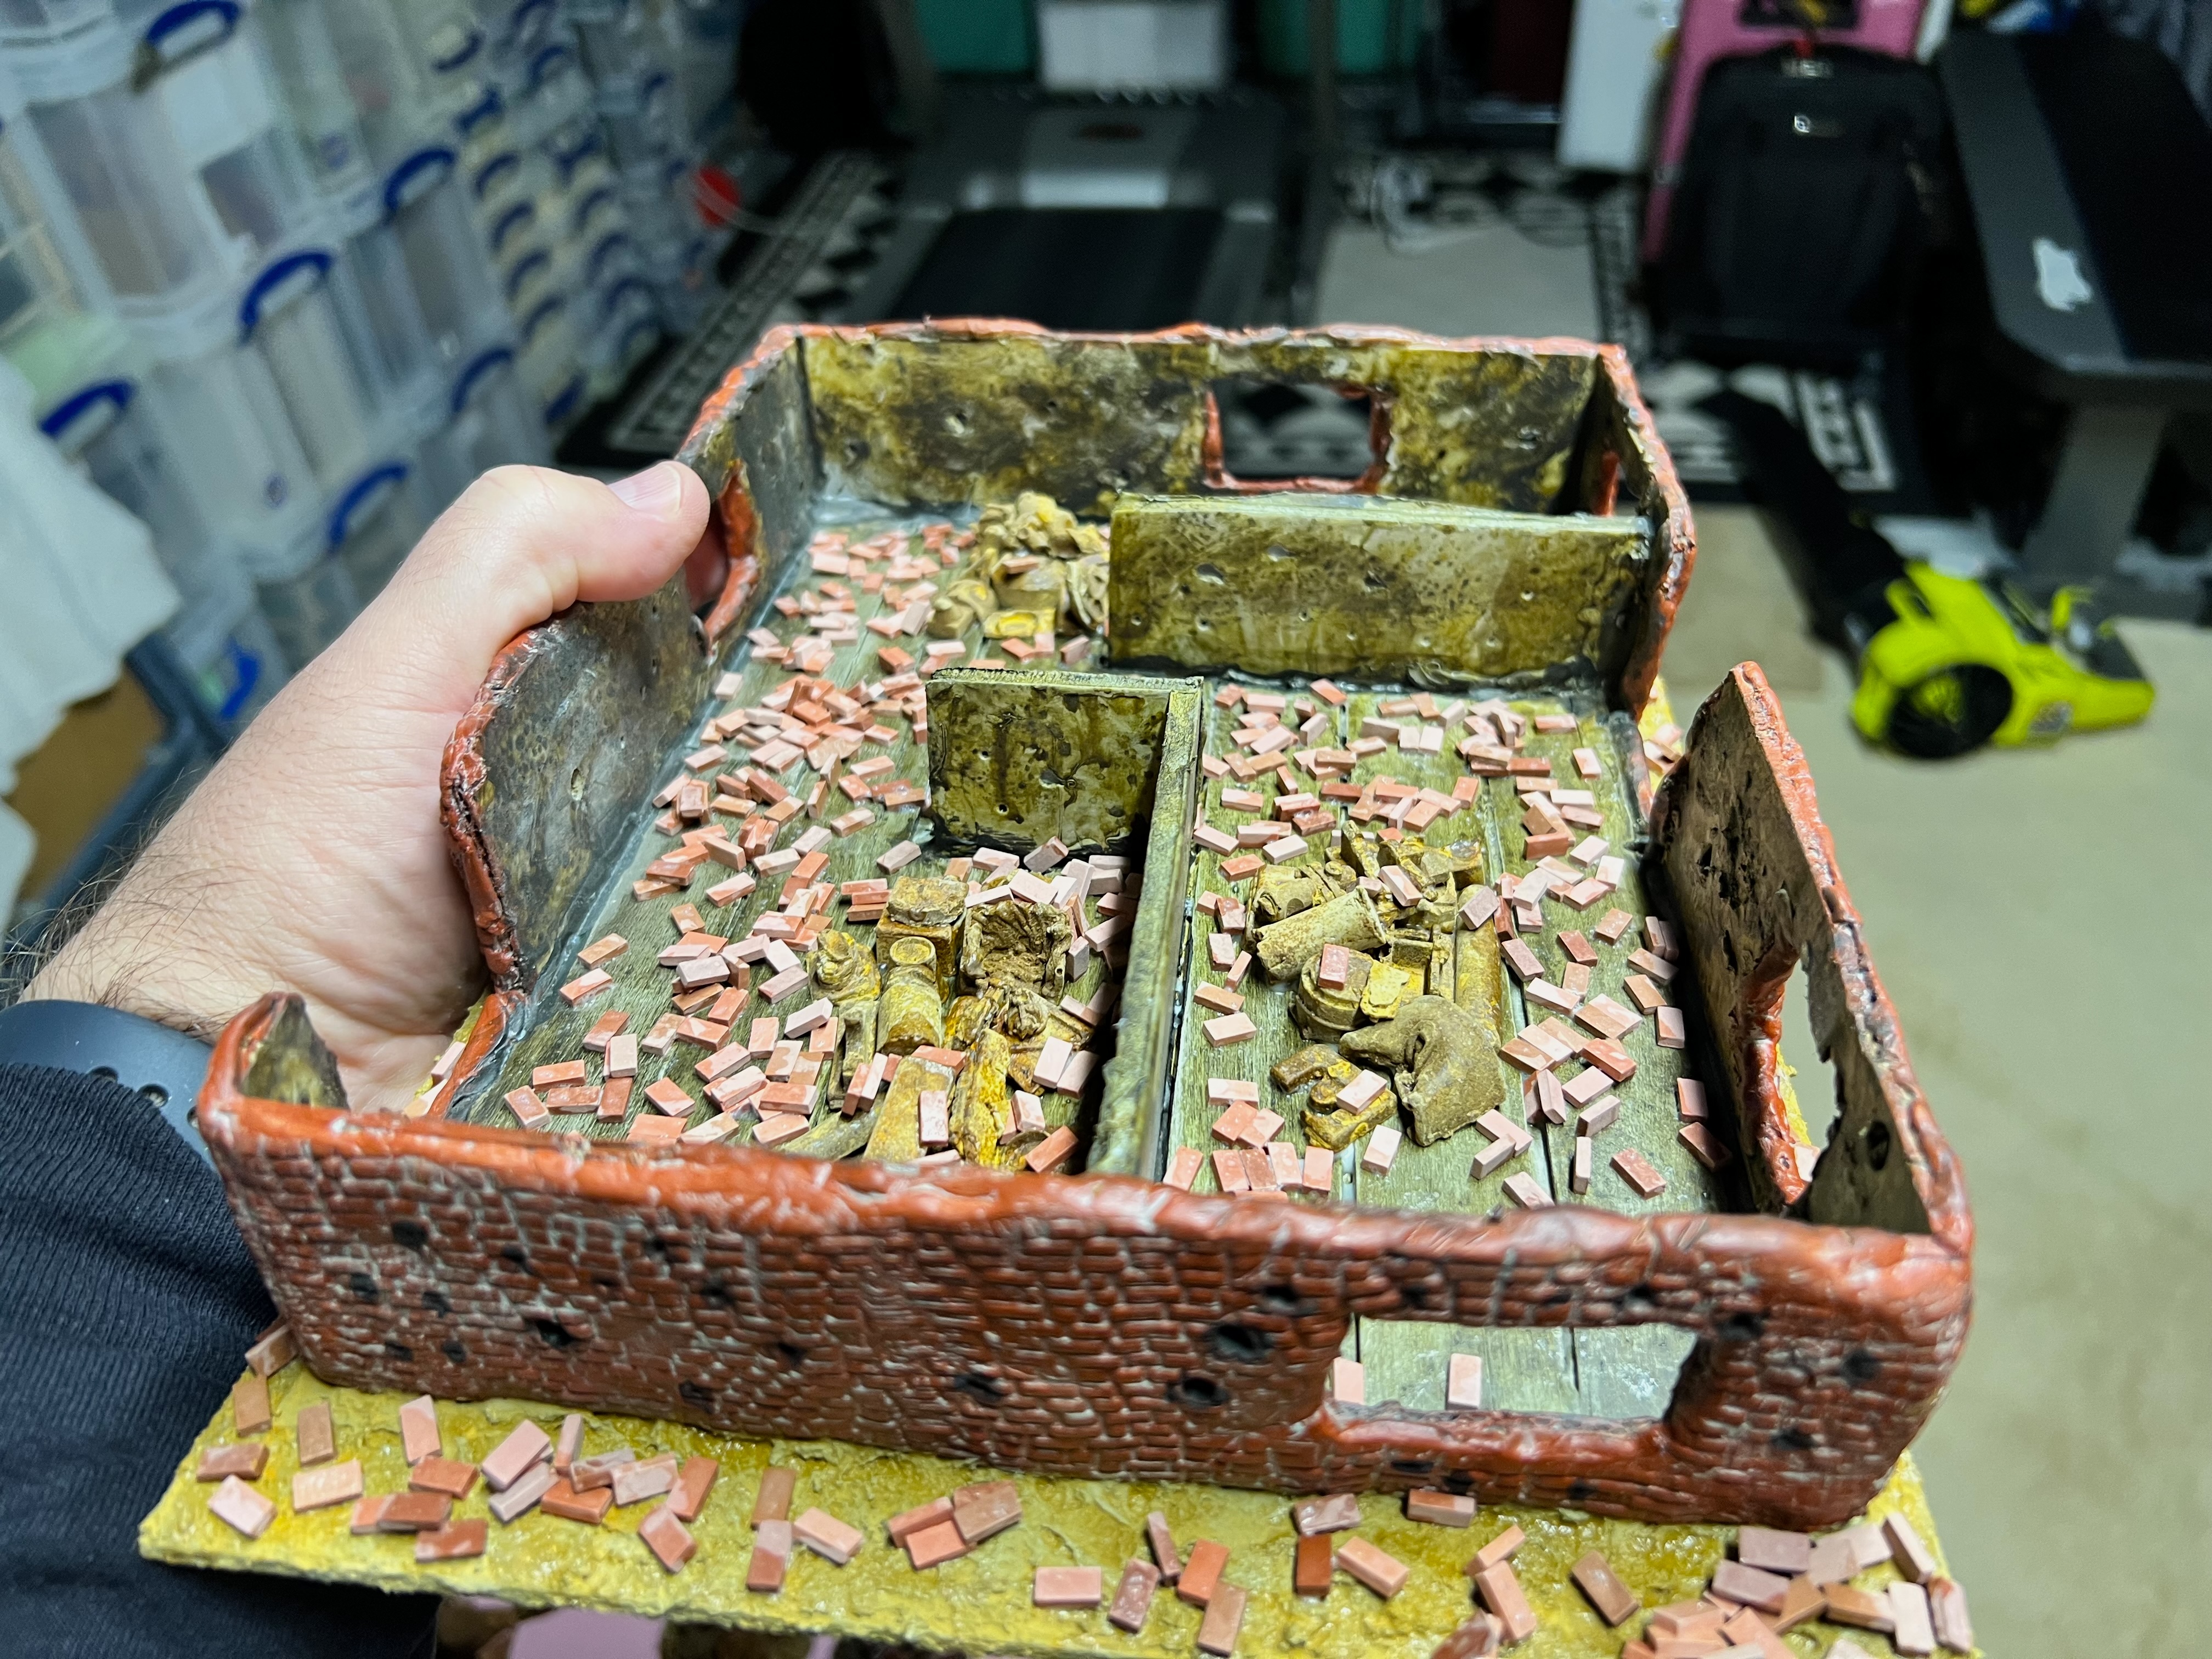
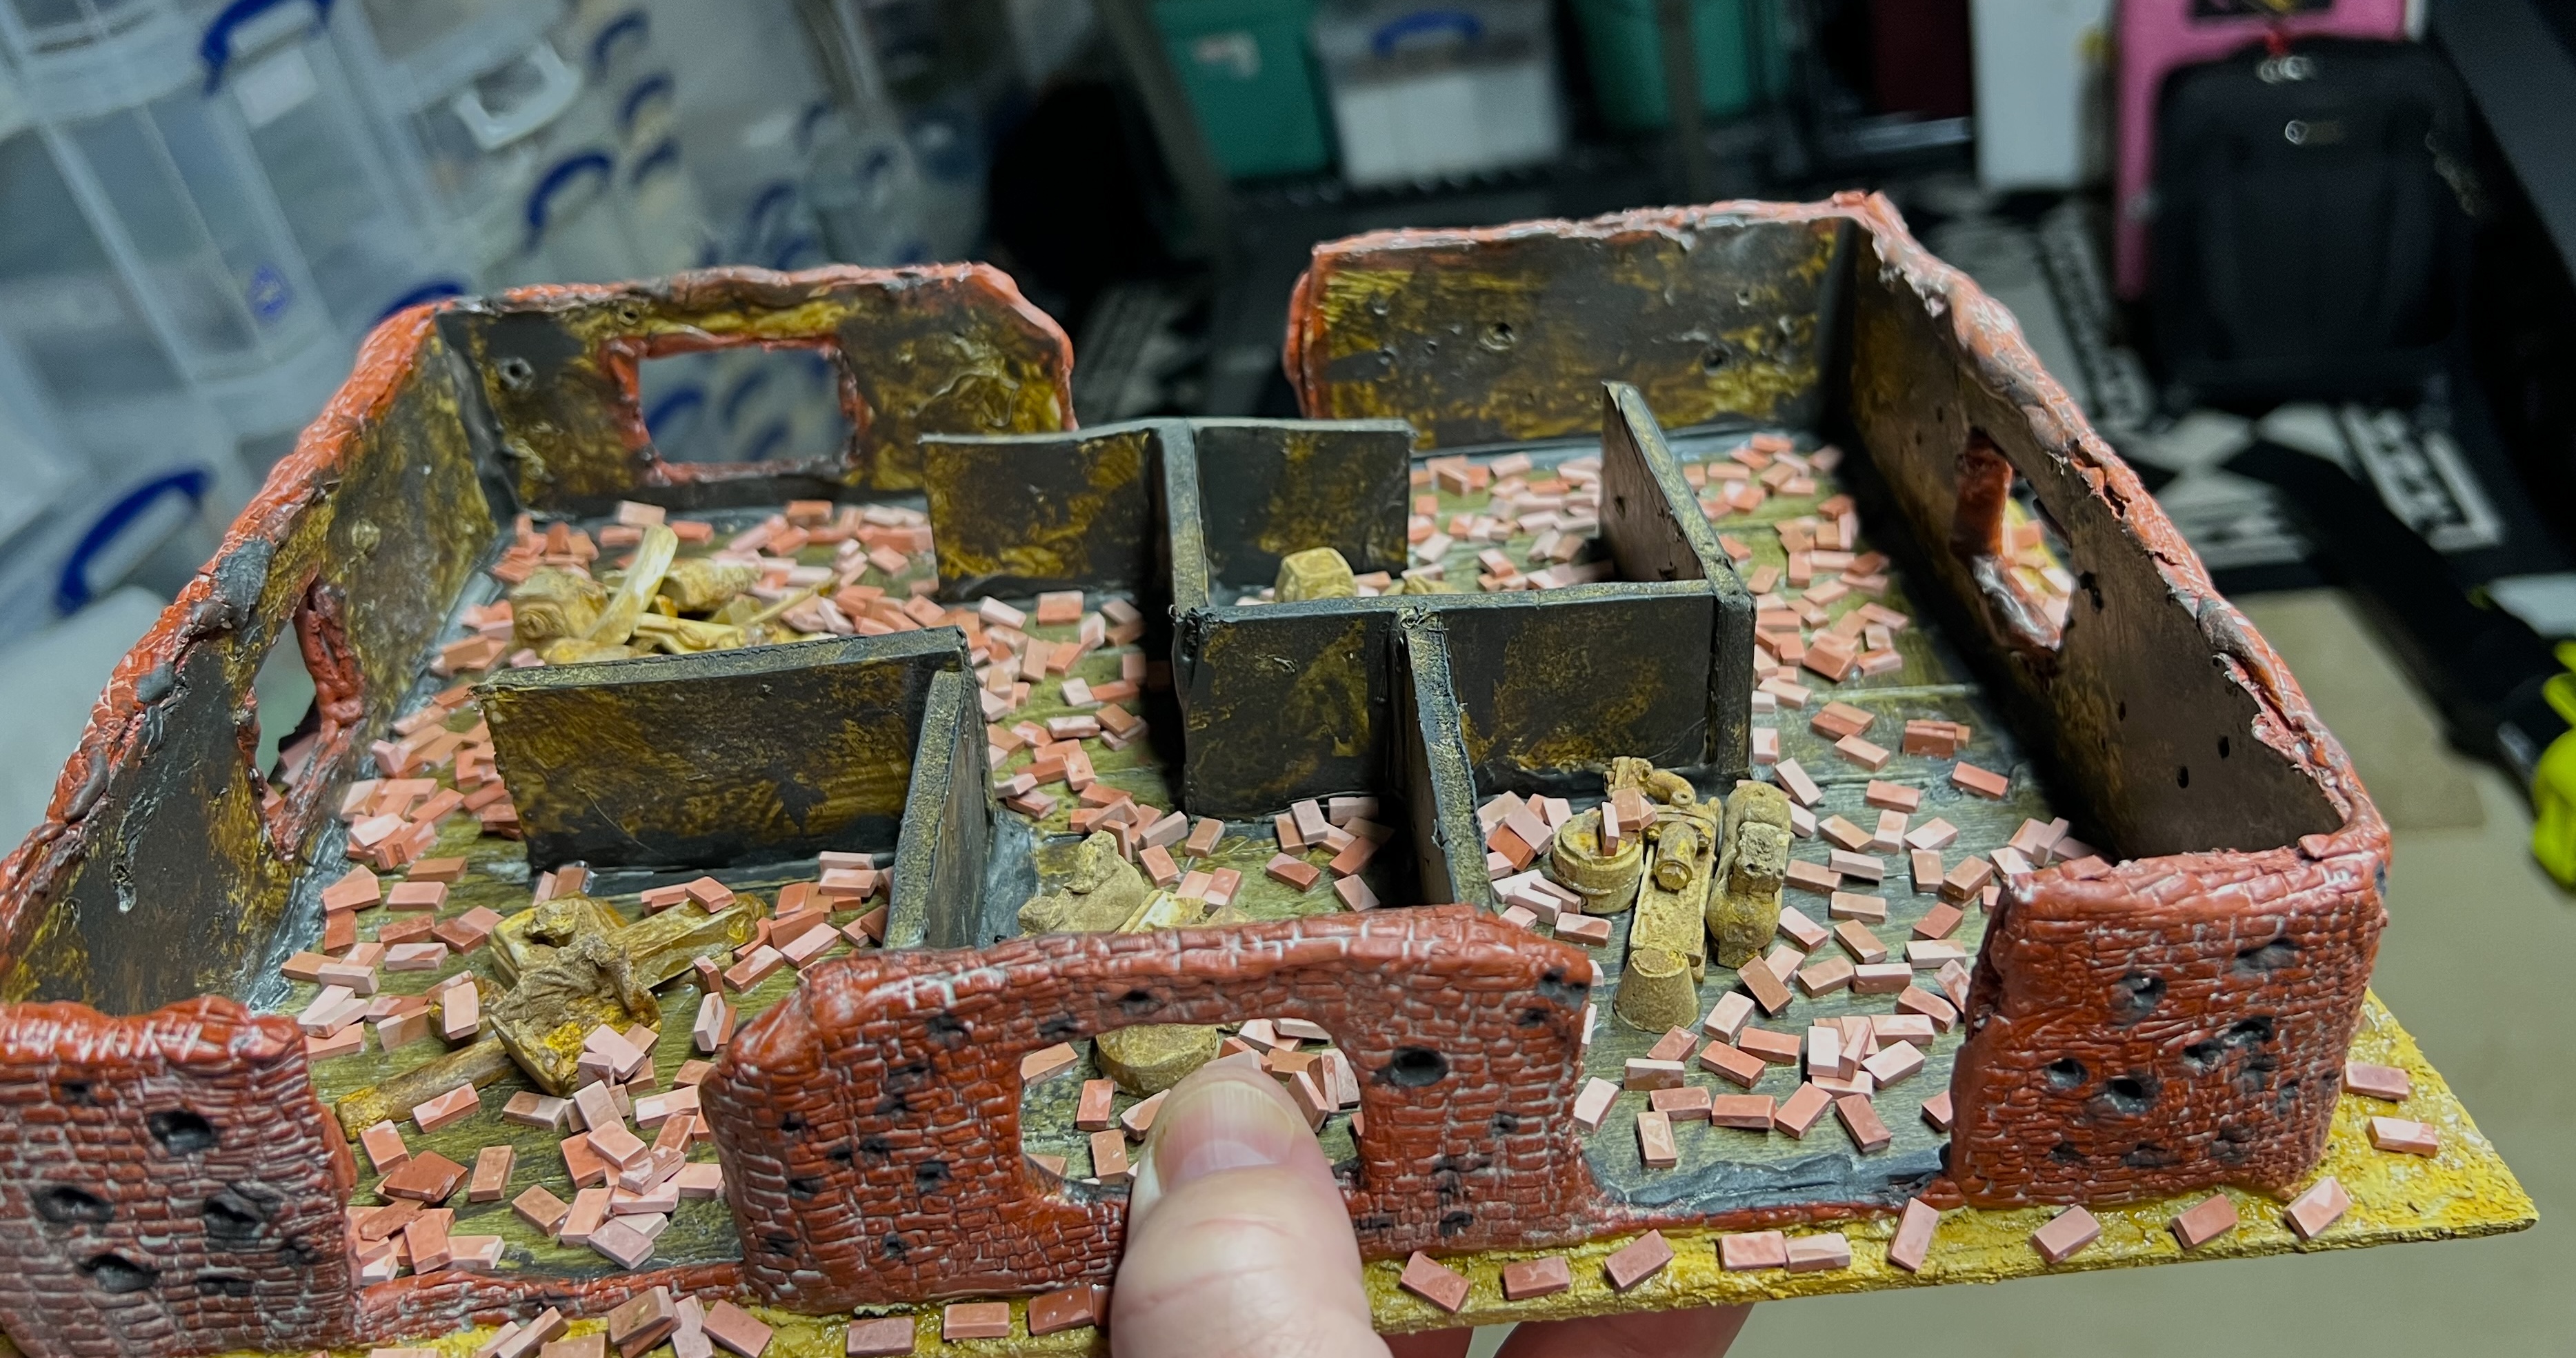
Clearly, pigments were needed at this point to make the bricks and wreckage look older and dirtier. More pigments and dark washes to the rescue!
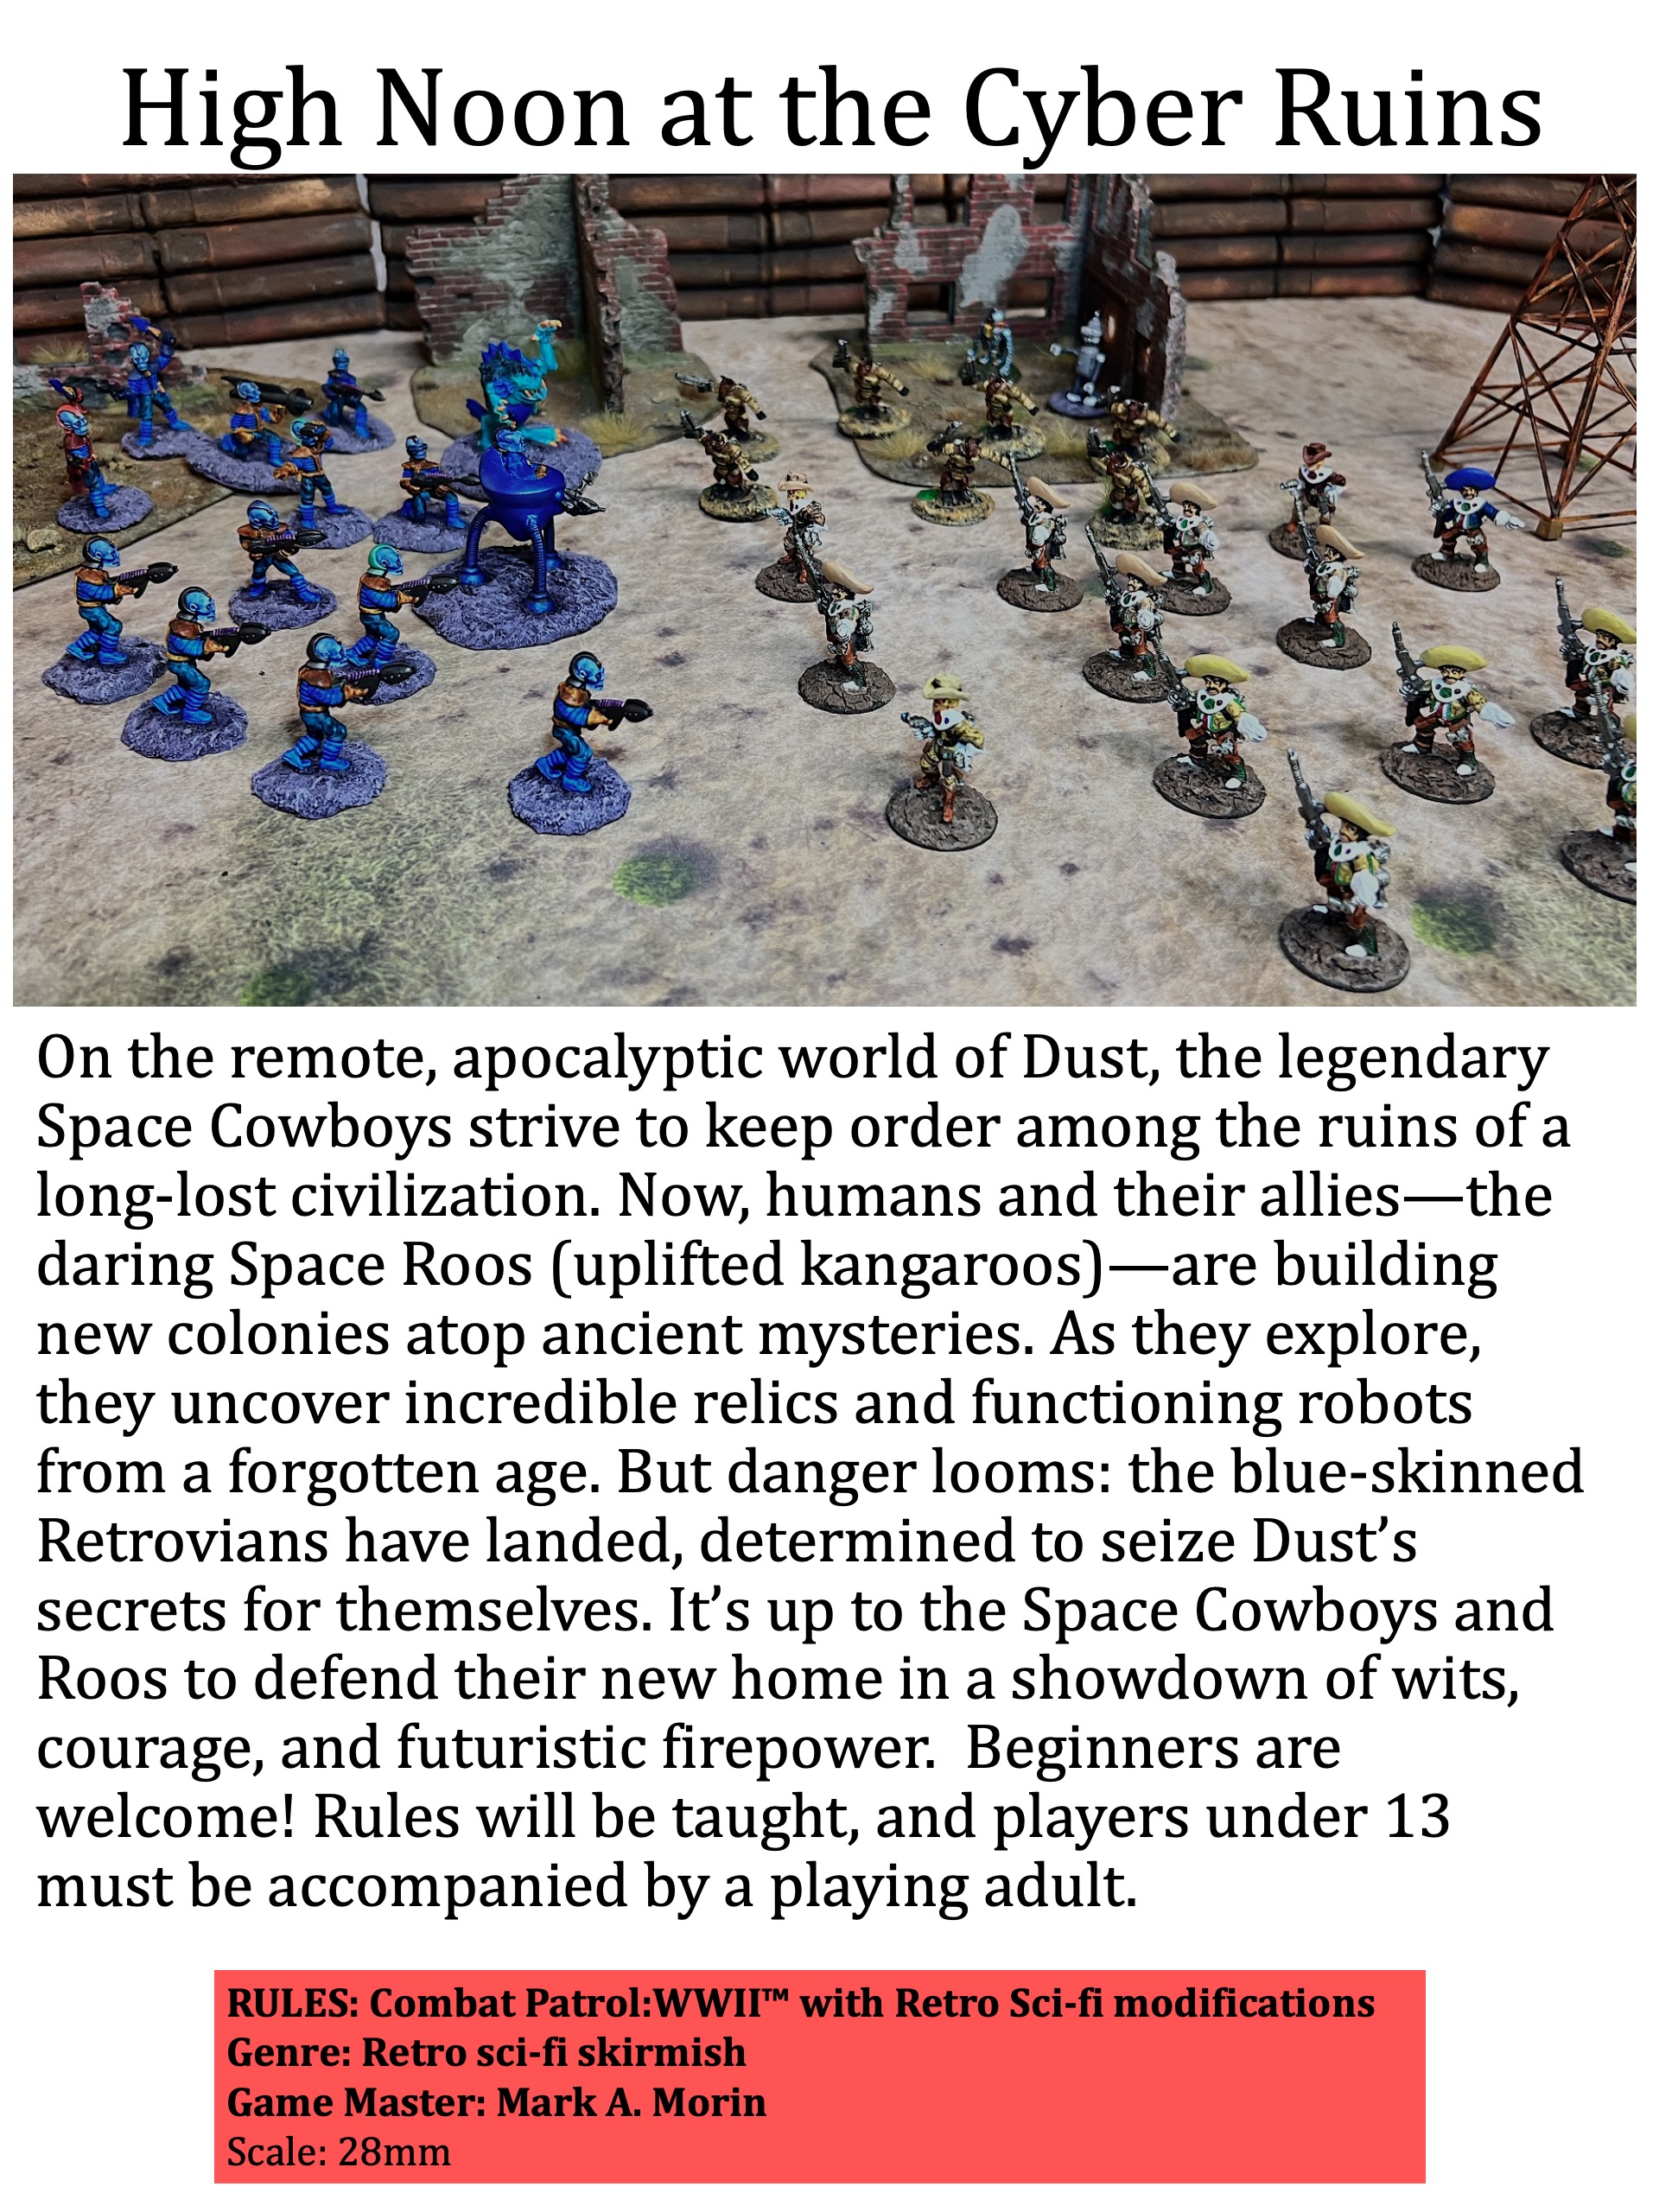
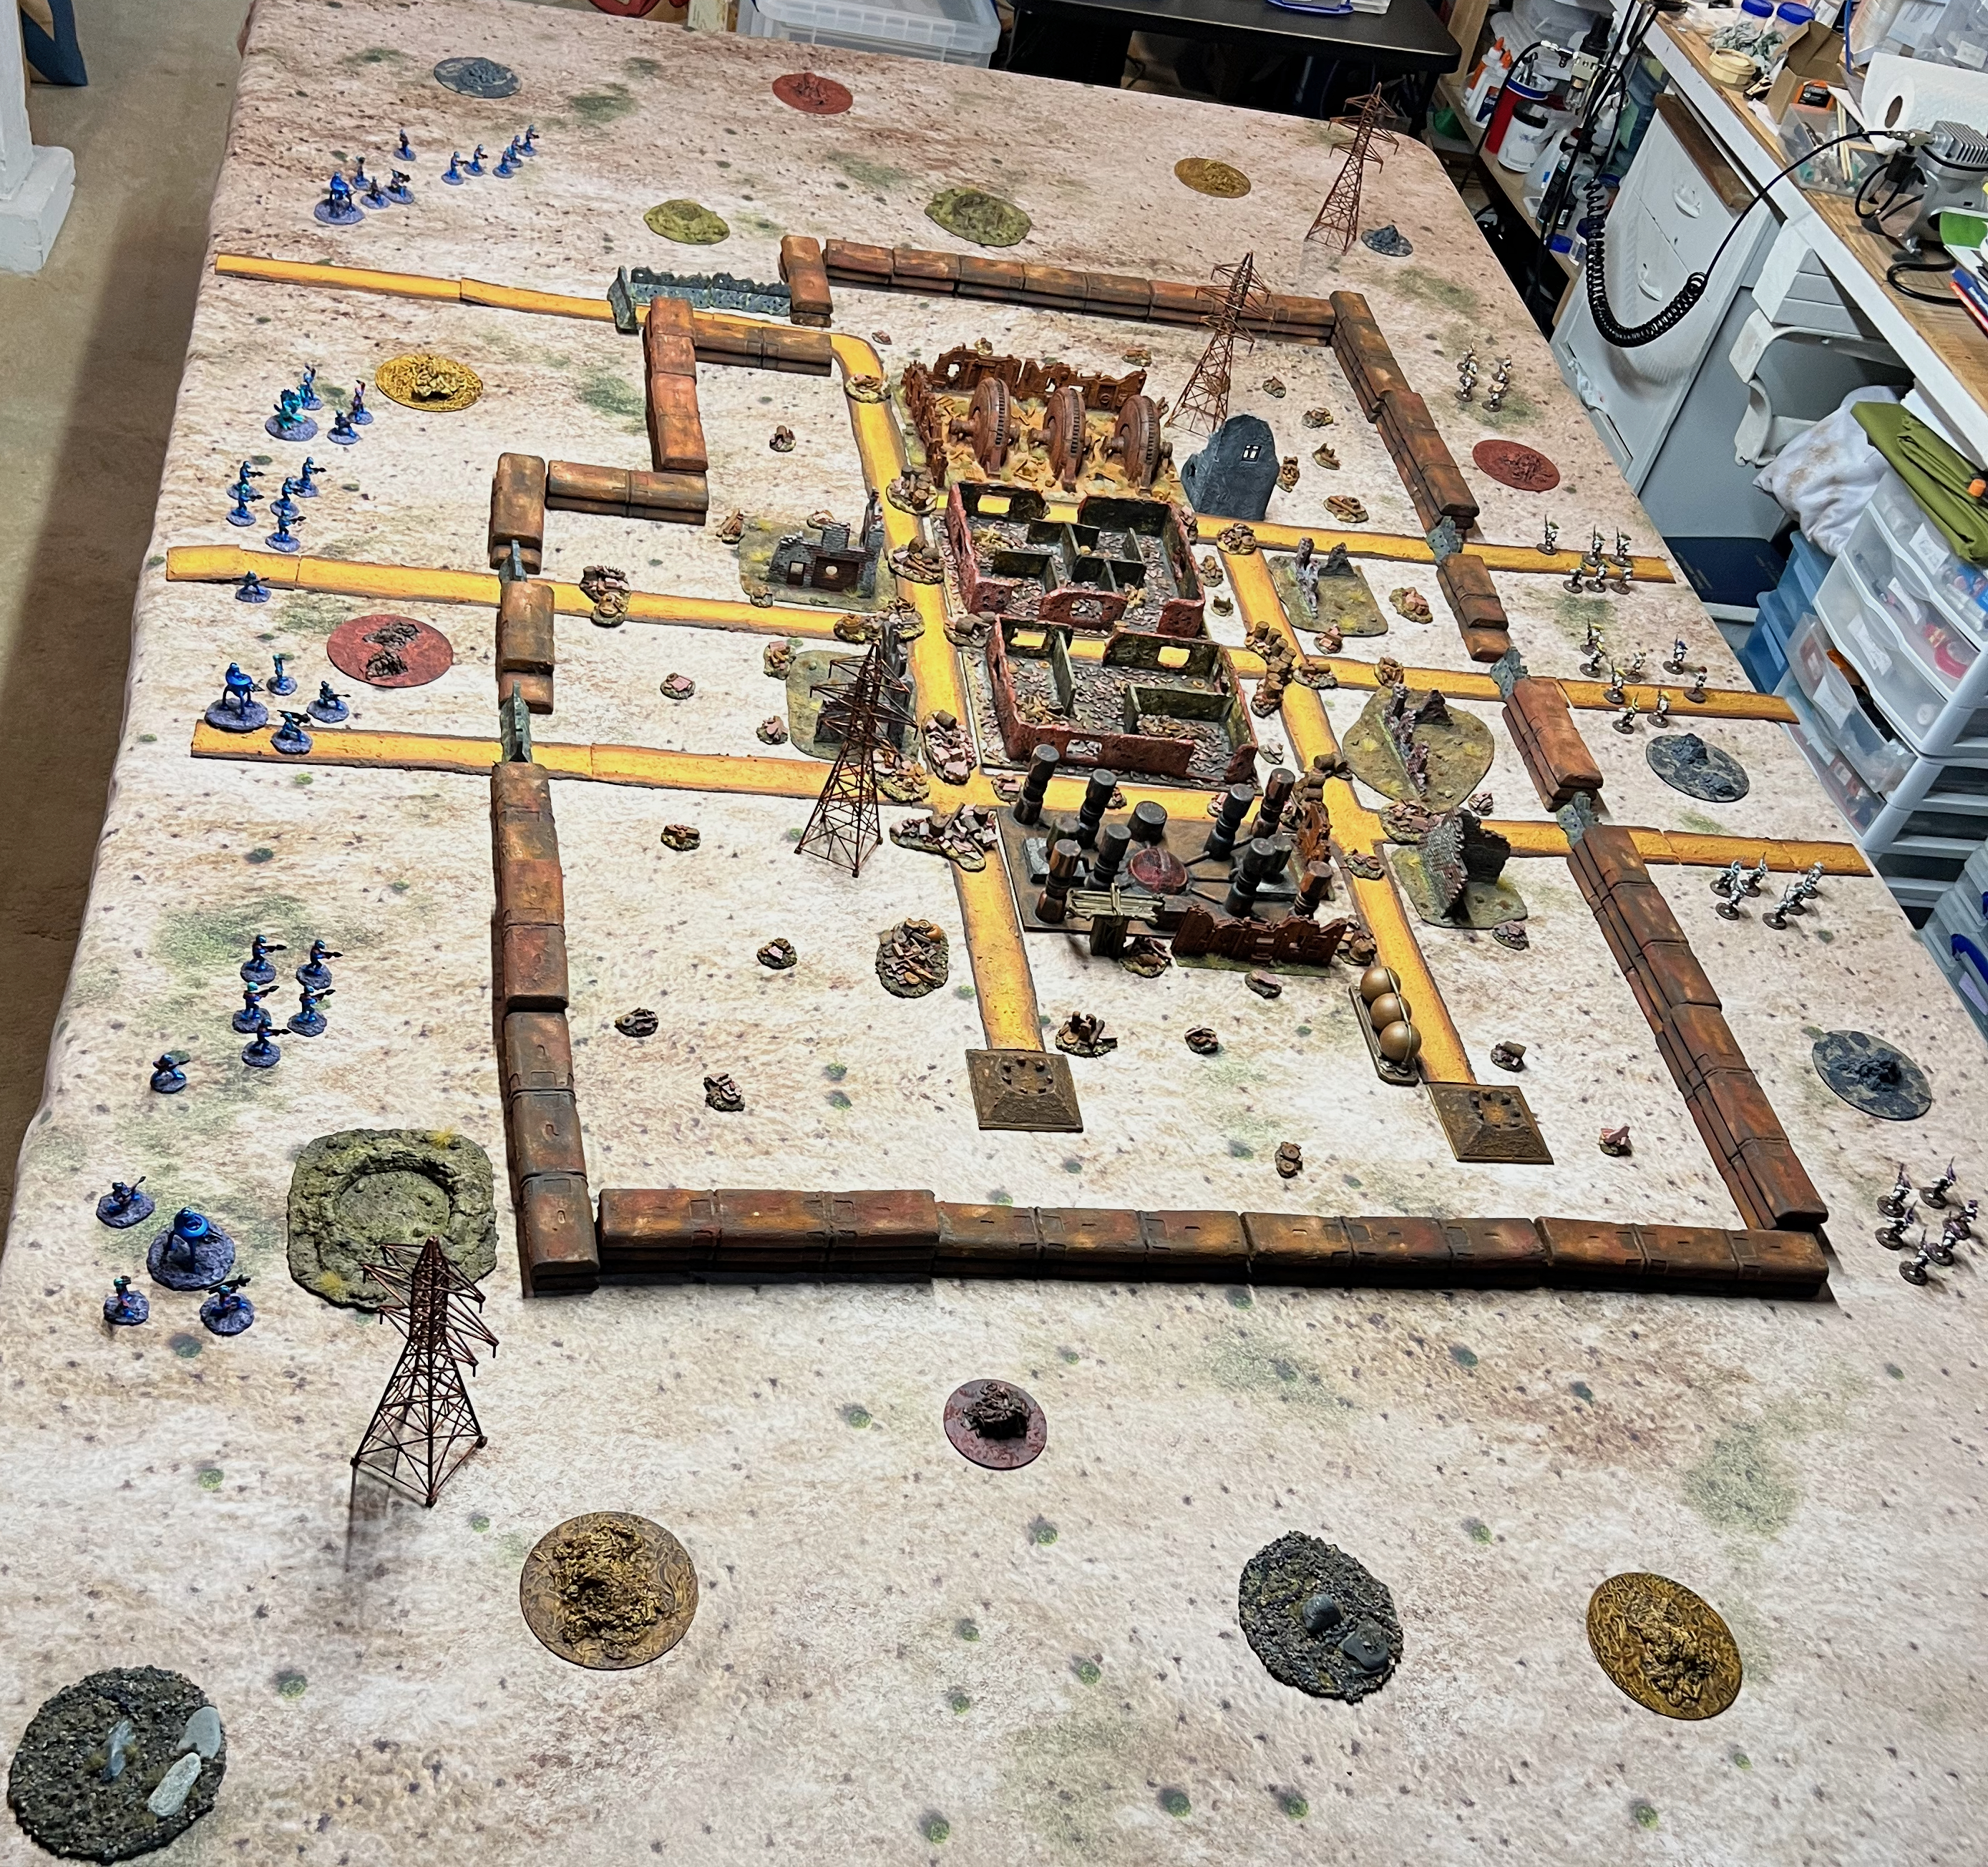
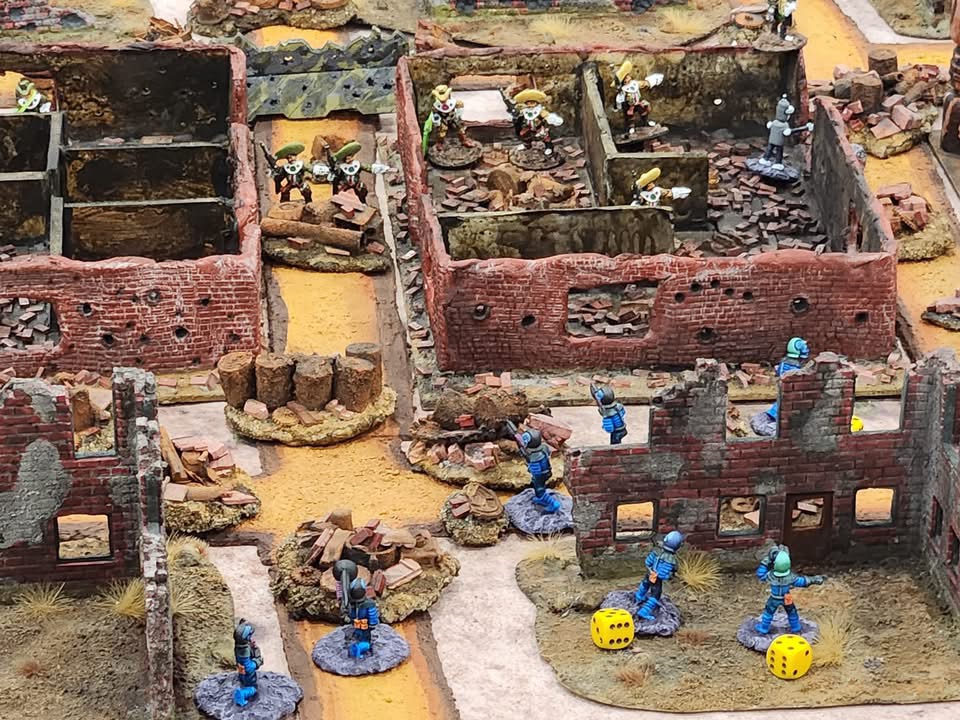
I was now ready to mock up the tabletop with everything! But first, the flyer for the game – which I finished before this project:
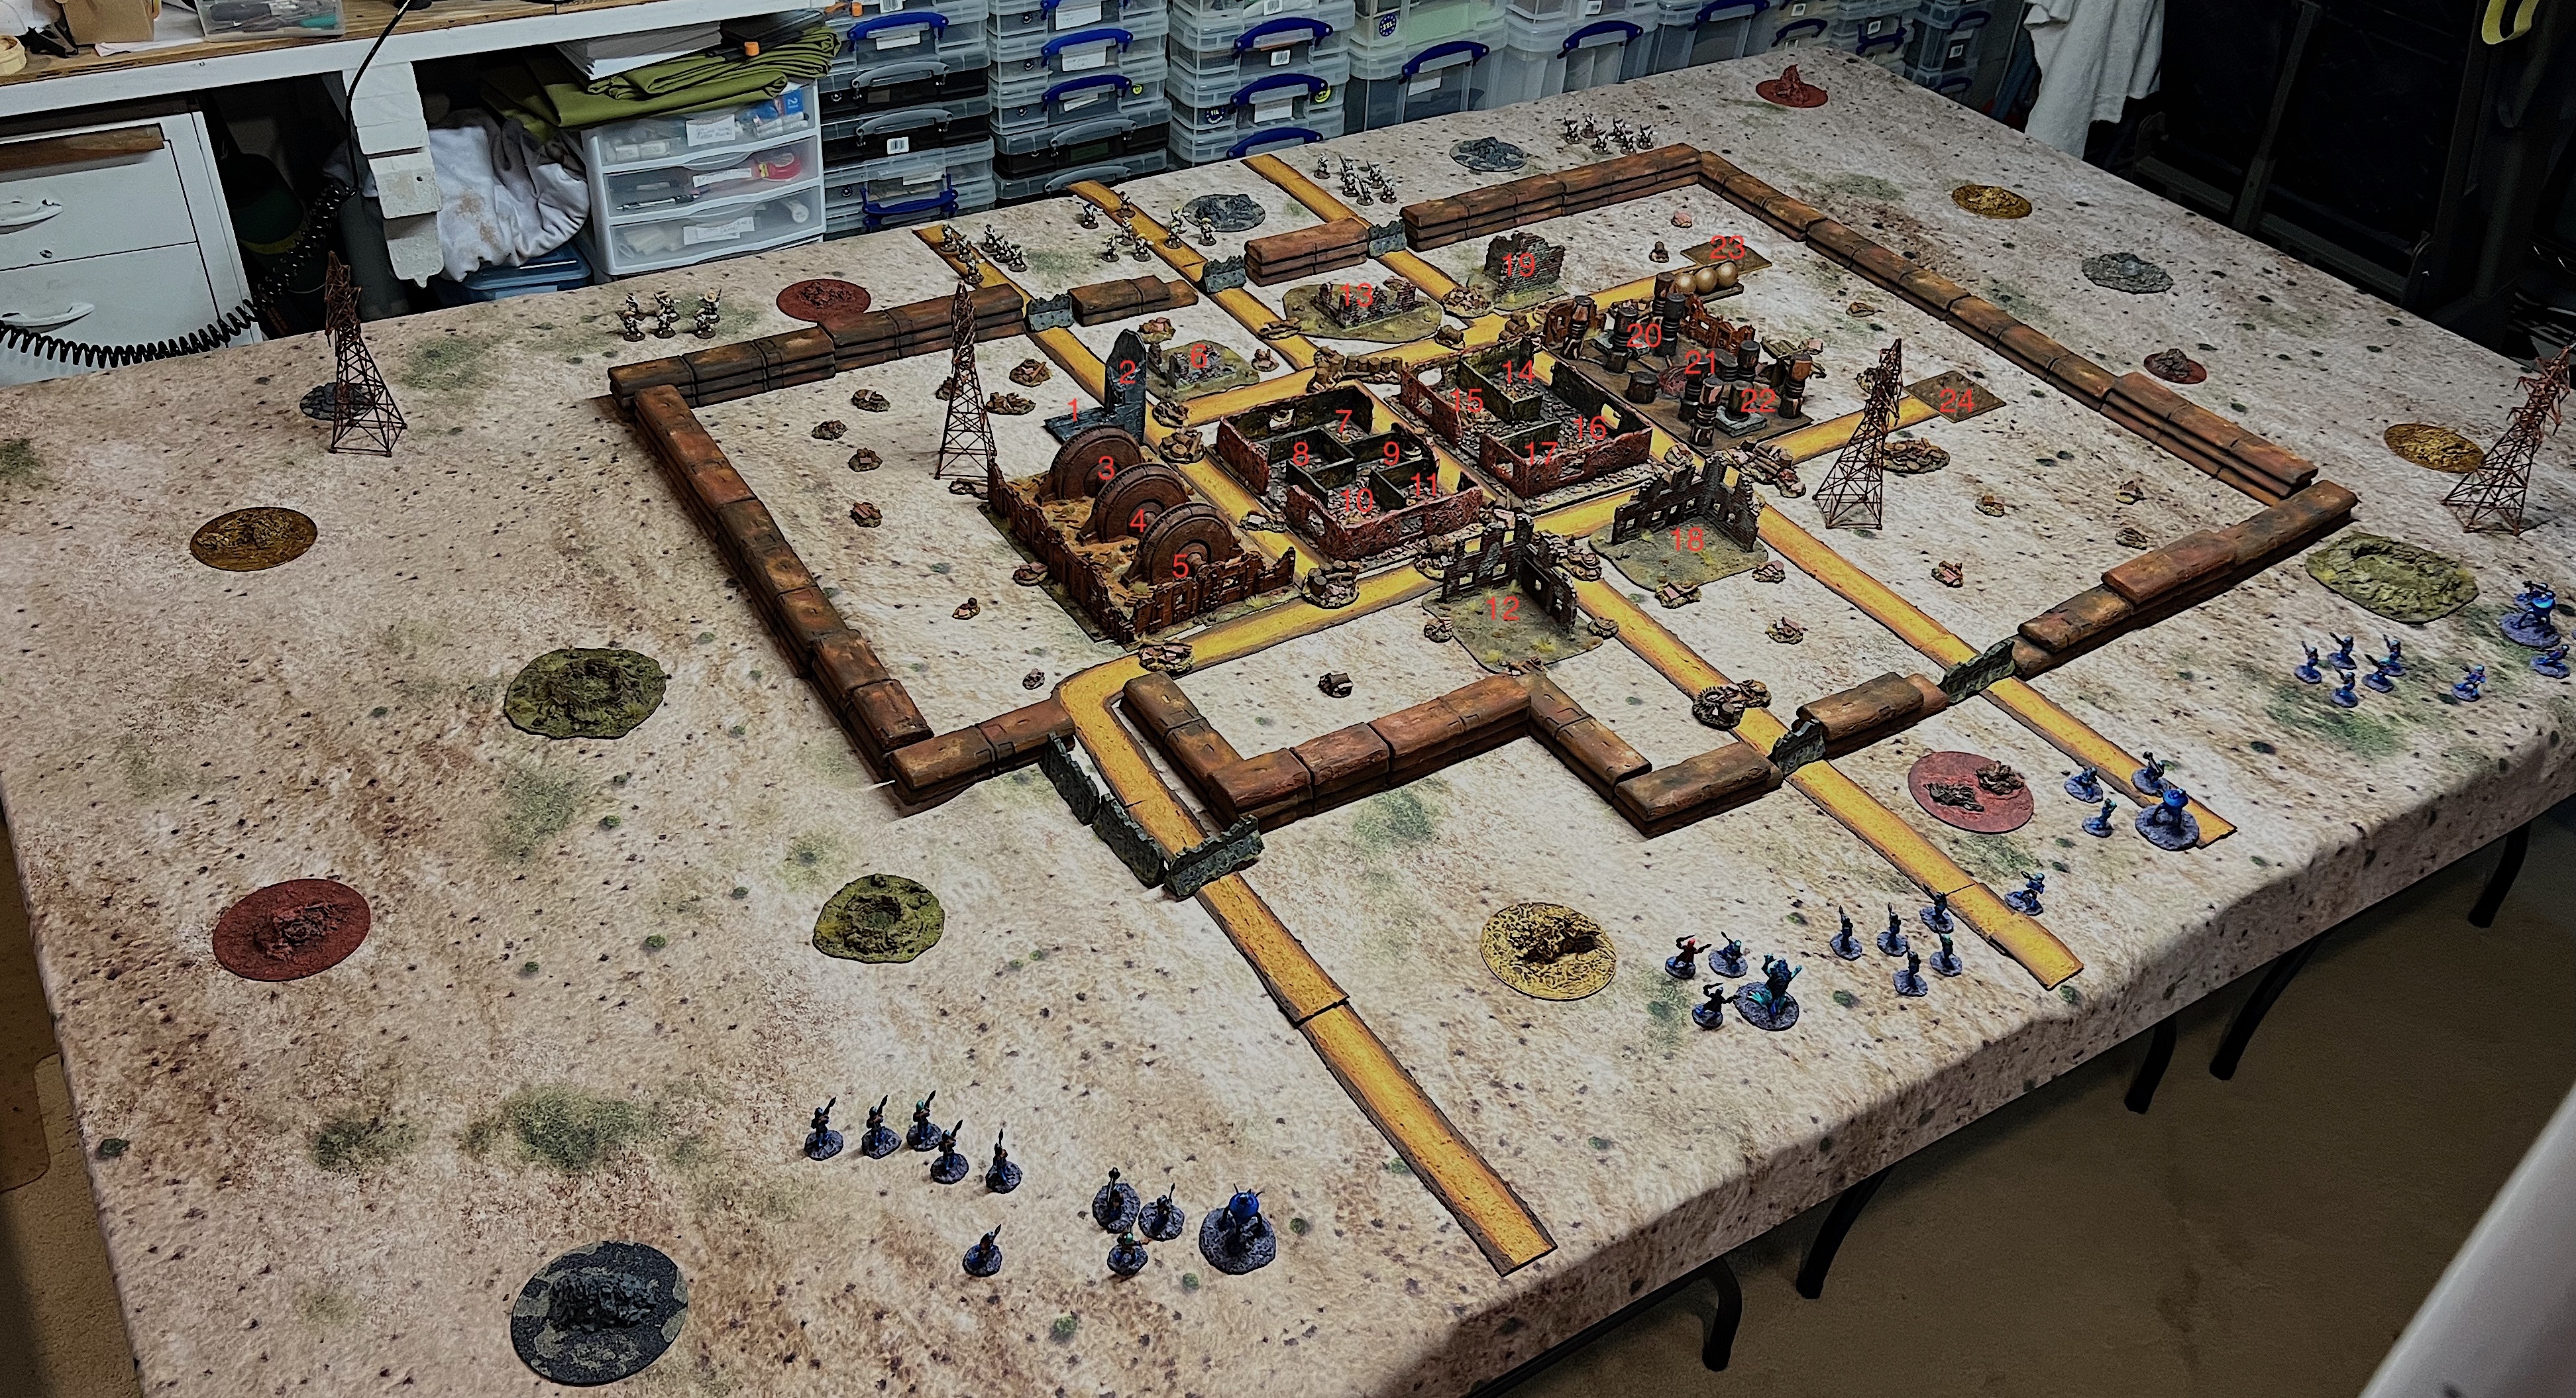
The wreckage (all 61 pieces and the buildings really helped complete my vision. There are 24 possible search locations for the 4 ancient robots, known only to the GM. The four ancient robots I used were: “Folder Bot 3000” (aka Bender) from Armorcast Terraform Terrain Ltd.’s “Robot Townies” collection; and “RT22” from old Archive miniatures Star Rovers line circa 1977; and two Archive Miniatures Robot Cooks also circa 1977 (also Star Rovers).

I randomly select the locations for the four robots (see numbers on the map below). My playtest worked well, and here are some shots of the mock-up tabletop.
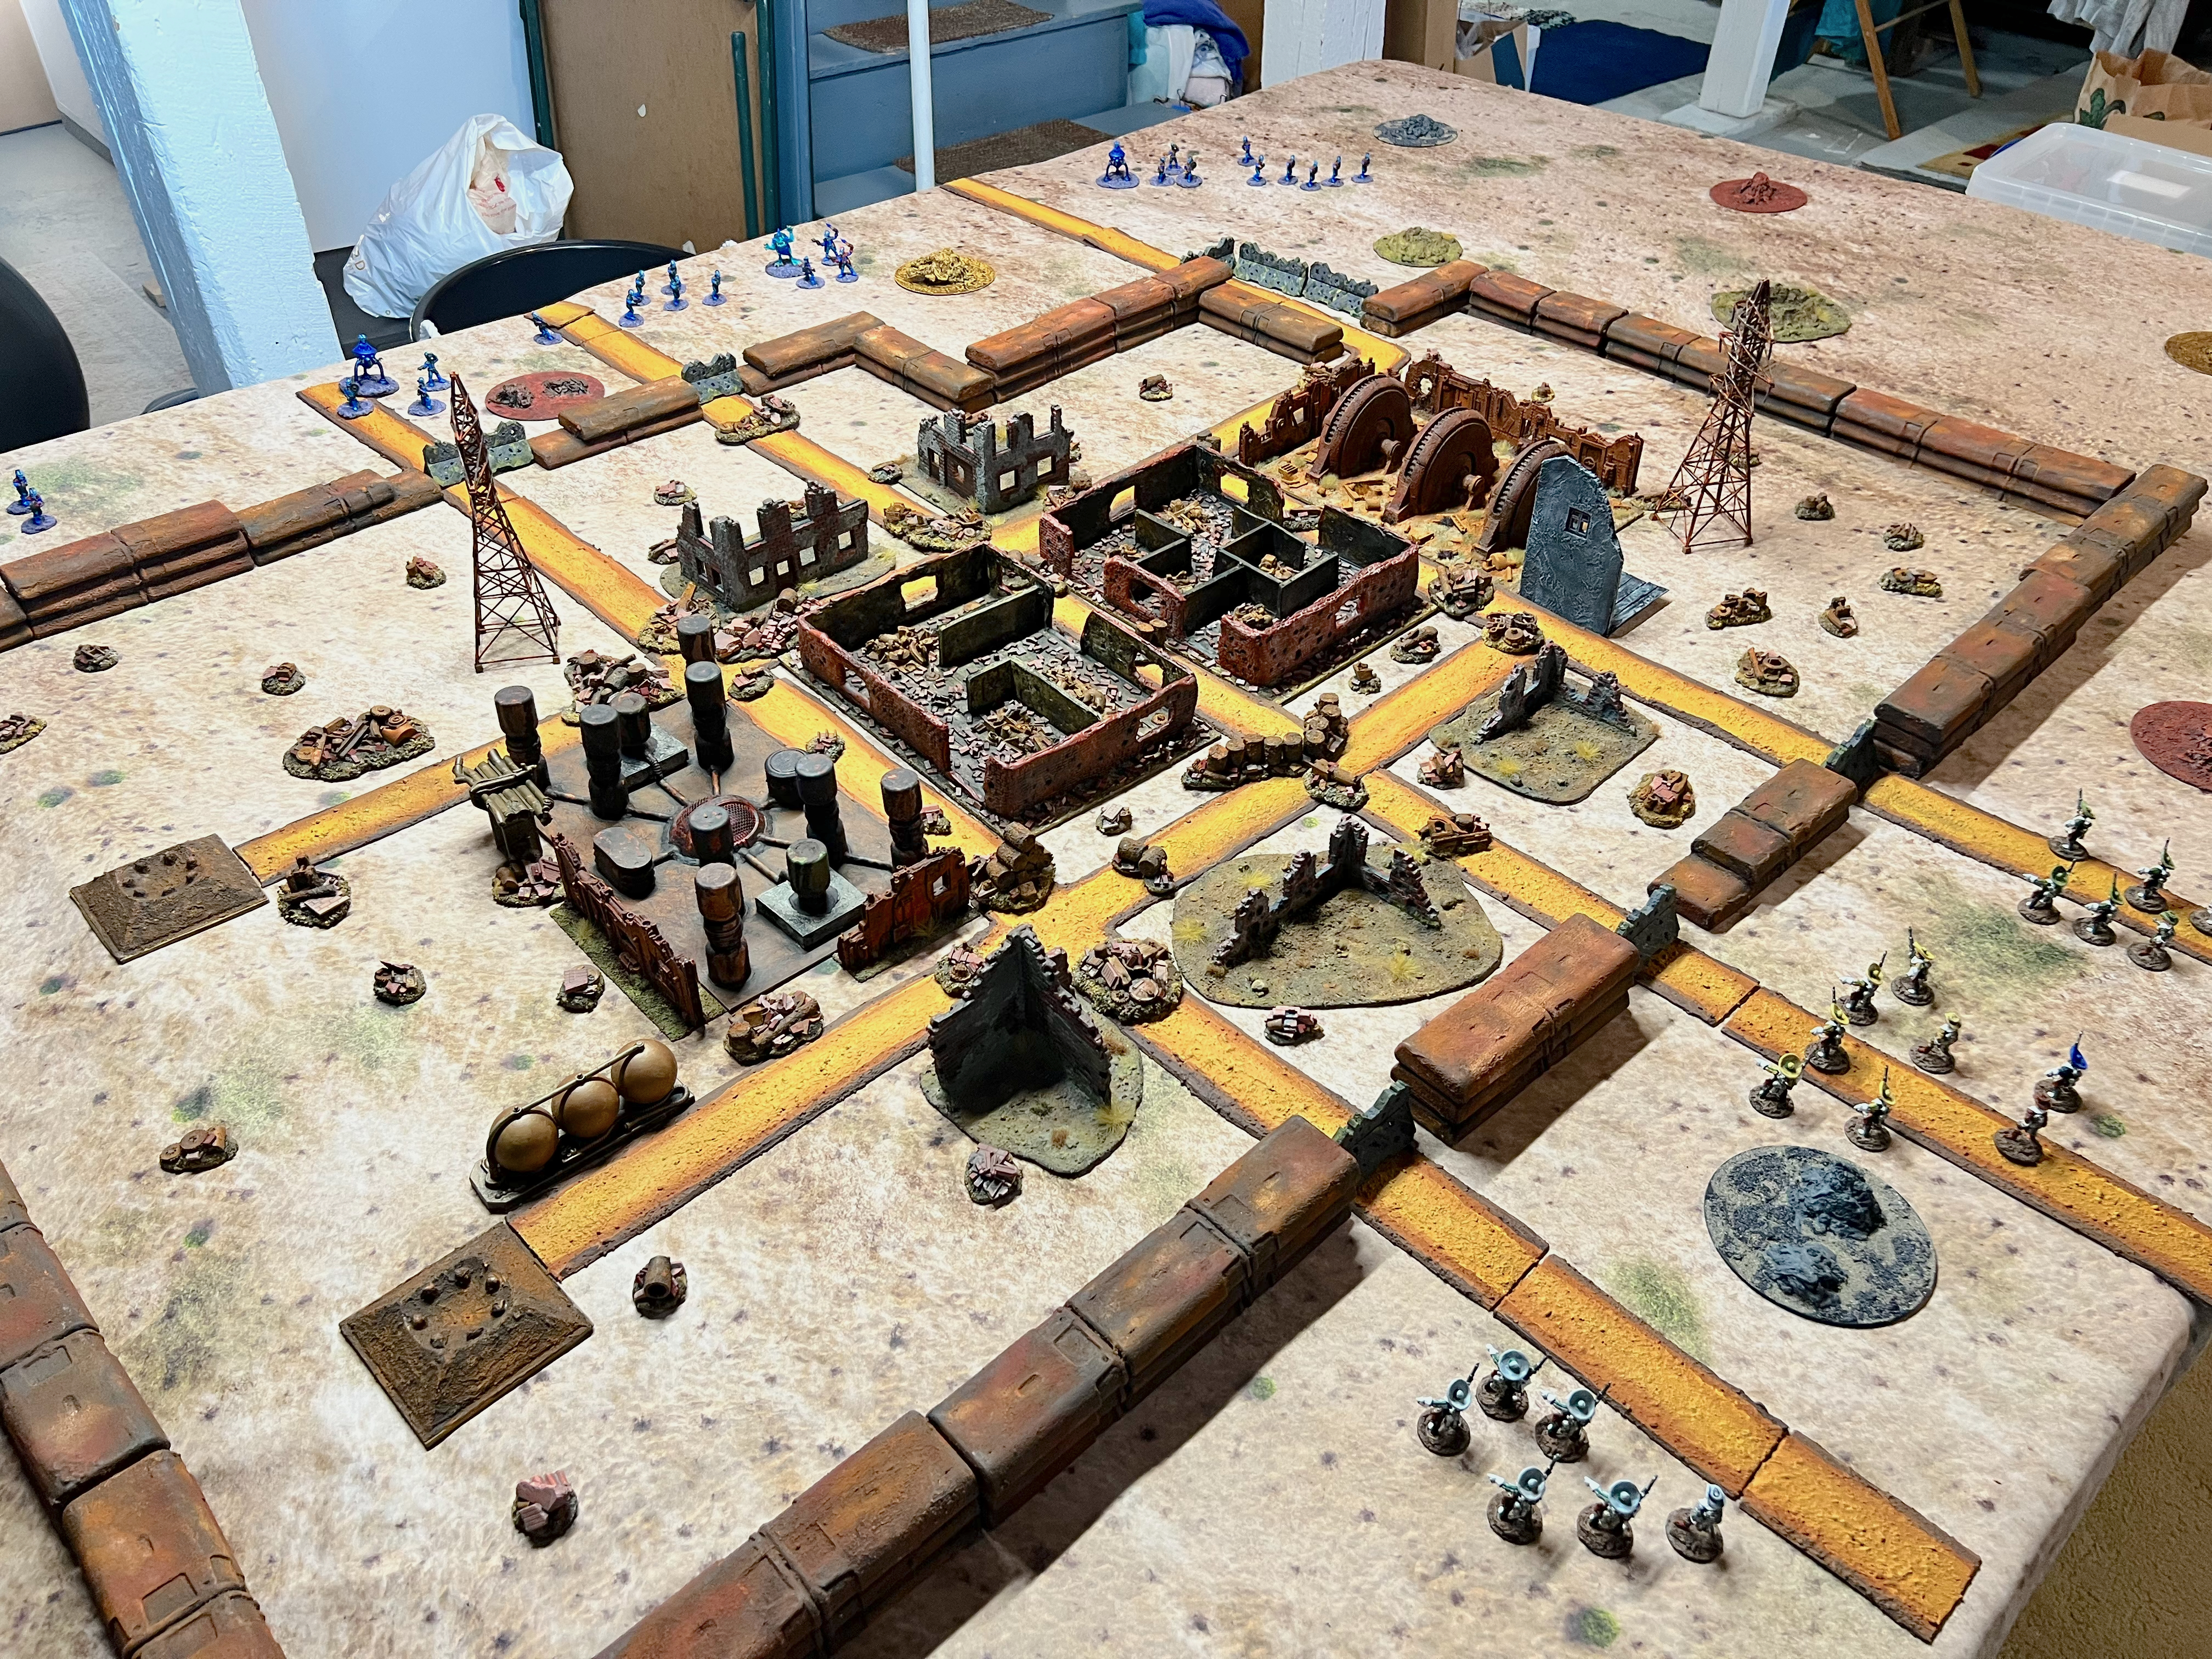

I did not use all of the wreckage in the mock-up. I will share a Cold Wars post soon. However, as a preview here are a couple of shots of the game set up at Cold Wars in all its glory:
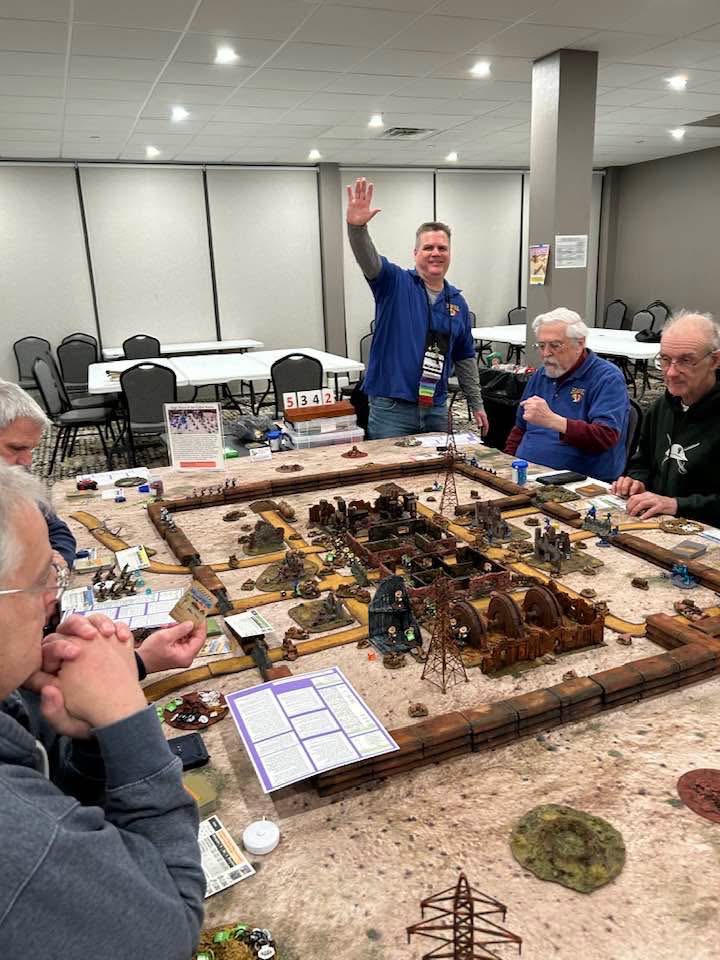
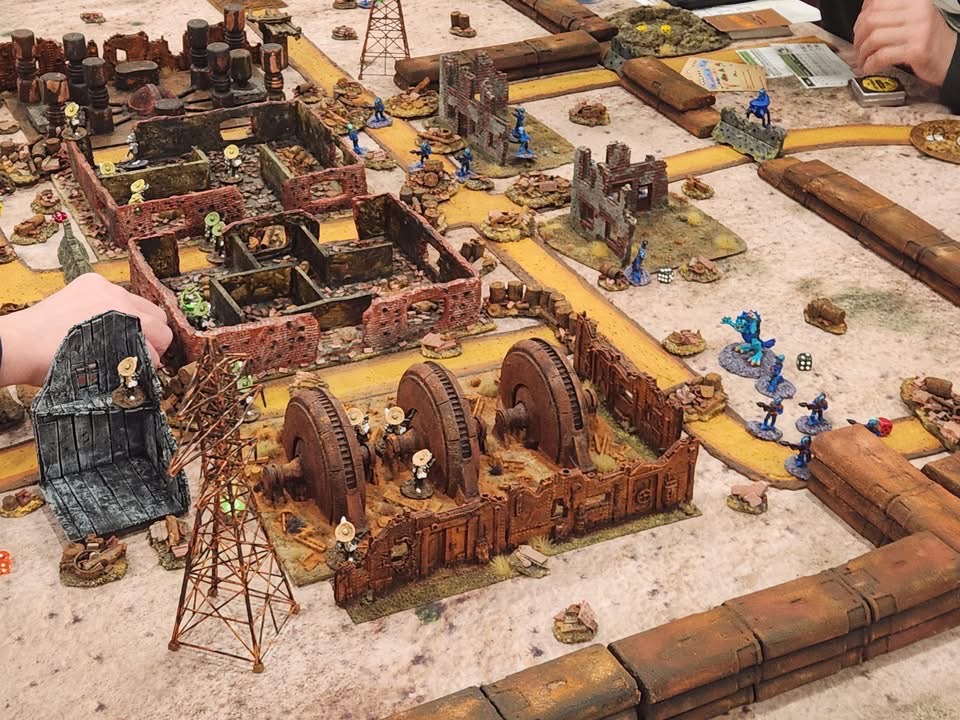
More about Cold Wars soon in a future post.
I hope you enjoyed reading this and seeing my rusty panorama come to life – on the tabletop anyways. If this WIP post helps you in any way, that is great! I am including these terrain pieces in Dave Stone’s PAINT WHAT YOU GOT 2025/2026 Challenge as these were completed in early February. For now, that’s it, until next time!
The materials are listed below as a reference for me (and you maybe).
For all of my previous posts on terrain projects, please see this page. For all of my previous posts on sci-fi projects, please see this page…for any of my previous posts on scratch-building, see this page.
PAINTS, INKS, GLAZES, SHADES, WASHES, PIGMENTS, FLOCKING, GLUES AND MORE THAT I USED ON THE TWO RUINED BUILDINGS:
- iPad 16 Box (top and bottom)
- Hot glue
- Foam Board
- Toothpicks
- Popsicle sticks
- Apoxie sculpt
- Vallejo Surface Primer “Grey”
- SIBE AUTOMATION “White Polystyrene 8″ X 12″ X 1/8″ Plastic Sheet”
- PVA
- Huge Miniatures “Brick Red”
- MSP “Brown Liner”
- Vallejo Game Color “Sepia” (wash/shade)
- Vallejo Wash FX “Dark Grey” (wash/shade)
- Liquitex “Burnt Umber” (ink)
- Secret Weapon Washes “Sewer Water”
- Vallejo Thinner
- Vallejo Surface Primer “German Green Brown”
- Vallejo “Light Slate Grey” (pigment)
- AK “Dry Ground” (texture)
- Vallejo “Carbon Black” (pigment)
- Juweela Metal Scrap Rusty Industry (23336)
- Juweela Debris Assortment (23316)
- Juweela Debris Brick Red (23315)
- Juweela Debris Assortment (23315)
- Juweela Bricks (23034)
- Juweela Metal Scrap Rusty Gear Wheels (23317)
- Army Painter “Red Tone” (wash)
- Secret Weapon Washes “Red Black” (wash)
- Secret Weapon Washes “Ruby” (wash)
- P3 “Red Ink” (ink)
- Vallejo Game Air “Red Terracotta”
PAINTS, INKS, GLAZES, SHADES, WASHES, PIGMENTS, FLOCKING, GLUES AND MORE THAT I USED ON THE 61 WRECKAGE BASES/PILES:
- Play sand
- Apoxie sculpt
- PVA
- Various scrap plastic pieces
- Cylindrical desiccant holders
- Rubber sink stopper rim
- Juweela Metal Scrap Rusty Industry (23336)
- Juweela Debris Assortment (23316)
- Juweela Debris Brick Red (23315)
- Juweela Debris Assortment (23315)
- Juweela Bricks (23034)
- Juweela Metal Scrap Rusty Gear Wheels (23317)
- AK “Corrosion Texture” (texture)
- Vallejo Model Air “Rust” (71.080)
- Vallejo Model Air “Rust” (71.080)
- Vallejo Model Air “Rust” (71.069)
- Vallejo Model Air “Orange Rust”
- Citadel “Ryza Rust” (dry)
- Vallejo “Old Rust” (pigment)
- Vallejo “Pigment Binder”
- Vallejo Thinner
- Vallejo “Dark Slate Grey” (pigment)
- Vallejo “Dark Yellow Ochre” (pigment)
- Vallejo Game Color “Sepia” (wash/shade)
- Secret Weapon Washes “Sewer Water”
- Army Painter “Red Tone” (wash)
- Secret Weapon Washes “Red Black” (wash)
- Secret Weapon Washes “Ruby” (wash)
- P3 “Red Ink” (ink)
- Vallejo Game Air “Red Terracotta”
PAINTS, INKS, GLAZES, SHADES, WASHES, PIGMENTS, FLOCKING, GLUES AND MORE THAT I USED ON THE 2 FLAT INDUSTRIAL STRUCTURES:
- SIBE AUTOMATION “White Polystyrene 8″ X 12″ X 1/8″ Plastic Sheet”
- Plastic packing material from a forgotten source!
- PVA
- AK “Corrosion Texture” (texture)
- Vallejo Surface Primer “German Green Brown”
- Vallejo Model Air “Rust” (71.080)
- Vallejo Model Air “Rust” (71.069)
- Vallejo Model Air “Orange Rust”
- Citadel “Ryza Rust” (dry)
- Vallejo “Old Rust” (pigment)
- Vallejo “Pigment Binder”
- Vallejo Thinner
- Vallejo “Dark Yellow Ochre” (pigment)

Really great work Mark- the finished result looks spot on.
Cheers,
Pete.
LikeLiked by 2 people
Cheers Pete! I gotta say it was a lot to do in a short time, but I’m happy with the results.
LikeLiked by 2 people
Excellent Mark and I like the idea of using a box. 👍
LikeLiked by 1 person
The terrain looks really lovely, and matches well with your previous ruins.
As a whole, the ruined city looks great 👍
LikeLiked by 1 person
Fantastic scenery Mark, the buildings and scatter terrain, all work well together and the board set up looks great in total.
LikeLiked by 1 person
Amazing stuff, Mark! I wish I had gone to Cold Wars and gotten a chance to play in it!!
LikeLiked by 1 person
Wow – excellent work! I particularly like the brick-built ruins.
LikeLiked by 1 person
This is not only a really cool project but its something a little different from other things I’ve seen you work on. I’m impressed to see you make everything from scratch. In today’s day and age, that isn’t done enough in the hobby. Funnily enough, this looks perfect for a Fallout game because you’ve got a great post-apocalypse look going!
LikeLiked by 2 people
Crikey, Mark, a mammoth amount of scenery there! 🙂 Excellent stuff! The whole game set-up looks really good!
LikeLiked by 1 person
Fan-bloody-tastic mark. Great post and it all looks so cool. Love that you used the word panorama too hehe
LikeLike
Terrific tutorial mate, ant you terrain peices look aces!! I especially love the wreckage bases those are excellent!! You are a blooming machine when you get started aren’t you. 😁
cheers Roger.
LikeLike