HAVOC XXXIX (aka HAVOC 2025) was held on the weekend of April 4-6, 2025 in Marlborough, Massachusetts. It is the annual tabletop wargaming convention for Battlegroup Boston (BGB). There were 36 4-hour games scheduled at the event. I ran 5 games of Wars of Ozz (one game on Friday, three on Saturday, and one on Sunday). Overall I think I had 27 players across my games.
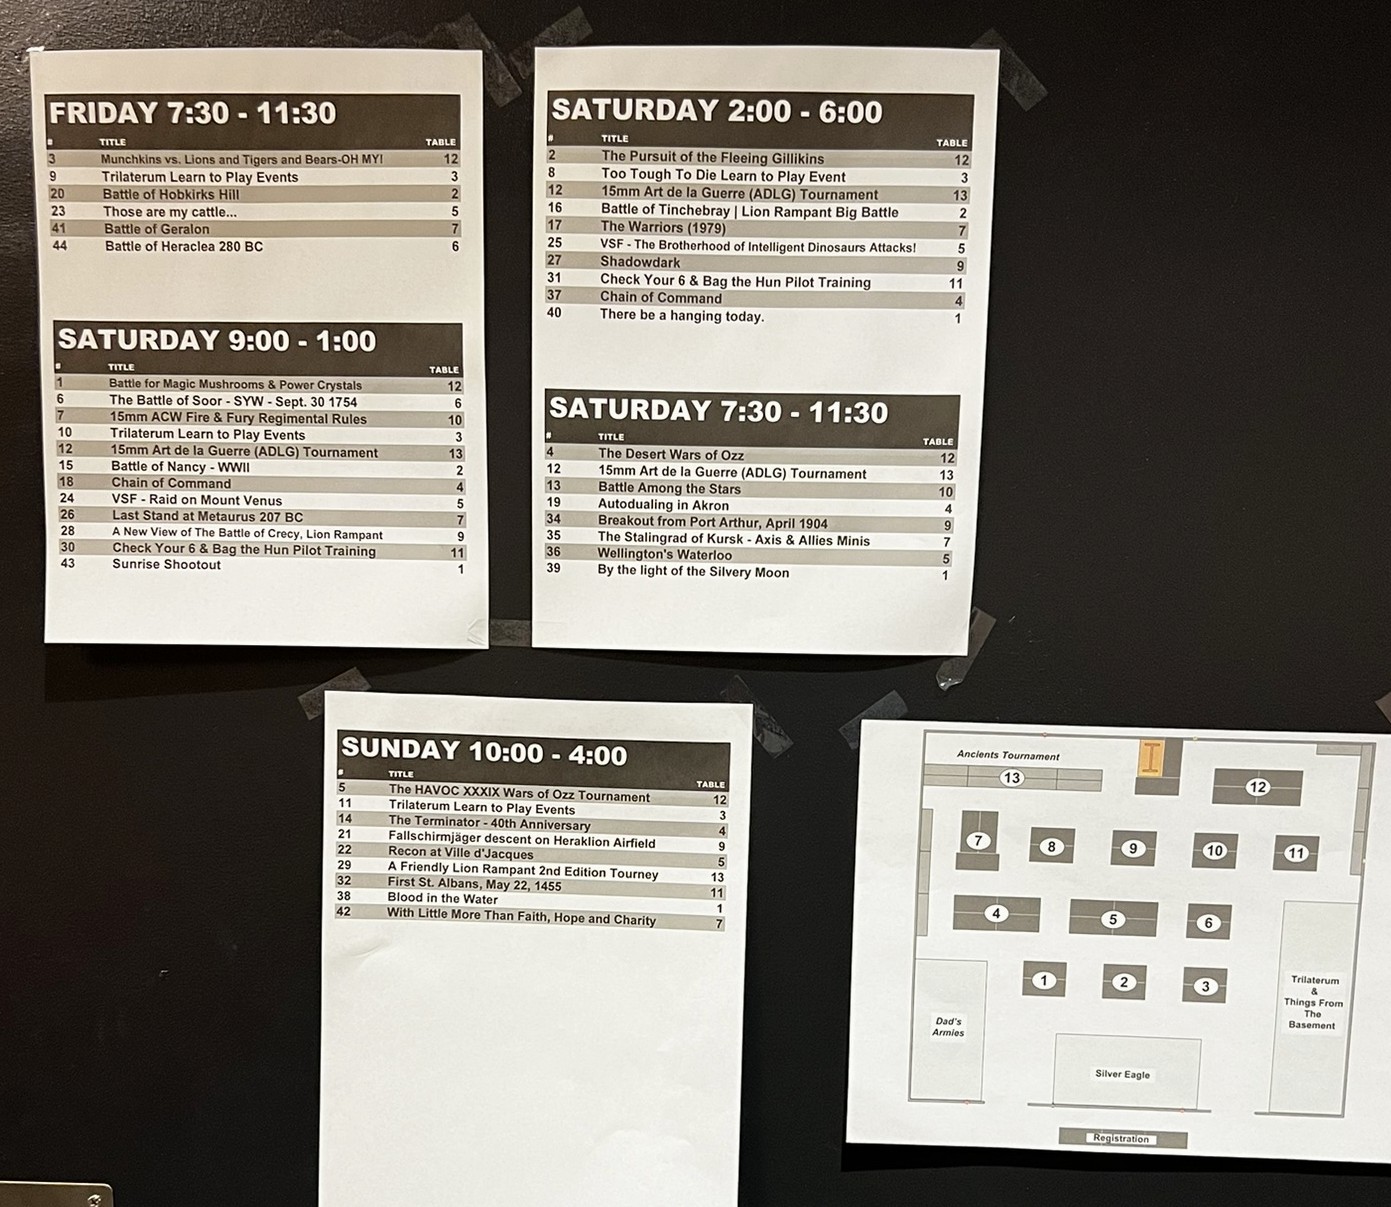
The HAVOC XXXIX game line up
The Wars of Ozz games that I ran were titled:
Friday evening: Munchkins versus Lions and Tigers and Bears – OH MY!
Saturday morning: Battle for the Magic Mushrooms & the Ancient Crystals of Power
Saturday afternoon: Rear Guard Action – The Pursuit of the Fleeing Gillikins
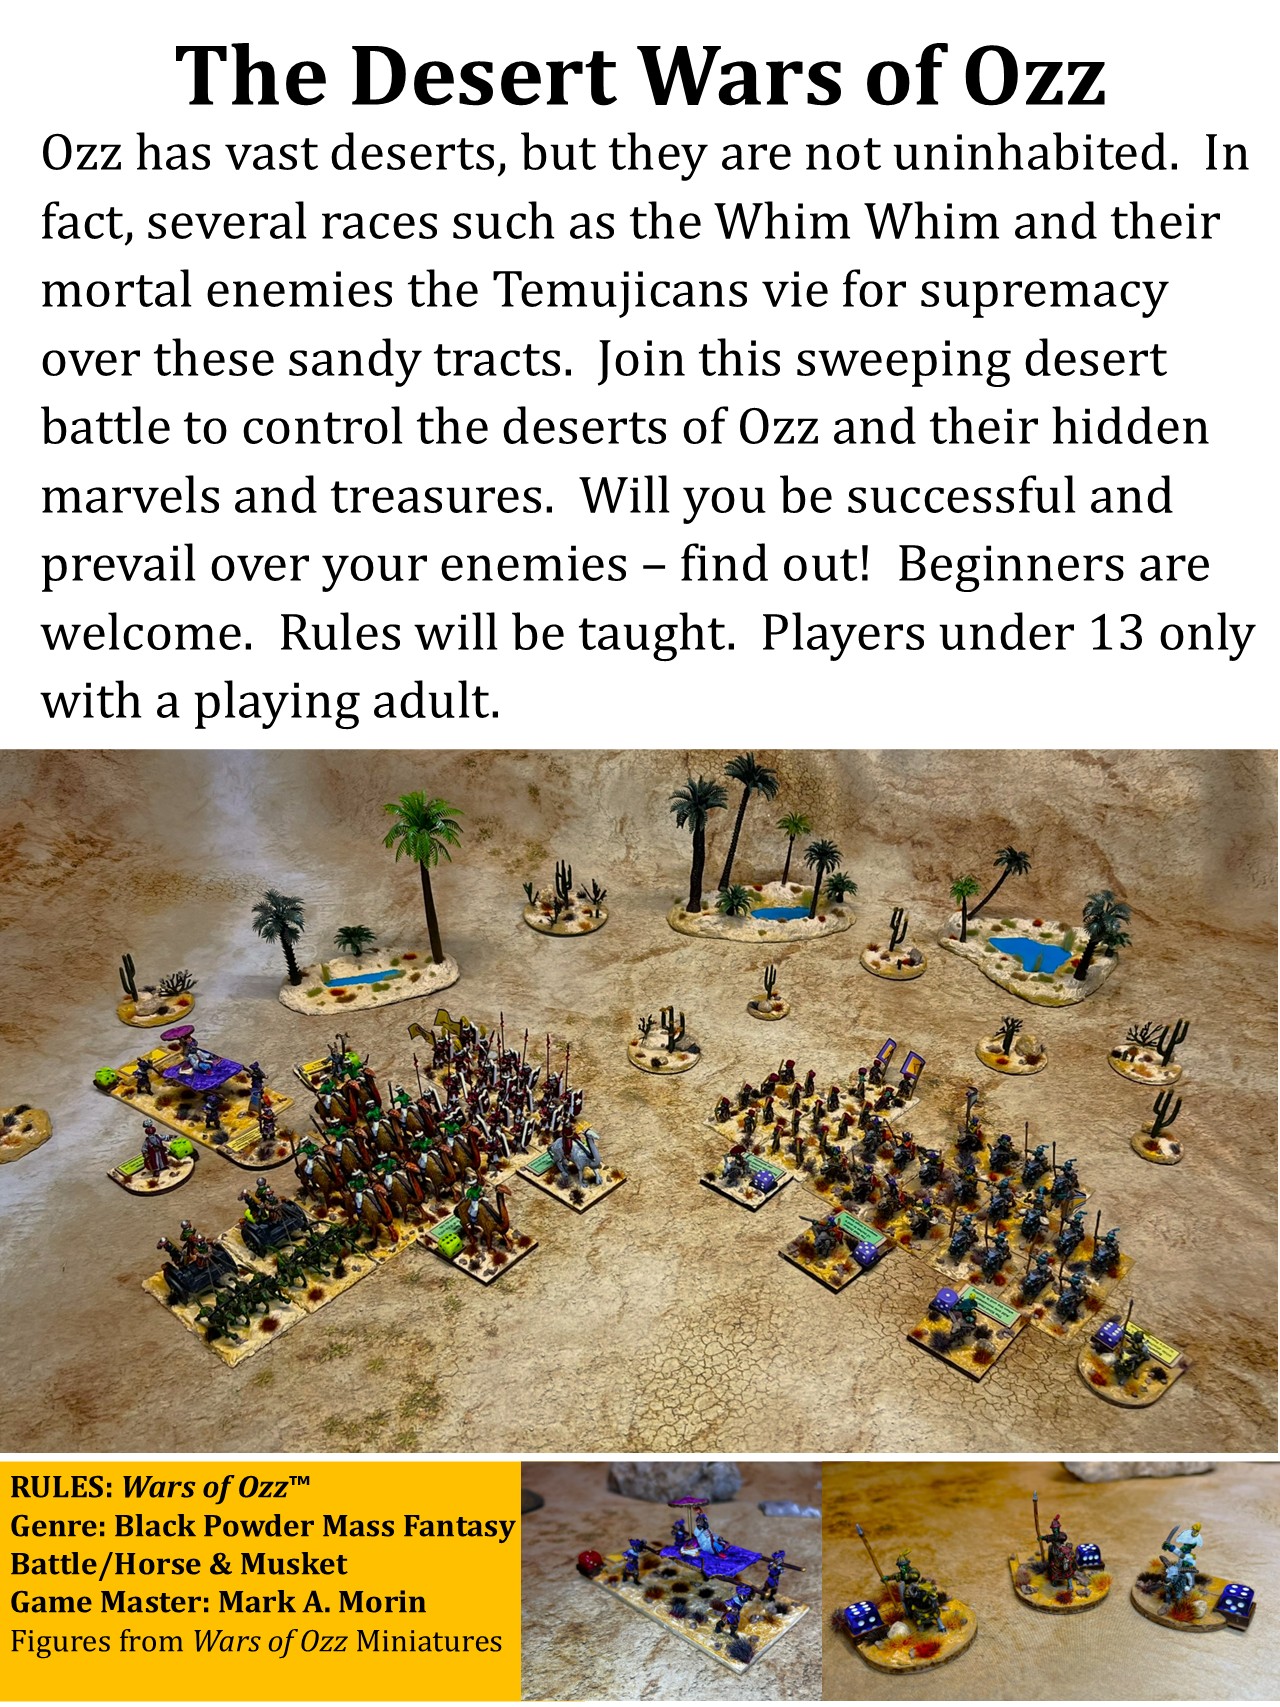
Saturday evening: The Desert Wars of Ozz
Sunday morning: The HAVOC XXXIX Wars of Ozz Tournament
Running so many games is indeed a challenge. I wish I could have posted about the other conventions I attended in February. These included COLD BARRAGE (3 games), TotalCon (10 games), and COLD WARS (3 games). These were done on three consecutive weekends in a row! So my apologies- blogging took a back seat. I hope to upload some photos of those events on Facebook. Yes hope.
For now, let’s take a look at each game at HAVOC 2025. Russ Dunaway had kindly supported my efforts with some prizes and giveaways that you’ll see.
Munchkins versus Lions and Tigers and Bears – OH MY!
The Munchkins are fighting the Gillikin’s Lions and Tigers and Bears (OH MY!). This is a quick session of Wars of Ozz suitable for all ages, new players and experienced ones. Will move very quickly!
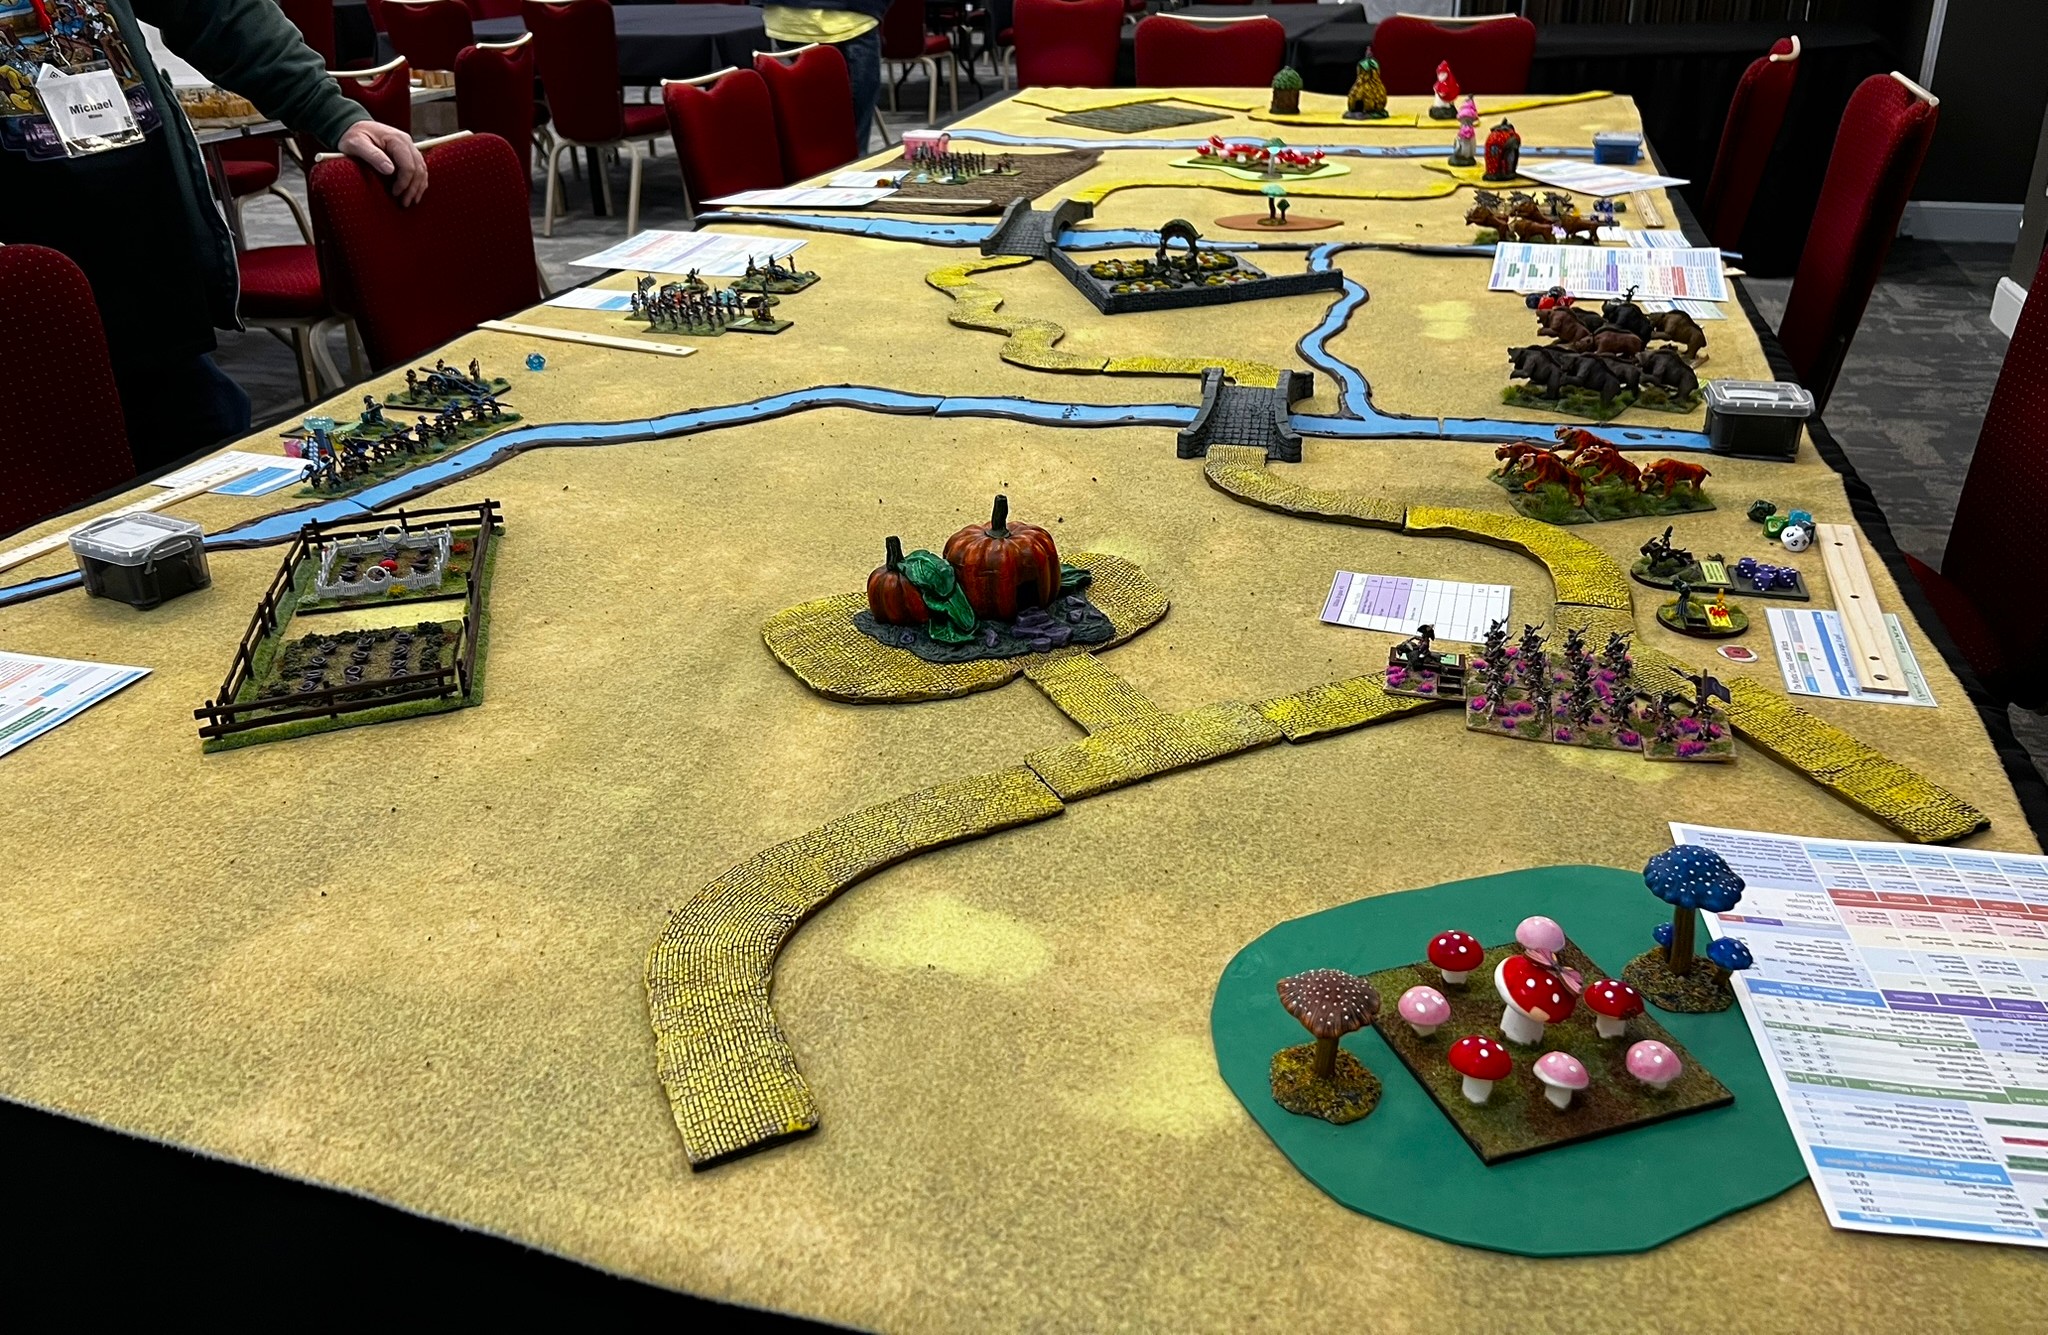
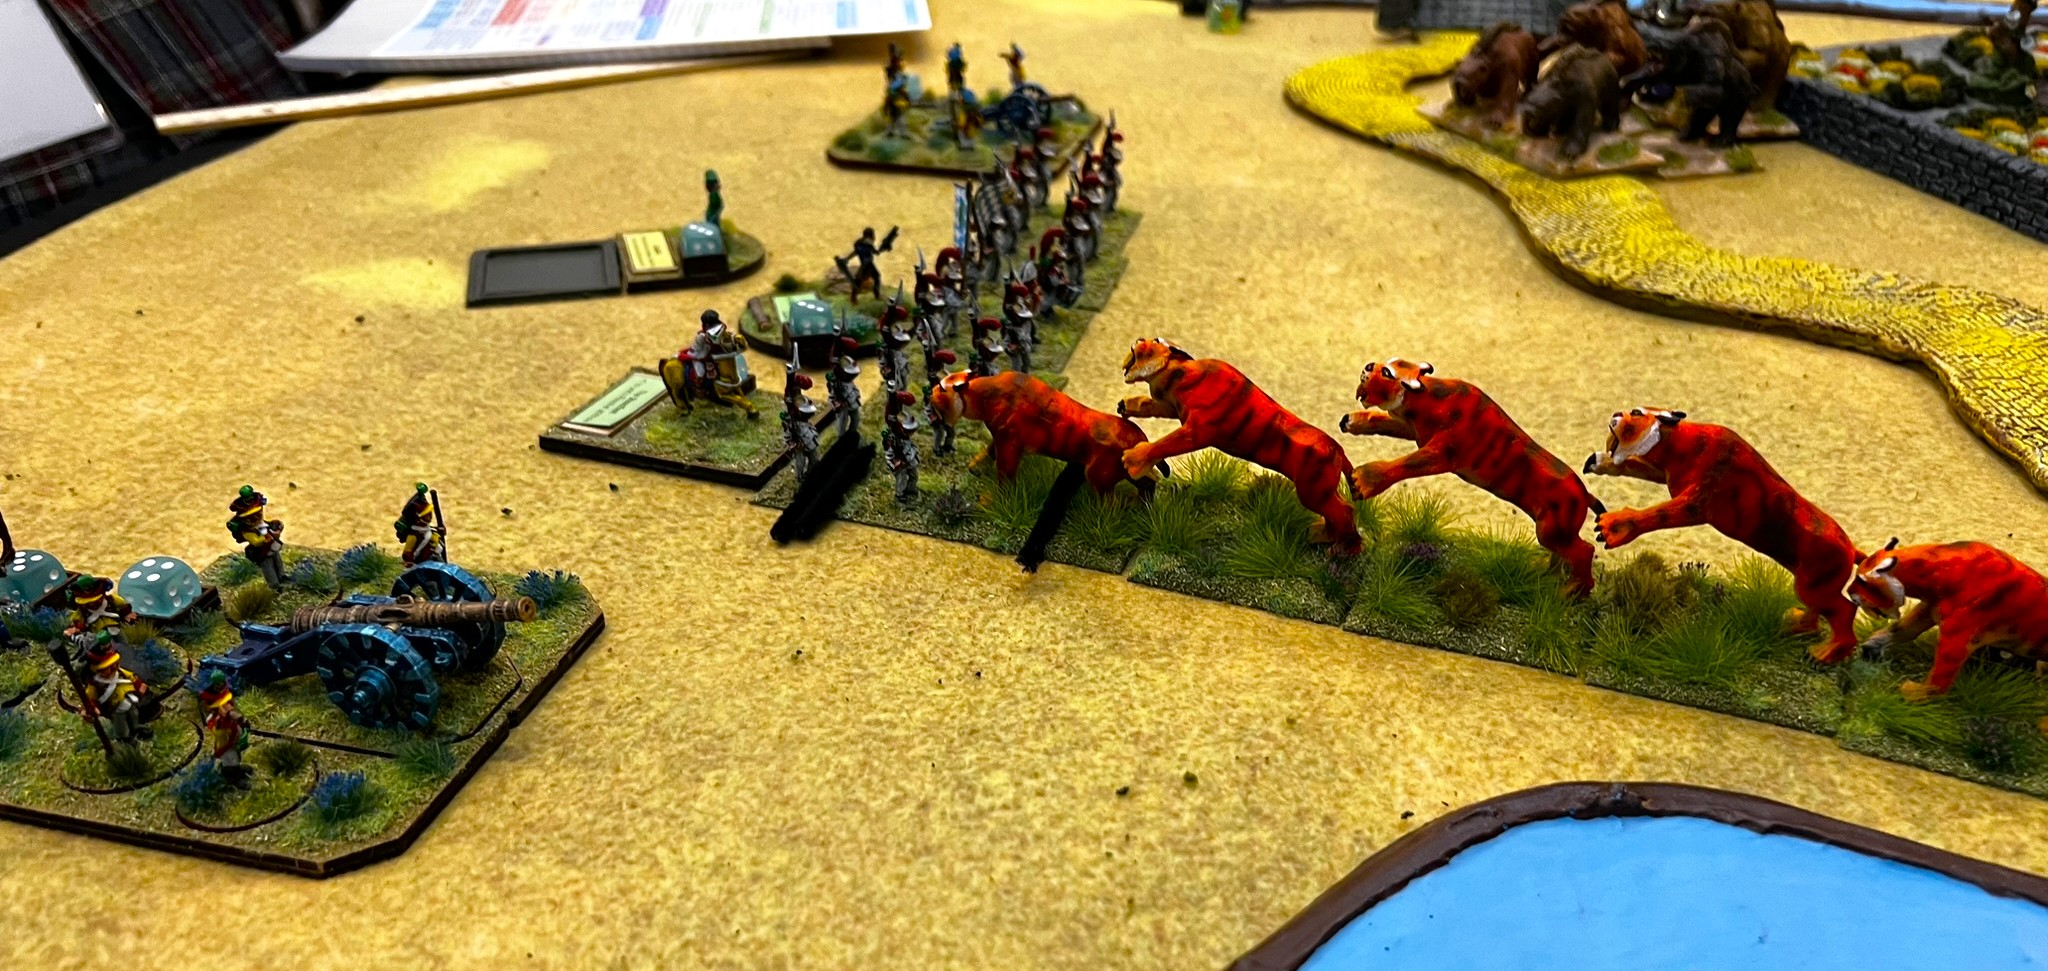
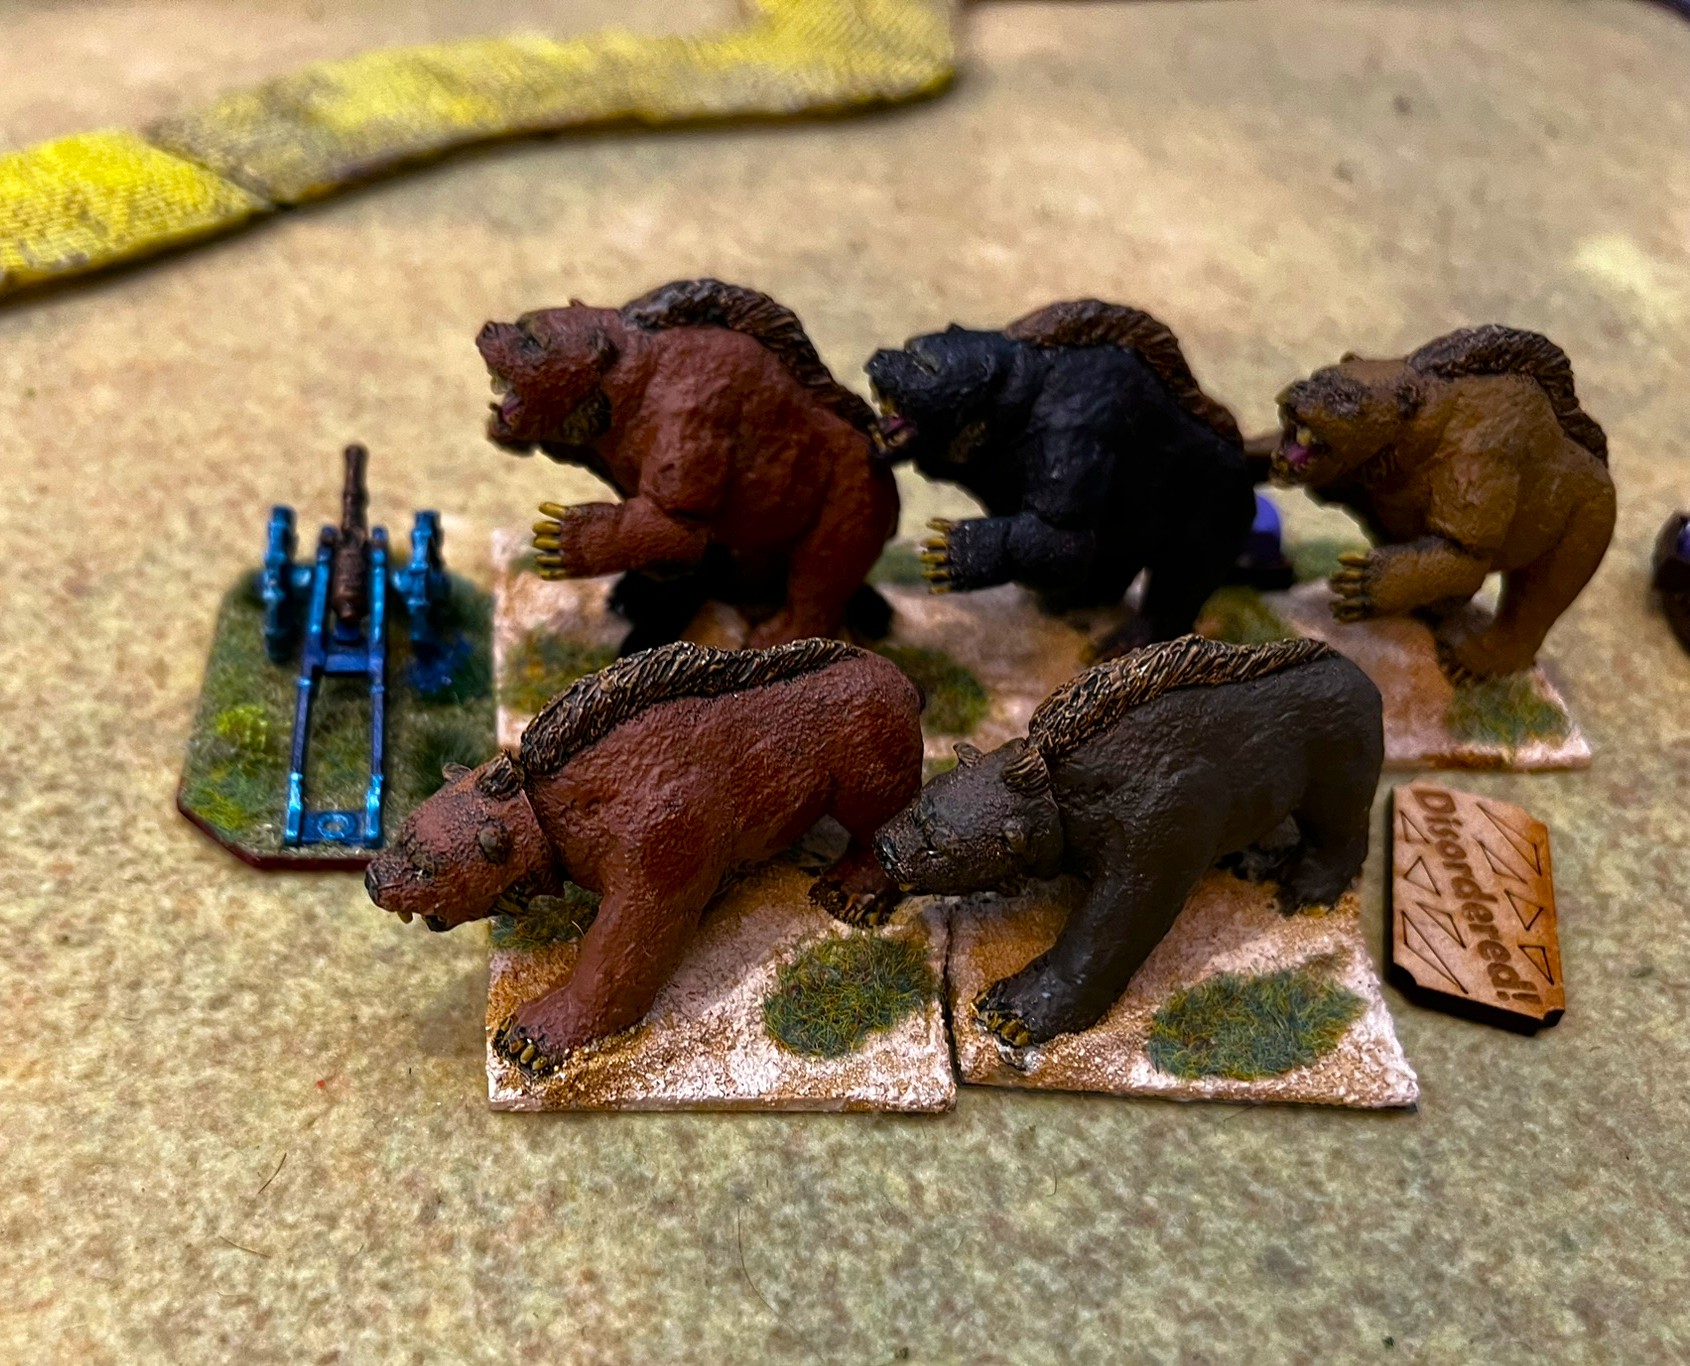
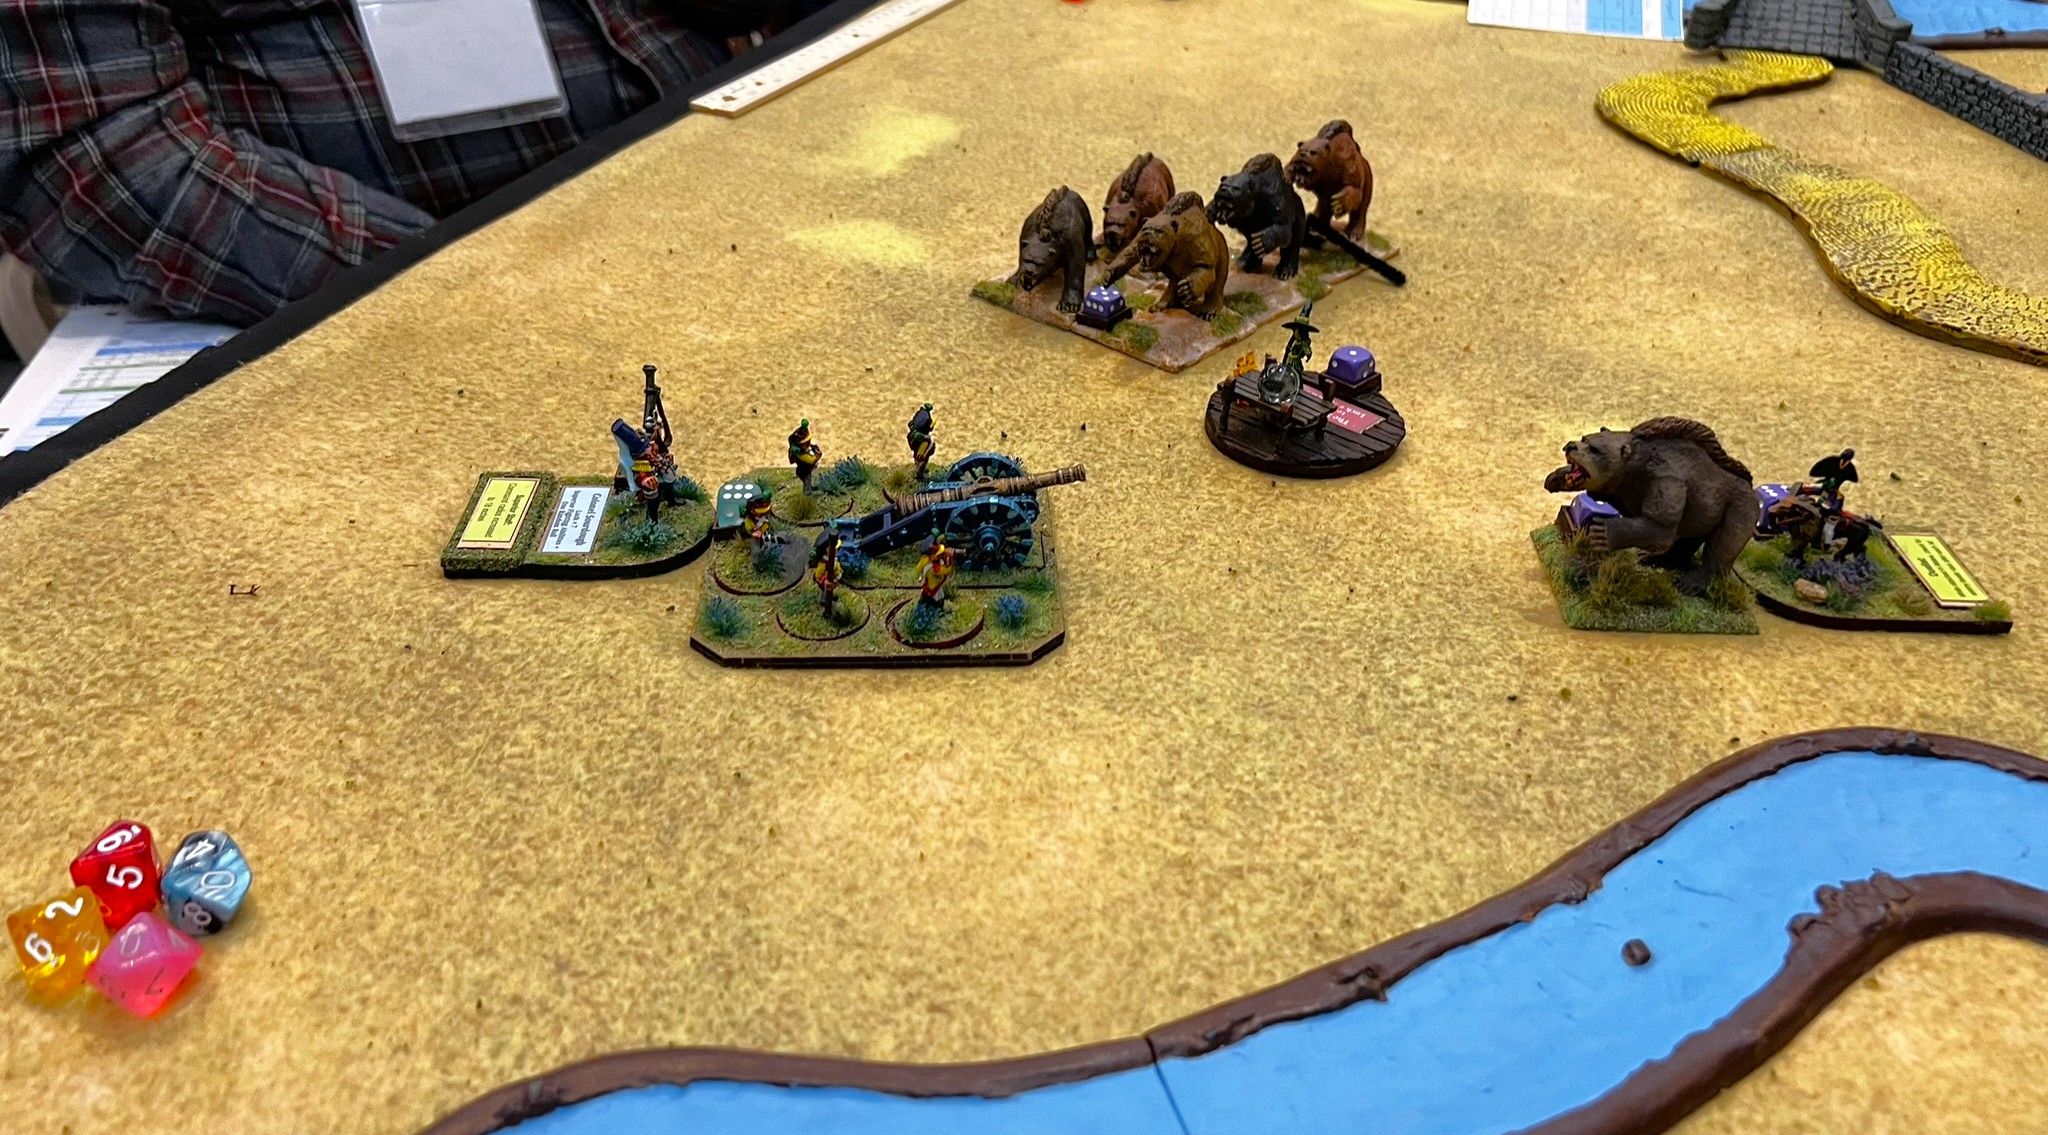
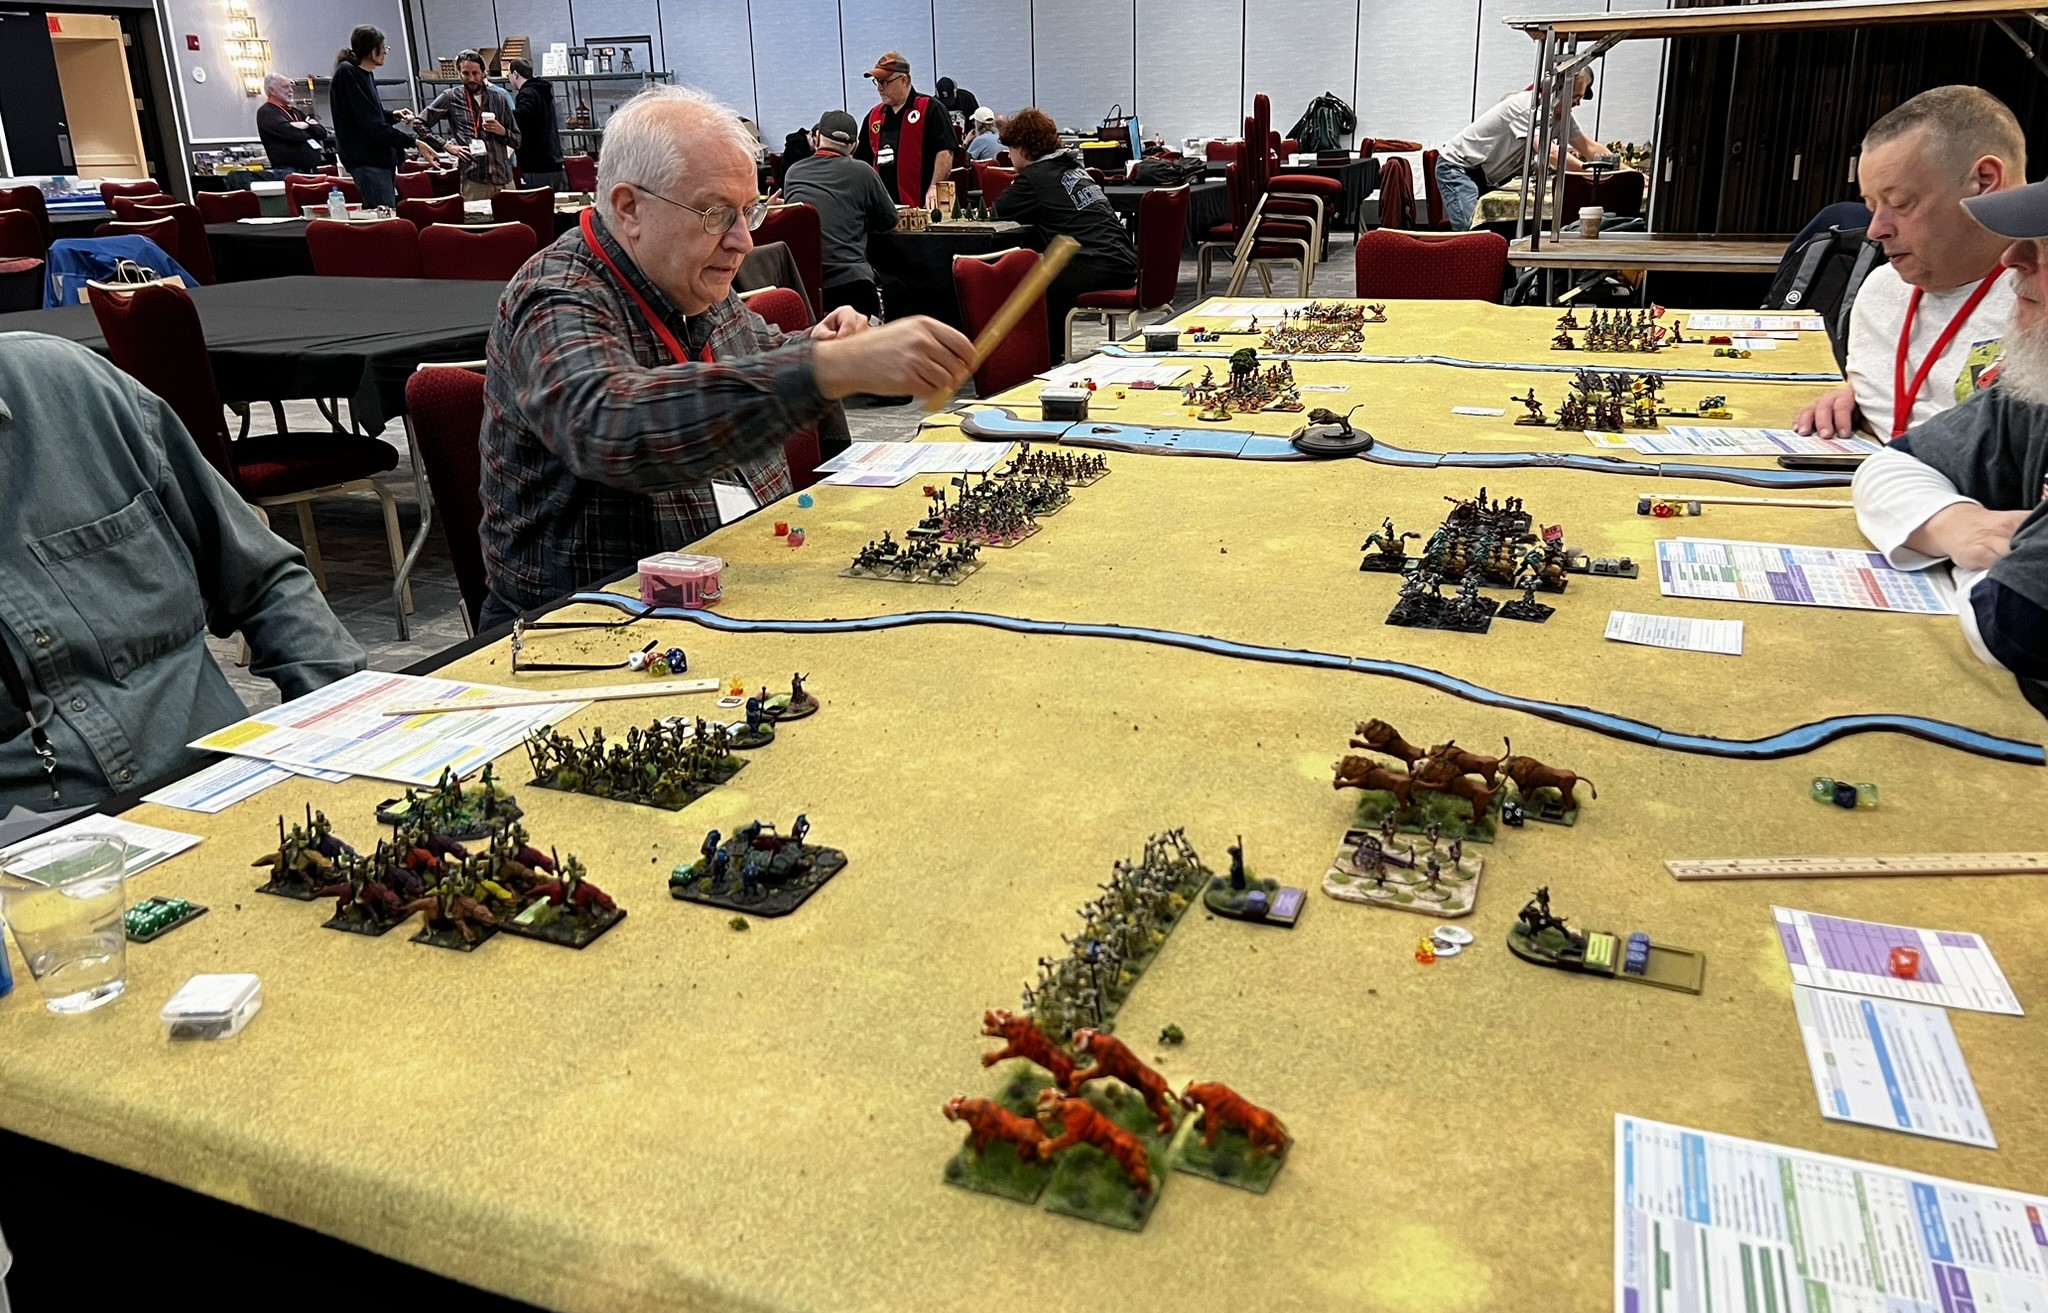
The set up. There were 3 Munchkin brigades (left side) versus 3 Gillikin brigades (right side). Each Gillikin Brigade was dominated by units of Dire Lions, Dire Bears, and Dire Wolves. The Gillikins had only 1 regiment with muskets. However, the Munchkins had artillery and excellent musketry. All brigades were small – 11 to 13 points each, with each side worth 35 points.The 6 players strategize.The Gillikins assault the Munchkins directly with their regiments of dire beasts. One regiment of musketry moves to move around a town to hit their right flank (at bottom of photo).The Munchkin Sharpshooter Regiment takes up position behind a river, flanked by a medium battery.The Gillikin 1st Infantry and the Mystic Crone (a witch) make their move to flank the sharpshooters. The town screened their approach.Colonel TikTok’s regiment was on the medium battery’s left. They watch as the first Dire Bear regiment approaches…their fire halts them……but the Dire Tigers make contact!Both the Tigers and Bears take hits coming in. The Munchkin infantry takes heavy damage. They hope one of the two artillery batteries will act quickly! Alas, a Dire Bear regiment dispatches the Munchkin Light Battery. Their gun is left behind to be torn asunder.The medium battery is now threatened! It too would be destroyed……as shown here.
All the Munchkins had left was an intact infantry regiment. That unit was on the far left flank and had been successful at holding off Dire Lions and Dire Wolves. Meanwhile, the sharpshooters position was finally taken by the Gillikin Infantry (commanded by Dan Eustace). Dan’s flanking maneuver had been one of the keys to their final victory. The final score was 13-11 in favor of the Lions, Tigers, and Bears of the Gillikins. Dan was awarded a set of the Wars of Ozz rules for his efforts!
Congrats Dan!
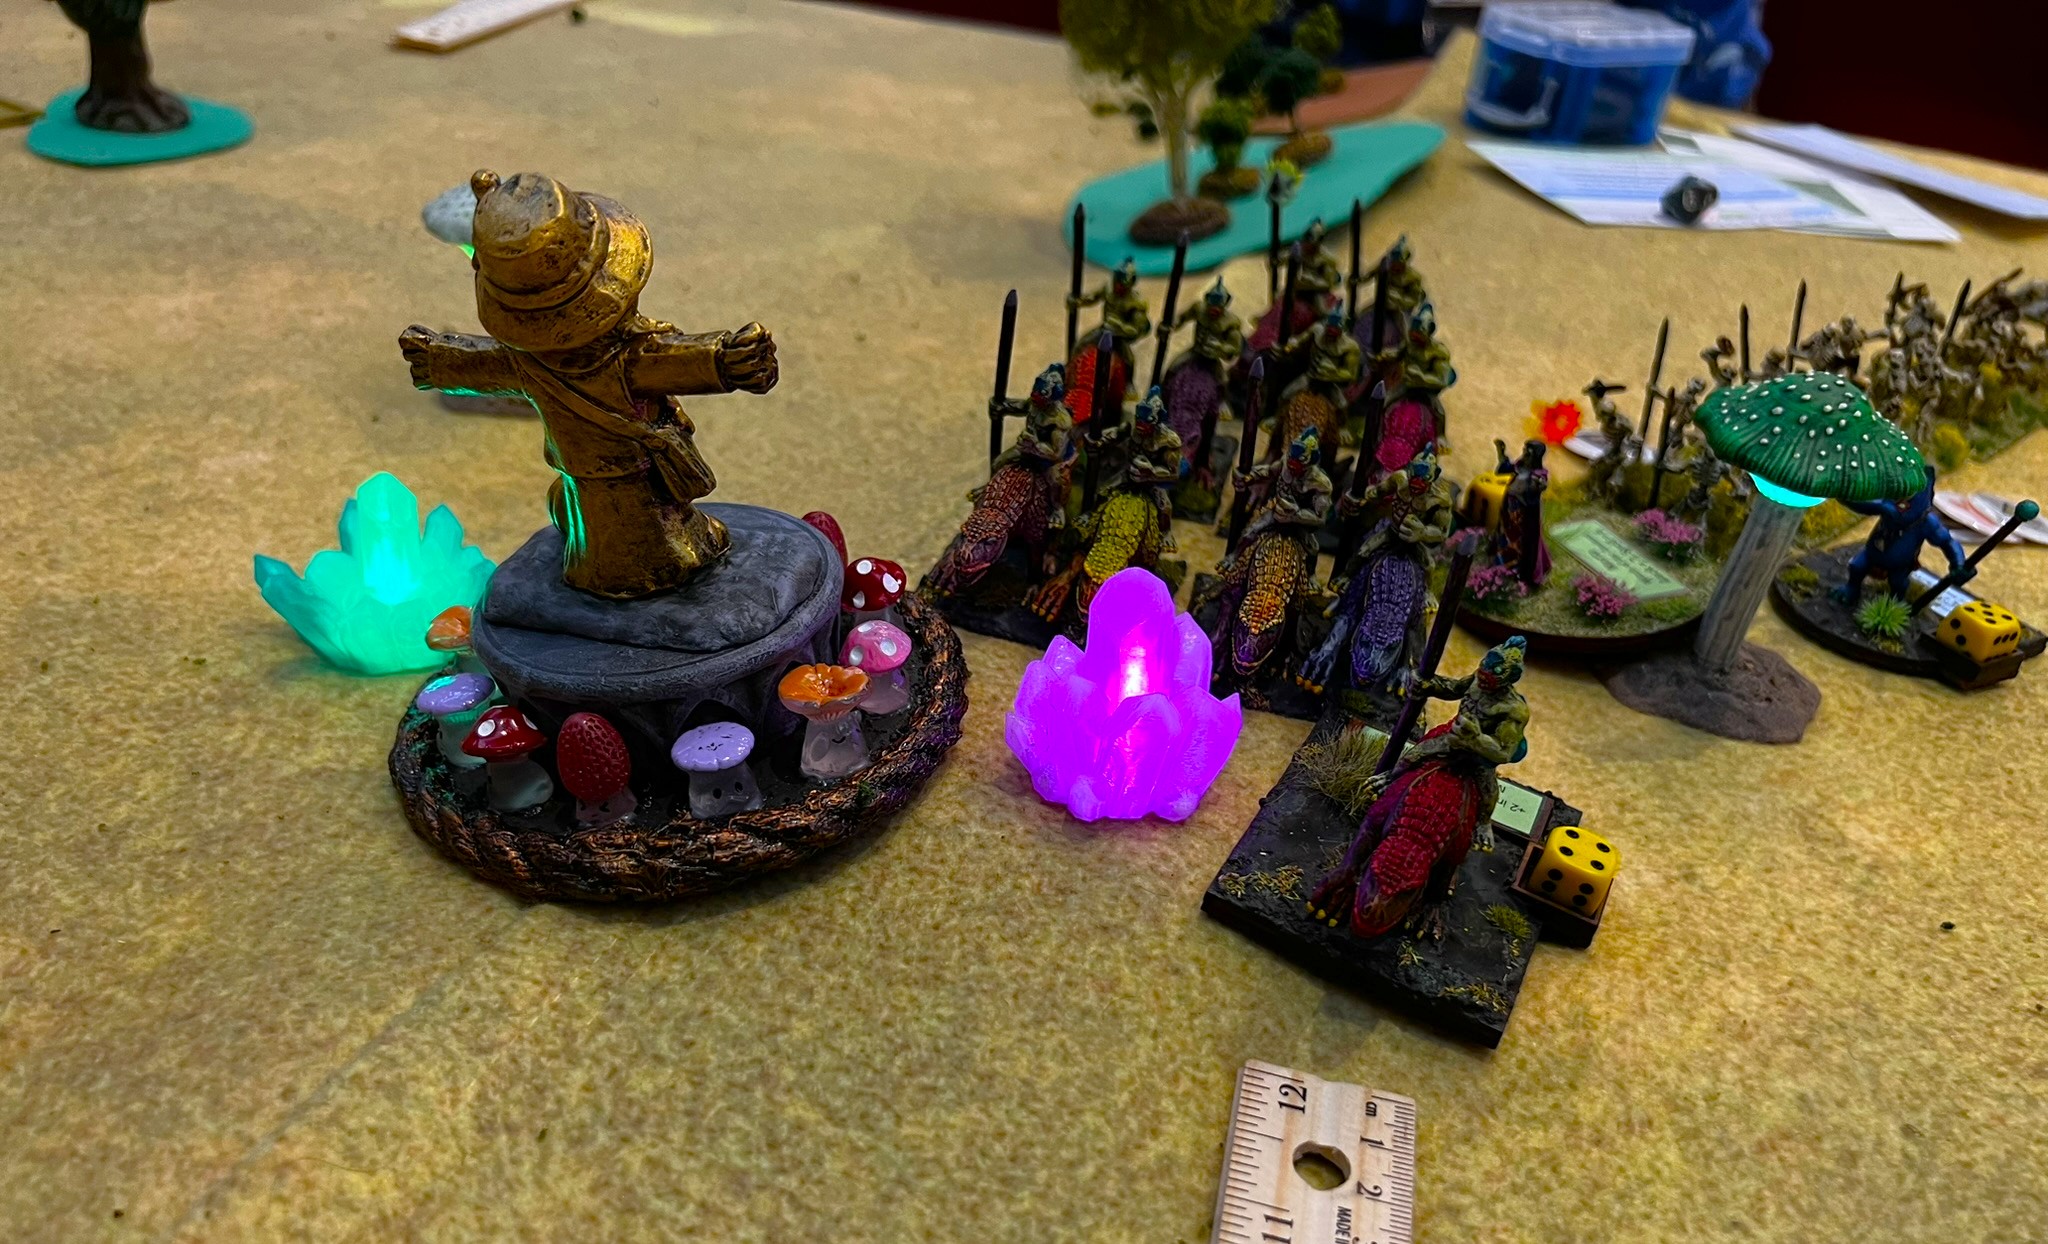
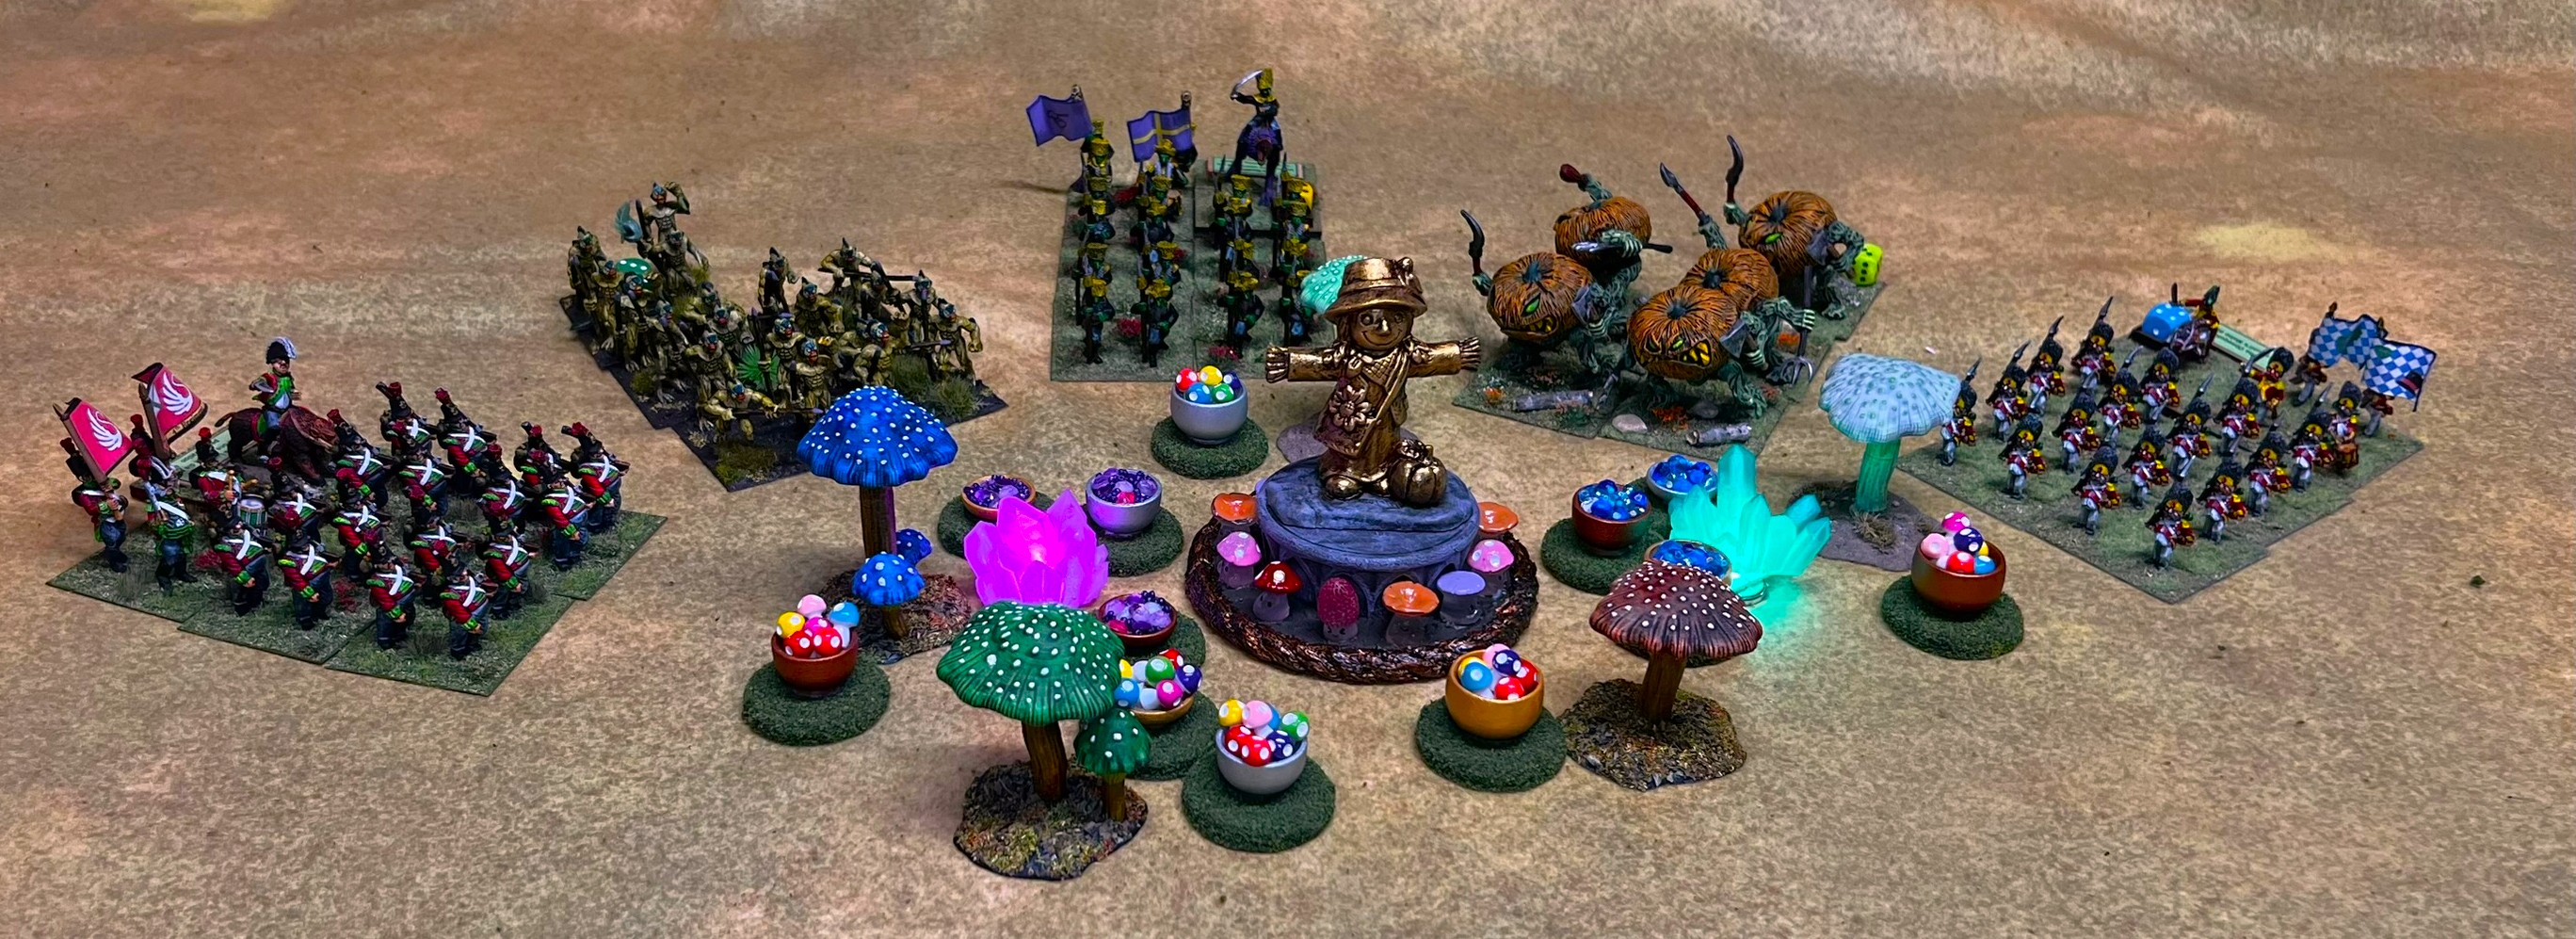
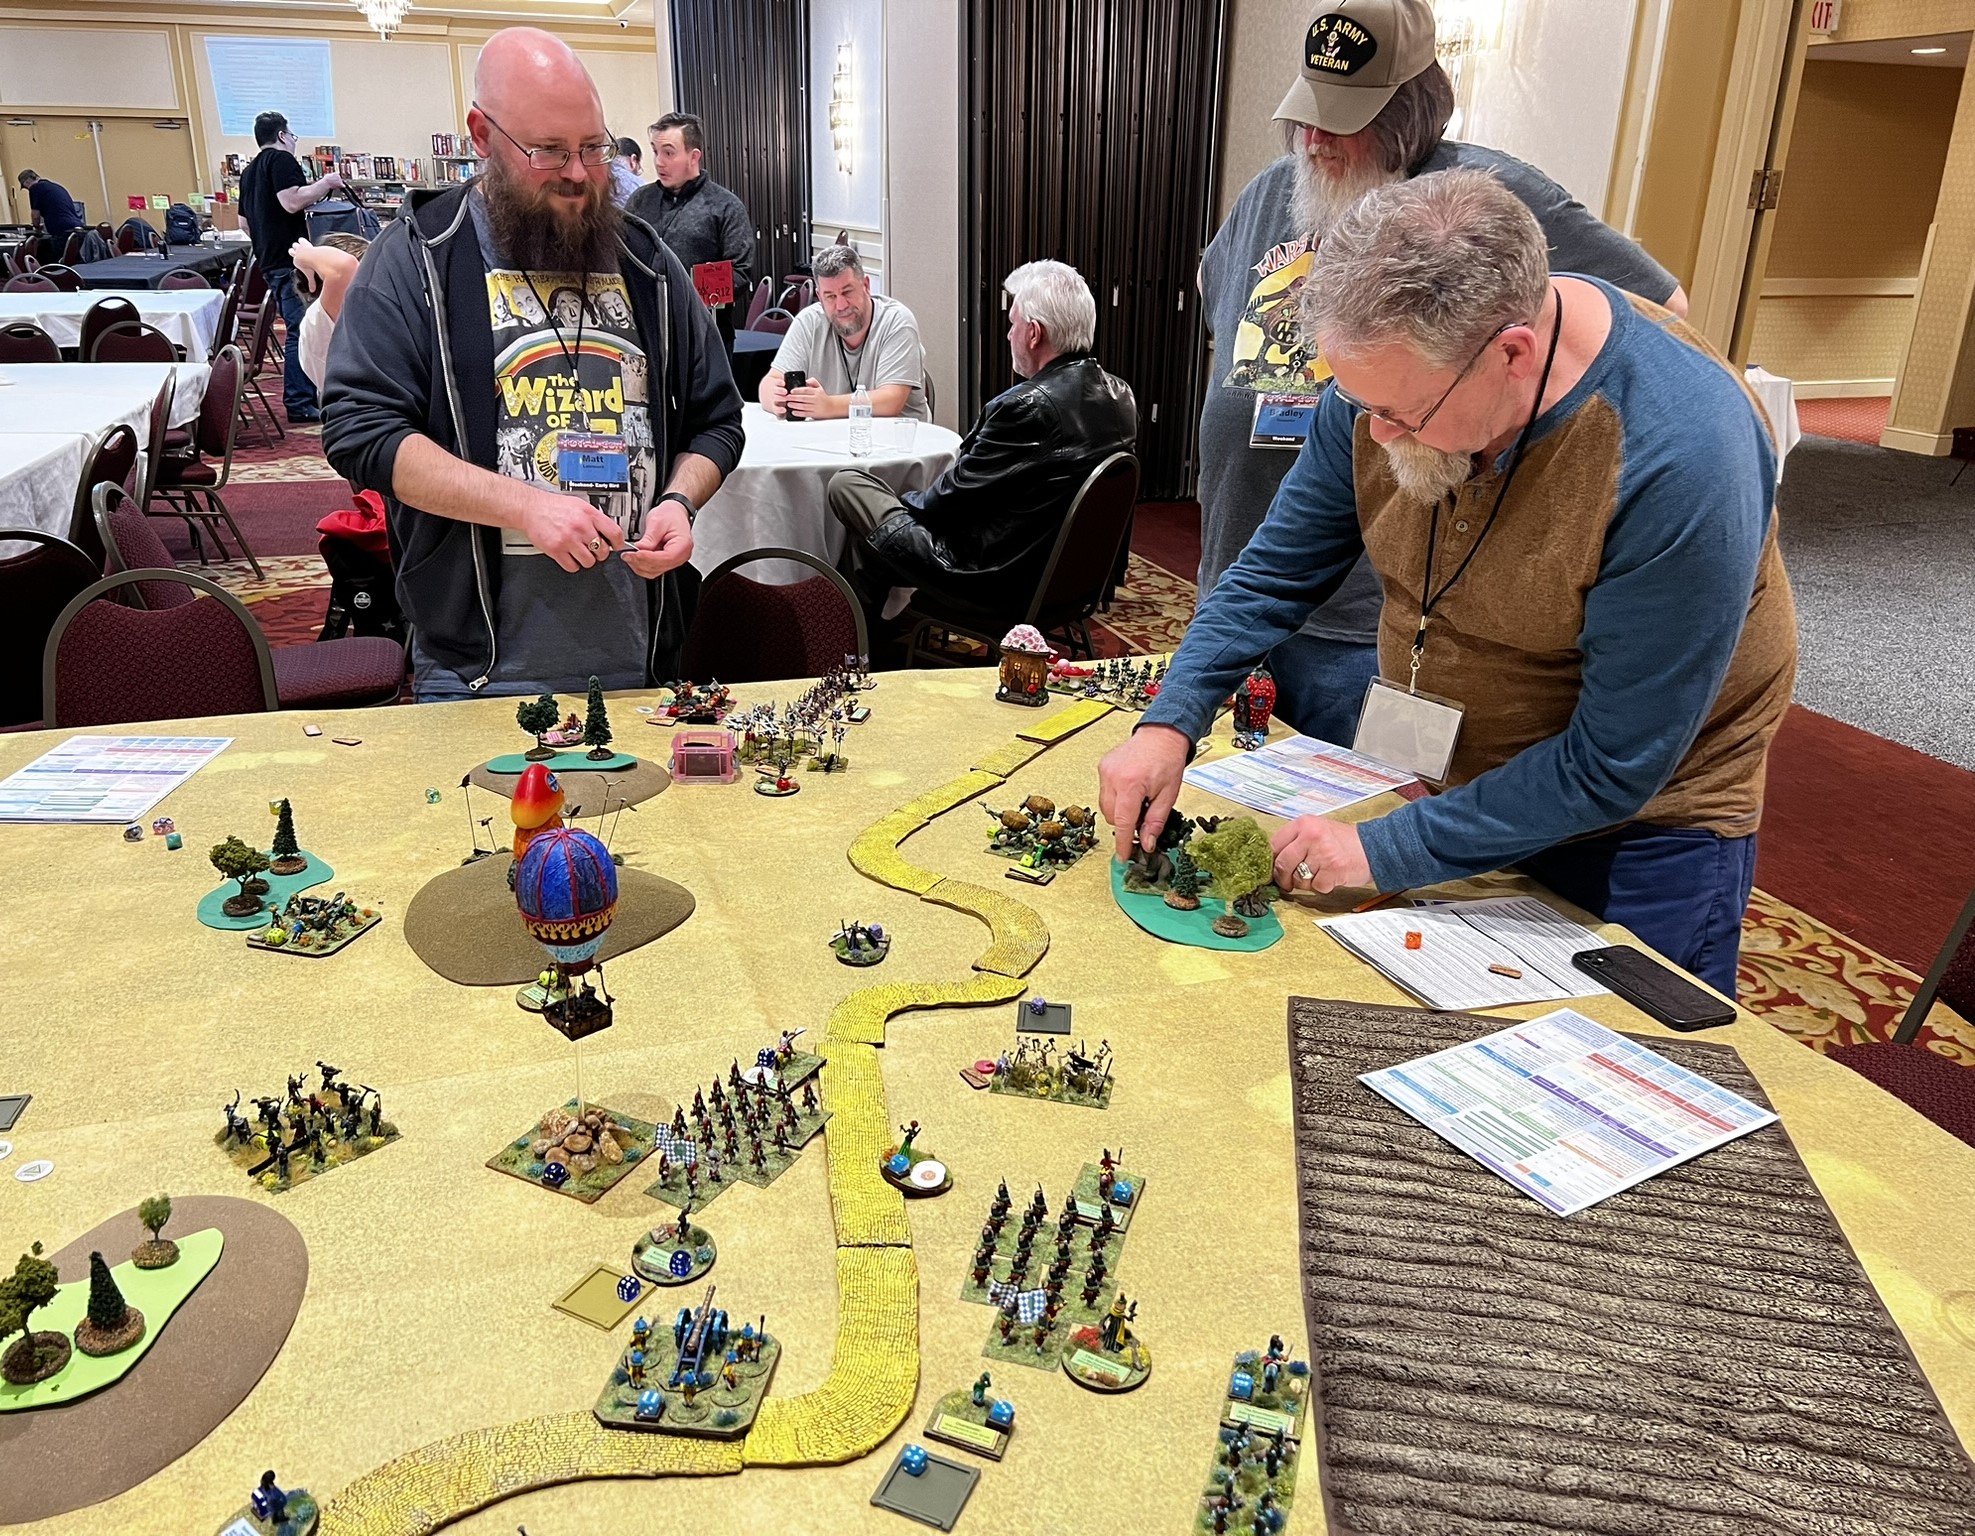
Battle for the Magic Mushrooms & the Ancient Crystals of Power
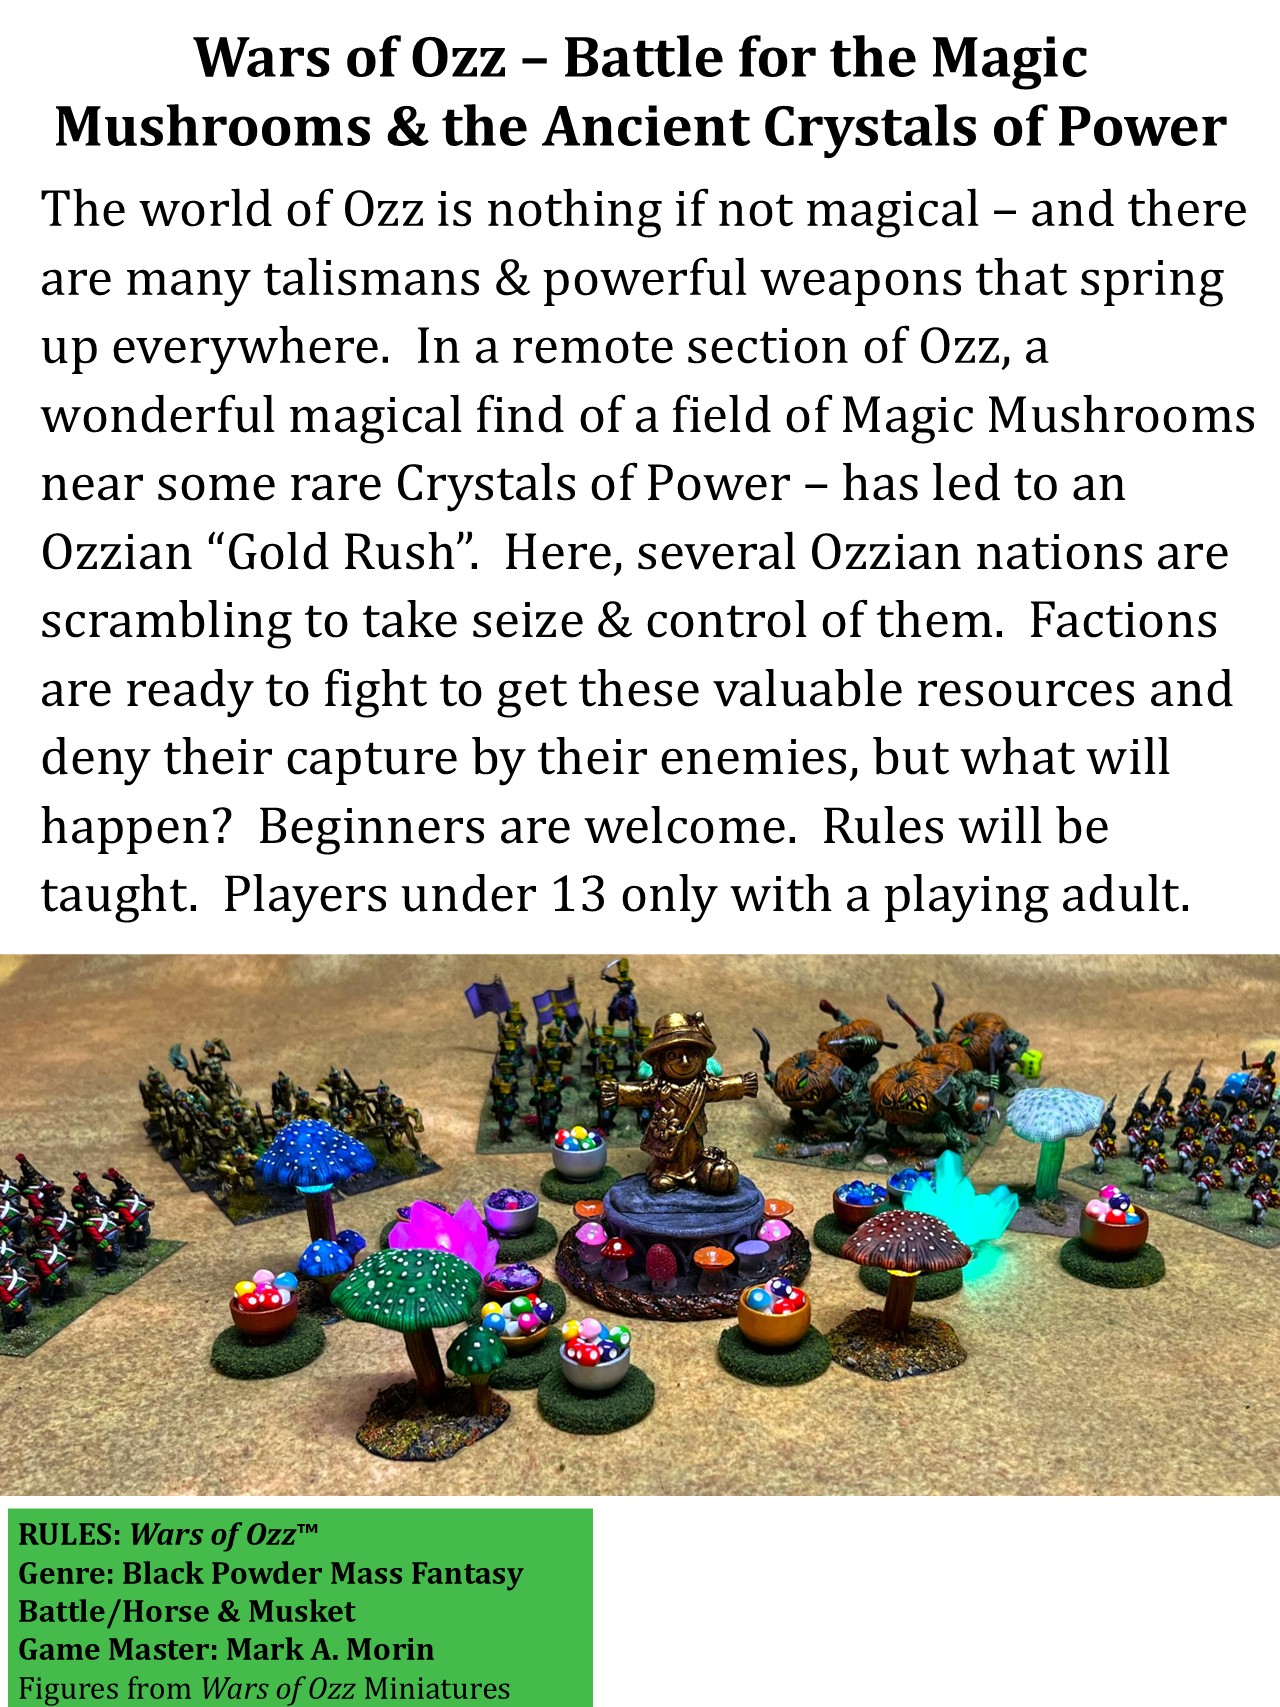
The world of Ozz is nothing if not magical – and there are many talismans & powerful weapons that spring up everywhere. In a remote section of Ozz, a wonderful magical find of a field of Magic Mushrooms near some rare Crystals of Power – has led to an Ozzian “Gold Rush”. Here, several Ozzian nations are scrambling to take seize & control of them. Factions have teamed up & are ready to fight to get these valuable resources and deny their capture by their enemies, but what will happen? Beginners are welcome. Rules will be taught. Players under 13 only with a playing adult.
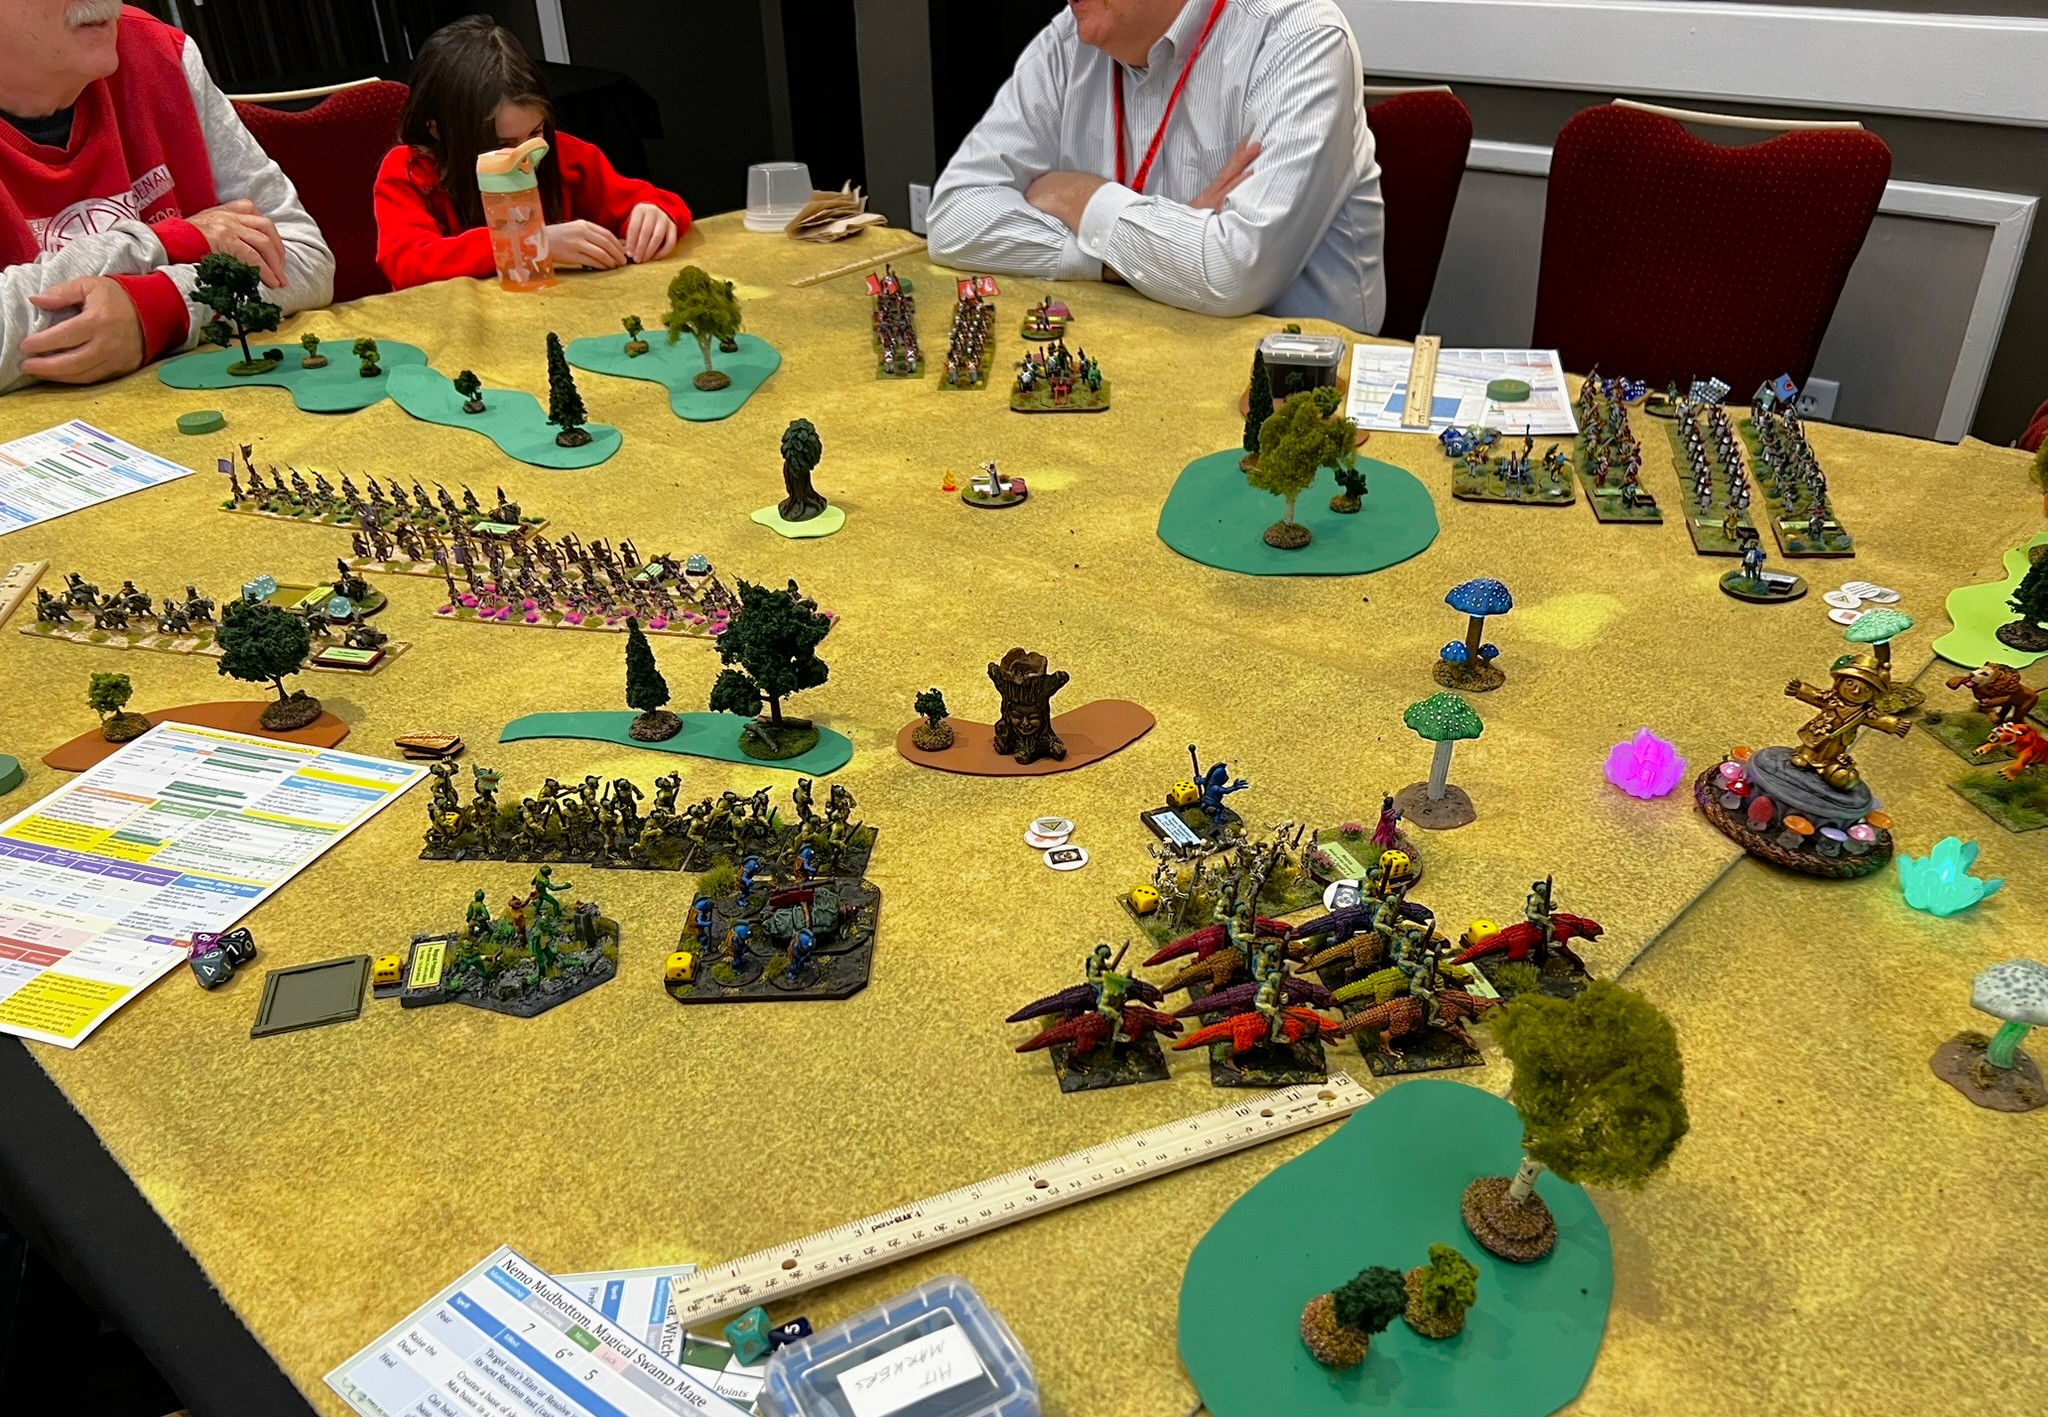
I set this game up for 8 players. I ended up with two brigades being unused and two players acting as a team. So, 6 brigades competed here against each other. Here is a video of the set up:
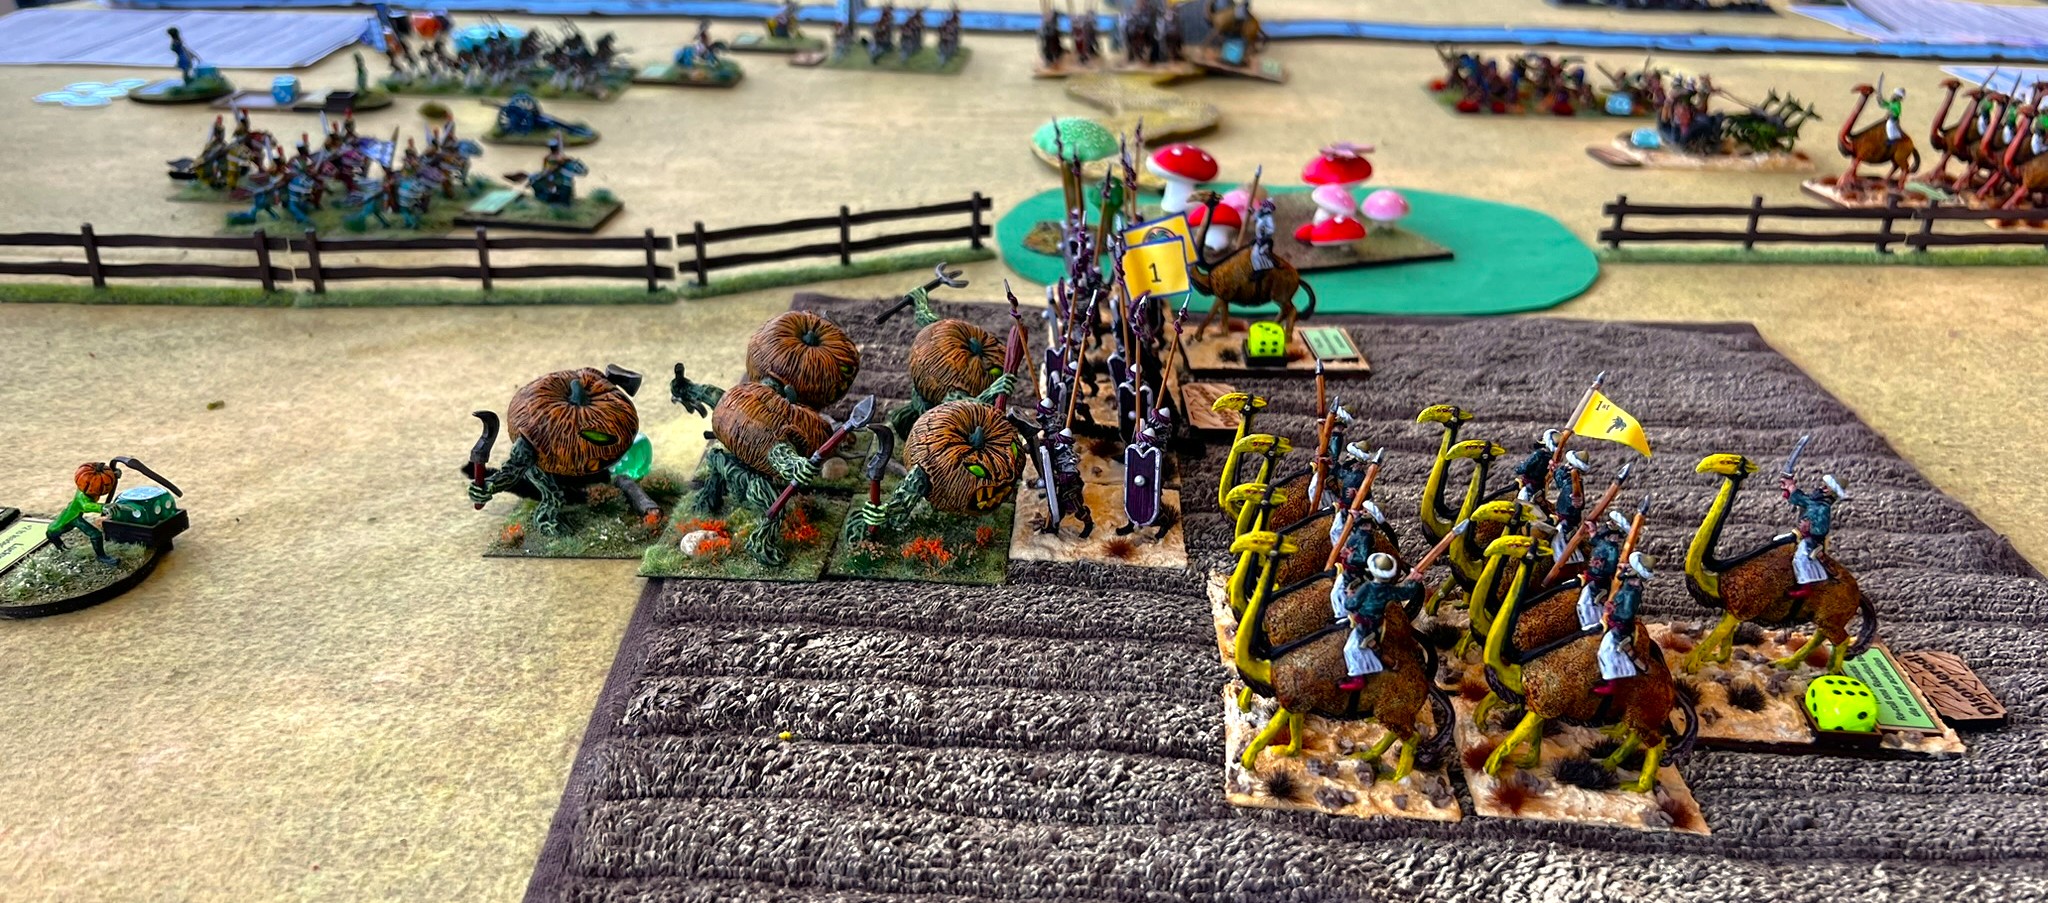
Players checking out their forces at the start.Charles moves his Impkins towards the objectives. They are menaced by Professor Nitpik’s advance to their left, and the Gillikin’s advance to their right.Carter’s Pollywomp brigade moves towards the objectives, while Gillikins and Quadlings try to catch up.The Nitpik cavalry takes flanking artillery fire from both the Impkins and the Gillikins – and routs away!In revenge, the Elite Axemen move towards the Impkin infantry, who form line.Meanwhile, the 1st brigade of Gillikin’s Tigers seize a cache of crystals. They are shot at by Nitpik artillery, and rout – dropping their crystals. Their compatriot Lions grab a stash of mushrooms and hope to escape with their booty.Across the table, Carter deftly deploys a blocking force of Pollywomp infantry against the approaching 2nd Gillikin brigade. The Quadlings try to sneak through the woods unmolested.Carter’s block worked – and his cavalry seizes crystals while his infantry grabs mushrooms.On the other side of the table, the Tigers recover quickly. They grab mushrooms dropped by the Lions, who had been routed. The Gillikin’s skeletons grab the crystals previously dropped by the Tigers.
At that point the game ended due to time. Crystals were worth 10 points and mushrooms 5. Carter’s (on the left) Pollywomps and Tim and his wife’s Gillikins were tied for the win(they played together). Carter chose a Zoraster the Wizard miniature for his win, and the couple got a set of the rules.
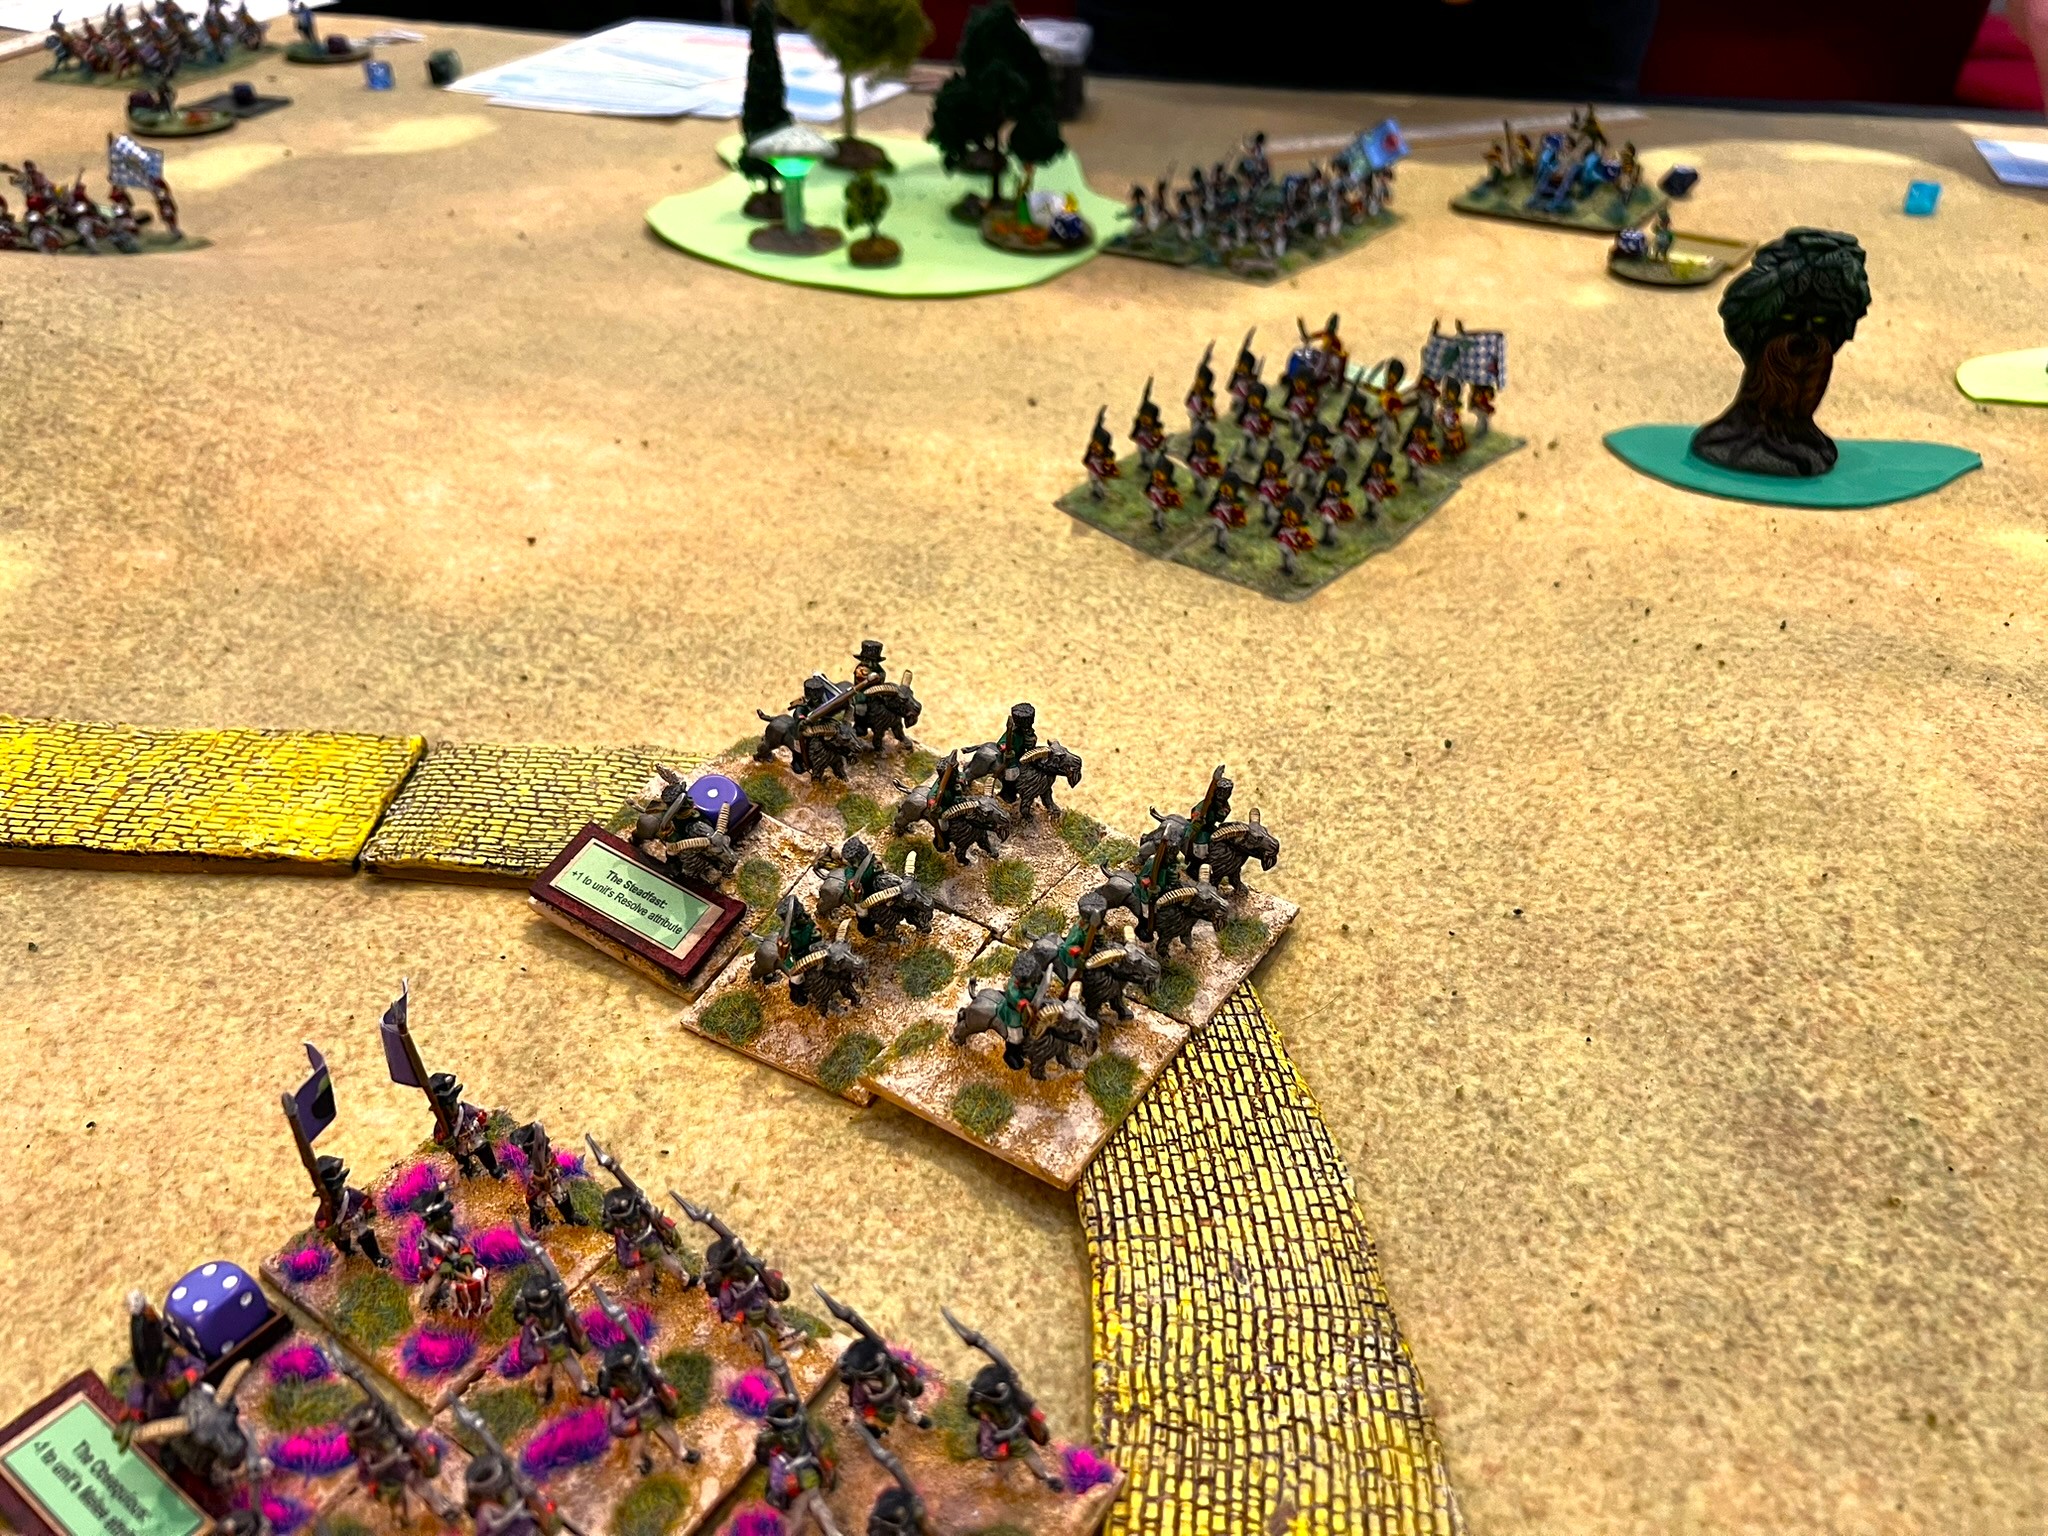
Rear Guard Action – The Pursuit of the Fleeing Gillikins (Wars of Ozz)
This is one of my favorite scenarios.
The Gillikins have recently been defeated by the Munchkins and their allies in a major battle. The remnants of the Gillikin forces are desperately trying to withdraw to the safety of their lands. The Gillikins Empress, Arella the Witch, has her Summoning Bell to call up the Undead to join her troops in retreat. Their Munchkin enemies – as well as their Nitpik and Impkin allies – are in hot pursuit. Can the Gillikins make it to safety, or will the Munchkins prevail? Beginners are welcome. Rules will be taught. Players under 13 only with a playing adult.
A full table for the start!Brad moves his Nitpik troops towards the Gillikins.The fleeing Gillikins and their Summoning Bell move forward towards safety.Slow-moving Munchkins do their best to catch the Gillikins on their left flank.Brad’s Nitpik cavalry wipes out a skeleton regiment and moves to hit the bell. The bell would not survive the encounter.Meanwhile, the Gillikins had successfully exited multiple regiments off the table. The Munchkin alliance had destroyed many Gillikins as well. The Munchkins moved to block the road to safety, leaving a Dire Bear regiment’s remnants to be destroyed.
The game ended in a tie! 26 bases were saved by the Gillikins and 26 bases were destroyed by the Munchkin Alliance! What a nail-biter!
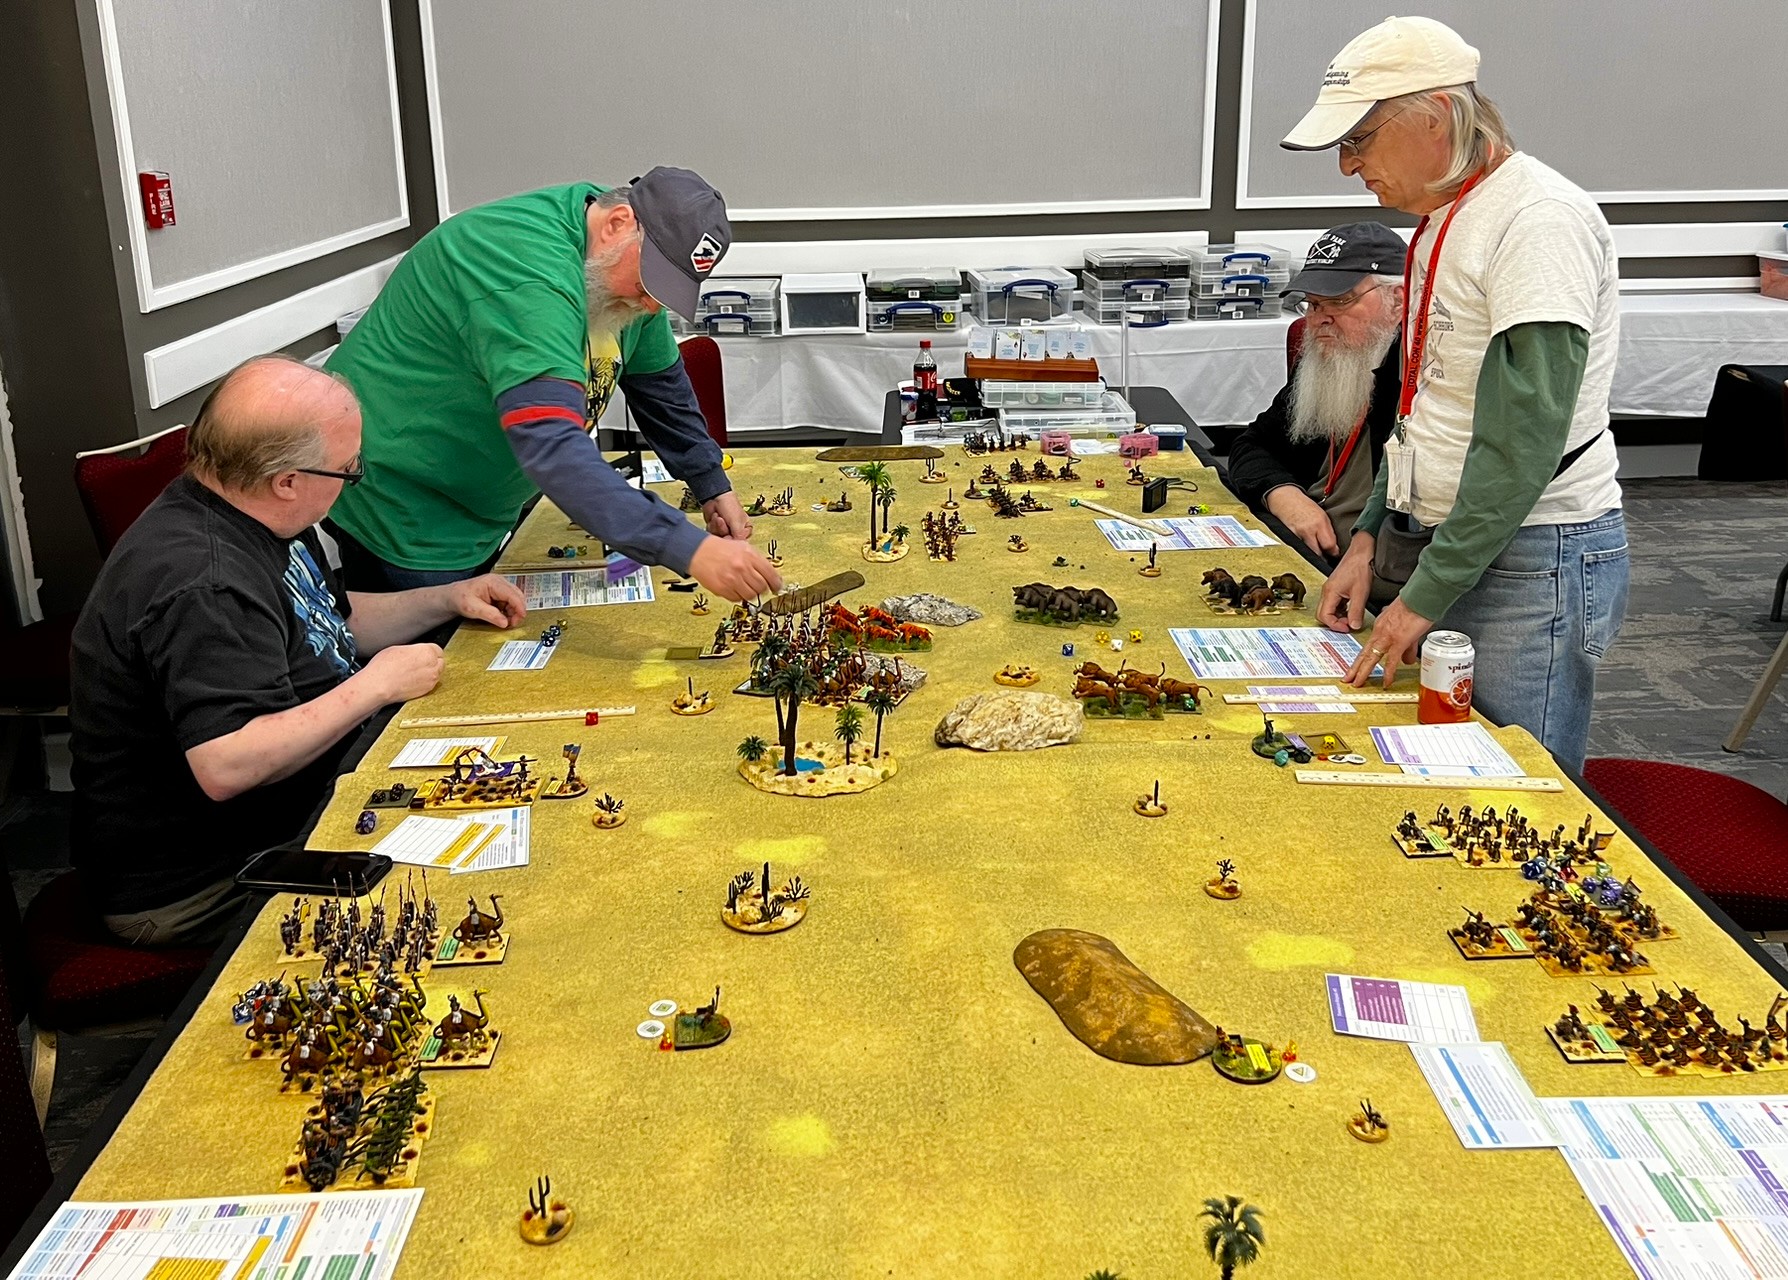
The Desert Wars of Ozz
Ozz has vast deserts, but they are not uninhabited. In fact, several races such as the Whim Whim and their mortal enemies the Temujicans vie for supremacy over these sandy tracts. Join this sweeping desert battle to control the deserts of Ozz and their hidden marvels and treasures. Will you be successful and prevail over your enemies – find out! Beginners are welcome. Rules will be taught. Players under 13 only with a playing adult.
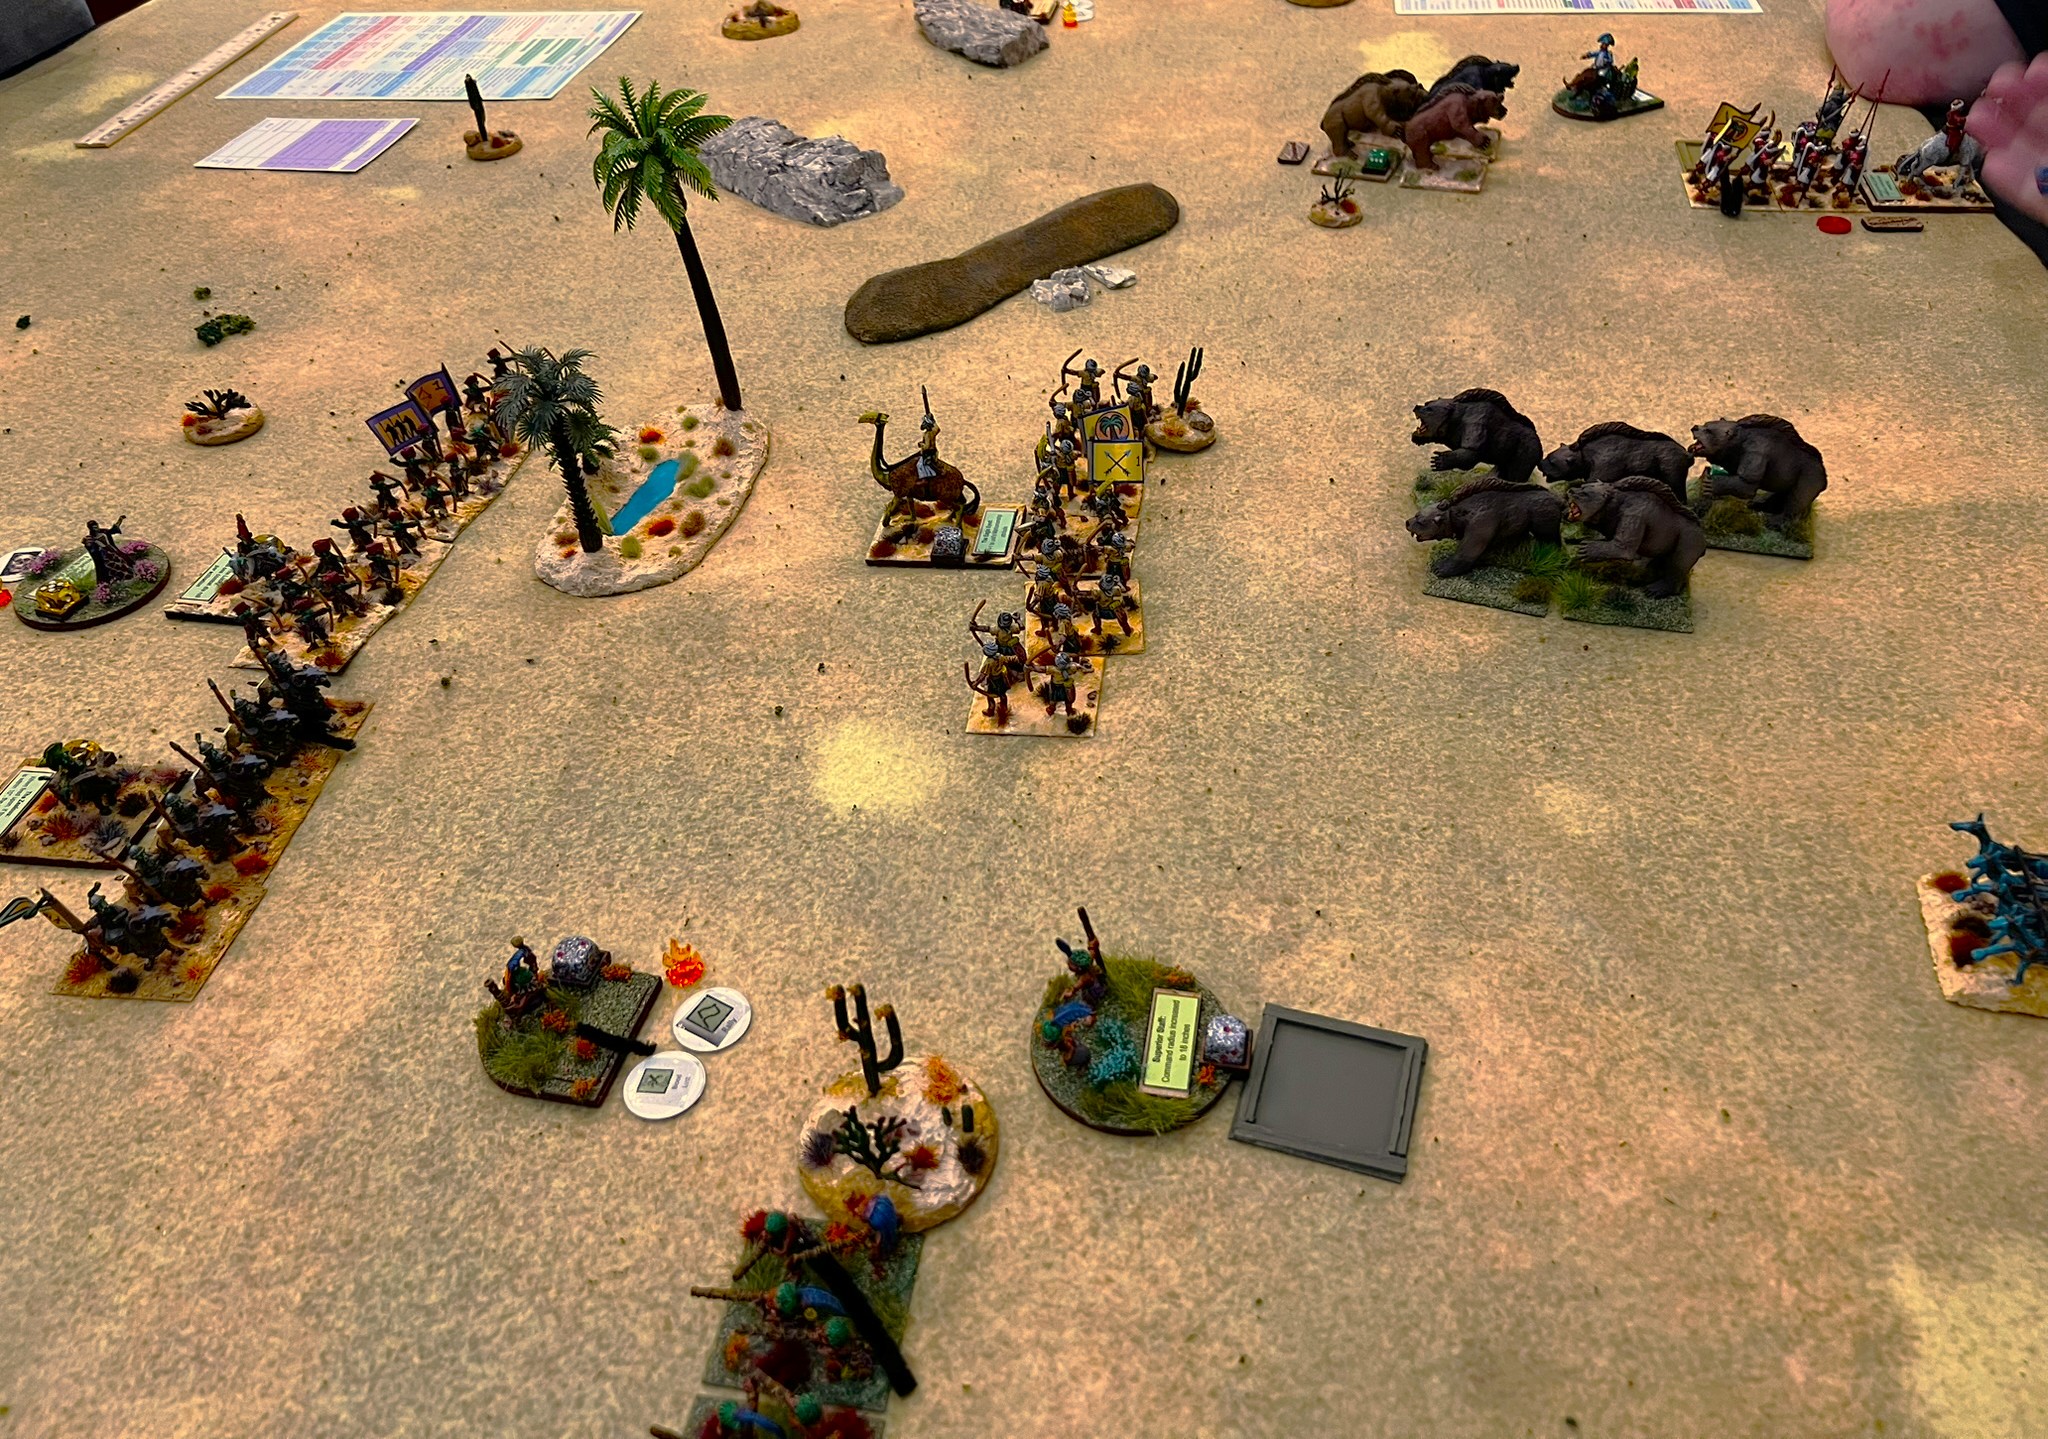
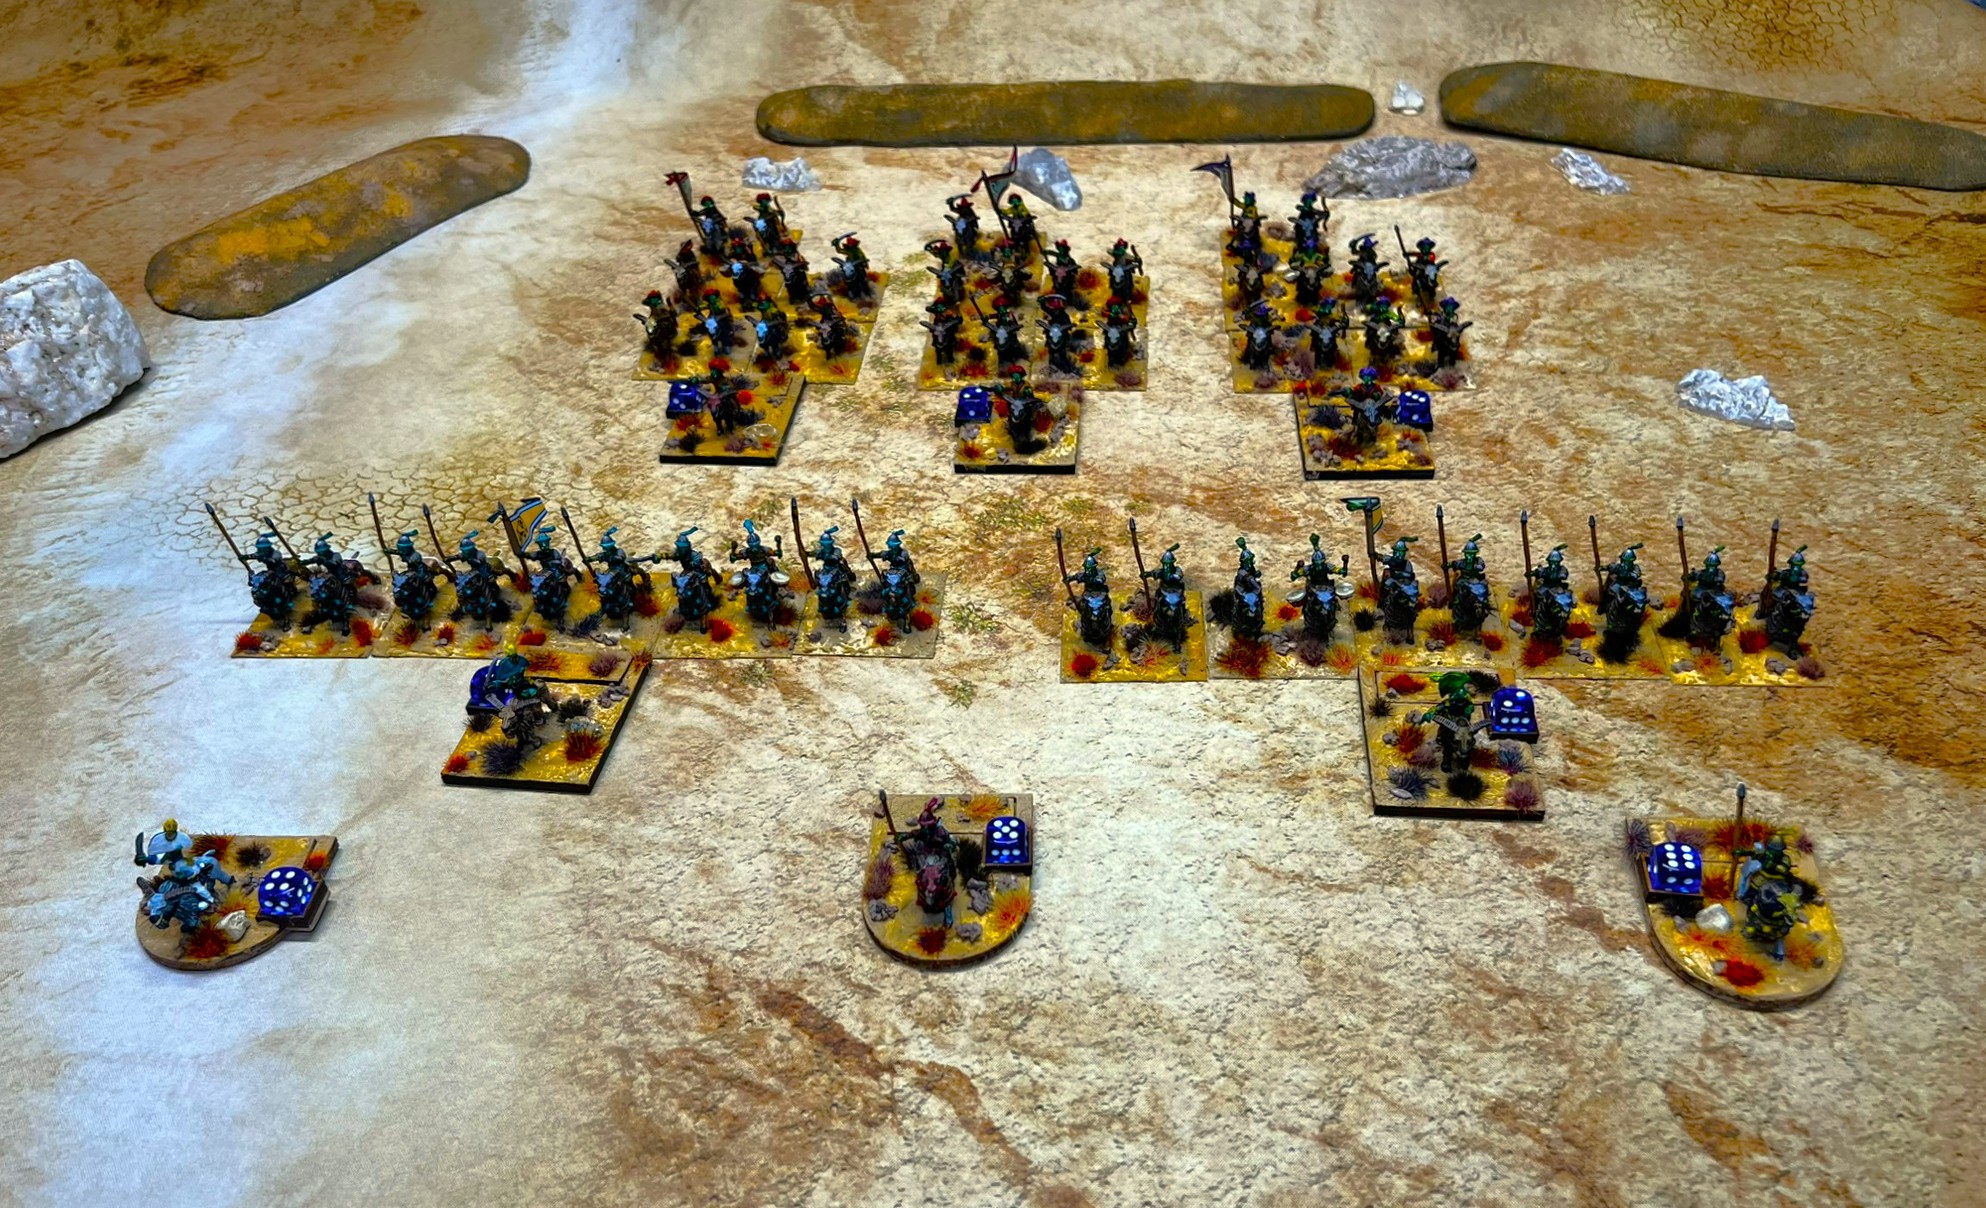
This Saturday night game was set up to accommodate 8 players. I only had 4 – so I scaled it down. The game’s objective was control of a single oasis. The contestants were a Temujican Brigade and a Gillikin brigade versus 2 Whim Whim brigades.
Brad moves his Whim Whim up, while teammate Mark and opponents Mike and Richard watch.The game became a mini-slugfest. In the end, the Temujican/Gillikins controlled the oasis for the win!
The HAVOC XXXIX Wars of Ozz Tournament
This was the final game of the convention.
At this tournament, players will be tested to see who is the best general in the Wars of Ozz. This is a playoff of evenly-valued brigades. This will be fast-paced. New players and old are welcome – but experience is a BIG plus – and there will be glory for the winner (and possibly prizes)! Do you have what it takes? Find out!
I can accommodate 8 players here, but only had 5. Each gets a 21-22 point brigade from a different faction at random. Each enemy base taken out is worth a point, with routed ones being worth half a point.
So based on a die roll, 4 players went into round one with 1 player getting a bye.
Each round lasted two turns. The winners in round one were the top three brigades so 1 player was eliminated. The player with the bye would face the strongest survivor from round 1. Bases would be made even in that match. Round two would reduce 4 players to just 2 players for the final championship. Lost bases would be lost forever and not make it into subsequent rounds.
The tournament begins!
Here is a video of the set up (not all brigades were used as described previously):
Pollywomps (Gregg) versus Gillikins (Eric). Gregg defeats Eric.
Gillikins (Rich) versus Nitpik (Brad). Rich defeats Brad.
Bye – Ken (Winkies)
After round 1, Rich graciously asked Brad to command his Gillikins in Round 2. Gregg and Eric were left to a rematch with their damaged units. However, Gregg was able to raise a number of Undead units with his spellcasters to offset his losses.
In Round 2, the match ups were:
Pollywomps (Gregg) versus Gillikins (Eric). Gregg defeats Eric again.
Gillikins (Brad) versus Winkies (Ken). Ken defeats Brad.
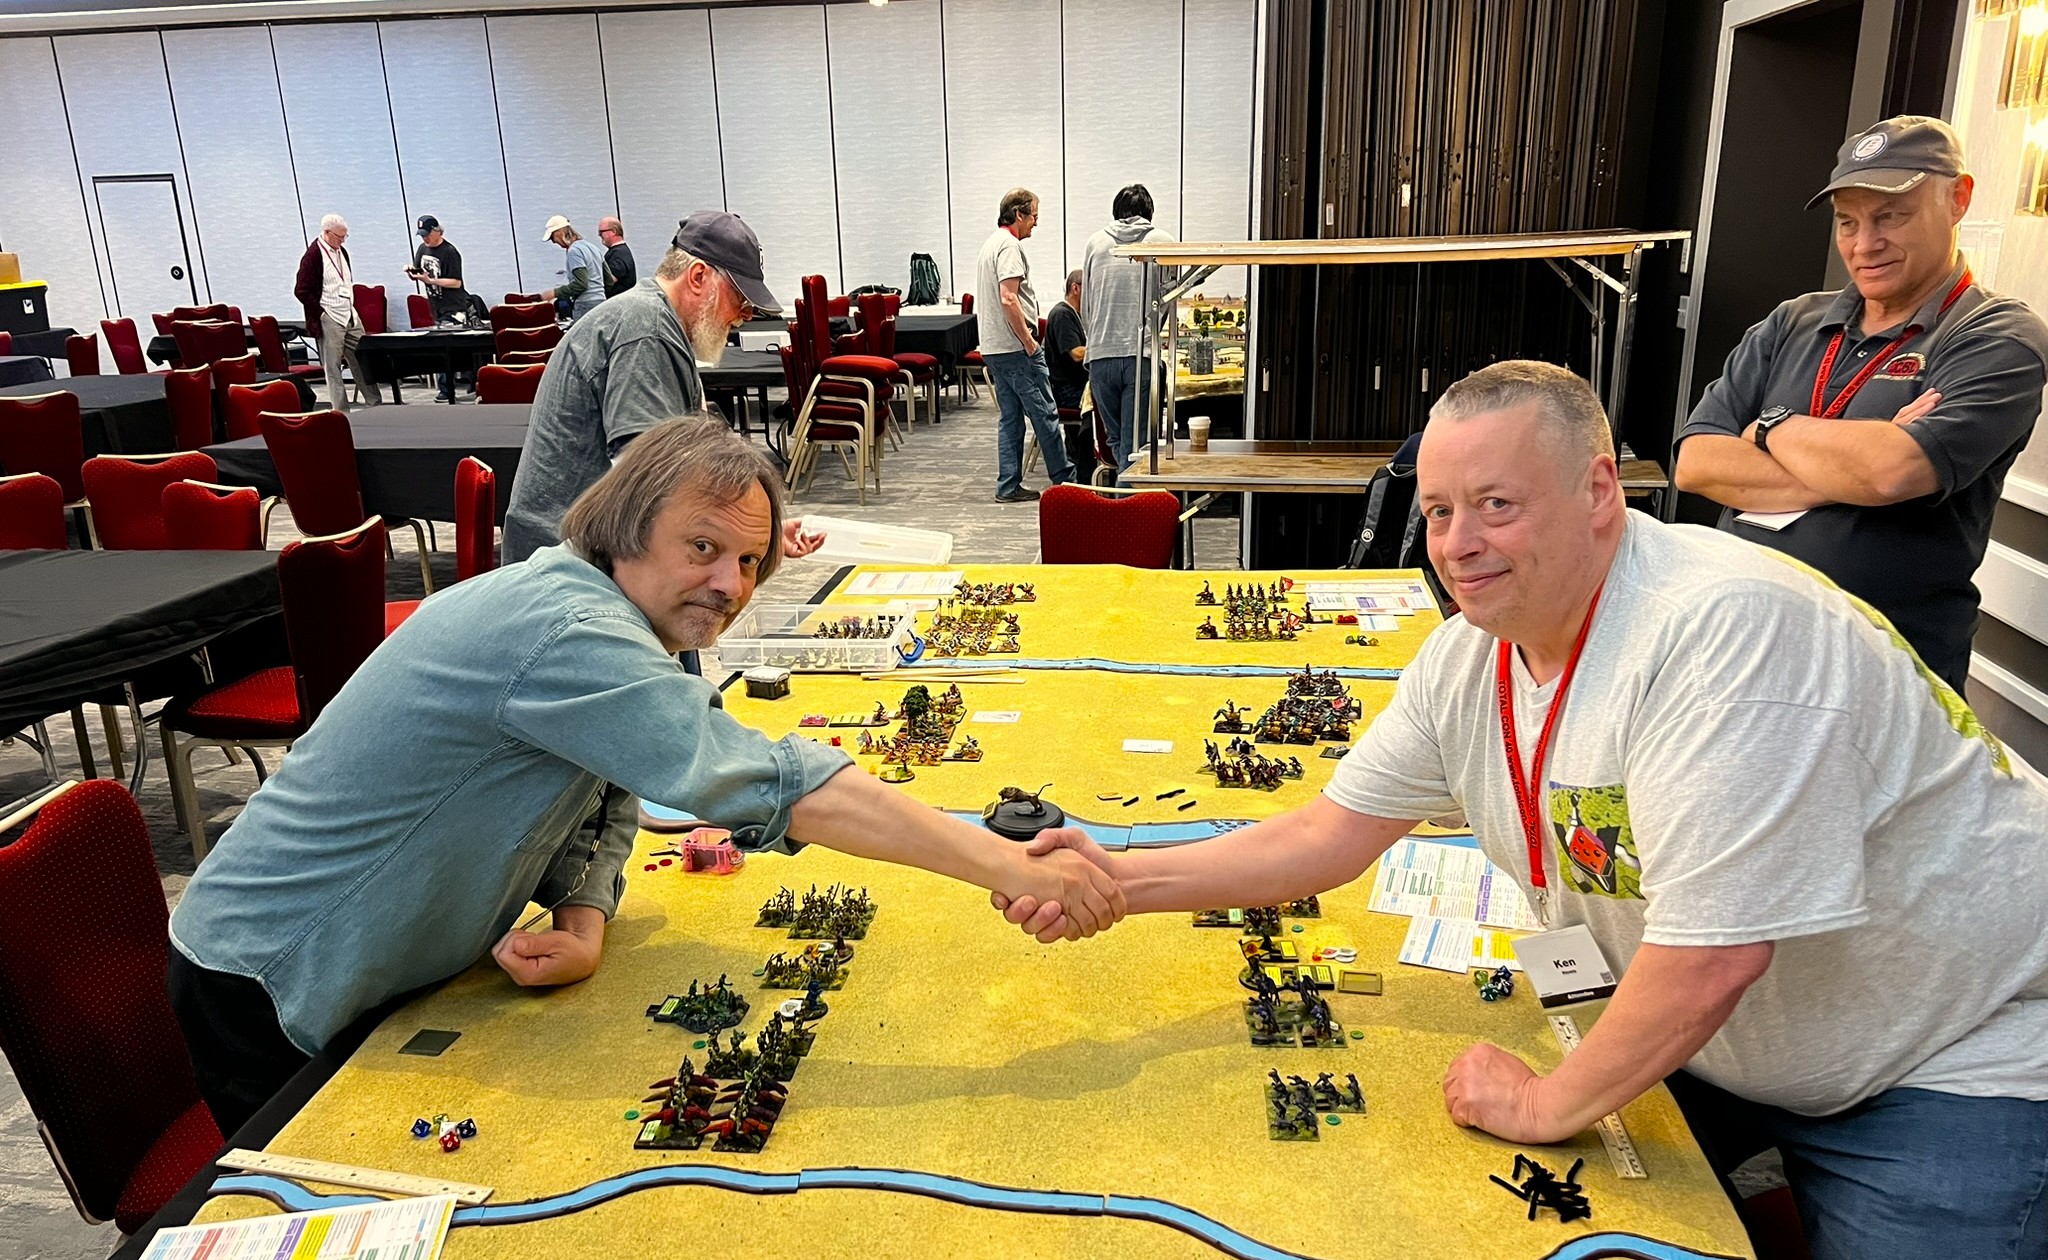
This set up the final round between Gregg’s Pollywomps and Ken’s Winkies – to the DEATH.
After a tough fight, Gregg’s Pollywomps came out on top! Congrats!
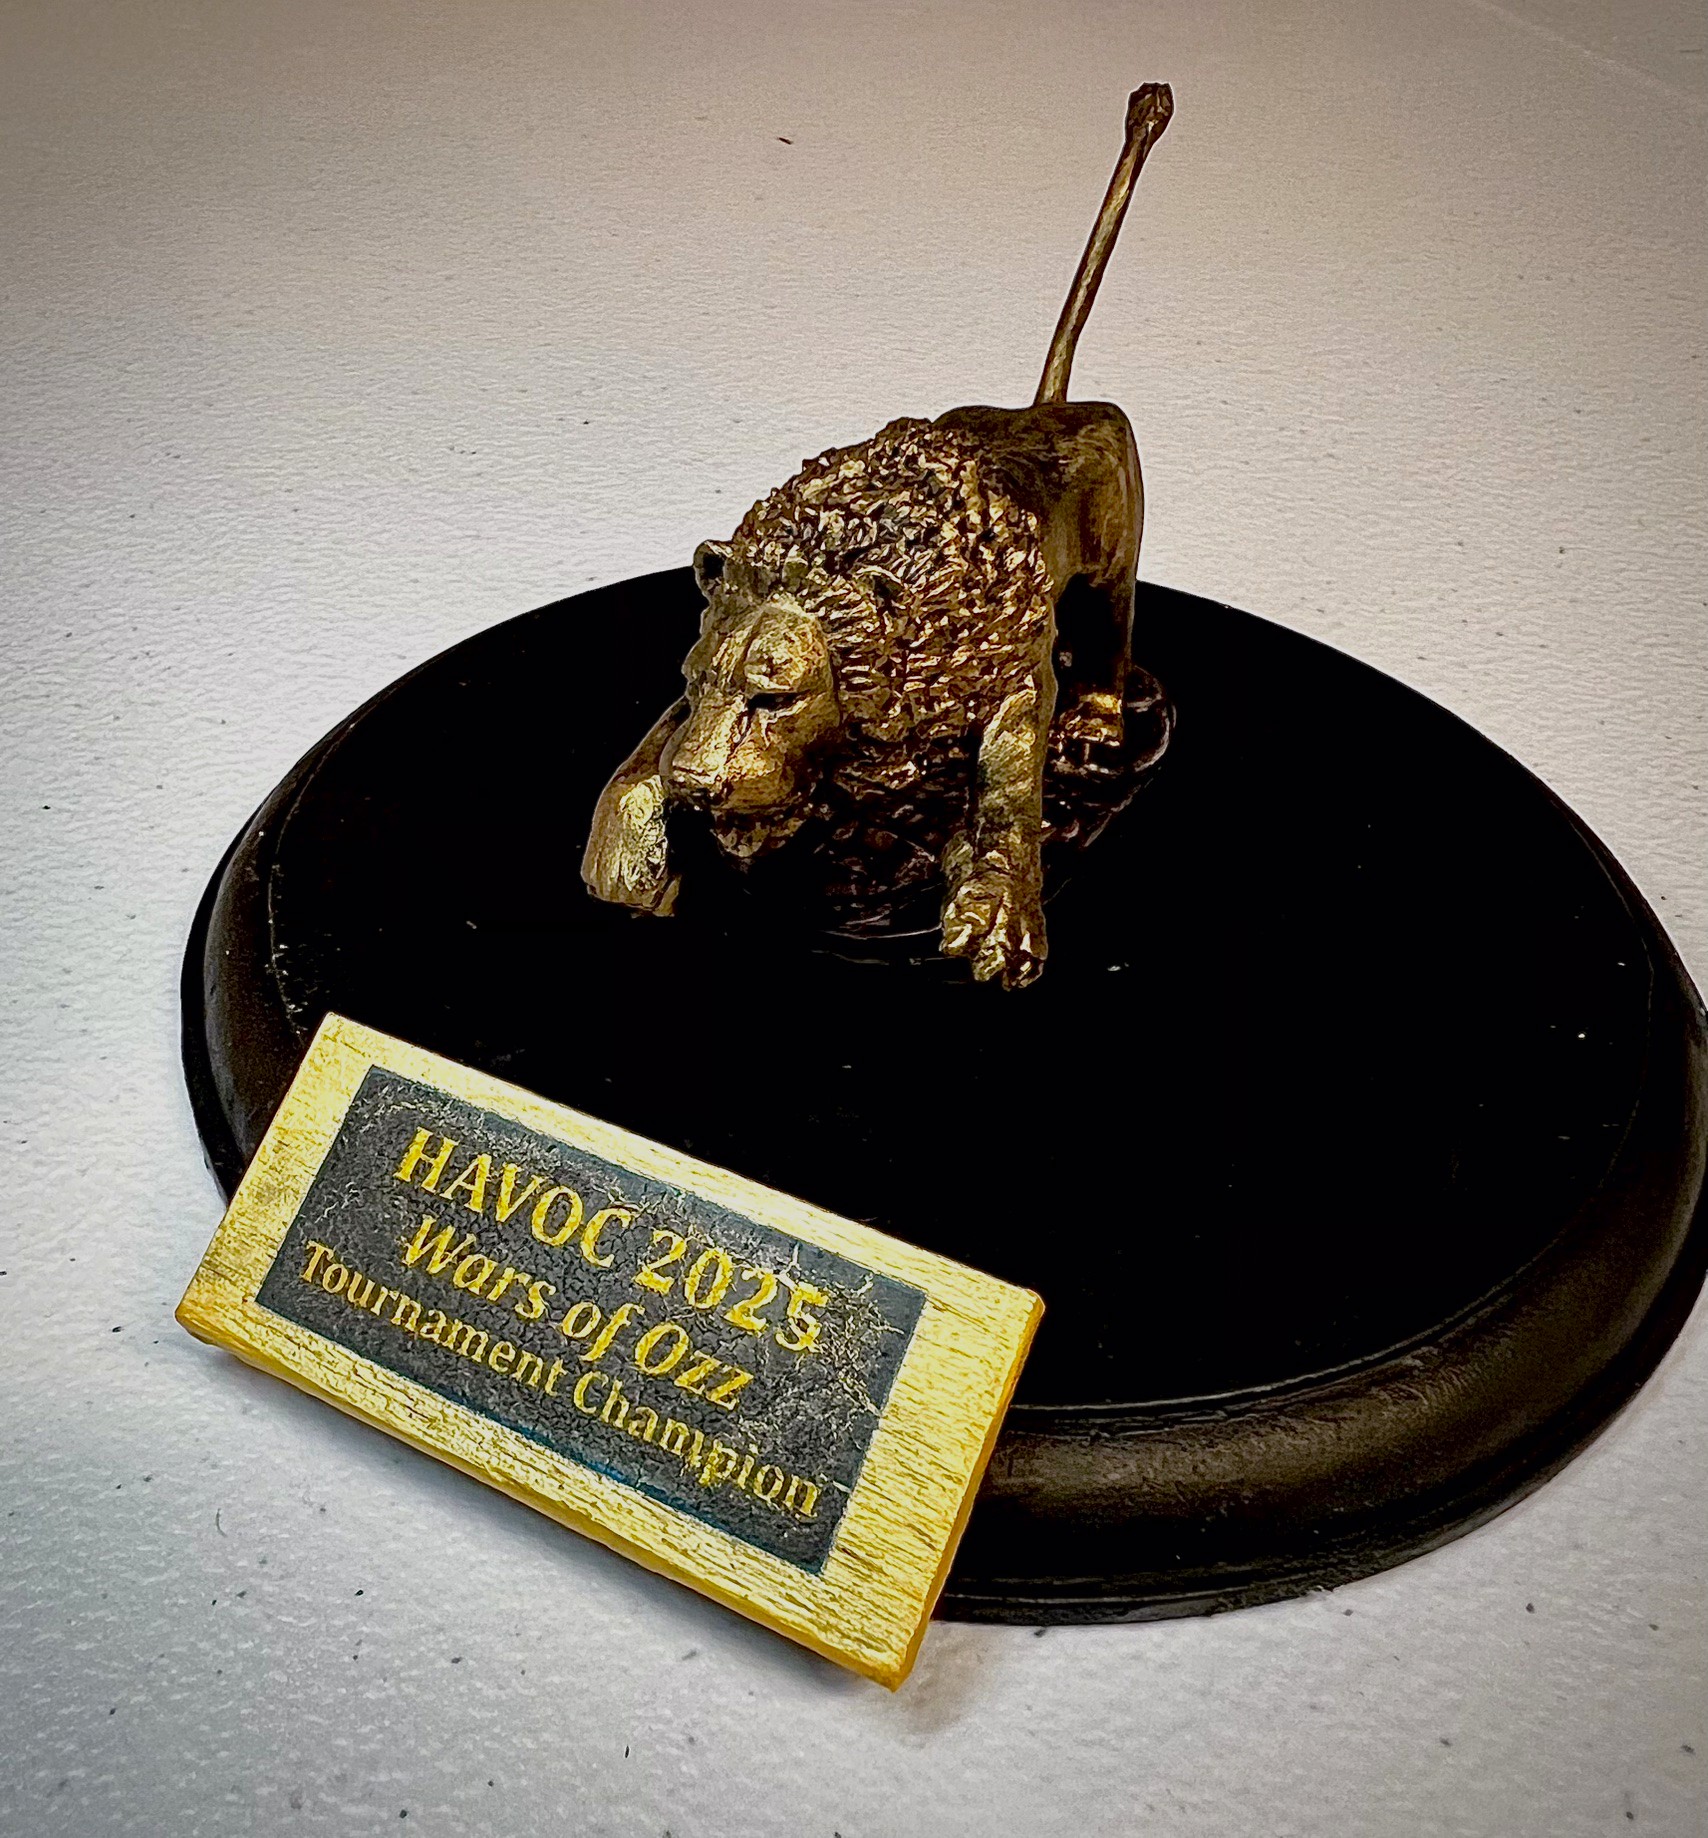
To the VICTOR! Gregg received the trophy – which I had made with a Dire Lion figure donation from Russ Dunaway!Gregg’s winning prize!
As a side note, there will be similar prizes awarded at HUZZAH 2025.
Thanks to all at Battle Group Boston for a great event and to Russ Dunaway for his support. Thanks to ALL the players.
Special thanks to Brad Gosselin for being an outstanding wingman for the ENTIRE convention…you rock buddy!!
Next up is MAYHEM, where some of these games will be run – then HUZZAH!
Thanks for looking – and feel free to share this post and or comment!
Miscellaneous details and references for those interested in that sort of thing:
For my earlier posts on Wars of Ozz games, view this page. It includes figures, units, and other related projects.
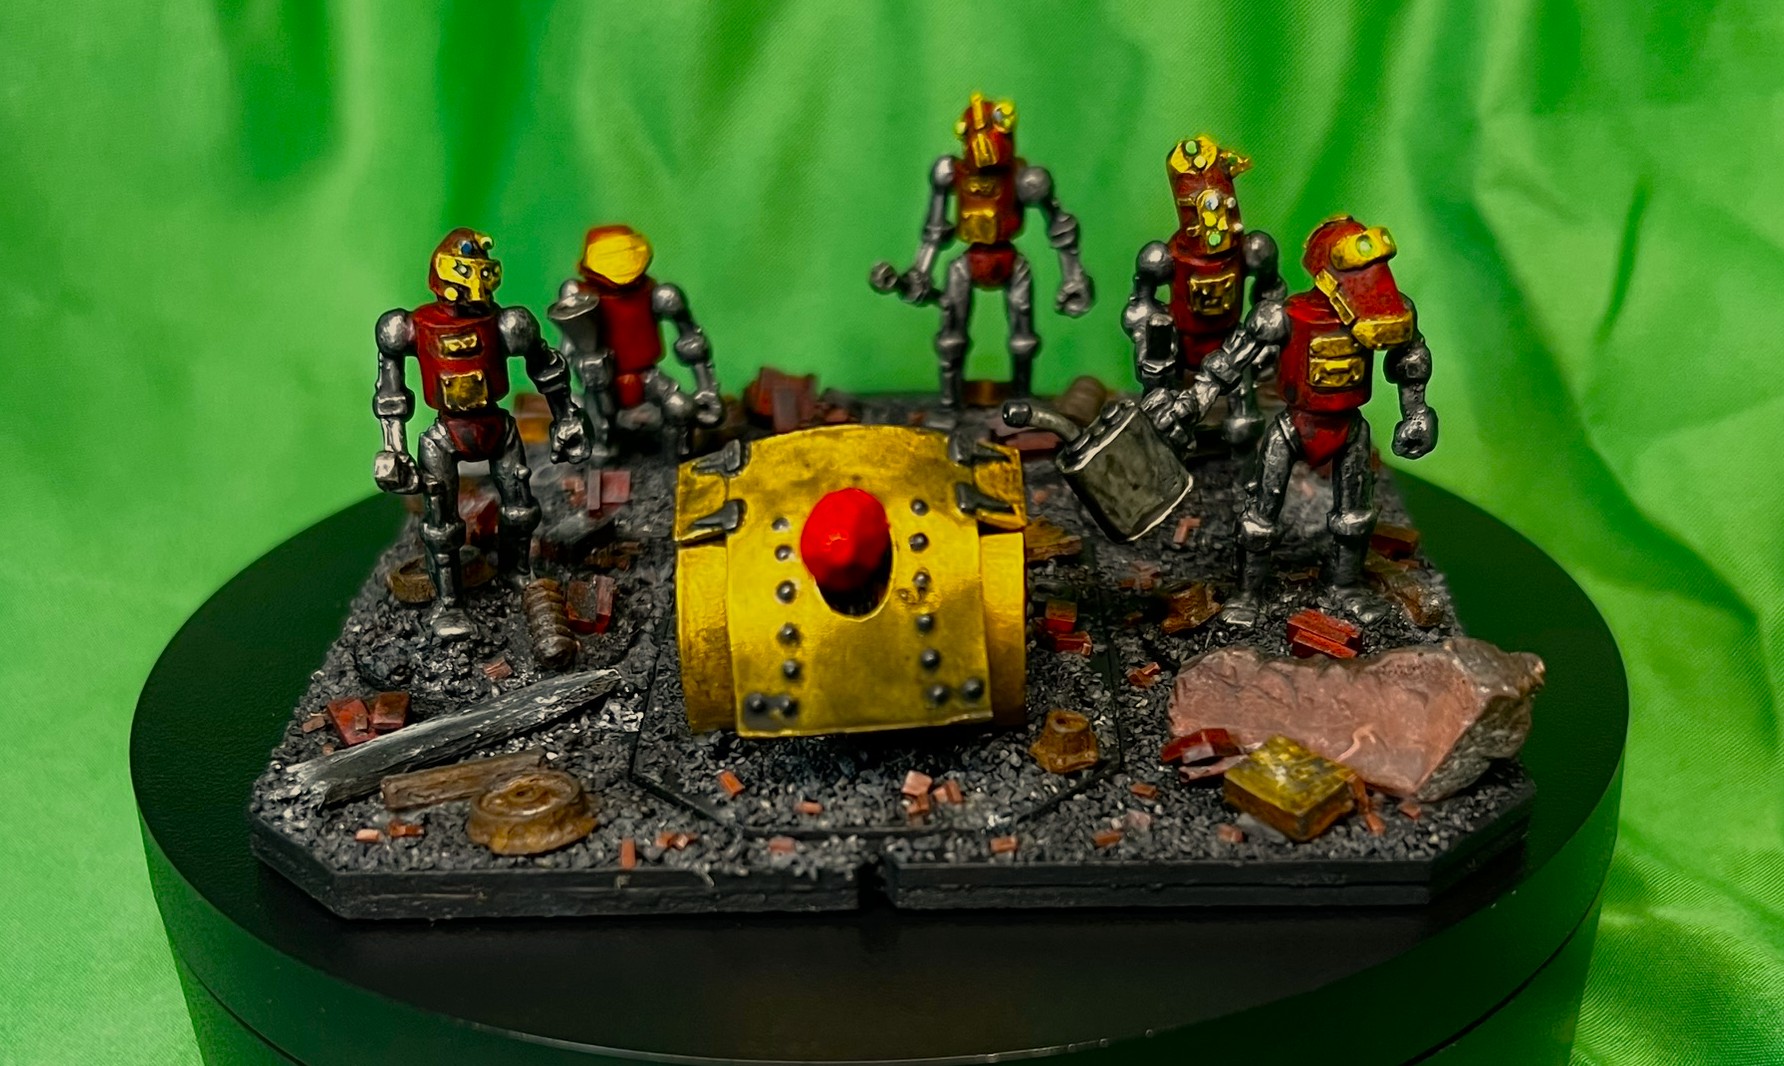
Artillery for the forces of Professor Nitpik’s Mechanical army!
This medium artillery battery will play a prominent role in my Wars of Ozz games. It will be featured in upcoming gaming conventions (HAVOC, MAYHEM, and HUZZAH). The artillery battery consists of 6 crewmen and the gun. It is 28mm and metal, SKU OZZ-541. Assembly was required for the gun and to attach the mechanical men’s heads.
Amazingly, this unit for the army of Professor Nitpik is personally significant. It marks that I have now painted 1,000 figures for Wars of Ozz. I started back in November 2022 with Zoraster’s Guard Infantry. What a journey!
In my last post you saw my cavalry additions. I already had painted up an infantry unit of axemen before Nitpik had his own faction. So, artillery was the next logical addition.
This post will be brief. I did not take as many photos as I normally would. I am trying to shorten my posts going forward. I said “trying”.
Conventions beckon so time was short.
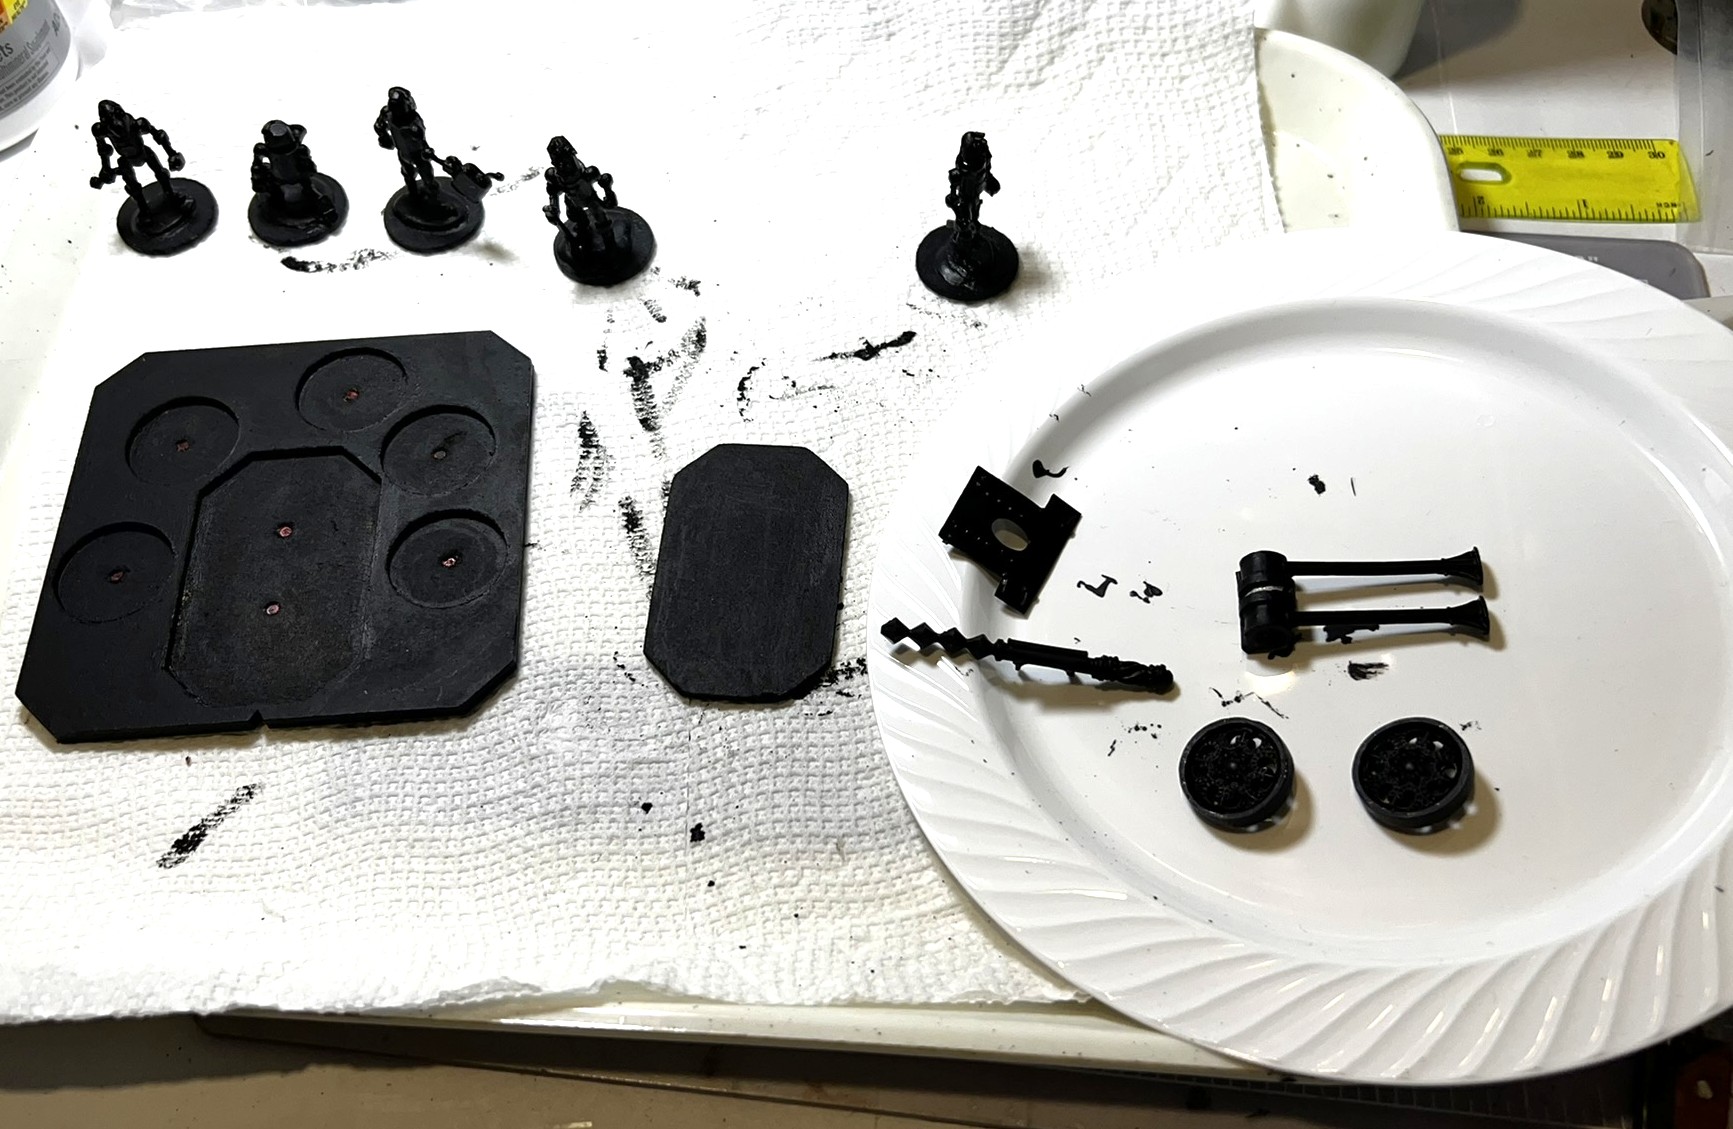
The pieces of the battery filed and washed.I primed everything in black to include the MDF sabot base.
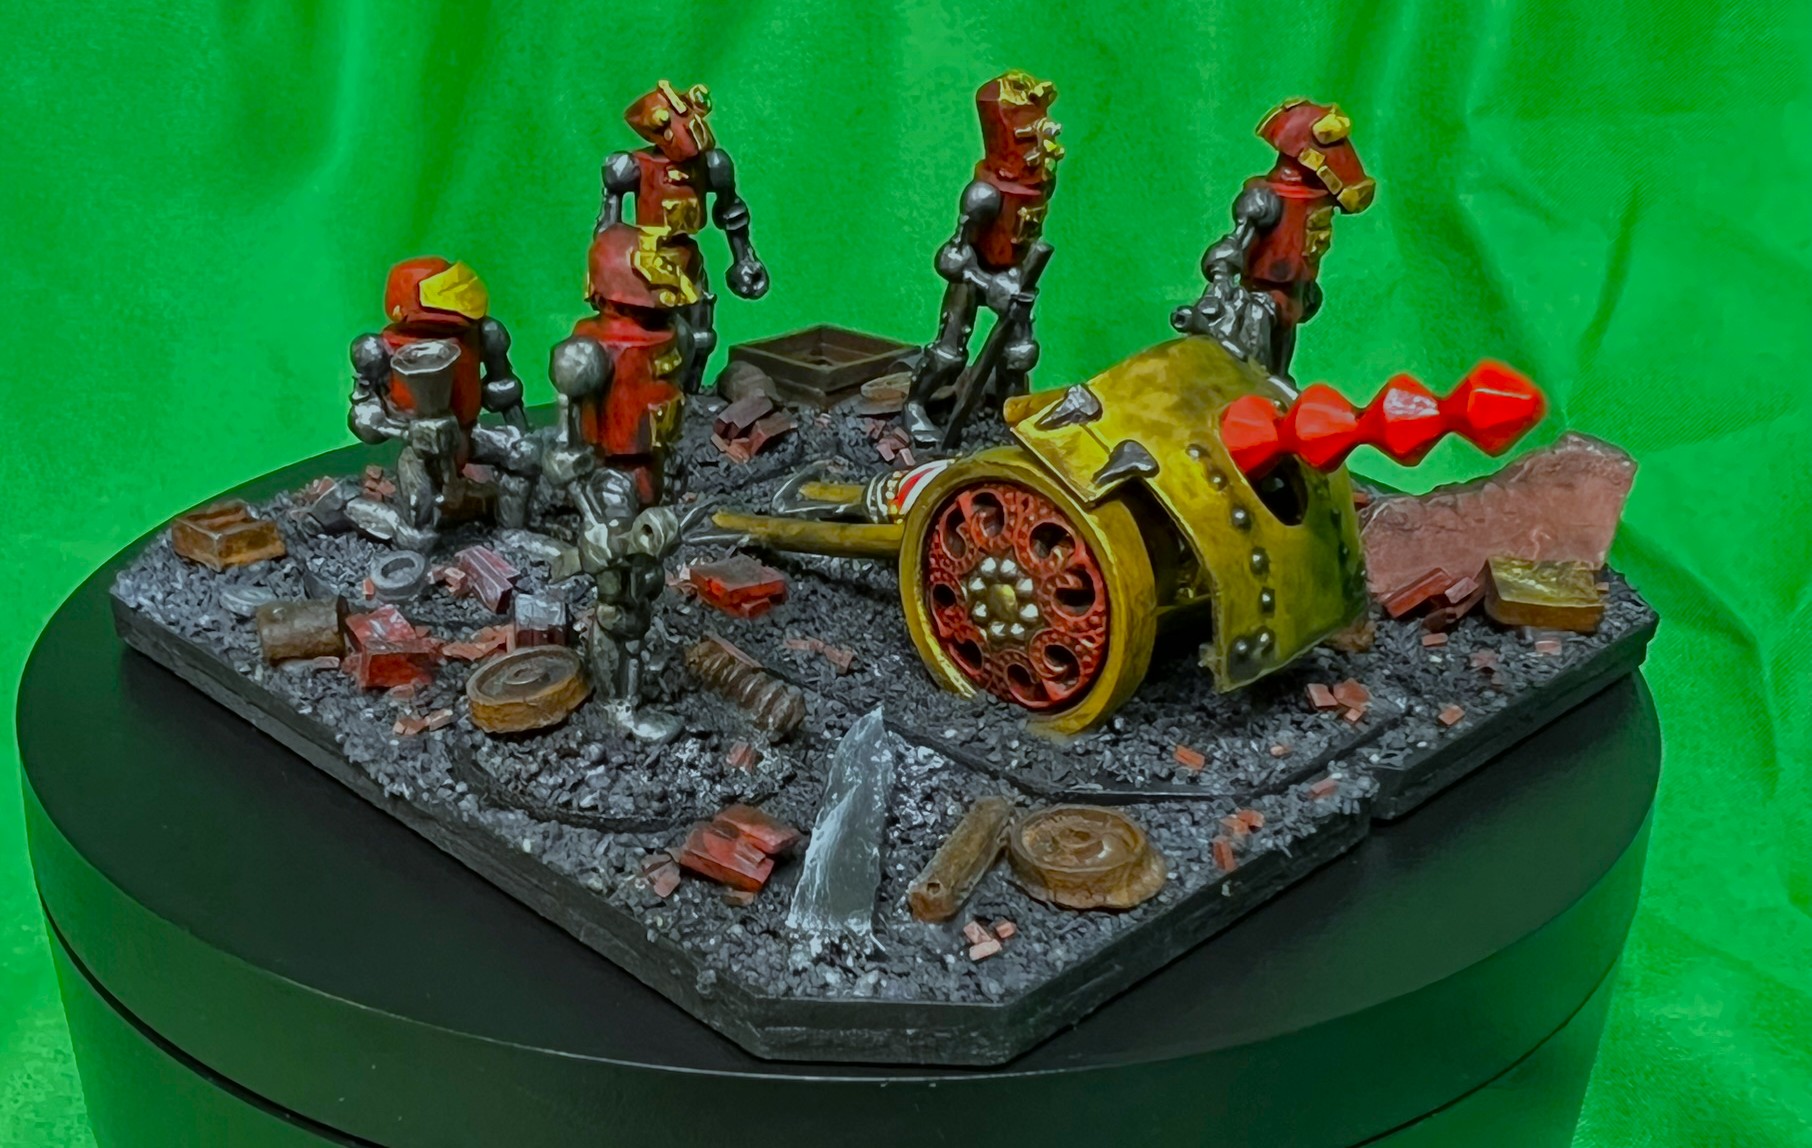
The gun came with a gun shield. The shield was perfectly flat, but thin and malleable. It looked to me less like a black powder-era weapon. It resembled more an anti-tank gun like a WWII German Pak 38. So, with that inspiration, I shaped it to be curved as well.
I added a lot of rubble pieces to the sabot base. I also used pigments and washes to create a sooty and oily look. As with Nitpik’s cavalry, I used pearlized red and copper airbrush paints here.
Below are shots of the battery. In the end, I think I achieved a retro sci-fi/”Iron Man” look to the unit. I may continue this theme for future Nitpik units. All of the “eyes” were painted with fluorescent paints – though that might not be so obvious in the photos.
Here is a video for your viewing pleasure:
OZZ-541
I hope you enjoyed this post. Next up (after conventions), will be more of this faction. Plus…I have a plan for a new WWII tank project…
Final Notes and Links
Want to learn more about Ozz? If you want to check out the excellent Wars of Ozz figures’ range, there are two places to get them. You can also get the rules there. (I make no money from this.) The game rules and the figures are available from the next two places:
Below you’ll see the list of paints and the like that I used on this project. They are more useful for me when I need to recreate a color scheme in the future. They are not likely as useful for you as they are for me. I have had to refer back to a post more than once. This happens when I need to recreate a color theme. It also happens when I need to repair a unit. In any case, that’s why I post the lists.
Miscellaneous details and references for those interested in that sort of thing:
For my earlier posts on Wars of Ozz games, view this page. It includes figures, units, and other related projects.
PAINTS, INKS, GLAZES, SHADES, WASHES, PIGMENTS, FLOCKING, GLUES AND MORE THAT I USED ON THIS NITPIK MEDIUM ARTILLERY BATTERY:
PVA Glue
MDF Base
War Games Accessories Steel Bases (FOW1)
1/8″ neodymium magnets
Gorilla Glue
Vallejo Surface Primer “Black”
War Games Accessories Steel Bases (Number 1)
Alligator clips and stands
Poster tack
Specimen jars
Createx Wicked Colors “Pearl Red”
Createx Wicked Colors “High Performance Reducer”
ComArt “Opaque Carmine”
Createx Airbrush Colors “Pearl Copper”
Tamiya “Titanium Silver X-32”
Vallejo Model Air “Gun Metal”
Tamiya “Chrome Silver X-11”
Vallejo Model Air “Black Metallic”
Vallejo Model Color “Off White”
Army Painter Warpaints Fanatics Effects “Data System Glow” (effect)
Army Painter Warpaints Fanatics Effects “Neon Yellow” (effect)
Army Painter Warpaints Fanatics Effects “Blue Flux” (effect)
Citadel “Spritstone Red” (technical)
Citadel “Nuln Oil GLOSS” (wash/shade)
Army Painter “Black Battlefields” (flocking)
Juweela 1:35 Debris
Juweela Metal Scrap Rusty
Juweelinis “Diorama Mix” – various metal scrap, tires, bricks
Popsicle stick shards
Vallejo “Carbon Black” (pigment)
Vallejo “Titanium White” (pigment)
Vallejo Acrylic Varnish “Gloss”
Vallejo Flow Improver
Vallejo Thinner
Vallejo Premium Color “Matte Varnish”
Pendraken 12mm dice frame
If you have any questions or feedback – go for it in the “Comments” section!
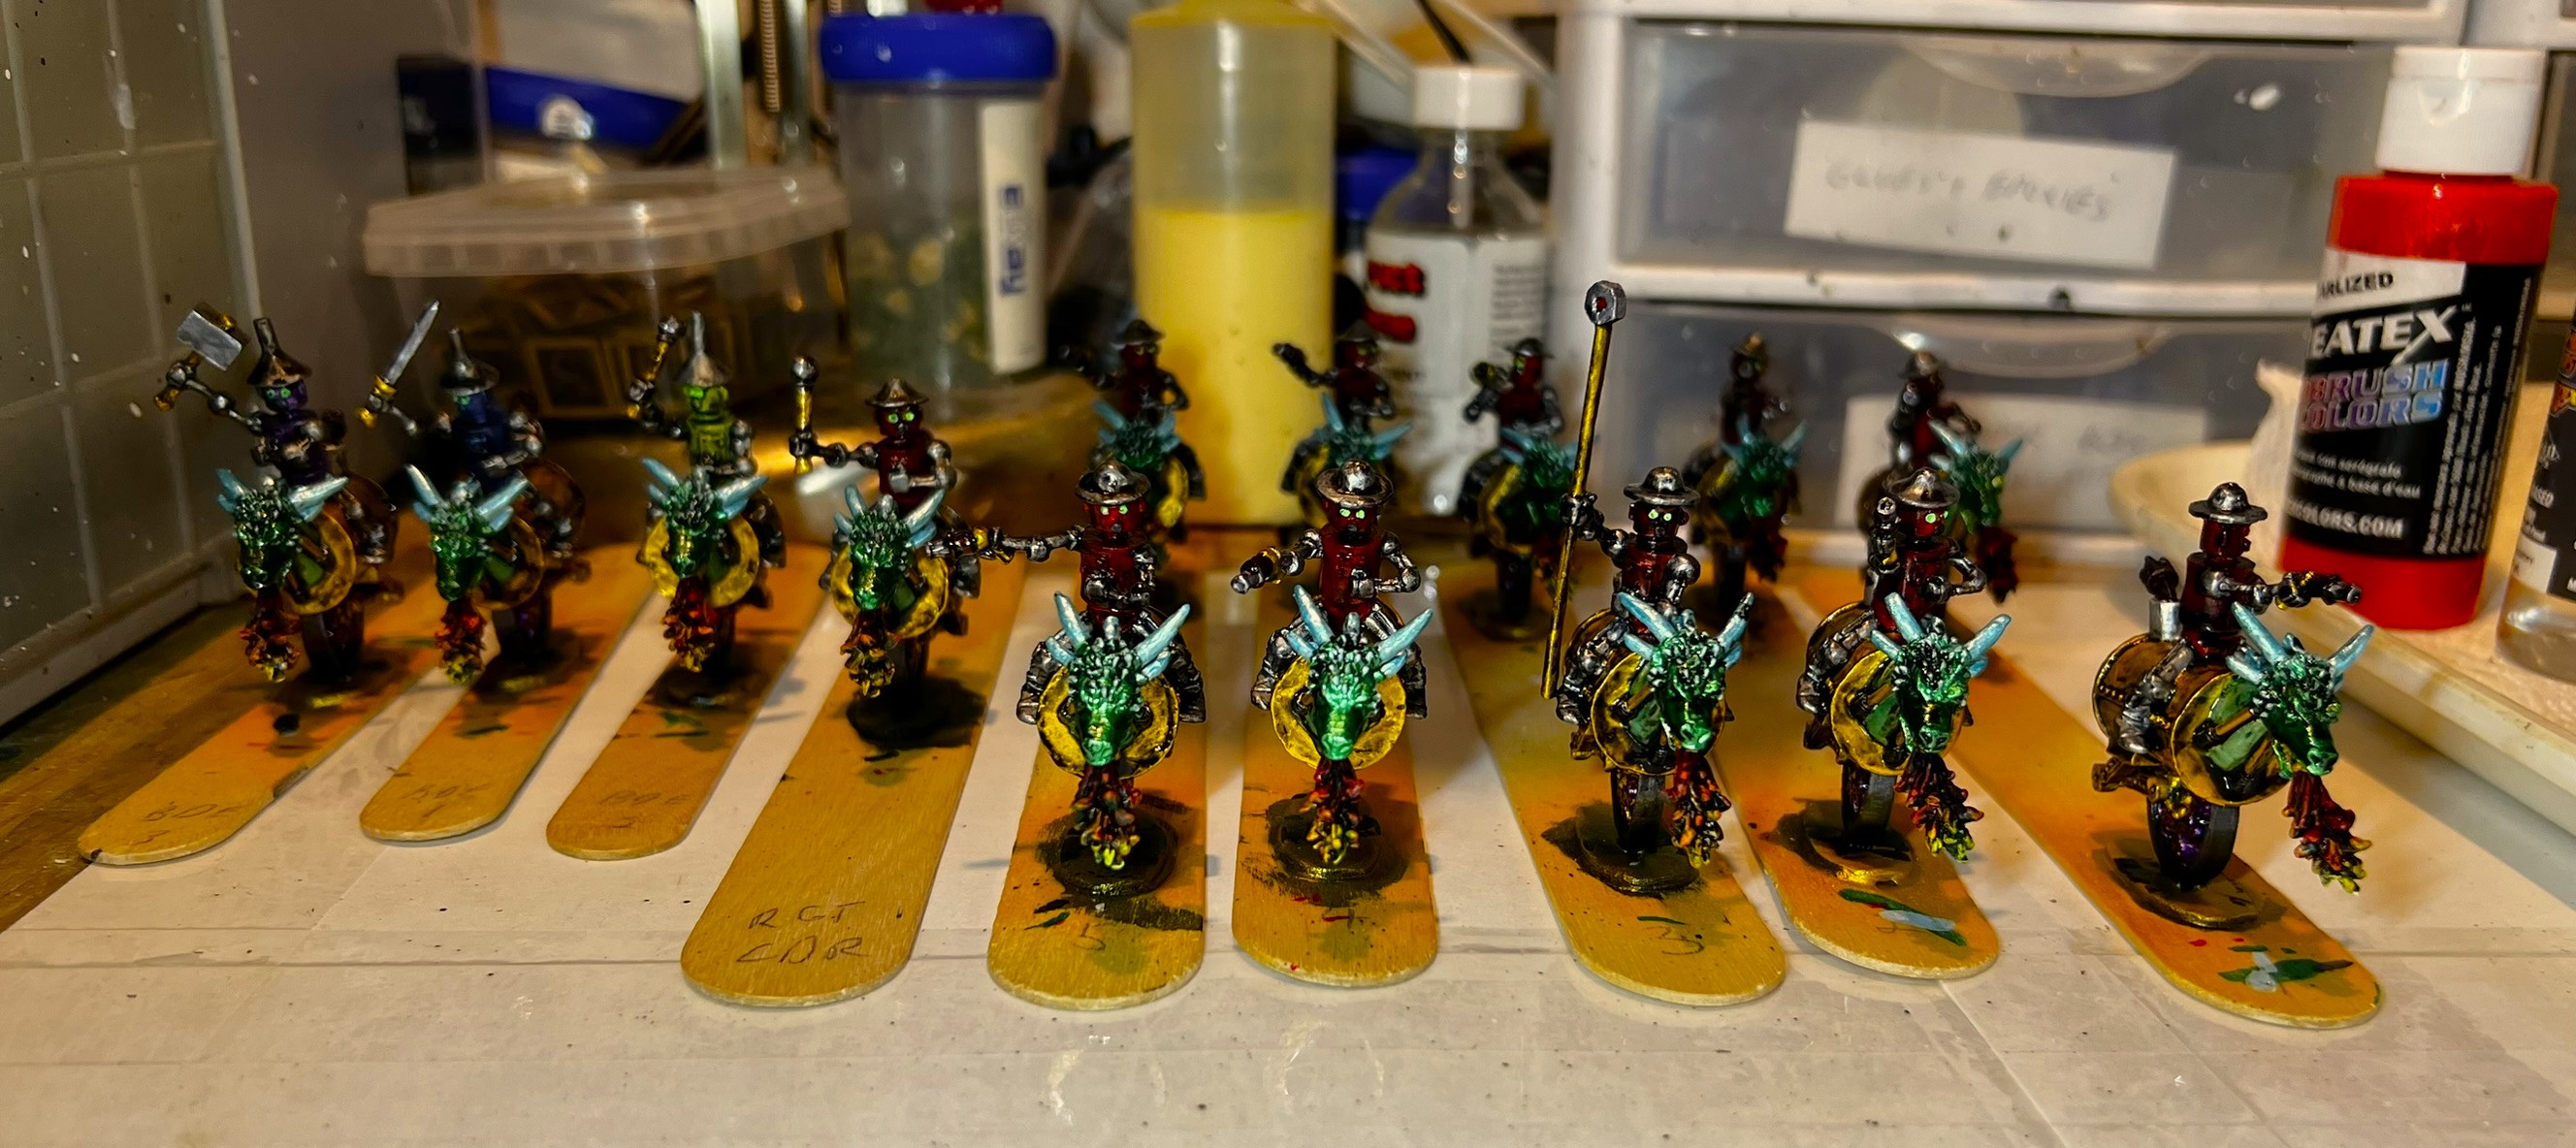
Professor Nitpik is back and has his own Industrial City faction for the Wars of Ozz. I painted up his infantry in 2023. But now he has his own faction with new troops, stats, (and new spelling). Right before TotalCon 39, I finished 11 figures for the cavalry regiment and three brigade commanders.
Interestingly, as a new faction they have a totally new chart with new Resolve and Elan results – to include “Reboot” and “Caracole”. The former makes the mechanical soldiers pause and gives an enemy a free hit on them. The latter results in a cavalry charge that stops short of contact with all figures firing their pistols at the enemy.
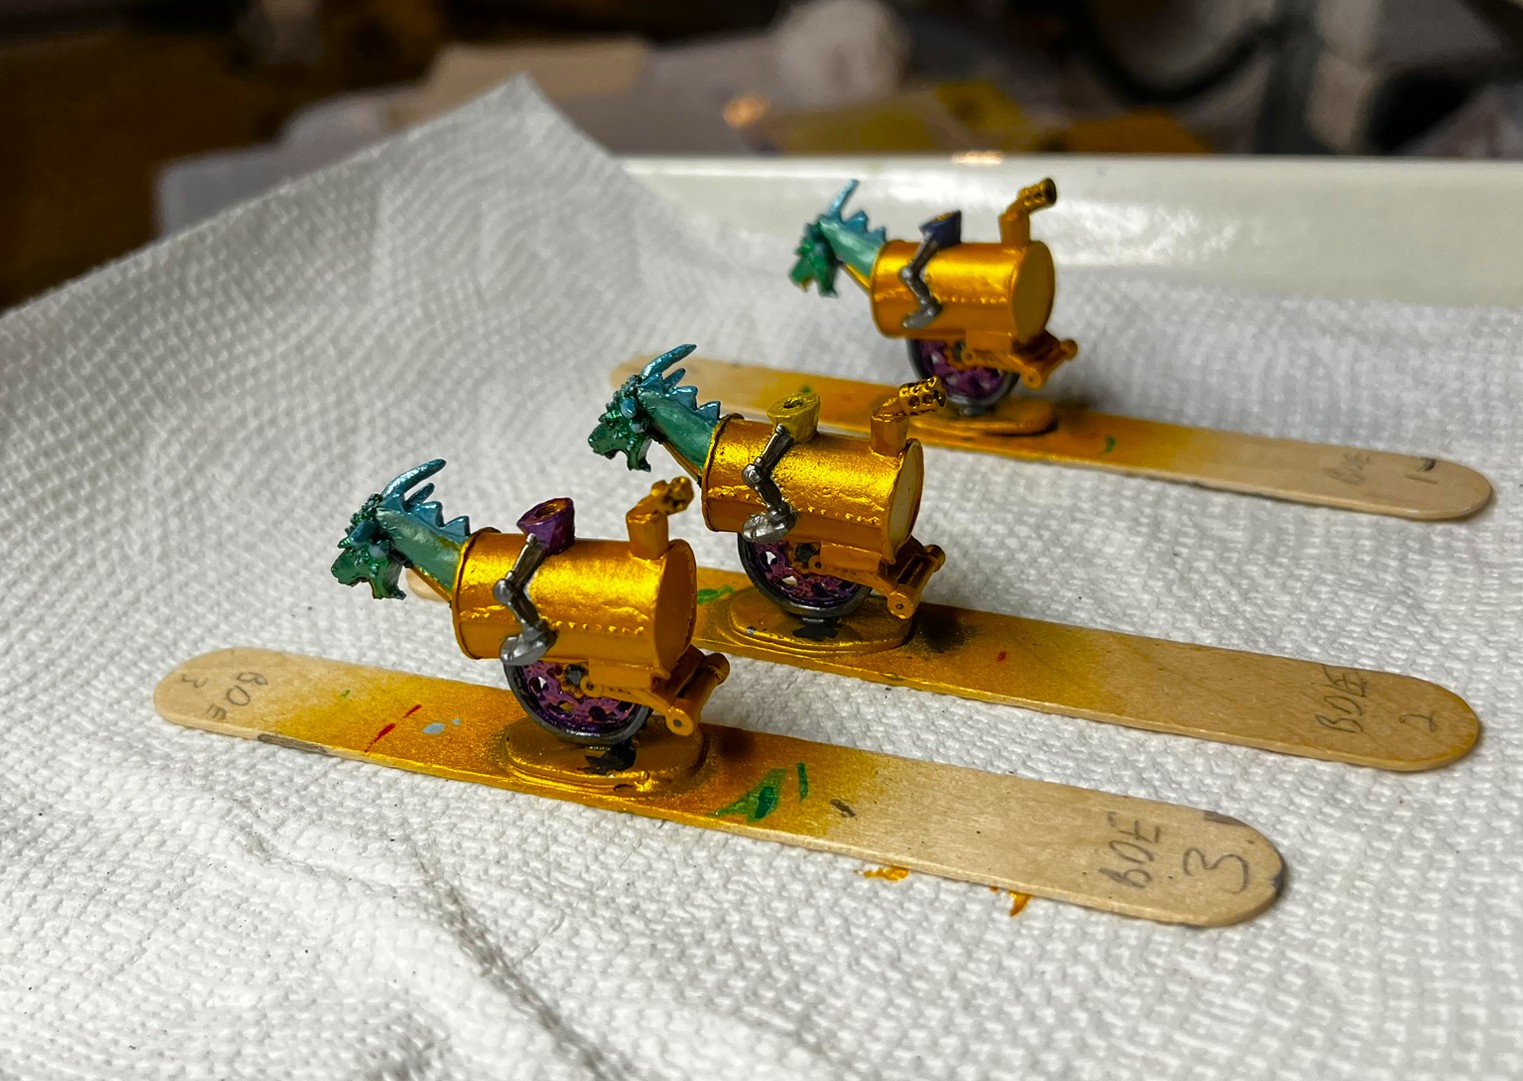
As I have been DEEP into convention prep this month, I am just going to be brief here and show you some WIP and the finished products. For these, I chose a lot of pearlized airbrush and craft paints. I also decided to make them sooty, oily, and grimy over their shiny metal coats.
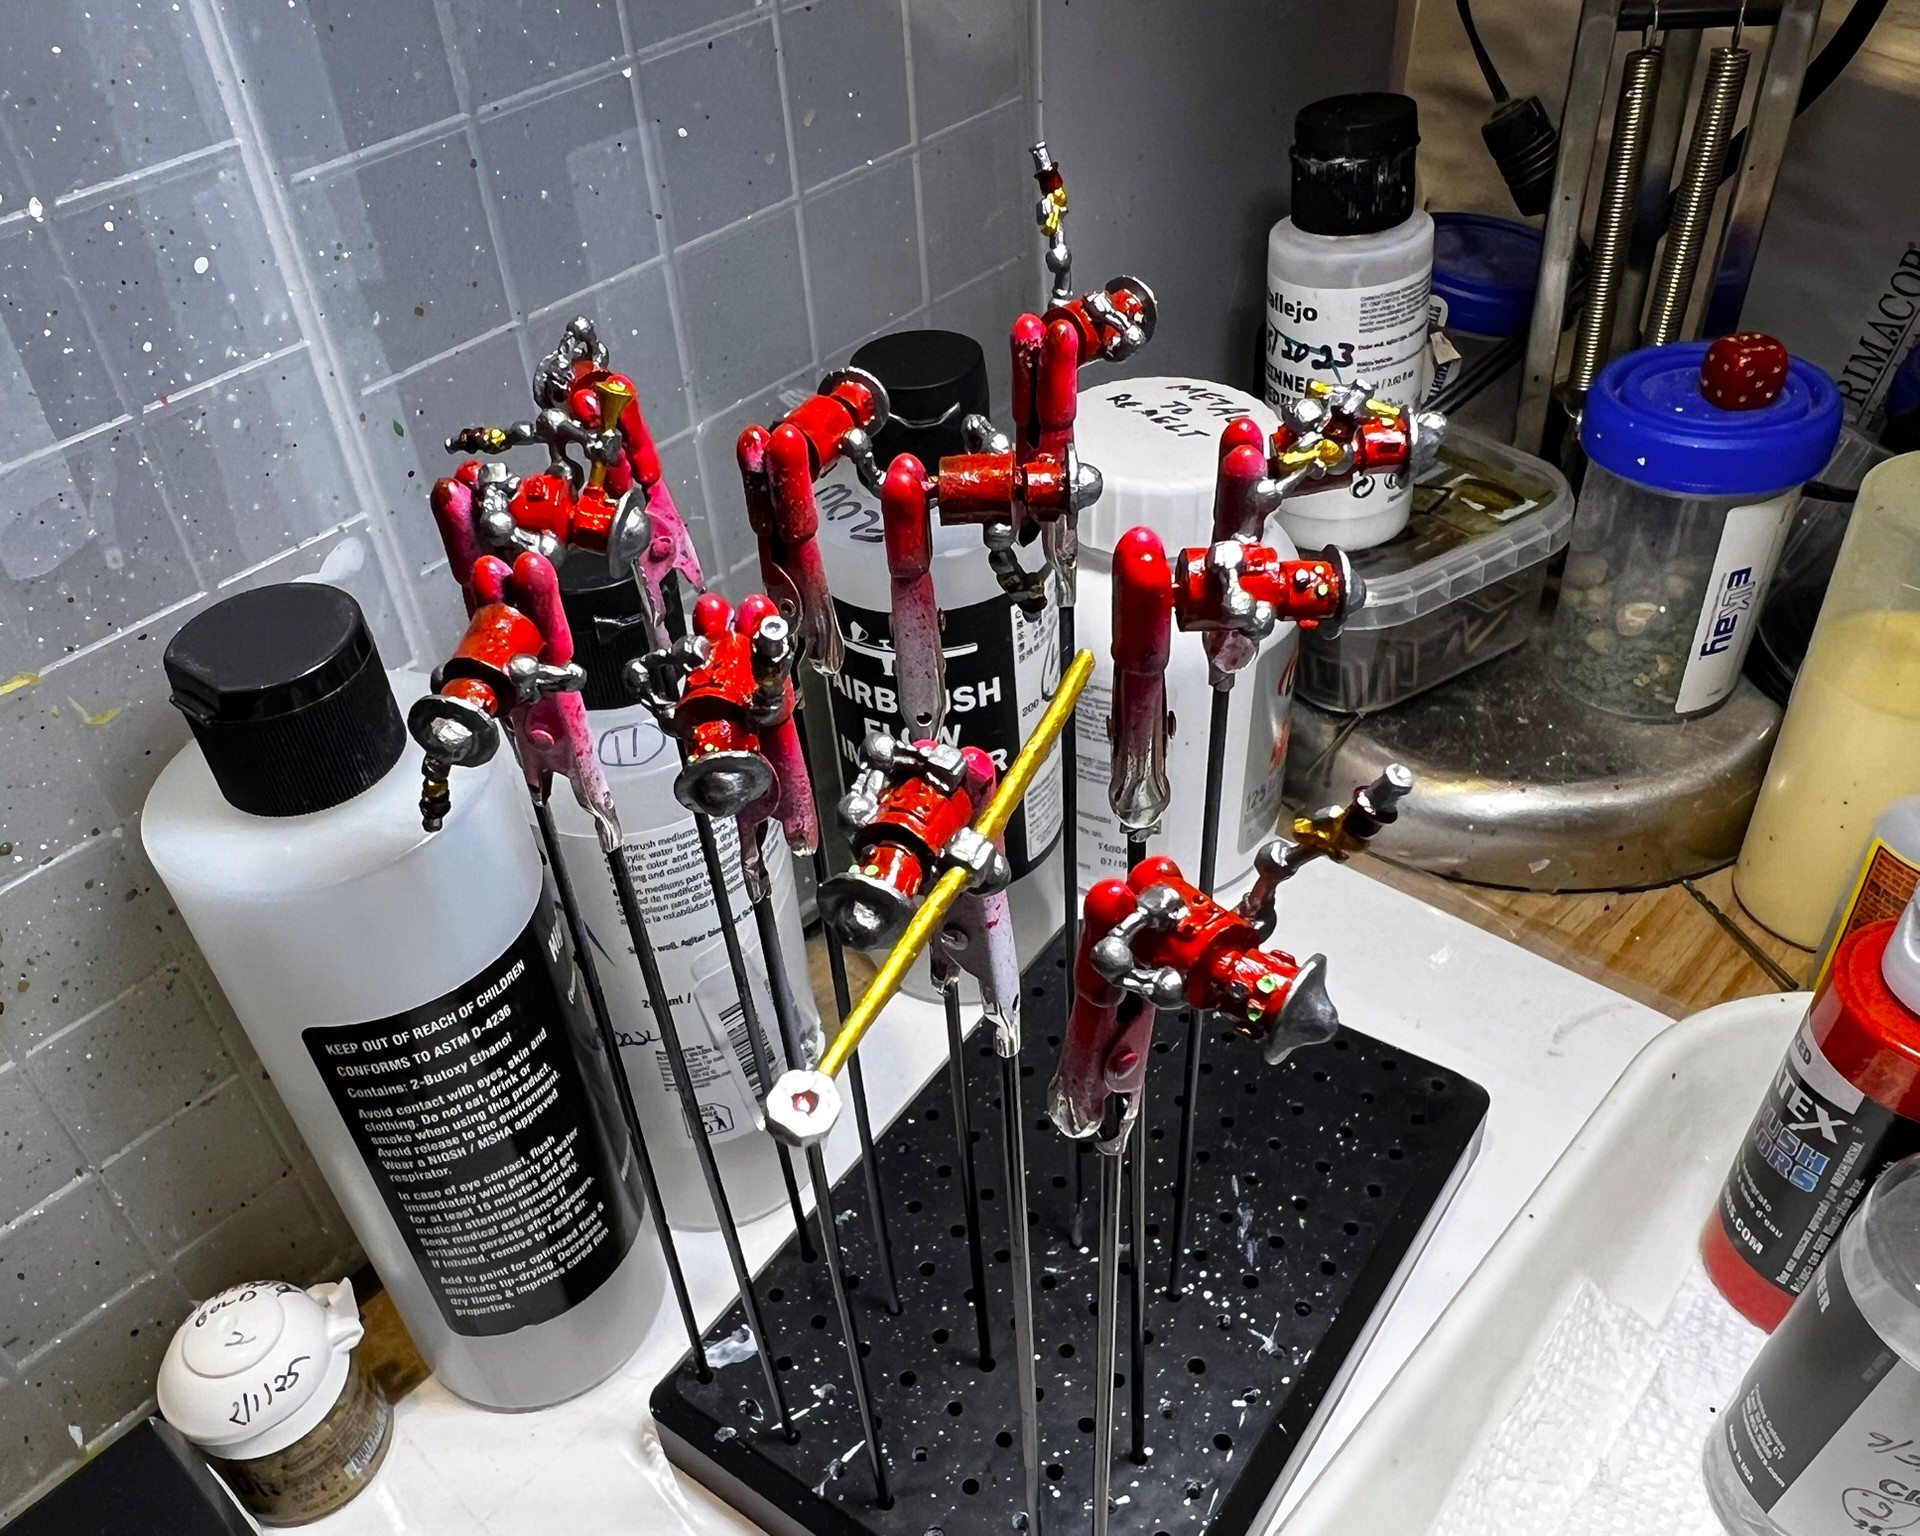
Using my airbrush I applied the pearlized copper as an undercoat over the primer. For the riders, I used a pearlized red. The brigade commander riders got pearlized blue, yellow, and purple paints. The mounts for all were painted identically.
Mechanical Cavalry early on.Brigade Commanders early on.Mechanical cavalry riders in progressFlame breaths and brigade commanders in progress
Next, I added various metallic craft and airbrush paints – mostly also pearlized. Then, I assembled them all.
Below you can see that progress before varnishing. Citadel “Nuln Oil GLOSS” provided a nice spilled/burned diesel sheen. Here are some close ups:
A cavalry trooper before varnishing
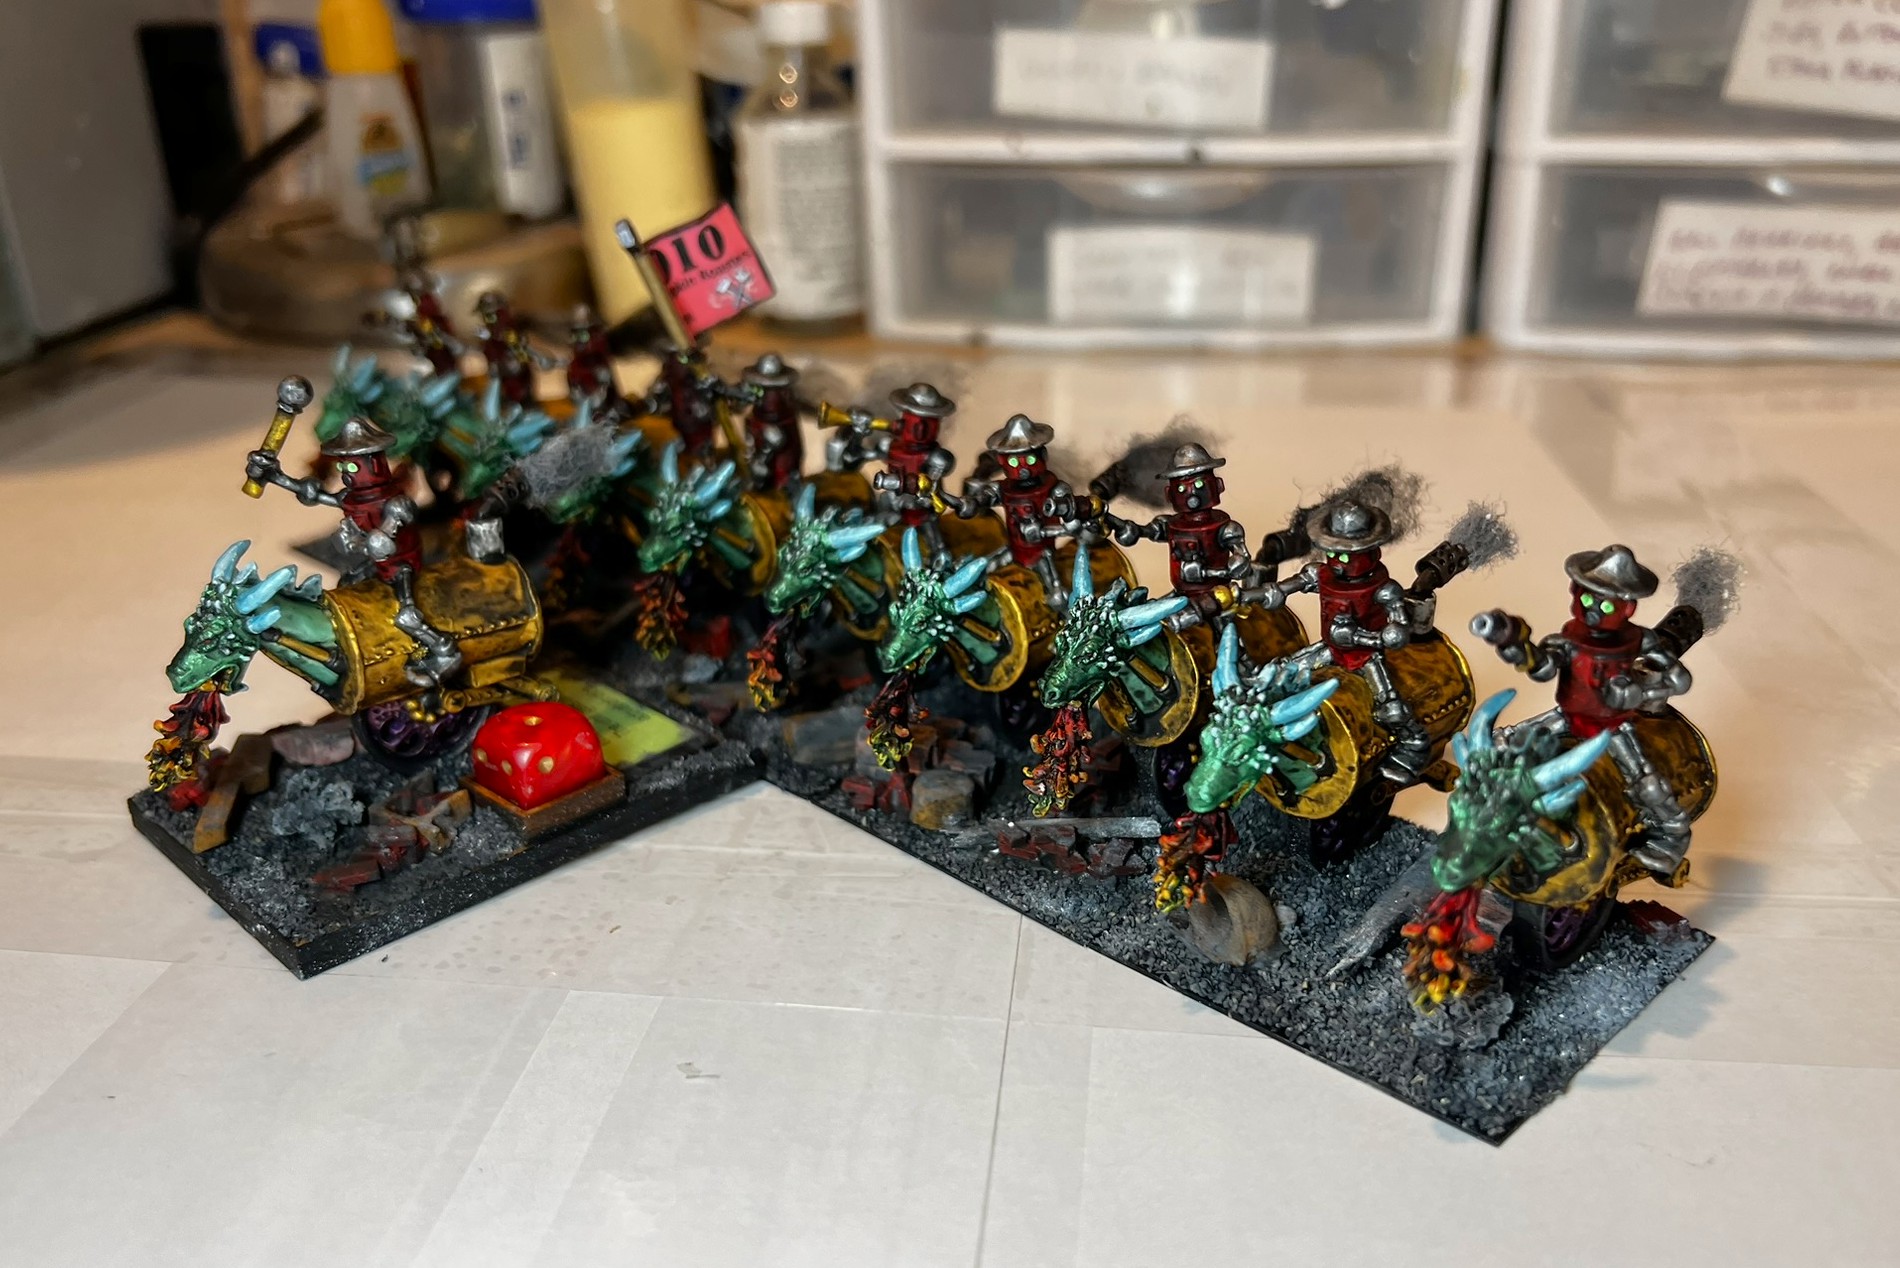
I varnished the figures with a gloss and a matte coating. I mounted the figures on their steel and MDF bases. Then, I added flocking material to “rubble up” the bases. This approach shows the ruins of the Industrial City from where they originated.
I like these railroad diorama rusted pieces.
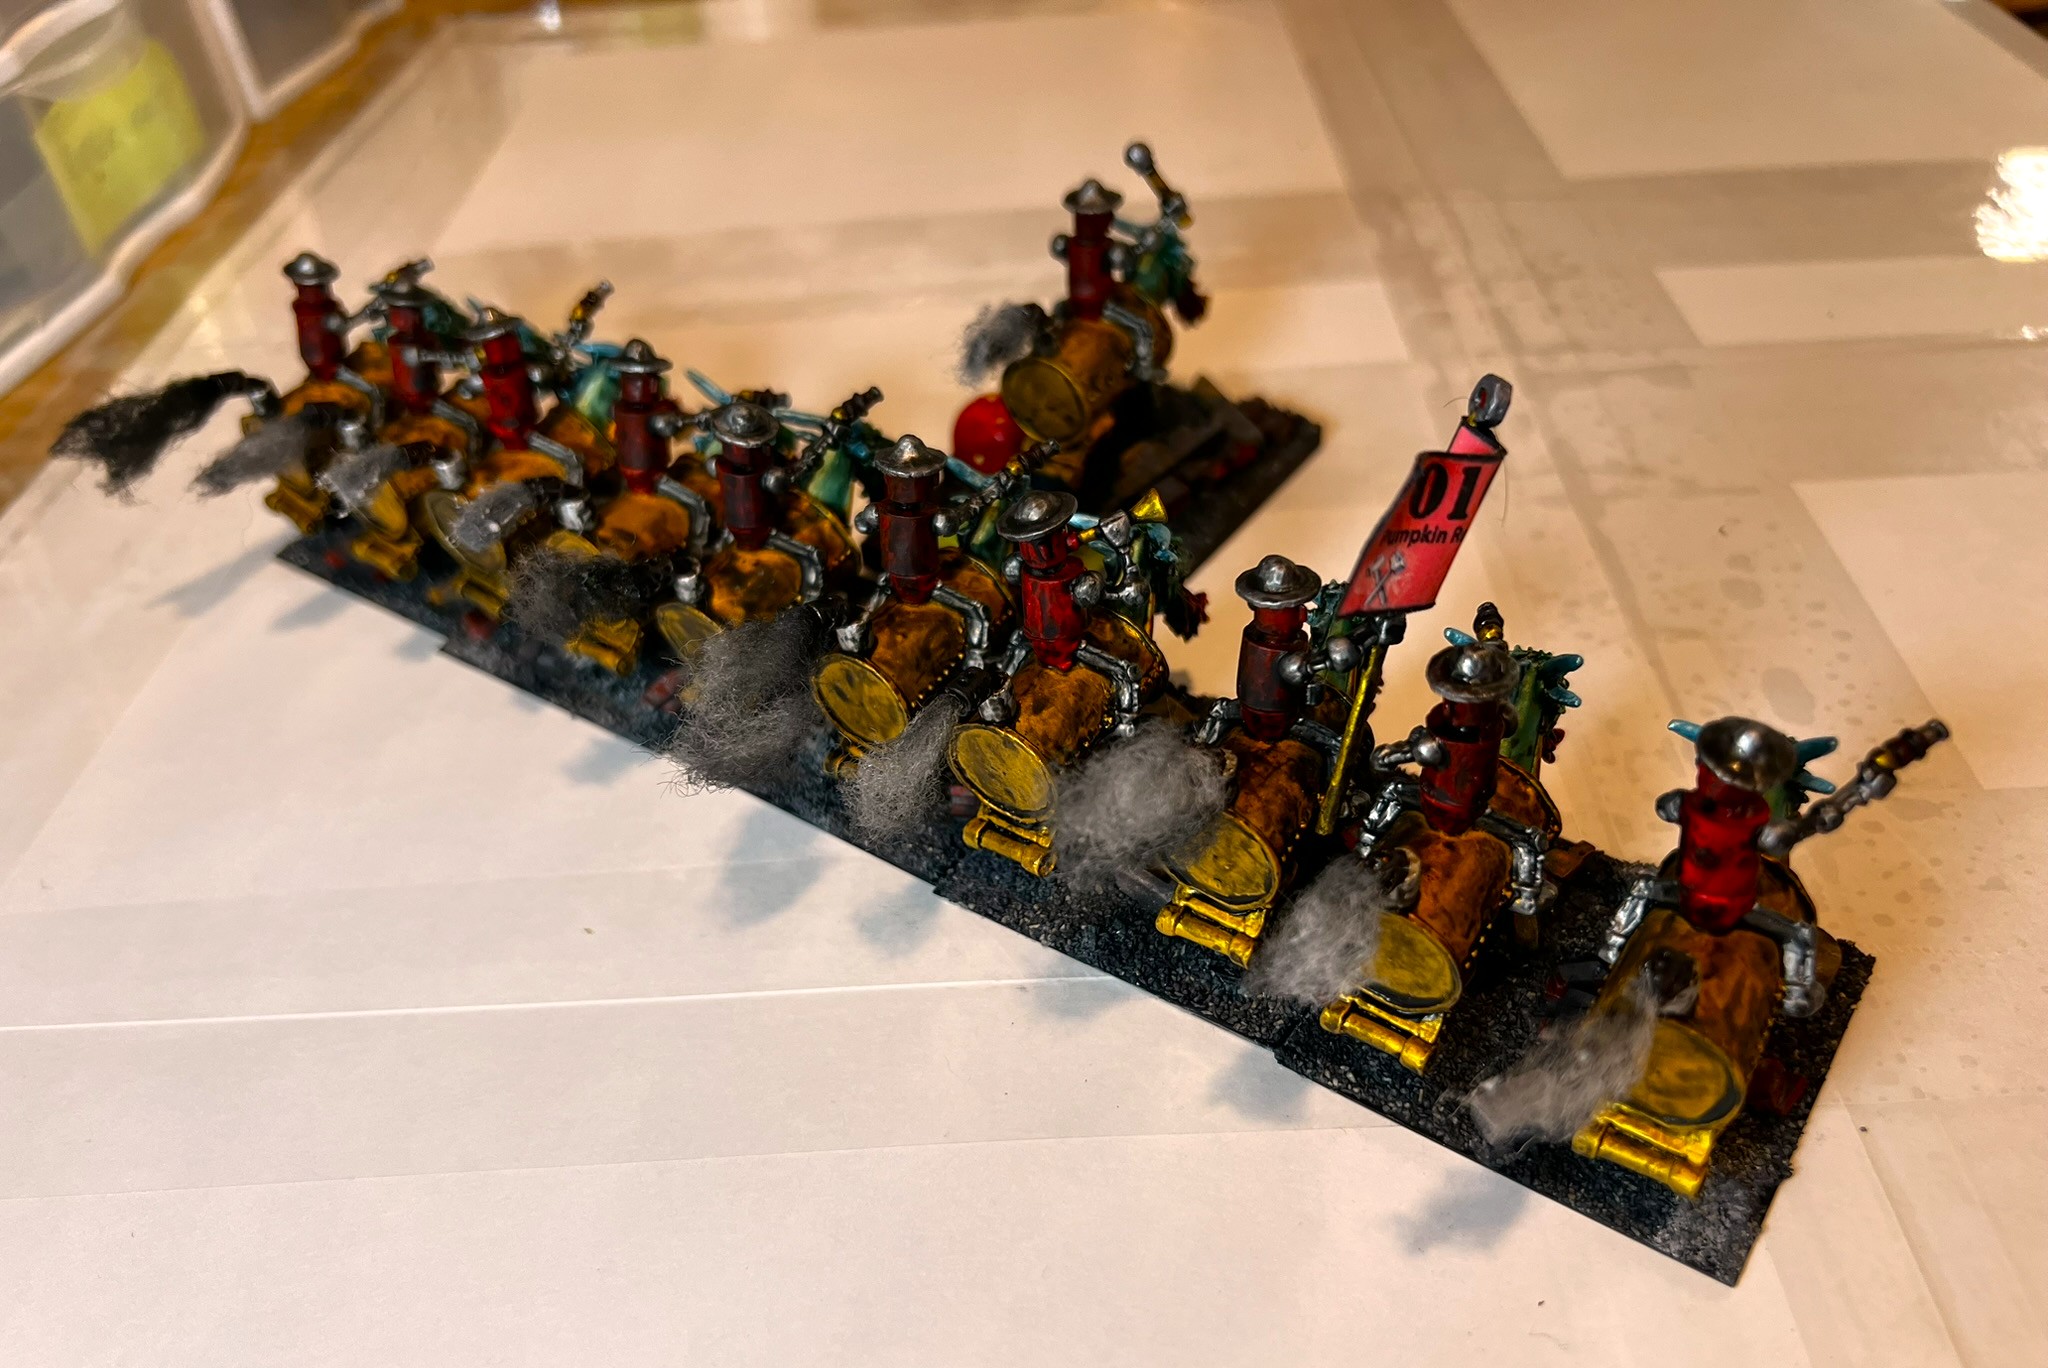
I flocked these with junk. Then, I added pigments to the base rubble. This gave them a dirty and sooty look. Lastly, I added painted pillow batting exhaust fumes.
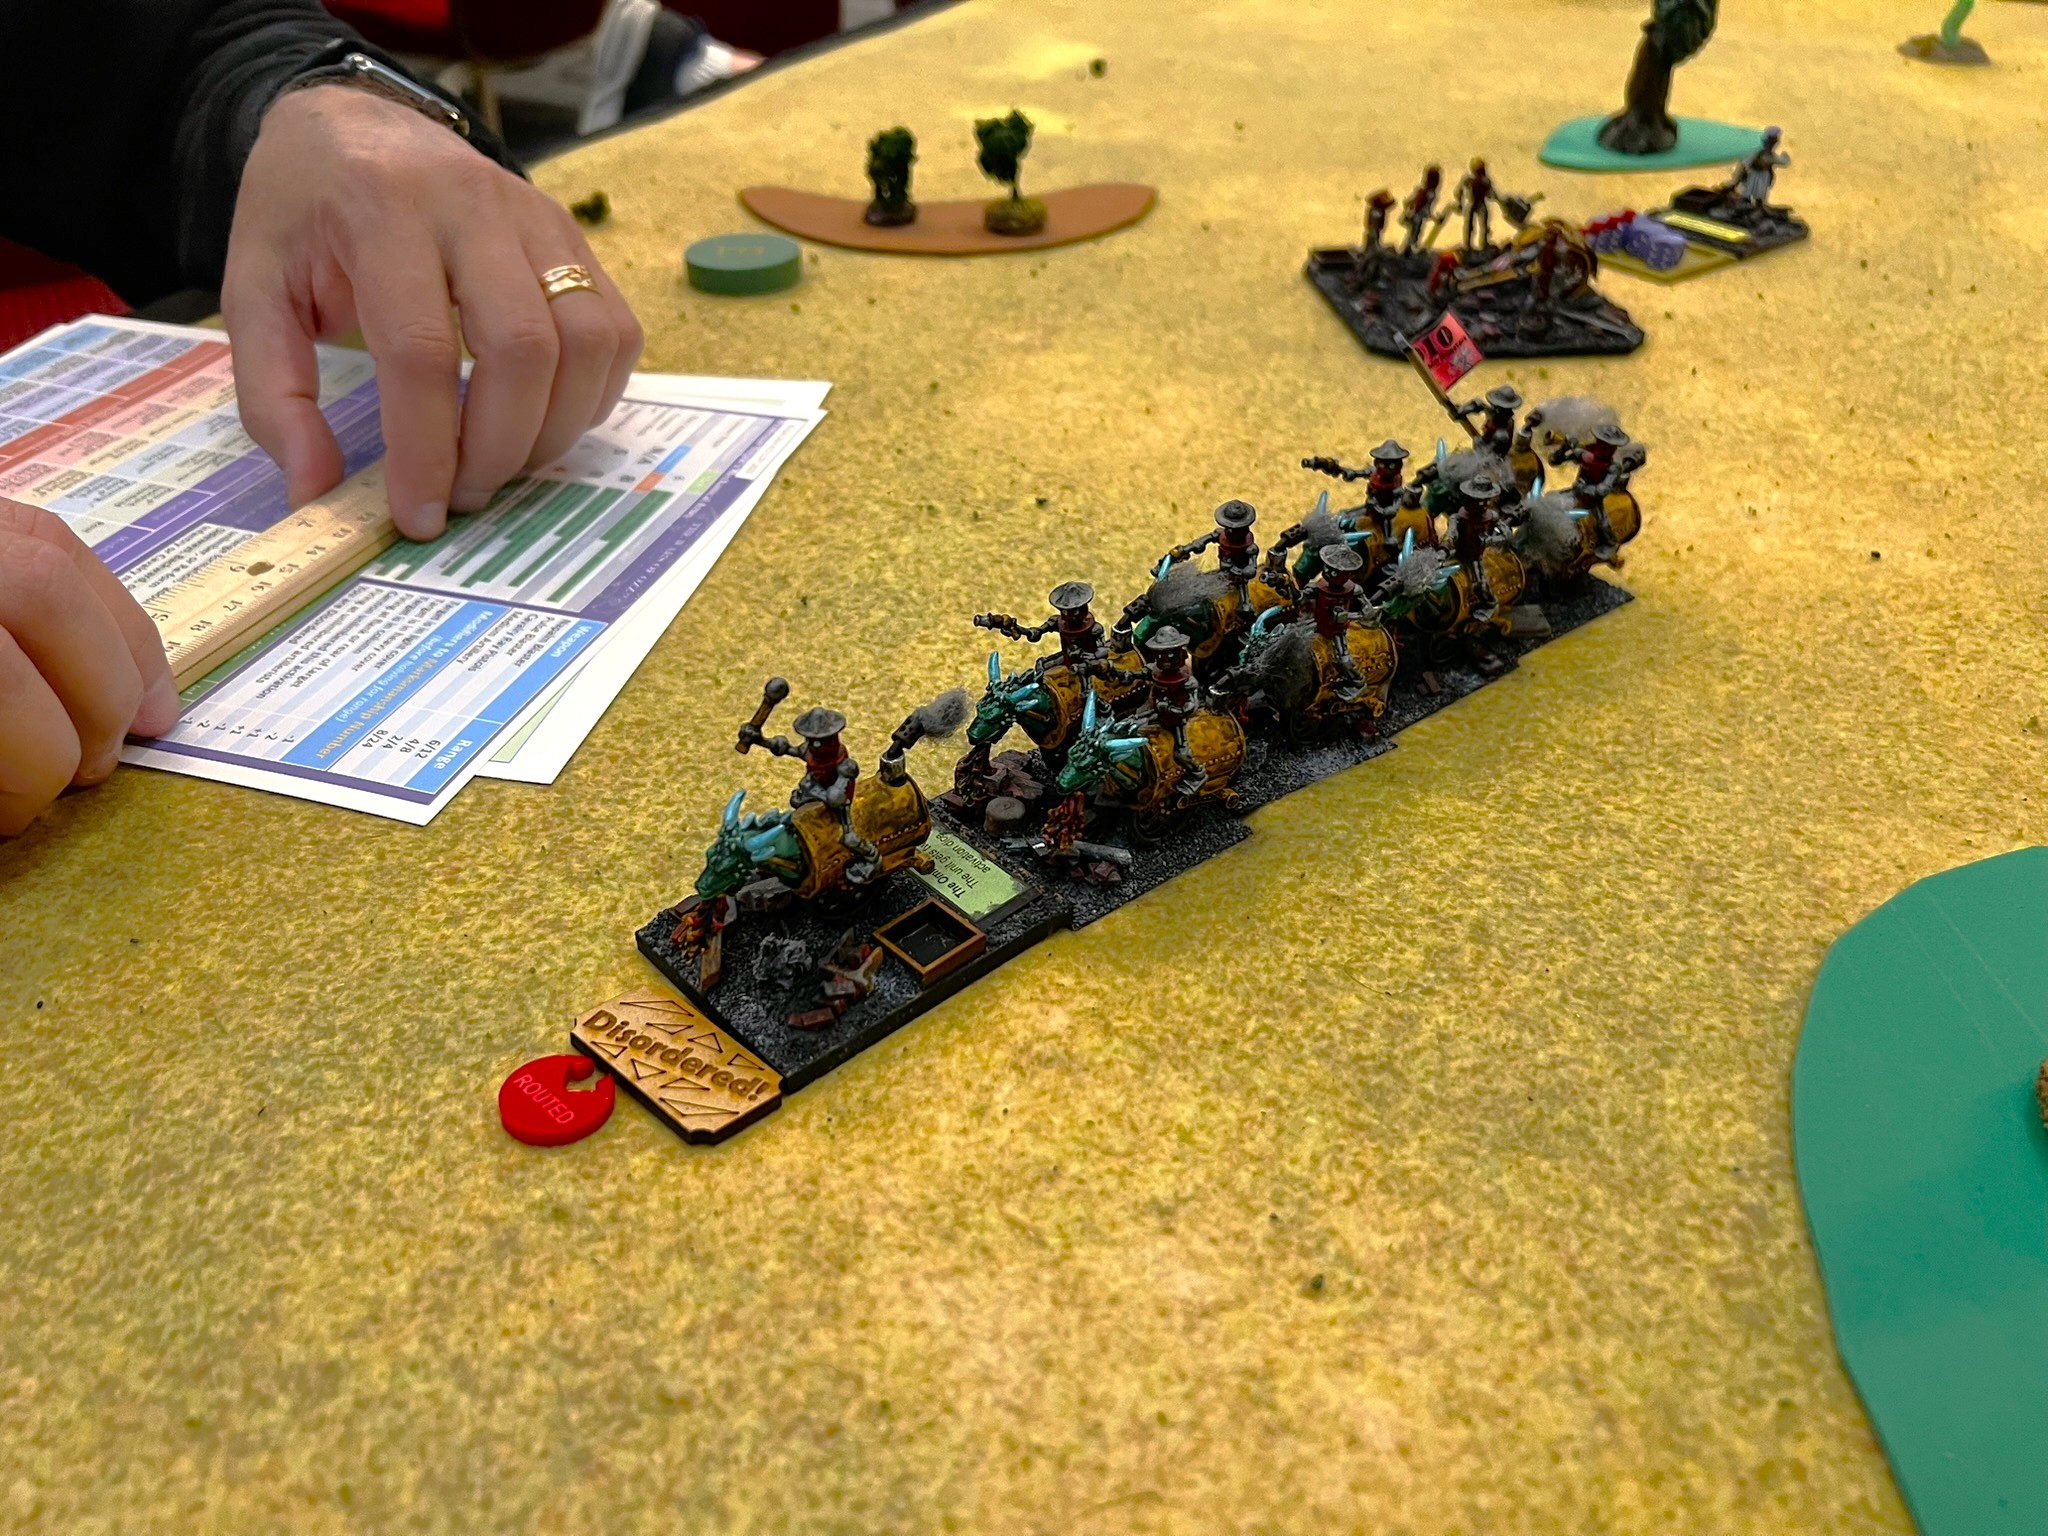
The 010 “Pumpkin Roaster” Mechanical Cavalry. So named because of their victory over the Great Pumpkinheads in a past battle.Opposite side view.Rear view showing the exhaust plumes.
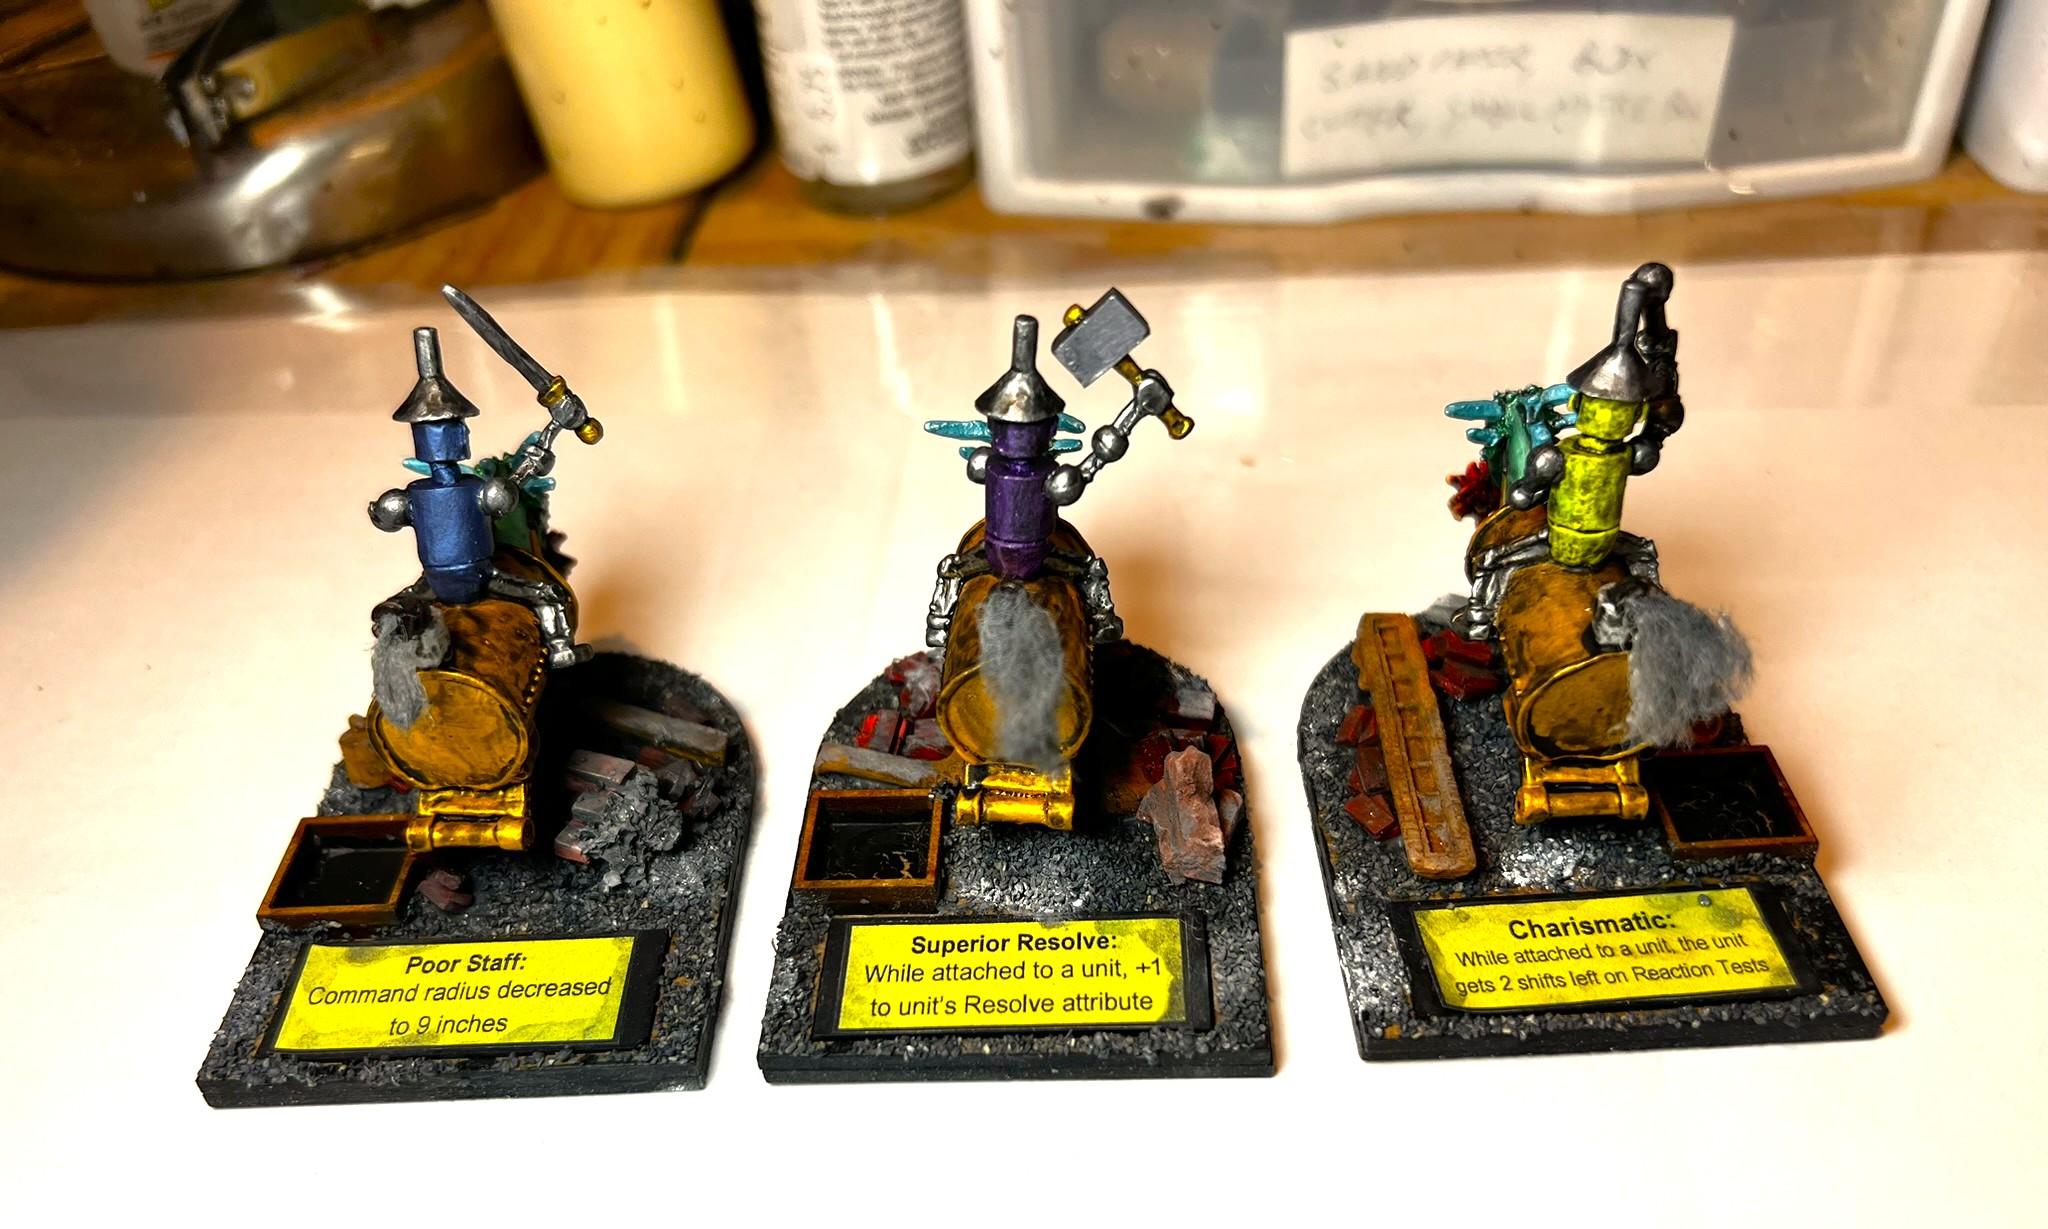
The three brigade commanders were completed similarly, and given their abilities as you see below..
Lastly, here is a video of the unit and the brigade commanders:
Video of the brigade commanders for Professor Nitpik (OZZ-544) and the Pumpkin Roasters Mechanical Cavalry.
These 14 figures statues also qualify for Dave Stone’s annual “Paint What You Got Challenge”. Check it out! I’ll say it again. Dave is a great guy. I guess he’d prefer “solid bloke.” He runs this every year between Christmas and the end of February.
These were a lot of fun to build and paint up. I hope that you enjoyed them and that you will share any of your feedback in the comments section.
Final Note
Want to learn more about Ozz? If you want to check out the excellent Wars of Ozz figures’ range, there are two places to get them. You can also get the rules there. (I make no money from this.) The game rules and the figures are available from the next two places:
Below you’ll see the list of paints and the like that I used on this project. They are more useful for me when I need to recreate a color scheme in the future. They might not be as useful for you. In any case, that’s why I post them.
Miscellaneous details and references for those interested in that sort of thing:
For my earlier posts on Wars of Ozz games, view this page. It includes figures, units, and other related projects.
PAINTS, INKS, GLAZES, SHADES, WASHES, PIGMENTS, FLOCKING, GLUES AND MORE THAT I USED ON THESE PROFESSOR NITPIK MECHANICAL CAVALRY AND BRIGADE COMMANDERS:
PVA Glue
Popsicle sticks
Gorilla Glue
Alligator clips and stands
MDF Bases
2″ Square War Games Accessories Steel Bases (21)
War Games Accessories Steel Bases (FOW1)
Vallejo Surface Primer “Black”
Createx Wicked Colors “Pearl Red”
Createx Airbrush Colors “Pearl Copper”
Createx Airbrush Colors “Pearl Green”
Createx Airbrush Colors “Pearl Plum”
Vallejo Mecha Color “Sky Blue”
Army Painter “Dark Tone” (wash)
Vallejo “Metal Medium”
DecoArt “Peacock Pearl”
Vallejo Mecha Color “Metallic Green”
Vallejo Mecha Color “Metallic Blue”
Vallejo Model Air “Gun Metal”
Martha Stewart “Duckling Pearl”
Vallejo Model Color “Off White”
Army Painter “Dark Tone” (wash)
Vallejo Mecha Color “Off White”
Vallejo Model Color “Brass”
Army Painter Speed Paint 2.0 “Brazen Copper”
Army Painter Speed Paint 2.0 “Polished Silver”
Army Painter Warpaints Fanatics Effects “Data System Glow” (effect)
Army Painter Speed Paint 1.0 “Blood Red”
Army Painter Speed Paint 1.0 “Fire Giant Orange”
Army Painter Speed Paint 1.0 “Zealot Yellow”
Army Painter Warpaints Air “Neon Yellow”
Vallejo Model Air “Chrome”
Army Painter Warpaints “Rough Iron”
Vallejo Thinner Medium
Citadel “Nuln Oil GLOSS” (wash/shade)
Battlefront “Black”
Vallejo Mecha Varnish “Gloss”
Vallejo Flow Improver
Vallejo Thinner
Army Painter “Black Battlefields” (flocking)
Juweela 1:35 Debris
Juweela Metal Scrap Rusty
Pillow batting
Vallejo “Carbon Black” (pigment)
Vallejo “Titanium White” (pigment)
Vallejo “Pigment Binder”
Vallejo Premium Color “Matte Varnish”
Black Sharpie pen
Brown Sharpie pen
Nitpik flag design from Wars of Ozz Facebook page (printed on card stock)
After I finished my Scarecrow Girl statue, I was motivated to make some more as gifts for my fellow Wars of Ozz game masters. Those would be Buck Surdu, Chris Palmer, Greg Priebe, and Dave Wood. As we are collaborating on a massive “Ozzaganza” game at Cold Wars, I thought that was worth a go.
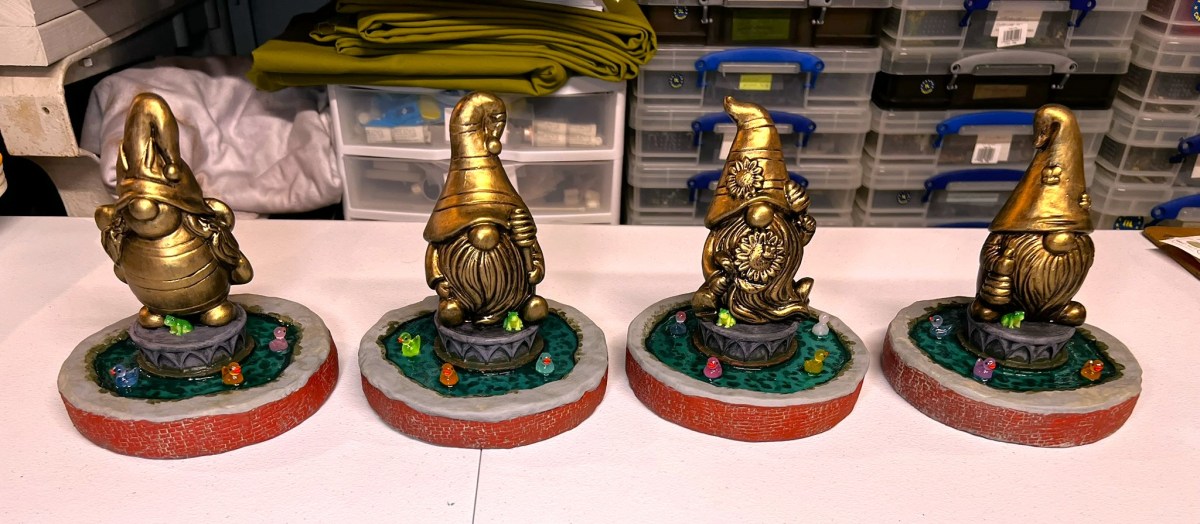
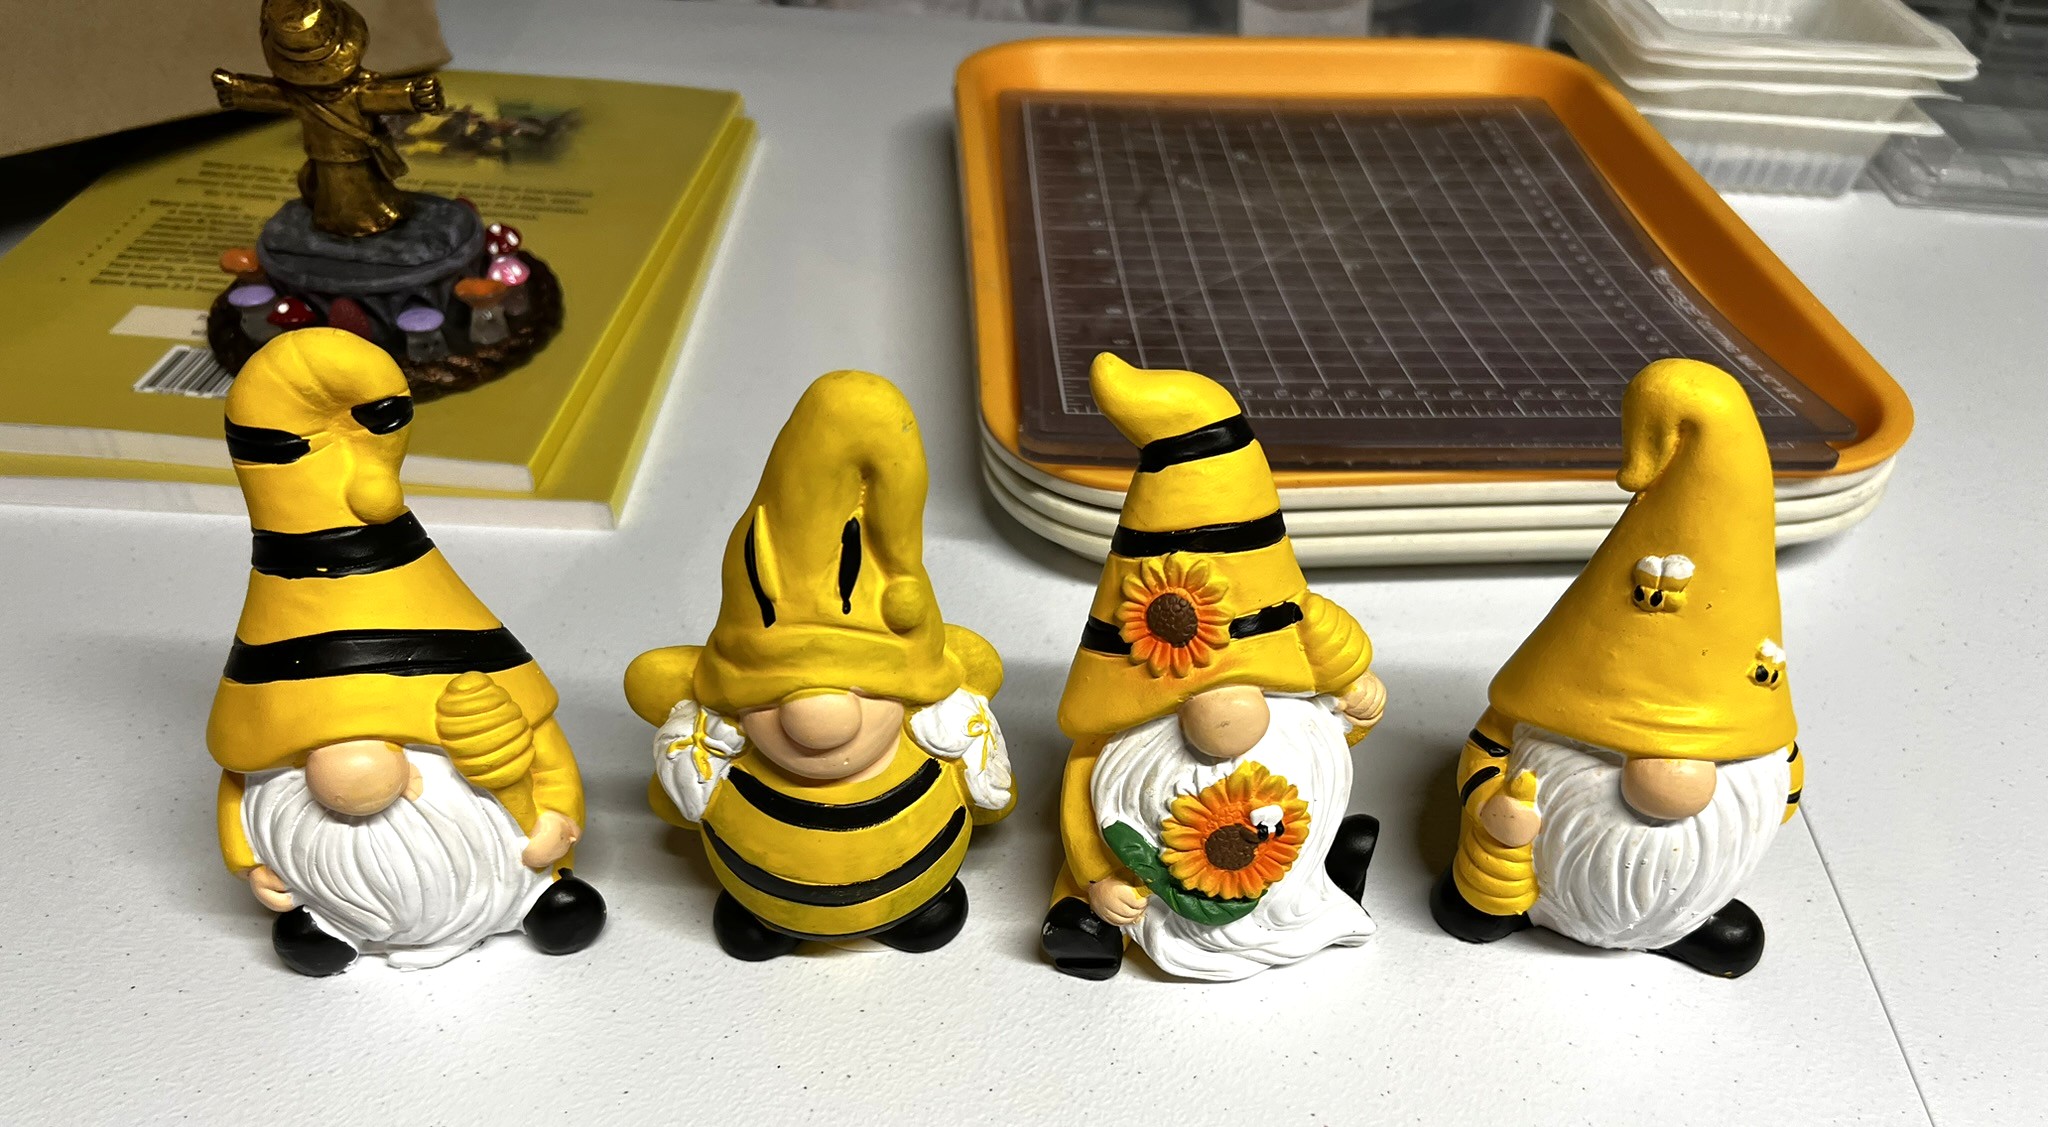
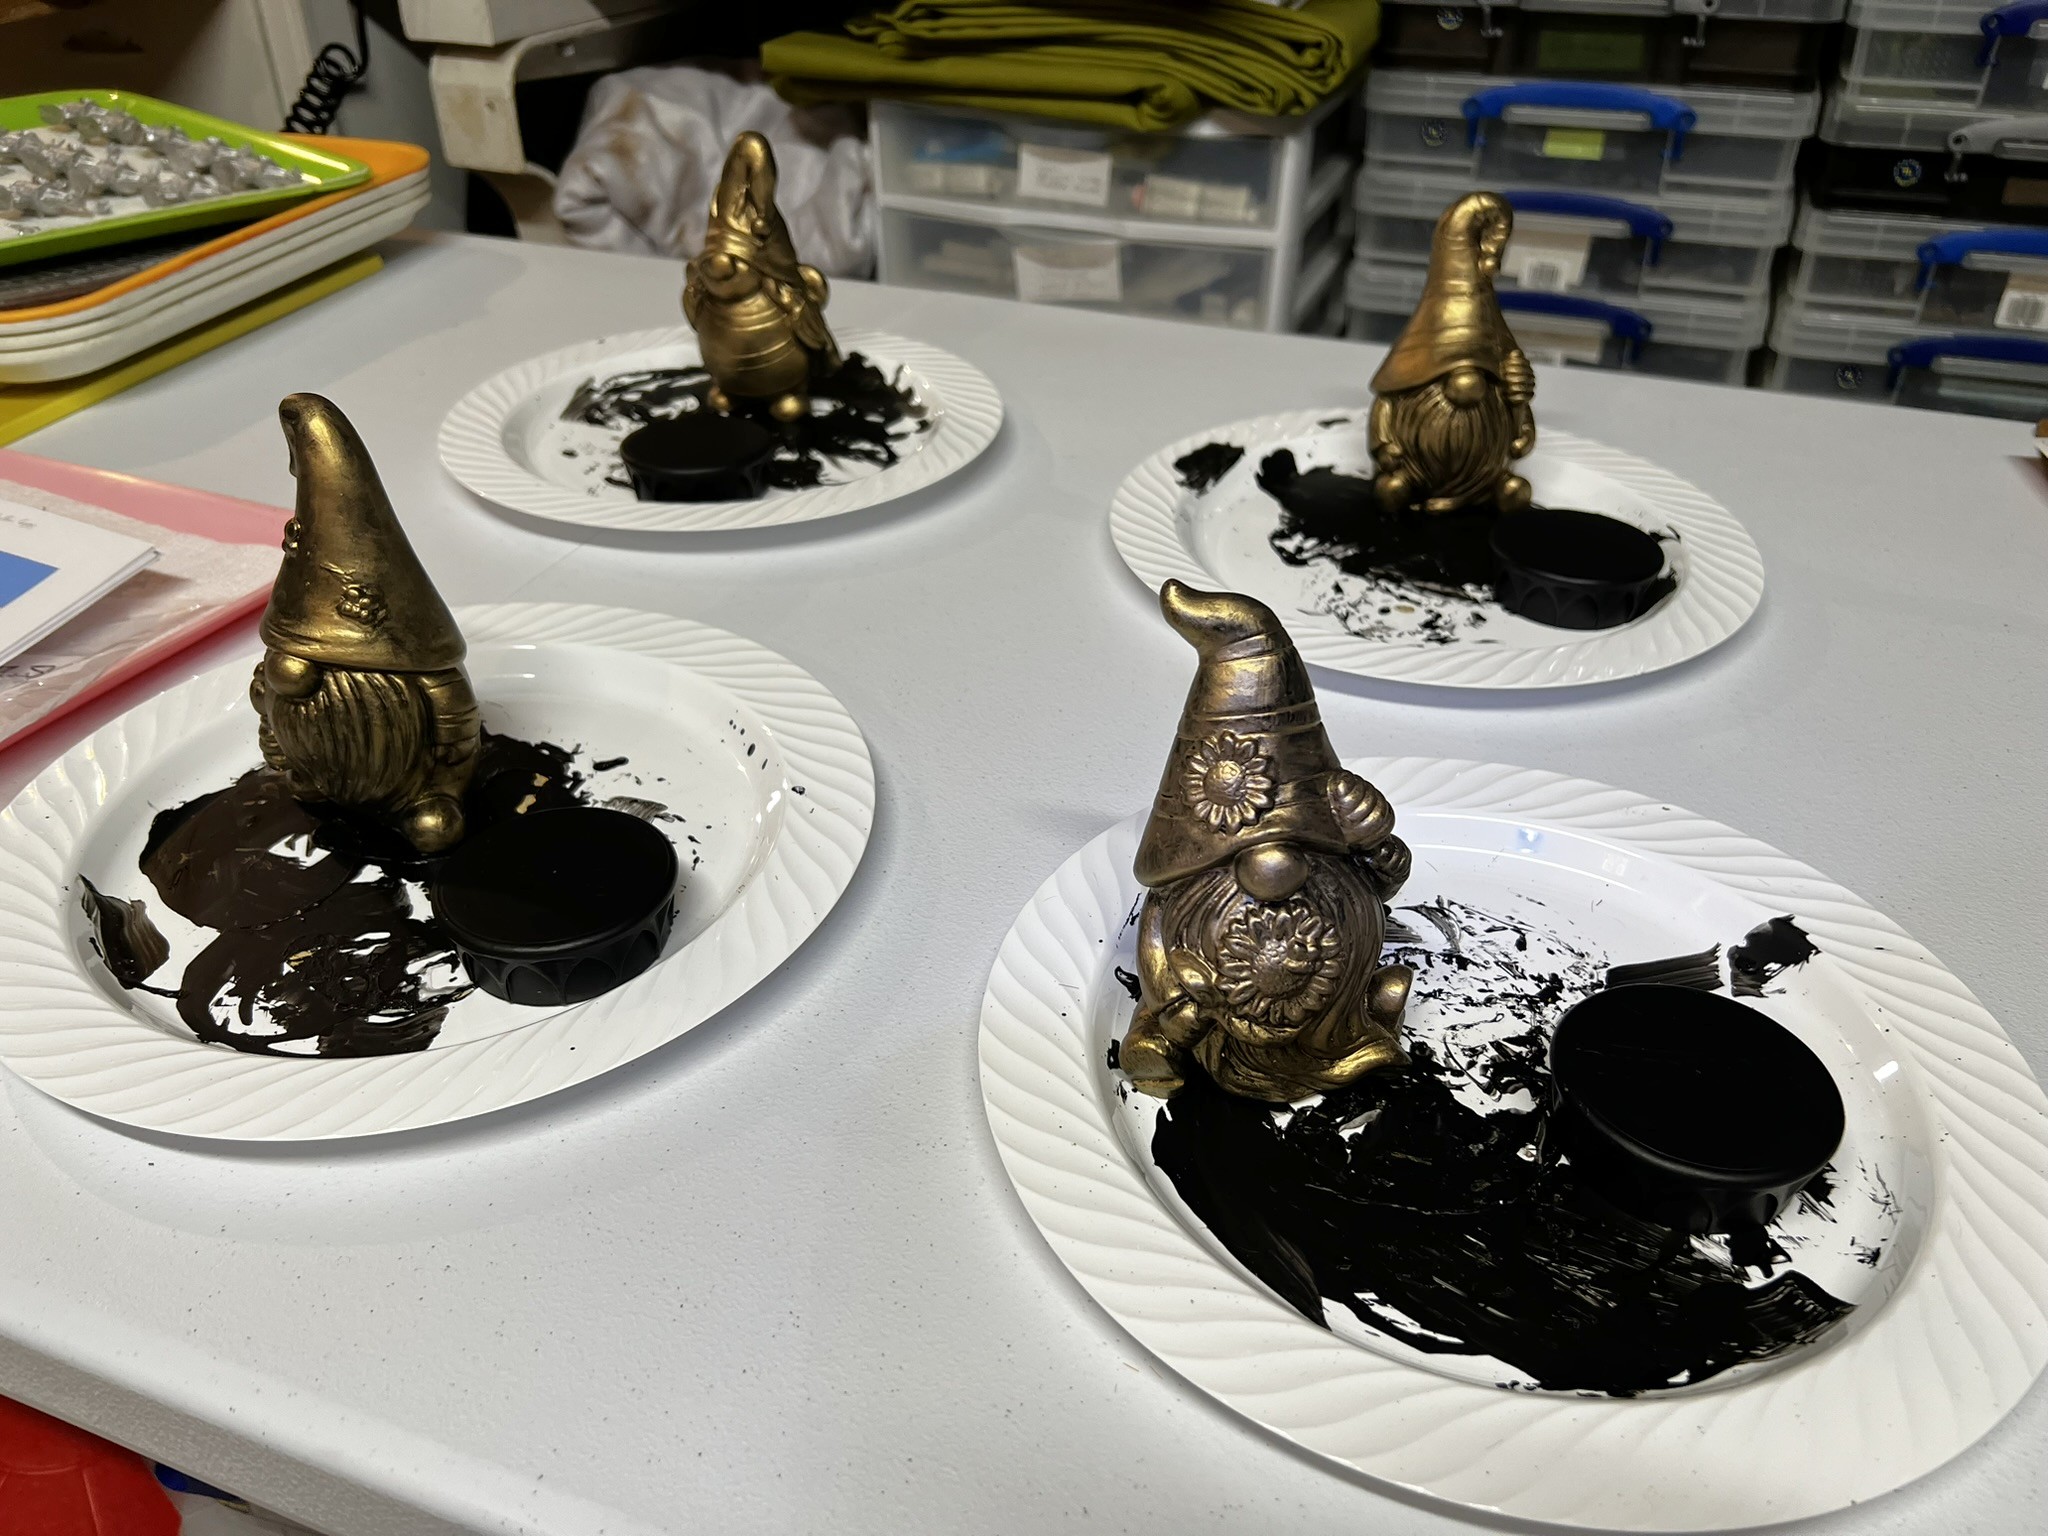
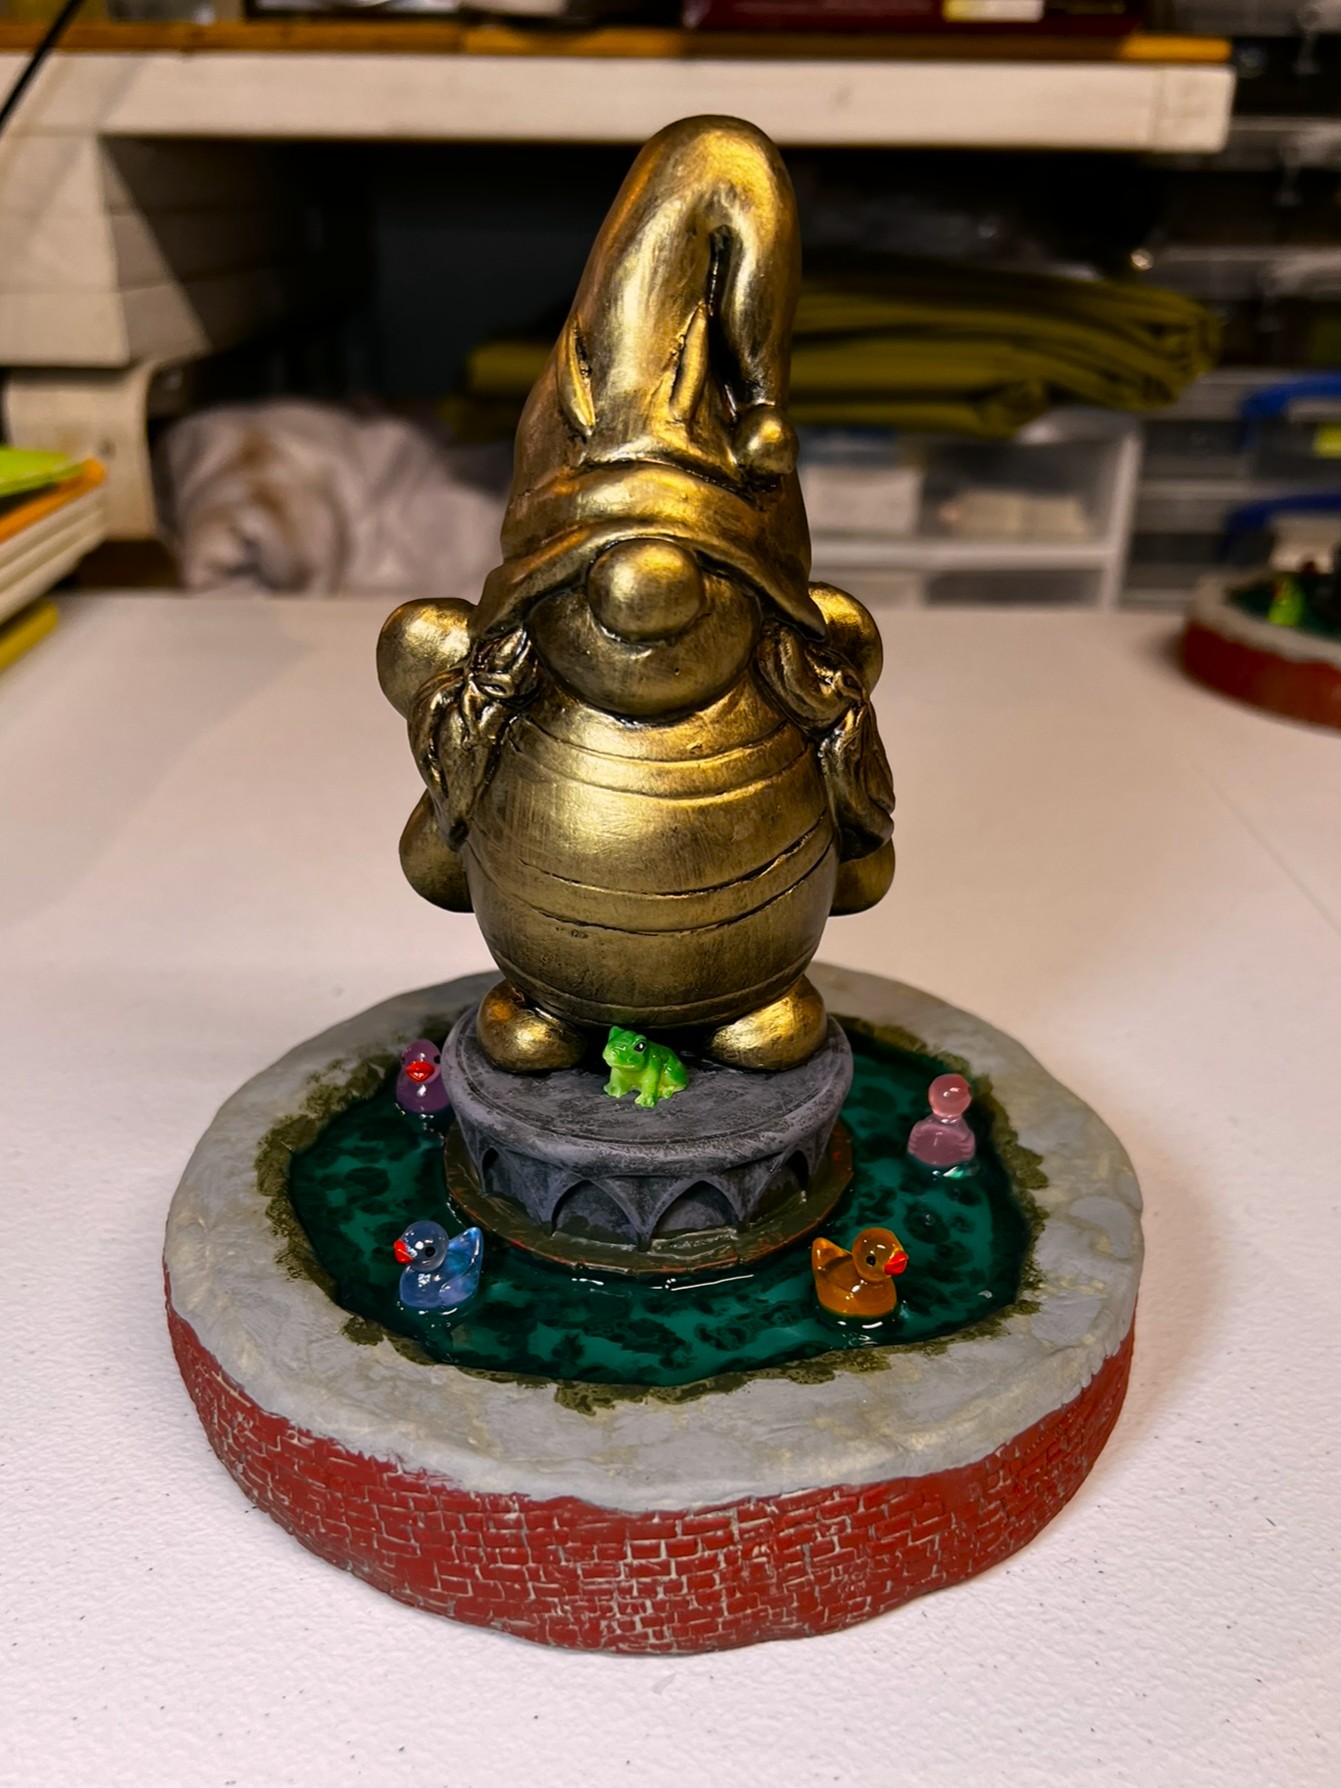
As it turned out, I could not reasonably source another scarecrow girl, so I hit my local Dollar store to see what I could find – and there were some beekeeper gnome statues. As in Ozz there are “Nomes”, I got 4 (at $1.25 each). These were prepainted as you see, and made out of plaster of Paris I believe.
The Nomes as purchased from the Dollar Store. My Scarecrow Girl statue is in the background.
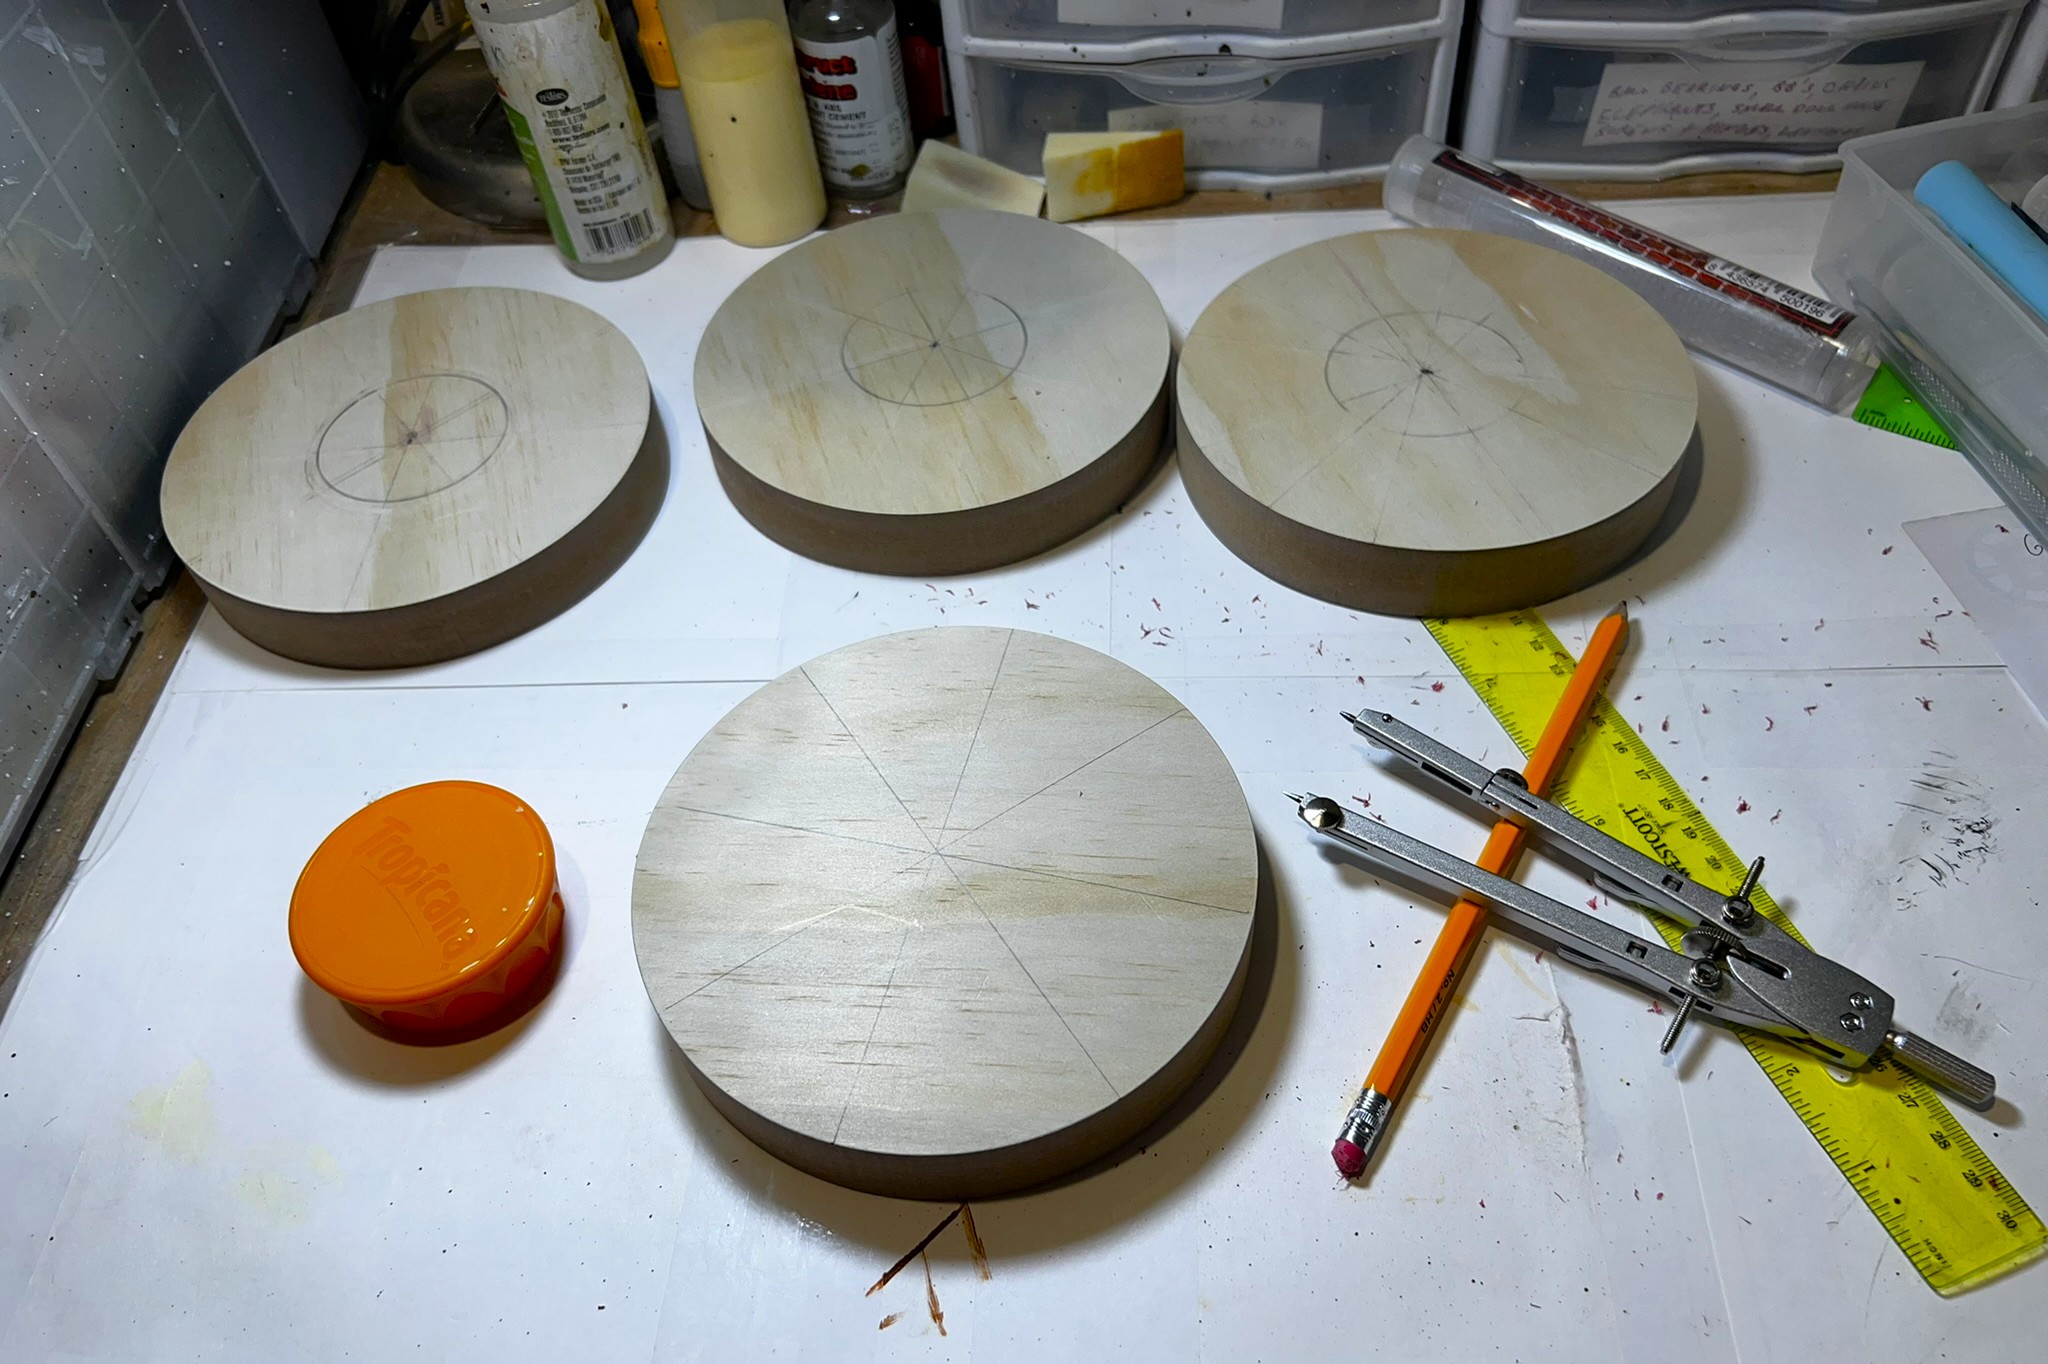
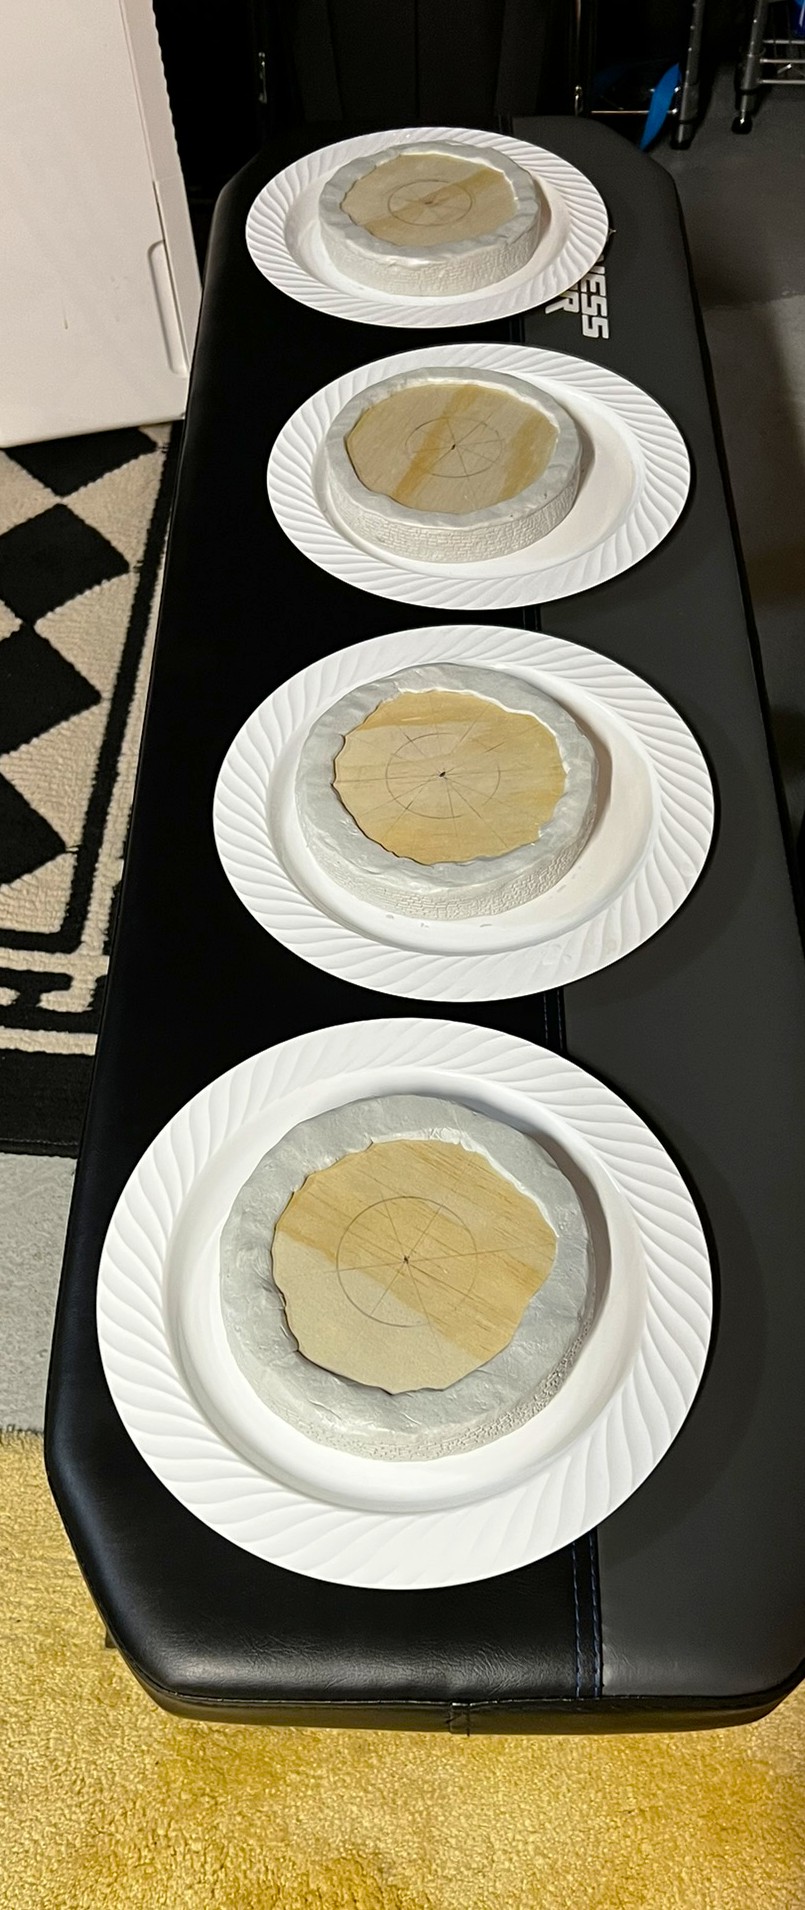
As for bases, I found a packet of 6″ wooden disks on Amazon. As these were much bigger than my previous build’s base, I chose to make a statue/fountain combination for these. Luckily I still had some more Tropicana Orange Juice lids to use as plinths.
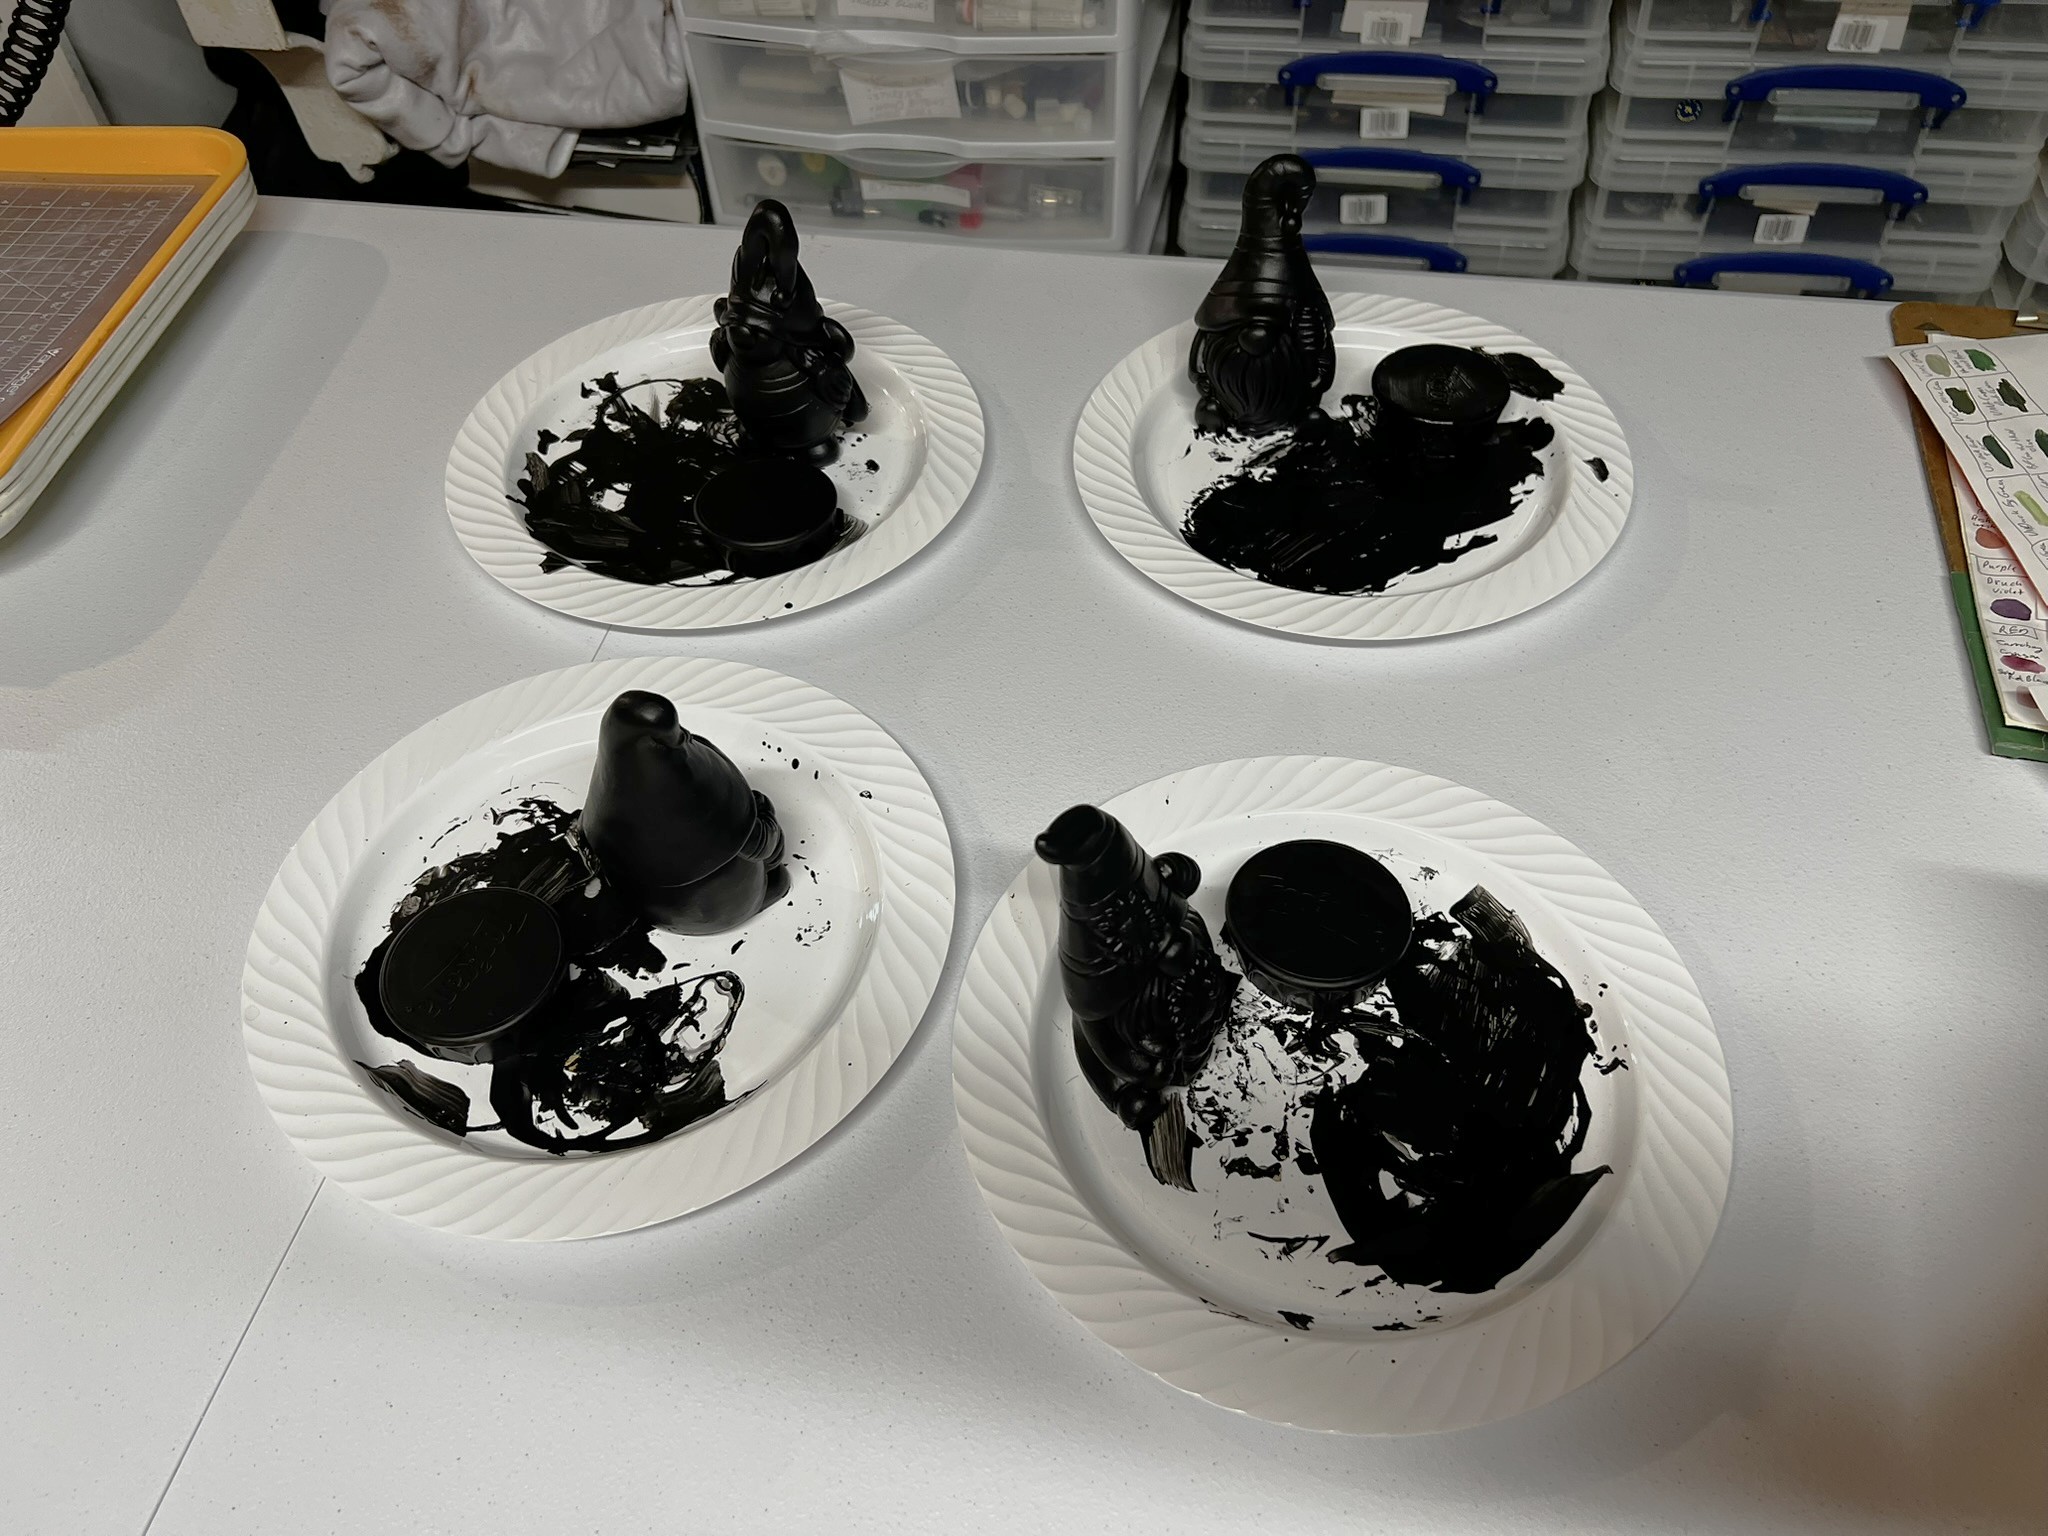
Nomes and plinths primed.Getting the disk centers just right with a Tropicana orange juice lid, a ruler, and a compass.
Applied Apoxie Sculpt and used Green Stuff World Dutch Brick roller on outside rims, while leaving the top to look like a concrete rim.
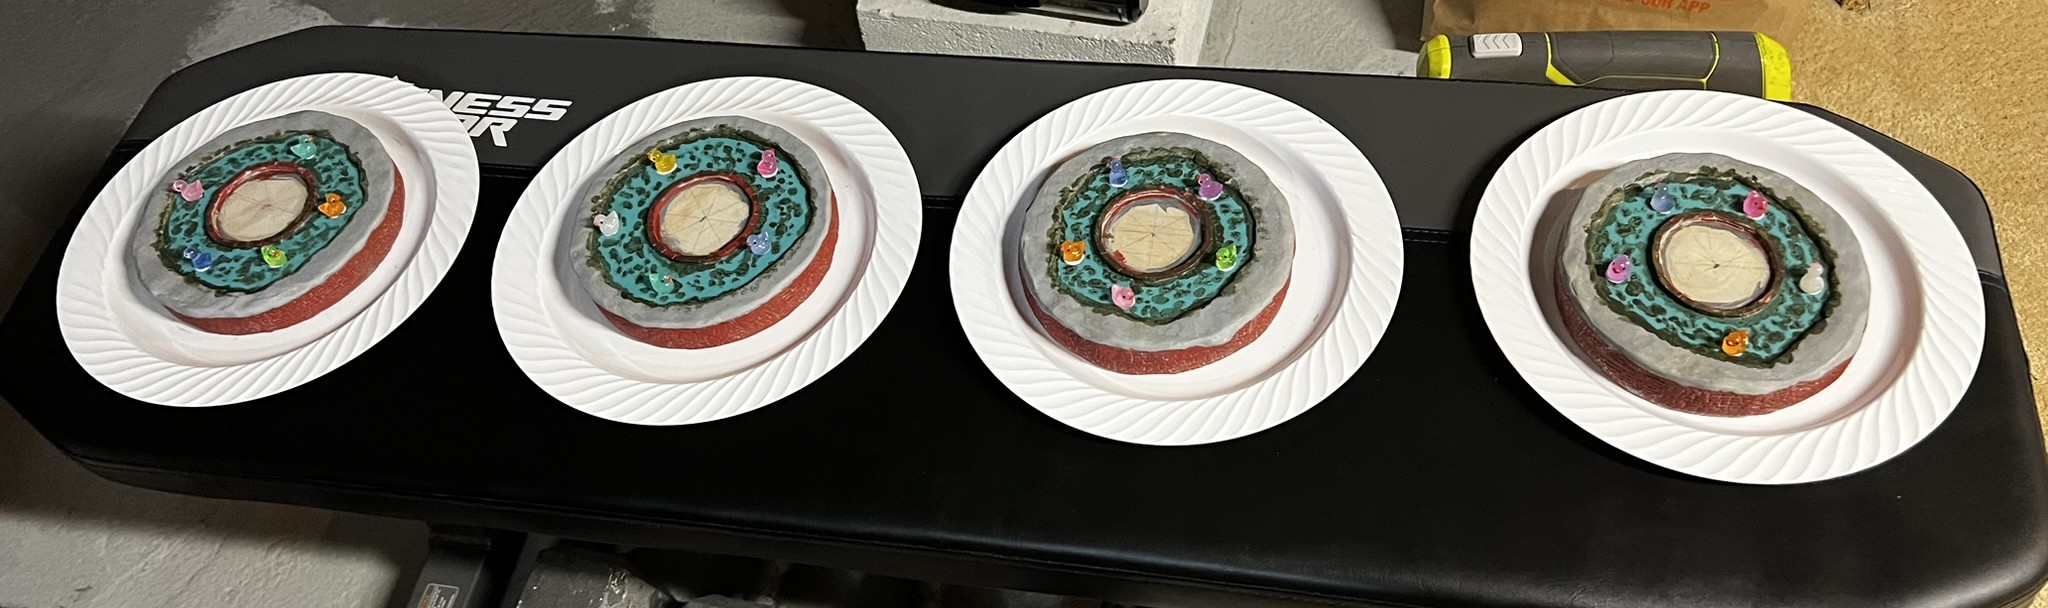
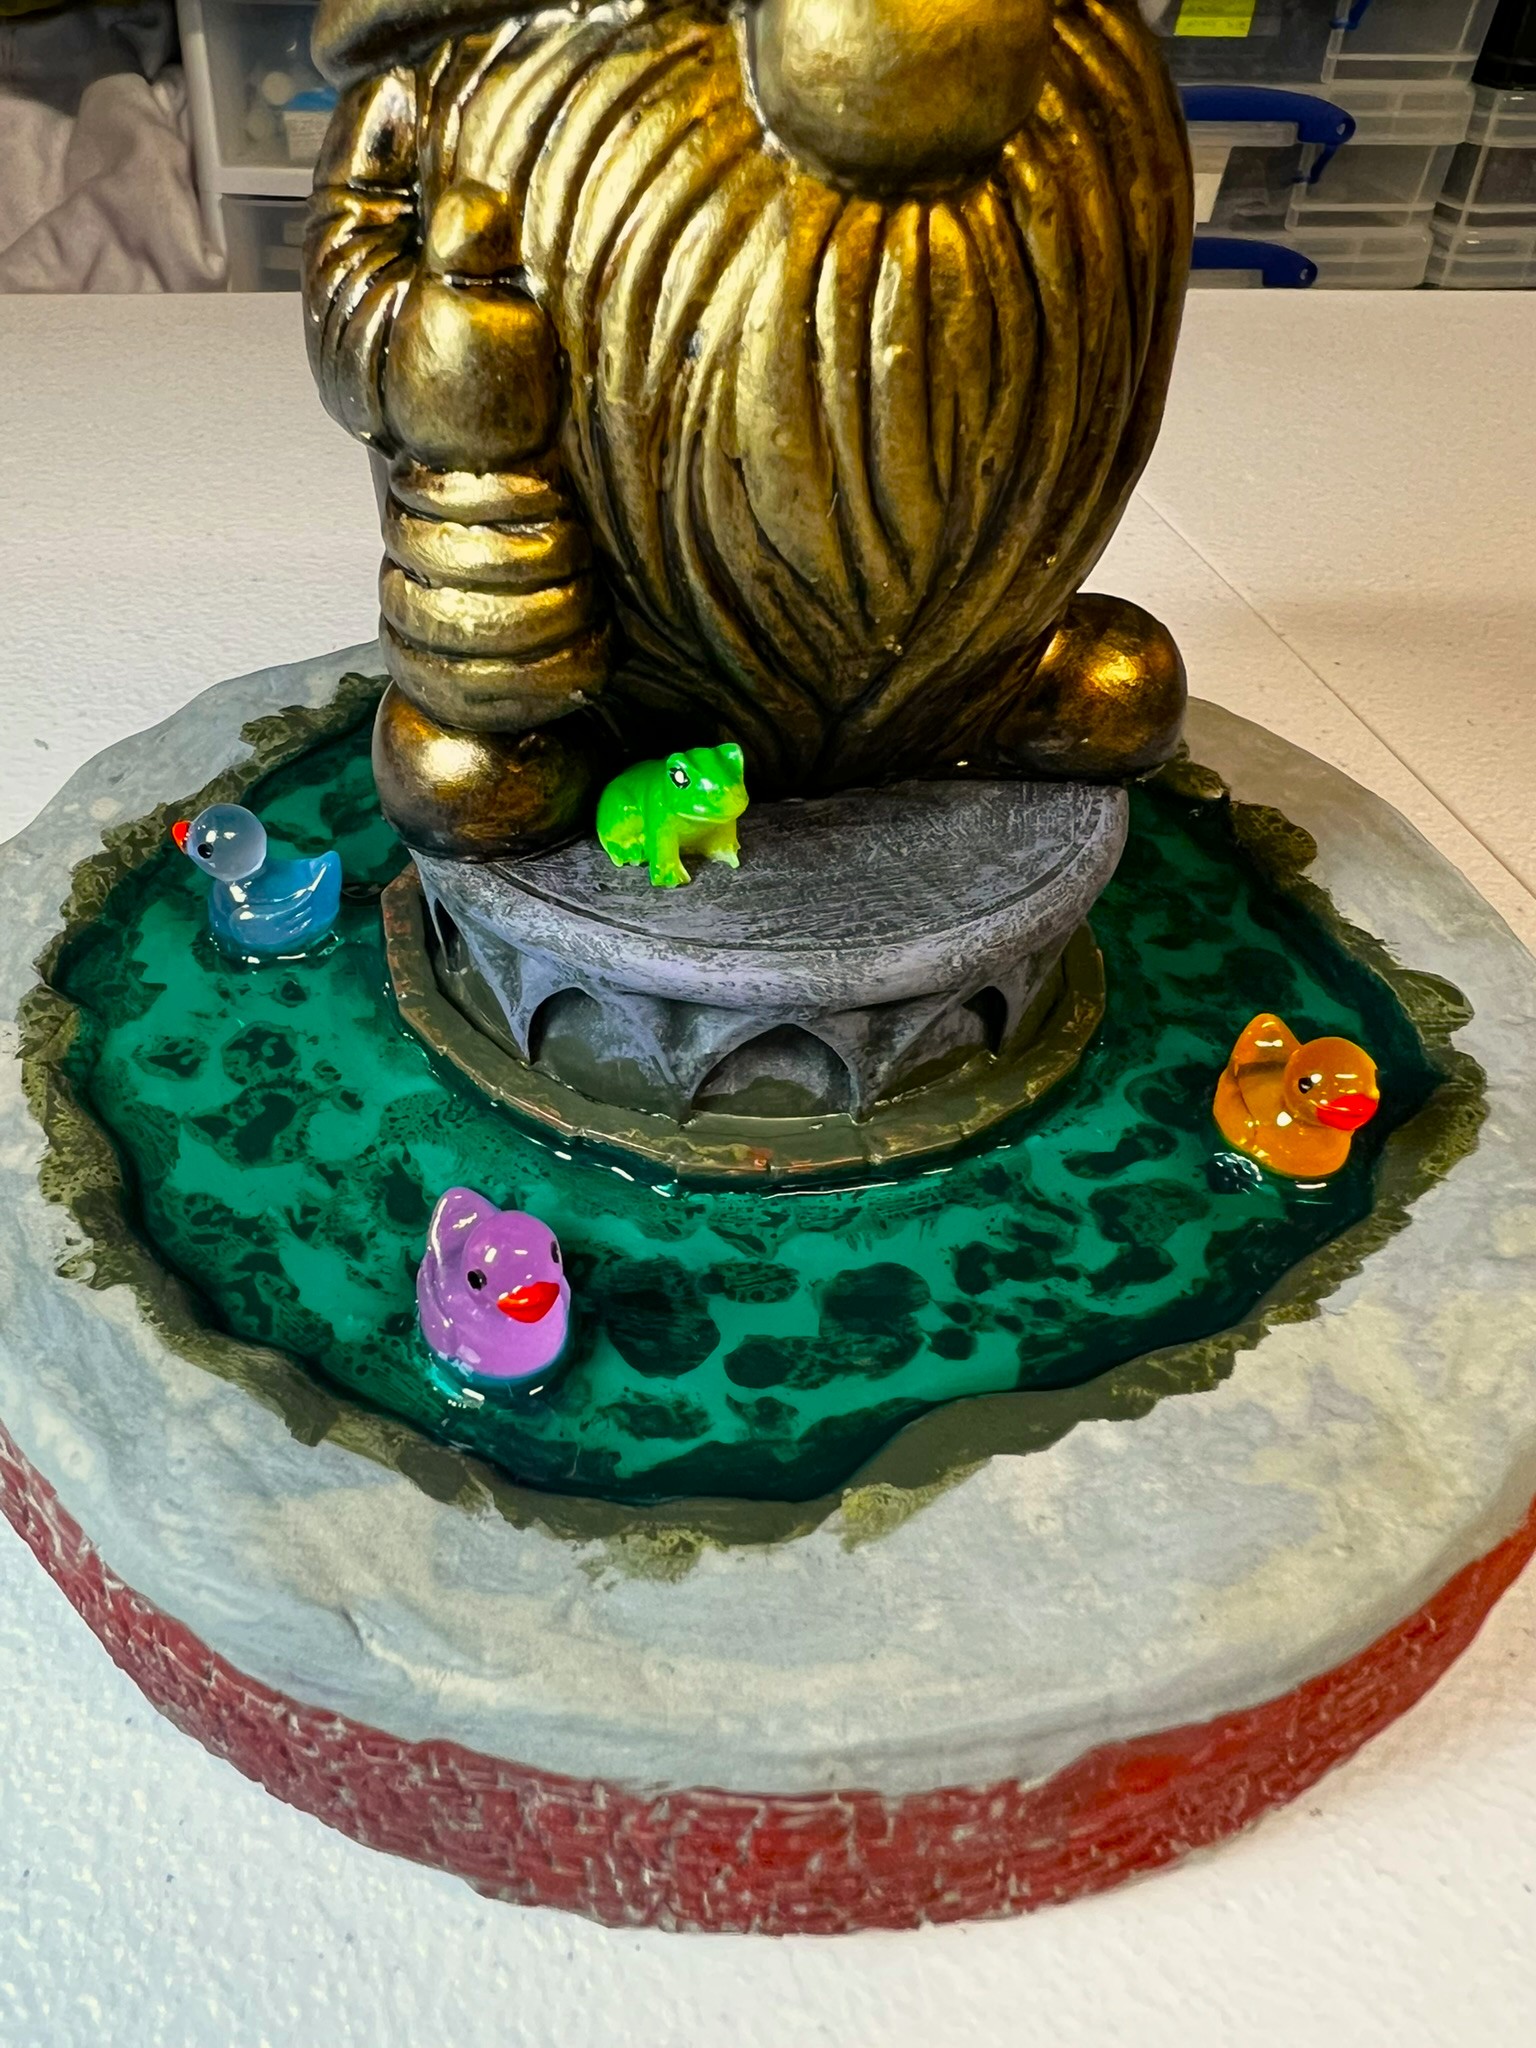
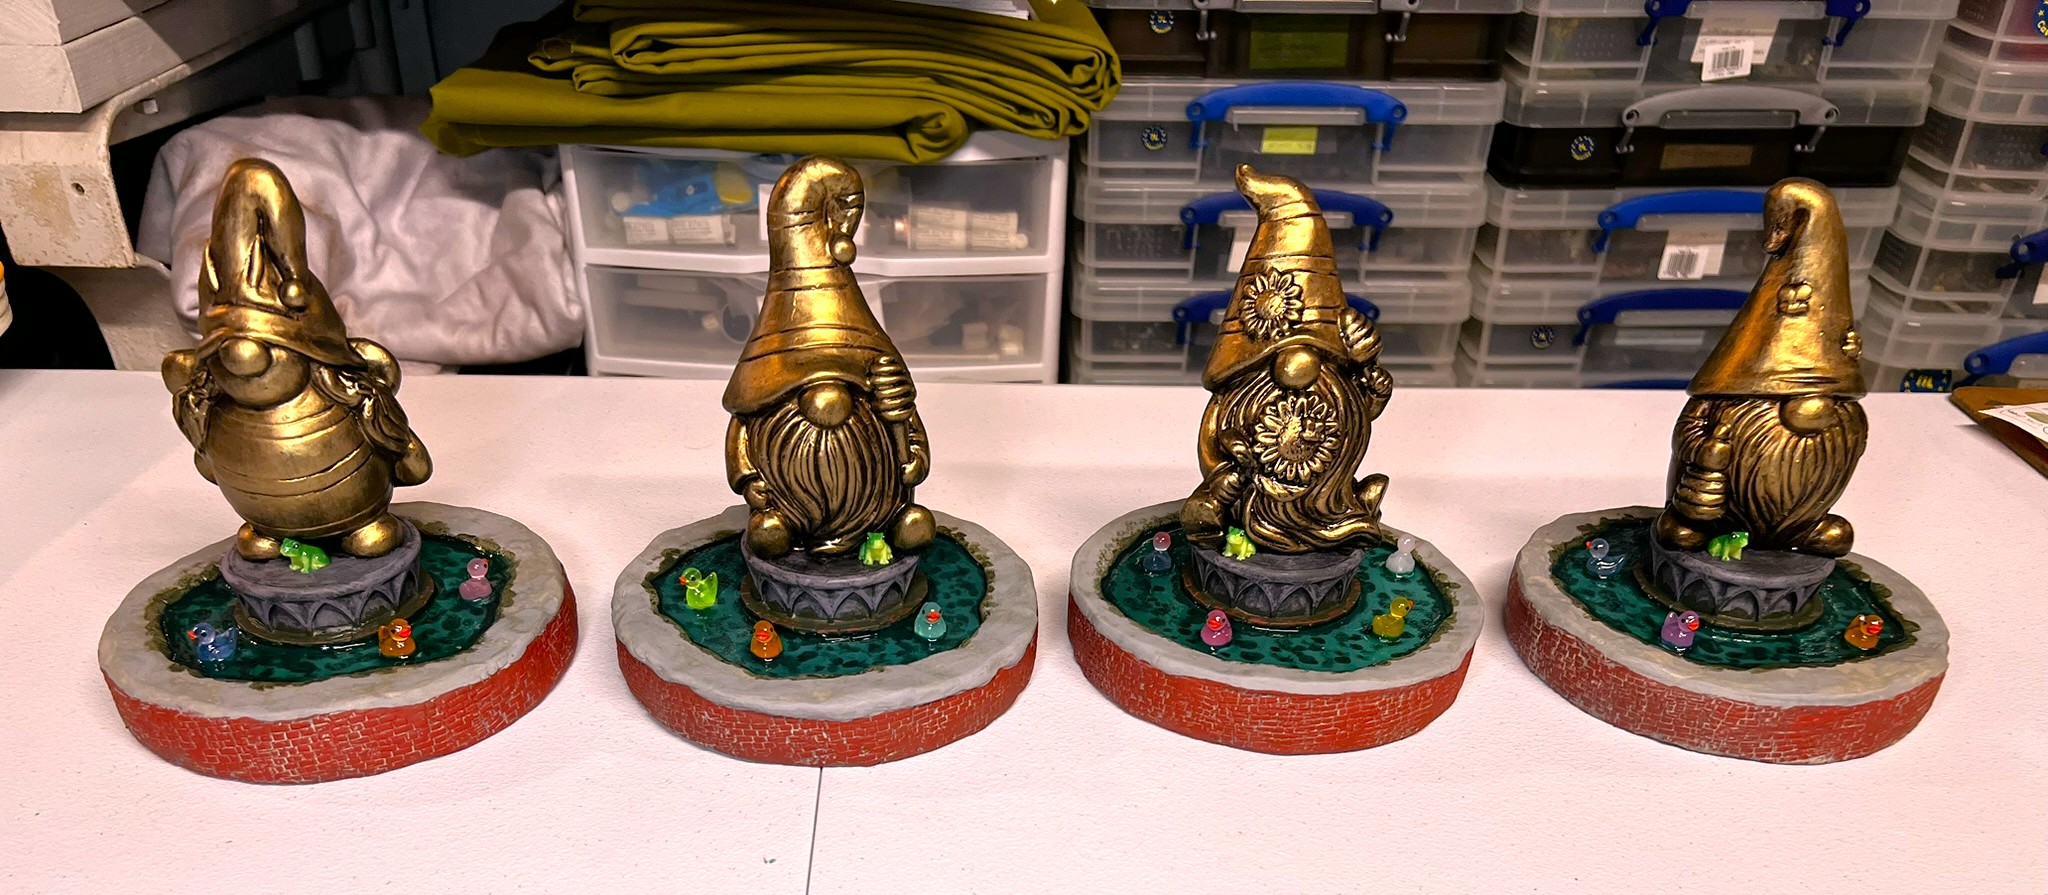
Laid little tiny Juweela 1:32 terracotta bricks in two courses with PVA to surround the orange juice lid plinths. The bricks would be painted red.Used bronze paint to change the Nomes to statues.Painted the fountain bottom blue using a mix of colors. Then stippled Vallejo “Slime Green” around the structures and on the fountain’s bottom.Got my ducks in a row! The set comes with multiple colored ducks that actually will glow in the dark.Dry brushed the plinths to resemble aged granite, then added a dark wash to the Nomes. Mounted the Nomes on the plinths and added a tiny frog.Mounted 5 ducks with PVA to each fountain, and then let dry. After that, I added the still water blended with inks to the fountains.The brick rims got a treatment of pigments to fill in and give a better look to the mortar. The Nomes and plinths then were set into the middle and I filled the little gap with PVA. Later I would reapply the slime to the water’s edge and hide any remaining gaps, and varnish the brick rim.
That would finish the project. Now…
Eye Candy
I was able to to present three of these at Cold Barrage in Havre de Grace Maryland to Greg Priebe, Chris Palmer and Buck Surdu. The fourth will go to Dave Wood at Cold Wars and take prominent places of the Ozzaganza tabletop.
Next up (hopefully shortly) the only figures that I finished for February…
Final Note
Want to learn more about Ozz? If you want to check out the excellent Wars of Ozz figures’ range, there are two places to get them. You can also get the rules there. (I make no money from this.) The game rules and the figures are available from the next two places:
Below you’ll see the list of paints and the like that I used on this project. They are more useful for me when I need to recreate a color scheme in the future. They might not be as useful for you. In any case, that’s why I post them.
Miscellaneous details and references for those interested in that sort of thing:
For my earlier posts on Wars of Ozz games, view this page. It includes figures, units, and other related projects.
PAINTS, INKS, GLAZES, SHADES, WASHES, PIGMENTS, FLOCKING, GLUES AND MORE THAT I USED ON THESE NOME BEEKEEPER STATUES/ “OZZCARS”:
For part three of this series, I wanted to share some smaller Wars of Ozz games projects. These projects included making some game markers. These are for a convention scenario I will be running. The scenario is called “Wars of Ozz – Battle for the Magic Mushrooms & the Ancient Crystals of Power“. There will be 6-8 players, each controlling one brigade, all converging on the center of the tabletop. At that center will be the Scarecrow Girl that I spotlighted in part 1. She will be surrounded by the Magic Mushrooms and the Ancient Crystals of Power. The players’ goal is to secure supplies of these and get them off the table to their homelands. Naturally, all the other players will compete for the same objective. Alternatively, they might try to deny possession to their competitors. Here is the game flyer:
Game flyer
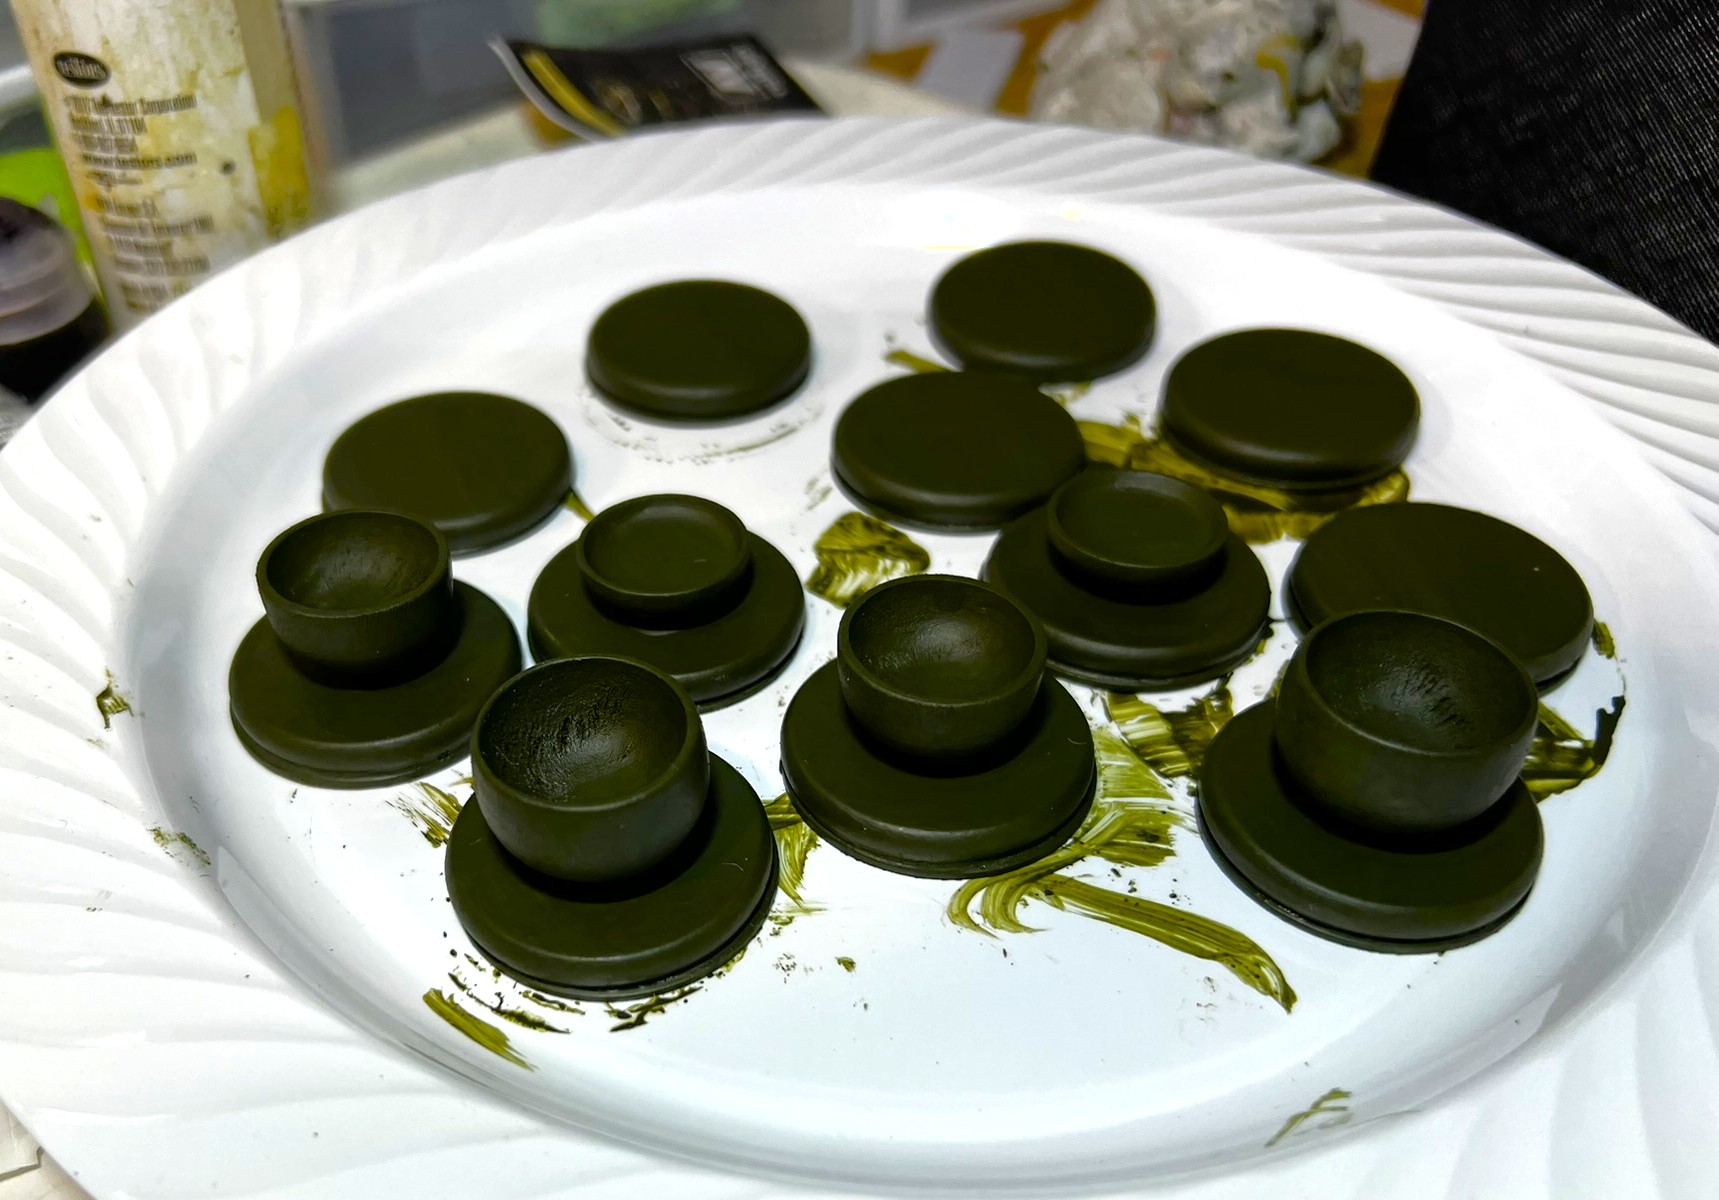
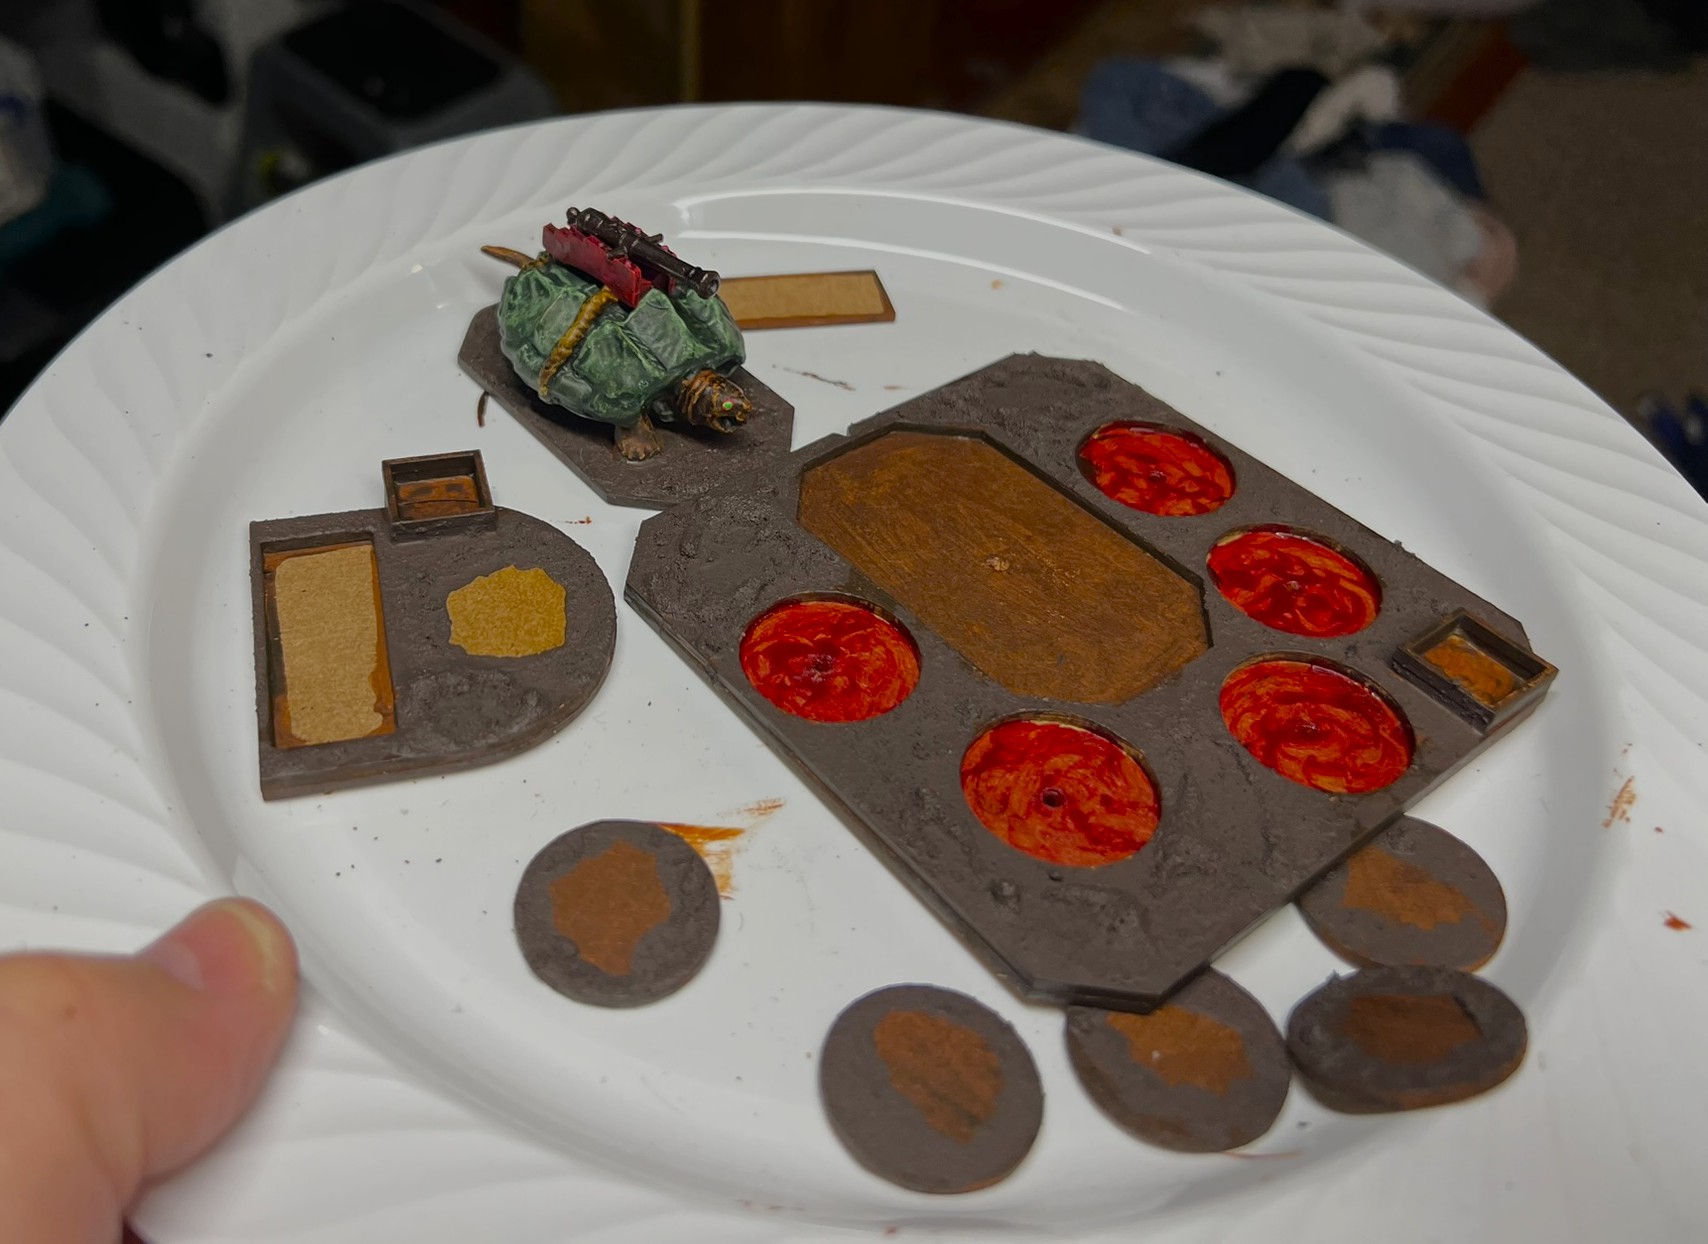
Naturally, I would need to have some markers or tokens to denote actual possession of either mushrooms and crystals. Therefore, I put some together – that would at least look like terrain. These were not difficult to make, cobbling together some bits from here and there. First, I saw some wooden miniature bowls at Michael’s that I thought would fit the bill. I got 12 in 2 packages, and based them on wooded disks atop steel washers. I primed them green.
Primed bowls.
I decided to paint one third of these copper, one third gold, and one third silver. Then I flocked them as I was also working on the trees you saw in my last post.
The bowls shown here flocked.
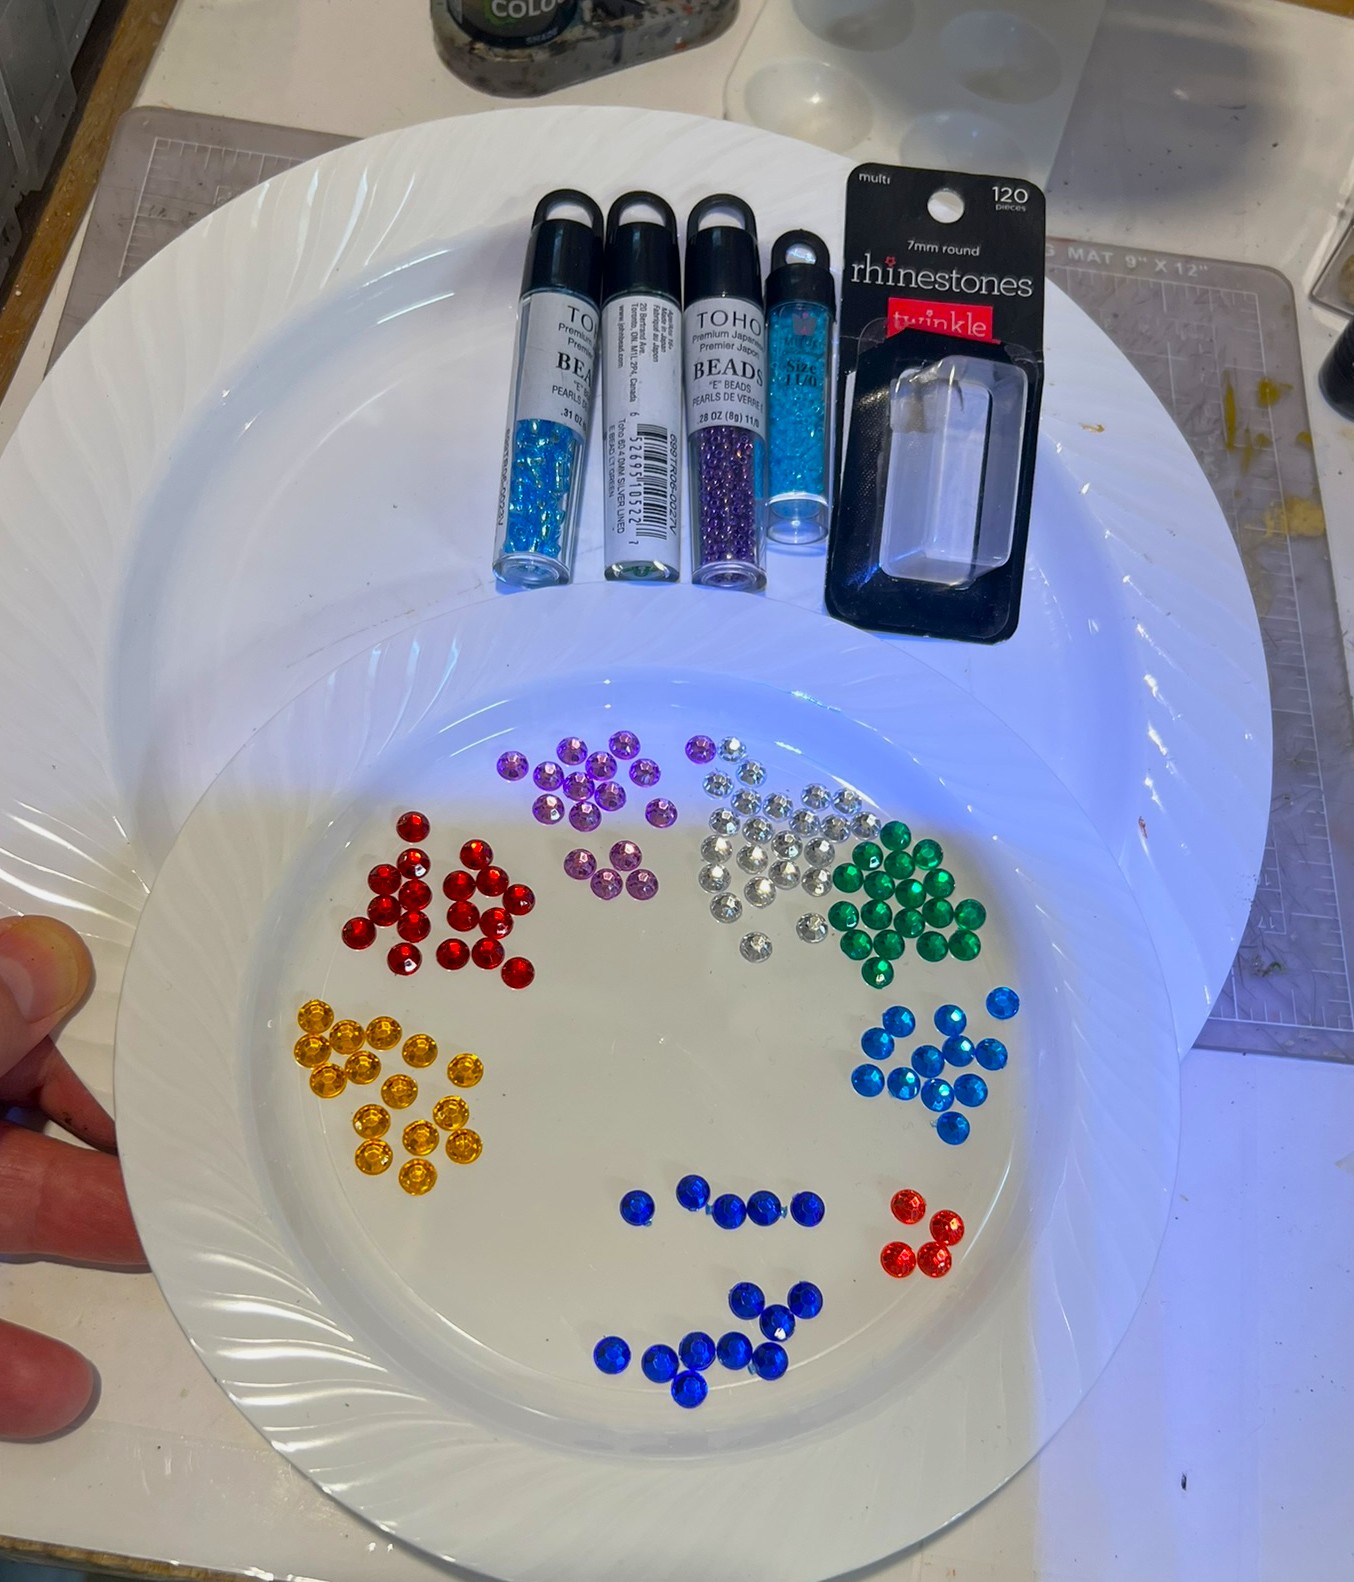
The next challenge would be to get small mushrooms and crystals to fill the bowls. To that end, I used multiple products to bling out the bowls as full of ancient magic crystals.
Rhinestones, glass beads…and more rhinestones!
I used Gorilla Glue to mount them in various combinations for the crystal markers.
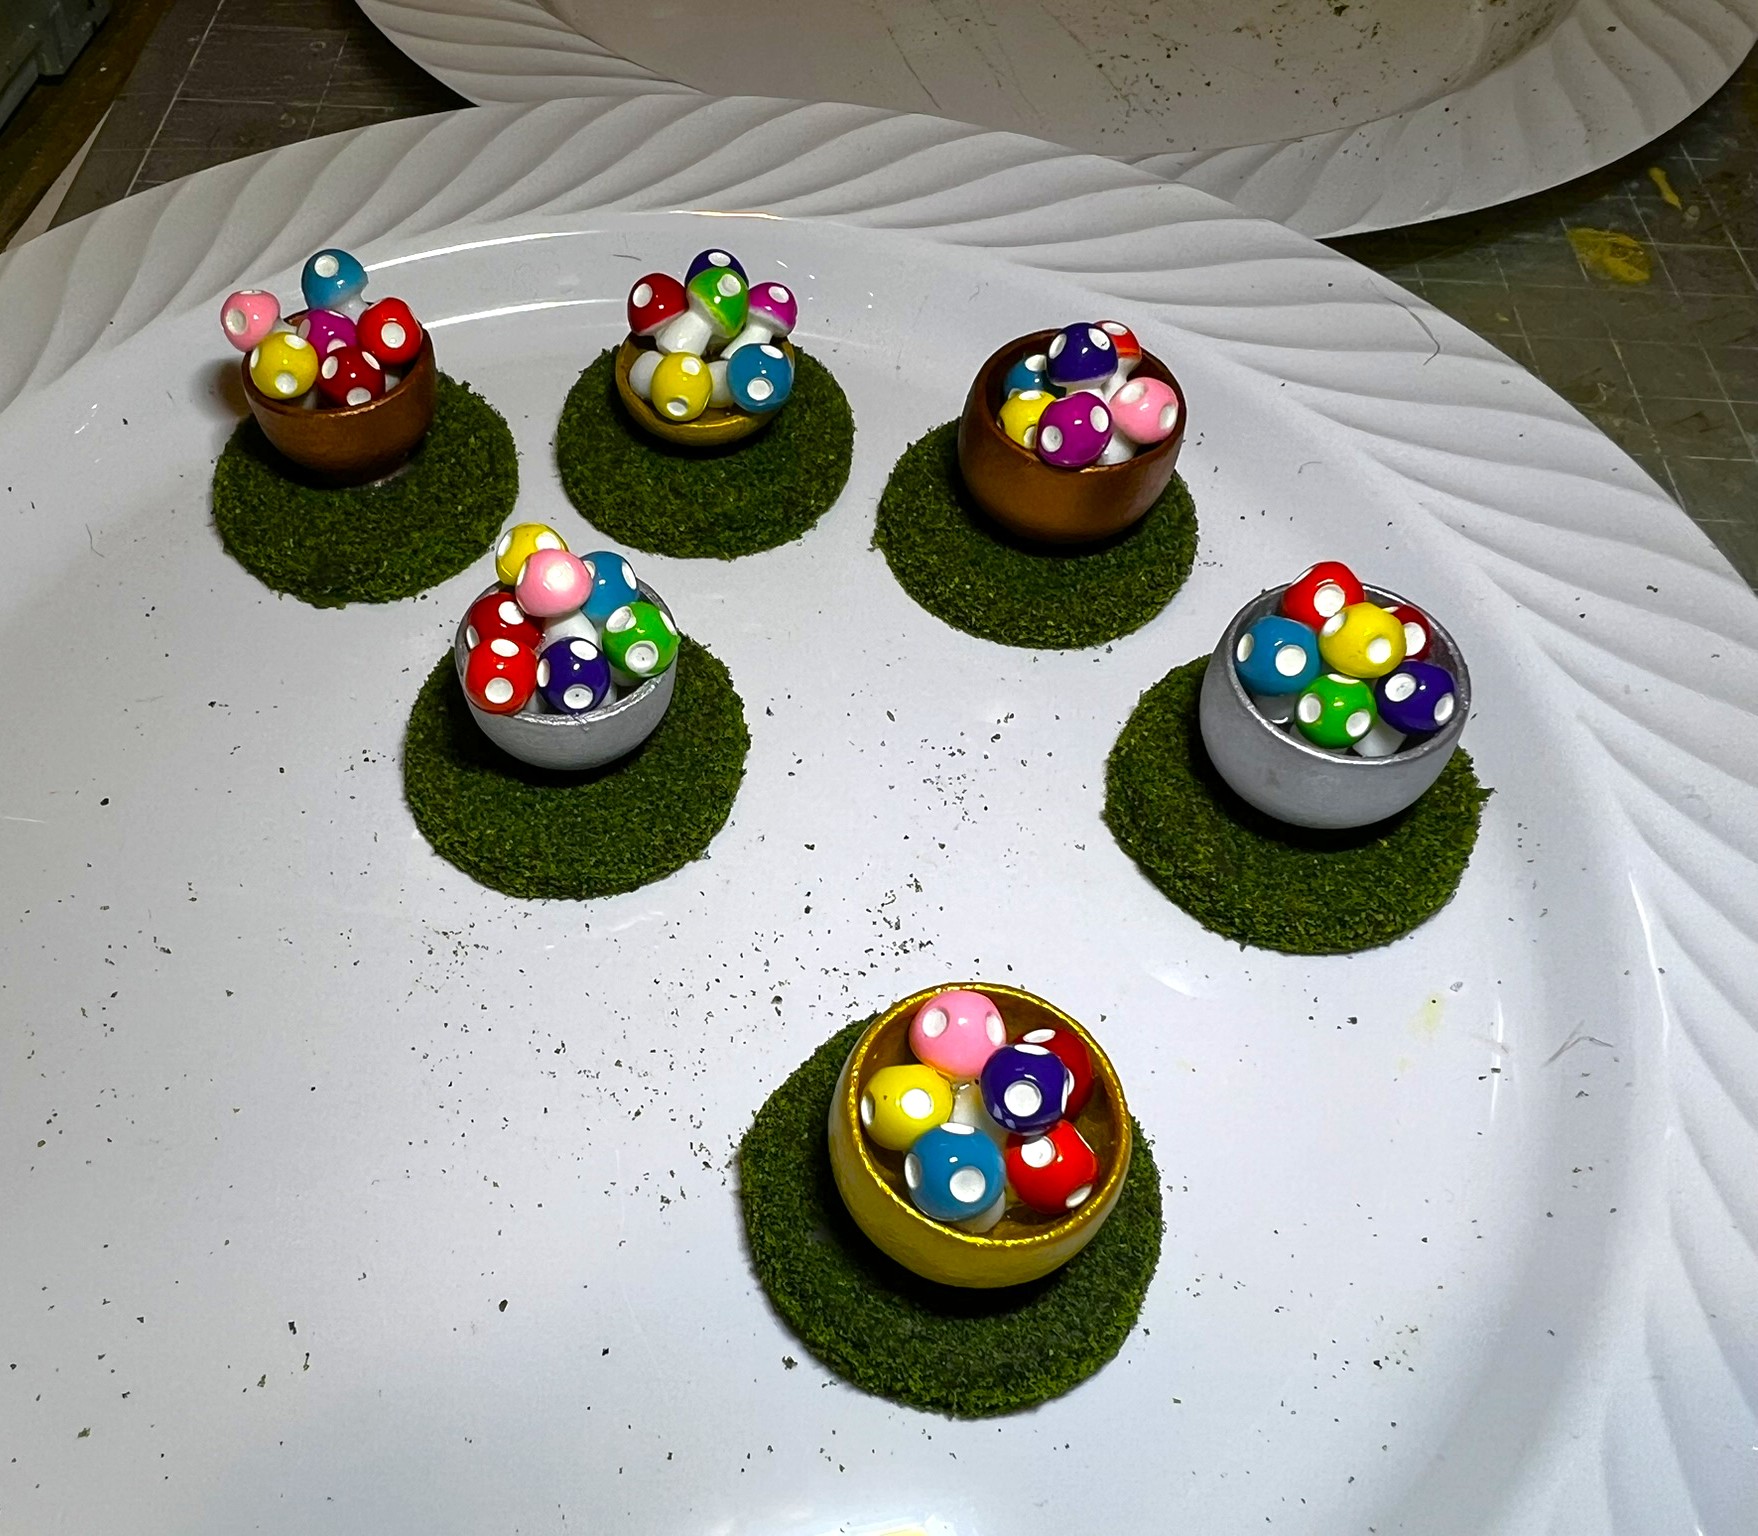
6 crystal markers.
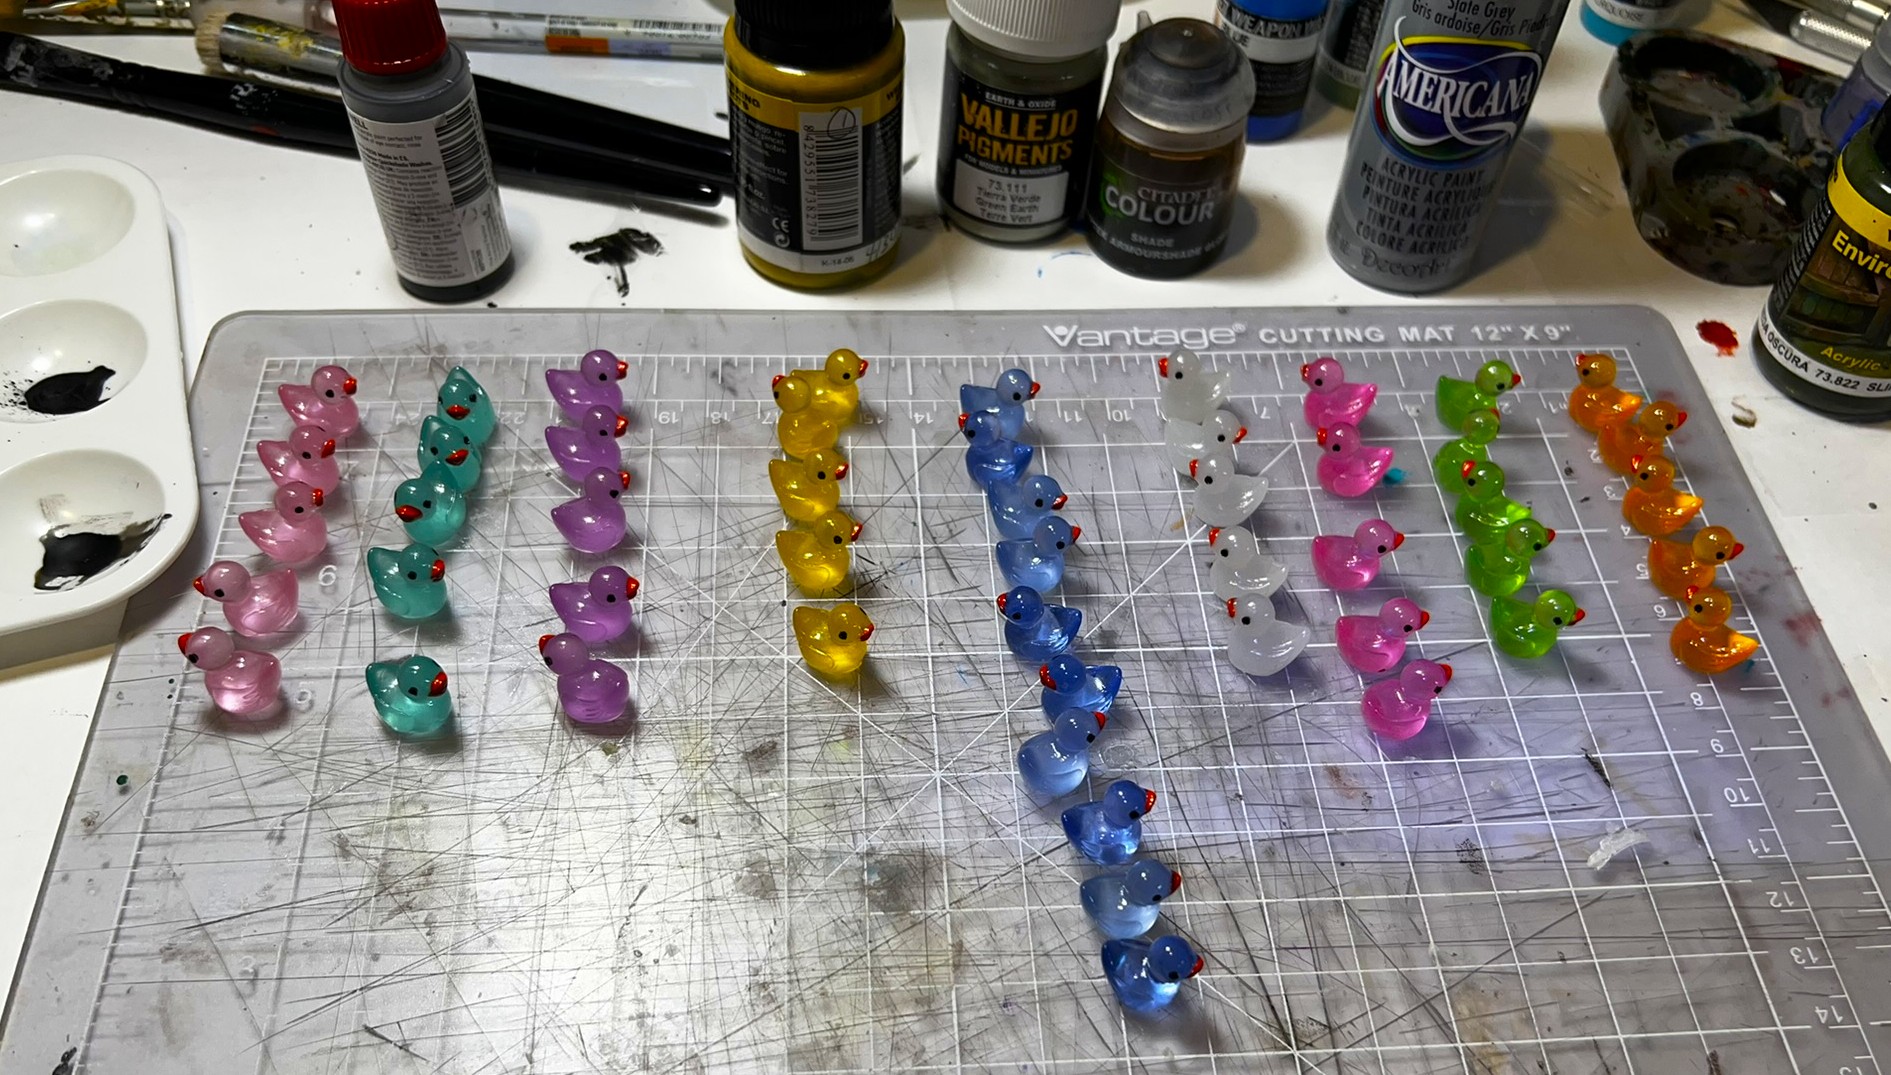
As for the mushrooms, I found some colorful little ones on Amazon. They serve the purpose. I can use them on unit bases too.
Mushroom markers.
And these were done!
I hope that these were fun to look at. In the game, possession of these will cause detrimental effects to the holders! So I expect a free-for-all in the game!
Additionally, I did adjust two units’ bases. The Great Flying Apes had one base that still needed adjustment to stay upright. I added a support wire and camouflaged it with some tall jungle turf.
Great Flying Ape base front……and back – repaired.
The other basing challenge I needed to rectify involved my regiment of Mushroom Creatures. I really like the regiment, but their big caps obscure their eyes from above. The issue is that players struggle to identify the actual facing direction of the Mushroom Creatures’ bases. The same little mushrooms that I used for the markers shown here were the solution. I added them to the front of each base – problem solved!
Mushroom Creatures with small mushrooms
I initially thought that this series would be one with just 3 parts. Now it will be 4 as I have finished off a very cool set of terrain pieces. I made these as gifts that simply MUST be shared. Stay tuned for a bonus part 4 and see if you agree!
Final Note
Want to learn more about Ozz? If you want to check out the excellent Wars of Ozz figures’ range, there are two places to get them. You can also get the rules there. (I make no money from this.) The game rules and the figures are available from the next two places:
Below you’ll see the list of paints and the like that I used on the markers. They are more useful for me when I need to recreate a color scheme in the future. They might not be as useful for you. In any case, that’s why I post them.
Miscellaneous details and references for those interested in that sort of thing:
For my earlier posts on Wars of Ozz games, view this page. It includes figures, units, and other related projects.
PAINTS, INKS, GLAZES, SHADES, WASHES, PIGMENTS, FLOCKING, GLUES AND MORE THAT I USED ON THE MAGIC MUSHROOM AND ANCIENT CRYSTALS OF POWER MARKERS:
1½” wooden disks from Michael’s
Everbilt ASD 1½” steel washers
Gorilla Glue
Twinkle 7mm plastic rhinestones
TOHO glass beads from Michael’s
Recollections purple bling stickers
Make Market Miniature Bowls & Plates (2 sets) from Michael’s
Everbilt ASP washers
PVA Glue
Binder clips
Vallejo Surface Primer “Russian Green”
Citadel “Auric Armour Gold”
Tamiya “XF-6 Copper”
Tamiya “XF-11 Chrome Silver”
Woodland Scenics “Blended Turf” (flocking)
Exasinine Mini Mushroom Resin Figurines for Home DéCor (Style 1, Small)
On the last time that I posted, I shared my Scarecrow Girl statue that I cobbled together. After Christmas, I was able to add even more to my scatter terrain with a myriad of pieces. In the case of this post, I’ll share how I built out and painted up desert/cactus pieces and some oases. I also did a bit of tree build and rehab work that I will share here.
It’s all for my Wars of Ozz games. I needed some more desert pieces – especially now as I have significant numbers of desert units from both the Whim Whim and Temujican factions. I did previously use some cacti from Hobby Lobby in my Mesoamerican games.
Two Christmas gifts from my Mom – cacti and trees (both kinds the types for model railroads or dioramas) – brought me an opportunity to go further. On a side note, she says I’m tough to get a gift for – to which I say I really don’t need any at my age – but I do appreciate her a lot and it was very thoughtful (she’s probably reading this too!). In any case they will outlast golf balls for sure…
The cacti were great for building some scatter terrain. Additionally, I needed to make objective markers for one of my desert games – and oases seemed appropriate for that purpose. Lastly, my deciduous and evergreen tree collection (which is mostly second-hand from a flea market) needed an upgrade badly as they were looking like victims of Agent Orange defoliant. So, Mom’s tree gift of three Hobby Lobby trees was another scatter terrain opportunity. I’ll discuss the cacti scatter bases first, then the oases build, and lastly the trees.
Cacti Bases
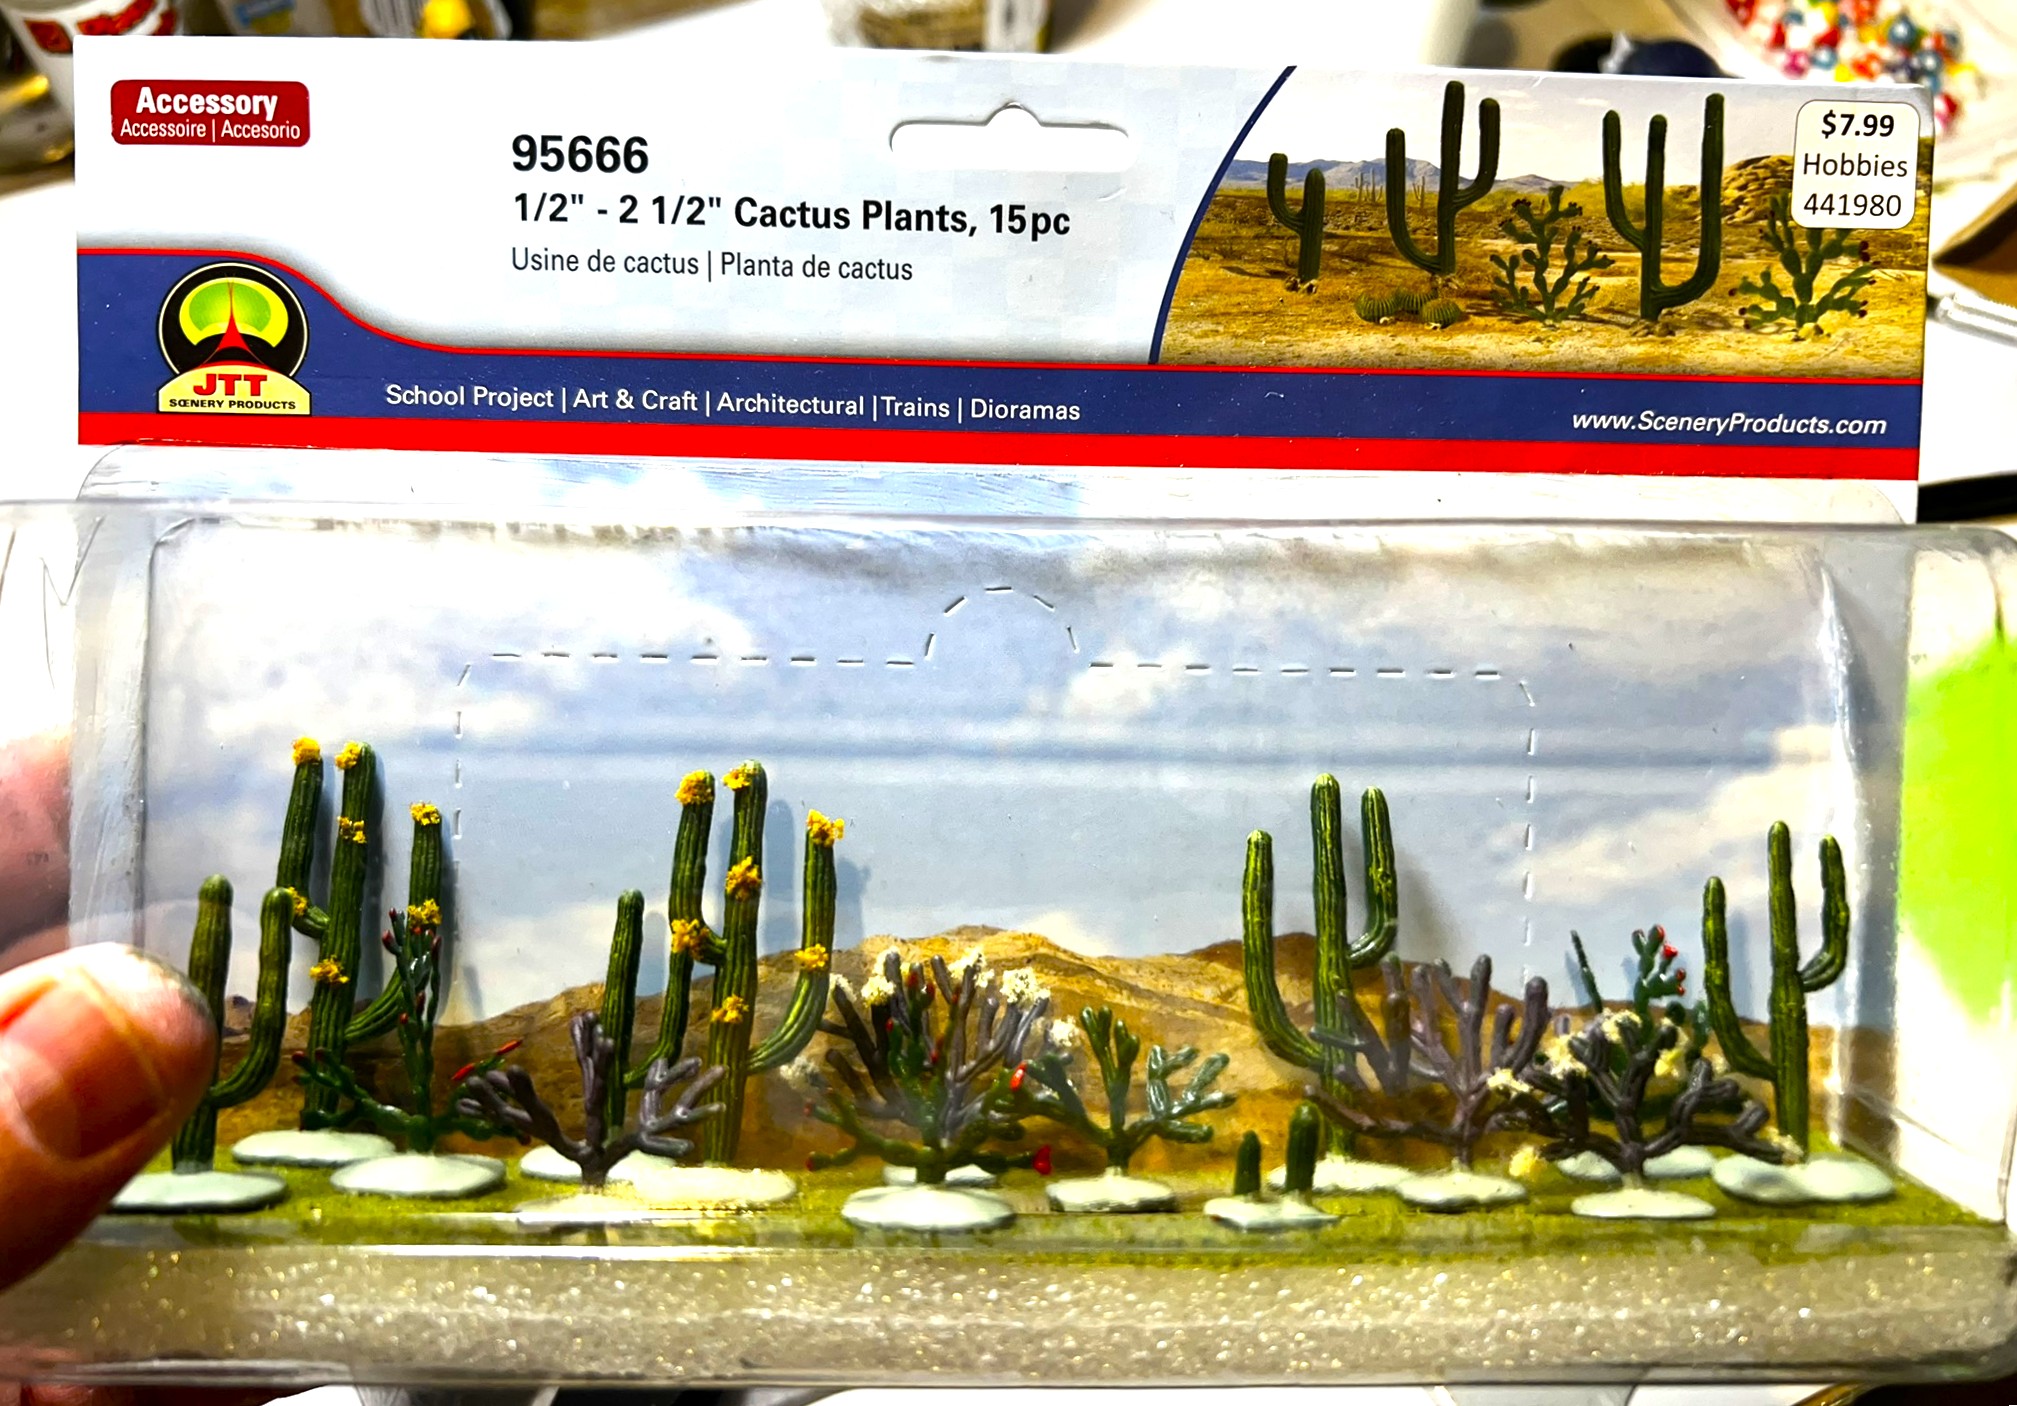
Cactus plants from JTT Scenery – I had two packages of 15 cacti.
The cacti are from JTT, and are plastic, and hence, they have that glossy look. I used a wash to knock off the glossy appearance and to give some depth to the plants’ striations. This was easy to do as the plants are set in the package into a styrofoam base. That base holds them loosely enough for applying a sepia wash and removing the cacti and bushes afterwards was simple.
After applying a sepia wash. The mounting styrofoam made this easy.
As for bases for the plants, I decided it was a good opportunity to clear out a bunch of different plastic and wooden bases from my collection. One was even the same as I used on the Scarecrow Girl statue. You can see them below – I ended up with 20 bases. All of them got appropriately-sized steel washers underneath.
Some of the bases I used – well 19/20 anyways! The other one was a wooden scratch-built base that needed a purpose.
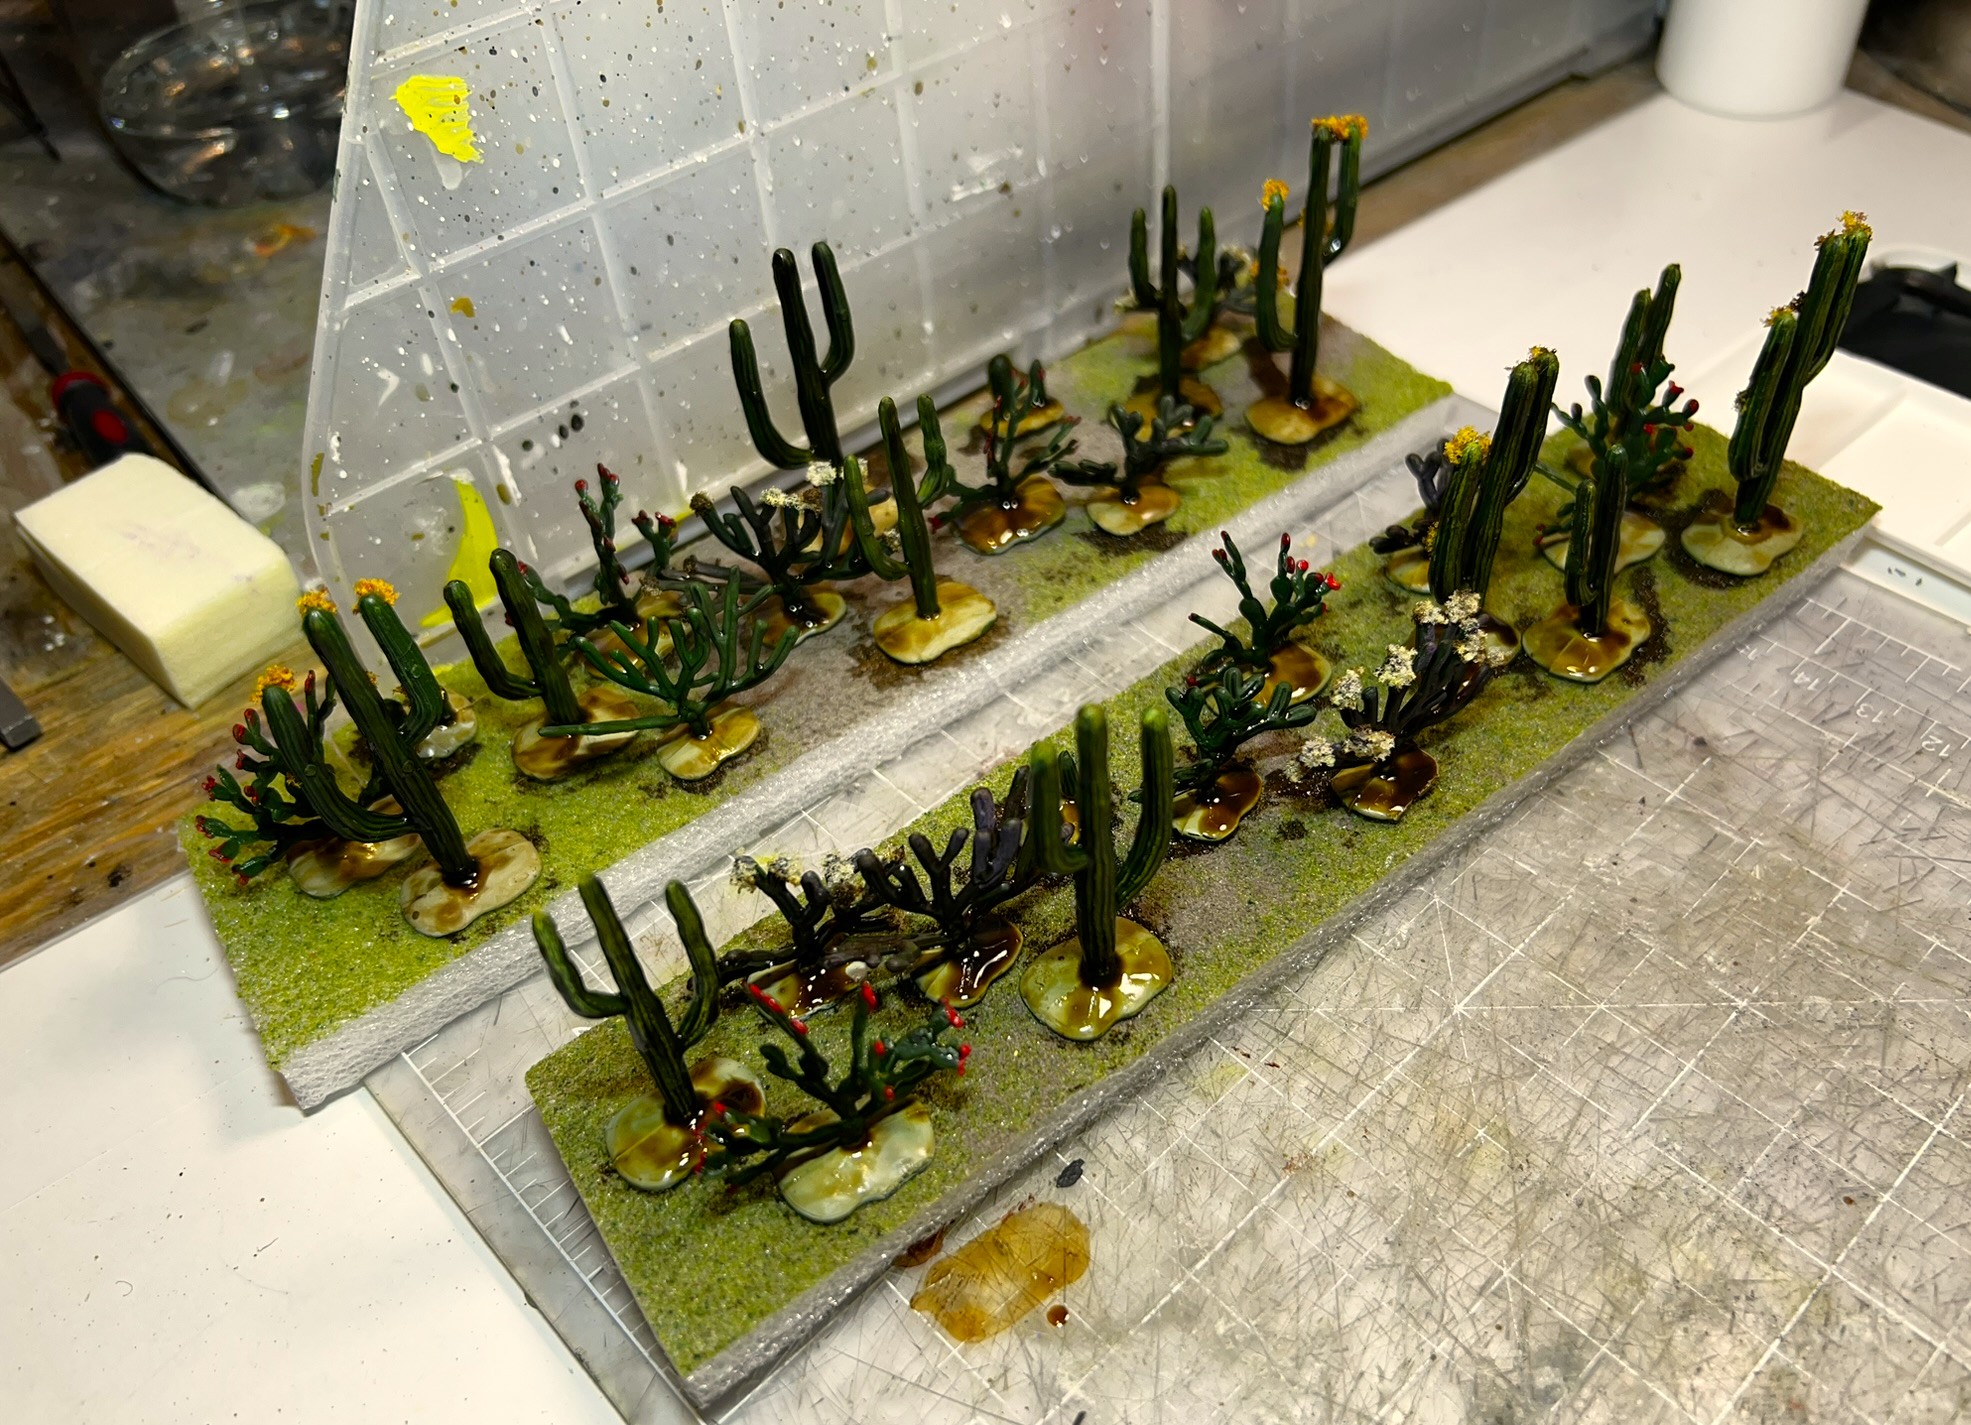
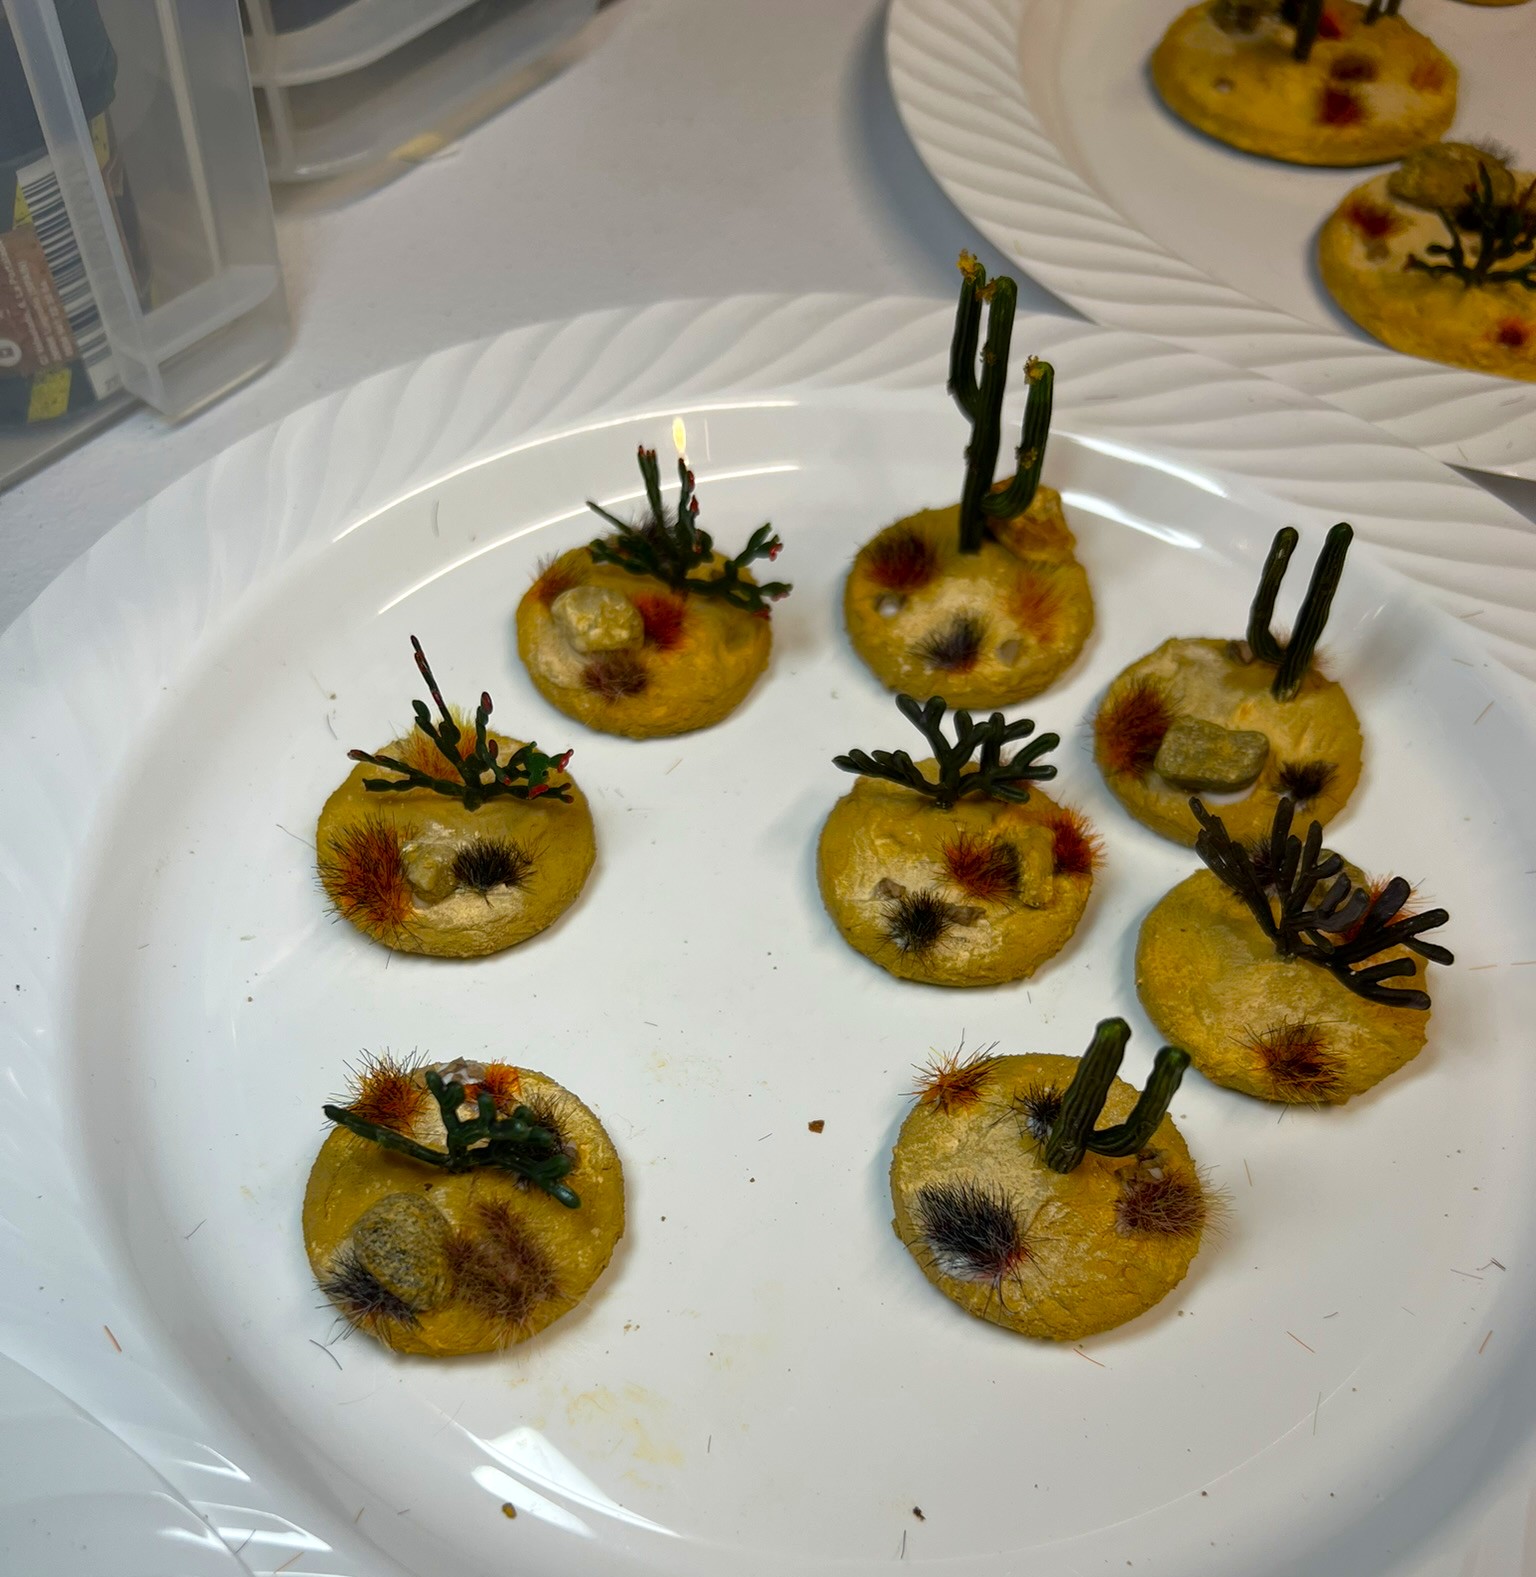
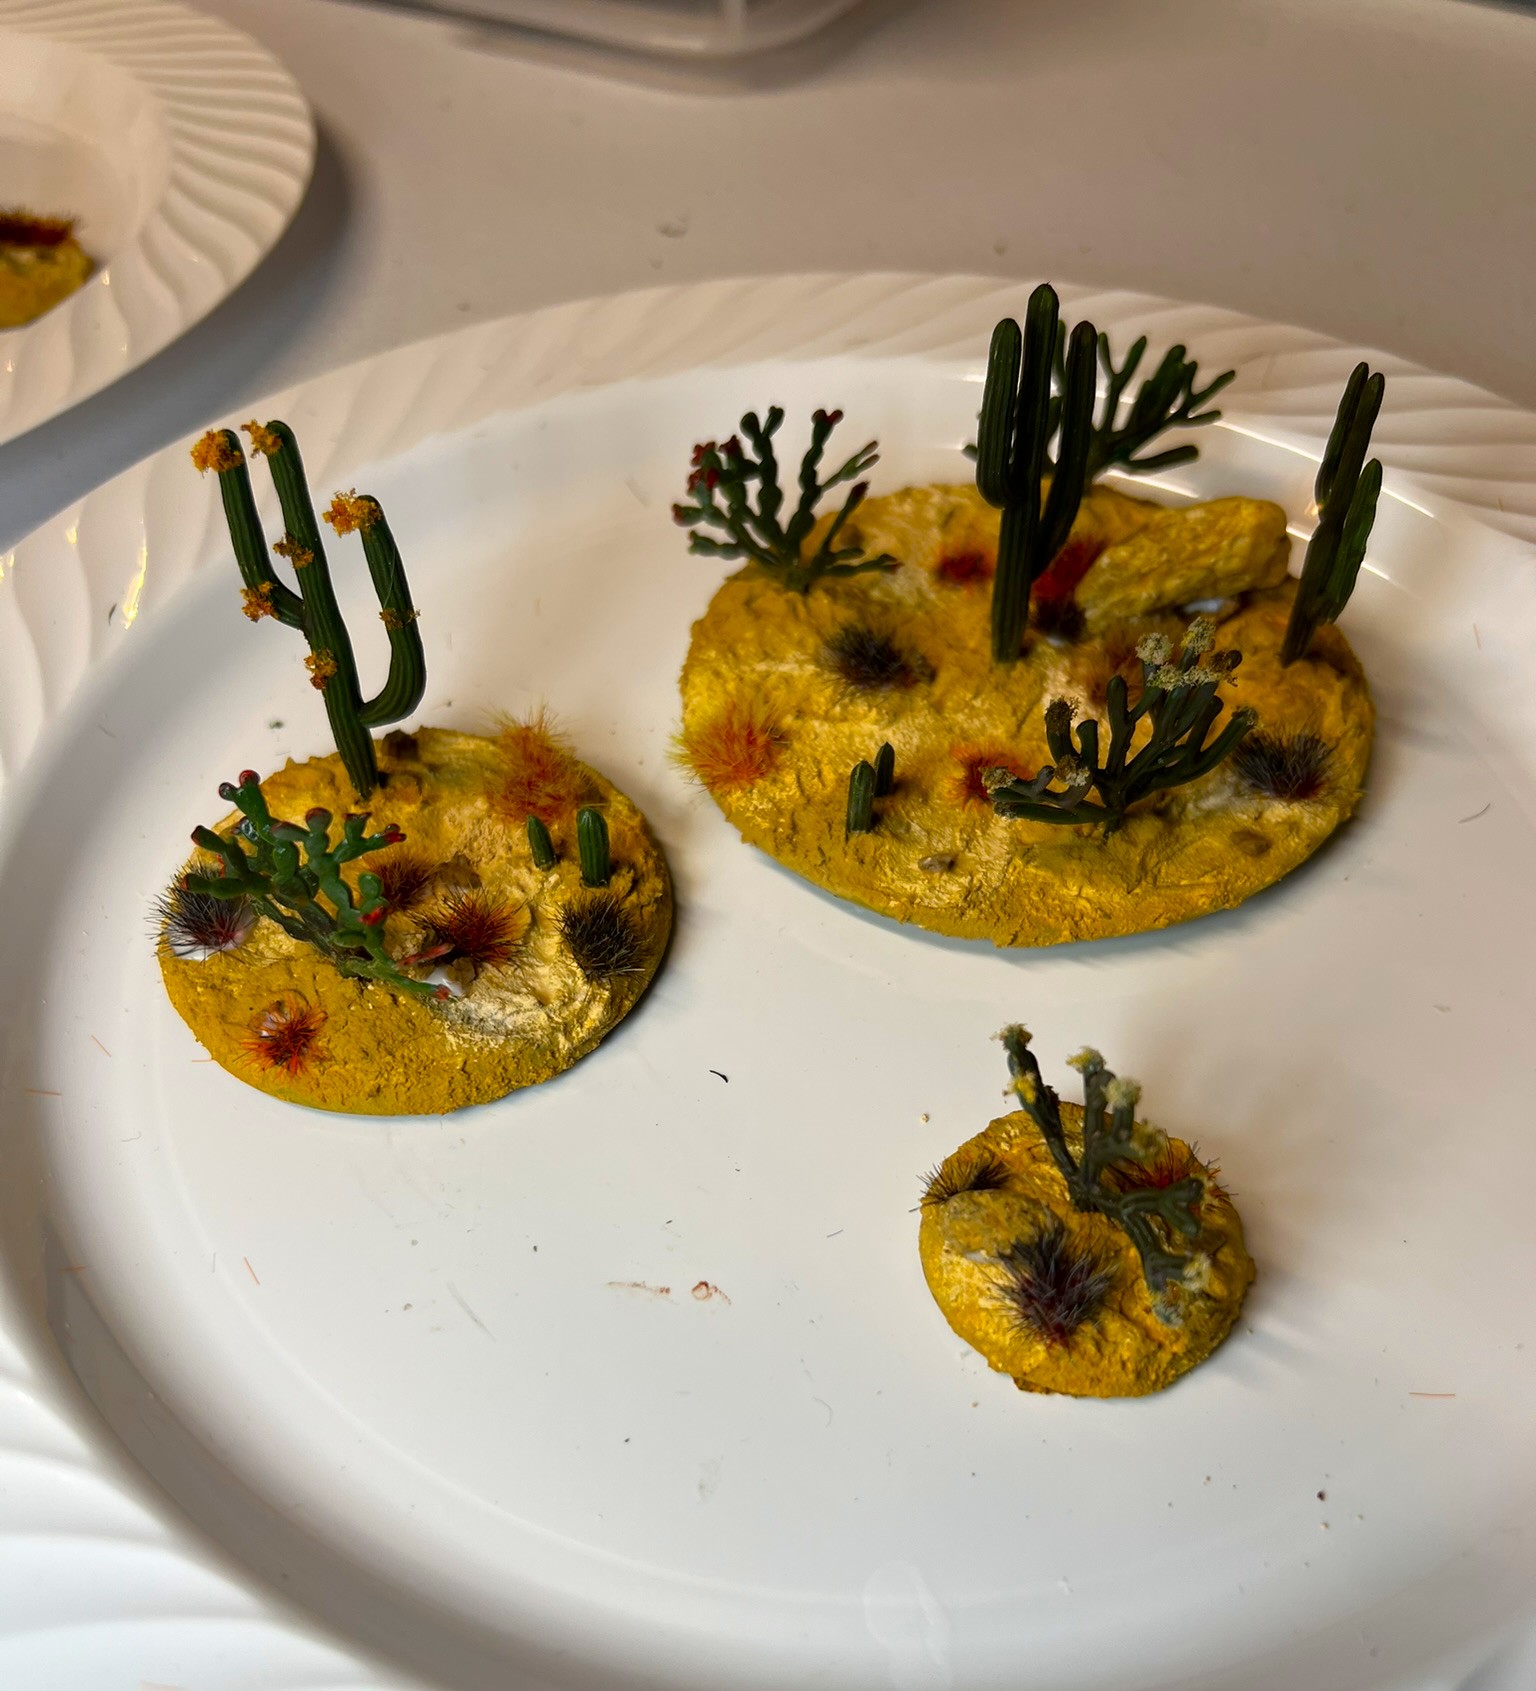
I glued the plants to the base, then added the AK basing paste, let that dry, then added pigments. When that was set, I added flocking to match my Whim Whim and Temujican unit basing schemes.
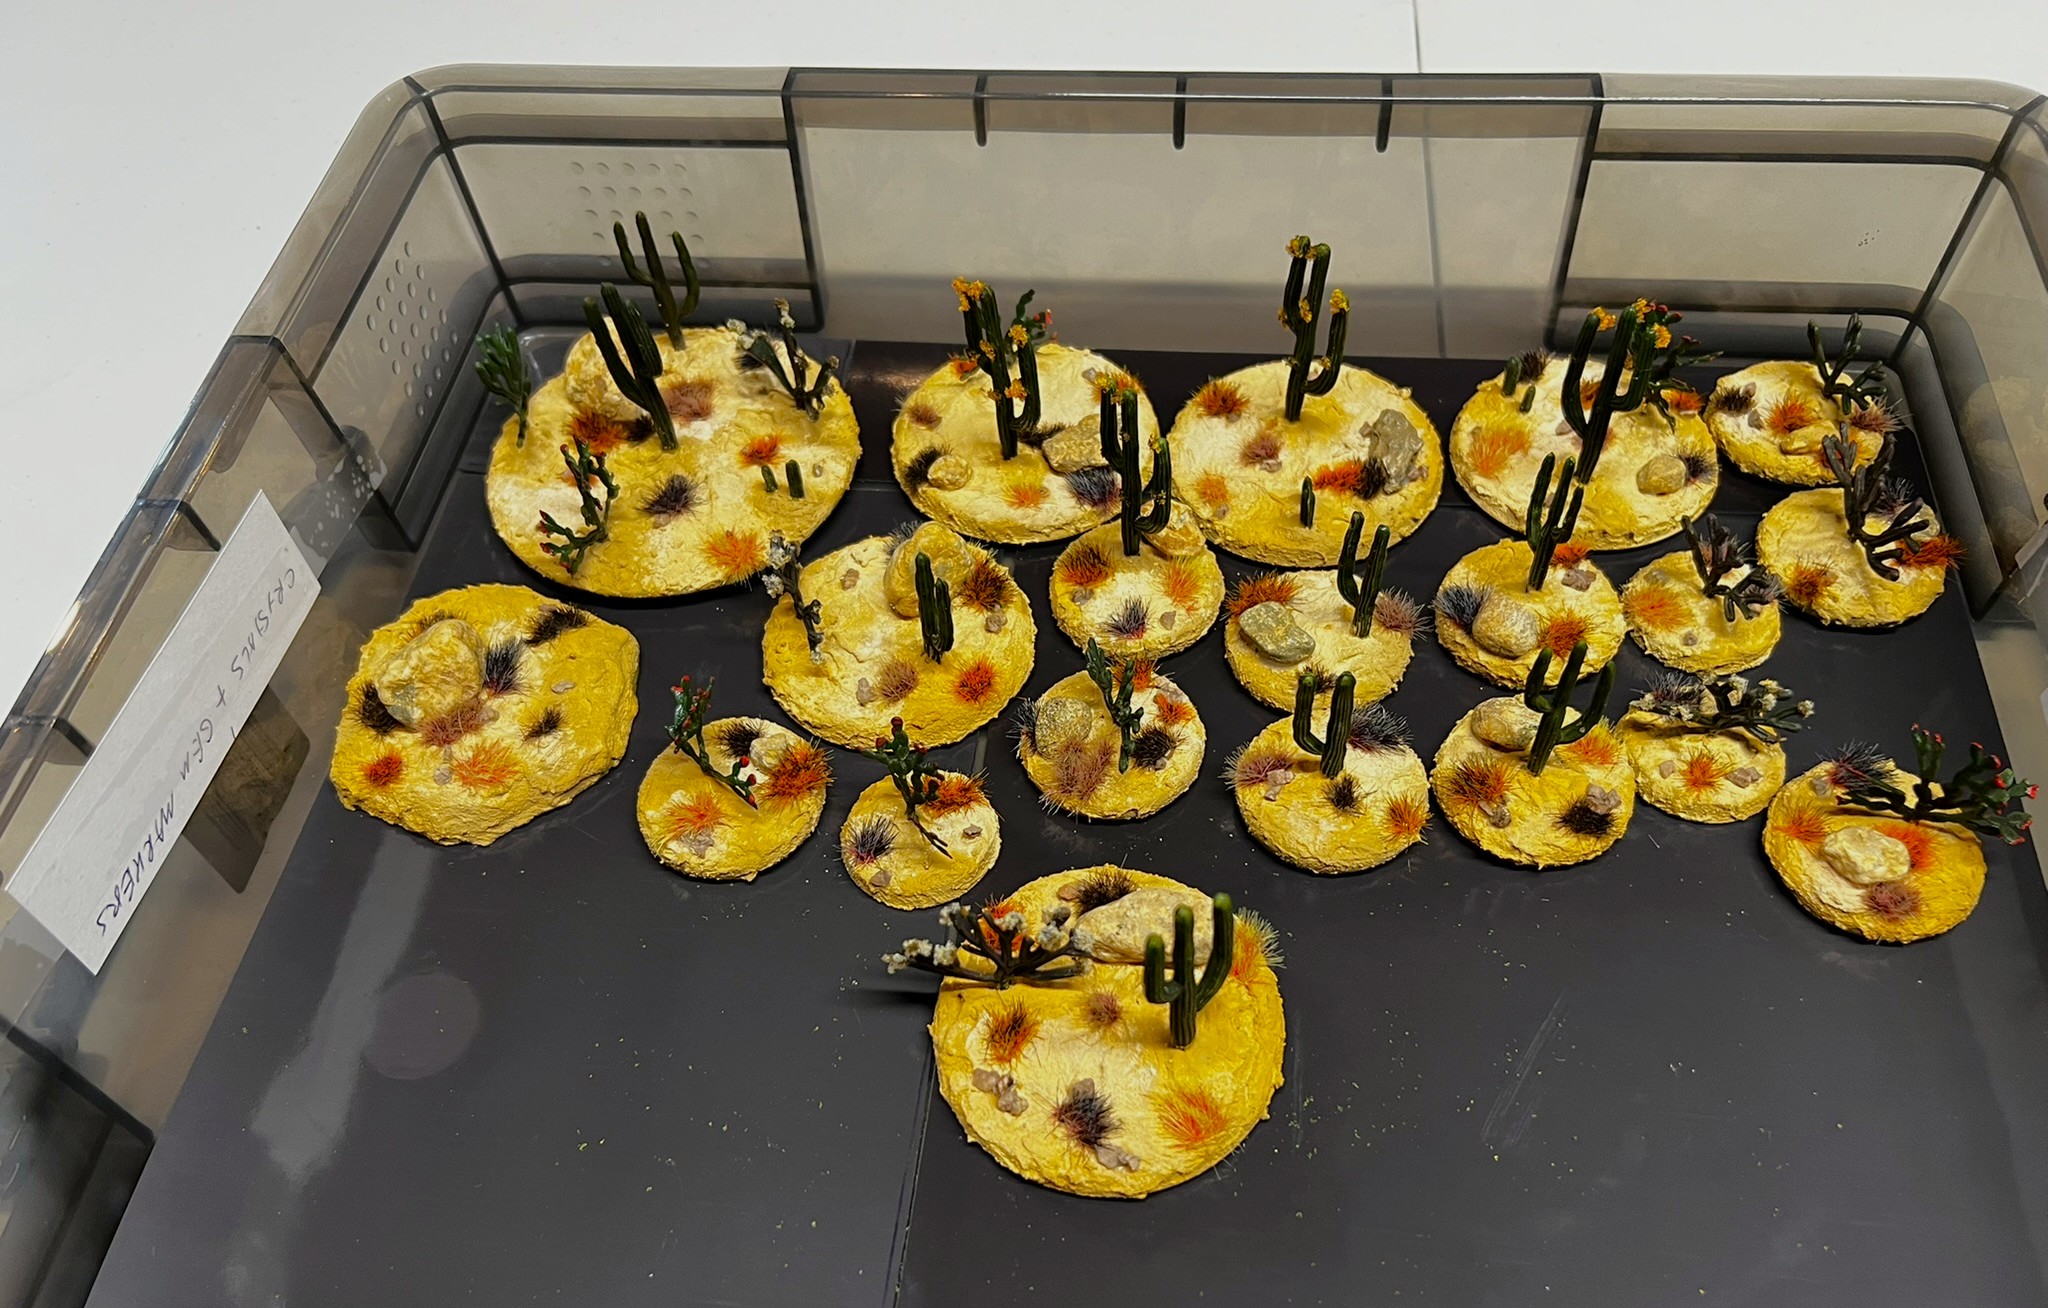
When I sent my mother these pictures on my phone, she thought they were cookies! Below you can see all 20 of them in a Really Useful Box.
Oases
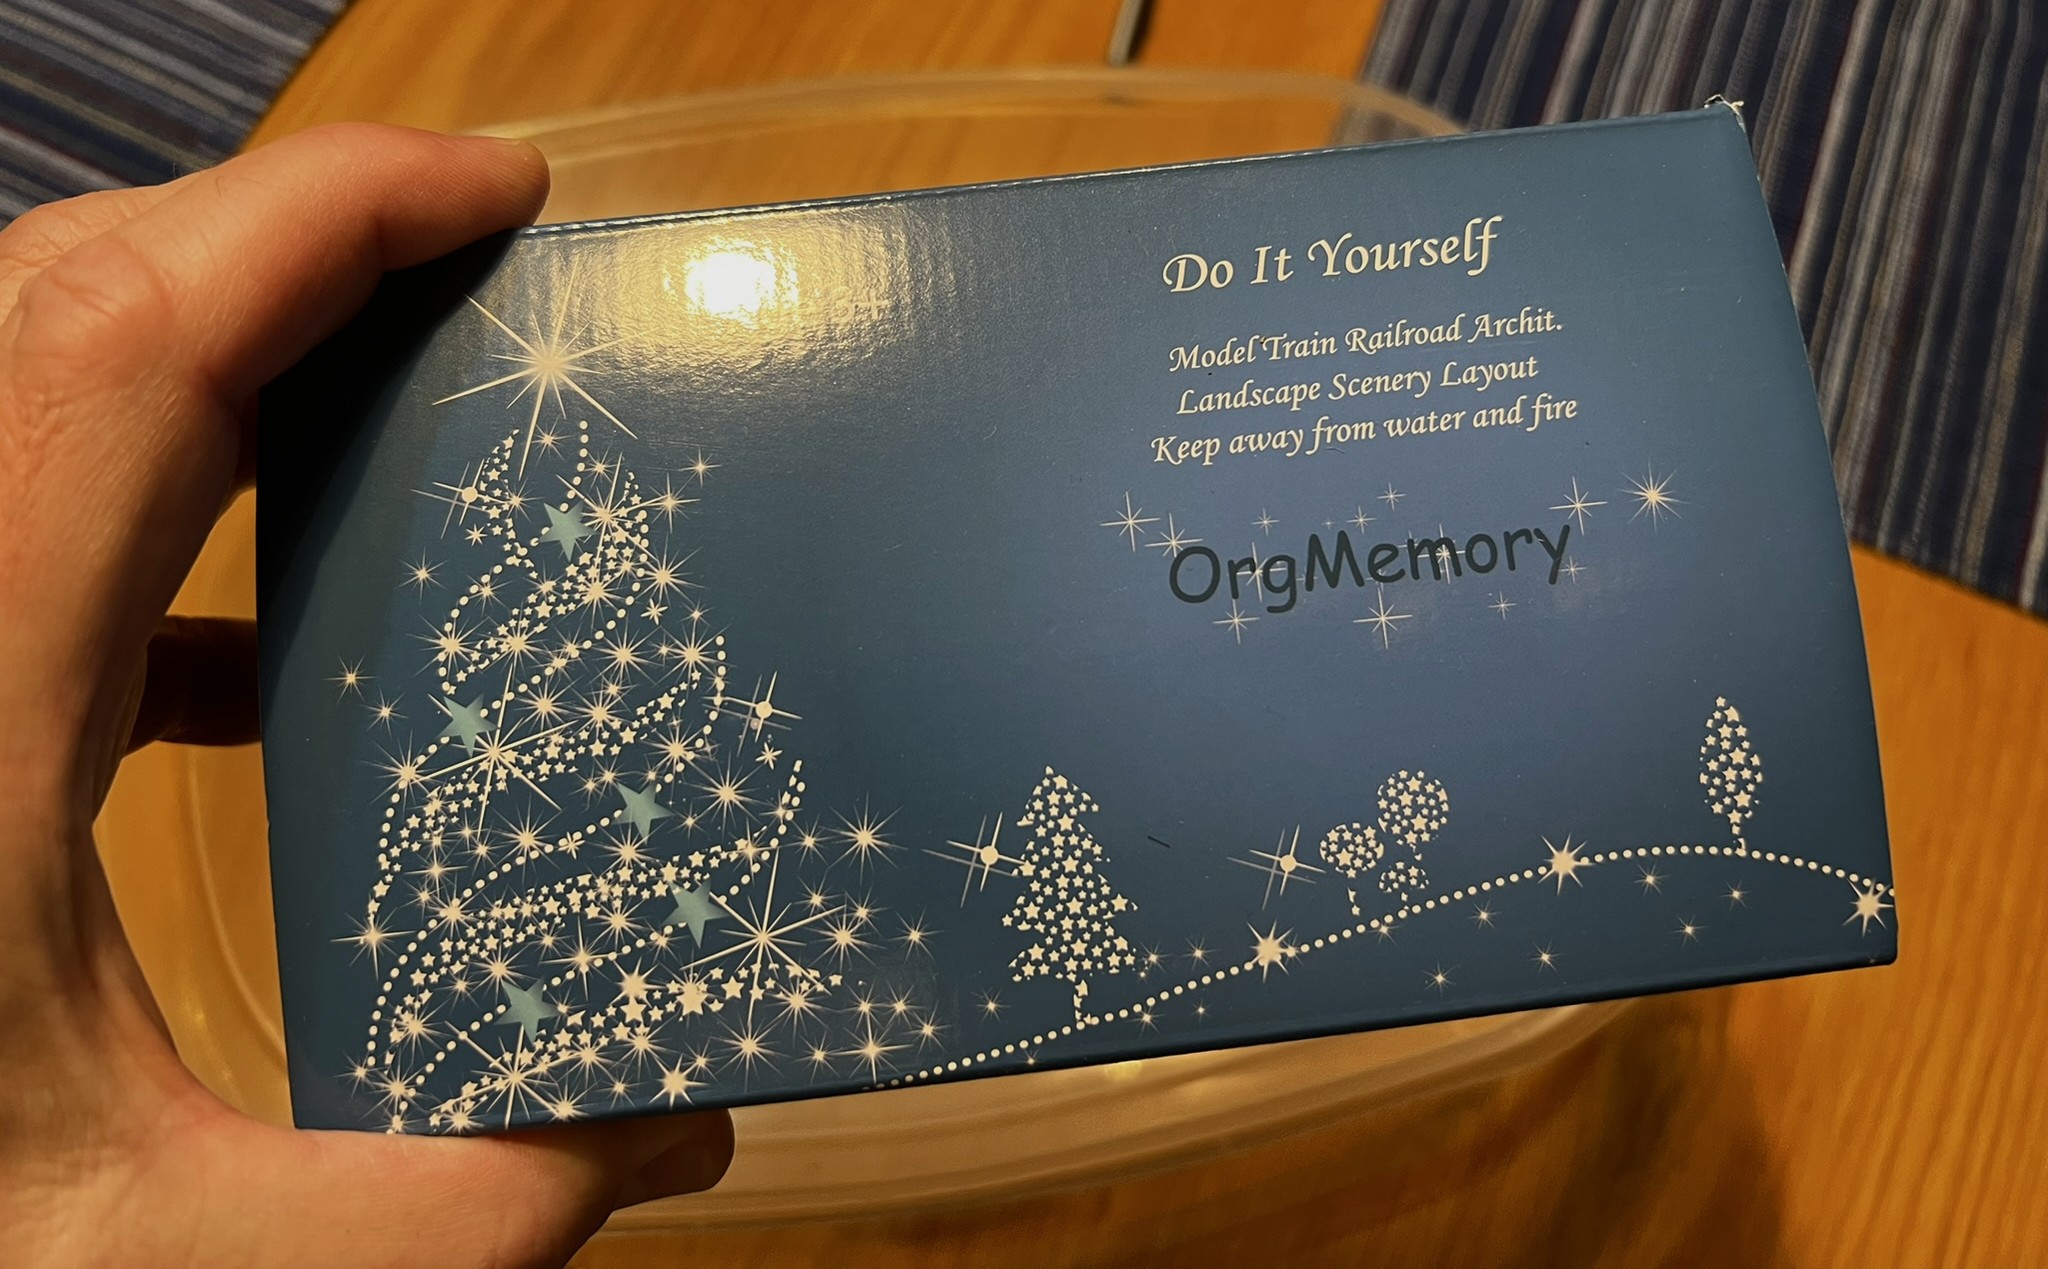
Some of you may remember that for my Conquistador/Maya game, I built some sandy scrub-like terrain pieces, that had a few palm trees. These did not look like an oasis to me – so I decided to make some that did. I found some model landscape palm trees on Amazon from OrgMemory.
The OrgMemory palm tree box.
The plastic palm trees would need (similar to the previous situation with the cacti), a sepia wash. To ensure that a sepia wash would adhere properly, I washed all of the palms in soap and water and let them dry. This would also let me figure out what sizes would be best to use on this scratch-build.
A mass of trees ready to wash……and drying. Now I needed somewhere to put them and to determine the appropriate mix of types and sizes. The little prongs on the bottoms of the trees would help later with mounting on the oases.
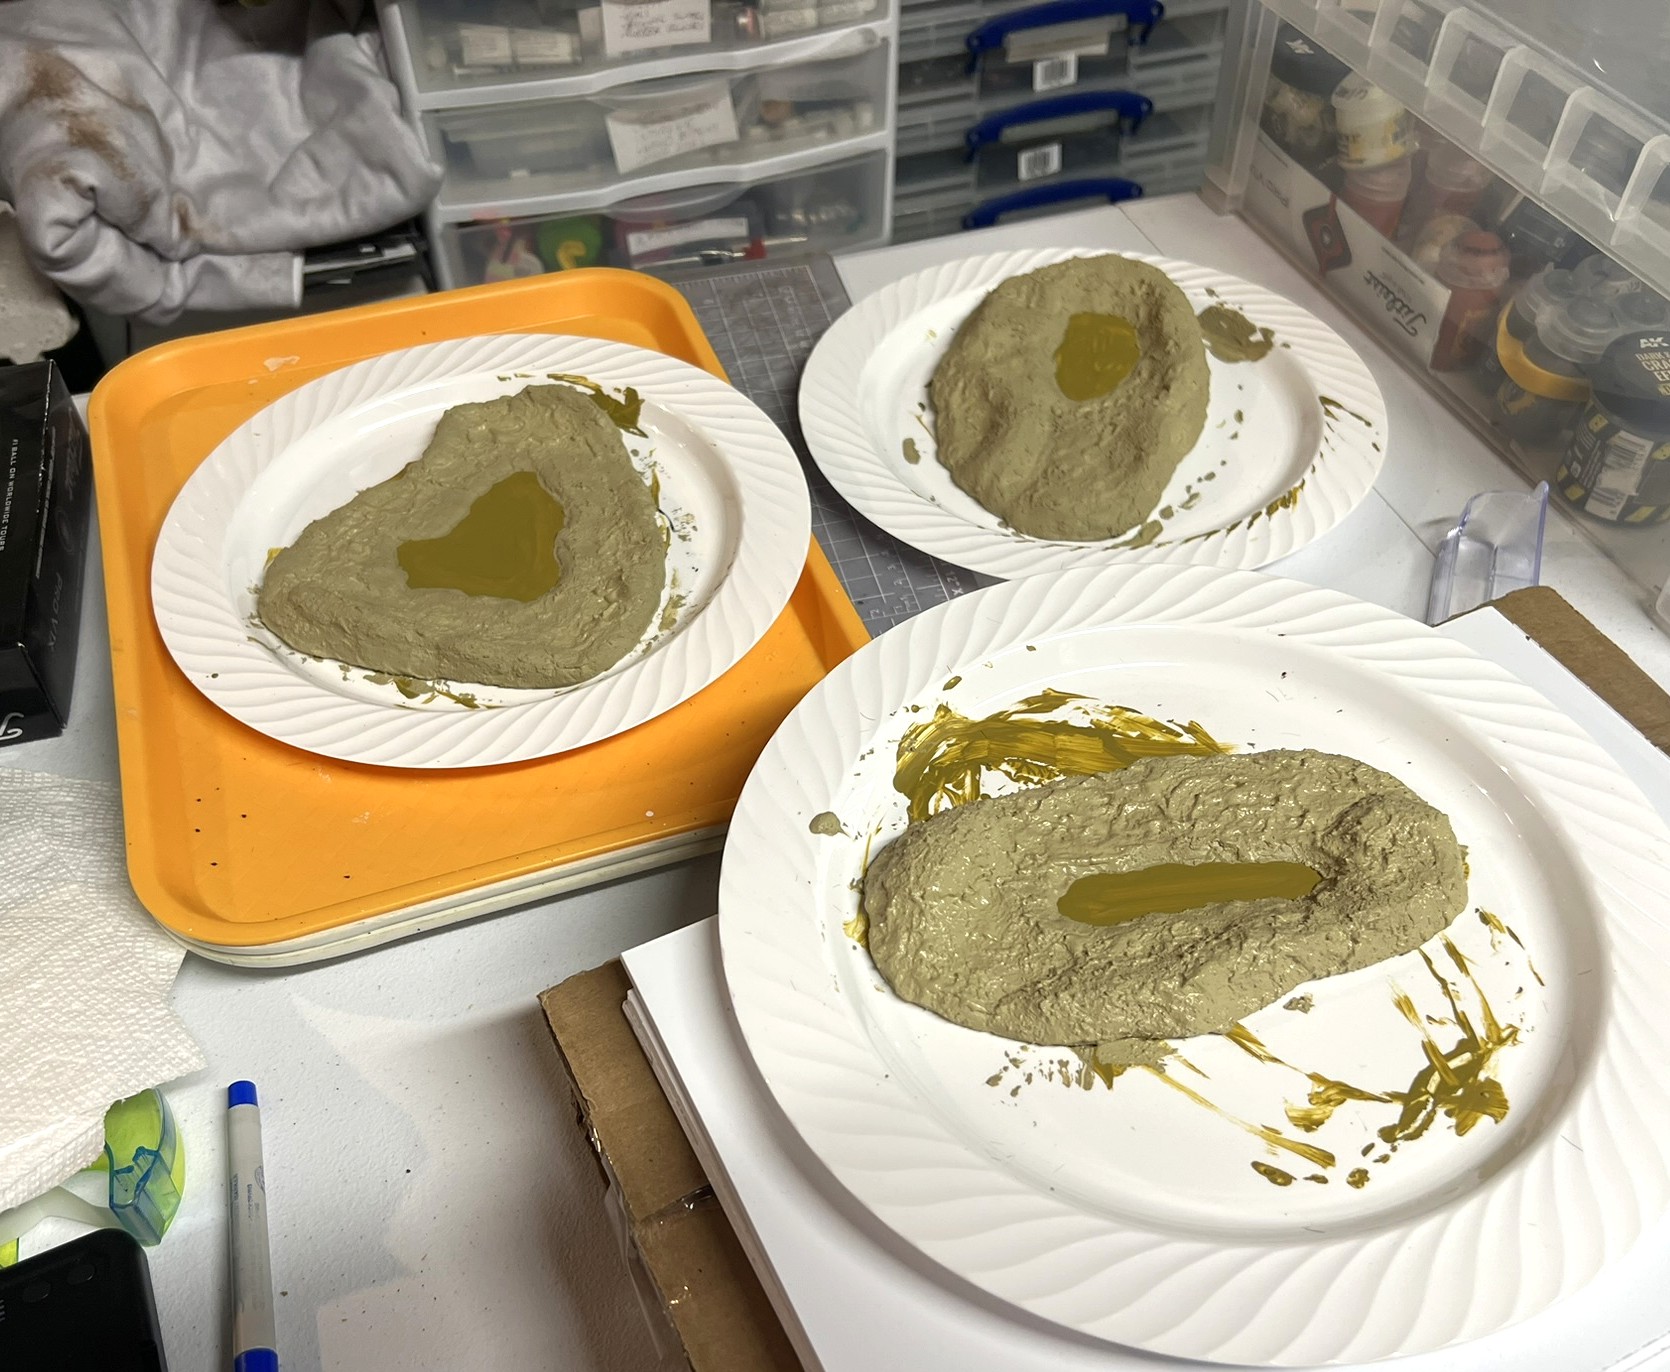
While the palm trees dried, I used my scroll saw cut up four polystyrene sheets into random shapes for the oases’ bases (that rhymes?). Apoxie Sculpt was applied on the sheets to create the shapes of the terrain. In the end, I only used three of the four sheets. I’ll save the other for later use.
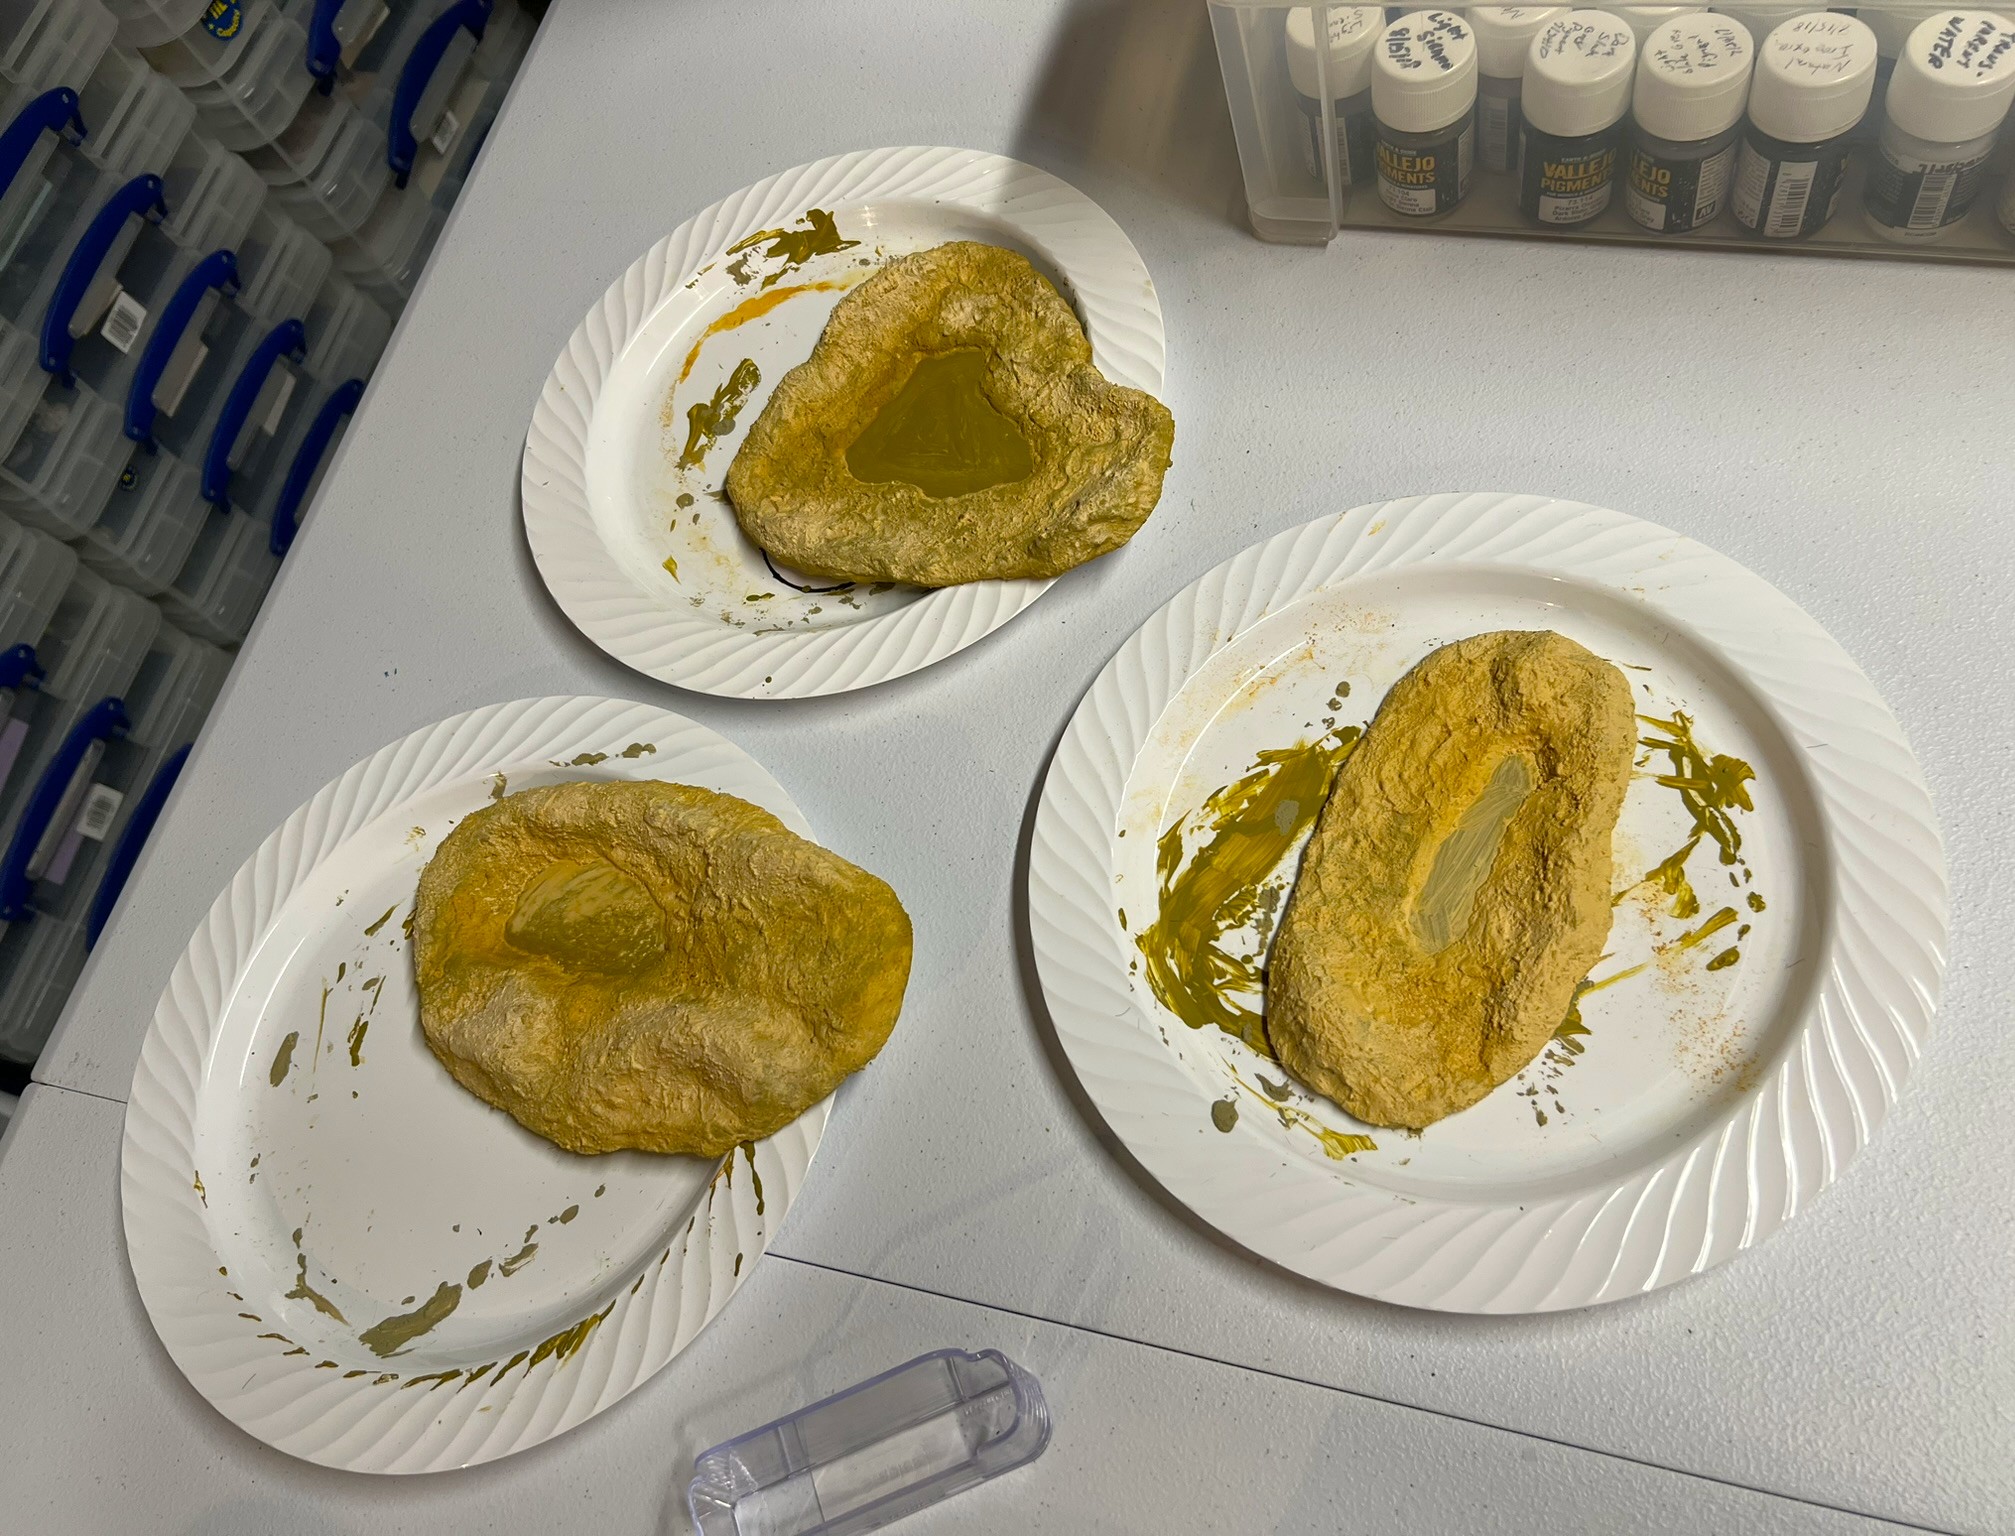
The polystyrene sheets cut into shapes for the oases.The Apoxie Sculpt setting up and hardening as shaped on the three oases. It cures in 24 hours.Once the Apoxie Sculpt had cured, I primed all three with a light yellow primer – and let that cure before adding the desert paste.Here you see the AK dry desert paste applied and starting to dry.Once dry, I added three different pigments (similar to my desert bases and scatter terrain), and let the pigments set.The next step was to paint the bottom of the water holes a distinct turquoise in anticipation of adding the Vallejo Still Water product later. I wanted the water to really stand out color-wise.
Once all the flocking was in I added the Vallejo Still Water in – mixed with some Secret Weapon Washes blue ink.
I then mixed and matched the palm trees to see what worked. The cured Apoxie Sculpt was pliable enough – yet strong enough – such that I was able to use an awl to make the holes for the trees’ prongs you saw above to set in the oases. This allows them to be removable, which is a plus, while the holes stay strong for reinsertion of the trees.
Completed!
Lastly, here is a video of them and a brief description by yours truly:
These three oases are the objective markers for my game, “The Desert Wars of Ozz“. The flyer for that game is below. You can see the some of the cactus bases and the oases – though they lost some color on the flyer being in the back.
“The Desert Wars of Ozz” game flyer.
I will be running this game (or a similar one) at multiple gaming conventions this year.
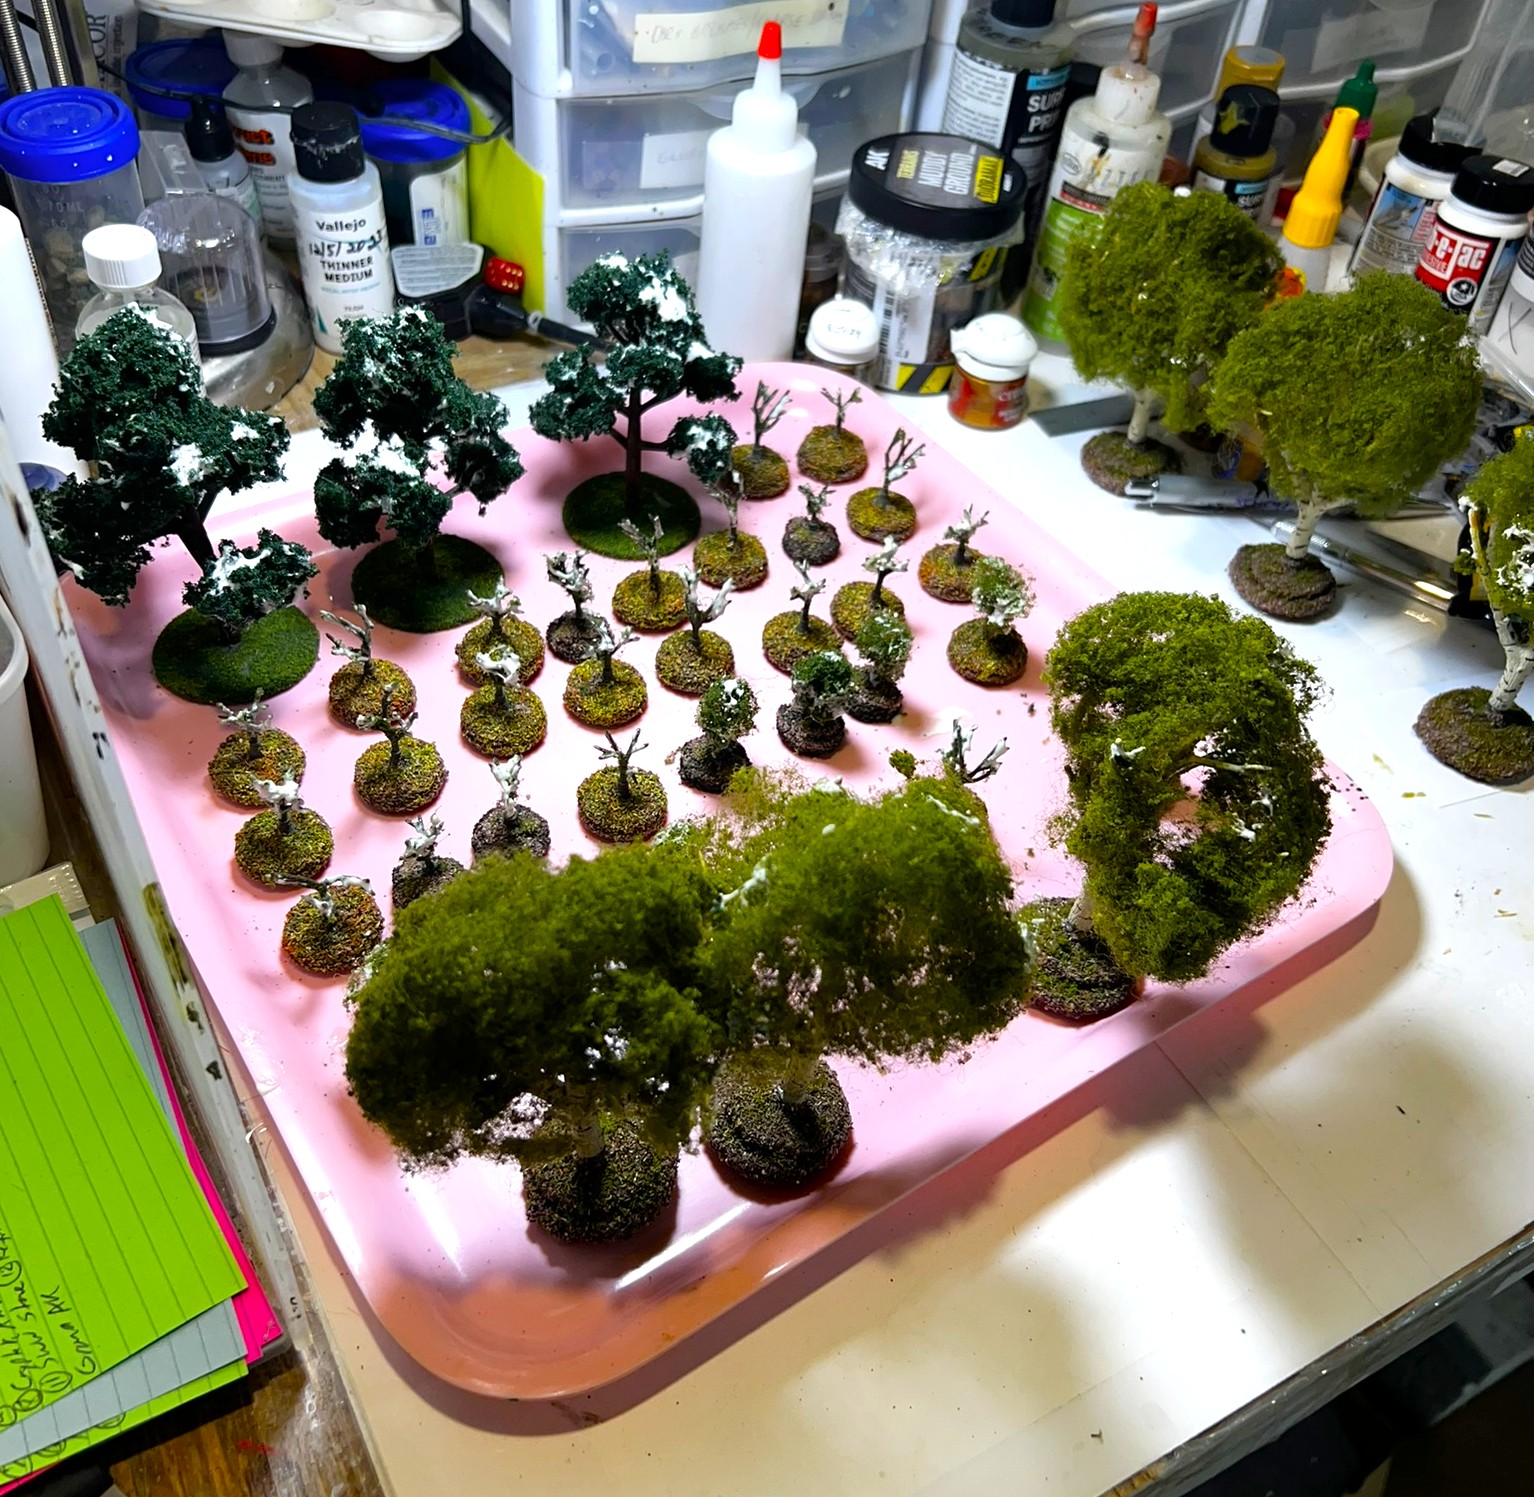
Tree Builds and Rehabilitation
My tree collection that I have used for years was in need of rehabilitation. The other gift from Mom was a JTT product that you see below:
The tree package.
These were nice trees, but the foliage was a bit stringy in places. Plus I needed to wash the plastic limbs and trunks down with sepia and a darker wash. I assembled and mounted these three on large 2″ steel washers. Then I went to my tree collection and stripped off the stringier foliage on the older trees I already had. I applied Woodland Scenics Hob-E-Tac to the older trees and the newer ones. After the glue had turned clear, I used Woodland Scenics Light and Medium Green clump foliage to finish them off. There were 32 trees in all.
The stripped trees with the three new ones in the back – all with Hob-E-Tac drying.The post-makeover trees.
As trees are just so essential to a tabletop, I was happy to have these in better shape for my games going forward.
That wraps up part 2 of this mini-series on terrain. I think I got a lot done here and it was fun. The cactus bases and the oases also qualify for Dave Stone’s annual “Paint What You Got Challenge”. Please, check it out – Dave is a great guy and runs this every year between Christmas and the end of February.
If you have any suggestions or feedback, as always, let me know in the comment section.
And part 3 (the last one) in this series will be coming soon…
Final Note
Want to learn more about Ozz? Well, if you do want to check out the excellent Wars of Ozz figures’ range – there are two places to get them and to get the rules (and I make no money from this). The game rules and the figures are available from the next two places:
Below you’ll see the list of paints and the like that I used on these – and they are more useful for me when I need to recreate a color scheme in the future than maybe you – but in any case that’s why I post them.
Miscellaneous details and references for those interested in that sort of thing:
For all of my earlier posts on Wars of Ozz games, figures, units, and other related projects – please see this page.
PAINTS, INKS, GLAZES, SHADES, WASHES, PIGMENTS, FLOCKING, GLUES AND MORE THAT I USED ON THE CACTUS SCATTER TERRAIN BASES:
2 packages of Cacti/desert bushes from JTT Scenery (SKU 95666)
Homemade wooden hex base
1½” wooden disks from Michael’s
Games Workshops 3½” Plastic bases
Games Workshops 2½” Plastic bases
Unknown 1¼” Plastic bases
Unknown 1½” Plastic bases
Unknown 2¼” Plastic bases
War Games Accessories Steel Bases (FOW1)
Citadel “Seraphim Sepia” (shade/wash)
Vallejo Surface Primer “German Dark Yellow”
PVA Glue
AK Terrains Diorama Series “Sandy Desert” (texture/basing paste)
Several upcoming wargame conventions are looming on my horizon, so I needed to get going on adding some new terrain and game markers for my Wars of Ozz games. I will be posting about these three parts for ease of reading. I have been (as you will see) very engaged with multiple terrain projects. Luckily, I was able to get all of them completed in early January after finishing my brigade of Pollywomps. At Christmas, I received several cool gifts that would be useful to convert or build as terrain pieces. This post will cover the first one I finished, a Scarecrow Girl statue.
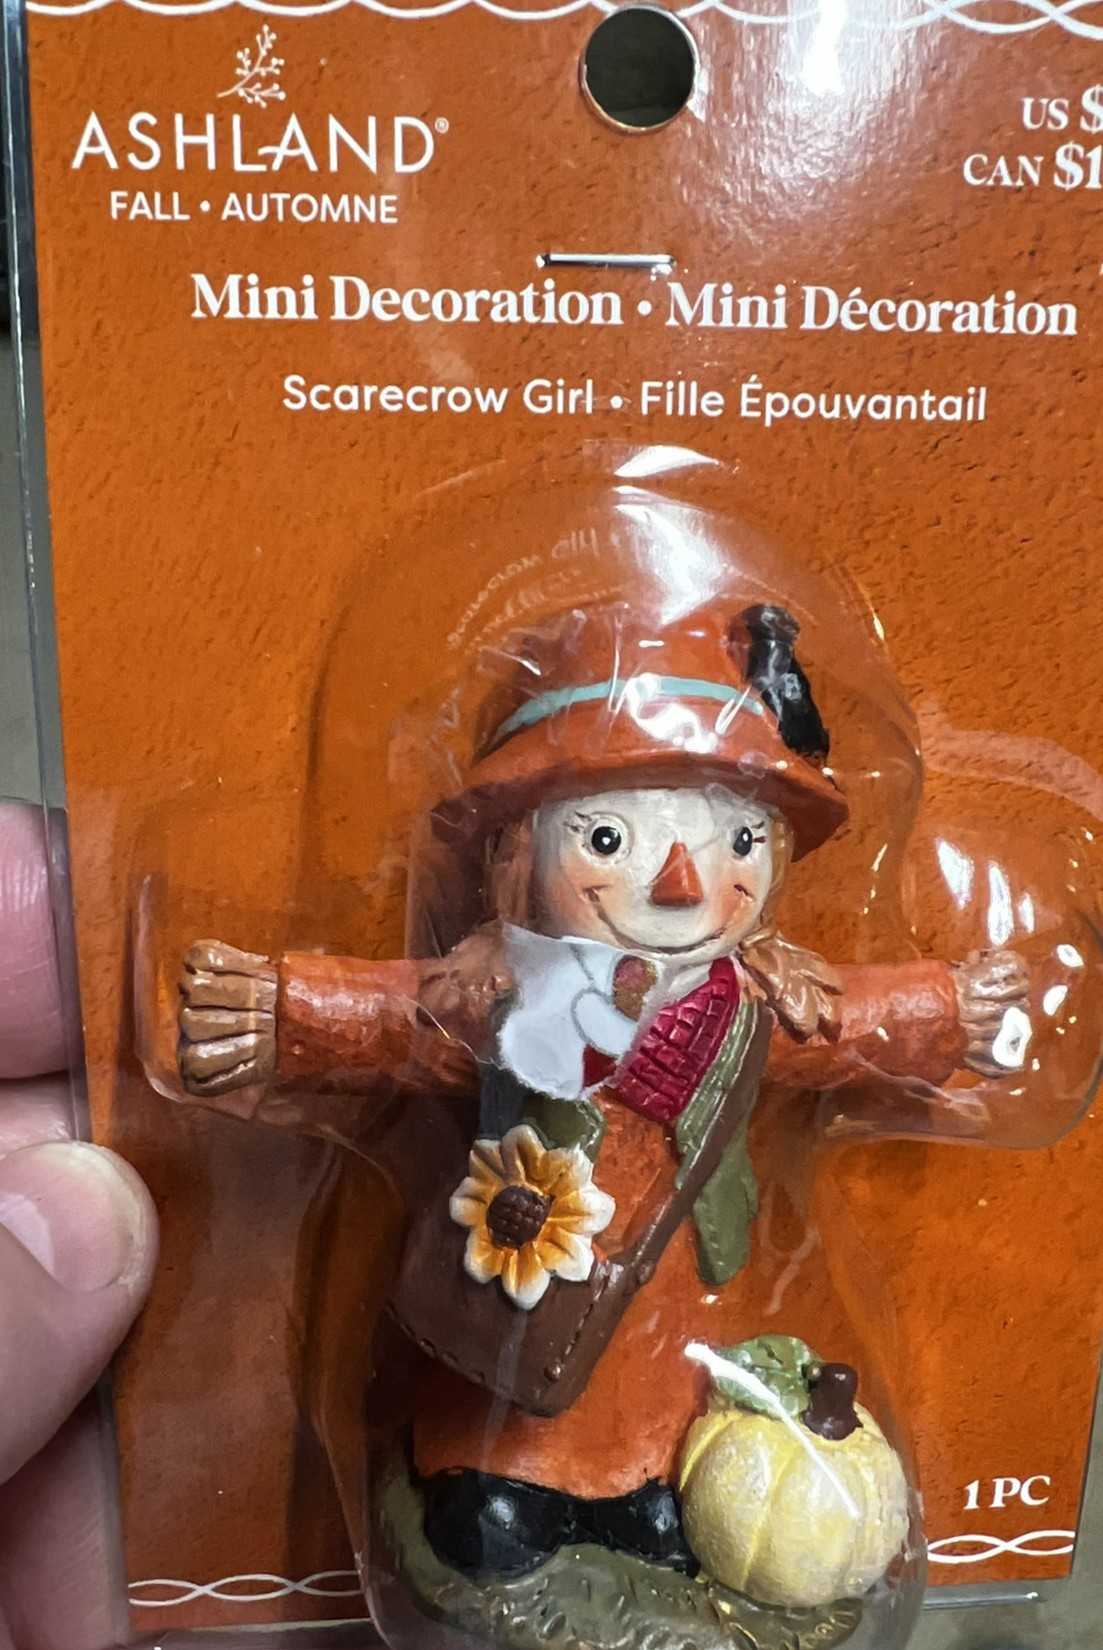
My wife Lynn saw a 3″ tall resin figurine of a scarecrow girl at the Dollar Store – and got it for me. It was factory-painted. When I saw it, ideas in my brain began to churn. I thought with the statue’s size she would make a nice centerpiece as a statue. I’ll share how I worked on it and then some shots of the finished product.
WIP Shots of the Project
The figurine in its package with wrapping paper shard still attached!
My plan was to build the terrain piece as a metal statue on a granite plinth. I had various plastic bases that I had not been using – and I selected one that was not originally even designed as a base for figures. It was probably came from something household-like that I assembled years ago and came as an extra piece. I saved it as I thought someday I could use it. I sanded off its shiny surface for better primer adhesion. Also, I had saved a plastic lid from a Tropicana orange juice bottle that had a nice shapes on its outside surface. Lastly, I added a heavy large steel fender washer underneath the plastic base for stability and adhesion to a magnetic sheet in a storage box.
The Tropicana lid, steel fender washer, sanded and repurposed base, and the Scarecrow Girl shown here at the start.
The steel washer was glued to the underside of the plastic base. I primed the lid and base all black, except where I was to glue the lid to the base, and let that cure. Then I affixed the lid to the base with PVA and let that set up.
Primed lid and base that would serve as the plinth
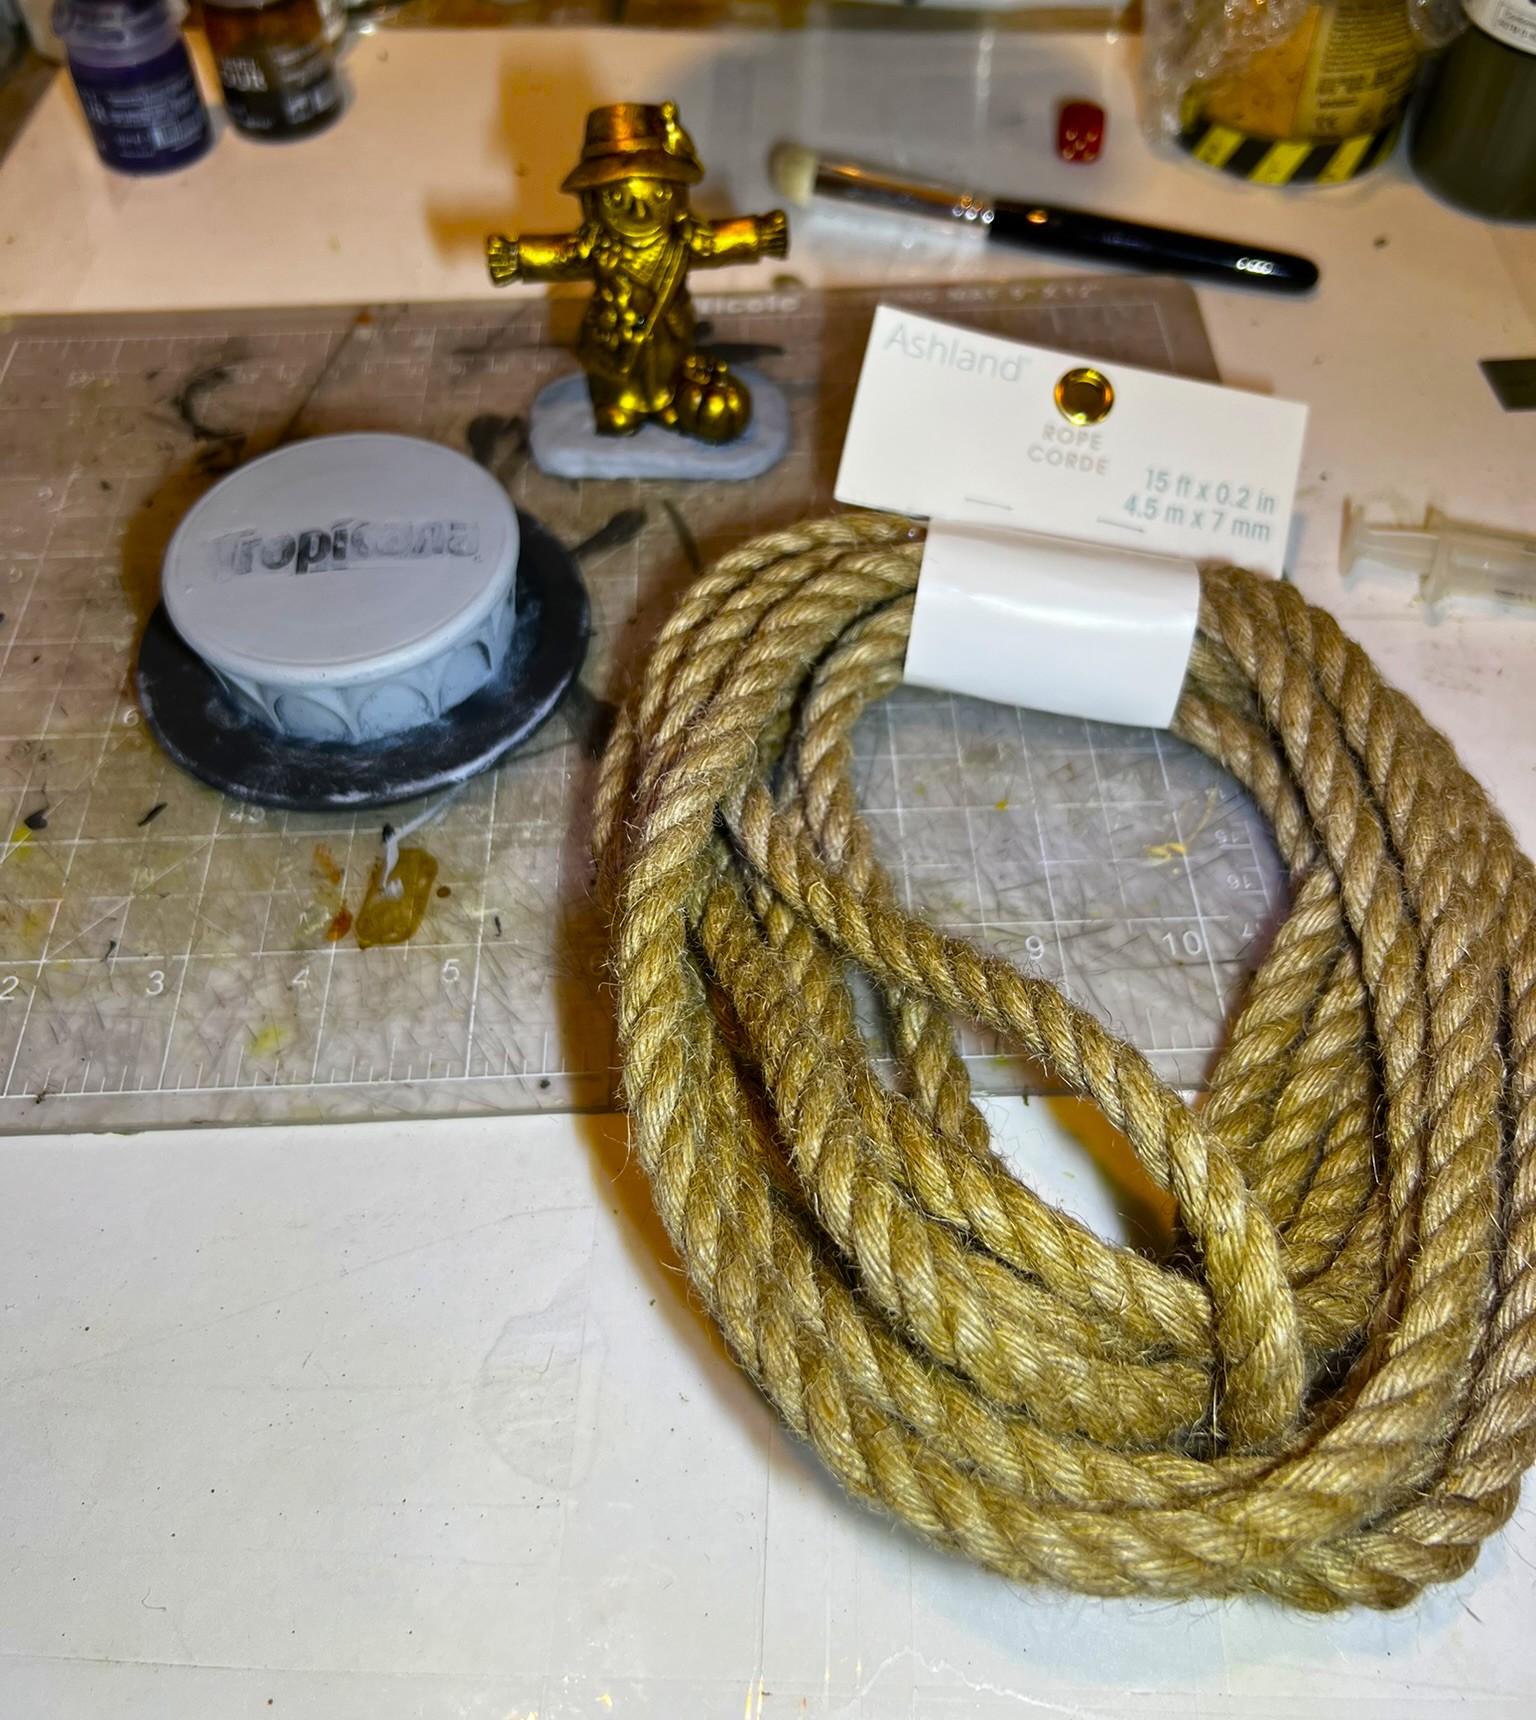
For the figure, I just overlaid the factory paint with gold paint in a dry-brushing fashion. Then I built out the Scarecrow Girl’s base with enough green stuff that it would cover the “Tropicana” logo. to do that, I had cut a piece of card stock to determine the size and shape that I would need to obscure the logo. After gluing that card stock to the statue, it was a lot easier to shape the green stuff perfectly.
Primed plinth and statue with enlarged base
I washed the statue down with a metal wash to give better definition. and added another dry-brush application of gold.
Statue after adding the dark wash and more gold. I also painted the green stuff as granite to match what I wanted for the plinth.
Then, I started to dry-bush the plinth to look like stone, but I saw that it had a small gap underneath. The steel washer was just thick enough to make the plinth seem to hover over the ground. I visited Michael’s store for inspiration, and saw a rope for decorative hobby projects – and voila – solution!
The plinth , statue, and rope
I cut the rope such that it would be the same circumference as the plinth. I then massively saturated the rope and where it touched the plinth with PVA glue. I drove the ends of the rope together where they met with a combination of toothpicks and small-gauge steel needles, and let it dry – hoping that approach would work.
The plinth and rope with the PVA drying
It worked well as you can see below. All I needed to do was remove the needles and clip off the toothpicks flush with the rope.
Fry and before removing toothpicks
I had also tried to use toothpicks underneath as “bridges” to hold the rope ends together. PVA is great here as the rope and toothpicks are porous enough to make great bonds.
Underneath view of the plinth showing the steel washer thickness that caused the gap. You can also see the toothpicks used both in the rope and as bridges.
Then I glued the statue to the plinth. Having previously applied the card stock that the green stuff rested on to the underside of the statue – I got a great bond to the plinth with PVA.
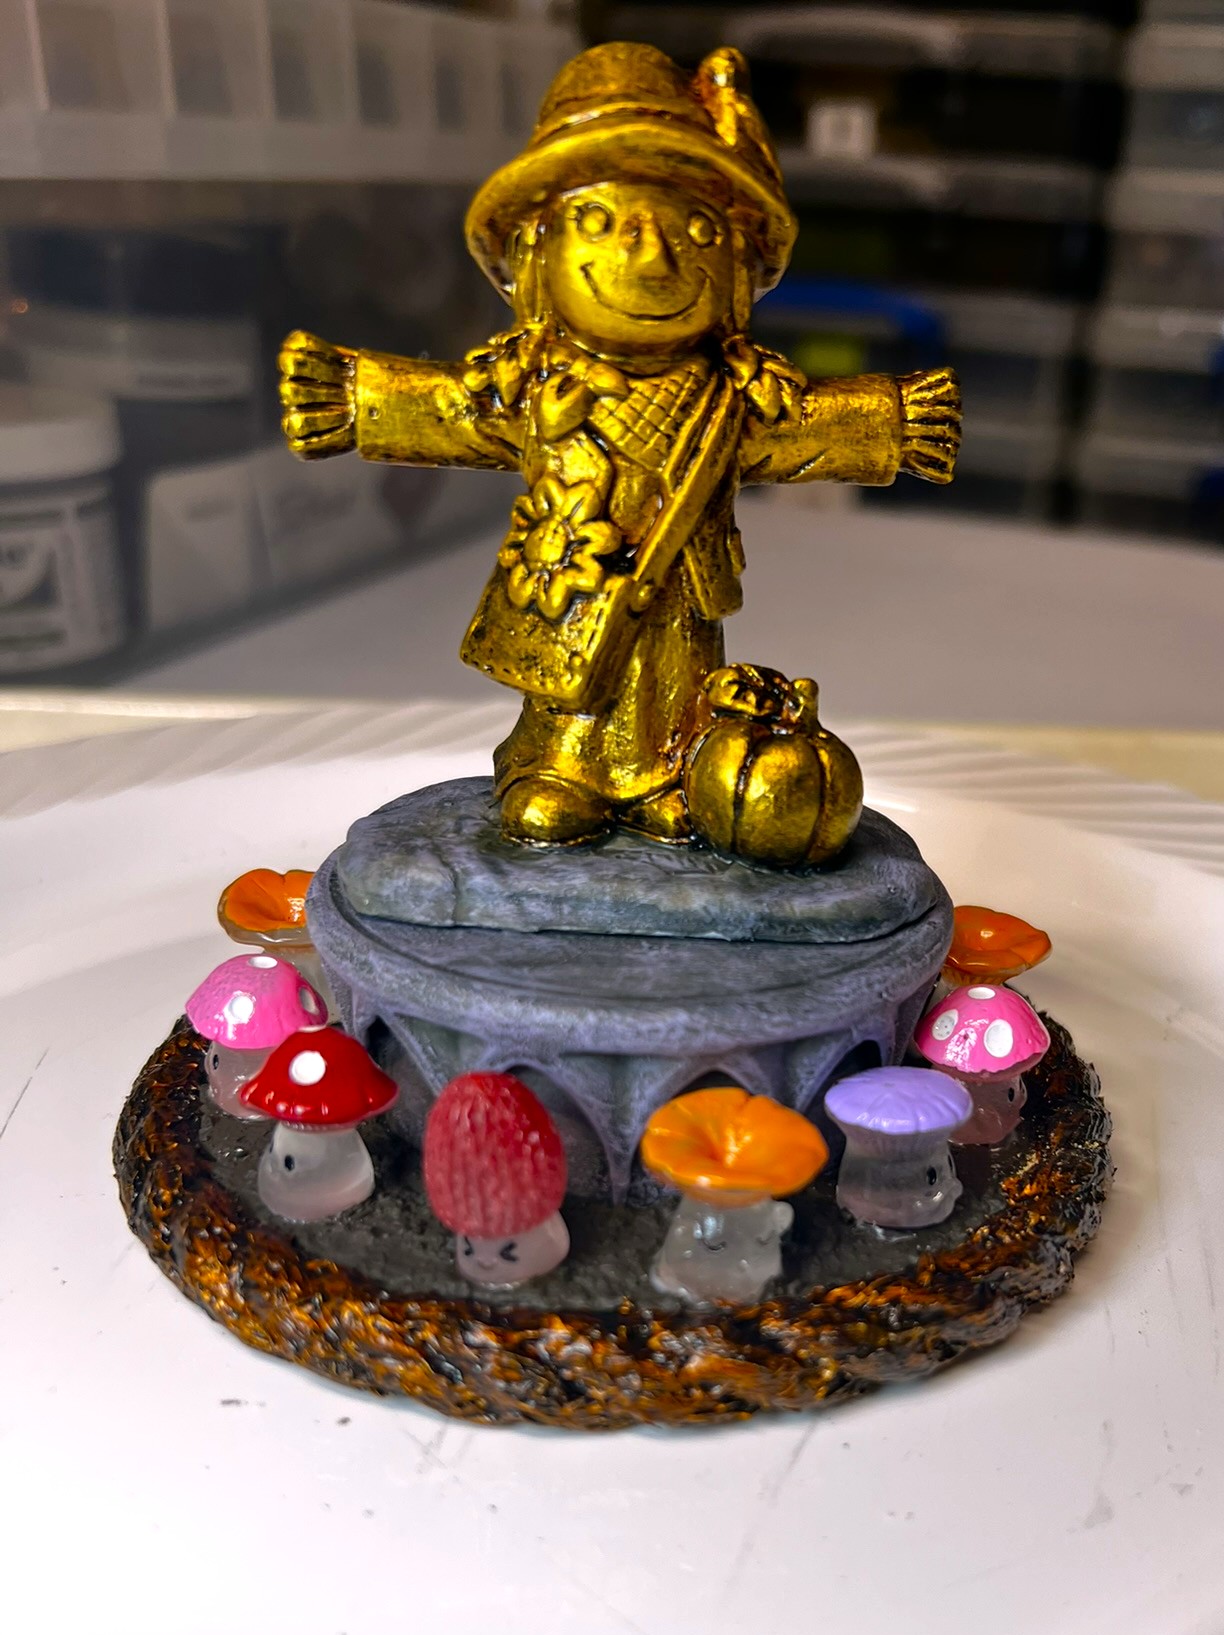
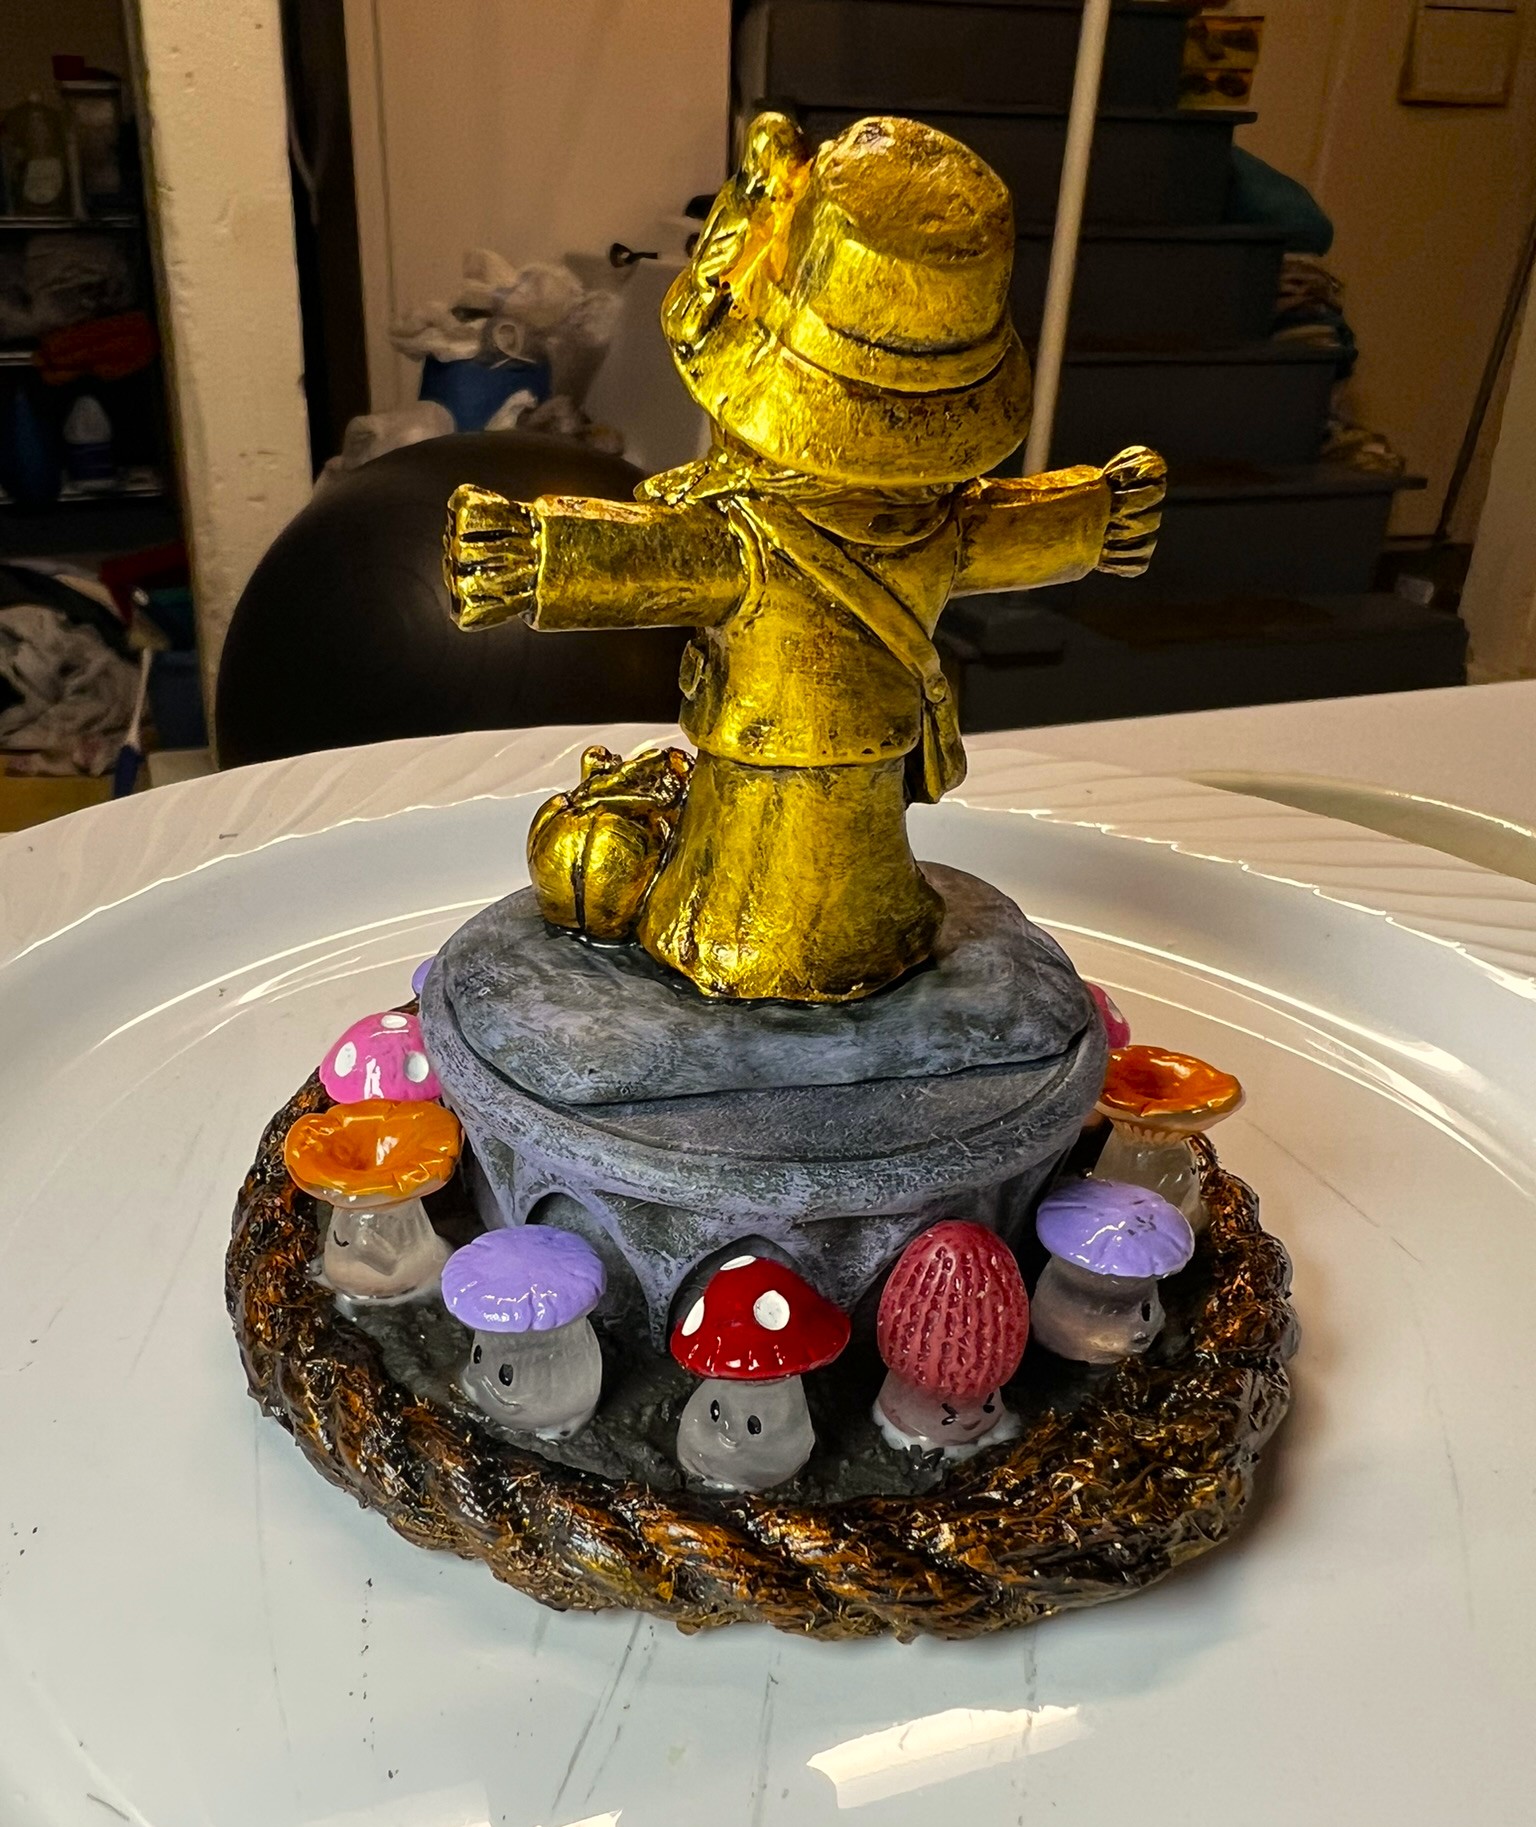
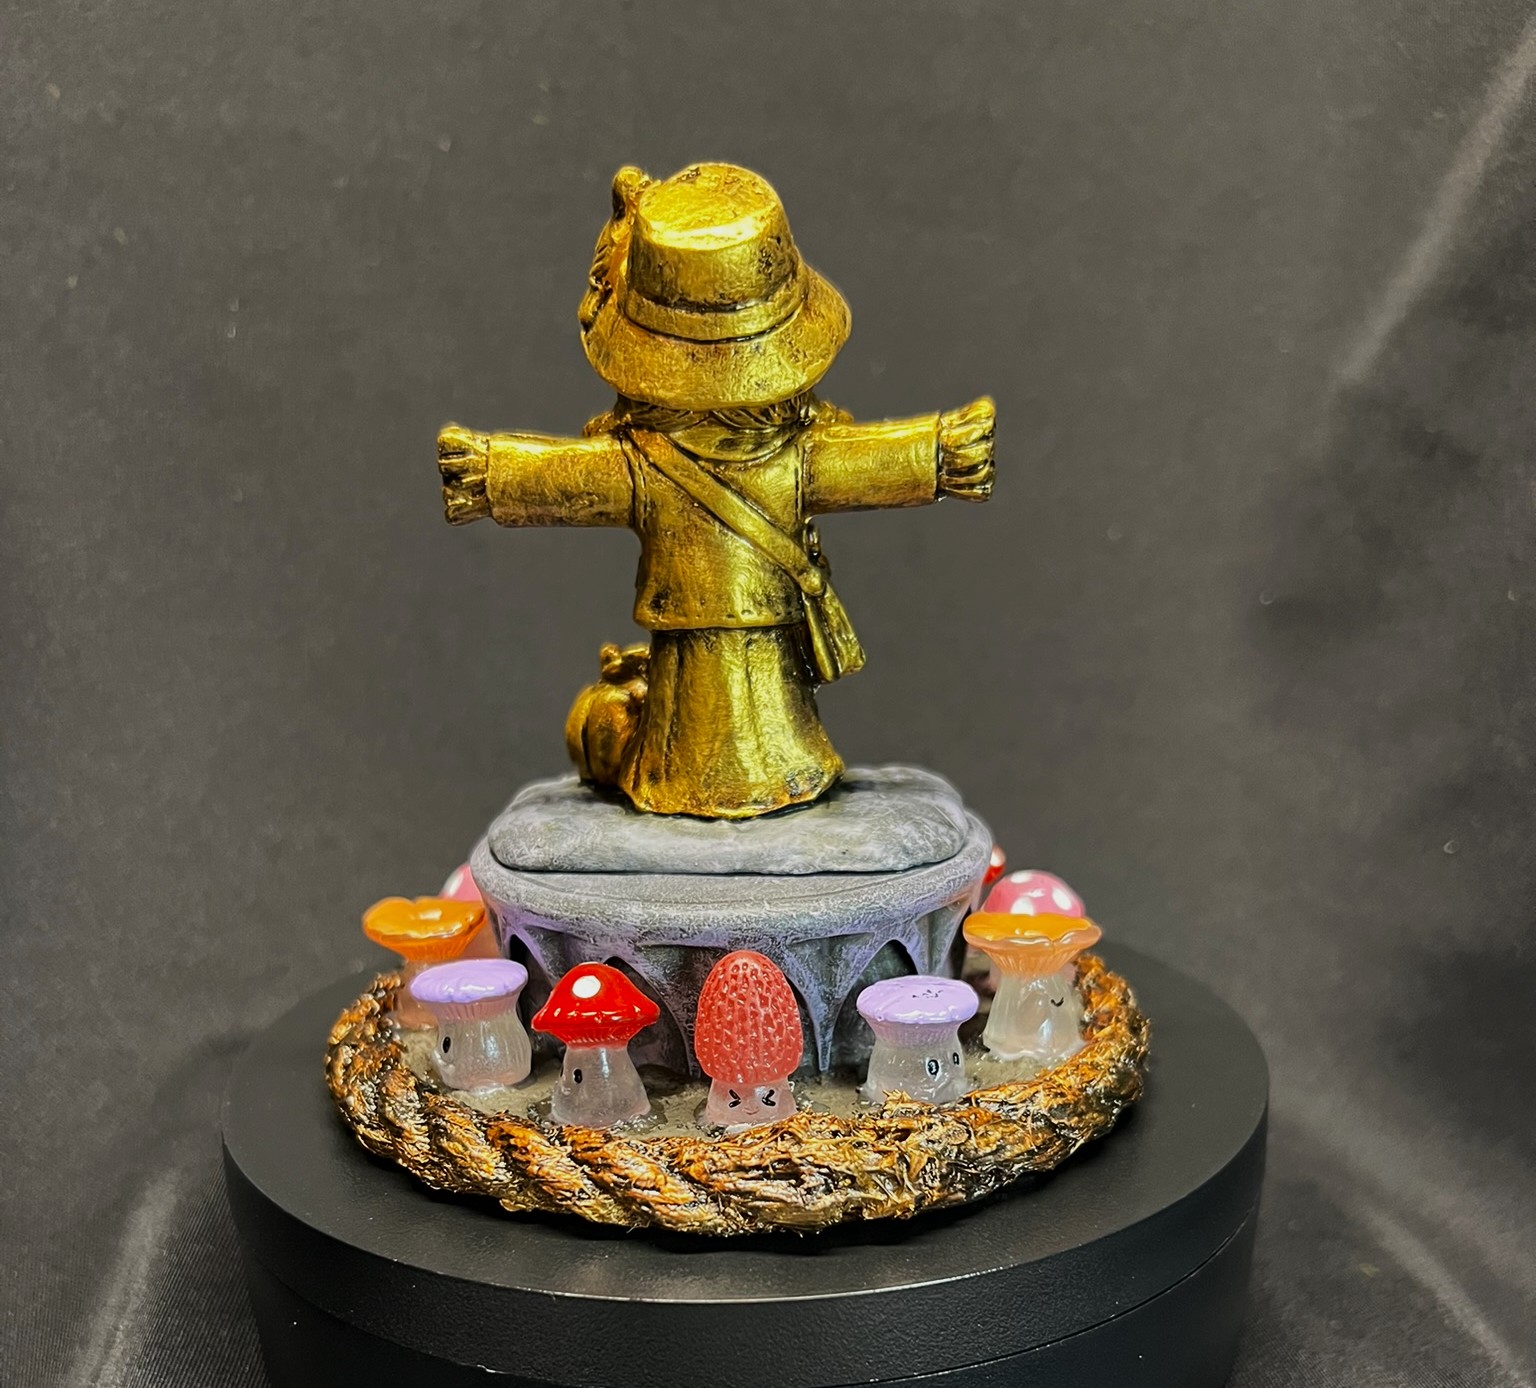
I used a different (darker) metallic gold color on the rope to simulate it as part of the entire work, then applied a dark wash. Lastly, I decided that there would be a “garden of guardian mushrooms” protecting here around the plinth. I did not paint them as this would allow me to treat the little guys as either carved or anthropomorphic!
Finished Scarecrow girl with little miushrooms’s glue drying (front)……and back
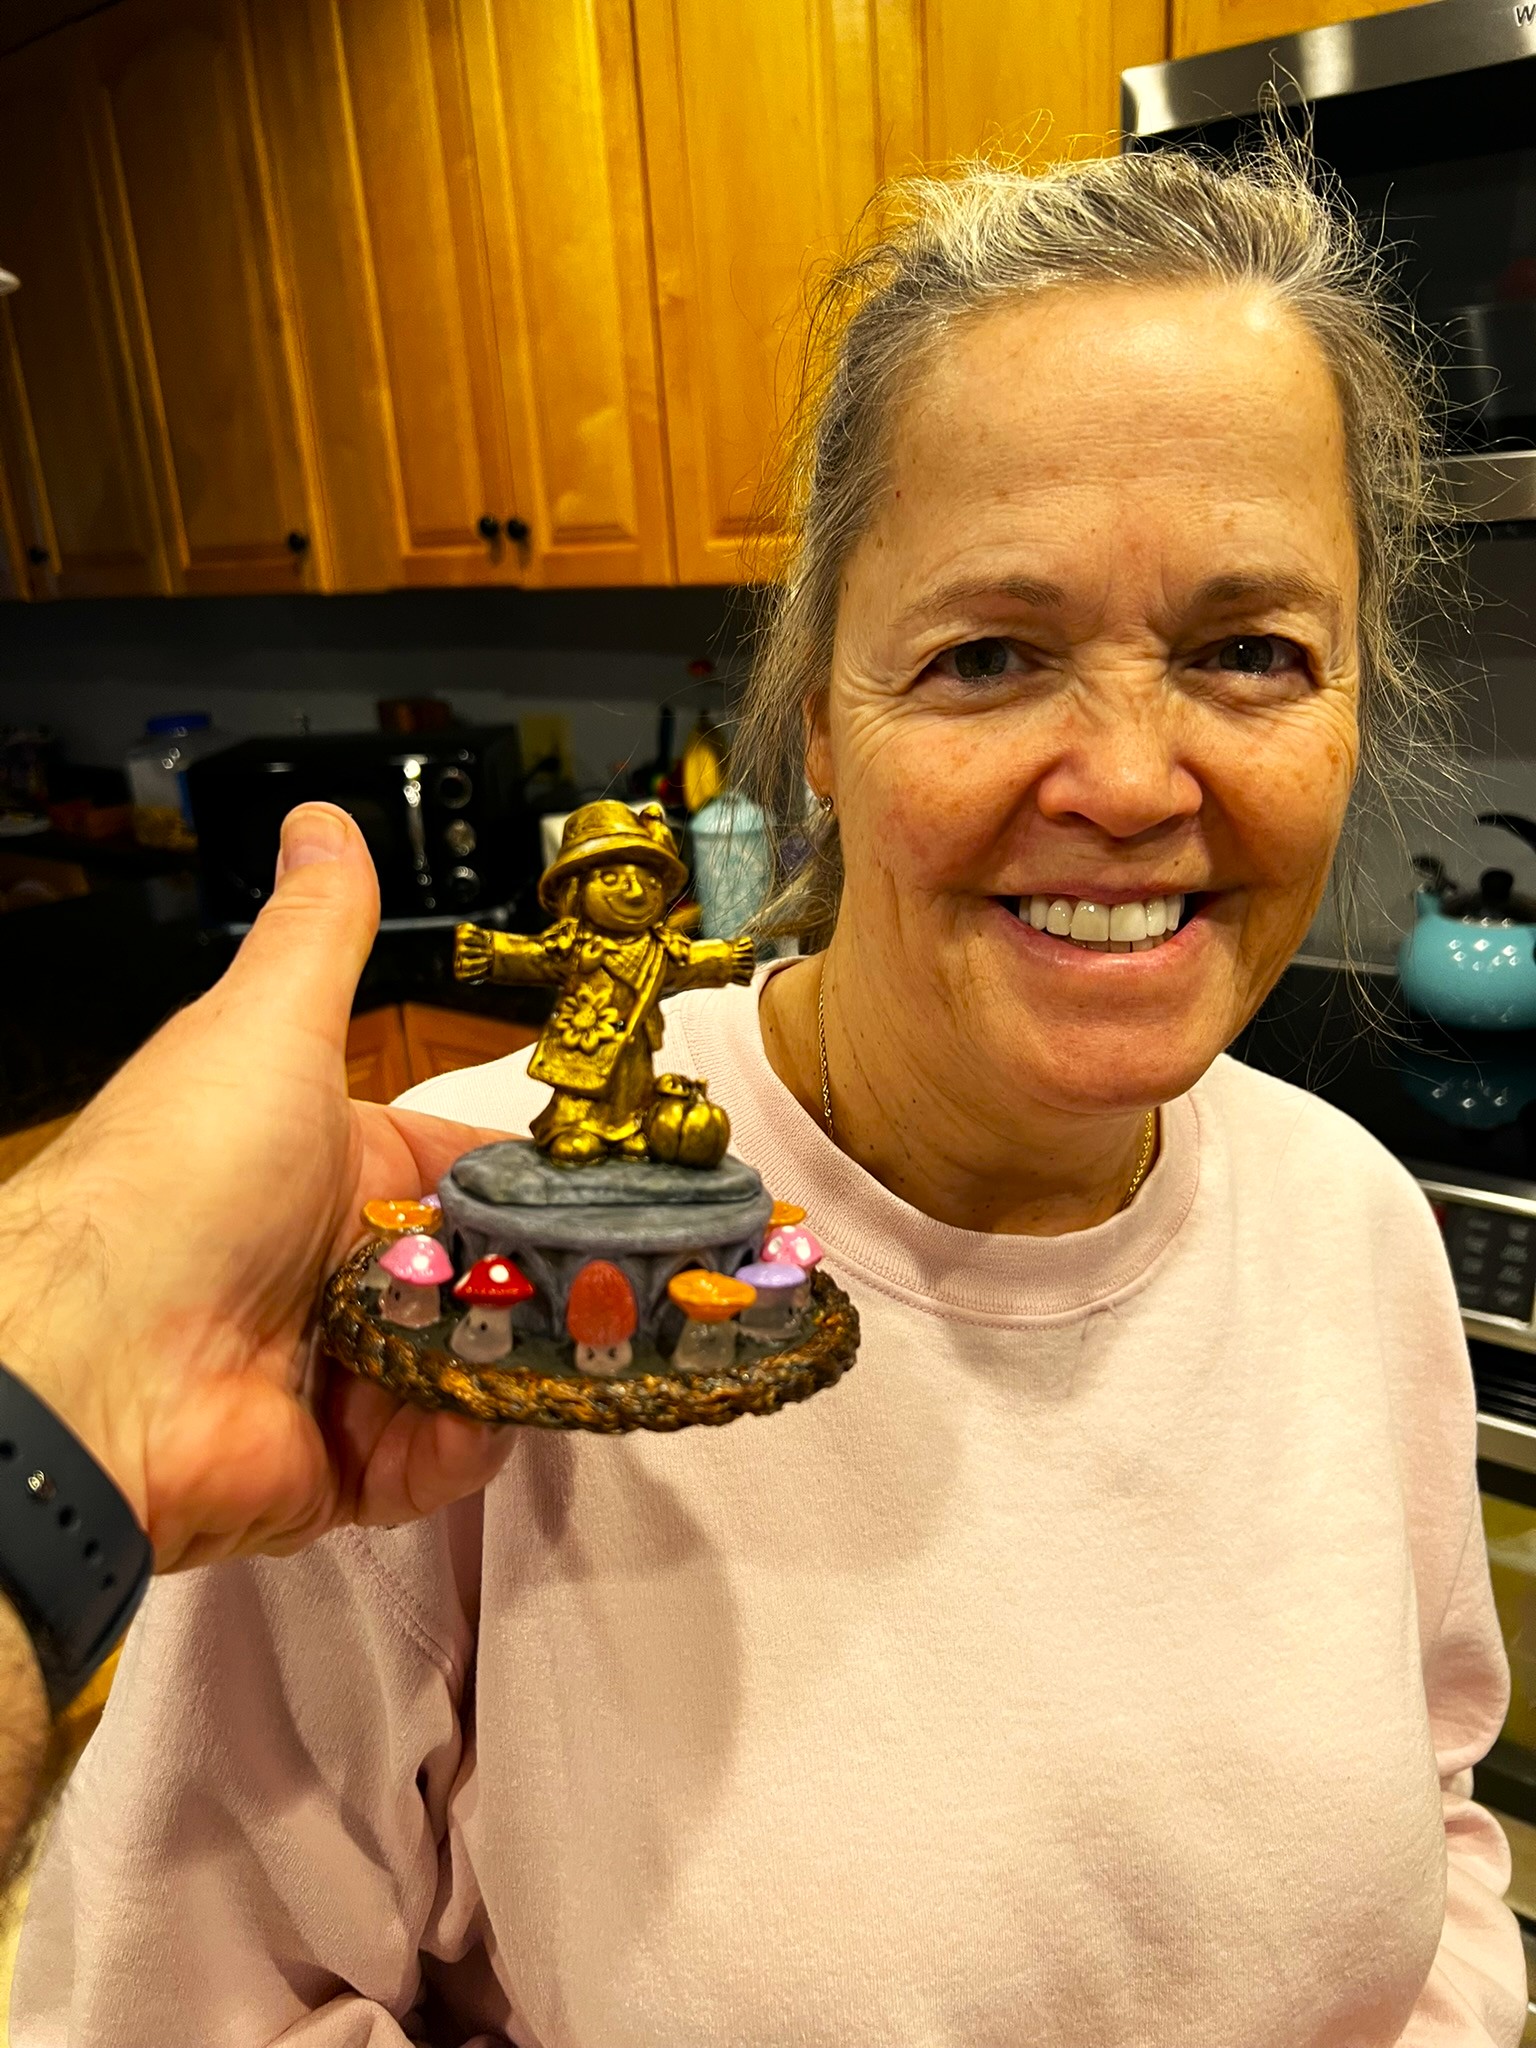
I of course had to show my lovely bride how much I appreciated her gift and what I had done with it! I think she liked it.
In the video I mention that I did not have a game for it – well, I decided that she will be the centerpiece on the tabletop for my “Wars of Ozz – Battle for the Magic Mushrooms & the Ancient Crystals of Power” game, described as follows:
The world of Ozz is nothing if not magical – and there are many talismans & powerful weapons that spring up everywhere. In a remote section of Ozz, a wonderful magical find of a field of Magic Mushrooms near some rare Crystals of Power – has led to an Ozzian “Gold Rush”. Here, several Ozzian nations are scrambling to take seize & control of them. Factions have teamed up & are ready to fight to get these valuable resources and deny their capture by their enemies, but what will happen?
Here is the flyer for that game – and you can see some game markers that will be fully shared in part 3 of this series.
Game Flyer
Thanks for looking – this was a fun change of pace. It also qualifies for Dave Stone’s annual “Paint What You Got Challenge”. It’s a fun and global challenge to paint up figures between Christmas and the end of February, check it out!
I’d be interested in hearing your feedback on this – thanks in advance for any sharing!
And part 2 in this series will be coming soon…
Final Note
While this figure is NOT official, if you do want to check out the excellent Wars of Ozz figures’ range – there are two places to get them and to get the rules (and I make no money from this). The game rules and the figures are available from the next two places:
Below you’ll see the list of paints and the like that I used on these – and they are more useful for me when I need to recreate a color scheme in the future than maybe you – but in any case that’s why I post them.
Miscellaneous details and references for those interested in that sort of thing:
For all of my earlier posts on Wars of Ozz games, figures, units, and other related projects – please see this page.
PAINTS, INKS, GLAZES, SHADES, WASHES, PIGMENTS, FLOCKING, GLUES AND MORE THAT I USED ON THIS SCARECROW GIRL STATUE:
Ashland “Scarecrow Girl Mini Decoration” statue
Black plastic disk
Plastic Tropicana Orange Juice lid
2″ Square War Games Accessories Steel Bases (21)
PVA Glue
Card stock
Green stuff
Ashland 7mm Rope Cord
Vallejo Surface Primer “German Panzer Grey”
Citadel “Liberator Gold”
Citadel “Retributor Armour”
Citadel “Cryptek Armourshade” (wash)
Americana “Slate Gray”
Toothpicks
Secret Weapon Washes “Stone”
Citadel “Slaneesh Grey”
AK Terrains Diorama Series “Muddy Ground” (texture/basing paste)
It’s that time again – when I review the past year and reflect a bit and look towards 2025. I do like to see what I did versus the goals that I set out to accomplish for myself back in January of 2024.
This post will also be where I set my 2025 goals for Life, Golf, Miniatures, & Other Distractions (after all that is the subject of this blog of mine since 2015). I use these goals to guide and motivate me, but I have seen that others can appreciate this type of post. 2023 was, like 2022, one very busy year on multiple hobby, golf, and life fronts. I did set some pretty aggressive goals for all aspects. Some were around gaming, some around hobby production, some were around golf, and more.
How did I do versus my 2024 goals?
Paint 365 figures or more
I thought that would be a stretch – but in the end I destroyed that particular benchmark, setting yet another personal high for the number of miniatures painted in one year ever. These were mostly figures for Wars of Ozz. I managed to paint 556 miniatures – 126 more than I did in 2023!
2024 Production
2023 Production
Complete 2 brigades of Quadlings for Wars of Ozz
My Quadlings at HAVOC in 2024
I’ll give myself a B+ here, as I painted up all the Quadlings that I currently have – 3 regiments of infantry, 2 batteries of artillery, one witch, and 3 individuals that can be brigade or army commanders. That is 79 figures in total, 1.24 25-point brigades’ worth. At some point I’ll get the Quadlings some cavalry.
Complete a brigade of Whim Whim & Noobi for Wars of Ozz
Whim Whim infantry and cavalry engage King Jack and his Great Pumpkinheads at EllisCon 2024
I think I get an A+ here as I painted up all my Whim Whim and Noobi in 2024. That army now is made up of of 7 regiments of infantry (5 Whim Whim, 2 Noobi), 4 cavalry regiments (all Whim Whim), 3 wizards (2 Noobi, 1 Whim Whim), and 7 individuals/leaders. I painted all of these except for 1 bannerman which was a gift from Buck Surdu. That is 216 figures in total, nearly three 25-point brigades’ worth, making them the largest painted contingent in my collection at present.
Complete a brigade of Temujicans for Wars of Ozz
5 regiments of Temujican Infantry4 regiments of Temujican infantry
I think I get another A+ here as I painted up all my Temujicans in 2024. That army now is made up of of 5 regiments of infantry, 4 cavalry regiments, and 3 individuals/leaders. That is 142 figures in total, exactly two 25-point brigades’ worth, making them worthy opponents for the Whim Whim.
Continue to run and play more games – and continue tracking them too
I ran a total of 30 games (all Wars of Ozz) in 2024 as a GM(I think I get an A+ as that is nuts). As for games played, I get a C- as I only played in 6 games.
Attend and run games at conventions. This would include TotalCon38, HAVOC, COLD BARRAGE, MAYHEM, HUZZAH!, HMGS Fall In, EllisCon, and others…
2024 Dave Award winner!2024 Best of Convention AwardRight after getting the HUZZAH! Award with happy players!
My 30 games that I GM’d came from these conventions. I was proud to have been awarded not one but TWO best of convention awards – one for HAVOC (the Award) and one for HUZZAH! So at least an A…ok A++😁
Complete one more scenario for my scenario booklet for Civilizations Collide
Total F here – never got to it.
Paint up a platoon from Wargames Supply Dump for Combat Patrol™
Total F here again – and sorry yet again Roger! With Ozz being a priority, I never got to it.
Try to get my Nomonhan WaT project off the ground. Note I said “try”. Again…
Same as last year…F. Maybe this year.
Get the Mass Pikemen more active
I have not been able to do this well at all. I do see many at conventions, which occupy a lot of my winter time. Once golf season starts, that takes precedence. I’ll try better this year.
Have another nice trip to Florida
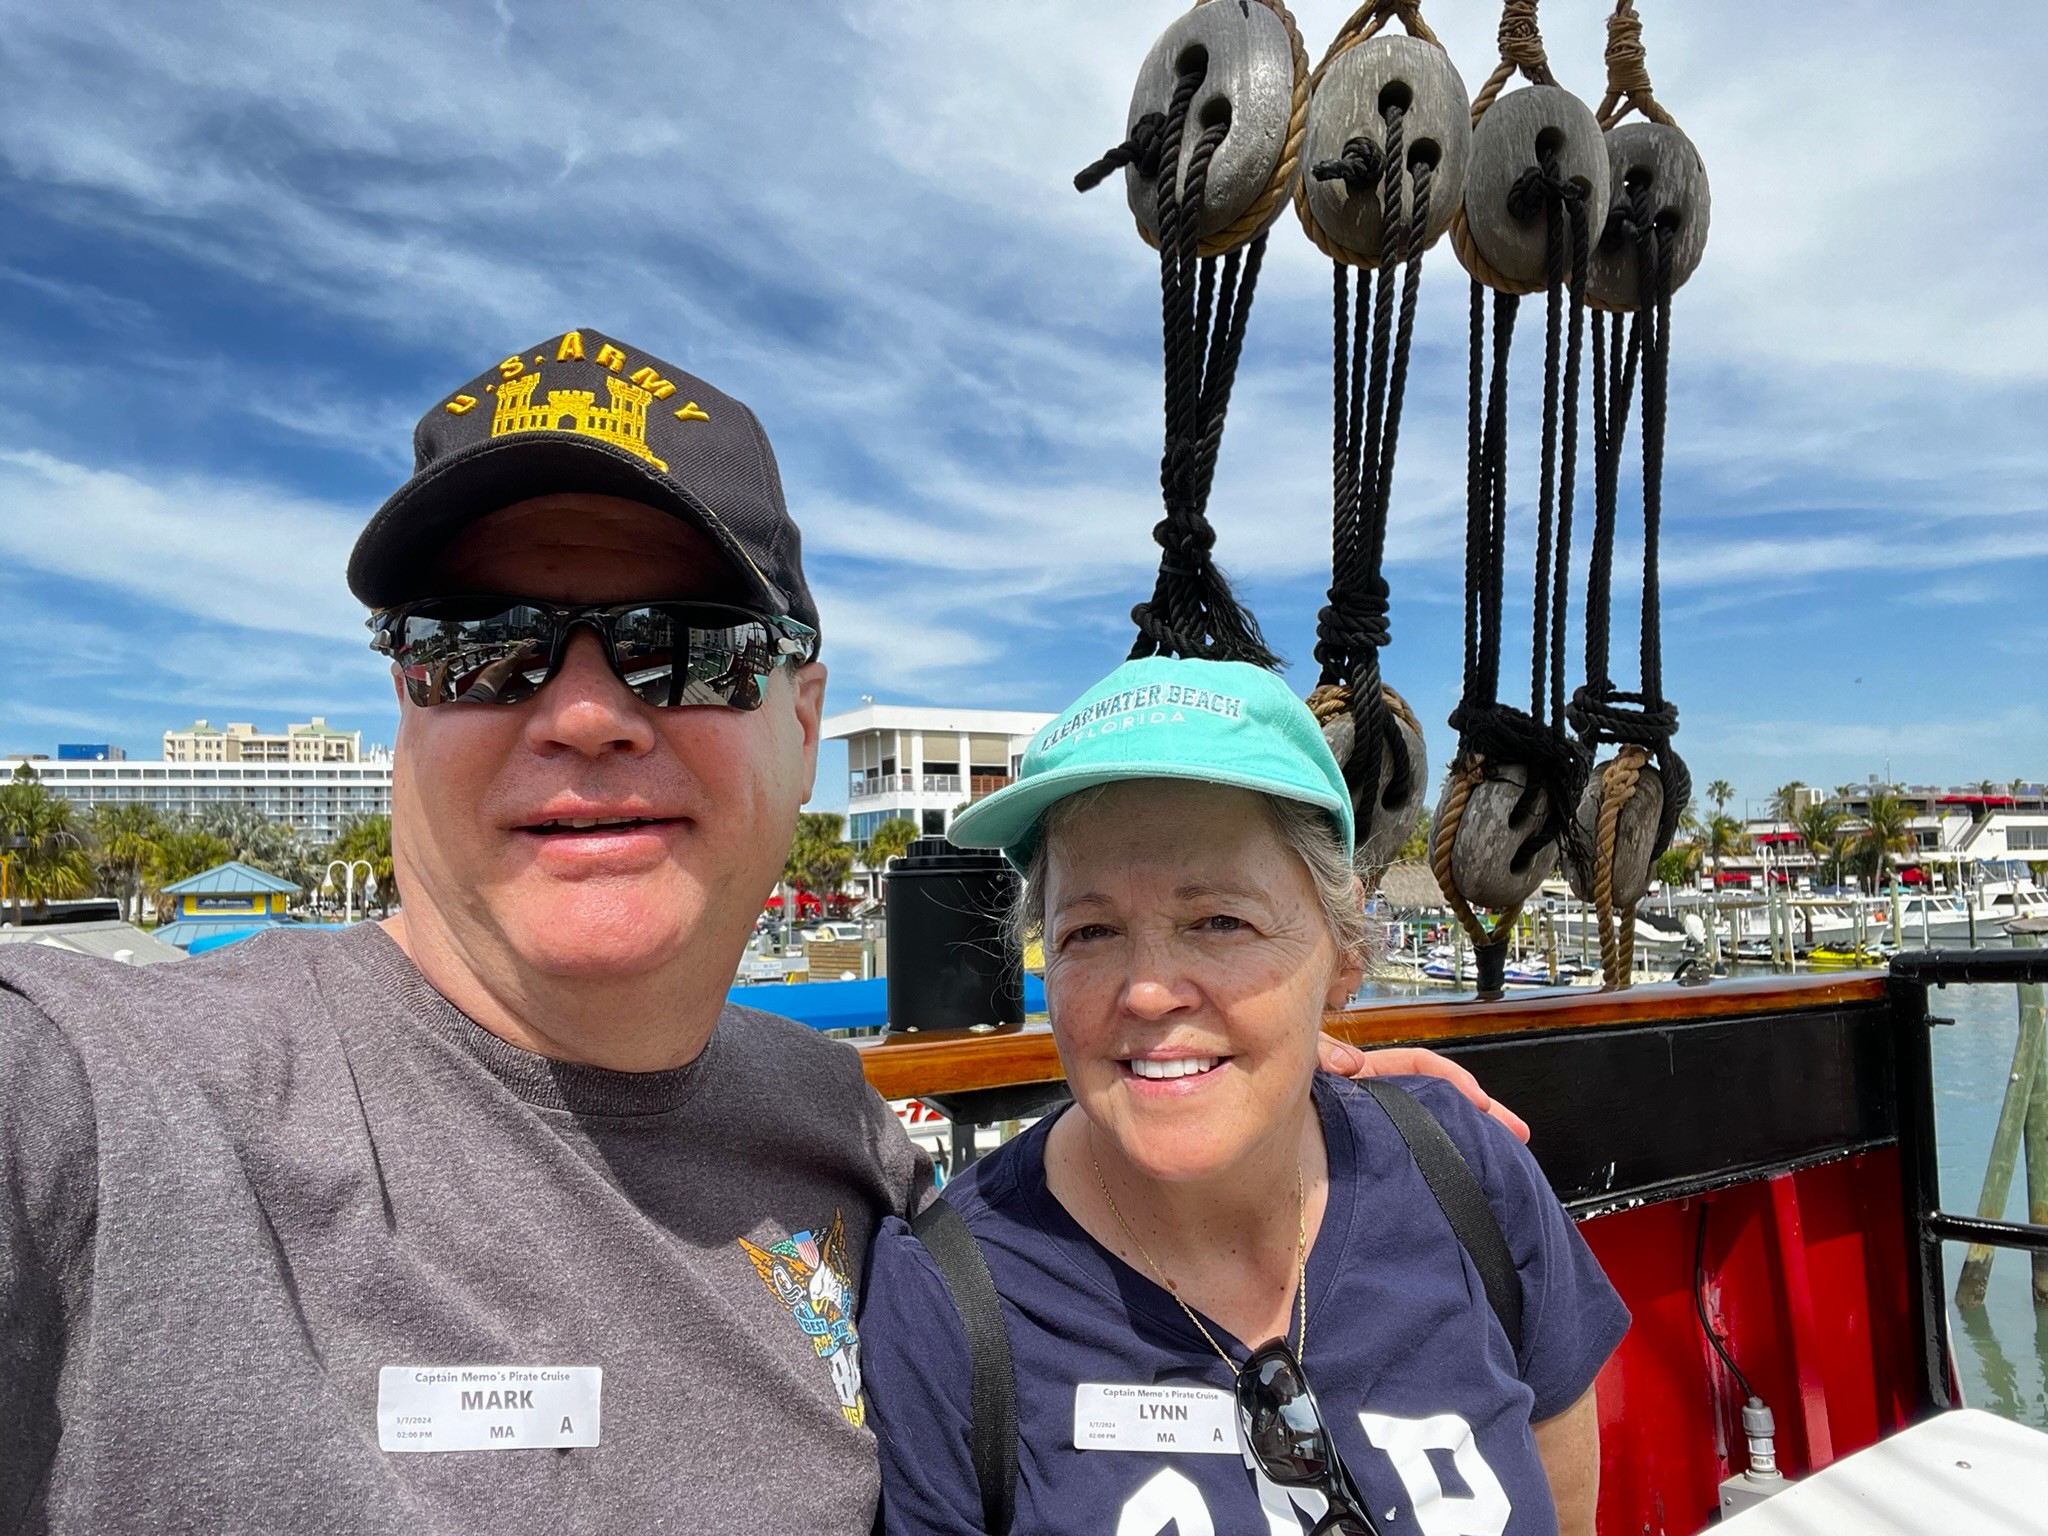
I think A++ – our trip was amazing to Clearwater Beach and Orlando was a blast!
At the JW Marriott in Clearwater BeachGreat hotel – the previous photo was taken from the balcony in the middle.Took the previous photo from Captain Memo’s Pirate Ship ride – was a LOT of fun.Had a great time hanging out with Tod and Tara Jeffers in Clearwater Beach. This place had amazing seafood.Then on to the Grande Vista in Orlando for golf lessons, golf, and relaxation!Lynn’s “favorite”sign at Grande VistaAction shot on the range! Hit the ball first then the turf!Even got to visit with the Surdu’s. I joined Buck for a Napoleonic game.
Post on the blog 50 times or more – make them of good quality
I think I get a B- here, as I think my output dropped a bit. I made 32 posts in 2024. Quality – well I let the readers determine that!
Be a good blog follower – still a goal but one that I cannot measure!
Ditto on this grade-wise – trying my best.
Have multiple Zoom chats with fellow hobbyists
Probably a C. Could do more and hope to this year.
Go to a golf school and get my golf handicap down below 16
My 2024 Handicap Review from Massachusetts golf.
As shown earlier , I did go to a golf school in Orlando -AND benefited greatly from lessons there. But, I think I made more progress with our club pro, Jim LeBlanc at Quail Hollow Golf and Country Club. My handicap went down to 16.1, so I’ll give myself an A-.
Update the Tour of the Brookfields on my blog.
Tom Orszulak and Lynn Morin high-five at the Tour of the Brookfields!
This worked very well at sharing information with the players and documenting each of the six regular tournaments and the FINALS. I think A is appropriate.
Play golf (in season) at least twice a week – get in 80 rounds
A+ here – as you saw, I had 102 rounds posted (some were 9-hole rounds of course), plus around 10 other events of 18 holes (scrambles).
Win my flight in the Club Championship
Fell short here again, but I was more competitive than in 2023. Bad play on Day 2 sunk me.
Defend in the Club Derby
That definitely did not happen – my partner Tom Orszulak had an injury, and the virus finally got me and knocked me out of any possibility of playing.
No golf that weekend…and it SUCKED.
Be a competitive golfer
I’d say I was – I did tie Matt Stepanski for 1st place in the year-long quest for the Quail Hollow Sunday Sweeps “Fedex Cup” run by Dennis Rice. I think I was competitive overall – helped by a dropping handicap.
Be a good friend
I guess so. Always a work in progress!
Personal Highs in 2024
Recovery from knee surgery.
For the third year in a row – the Florida trip and golfing with my wife Lynn – and she continues to get better. Her teams actually did better in the Tour of the Brookfields than I did!
Clearwater Beach, Florida. Wow!
Getting together with the Jeffers and Surdus in Florida.
Getting together with family especially my Mom, my daughter Ellen and my granddaughter Tabitha.
Winning my first “Dave” award for my Wars of Ozz game “determined to be the best game at the HAVOC (Convention) that year. The criteria for the best game includes excellent concept and execution in game play, and player enjoyment.”
Winning my first “Best in Convention” award for my Wars of Ozz games at the HUZZAH! Convention in Maine.
Knocking out 556 figures for the Wars of Ozz!
Having EXCELLENT wingmen in Brad Gosselin and Leif Magnuson at MULTIPLE conventions.
Getting together with Dave Wood, Buck Surdu, Greg Priebe, Chris Palmer, and Duncan Adams, Eric Schlegel, and all of the other HAWKS in person.
Getting together with Fitchburg High School buddies Bob McNamara, Phil Schoenig, Peter Collette, and St. Bernard’s HS pals Mike Sullivan, and Eddie Tarka (and Tom Orszulak) to honor our late friend Leo Thibault, who passed away way too young back in 2007. Best part was getting his widow Sandy there to surprise us all at the end.
Being on the Committees for the Tour of the Brookfields tournaments and the New England Service Academy golf tournaments.
Amazing Halloween Party at Quail Hollow!
Great get together for an Army-Navy game watch party with amazing friends!
As a team, tying for first place for the Fedex Cup at Quail Hollow.
And again, being with my wife Lynn, every day (seriously, and she won’t likely read this).
Retirement is GREAT!
Ed Tarka, Bob McNamara, Phil Schoenig, me, Sandi Thibault, Mike Sullivan and Peter Collette at “The Leo”Halloween party!Army-Navy Game Watch PartyLynn and Tabitha – fun at Cracker Barrel!Me, Lynn, my Mom, Tabitha, Ellen, and Nick
Personal Lows for 2024
COVID.
Army losing to Navy…not personal, but always feels that way!
Life’s been pretty good otherwise!
My goals for 2025
Well, its time to set my Life, Golf, Miniatures, & Other Distractions goals for 2025.
Have a great Florida trip again.
Paint 500 figures or more.
Continue to run and play more games – and continue tracking them too.
Attend and run games at conventions. This would include TotalCon, HAVOC, COLD BARRAGE, HMGS COLD WARS, MAYHEM, HUZZAH!, HMGS HISTORICON,HMGS FALL IN, EllisCon, and others…
Get the Mass Pikemen more active.
.Complete the Musculite faction for Wars of Ozz.
Complete the Professor Nitpik faction for Wars of Ozz.
Complete the Ix faction for Wars of Ozz.
Complete the Noland faction for Wars of Ozz.
Paint up a cavalry regiment for the Harvest and the Quadling factions.
Complete one more scenario for my scenario booklet for Civilizations Collide.
Paint up a platoon from Wargames Supply Dump for Combat Patrol™ .
Try to get my Nomonhan WaT project off the ground. Note I said “try”. Again.
Paint SOME tanks.
Post on the blog 40 times or more – make them of good quality.
Be a good blog follower – still a goal but one that I cannot measure!
Have some Zoom chats with fellow hobbyists.
Get my golf handicap down below 14.
Update the Tour of the Brookfields on my blog.
Play golf (in season) at least twice a week – get in 90+ rounds.
Win my flight in the Club Championship.
Win the Club Derby
Be a competitive golfer.
Be a good friend.
Of course, again I must say THANK YOU to all who make the time to read this blog and comment on my stuff, craziness, and madness – Have a Happy 2025!
To paraphrase Monty Python’s Flying Circus, “…and now for something completely different…” – specifically, Pollywomps.
After Christmas but before New Year’s Eve I managed to complete a Pollywomp brigade for my Wars of Ozzgames. The brigade right now will be led by my Sleestak Command Base that I shared a description of recently in this blog. It was actually completed by December 30th, qualifying almost the entire brigade (less the Sleestak) for for Dave Stone’s annual “Paint What You Got Challenge”. It’s a fun and global challenge to paint up figures between Christmas and the end of February. The Pollywomps were perfect candidates for it.
So who are these Pollywomps? According to the “Wars of Ozz supplement“, they are denizens of “The Principality of Dismal”, also known as “the Bottomless Swamp”, and subjects of Prince Wartskin.
Nobody would ever accuse the Pollywomps of being smart. Savage, impulsive, sometimes clever – yes, but never smart. Thus, it was a wonderment when a trio of garishly accessorized Pollywomps visited each capital of the major kingdoms of Ozz and announced themselves as speakers for Prince Wartskin of Dismal. Nobody had ever heard of a place called Dismal, and with good reason, it didn’t exist until it was announced, nor was it called Dismal, but rather some blurpy Pollywomp word that sounded, at best, like Dismal. According to the Pollywomp speakers, Dismal was the city and the new principality, sometimes called the Bottomless Swamp. And just like that, another nation emerged overnight….
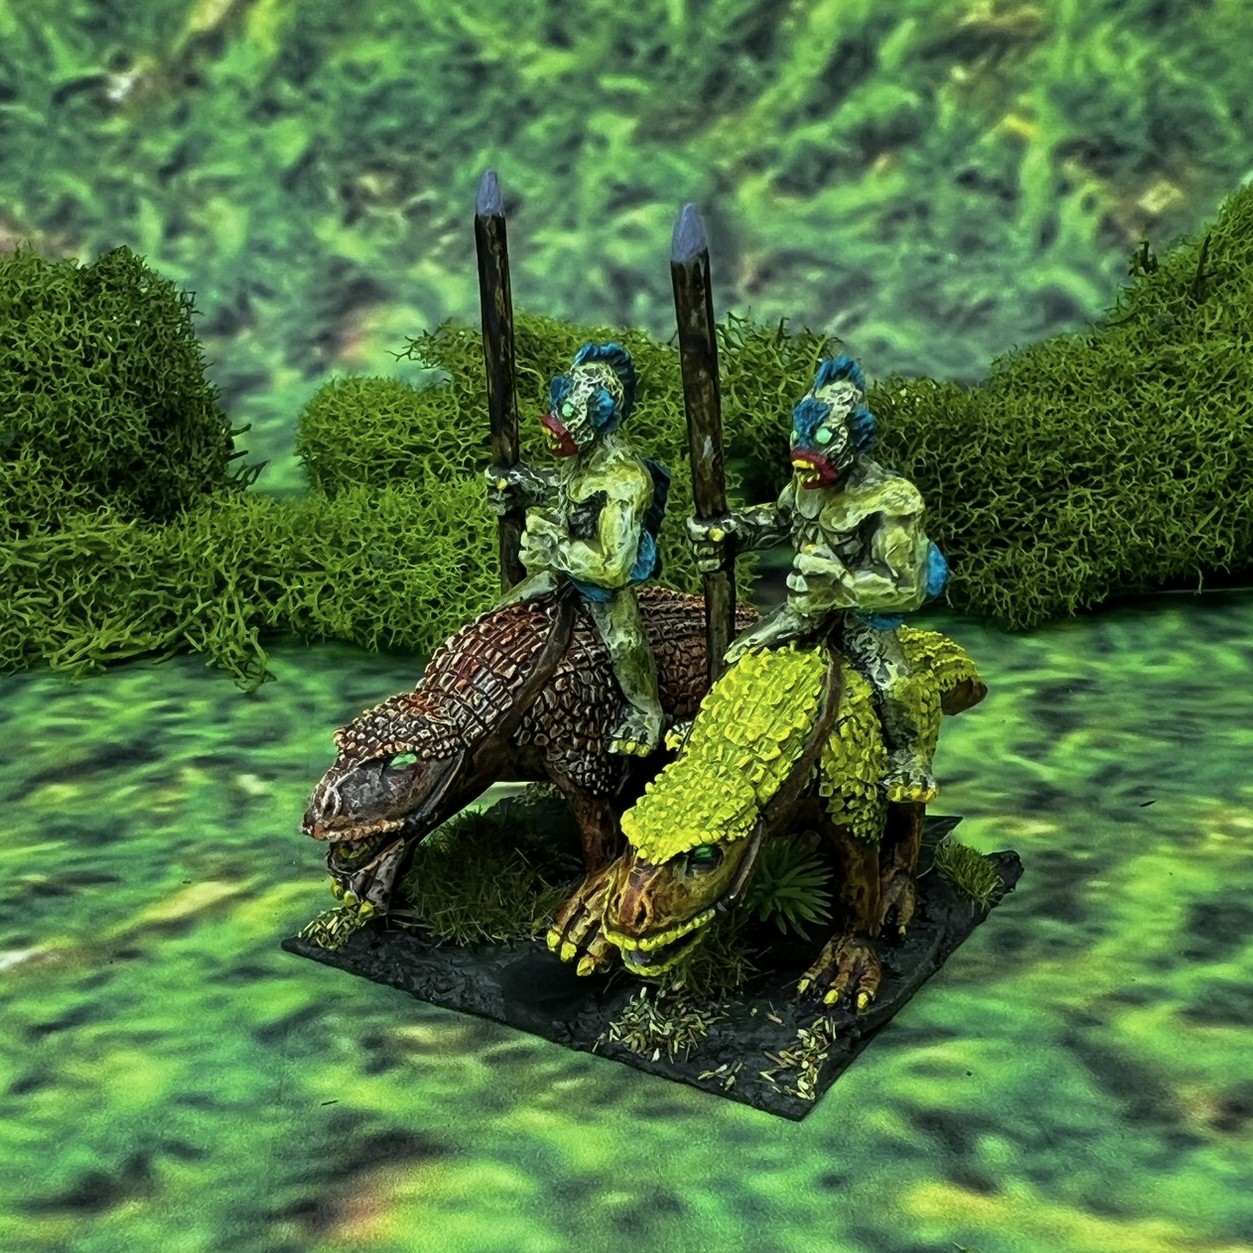
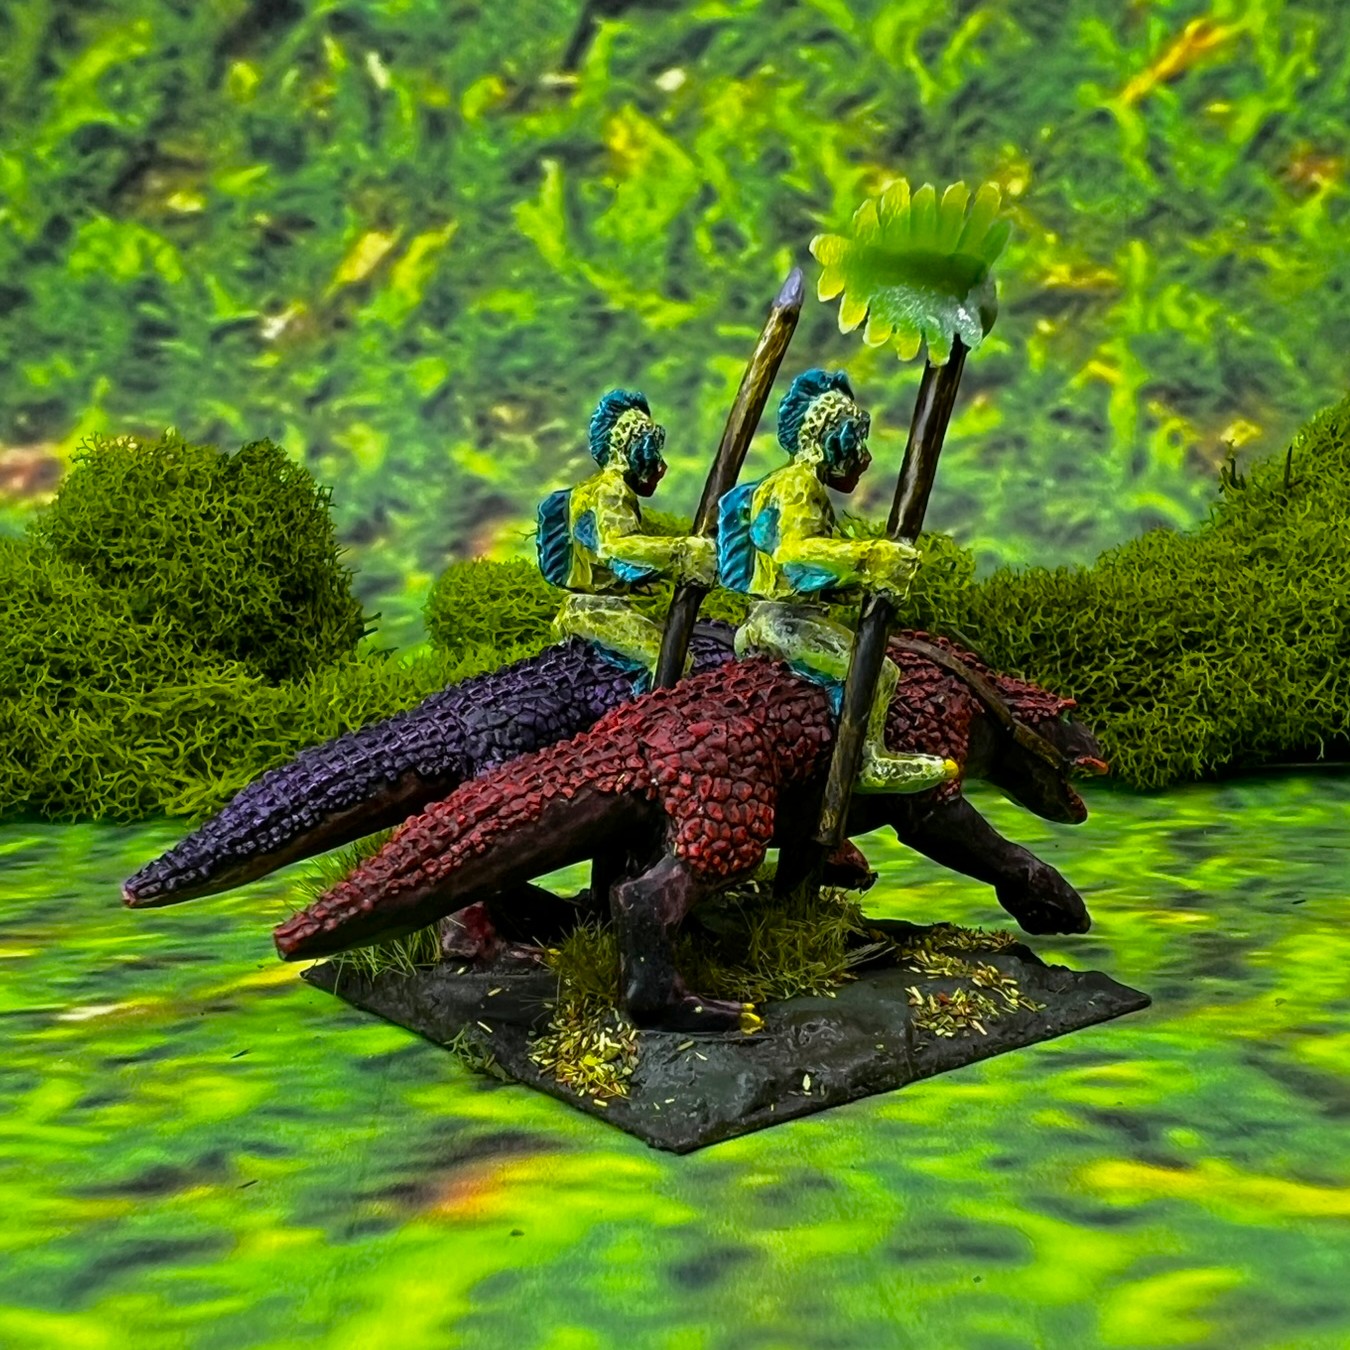
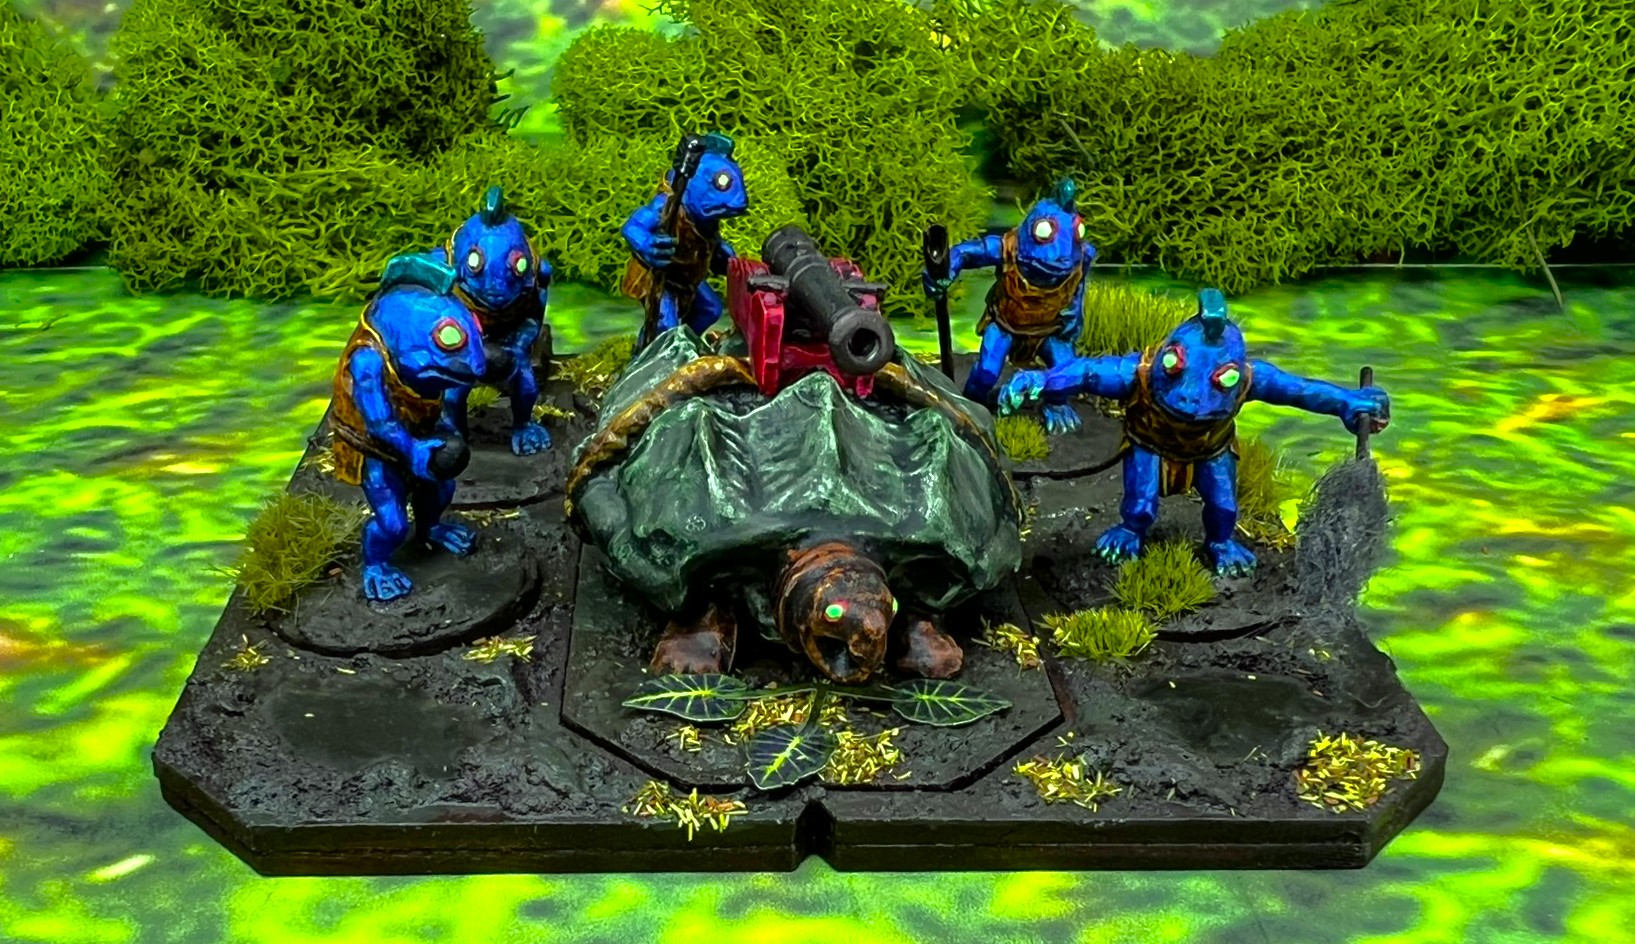
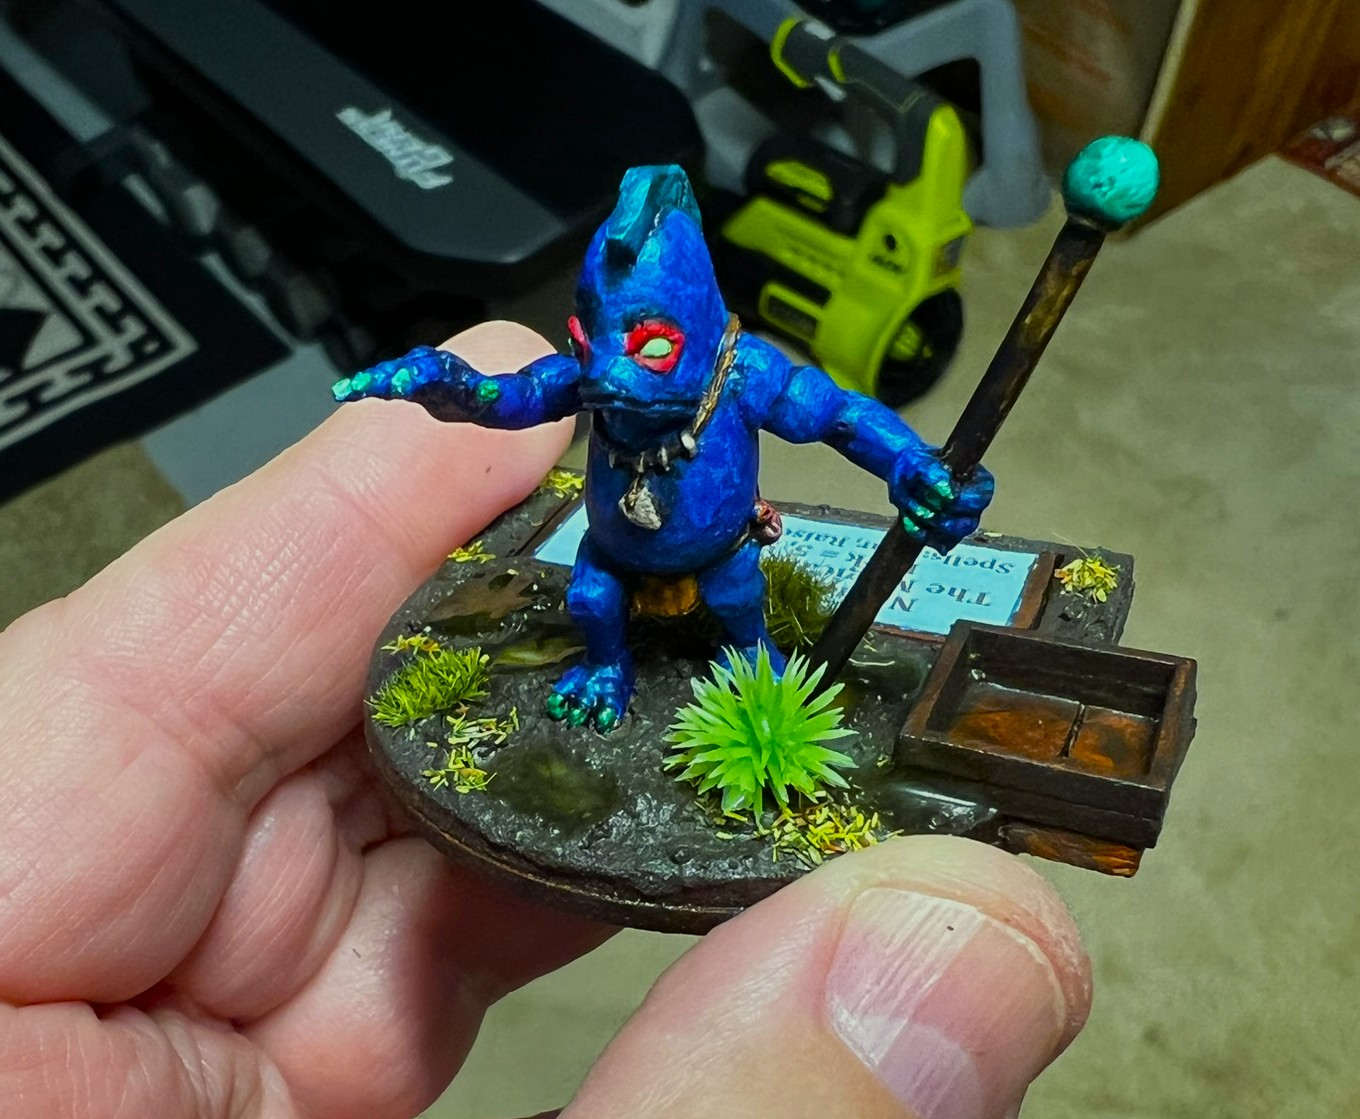
…The Pollywomps are more than just spear-armed infantry. In addition, Prince Wartskin fields Pollywomprats as light cavalry. Pollywomp artillery is all light cannons acquired from the Munchkins (and sometimes Winkies). They have unlimbered and strapped onto the backs of giant lumbering turtles raised in the swamp. While the turtles are slow, they do not require unlimbering to fire, and their massive shells provide some protection to the fishing crews. The wizard Nemo Mudbottom is Dismal’s foremost mage and often travels with the army. When he is among the ranks, his mere presence triggers the ability for nearby troops to blend with their terrain. Other wizards who serve, even if they are Pollywomps, lack this unique ability.
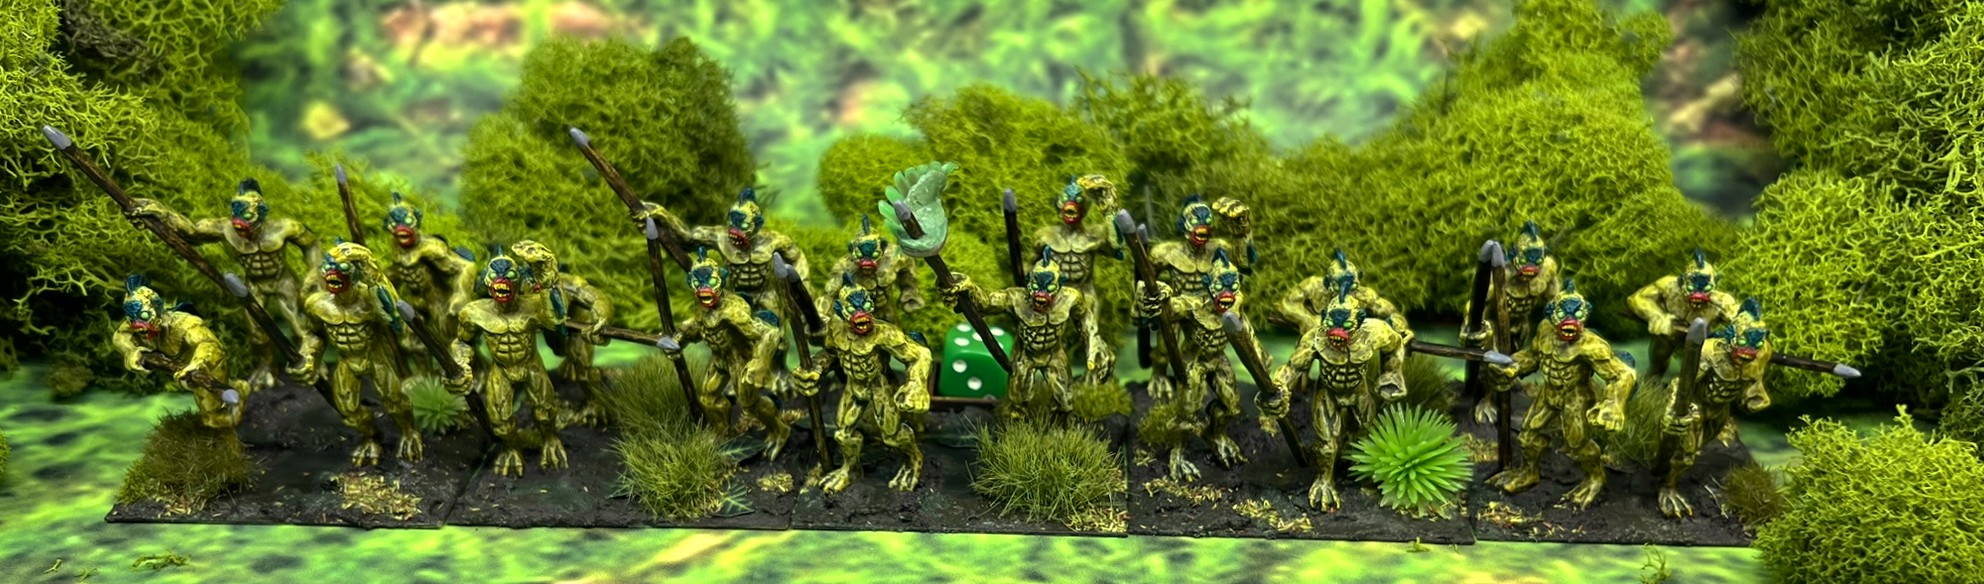
My brigade currently consists of an infantry regiment, a cavalry regiment, an artillery battery, Nemo Mudbottom, and the Sleestak Command base (which will lead until the Prince Wartskin figure becomes available anyways). I decided to consolidate the brigade into this one blog post as I worked on the units and Nemo simultaneously.
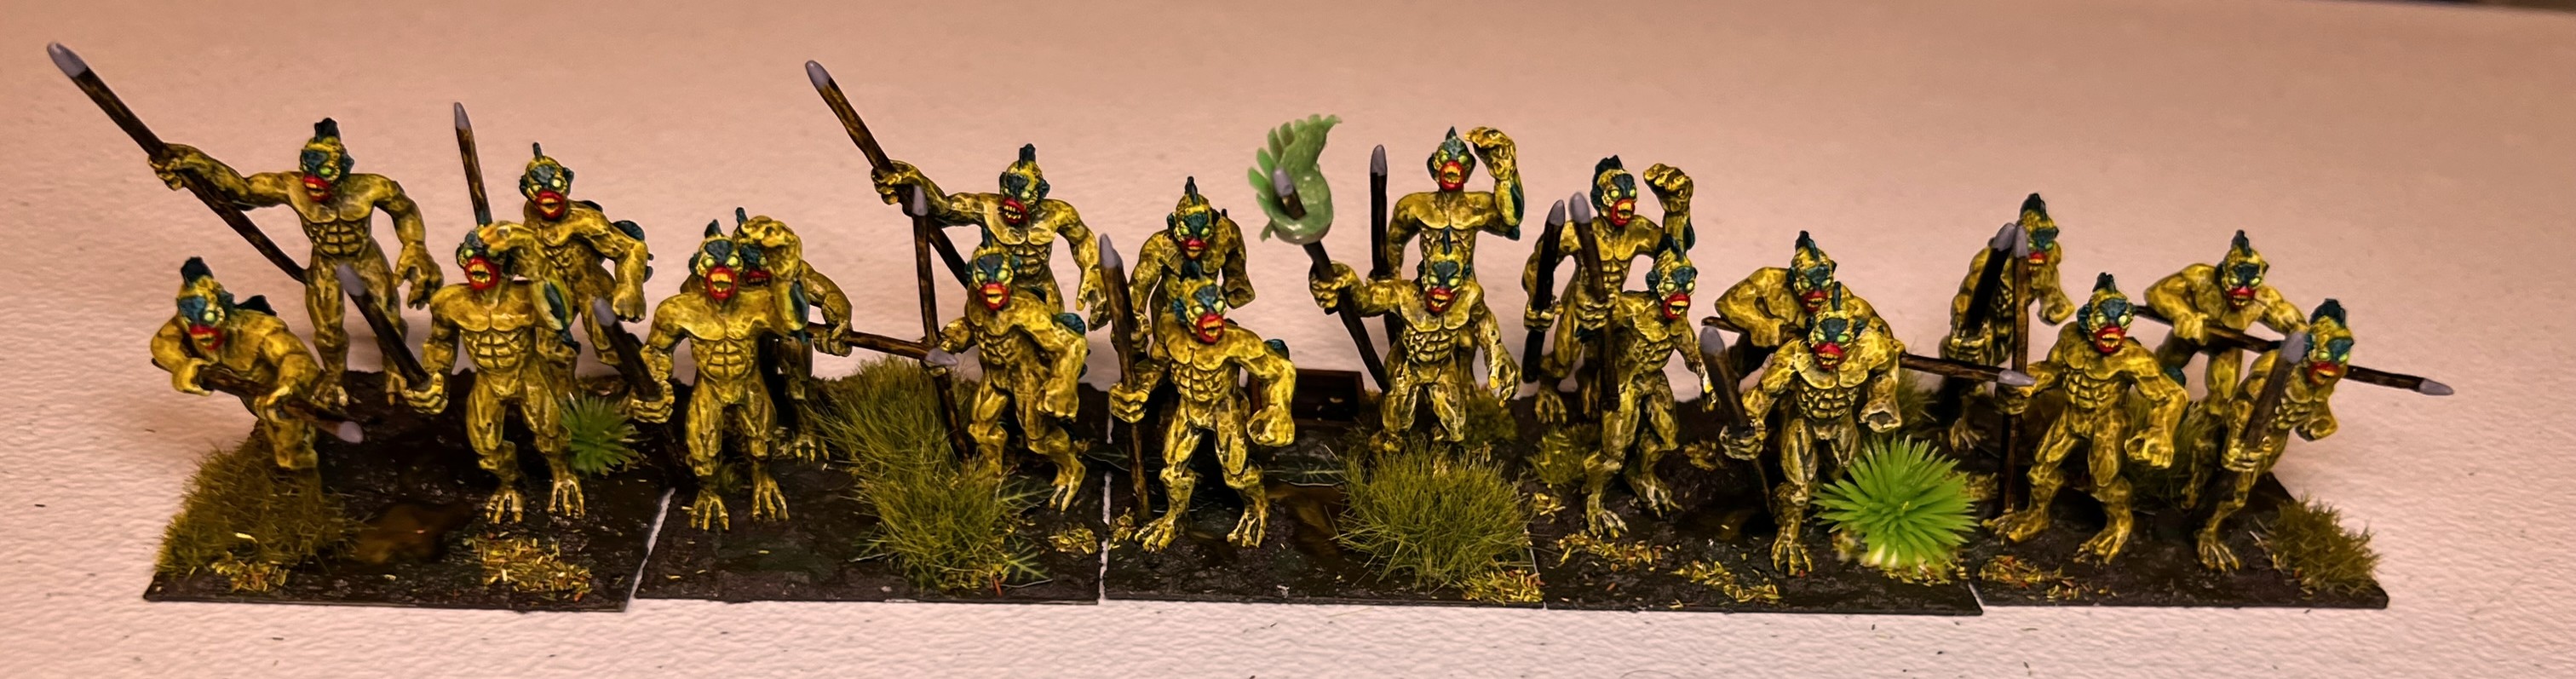
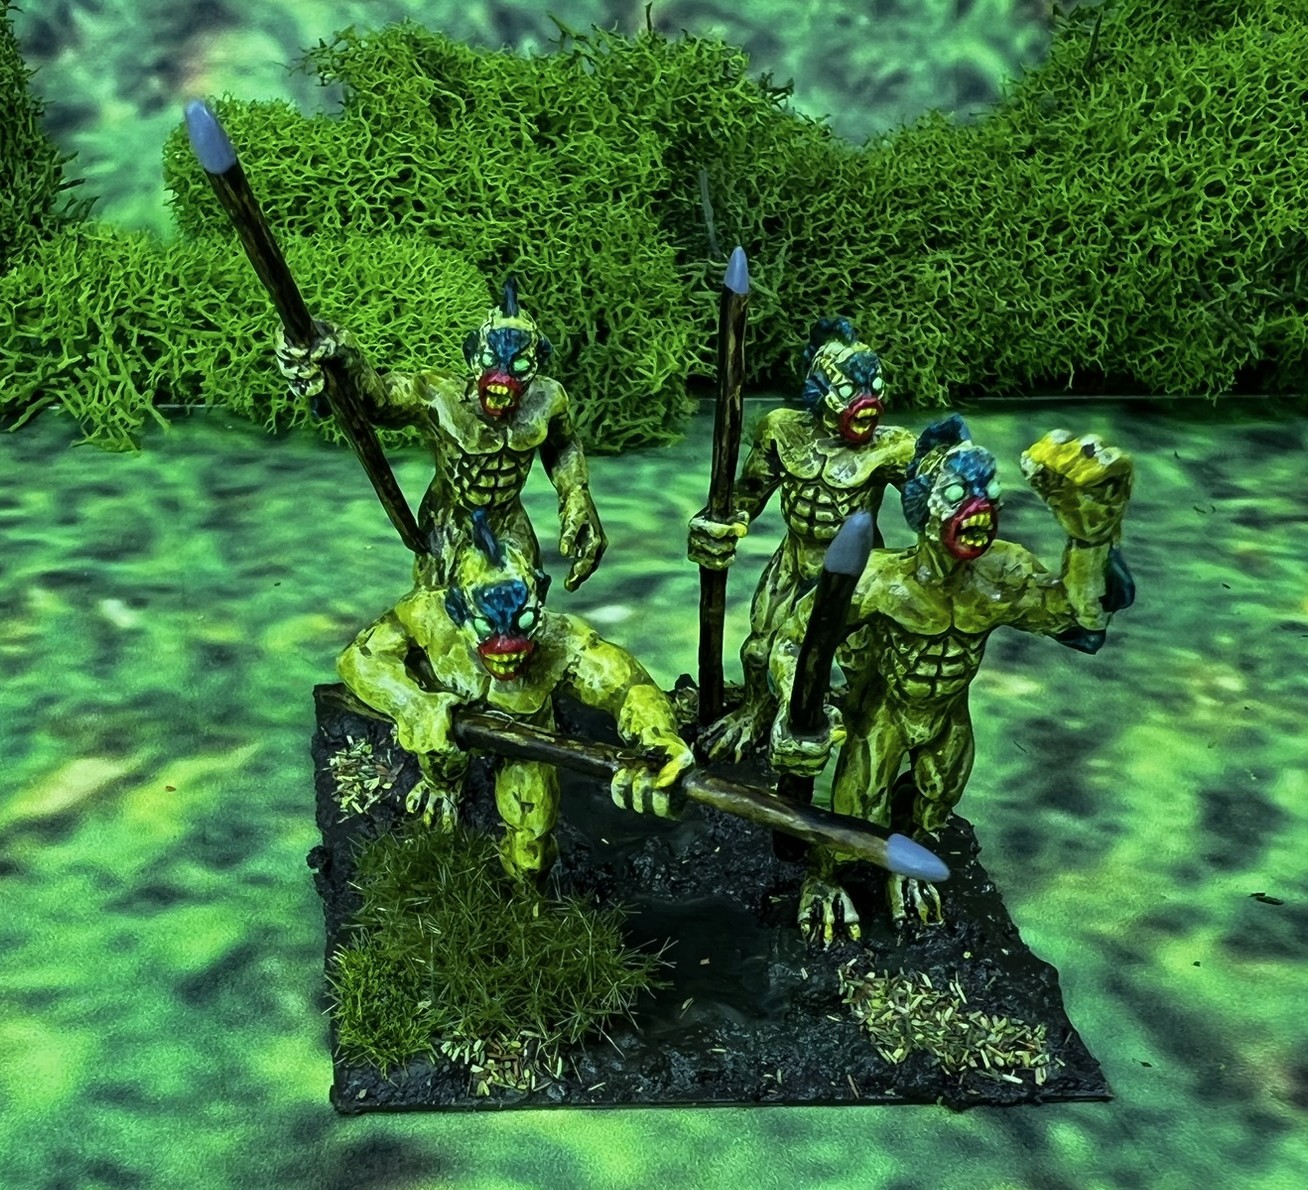
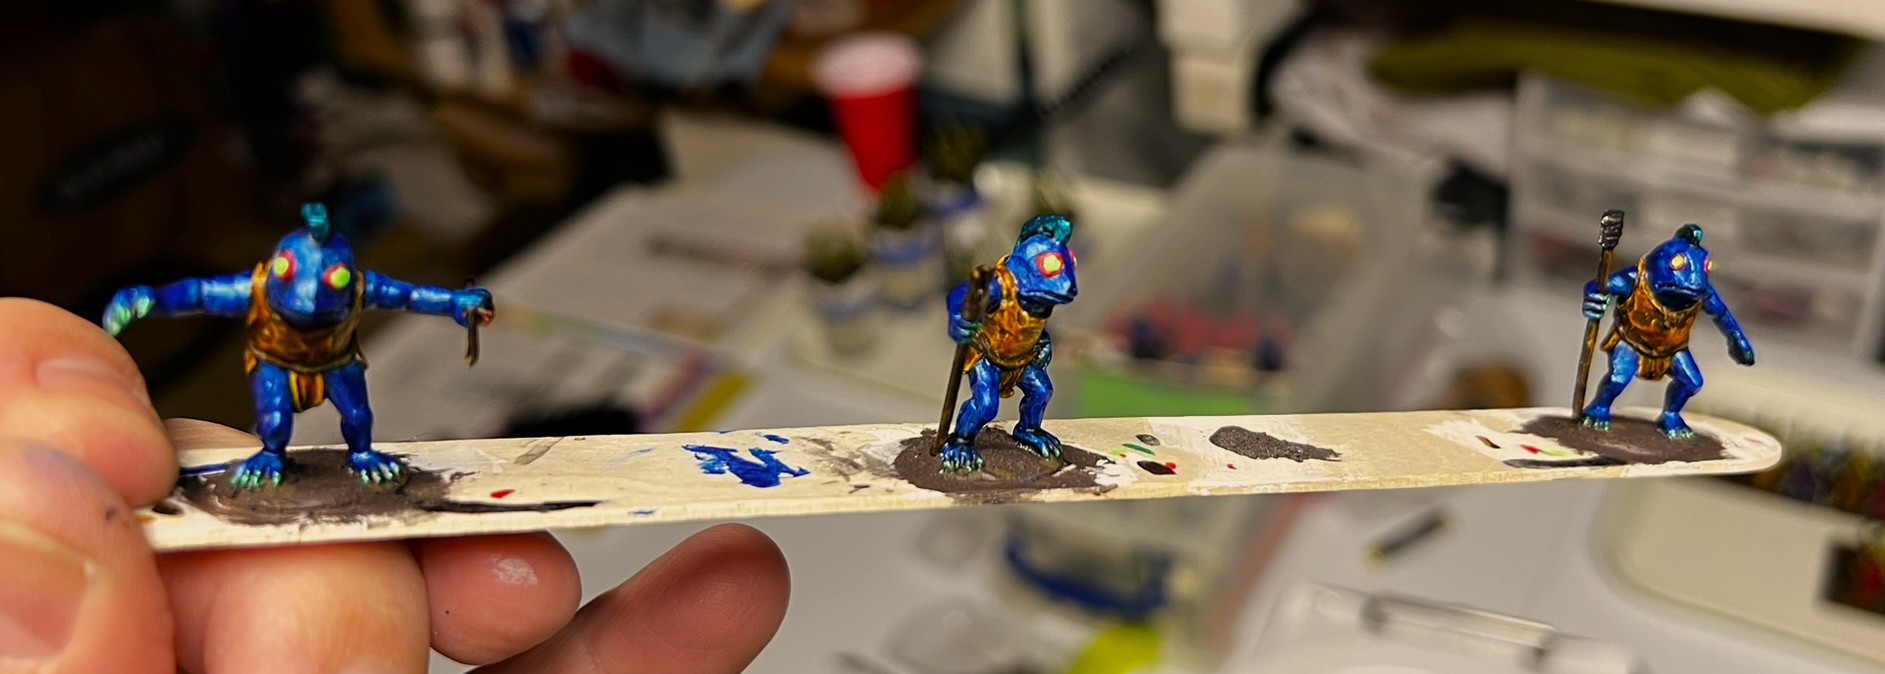
With the exception of the resin giant turtle, the figures are all metal, and 28mm. The infantry and cavalry soldiers look like the Gill-Man from the classic 1954 film “Creature from the Black Lagoon“, so I painted them as such, with some turquoise modifications around the gills and back fins.
Movie poster from “Creature from the Black Lagoon“
The artillery crew and Nemo Mudbottom are fishmen. Rather than make them look swampy, I decided to give them metallic blue and green shades to simulate their scales. The bases for all were painted up to represent swamp, mud, and puddles as you will see. As for combat stats, here are their stats:
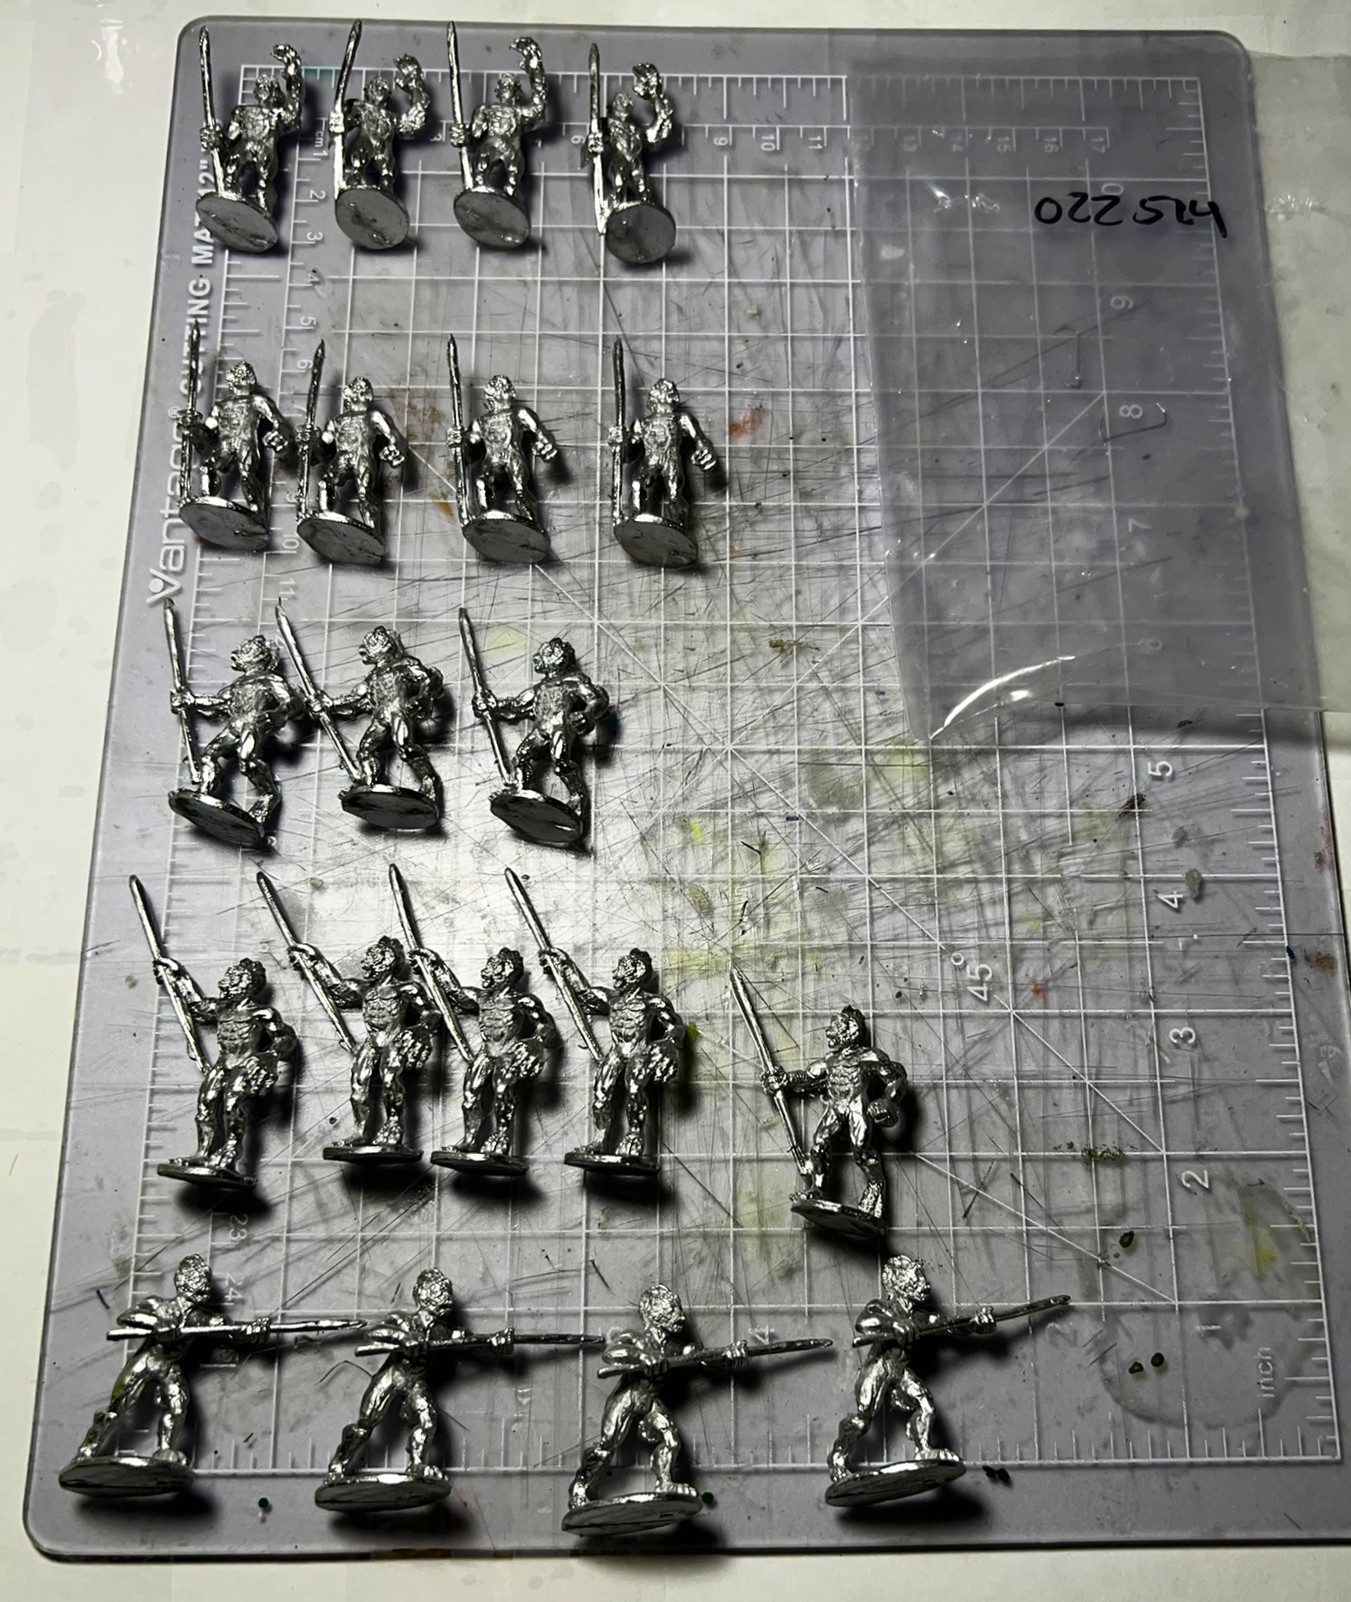
There were 20 infantry figures, 11 mounted cavalry figures, 5 artillery crewmen, 1 giant turtle with a light cannon, and Nemo. Below is what I started with:
The Pollywomp InfantryThe Pollywomp Cavalry, Artillery, and Nemo
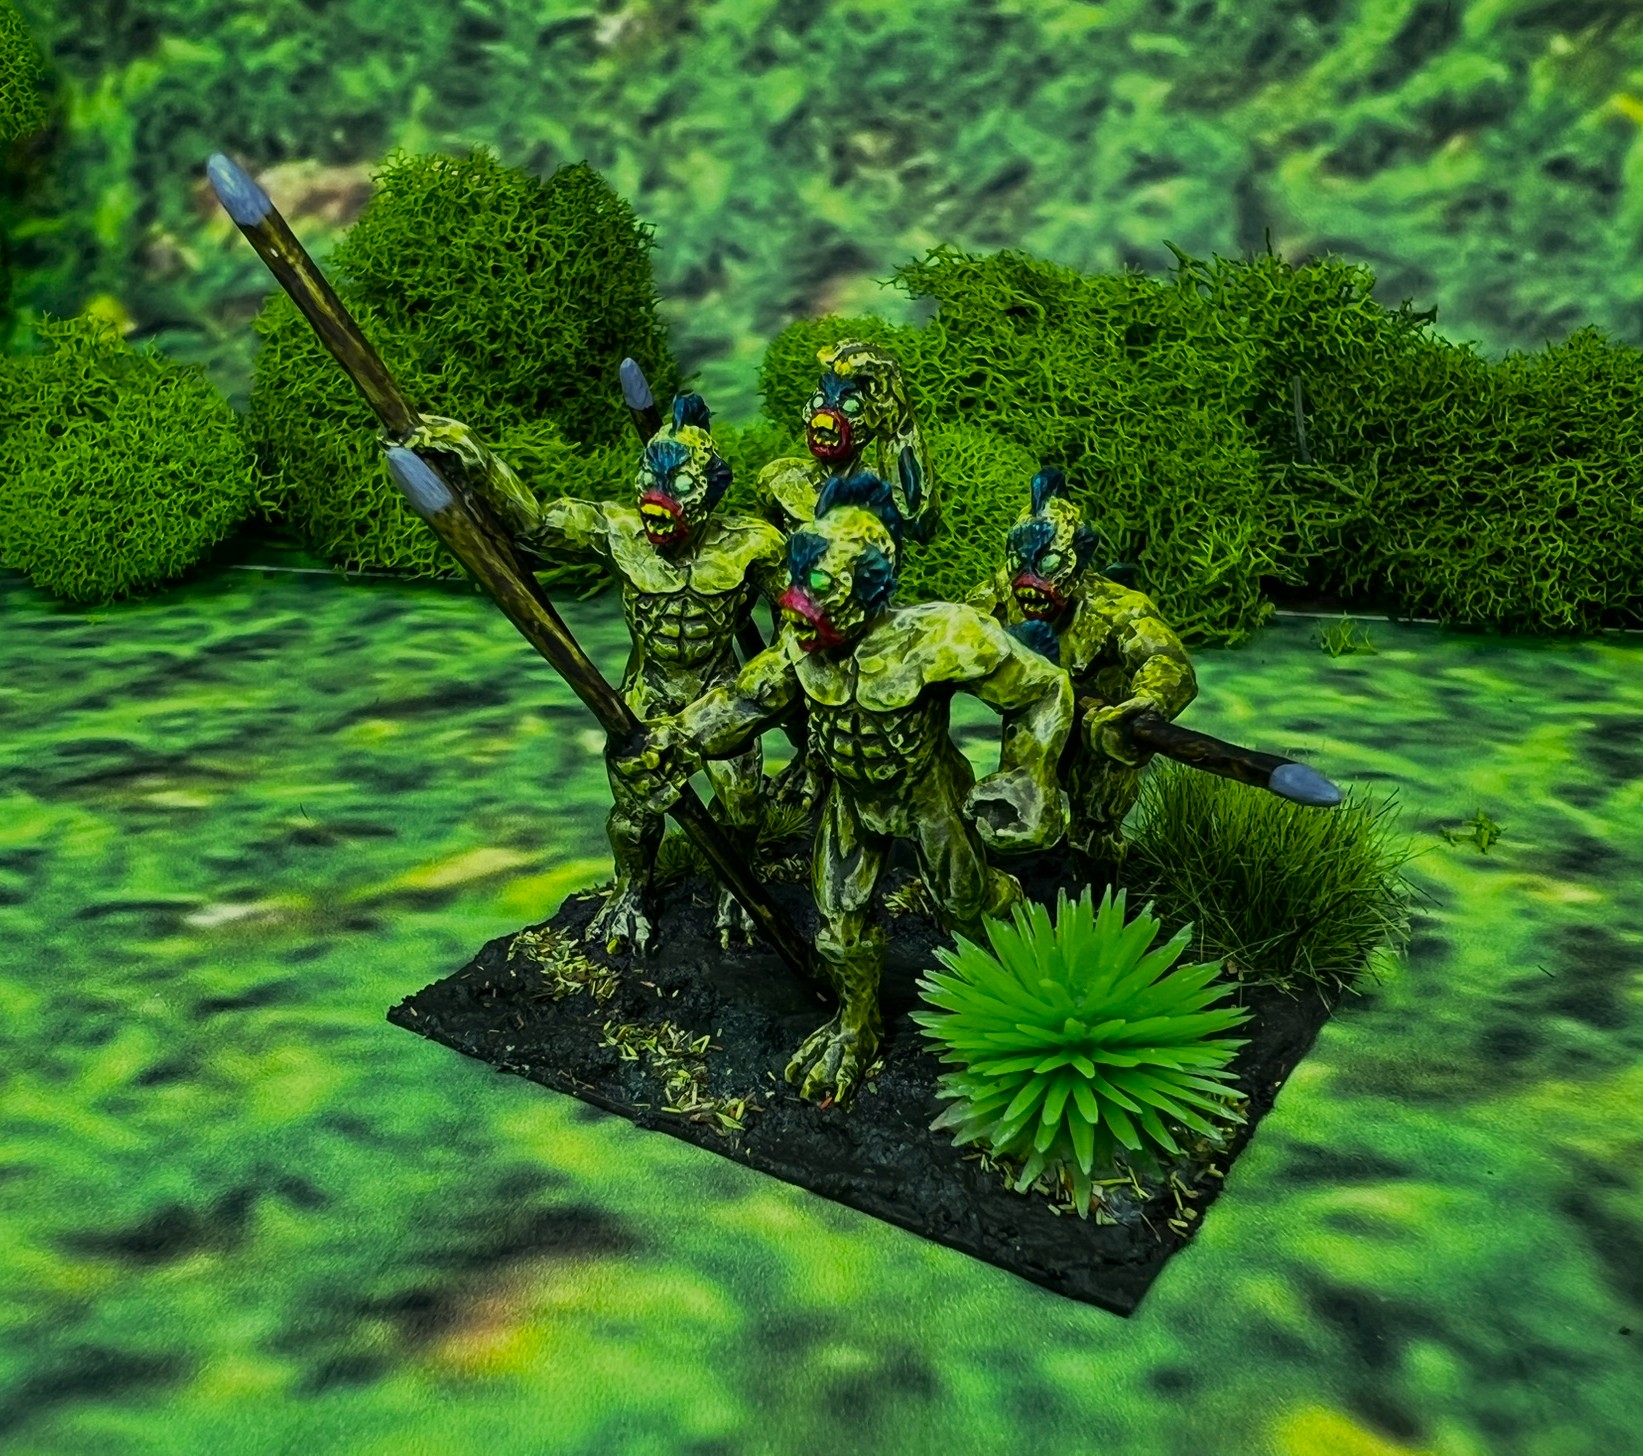
I did give the regiment a banner that I made out of green stuff and a plastic jungle leaf, even though the regiment does not have a regimental commander. All have glowing green eyes.
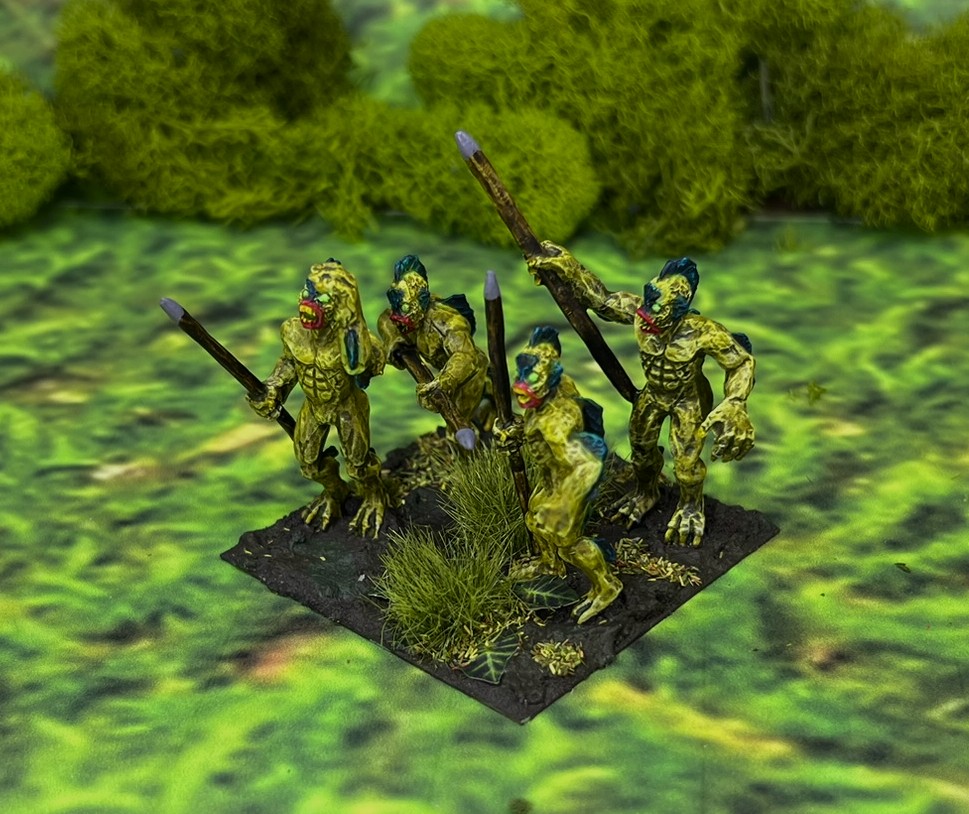
Here are some jungle shots of the regiment in line and column formations:
Pollywomp Infantry Regiment in line formationPollywomp Infantry Regiment in column formation
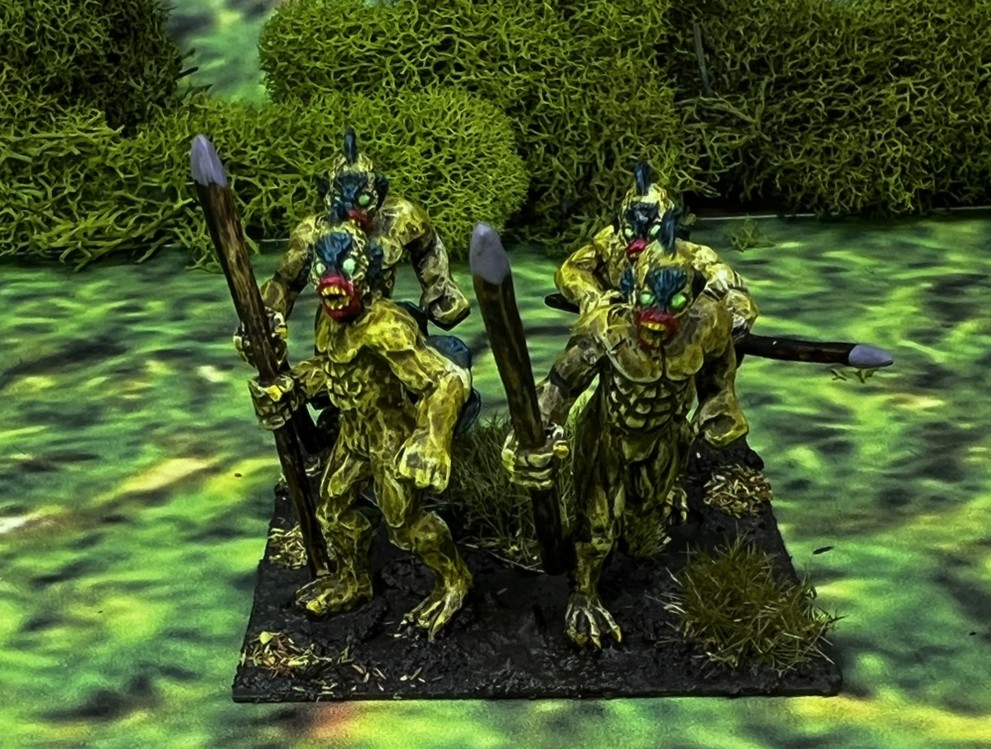
Here are some closer shots of the individual bases:
Note the leaf banner!
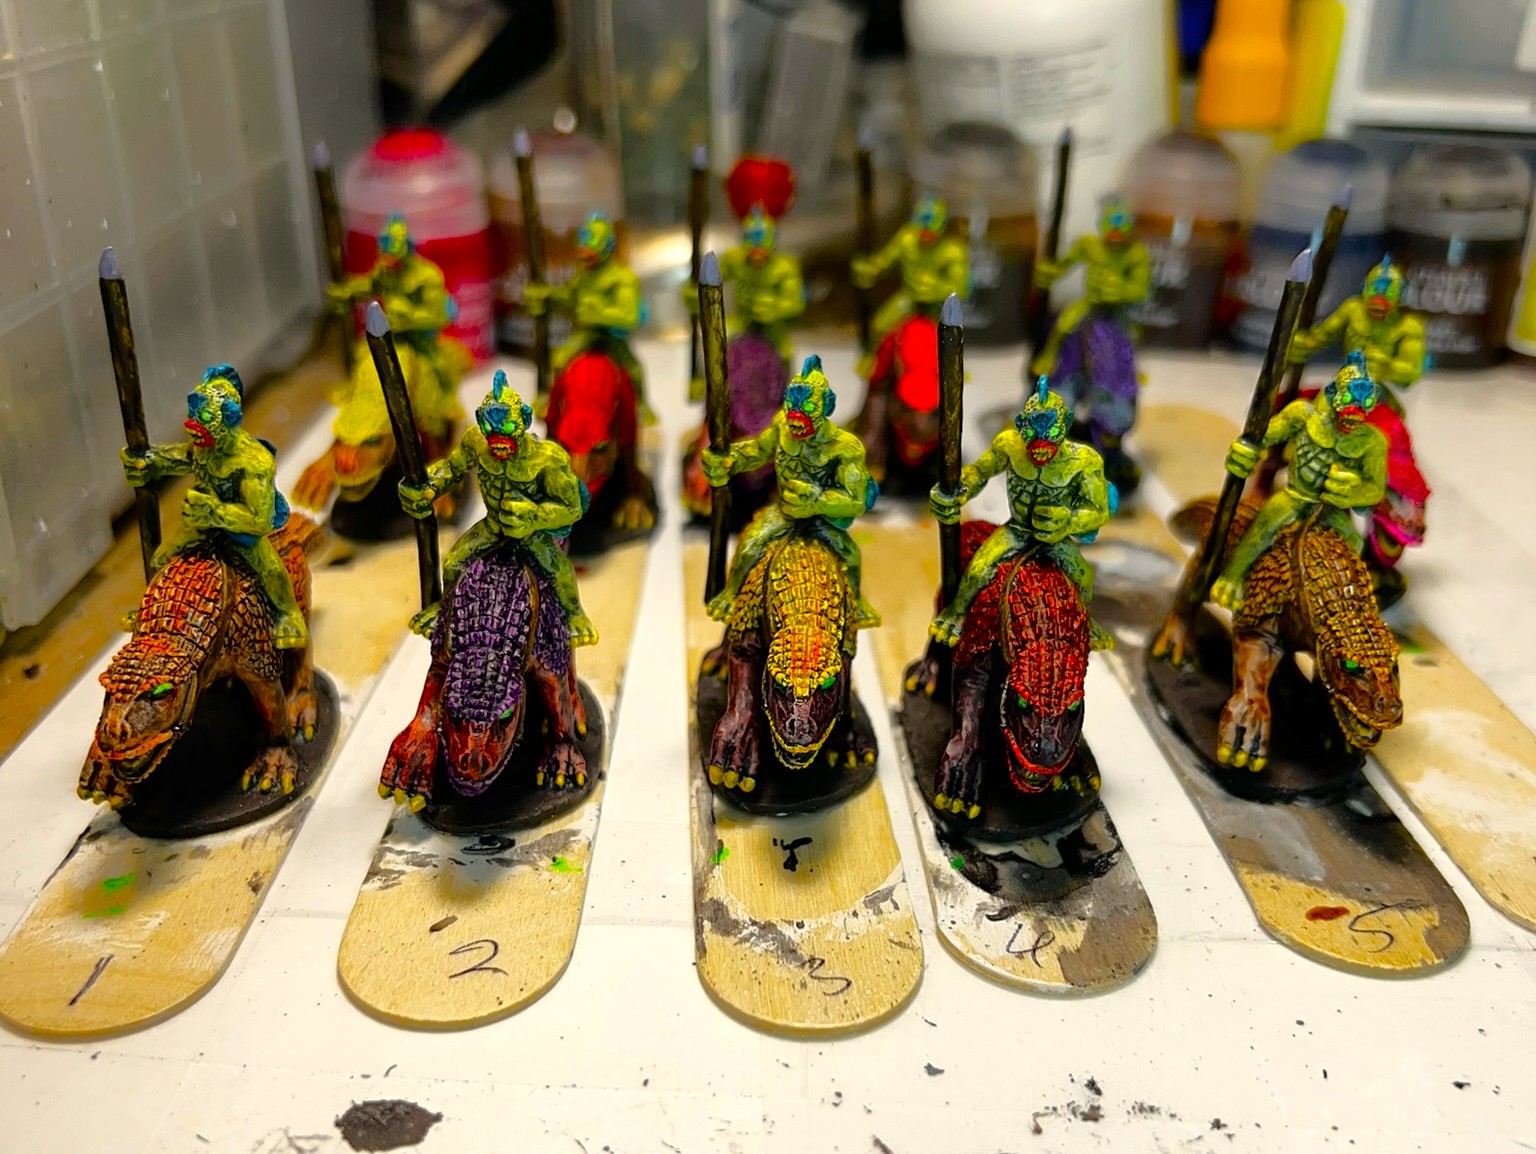
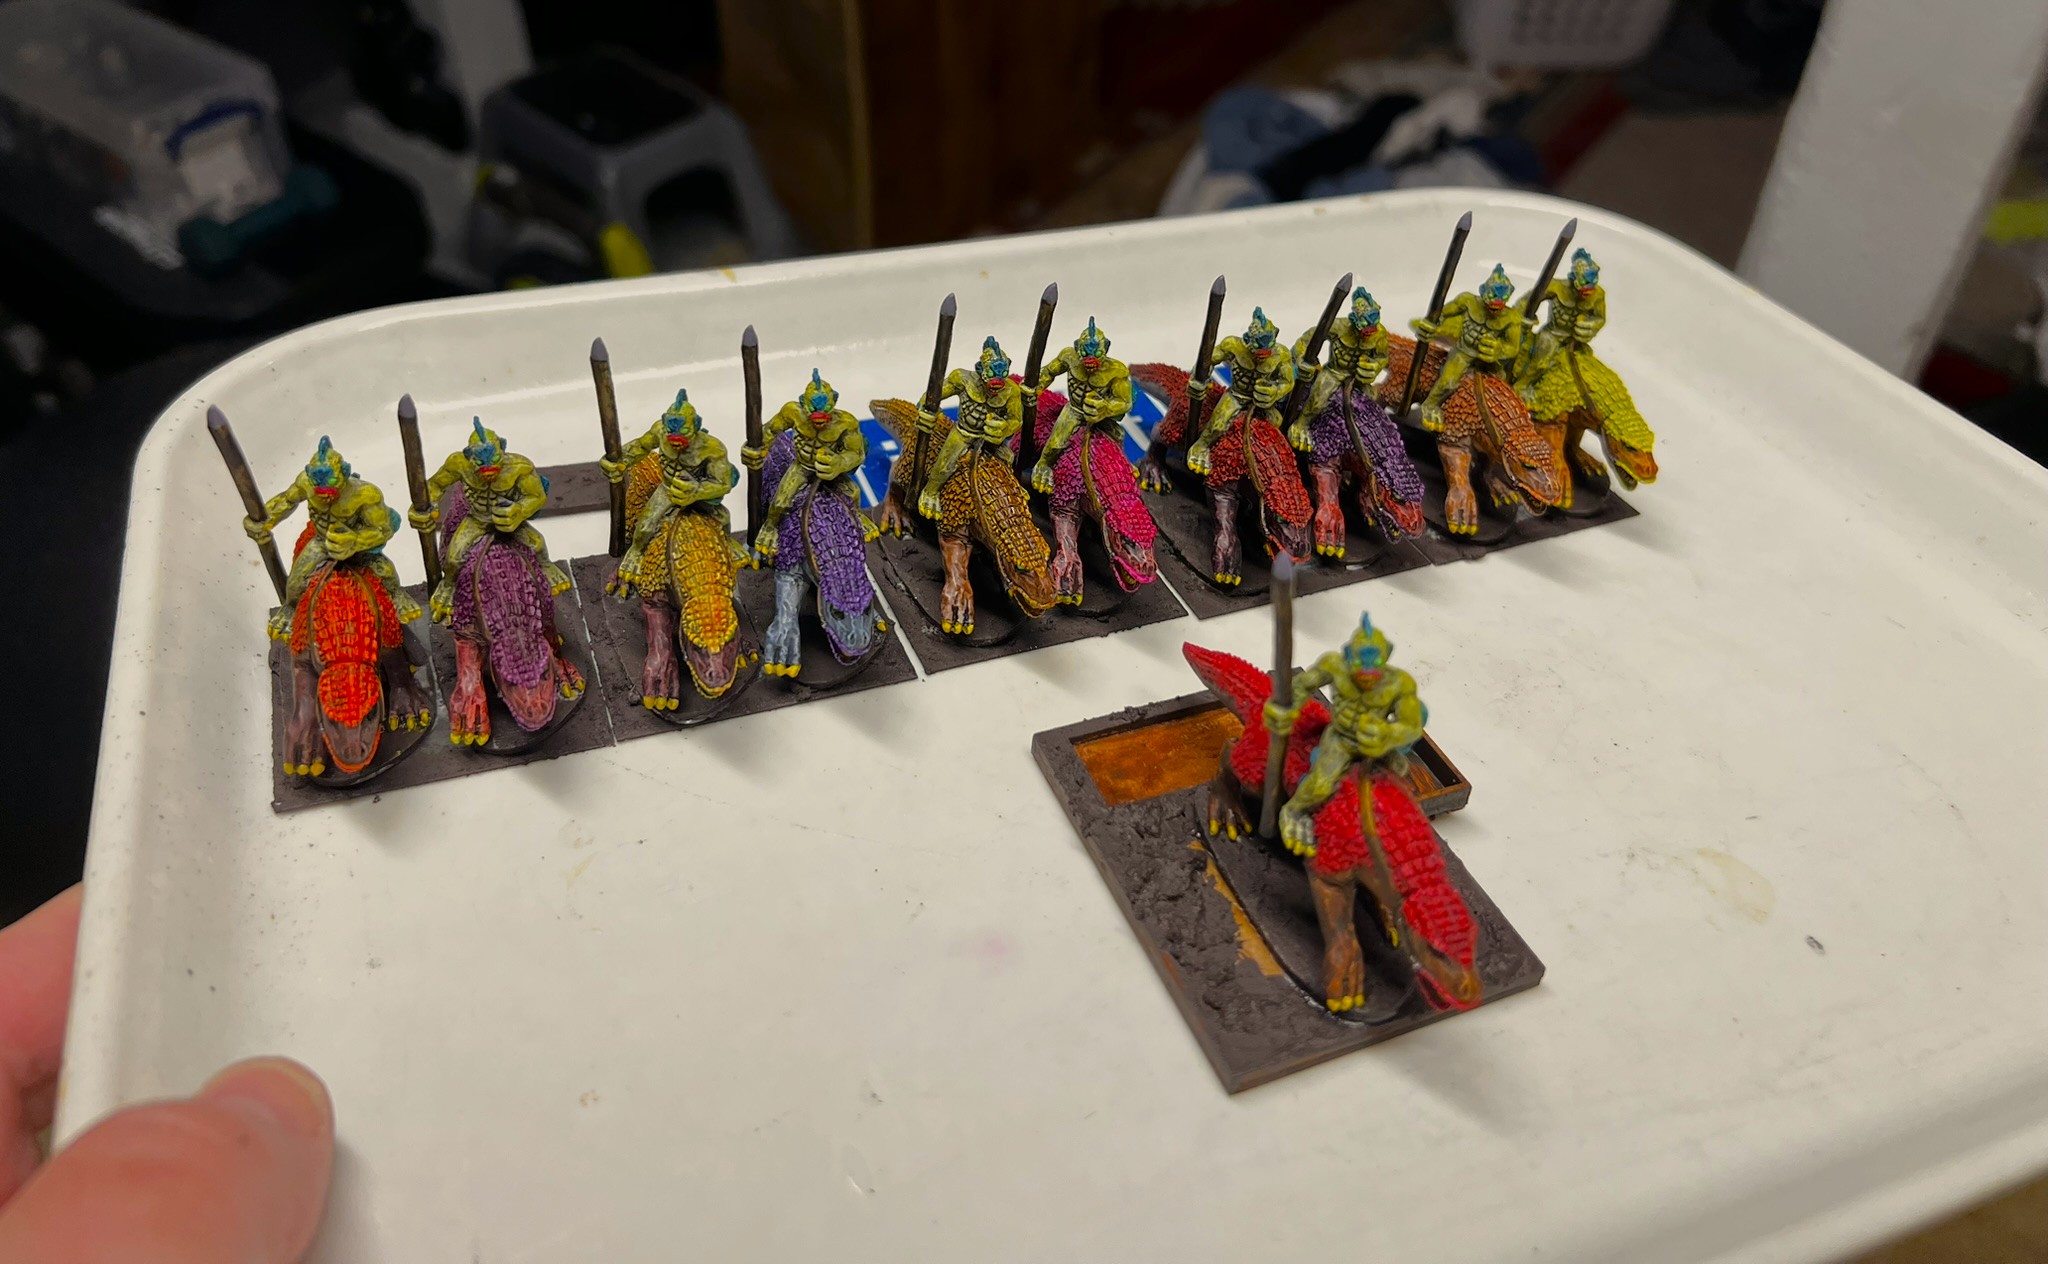
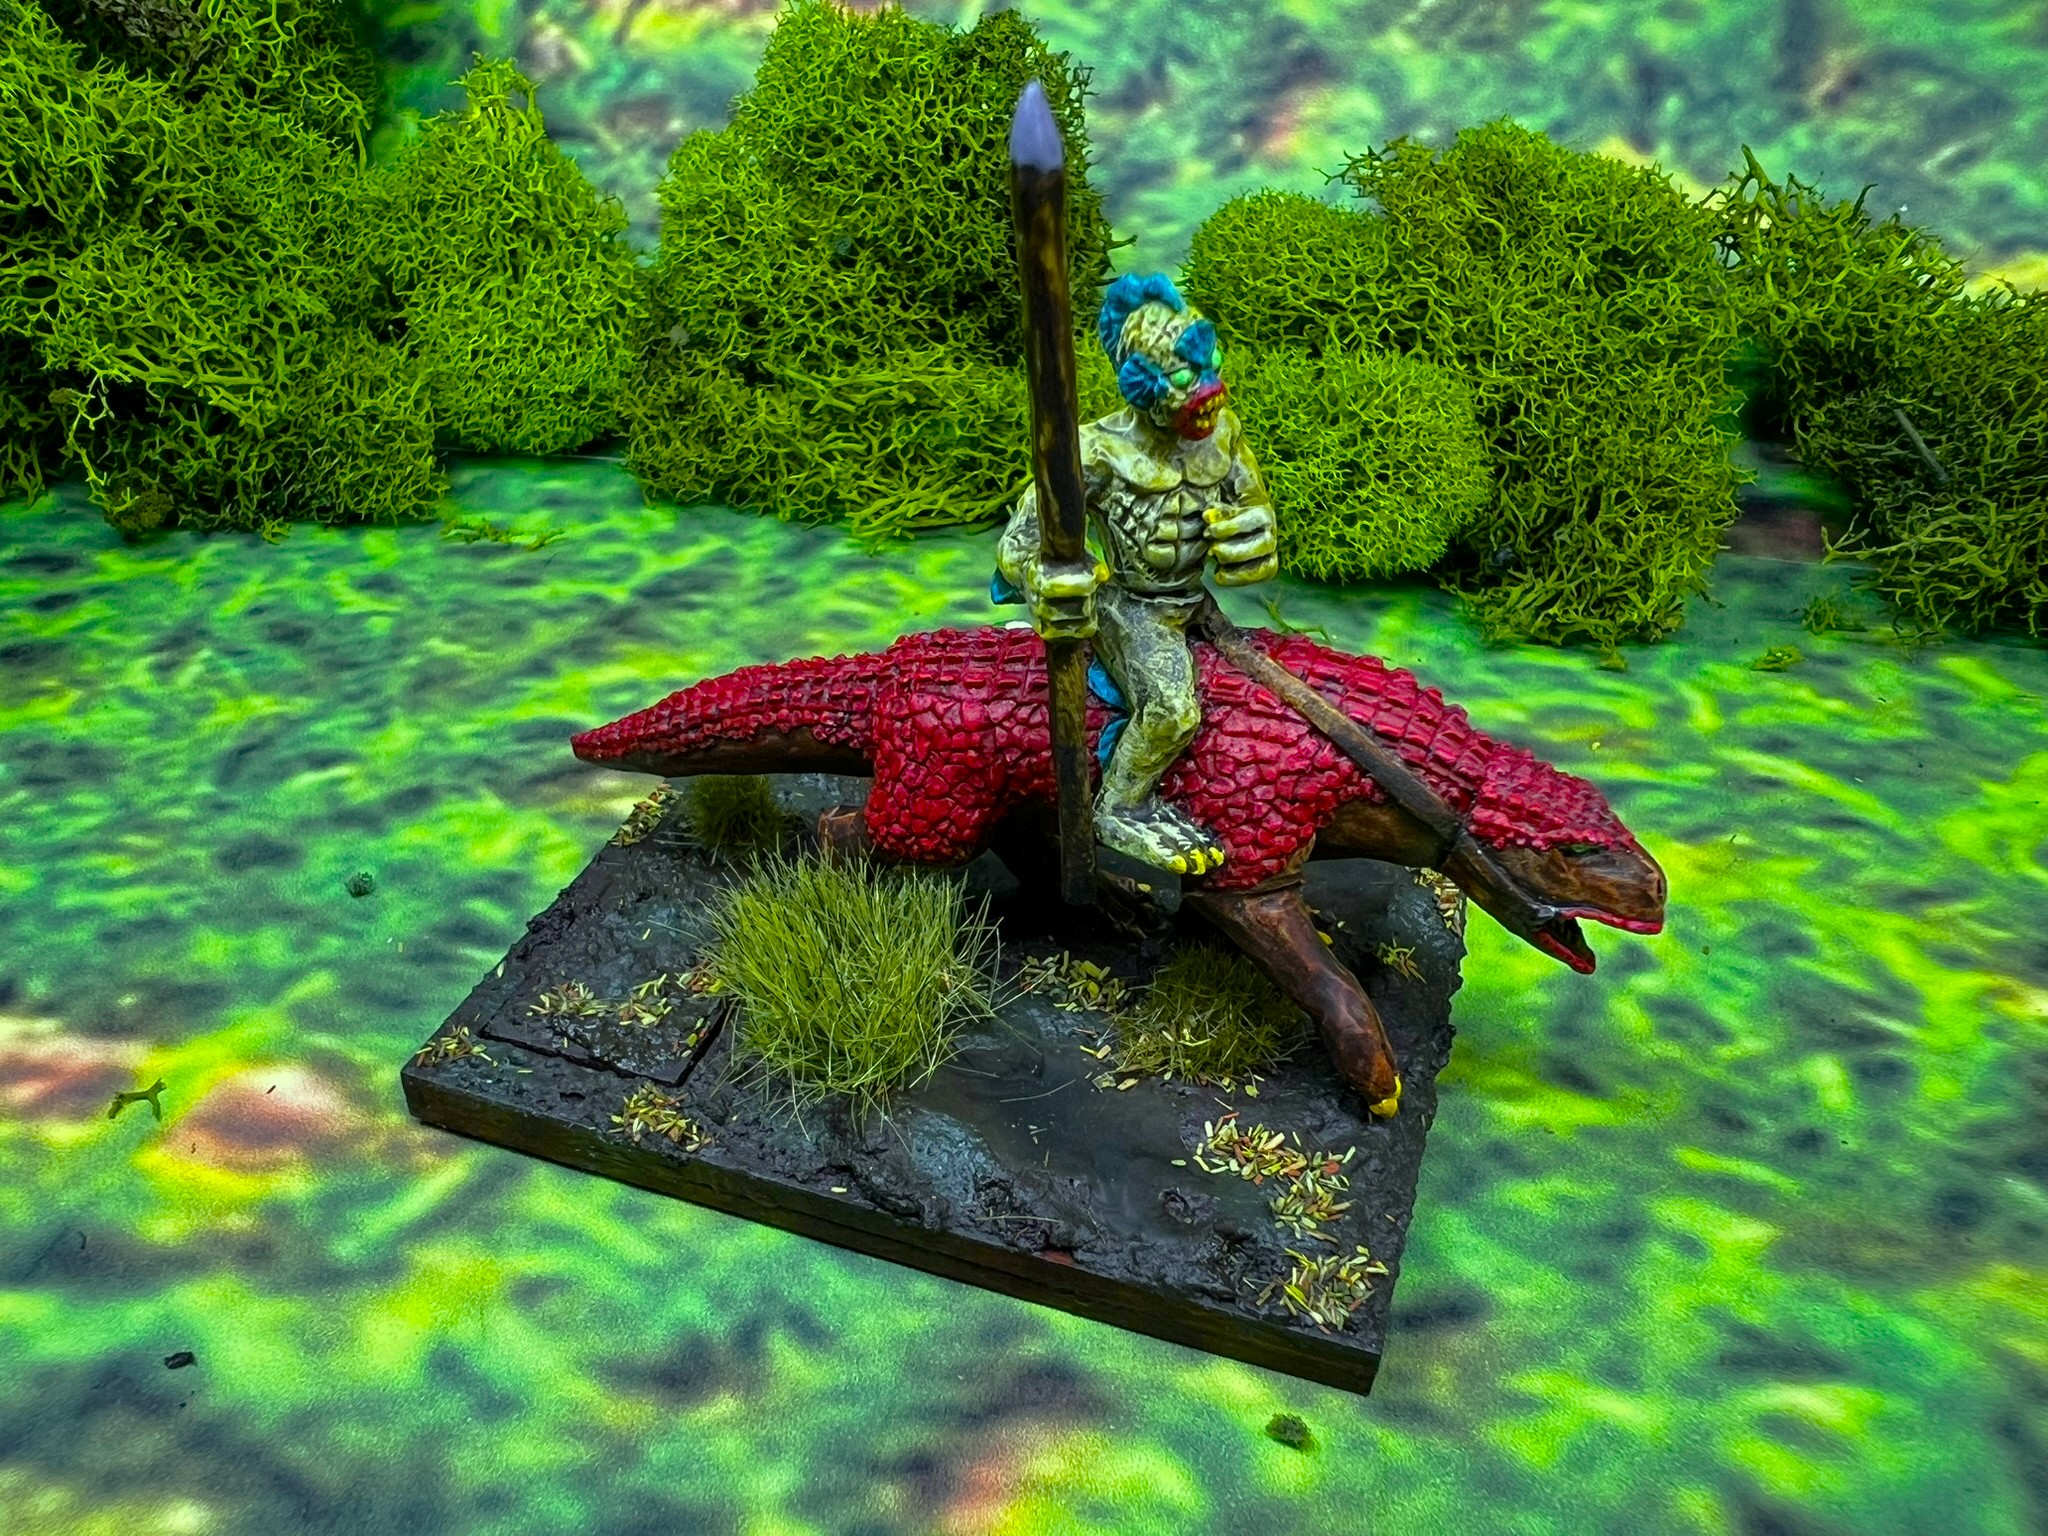
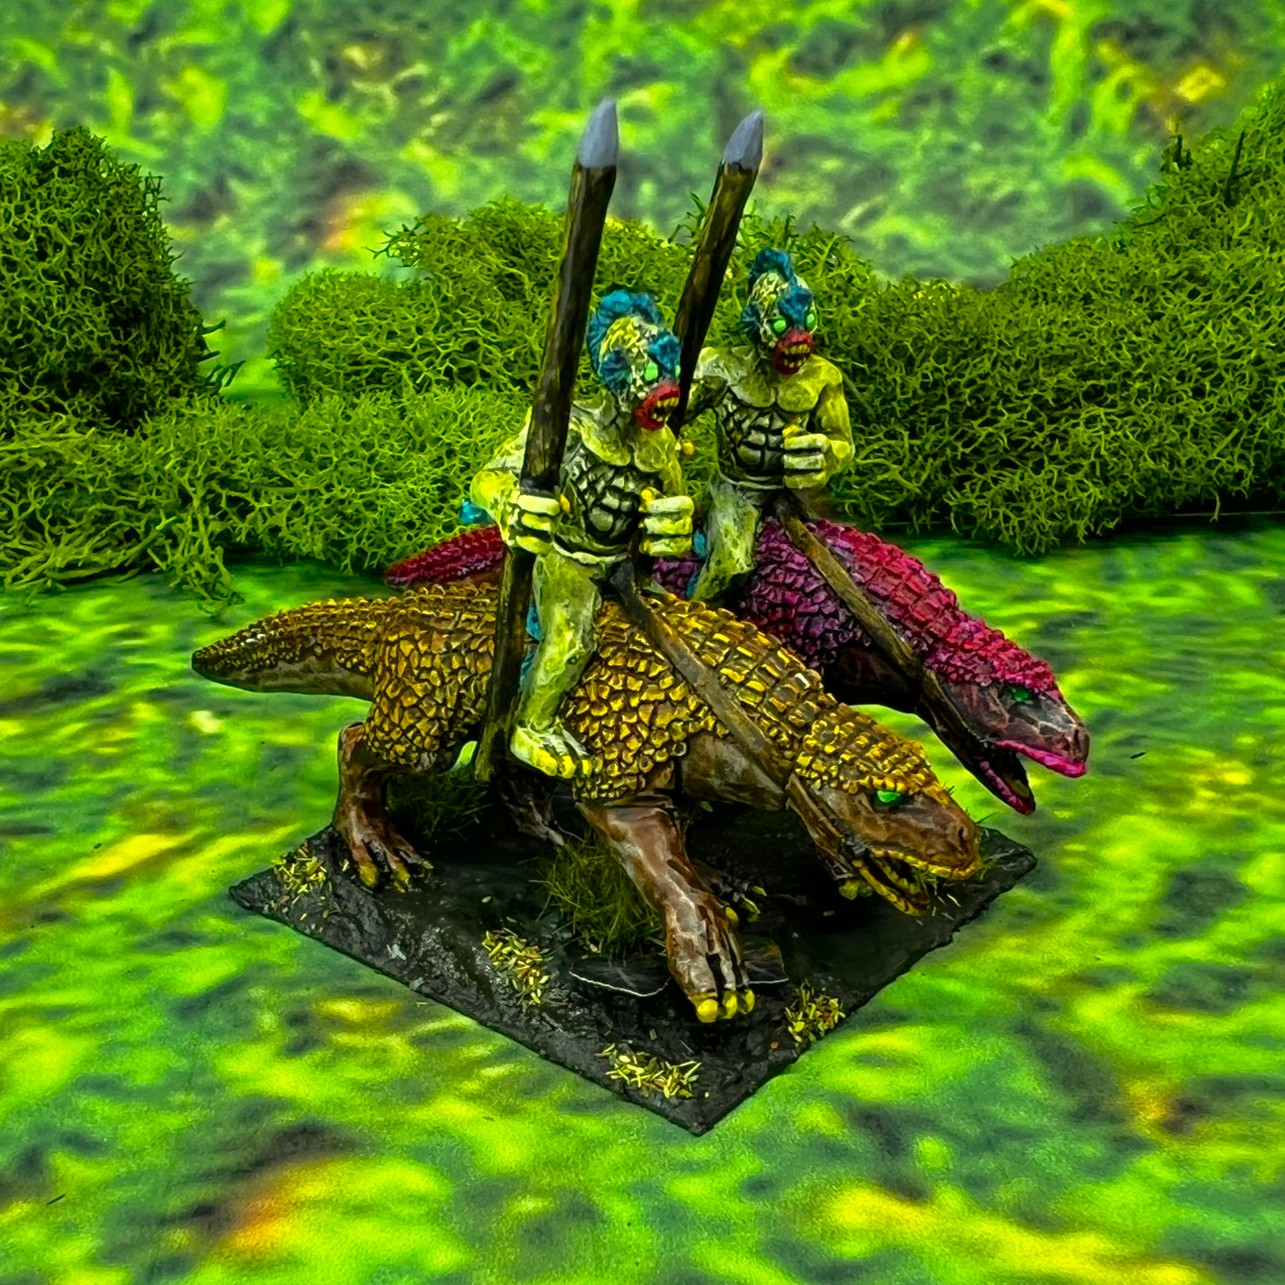
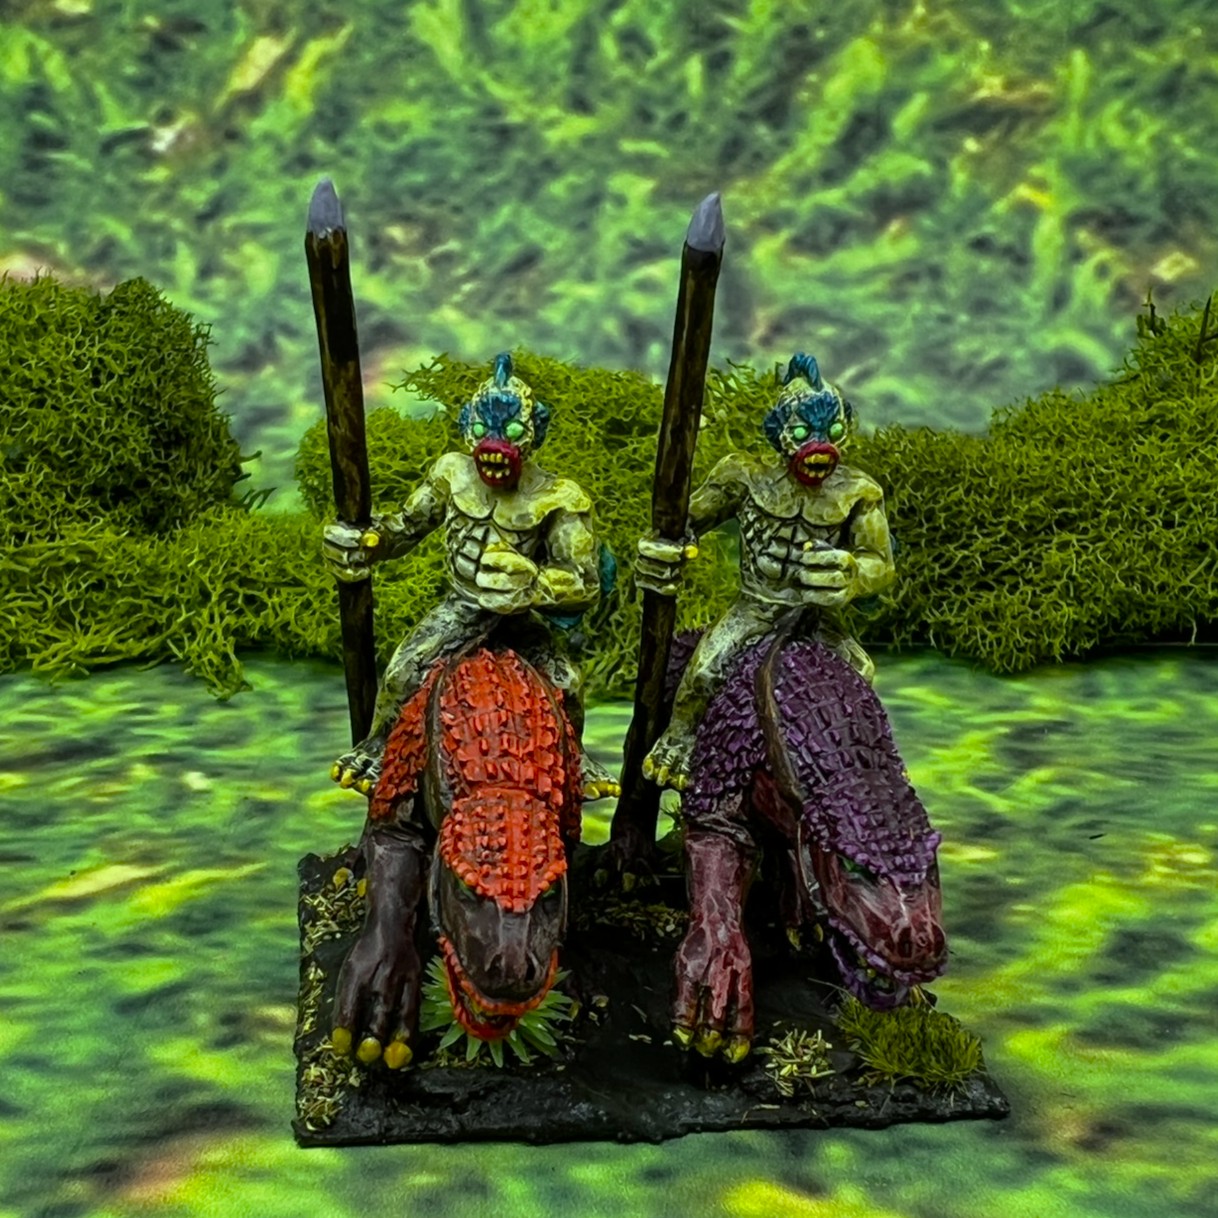
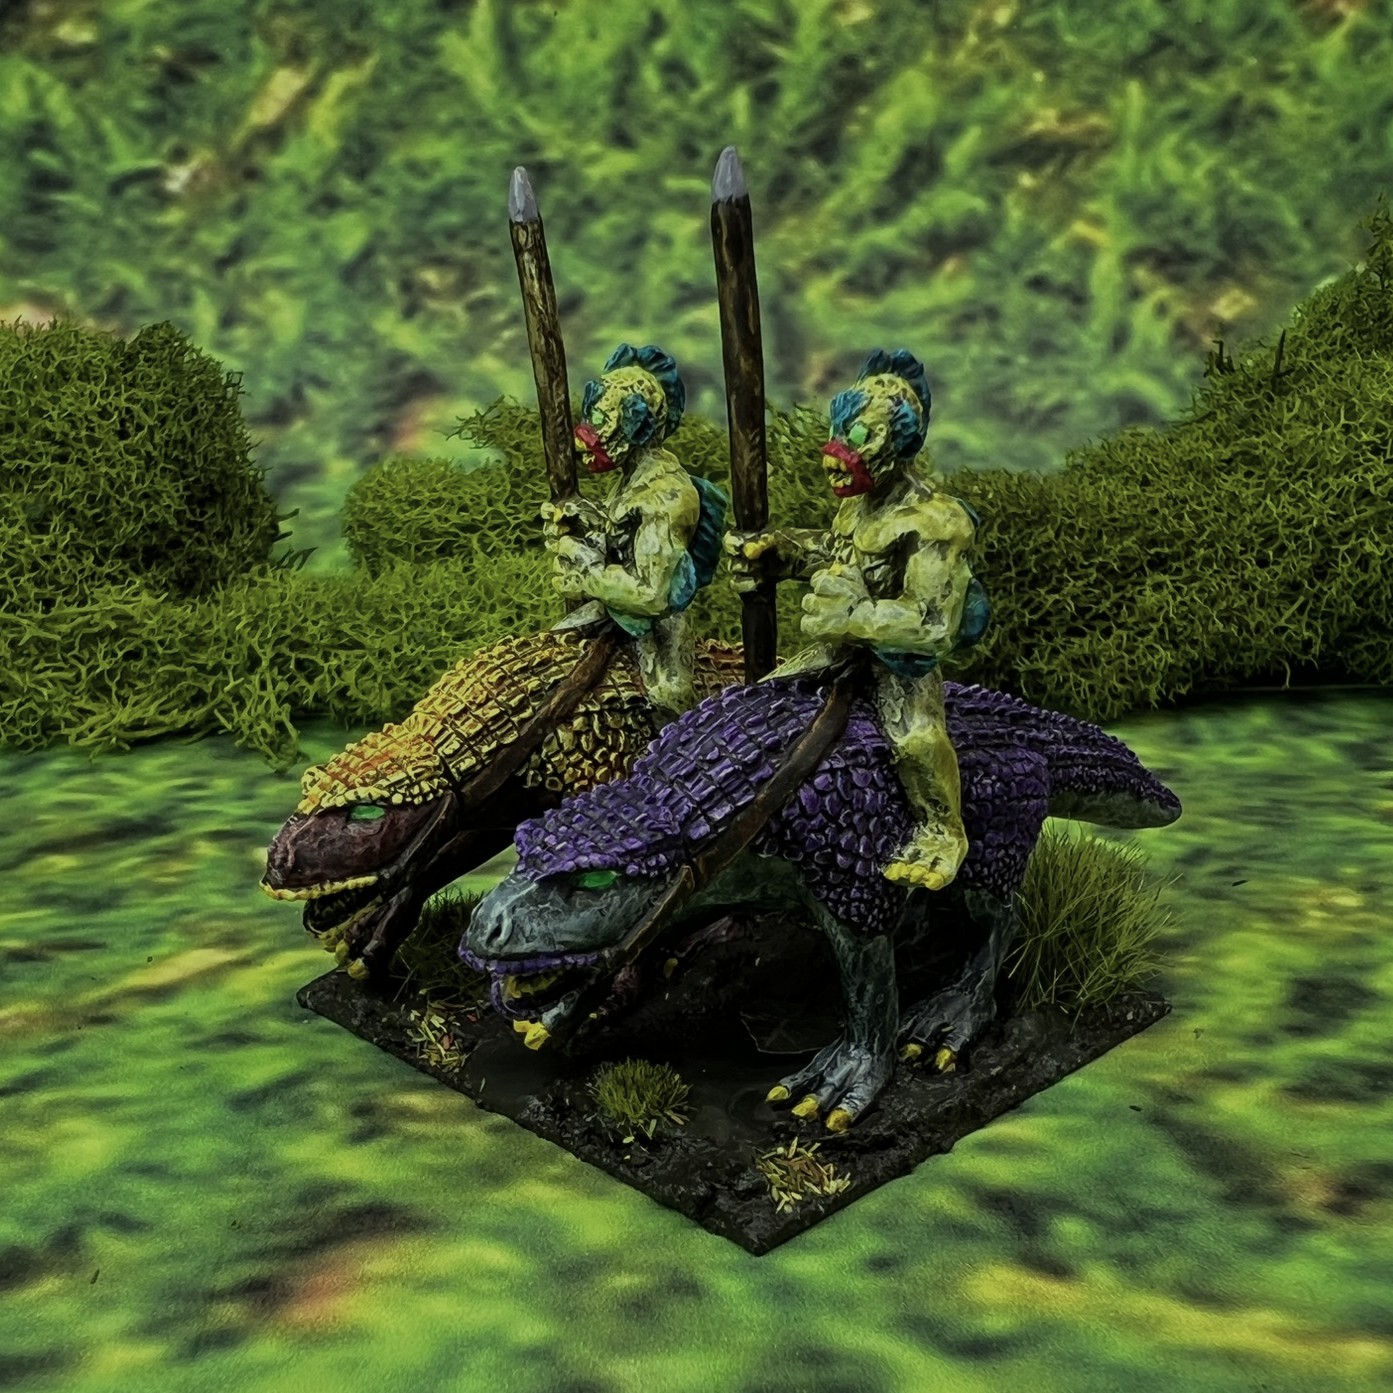
Pollywomp Cavalry on Pollywomprats
The cavalry regiment rides on “pollywomprats” which resemble a cross between an alligator and a monitor lizard. As the pollywomprats are supposed to have varied colors (similar to how the Munchkin cavalry has ponies of different colors), I made sure that no two were alike. Unlike the infantry, the regiment does have a regimental commander, which gives the unit an ability as rolled by dice. This regiment got “The Swift” giving them a +2″ bonus when they move. I also gave them a leaf banner. The riders were painted exactly the same way as the infantry color-wise.
The Pollywomp cavalry regiment, OZZ-535, ready for varnish, basing, and final flocking.The Pollywomp cavalry based and awaiting flocking.Pollywomp Cavalry Regiment in line formation.
And here are some closeup shots of the bases, starting with the regimental commander’s single-figure base. Very muddy bases!
Note the leaf banner!
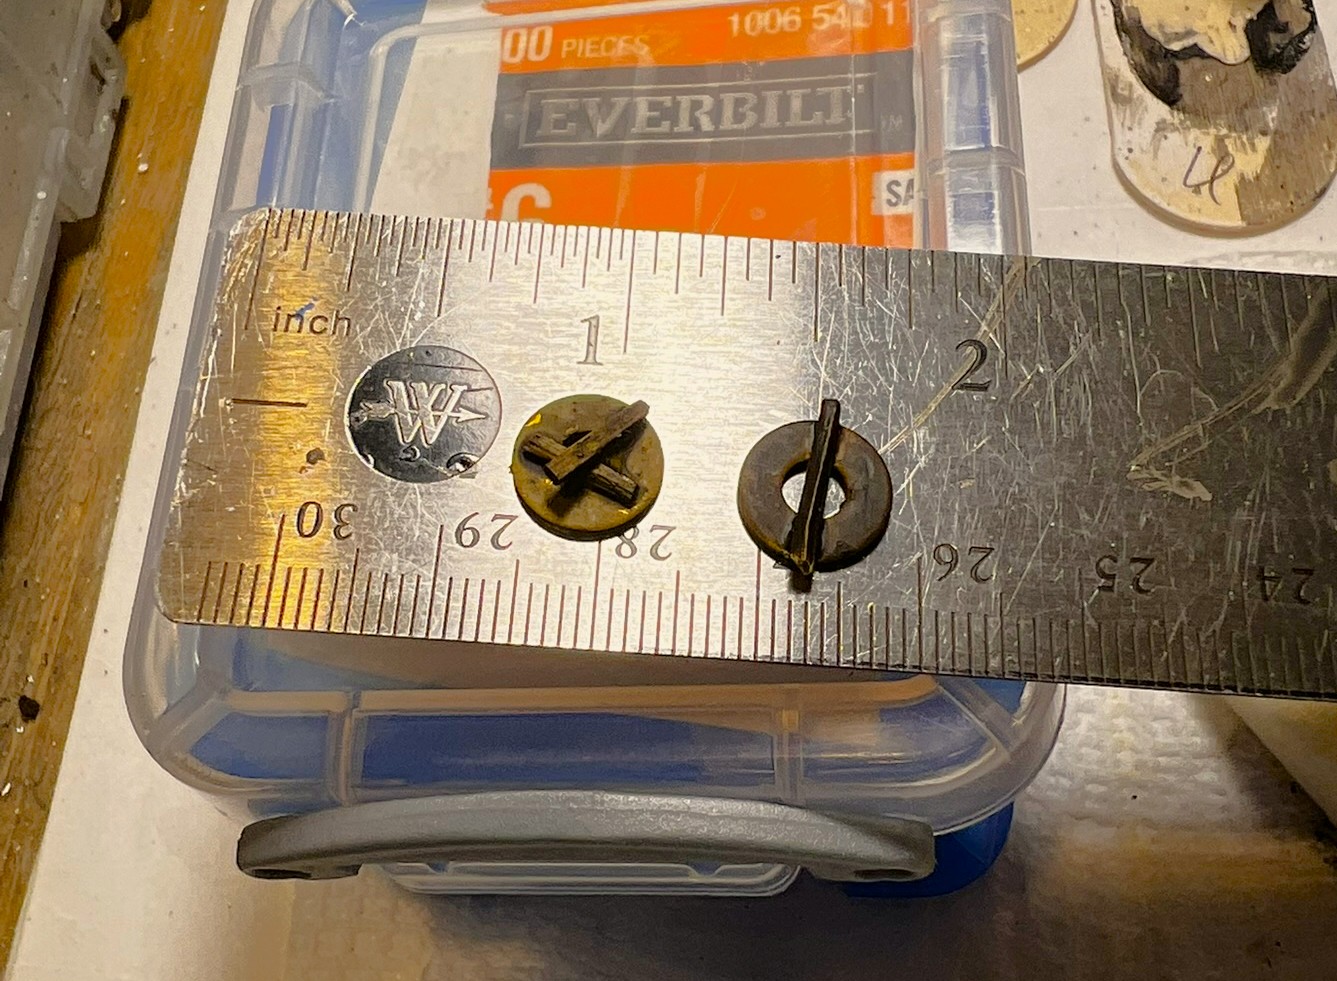
Both Pollywomp infantry and cavalry have limited missile capabilities. Each base can fire twice per game. So, for both I made small markers to keep track of that in the game. The markers are just toothpick pieces on washers, lightly painted, but small enough to put on the bases unobtrusively.
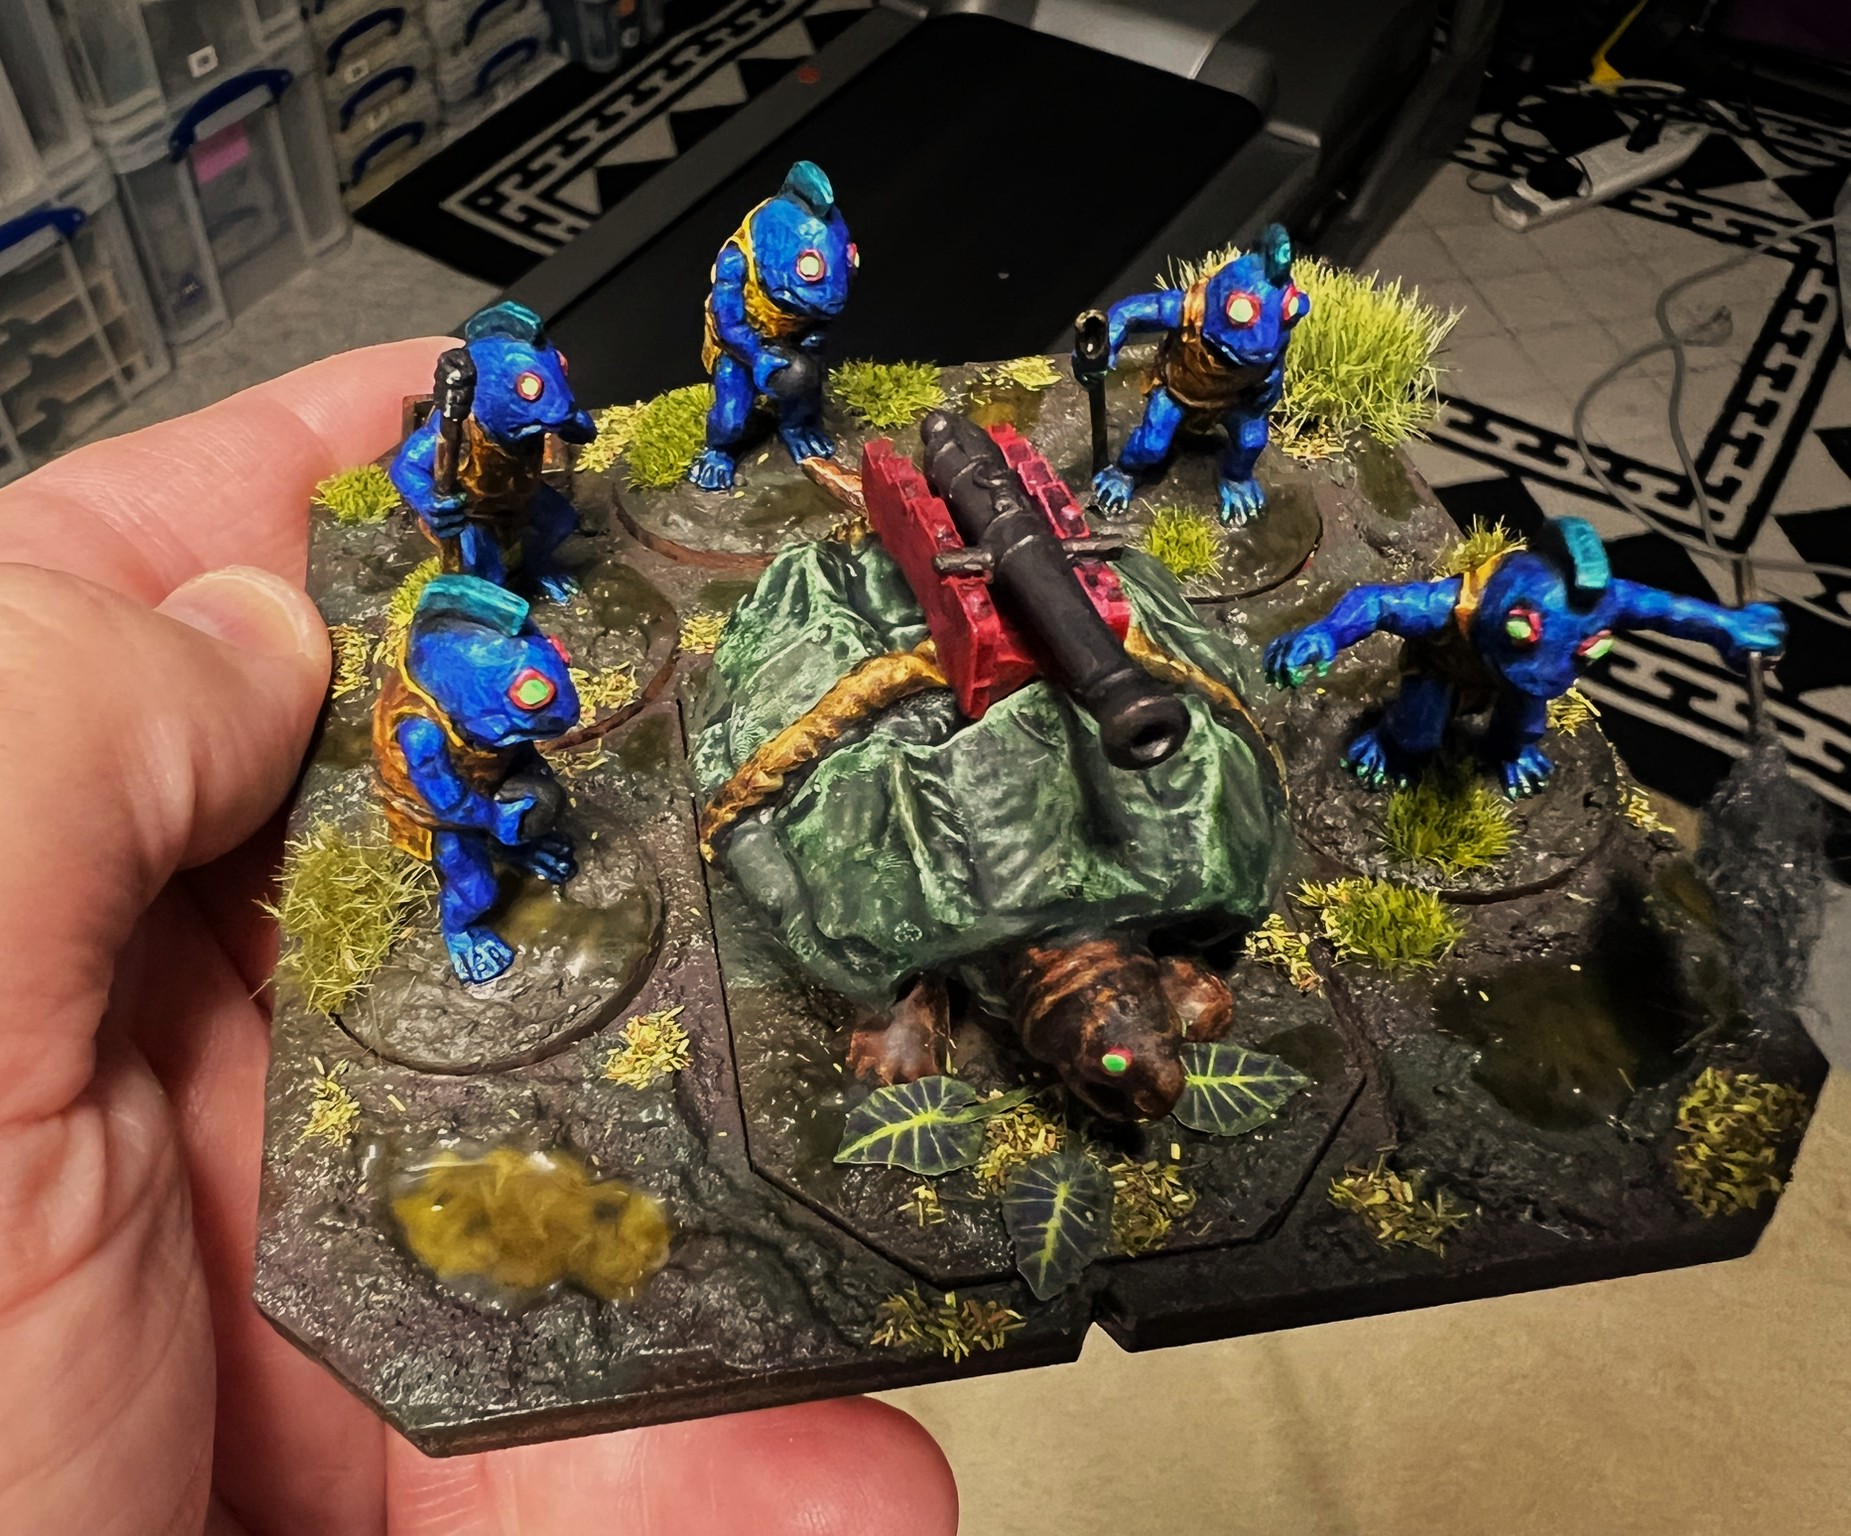
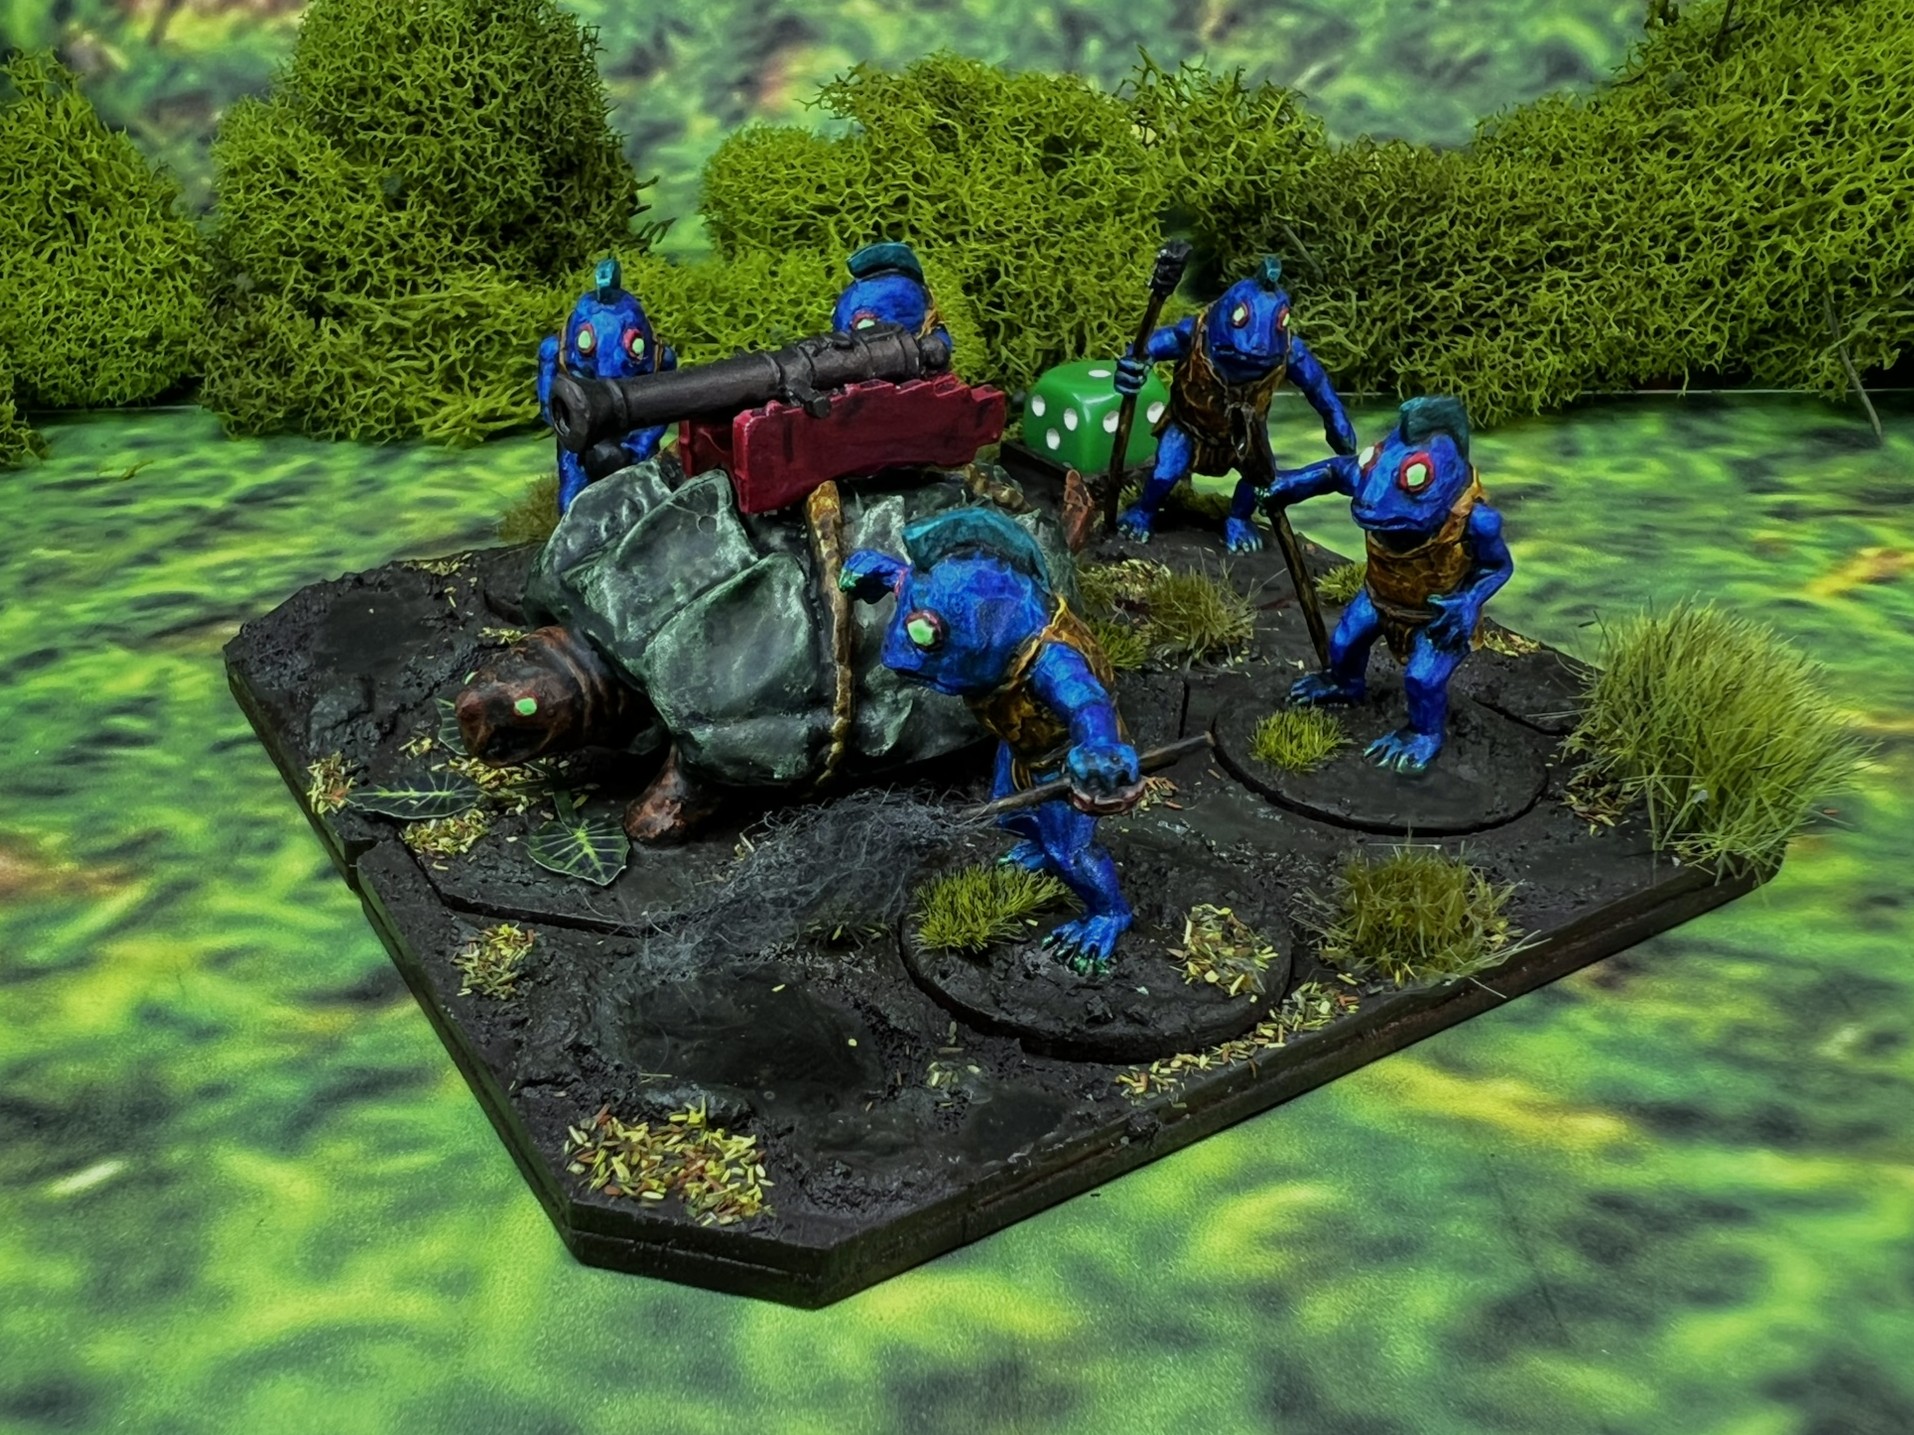
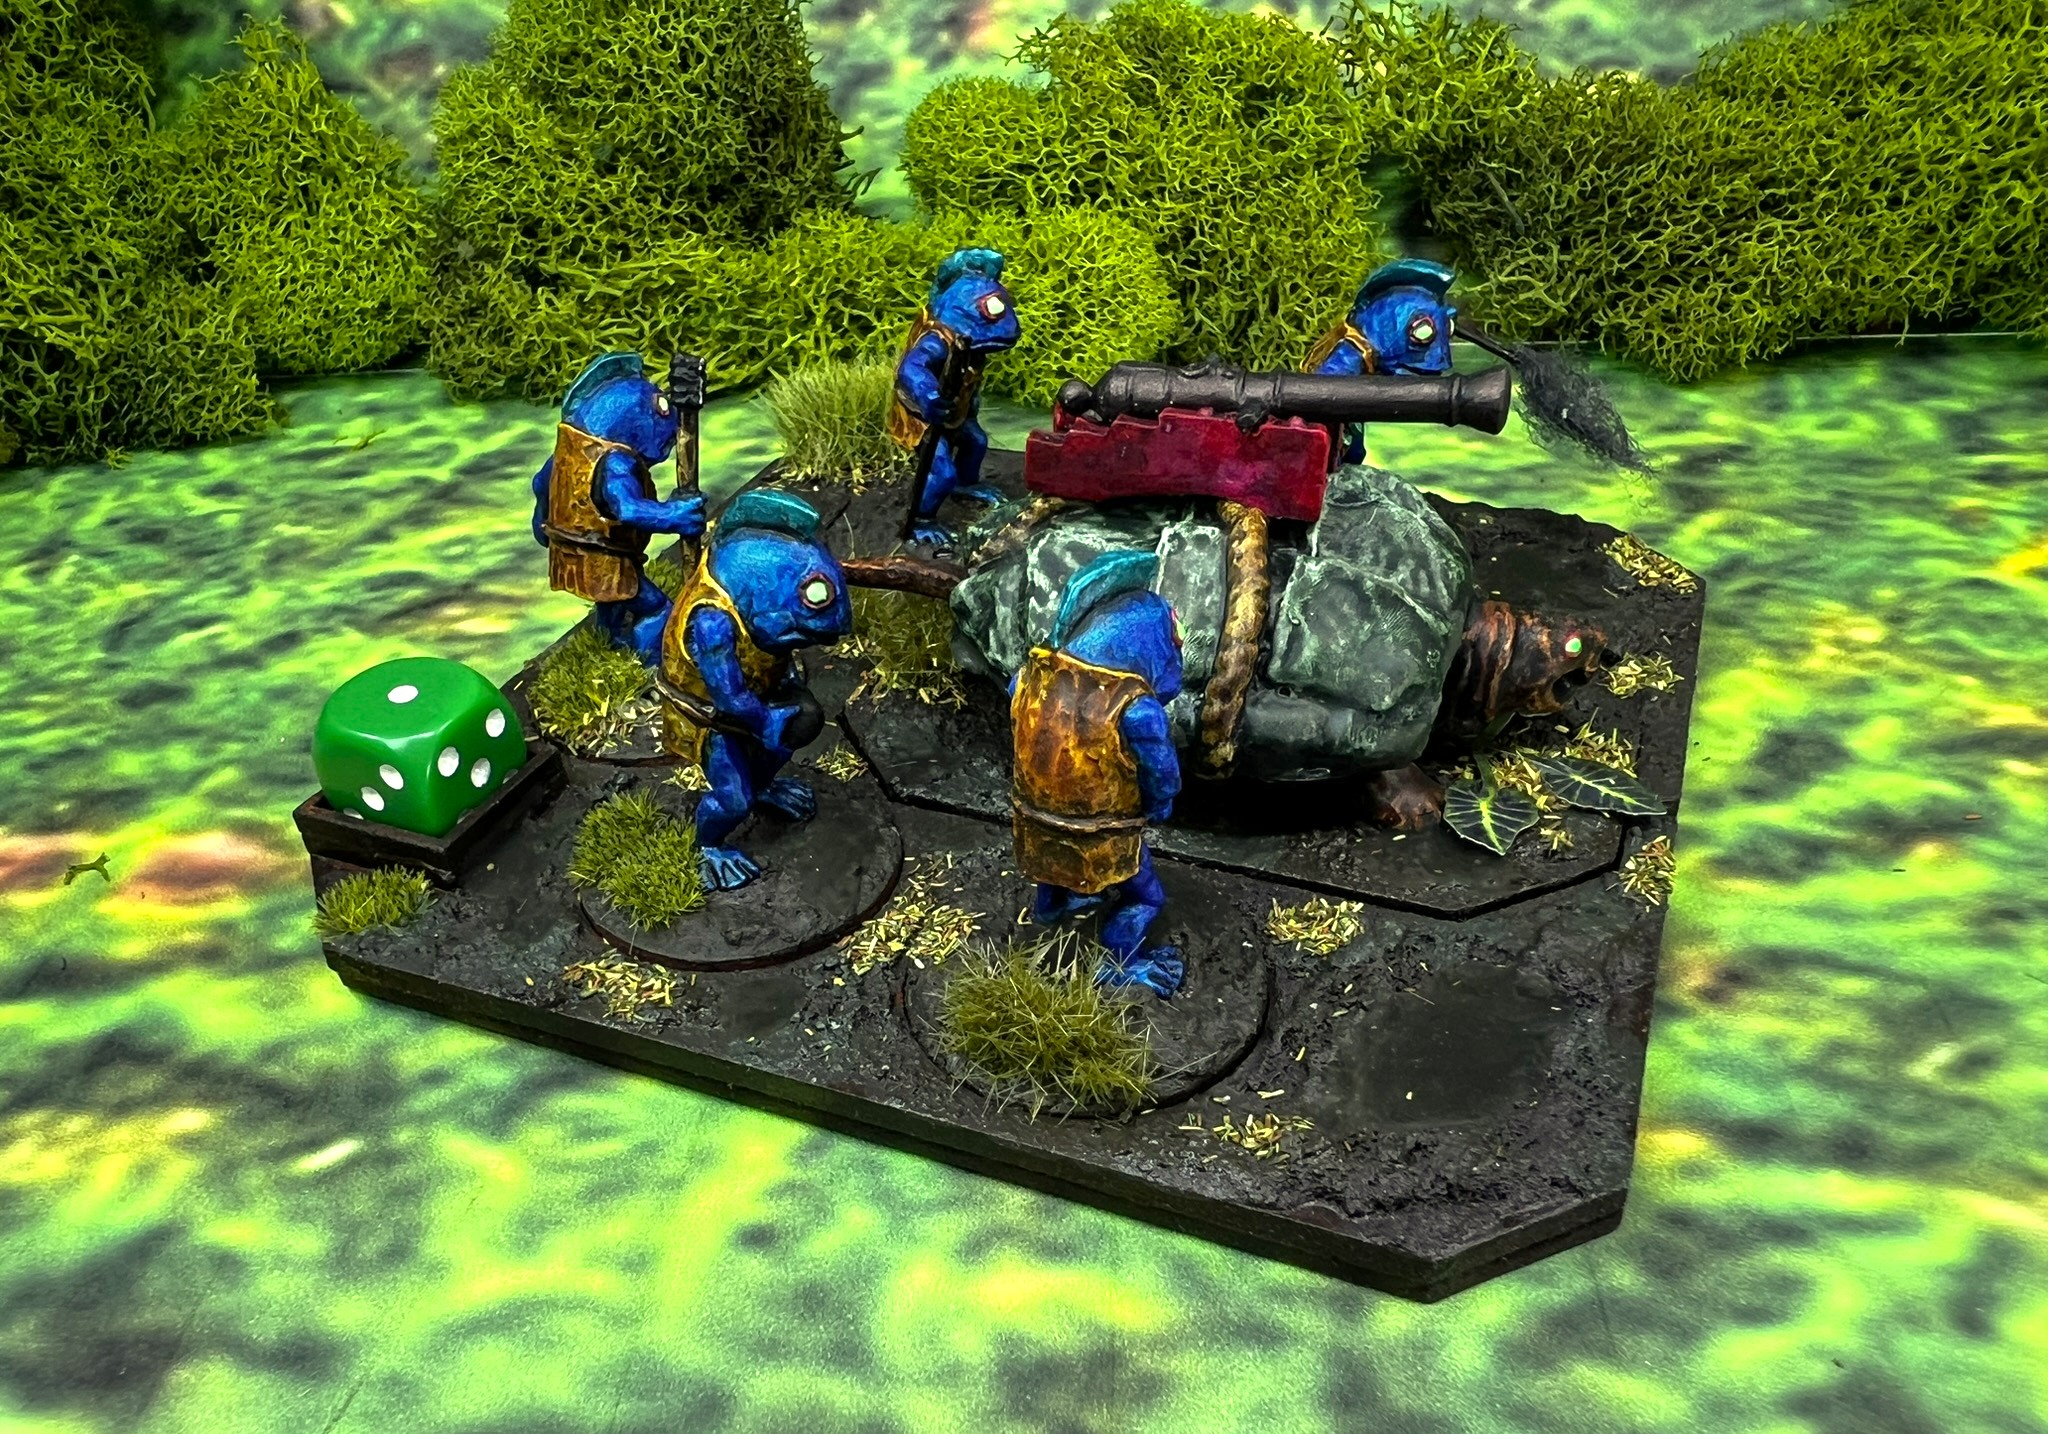
Pollywomps Artillery Battery
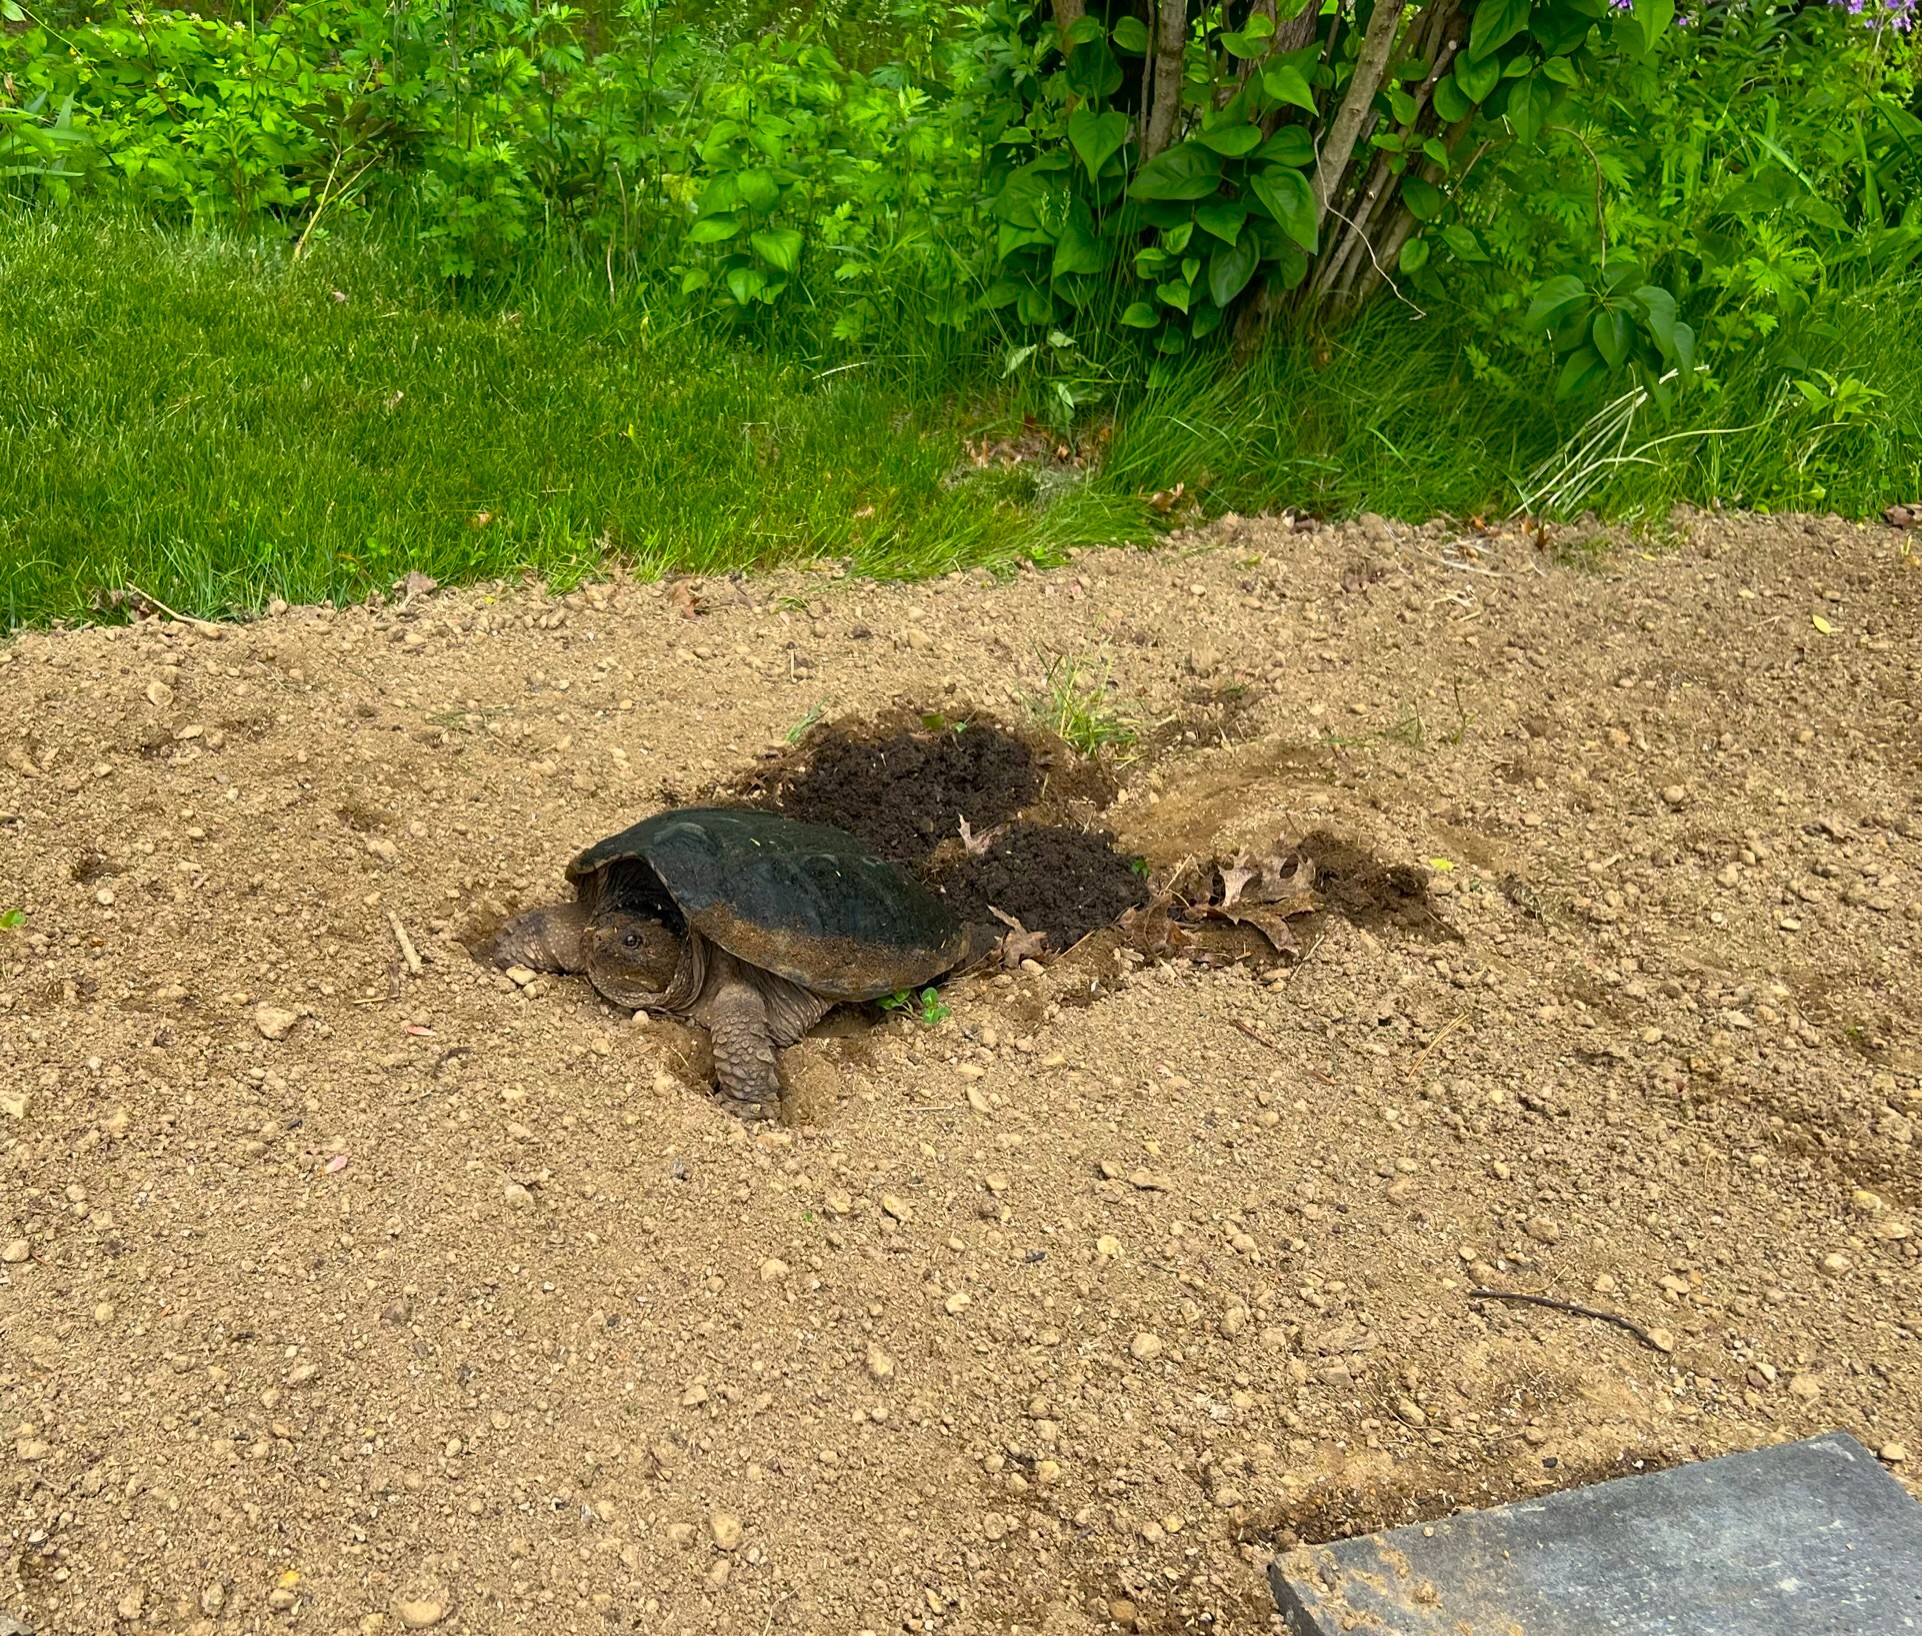
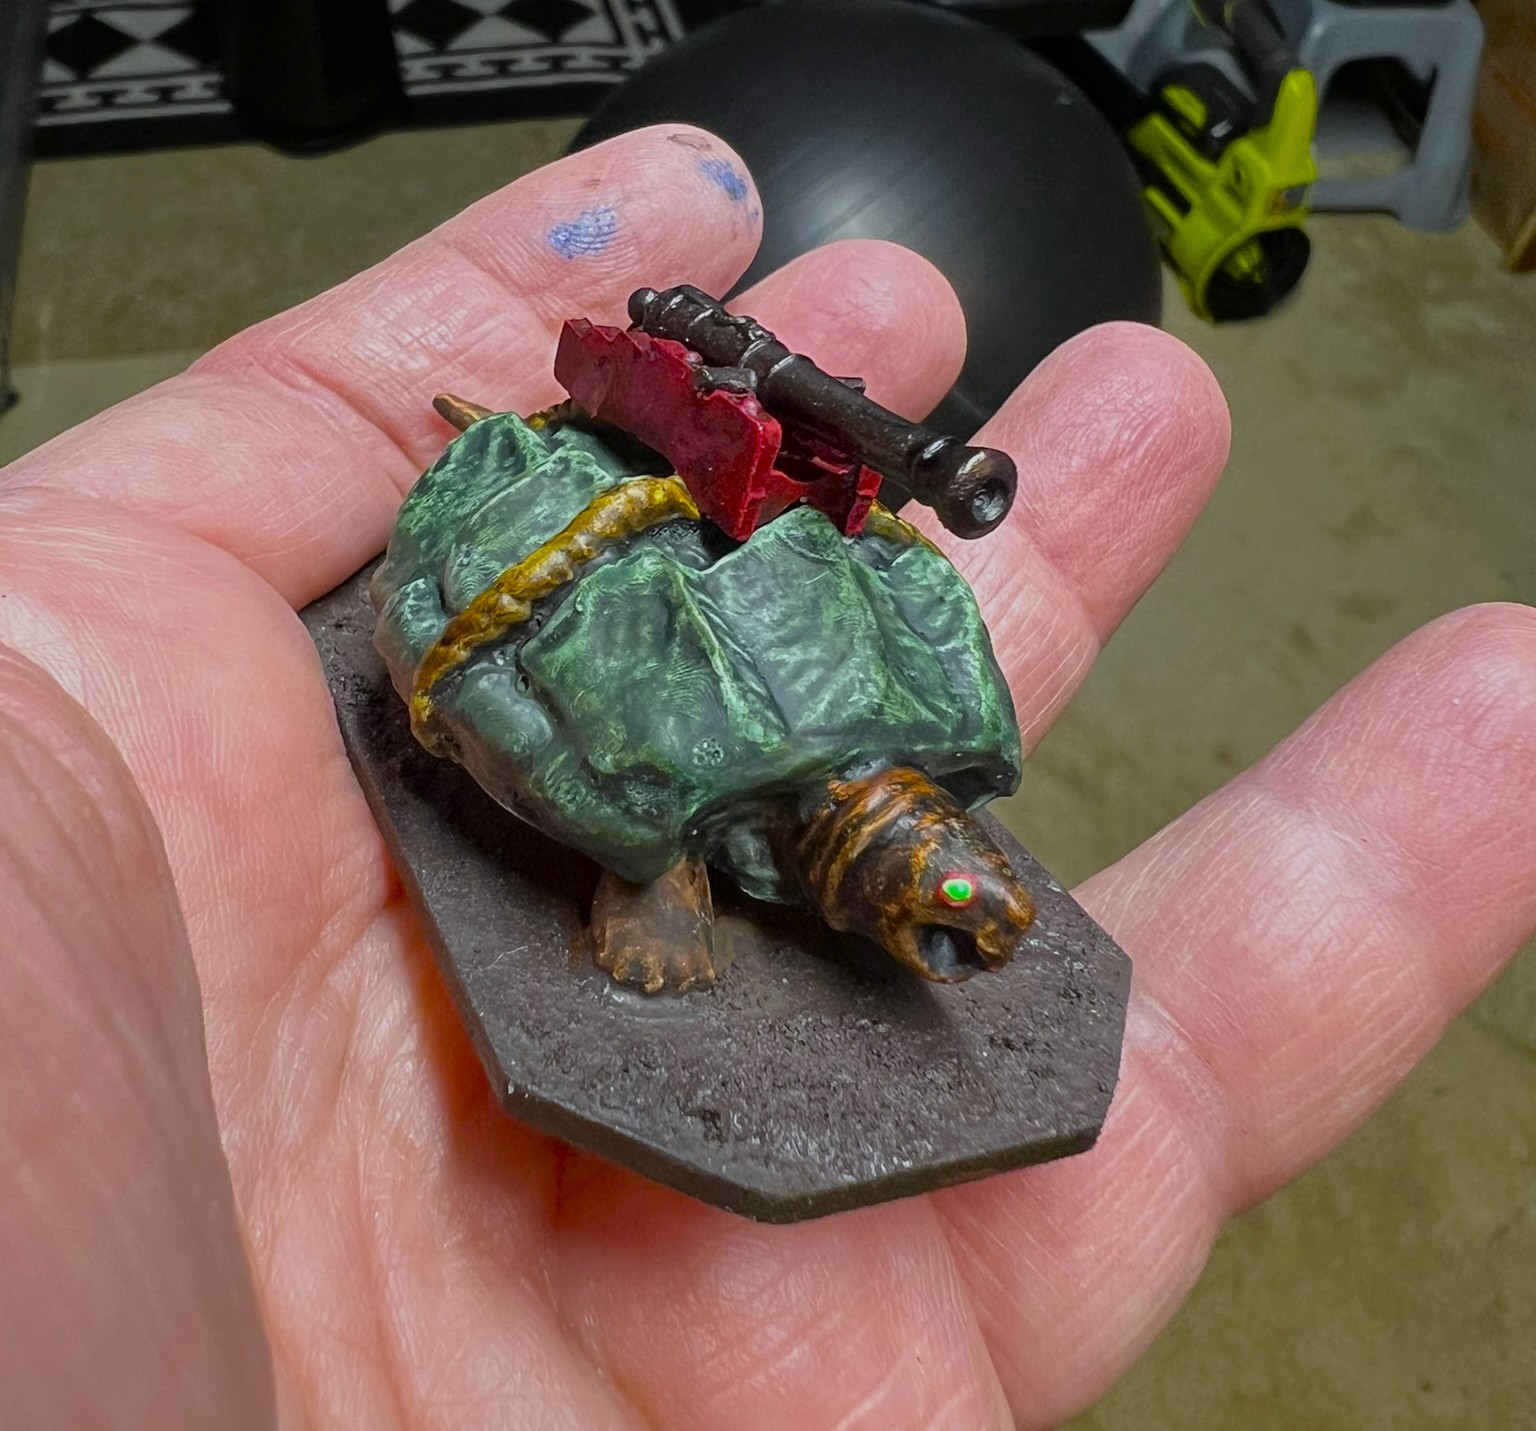
As described previously, the Pollywomps artillery is a light cannon on a giant turtle, crewed by fishmen. I painted the turtle to resemble a snapping turtle – like the ones that I shared photos of during my garage build. Both of these large turtles were trying to take advantage of my newly-seeded areas to lay their eggs.
Female snapping turtle digging out to lay her eggs in my yardFemale snapping turtle glaring at me in driveway – this one was trying and failing on the right.
I painted up the turtle, its gun, and carriage and prepped the artillery base for the crew. I gave the gun a rusty iron look as befitting a swampy artillery piece.
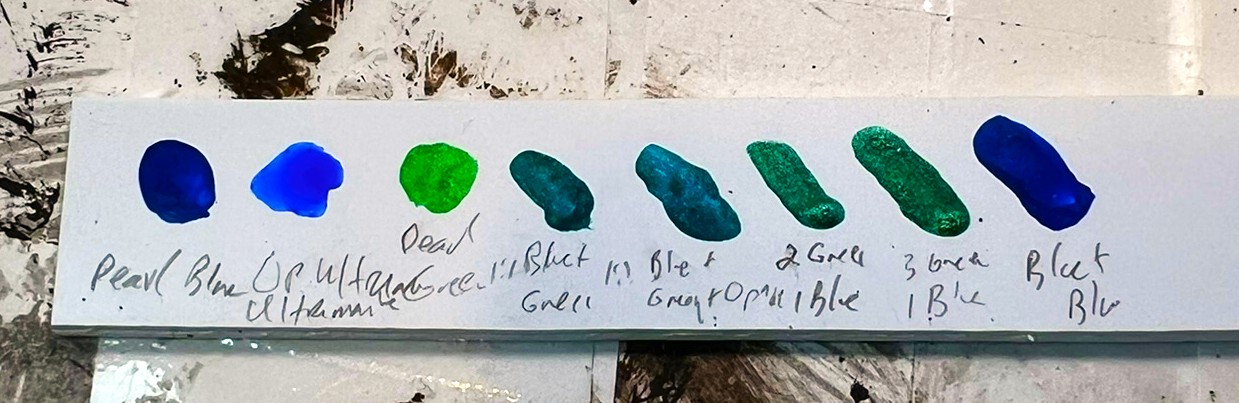
For painting the artillery fishmen crew, I experimented on a leftover piece of polystyrene. I made a palette with it using some metallic and airbrush paints to get the right combination of colors.
My palette. I ended up using the far right combination for the main body colors and the fifth from the left for fin colors.
The crew painted up quickly.
Three of the five crew members. The one on the far left is supposed to have a match – but that did not cast. No worries, as I made one as you will see shortly.
I flocked the artillery base similar to the other Pollywomps as you see here below. The mud puddles were fun to do.
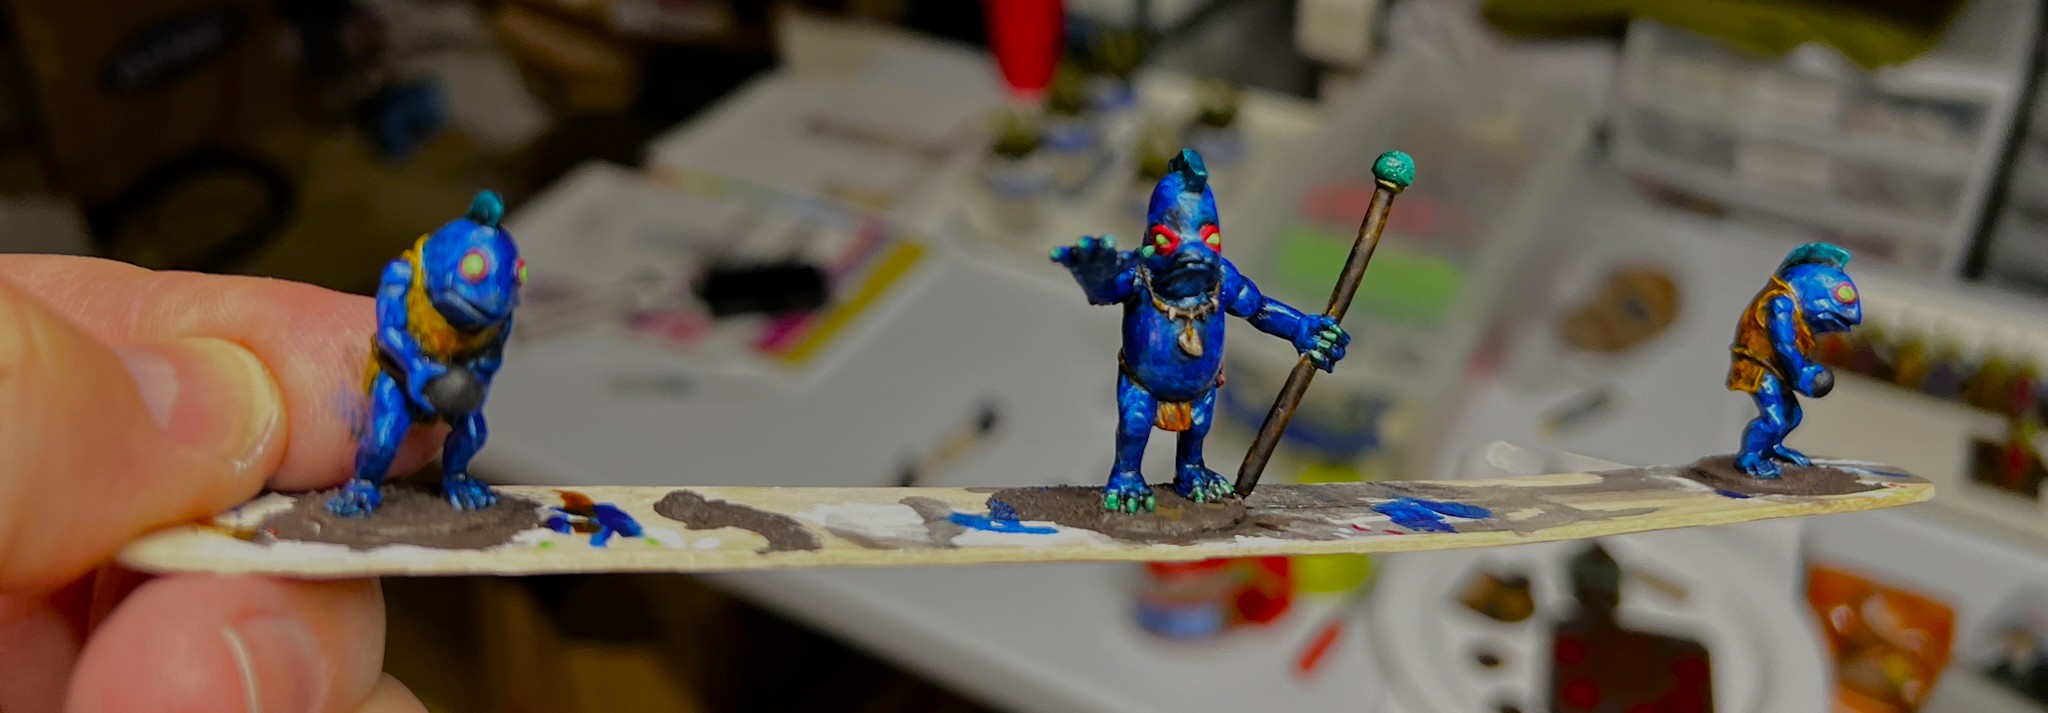
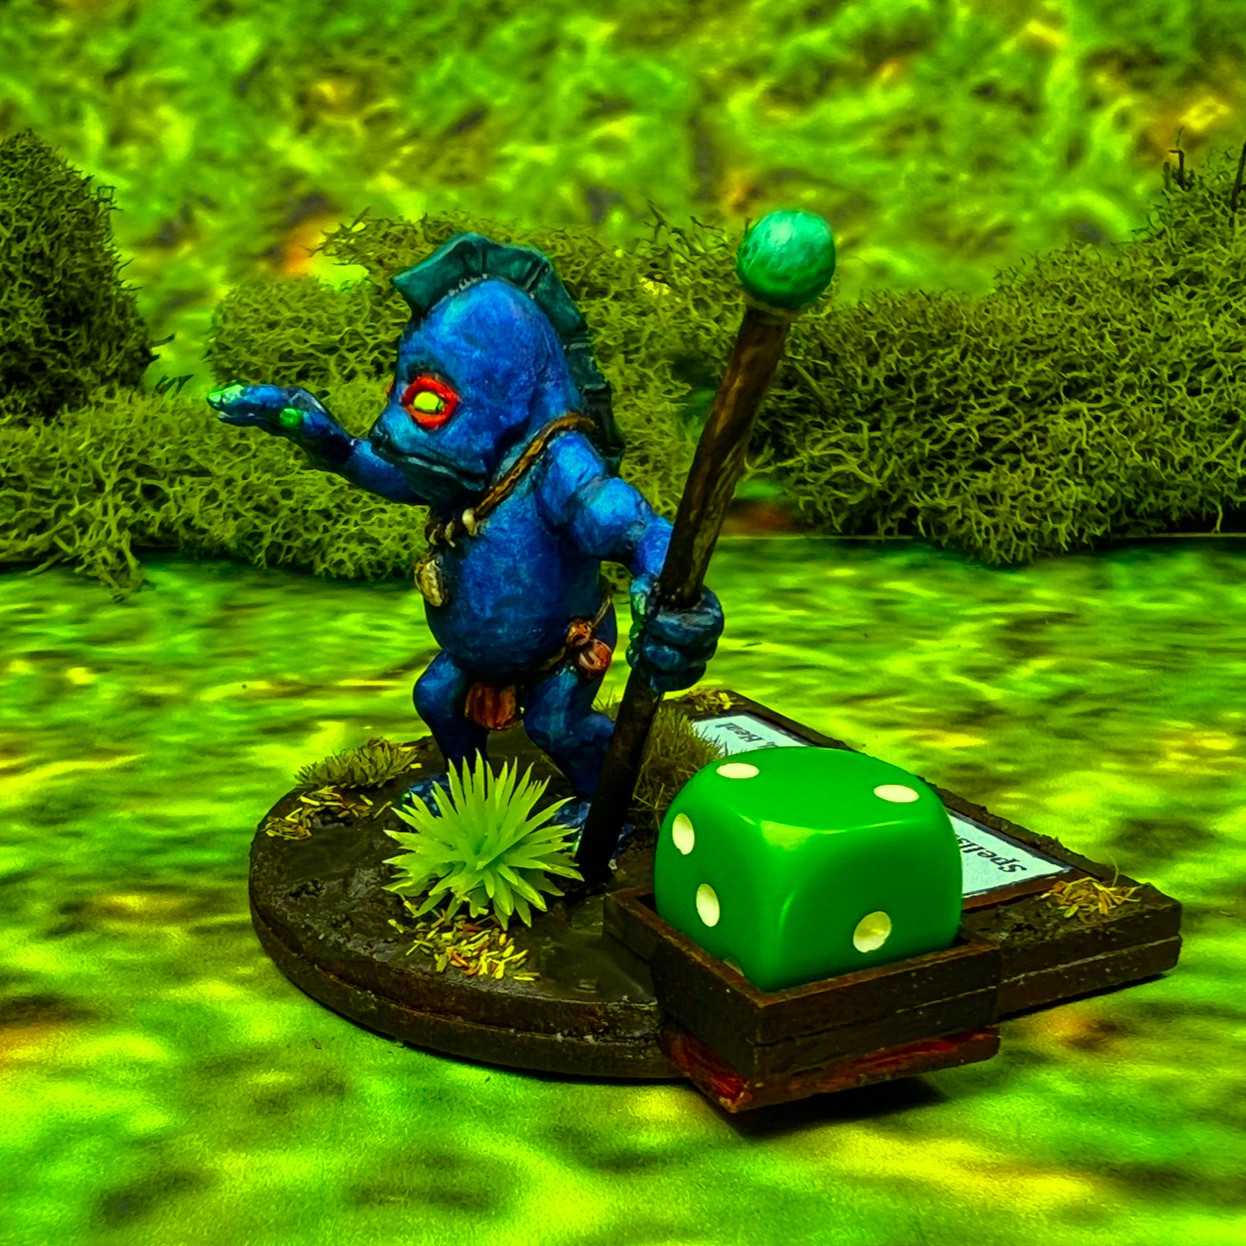
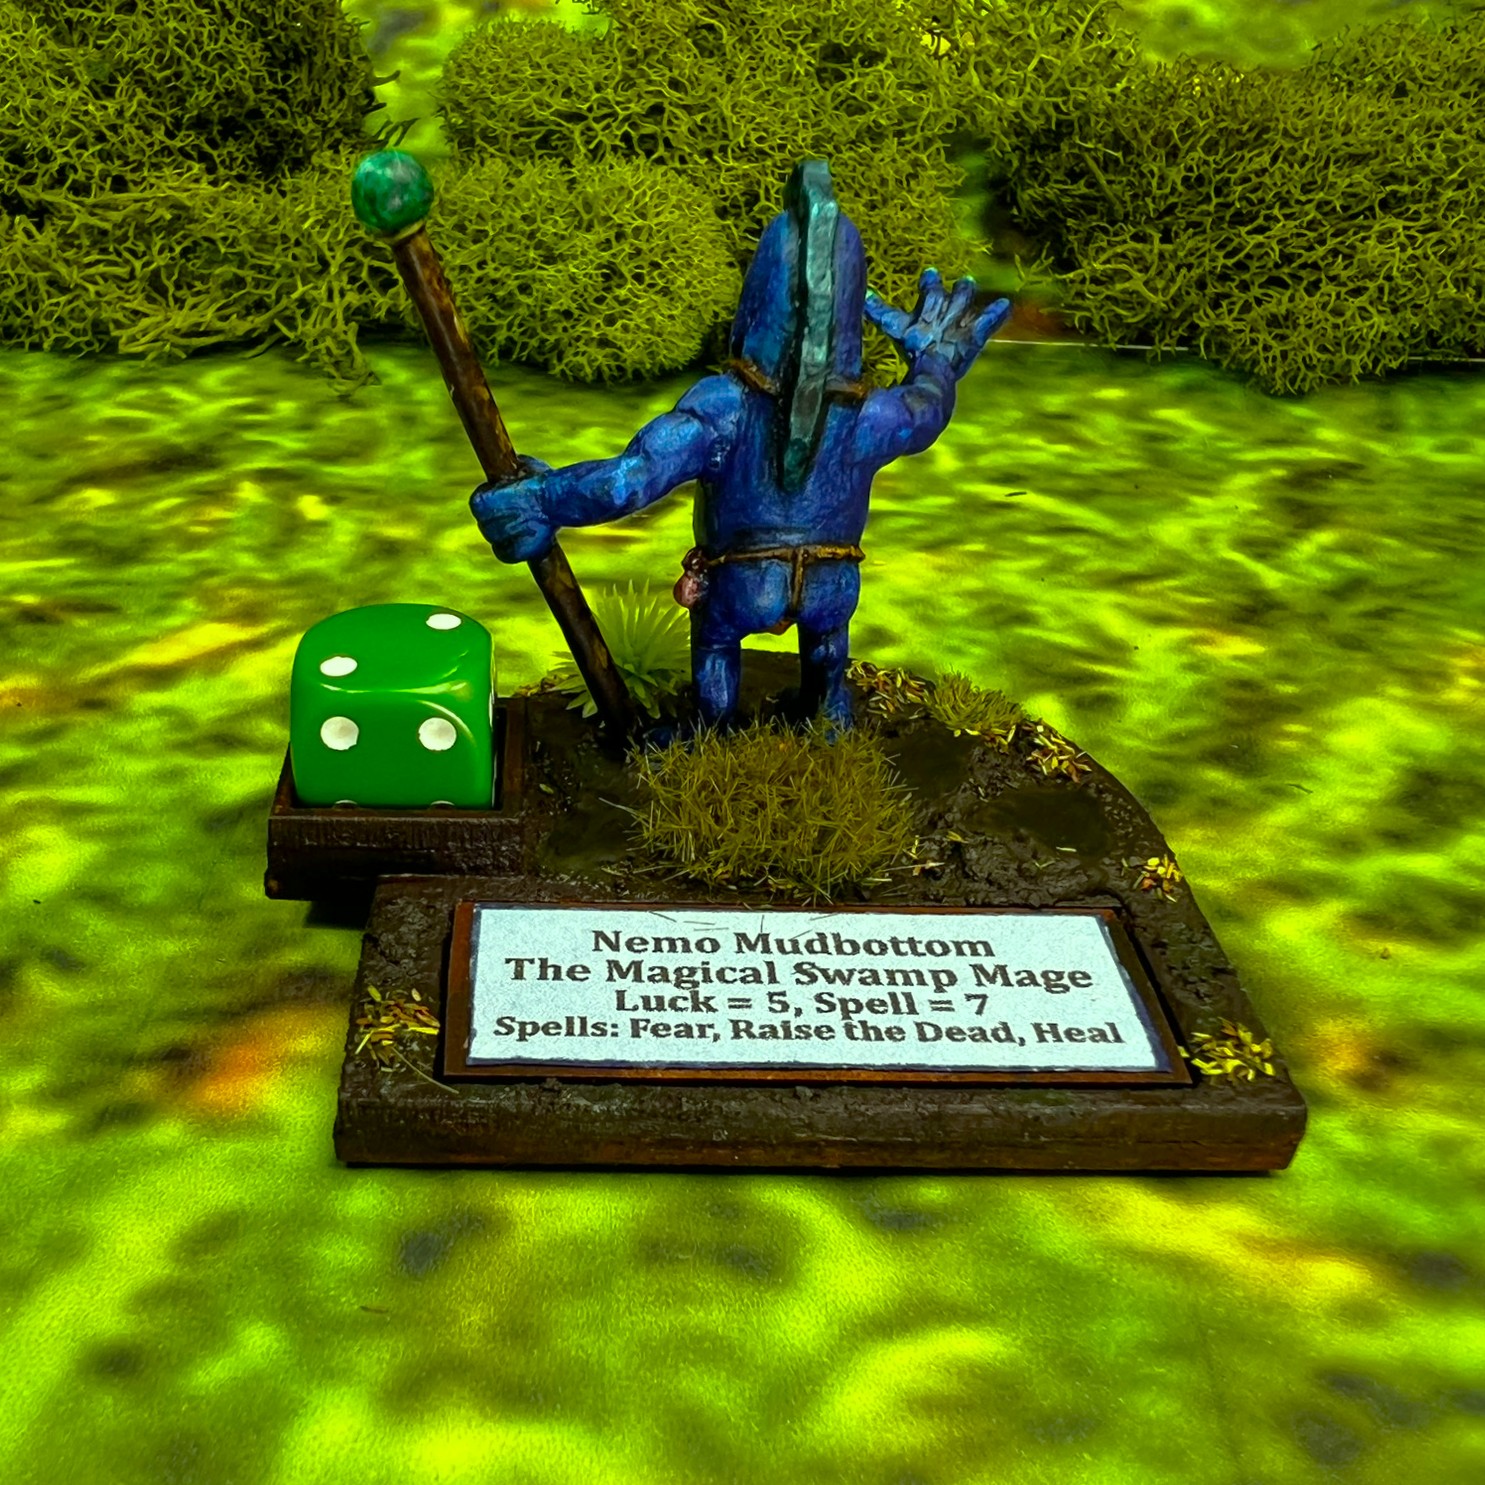
Lastly, we have Nemo Mudbottom, the Magical Swamp Mage. This wizard has three spells – Raise the Dead, Fear, and Heal. He also can provide a chameleon-like benefit to nearby troops that makes them tougher to hit with musketry.
He is larger than the Fishmen crew, but I gave him the same color scheme.
Nemo Mudbottom (in middle) with two of the Fishmen artilleristsNemo done – front……and back. Nice thong Nemo!
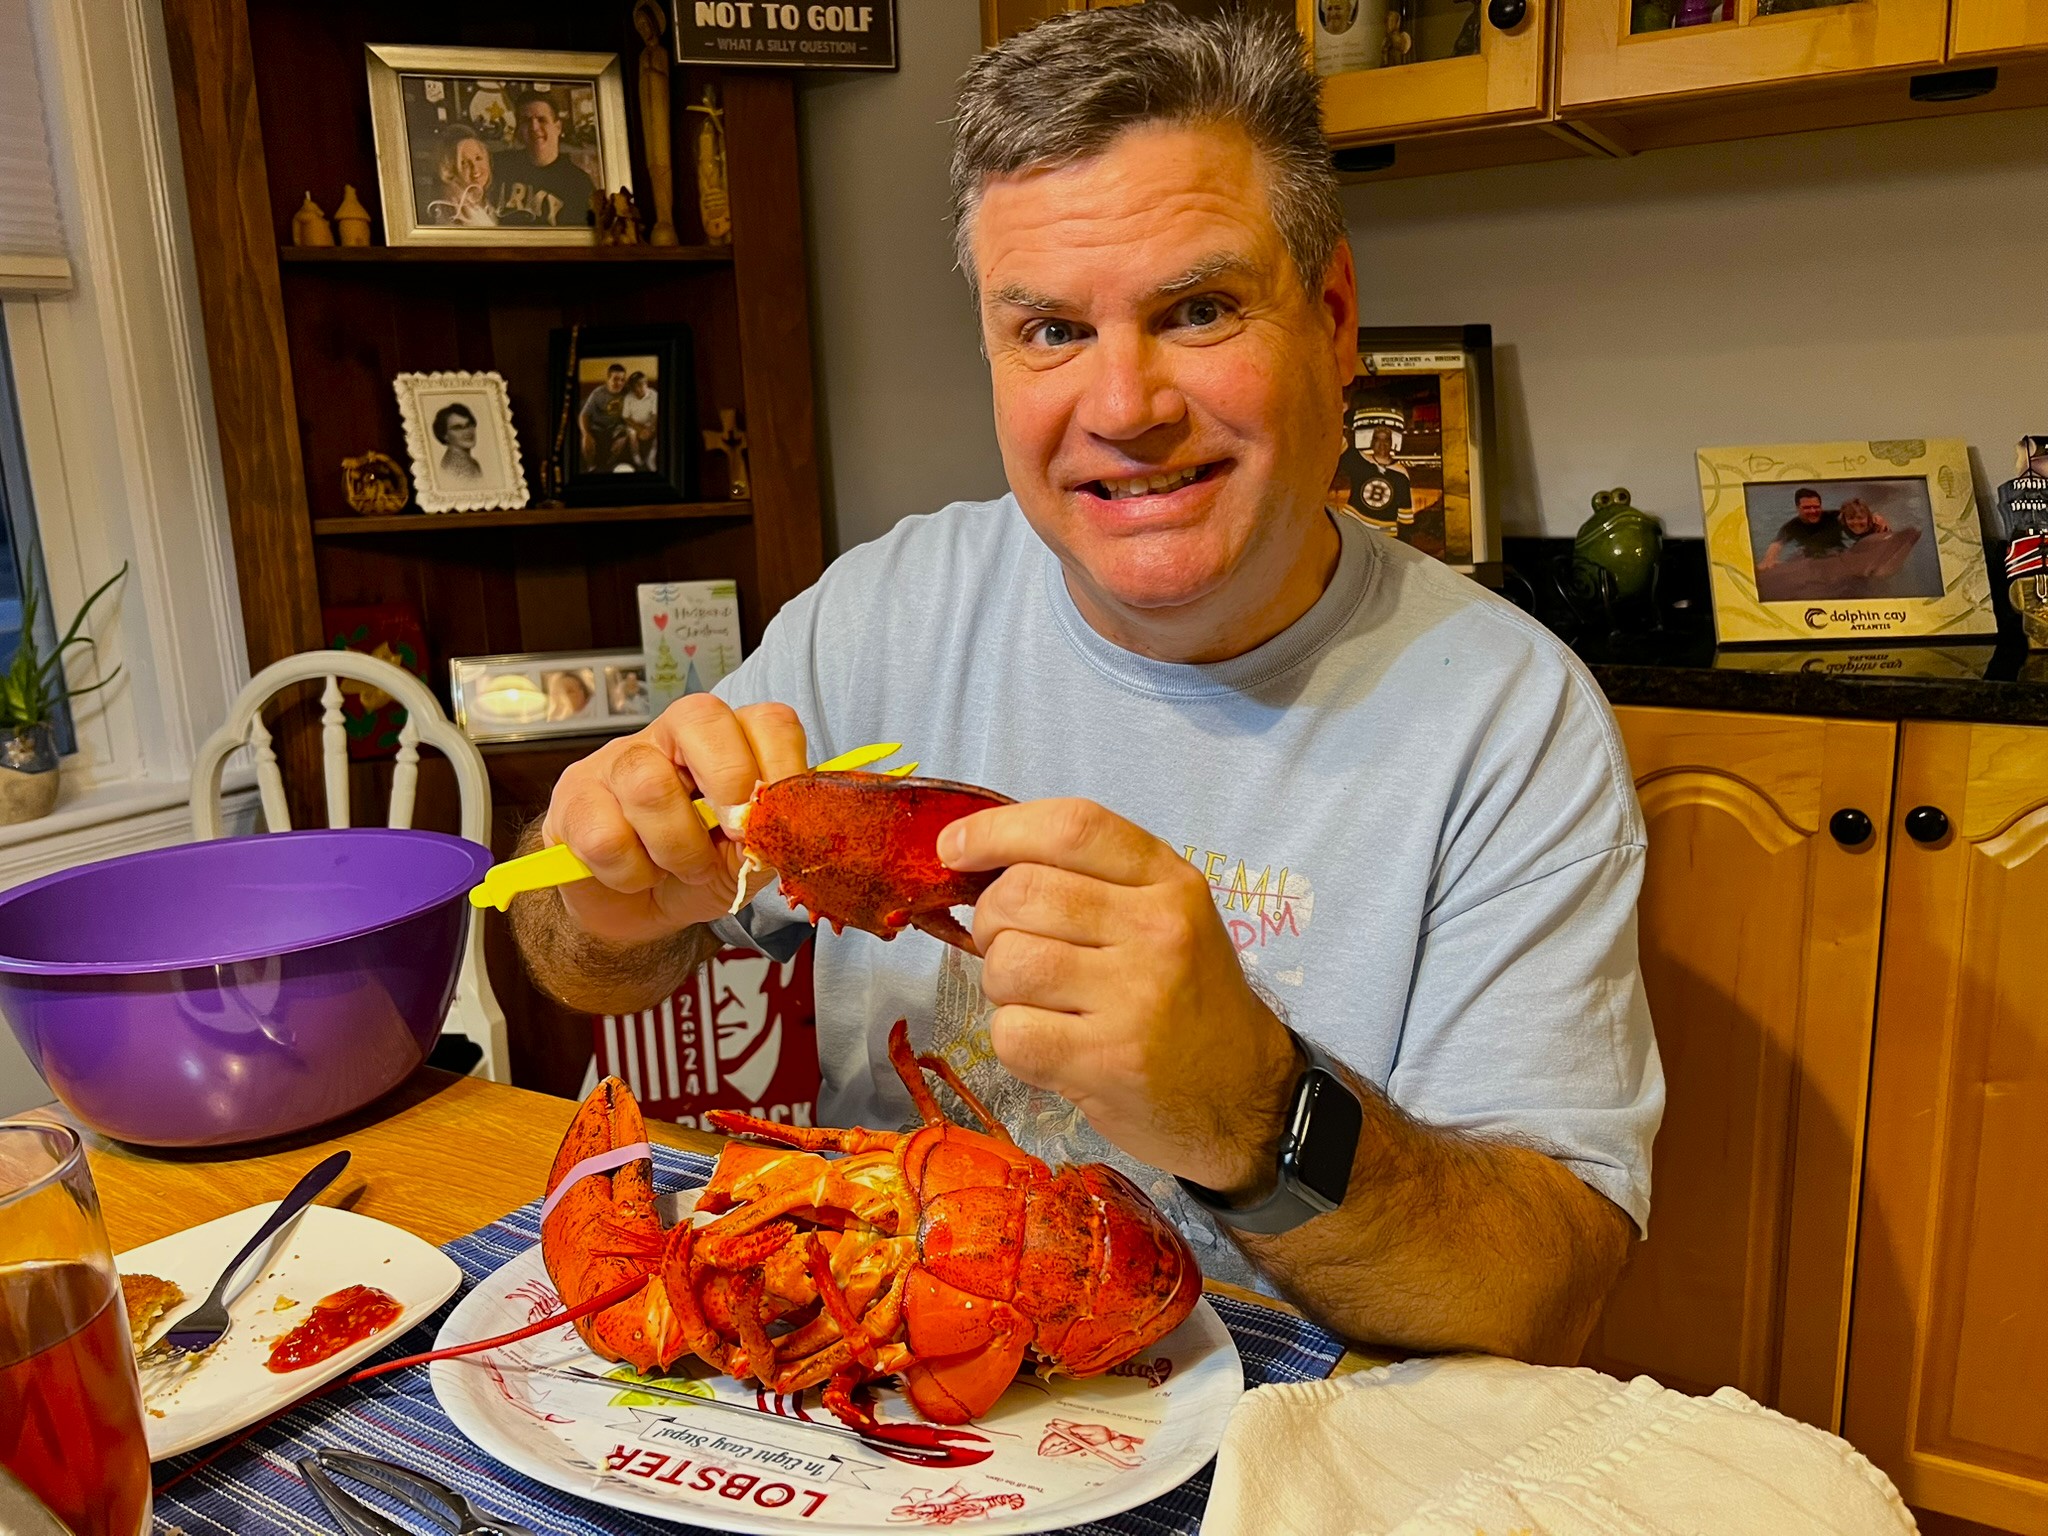
After finishing the brigade, it was time to end 2024 in style as my wife and I usually do with some big lobsters!
Nice 3 pound lobster on New Year’s Eve!!
That is it for now – next in the blog I will do a roundup of 2024 as I have done at the end of every year (well usually anyways). 2024 has been a bit insane hobby-wise…and golf wise!
Final Note
If you want to check out the excellent Wars of Ozz figures’ range – there are two places to get them and to get the rules (and I make no money from this btw). The game rules and the figures are available from the next two places:
Below you’ll see a loooong list of paints and the like that I used on these – and they are more useful for me when I need to recreate a color scheme in the future than maybe you – but in any case that’s why I post them.
Miscellaneous details and references for those interested in that sort of thing:
For all of my earlier posts on Wars of Ozz games, figures, units, and other related projects – please see this page.
PAINTS, INKS, GLAZES, SHADES, WASHES, PIGMENTS, FLOCKING, GLUES AND MORE THAT I USED ON THE POLLYWOMP INFANTRY REGIMENT:
Popsicle sticks
PVA Glue
Vallejo Premium White Primer
Vallejo Thinner
2″ Square War Games Accessories Steel Bases (SKU Number 21)
Secret Weapon Washes “Sewer Water” (wash)
Army Painter “Dark Tone” (shade/wash)
Vallejo Mecha Color “Off White”
Vallejo Model Color “Off White”
Vallejo Mecha Color “Green Blue”
Citadel Contrast Paint “Akhelian Green”
Army Painter Speed Paint 2.0 “Maize Yellow”
Secret Weapon Washes “Green” (ink/wash)
Army Painter Speed Paint 2.0 “Carmine Dragon”
Army Painter Warpaints Fanatics Effects “Data System Glow” (effect)
The Wars of Ozz Supplement has just been launched in PDF form – and what a great add-on it is! At 124 pages – it holds a LOT of Ozz goodness.
Supplement cover showing an assault on the Emerald City
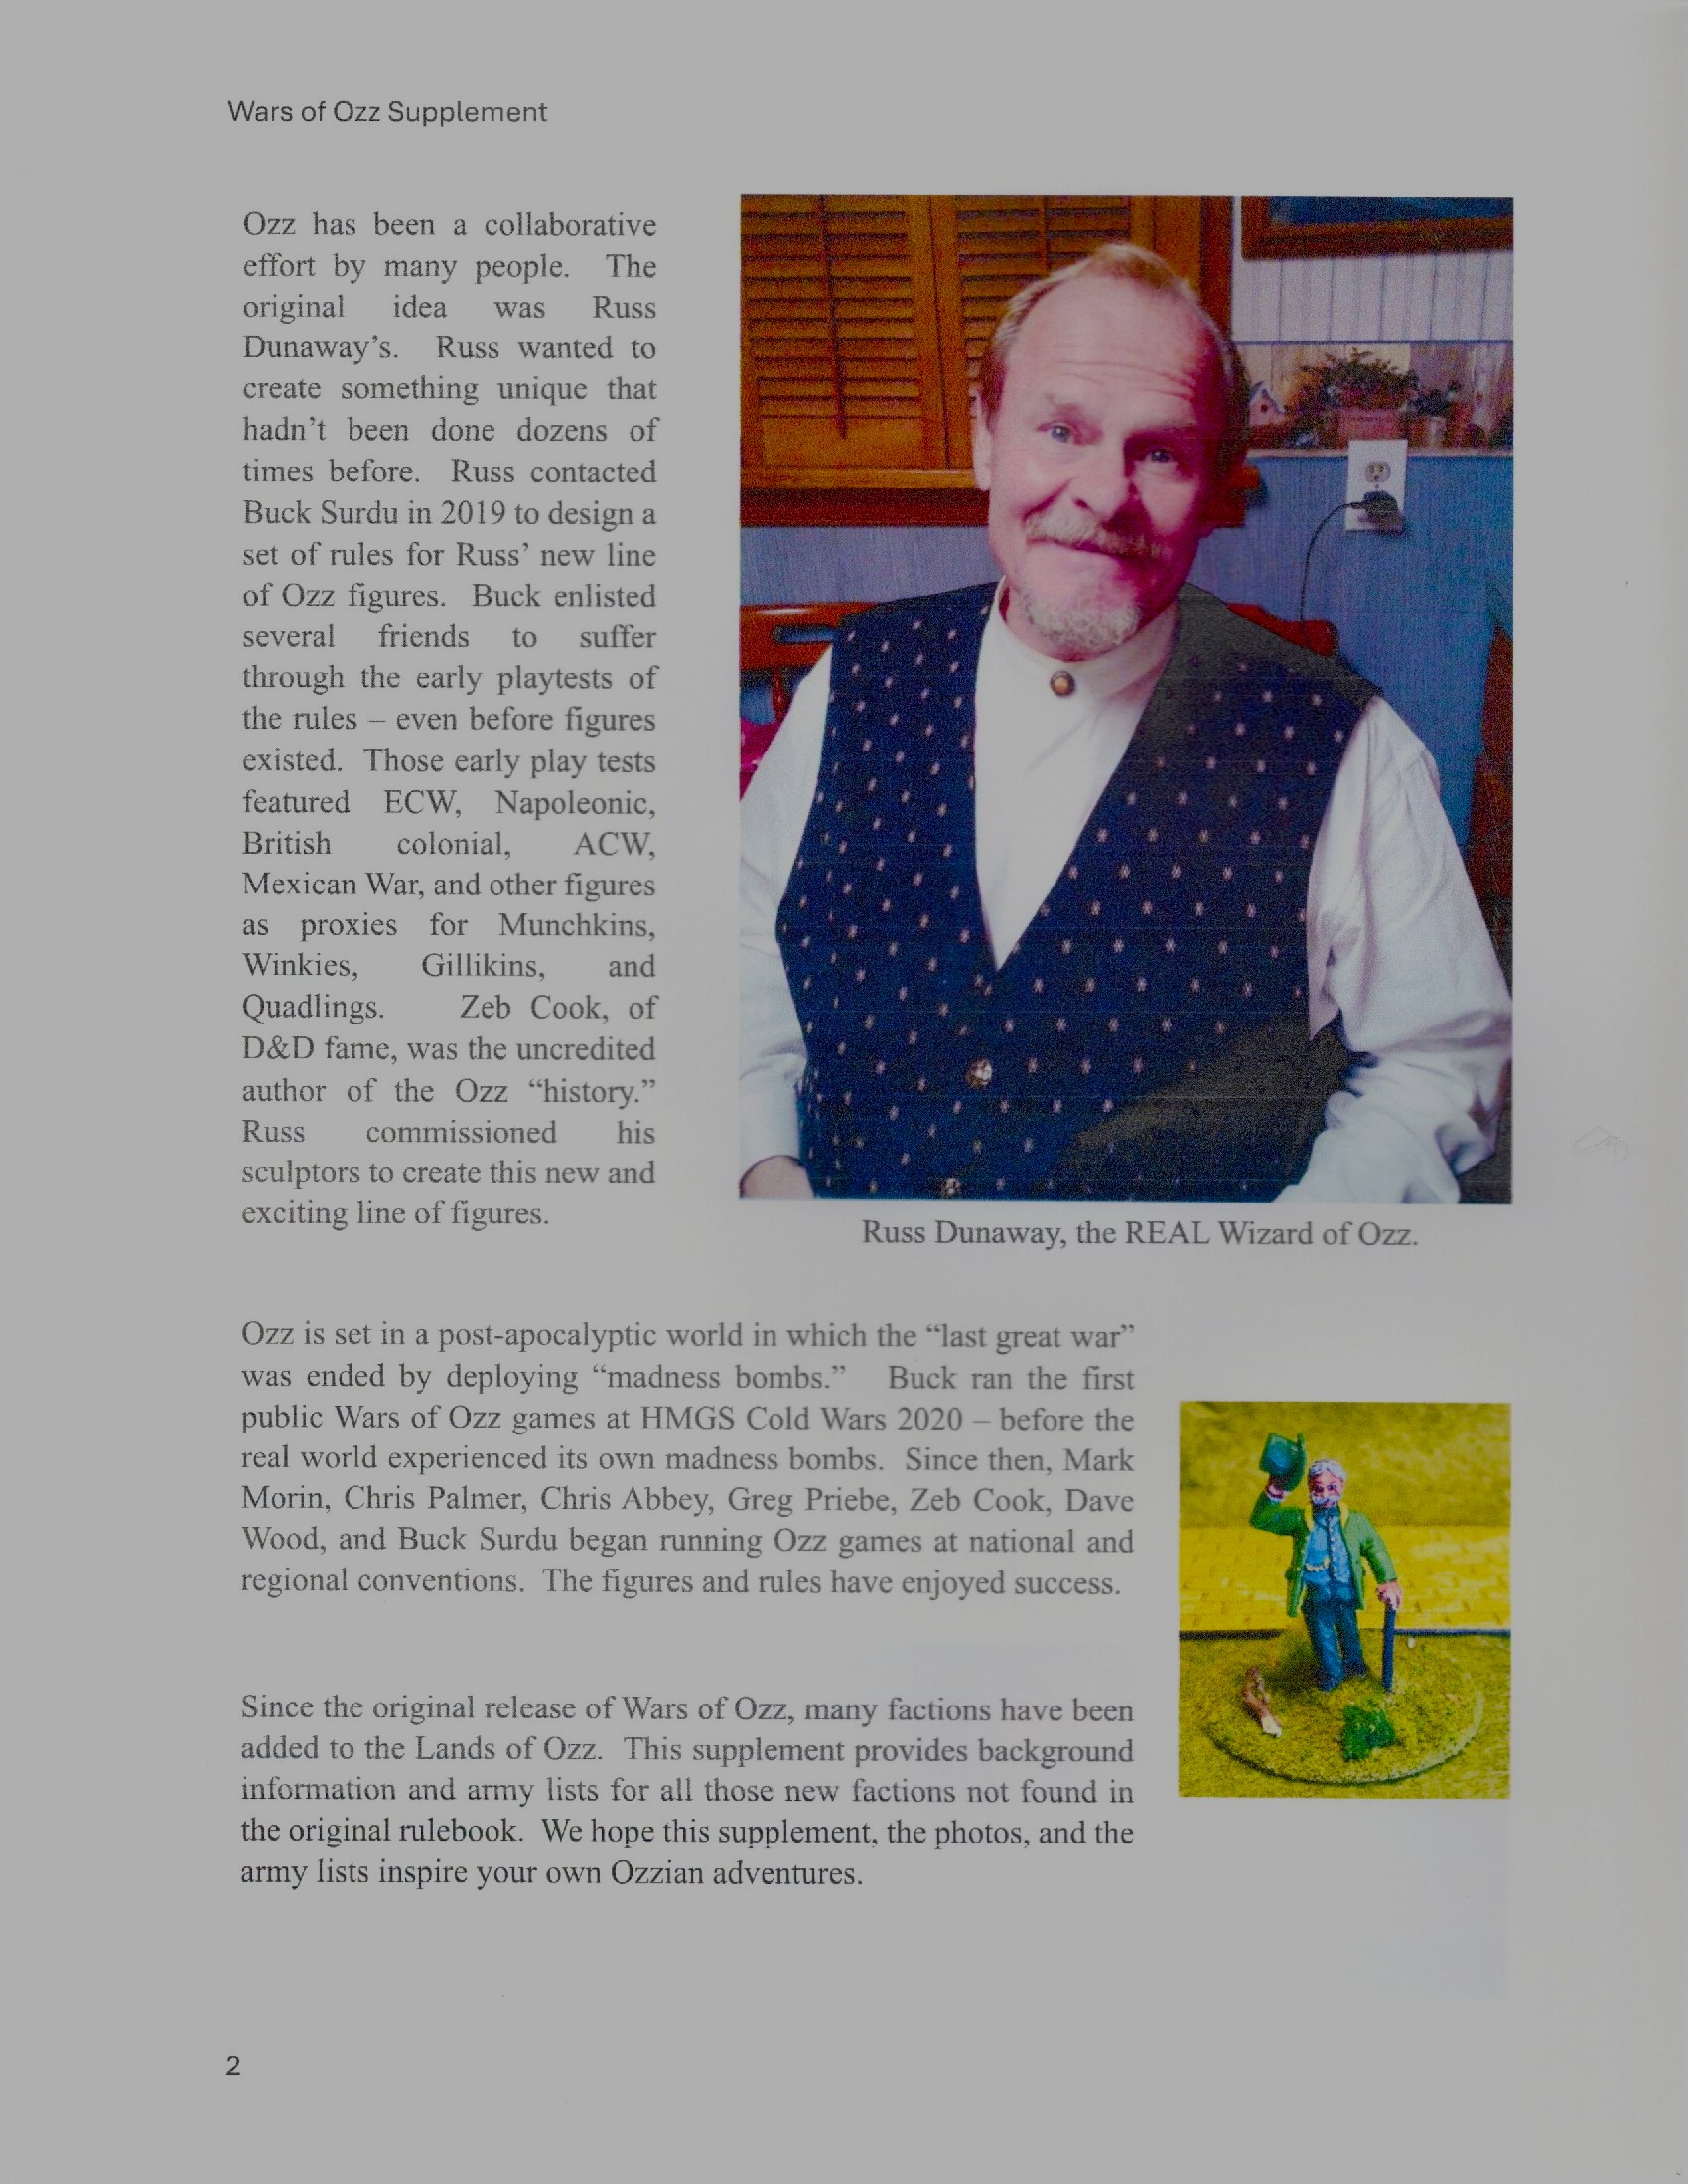
The supplement picks up where the original Wars of Ozz rules left off. Authored by two well-knowns in the worlds of wargaming and fantasy gaming, David “Zeb” Cook and John R. “Buck” Surdu. Zeb, according to Wikipedia:
Cook designed several games, wrote the Expert Set for Dungeons & Dragons, worked as lead designer of the second edition of Advanced Dungeons & Dragons, and invented the Planescape setting for AD&D. He is a member of the Origins Hall of Fame.
I have known Zeb for a few years – since I have become more acquainted with the Harford Area Weekly Kriegspielers (H.A.W.K.’s) down in Maryland. He even played in one of my Wars of Ozz games last year at TotalCon 38 where he was an esteemed guest speaker on his TSR career and more. He’s a great guy.
Zeb (on the right) commanding Gillikins at TotalCon 38 in February of 2024 (his side did win!).
Buck has been my good friend for around 43 years – going back to our time at West Point. He retired as a Colonel in the US Army as an Infantry officer. Waaay back, he gave me my first exposure to tabletop miniature gaming back in 1982 or 1983, along with my good friend Dave Wood. Buck has published many rules sets as described here (you should check that link out!). He was also my inspiration for starting this little blog back in 2015.
So, while I love the Wars of Ozz game, and the new supplement, I am not without a small degree of bias! But I like to think I am fair in this review. As this blog has more than regularly shown, I have been very involved with painting up miniatures for Wars of Ozz games and running them at conventions (30 games in 2024 alone). So I know the game…
So what do you get with the supplement? First, let me share a short video that will help:
Supplement Unboxing Video!
Pretty impressive! And here is the Instagram Link as well.
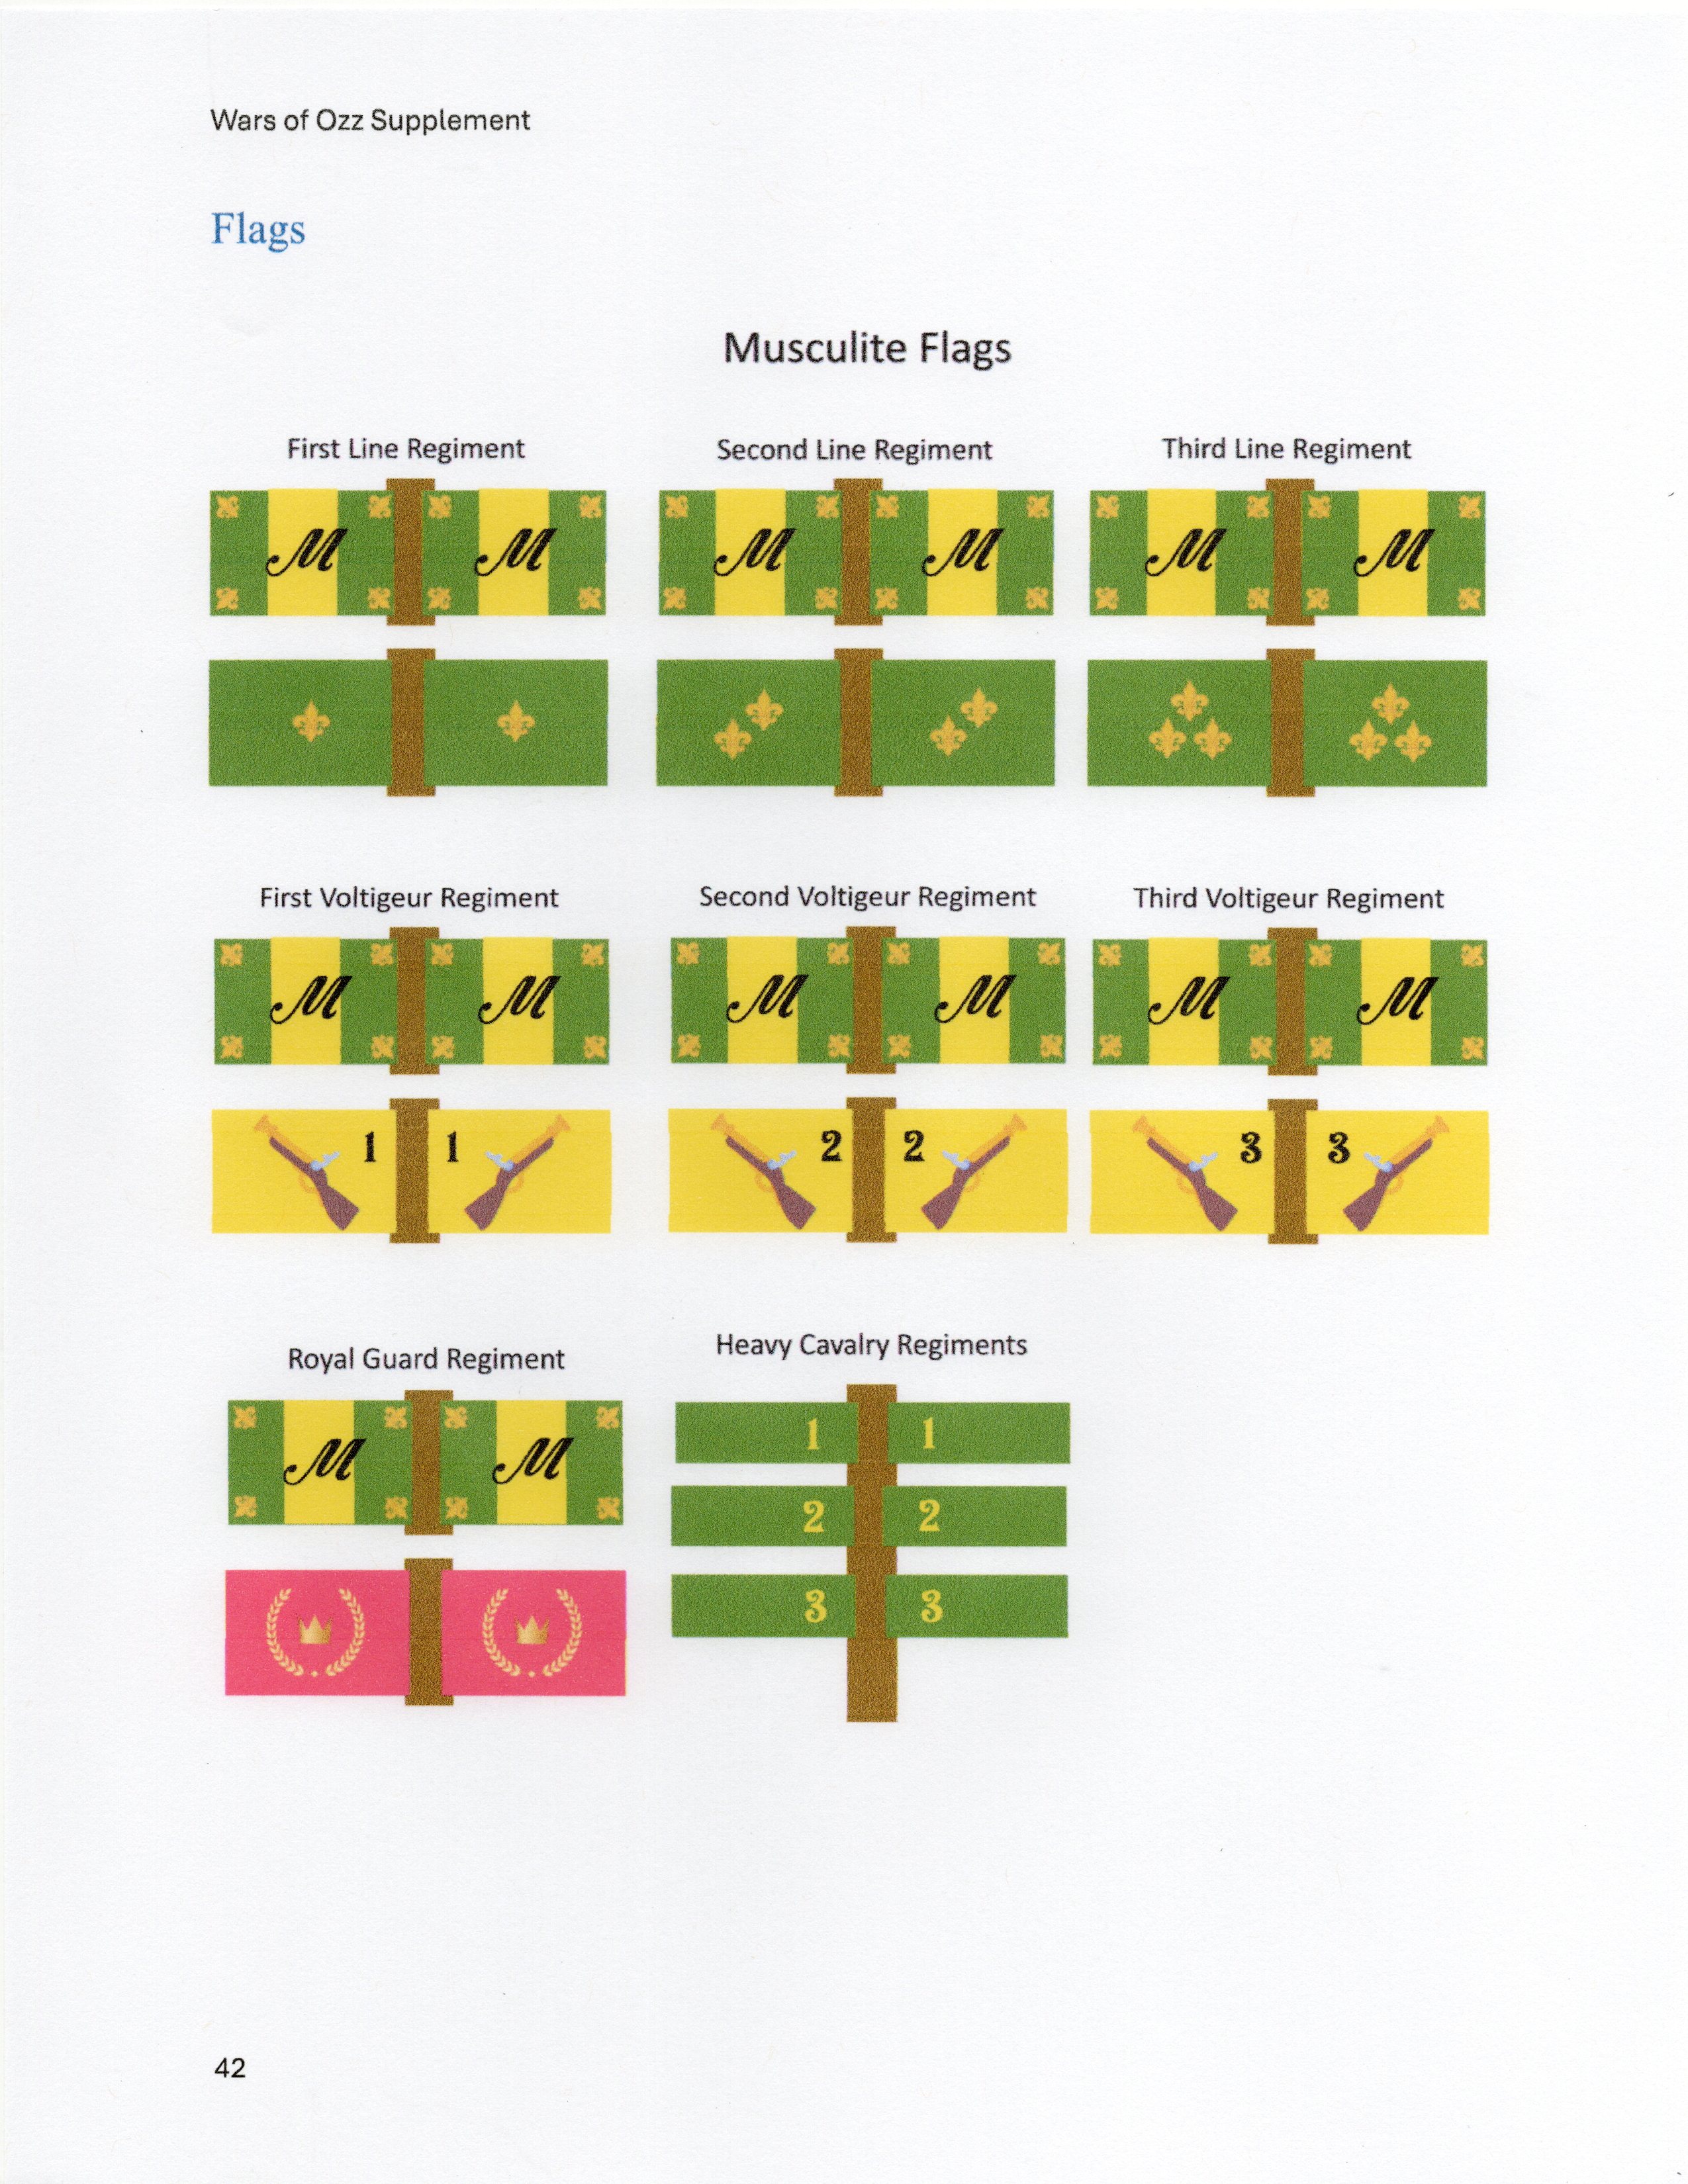
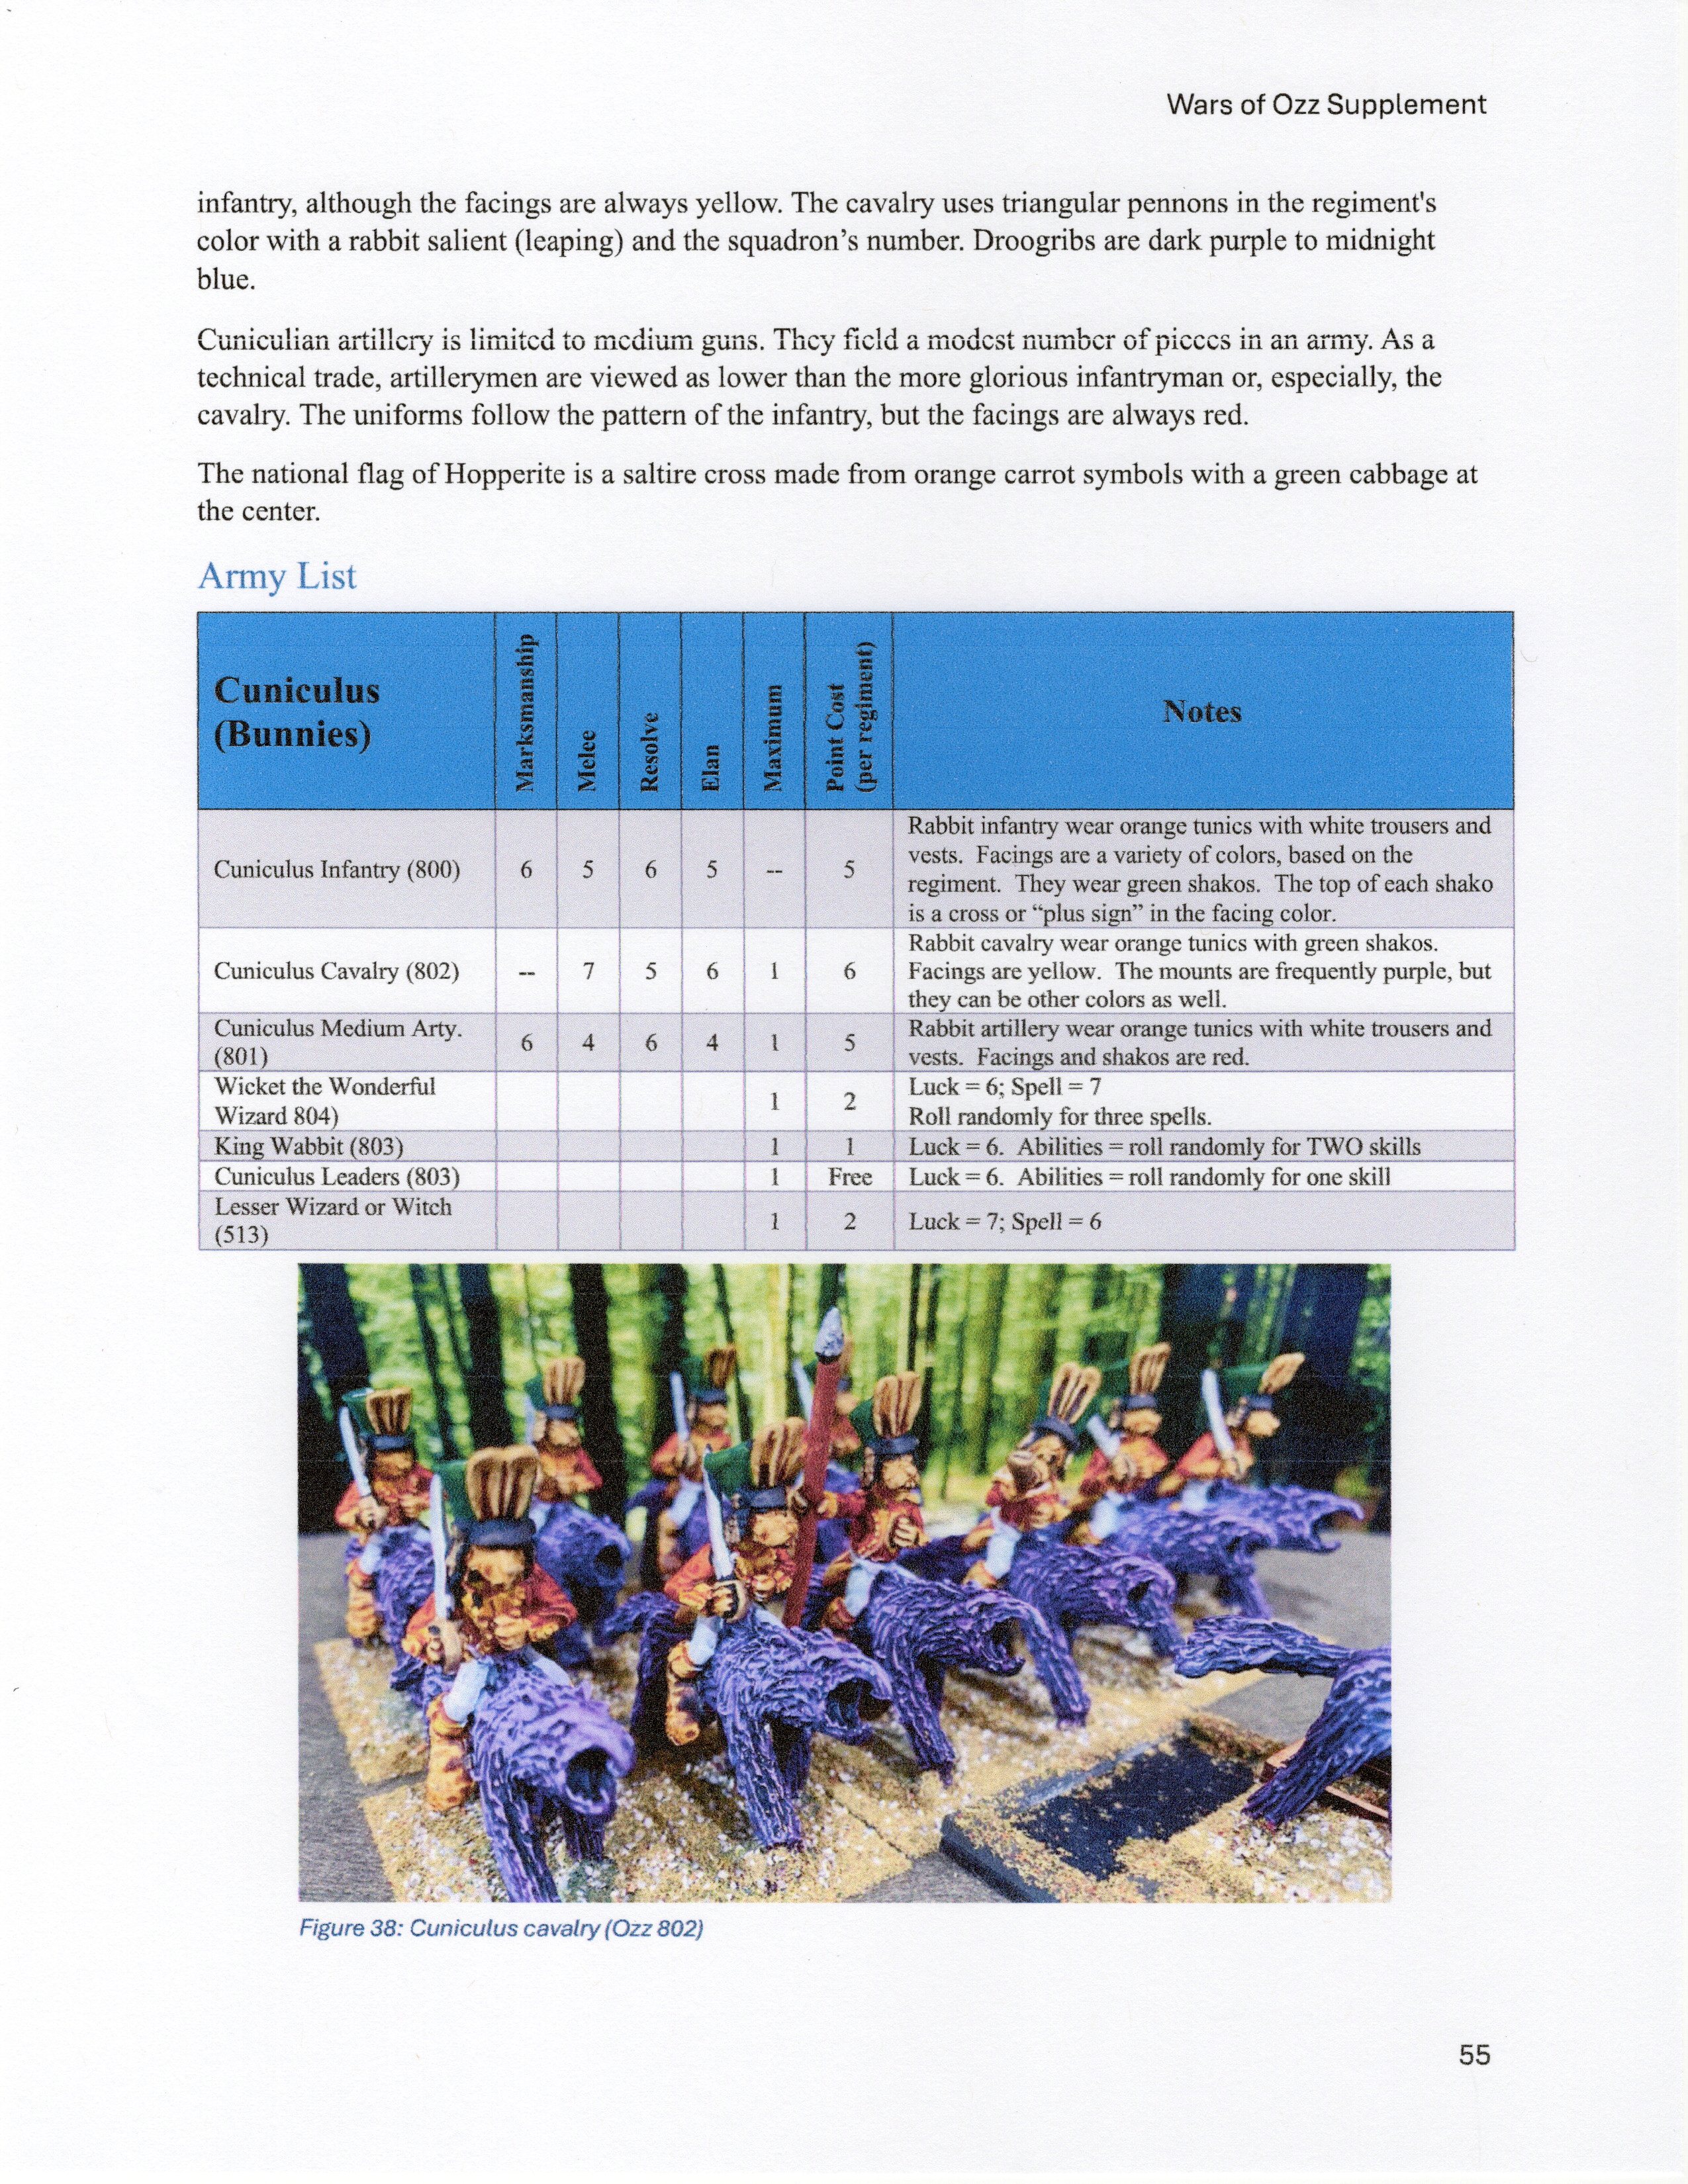
Cool backgrounds for all the newer and updated factions!Lots and Lots of Flags for your factions!Example of the Bunny Army List – there are Army lists for all the newer factions!
Plus, EVERY player chart and EVERY Army List for EVERY faction!
OK, that’s enough I think. Remember the Wars of Ozz rules and figures are still available. There are two places to get them and to get the rules (and I have no financial interest here):
I expect that at some point Sally 4th will publish a hard copy that will be available in both spots – but the PDF is available now as shared earlier on Drive Thru Cards and Wargame Vault.
Congrats to all involved – and let’s include the real Wizard of Ozz, Russ Dunaway!