Crafting Rusty Walls and Transmission Towers for Retro Sci-Fi and Wars of Ozz Gaming Adventures

Imagine an industrial cityscape – an apocalyptic one. One that shows that “something really terrible happened here”. Now add 300 years to it and an arid desolate climate with a lot of rust. Lastly, add mystery – “what am I looking at?”, and you are here.

These were the thoughts that I had last month as I prepared to create and build components for such a wasteland ruin. As my 2026 “convention season” was nearing, I needed to build terrain for my tabletop games. For games of Wars of OzzTM, my goal was to build terrain pieces for Professor Nitpik’s Industrial City (aka the Robotic Sanctum). I also wanted to get back into some retro sci-fi games using Buck Surdu’s Combat Patrol:WWIITM gaming system (with my modifications). One of the games I envisioned for that would be using Archive “Space Cowboys”, my converted “Space ‘Roos” defending against an invasion of blue-skinned “Retrovians”. Click those links to learn more about those forces – and more about them in a future post. For now, I needed more rust than just my rusty generators and my ruined chemical plant.

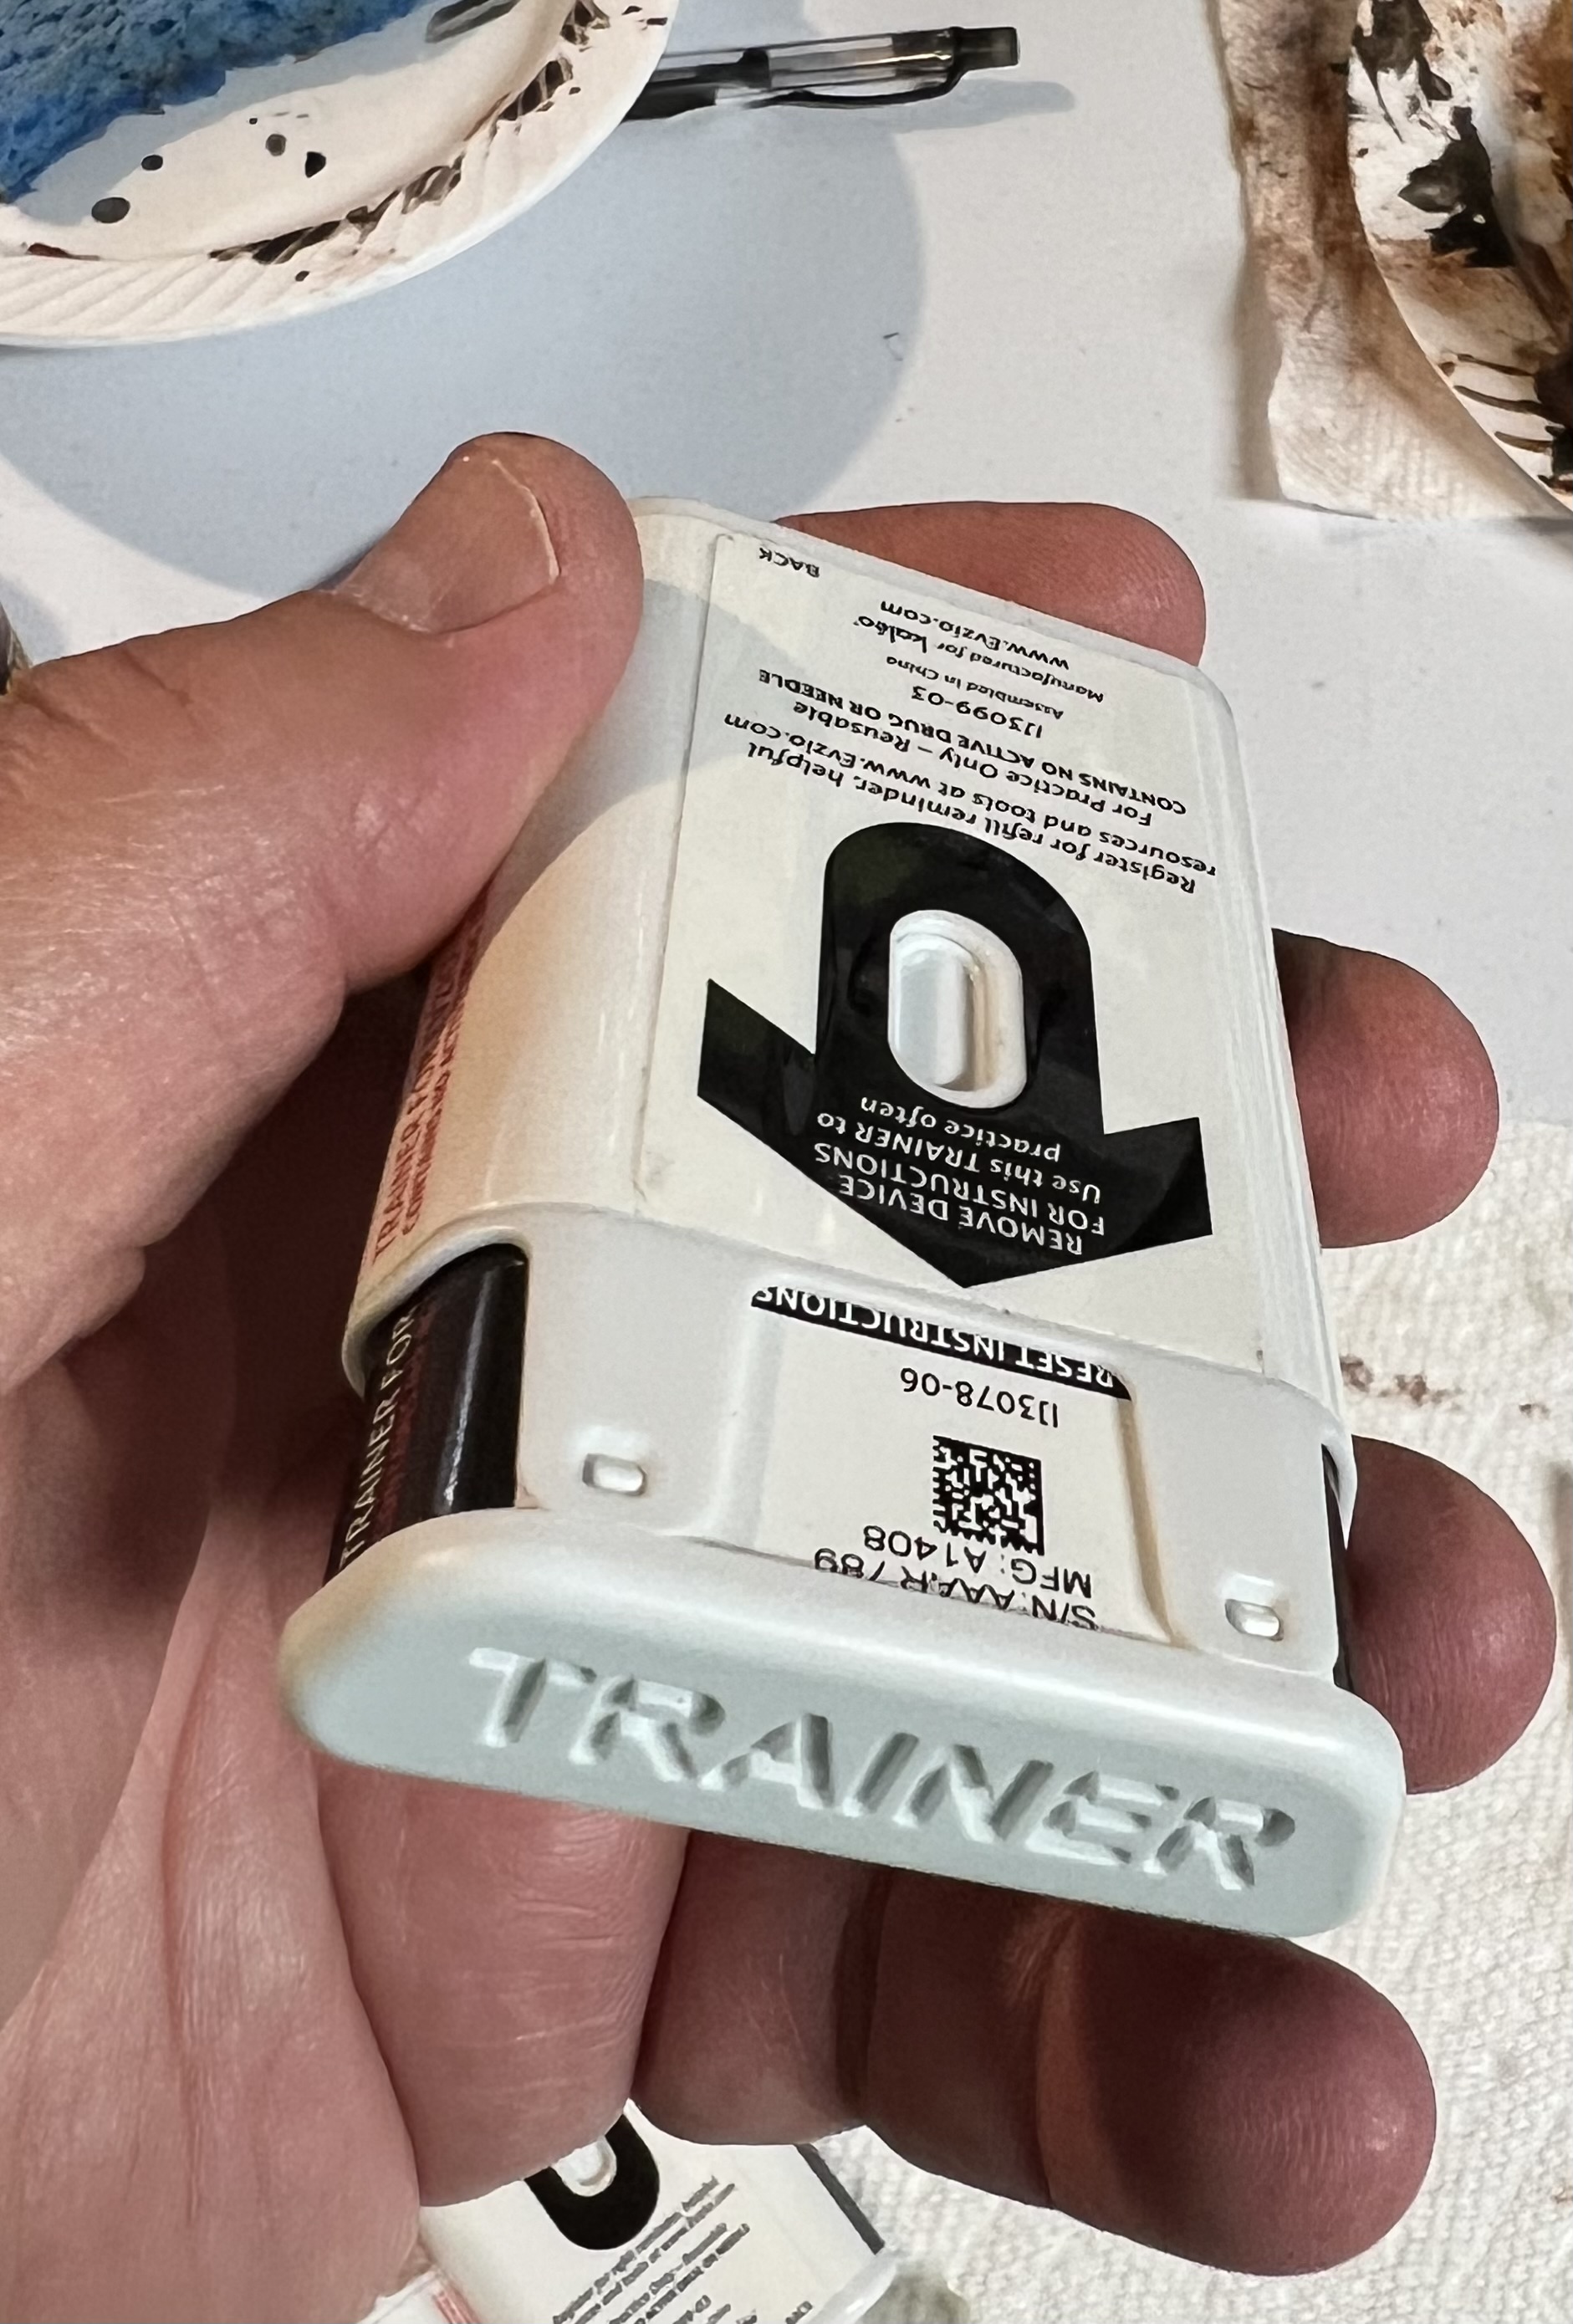
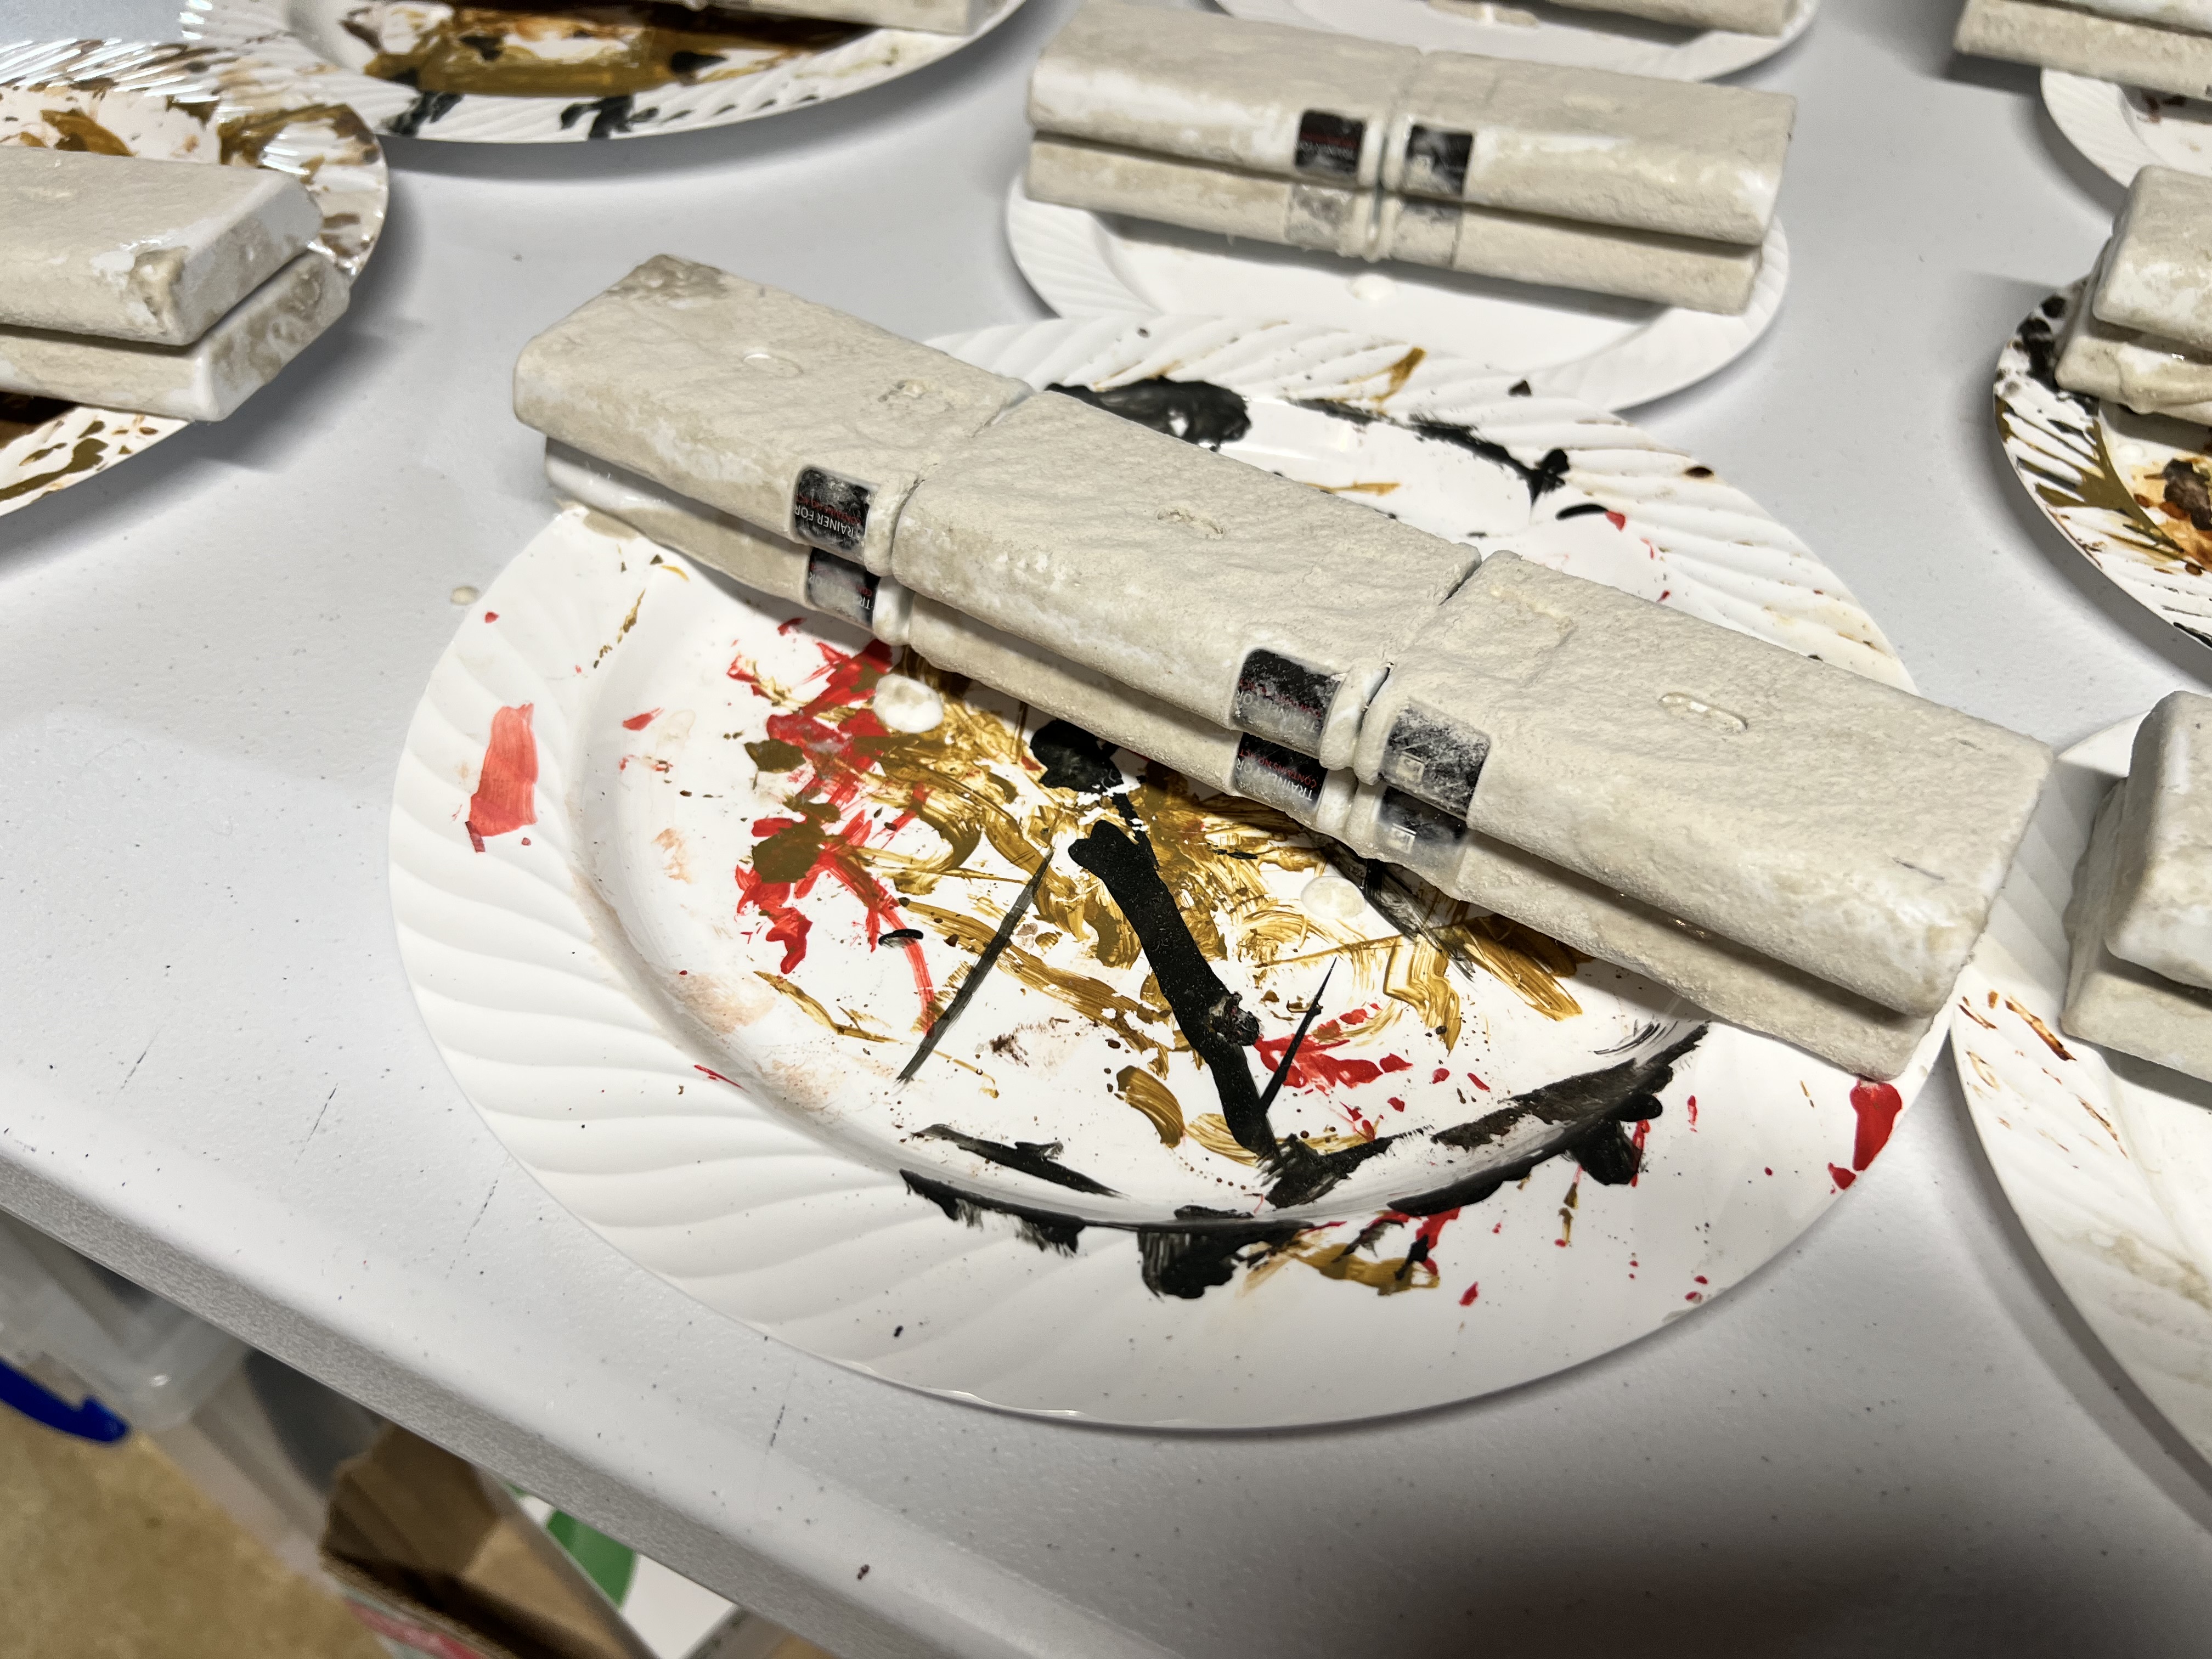
I’ve been retired now since 2019. I got laid off of my last job when the company I was working for pulled the product line off the market. Never found a replacement gig. Back to the product I was selling – it was a pharmaceutical autoinjector device. We had dozens of electronic trainer devices we handed out to potential customers. These trainers acted like the real thing except without any needles or drug inside. After the layoff happened, I had a bunch of them, and was told by my former employer to just throw them away. They had a unique shape, like a cross between a card deck and a tapered brick. The outer layer was plastic, with a label glued on to it. I was running retro sci-fi games, and thought these would be good for making walls. I saved them, and they waited to fulfill their destiny until December 2025!

An example of the trainer.

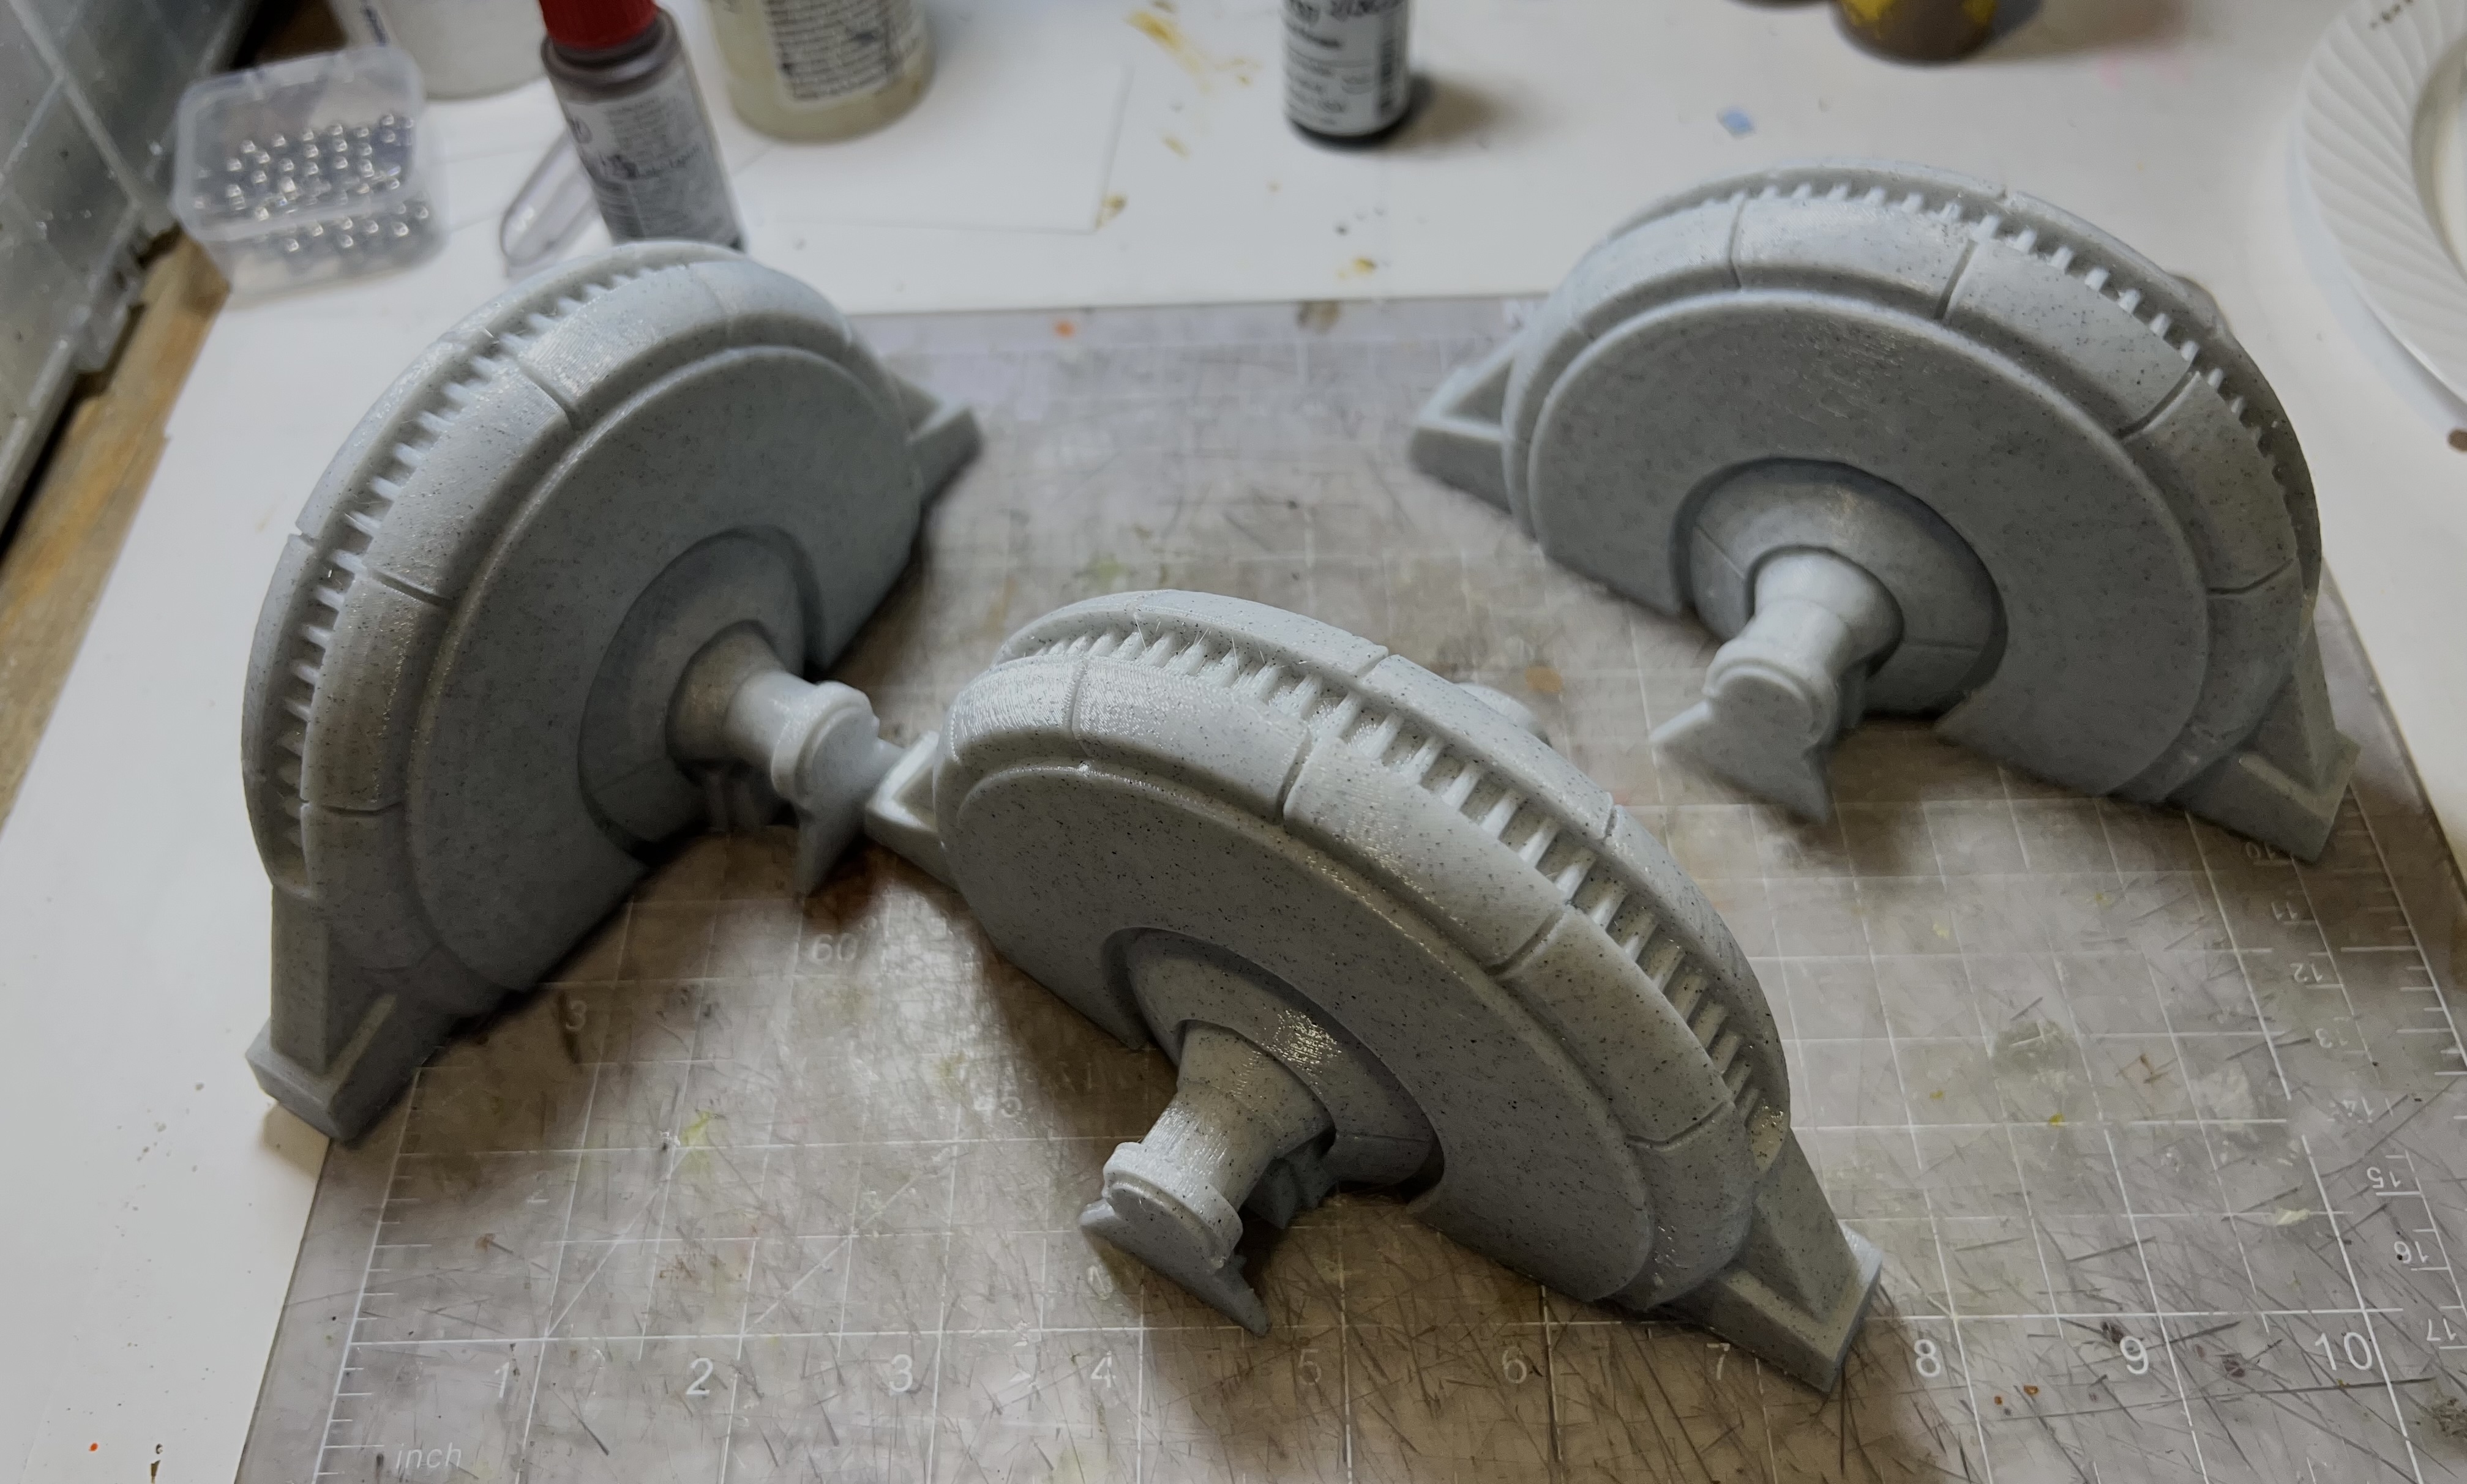
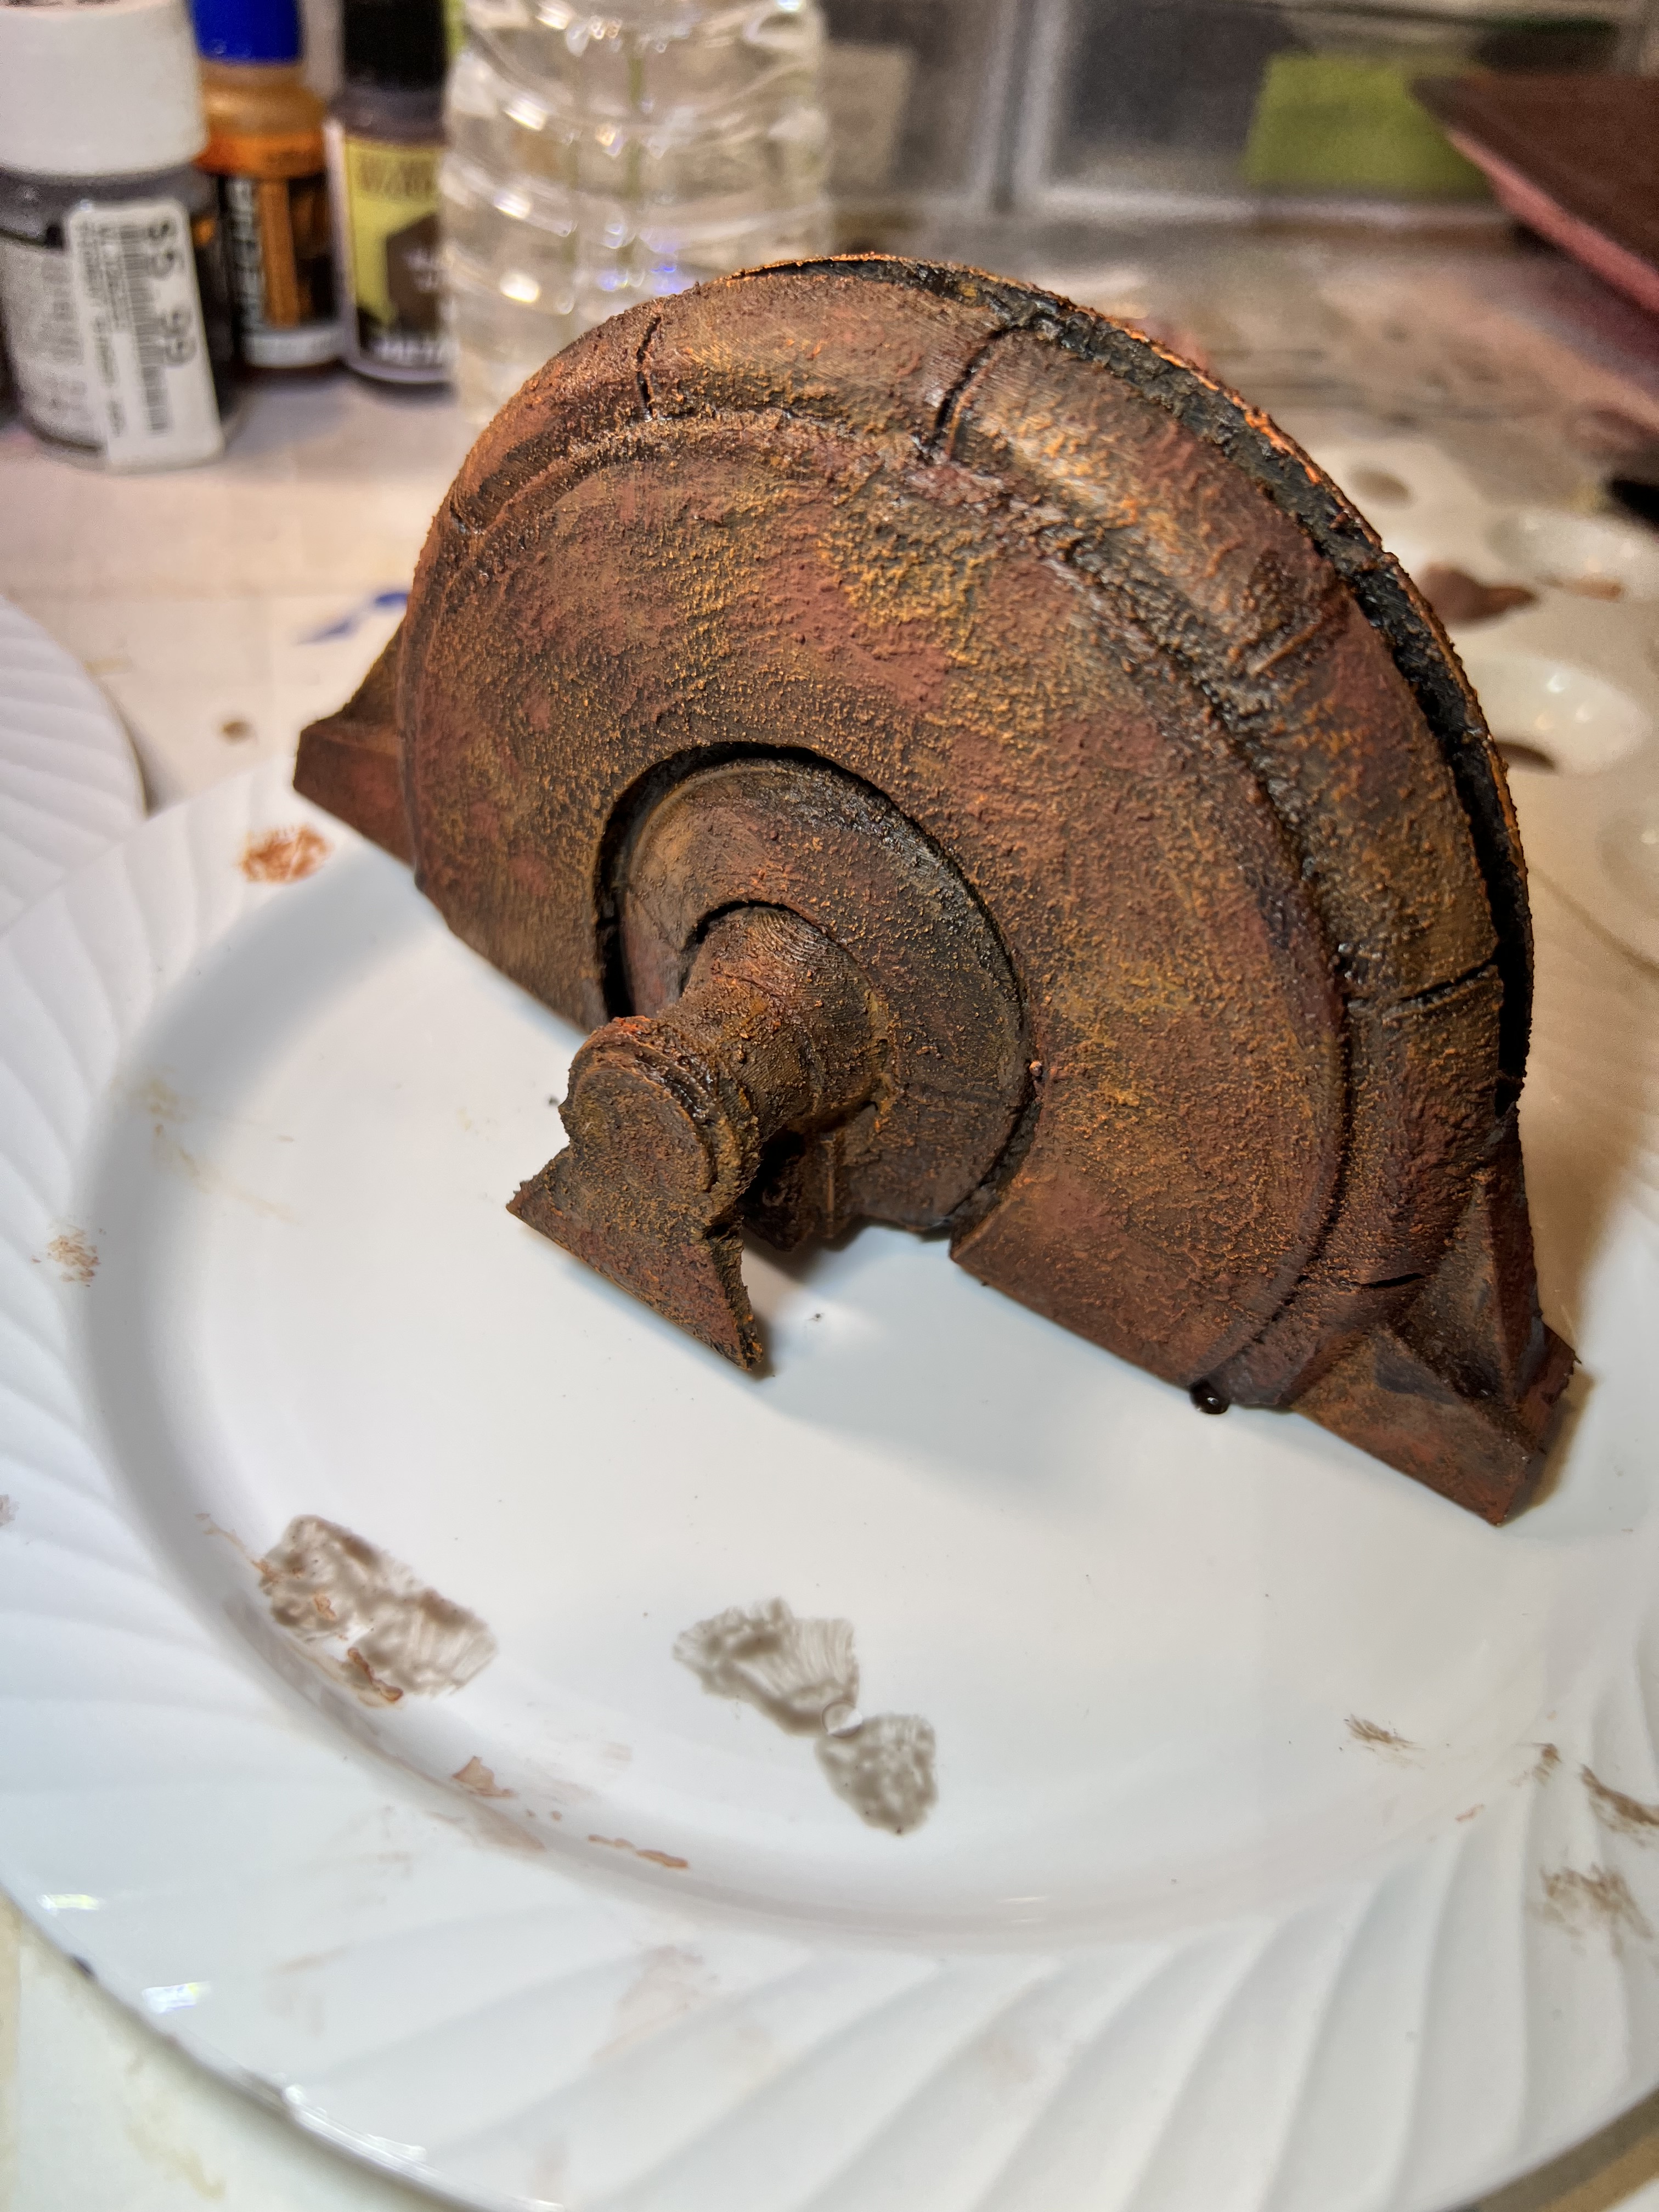
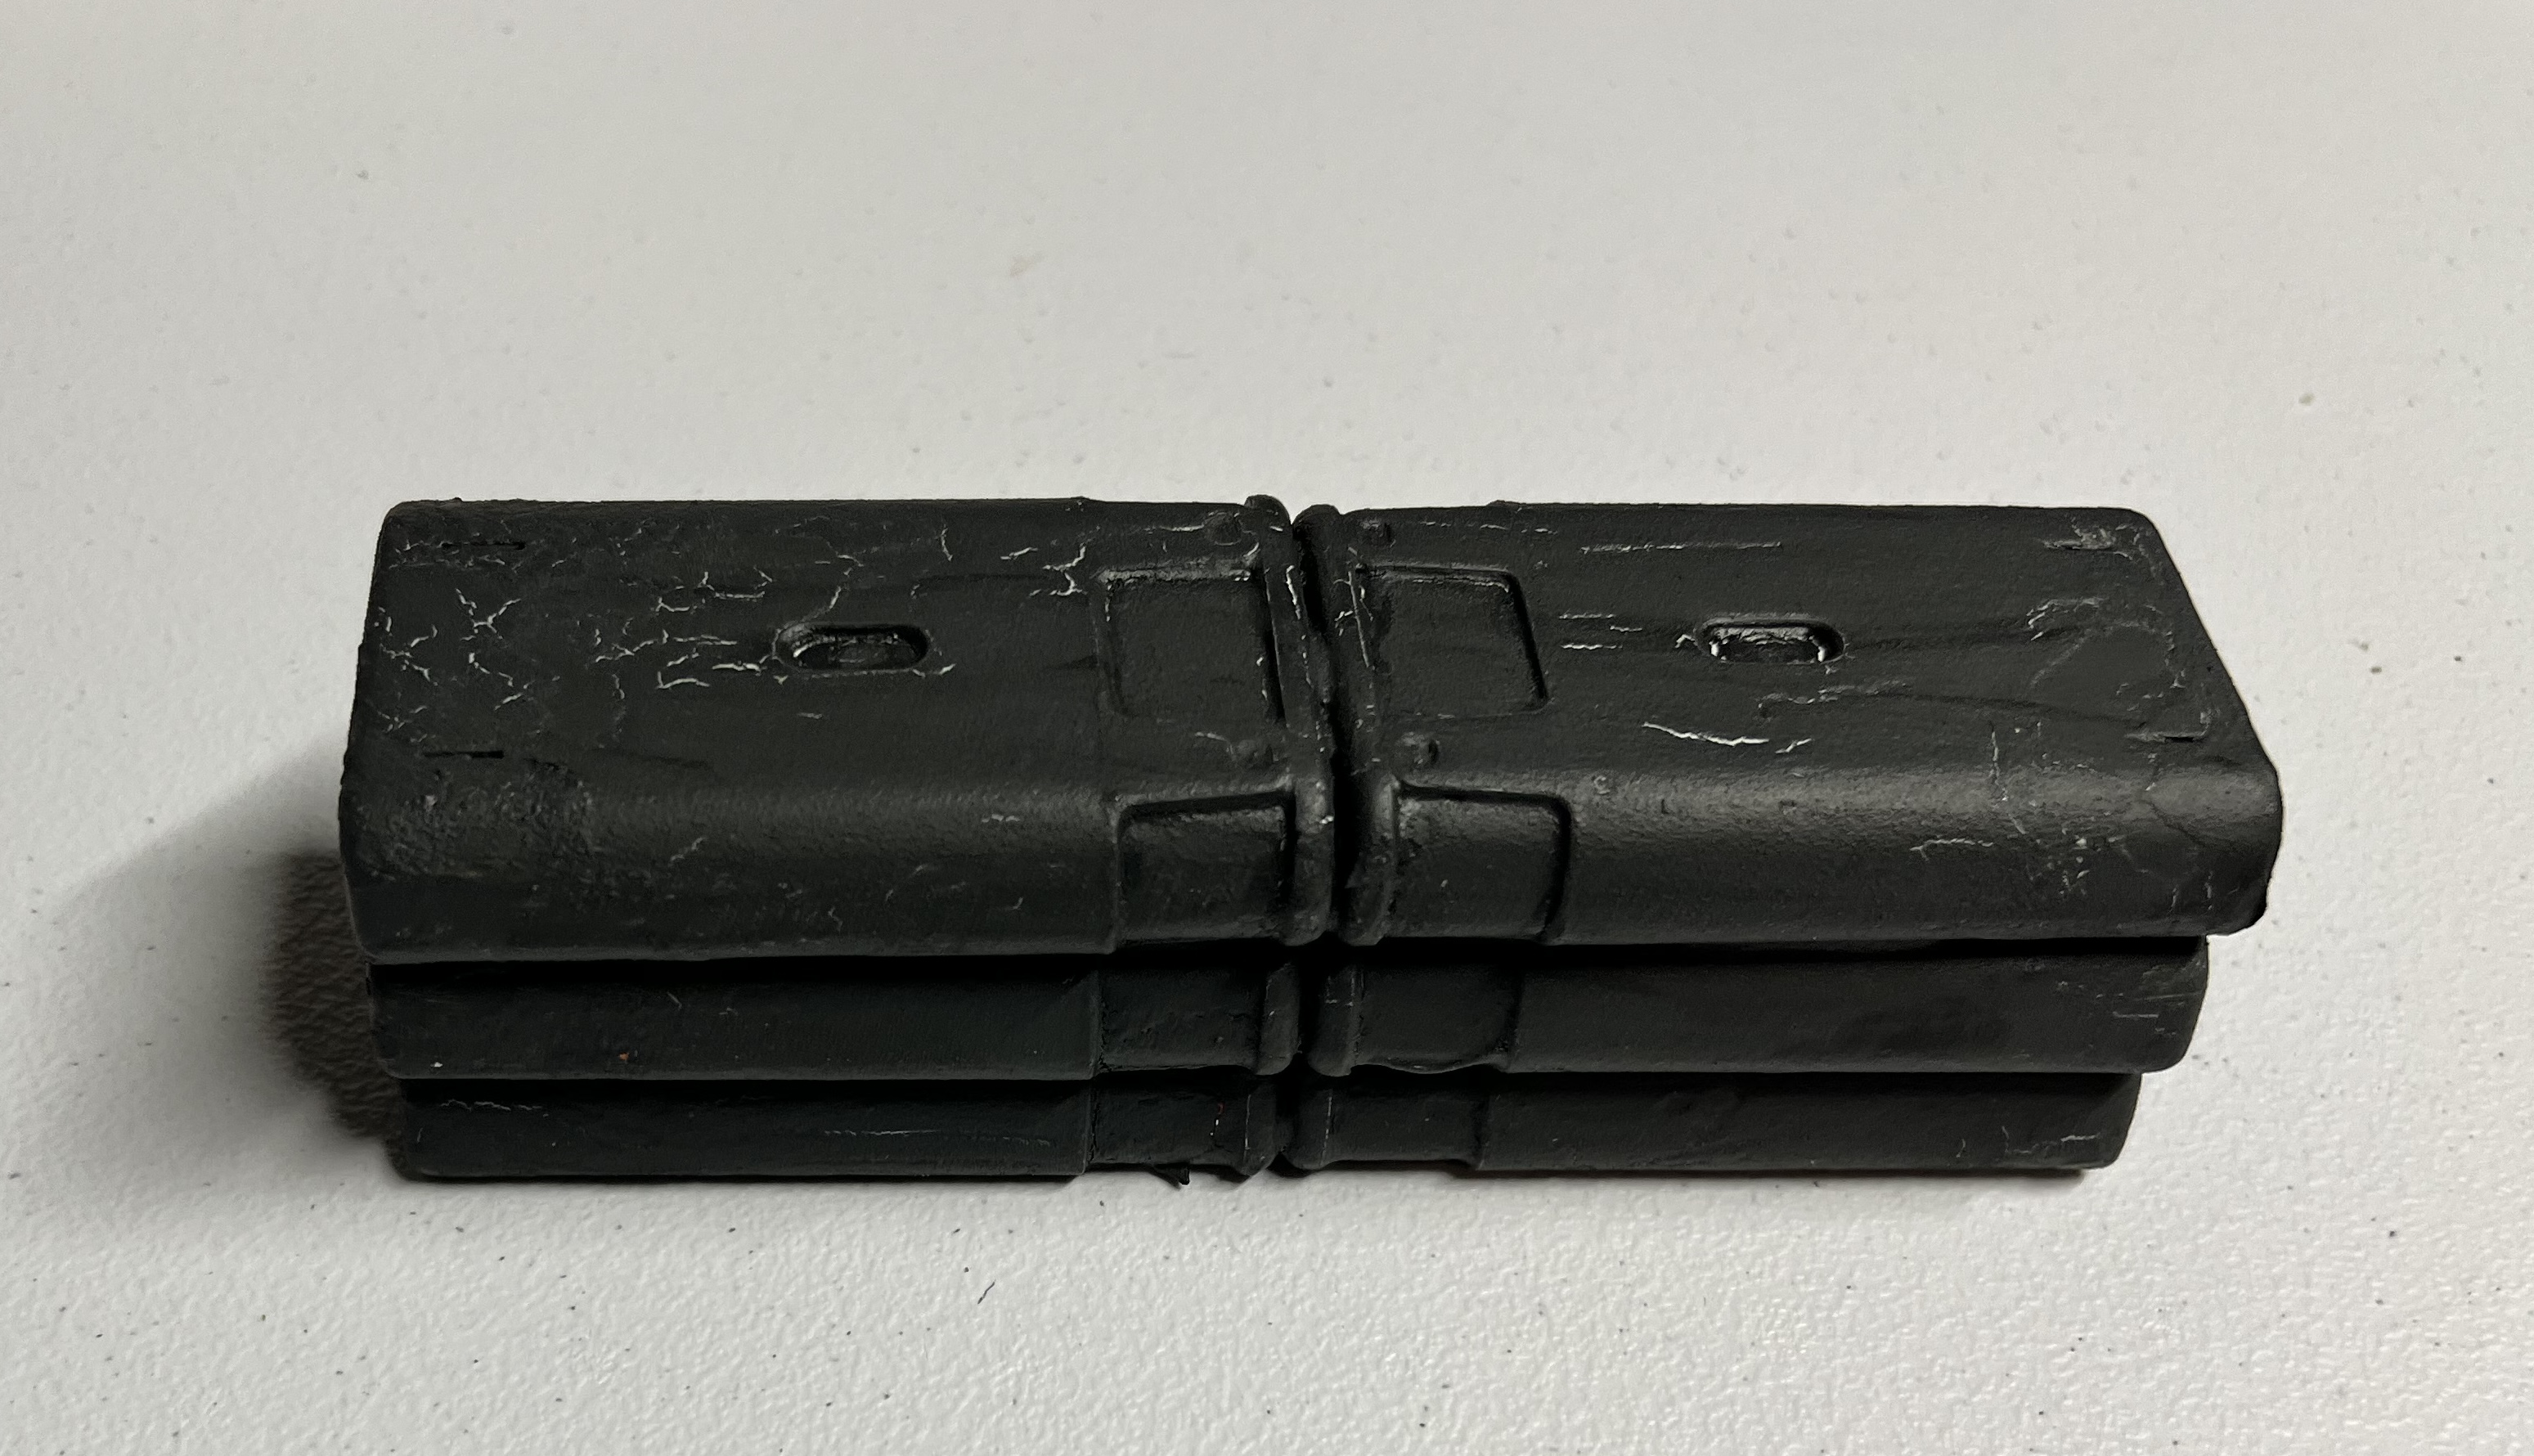
To make sure what I wanted to do would work (and to learn from any errors), I went with a prototype. I used an Exacto blade to remove the outer label. Then, I sanded the exterior to make it rough. To attach multiple units together, green stuff was the solution. After that hardened, I coated the outside of the attached trainers with PVA – followed by a dusting of chinchilla dust on the glue. When that combination had hardened, I primed the combinations with black primer.

First prototype primed.

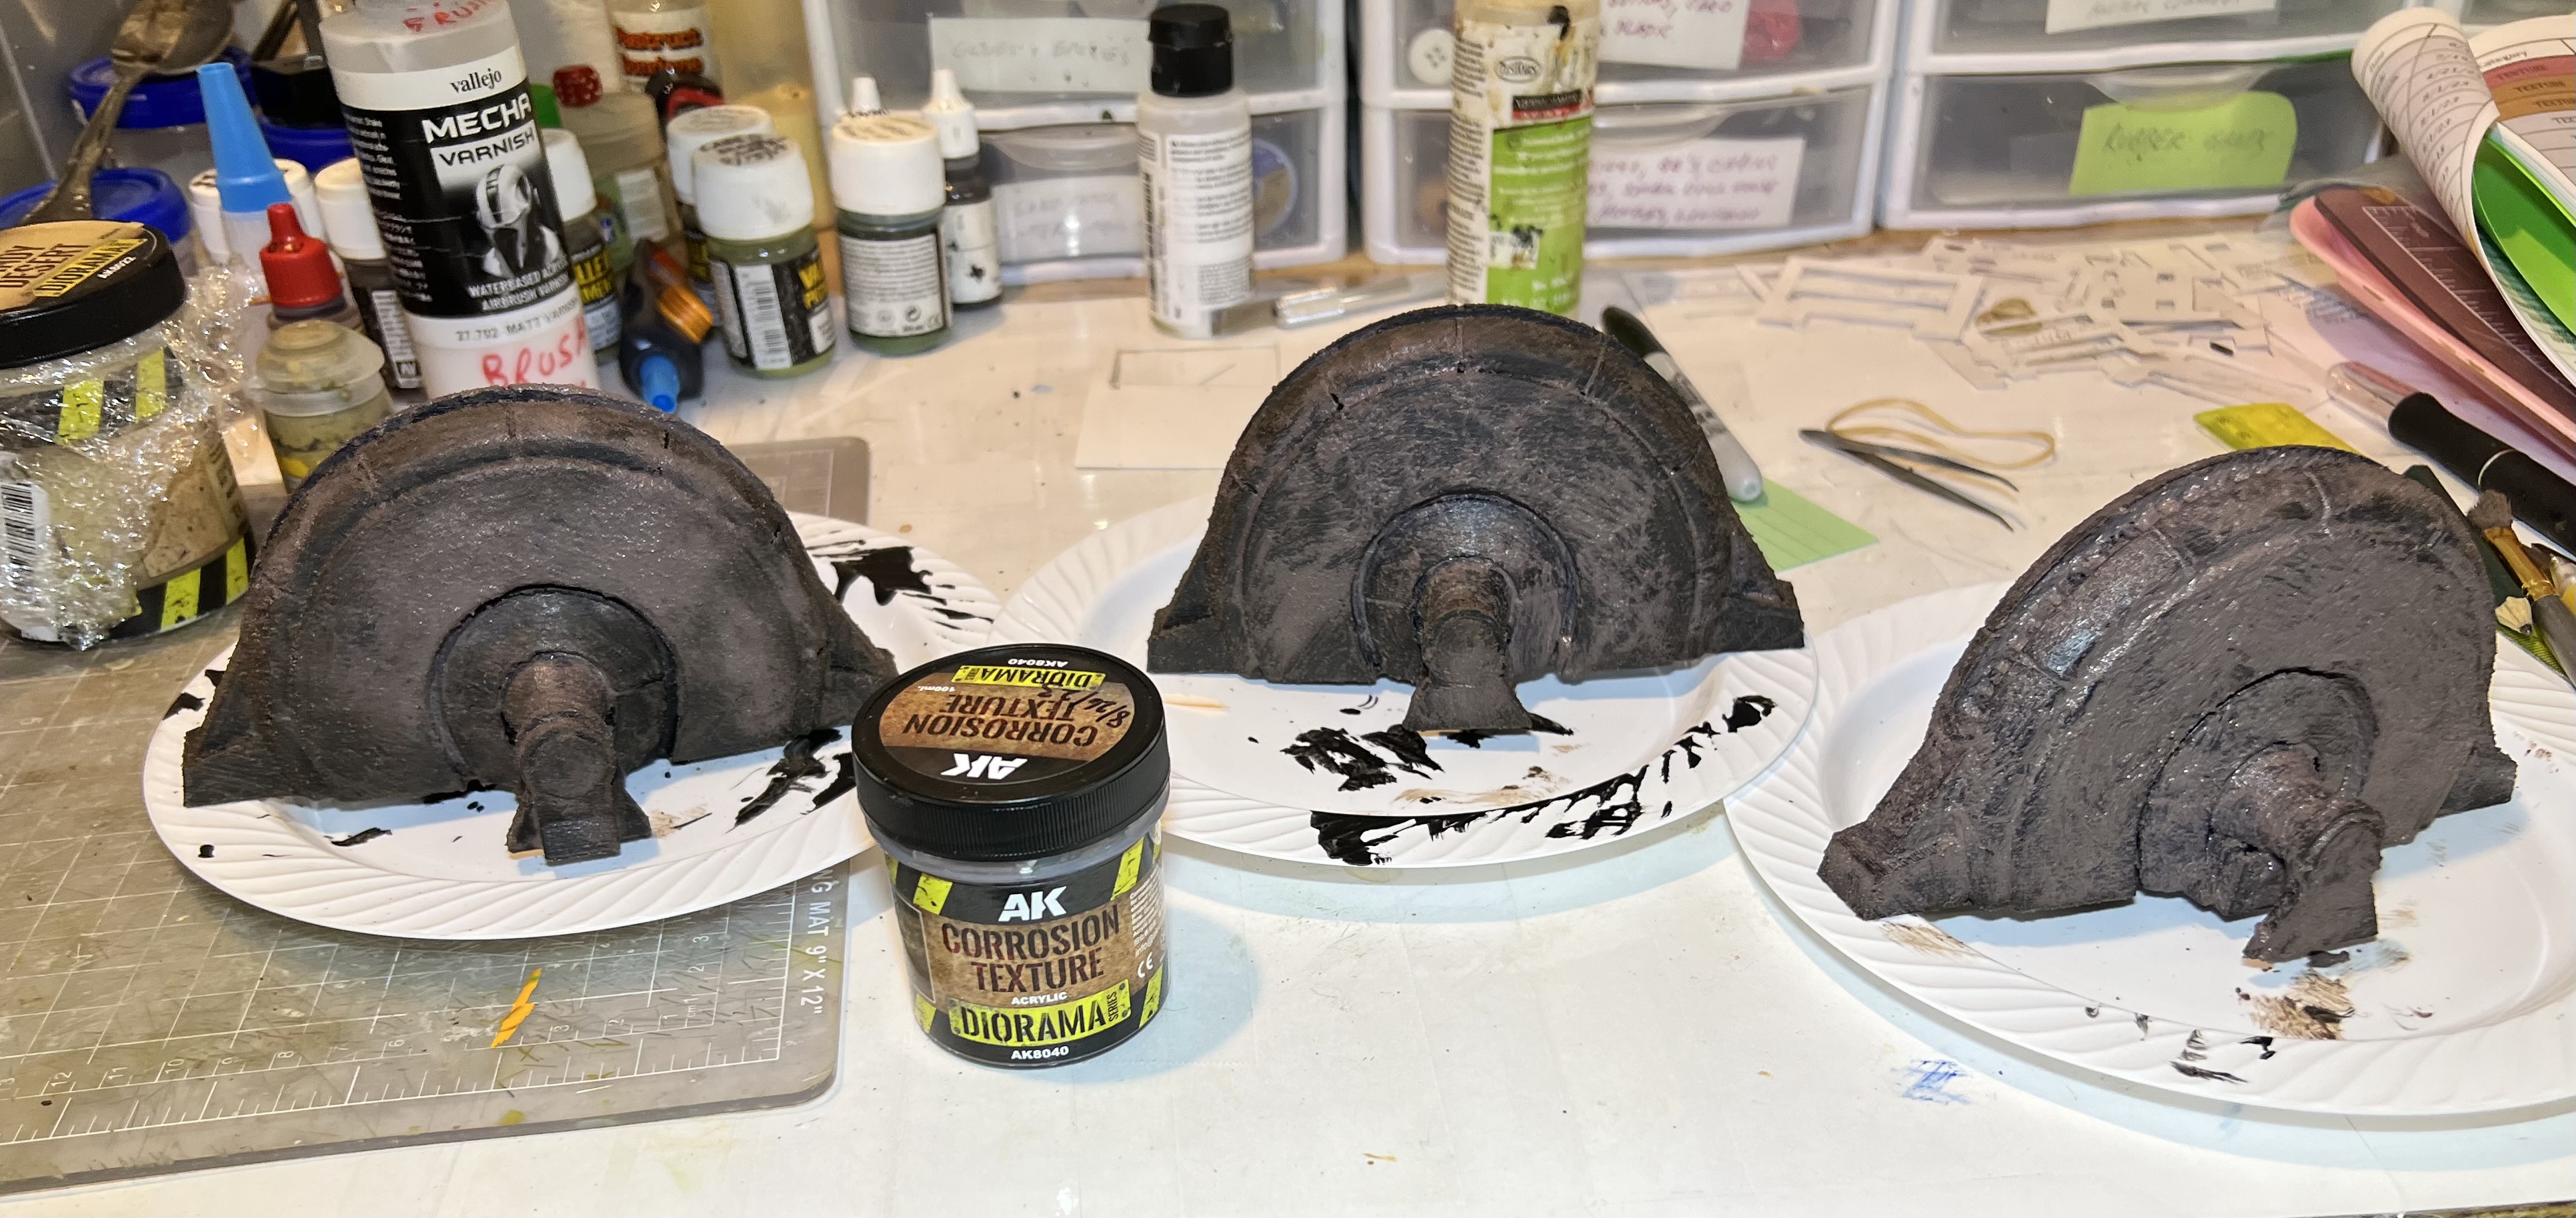
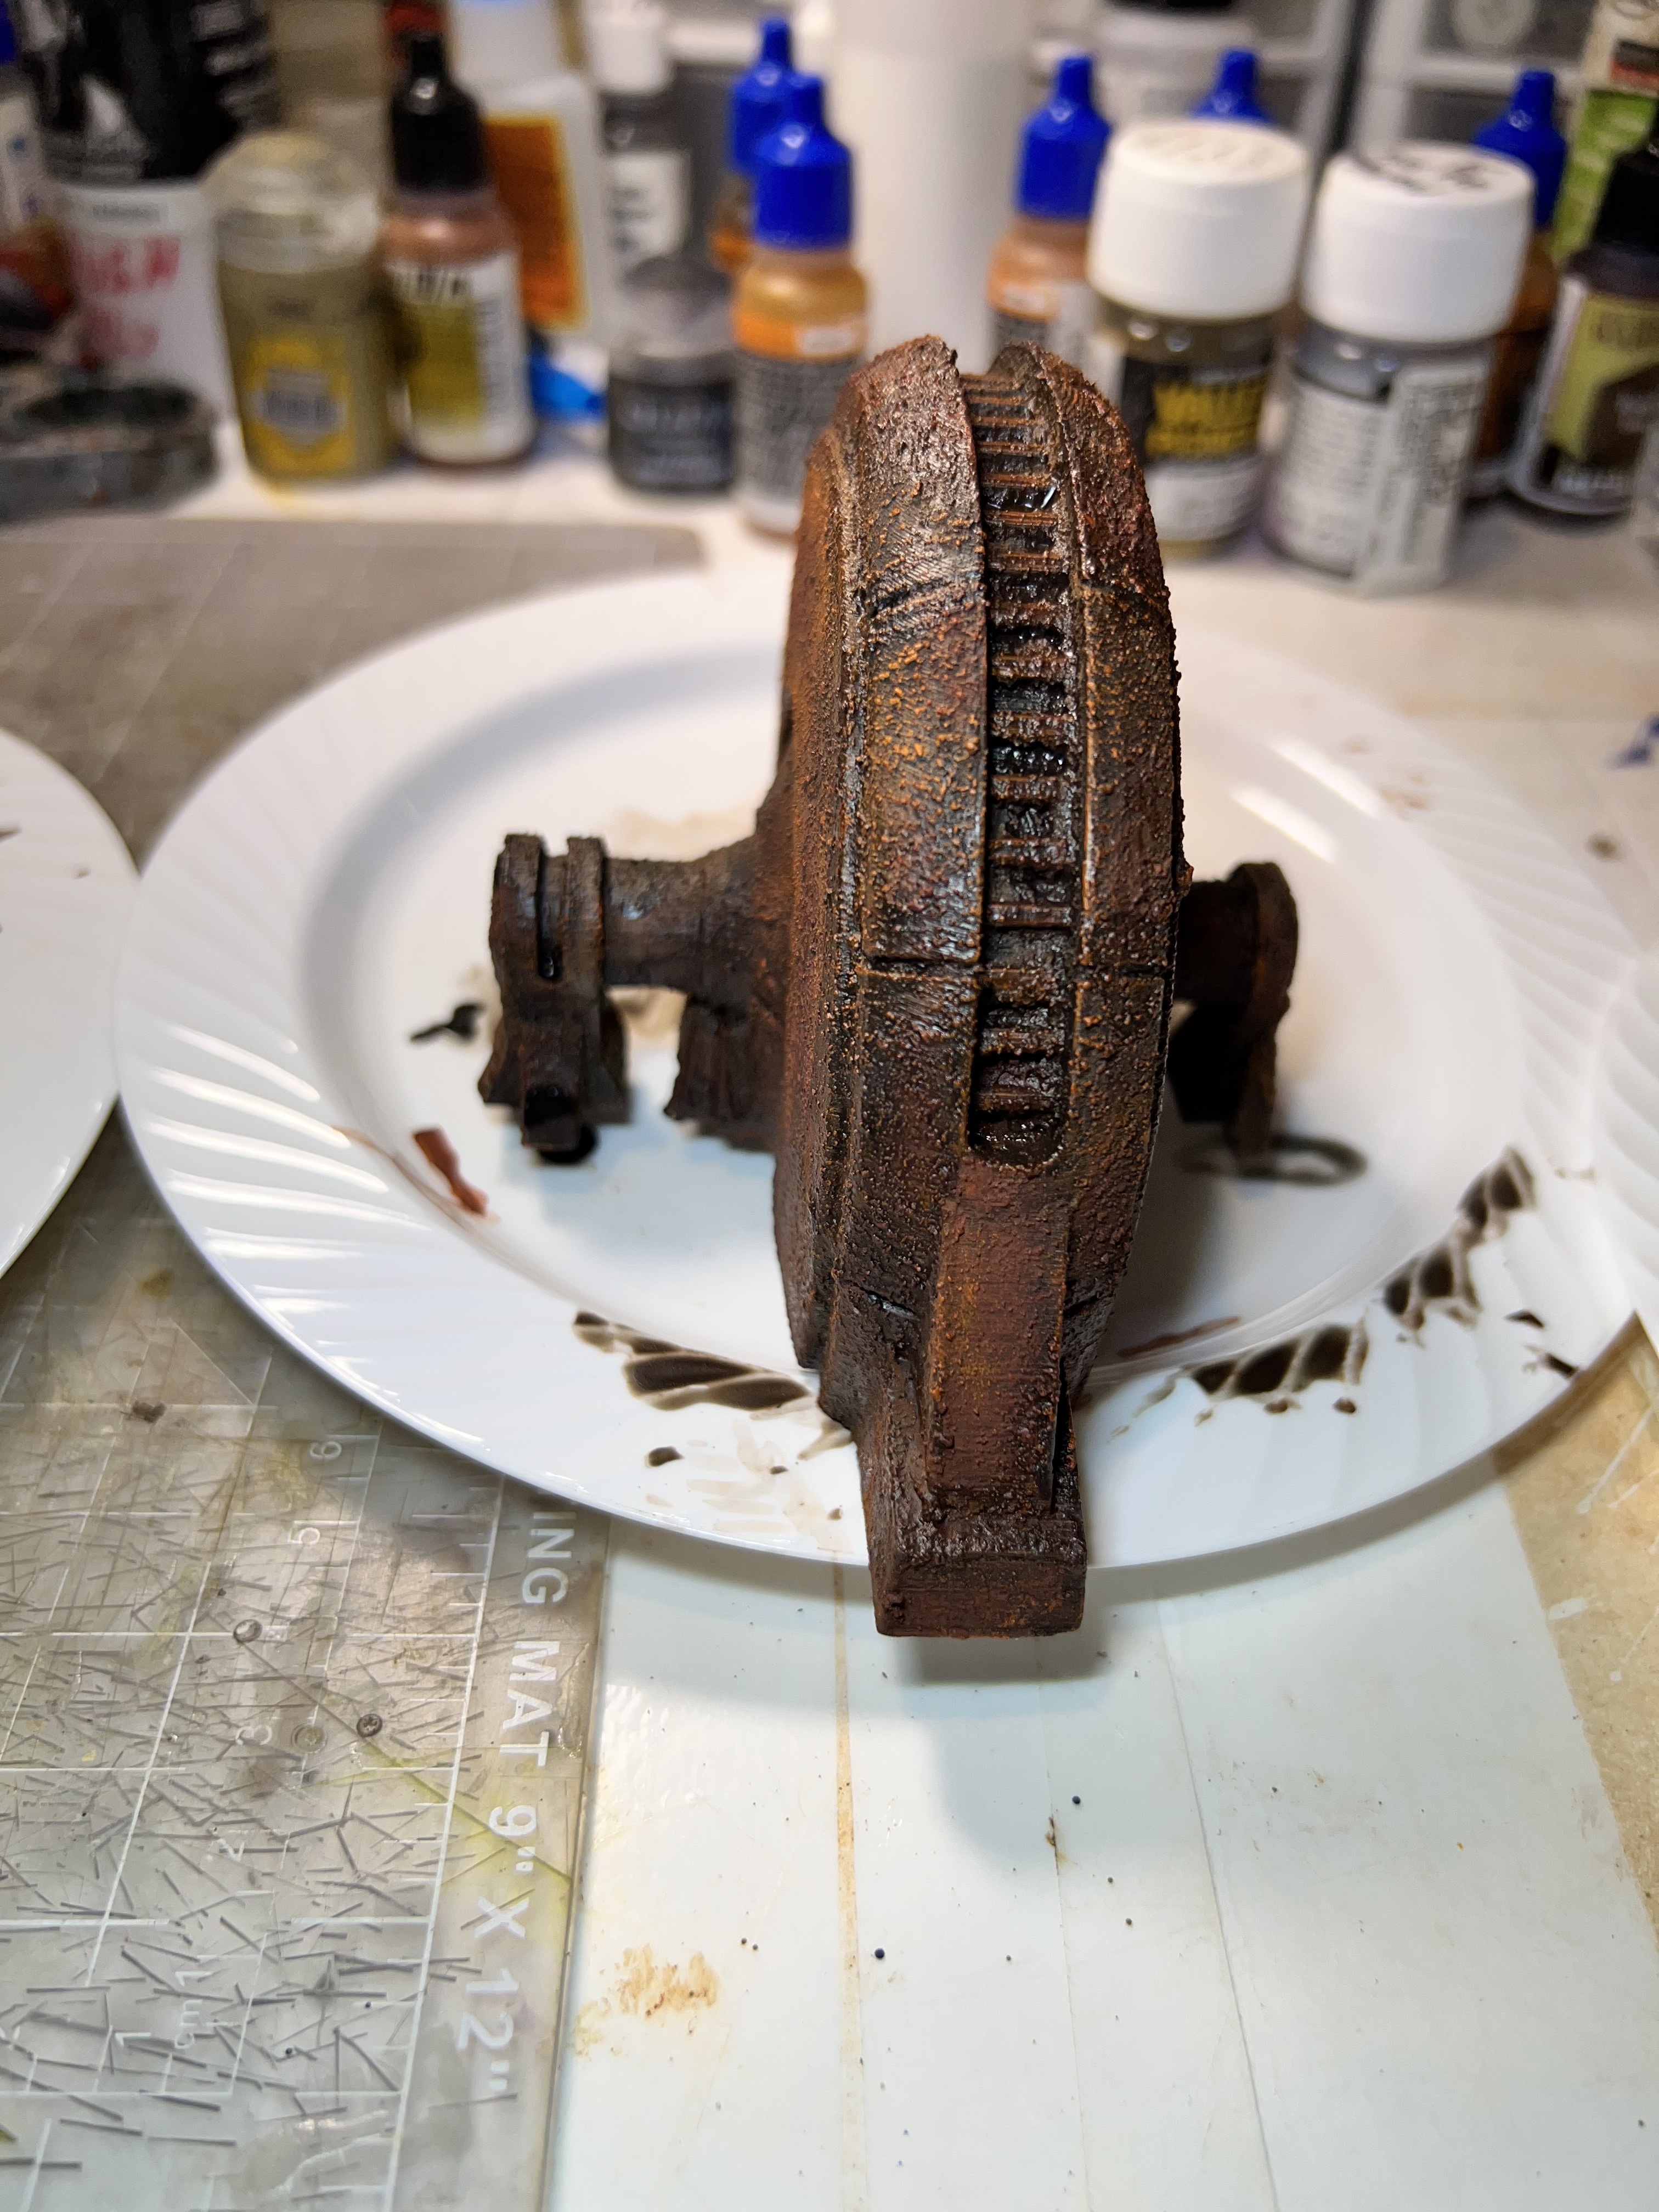
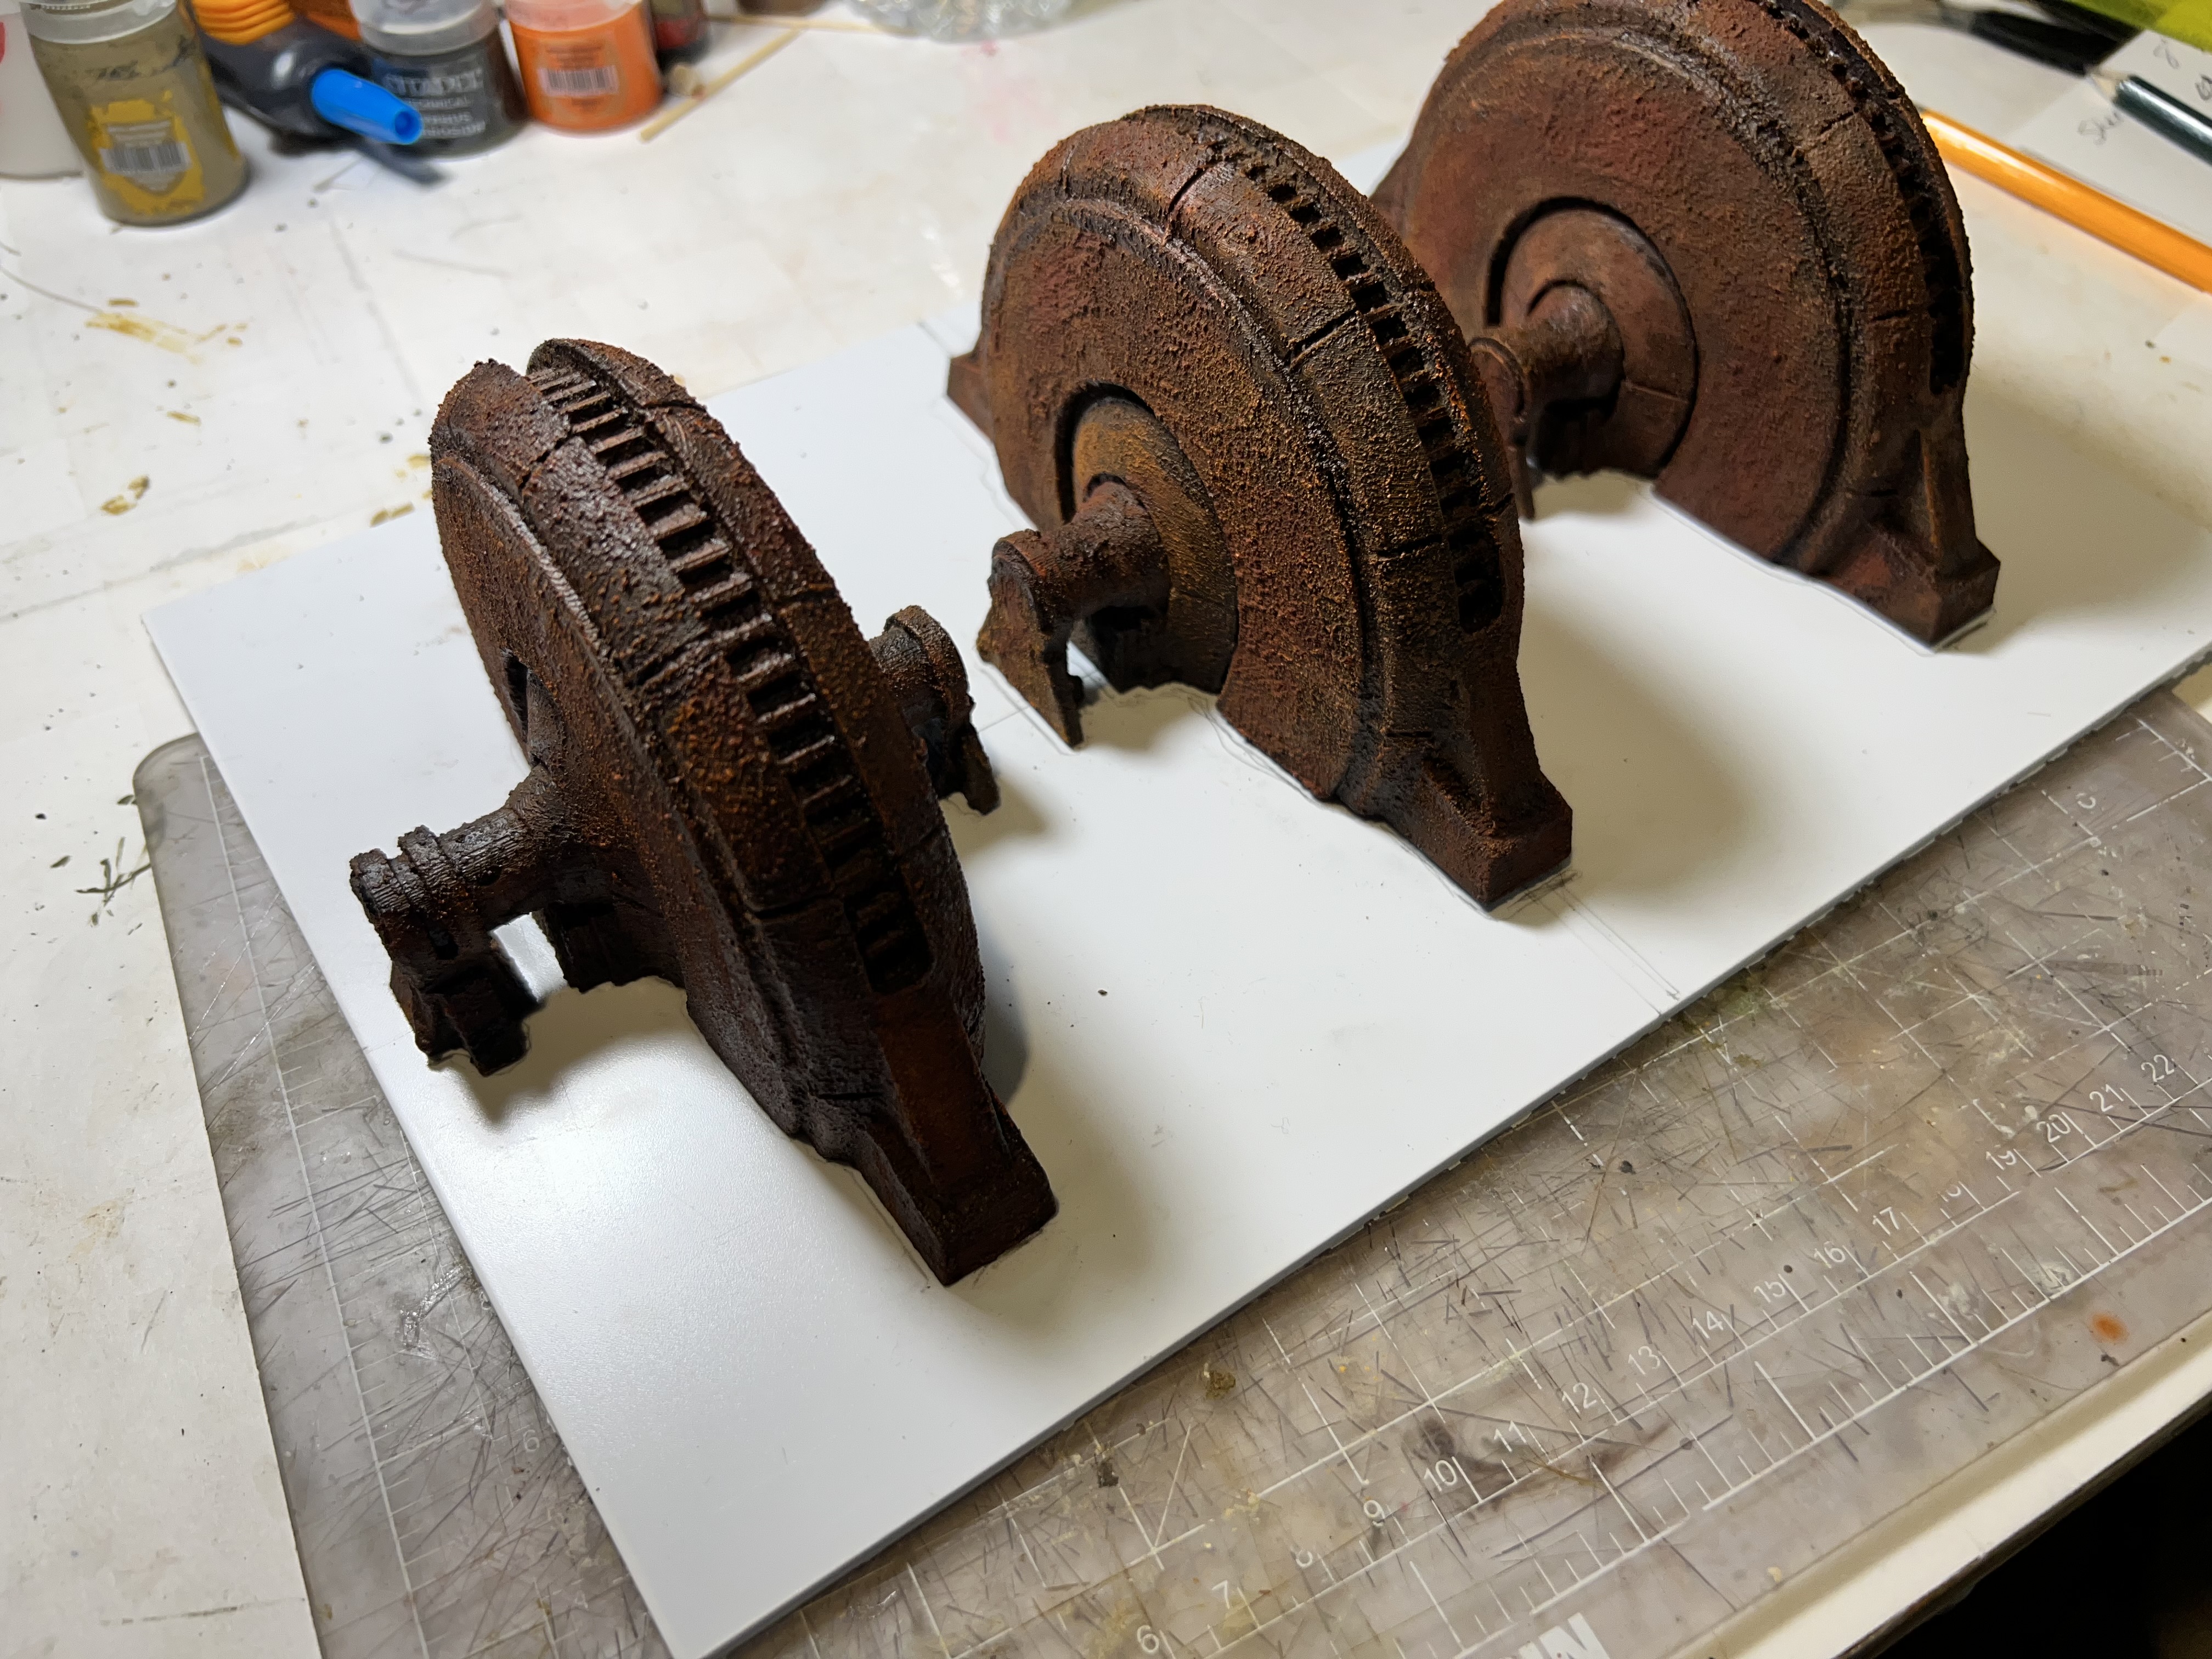
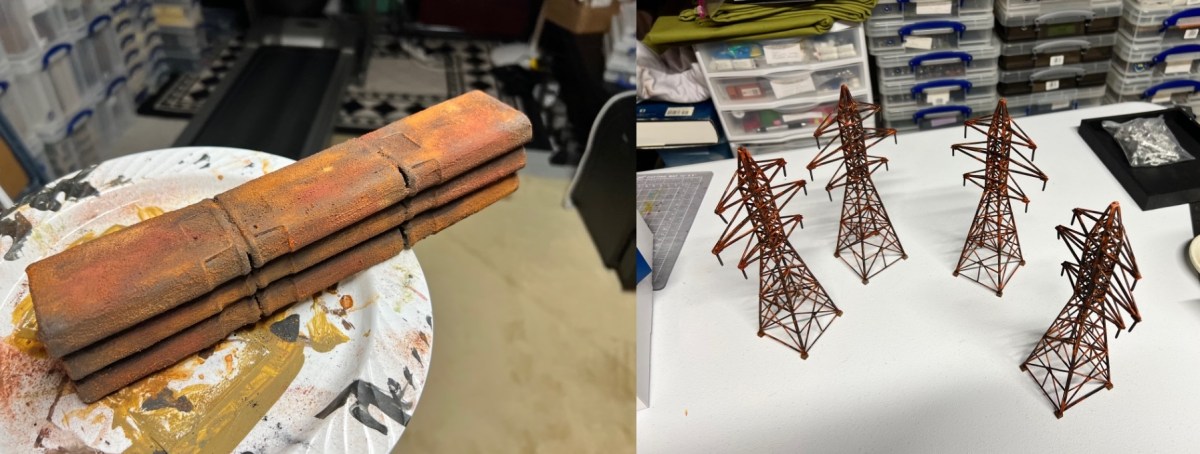
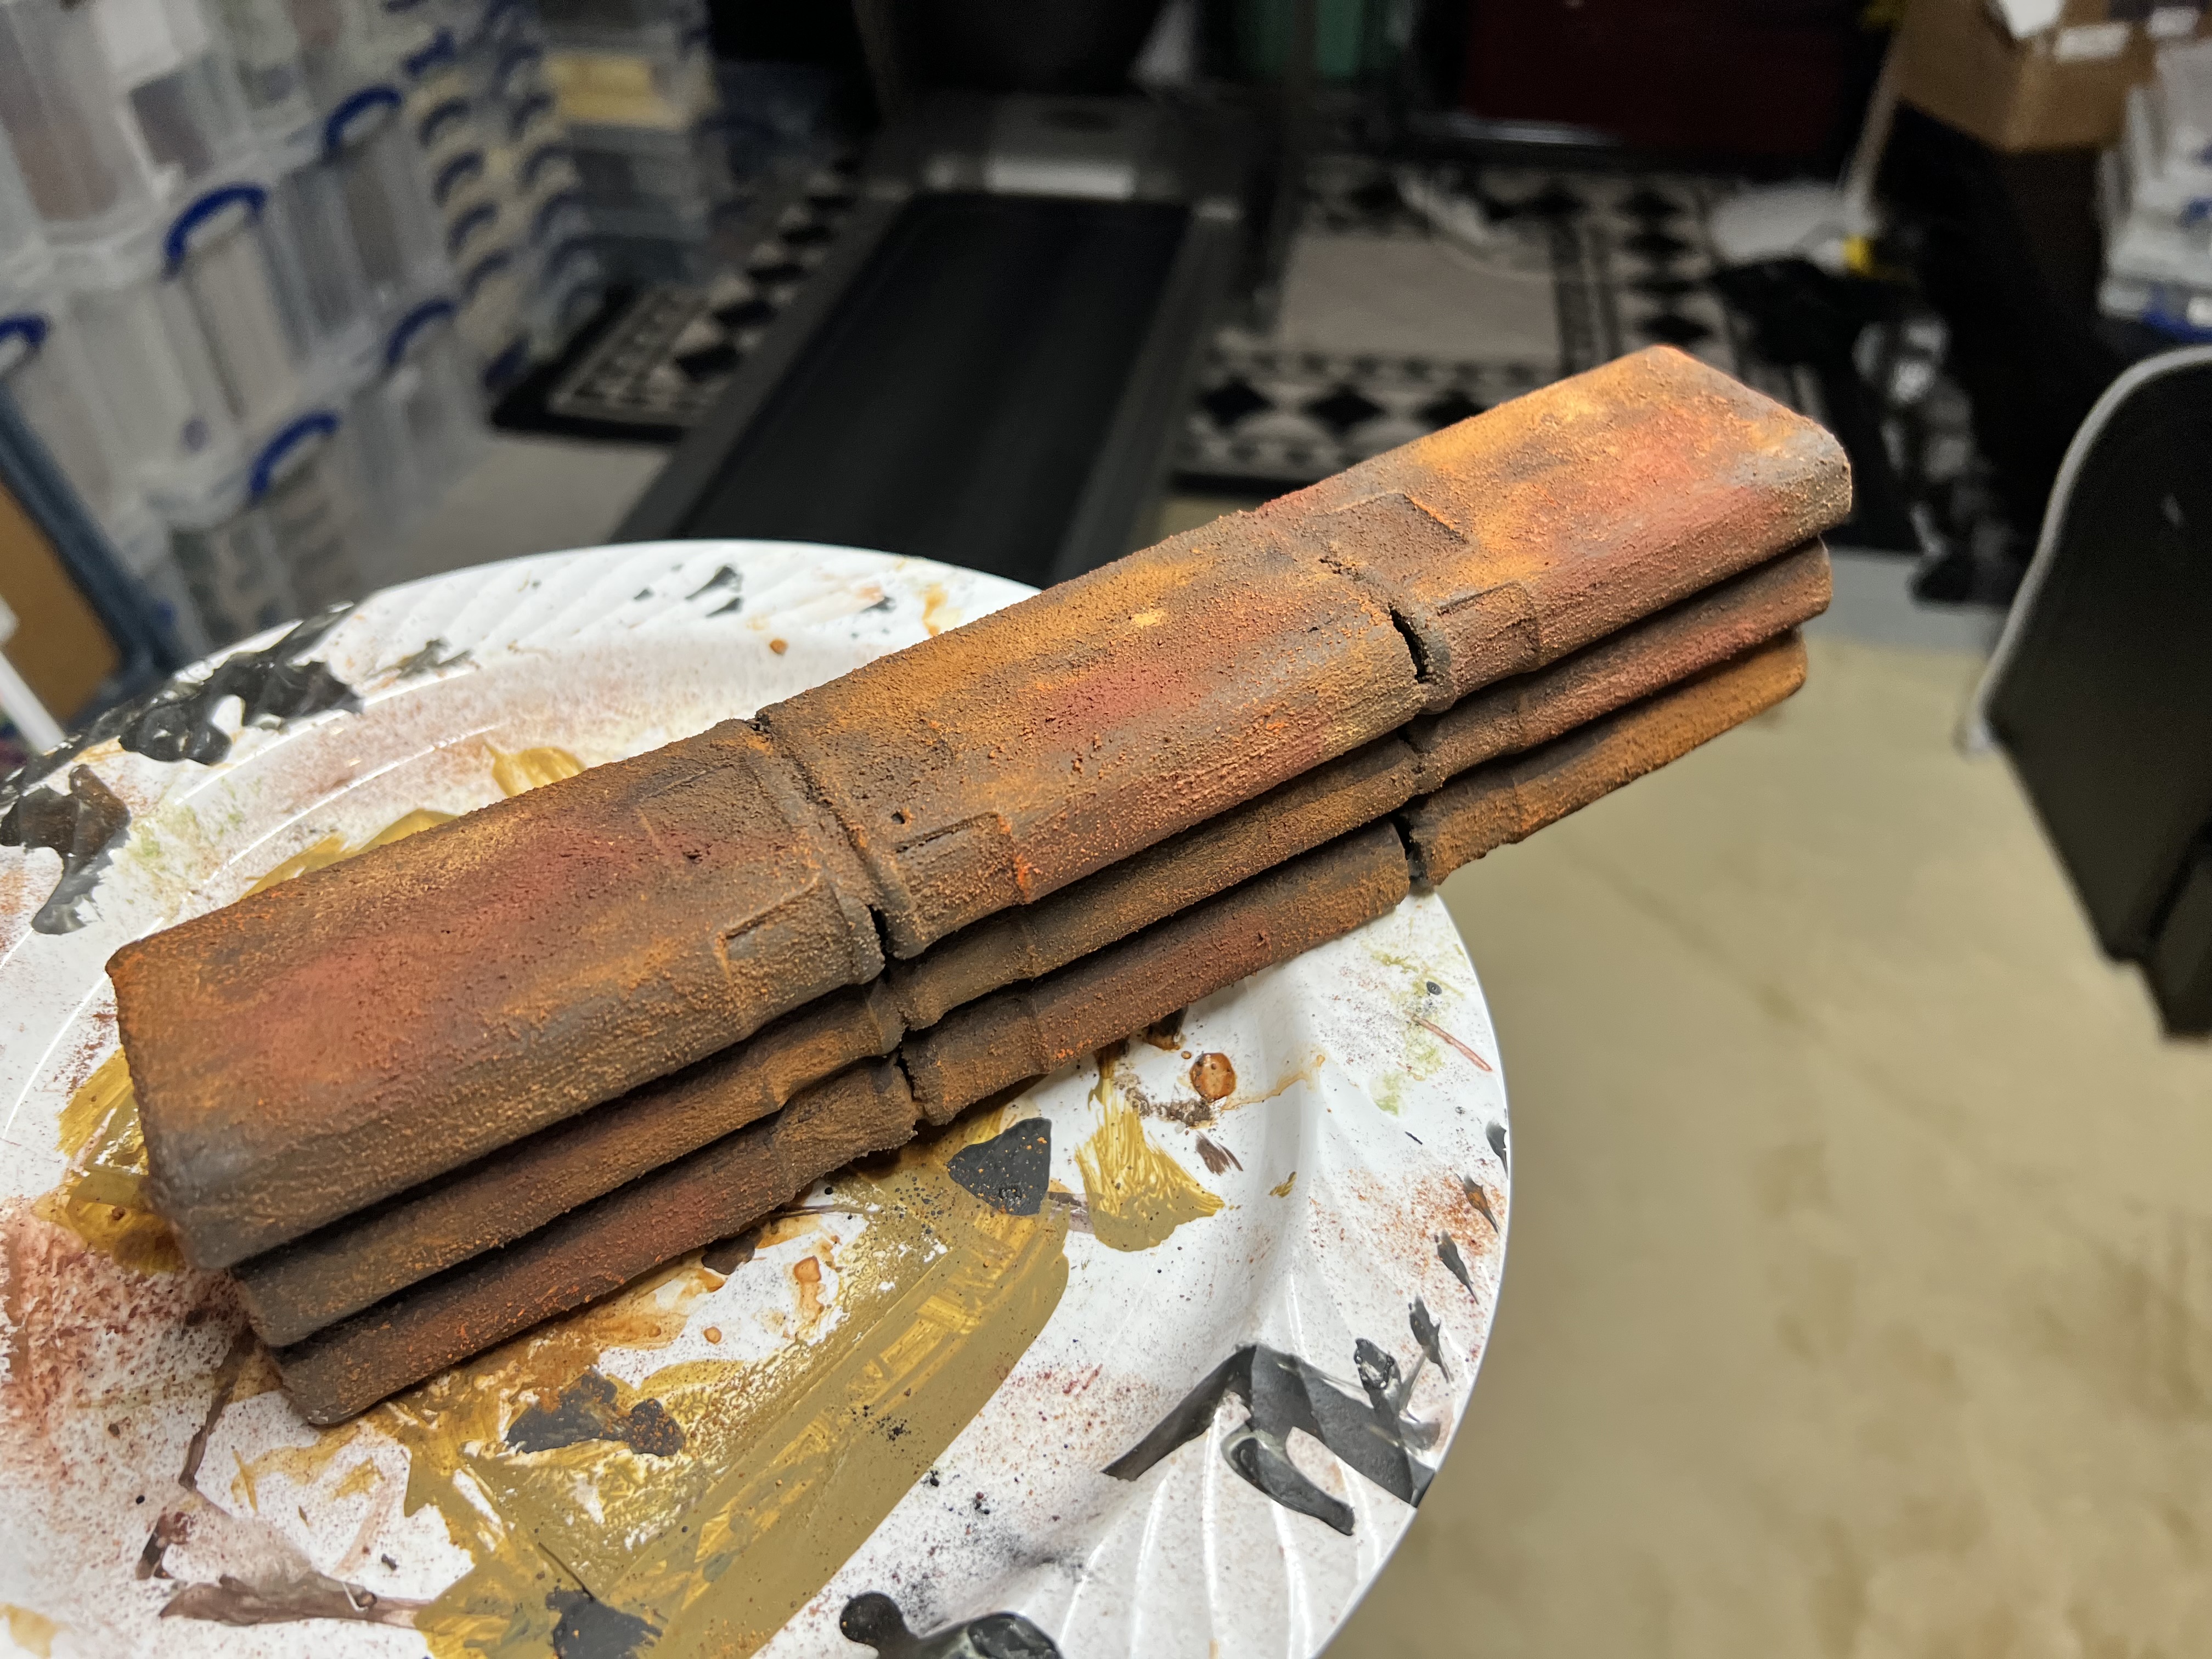
From this point, I used corrosion texture paint(let that harden), then used a number of rusting paints and pigments. I really liked the results and moved on to making two large batches of different combinations.

Walls after labels removed and sanded.
PVA and chinchilla dust application.
Corrosion texture paint applied and drying.
First half-batch of walls after being rusted up.
Close up shot of a 3×3 combination.
Second half batch done.

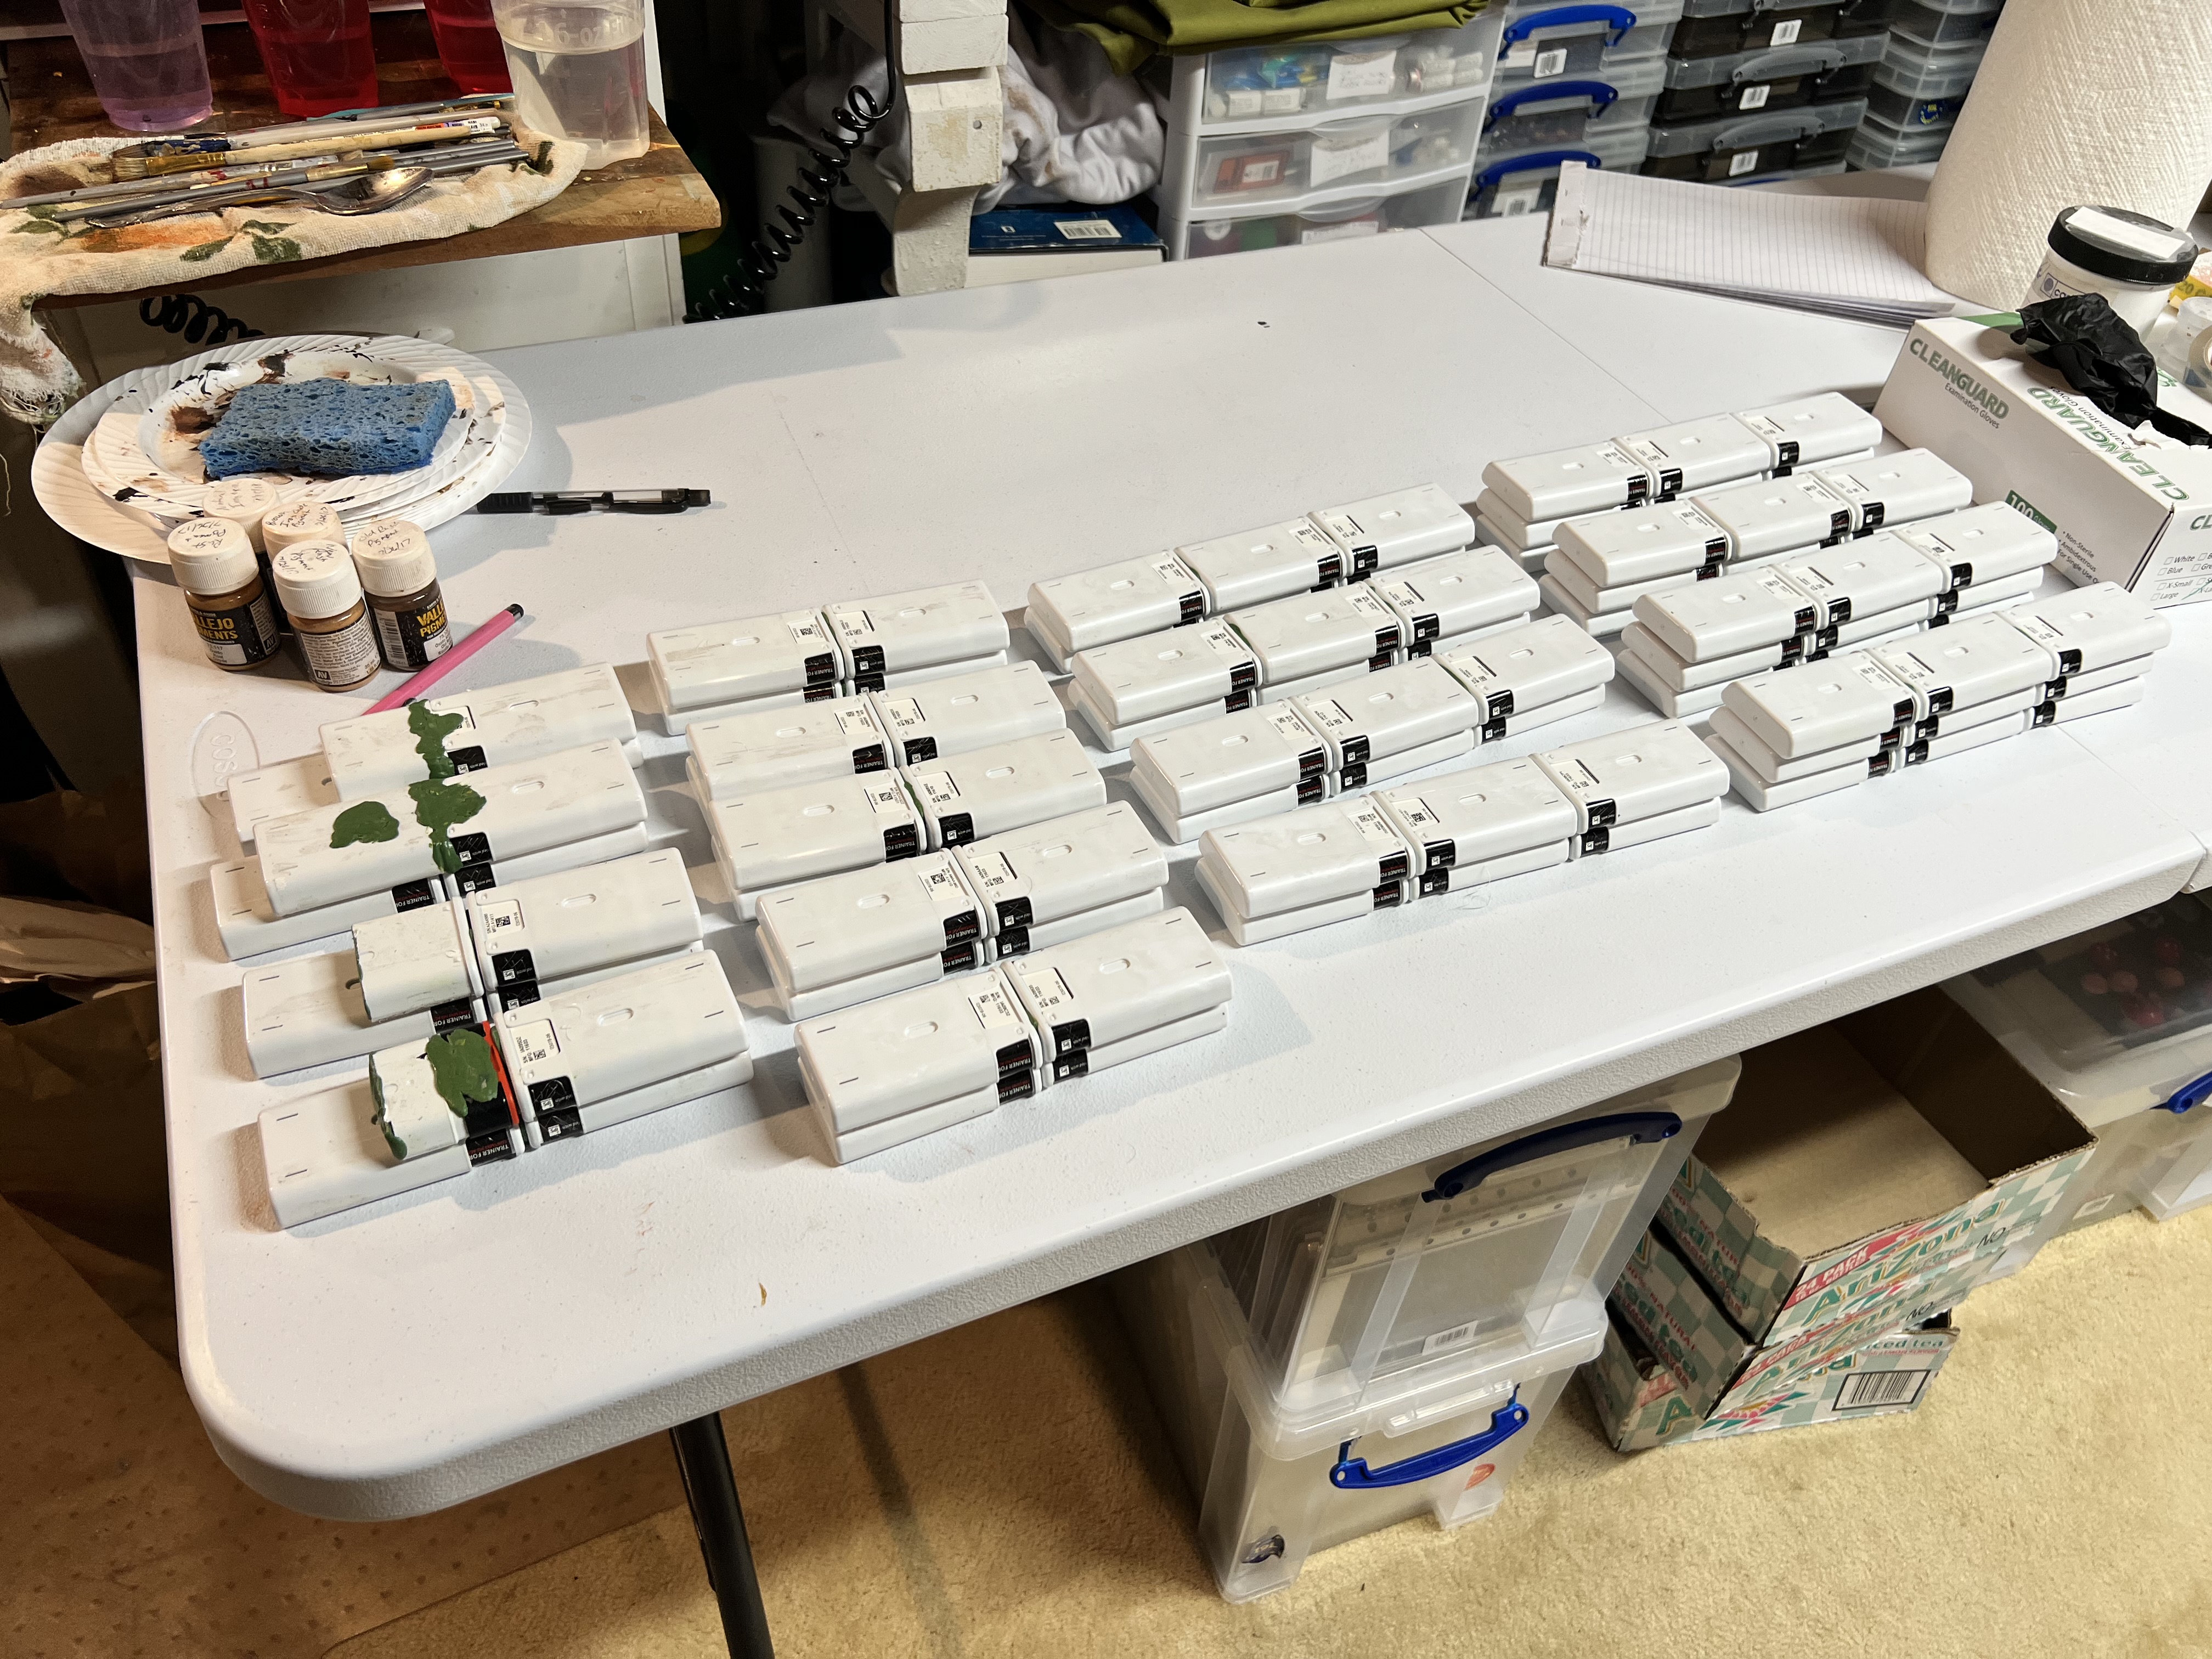
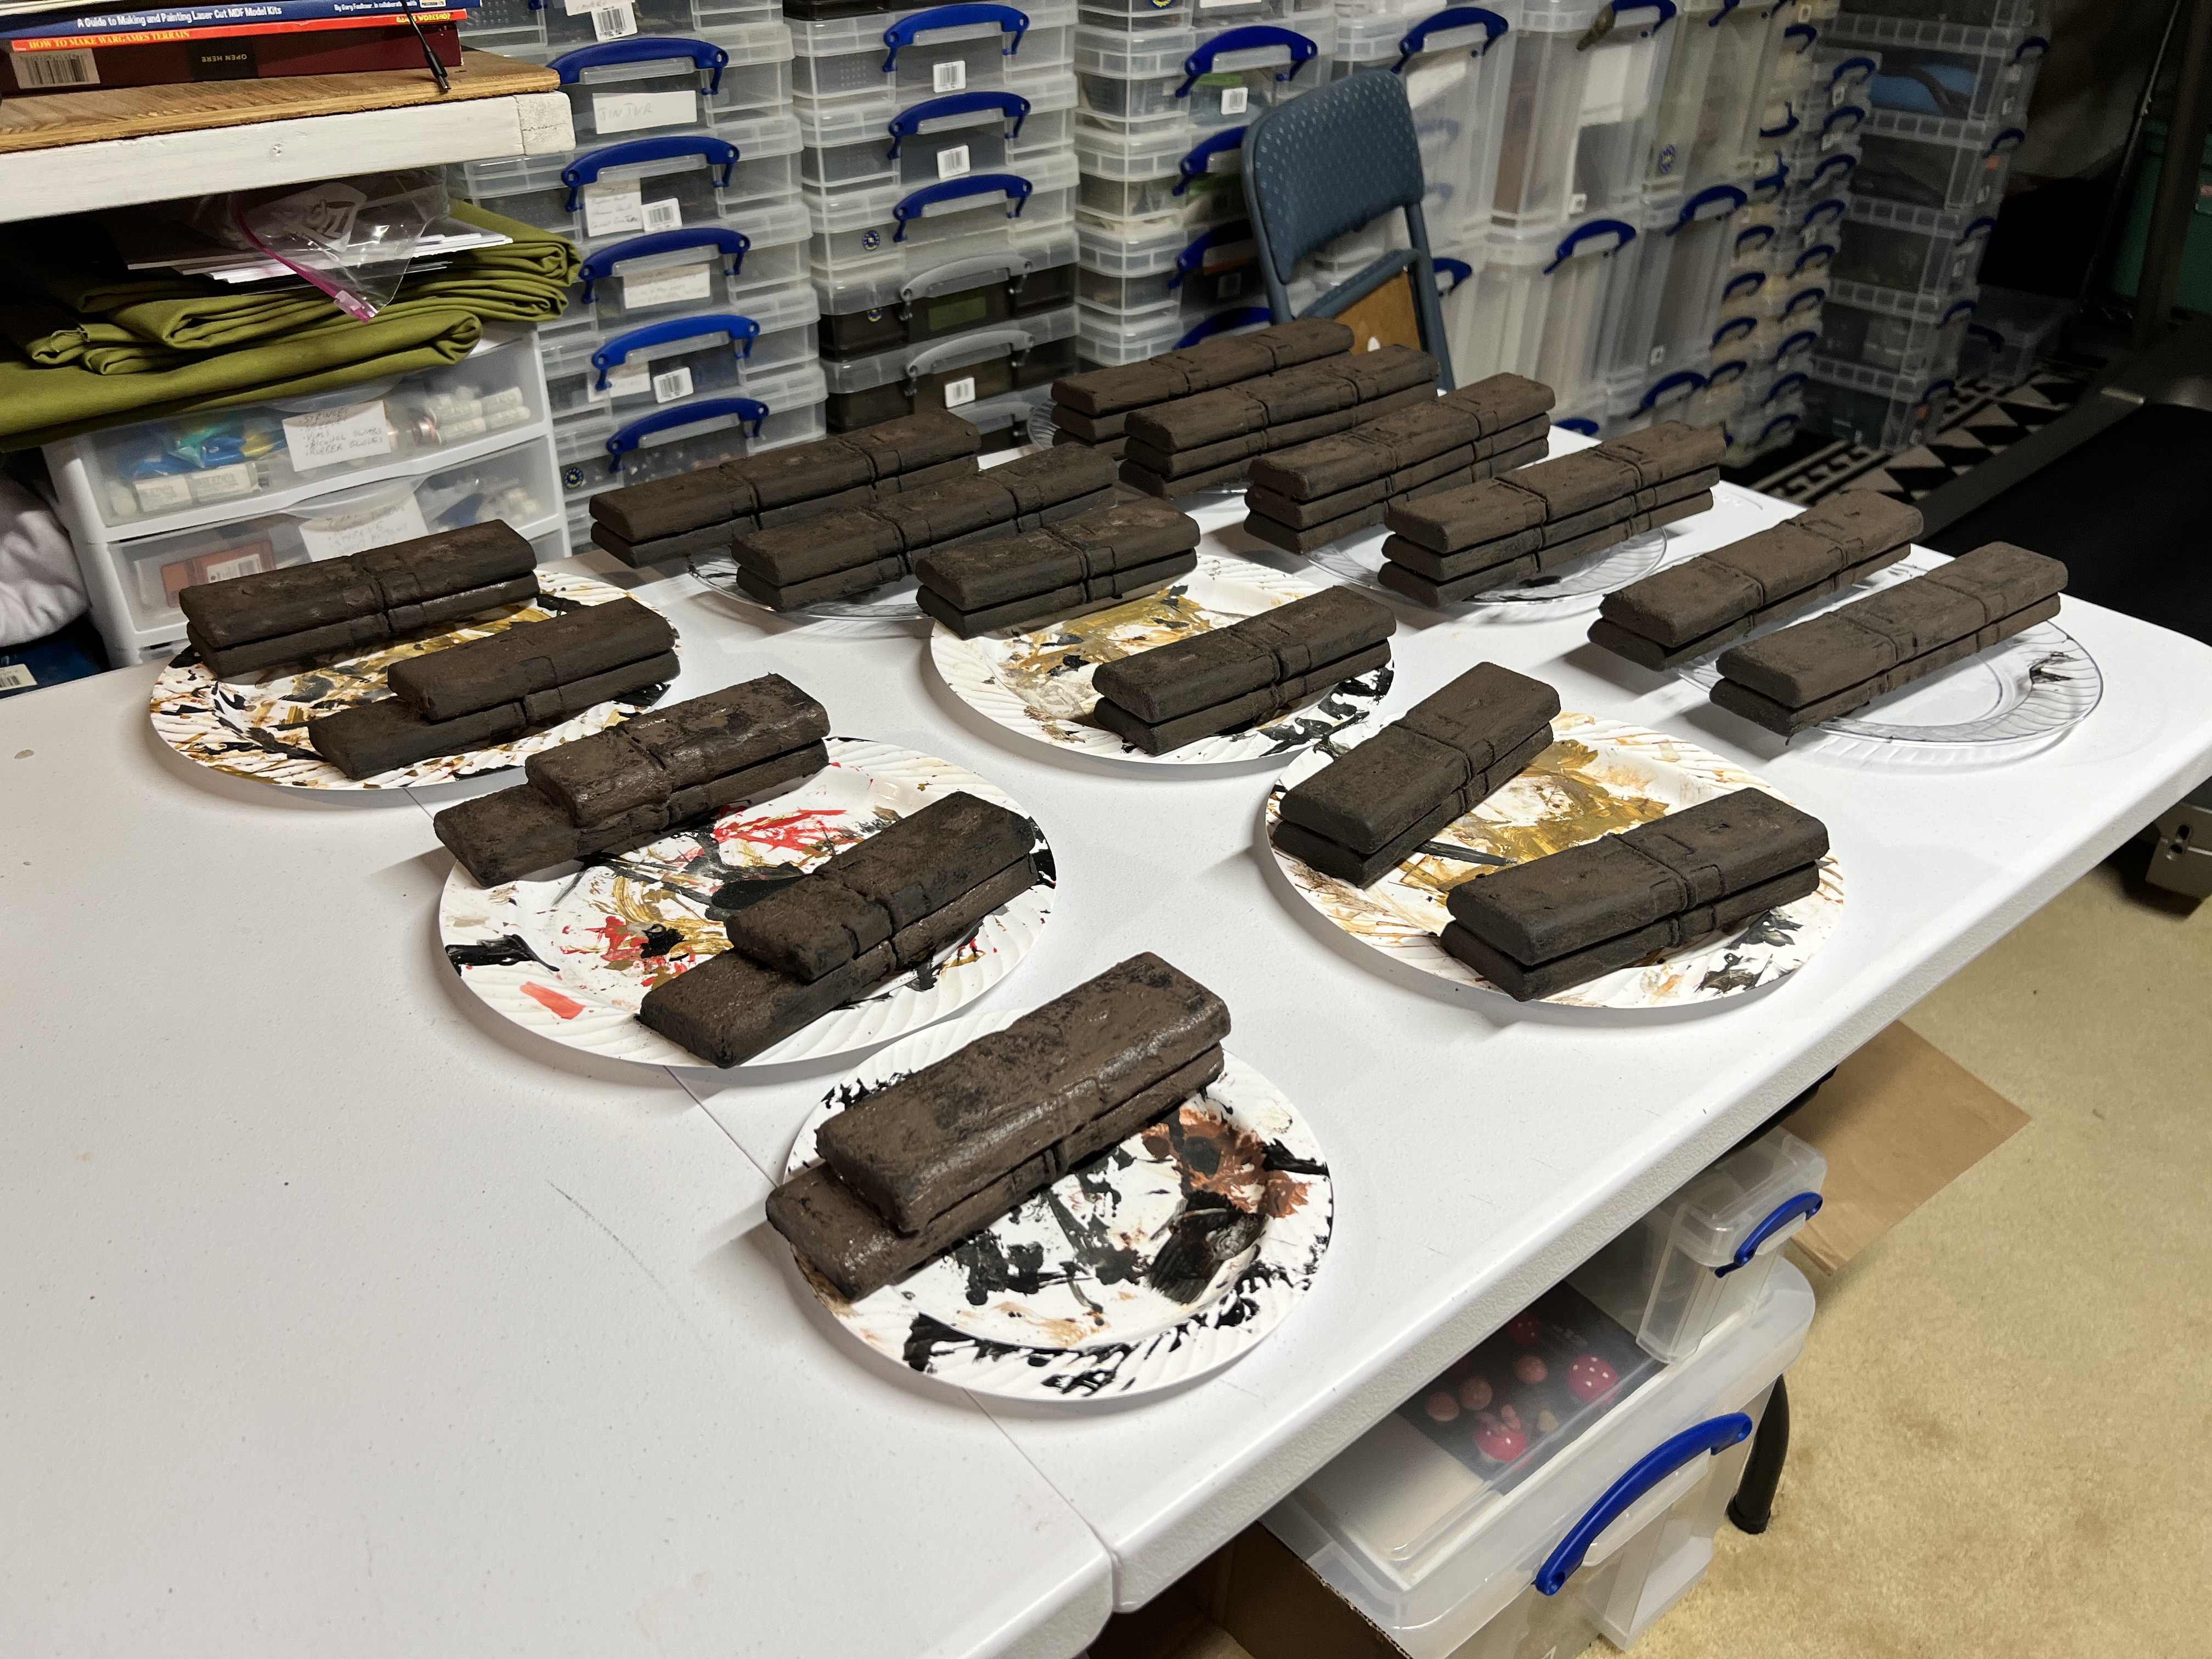
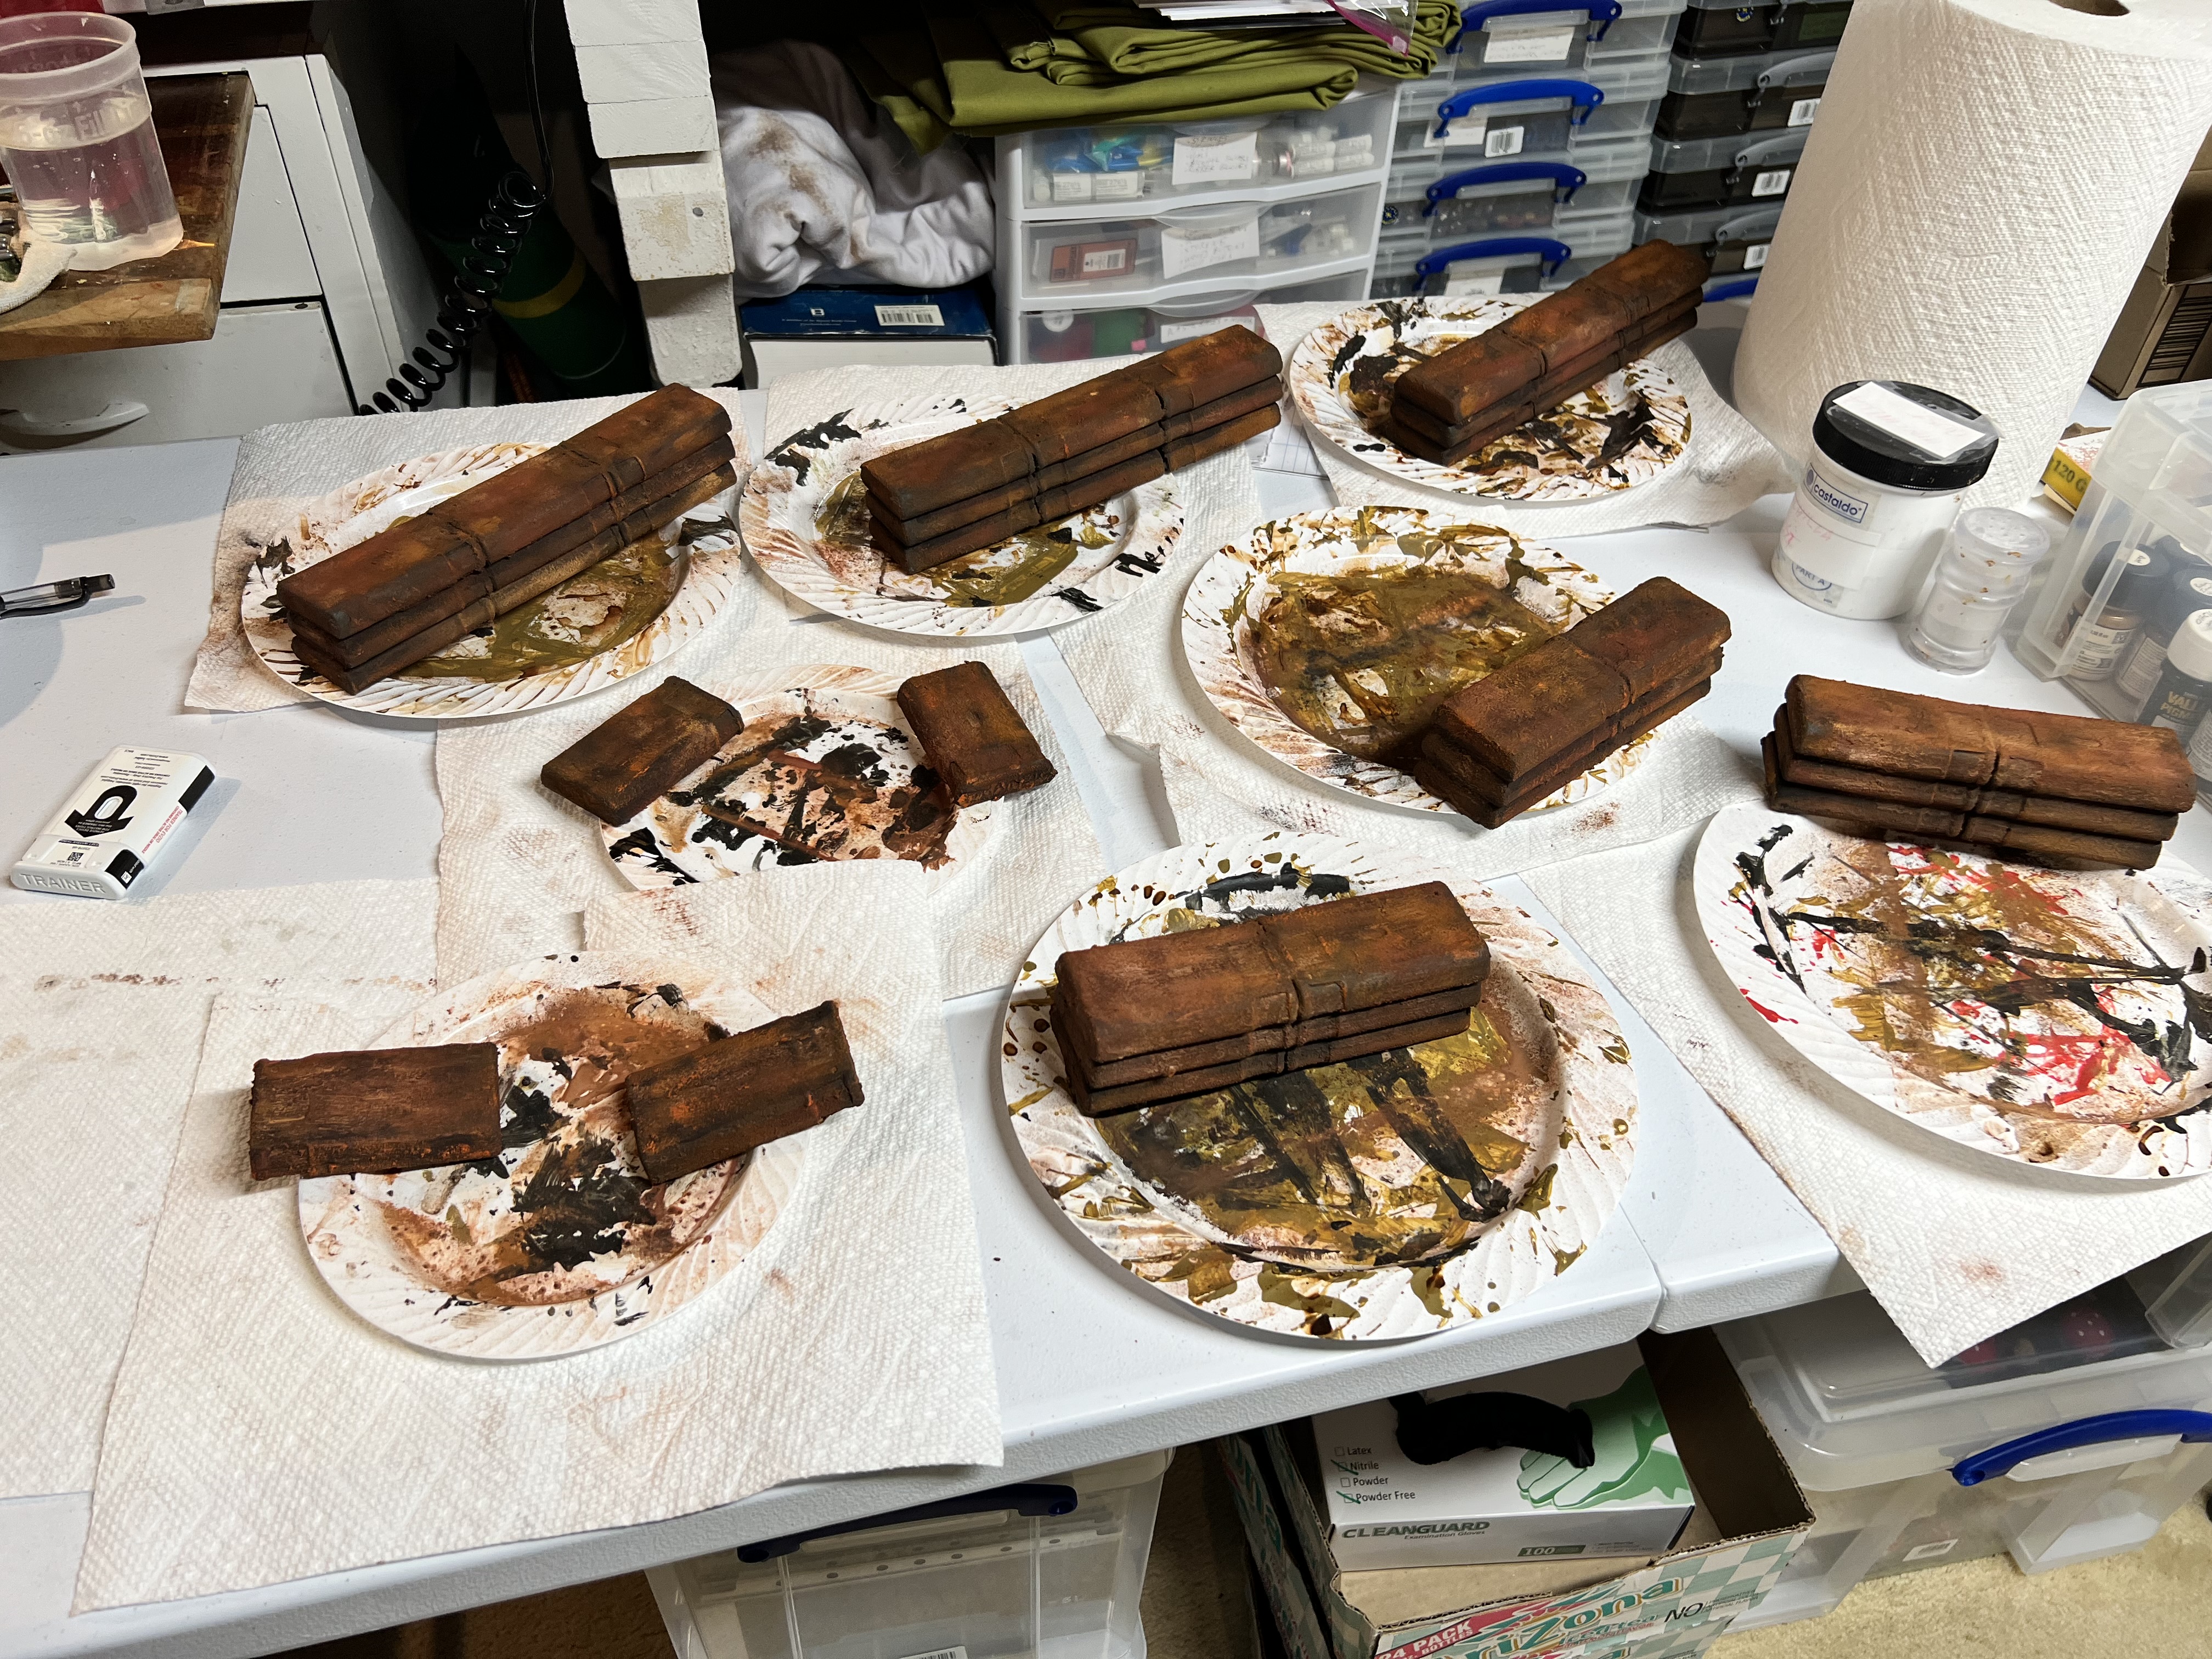
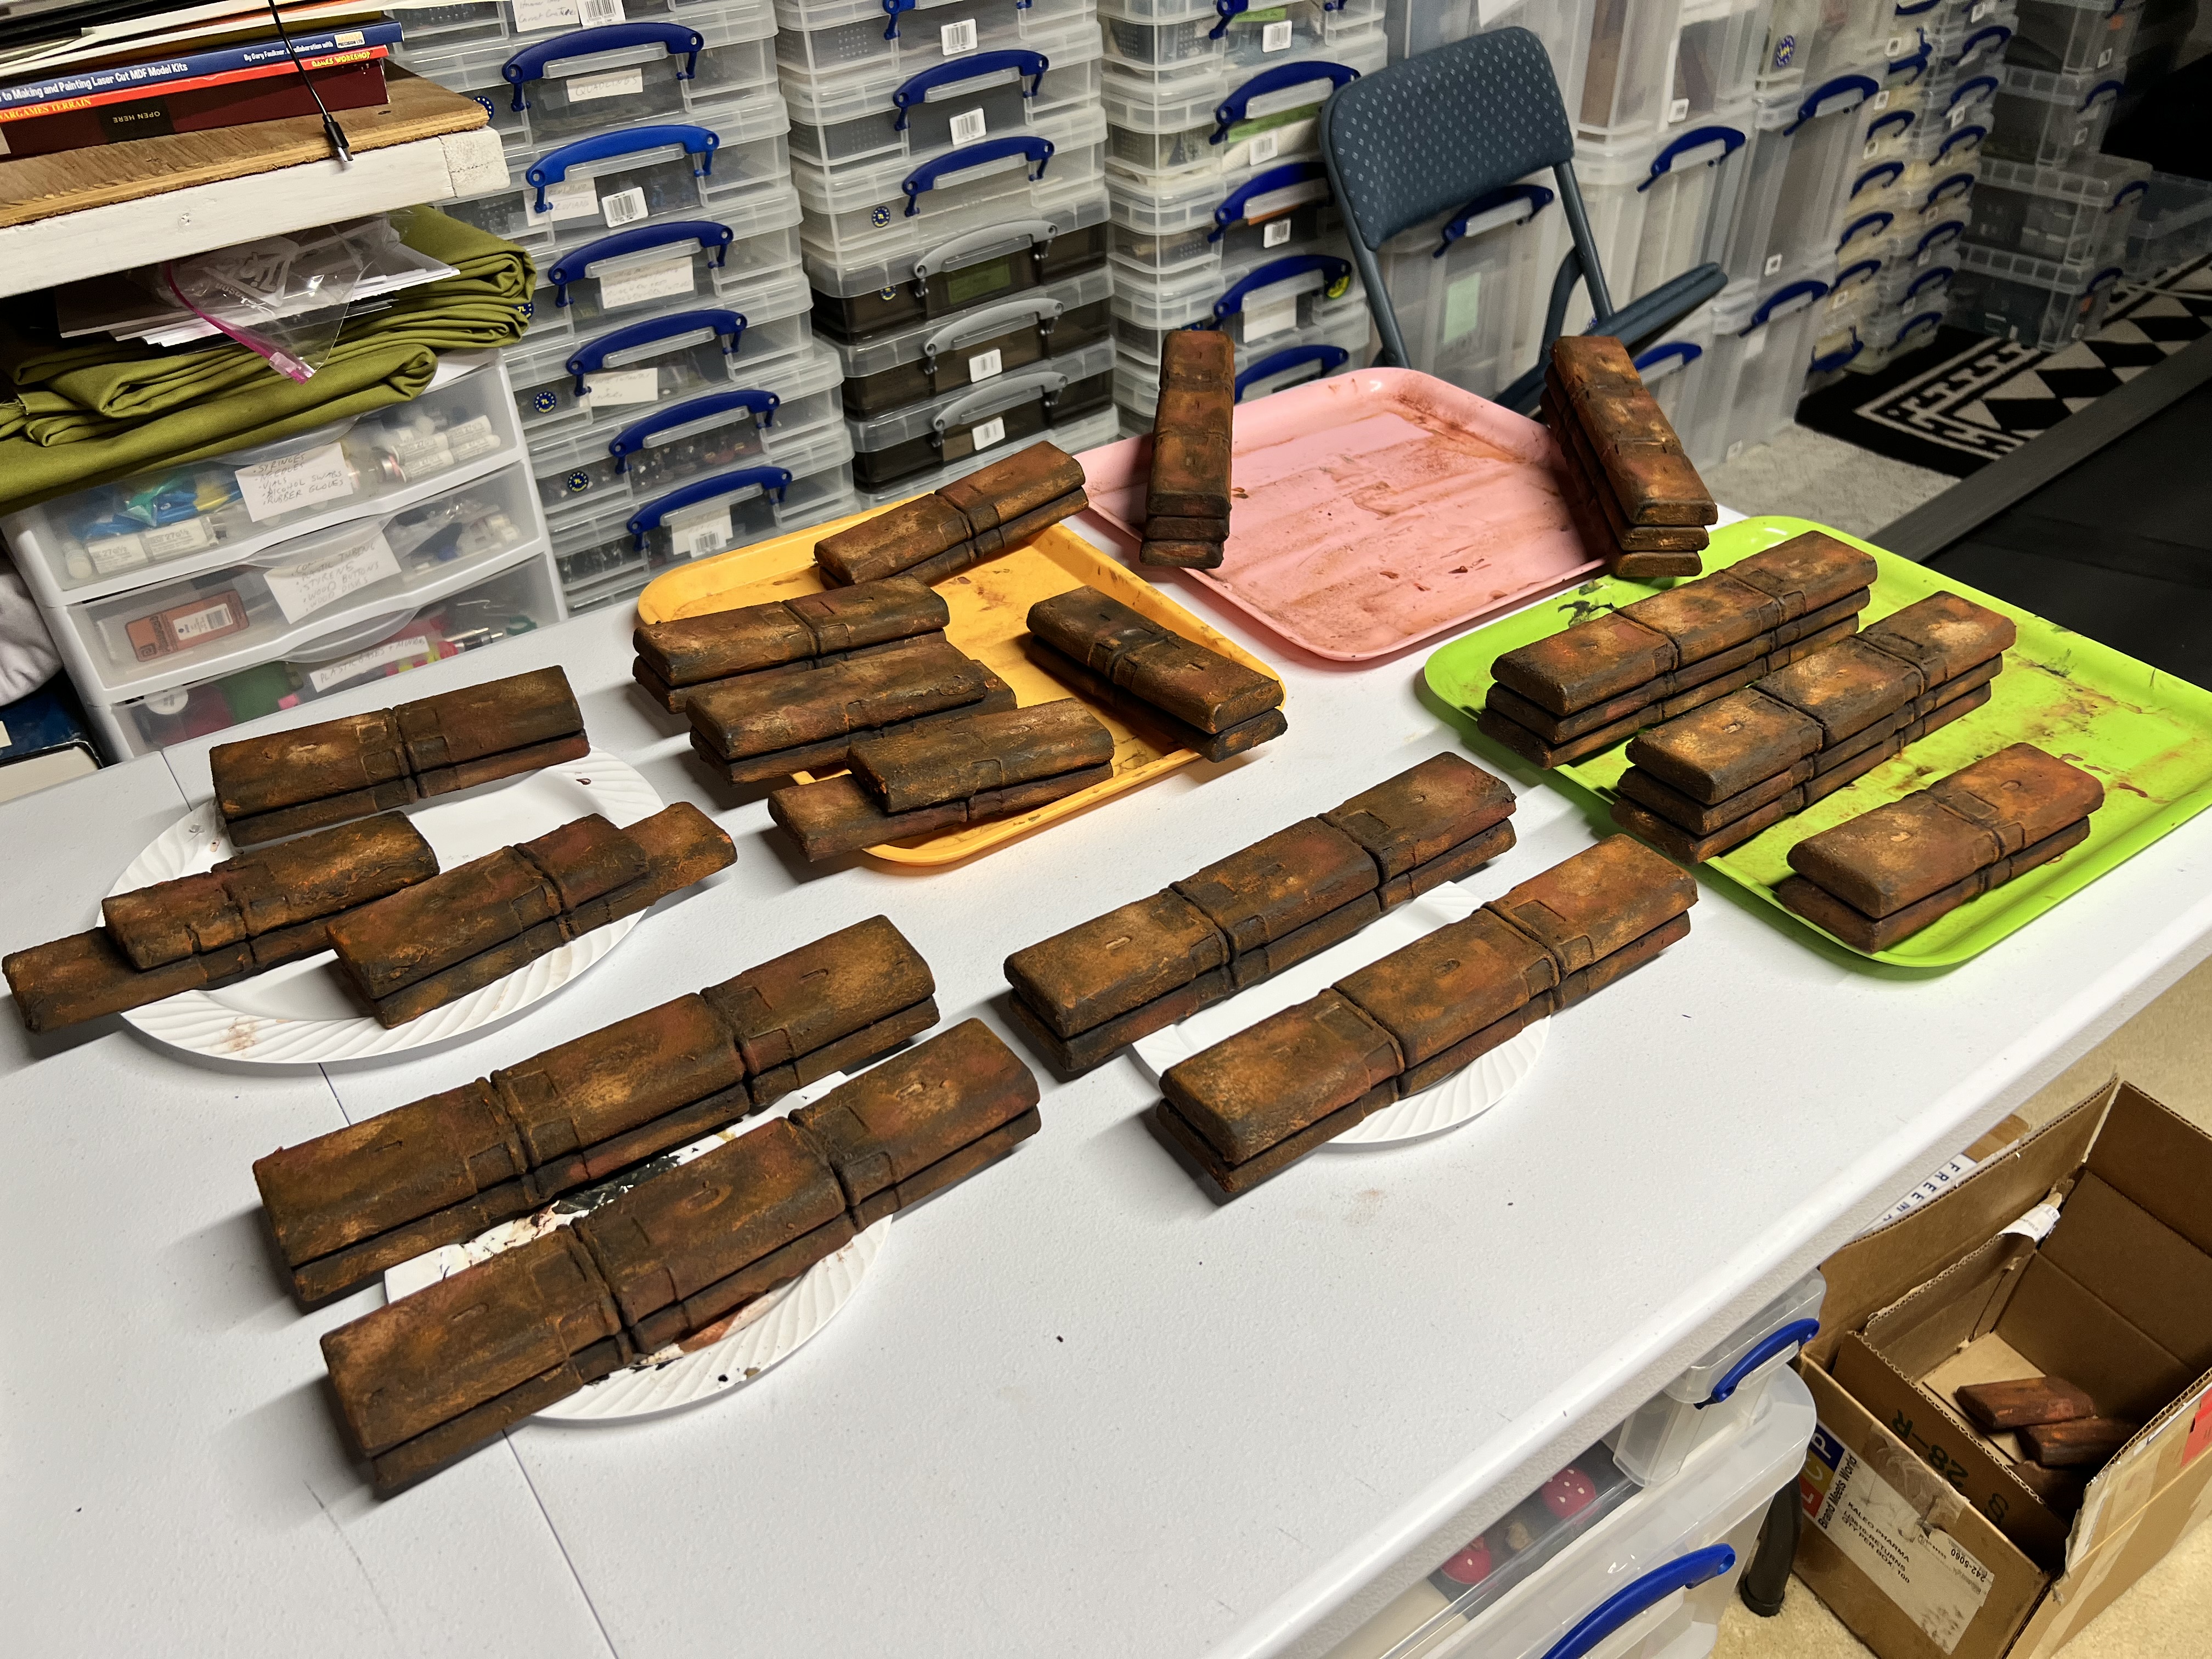
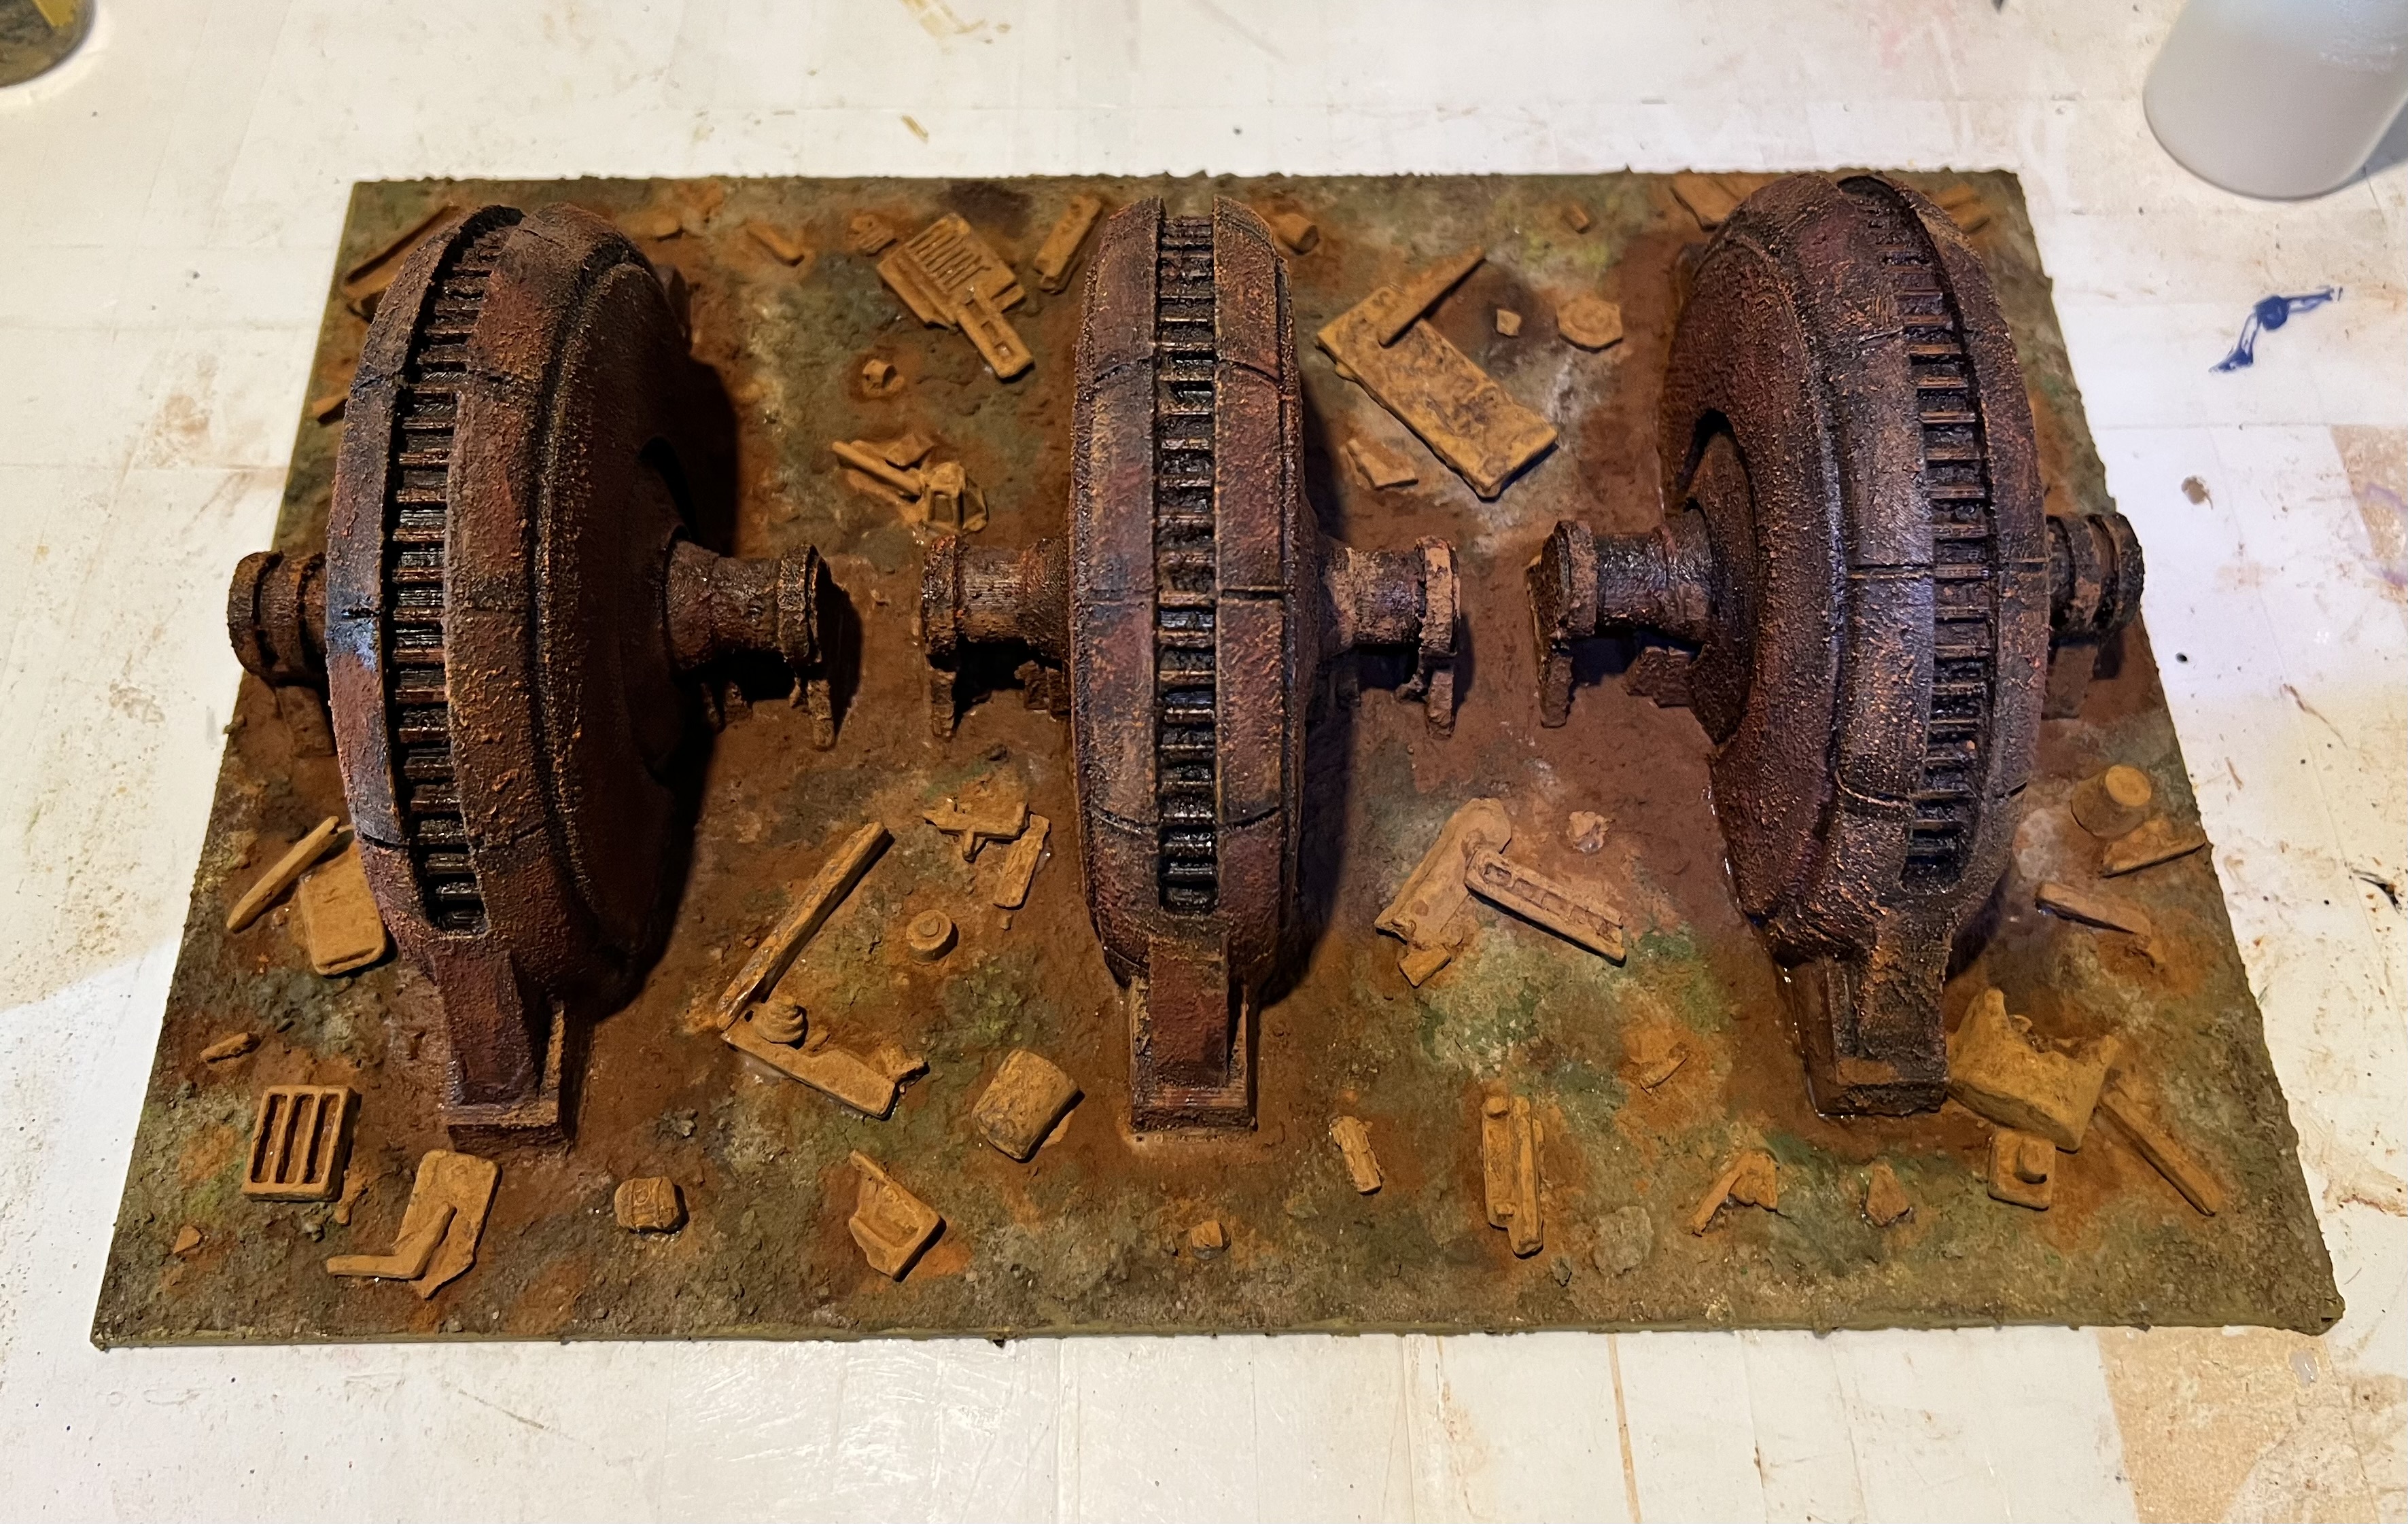
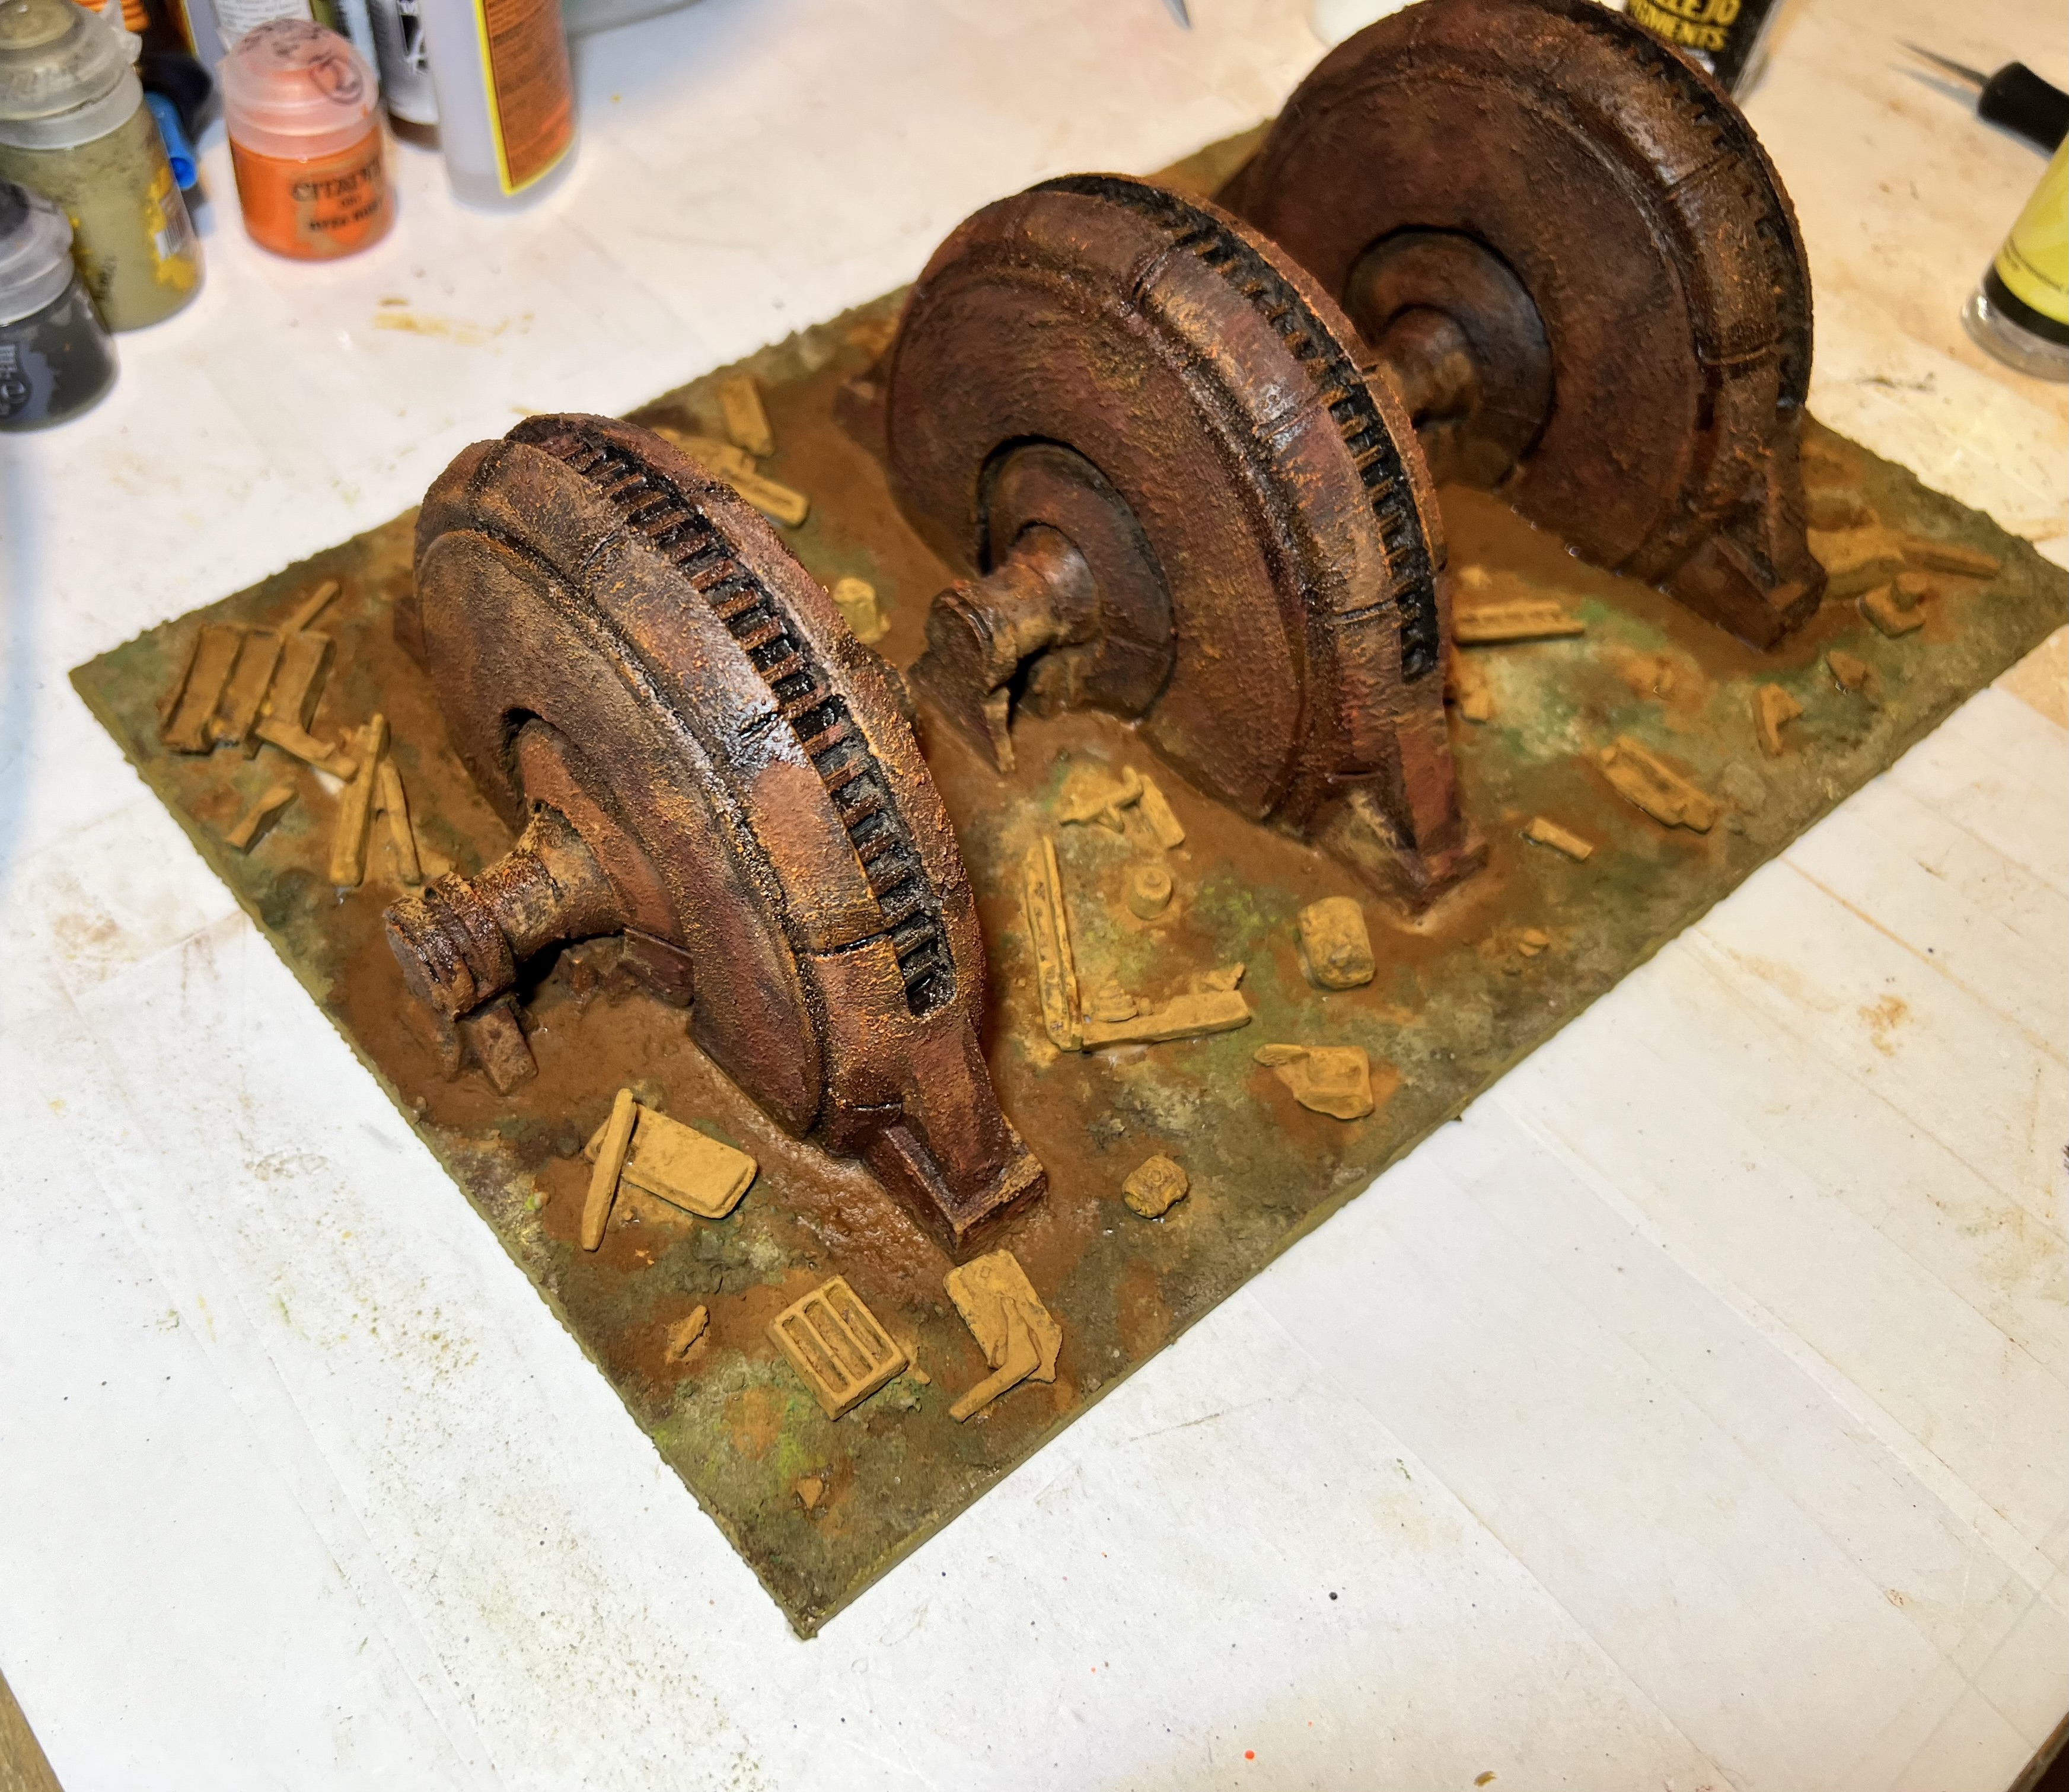
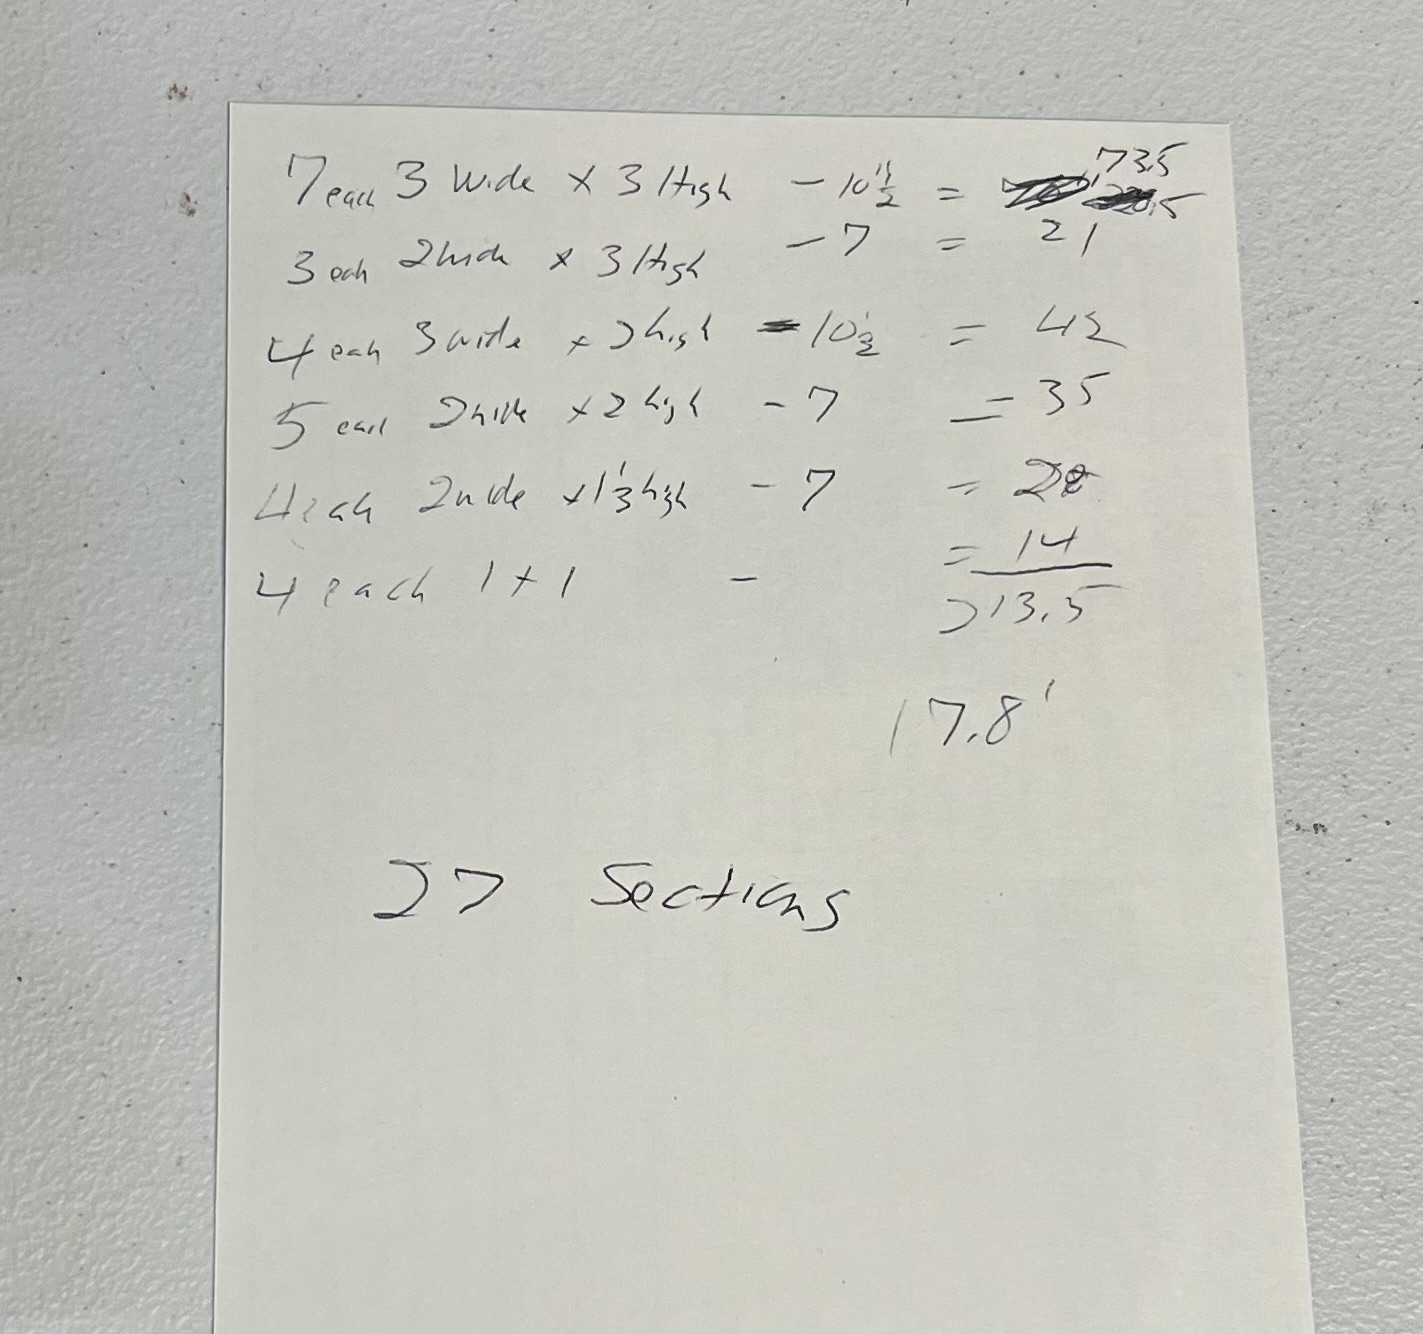
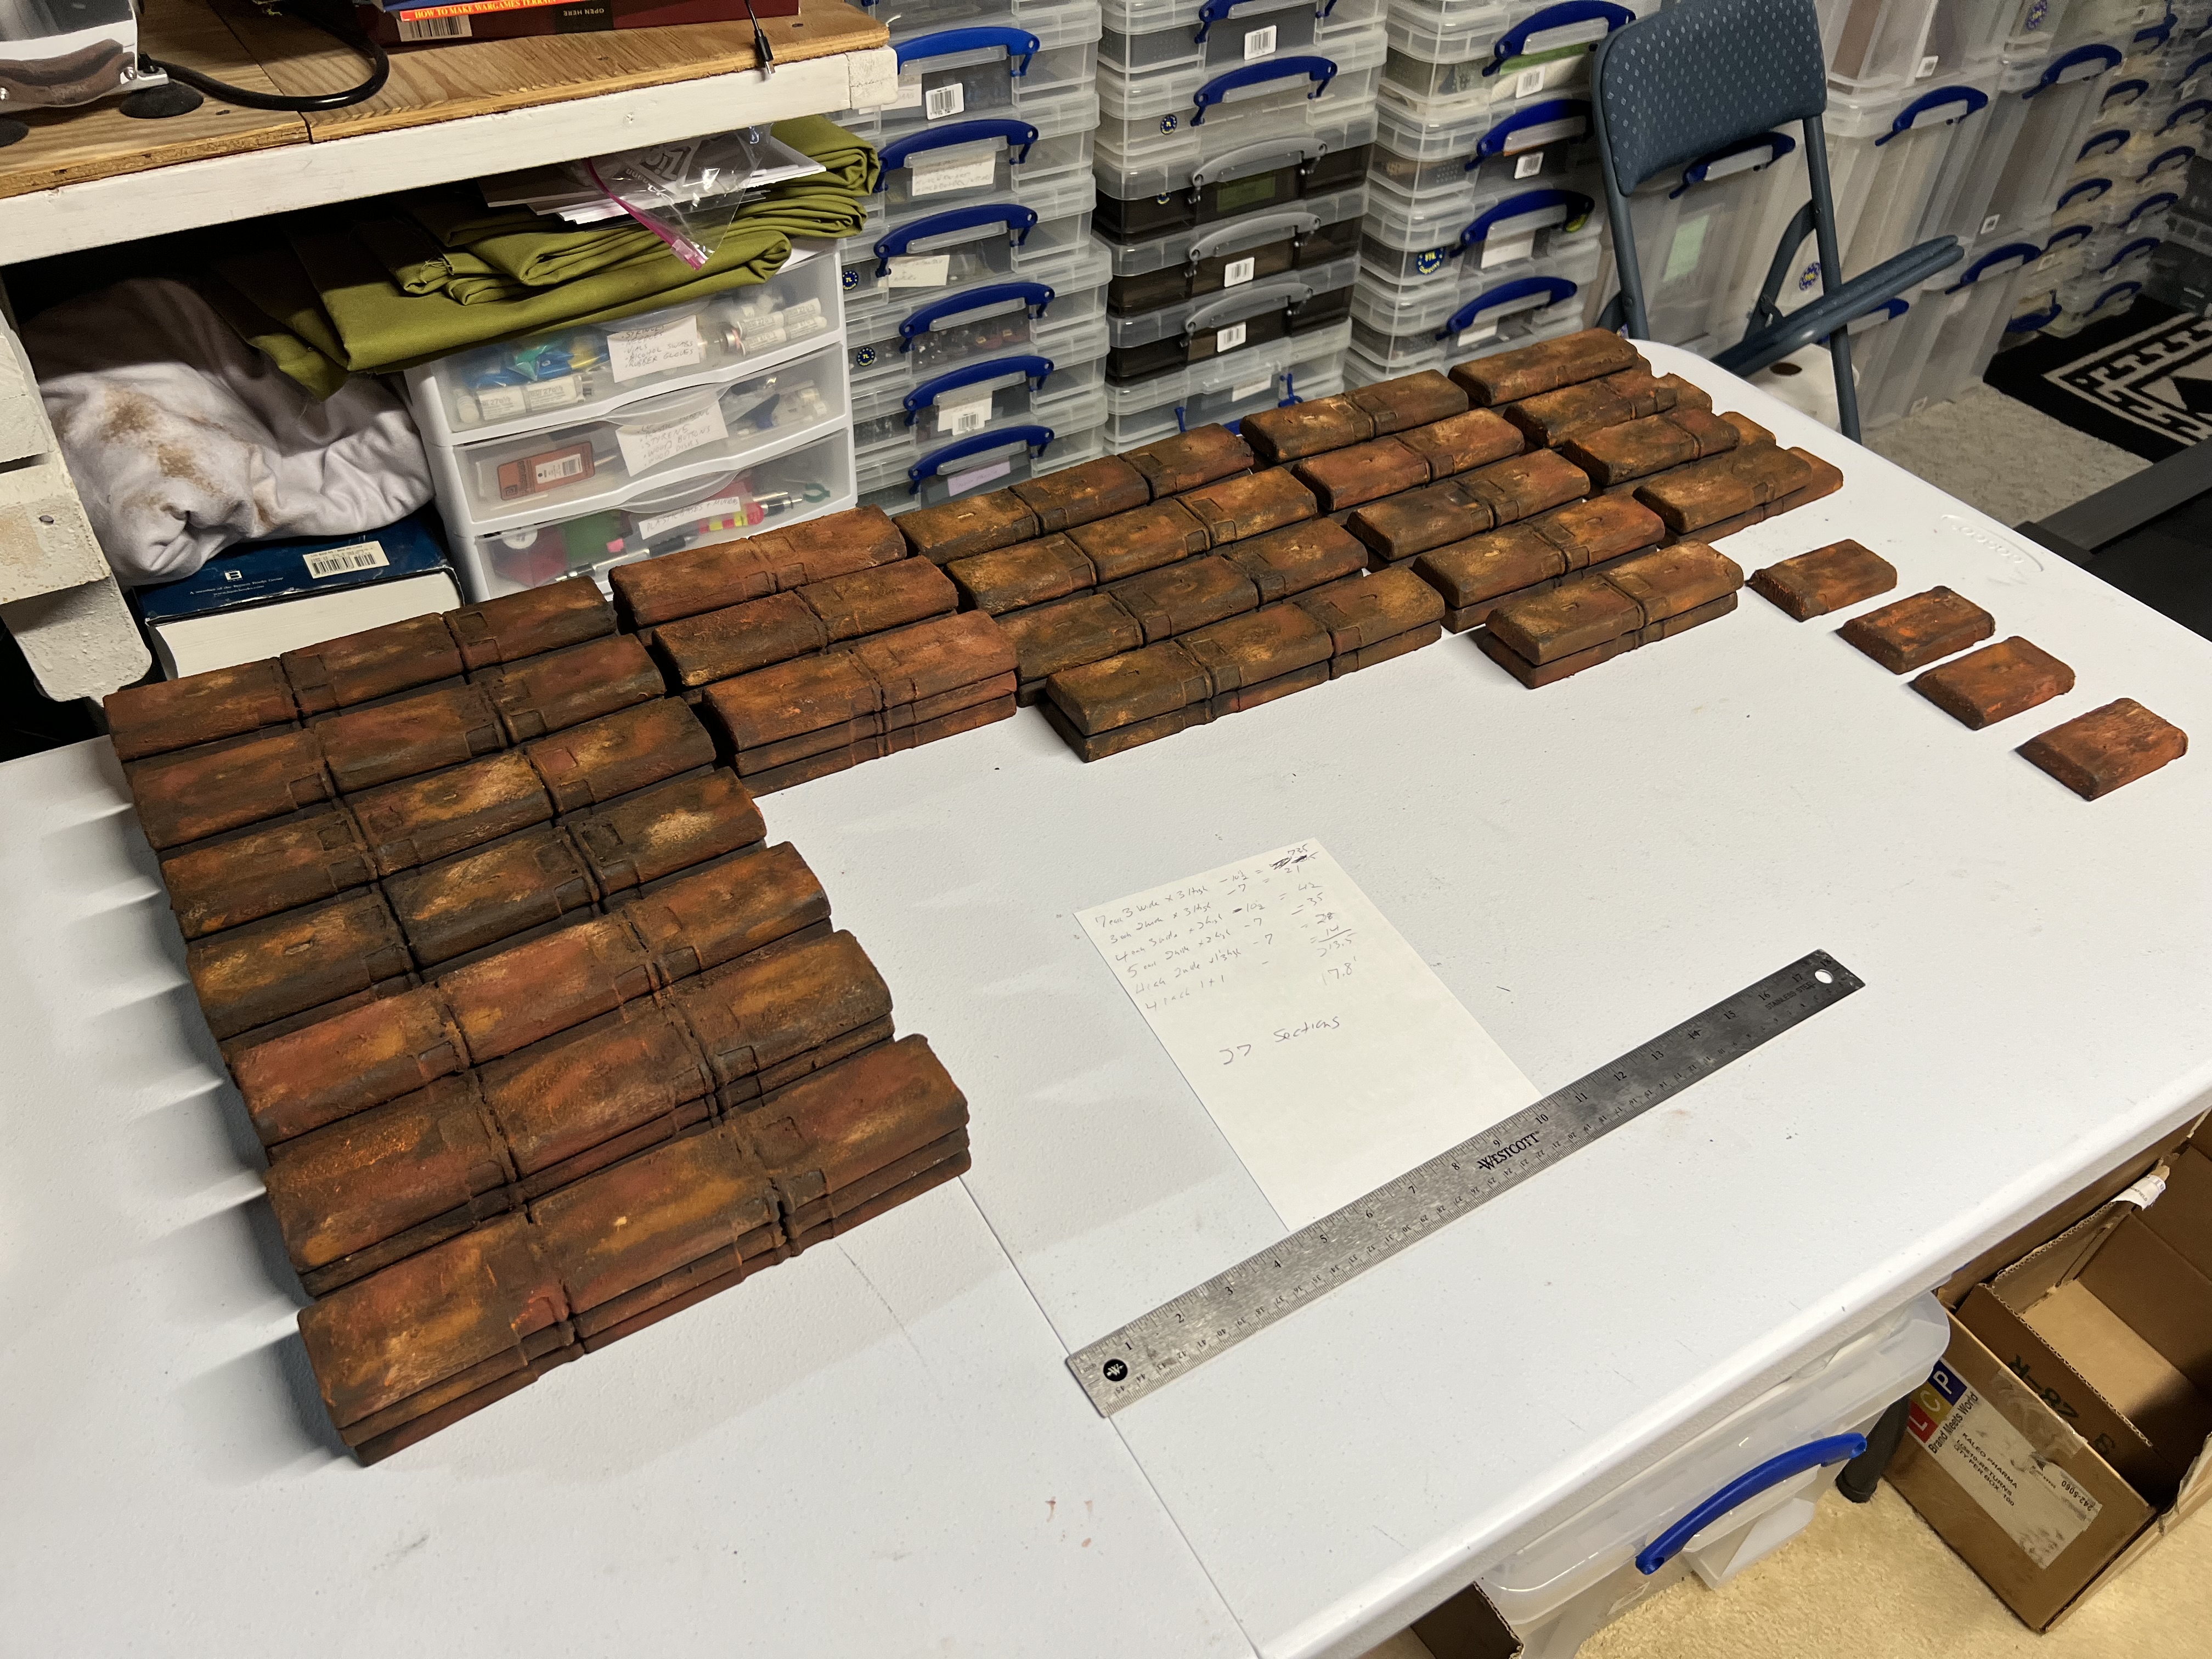
I ended up with 27 sections = a total of 17.8′ worth of rusty wall.

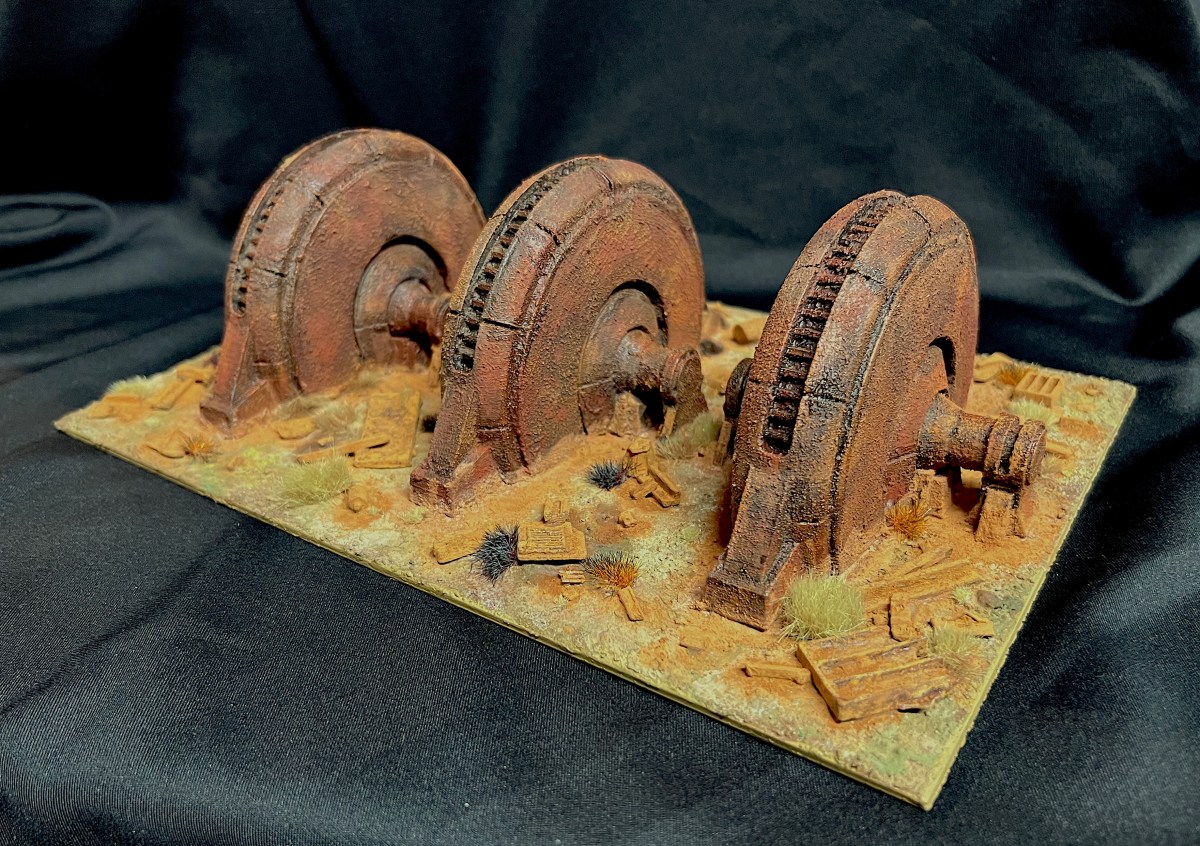
And here they are in total finished up mid-December.:

27 sections of rusty walls!

With the walls done, it was time to get some verticality for the tabletop. And get them done BEFORE Christmas.

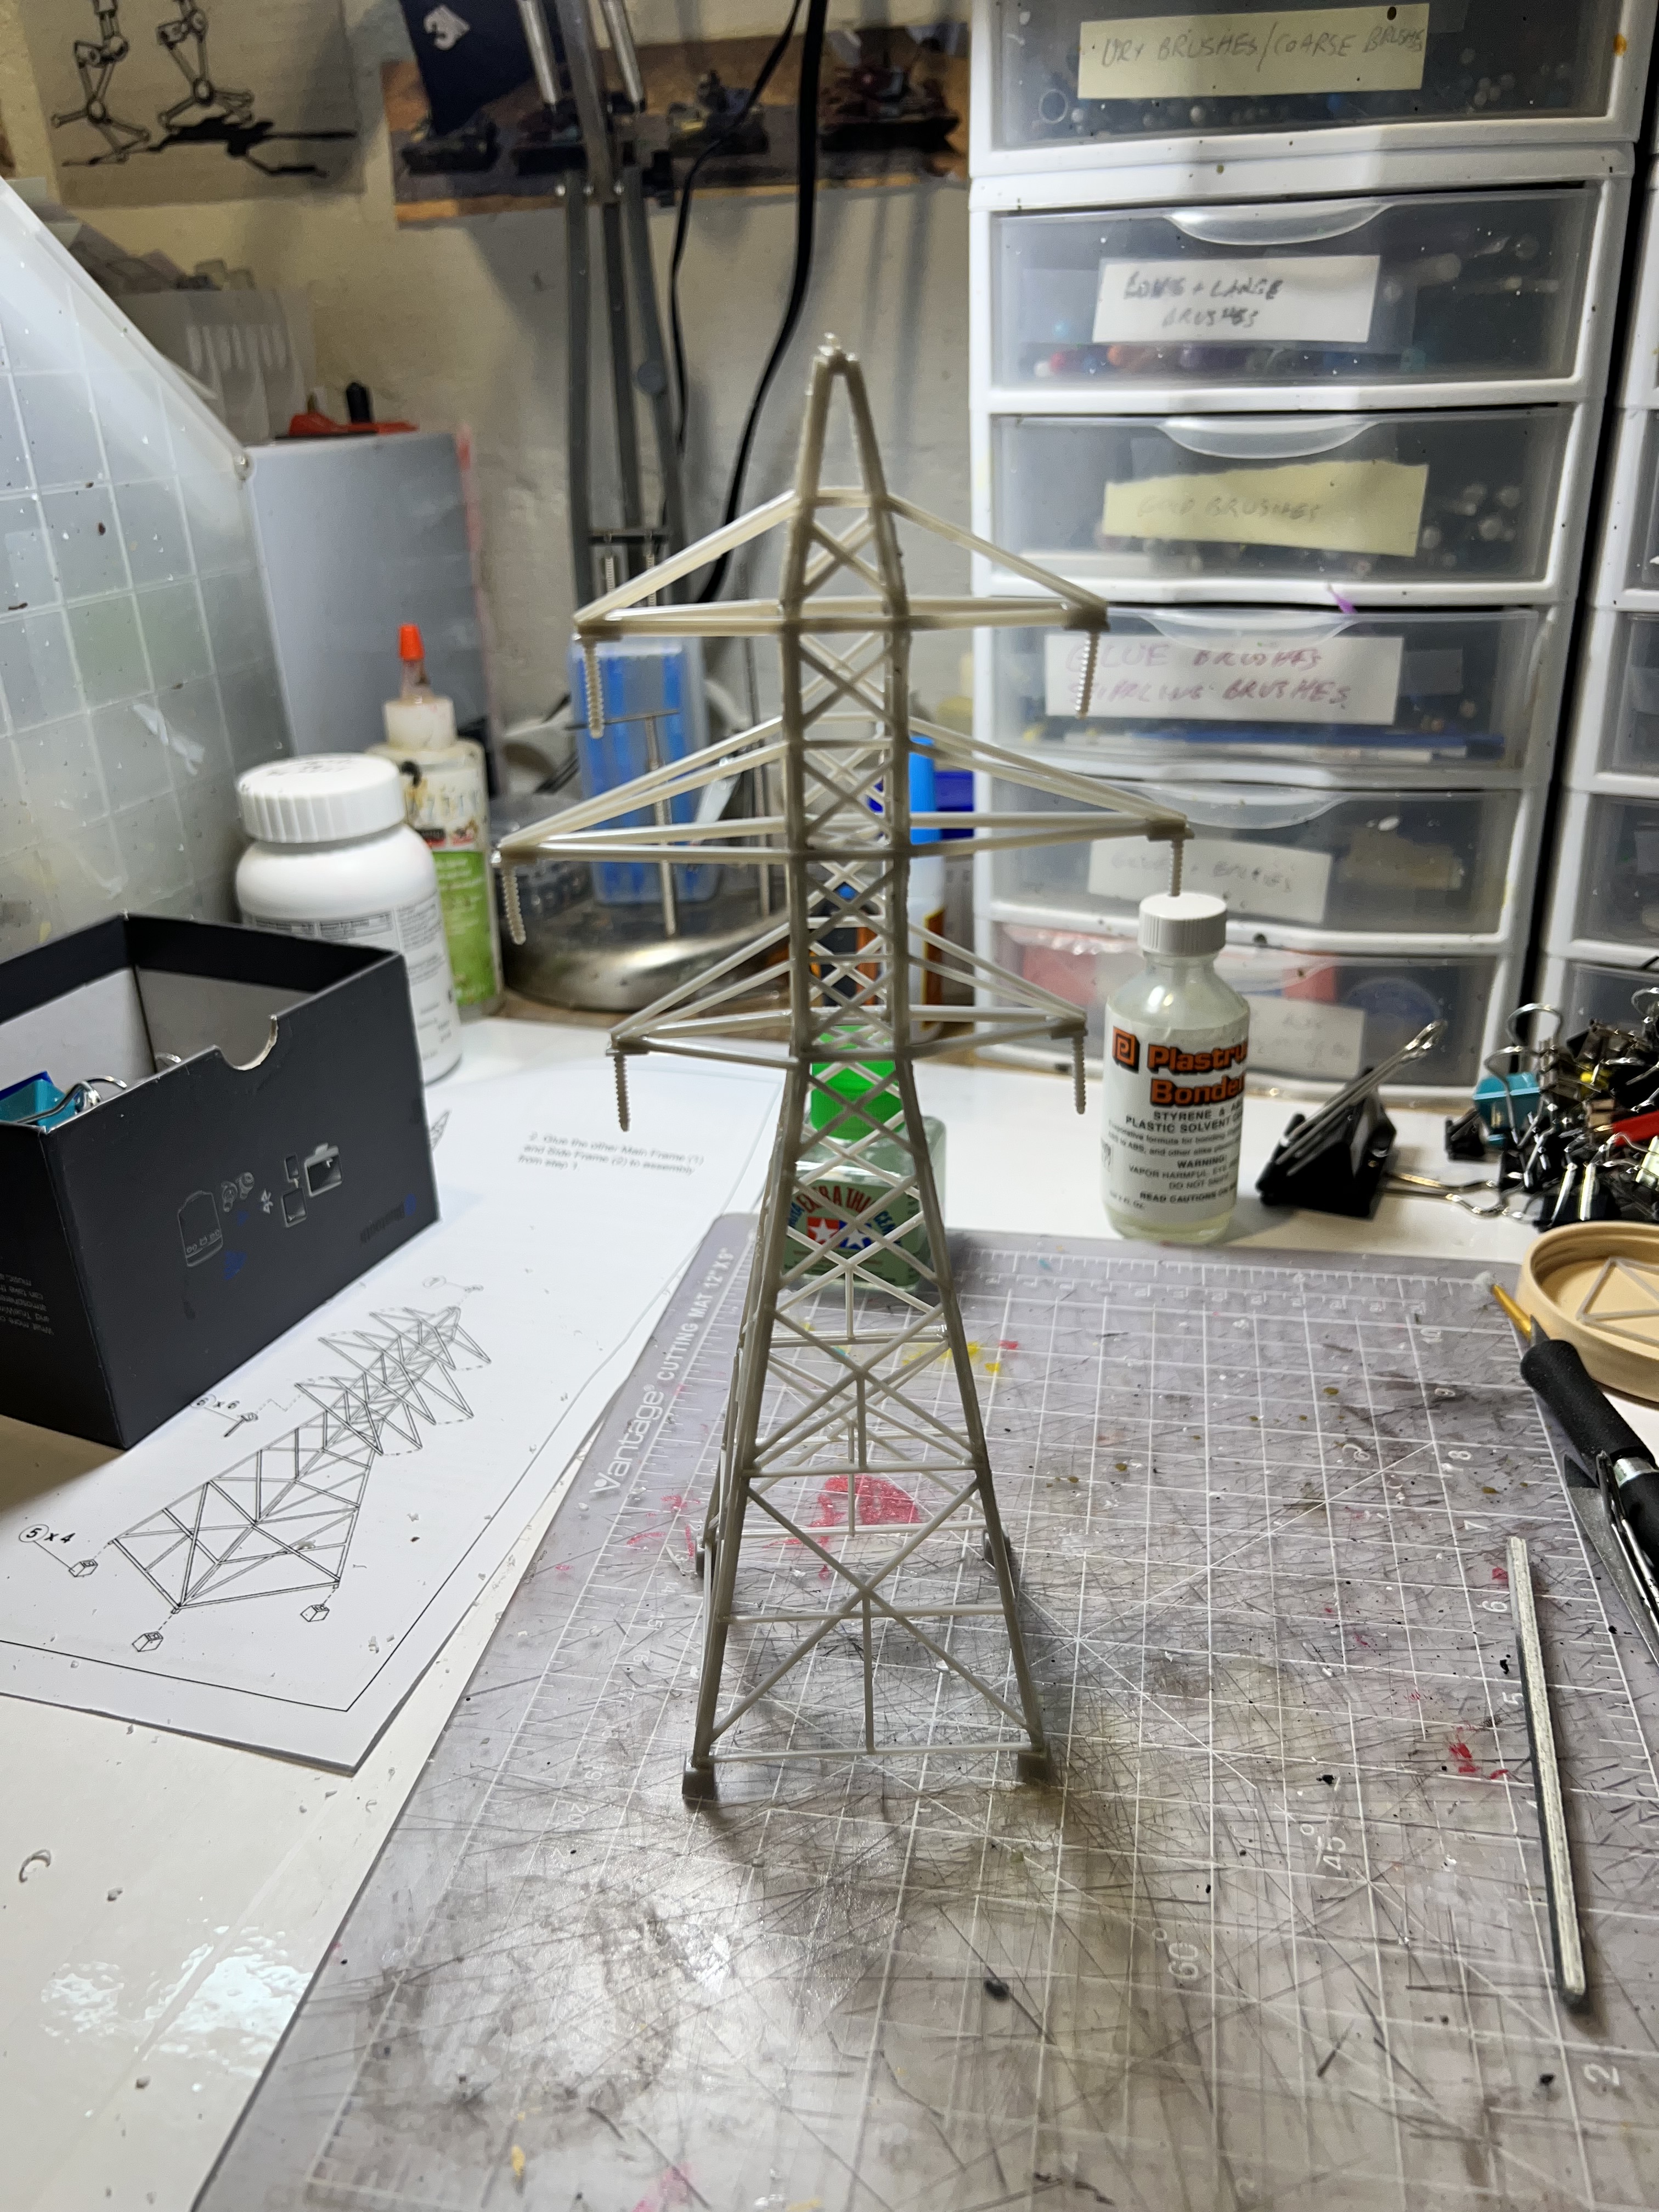
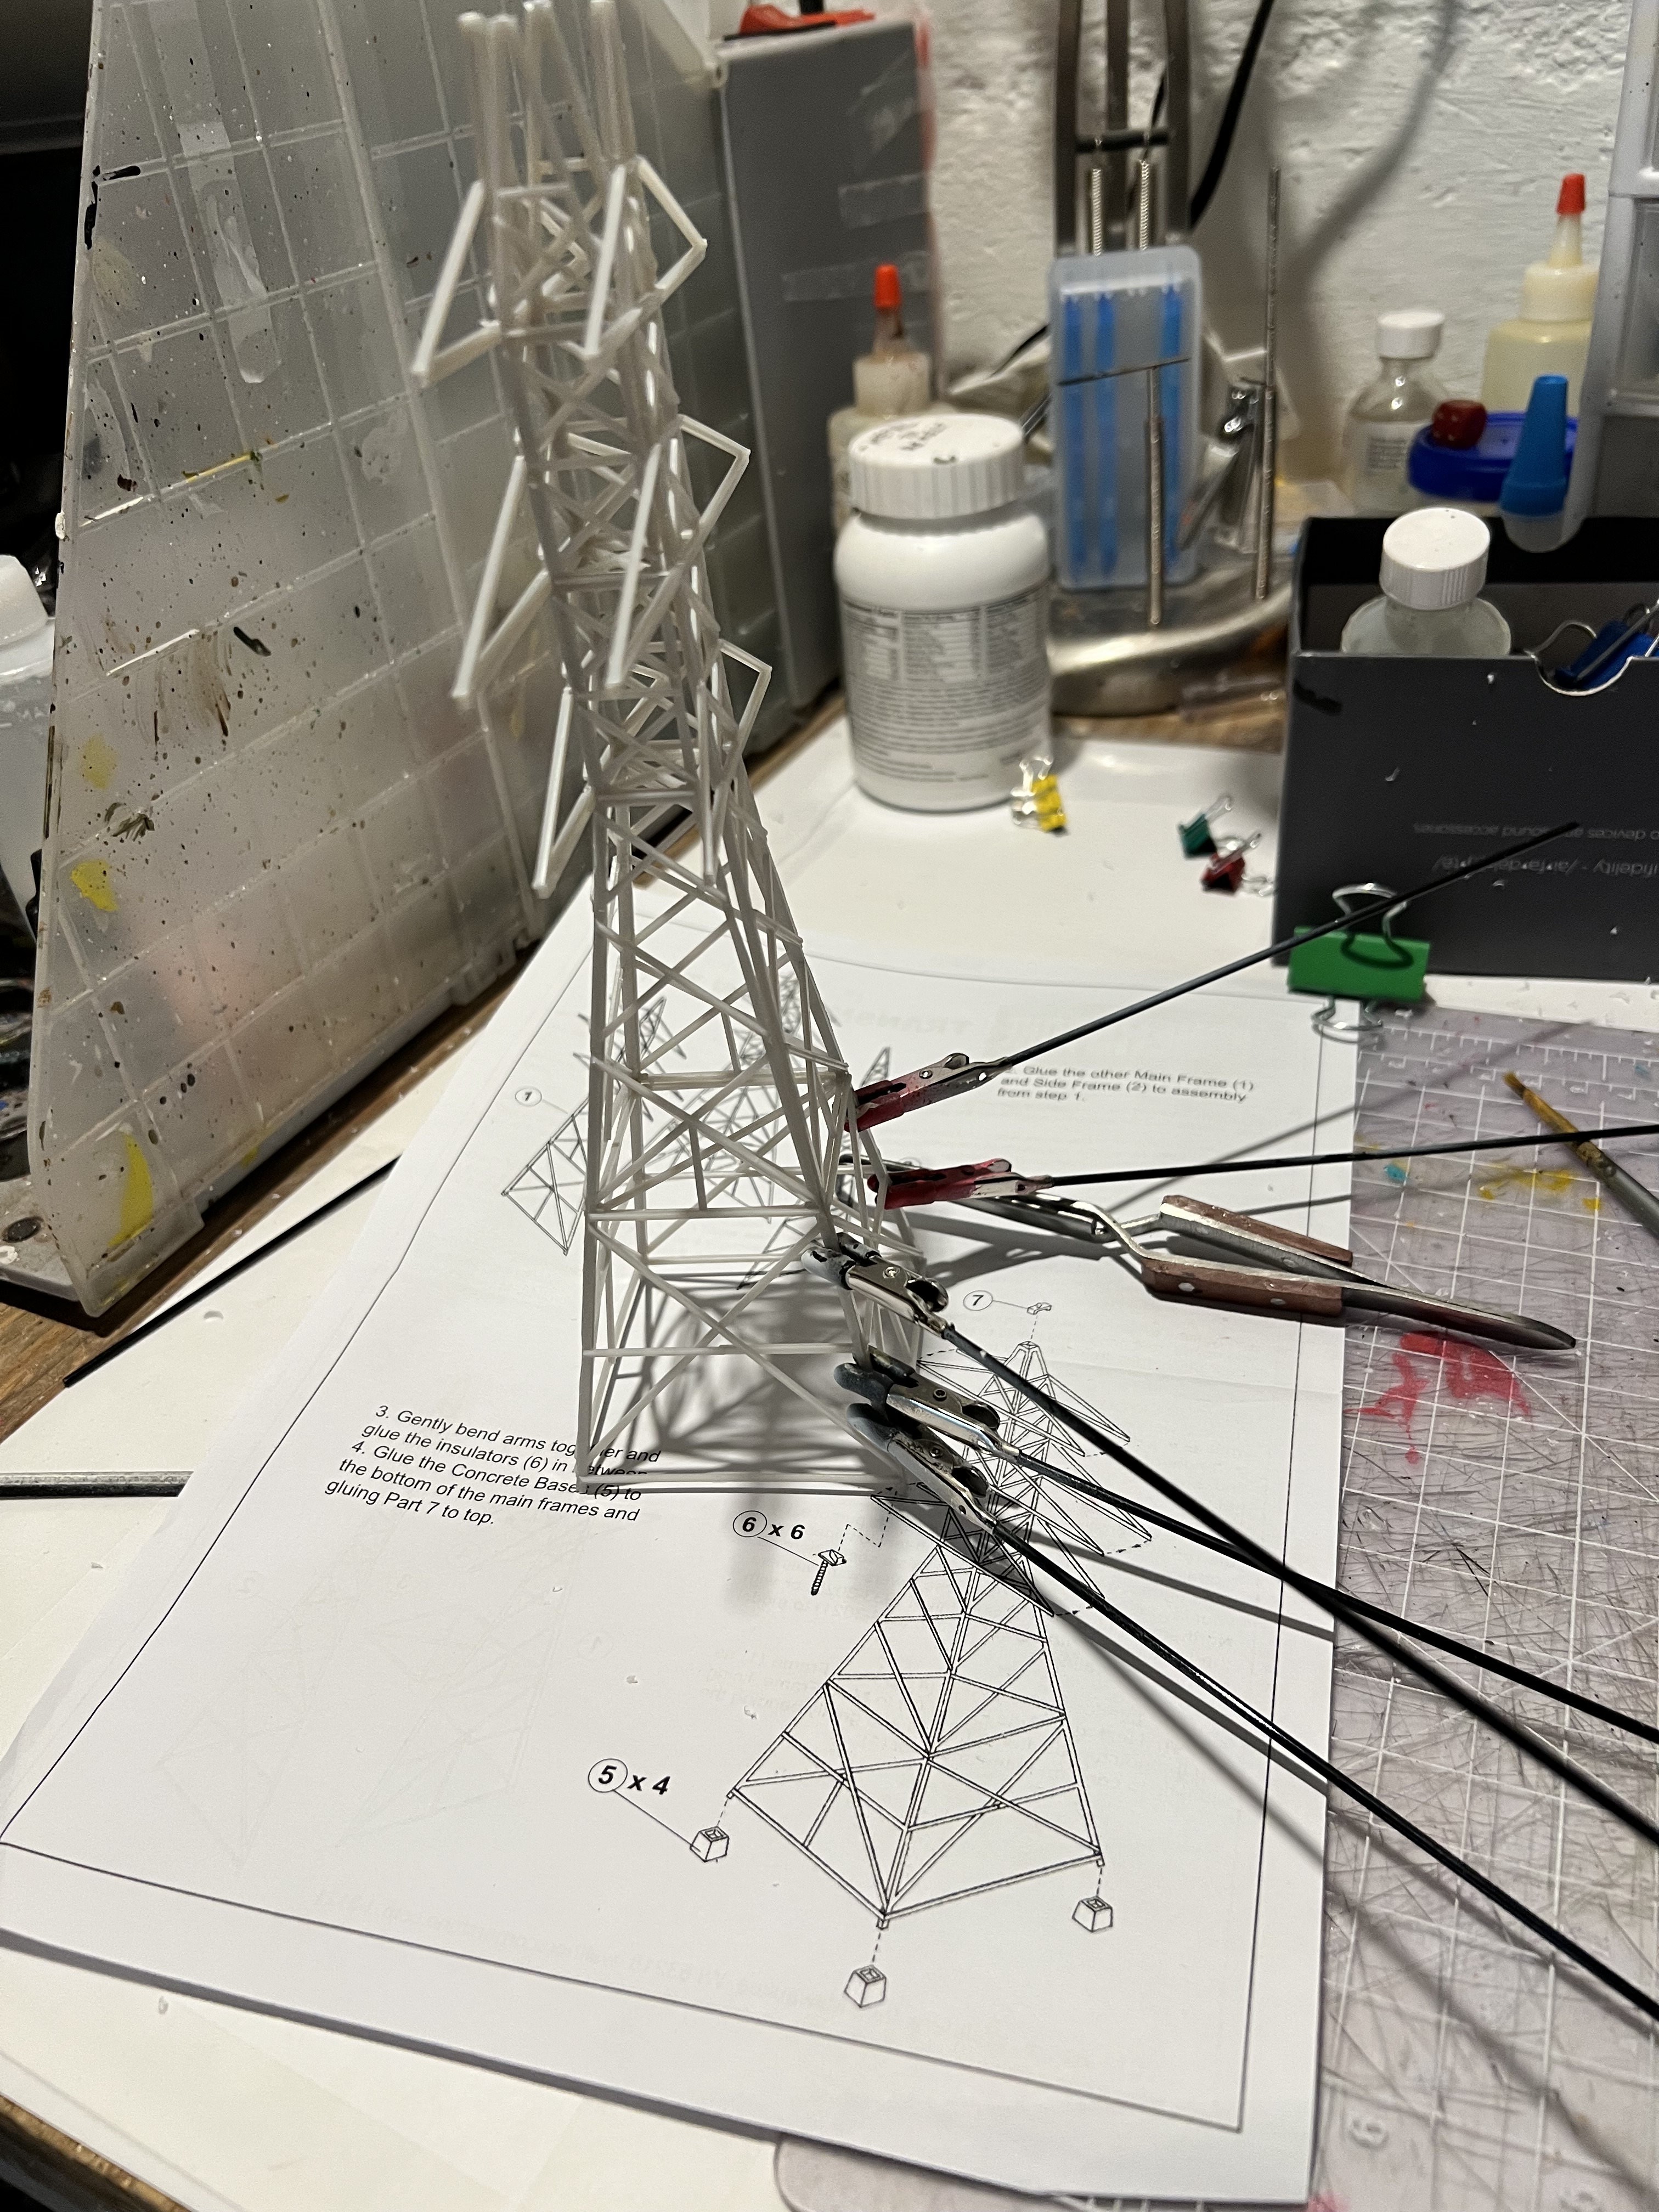
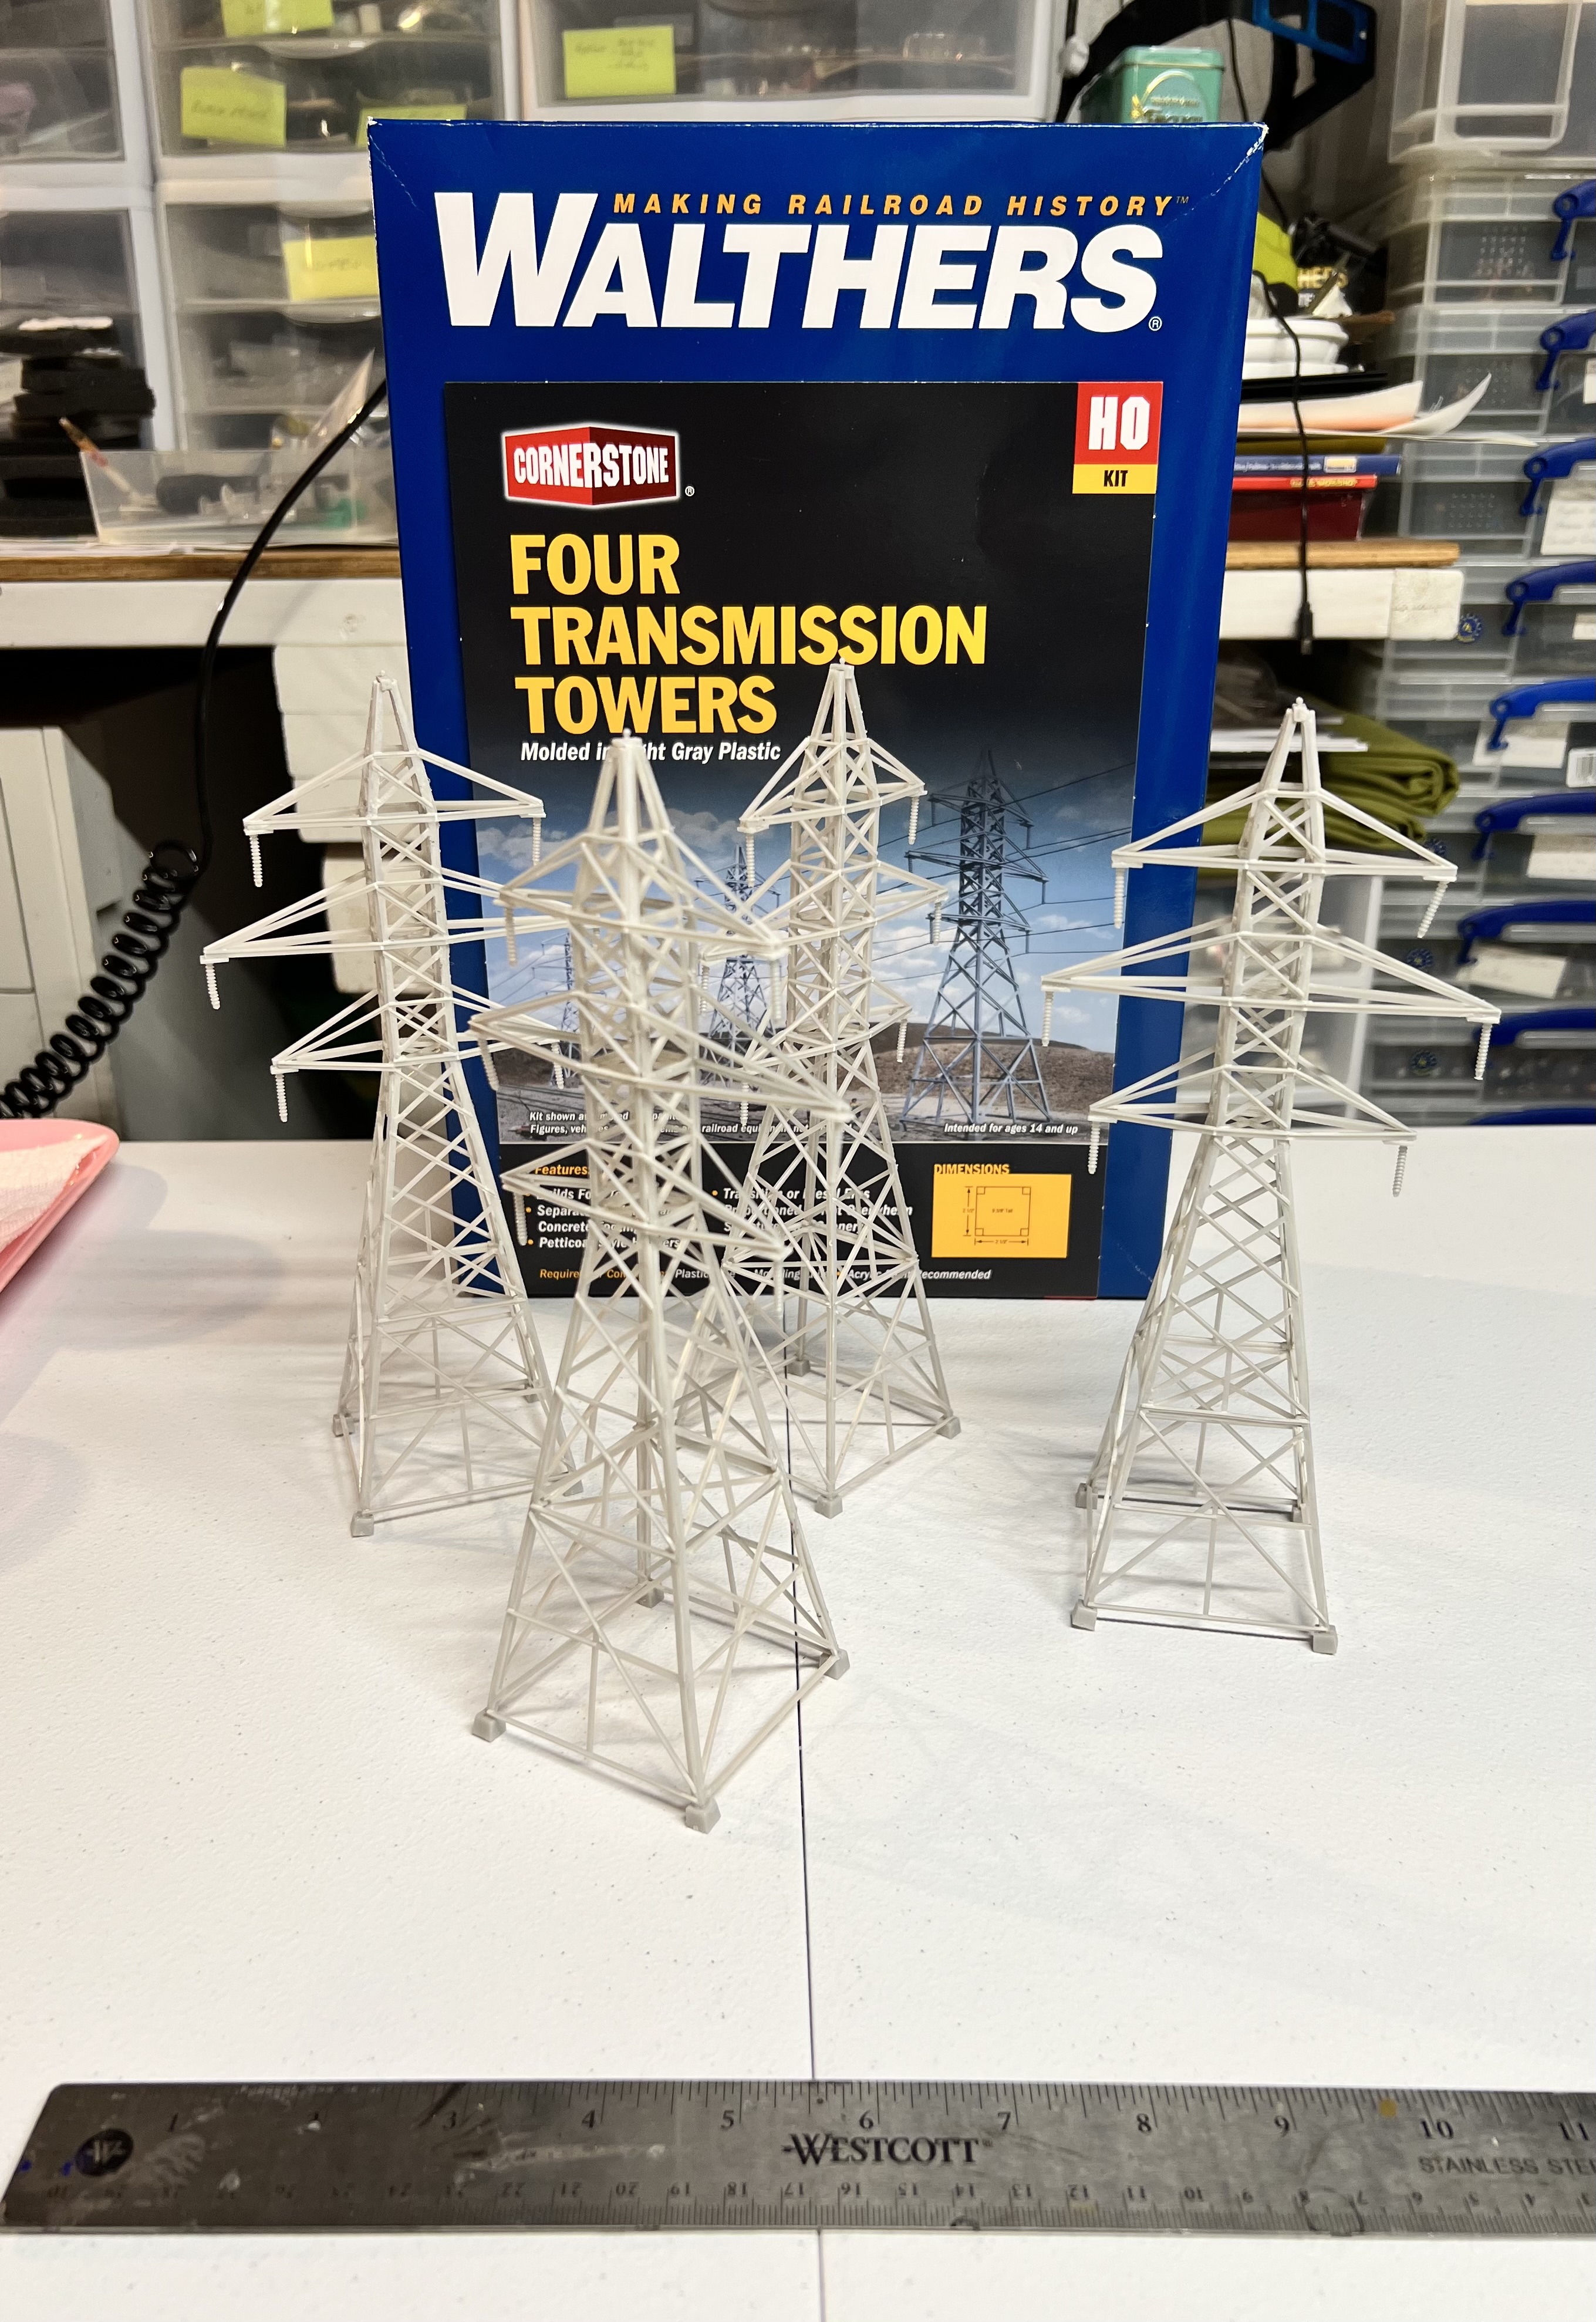
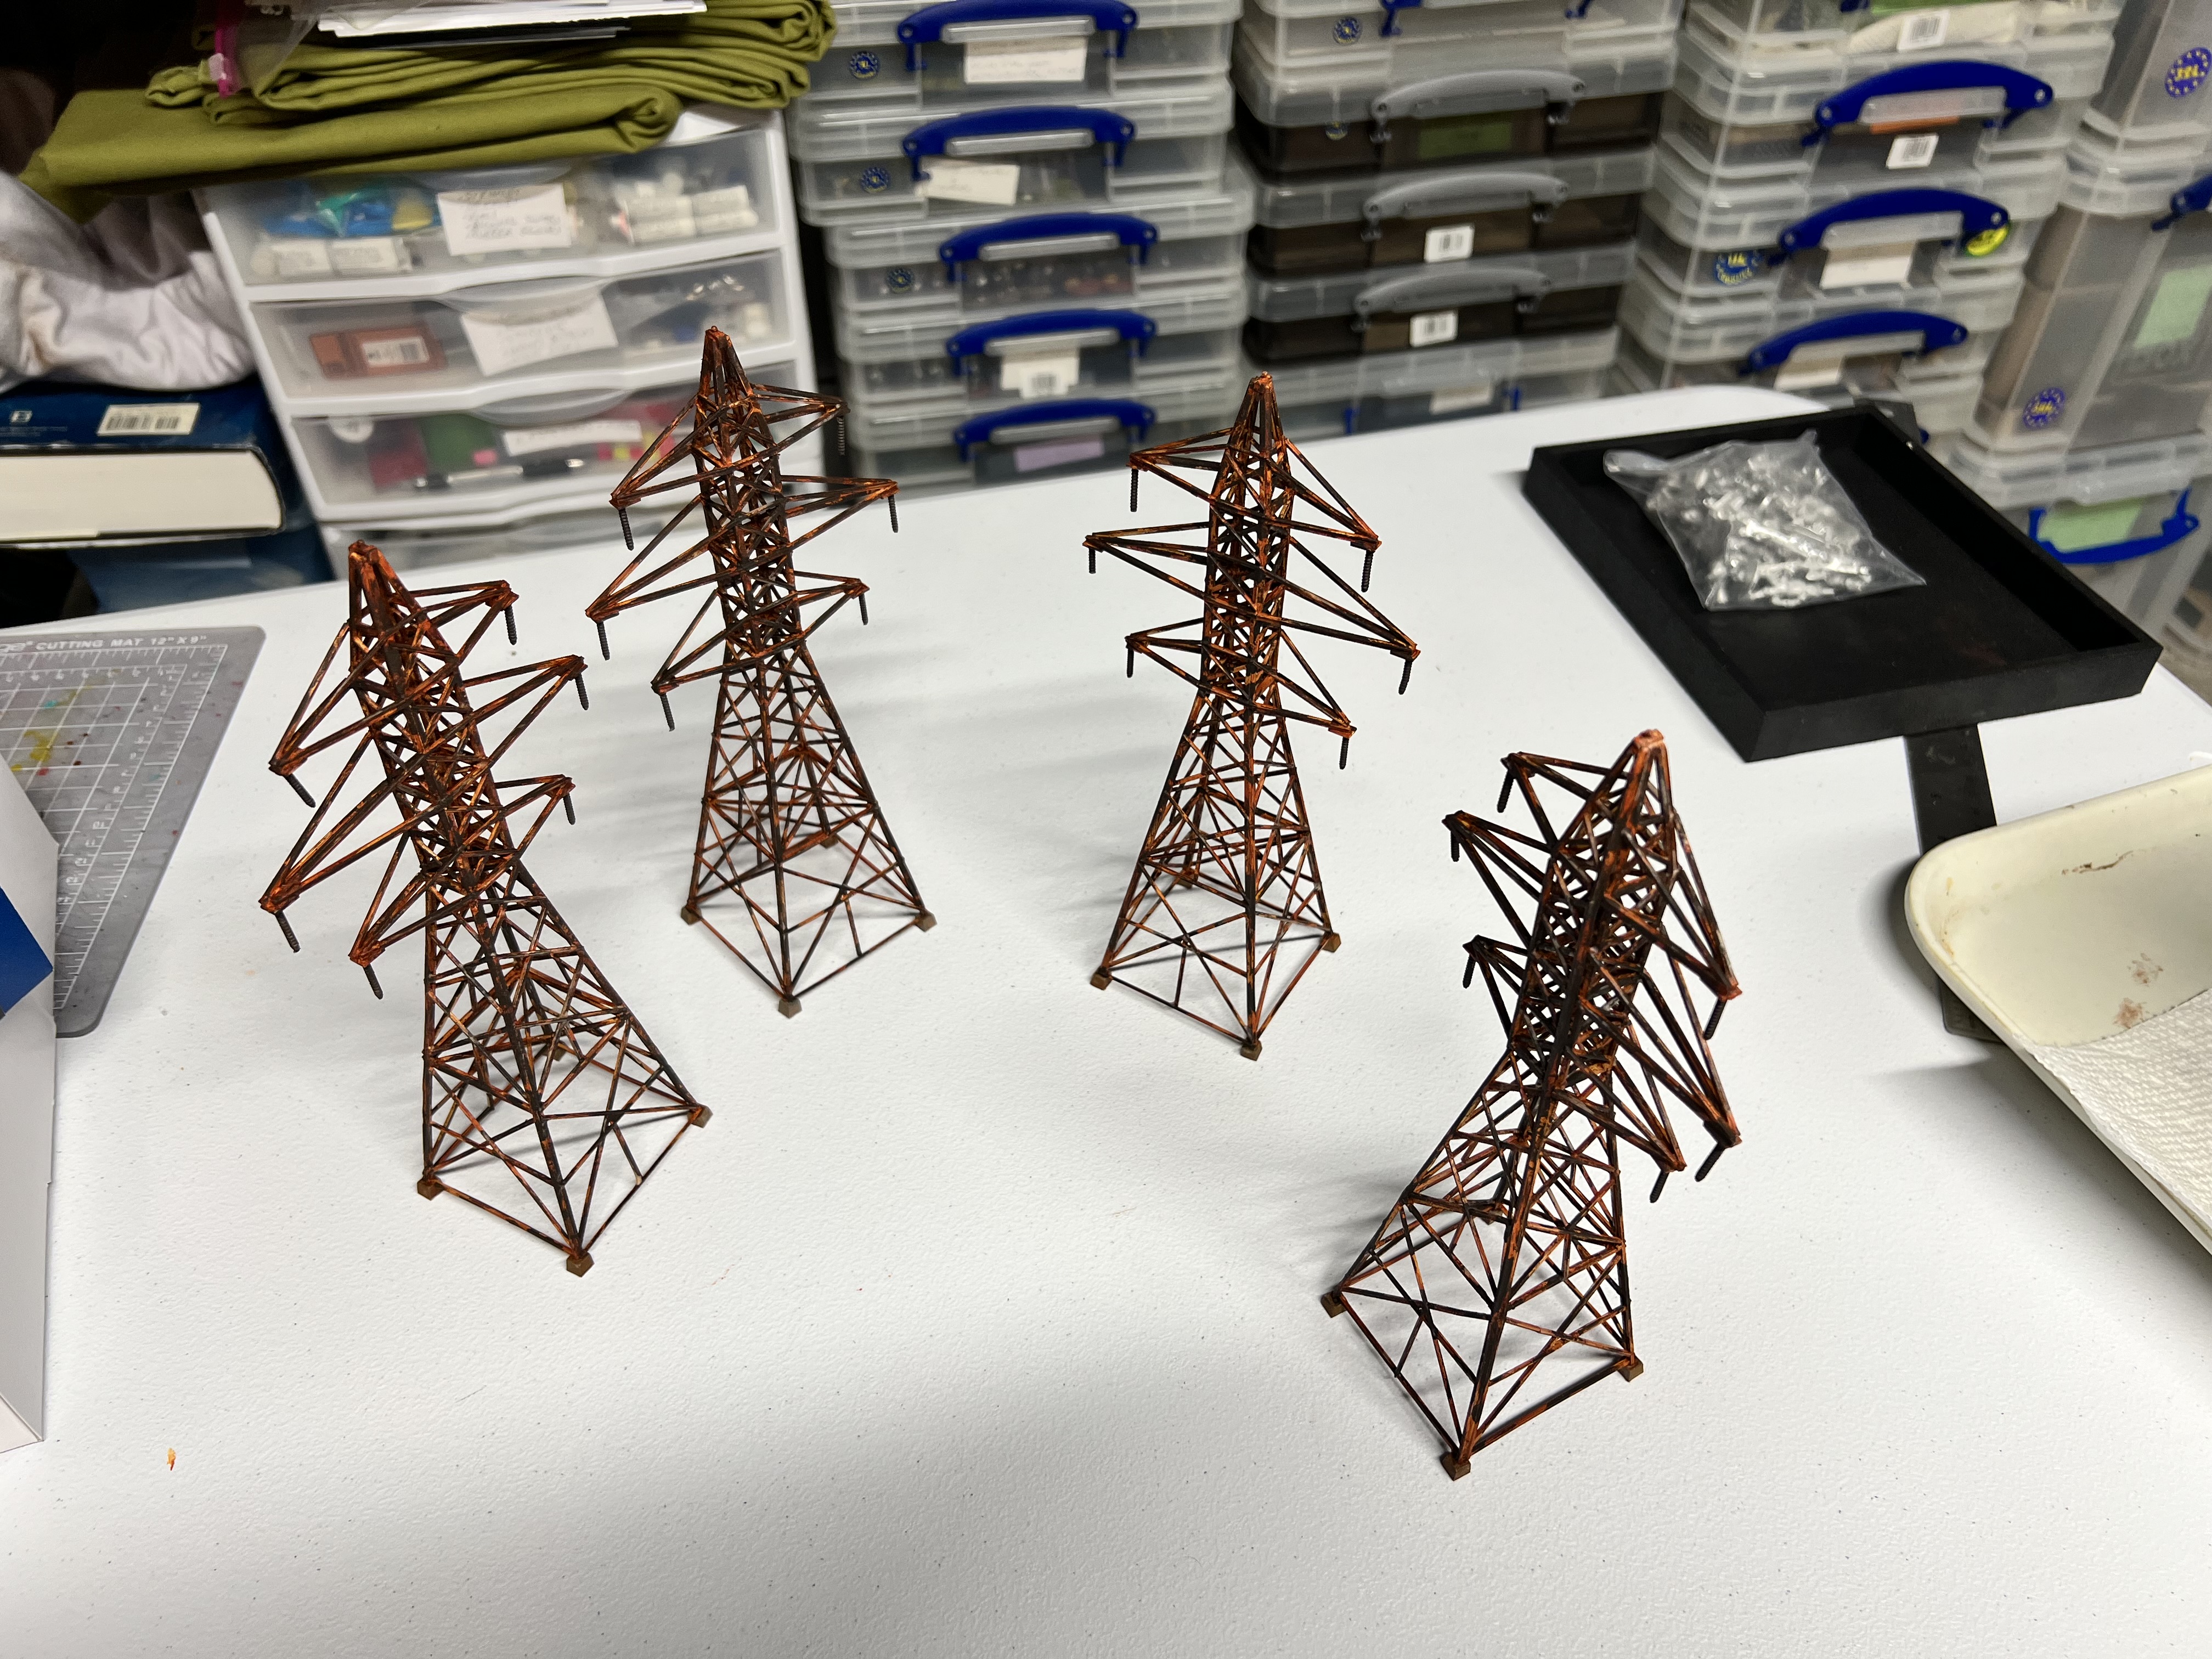
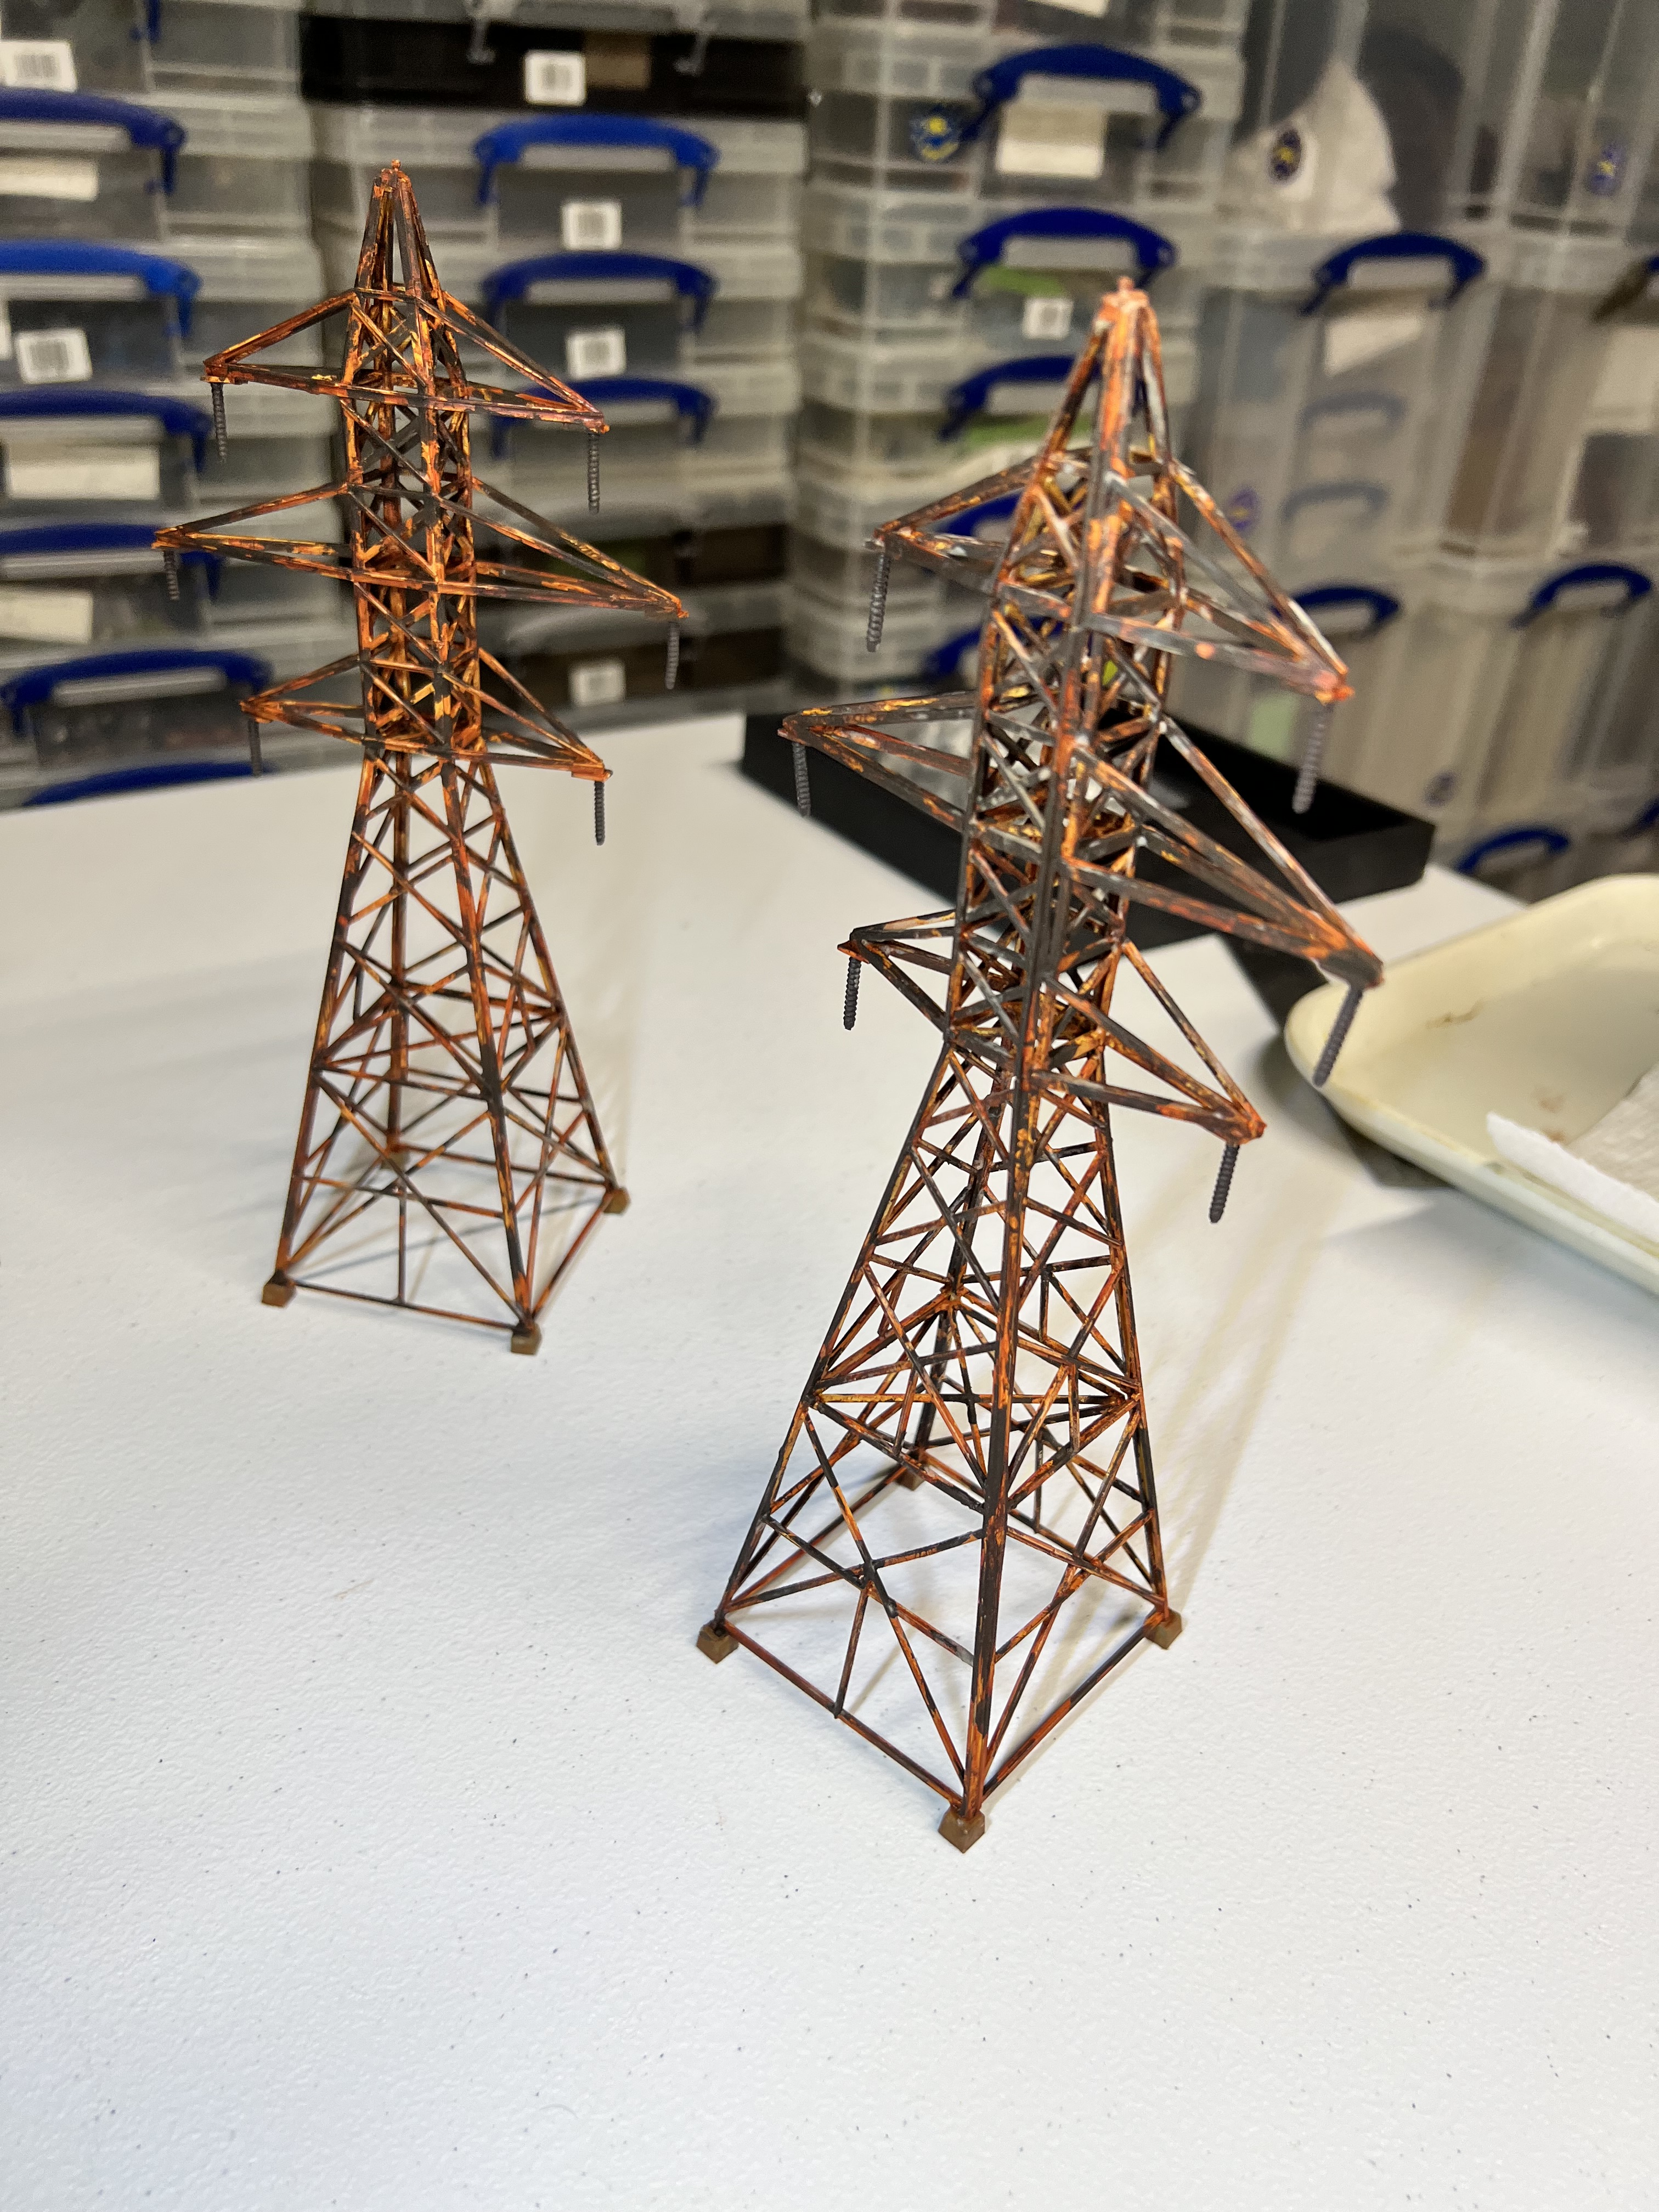
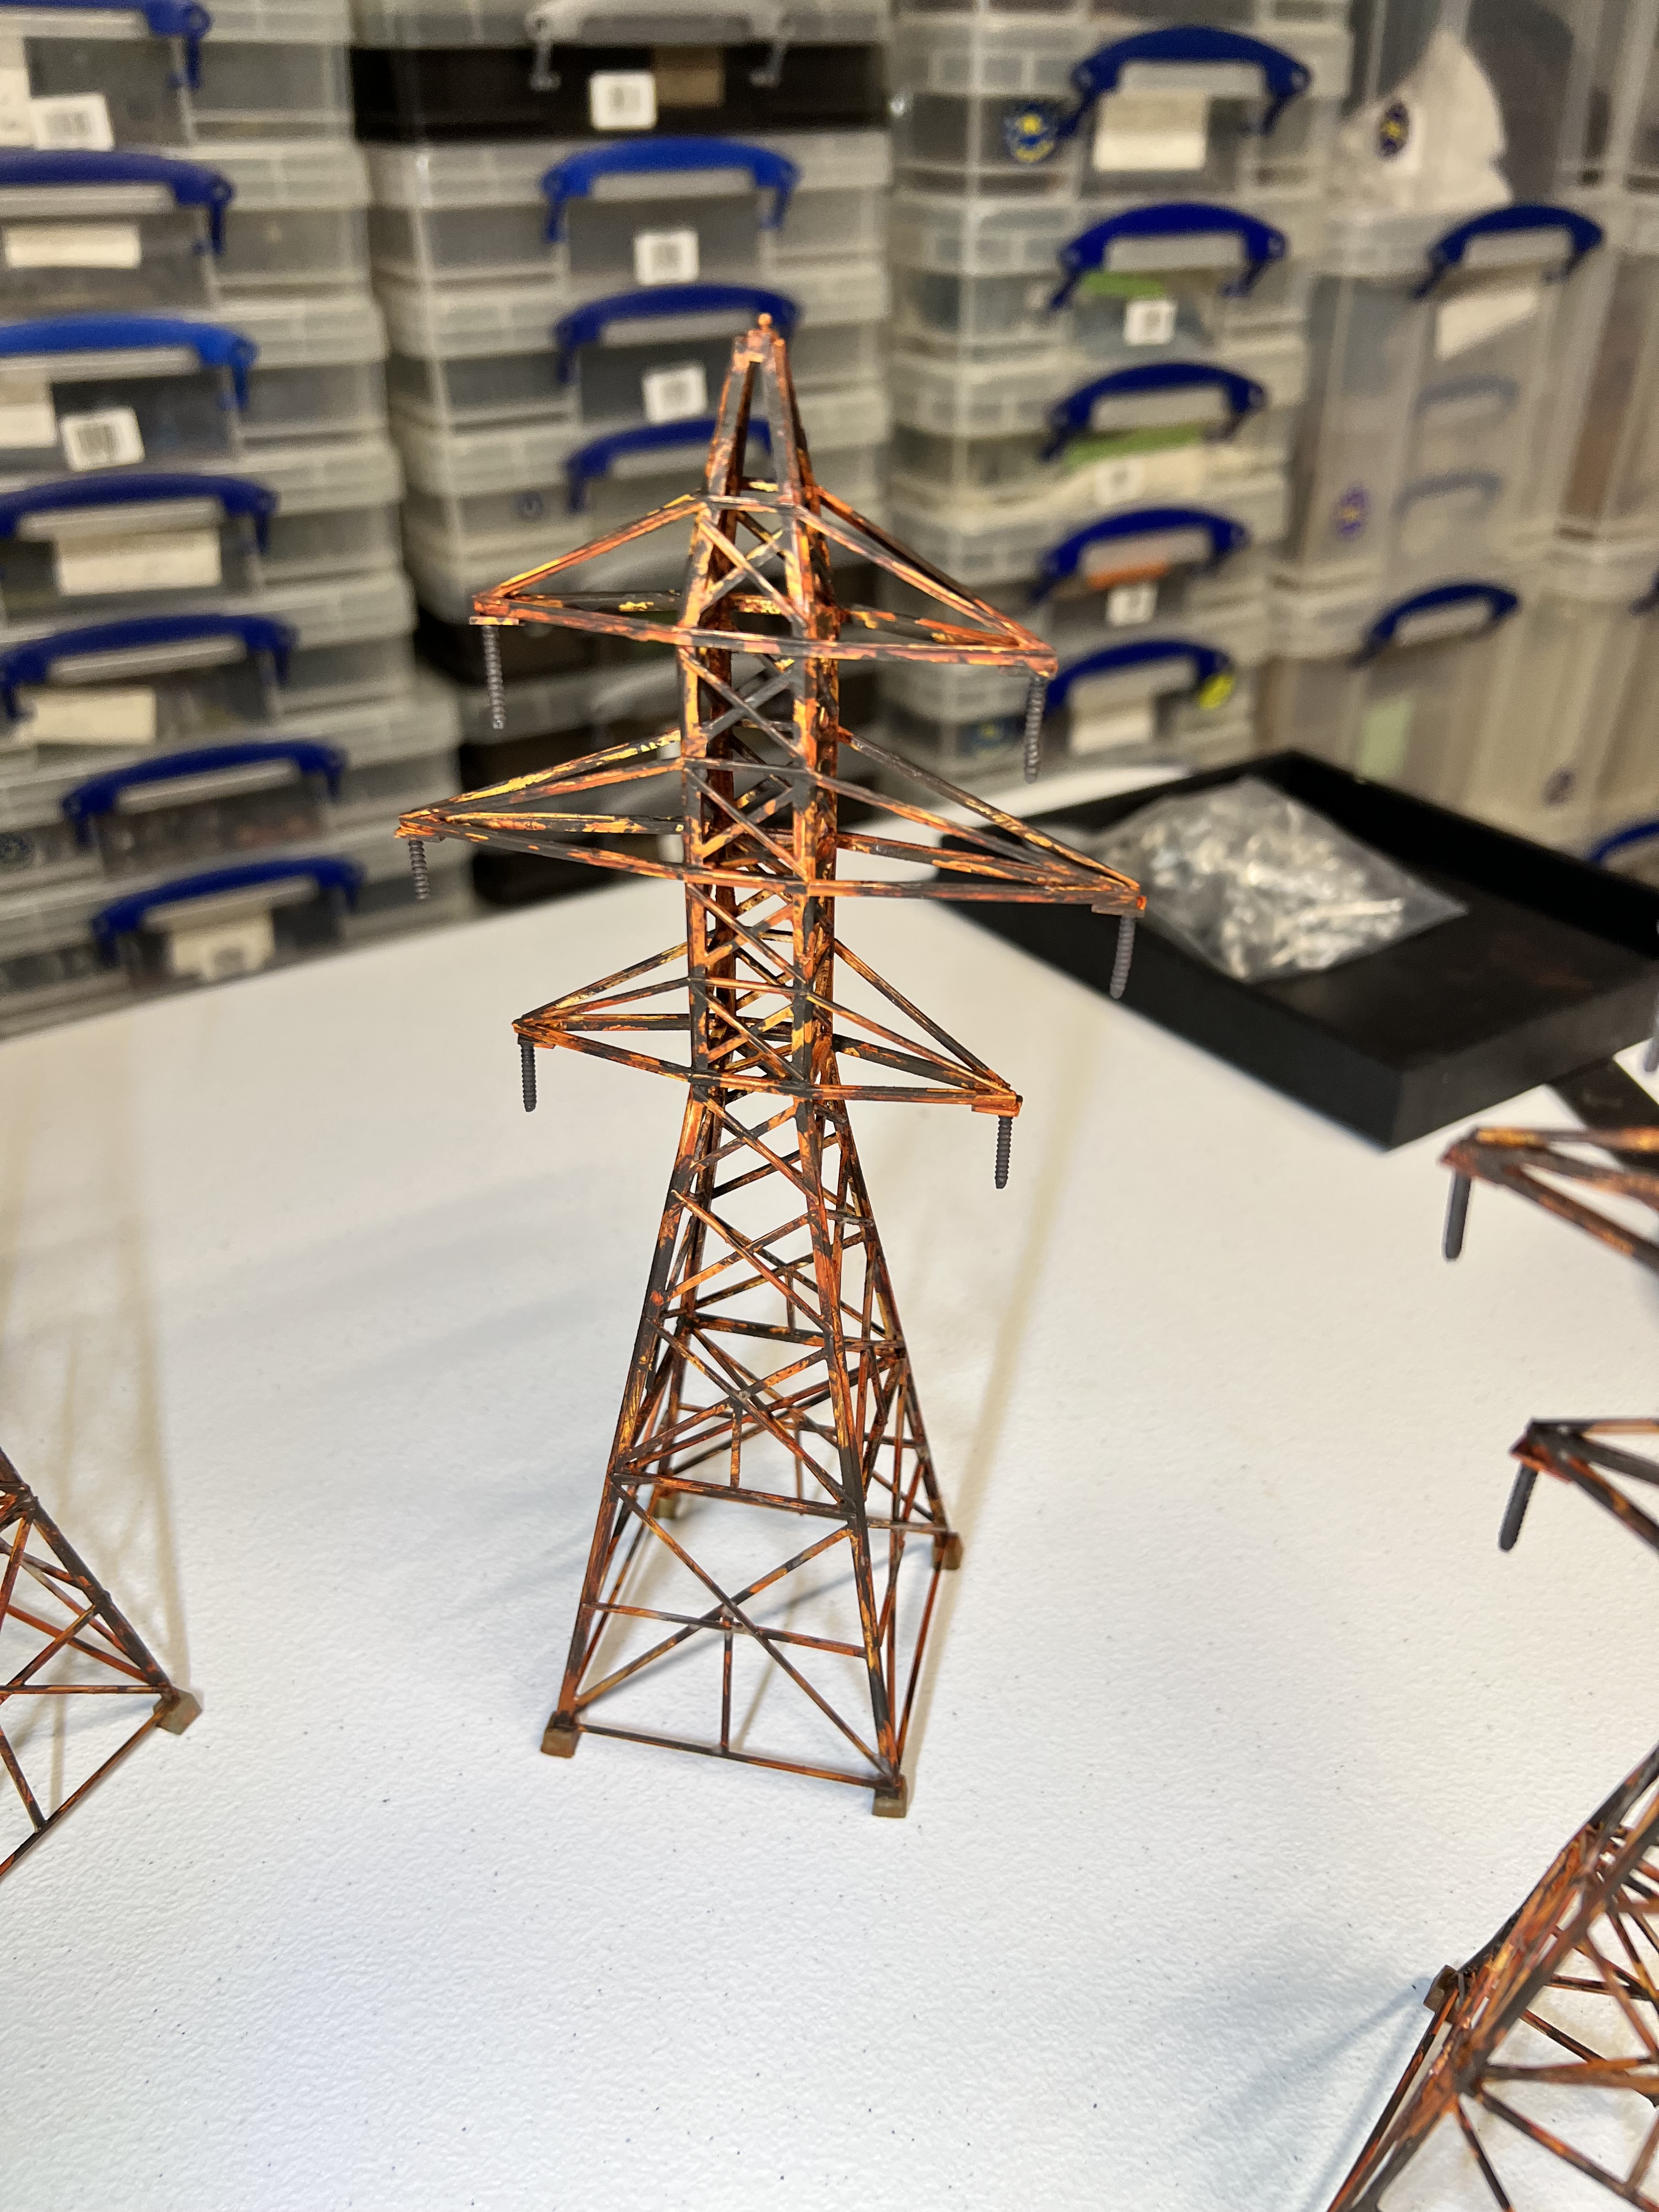
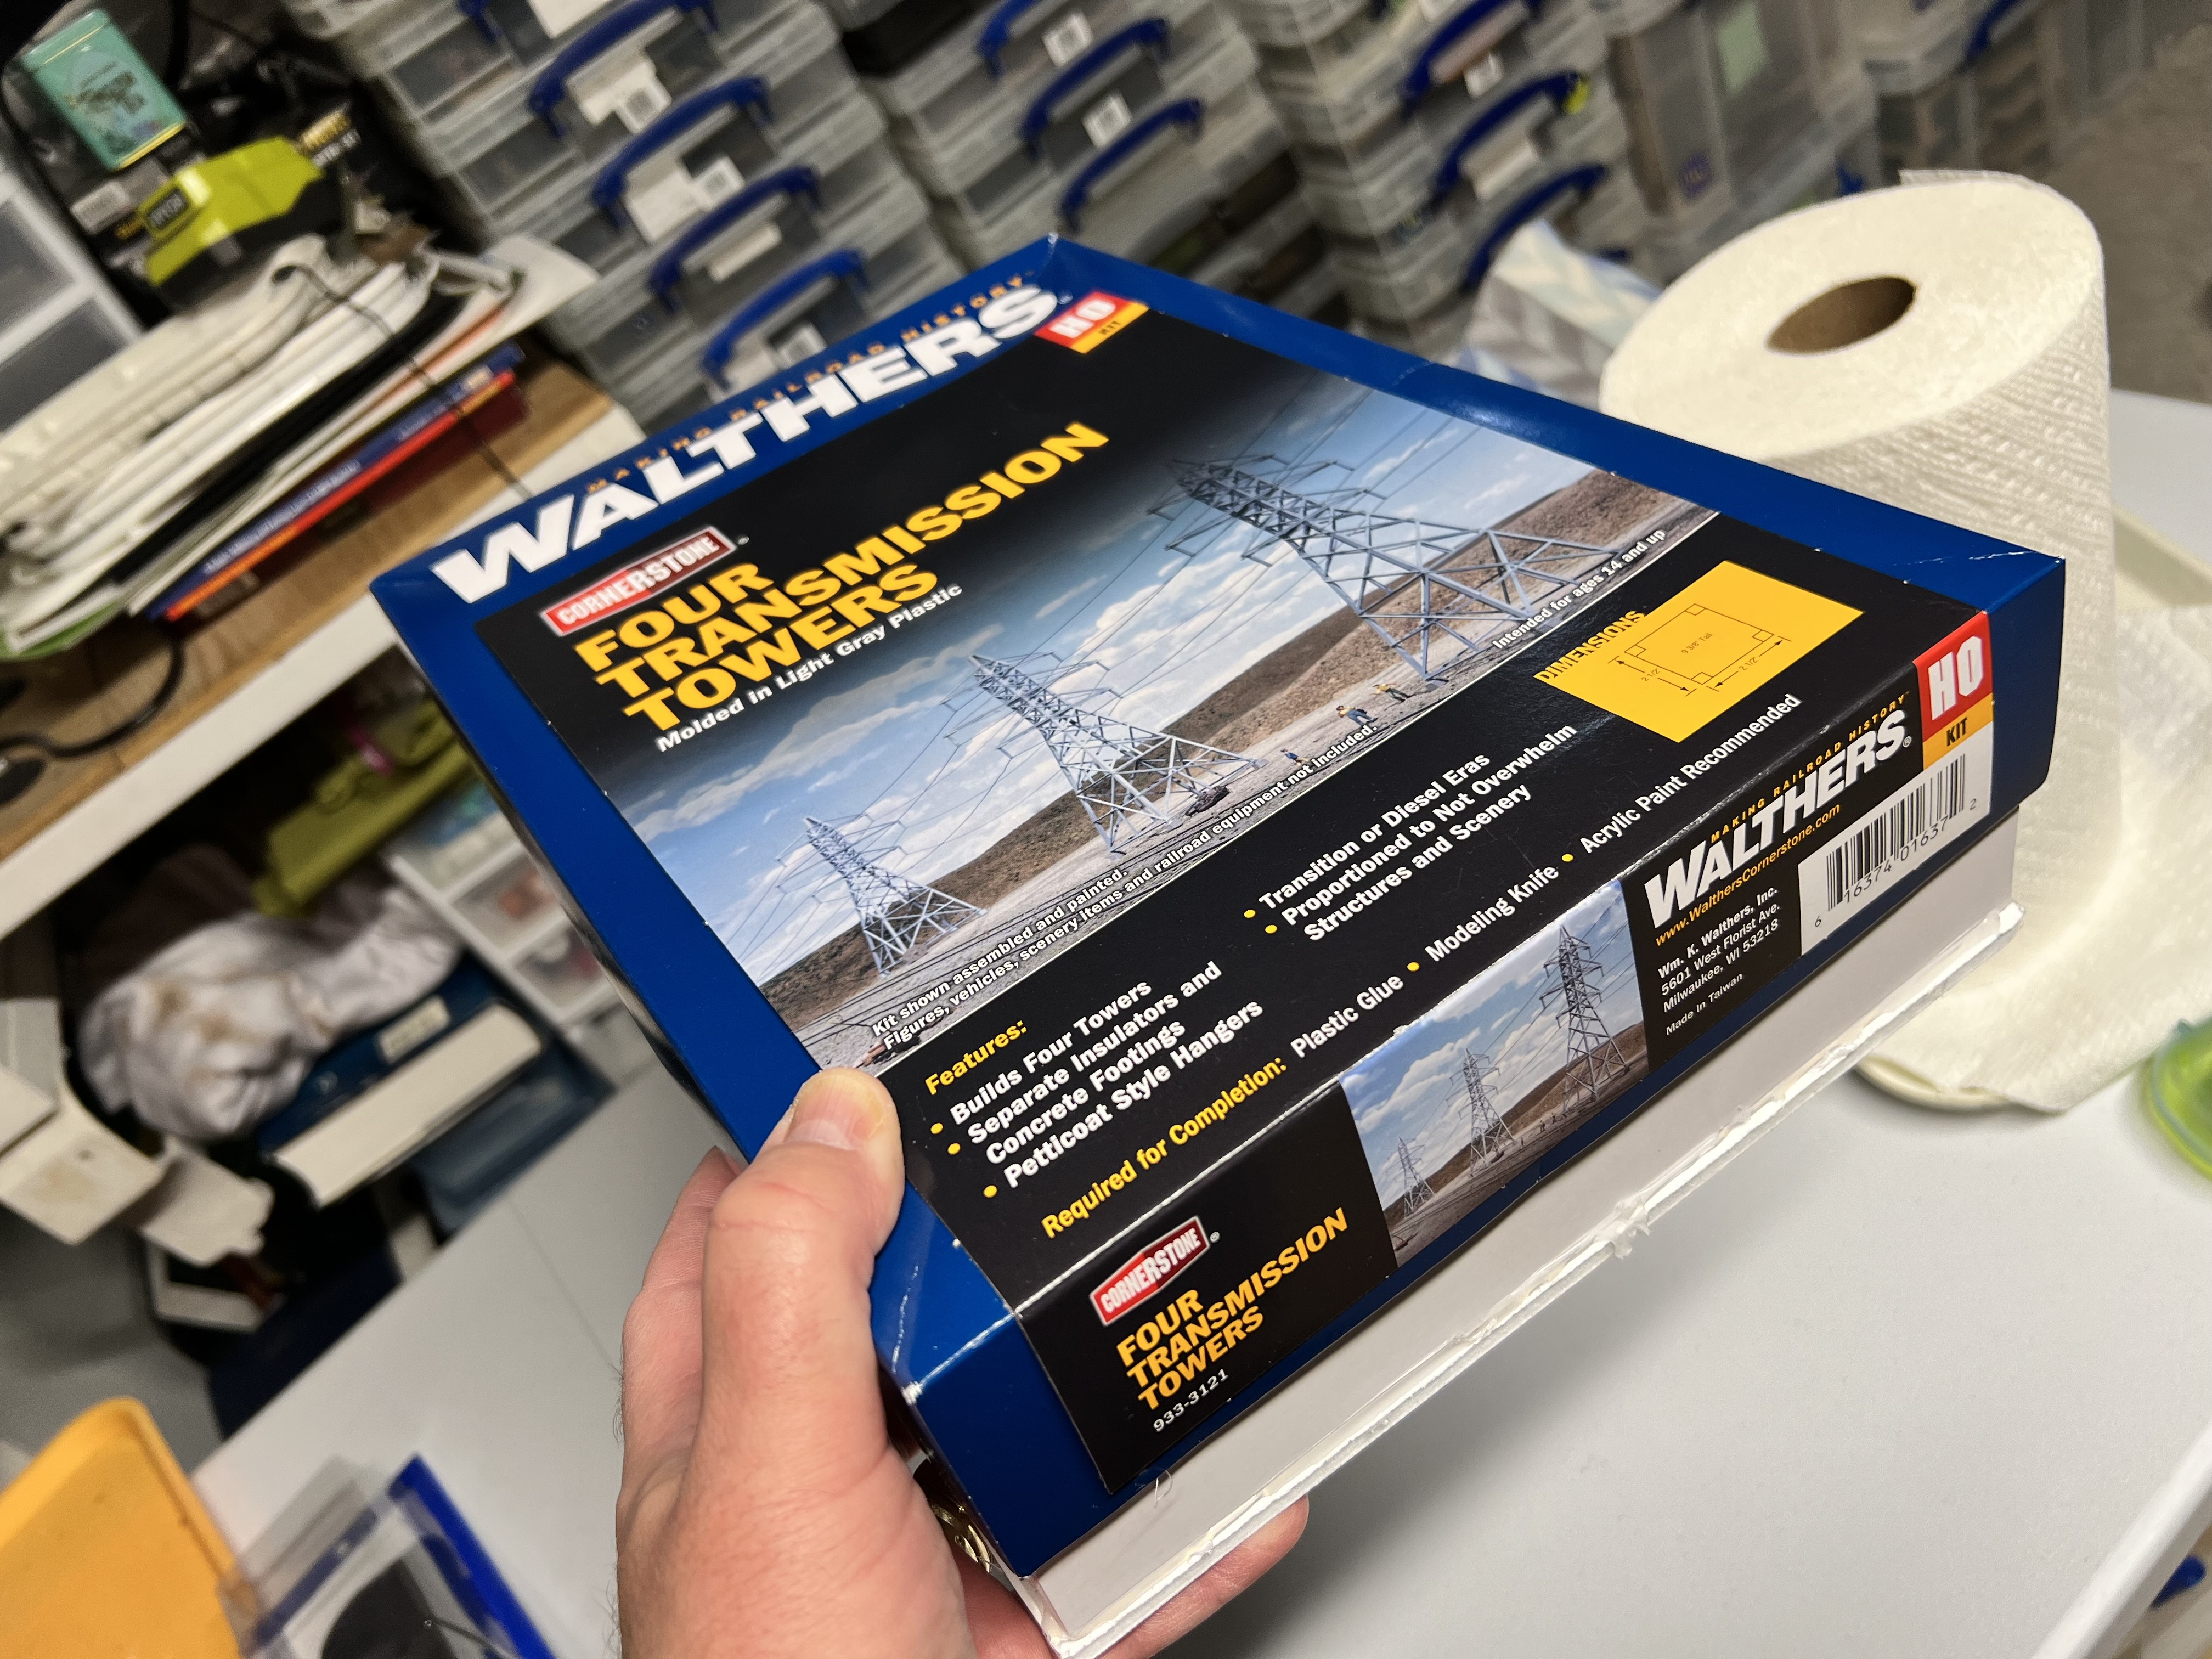
I thought transmission towers – rusty ones – would be great in that role. I found a railroad terrain kit on eBay. It was HO scale. It would go well with the other pieces of rusty fun. These were “Walther’s Cornerstone Four Transmission Towers”.

The transmission towers kit.

Assembly was a bit fiddly but manageable. It was not immediately clear to me which sides were front or back – but by the fourth iteration I got it down. Luckily, plastic cement covers any mistakes in assemble. I did find using rubber-shoed alligator clips to hold sections together while the cement set to be VERY helpful.

The first assembly went smoothly…
…the second was off (again figuring out which side went where was a bit confusing). Alligator clips to the rescue!
All four assembled.
The cements I used.
The towers primed in grey.

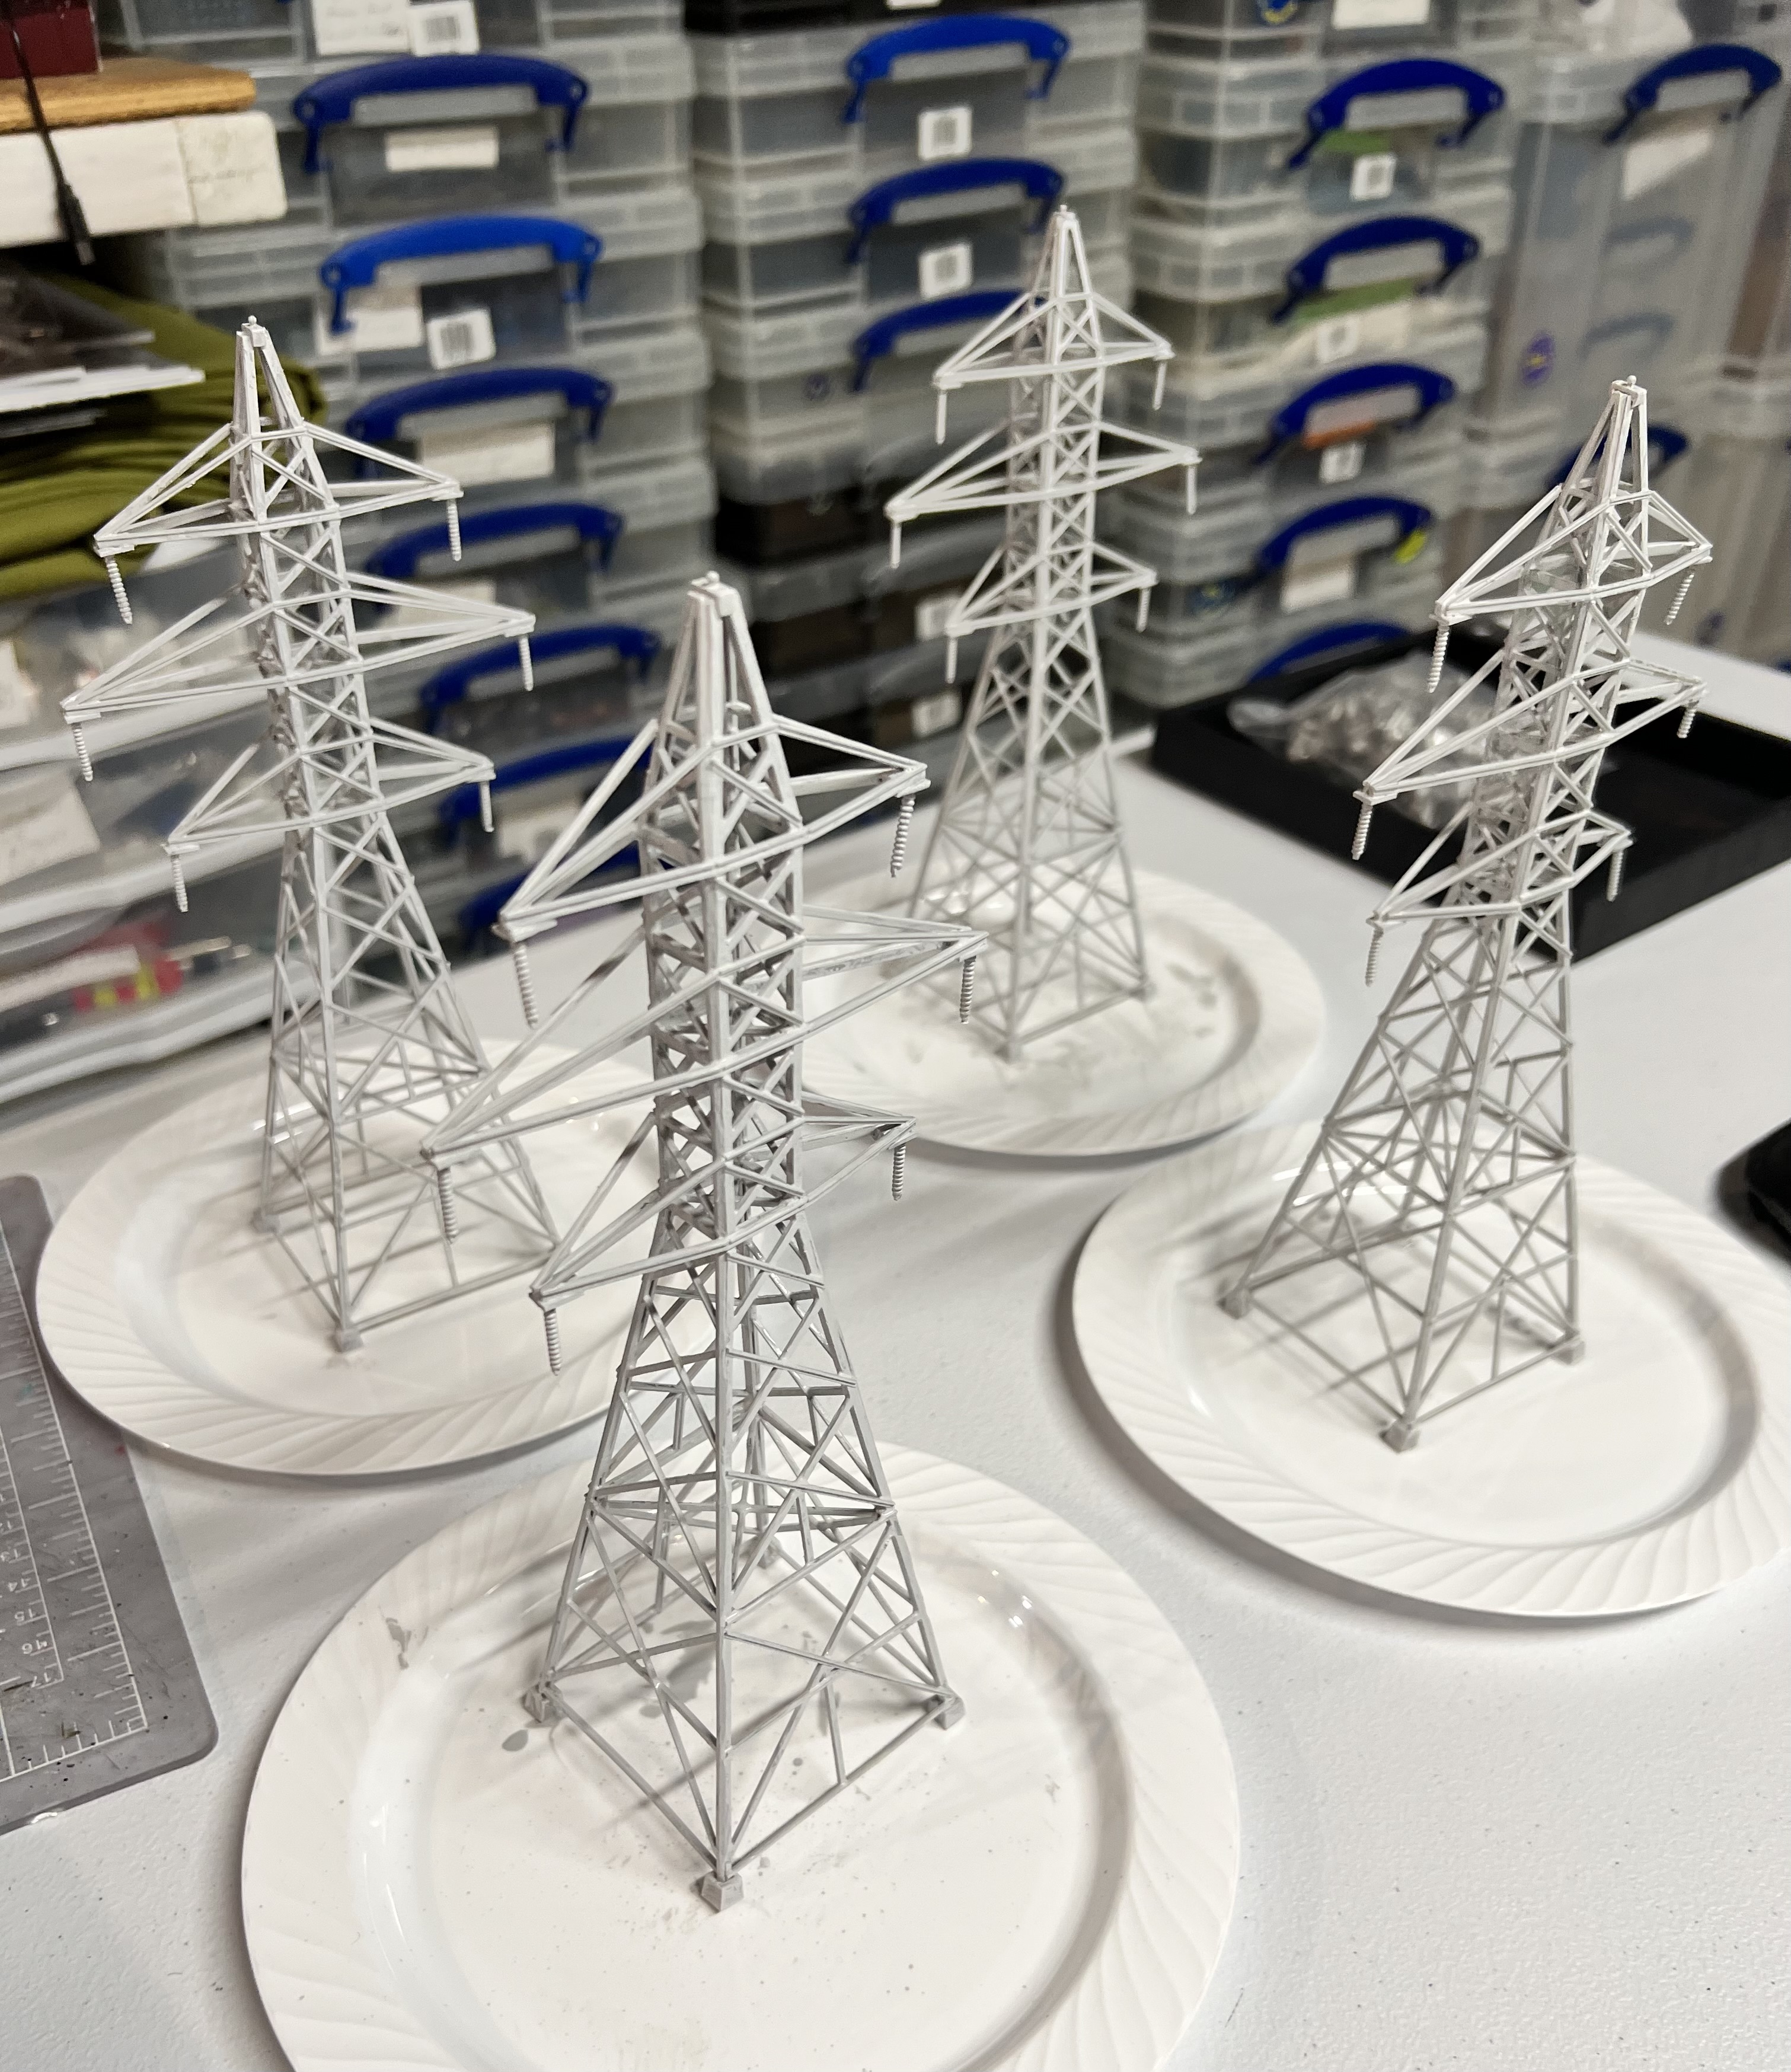
Rusting them up was similar to the walls – basically minus the use of the corrosion texture paint. The lists of what I used for these and the walls will be listed at the end of this post.

Rusted up!
Close up shot of two.
View of one from a slightly different angle.

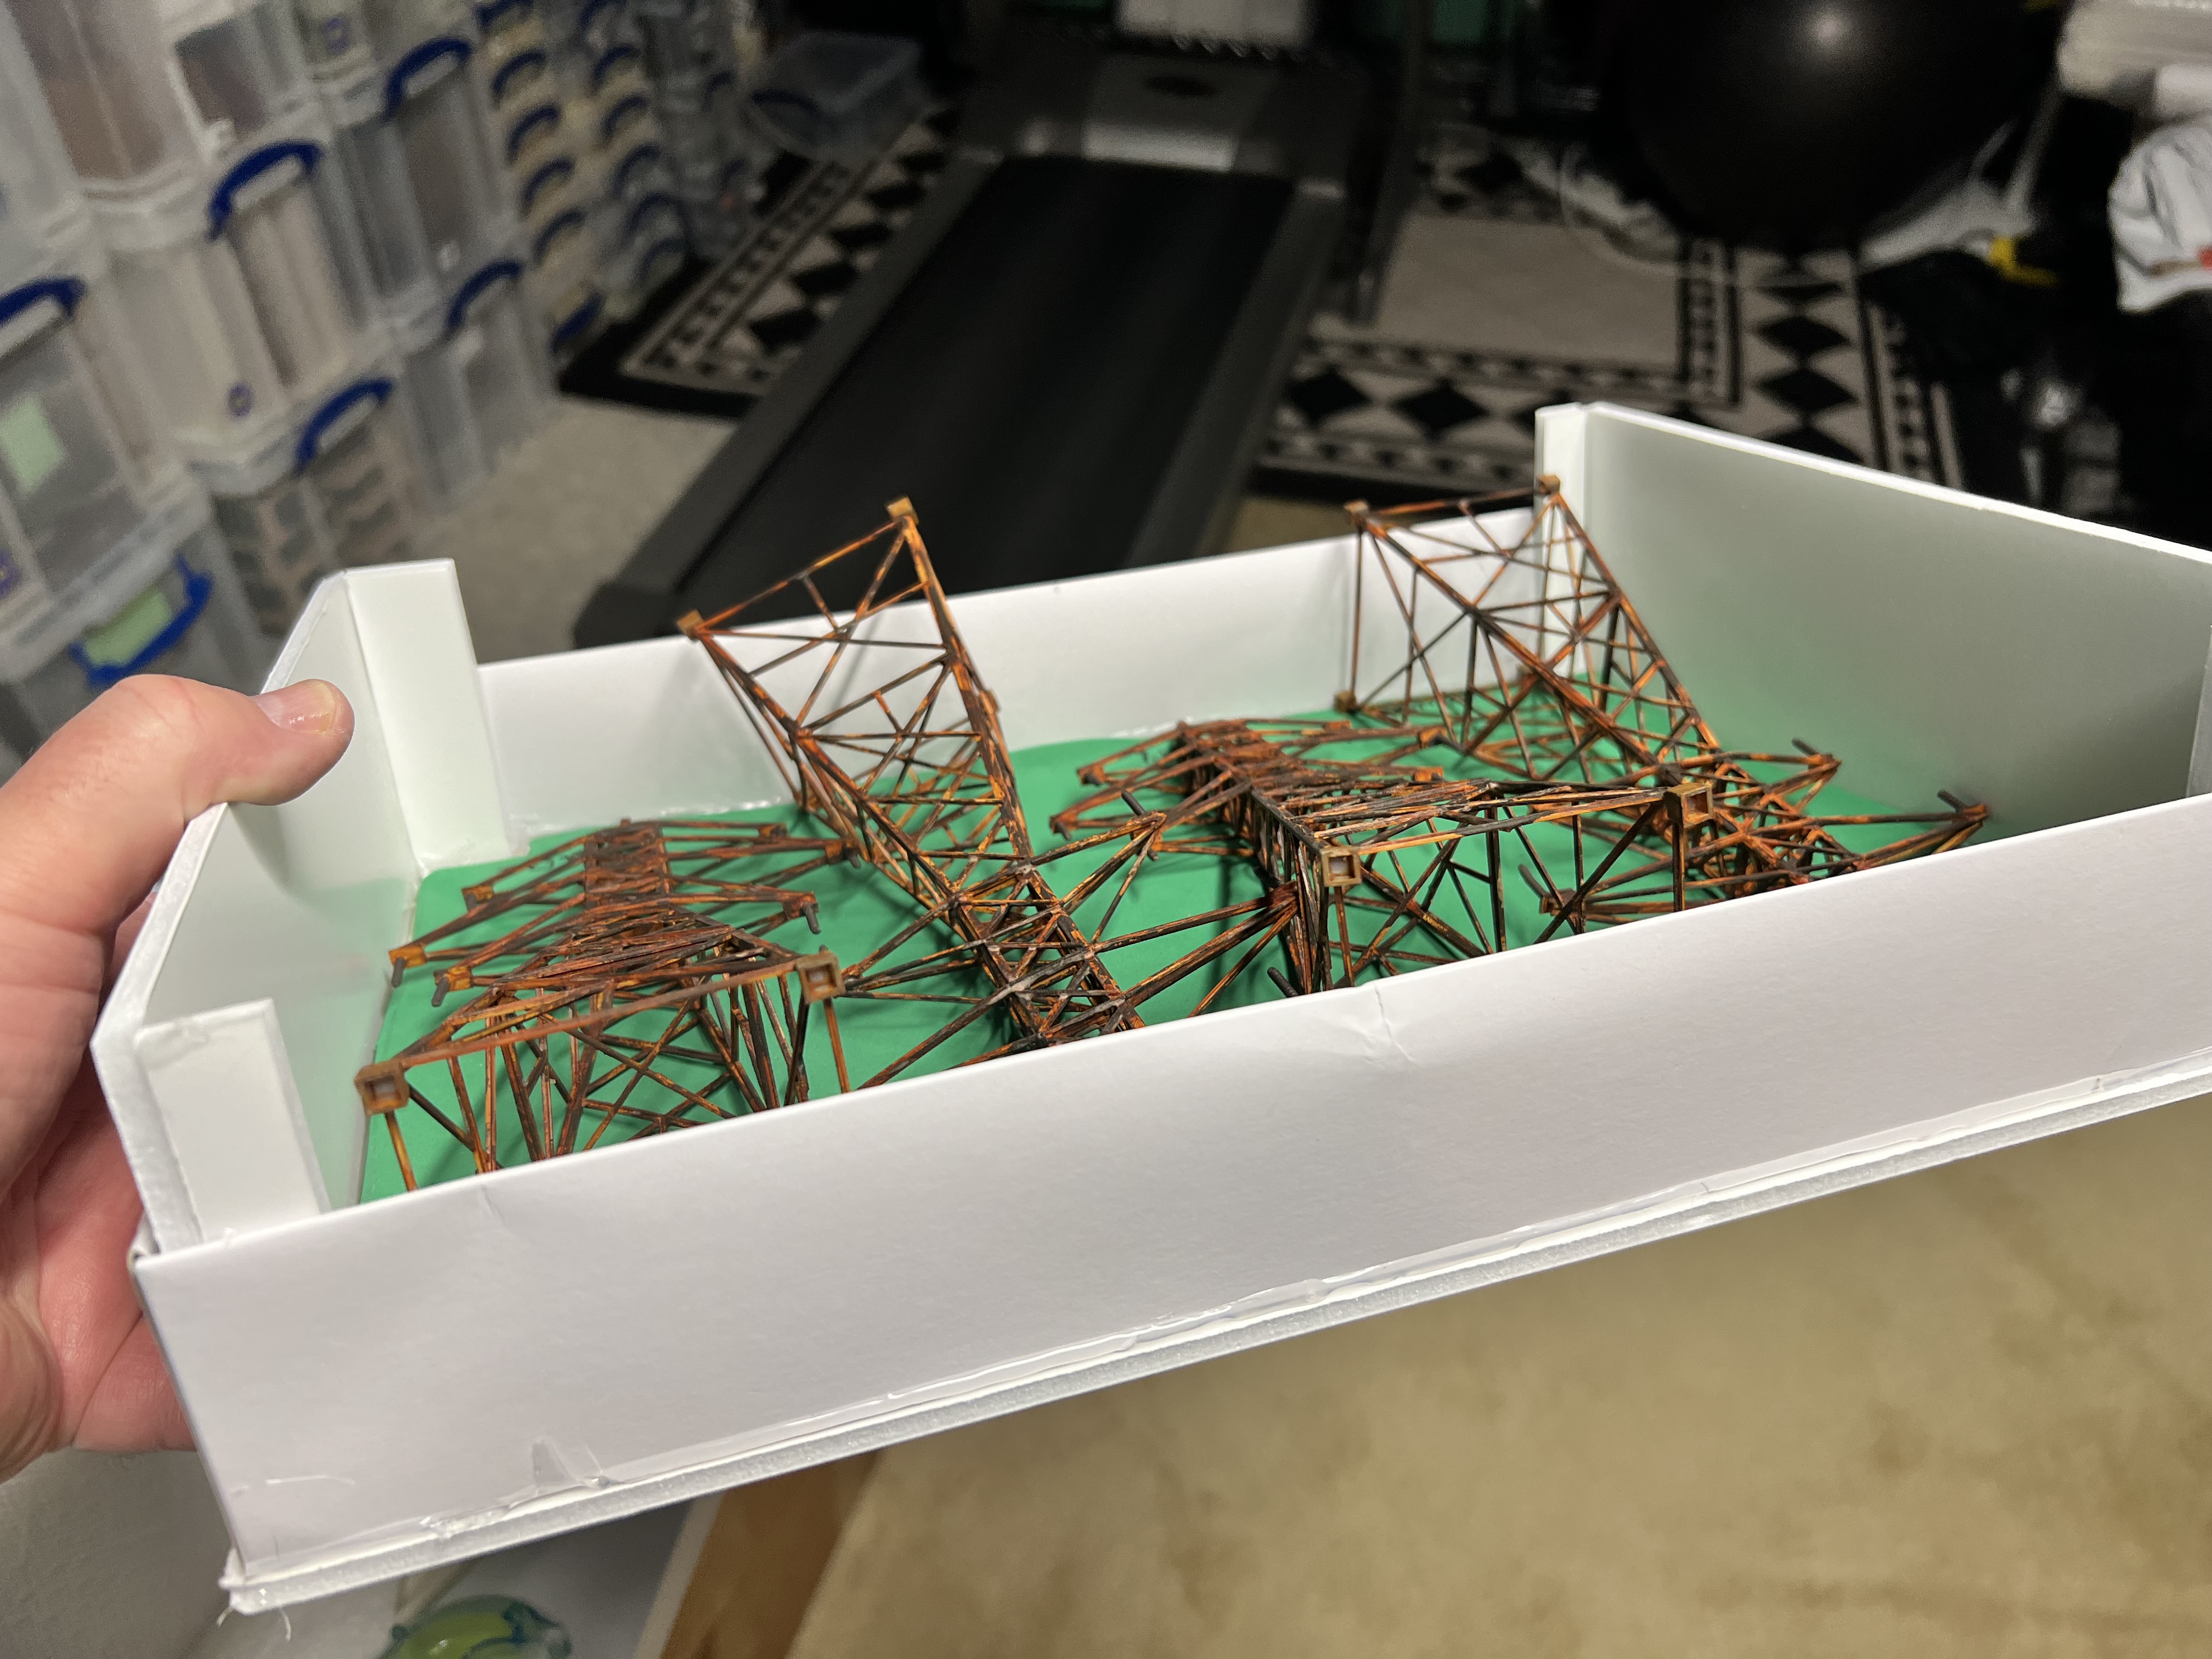
As you can see these are just plastic models and vulnerable to damage in transport! Unlike the walls, which went into a cardboard wine bottle box with some foam padding between levels, these needed a sturdy solution. They required something strong. I decided to modify the original box to accommodate the greater height needed when the models were lying down. I used more foam padding on the box bottom, and foam board to extend and strengthen the box as you see below:

Top view of the original box modifications with a sheet of green foam padding on the bottom. The sides and corners were reinforced by adding foam board set with hot glue on the insides.
Side view – here you see the added height with the foam board.
The original box top fit like a glove – and is significantly stronger than its original configuration.

That’s about it for this rusty old post. I hope it inspired you to rust up some stuff yourself!

As I teased, I will be sharing how these fit into both of the tabletop set ups for 2026. I’ll also be sharing some of the new 2026 units of mechanical tin men that will find these structures as part of their apocalyptic homes. Until next time.

For all of my previous posts on terrain projects, please see this page. For all of my previous posts on sci-fi projects, please see this page…for any of my previous posts on Wars of Ozz, see this page.

PAINTS, INKS, GLAZES, SHADES, WASHES, PIGMENTS, FLOCKING, GLUES AND MORE THAT I USED ON THE RUSTY WALLS PIECES:

  1. Old autoinjector trainers
  2. Green stuff
  3. Chinchilla dust
  4. PVA Glue
  5. Vallejo Surface Primer “Grey”
  6. AK “Corrosion Texture”
  7. Citadel “Typhus Corrosion” (Technical)
  8. Citadel “Ryza Rust” (Dry)
  9. Vallejo “Old Rust” (pigment)
  10. Vallejo “Brown Iron Oxide” (pigment)
  11. Vallejo “Natural Iron Oxide” (pigment)
  12. Vallejo Model Air “Rust 73.117” (pigment)
  13. Vallejo Model Air “New Rust 73.118” (pigment)
  14. Vallejo Thinner
  15. Vallejo Model Color “Dark Rust”
  16. Vallejo “Natural Umber” (pigment)

PAINTS, INKS, GLAZES, SHADES, WASHES, PIGMENTS, FLOCKING, GLUES AND MORE THAT I USED ON THE RUSTY TRANSMISSION TOWER MODELS:

  1. Walther’s Cornerstone Four Transmission Towers (HO Scale)
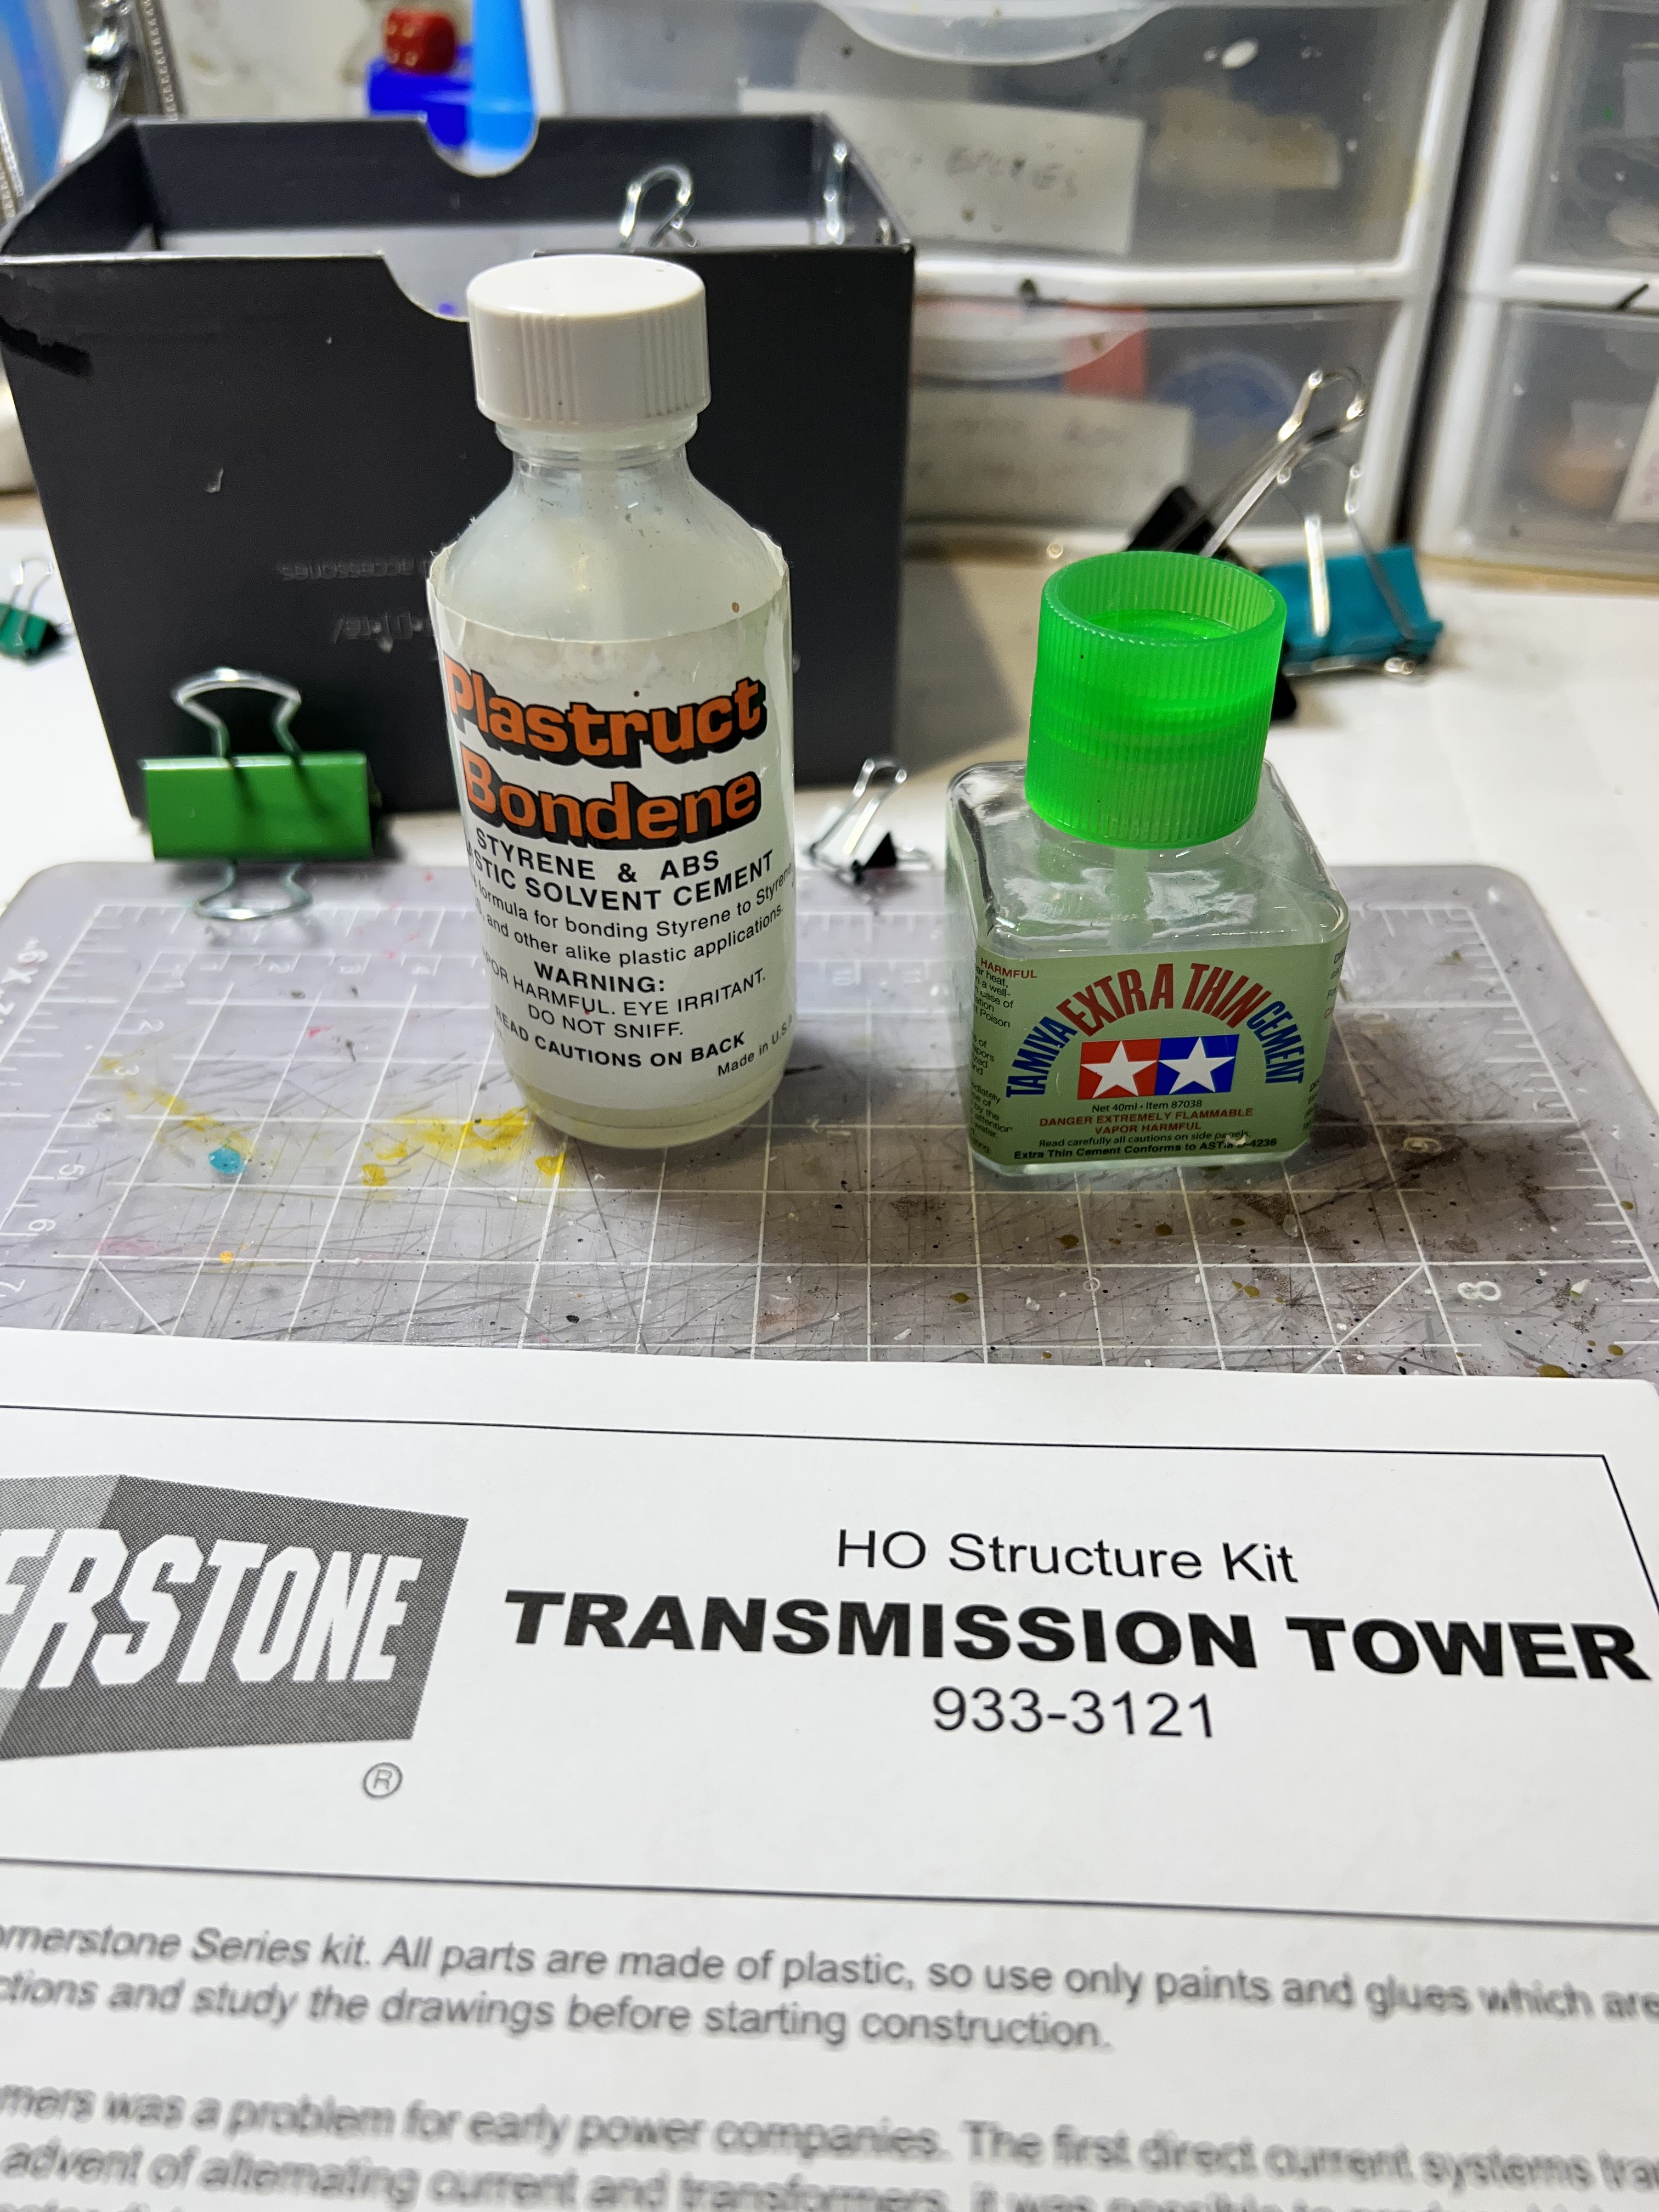
  2. Tamiya “Extra Thin Cement”
  3. Plastruct Bondene “Styrene & ABS Plastic Solvent Cement”
  4. Alligator clips
  5. Vallejo Thinner
  6. Vallejo Surface Primer “Grey”
  7. Citadel “Ryza Rust” (Dry)
  8. Vallejo “Old Rust” (pigment)
  9. Vallejo Mecha Weathering “Light Rust Wash” (wash)
  10. Vallejo Mecha Weathering “Dark Rust Wash” (wash)
  11. Vallejo Mecha Weathering “Rust Texture Matt”
  12. Vallejo Model Color “Camouflage Black Brown”
  13. Vallejo Model Air” Concrete”
  14. Vallejo Mecha Varnish “Matte Varnish”

Support Your Favorite Bloggers: Follow This List…if you dare!

My blogger buddy in the UK, Roger, from “Rantings Under the Wargame Table”, has a novel idea in his recent post. Or rather a challenge.

https://wordpress.com/reader/feeds/17667794/posts/5920125115

In short, (if you don’t want to click above) he has a list of folks who blog that he follows (most of them are the same ones that I also follow).

To quote Roger:

Well, What I’m asking you to do is, if you look below you’ll see a list of blogs that I follow (or should follow!), some are great painters (actually all of them are) 3D printers, game writers, DM’s, Sculptors, Convertors etc.. The one thing they all have in common is they are all entertaining writers! So if you can I’d like you to follow each of the links and take a look around, now some of these have not had new posts added for a while, but don’t let that put you off, have a look around check out some older posts, you never know there might be something you like or find useful, if so make a comment, follow (or if you have too “like”), let’s give these people some love and hopefully get them posting again!

So, take a look. I know some might not be up your alley, but if you’re into hobbying or modeling etc, most will. Of course my blog does also have some golf in there, but that’s just another addiction you know…

Here’s the list from Roger:

Azazels Bitz Box

Bogenworld

Carrion Crow Buffet

Dead Dicks Tavern

Fantorical

Gisby’s Gaming Blog

Guru Pig

Imperial Rebel Ork

Just Needs Varnish

Leadballoony

Mark A Morin

PM Painting

Pat’s 1/72 Military Diorama’s

Skinflint Games

SP’s Projects Blog

The Imperfect Modeller

War Through The Ages & Other Dark horrors

Wargames sculptors blog

Anne’s Immaterium

Dragons Of Lancasm

Fawcett Avenue Conscripts

 The wargaming erratic

Rantings From Under the Wargames Table

Anyways, just a thought and a hope for fun amongst you as you read these.

I’ll be back with some new content myself very shortly!

Happy New Year!

Finally Getting Around to Building Generator Models for my Retro Sci-Fi Convention Games

My recent efforts on the hobby front have been focused on multiple projects. Some of these are figures and vehicles, others are terrain-oriented. These are all in support of the games I will run at multiple 2026 gaming conventions.

This year, I will be running Wars of Ozz and What a Tanker games. I am also getting back into retro sci-fi skirmish games with Combat Patrol:WWII. I have not run these games in a while and they were always a lot of fun. To that end, I decided to add more terrain to the mix.

As background, a friend, Chris Rett, 3D-printed three excellent generators for me way back in 2018 (I think). These were great terrain pieces. At that point I was still immersed in retro sci-fi skirmish gaming with Combat Patrol:WWII as my preferred system. However, I was on the cusp of jumping my focus to WWII What a Tanker games. Thus, the generators took a back seat. My gaming then went in sequence to What a Tanker, then Feudal Patrol for the Spanish Conquest in Mesoamerica. Finally, I moved on to Wars of Ozz. Recently, I felt a need for a bit more variety as I mentioned – so terrain is what I hit first.

The three generators would be useful for retro sci-fi apocalyptic planet scenarios. They would also be useful for some Wars of Ozz scenarios. This includes any involving Professor Nitpik and the Industrial City. That city was wrecked over 300 years ago in the “Last Great War”. Plus I could use it as part of a “Space Cowboys” apocalyptic scenario.

The generators at the start of the project.

I primed the pieces. Then I used AK “Corrosion Texture” on it. This allowed me to use different rust pigments and paints on it.

Primed with corrosion texture added and drying here.

After the corrosion texture dried, I used the paints and pigments to “rust them up”.

All rusted up!

Two of the models were identical – so I planned on using them symmetrically on a polystyrene base. Using sand and PVA, I had a substrate for the rust pigments.

Here I measured carefully to align the three equidistantly on the base. Then, I traced out on the base where they would be glued. The one odd generator is in the center.
Here you see the sand applied over the PVA. Note that where the generators would go is not covered with any glue/sand mixture.

Once the sand mix had hardened, I assembled the pigments as you see below. I fixed all the pigments with pigment binder, as I have found that other liquids can dissolve the PVA/sand bonds.

Ready for gluing down the generators. Then, adding pigments to the base. As is my habit, I list all the materials that I used at the end of this post. This practice served me well here as older posts I did on rusty walls had some pearls that I forgot.

The generators were secured to the base by Gorilla Glue. Once that dried, I added the pigments to the base and fixed them with the binder. I then decided that there should be more detritus and wreckage here. I added some of my rusty Juweela scrap pieces. Then, I applied more rust pigments to them. These actions are shown in the gallery below.

Finally, in an effort to add some wasteland life to the piece, I added multiple different flocking tufts. Here are some finished shots.

Thanks again to Chris Rett for this gift, and sorry it took me so long to finally complete it!

I’m looking forward to having this on the tabletop. It will be a companion piece to my rusty walls and ruined buildings. It will also complement my ruined chemical plant. I will be making other pieces soon. Stay tuned! I hope that you found this interesting or useful. Let me know in the comments section.

Until next time.

For all of my previous posts on terrain projects, please see this page. For all of my previous posts on sci-fi projects, please see this page..

PAINTS, INKS, GLAZES, SHADES, WASHES, PIGMENTS, FLOCKING, GLUES AND MORE THAT I USED ON THIS MODEL

  1. Vallejo Surface Primer “Black”
  2. Polystyrene sheet
  3. AK “Corrosion Texture”
  4. Vallejo Model Air “Rust” (71.080)
  5. Citadel “Typhus Corrosion” (Technical)
  6. Citadel “Ryza Rust” (Dry)
  7. Vallejo “Old Rust” (pigment)
  8. Vallejo “Brown Iron Oxide” (pigment)
  9. Citadel “Nuln Oil” (wash)
  10. Play sand
  11. PVA Glue
  12. Gorilla Glue
  13. Vallejo Surface Primer “German Green Brown”
  14. Vallejo “Natural Umber” (pigment)
  15. Vallejo “Burnt Umber” (pigment)
  16. Vallejo “Light Sienna” (pigment)
  17. Vallejo “Light Yellow Ochre” (pigment)
  18. Vallejo “Faded Olive Green” (pigment)
  19. Vallejo “Chrome Oxide Green” (pigment)
  20. Vallejo “Old Rust” (pigment)
  21. Juweela “Metal Scrap, Rusty”
  22. Vallejo “Pigment Binder”
  23. Gamers Grass “6mm Beige Tufts” (flocking)
  24. Gamers Grass “6mm Dry Tufts” (flocking)
  25. Gamers Grass “6mm Beige Tufts” (flocking)
  26. Gamers Grass “Tiny Beige 2mm Tufts” (flocking)
  27. Shadow’s Edge Miniatures “6mm Nightmare Tufts” (flocking)
  28. Shadow’s Edge Miniatures “6mm Scorched Earth” (flocking)
  29. Shadow’s Edge Miniatures “4mm Badlands” (flocking)
Man of TIN blog two

Toy Soldiers, Gaming, ImagiNations

Gisby's Gaming Blog

Miniatures gaming projects, products, and reviews

Carrion Crow's Buffet

Narrative Wargaming, Fiction and General Musings on the Universe

Despatches from Fort Syllabub

An account of fictional adventures on the North West Frontier - and other times and places, real or imagined

Man of Tin blog

Toy soldiers, gaming, Imagi-Nations

Zauberwurfs Blog

Ein Blog über Tabletop und Miniature Wargames.

Frank Tank Rants

musings of a fat old bloke on tanks and wargames

Dragons of Lancasm

Games, miniatures, painting, books and more games

Tiny Painted Heroes

The Adventures of a lifelong Tabletop Gamer, Game Design hobbyist, and full-time Software Engineer

Steve's Paint Brush

Grimdark model making and mini painting

Wargamesculptors Blog

Life, Golf, Miniatures, & Other Distractions

Dead Dick's Tavern and Temporary Lodging

Life, Golf, Miniatures, & Other Distractions

Guru Pig - the gaming Guru

Guru's thoughts on wargaming, life, and the universe!

Wisely lead... without a head!

History, Miniatures and Wargaming

Kuribo's Painting

Fallout Wasteland Warfare, Warhammer, and Hellboy Painting, Terrain, Dioramas, and Battle Reports

Don't Give Greg Ideas

Seriously, just don't

War Across the Ages, and other dark horrors

A discussion of miniatures collecting, painting and gaming.

Classic Warhammer 40K

Painting diary focused on Warhammer 40K 2nd ed., 5th ed. WHFB, related GW games, and miscellaneous whimsy

Colonel Mustard

WW2 Modelling in 1/72 Scale

Bogenwald

Random painting and terrain making.

Pat's 1:72 Military Diorama's

Scale diorama tips and ideas

Arcade Dreams

Building the Arcade Dream

P.B.Eye-Candy

Phil's 20th century wargame pages

SP's Projects Blog

A futile fight against entropy or 'Every man should have a hobby'? Either way it is a blog on tabletop wargames, board games and megagames

30mmdave

Wargaming Plausible reality?

The Imperfect Modeller

Miniature Figure Painting and Diorama Modelling

Double Down Dice

Painting miniatures and rolling dice!

Just Needs Varnish!

My ongoing wargames projects!

miniaturepopcorns

Sculpting some worlds

Despertaferres

Wargaming with the ability of a dull nine year old

Dawn of the Lead

Miniature wargaming and the occasional zombie

Rantings from under the Wargames table

Wargames, Figures, Sculpting and Converting Miniatures

Simple as War

Miniatures & Terrains

Buck's Blog

Life, Golf, Miniatures, & Other Distractions

IRO aka Imperial Rebel Ork

- I model - therefore I am -