US Vehicles for Operation Torch: M3A1 Scout Cars

Now that I have shared all of the Vichy French vehicles that I completed on this blog, it is time for me to add the American models. These will also be used in my What a Tanker games for Operation Torch at HISTORICON 2025. I am starting with the American reconnaissance scout car – the M3A1 Scout Car.

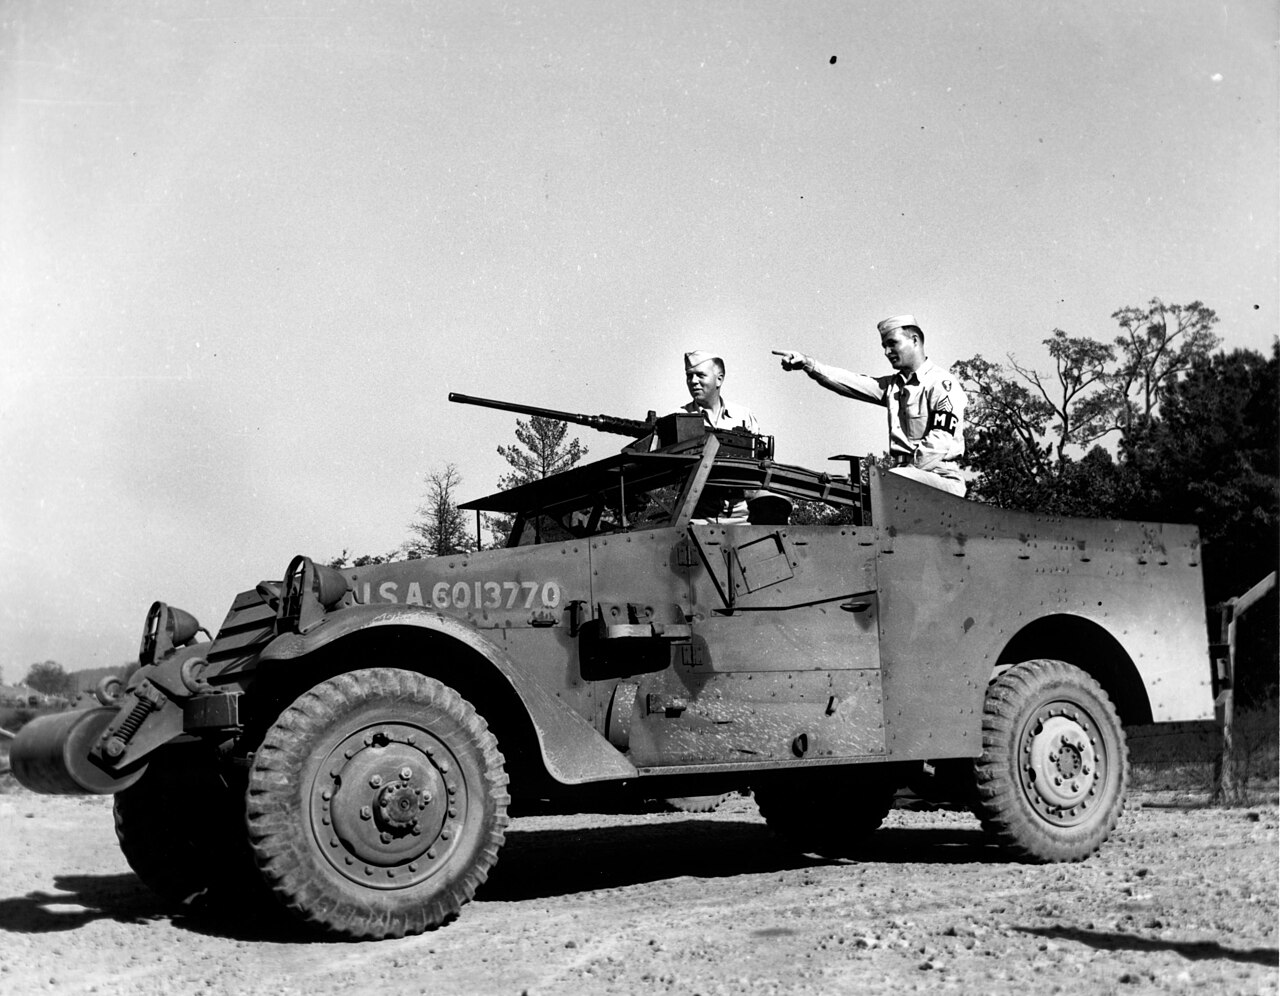
It was designed and built by the now-defunct White Motor Company, with the chassis interestingly being a product of the Diebold Lock and Safe Company. It was a 4×4, and could do up to 50 mph on the road (80 kph). Many of you will notice how similar the M3A1 is to the M3 half-track. And for good reason, as the M3 half-track was a development of the M3A1 Scout car.

It typically carried a Browning M2 .50 caliber machine gun plus up to two additional Browning M1919 .30 caliber machine guns. It was open-topped with armor on the chassis up to 13mm/.5″ in thickness. It could carry up to 6 soldiers in addition to the driver. A canvas cover was available for protection against the elements. The M3A1 was intended to be a reconnaissance vehicle, but its lack of protection made it less desirable than the M3 half-track in that role. In US use, it was relegated to rear-echelon uses after Operation Torch and Operation Husky (the invasion of Sicily). Over 21,000 were made, with over half of that number going as Lend-Lease, mainly to the British Commonwealth and the Soviet Union.

I found David Doyle’s book, M3A1 Scout Car: The US Army’s Early World War II Reconnaissance Vehicle (Legends of Warfare: Ground, 8), very interesting and useful.

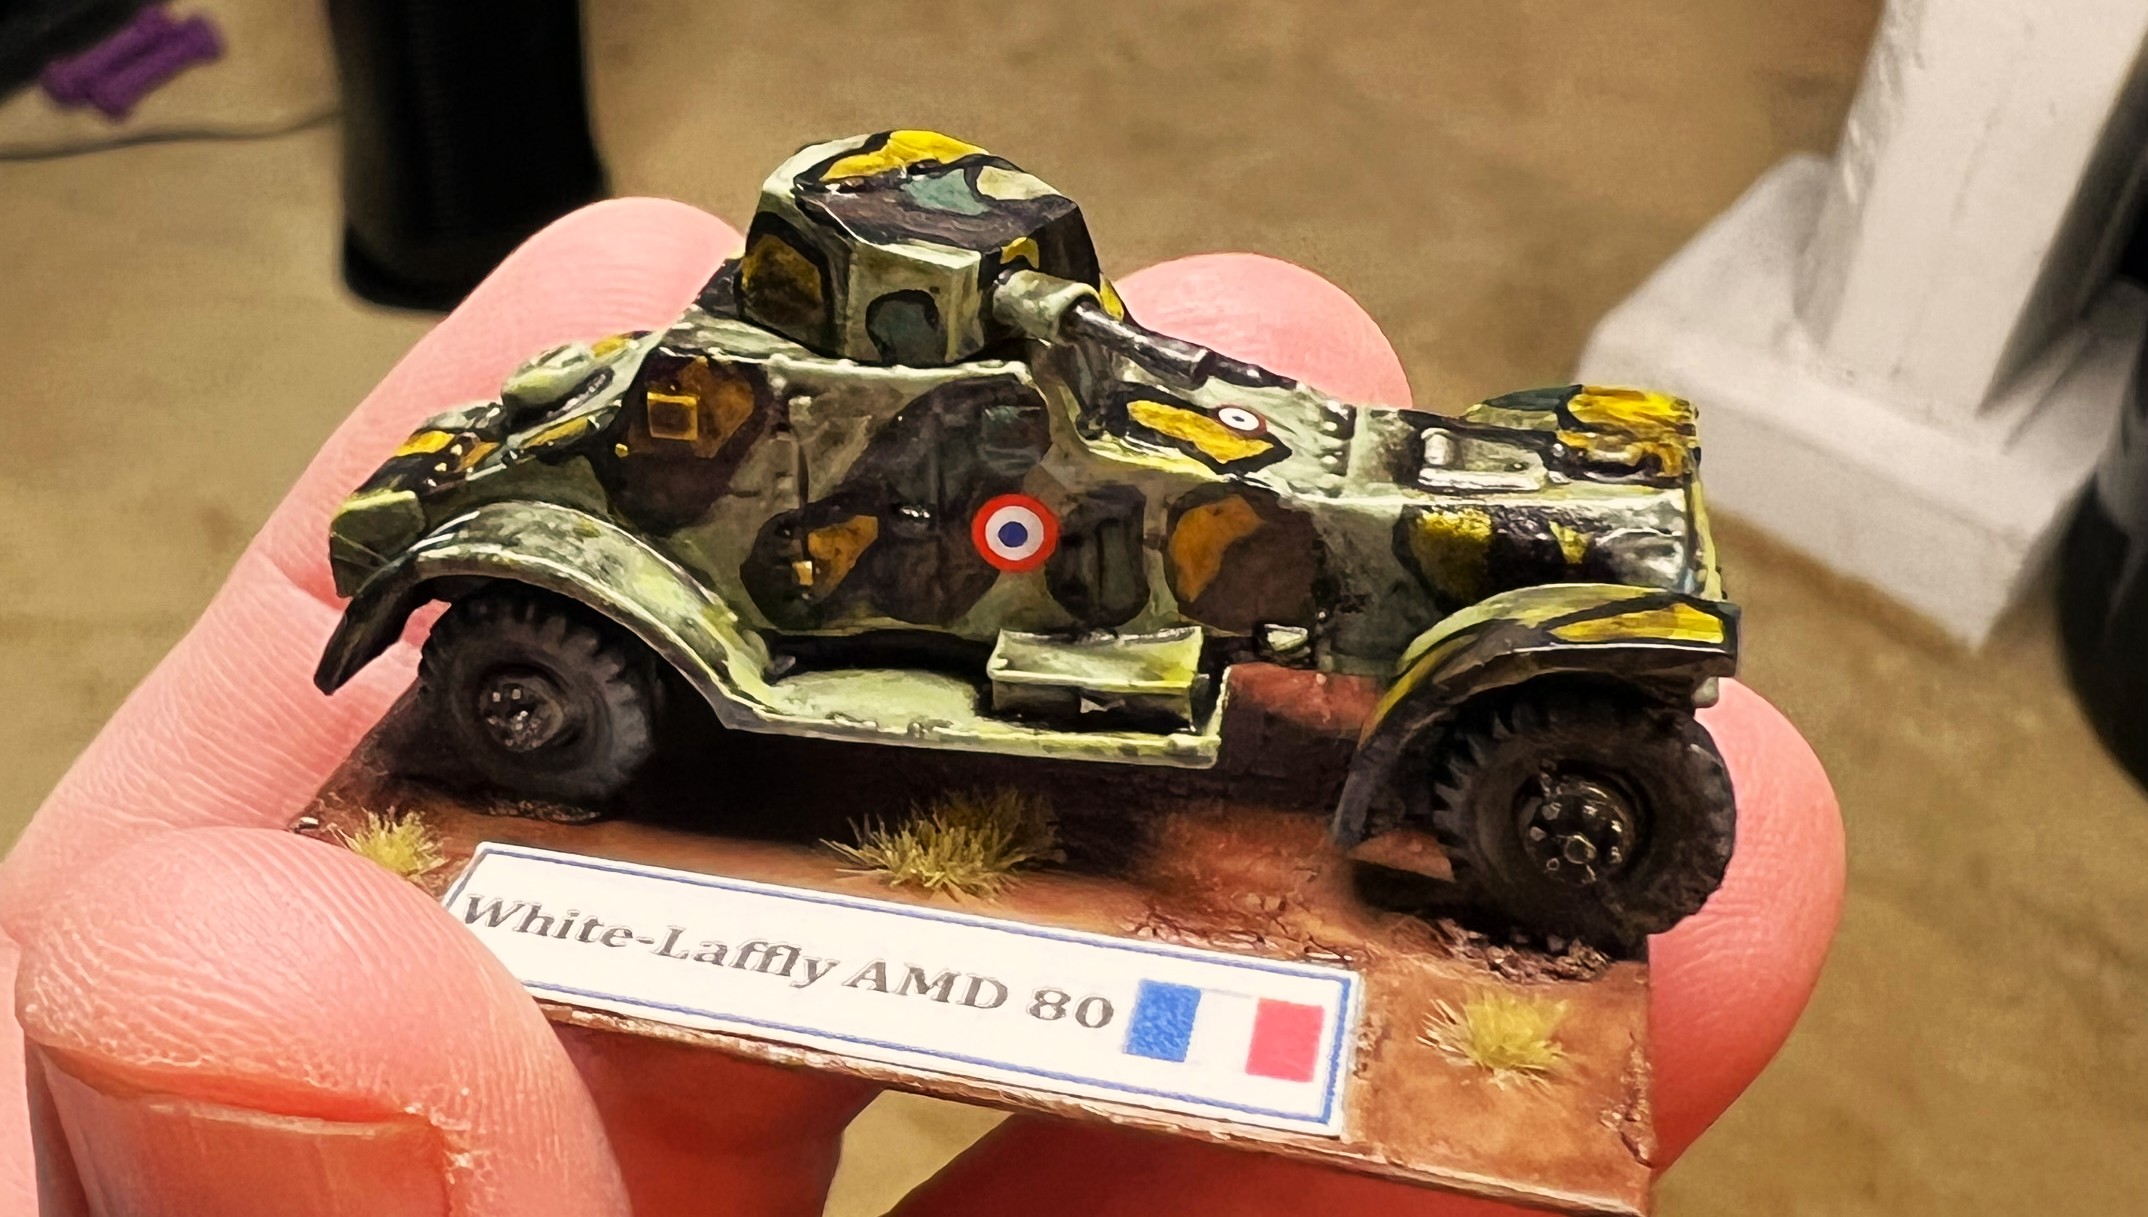
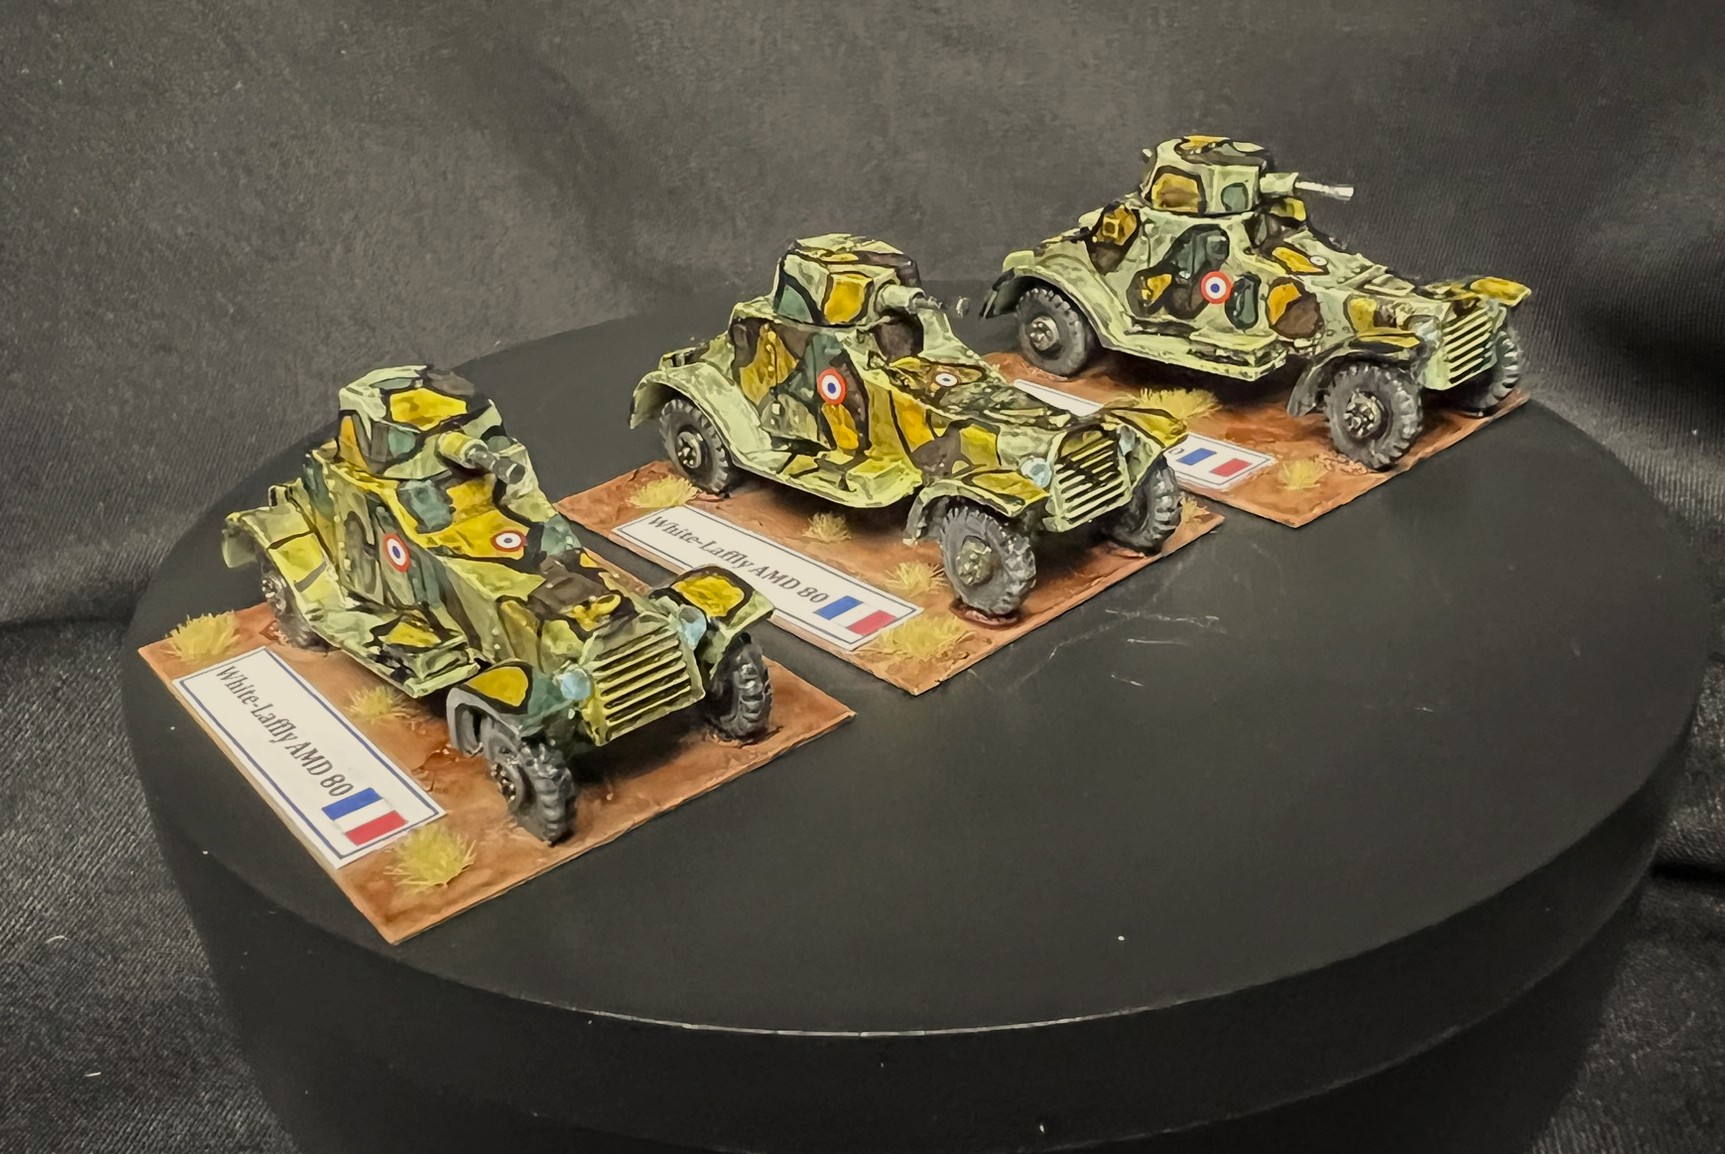
For my Operation Torch What a Tanker games, I decided that these would serve as the cavalry scouts that would run into those quirky French armored cars that I’ve been posting about recently.

Sourcing of the M3A1 models came from two different places. I got two Battlefront Flames of War models (SKU US 300) from a flea market at the HAVOC gaming convention in April. These models came with crew and machine guns. As the Battlefront model seems to be out-of-production, I needed to look elsewhere for more models. I went to eBay as a second source.

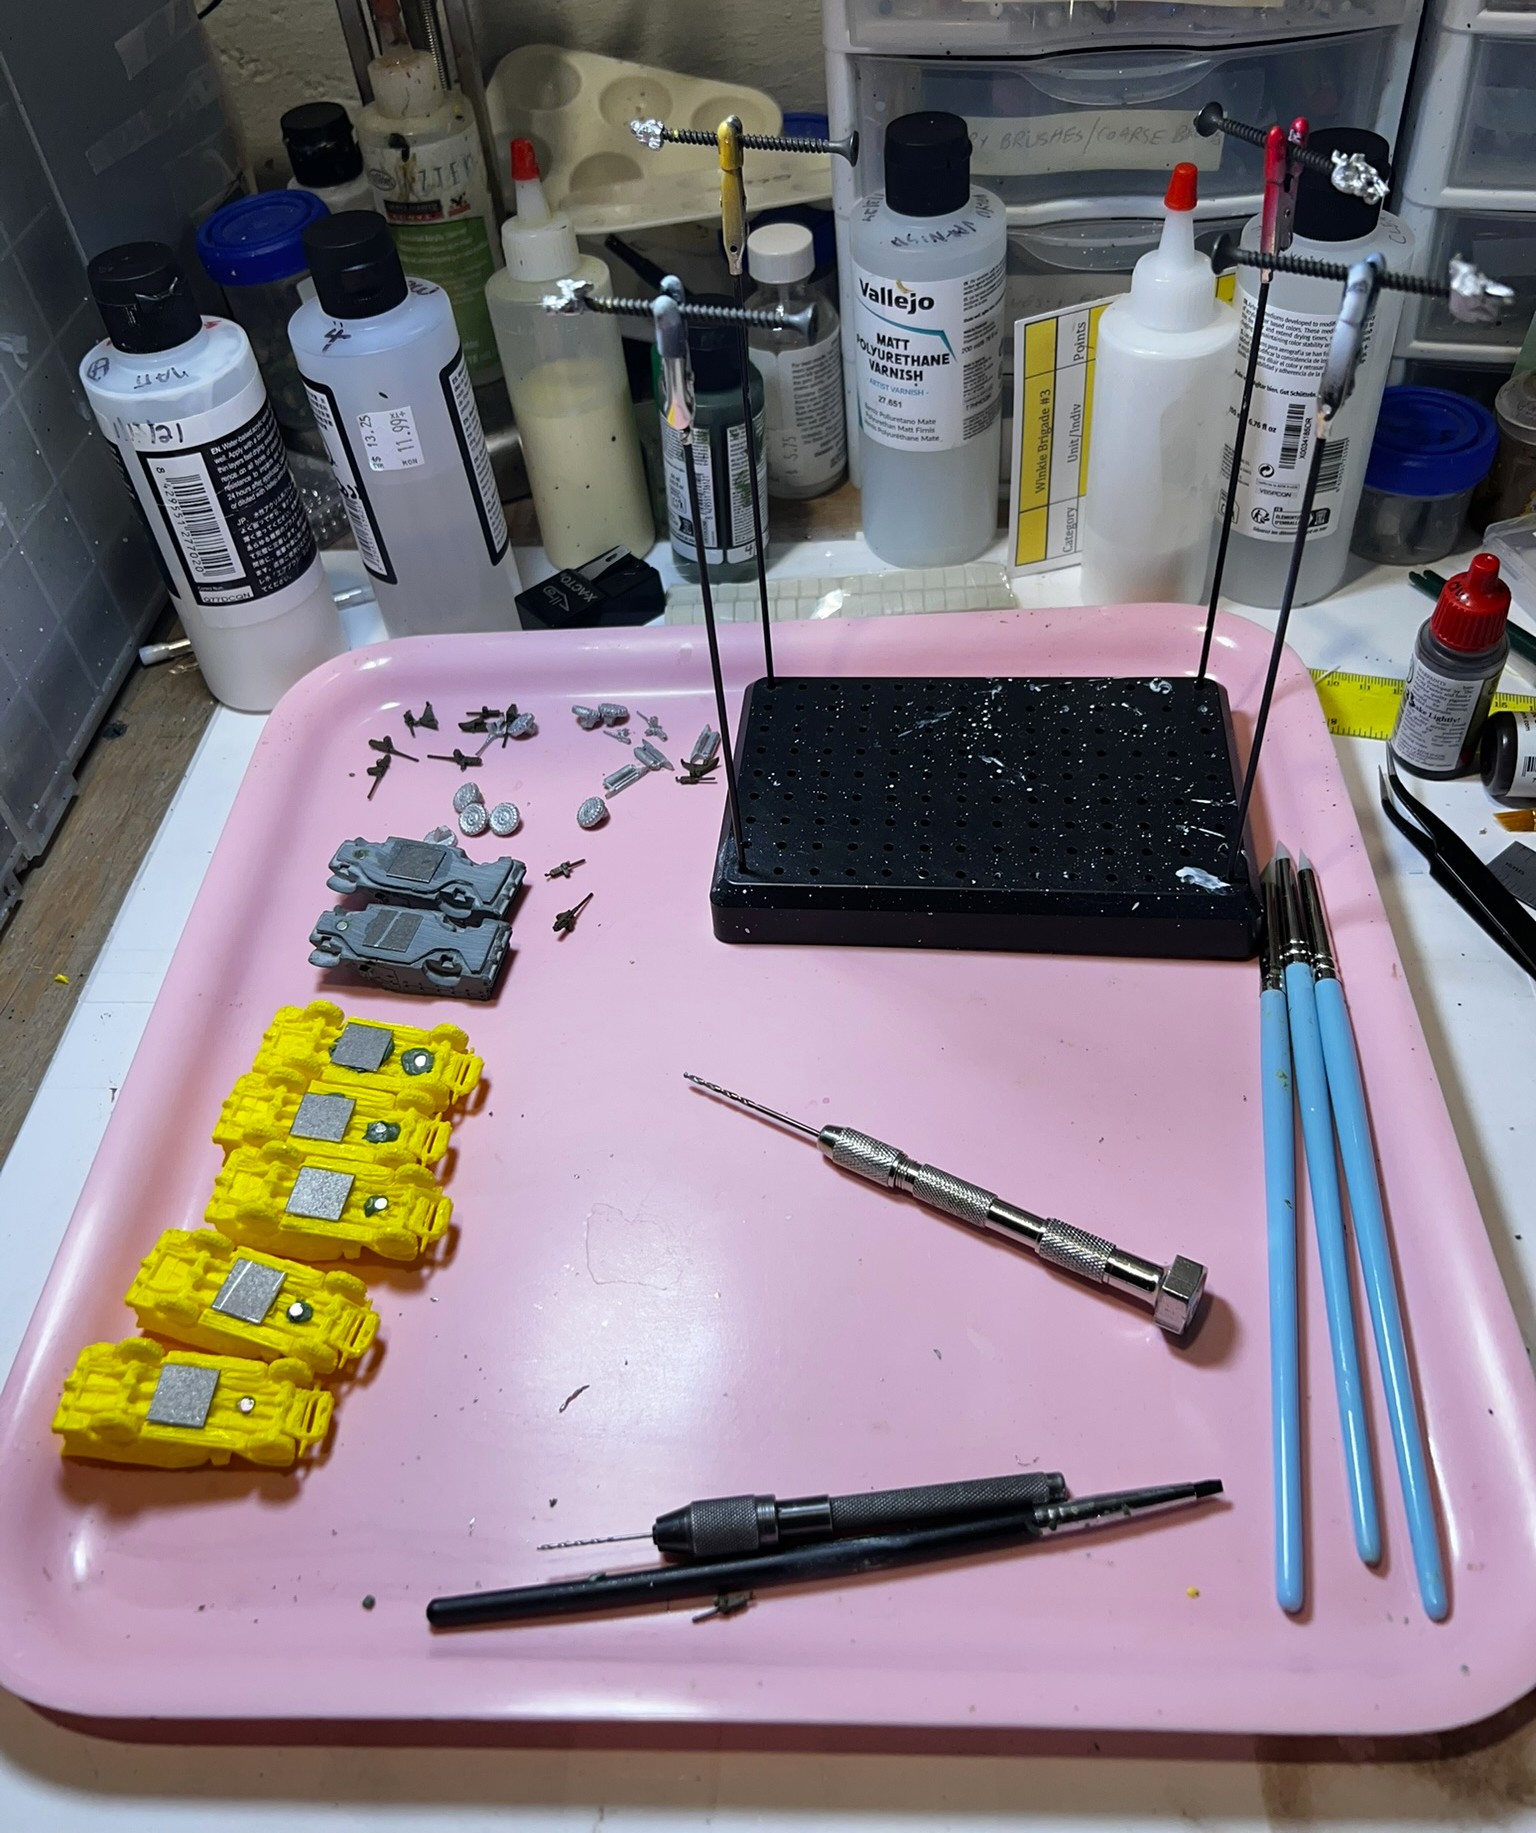
There from Wolverine3d.com I found models with the tarpaulin covers on. Given that a) these were different from the Battlefront models, b) there would be no crew to paint (saving time), and c) very reasonably-priced, I ordered 5, bringing my total available to 7 M3A1’s. They were not too crisp, and made of PLA plastic, but good enough for tabletop use. I started work on them all on May 23rd, and finished them on June 2nd. As I was hurrying to complete the entire project, photography of in-progress work took a backseat. I did work on multiple types of US vehicles concurrently as well. I judged doing separate posts for each type was better for me and you dear reader!

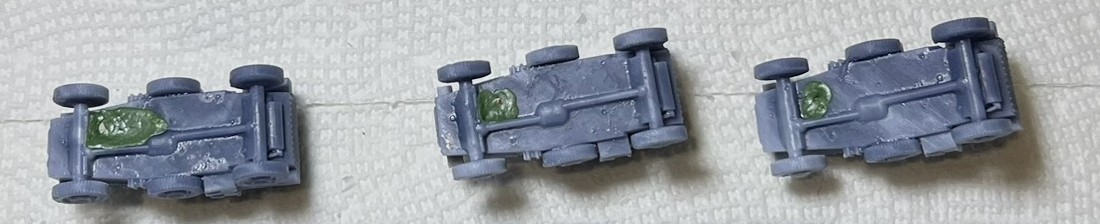
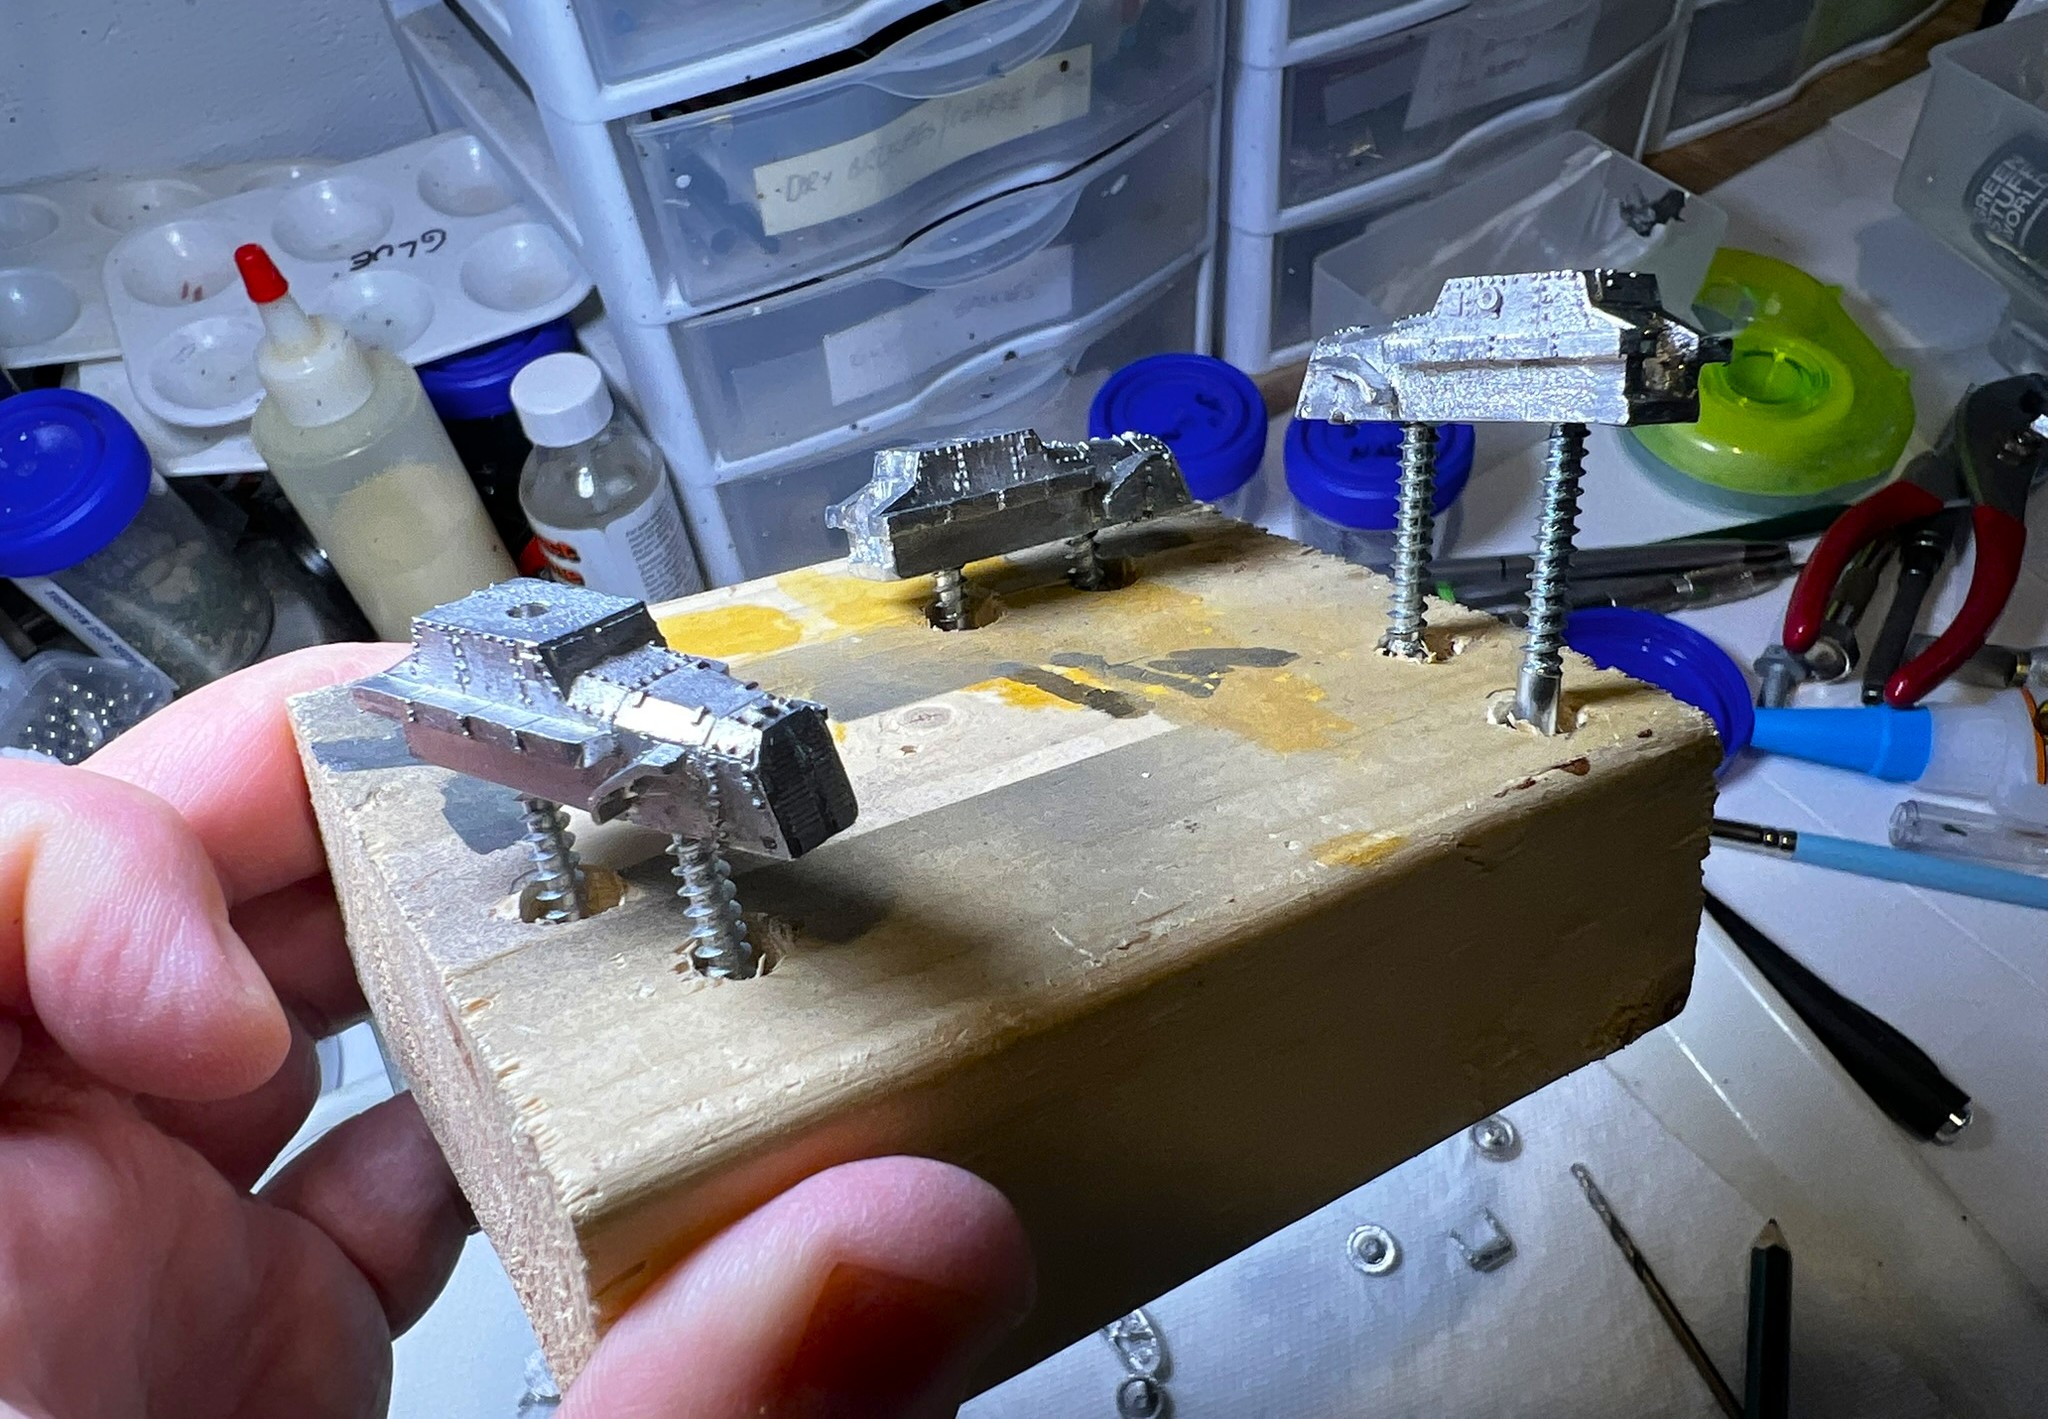
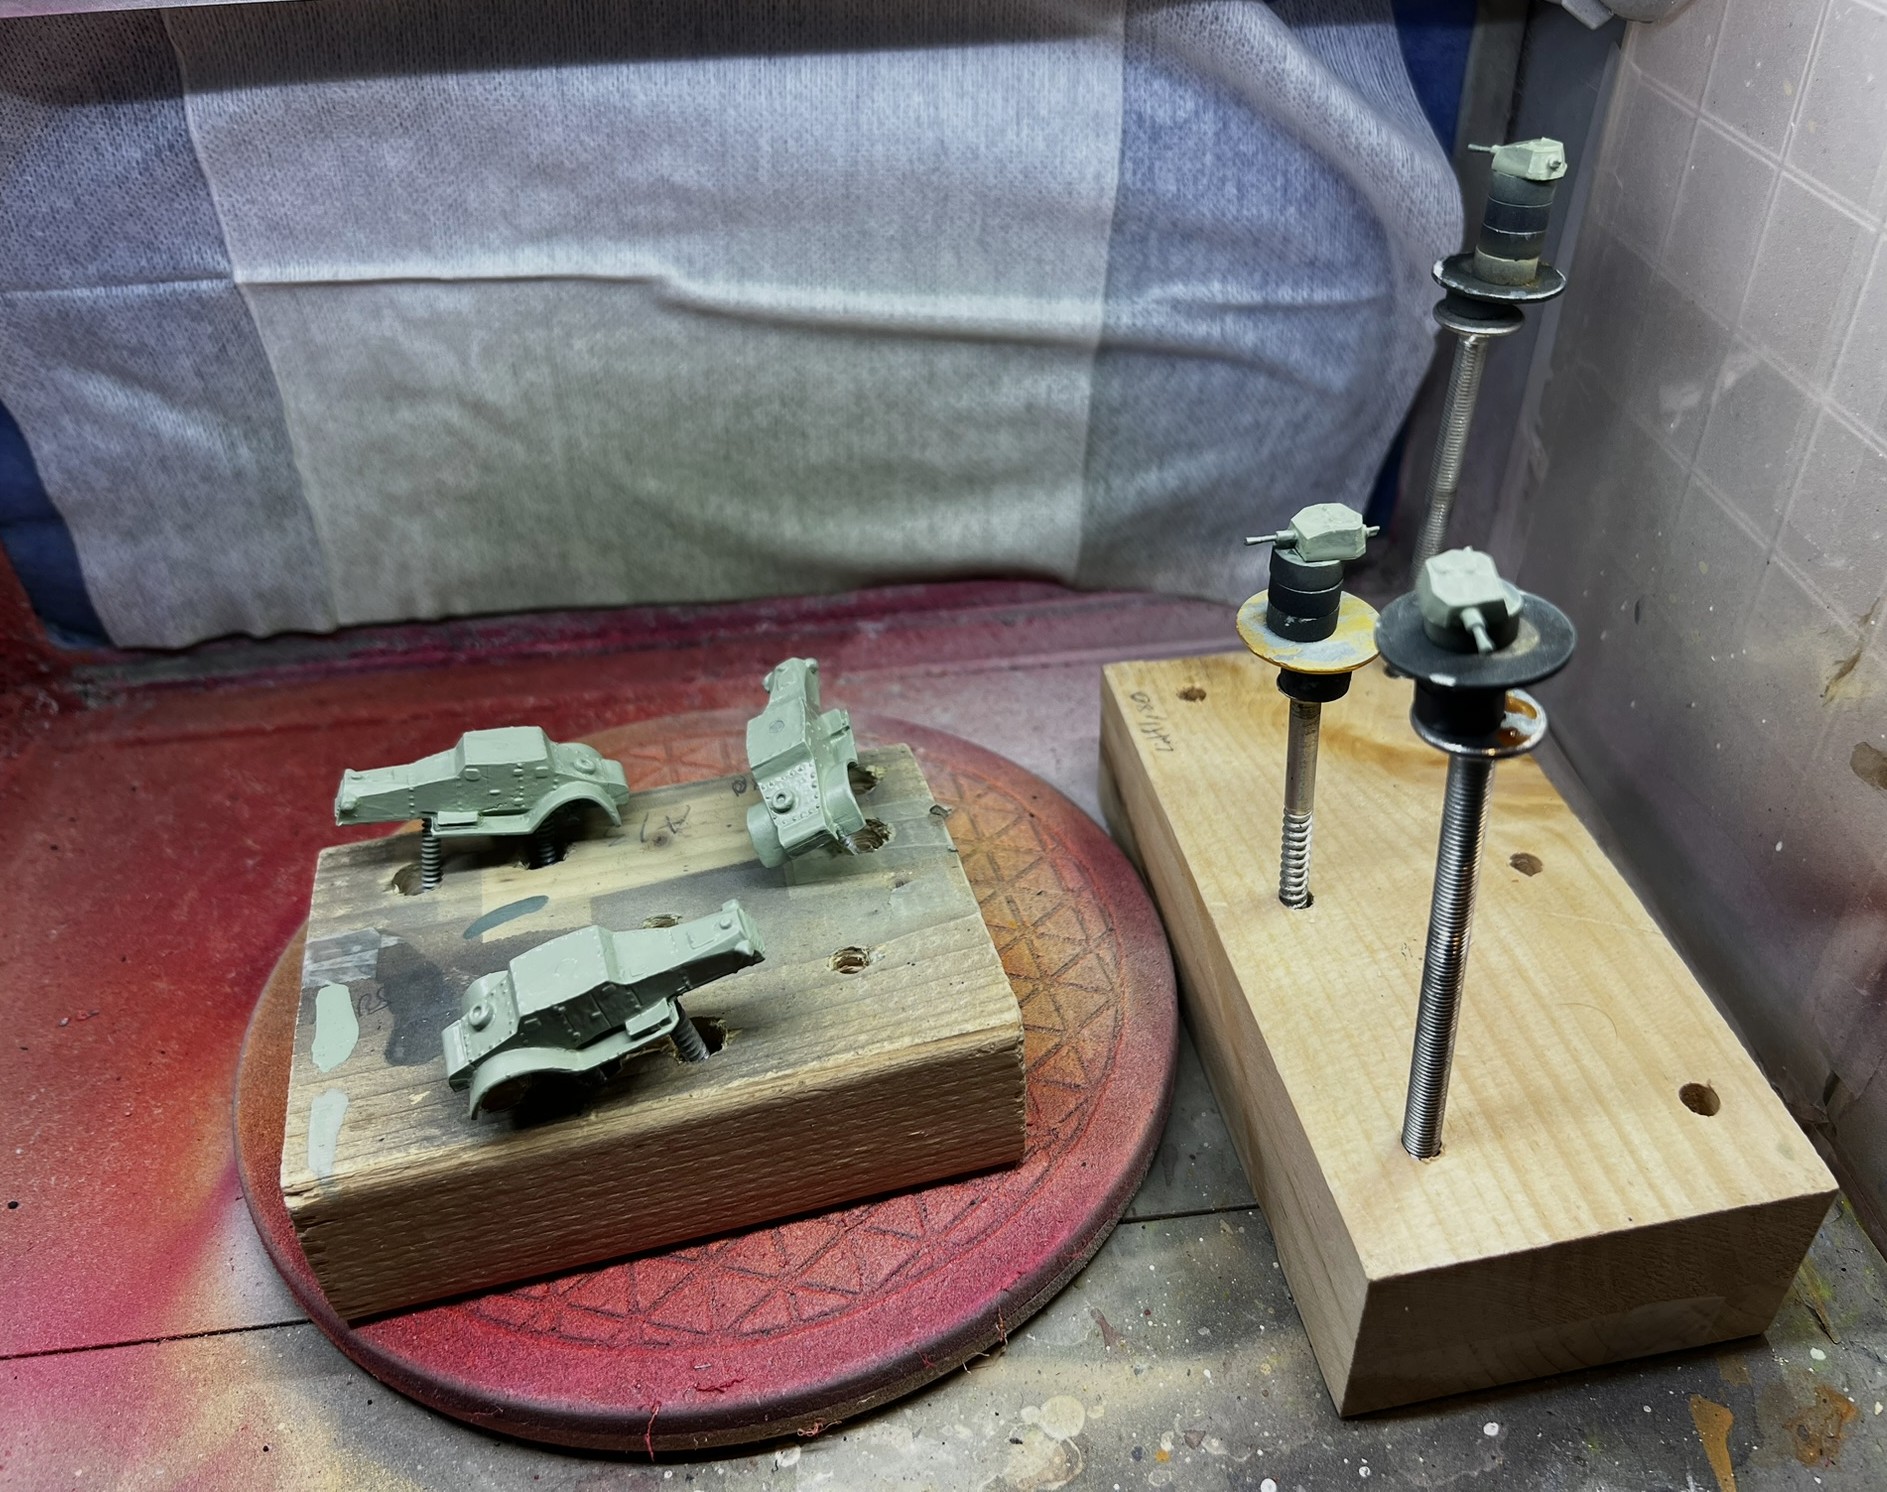
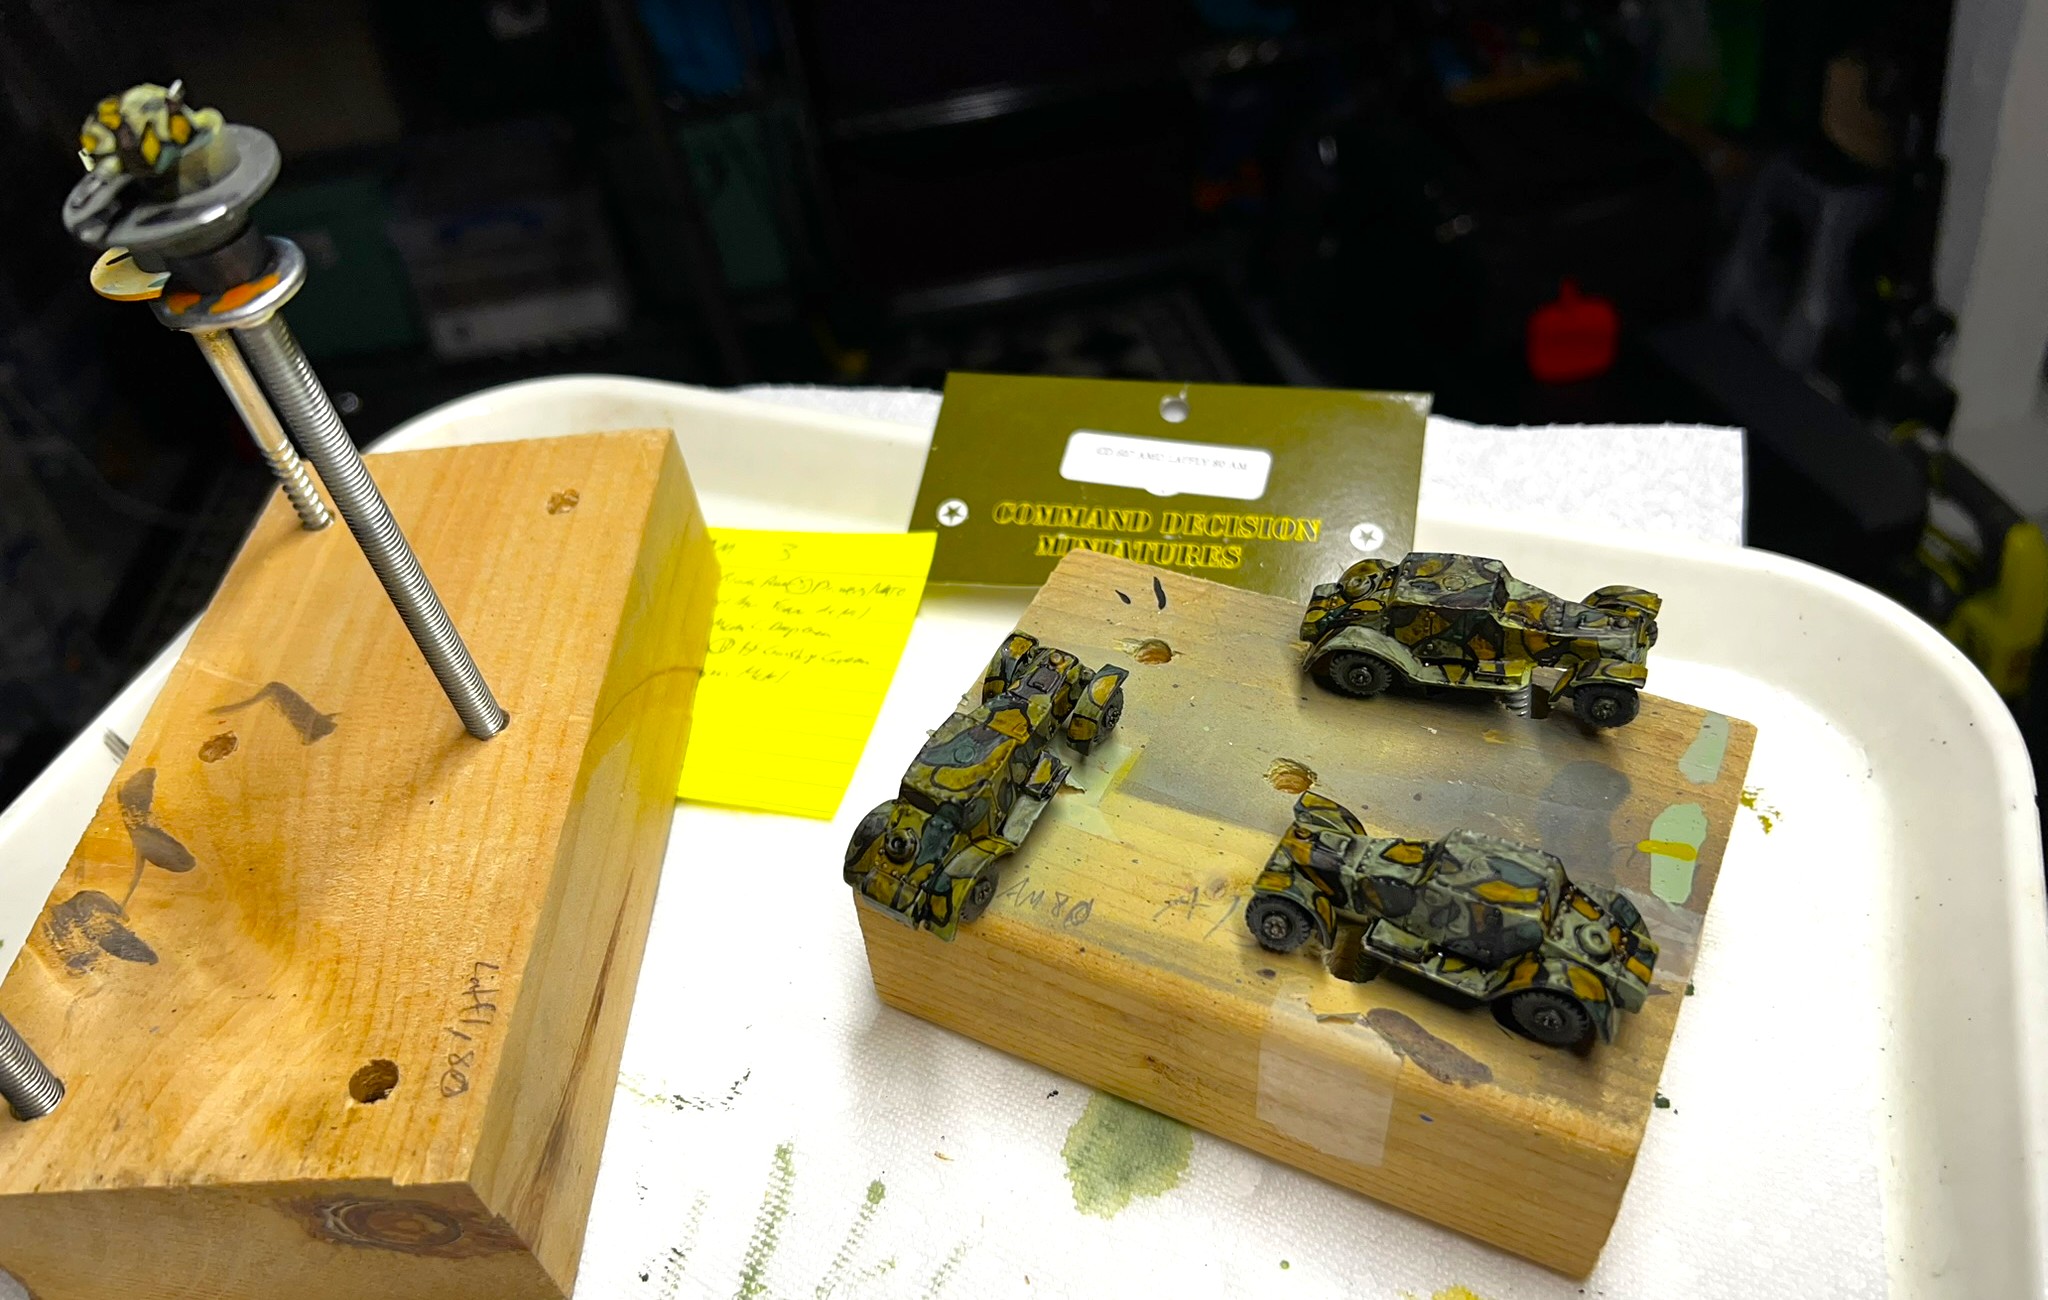
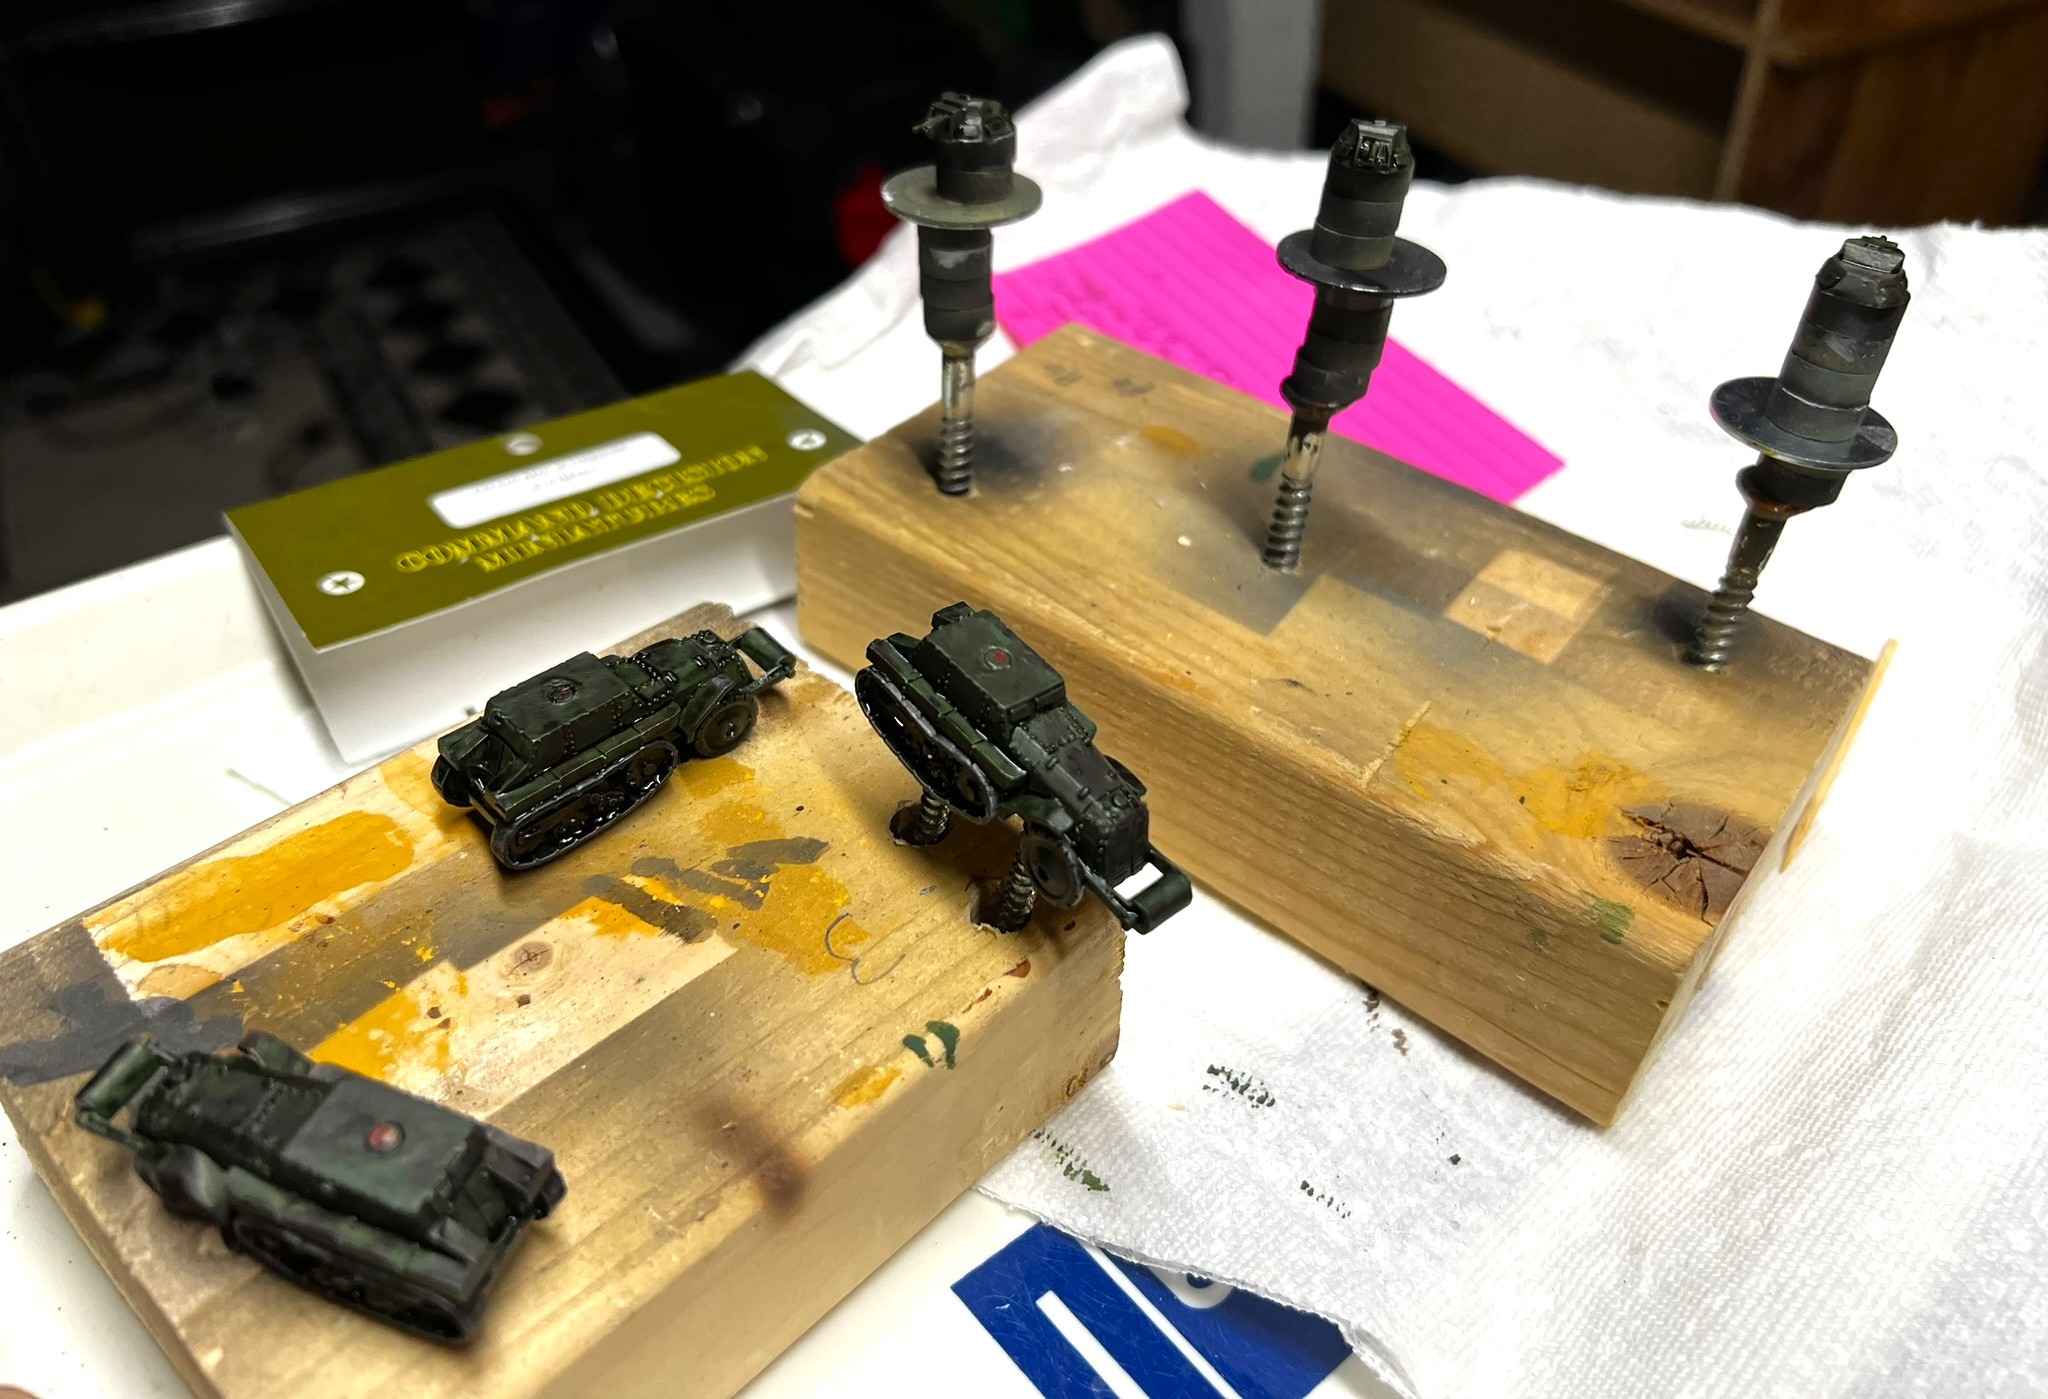
I cleaned up the models and washed them. For ease of painting I then mounted a small 1/2″ square steel base under each M3A1 model. This would allow me to use magnets to support the vehicles while I painted them. I also drilled out and installed small neodymium magnets (secured with green stuff) so that I would be capable of using my equally-magnetized blast markers on any that got brewed up in a game. As for crew- I used my alligator clip stand and some wood screws on them as supports – in a painful way for them (if they were capable of pain of course).

May 23rd – the work begins.

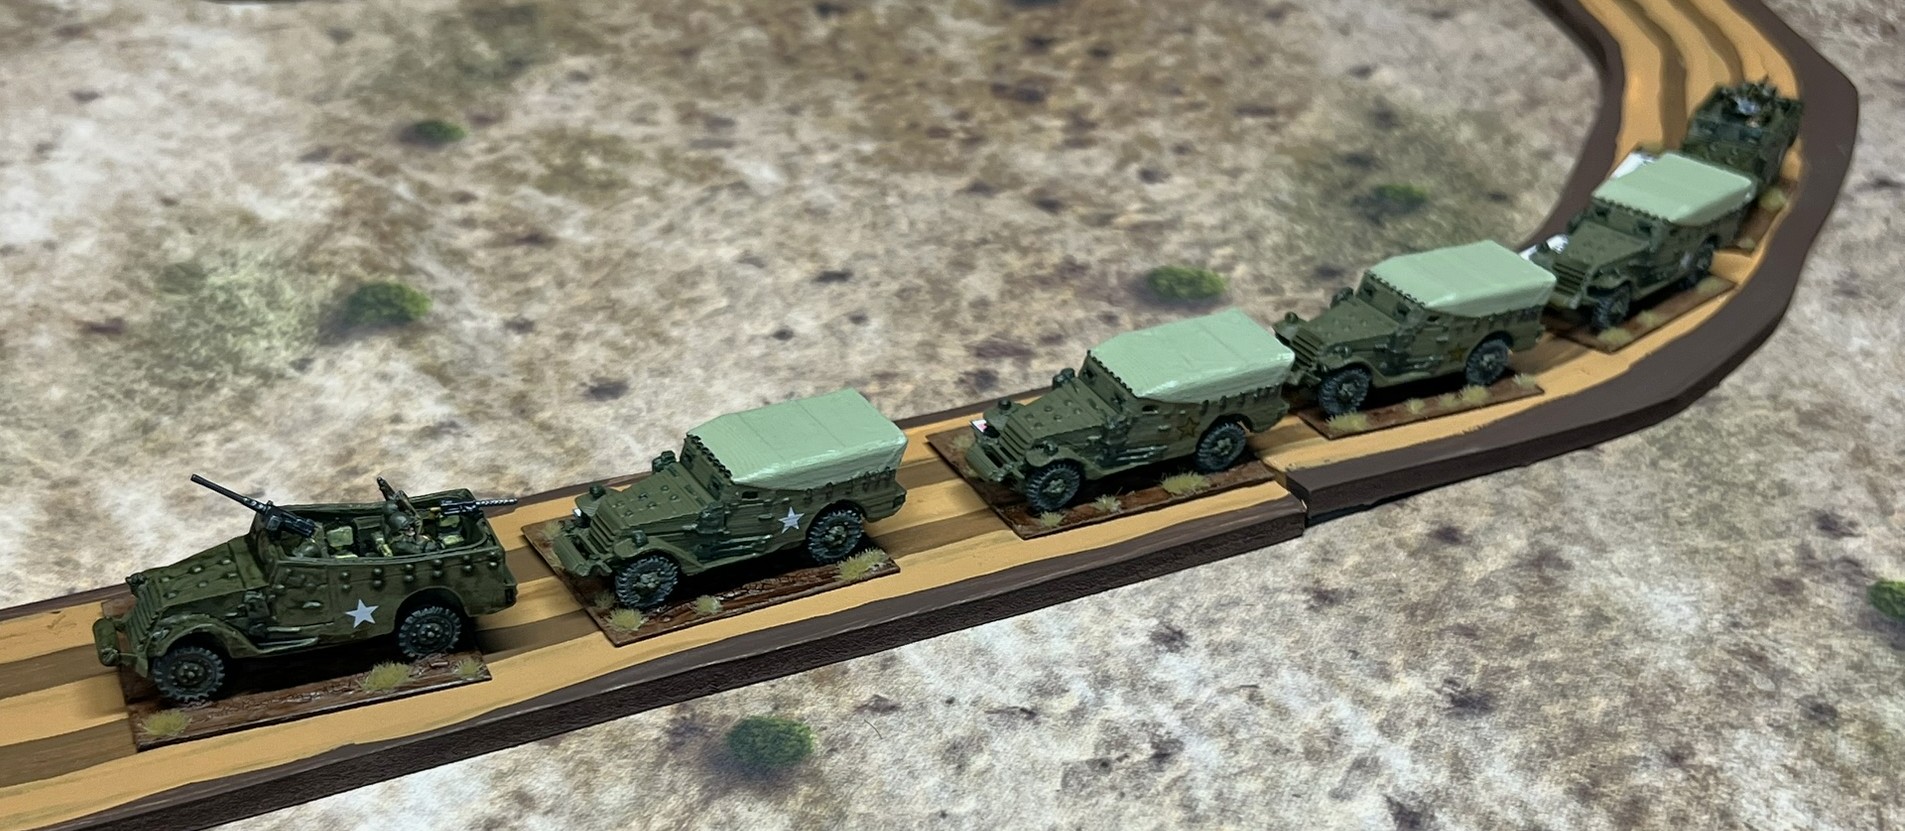
After painting I added decals and labels. Each M3A1 got a different name. Because in Operation Torch there was a mixed use of gold and white stars on US vehicles, I varied their application as well with some home-made gold star decals. They were ok – but not 100% to my liking, and you will see the different approach that I took on the other US vehicles (in future posts).

The seven M3A1’s before I added any tufts as final flocking. The bases are 1.5″ x 2″.

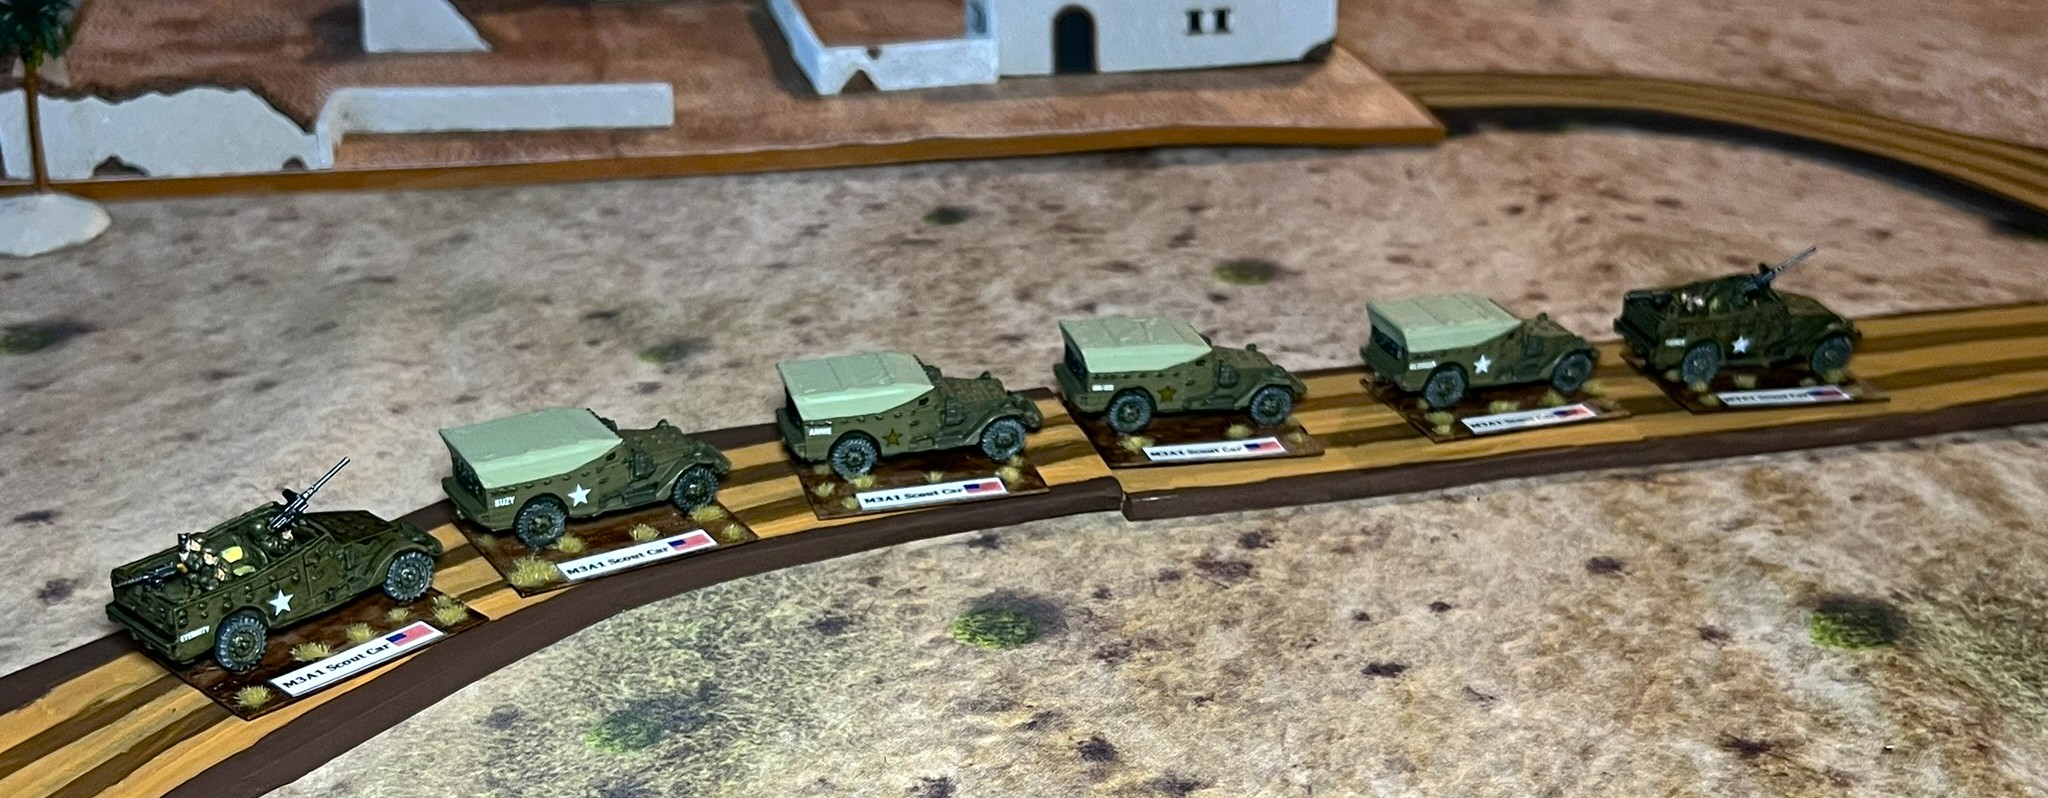
Once completed, I took a few photos of them assembled on my tabletop set up.

M3A1’s in convoy from the drivers’ sides.
M3A1’s in convoy from the other side.
Close up shot of M3A1 “Fierce”. Each Battlefront model had a driver and two soldiers in the back. I also replaced some of the bendy metal machine guns with plastic ones from another kit.

This wraps up this post on my 7 M3A1’s. Remaining are I have 8 American tanks and 6 tank destroyers to share. Which ones? You can probably guess – rightly or wrongly! What did you think of the M3A1’s? Did you learn anything? Maybe I motivated you to get some for yourself? Please let me know your thoughts in the comments section!

Lastly, for all of my posts on WWII games and projects – there is a consolidated list of posts and their links located here.

MATERIALS USED

PAINTS, INKS, GLAZES, SHADES, WASHES, PIGMENTS AND FLOCKING USED ON THE TWO BATTLEFRONT/FLAMES OF WAR RESIN M3A1 MODELS AND THE FIVE WOLVERINE3D.COM M3A1 3D-PRINTED MODELS:

  1. Green Stuff
  2. War Games Accessories Steel Bases Number 23 (1½” x 2″)
  3. Vallejo Surface Primer “German Green Brown”
  4. War Games Accessories Steel Bases Number 16 (½” x ½”)
  5. Gorilla Glue
  6. Alligator clips and stand
  7. Wooden Blocks, steel bolts, steel washers, magnets, steel screws
  8. Neodymium magnets (⅛” and ¼”)
  9. Vallejo Surface Primer “Black”
  10. Vallejo Surface Primer “German Green Brown”
  11. Plastic machine guns from Battlefront M5 Stuart Platoon kit
  12. Vallejo Surface Primer “USA Olive Drab”
  13. Citadel “Agrellan Earth” (texture)
  14. Army Painter “Mid Brown” (shade/wash)
  15. Reaper MSP Core Colors “Blackened Brown”
  16. Vallejo Model Air “Tire Black”
  17. Vallejo Model Color “Dark Sea Grey”
  18. Battlefront “Tommy Green”
  19. Vallejo Model Air “Ivory”
  20. Vallejo Model Color “Off White”
  21. Citadel “Tallarn Sand”
  22. Reaper MSP “Pure Black”
  23. Battlefront “European Skin”
  24. Vallejo Model Air “Black Metallic”
  25. Vallejo Model Color “Wood Grain”
  26. Vallejo Model Air “Wood”
  27. Army Painter “Flesh Wash” (shade/wash)
  28. Army Painter “Military Shader” (shade/wash)
  29. Hataka “Vert Fonce”
  30. Vallejo Model Color “USA Olive Drab”
  31. Vallejo “Mecha Varnish Gloss”
  32. Microscale Industries “Micro Set”
  33. Microscale Industries “Micro Sol”
  34. Microscale Industries “Liquid Decal Film”
  35. Expert’s Choice Ink Jet Clear Decal Paper
  36. Gin Fritter US Army decals
  37. Battlefront US Army decals
  38. Vallejo “Gloss Acrylic Varnish”
  39. Citadel “‘Ardcoat”
  40. Vallejo “Gloss Acrylic Varnish”
  41. Vallejo Flow Improver
  42. Vallejo Thinner
  43. Vallejo “Matte Polyurethane Varnish”
  44. Printed labels on card stock
  45. Gamers Grass “Tiny Beige 2mm Tufts” (flocking)
  46. PVA Glue

French Armor for Operation Torch: Panhard 175 TOE’s, Laffly S15 TOE’s, and Berliet VUDB’s

Yes – more armored cars of French origin are coming your way right here and now!

This post will cover off on the last three vehicle types that I built and painted for Vichy French forces during Operation Torch. All three here are armored cars, but each is definitely different and not commonly seen in tabletop wargames. I thought that that aspect alone would make for some interesting historical interest as well as game aesthetics.

Like the other inter-war armored cars – including the White-Laffly AMD 80’s and the Schneider AMC P16’s that I posted about here – these three were all models of AFV that were “good enough for the colonies”. The French Army certainly considered them as not good enough for defending against a potential German attack. Some were in France during 1939-1940, but most were in North Africa and the Levant. All of these were at least armed with machine guns, with the Panhard having a 25mm cannon as well.

Certainly finding appropriate 15mm/1:100 scale models of these was not easy. Luckily I managed to enlist the help of my friend Greg Priebe who 3D-printed two of these types. I did get the third type (Laffly S15 TOE) from Butlers’ Printed Models. Let’s look at each vehicle and model in turn.

Panhard 175 TOE

Photo from https://tank-afv.com/ww2/france/panhard-165-175.php

The Panhard 165 and 175 TOE’s shared similar frames – with the 175 version being a modification/upgrade. The acronym “TOE” stood for théâtres d’opérations extérieurs – i.e. designed for foreign theaters of operations like the colonies. Greg printed for me two Panhard 175’s that I assembled and painted. In reality, it was, as you can see, very tall (9.1′). That’s just 1′ 2″ shorter than the M3 Lee!

Do not confuse the 175 with the more well-known Panhard AMD 178. The 165 TOE type was built in the early 1930’s with the 175 TOE upgrades happening around 1934. Maybe 60 or so were initially built and then so upgraded. It did have a 25mm antitank gun, so it possessed some light antiarmor capability. Armor-wise, it had just 6-9mm of riveted armor, so not much. These were really designed to work to keep France’s colonies in line.

Greg sent me a bag of the models that he printed in late April. I was able to cobble together two good vehicles from the pieces. After a good (but gentle) washing (I needed to be careful of the fiddly fenders), I drilled out and installed small magnets as you see below. This was to make the turrets movable – as well as to hold smoke markers if they got brewed up or knocked out in a game. For a painting scheme. I used a green primer base with yellow camouflage stripes, akin to my H35’s. All of my paints used are listed as references at this post’s end for those interested in such stuff.

Panhard 175 TOE’s drilled out with installed magnets.
Panhard 175 TOE’s painted but before tufts and final base work was completed.
Completed Panhard 175 TOE models completed, shown here in cover scouting for approaching US vehicles during an Operation Torch game of What a Tanker.

Laffly S15 TOE

Photo from https://cartalana.com/033-15.php

This was yet another Laffly-modified truck. These were common civilian truck chassis developed into a range of different military types, one of which was the Laffly S15 TOE. It was designed for colonial use in 1934, but was not delivered to the French Army until 1938 or 1939. It had a single machine gun – a Reibel 7.5 mm light machine gun located inside of a domed turret. I thought it had a unique look.

I really was impressed with my examples from Butlers’ Printed Models. Here is the link for the model.

Unfortunately, my original purchased models were lost in transit. Yet, the company quickly sent me another pair of models – great customer service! They were crisp and very nice resin models. As I was rushing to finish all these vehicles (yes I am repeating that issue!), I have no WIP shots! For a painting scheme, I went with a sandy look.

My finished Laffly S15 TOE Models.

Berliet VUDB

The last type of Vichy French armored car that Greg printed up for me was a trio of Berliet VUDB’s. This type was made by – the Berliet company – which was in competition with Laffly and Panhard for French government contracts. It seems that all three companies got some business. One can only imagine what having so many armored car variants would do to logistics and the need for spare parts.

Berliet VUDB – photo from https://cartalana.com/033-15.php

As you can see, it was a 4×4 armored car with a big spare tire. Some credit this vehicle with the accolade of being the first armored personnel carrier as it had space for a driver and seven soldiers. The vehicle even had ports on the sides from which soldiers could fire their rifles while riding inside. It was armed with two Fusil-mitrailleur Modèle 1924 Modifié 29 machine guns (the standard French light machine gun at the beginning of WWII). Armor was just 7mm thick.

Detail from the Berliet VUDB wikipedia page – which is in French (luckily my second language).

” VUDB” is a French acronym for “voiture de prise de contact“, or “contact vehicle”. It was a scout car in US parlance and use. Sixty-two were produced between 1929 and 1932 – and originally were looked at to be used in the pacification of Morocco in the early 1930’s after the Rif War. There were a number of them in Morocco in November 1942.

As for the models, these were very solid resin prints. No assembly was required except for my usual drilling out holes for neodymium magnets.

My three Berliet VUDB’s at the start.
Painted Berliet VUDB’s before I added labels and flocking on the bases. While a Berliet VUDB could have had two machine guns sticking out, the model only had the one out.
Berliet VUDB’s on tabletop heading to the front.

That finishes off the 31 AFV’s that I assembled and painted for my Operation Torch What a Tanker game. All are in their glory…well their box…below.

31 French tanks and armored cars!

I have now caught up on all my French vehicles! It’s time to move on to the Americans next!

I have 22 American tanks, tank destroyers, or armored cars to write about next. All were used in Operation Torch in November 1942. These vehicles will be the topics of my next posts.

Please, I’d love to hear any feedback – were you surprised at anything here? Learn anything? Get inspired?

Let me know your thoughts in the comments section!

Lastly, for all of my posts on WWII games and projects – there is a consolidated list of posts and their links located here.

MATERIALS USED

PAINTS, INKS, GLAZES, SHADES, WASHES, PIGMENTS AND FLOCKING USED ON THE TWO PANHARD 175 TOE MODELS 3D-PRINTED BY GREG PRIEBE:

  1. Green Stuff
  2. War Games Accessories Steel Bases Number 23 (1½” x 2″)
  3. Neodymium magnets (⅛”)
  4. Gorilla Glue
  5. Vallejo Surface Primer “Black”
  6. Wooden Blocks, steel bolts, steel washers, nails, magnets, steel screws
  7. Vallejo Primers “Desert Tan”
  8. Vallejo Model Color “Dark Yellow”
  9. Vallejo “Thinner Medium”
  10. Vallejo Surface Primer “German Green Brown”
  11. Reaper MSP Core Colors “Blackened Brown”
  12. Army Painter “Mid Brown” (shade/wash)
  13. Citadel “Agrellan Badlands” (texture)
  14. Vallejo Primers “NATO Green”
  15. Vallejo Model Air “Tire Black”
  16. Vallejo Model Color “Dark Sea Grey”
  17. Poster tack
  18. Reaper MSP Core Colors “Blackened Brown”
  19. Army Painter “Mid Brown” (shade/wash)
  20. FolkArt “Champagne”
  21. Vallejo “Mecha Varnish Gloss”
  22. Microscale Industries “Micro Set”
  23. Microscale Industries “Micro Sol”
  24. Microscale Industries “Liquid Decal Film”
  25. Flames of War French Decal Set (FR940)
  26. Peddinghaus-Decals 1/100 2181 “World of Flames French tanks early war”
  27. Citadel “‘Ardcoat”
  28. Vallejo “Gloss Acrylic Varnish”
  29. Vallejo Mecha Weathering Effects “Dark Rust Wash”
  30. Army Painter “Dark Tone” (wash)
  31. Vallejo Flow Improver
  32. Vallejo Thinner
  33. Vallejo “Matte Polyurethane Varnish”
  34. Printed labels on card stock
  35. Gamers Grass “Tiny Beige 2mm Tufts” (flocking)
  36. PVA Glue

PAINTS, INKS, GLAZES, SHADES, WASHES, PIGMENTS AND FLOCKING USED ON THE TWO LAFFLY S15 TOE MODELS FROM BUTLERS’ PRINTED MODELS:

  1. No. 19 x ½” flat head nails
  2. War Games Accessories Steel Bases Number 23 (1½” x 2″)
  3. Gorilla Glue
  4. Green Stuff
  5. Neodymium magnets (⅛”)
  6. Daisy BB’s
  7. Vallejo Surface Primer “Black”
  8. Wooden Blocks, steel bolts, steel washers, nails, magnets, steel screws
  9. Vallejo Surface Primer “German Green Brown”
  10. Army Painter “Mid Brown” (shade/wash)
  11. Vallejo Primers “Desert Tan”
  12. Vallejo Model Color “Black”
  13. Vallejo Model Air “Tire Black”
  14. Vallejo Model Color “Dark Sea Grey”
  15. Battlefront “Oxide Red”
  16. Reaper MSP “Carrot Top Red”
  17. Vallejo “Thinner Medium”
  18. Vallejo Mecha Color “Dark Steel”
  19. Vallejo Mecha Color “Sand Yellow”
  20. Army Painter “Dark Tone” (wash)
  21. FolkArt “Champagne”
  22. Citadel “Agrellan Earth” (texture)
  23. Citadel “Agrellan Badlands” (texture)
  24. Reaper MSP Core Colors “Blackened Brown”
  25. Vallejo “Mecha Varnish Gloss”
  26. Microscale Industries “Micro Set”
  27. Microscale Industries “Micro Sol”
  28. Microscale Industries “Liquid Decal Film”
  29. Flames of War French Decal Set (FR940)
  30. Peddinghaus-Decals 1/100 2181 “World of Flames French tanks early war”
  31. Citadel “‘Ardcoat”
  32. Vallejo “Gloss Acrylic Varnish”
  33. Vallejo Mecha Weathering Effects “Dark Rust Wash”
  34. Vallejo Flow Improver
  35. Vallejo Thinner
  36. Vallejo “Matte Polyurethane Varnish”
  37. Printed labels on card stock
  38. Gamers Grass “Tiny Beige 2mm Tufts” (flocking)
  39. PVA Glue

PAINTS, INKS, GLAZES, SHADES, WASHES, PIGMENTS AND FLOCKING USED ON THE THREE BERLIET VUDB MODELS 3D-PRINTED BY GREG PRIEBE:

  1. Green Stuff
  2. War Games Accessories Steel Bases Number 23 (1½” x 2″)
  3. Neodymium magnets (⅛”)
  4. Gorilla Glue
  5. Vallejo Surface Primer “Black”
  6. Wooden Blocks, steel bolts, steel washers, nails, magnets, steel screws
  7. Vallejo Primers “Desert Tan”
  8. Vallejo Model Color “Dark Yellow”
  9. Vallejo “Thinner Medium”
  10. Vallejo Surface Primer “German Green Brown”
  11. Battlefront “Oxide Red”
  12. Reaper MSP “Carrot Top Red”
  13. Vallejo Model Air “Tire Black”
  14. Vallejo Model Color “Dark Sea Grey”
  15. Vallejo Mecha Color “Dark Steel”
  16. Army Painter “Mid Brown” (shade/wash)
  17. Reaper MSP Core Colors “Blackened Brown”
  18. Citadel “Agrellan Badlands” (texture)
  19. Vallejo “Mecha Varnish Gloss”
  20. Microscale Industries “Micro Set”
  21. Microscale Industries “Micro Sol”
  22. Microscale Industries “Liquid Decal Film”
  23. Flames of War French Decal Set (FR940)
  24. Peddinghaus-Decals 1/100 2181 “World of Flames French tanks early war”
  25. Citadel “‘Ardcoat”
  26. Vallejo “Gloss Acrylic Varnish”
  27. FolkArt “Champagne”
  28. Vallejo Mecha Weathering Effects “Dark Rust Wash”
  29. Vallejo Flow Improver
  30. Vallejo Thinner
  31. Vallejo “Matte Polyurethane Varnish”
  32. Printed labels on card stock
  33. Gamers Grass “Tiny Beige 2mm Tufts” (flocking)
  34. PVA Glue

French Armor for Operation Torch: Hotchkiss H35’s, H39’s, and Renault R35’s

In November 1942, the Vichy French had a 8 division’s worth of troops in her colonies – from Morocco to the Levant. Under the terms of the Armistice of 22 June 1940, Vichy France was still obligated to defend its unoccupied lands as a neutral state.

And yes, they had more tanks than just the FT-17’s you saw in my last post. In addition to those old WWI relics, Vichy had Hotchkiss H35 and H39 tanks, as well as Renault R35’s. Both of the Hotchkiss models were “cavalry” tanks, in that they had been forced as a light tank on the French cavalry in the 1930’s (and later forced on infantry tank regiments as stopgaps). Contrastingly, the R35 was an “infantry tank”. After the Armistice, the Vichy Army had both types in the colonies. I did read somewhere that some R35’s were hidden away under hay bales behind horse barns to keep prying German and Italian officers of the Armistice Commission from finding them.

The H35, or Char léger modèle 1935 H, was a two-man tank, armed with the same cannon as the FT-17 (the Puteaux SA18 37mm cannon). The H39, or Char léger modèle 1935 H modifié 39, was a 1938 upgrade of the H35 that also got a better engine, and a newer and longer 37mm gun – the SA38 cannon, that supposedly had increased armor penetration over the SA18 (how much I cannot find!). Both variants were in North Africa in November 1942. There are only two observable differences to an outsider between the two models. Both have different engine deck configurations and the mufflers of H35’s point forward – while H39 mufflers point rearward.

An H35 tank. Note the engine deck and the forward-pointing muffler.
An H39 tank shown in Israeli markings at Yad La-Shiryon (officially: The Armored Corps Memorial Site and Museum at Latrun in Israel. Note the rearward-pointing muffler.

As for the R35, or Char léger Modèle 1935 R, it was an infantry tank under French Army doctrine. It too had a two-man crew, and was also armed with the Puteaux SA18 37mm cannon. It was thought to be slightly better mechanically than the H35/H39 variants. As the Armistice forbade Vichy from having pure tank units, these and the Hotchkiss tanks would be spread around into combined-arms units. These Vichy tanks and armored cars would play a role in Operation Torch in November 1942 against US forces in Morocco (and Algeria as well).

R35 tank at Saumur Museum in France.

In gathering appropriate models for my What a Tanker game for HISTORICON, I started with looking for H35 and H39 metal or 3D-printed models in resin. I found a two listings for some on eBay. One was for Sarge_s Stuff – he had H35’s that could be bought individually – and I ordered 4 of them. The other site was the same one I bought the FT-17’s from earlier – jacobsminis (aka HobbyHouse&Miniatures.LLC). I ordered 5 from HH&M as that was the minimum order. The tanks from HH&M were (and still are) listed as H39’s, but when I got them I realized that they were actually H35’s. Unlike their excellent FT-17 models, some of these had printing errors, and I ended up using just 2 of these. However, I did use all 4 of the Sarge_s Stuff ones as H35’s. For H39’s and R35’s, I decided to rebase the ones that I painted a few years ago. I had 1 H35 and 3 H39’s (documented here) and 2 R35’s (documented here). I rebased all 6 of these.

One of my 3 H39’s before I rebased.
My R35’s before rebased them.
All rebased!

This left me with 6 H35’s to paint to round out the tanks for Vichy (more armored cars would be coming!). As I was also working on many other vehicles at the time, plus running for reelection (I won), plus preparing for and attending HUZZAH, AND prepping for HISTORICON…plus golf…I was BUSY in April, May and even June and July. I am sure that you get the picture, and ironically I have few WIP pictures! But I’ll share what I have.

I used neodymium magnets and flat-head nail again to mount the turrets. The two H35 turret prints were slightly different, but I adapted with green stuff.

The 6 H35’s primed with the first desert sand color.

I used poster-tack again for masking/making camouflage patterns over the initial color. I did experiment with using Silly Putty as masking as I had seen someone do that – but it did not work for me. So I went back to what I knew would work – poster tack and touching up afterwards..

Poster-tack covered!
Then I applied a second prime with a NATO Green. Al paints are listed at the end of this post.
Now I had 6 H35’s. The third one from the left is one from an earlier project that I rebased, with the other 5 being new. The yellow is different on that older one, but ok enough I think for a game.

Now, I can share some limited…

Eye Candy

H35’s in column on my game tabletop.
Close up of the H35 column.

I am indeed – as promised – catching up on the posts I have backlogged for my What a Tanker Operation Torch game project- and yes there are more AFV’s to come. I do appreciate you, my readers. Of the eventually-painted 31 Vichy vehicles I had for the game, this brings me up to 24 Vichy combat vehicles that I have covered to date in this blog. I have 8 remaining Vichy armored cars to write about before I get to the USA. Those 8 will be the topic of my next post. Please, if you want, I’d love to hear any feedback – feel free to let me know your thoughts in the comments section.

For all of my posts on WWII games and projects – there is a consolidated list of posts and their links located here.

MATERIALS USED

PAINTS, INKS, GLAZES, SHADES, WASHES, PIGMENTS AND FLOCKING USED ON THESE H35 MODELS:

  1. Green Stuff
  2. War Games Accessories Steel Bases Number 23 (1½” x 2″)
  3. No. 19 x ½” flat head nails
  4. Vallejo Surface Primer “German Green Brown”
  5. Neodymium magnets (¼”)
  6. Gorilla Glue
  7. Wooden Blocks, steel bolts, steel washers, nails, magnets, steel screws
  8. Citadel “Agrellan Earth” (texture)
  9. Vallejo Primers “NATO Green”
  10. Vallejo Surface Primer “Black”
  11. Vallejo Primers “Desert Tan”
  12. Vallejo Surface Primer “German Green Brown”
  13. Reaper MSP Core Colors “Blackened Brown”
  14. Army Painter “Mid Brown” (shade/wash)
  15. Vallejo Mecha Color “Dark Steel”
  16. Battlefront “Oxide Red”
  17. Reaper MSP “Carrot Top Red”
  18. Army Painter Speed Paint 1.0 “Dark Wood”
  19. Army Painter “Dark Tone” (wash)
  20. Vallejo Mecha Weathering Effects “Dark Rust Wash”
  21. Vallejo Model Air “Tire Black”
  22. Vallejo Model Color “Dark Sea Grey”
  23. Vallejo “Mecha Varnish Gloss”
  24. Microscale Industries “Micro Set”
  25. Microscale Industries “Micro Sol”
  26. Microscale Industries “Liquid Decal Film”
  27. Flames of War French Decal Set (FR940)
  28. Peddinghaus-Decals 1/100 2181 “World of Flames French tanks early war”
  29. Citadel “‘Ardcoat”
  30. Vallejo “Gloss Acrylic Varnish”
  31. Citadel “Agrellan Earth” (texture)
  32. Army Painter “Mid Brown” (shade/wash)
  33. Reaper MSP Core Colors “Blackened Brown”
  34. Vallejo Flow Improver
  35. Vallejo Thinner
  36. Vallejo “Matte Polyurethane Varnish”
  37. Printed labels on card stock
  38. Gamers Grass “Tiny Beige 2mm Tufts” (flocking)
  39. PVA Glue

French Armor for Operation Torch: Renault FT-17’s

Vichy France had many different old or at least obsolete combat vehicles in their colonies. While more than half of Metropolitan France was occupied by the Germans, under the Armistice of 22 June 1940, Vichy was still obligated to defend its unoccupied lands as a neutral state.

As such, while Vichy was denied armored units, she was allowed to have integrated combined-arms units in the colonies – forces that had armored vehicles. These Vichy tanks and armored cars would play a role in Operation Torch in November 1942 against US forces in Morocco (and Algeria as well).

Abandoned / damaged Vichy French Renault FT-17 tanks are examined by curious US Personnel in Safi Morocco during Operation Torch – November 1942 – from https://www.reddit.com/r/WW2info/comments/17rn03o/abandoned_damaged_vichy_french_renault_ft17_tanks/

My last post covered two older (by November 1942 standards) armored cars used by Vichy forces – the White-Laffly AMD 80 and the Schneider AMC P16. Vichy also had tanks in North Africa, one of the most common was the WWI-vintage Renault FT-17.

For this post, I will discuss the venerable Renault FT-17’s that I built and painted up for my Operation Torch game of What a Tanker that I ran at HISTORICON 2025.

3,000 FT-17’s were built by France between 1917 and 1919. Indeed, she had so many old FT-17’s that the development and acquisition of newer tanks was negatively affected. Simply put, the French budgetary bean counters saw that the French Army had plenty of tanks available on paper, so why build too many more expensive ones? This would not bode well when May-June 1940 came around. Of course, French military doctrine was as least as equally to blame for the Fall of France (read BG Doughty’s The Seeds of Disaster: The Development of French Army Doctrine 1919-1939). After that debacle, Vichy did have many FT-17’s still in her colonies.

For my game, I had to have some FT-17’s. Historically, some were armed with the Puteaux SA18 37mm cannon, others with machine guns and even a very few with a short-barreled 75mm howitzer. For my game-design purposes, I decided that all should be armed with the 37mm cannon. I did have one completed 15mm/1:100 scale metal FT-17 from Peter Pig that I could rebase and use – it was described in my blog here.

To augment that, I purchased a 5-vehicle FT-17 platoon on eBay from jacobsminis (aka HobbyHouse&Miniatures.LLC). The tanks were nice crisp resin models. I ordered them on April 8th, and they arrived on April 14th. I started to work on them on April 28th (while concurrently working on all of the other vehicles for the project).

After washing the models, I drilled out and installed neodymium magnets in the hulls with green stuff. I also drilled out the turret bases to accommodate small flat-headed steel nails. These would work with the magnets in the hulls to both allow rotation and keep the turrets relatively secure. Priming and painting followed.

As I was working on many other vehicles, photo time got to be rare for me. Therefore, I do not have much in terms of WIP shots. I adopted the same airbrush painting pattern as I used for the Peter Pig model. The only difference was that I did not add a lot of mud to the tracks.

The main painting is done. You can see the turrets are semi-mounted temporarily on magnets and steel washers for painting purposes.

Then it was on to the decal and basing phases, which were like those that I employed and shared in my last post. I did end up with similar numerical decals on different tanks – but I did vary the sides and the other decals. Each one had a distinct name.

As an example, here is “MARECHAL PETAIN”. Each steel base is 1½” x 2″.

I’m sure that you’d like some better “eye candy”, so…

FT-17’s

“REIMS”

“MARECHAL FOCH”

“MARECHAL PETAIN”

“TYPHON”

“TOMBOUCTOU”

Group Shots

Below are all my FT-17’s, including the Peter Pig model on the front right. It has no name – but it does have mud!

Another view of the opposite side of the tanks – the Peter Pig model is on the bottom right here as well.

With terrible armor – yet the same 37mm gun as many other Vichy French AFV’s – these antique FT-17’s did indeed engage the US in battle in November 1942.

And an Instagram link for a video: https://www.instagram.com/p/DMwIOgMNcpD/

I do want to dedicate this post to my good friend Leif, who adores the FT-17 more than anyone else I know. When we play, it’s an easy choice as to which side he wants. He also helps me immensely at conventions – so this post is for you!

To all of you, thanks for looking! I will have share more Vichy vehicles soon. I eventually painted up 31 Vichy – and so far I’ve covered just 12 of them (6 FT-17’s, 3 White-Laffly AMD 80’s, and 3 Schneider AMC P16’s). More to come as I catch up. And there of course will be US vehicles. As always, if you want, I’d love to hear any feedback – feel free to let me know your thoughts in the comments section.

For all of my posts on WWII games and projects – there is a consolidated list of posts and their links located here.

Next up – Hotchkiss 35’s, 39’s, and Renault 35’s. Until my next post!

Eventually I do get these in games!

MATERIALS USED

PAINTS, INKS, GLAZES, SHADES, WASHES, PIGMENTS AND FLOCKING USED ON THESE FT-17 MODELS:

  1. Vallejo “Flow Improver”
  2. Green Stuff
  3. War Games Accessories Steel Bases Number 23 (1½” x 2″)
  4. No. 19 x ½” flat head nails
  5. Neodymium magnets (⅛” and ¼”)
  6. Gorilla Glue
  7. Vallejo Surface Primer “Black”
  8. Wooden Blocks, steel bolts, steel washers, nails, magnets, steel screws
  9. Vallejo Model Air “Dark Brown”
  10. Vallejo Primers “NATO Green”
  11. Vallejo Premium Color “Yellow Ochre”
  12. Hataka “Vert Fonce”
  13. Vallejo Model Air “Tire Black”
  14. Vallejo Model Color “Dark Sea Grey”
  15. Battlefront “Oxide Red”
  16. Army Painter “Dark Tone” (wash)
  17. Vallejo Mecha Weathering Effects “Dark Rust Wash”
  18. Vallejo “Mecha Varnish Gloss”
  19. Microscale Industries “Micro Set”
  20. Microscale Industries “Micro Sol”
  21. Microscale Industries “Liquid Decal Film”
  22. Flames of War French Decal Set (FR940)
  23. Peddinghaus-Decals 1/100 2181 “World of Flames French tanks early war”
  24. Citadel “‘Ardcoat”
  25. Vallejo Surface Primer “German Green Brown”
  26. Vallejo “Gloss Acrylic Varnish”
  27. Citadel “Agrellan Earth” (texture)
  28. Army Painter “Mid Brown” (shade/wash)
  29. Reaper MSP Core Colors “Blackened Brown”
  30. Vallejo Flow Improver
  31. Vallejo Thinner
  32. Vallejo “Matte Polyurethane Varnish”
  33. Printed labels on card stock
  34. Gamers Grass “Tiny Beige 2mm Tufts” (flocking)
  35. PVA Glue

French Armor for Operation Torch: White-Laffly AMD 80’s & Schneider AMC P16’s

Having decided to run an Operation Torch game of What a Tanker at HISTORICON 2025, I had to get working back in March and early April. It was time to gather enough vehicles and paint them up. As you will see in these entries, it was not always easy, especially for some of the esoteric/rare Vichy vehicles.

This blog will, as I promised, catch you up on the myriad of US and Vichy French vehicles that I assembled and painted for that recent convention. If I had stopped to blog about them at the time, I don’t think I would have gotten everything done. I had not built any tanks in many years, so I was excited!

After the Fall of France, there were still French Army units defending the colonies. So let’s start with some of these Vichy French vehicles for November 1942.

I will start with two types of Old Glory models. Both are metal and 1:100 in scale (15mm).

The first one is SKU CD607, “White-Laffly AMD 80“. This vehicle was a twice-modified holdover from WWI, and it looks it. Around 28 were reworked in 1934. It was rearmed with three machine guns. One heavy machine gun replaced the Puteaux SA18 37mm cannon in the turret that its predecessor, the AMD 50, had. AMD stands for “automitrailleuse de decouverte” – basically “armored scout car” in English. By the time war broke out in Europe, all of these were in North Africa in the colonies. This was a common fate for all older French armaments.

The second one is SKU CD610, “Schneider AMC P16“. Like the White-Laffly AMD 80, this was a cavalry vehicle. Unlike it, its designation was AMC, or “automitrailleuse de combat” (combat armored car). 100 were produced. It had an innovative Kegresse suspension system that made it into a half-track. It also kept its turret-mounted Puteaux SA18 37mm cannon. This was the most common cannon on French tanks, so this gave it some anti-armor punch. Some P16’s did met the Wehrmacht in Germany, but many were similarly dispersed to the colonies before 1939.

The Old Glory Command Decision models as received. There were 3 of each type. I printed off some examples of paint schemes to start with them.

I got the models in April, and started work on them on the 26th. I did the usual drilling and washing in preparation for assembling and painting. I also used small magnets to affix the turrets. These magnets also serve to help to hold the brewed-up markers (also on magnets) that I use to indicate knocked-out tanks.

The White-Laffly AMD 80 models drilled and washed.
The Schneider AMC P16 models drilled and washed.

Metal miniatures don’t always cast perfectly. In the case of the AMD 80’s, the headlights were not great, but fixable.

Close up example of a missing White-Laffly headlight.

I used a little green stuff and they started looking old again!

Headlights are back!

I also used green stuff and to fill the cavities under the vehicles. I waited until the green stuff had hardened just slightly, then inserted screws as you can see. Once that had fully set, I had a nice way of setting up the models on wooden blocks for painting, as the screws would come out easily later.

I ended up with a typical French camouflage pattern on the AMD 80’s as opposed to the pattern in the reference.

The P16’s got a brown and green camouflage pattern.

The Schneider AMC P16’s got a darker green – shown here ready for decals.

To be efficient and productive, I worked on these (and others you will see shortly in future posts) at the same time. I ended up deciding to base these on steel bases so as to allow each type a label. Let’s face it, I can’t expect most gamers at a convention to recognize these old and rare types. Labels help. I just needed to explain to the players that the bases are irrelevant to targeting the vehicles.

Decals and labels applied, still needed an application of matte varnish, some tufts and their turrets!

I managed to finish these on May the 8th.

Eye Candy

White-Laffly AMD 80

White-Laffly AMD 80 right side.
White-Laffly AMD 80, frontal view.
Group shot of the three White-Laffly AMD 80 models completed.

Here is my Instagram White-Laffly AMD 80 video link: https://www.instagram.com/p/DMtJSygOJqJ/

Schneider AMC P16

Right side of a Schneider AMC P16.
Left side of a Schneider AMC P16.
Group shot of the three Schneider AMC P16 80 models completed.

Here is my Instagram Schneider AMC P16 video link: https://www.instagram.com/p/DMtJ_a1OSg4/

Thanks for looking!

For all of my posts on WWII games and projects – there is a consolidated list of posts and their links located here.

I hope you enjoyed the post – there are several more entries coming soon! I’d love to hear any feedback – feel free to let me know your thoughts in the comments section.

MATERIALS USED

PAINTS, INKS, GLAZES, SHADES, WASHES, PIGMENTS AND FLOCKING USED ON THE WHITE-LAFFLY AMD 80 MODELS:

  1. Vallejo “Flow Improver”
  2. Green Stuff
  3. War Games Accessories Steel Bases Number 23 (1½” x 2″)
  4. Neodymium magnets (⅛” and ¼”)
  5. Gorilla Glue Vallejo Surface Primer “Black”
  6. Wooden Blocks, steel bolts, steel washers, magnets, steel screws
  7. Vallejo Primers “NATO Green”
  8. Vallejo Model Air “Duck Egg Green”
  9. Vallejo Model Air “Dark Brown”
  10. Vallejo Mecha Weathering Effects “Dark Rust Wash”
  11. Vallejo Mecha Color “Deep Green”
  12. Vallejo Model Color “Dark Yellow”
  13. Vallejo Model Color “Black”
  14. Battlefront “Gunship Green”
  15. Vallejo Mecha Color “Sky Blue”
  16. Vallejo Model Air “Gun Metal”
  17. Vallejo Model Air “Tire Black”
  18. Vallejo Model Color “Dark Sea Grey”
  19. Army Painter “Dark Tone” (wash)
  20. Vallejo “Mecha Varnish Gloss”
  21. Microscale Industries “Micro Set”
  22. Microscale Industries “Micro Sol”
  23. Microscale Industries “Liquid Decal Film”
  24. Flames of War French Decal Set (FR940)
  25. Peddinghaus-Decals 1/100 2181 “World of Flames French tanks early war”
  26. Citadel “‘Ardcoat”
  27. Vallejo Surface Primer “German Green Brown”
  28. Vallejo “Gloss Acrylic Varnish”
  29. Citadel “Agrellan Earth” (texture)
  30. Army Painter “Mid Brown” (shade/wash)
  31. Reaper MSP Core Colors “Blackened Brown”
  32. Vallejo Flow Improver Vallejo Thinner
  33. Vallejo “Matte Polyurethane Varnish”
  34. Printed labels on card stock
  35. Gamers Grass “Tiny Beige 2mm Tufts” (flocking)
  36. PVA Glue

PAINTS, INKS, GLAZES, SHADES, WASHES, PIGMENTS AND FLOCKING USED ON THE SCHNEIDER AMC P16 MODELS:

  1. Green Stuff
  2. War Games Accessories Steel Bases Number 23 (1½” x 2″)
  3. Neodymium magnets (⅛” and ¼”)
  4. Gorilla Glue
  5. Vallejo Surface Primer “Black”
  6. Wooden Blocks, steel bolts, steel washers, magnets, steel screws
  7. Steel ball bearings
  8. Vallejo Primers “NATO Green”
  9. Vallejo Model Air “Dark Brown”
  10. Vallejo Mecha Weathering Effects “Dark Rust Wash”
  11. Vallejo Model Air “Tire Black”
  12. Vallejo Model Color “Dark Sea Grey”
  13. Army Painter “Dark Tone” (wash)
  14. Vallejo “Mecha Varnish Gloss”
  15. Microscale Industries “Micro Set”
  16. Microscale Industries “Micro Sol”
  17. Microscale Industries “Liquid Decal Film”
  18. Flames of War French Decal Set (FR940)
  19. Peddinghaus-Decals 1/100 2181 “World of Flames French tanks early war”
  20. Citadel “‘Ardcoat”
  21. Vallejo “Gloss Acrylic Varnish”
  22. Vallejo Surface Primer “German Green Brown”
  23. Citadel “Agrellan Earth” (texture)
  24. Army Painter “Mid Brown” (shade/wash)
  25. Reaper MSP Core Colors “Blackened Brown”
  26. Vallejo Flow Improver
  27. Vallejo Thinner
  28. Vallejo “Matte Polyurethane Varnish”
  29. Printed labels on card stock
  30. Gamers Grass “Tiny Beige 2mm Tufts” (flocking)
  31. PVA Glue
Despatches from Fort Syllabub

An account of fictional adventures on the North West Frontier - and other times and places, real or imagined

Man of Tin blog

Toy soldiers, gaming, Imagi-Nations

Zauberwurfs Blog

Ein Blog über Tabletop und Miniature Wargames.

Frank Tank Rants

musings of a fat old bloke on tanks and wargames

Dragons of Lancasm

Games, miniatures, painting, books and more games

Tiny Painted Heroes

The Adventures of a lifelong Tabletop Gamer, Game Design hobbyist, and full-time Software Engineer

Steve's Paint Brush

Grimdark model making and mini painting

Wargamesculptors Blog

Life, Golf, Miniatures, & Other Distractions

Dead Dick's Tavern and Temporary Lodging

Life, Golf, Miniatures, & Other Distractions

Guru Pig - the gaming Guru

Guru's thoughts on wargaming, life, and the universe!

Wisely lead... without a head!

History, Miniatures and Wargaming

Kuribo's Painting

Fallout Wasteland Warfare, Warhammer, and Hellboy Painting, Terrain, Dioramas, and Battle Reports

Don't Give Greg Ideas

Seriously, just don't

War Across the Ages, and other dark horrors

A discussion of miniatures collecting, painting and gaming.

Classic Warhammer 40K

Painting diary focused on Warhammer 40K 2nd ed., 5th ed. WHFB, related GW games, and miscellaneous whimsy

Colonel Mustard

WW2 Modelling in 1/72 Scale

Bogenwald

Random painting and terrain making.

Pat's 1:72 Military Diorama's

Scale diorama tips and ideas

Arcade Dreams

Building the Arcade Dream

P.B.Eye-Candy

Phil's 20th century wargame pages

SP's Projects Blog

A futile fight against entropy or 'Every man should have a hobby'? Either way it is a blog on tabletop wargames, board games and megagames

30mmdave

Wargaming Plausible reality?

The Imperfect Modeller

Miniature Figure Painting and Diorama Modelling

Double Down Dice

Painting miniatures and rolling dice!

Just Needs Varnish!

My ongoing wargames projects!

miniaturepopcorns

Sculpting some worlds

Despertaferres

Wargaming with the ability of a dull nine year old

Dawn of the Lead

Miniature wargaming and the occasional zombie

Rantings from under the Wargames table

Wargames, Figures, Sculpting and Converting Miniatures

Simple as War

Miniatures & Terrains

Buck's Blog

Life, Golf, Miniatures, & Other Distractions

IRO aka Imperial Rebel Ork

- I model - therefore I am -

Azazel's Bitz Box.

Painting, Modelling, Miniatures, 1:6, Games... Whatever else I find interesting.

diggingforvictoryblog

Smallholding and Wargaming.......not always at the same time!

Shamutantis

Nørdblog numero uno