
My recent efforts on the hobby front have been focused on multiple projects. Some of these are figures and vehicles, others are terrain-oriented. These are all in support of the games I will run at multiple 2026 gaming conventions.
This year, I will be running Wars of Ozz and What a Tanker games. I am also getting back into retro sci-fi skirmish games with Combat Patrol:WWII. I have not run these games in a while and they were always a lot of fun. To that end, I decided to add more terrain to the mix.
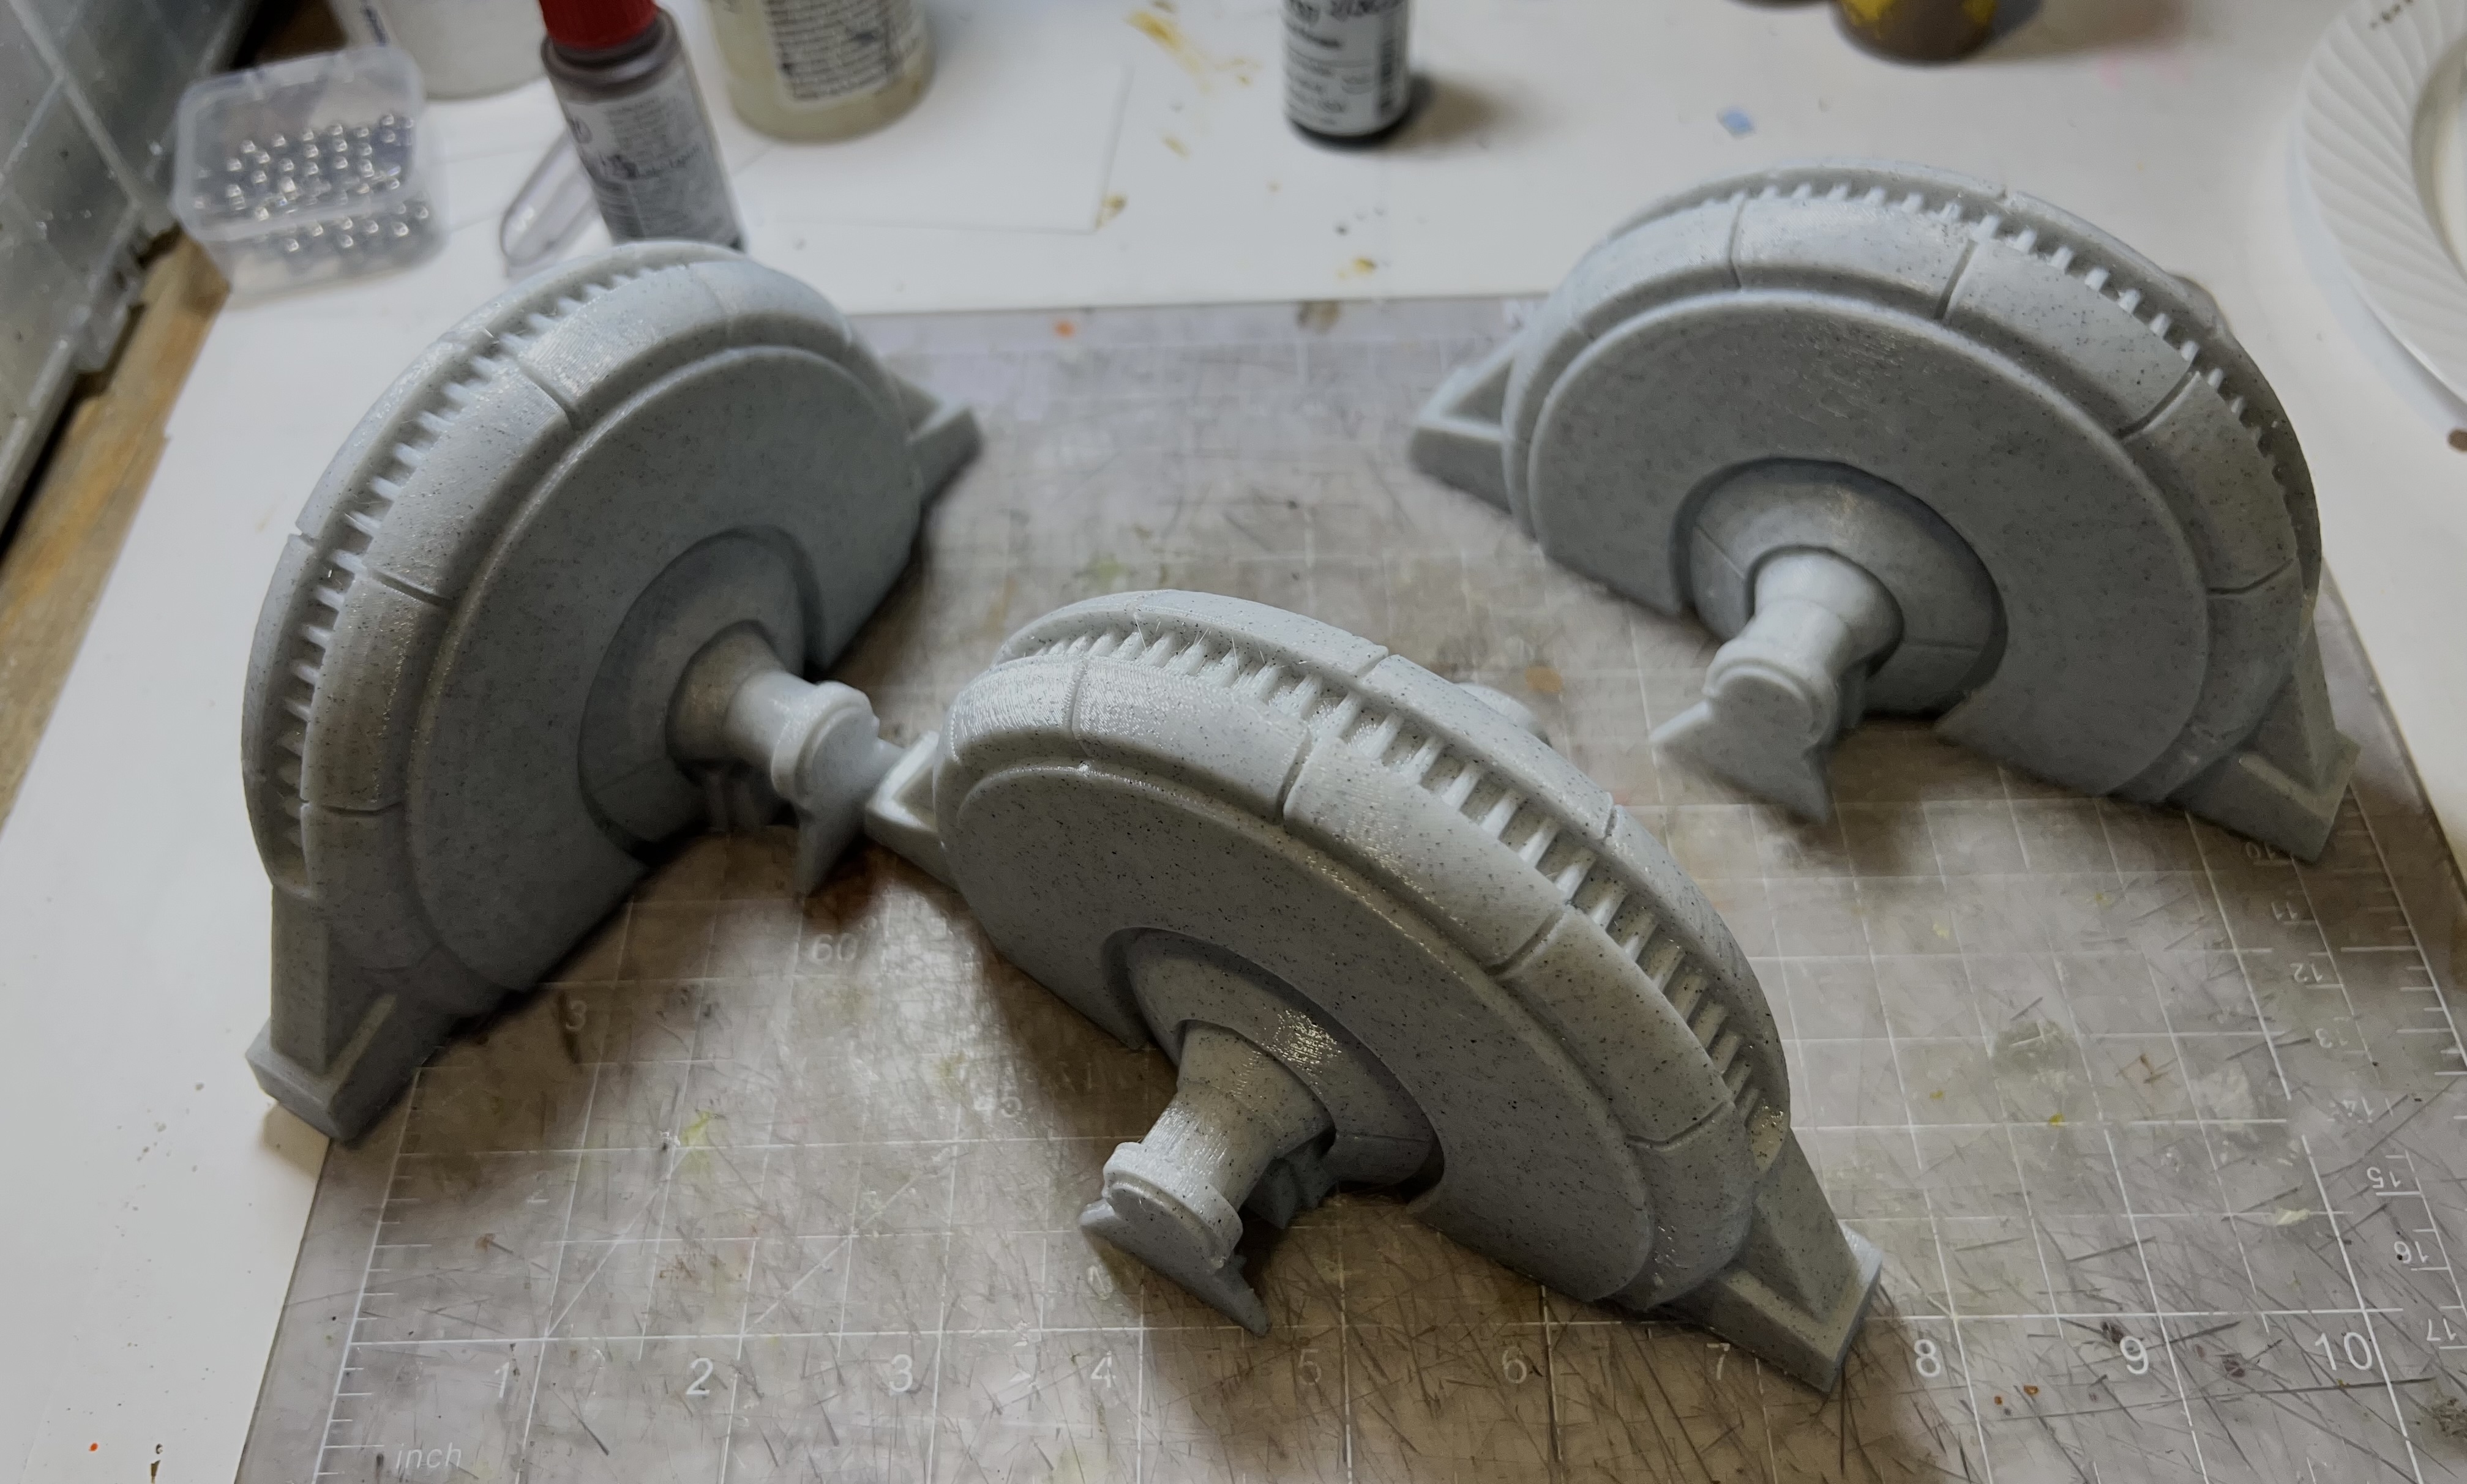
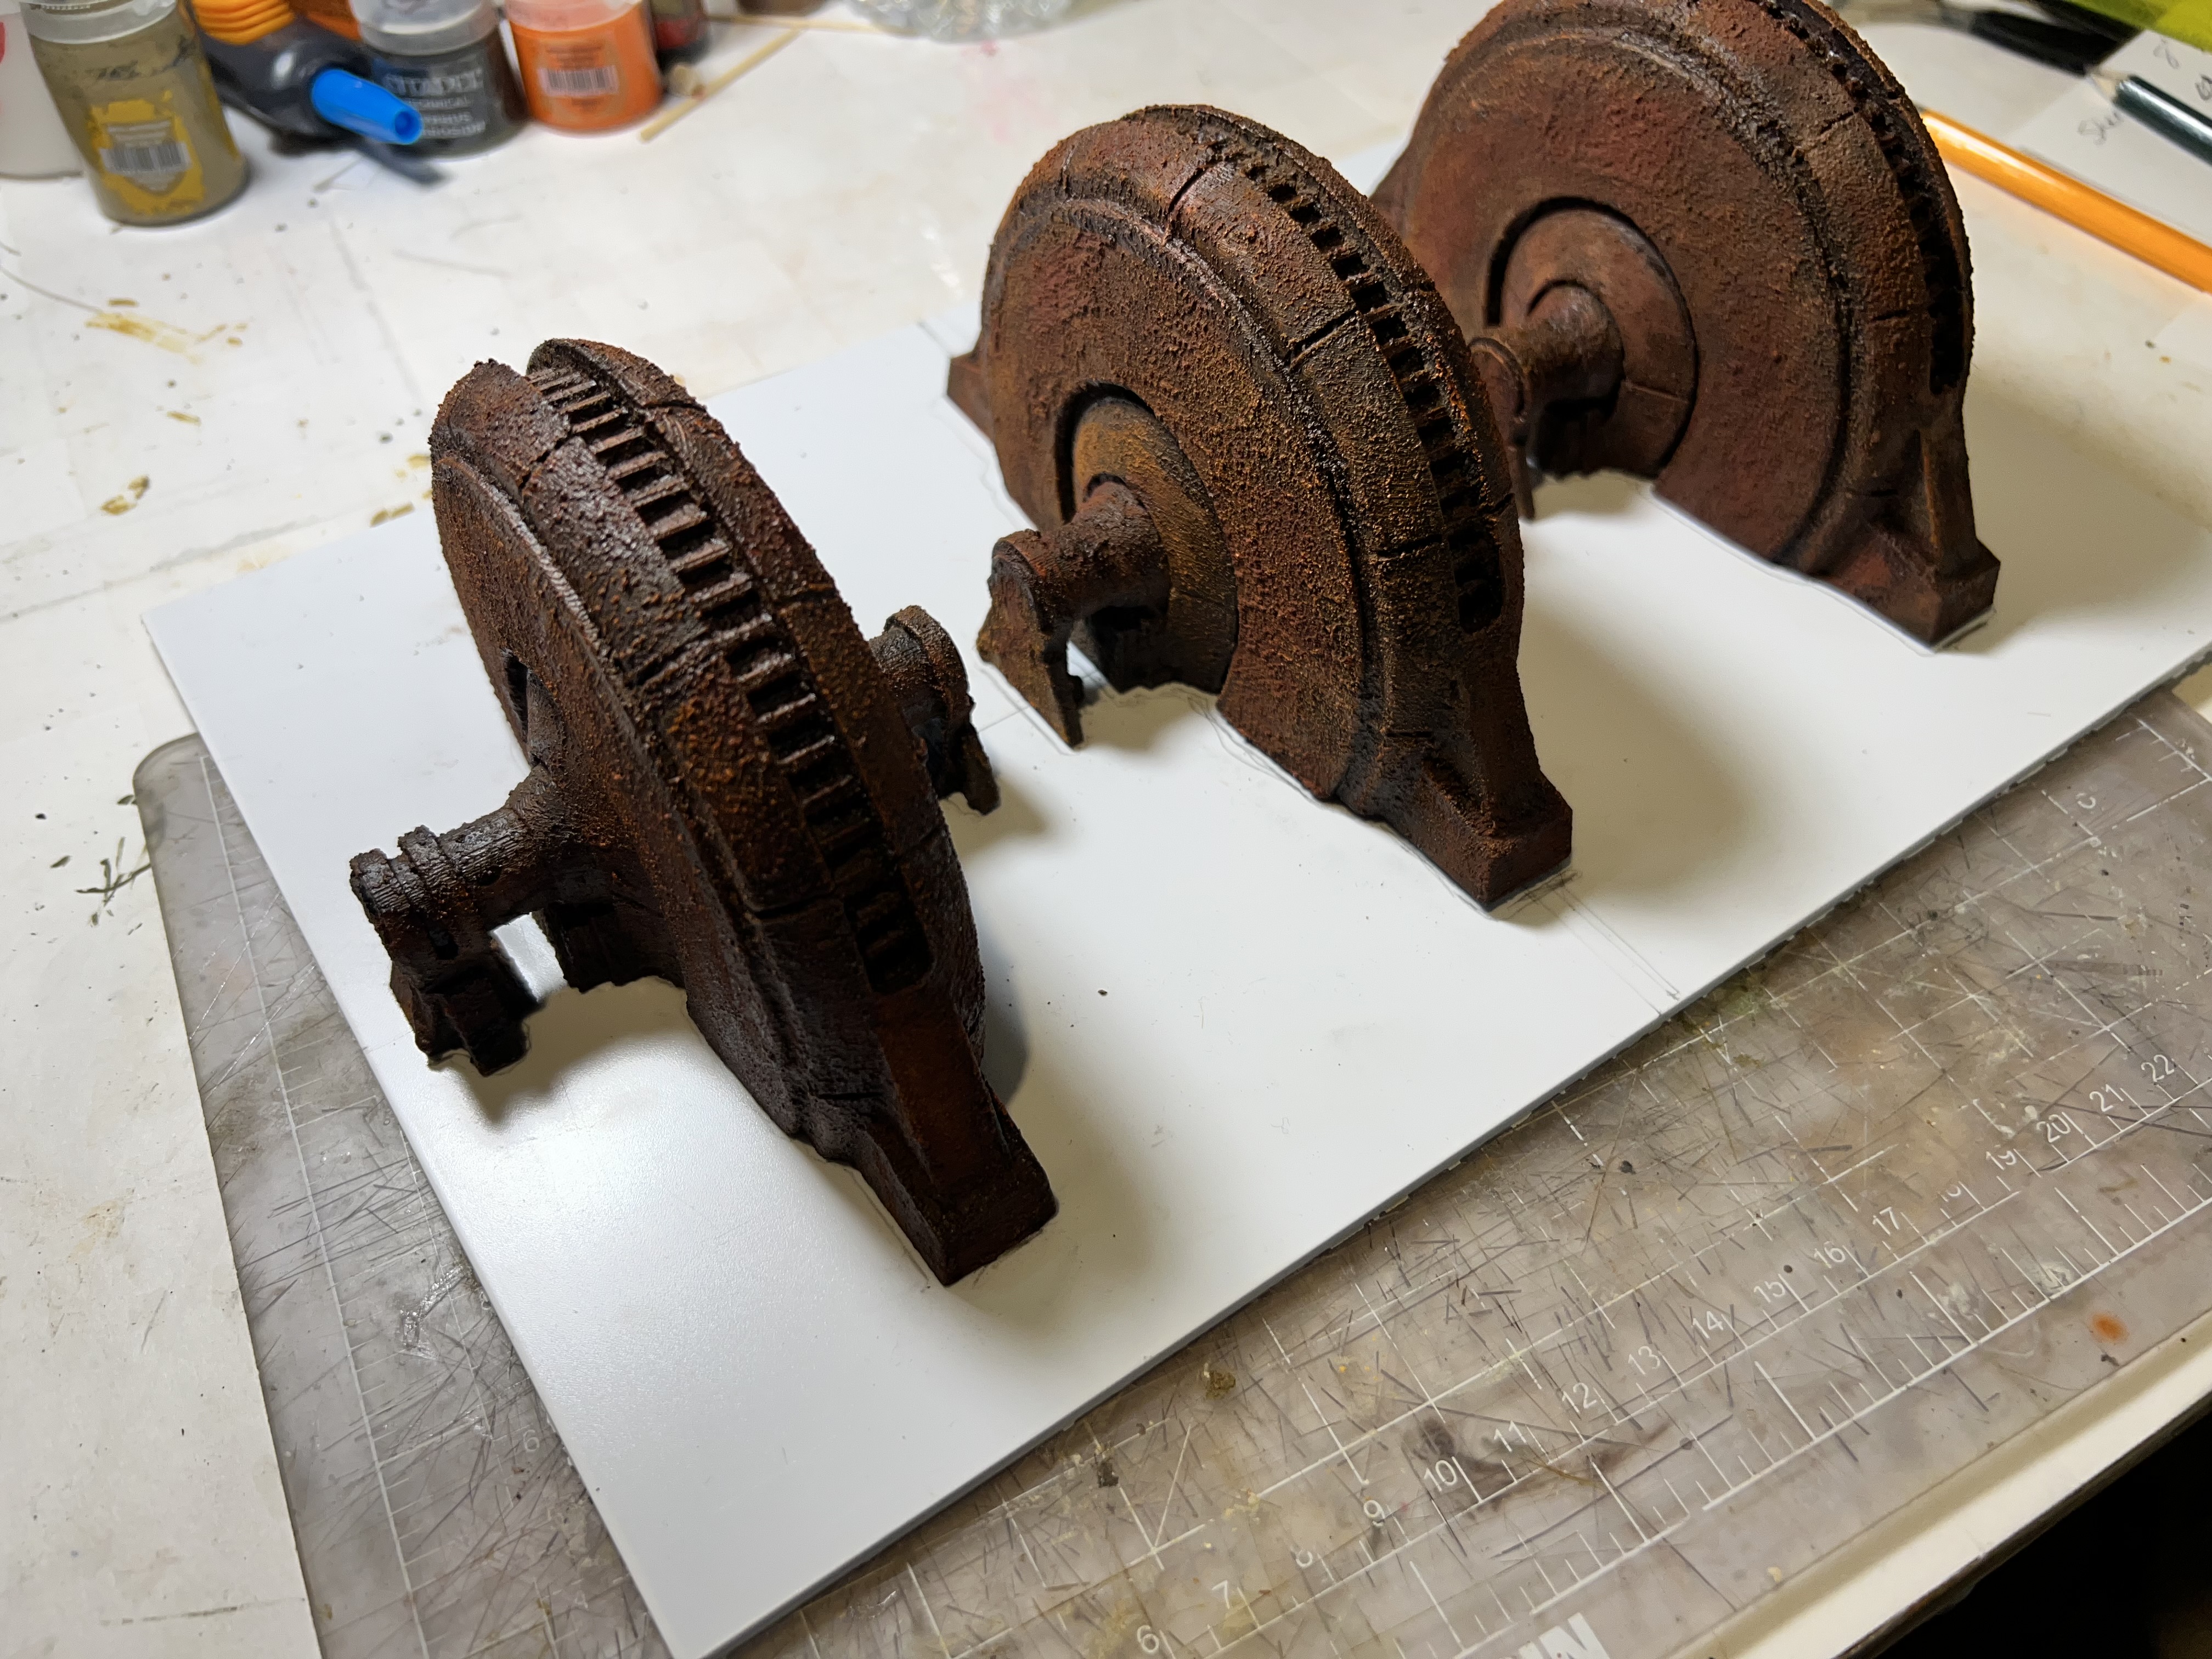
As background, a friend, Chris Rett, 3D-printed three excellent generators for me way back in 2018 (I think). These were great terrain pieces. At that point I was still immersed in retro sci-fi skirmish gaming with Combat Patrol:WWII as my preferred system. However, I was on the cusp of jumping my focus to WWII What a Tanker games. Thus, the generators took a back seat. My gaming then went in sequence to What a Tanker, then Feudal Patrol for the Spanish Conquest in Mesoamerica. Finally, I moved on to Wars of Ozz. Recently, I felt a need for a bit more variety as I mentioned – so terrain is what I hit first.
The three generators would be useful for retro sci-fi apocalyptic planet scenarios. They would also be useful for some Wars of Ozz scenarios. This includes any involving Professor Nitpik and the Industrial City. That city was wrecked over 300 years ago in the “Last Great War”. Plus I could use it as part of a “Space Cowboys” apocalyptic scenario.
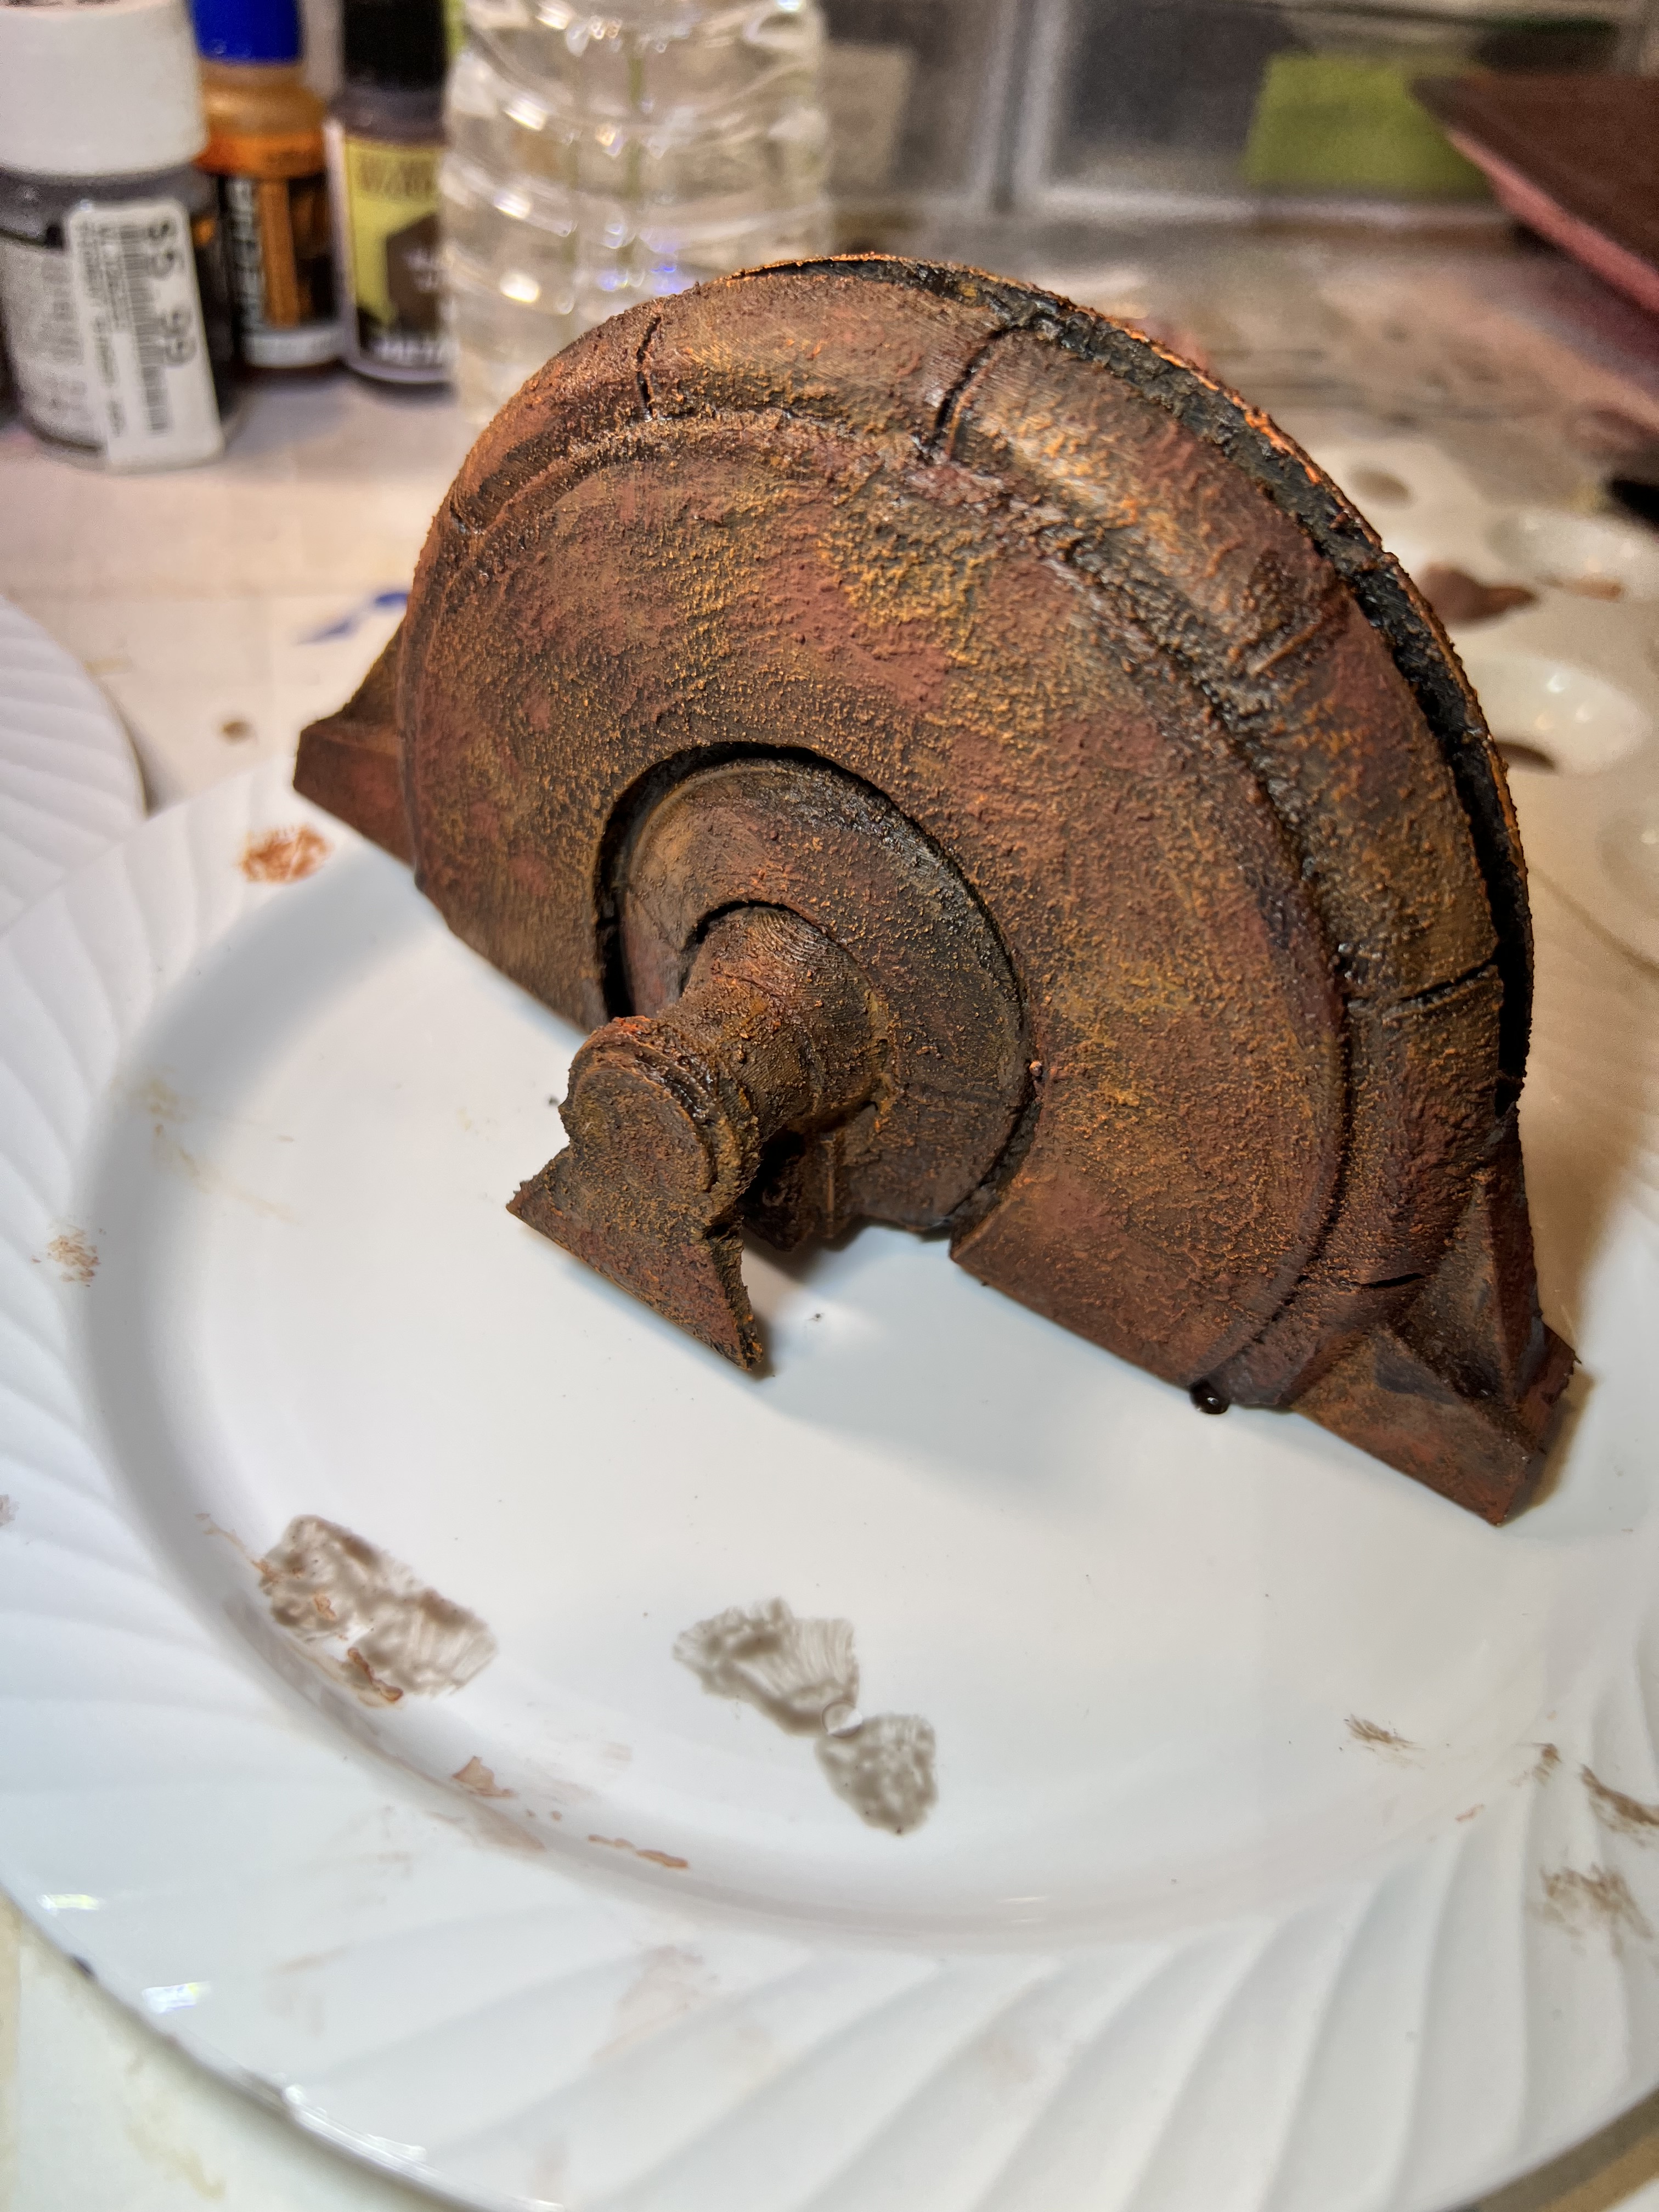
I primed the pieces. Then I used AK “Corrosion Texture” on it. This allowed me to use different rust pigments and paints on it.
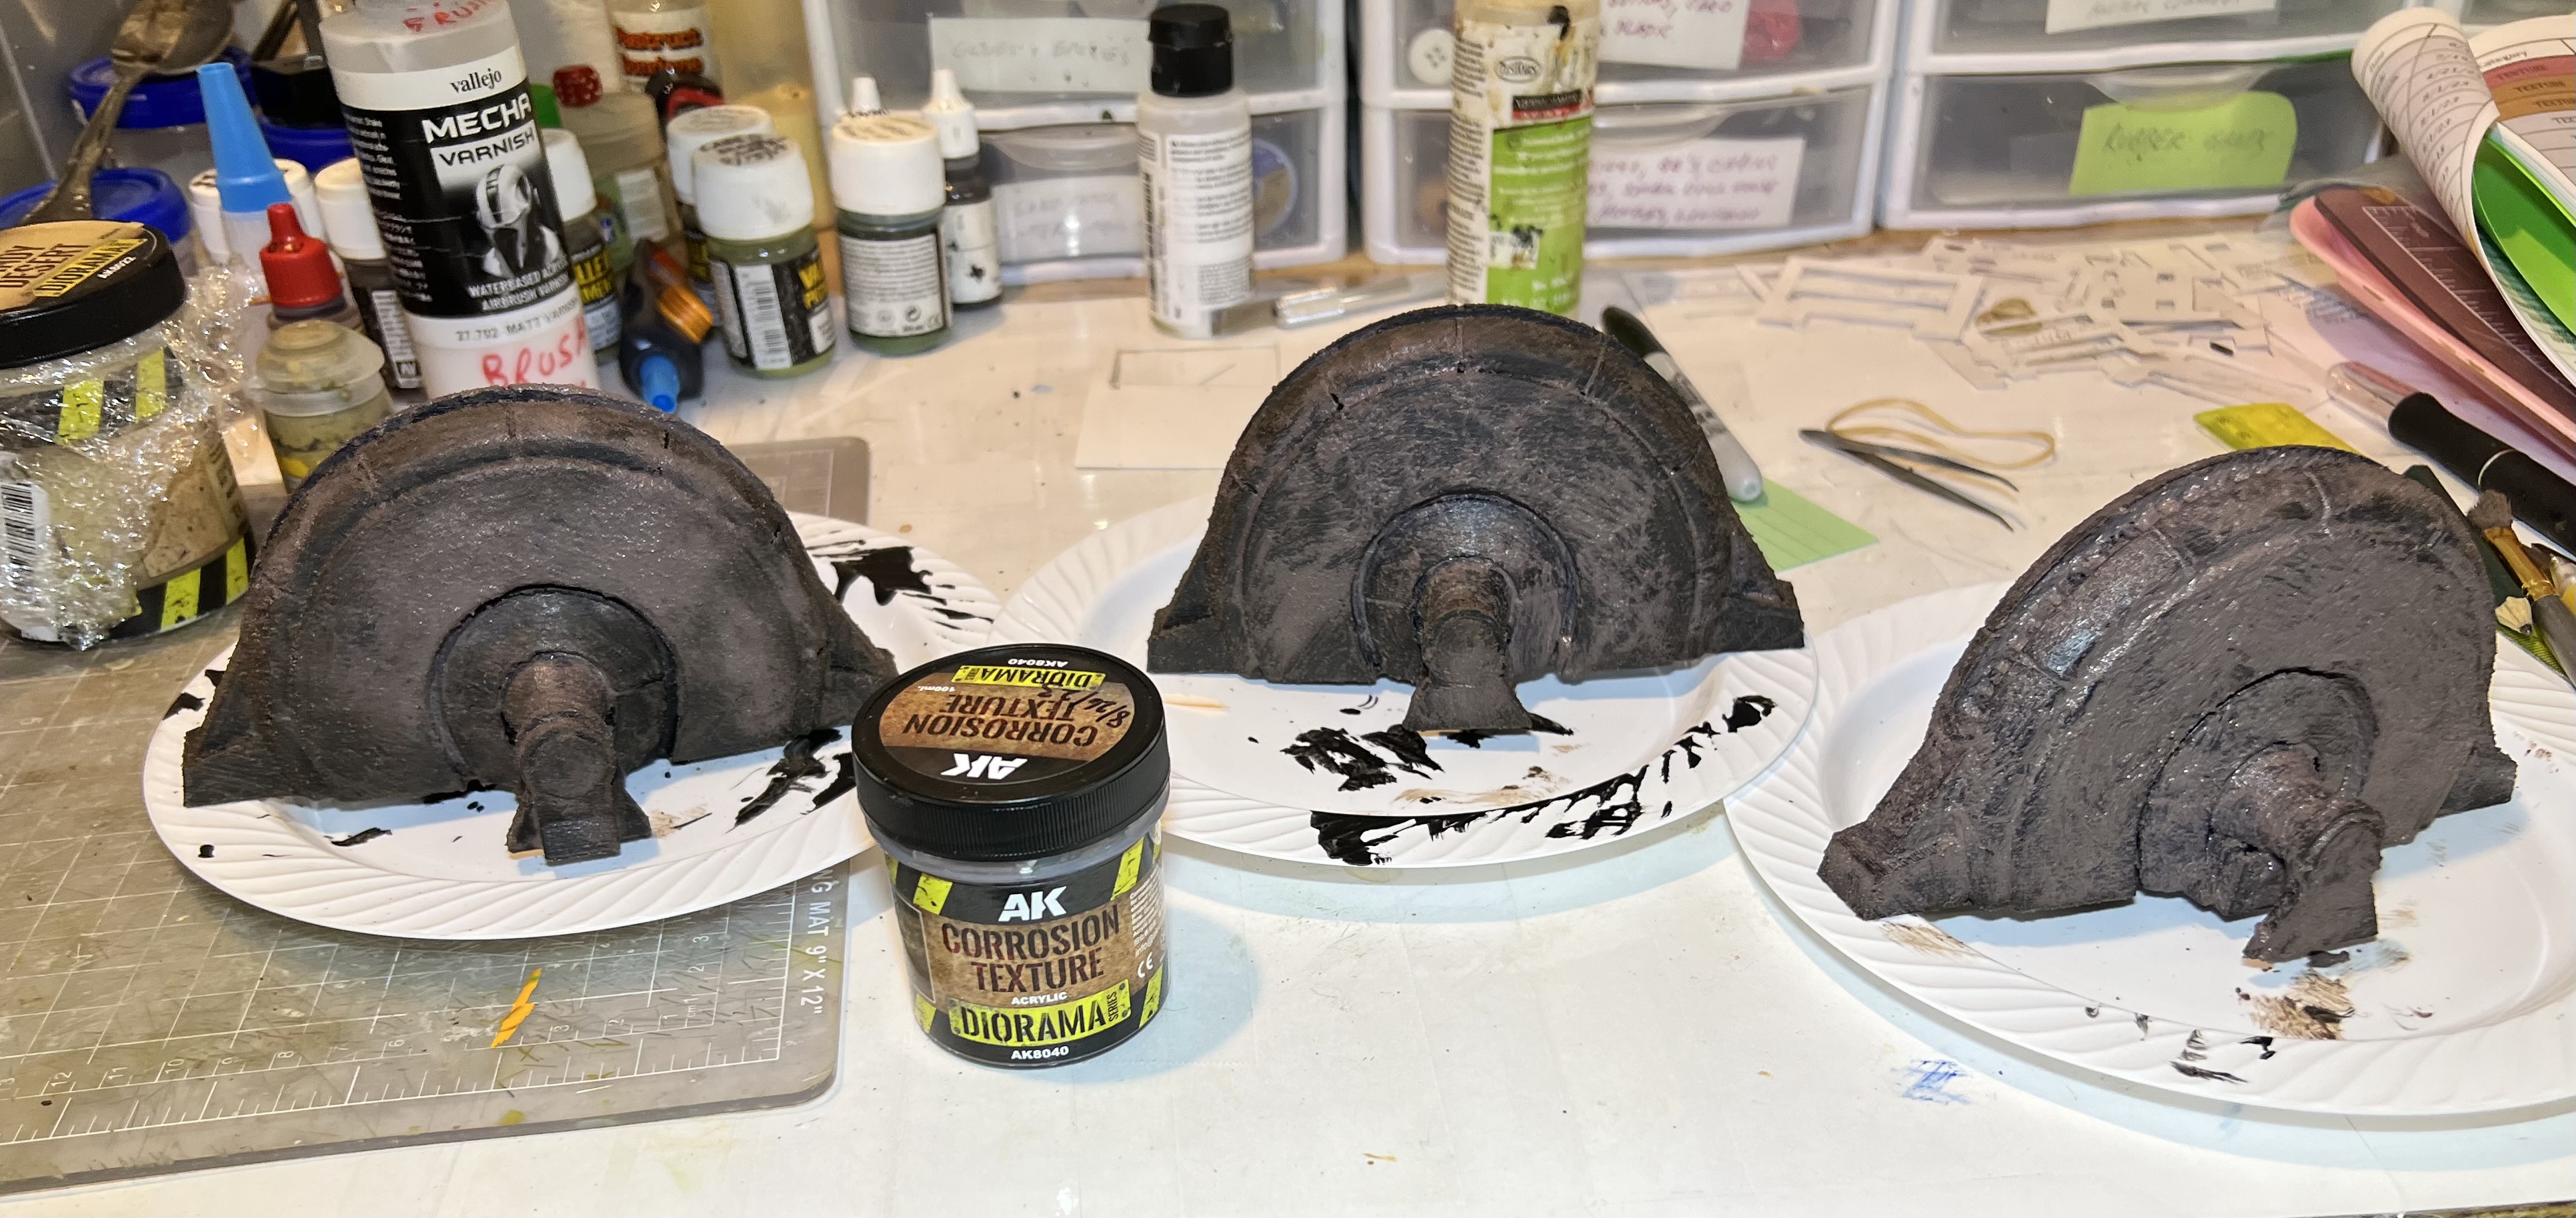
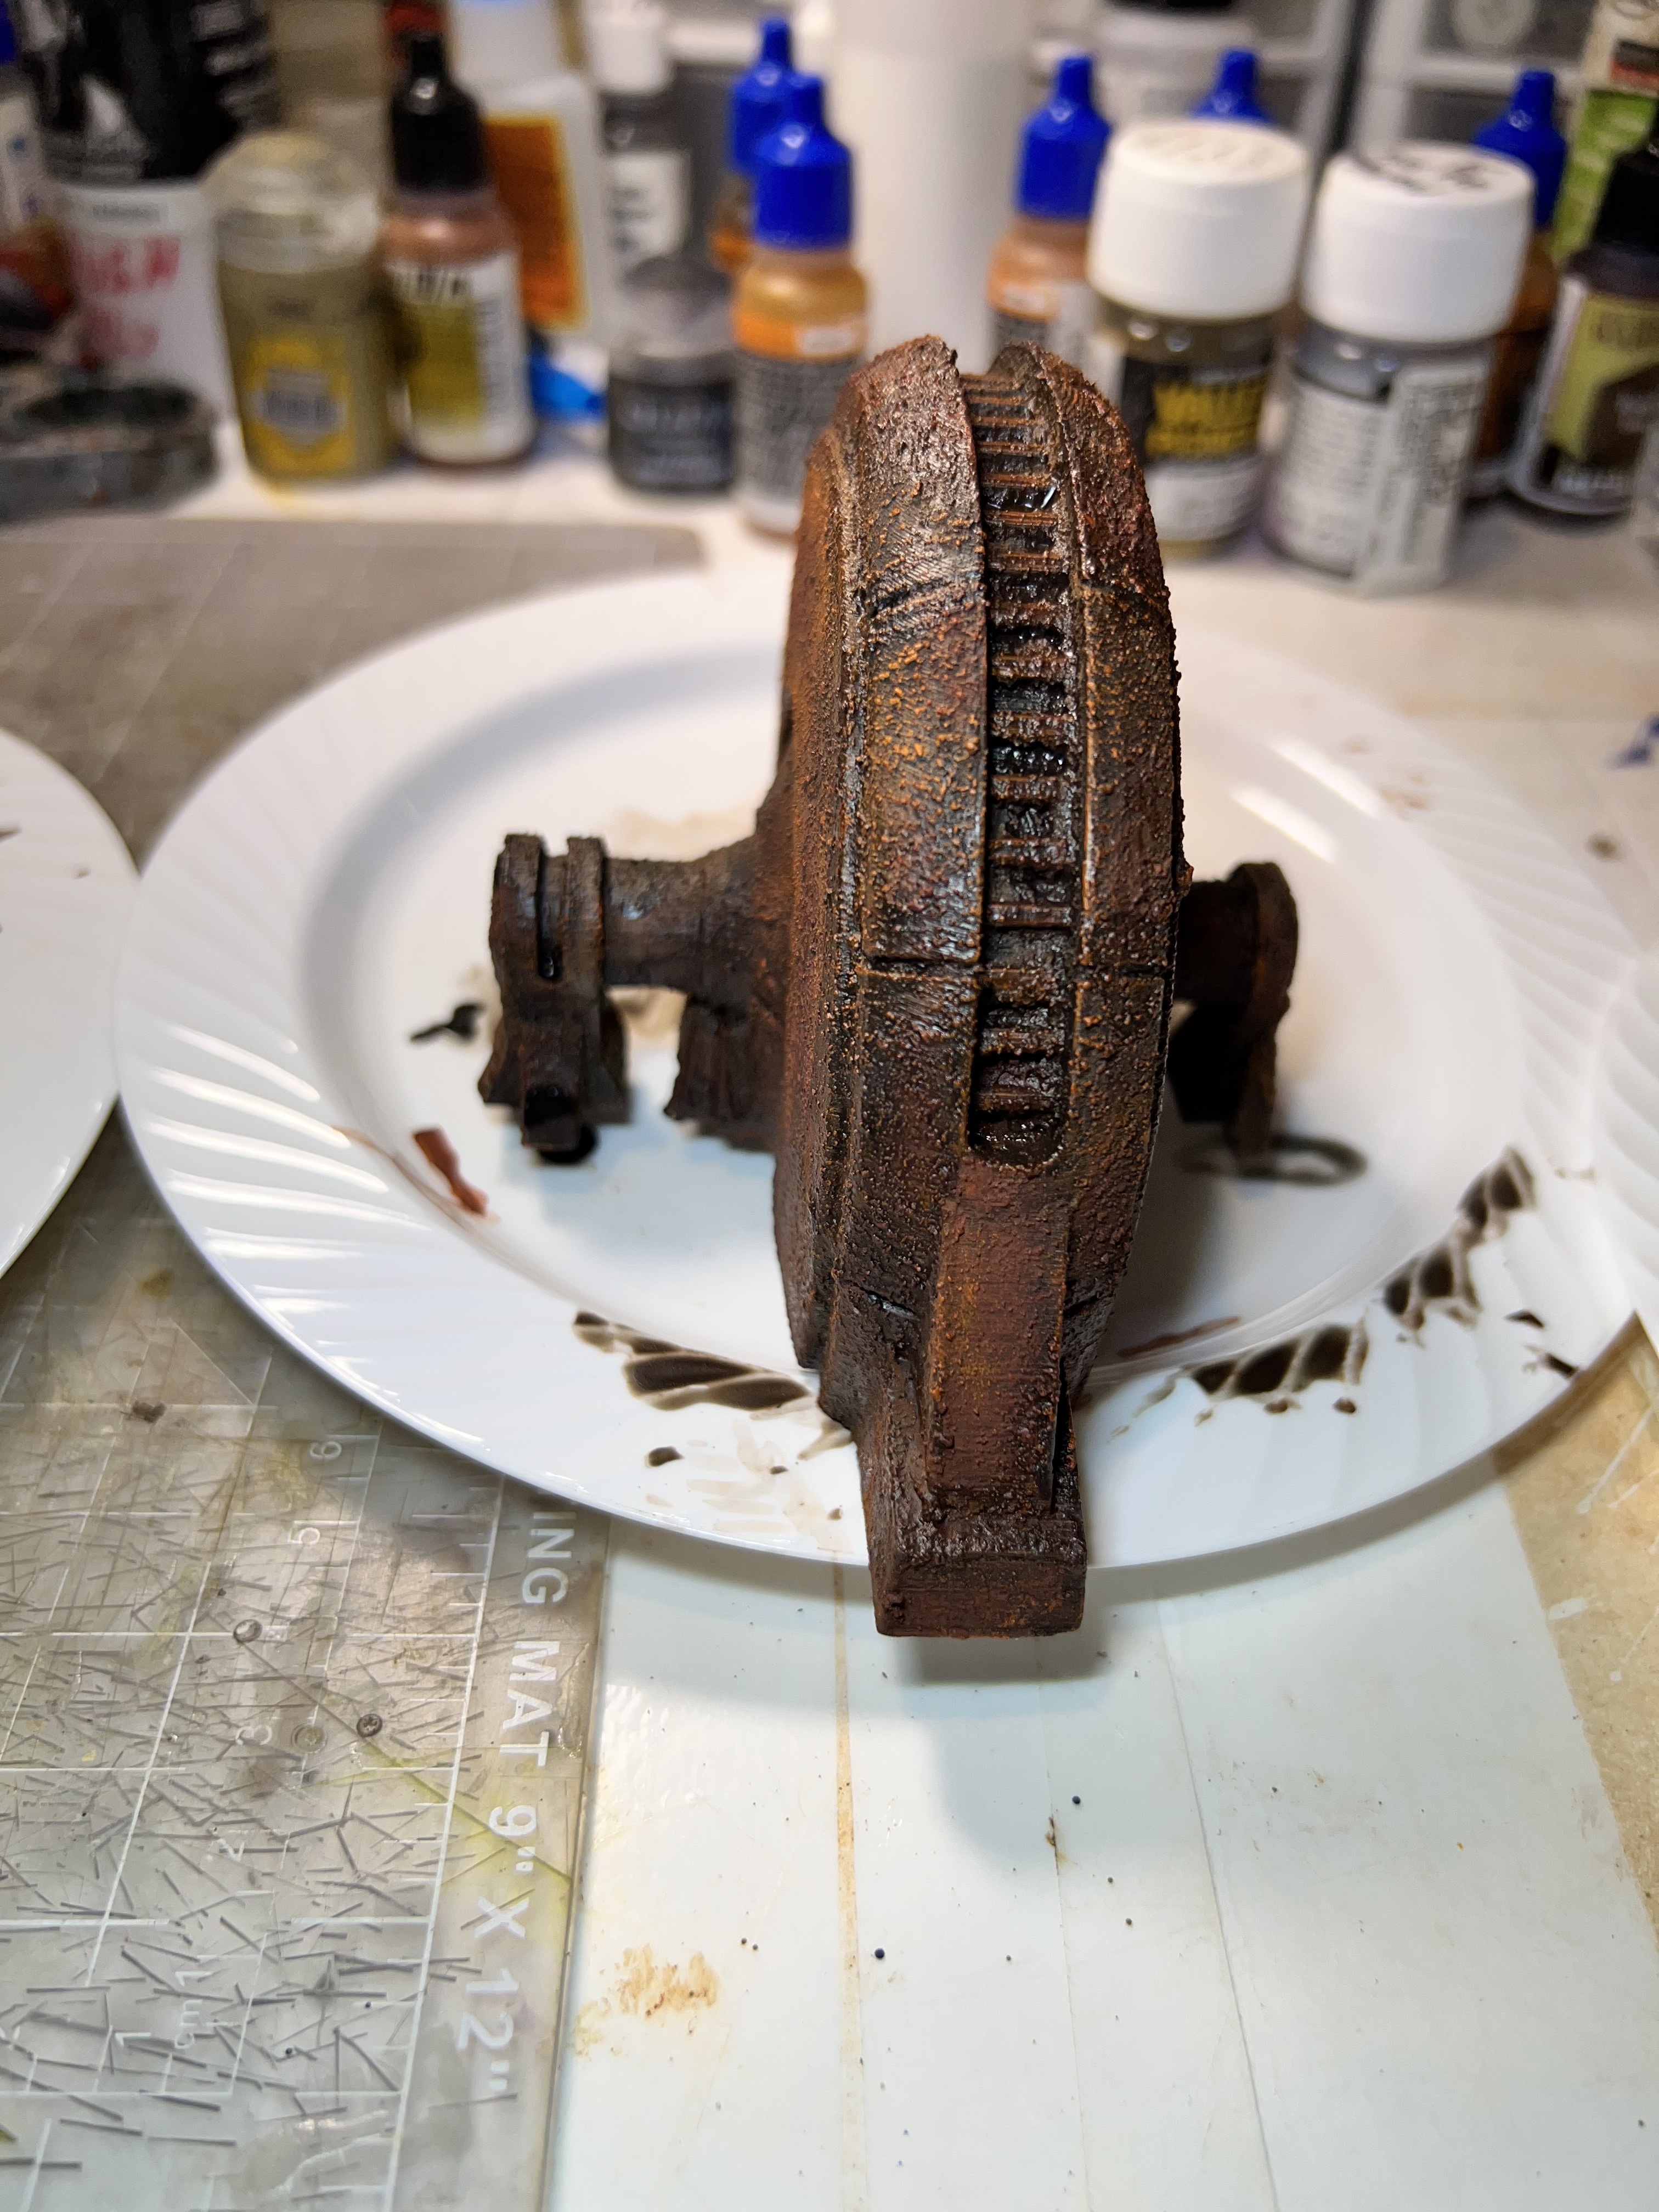
After the corrosion texture dried, I used the paints and pigments to “rust them up”.


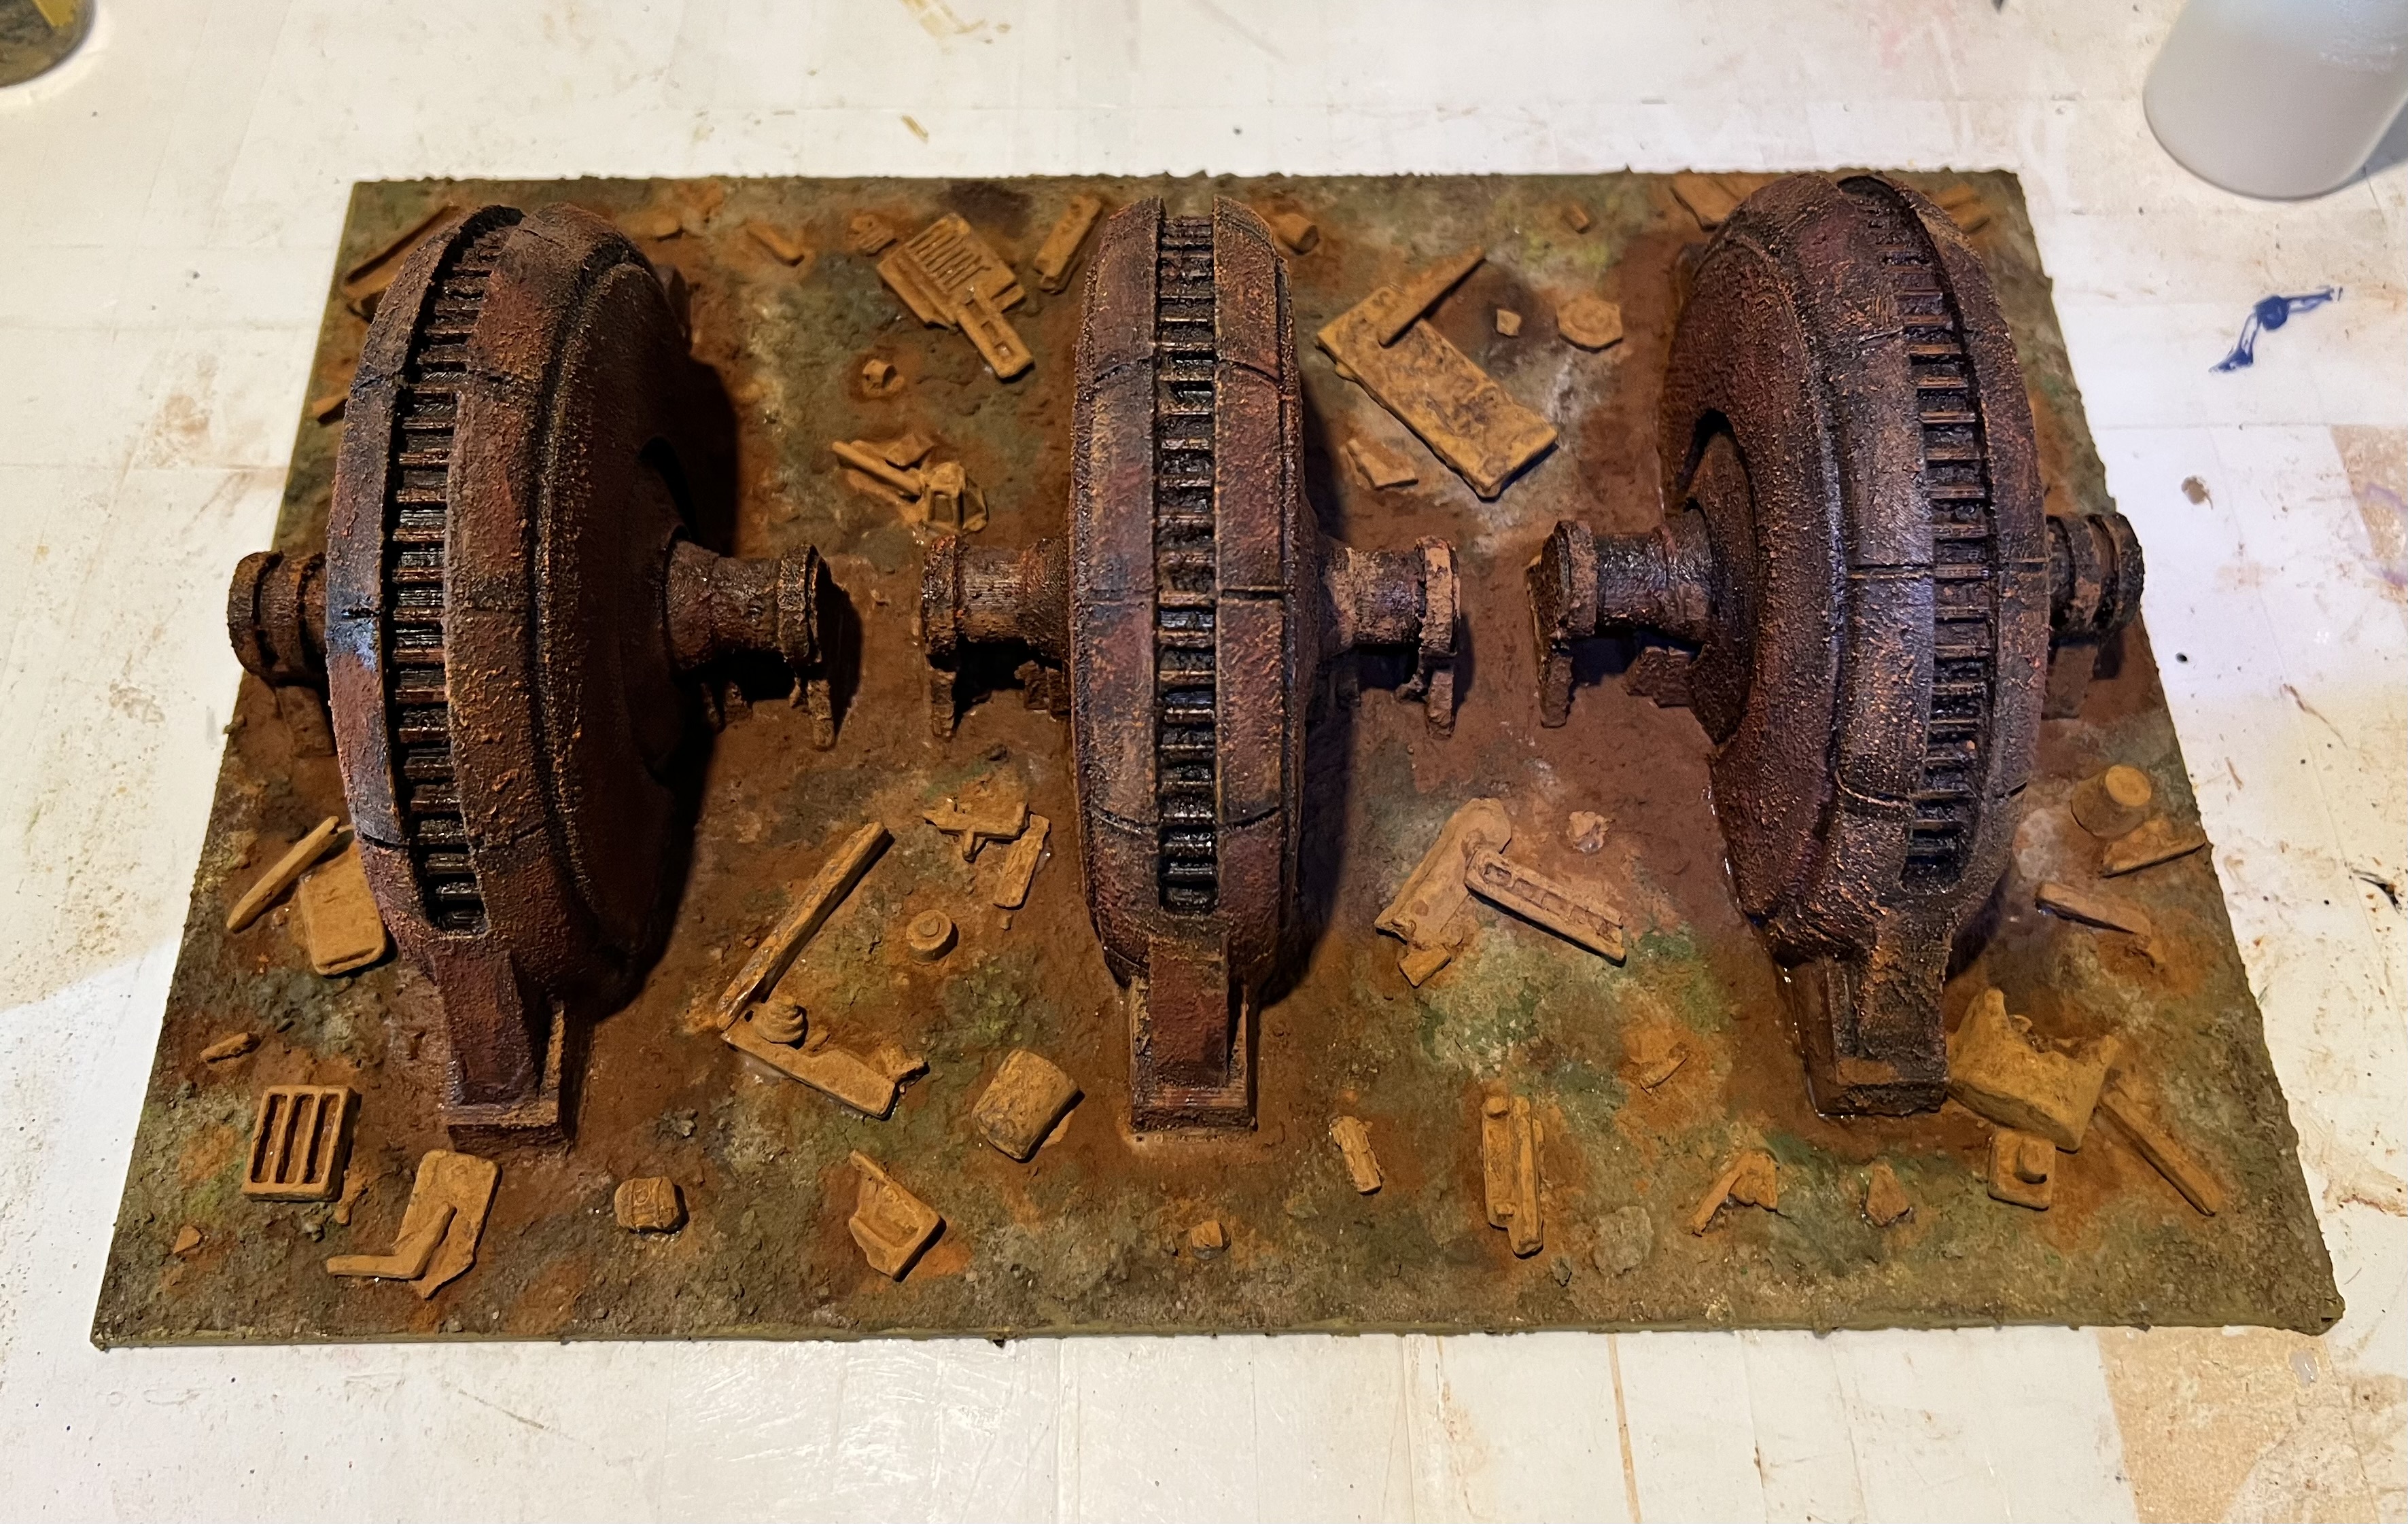
Two of the models were identical – so I planned on using them symmetrically on a polystyrene base. Using sand and PVA, I had a substrate for the rust pigments.

Once the sand mix had hardened, I assembled the pigments as you see below. I fixed all the pigments with pigment binder, as I have found that other liquids can dissolve the PVA/sand bonds.

The generators were secured to the base by Gorilla Glue. Once that dried, I added the pigments to the base and fixed them with the binder. I then decided that there should be more detritus and wreckage here. I added some of my rusty Juweela scrap pieces. Then, I applied more rust pigments to them. These actions are shown in the gallery below.

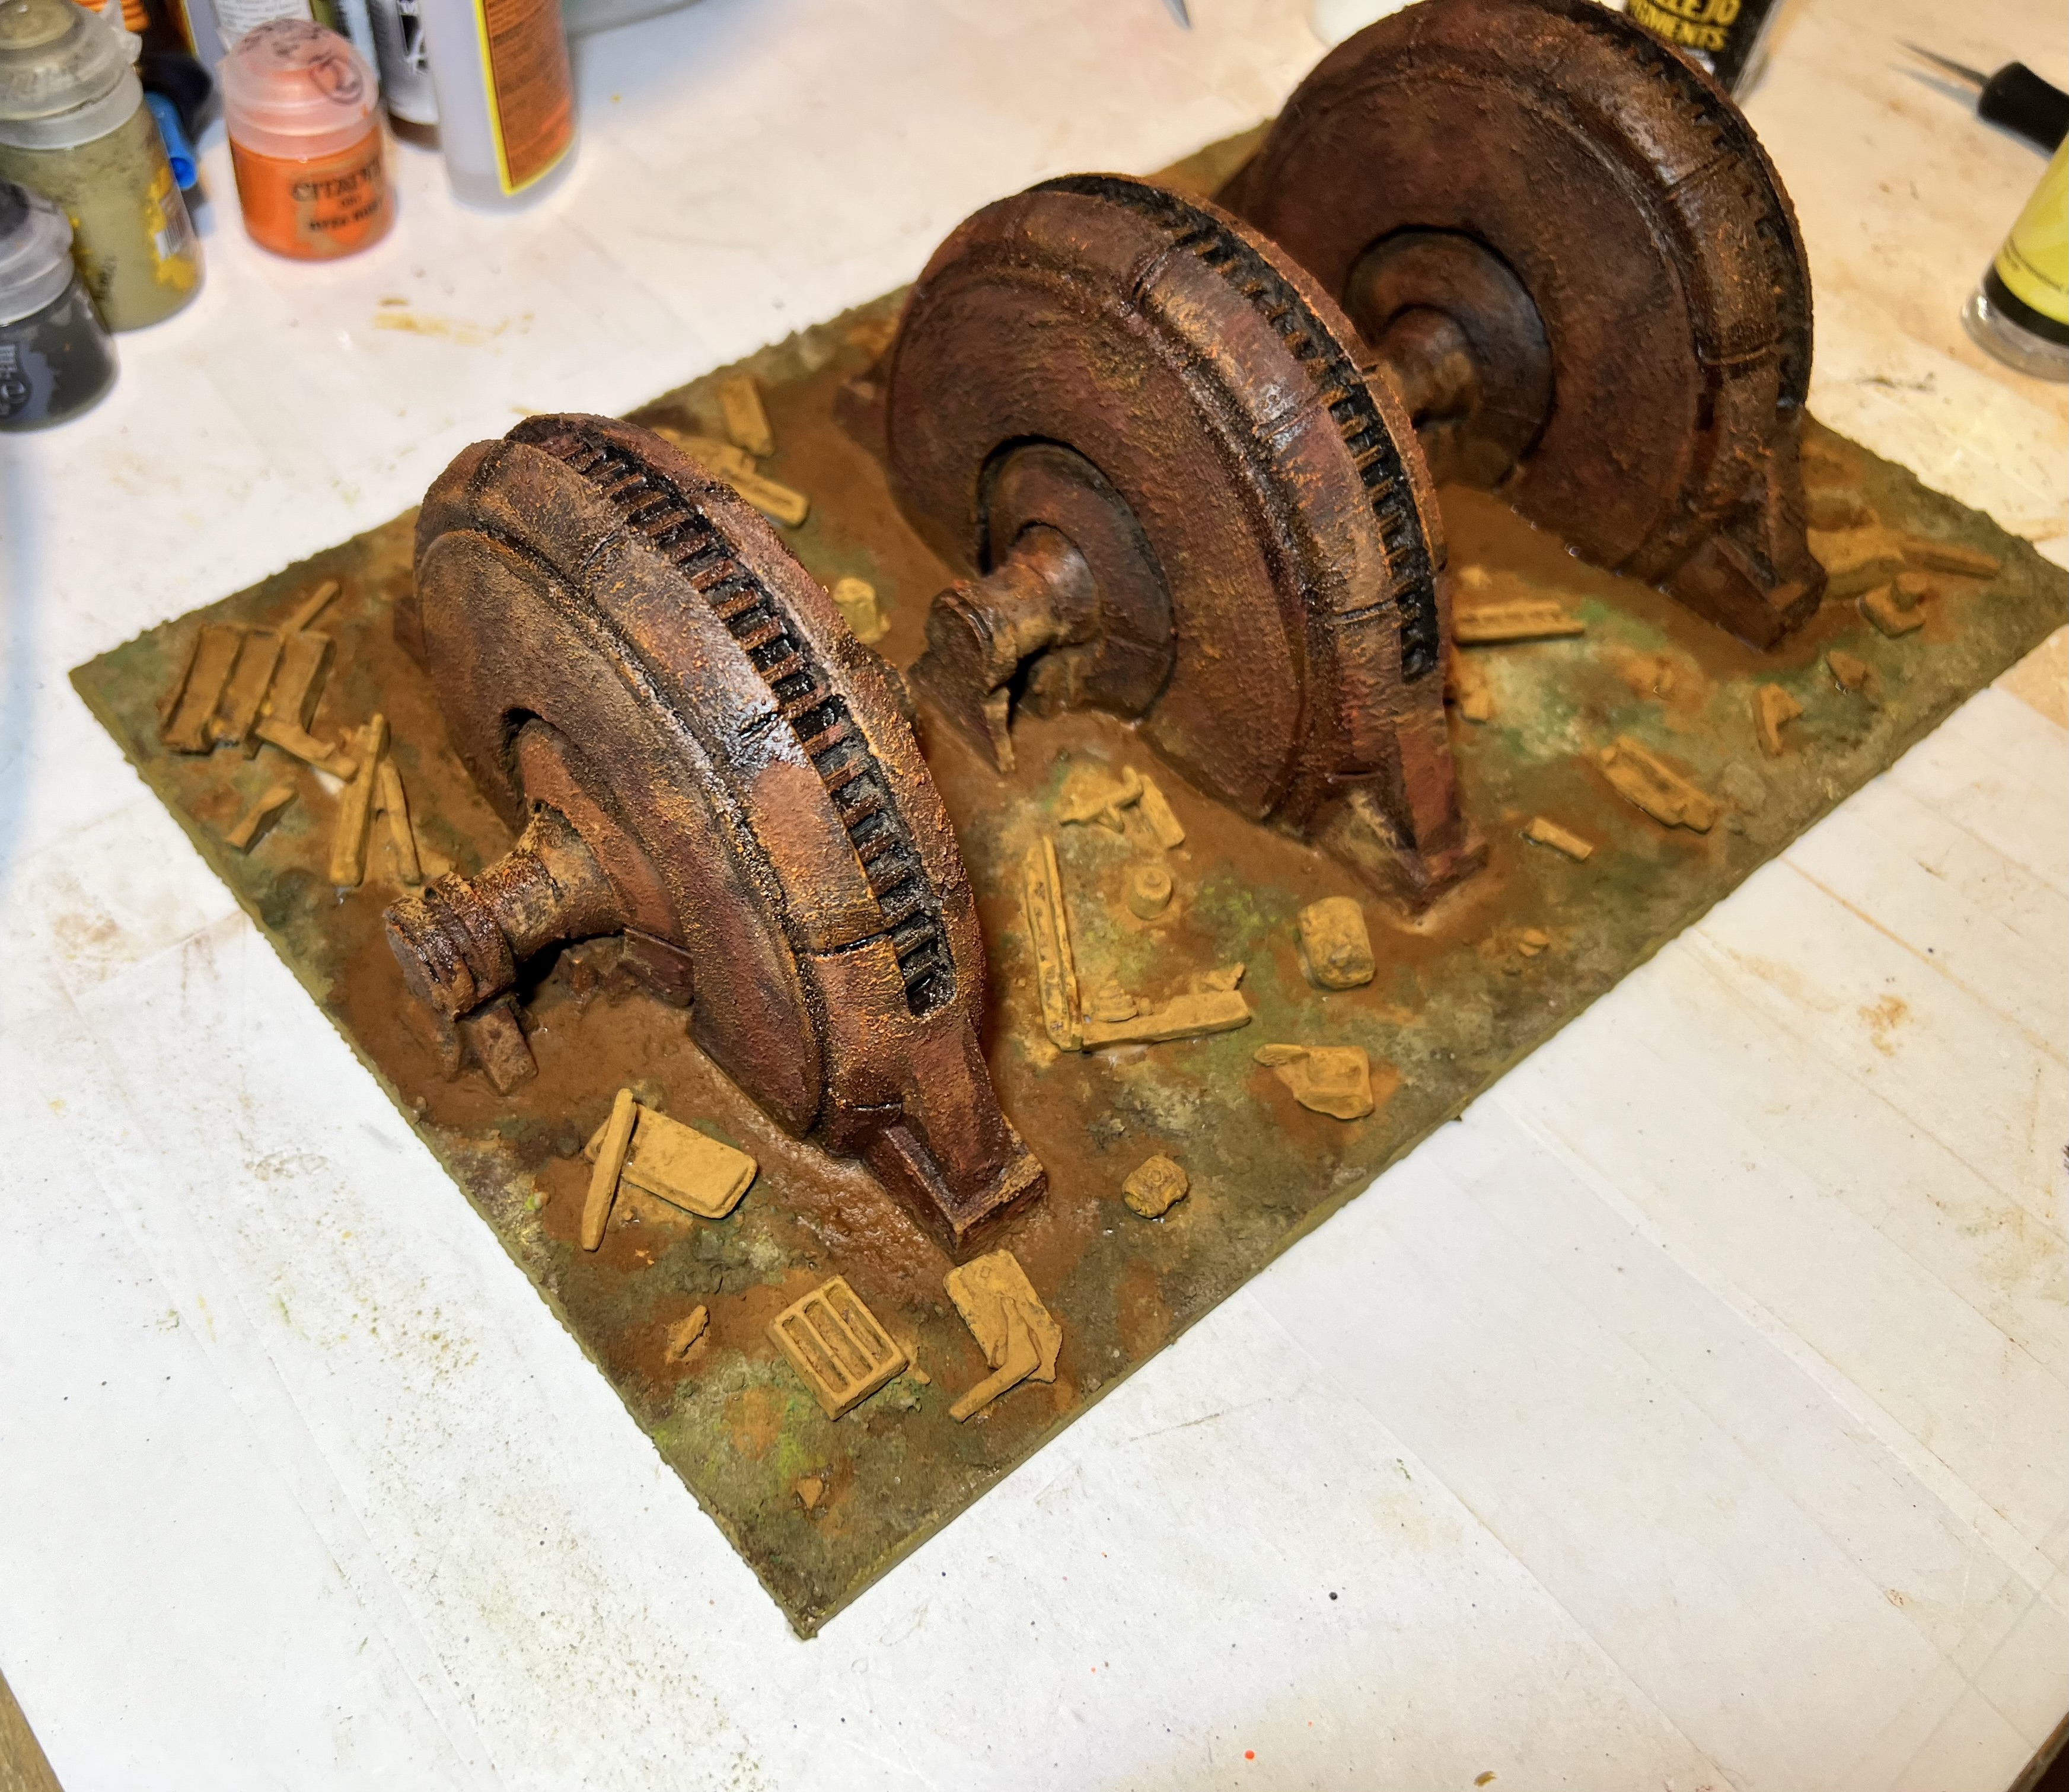
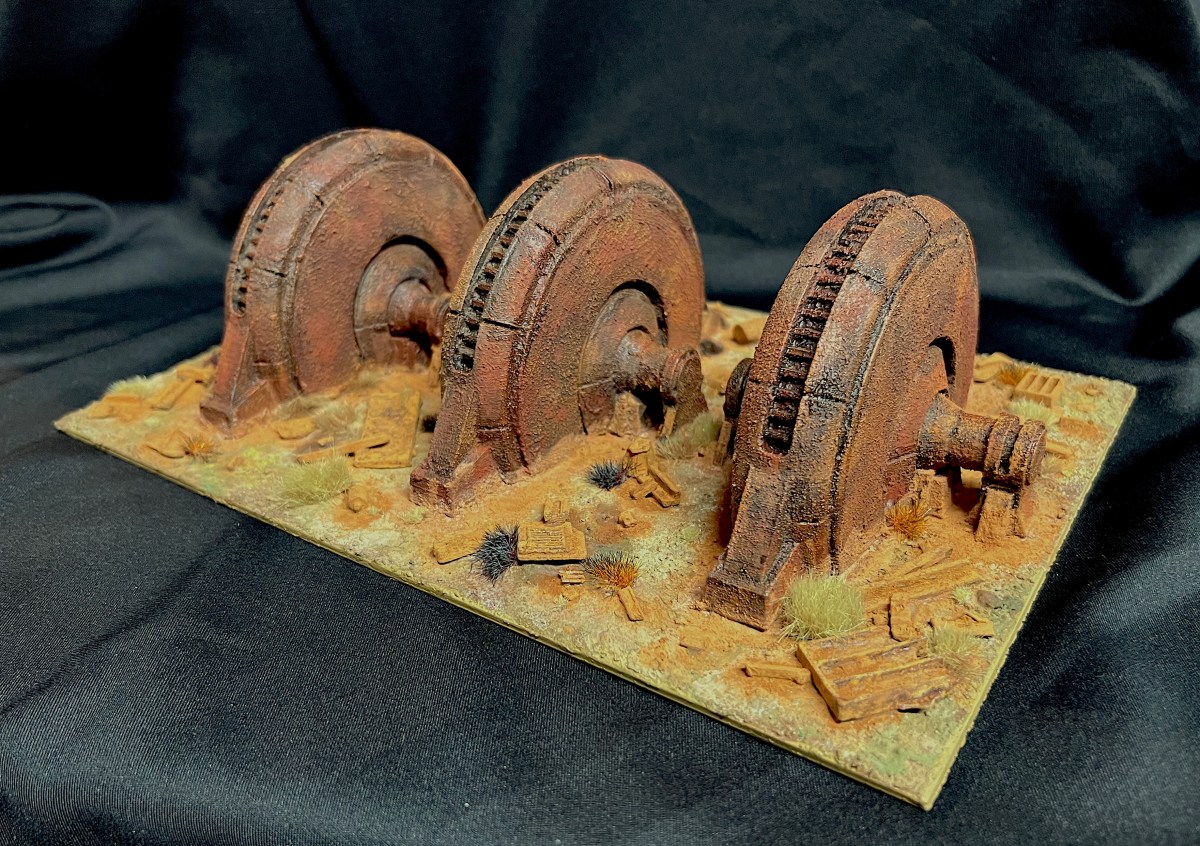
Finally, in an effort to add some wasteland life to the piece, I added multiple different flocking tufts. Here are some finished shots.


Thanks again to Chris Rett for this gift, and sorry it took me so long to finally complete it!
I’m looking forward to having this on the tabletop. It will be a companion piece to my rusty walls and ruined buildings. It will also complement my ruined chemical plant. I will be making other pieces soon. Stay tuned! I hope that you found this interesting or useful. Let me know in the comments section.
Until next time.
For all of my previous posts on terrain projects, please see this page. For all of my previous posts on sci-fi projects, please see this page..
PAINTS, INKS, GLAZES, SHADES, WASHES, PIGMENTS, FLOCKING, GLUES AND MORE THAT I USED ON THIS MODEL
- Vallejo Surface Primer “Black”
- Polystyrene sheet
- AK “Corrosion Texture”
- Vallejo Model Air “Rust” (71.080)
- Citadel “Typhus Corrosion” (Technical)
- Citadel “Ryza Rust” (Dry)
- Vallejo “Old Rust” (pigment)
- Vallejo “Brown Iron Oxide” (pigment)
- Citadel “Nuln Oil” (wash)
- Play sand
- PVA Glue
- Gorilla Glue
- Vallejo Surface Primer “German Green Brown”
- Vallejo “Natural Umber” (pigment)
- Vallejo “Burnt Umber” (pigment)
- Vallejo “Light Sienna” (pigment)
- Vallejo “Light Yellow Ochre” (pigment)
- Vallejo “Faded Olive Green” (pigment)
- Vallejo “Chrome Oxide Green” (pigment)
- Vallejo “Old Rust” (pigment)
- Juweela “Metal Scrap, Rusty”
- Vallejo “Pigment Binder”
- Gamers Grass “6mm Beige Tufts” (flocking)
- Gamers Grass “6mm Dry Tufts” (flocking)
- Gamers Grass “6mm Beige Tufts” (flocking)
- Gamers Grass “Tiny Beige 2mm Tufts” (flocking)
- Shadow’s Edge Miniatures “6mm Nightmare Tufts” (flocking)
- Shadow’s Edge Miniatures “6mm Scorched Earth” (flocking)
- Shadow’s Edge Miniatures “4mm Badlands” (flocking)

Nice!
The additional debris and tufts of grass really bring them to life!
LikeLiked by 2 people
Thanks – I do love the little things added!
LikeLiked by 2 people
Excellent piece of scenery Mark, and with the basing and colors used lot’s of uses for multiple gaming systems.
LikeLiked by 2 people
Cheers Dave! I hope to use a lot!
LikeLiked by 2 people
Your rust effect it so very good. It is one of those things that is just tough to get to look good. I hope the piece sees a lot of table time!
LikeLiked by 2 people
Thanks Tichy. The rust is a lot of fun as its a exercise in patience and blending with the pigments. I’m hoping it goes over well!
LikeLiked by 1 person
The terrain came out great and it has a very Star Wars feeling to me anyway. Glad to see Gorilla Glue is prevalent on the East Coast as well. Its made in my hometown and I use it pretty regularly on projects too.
LikeLiked by 3 people
Jeff, even I use Gorilla Glue! 🙂
LikeLiked by 2 people
The city of Cincinnati thanks you for your business, John 😀
LikeLiked by 1 person
Well rusty Star Wars anyway! Gotta love Golilla Glue
LikeLiked by 1 person
Or Gorilla
LikeLiked by 1 person
I don’t believe any of this, Mark! 😉 You’ve had those iron models for ages and left them out to rust for a couple of decades before bringing them inside and putting them on a base! The rust looks far too realistic to have been simulated!
LikeLiked by 2 people
Fantastic comment John! You humble me!
LikeLiked by 1 person
The textures and colors work together perfectly. Great work Mark, these are awesome!
LikeLiked by 1 person
Thanks. I seem to be in total rust mode lately!
LikeLike
Nice work, Mark. I spotted (and downloaded) those exact files myself recently. If/when I get around to printing them, I’ll have a very different look to mine, but regardless it’s still motivating to see them assembled and painted up so nicely!
LikeLike