
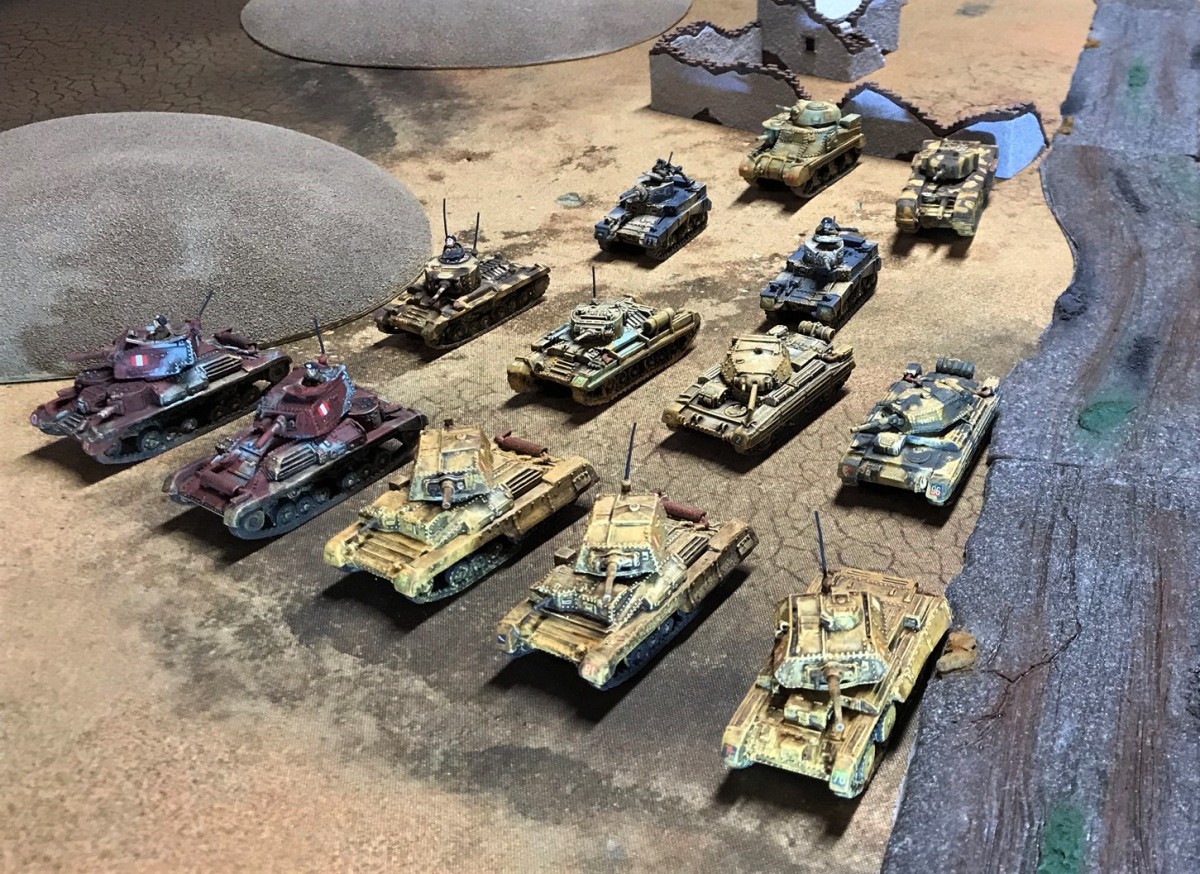
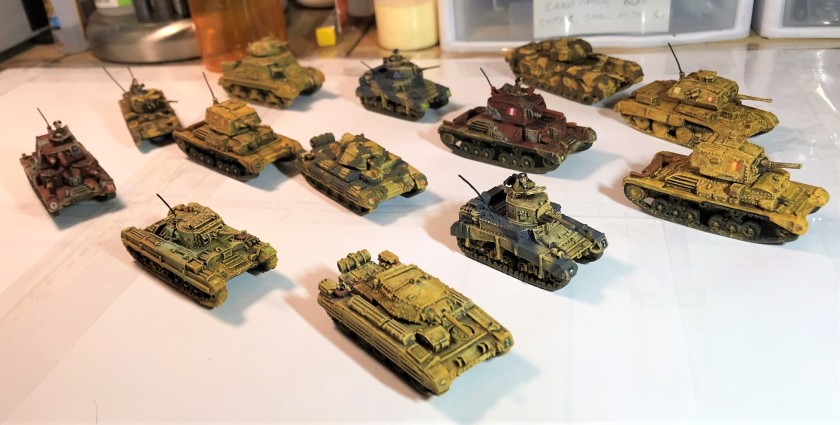
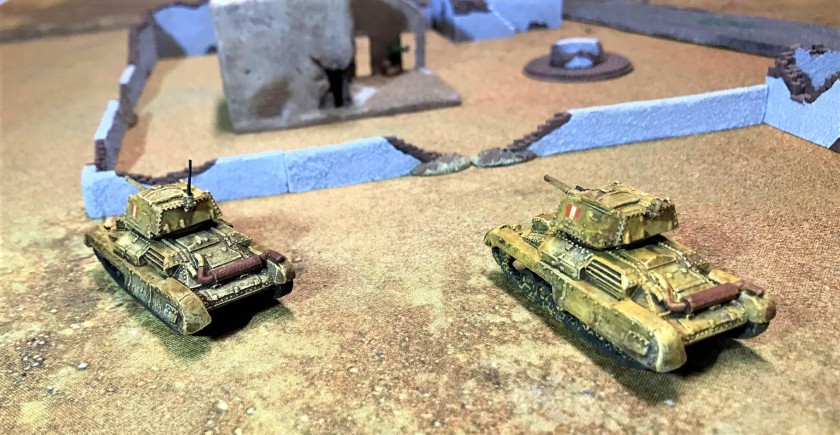
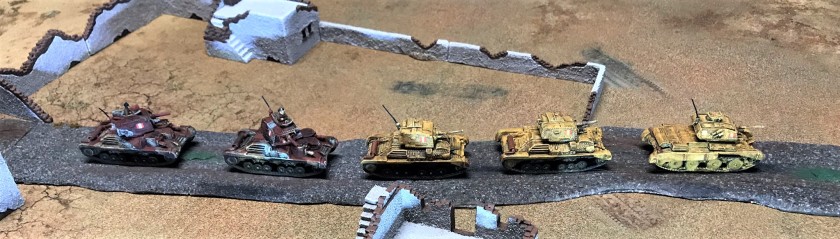
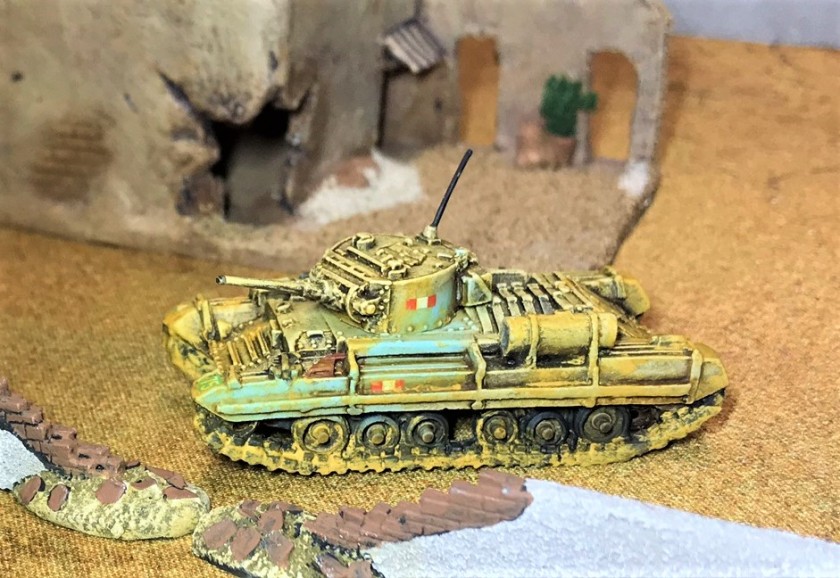
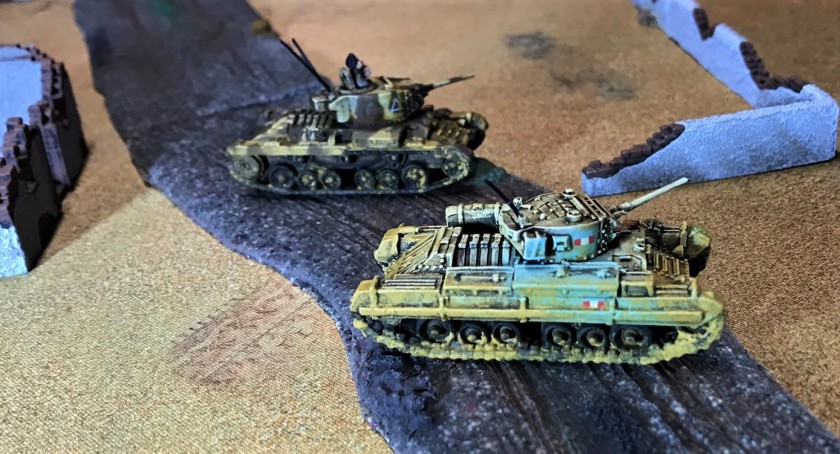
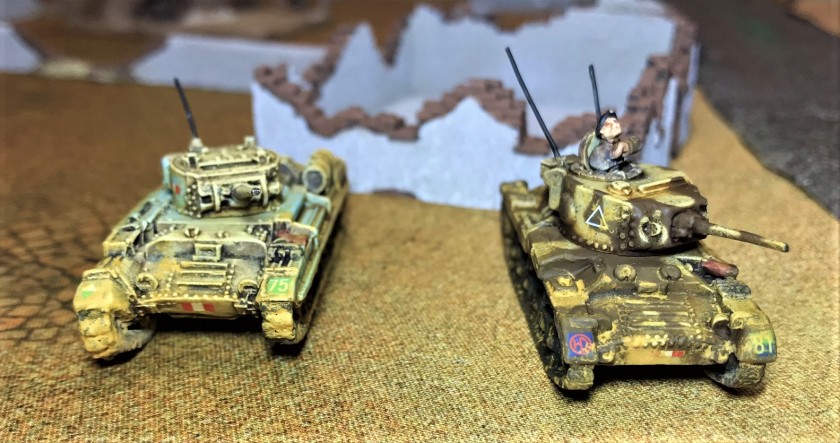
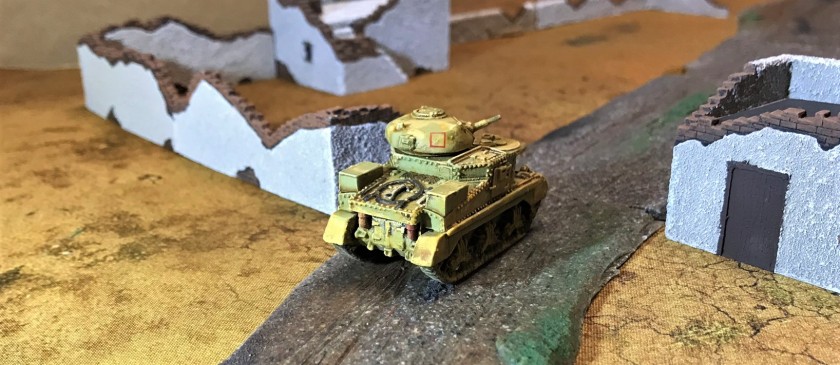
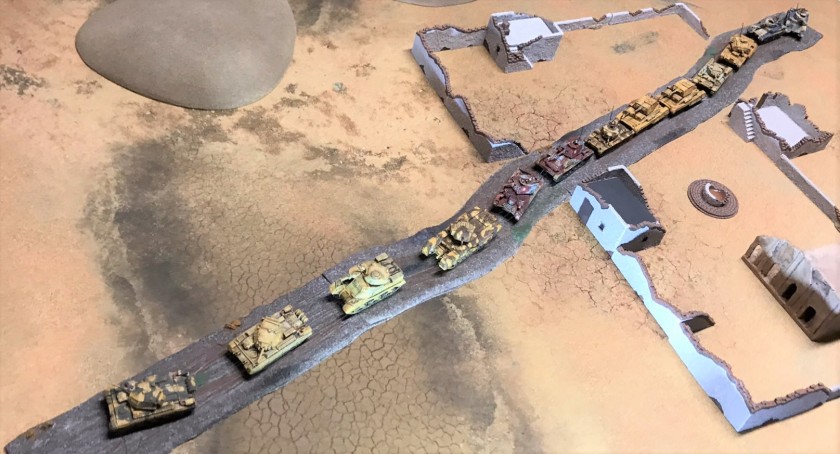
This week I was able to finish off my 8th Army tank force for What a Tanker© games. The group was composed of 9 Battlefront/Flames of War 15mm scale tanks – two A10 Cruiser Mark IIA’s, one A13 Cruiser Mark IVA, two Valentine tanks (a II and a III), two Crusader tanks (a II and a III), one M3 Grant, and one Churchill II. These would add to my previous two A9 Cruiser Mark I’s and my two M3 Stuart “Honeys” tanks that I finished in November (those are discussed here). Including a couple of prepainted Matilda II’s that I had bought from Wargames Models in Ohio, my 8th Army force now has 15 tanks. Noticeably absent from this group of course are the Sherman tanks that arrived in time for the British push at the Second Battle of El Alamein, but I am sure I’ll get to adding them eventually. I wanted to have a group of earlier war tanks ending with the Grant and Churchill for now, as most folks are less familiar with them.
I did not take as many pictures in the assembly and painting processes this time as I wanted to get these done. I need to move onto the Germans and the Italians! My goal is to run these in What a Tanker© games at gaming club meetings and at local conventions. I do feel that these, as well as my last tank project attempts, have been fun and have stretched my hobby skills a good bit.
I’ll cover each of the types individually, then some eye-candy shots at the end for your (I am hopeful) enjoyment. Of course, I will list my paints and materials at the end for those interested. I used my airbrush and standard brushes on all of these.
A10’s and A13
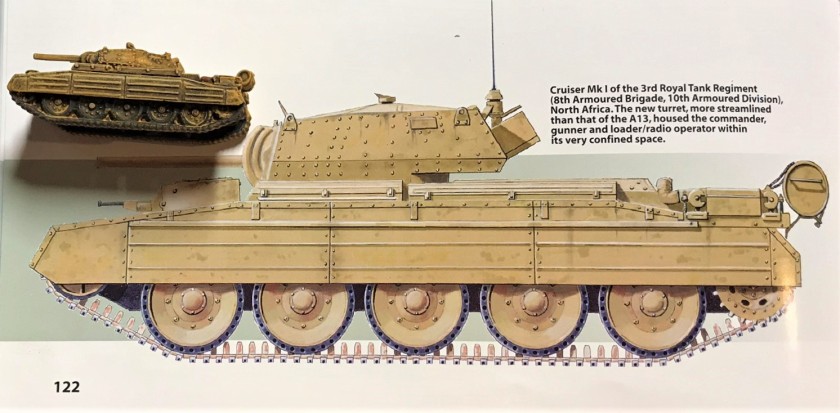
I finished three more cruiser tanks – two A10 Mark IIA’s and one A13.


I find that cleaning, filing, and general preparation of these models does take a bit of time. I know that washing the resin parts is very important. My last step in cleaning the resin involves a gentle brush wash/application of isopropyl alcohol (rubbing alcohol to some of you) to it. This has been helpful I think – you just need to let that dry before handling or you may leave fingerprints on the resin. I also added radio antenna aerials with 24 gauge wire if the model would withstand the drilling and mounting process structurally. Sometimes, I just could not add one without damaging the model.
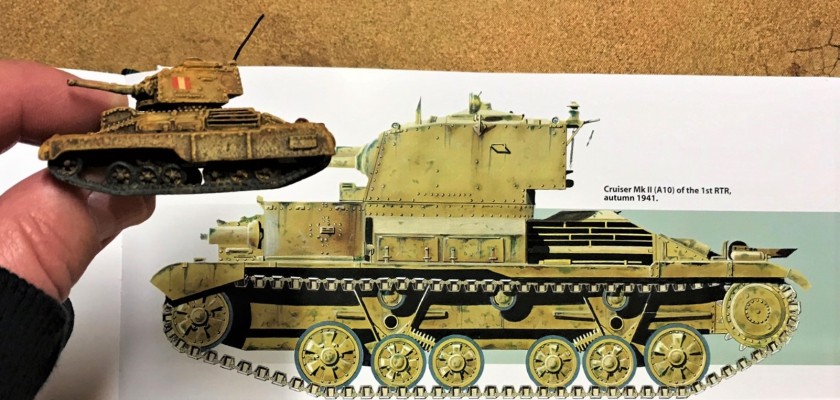
During the war, compared to the A10’s, the A13’s were much faster due to the Christie suspension and a better engine. Combat wise, they were not much better, and are not better in the game rules either. They are adequate foes for Panzer II’s and some Italian light AFV’s.
On all of my tanks I tried to use different FoW decals that seemed to make sense – they are so small! Of course, getting the decals to look sand-worn was important, and the pigment helped. Getting the decals to conform to the curved surfaces took many slow applications of Micro-Set, Micro-Sol, and Liquid decal film. Our hobby blog-guru Azazel mentioned using barely-moist sponges to lightly apply pigments, so I gave that a shot, especially on the decals. While I think I got a darker look, it did made the decals look less out of place, and I liked the effect.
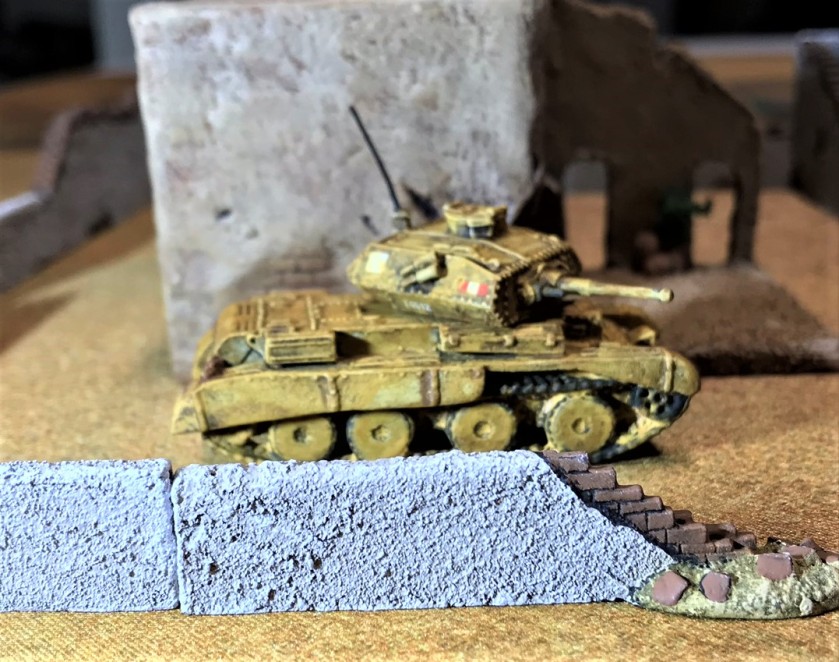
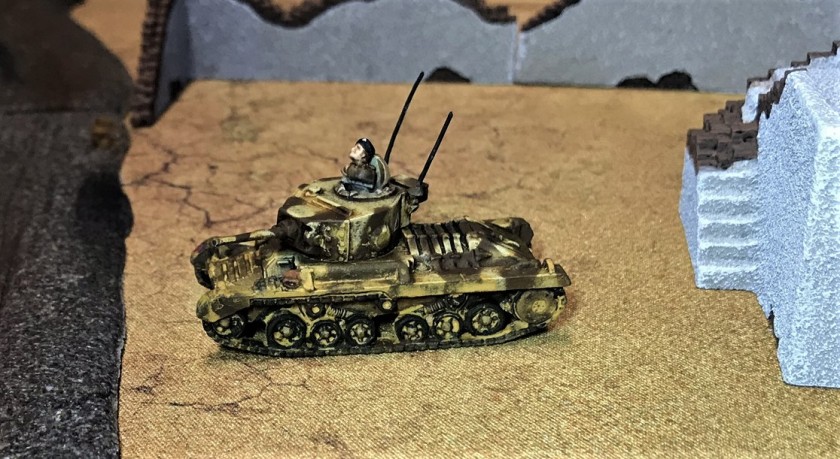
Valentines
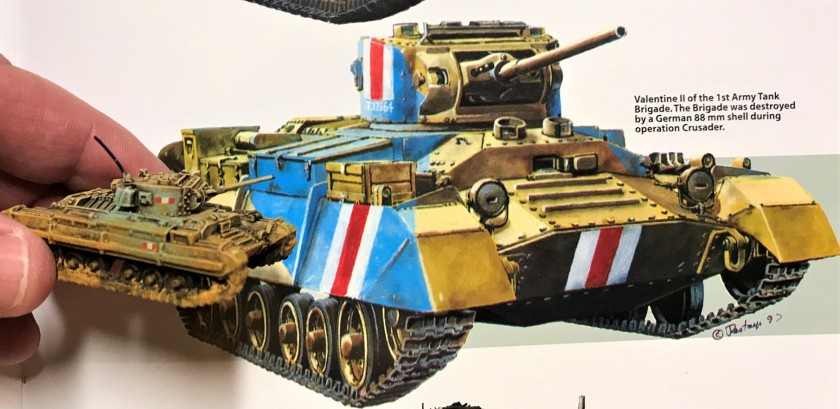
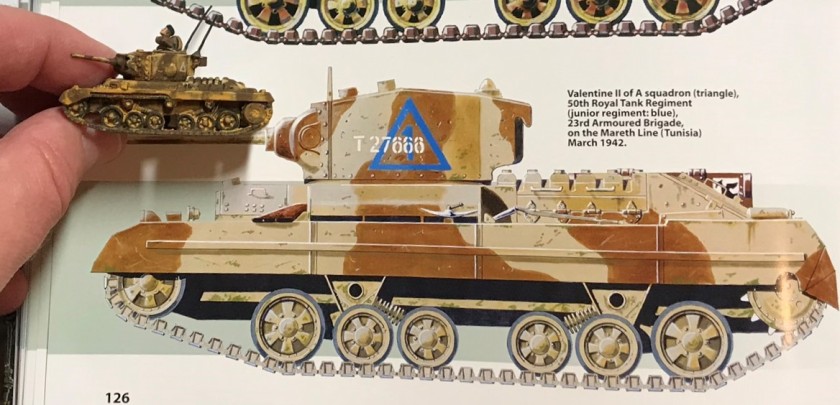
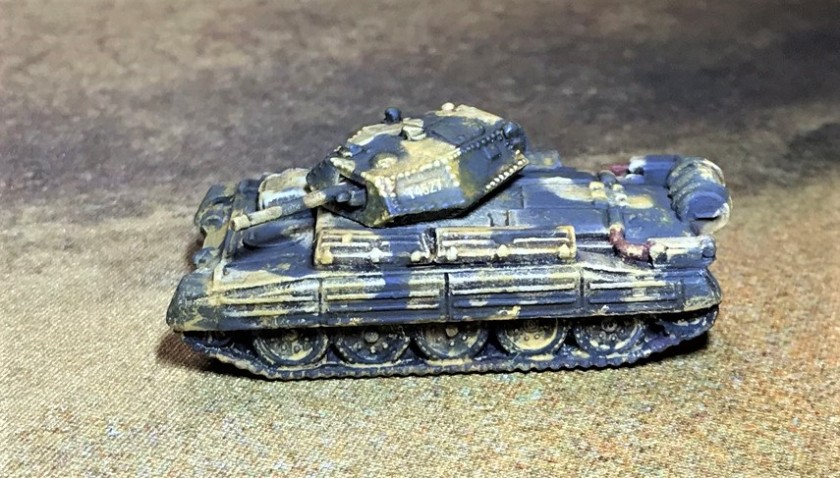
I picked up the two Valentine infantry tanks on sale at two different hobby shops. The track treads were a bit different. Of note, the Valentine II needed significant reinforcing with green stuff to come together as it was either poorly designed or not well made.


For the Valentine II, I chose a Caunter camouflage scheme that was more bluish than what I had done previously with the A9’s or the Honeys. That would help on the tabletop as well – and the biggest difficulty was masking the appropriate parts of the tank for airbrushing the blue.
I am not sure how effective the blue scheme was in WWII combat, but as the British abandoned it my guess is not very. Still, it does look striking and different.
For the Valentine III, I went with a camouflage scheme that was more brown and sand. I also added two aerials to this one.
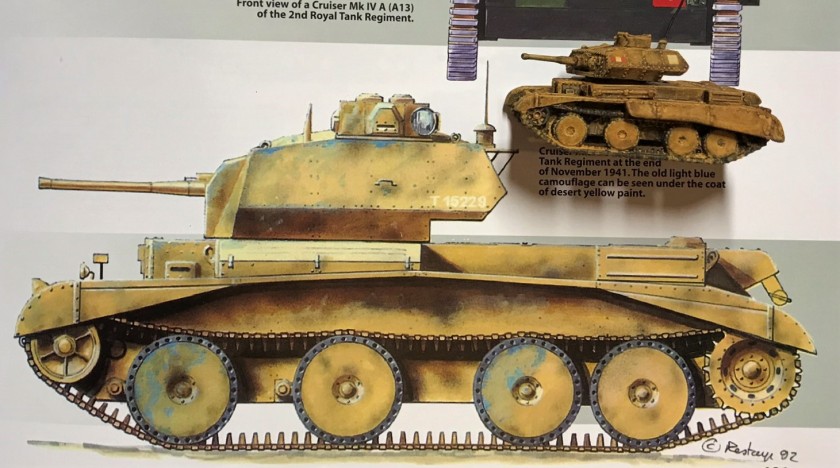
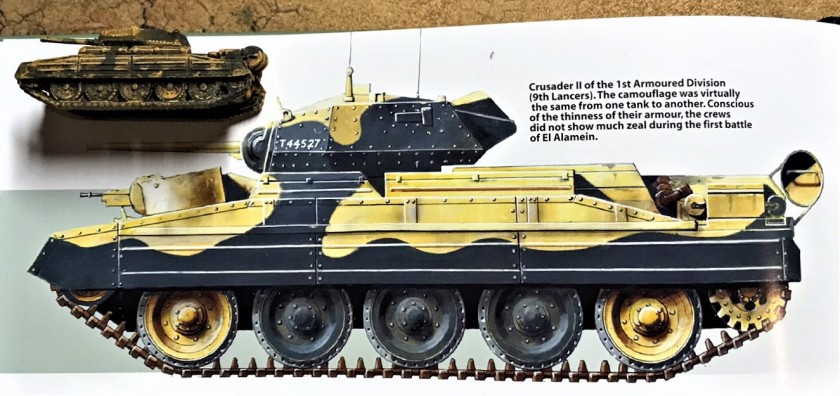
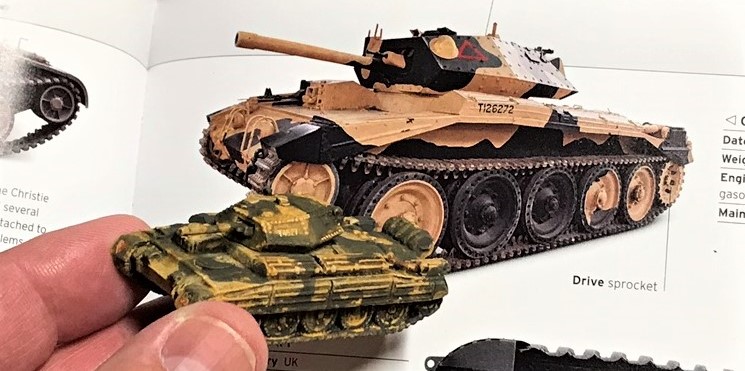
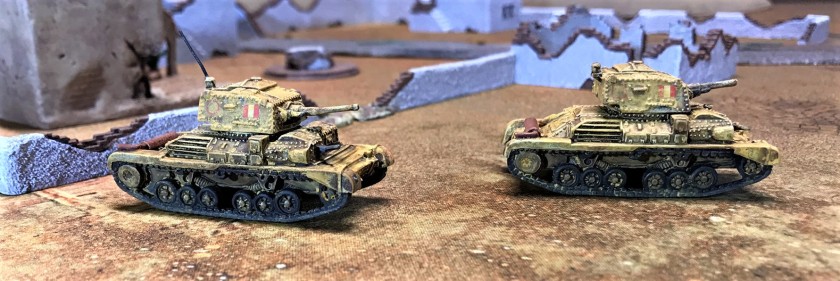
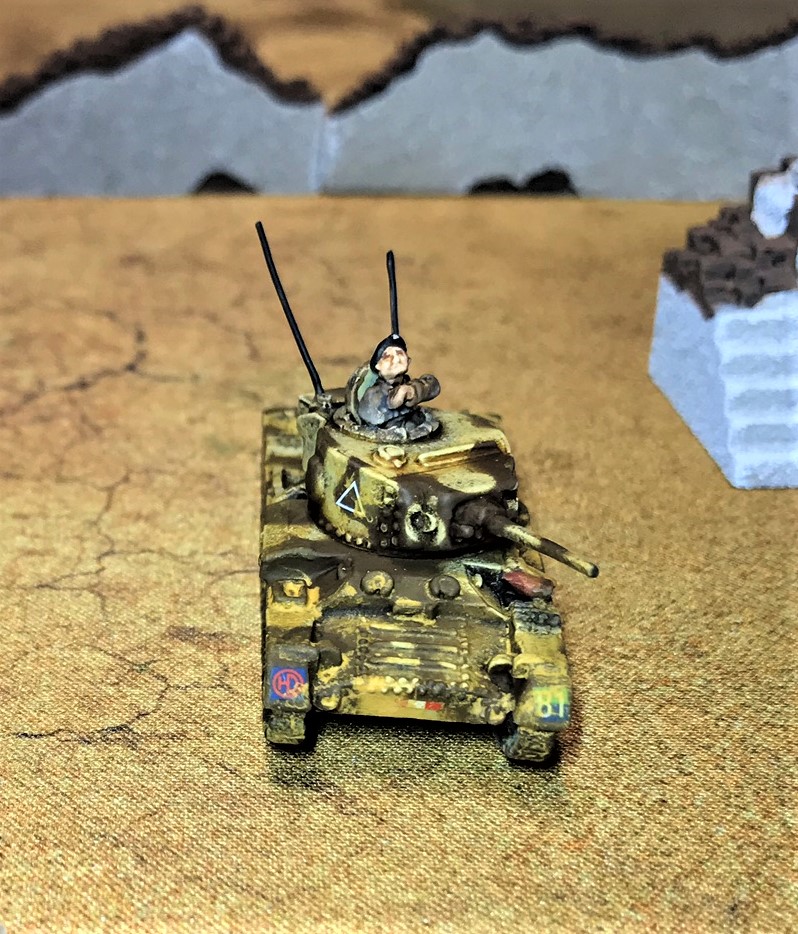
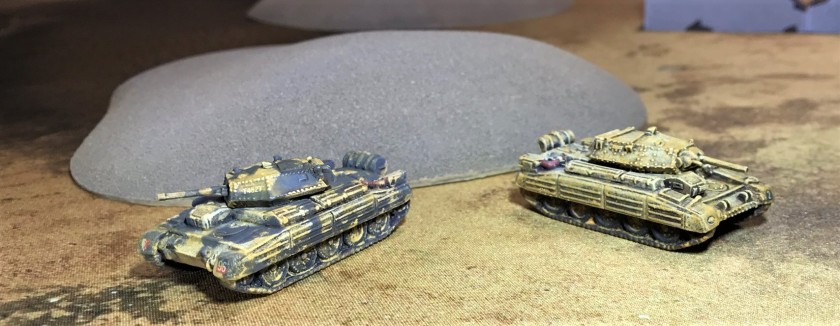
Crusaders
I definitely wanted to have a couple of Crusader cruiser tanks in my force. They do look good, though in combat their armor was not effective enough against their Axis counterparts.


I decided to use two different painting schemes here as well. The earlier Crusader II would get a sandy look, while the Crusader III would get a brown camouflage pattern.
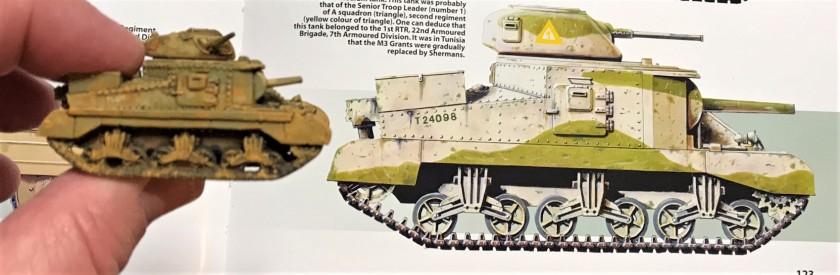
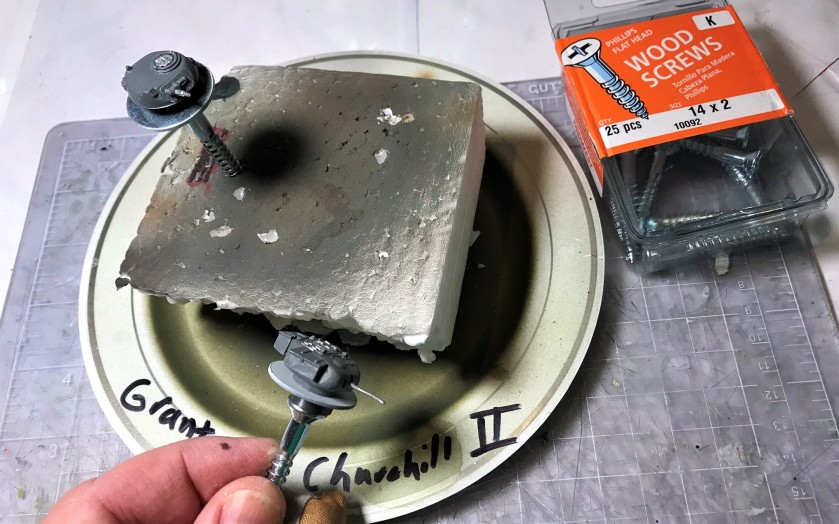
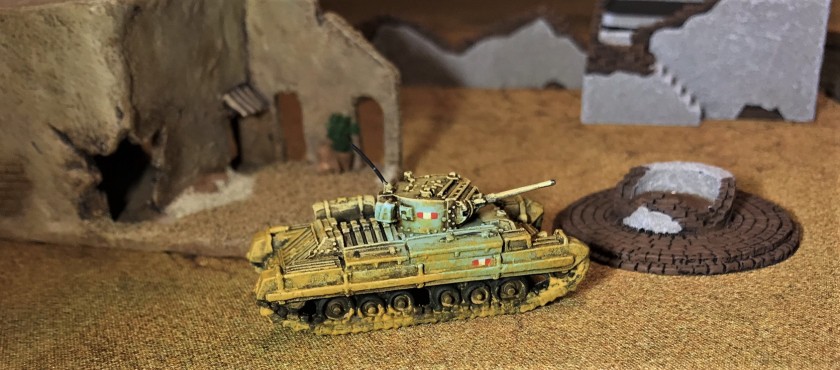
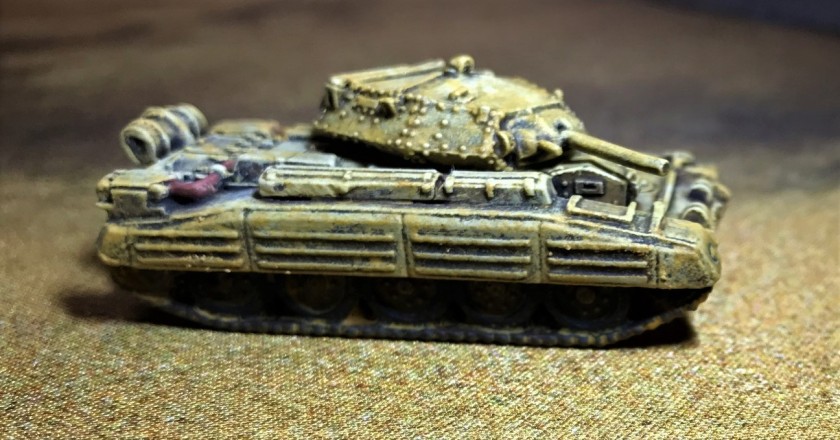
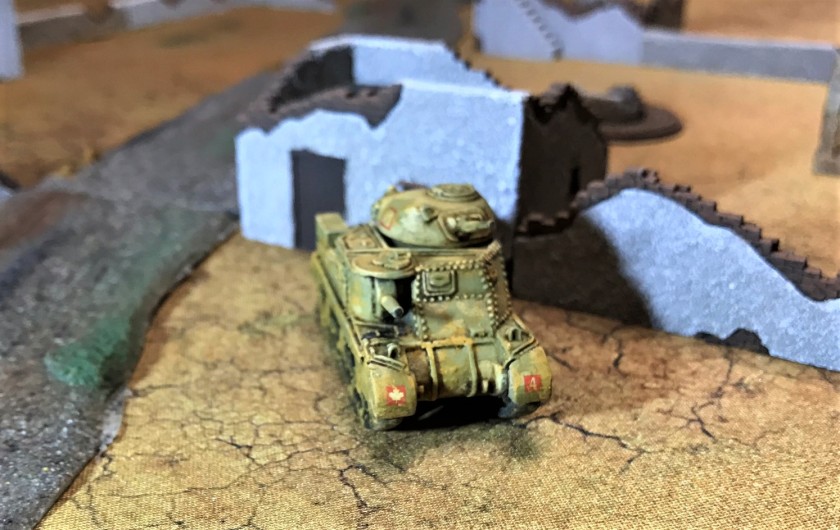
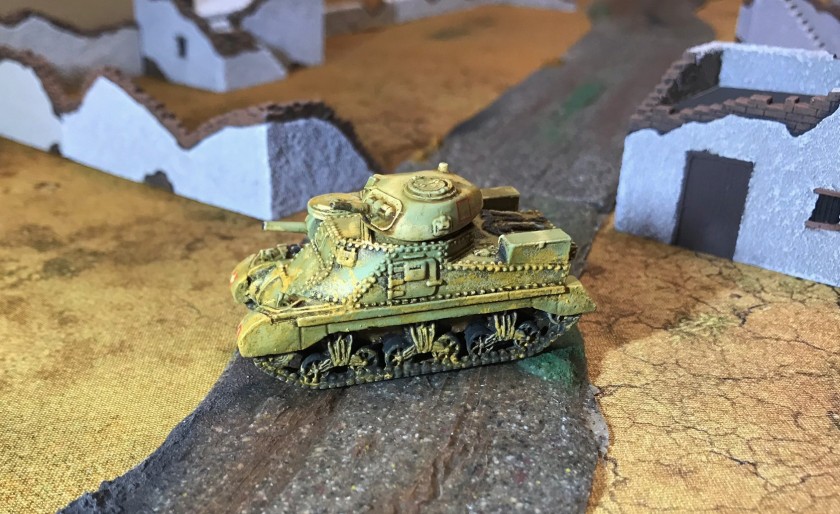
M3 Grant
The British were not happy to get American tanks at first. They did invent the tank after all in WWI, and they were proud of them. They wanted the US to build British designs, but with the risk of the UK losing the war early on, we Americans balked and said we would only build US designs. That way, if the British lost, we would not have our factories tooled for non-American designs. One of these was the light tank M3 Stuart, another was the medium tank M3 Lee. To placate the Brits, a different and more rounded turret was made than that of the American M3 Lee, and that is the major difference between a Grant and a Lee. So, my tank is a Grant. In doing my research, it was interesting to learn that the sponson-mounted 75mm gun was more prized (eventually) because it had an HE round. That meant that the Grant 75 was far better able to deal with anti-tank gun crews, like the dreaded 88mm, than a solid shot AP round would have been. In the turret, a 37mm gun was the main anti-tank weapon (though certainly the sponson gun was used in that role as well).


If the chassis looks familiar, yes, it was used as the basis for the M4 Sherman as well.
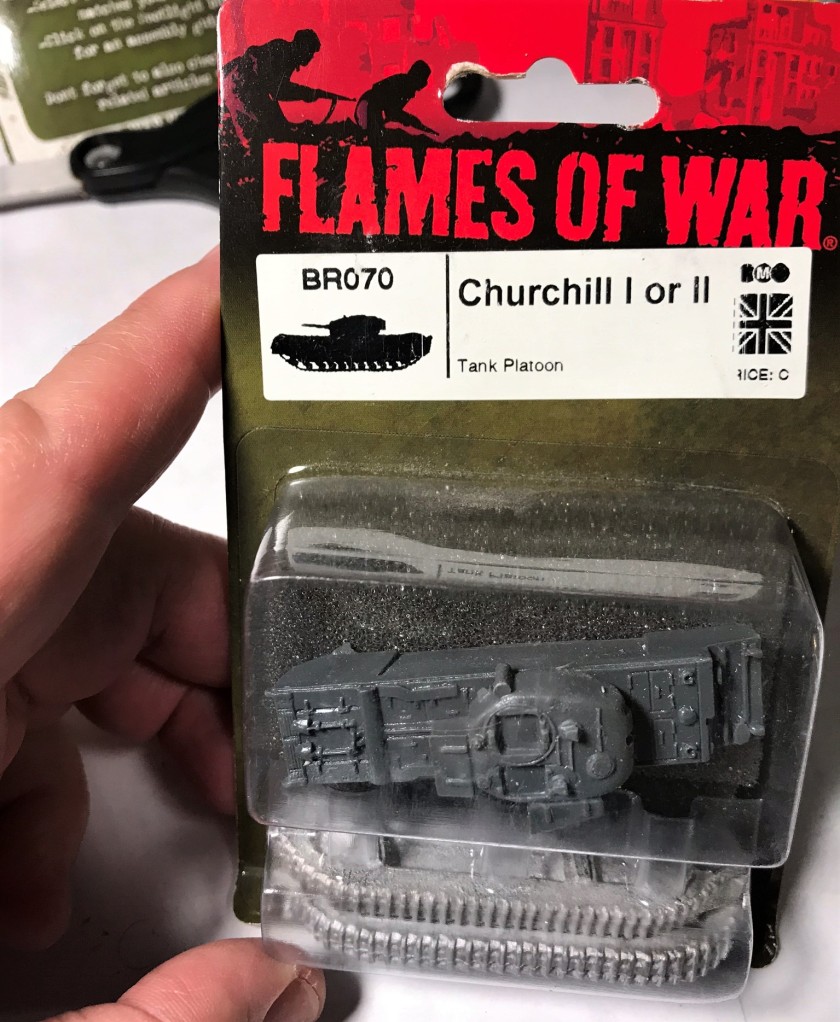
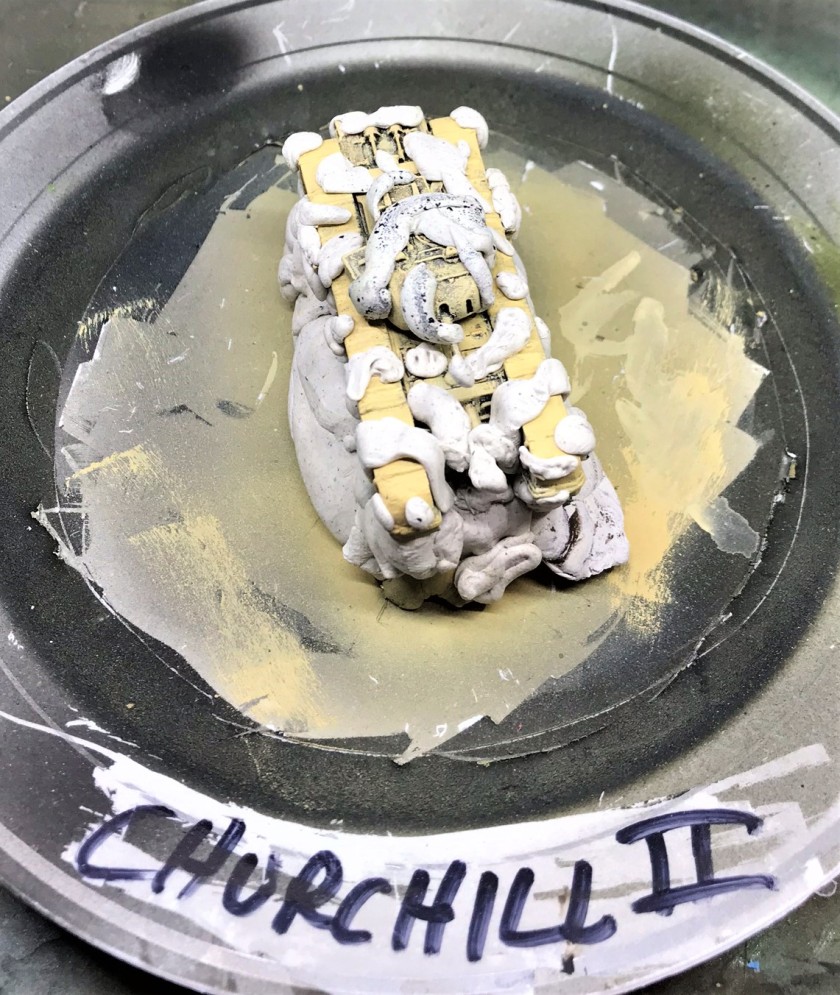
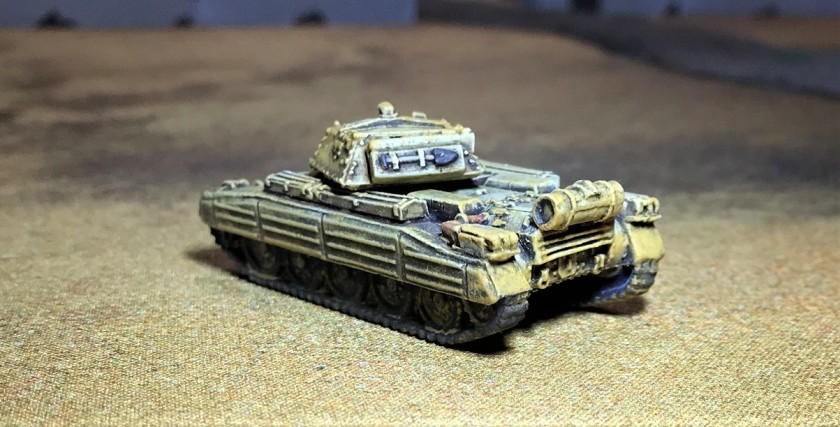
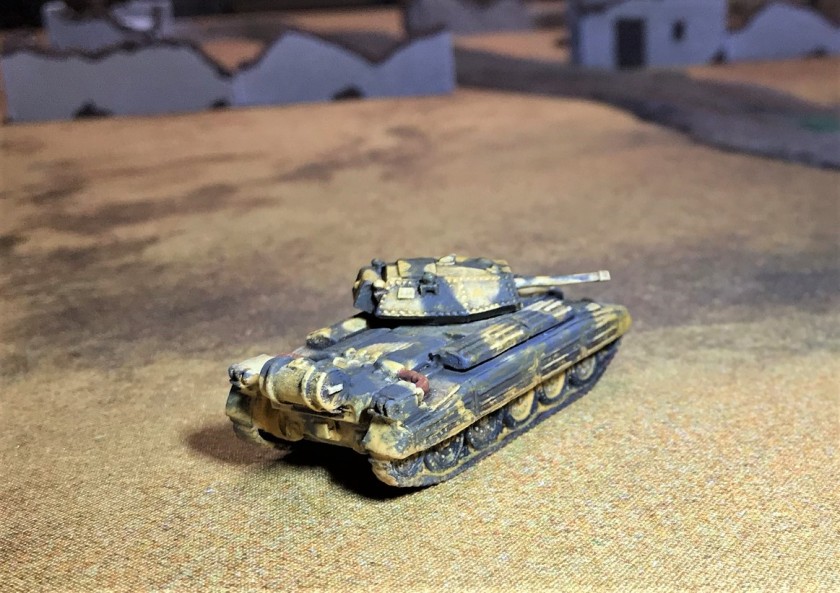
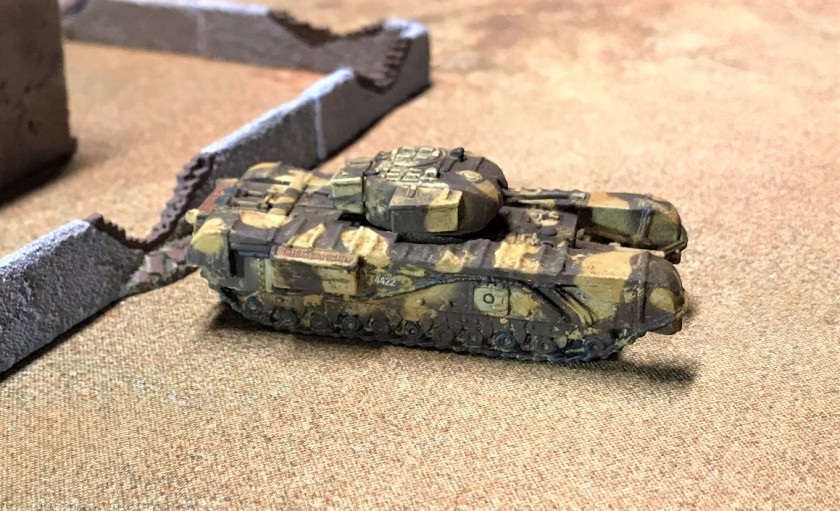
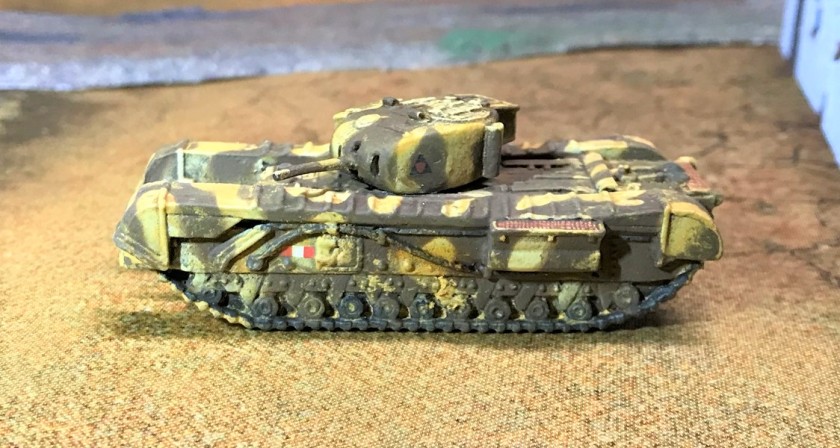
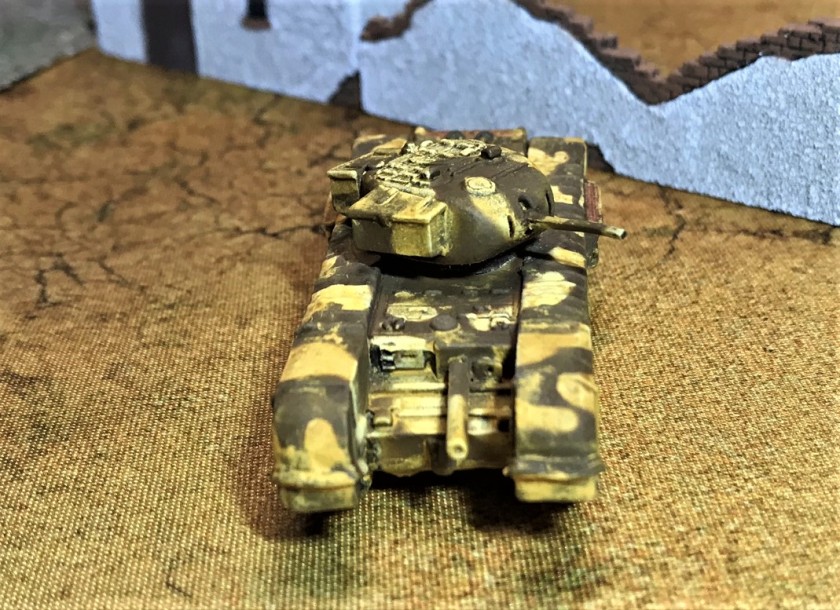
Churchill Mark II
The Churchill infantry tank made its unhappy debut in the costly Canadian forces raid at Dieppe (these were Churchill Mark I’s). The Churchill Mark II was first used by the “Kingforce” detachment (6 Churchill II tanks) in North Africa in October 1942, and Churchills were used in that theater and in Western Europe throughout the rest of the war.
I then masked this big behemoth (for 15mm). The effort on this tank took some doing – I needed a lot of poster tack.

Now my force was – as you Brits out there might say – “proper” in terms of game-worthiness.
That concludes the history/what-I-did section – now for the…
Eye Candy

Now it’s onto the Germans and Italians – which I hope to finish soon. But never soon enough…
Thanks for looking, and I very much hope that you enjoyed seeing these. Any favorites? Feedback? Winning lottery numbers? Please leave me your thoughts in the comments section!
PAINTS, INKS, GLAZES, SHADES, WASHES, AND FLOCKING USED ON THIS TANK GROUP:
- Vallejo “Flow Improver”
- Vallejo “Airbrush Thinner”
- Vallejo “Surface Primer – Black”
- Testors “Universal Acrylic Thinner”
- Citadel “Imperium Primer”
- Battlefront “European Skin”
- Battlefront “Skin Shade” (shade)
- Vallejo “English Uniform”
- Battlefront “Crusader Sand”
- Vallejo “Desert Sand”
- Battlefront “Worn Canvas”
- FolkArt “Champagne”
- Battlefront “Black”
- Citadel “Agrax Earthshade” (wash)
- Citadel “Nuln Oil” (wash)
- Vallejo “Dark Sand”
- Battlefront “Dry Dust”
- Battlefront “Wool Brown”
- Battlefront “Boot Brown”
- Battlefront “Rommel Shade” (shade)
- Battlefront “Bradley Shade” (shade)
- Battlefront “Dark Gunmetal”
- Battlefront “Dark Leather”
- Battlefront “Oxide Red”
- Battlefront “Tommy Green”
- Gorilla Glue
- Green stuff (kneadatite)
- Tamiya masking tape
- Vallejo Mecha Varnish “Gloss Varnish”
- Microscale Micro-Set
- Microscale Micro-Sol
- Microscale Liquid Decal Film
- 1/8″ rare earth neodymium magnets
- Appropriate decals from Battlefront
- Vallejo Mecha Varnish “Matt Varnish”
- Vallejo Mecha Color “Sky Blue”
- Aleene’s poster tack
- Vallejo Model Air “Blue Grey”
- Secret Weapons Washes “Armor Wash” (wash)
- Vallejo “Dark Yellow Ochre” (pigment)
- Sponges
- Army Painter Quickshade “Light Tone” (wash)
Thanks again for looking and for sharing your feedback!
RESEARCH MATERIALS
As for research materials, I used the same ones as I cited before – but for completeness here they are in case you are interested (you can find them on Amazon):
- Two by David Fletcher:
-
- British Battle Tanks: British-made tanks of World War II
-
- British Battle Tanks: American-made World War II Tanks
- One by Jean Restayn:
-
- WWII Tank Encyclopaedia, 1939-45
- One by the Smithsonian/DK:
-
- Tank: The Definitive Visual History of Armored Vehicles
- One by Michael Green:
-
- Axis Armoured Fighting Vehicles of the Second World War (Images of War)
- One by Robert Jackson:
-
- Tanks and Armored Fighting Vehicles Visual Encyclopedia
I would easily recommend all of these books as good resources for gamers and modelers.

Crikey, Mark, you have been busy! An impressive array of tanks there. Good idea to use different paint schemes and markings to make them that bit easier to differentiate in action. My favourite’s the Churchill I think, but I like them all. Will be interesting to get your views on how they perform in a game, considering the differences between them, although I’d probably rate the Grant as having the most balanced capability, despite its configuration. Enjoyed all the background you included. Well done!
LikeLiked by 1 person
Cheers as you say John! Agree, will be interesting to see them in a game but I suspect the early cruisers will have a questionable life expectancy on the battlefield. The Churchill is one of my faves as well, but the M3 Lee/Grant had such a unique look, and when I saw the one at the museum I was blown away. Also, that one was used in the movie 1941 http://www.war-movies.info/ww2/movie/1941-war-comedy. Anyways, appreciate the kind words and glad you enjoyed it!
LikeLiked by 1 person
Great write up Mark. Love the photos of the finished tanks taken alongside the real tank images for comparison. They look so good. I’m sure you are pleased with them and so you should be.
LikeLiked by 1 person
Thanks Dave, I am as I’m still learning about them and adding new techniques to my kit bag.
LikeLiked by 1 person
You’ve been busy mate. Looking great. I enjoyed the history lesson too. That Valentine II is awesome
LikeLiked by 1 person
Thanks IRO, glad you liked them. Yes, blue camouflage looks cool!
LikeLiked by 1 person
What great work….against those images, you can see how you’ve captured the schemes so well!
LikeLiked by 1 person
Thanks. As I say I like my tanks dirty, so they looked closer to the images before the pigments, but trying to identify what they should look like is not easy. Sources conflict and I think the saving graces are that nobody knows for sure if the painting and markings deviate from history and they are so small that it’s tough to tell! Glad you liked them.
LikeLike
Amazing job mate – that is indeed ‘proper’! It’s enough to warm the most jaded tread-head’s heart 🙂
LikeLiked by 1 person
Cheers Alex!
LikeLiked by 1 person
Very nice tanks , always a sucker for early armour !
For the aerials have you tried brush bristles ? they are already black and not such a shock should you happen to hit your hand with one 🙂
Also they can be stuck on the surface with a blob of PVA so no drilling required.
regards Paul
LikeLiked by 1 person
Thanks for looking and I had not considered the bristles. I will the next time I have a fiddly mounting situation. The 24 gauge wire is pretty easy to use and I file the tips and sides so it’s not sharp at all and with the filing it holds paint very well. I can size it easily as well, but the bristle idea is intriguing. Thanks for that tip!
LikeLike
Great work Mark. Nice to see the early mark Churchill in there too.
I do like the photos of the finished models next to the colour plate that was its inspiration, it’s a nice touch.
Cheers,
Pete.
LikeLiked by 1 person
Cheers Pete! It was fun to learn more about the early Churchill tanks.
LikeLiked by 1 person
Looking Sharp, and what a nice write-up. I especially like the tank next to the picture shots. Excellent!
LikeLiked by 1 person
Thanks Per! Someday I hope to add Swedish and Finnish tanks to my 15mm fleet!
LikeLiked by 1 person
Super work, Mark.
Where did you get all your decals?
LikeLiked by 1 person
Thanks Buck. The ones I used were British and Commonwealth ones – I thought I ordered the Desert Rats ones – oh well! https://www.flamesofwar.com/online_store.aspx?CategoryID=9940 I found them needing a good coat of Liquid Decal Film
LikeLiked by 1 person
Have you been gloss coating before and after applying the decals?
LikeLiked by 1 person
Gloss under the varnish area, then micro set, then micro sol. After that dries and is down properly, I put a coat of Liquid decal film over the decal. Let that dry, then I brush mat varnish on the decal. Then pigments, then final two coats of varnish over the entire tank.
LikeLiked by 1 person
These look great, Mark – I enjoyed the historical details on the tanks almost as much as looking at the eye candy. I’m sure your beloved Cleveland Bruins will win an NBA game soon, so don’t worry too much on that one! I’m imporssed by both the quantity and the quality, and using different, distinct camo on each type of tank will make them much easier to identify in games – and especially so for people unfamiliar with the different tanks!
I’ve got caught up on some FoW plastic Shermans. Their early ones are truly abominable models, needing filler on both side of the hull glacis and with slots for mandatory magnets to hold the turrets on (and do you think I can find the right magnets?) Bleh!
LikeLiked by 1 person
I’m sure you meant the Boston Bruins and the NHL, so 😁 on that dig my friend. They lost in overtime last night to the dreaded Montreal Canadiens, so maybe my project cursed the Bruins…Not like I’d know what sports teams are in Australia for sure!
As for the tanks, thanks for the plug on your December round up, it was my goal to get the Brits done but missed that goal. Been staying with the FoW resin/metal tanks, I like them and their heft, but man there have been some weird issues. Like missing a gun on a Panzer II kit of 5 tanks, or getting 2 left treads on a Panzer IVD kit. And there are NO assembly instructions on the Battlefront website for (GE070) the early Tiger I I’m doing (for your January challenge), and that model has nearly 20 pieces. One is a mystery to me! Battlefront customer service has done right by me so far, so I will stick with them. As for magnets, here’s the best I have found: https://rover.ebay.com/rover/0/0/0?mpre=https%3A%2F%2Fwww.ebay.com%2Fulk%2Fitm%2F162793688640 , love these.
Nice to see them when you get done!
LikeLike