

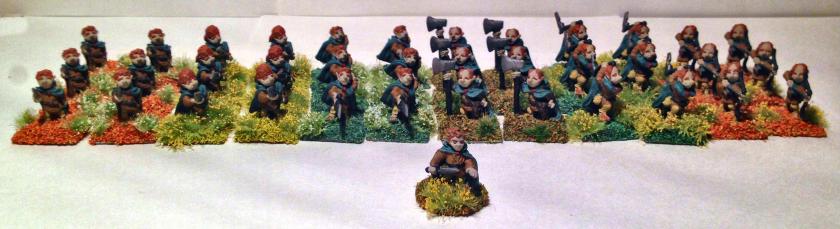
Halflings to the front!
Dave Wood was kind enough to give me an entire 24 figure battalion of 1977 Minifig World of Greyhawk (42 “Halfling Fighters”). They are 25mm figures, so the photos below are enlarged.
Here is the link with the original package from Lost Minis Wiki:http://www.miniatures-workshop.com/lostminiswiki/index.php?title=Image:Minifigs-wogreyhawk-wog42.jpg
After checking with Dave, we are sure that I painted some of these in the 1982-1984 timeframe while we were roommates at West Point. A fading memory of my painting the eyebrows and the furry halfling feet somehow was still kicking around in my brain. This gift jogged that memory to life! Back then, Dave had a lot of figures (well, some things do not change). I offered to paint some and he was kind enough to let me. These were armed with axes, hobbit swords, hobbit spears, short bows, hobbit daggers, and what looked like adzes or mattocks. At some point later, Dave remounted the figures on flat steel bases and flocked them a yellow greenish color.
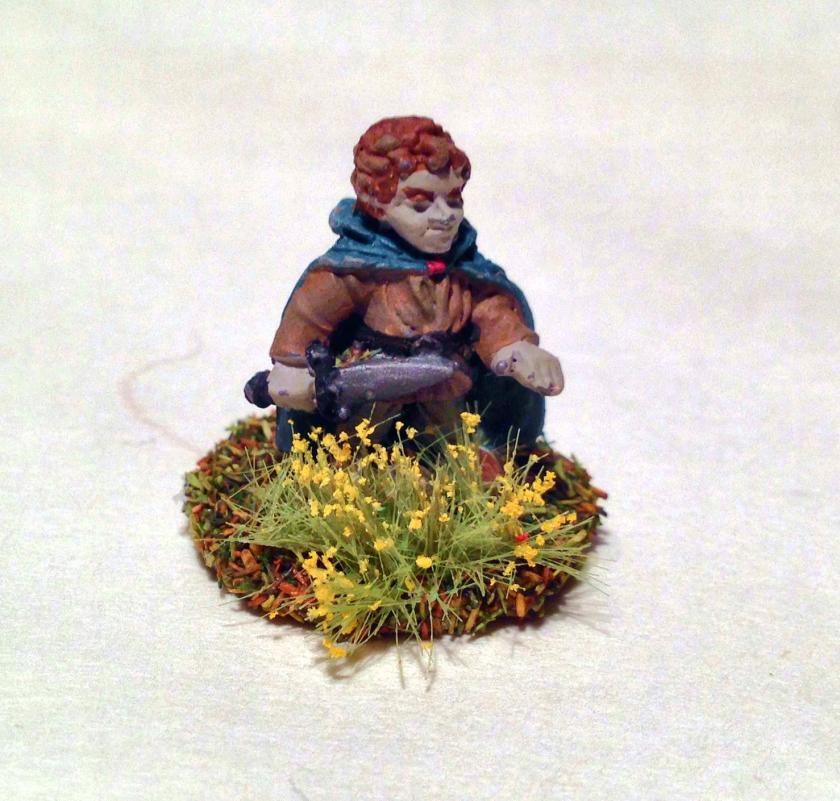
There was also a Grenadier leader that he had included with the group. This figure originally came in a 1980 boxed set (Grenadier #2002 Halflings). This set had 9 halfling figures in the box. The leader was “C” Halfling Thief“. He does look the leader type. He was mounted on a small washer and similarly flocked. Here is the list of the figures that came in the set from Lost Minis Wiki: http://www.miniatures-workshop.com/lostminiswiki/index.php?title=Image:G-asfs-2002z.jpg
I have several of these in my collection from eBay.
Back in the 1980’s, it was easy for younger eyes to discern which one of the Minifig halflings had which weapon. As those days are past, I decided to reflock the bases so that they would be easier for play on the tabletop. I used a variety of flocking and grasses and meadow flowers to make them look slightly different from afar.
I did not want to do anything with the paint jobs except ensure that they were varnished. I was unsure as to whether they were already varnished or not, so they got two coats of Testors “Dullcoat” after flocking. I added all the flowers and tufts after the varnish applications were dry. The results are below.

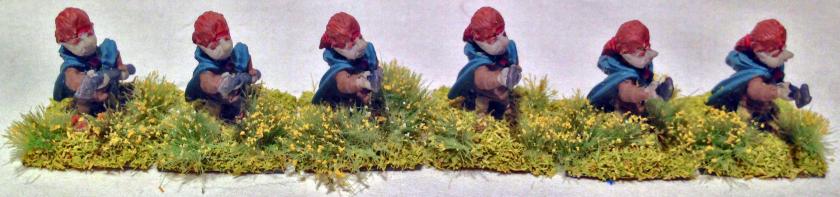
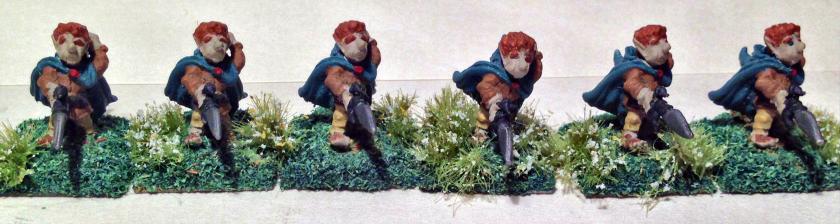
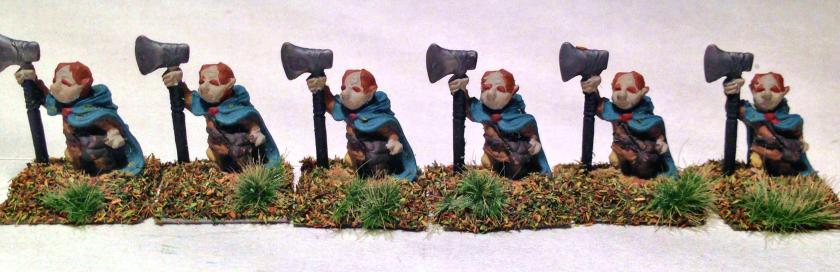


I thought the use of different colored flowers and tufts would give the unit a hint of their origin – a happy, peaceful agrarian Shire. I think that this color scheme worked, and I really like the effects.
Overall, I am very happy to add this unit to my armies. Thanks Dave!


