

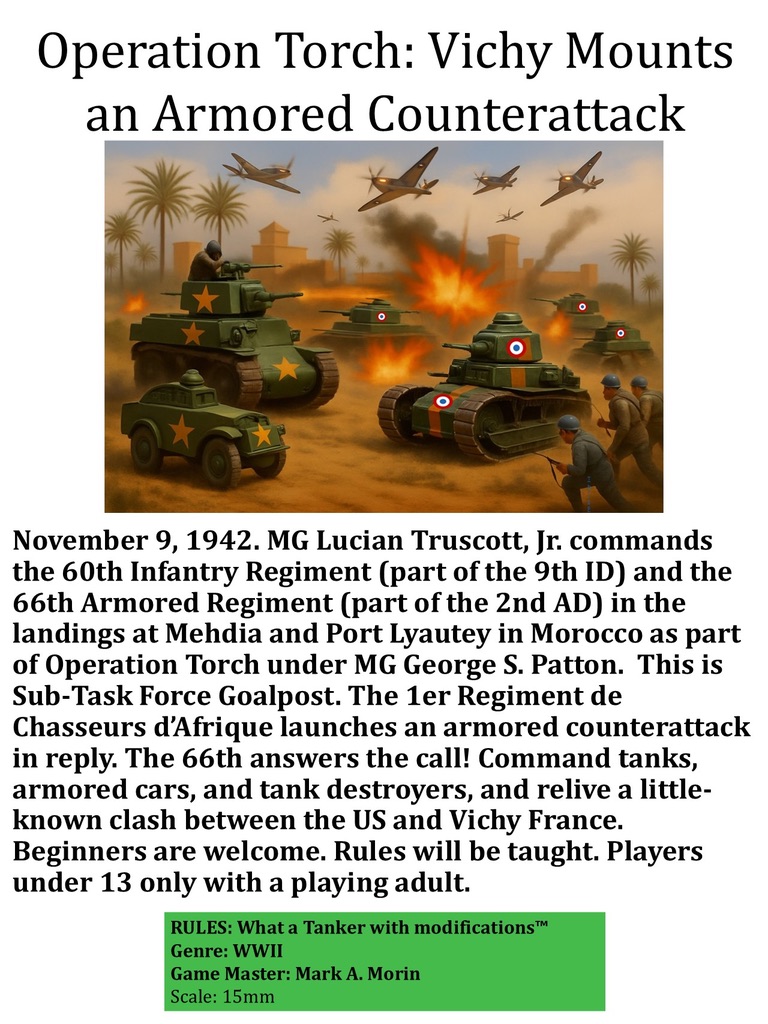
Over the summer, happily, golf dominated my free time for the most part. I didn’t really have much time for hobby work or wargames. Blogging about what little I did complete or participate in fell to the wayside. The “little” that I refer to is work on my 15mm/1:100 scale WWII scenario, Operation Torch: Vichy Mounts a Counterattack. This scenario is part of a What a Tanker game. It is set in Morocco in November 1942. The Vichy French responded to the American landings during this time with an armored counterattack.
It is a little-known clash. France the June 1940 post-armistice was titurlarly neutral, and had the responsibility to defend its colonies against any allied invasions. At this time in 1942, the Soviets were under massive German pressure on the Eastern Front. They were begging the Allies to get in the fight against the Germans – anywhere at all. However, at this point in the war, the US/UK were not in a position logistically to assault Fortress Europe. They also lacked the necessary forces to execute such a mission successfully.
The invasion of North Africa – and the colonies of Vichy France – became the compromised option. Operation Torch thus came to be. In addition, this assault would open up a line of attack on Rommel’s rear. This would reduce pressure on the British 8th Army in Egypt. However, no one knew how much the Vichy French would resist.
As I write this, the 2025 golf season is over now. At least it is here in balmy Massachusetts in November. It’s time for me to capture my summer and fall efforts that led to my running this games at conventions. This post will cover some of my preparations, upgrades, and the actual games themselves. I will discuss the initial games at HMGS HISTORICON, then my upgrades, then the games at HMGS FALL IN! and EllisCon.
By the time I attended HISTORICON in July of 2025, I had the scenario pretty much where I wanted it. I had play-tested it with friends, and was ready to roll it out. This year, in total I have run the game twice at three different conventions. These are HMGS HISTORICON in July, and both HMGS FALL IN! and EllisCon in November. This makes six iterations so far since the spring.
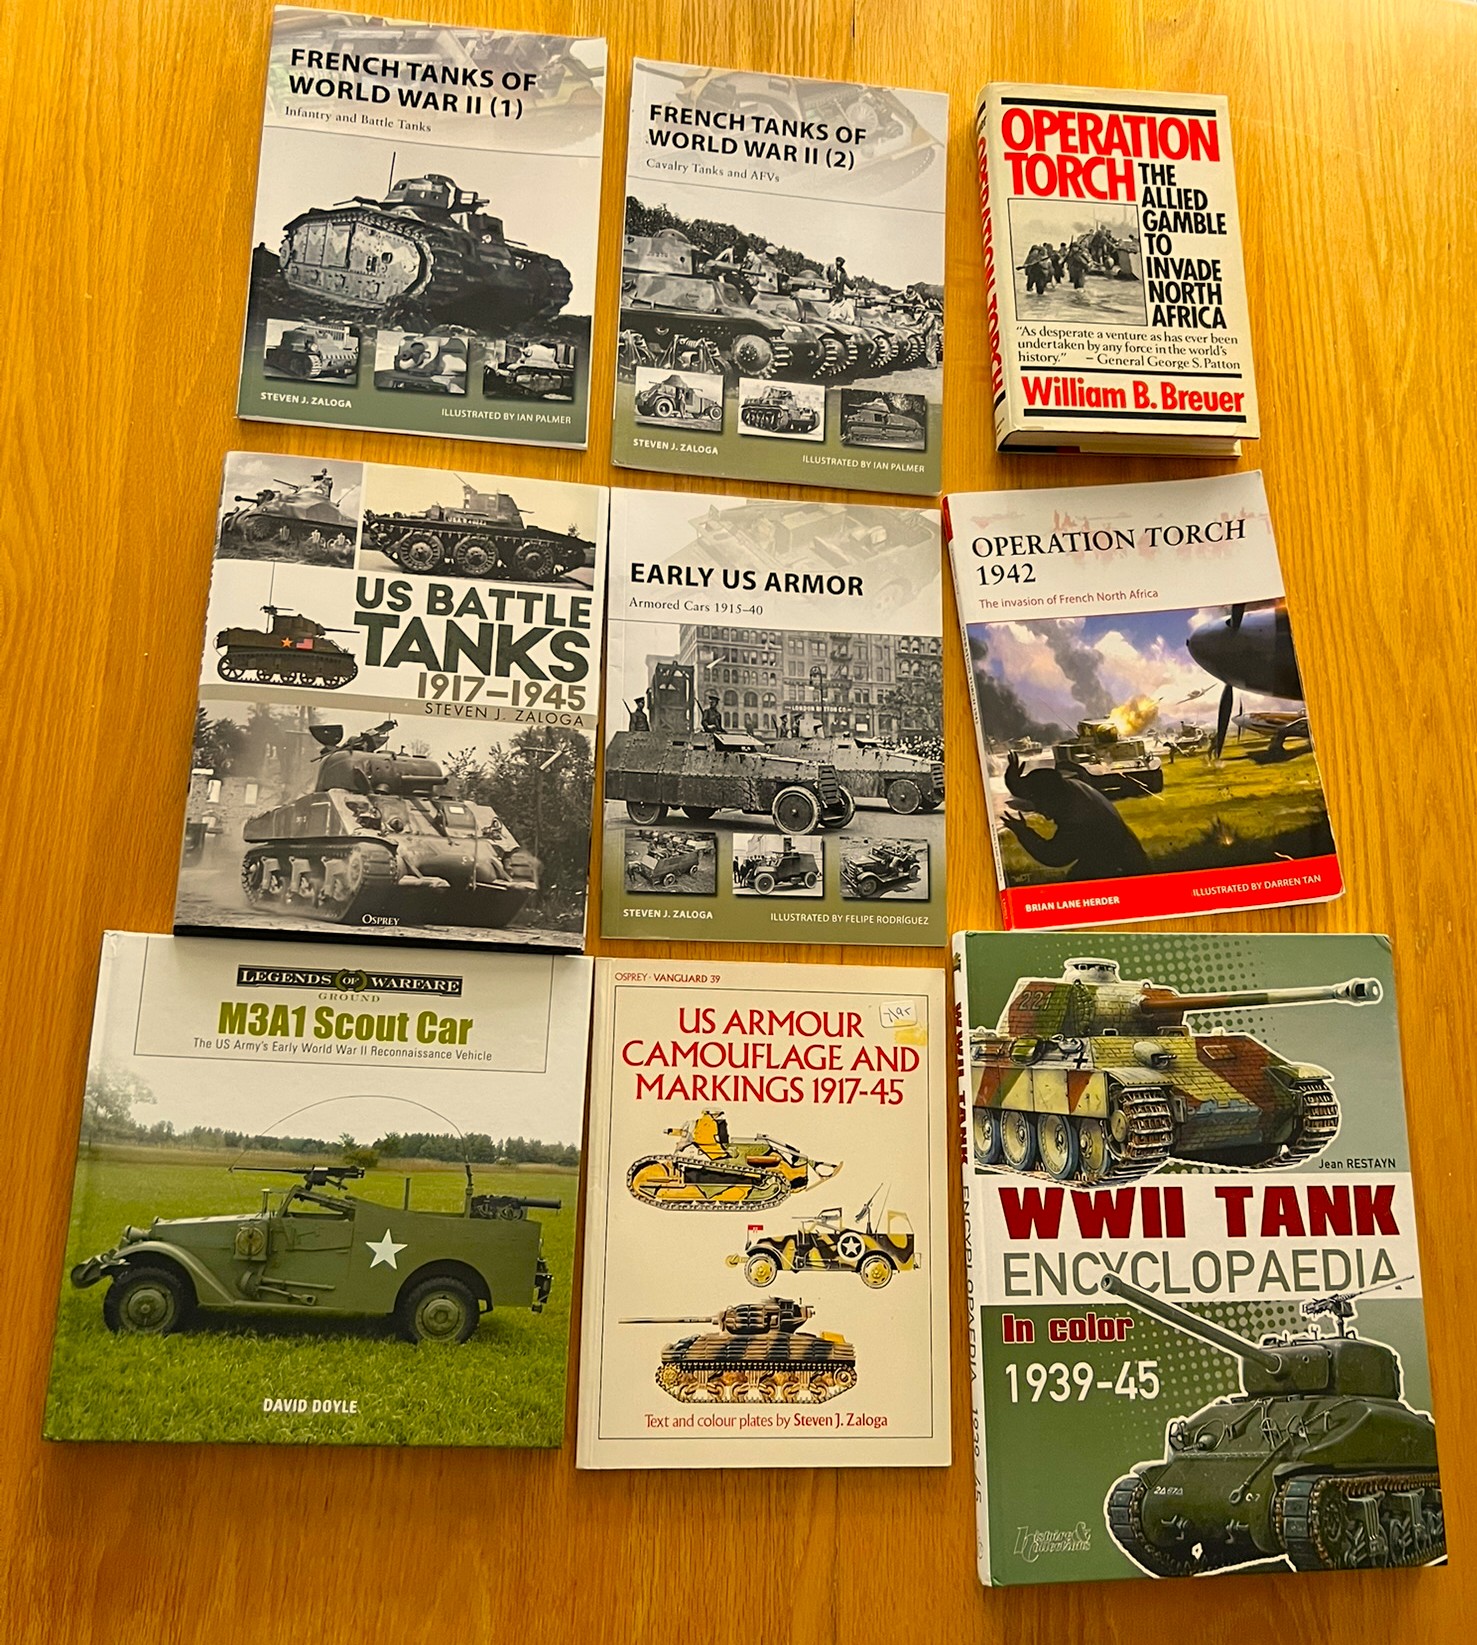
For vehicles for the game, I have finished many AFV’s for that I have discussed in previous posts. Here below are those posts in reverse chronological order in case you missed them:
- M5 Stuart tanks for “Operation Torch: Vichy Mounts an Armored Counterattack” Game
- US Vehicles for Operation Torch: TANK DESTROYERS – M3 GMC’s and M6 GMC Fargo’s
- US Vehicles for Operation Torch: M3A1 Scout Cars
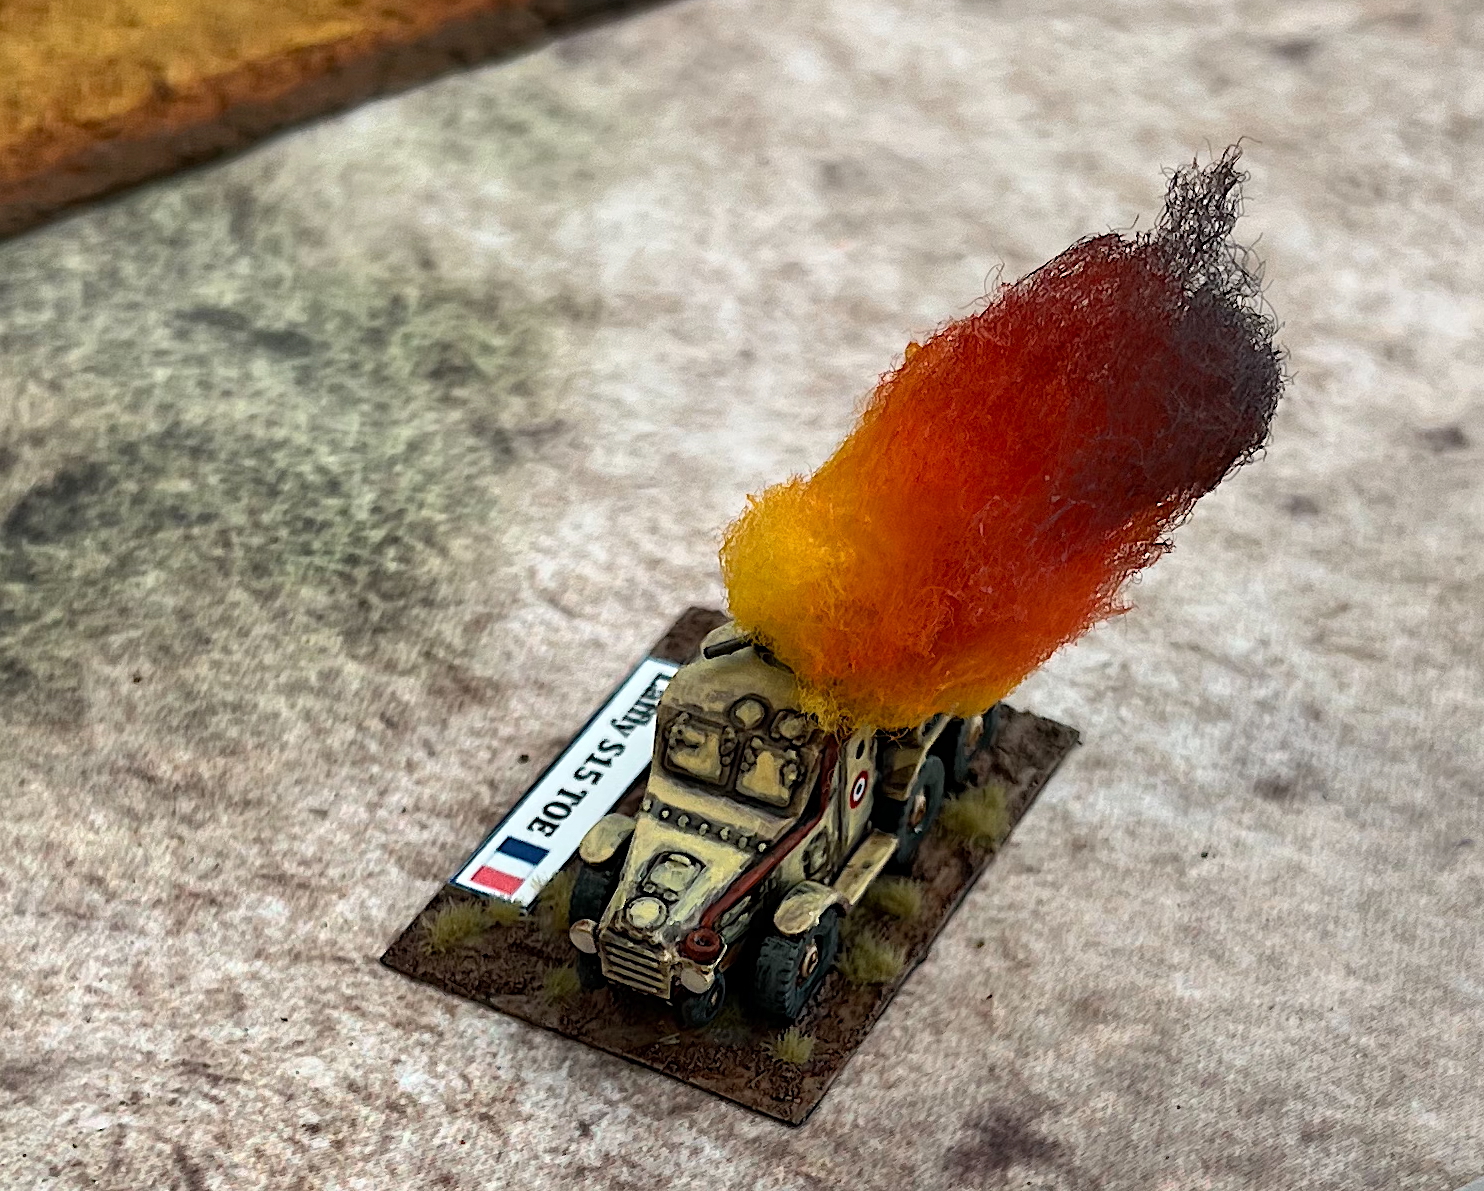
- French Armor for Operation Torch: Panhard 175 TOE’s, Laffly S15 TOE’s, and Berliet VUDB’s
- French Armor for Operation Torch: Hotchkiss H35’s, H39’s, and Renault R35’s
- French Armor for Operation Torch: Renault FT-17’s
- French Armor for Operation Torch: White-Laffly AMD 80’s & Schneider AMC P16’s
- Operation Torch: Planning My WWII Gaming Experience for HISTORICON

In addition to the vehicles, many game aids also were on my to do list. Before HISTORICON, I made road sections and town bases out of poster board and painted them. I also built dice boxes and dice frames for ease of play. Plus, I needed more blast markers for destroyed vehicles.
I was making these dice aids to make play better. What a Tanker is a great game. However, for a multiplayer game at a convention, the activation sequence is not the greatest. It does not keep the players engaged. I decided to borrow Buck services Double Random ActivationTM activation methodology, and that seemed to serve the game well. I also added Bonus Attack Cards and other changes as discussed in the next section.
Overview of My Scenario Rules Modifications
The game uses modified What a Tanker rules. The major modifications that I use are:
- The game starts with each player receiving $75 in Tanker Bucks.
- Before there are any play or purchases of extra resources, there is a VICHY FREE ATTACK PHASE. All US vehicles on the table will receive both 1 French infantry attack and 1 French AT attack. This phase represents the Vichy infantry attacks that were repulsed in November 1942 prior to the armor engagement. This happens only once at the beginning of the game.
- There is an ACQUISITION PHASE after the free attacks conclude. More vehicles and Bonus Attack Cards may be purchased. This phase happens once at the beginning of each turn.
- Uses of Bonus Attack Cards in the game simulate infantry, anti-tank, artillery, naval gunfire, and air actions. These are deployed by scout cars according to each sides’ historical capabilities. These cards can be shared across the team. Bonus Attack Cards are purchased with “Tanker Bucks”, which also play into Victory Conditions. Having more Tanker Bucks at the games end is better, as high amount remaining wins the game. I allow teams to share their Tanker Bucks as well. However, you need to use resources to defeat the enemy. You earn $25 for each AFV or plane destroyed. See the card below to see the costs for acquisitions and for rewards. So, a balancing act exists for the players. Do they hoard their Tanker Bucks, or use them effectively against their opponent?


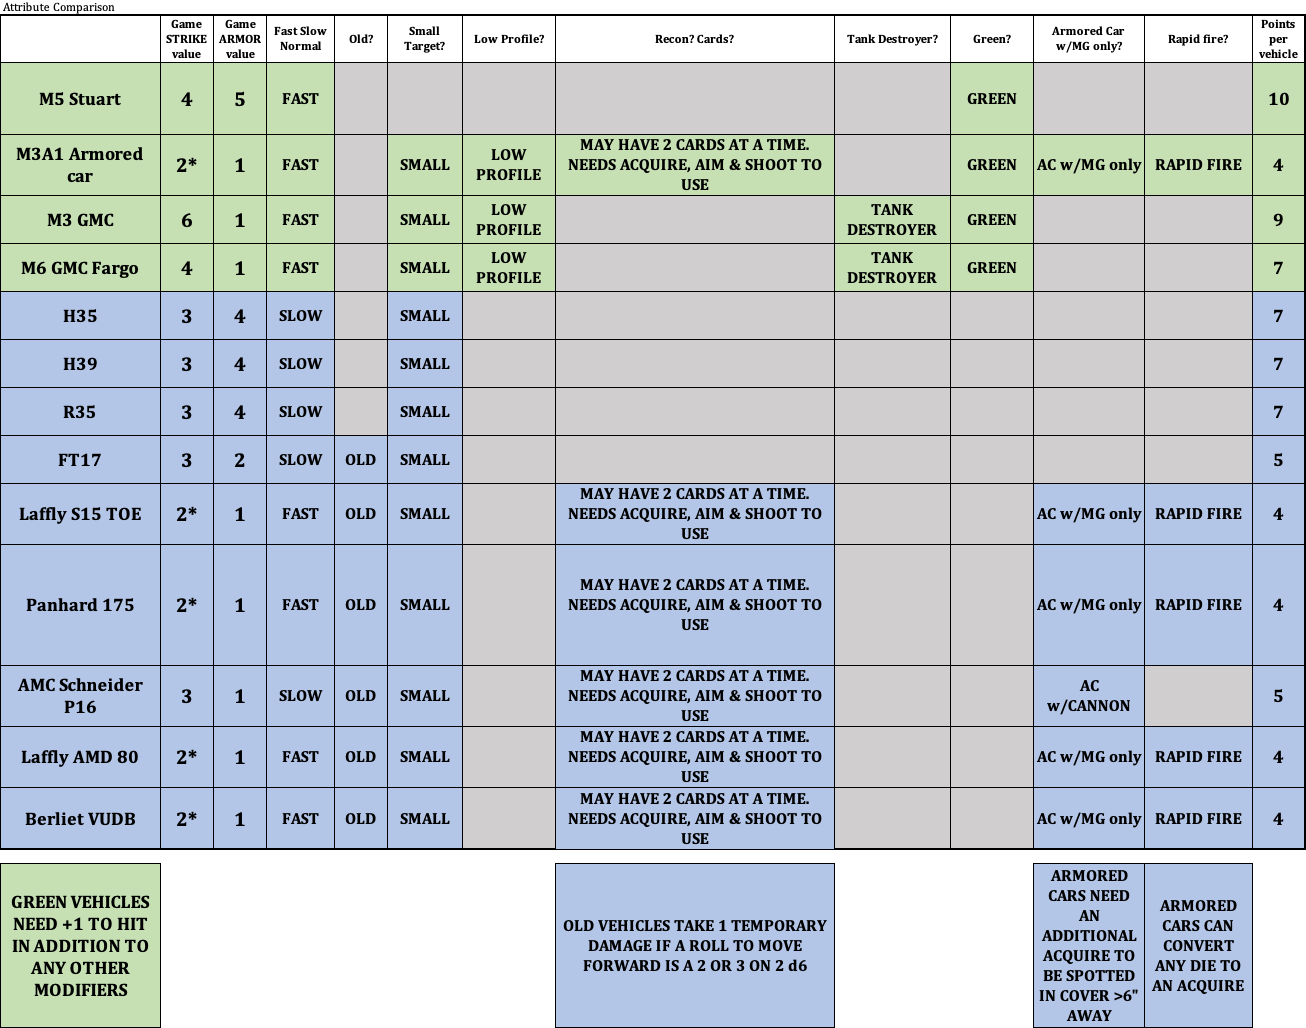
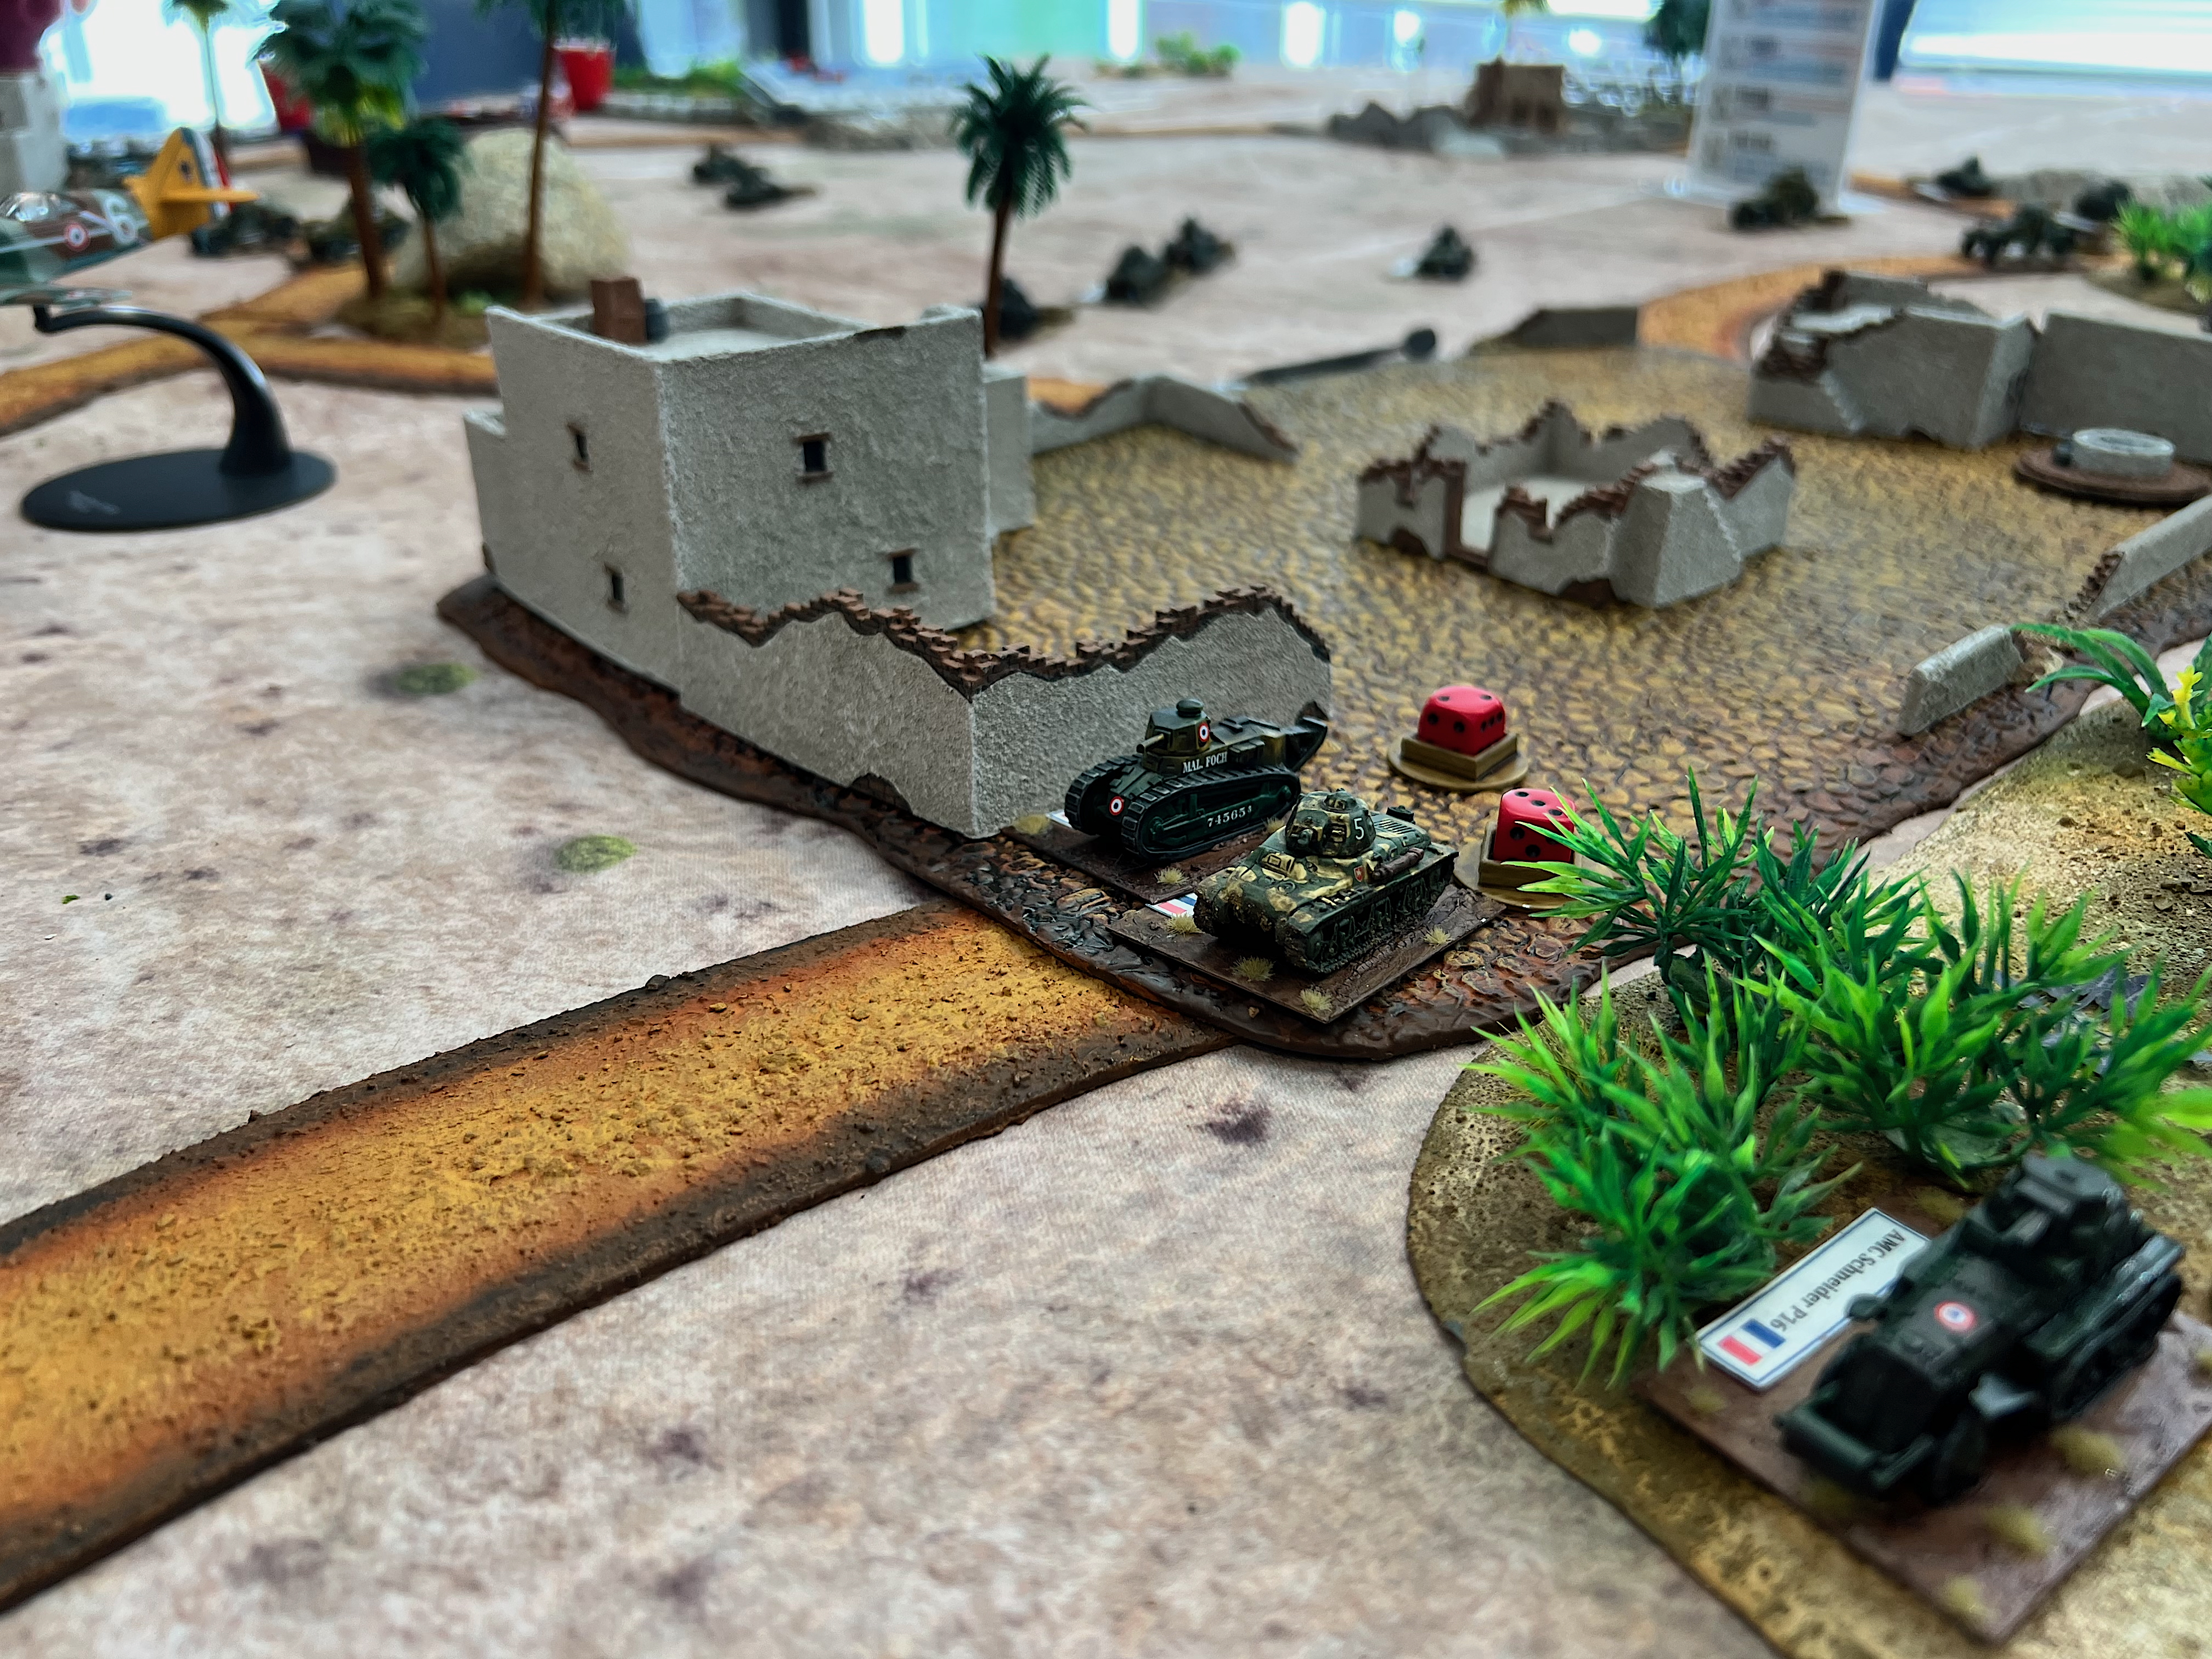
- To represent the French vehicles’ advanced age and mechanical unreliability. “OLD” French vehicles that try to move and roll a 3 or less will lose 1 die to temporary damage. Mathematically, there is an 8.33% chance of that happening. So a good number of the Vichy Forces are indeed OLD (mainly the armored cars and the FT-17’s). In addition, all of the French tanks and some armored cars are SLOW – which limits their advances. But, in the game, there are more of them, and not all of the French tanks are OLD.
- Any vehicle touching a road can convert any die to a DRIVE dice.
- Armored and scout cars may engage other armored cars and tanks with heavy machine guns or deploy Bonus Attack Cards. Also I have rules that show how devastating any cannon fire would have been against thin-skinned vehicles. Cannon fire causes double hits on thinly armored vehicles that are not tanks.
- The US Army was inexperienced before these landings. To represent that, their status is GREEN at this point in the war. GREEN means their base roll needed to hit increases. It goes from needing a 6 on 2d6 added together to a 7 as a base number. Most of the French vehicles are SMALL. This necessitates an additional +1 to hit at short range. There is also another +1 at long range. Oh yeah, the Stuarts have just a 37mm gun. This means that the US has a tough time making damaging hits at long range against French tanks.
- The US use of Bonus Attack Cards is limited to just the US Scout and French Armored Cars. The M5 Stuart’s radios got wet during the landings and were not working. Many French tanks in North Africa did not have radios. The one-man-turrets in all of these Vichy tanks made coordinating activities very difficult.
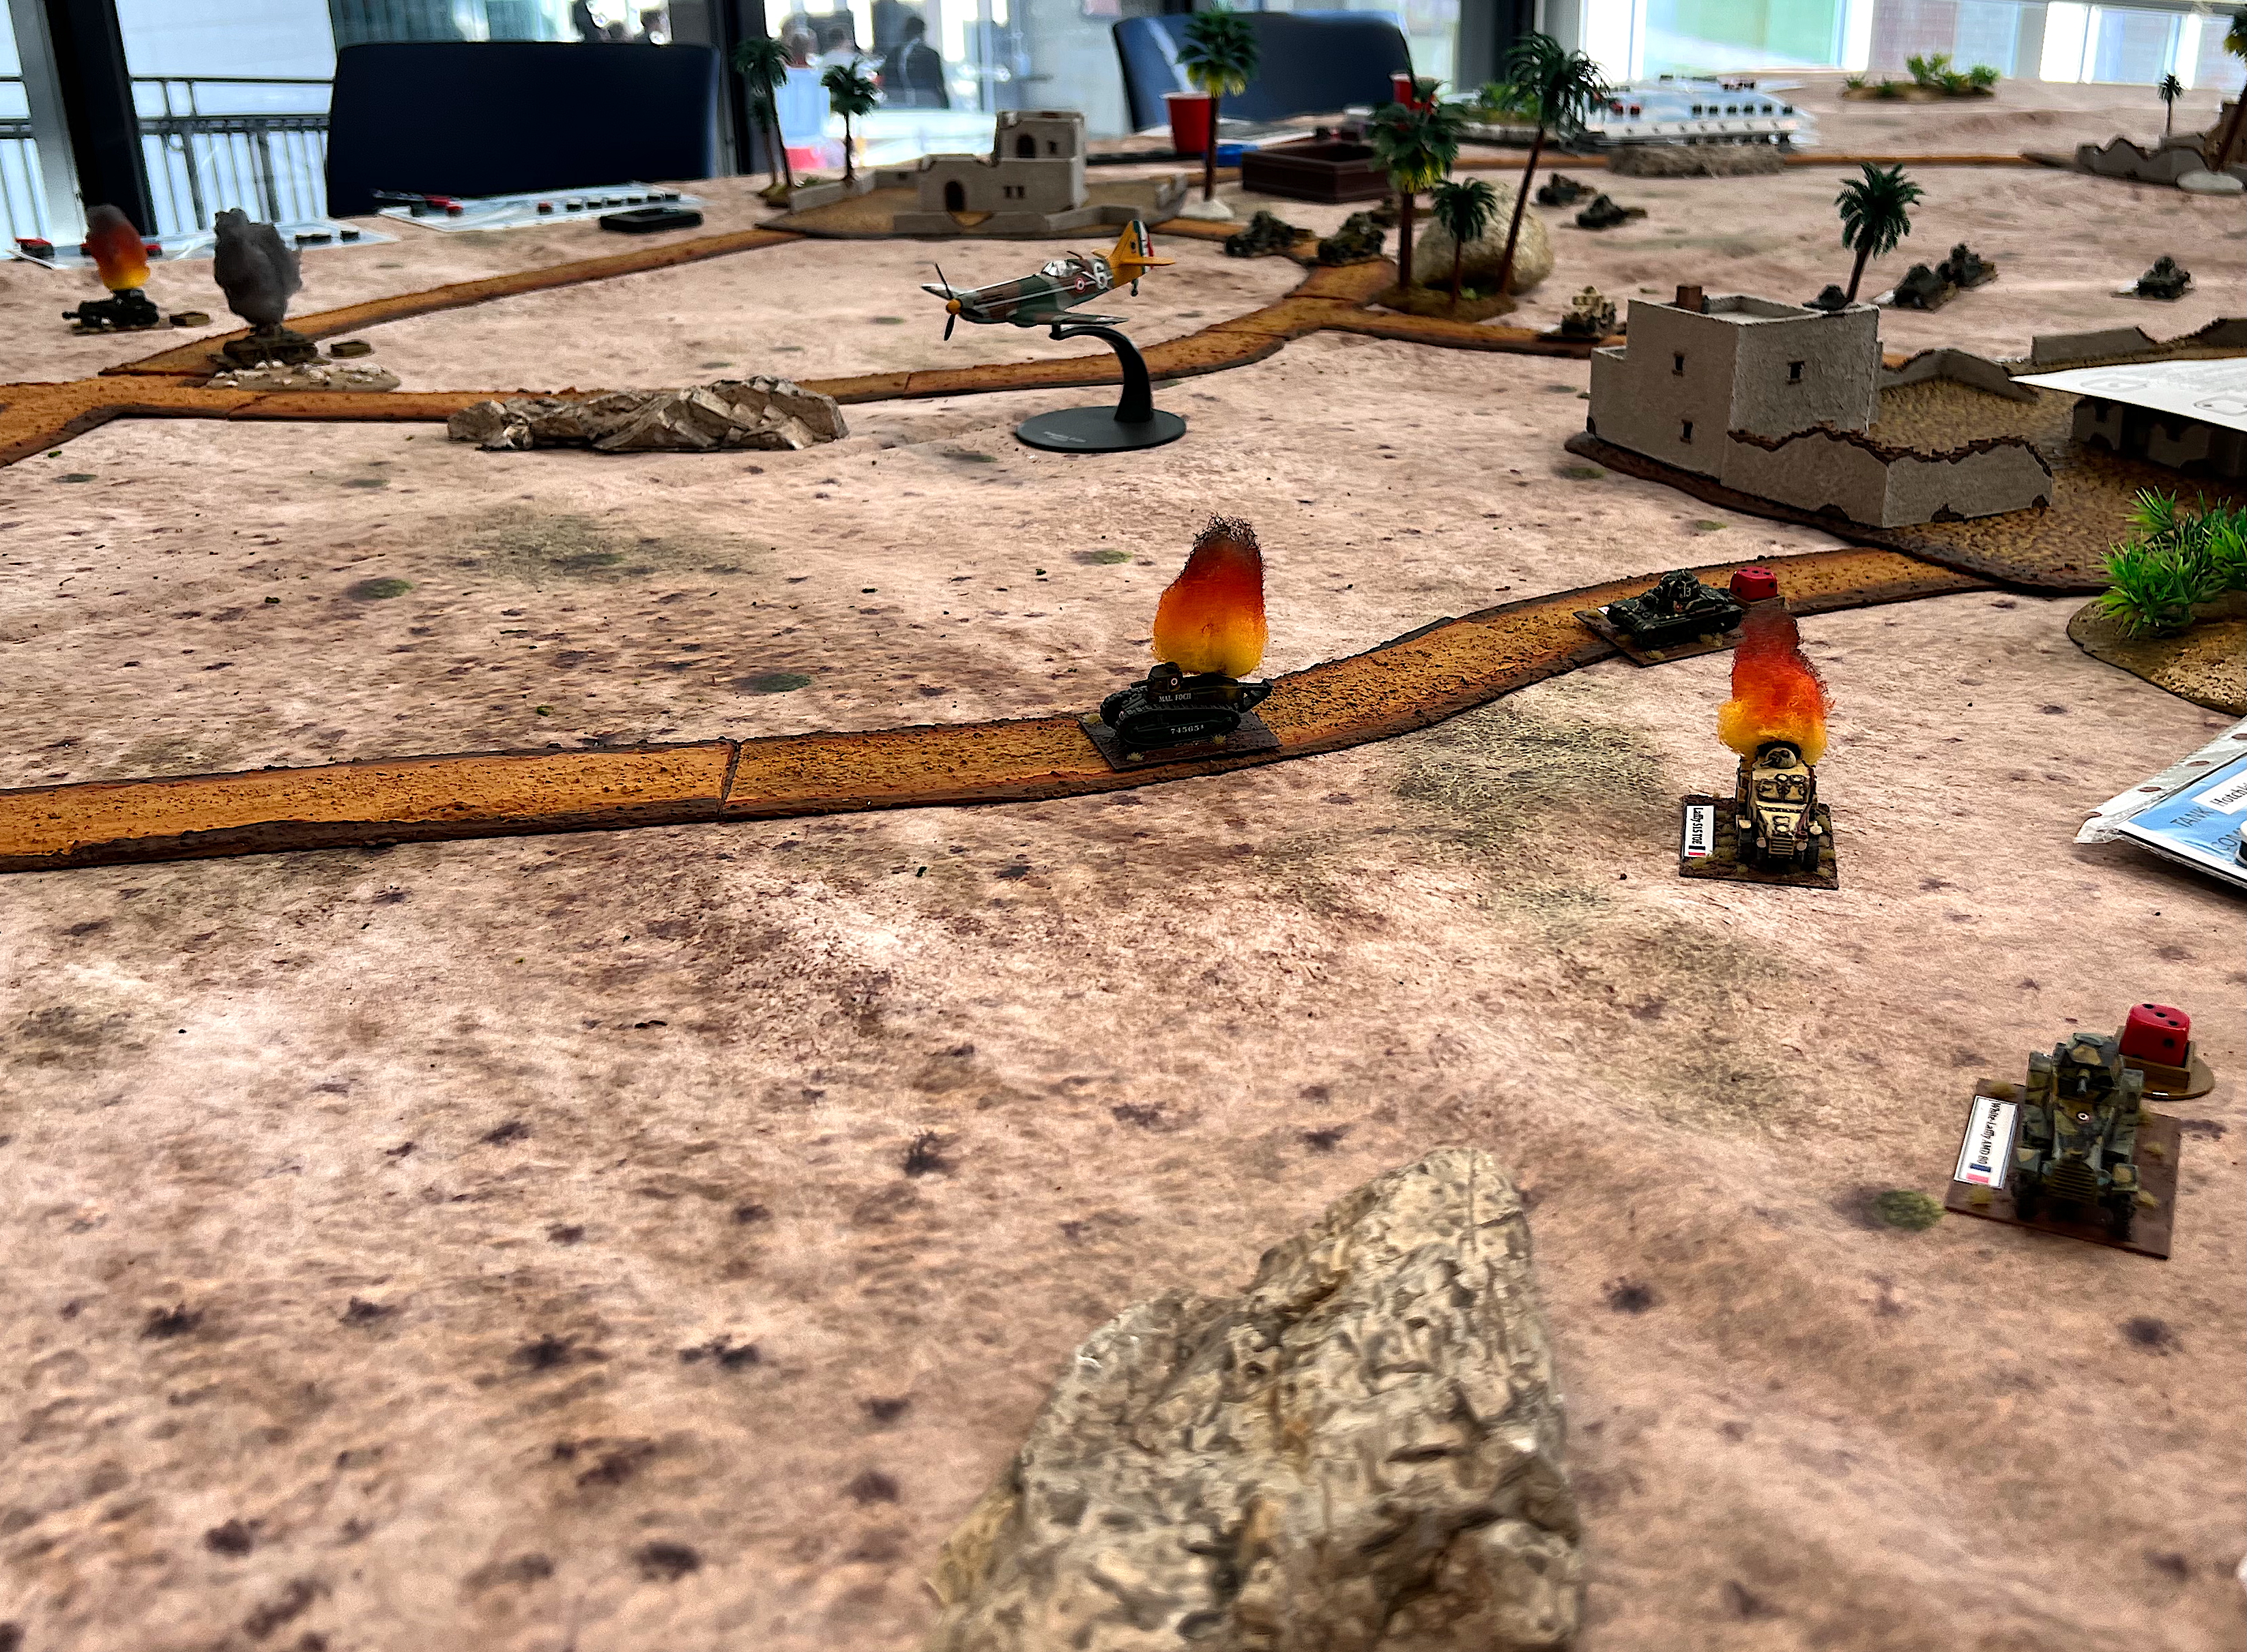
- To represent the fight for air superiority, I added Bonus Attack Cards that allow the deployment of French Dewoitine D.520’s and American carrier-bases F4F Wildcats. These vie for air superiority and can also convert to ground attack missions with other Bonus Attack Cards as well.
- Having air superiority enables the US player to deploy the Avenger TBM’s as spotter planes. These can improve US artillery accuracy significantly. They also can also bomb the French vehicles with depth charges (yes that happened). Lastly, Avenger deployment also opens up the chance for devastating naval gunfire from the light cruiser USS Savannah.
- Modifying the activation sequencing methodology by using Buck Surdu’s “DOUBLE RANDOM TM ACTIVATION” method.
- Because of the different activation sequence from What a Tanker, I now use three types of dice. Larger white d6 are used for COMMAND DICE (these let your AFV take actions). Larger colored d6 are used for ACTION DICE (for rolling for movement and firing). Smaller colored d6 are used for ACTIVATION DICE (to, well, activate an AFV in the game).
- Scoring is done with TANKER BUCKS. Most wins at game end. See the rules file below (downloadable) for all the details.
I was asked to share my rules on the Facebook What a Tanker page. As I am a wicked nice guy (as we say here in Massachusetts), I am happy to do so. Below is the Word document that outlines all of the rules changes in detail. Feel free to download. If you use them, please do share your thoughts and experiences with me, I’d love to hear them.
Let’s look at some photos from the HMGS HISTORICON convention games next.
HMGS HISTORICON 2025 PHOTOS OF THE GAME
I ran the scenario twice at HISTORICON in July 2025. The games went well. Each side won once.


After the game, I pondered what improvements I could make. The tweaks in the rules are reflected in the file I shared previously. However, I need to add:
- More game aids like dice holders
- More blast markers
- Better roads – I wanted rubber ones that laid flat and took up less space in a box.
- Better town bases that also were rubber and laid flat on the tabletop.
- Actual plane models to represent the aircraft. I was using photos on flight stands at HISTORICON for the planes, and I wanted better.
I wanted to read a book on the campaign that I learned about. It was recommended to me in a comment to one of my blog post links on TMP. It focused on this phase of WWII, and I planned to do this before I did any more hobby work. Rick Atkinsons’s An Army at Dawn is a true gem of a historical book, and a must read. This was my August effort.

After reading these, it was time to get going on the additional “stuff” listed above. I knocked out the dice frames and similar tasks quickly. I had enough for 8 players, and now I was set for 10.
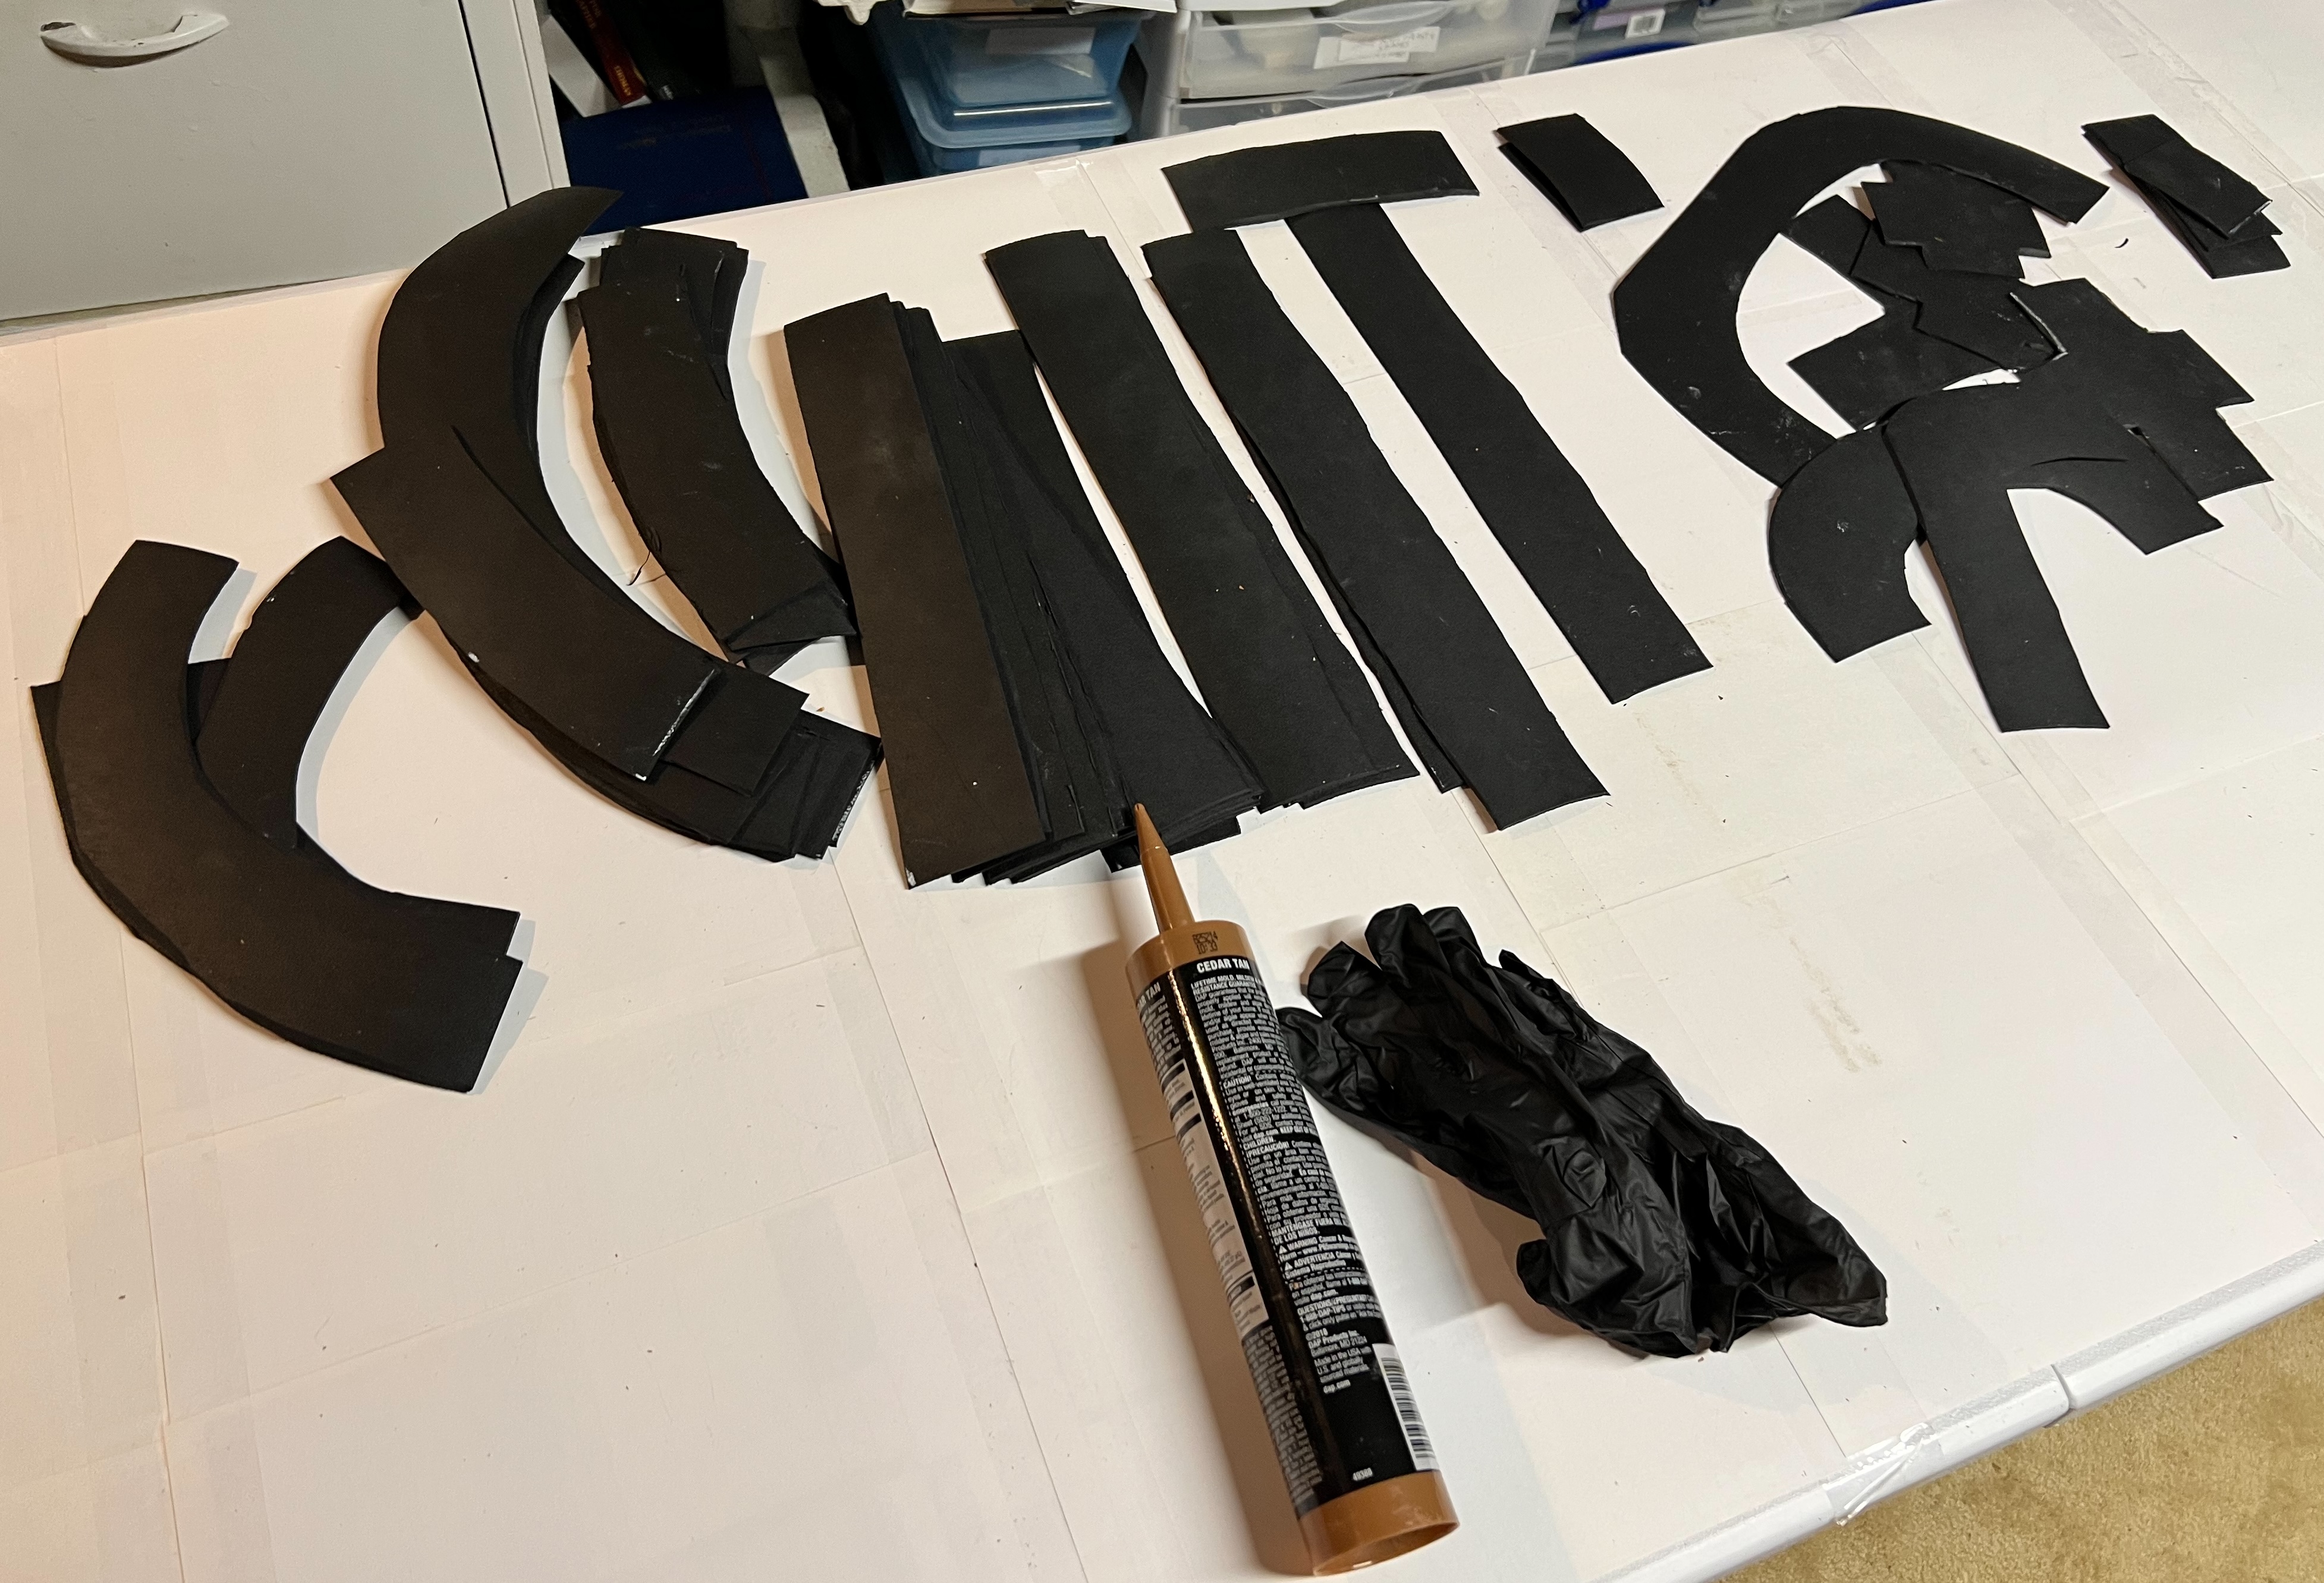
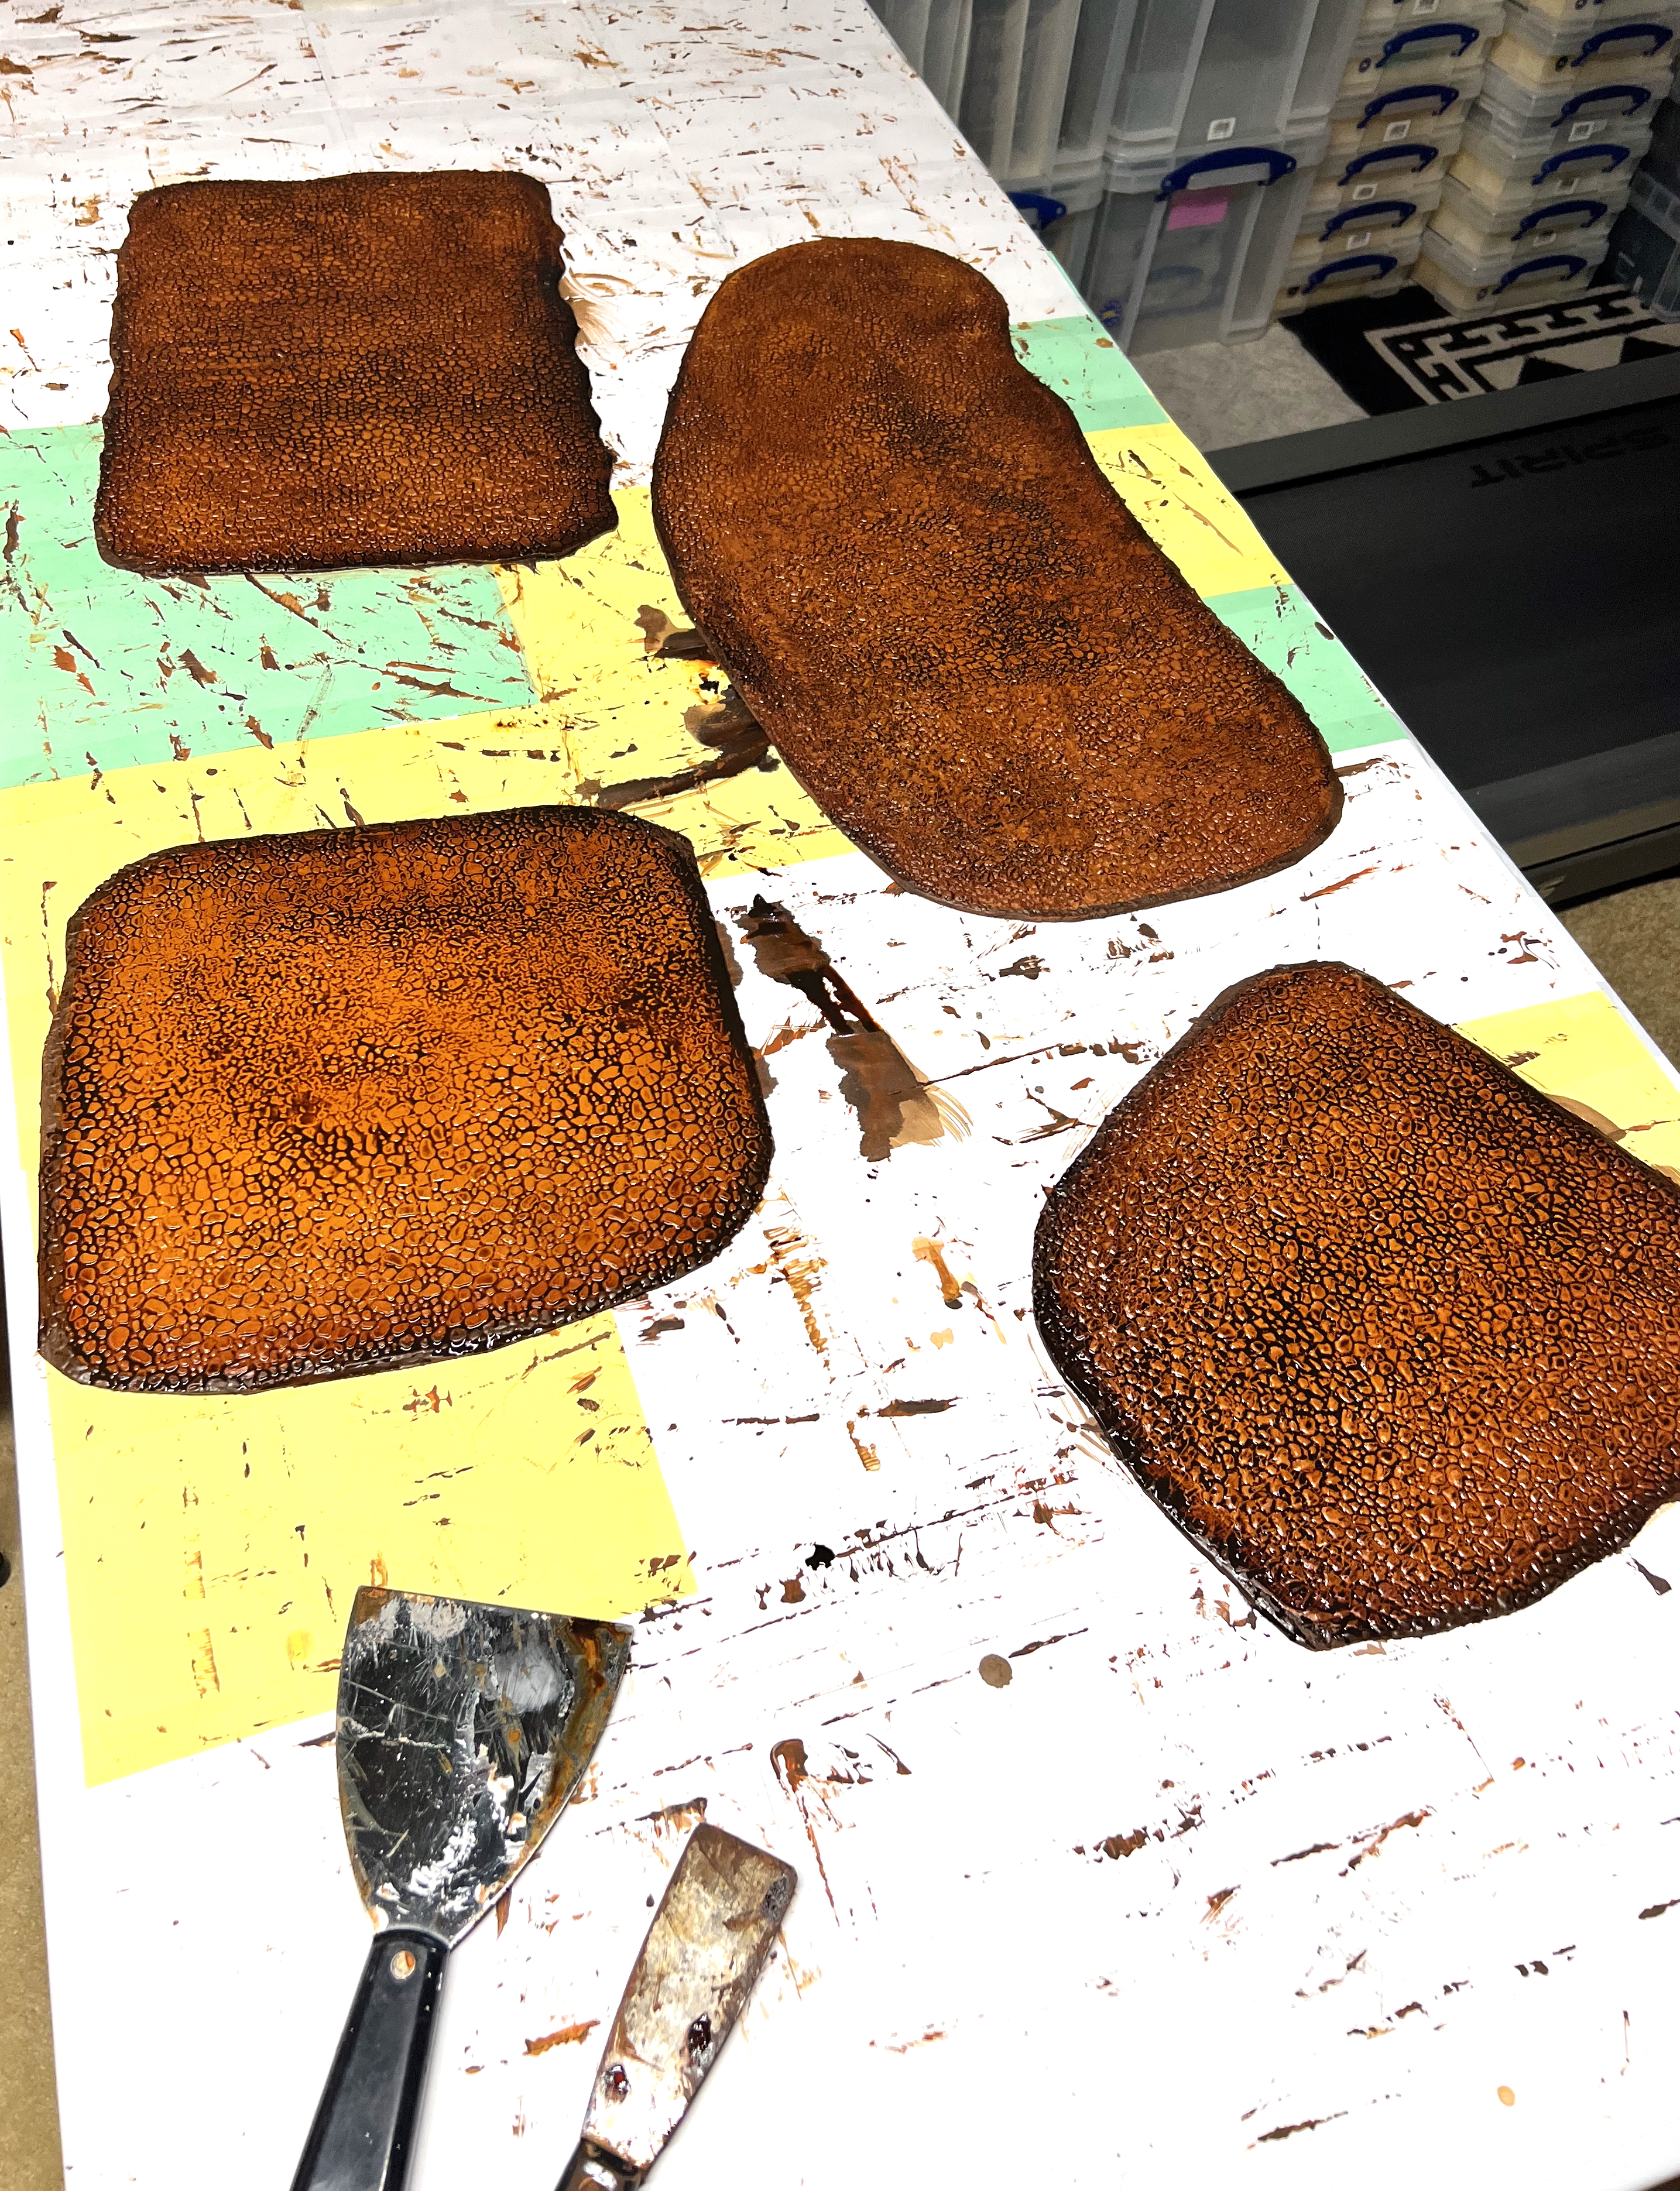
Building Dirt Roads and City Bases WIP Shots
Now it was time to make the roads and city bases. I stumbled on this excellent video on how to make rubber wargaming roads. It became the blueprint I used and I highly recommend his process.
Here is a link to the excellent video.
Below are progress WIP shots of how I built 54 sections of road and 4 bases.
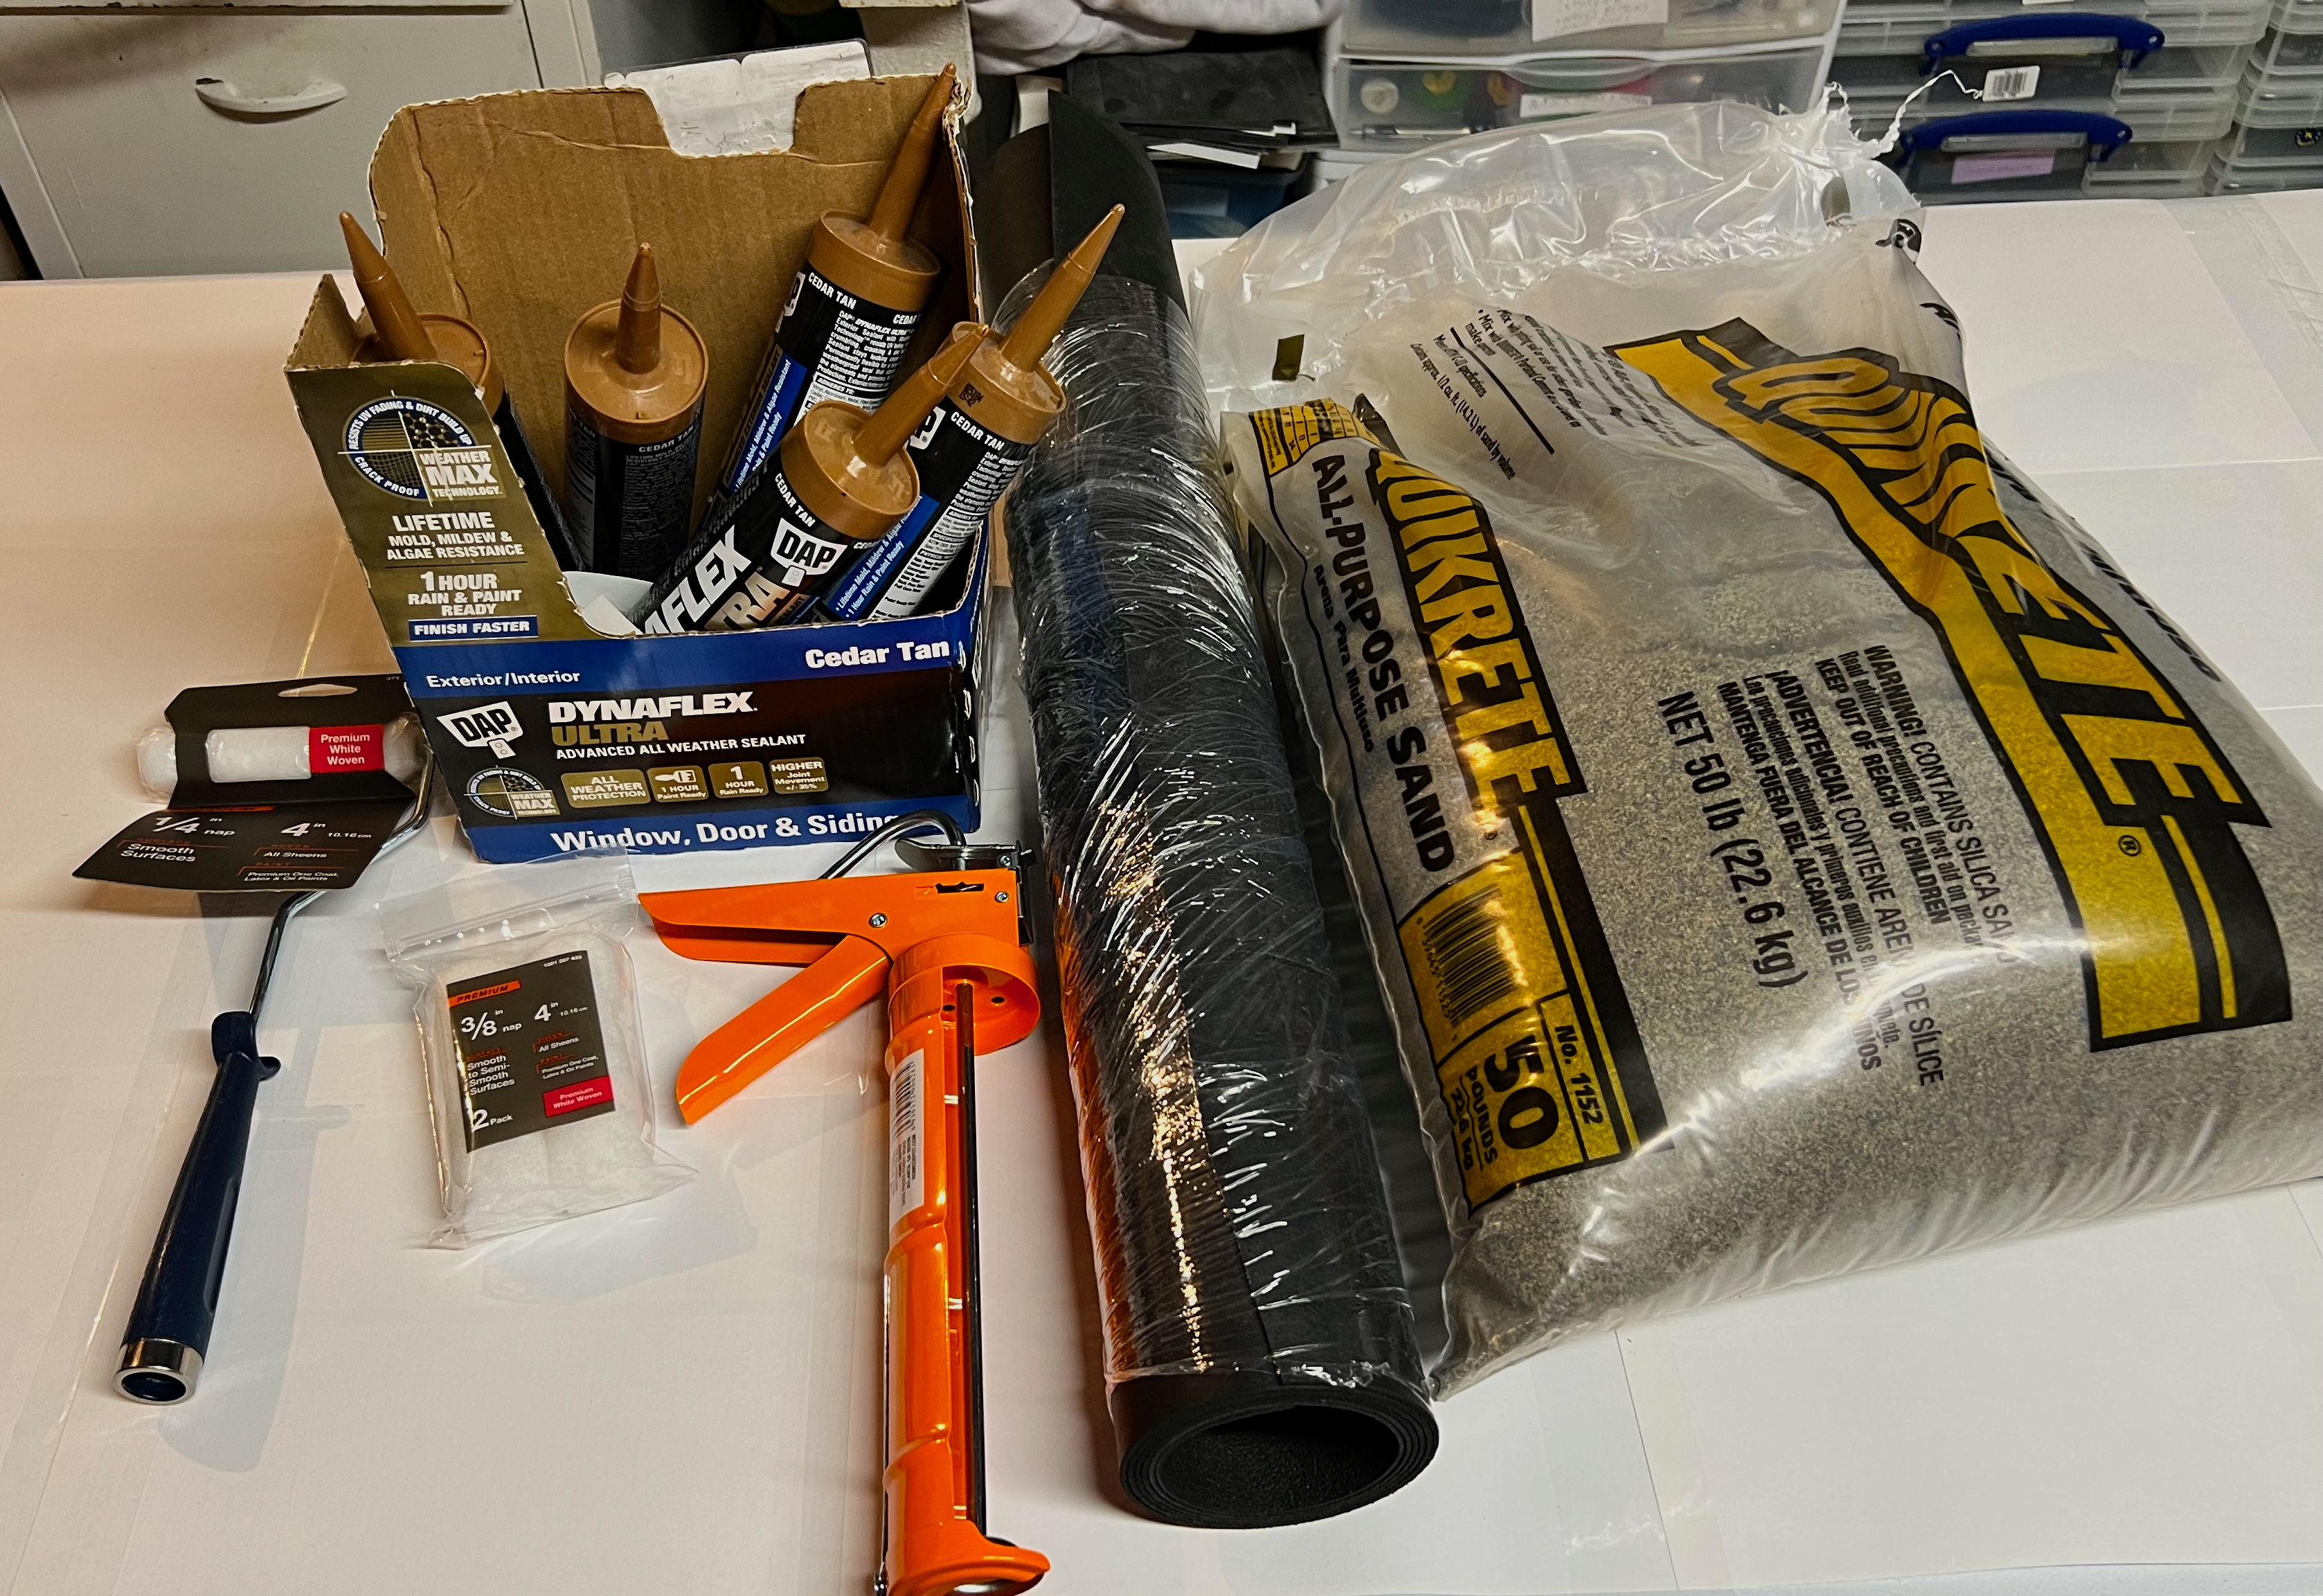
For a working space to work on the roads, I covered one of my gaming tables with paper. The sheets were secured with packing tape and this was sufficient to protect the table.
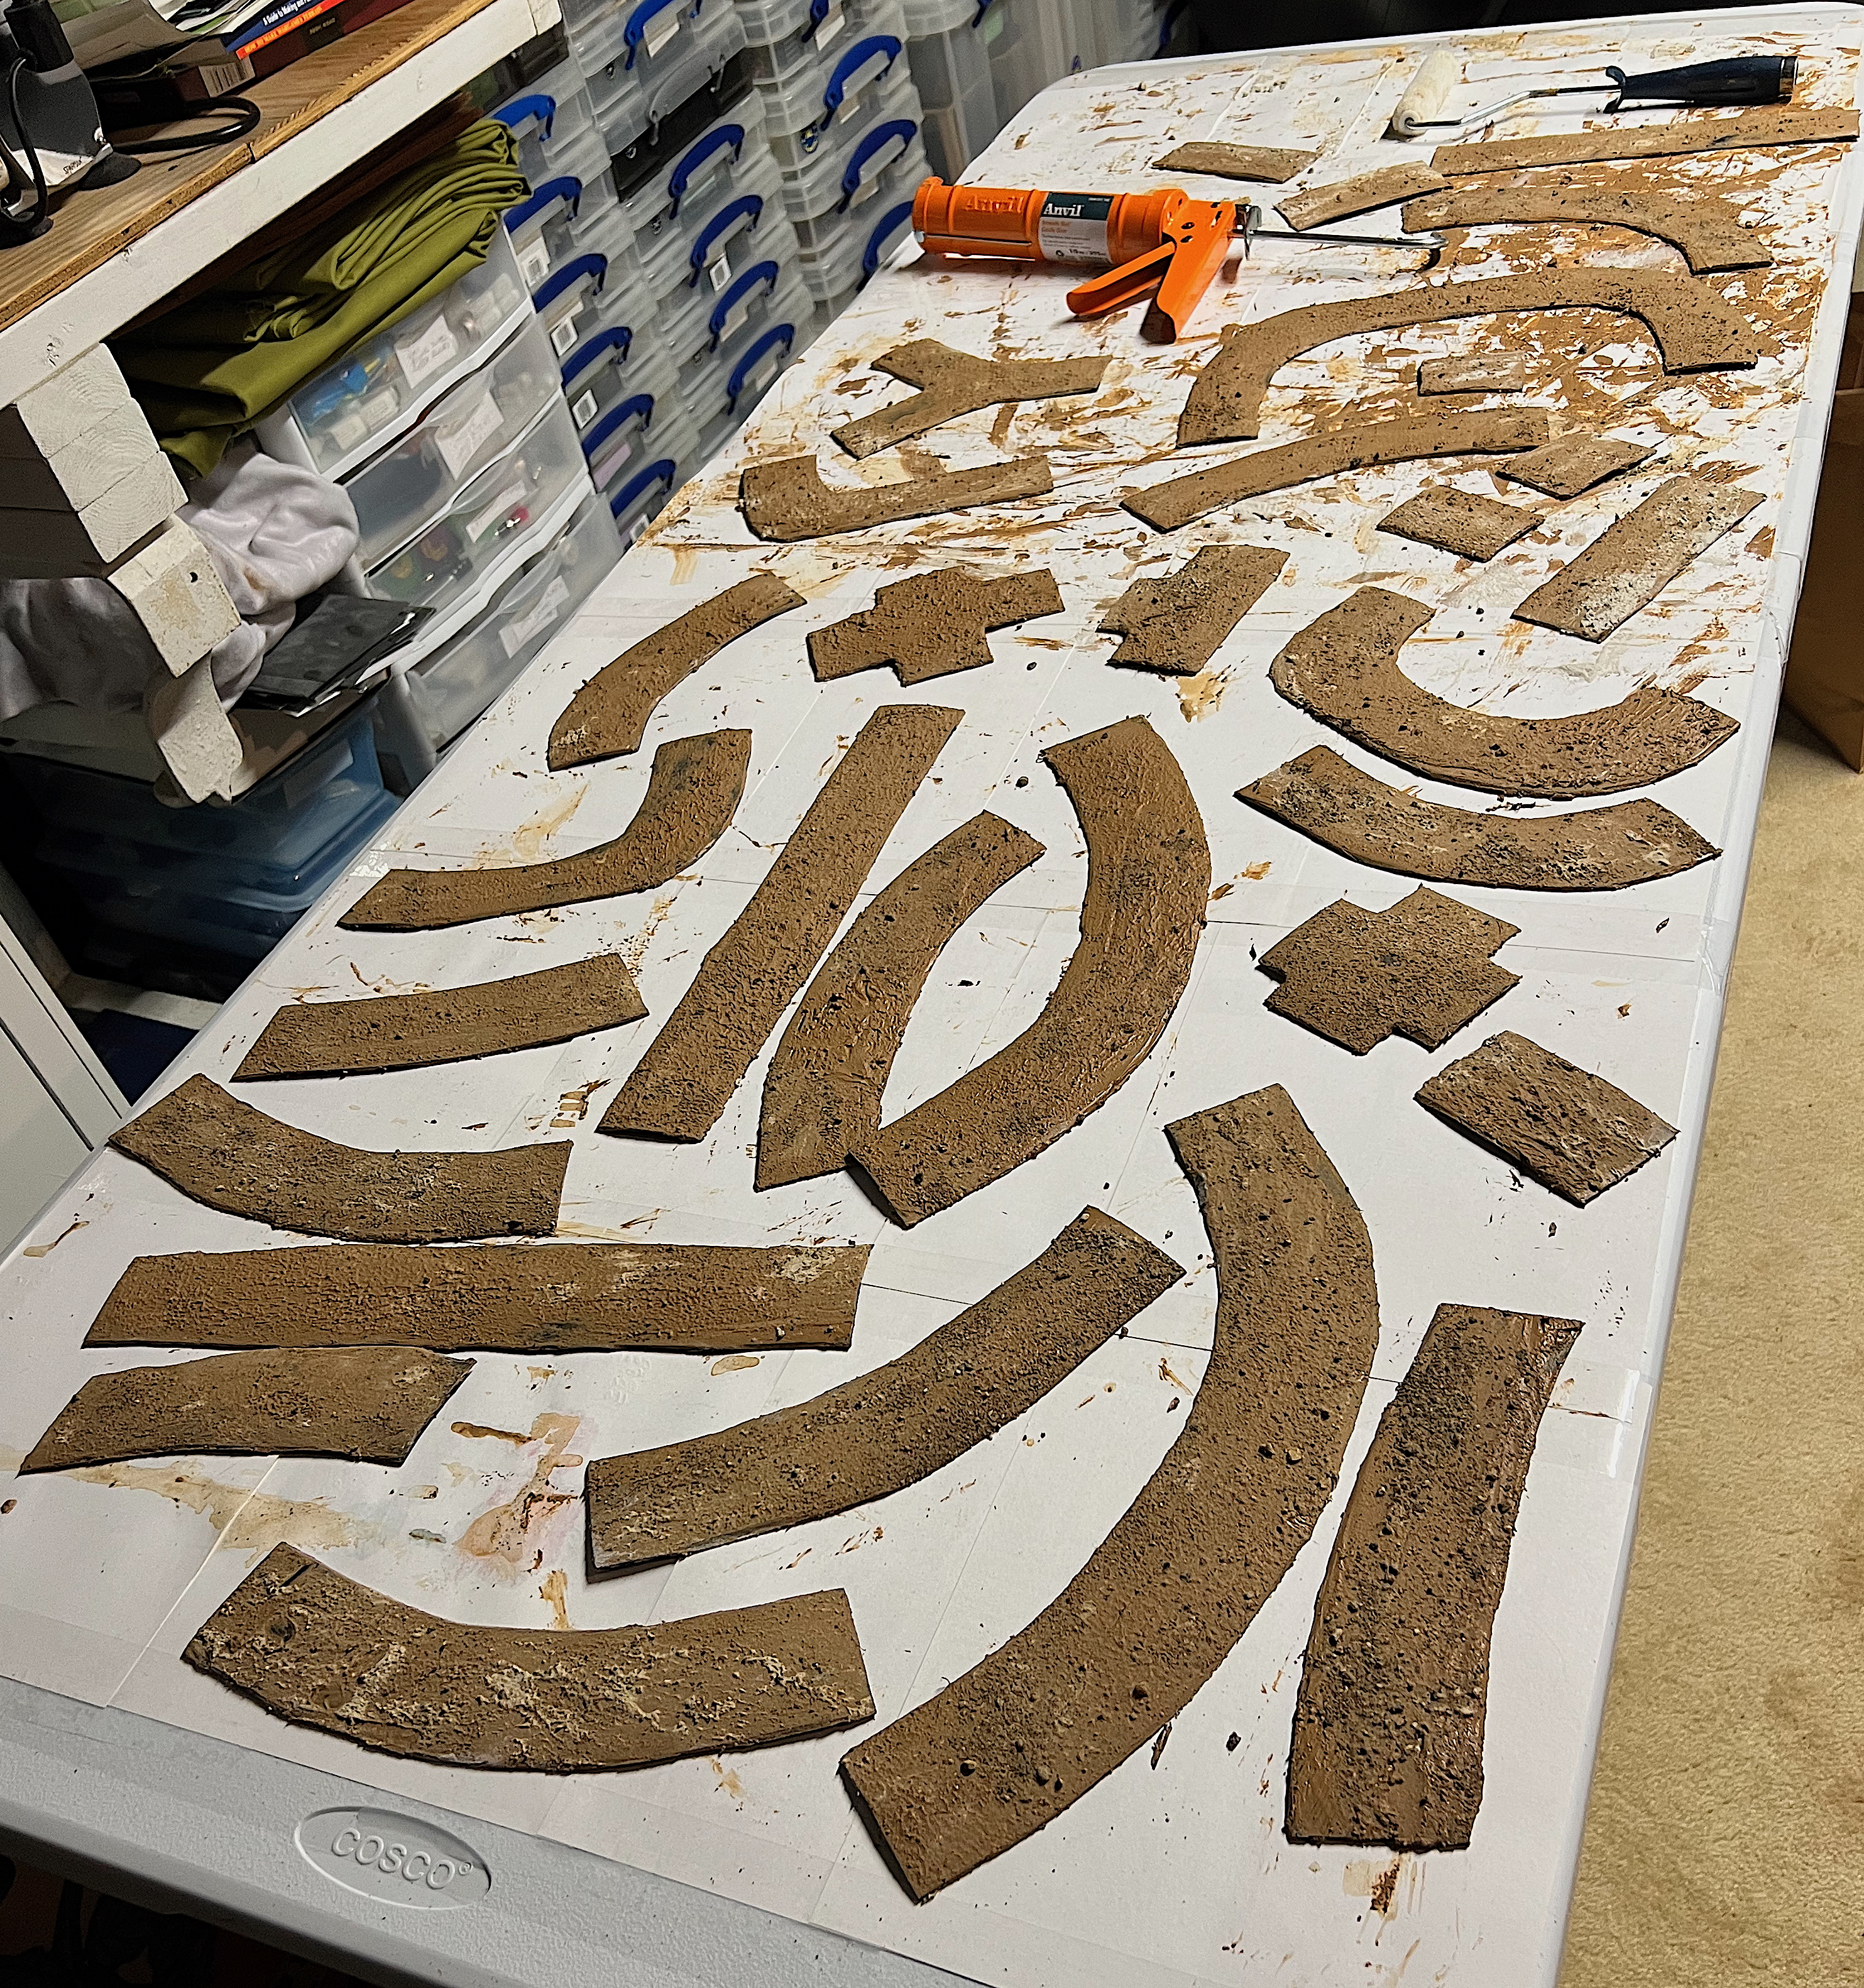


This was far more economical than buying similar roads. Now that the dirt roads and town bases were completed, it was time to add my 3 aircraft.
Aircraft Model WIP Shots
My search initially was for the right three 1:100 scale planes, but that effort proved fruitless. No one really makes aircraft in that scale, at least not the ones that I was looking for. Most models were 1:72. I did find some die cast models that would work just fine. They are more like game status makers. Those diecast models were the carrier-based Grumman F4F Wildcat and the Dewoitine D.520. Both had flight stands – an important feature as I wanted their landing gear to be retracted in flight.
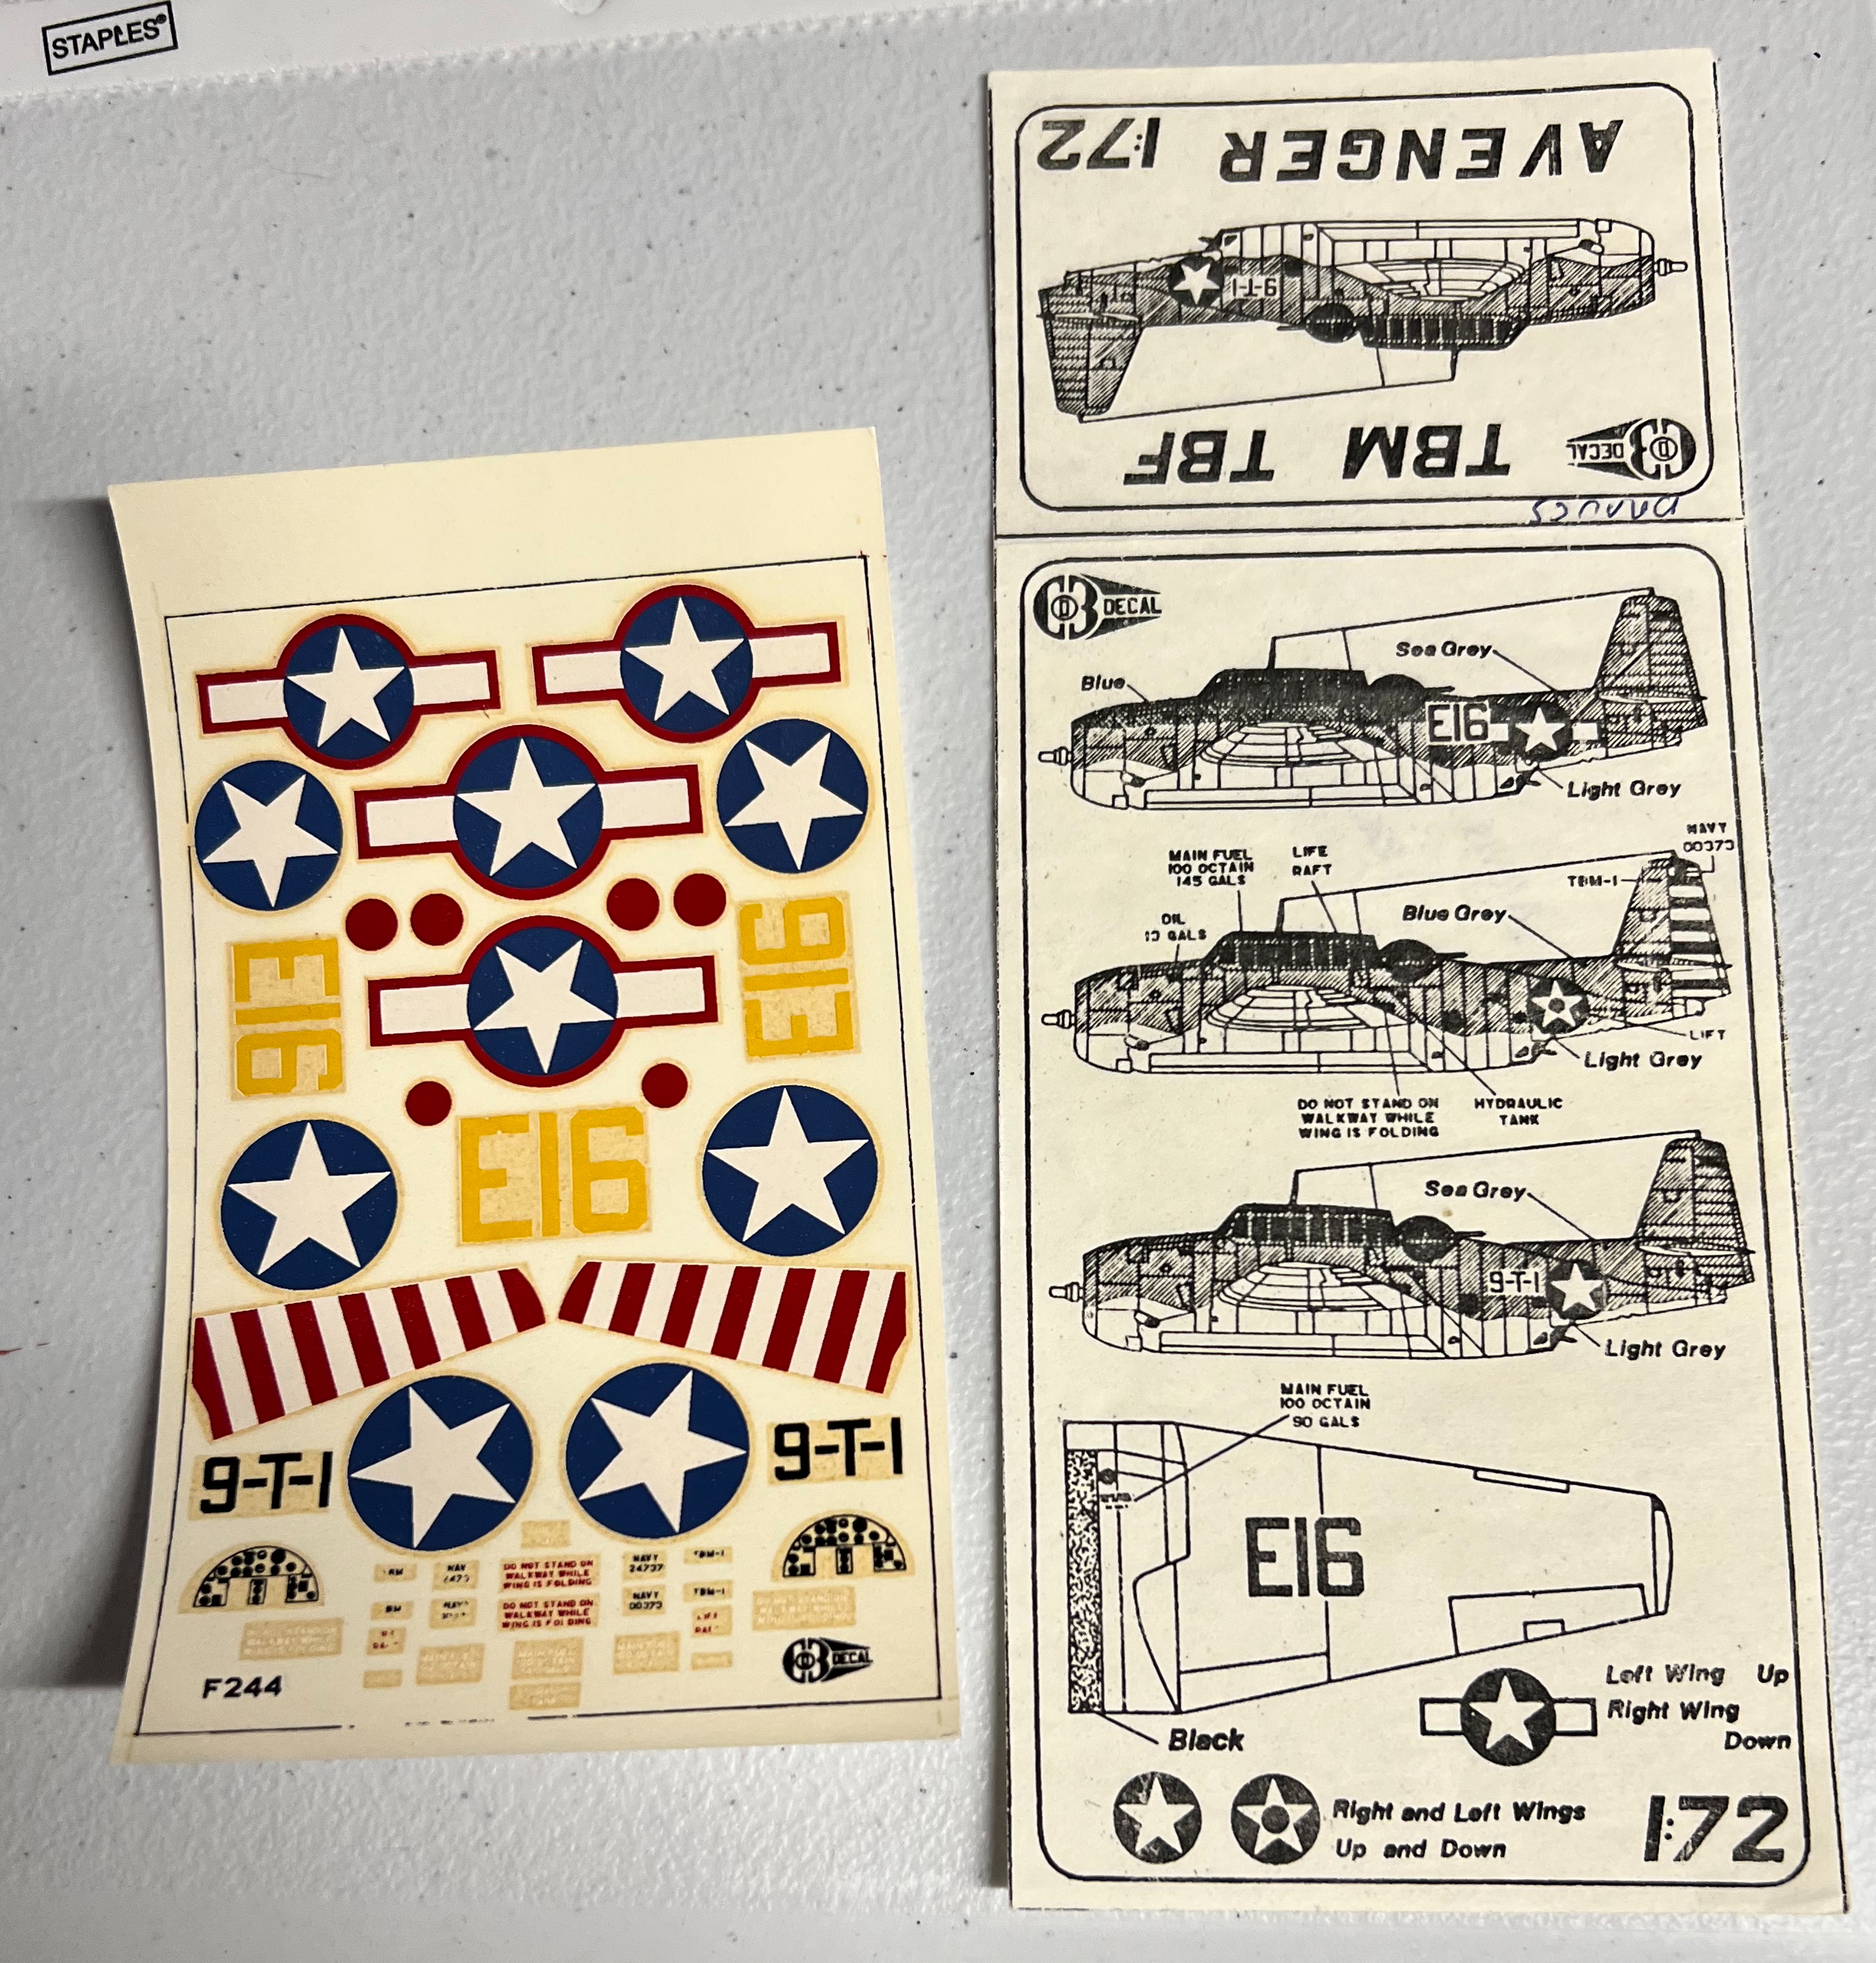
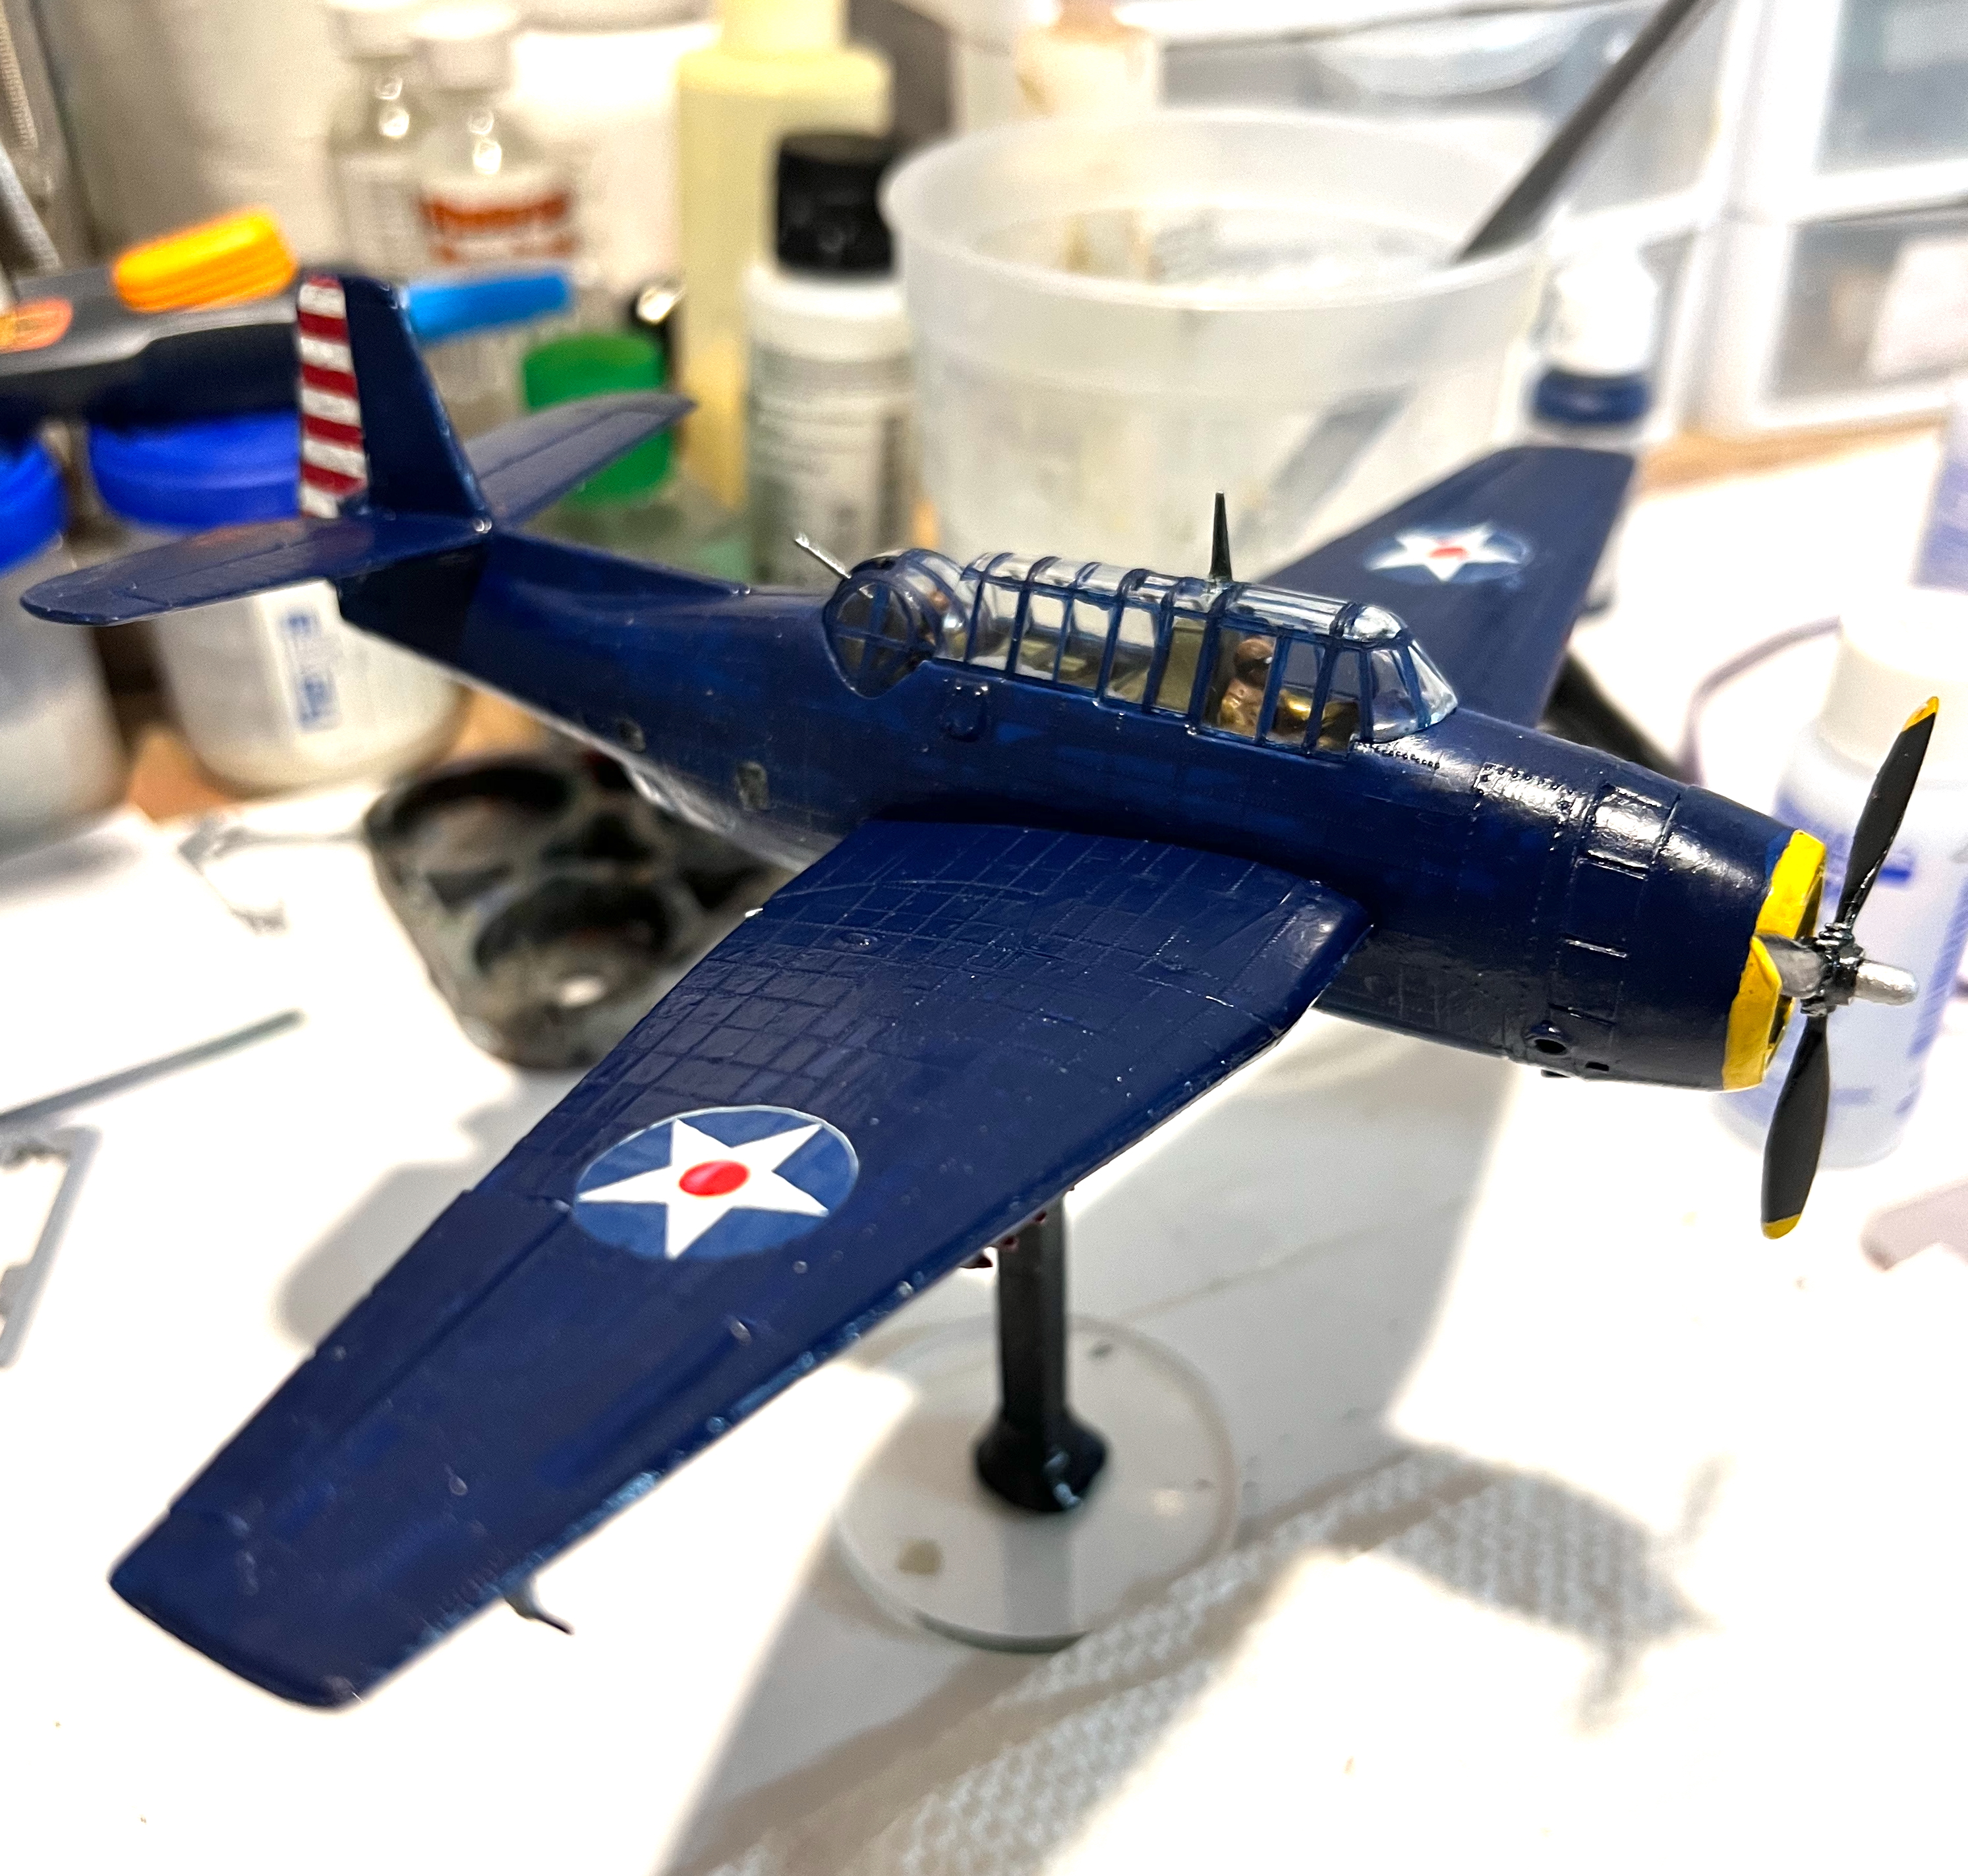
A bit of assembly for these two diecast models was required, but not much. That left the Grumman Avenger TBM to source. And lucky me, I found one on eBay – obviously left unassembled since at least 1979 – if not much earlier. It was an Airfix plastic model, and it was complete. The papers inside were amazingly yellowed with age as you will see. I had not built a plastic model like this since I was a kid. It was probably for sale back then!


As for assembly, it went fine. I painted the three crewmen. The tail gunner will never be seen because the acrylic window was not too clear. As for the outside, I went with a Vallejo “Deep Prussian Blue” – it seemed closest to the box color. In my research, I saw several different color schemes for the undercarriage. Some were blue, some were two-toned. The model would be on a flight stand. This stand would not afford visibility to the bottom, so I decided that blue was sufficient.


The last assembly from the kit for the Avenger was the rockets underneath. I assume that any depth charges would have been in the bomb bay – as unseen as the gunner underneath. So that works!

The decals I bought were from the US and came via a modeling shop in Latvia of all places. I have no idea of the age – except likely post-Cold War I imagine. I used multiple coats of Microscale “Liquid Decal File” to restore them as best I could. Even with that, several of them disintegrated into multiple jigsaw pieces in the progress of placing them on the model. This led to my having to reconstruct the decals while wet. Ugh. I made it work.

But wait – before all the decal work – I needed a flight stand! I made one with a 1/4″ wooden dowel, green stuff, and a 2″ acrylic base. I carefully carved out a hole on the model to accommodate the stand.

Then it was on to applying decals as best as I could.
Finally the planes were done. I also built a special travel box for the Avenger. For the other two, the original package blisters served that purpose.


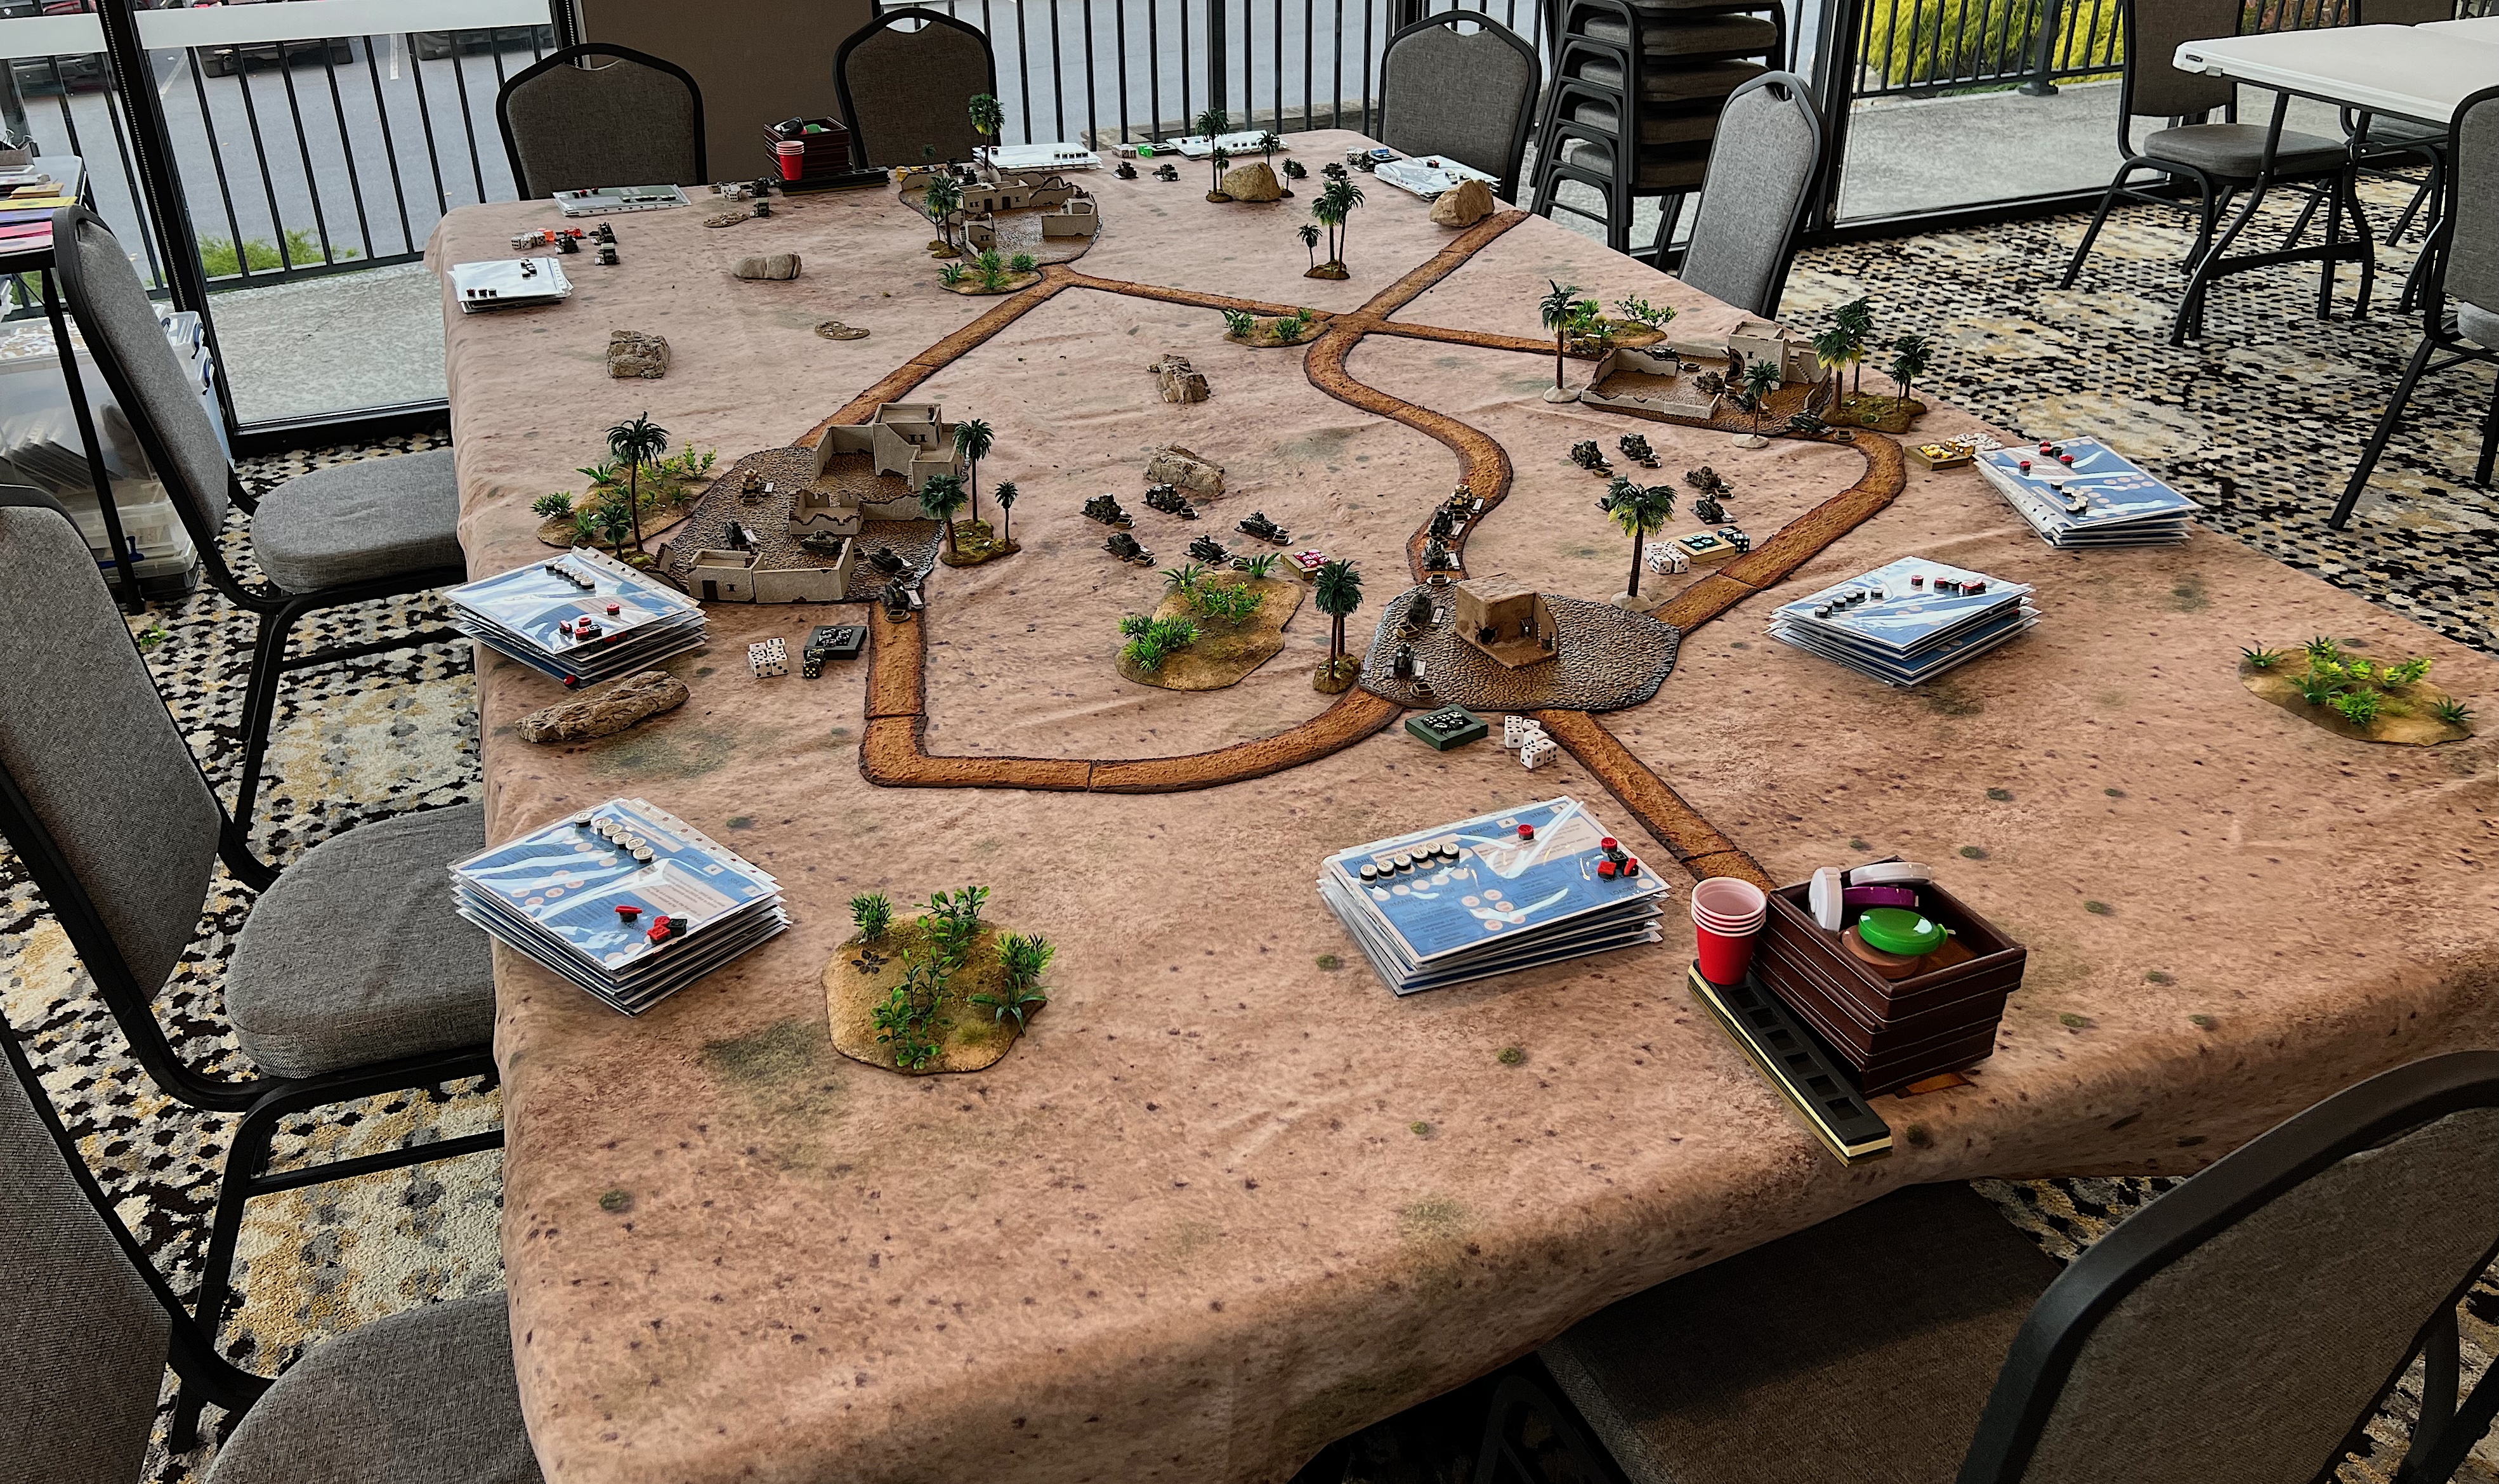
Upon completion, I could mock up the tabletop in the cellar in preparation for HMGS FALL IN! in Lancaster PA and EllisCon in Danielson, CT.
Mock up of the Tabletop

First up, HMGS FALL IN!
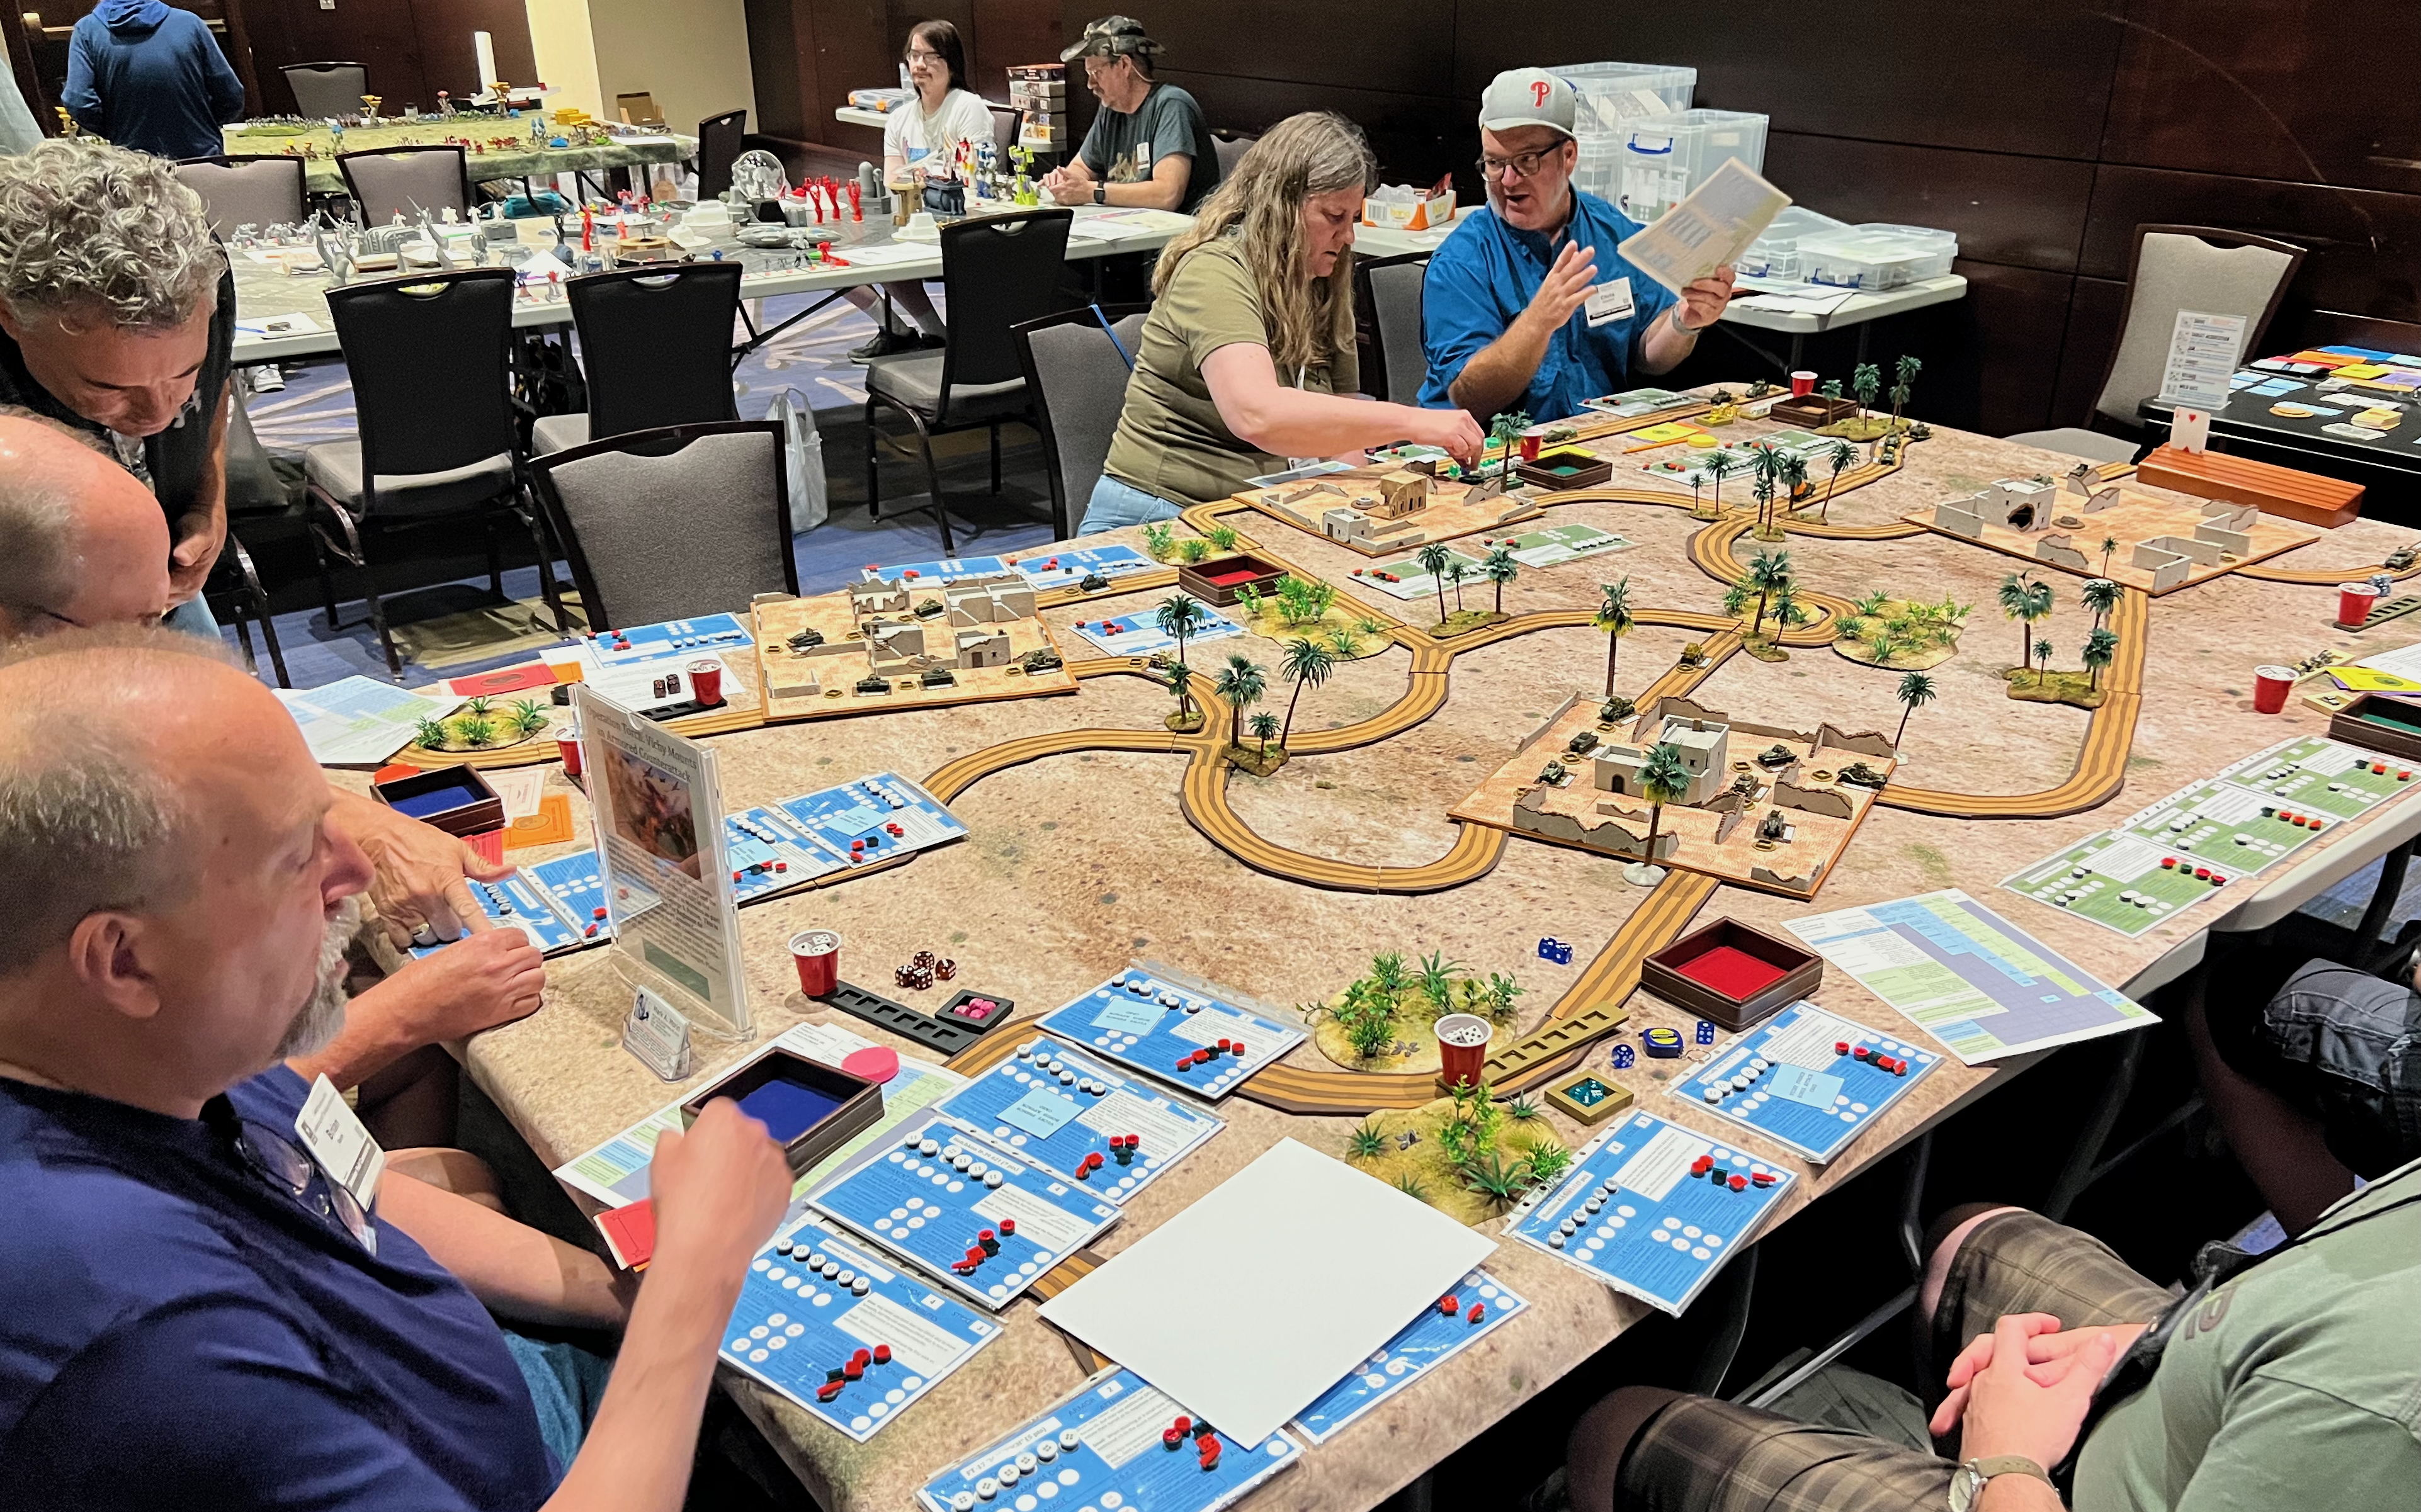
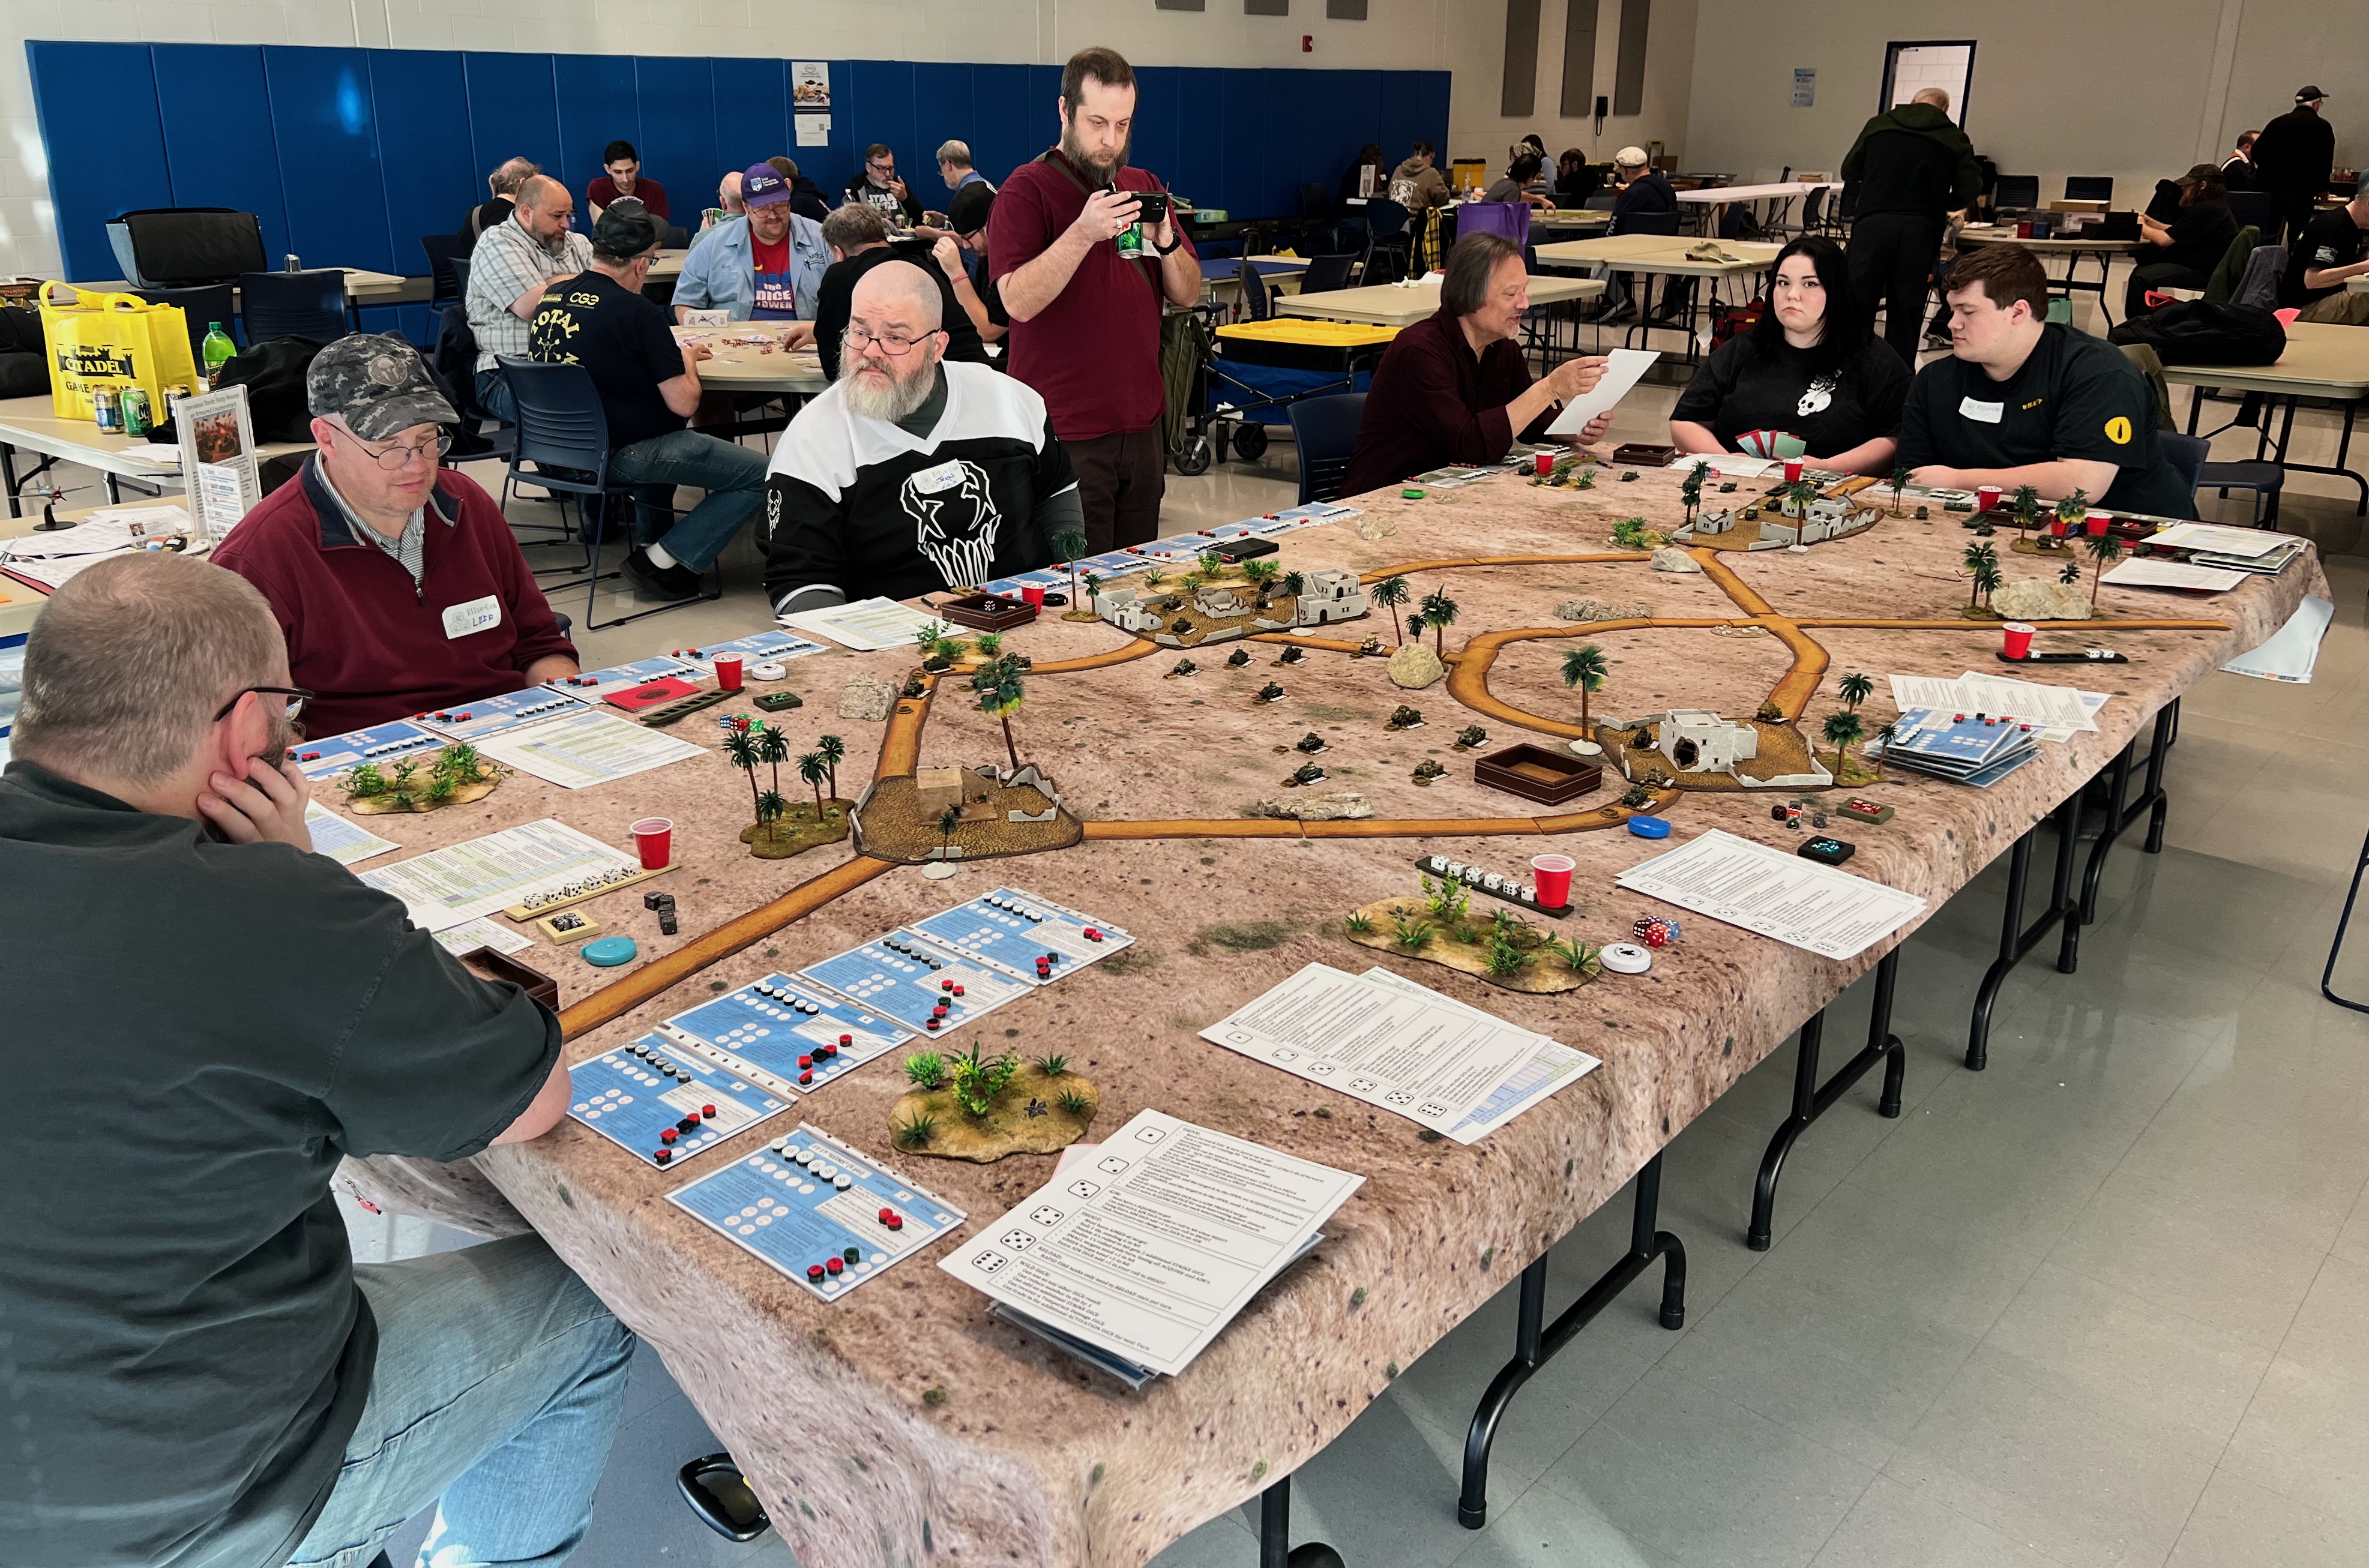
HMGS FALL IN! 2025 PHOTOS OF THE GAME


The US then deployed air, achieved superiority, and brought on the Avenger.


With that, the US won the first game I ran.
In the second game, the tables turned. The US never got going very well. Or, perhaps, the French were very lucky. Take your pick. I don’t have any photos of that game (apologies) – but it was a complete French victory.
Next up, one week later, was EllisCon.
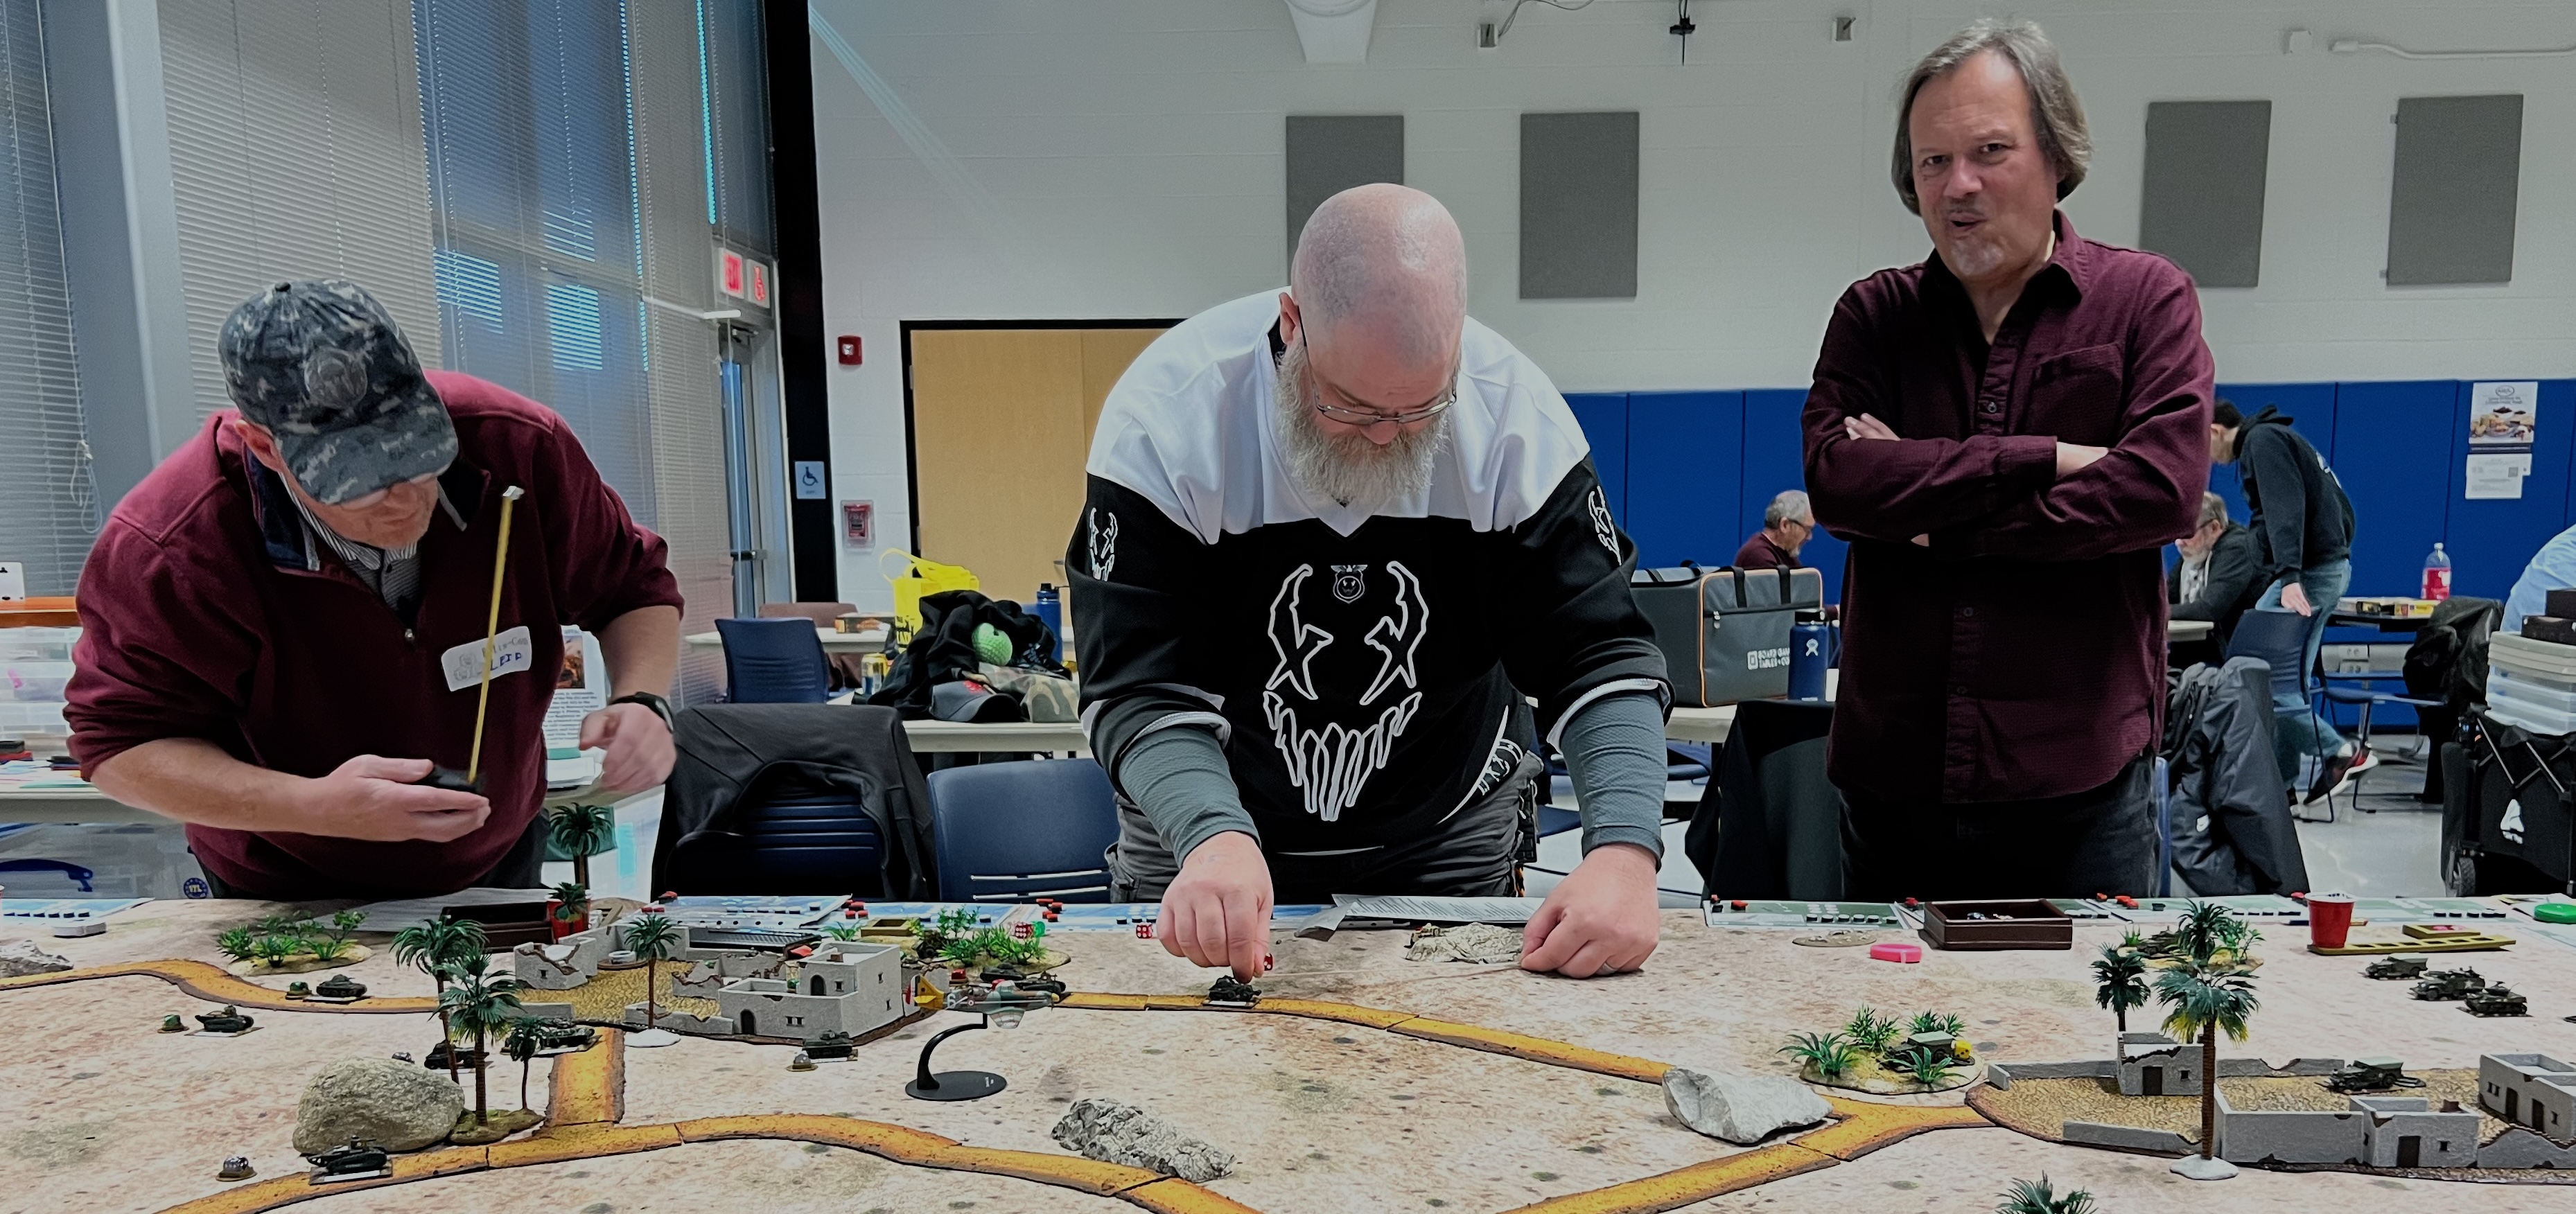
EllisCon 2025 Photos
Here I also ran the game twice.


At the end, the Vichy claimed a victory, as their Tanker Bucks were more than the Americans total.
In game two, the fortunes reversed yet again. Leif played again and was joined on the other side by Gregg Belevick. Both were involved in my initial play testing of this scenario.


The US won this game with the last barrage destroying 1/3 of the Vichy force deployed at the time. A massive US victory!
I really like this scenario. So far, the victories have been 3 for each side. It seems pretty fairly balanced. It’s fun and highlights a little-known part of WWII. It’s likely coming again to a convention in 2026.
I list the paints that I used for the roads at the end of this blog post. For my records, I am sharing these materials I use for these projects with you, dear reader. You’ll see the list below detailing the process and materials for both the roads/bases and the Avenger torpedo bomber.
I hope that you found this tale of my journey interesting. If you do use my rules modifications, again please let me know how they worked out. If you have any questions, certainly throw them at me. I’d also enjoy any feedback on the work or this post in the comments section. Thanks in advance for that.
Lastly, I have compiled all of my posts on WWII games and projects. There is a consolidated list of posts and their links located here.
MATERIALS USED
PAINTS, INKS, GLAZES, SHADES, WASHES, PIGMENTS AND FLOCKING USED ON THE DIRT ROADS:
- TrafficMaster Rubber Floor Runner from Home Depot, SKU 1003092882
- DynaFlex Ultra Advanced All Weather Sealant “Cedar Tan”, (paintable caulking)
- Quikrete “All Purpose Sand”
- Chinchilla Dust
- DecoArt Americana “Cinnamon Stick”
- DecoArt Americana “Deep Ochre”
- DecoArt Americana “Raw Sienna”
- DecoArt Americana “Raw Umber”
- Apple Barrel “Burnt Umber”
- Vallejo Thinner
PAINTS, INKS, GLAZES, SHADES, WASHES, PIGMENTS AND FLOCKING USED ON THE TOWN BASES:
- TrafficMaster Rubber Floor Runner from Home Depot, SKU 1003092882
- DynaFlex Ultra Advanced All Weather Sealant “Cedar Tan”, (paintable caulking)
- Quikrete “All Purpose Sand”
- Chinchilla Dust
- DecoArt Americana “Cinnamon Stick”
- DecoArt Americana “Deep Ochre”
- DecoArt Americana “Raw Sienna”
- DecoArt Americana “Raw Umber”
- Apple Barrel “Burnt Umber”
- Vallejo Thinner
- Liquitex “Burnt Umber” (ink)
PAINTS, INKS, GLAZES, SHADES, WASHES, PIGMENTS AND FLOCKING USED ON THE AIRFIX AVENGER TBM-3 MODEL:
- Airfix Grumman Avenger TBM-3 1:72 plastic model kit
- Tamiya “Extra Thin Cement”
- Vallejo Surface Primer “USA Olive Drab”
- Vallejo Surface Primer “Sun Yellow”
- Vallejo Surface Primer “German Dark Yellow”
- Vallejo Surface Primer “Leather Brown”
- Vallejo Surface Primer “Black”
- P3 “Midland Flesh”
- Army Painter “Soft Tone” (wash)
- P3 “Flesh Wash”
- Vallejo Model Color “Dark Prussian Blue”
- Vallejo Thinner Medium
- Hataka “Gris Clair Neutre”
- Reaper MSP Core Colors “Pure White”
- Vallejo Model Air “Black Metallic”
- Tamiya “XF-16 Flat Aluminum”
- Green Stuff
- Vallejo Model Air Metallic “Signal Red”
- Vallejo Model Color “Red”
- Vallejo “Mecha Gloss Acrylic Varnish”
- Vallejo Thinner
- Citadel “Nuln Oil Gloss” (shade/wash)
- 1/4″ square wooden dowel
- 2″ Clear acrylic disk
- 2″ steel washer
- Gorilla Glue
- Microscale Industries “Liquid Decal Film”
- Avenger decals from eBay
- Microscale Industries “Micro Set”
- Microscale Industries “Micro Sol”
Thanks for looking!

Superb work Mark.
Cheers,
Pete.
LikeLiked by 1 person
Thanks Pete!
LikeLike
Its great to have you back, first of all! I really like the road upgrades as it looks more natural than before but still is flexible and modular. Your convention games look and sound great, which is no surprise considering your expertise in them!
LikeLiked by 1 person
Thanks Jeff, appreciate that. I’m now cobbling together my 2026 games so hopefully more to come.
LikeLiked by 1 person
The rules amendments, and additions sound like they added a lot to the games and a better experience for all gaming. The look is up to your usual high standard, and modifications and improvements often come after being used.
LikeLiked by 1 person
Thanks Dave, yes I’m always trying for improvements!
LikeLiked by 1 person
Great to see this, Mark! 🙂 I really like the game layouts and how all the roads link it all together nicely! I did buy a Kindle copy of “An Army at Dawn” but just could not get into it at all – too many little asides and personal details for my liking!
LikeLiked by 1 person
Glad you like the game set up John. Toying with conceptualizing a “what-if “ game in a world where Torch did not happen and a premature cross-channel invasion of Europe went disastrously instead. Eighth Army was defeated and Rommel headed further east. Mussolini gets greedy and decides he wants the Vichy French colonies. So I will have a Franco-Italian armored conflict in the desert next. As for the book, yes it’s heavy on details but that’s what I liked. Currently I’m in his second volume. Equally good but heavy on details too so definitely not for you. Nice to be back and appreciate your feedback as always!
LikeLiked by 1 person
Those sound like some good ideas, Mark! 🙂 I’m quite happy with “heavy on detail” but I just did not like the writing style. I find this from time to time and only got part way through books on the 30 Years War and history of Rome before I had to give up. On the flip side I’m now on my fifth consecutive book on the Franco-Prussian War (over 1200 pages so far) and still going strong!
LikeLiked by 1 person