
Two totally unrelated things conspired to make me jump off my Spanish Conquest/Mesoamerican hobby path for just a short August detour. The first was my desire to participate in Dave Stone’s Season of Scenery challenge. I did get in that last year with my cityscape build for Tenochtitlan, the Aztec capital. My challenge this year was that I really did not need any more scenery for those games. The second thing – and we are talking about scenery here – was right in my back yard.
Woodstock.

Yes, that Woodstock from the late Charles Schulz’s Peanuts. Or rather the resin yard sculpture of Woodstock that we have had in the back yard for so many years that I don’t remember when we got it. Plus, I grew up reading the strip and still do in the reruns in the daily newspaper (which, yes, I still get daily). I think Peanuts still holds up.
As some of you remember, my wife Lynn and I had a cockatiel named Caesar who passed away on January 1st in my wife’s arms.

Woodstock looks somewhat like a cockatiel (but Schulz never would specify exactly what kind of bird he intended him to be).
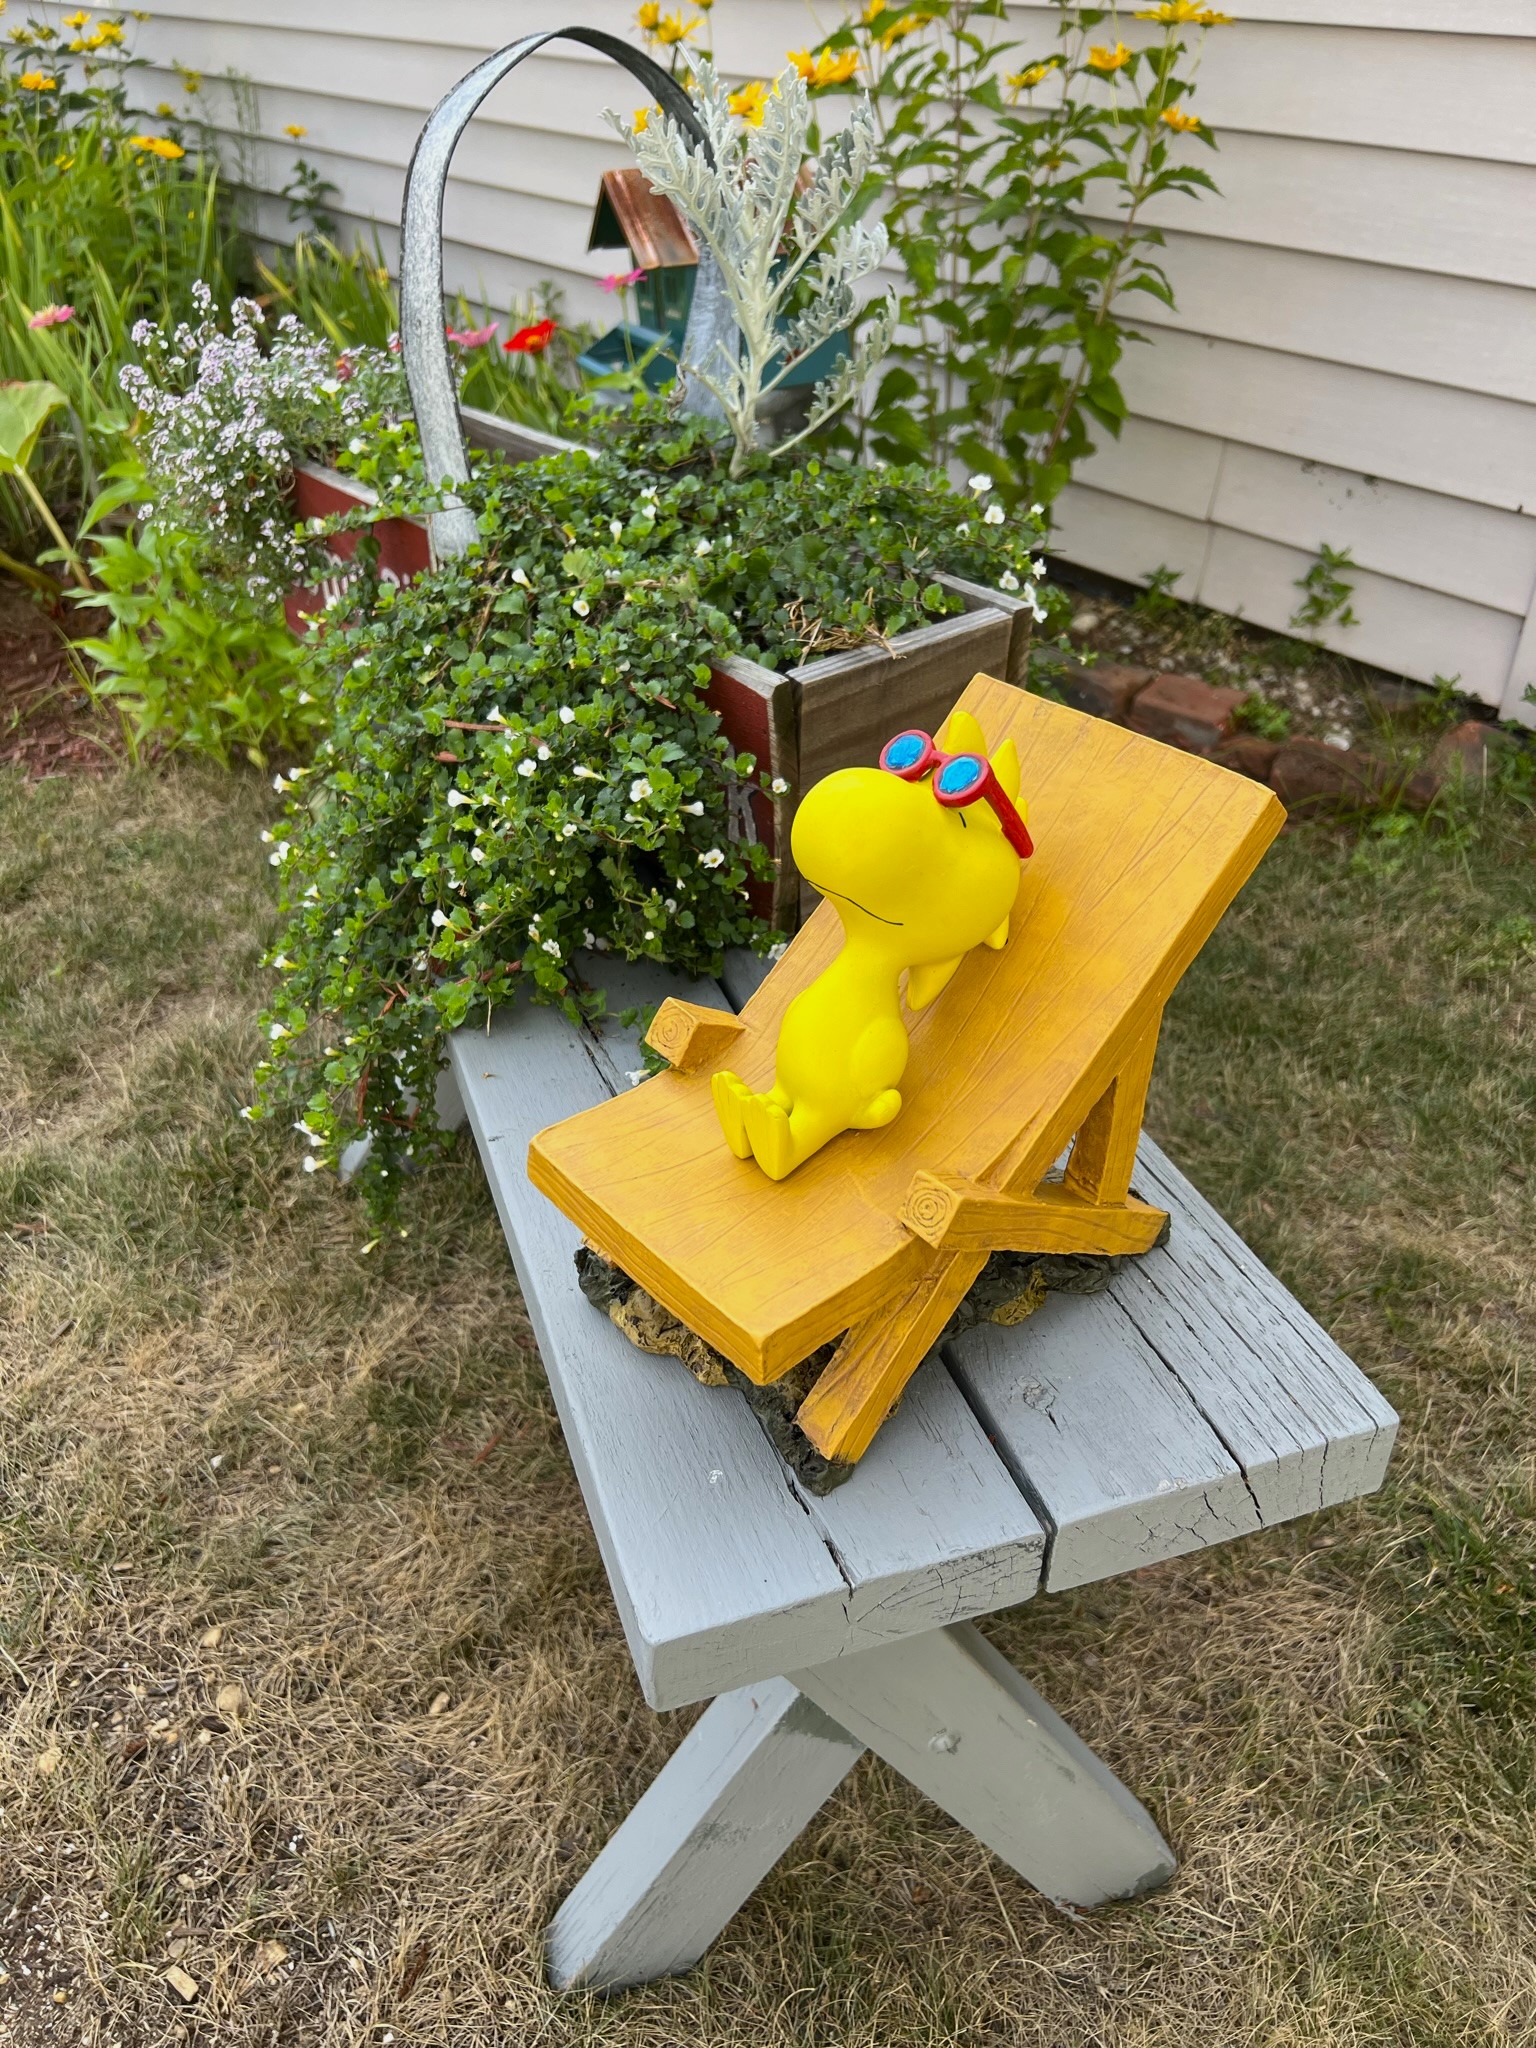
In any case, as Caesar was part of our family, we naturally have had several bird-themed decorations inside and outside of the house. One of these is the aforementioned resin yard sculpture/ornament of Woodstock wearing sunglasses while lounging on a chaise lounge for many years. The New England sun, snow, heat and rain have taken their collective toll on the dude. But, back to my original point, he’s part of the scenery! And he is a fond reminder of Caesar. So, as such, I decided to rehab Woodstock for my backyard and for Dave Stone’s Season of Scenery.
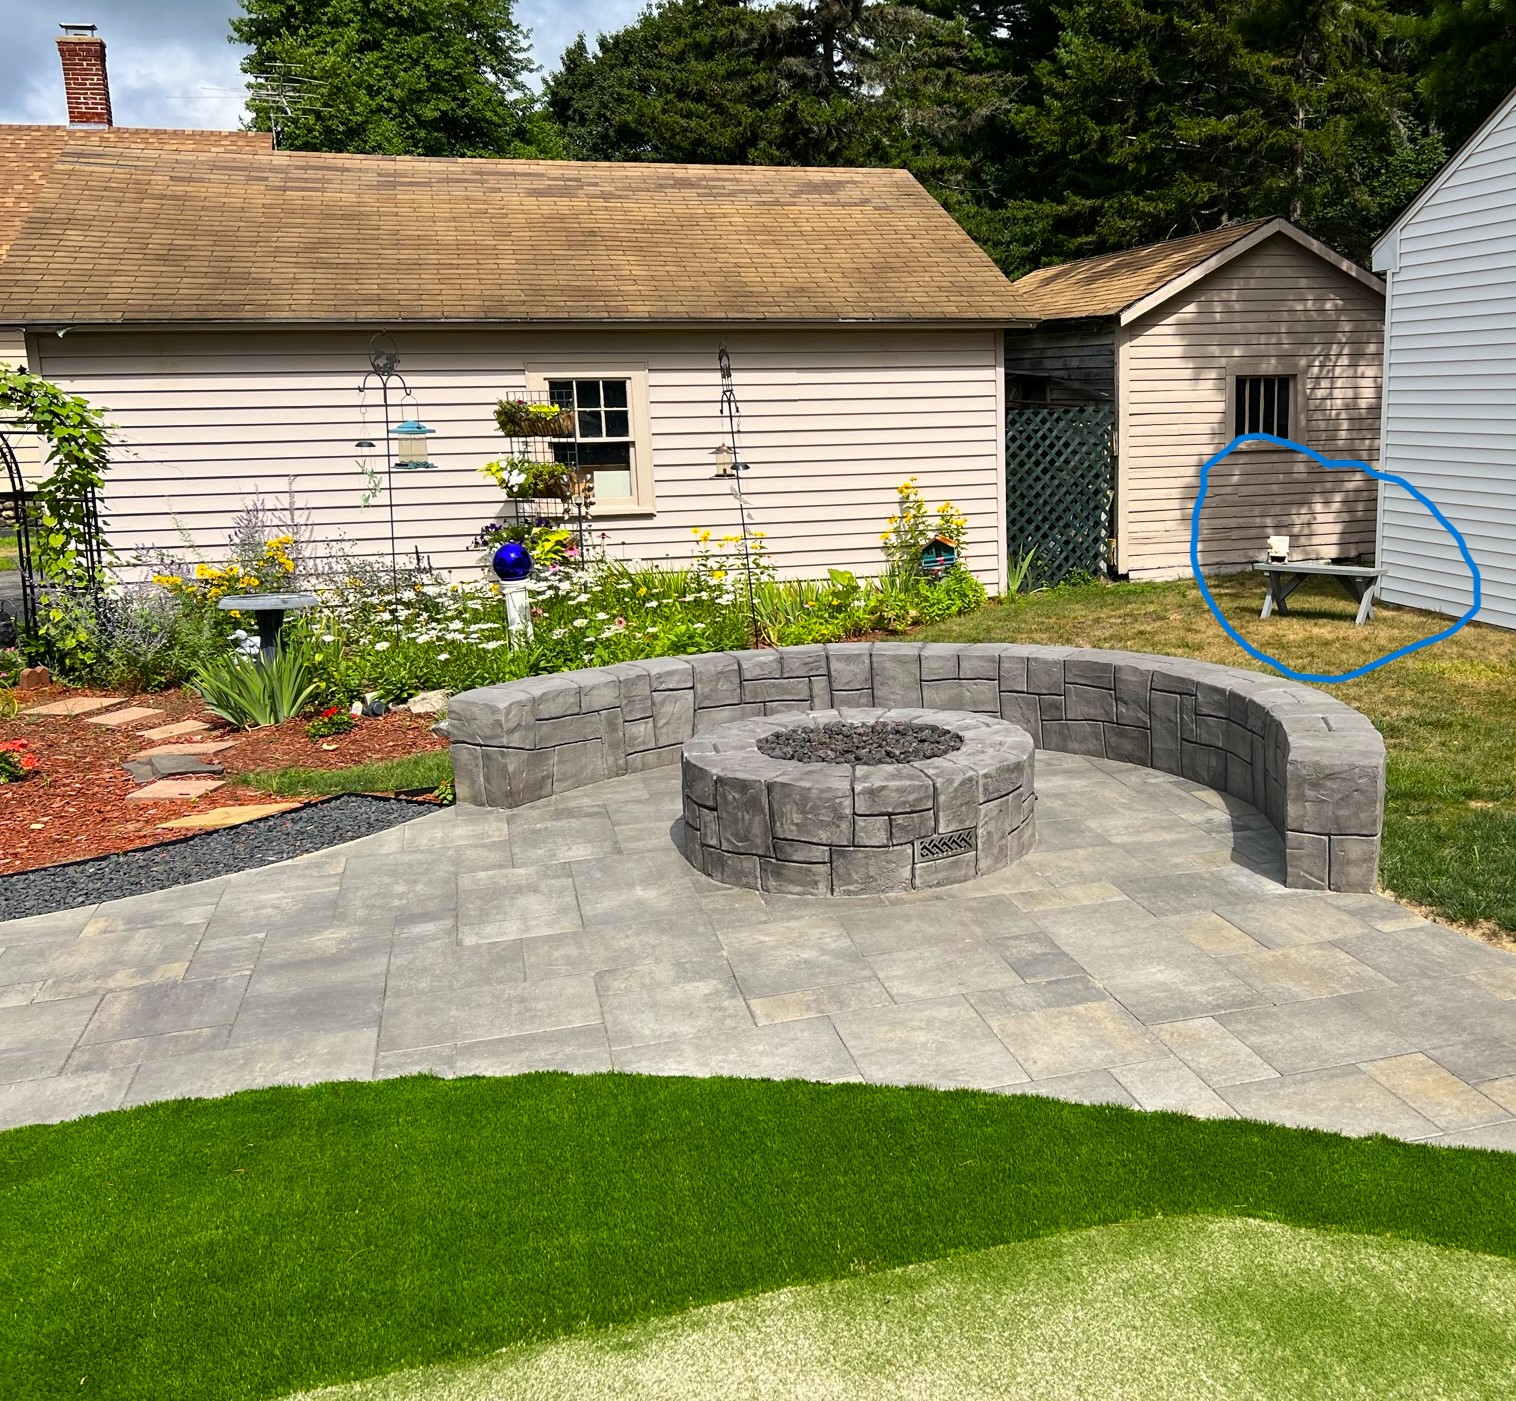
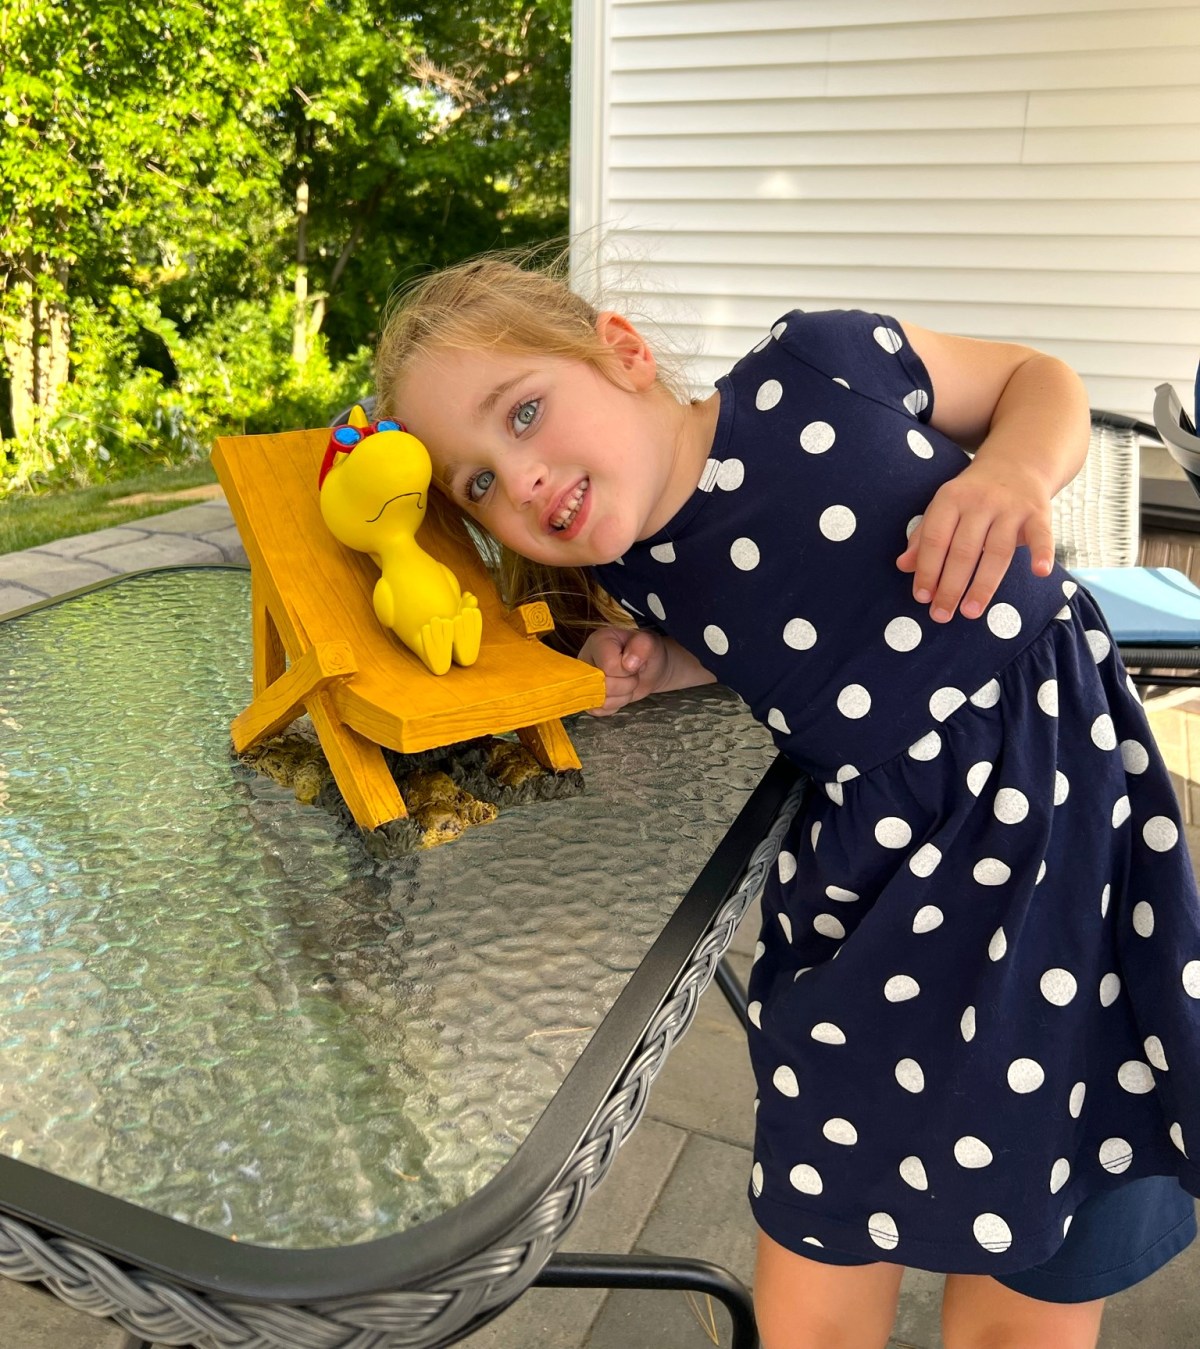
And it’s been quite hot this summer – and we are in a drought so my grass (not the artificial putting green) are pretty burnt. You can see below that Woodstock has long since been separated from his chair. My granddaughter Tabitha does likes to hold him. As he’s no longer affixed, I thought I’d rehab Woodstock and keep him removable but also make him more secure on his chaise lounge as well. Therefore, as fate would have it, I could do that and use him for Dave’s annual scenery challenge!


I decided to use a combination of paints and varnishes – craft paints, old primers that are no longer good to airbrush with (i.e. too prone to clot and jam up an airbrush), and some rattlecan varnishes and lacquers left over from my pre-airbrush days. Add to that some other paints (which I list at the end of this post for those interested).
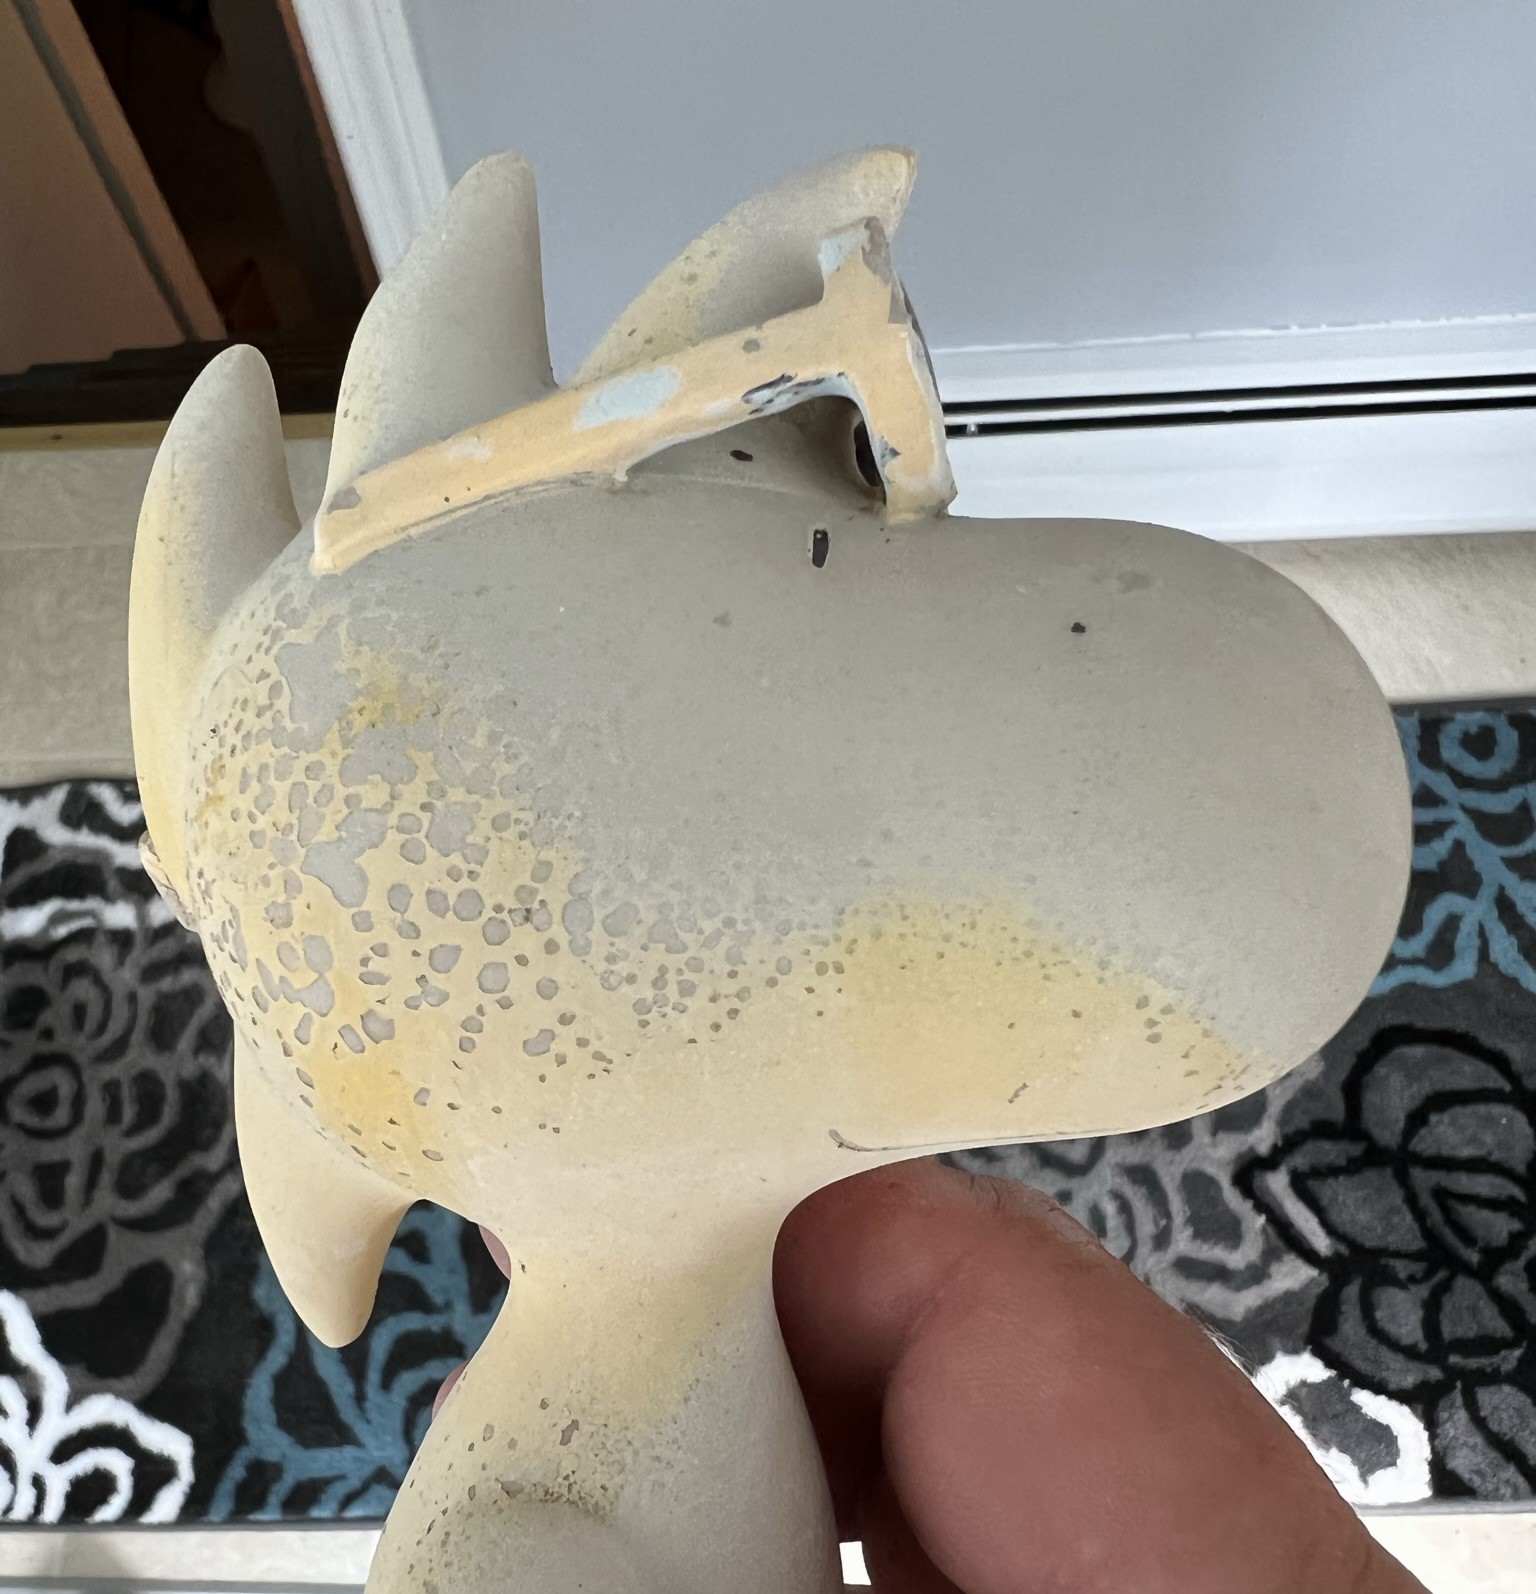
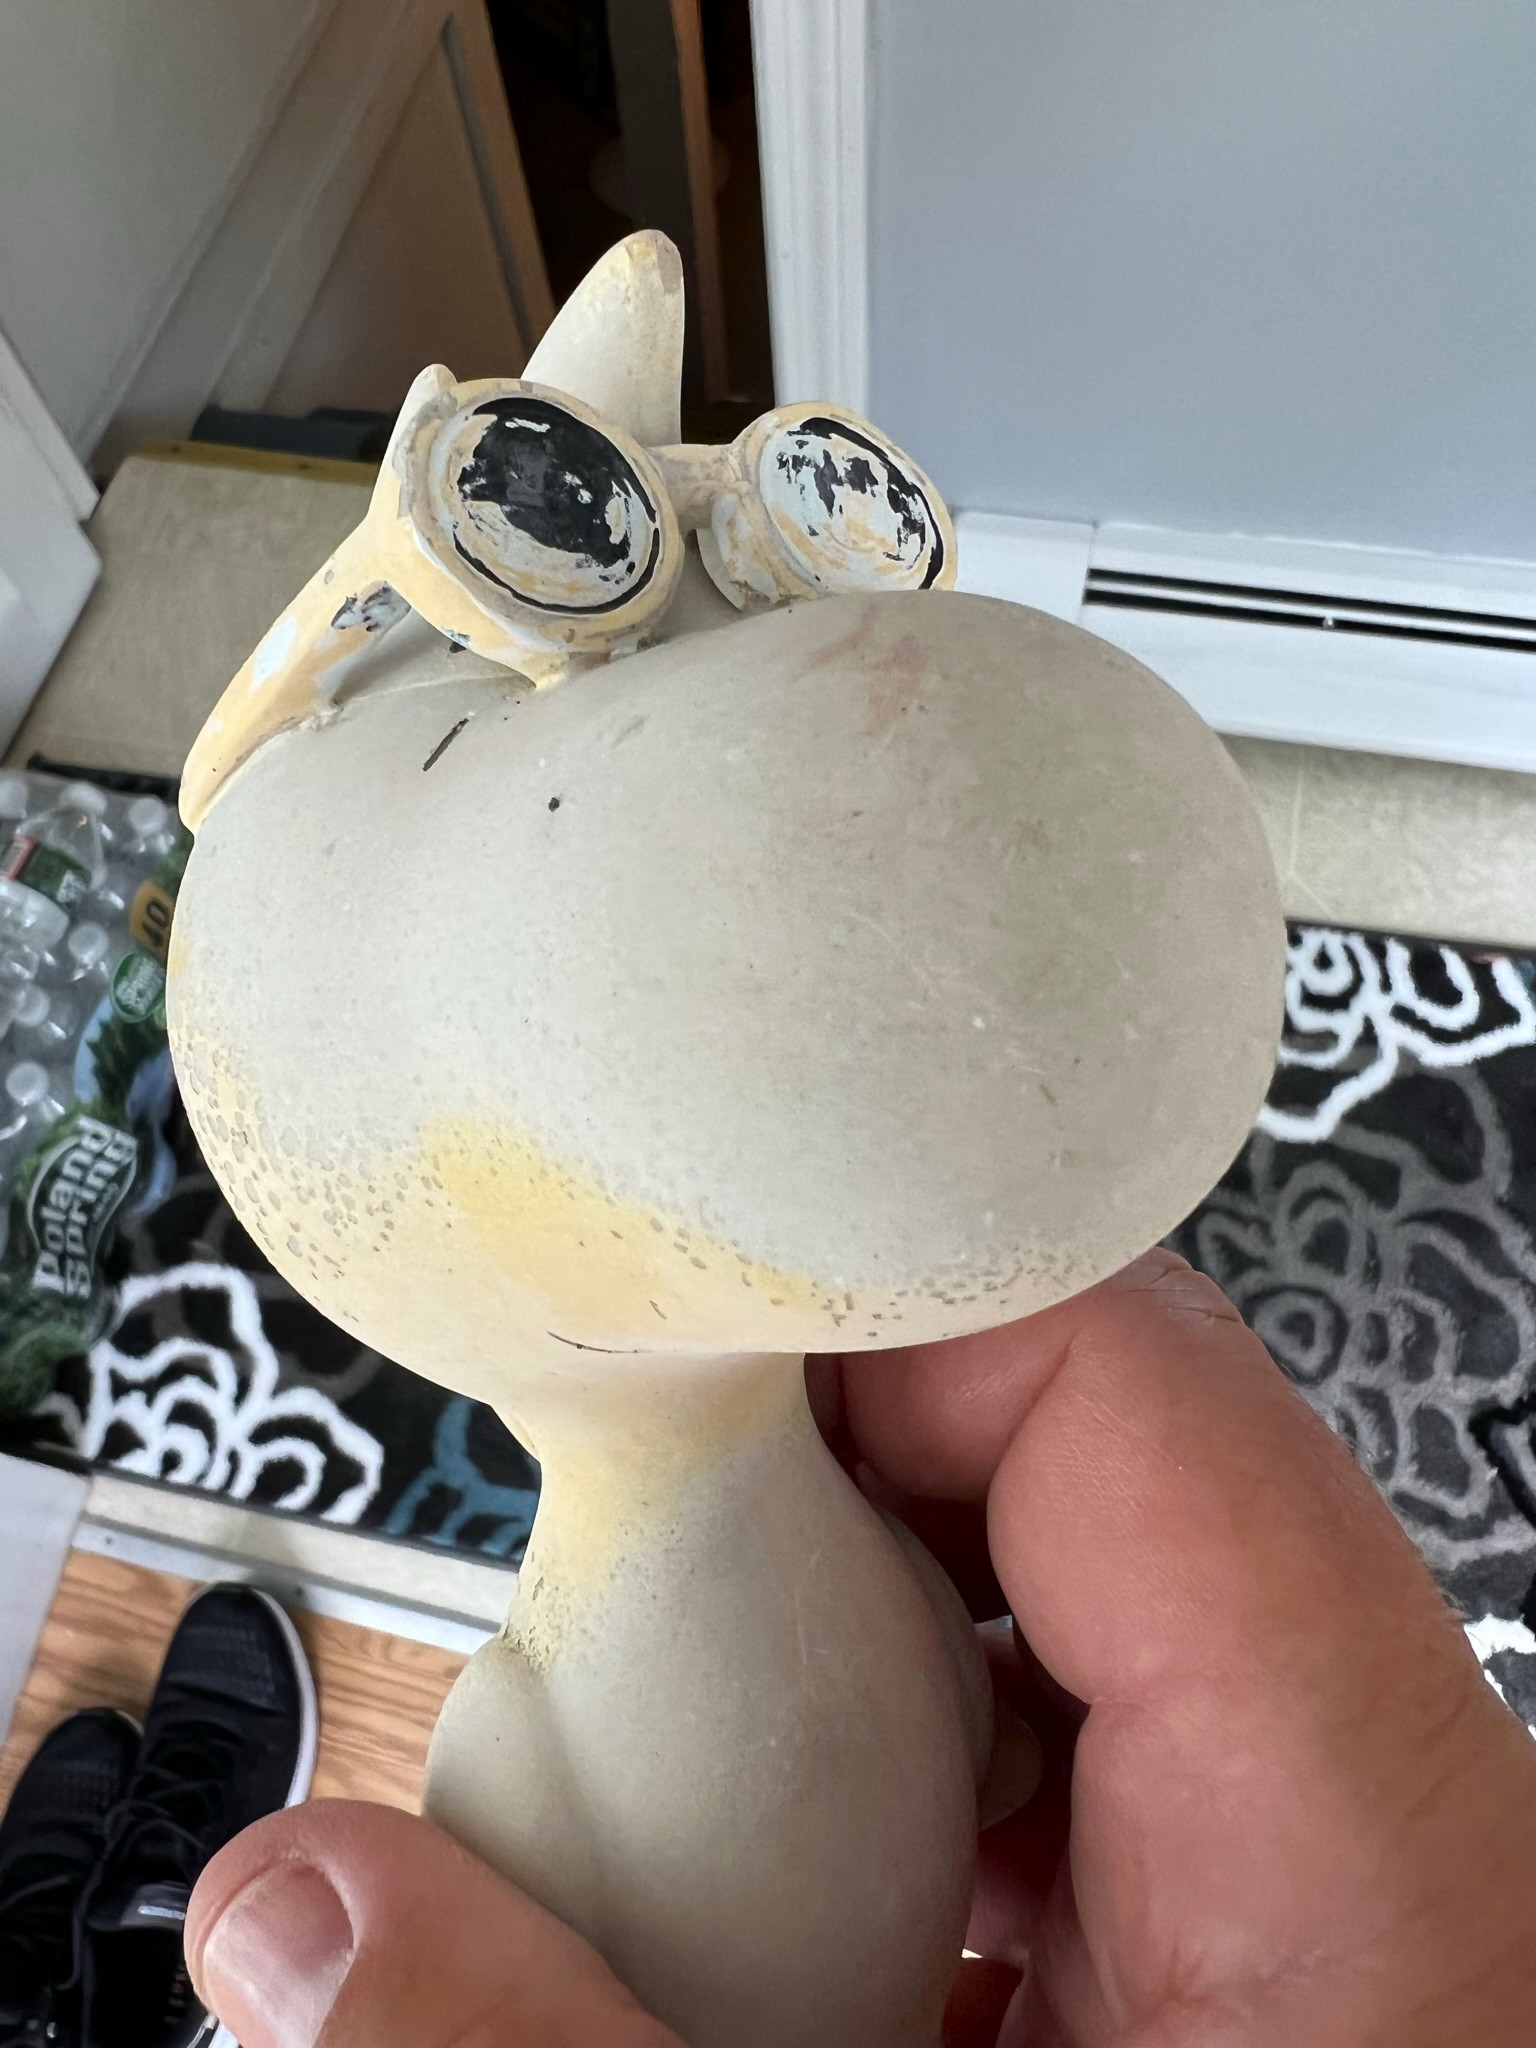
First, I washed and scrubbed the piece – it had a good amount of grime on it and I wanted the primers to really adhere. A few ants had taken up residence in it as well and kept wandering out at random times despite the cleaning.

The chaise lounge also had a good-sized crack that I repaired with green stuff.
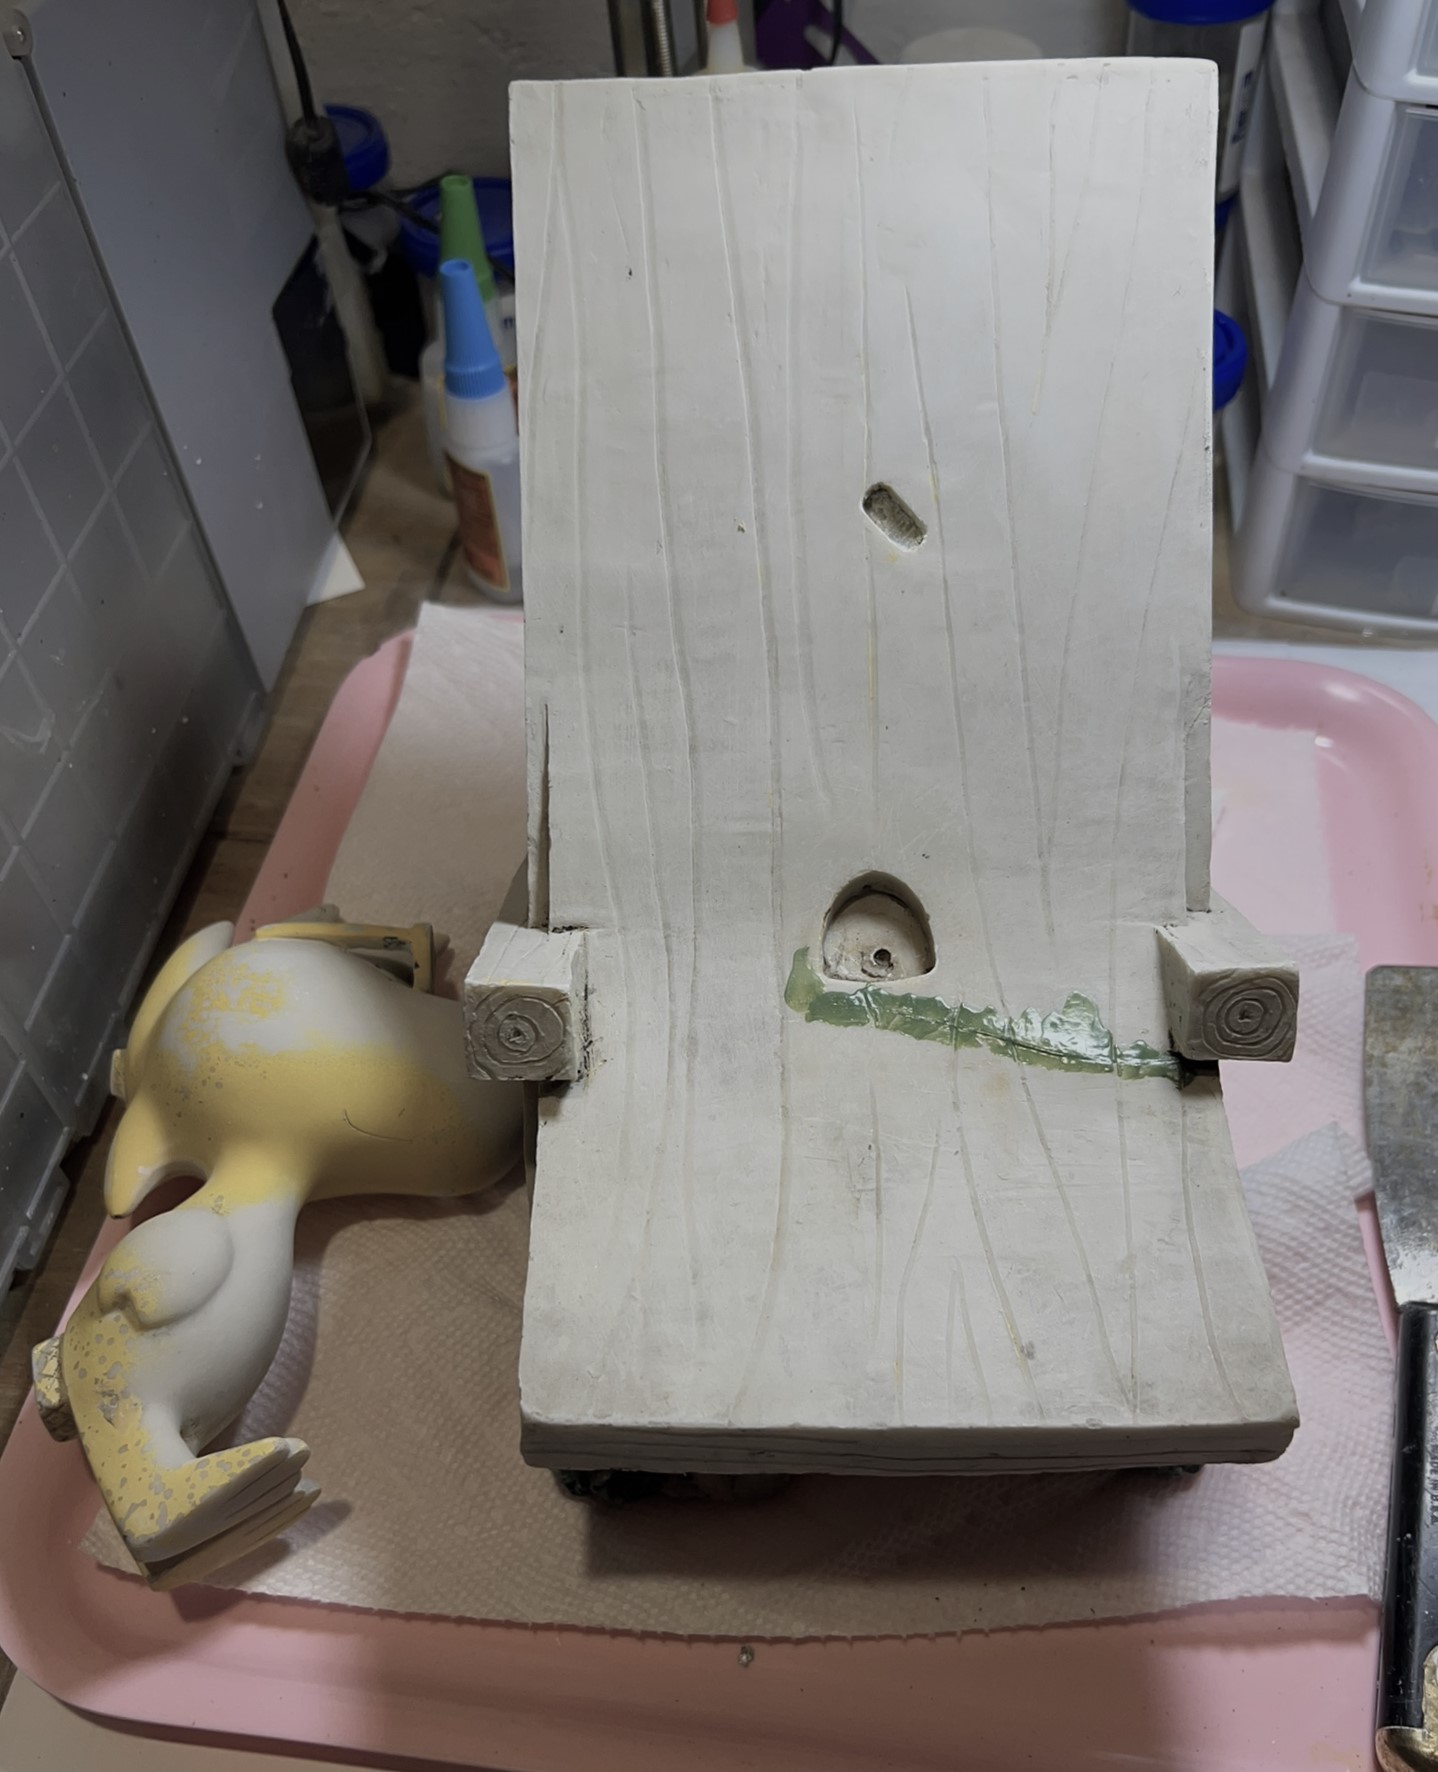
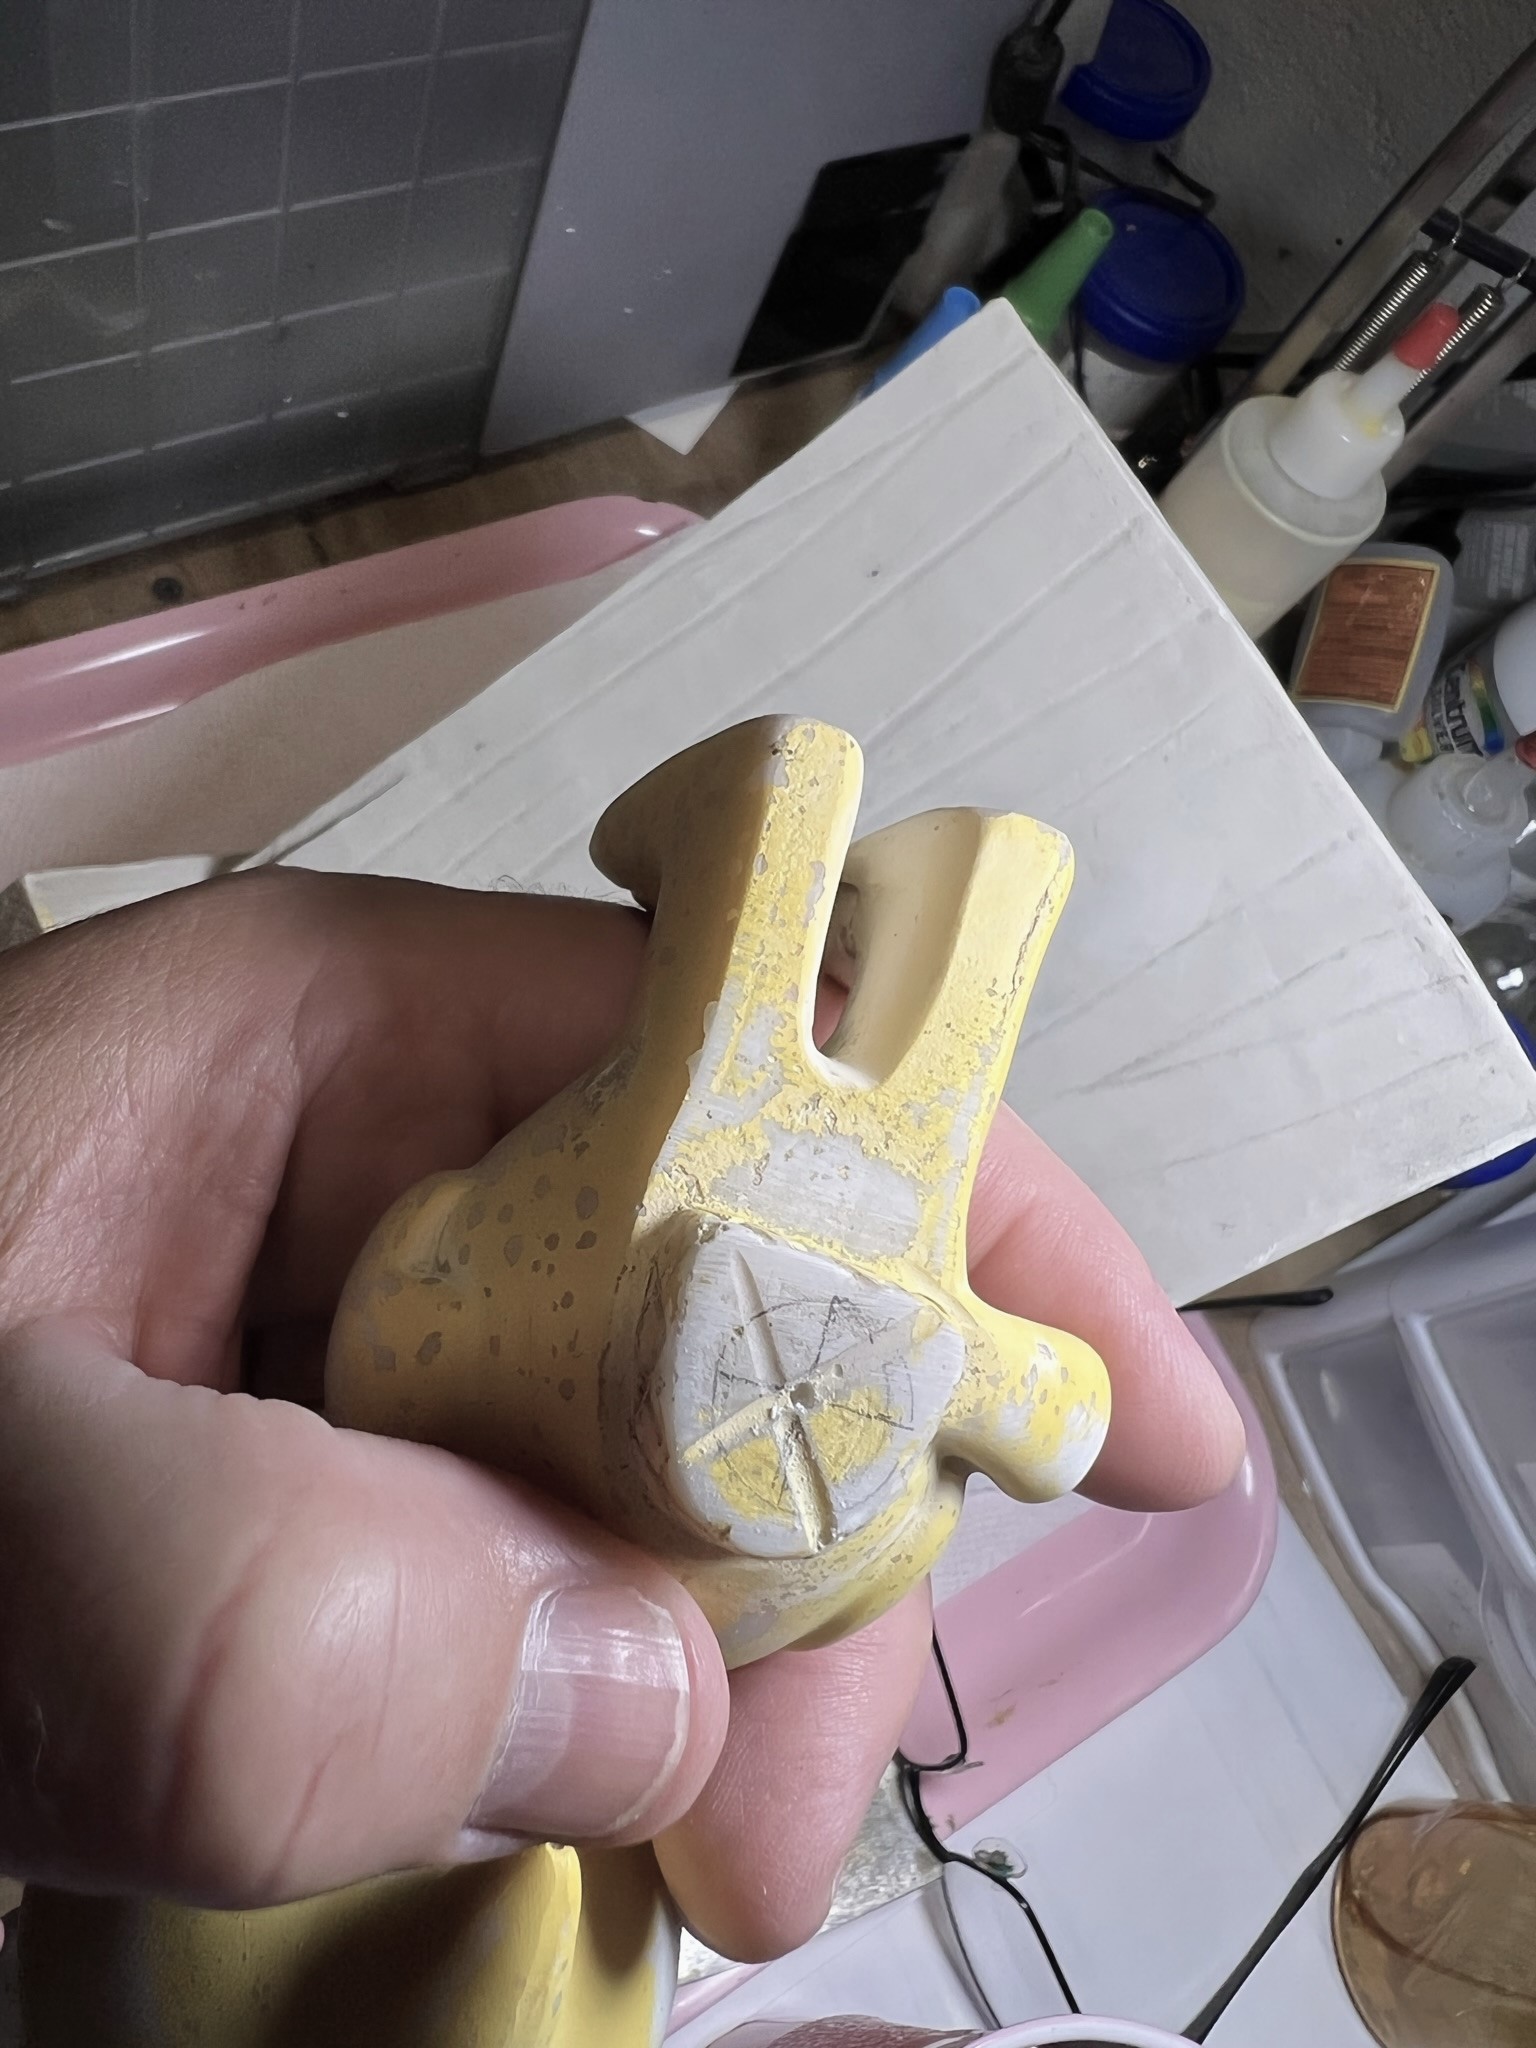
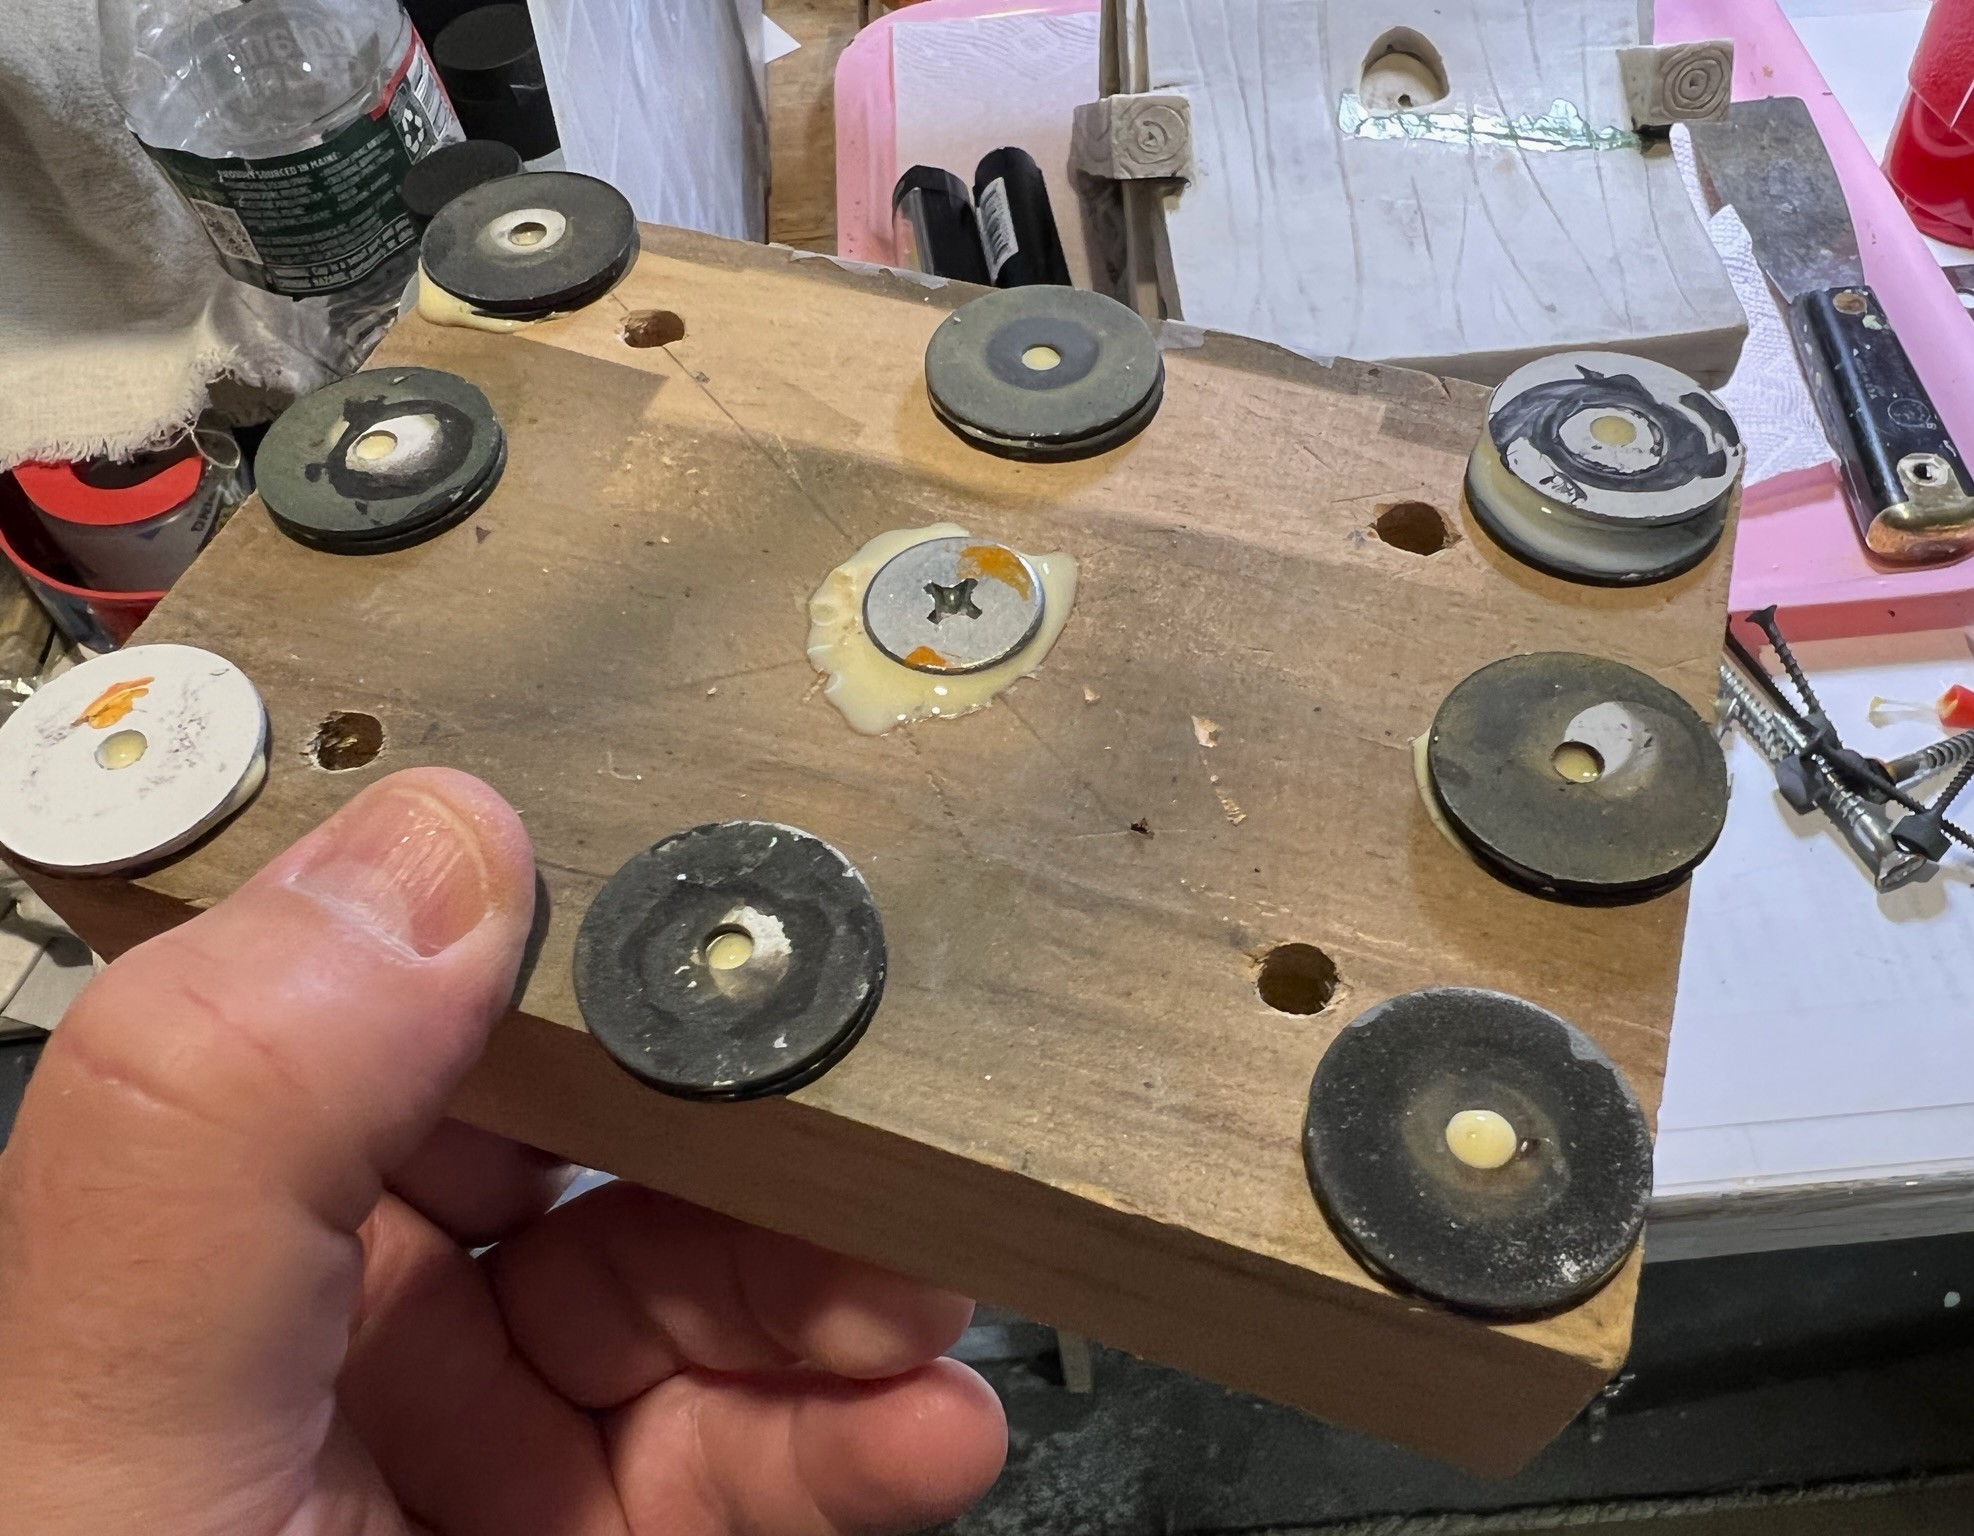
The next challenge was how to paint the two pieces without handling them. For the chaise lounge, I just did each side and allowed for drying. For Woodstock, I needed a support jig – so I built one. The drilling also allowed for magnet insertion later with a bigger hole centered on the smaller one (not shown immediately below but later on in this post).
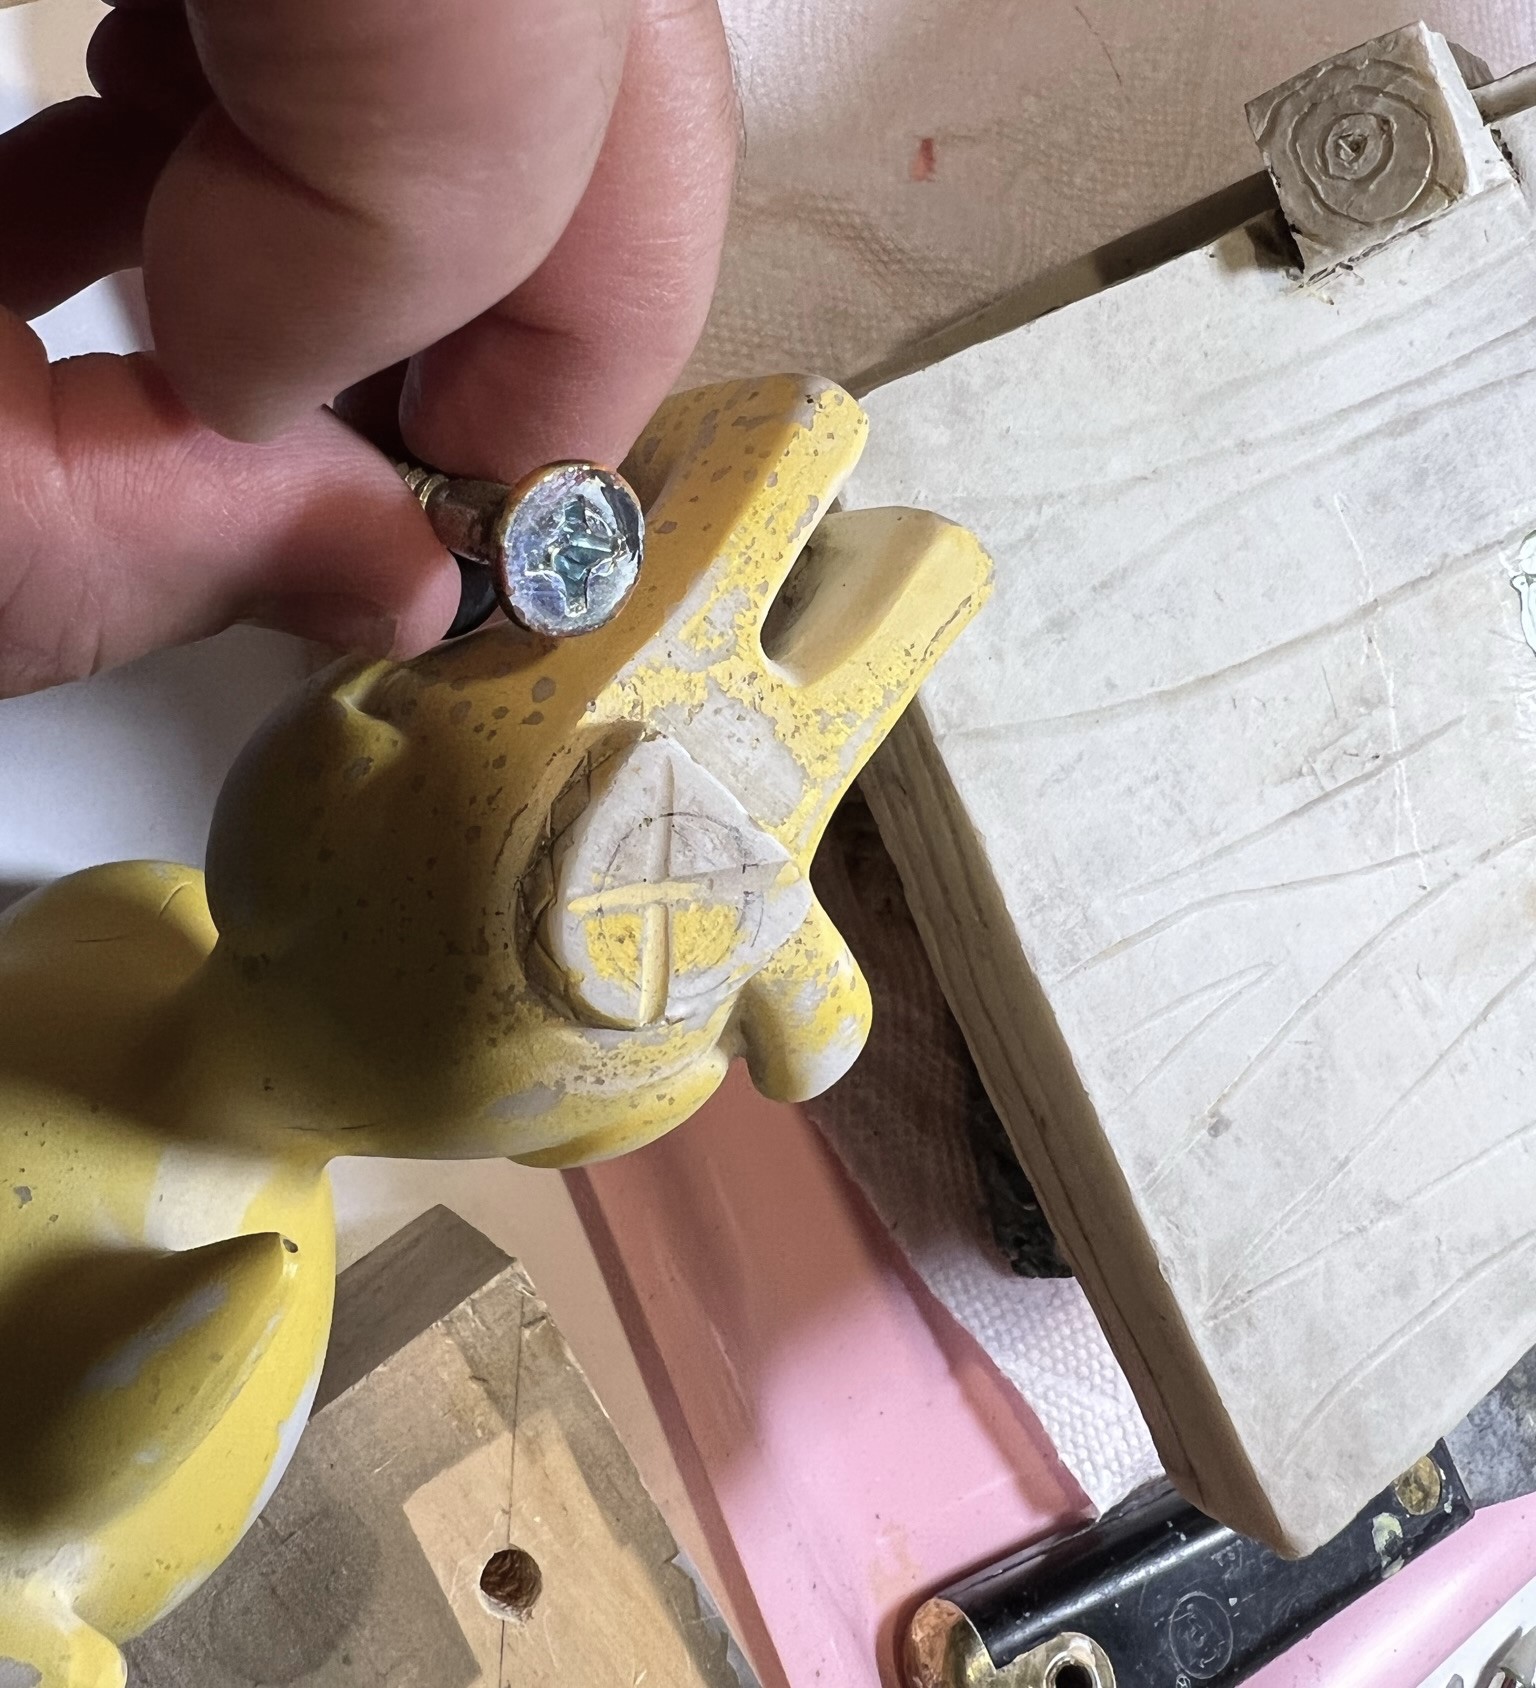


As for the jig itself, I reused a blot of wood that had a few holes that I had used to support 15mm tank turrets on previous projects. I had a longer bolt for the support that I drilled from the bottom side, and added several washers so that the bolt head would not touch the ground when flipped over and supporting Woodstock. I secured all the washers and the bolt with wood glue.
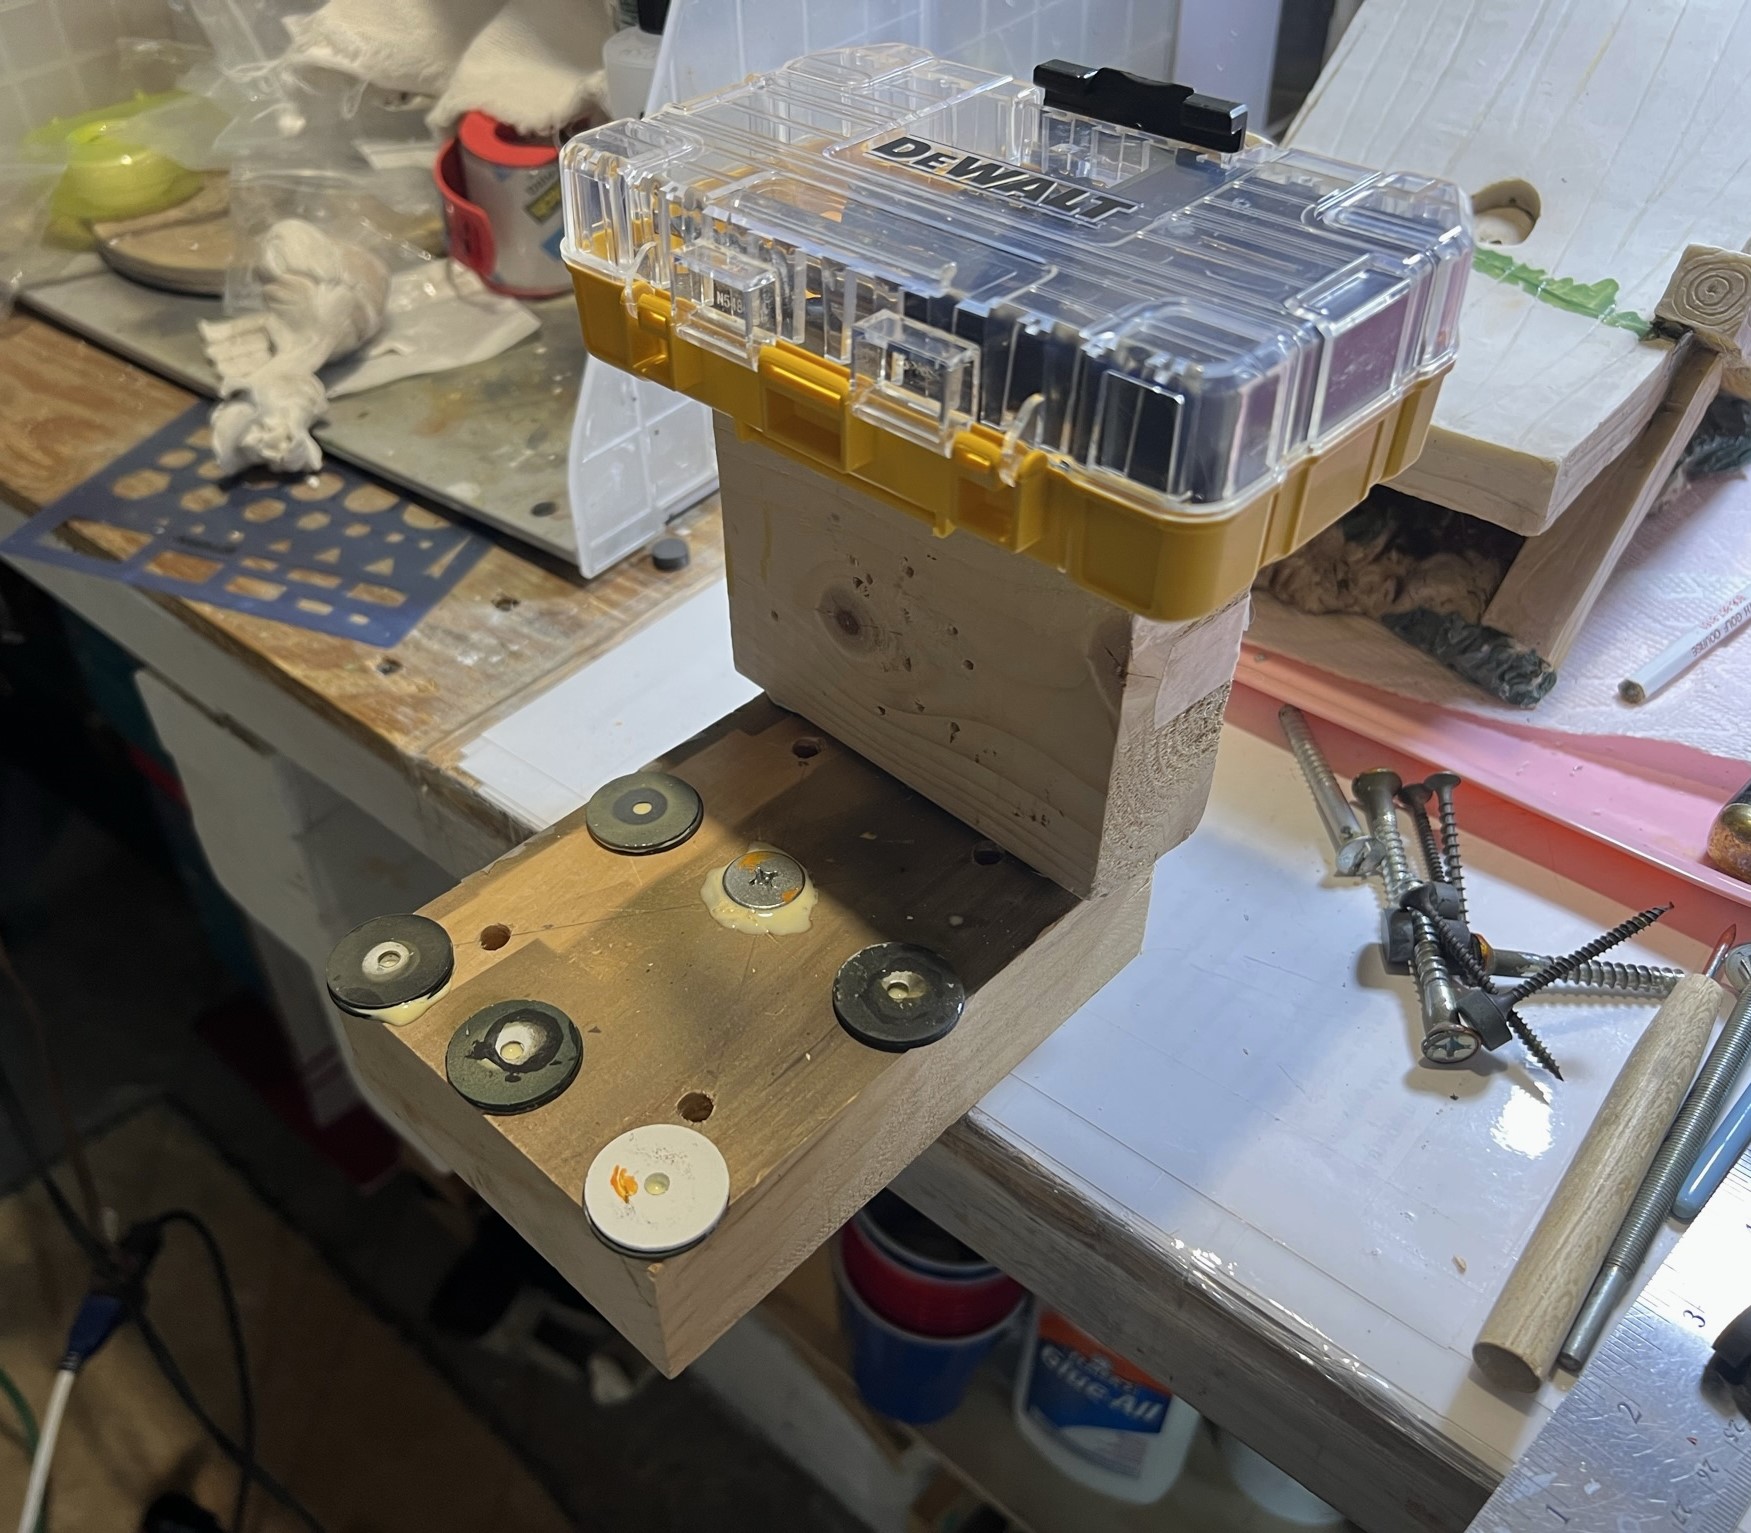
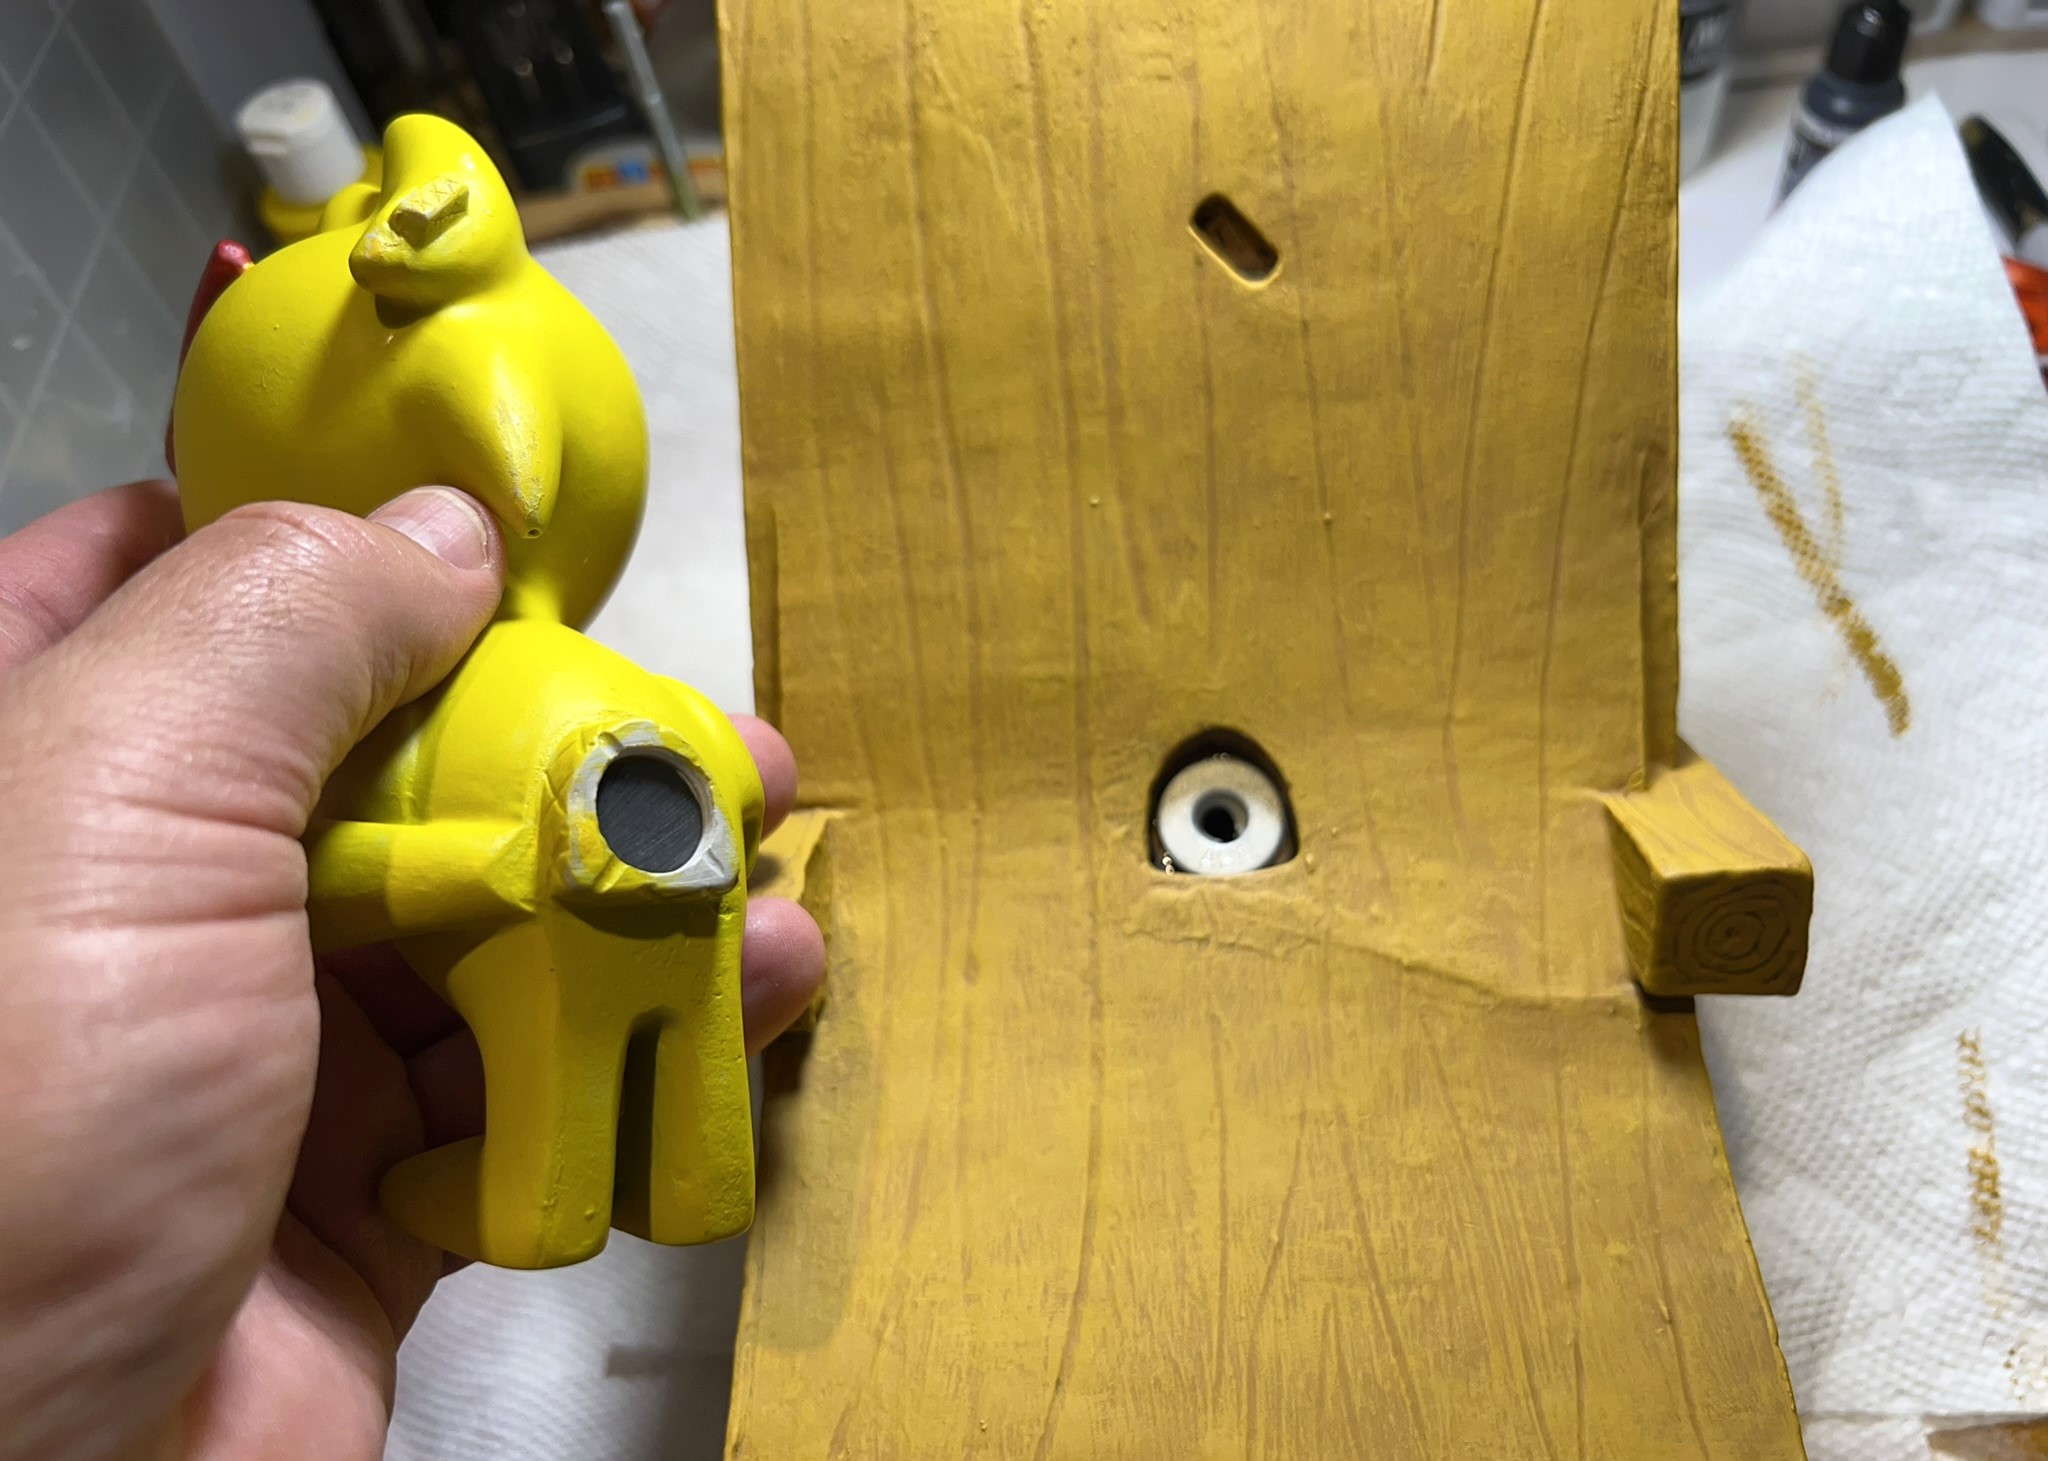
For Woodstock, I scribed over his mouth and eyes with an awl before priming him. I then secured Woodstock and brush primed with some older primer that was no longer suitable for the airbrush but was still good enough for the brush.

From here, it was onto the chaise lounge base. It needed to be primed both on top and on the bottom as there were some rock-like and bush-like structures underneath that were not well-defined. These I painted and then added a glossy wash for depth. Over the repair, I had previously etched the wood grain of the chaise lounge.
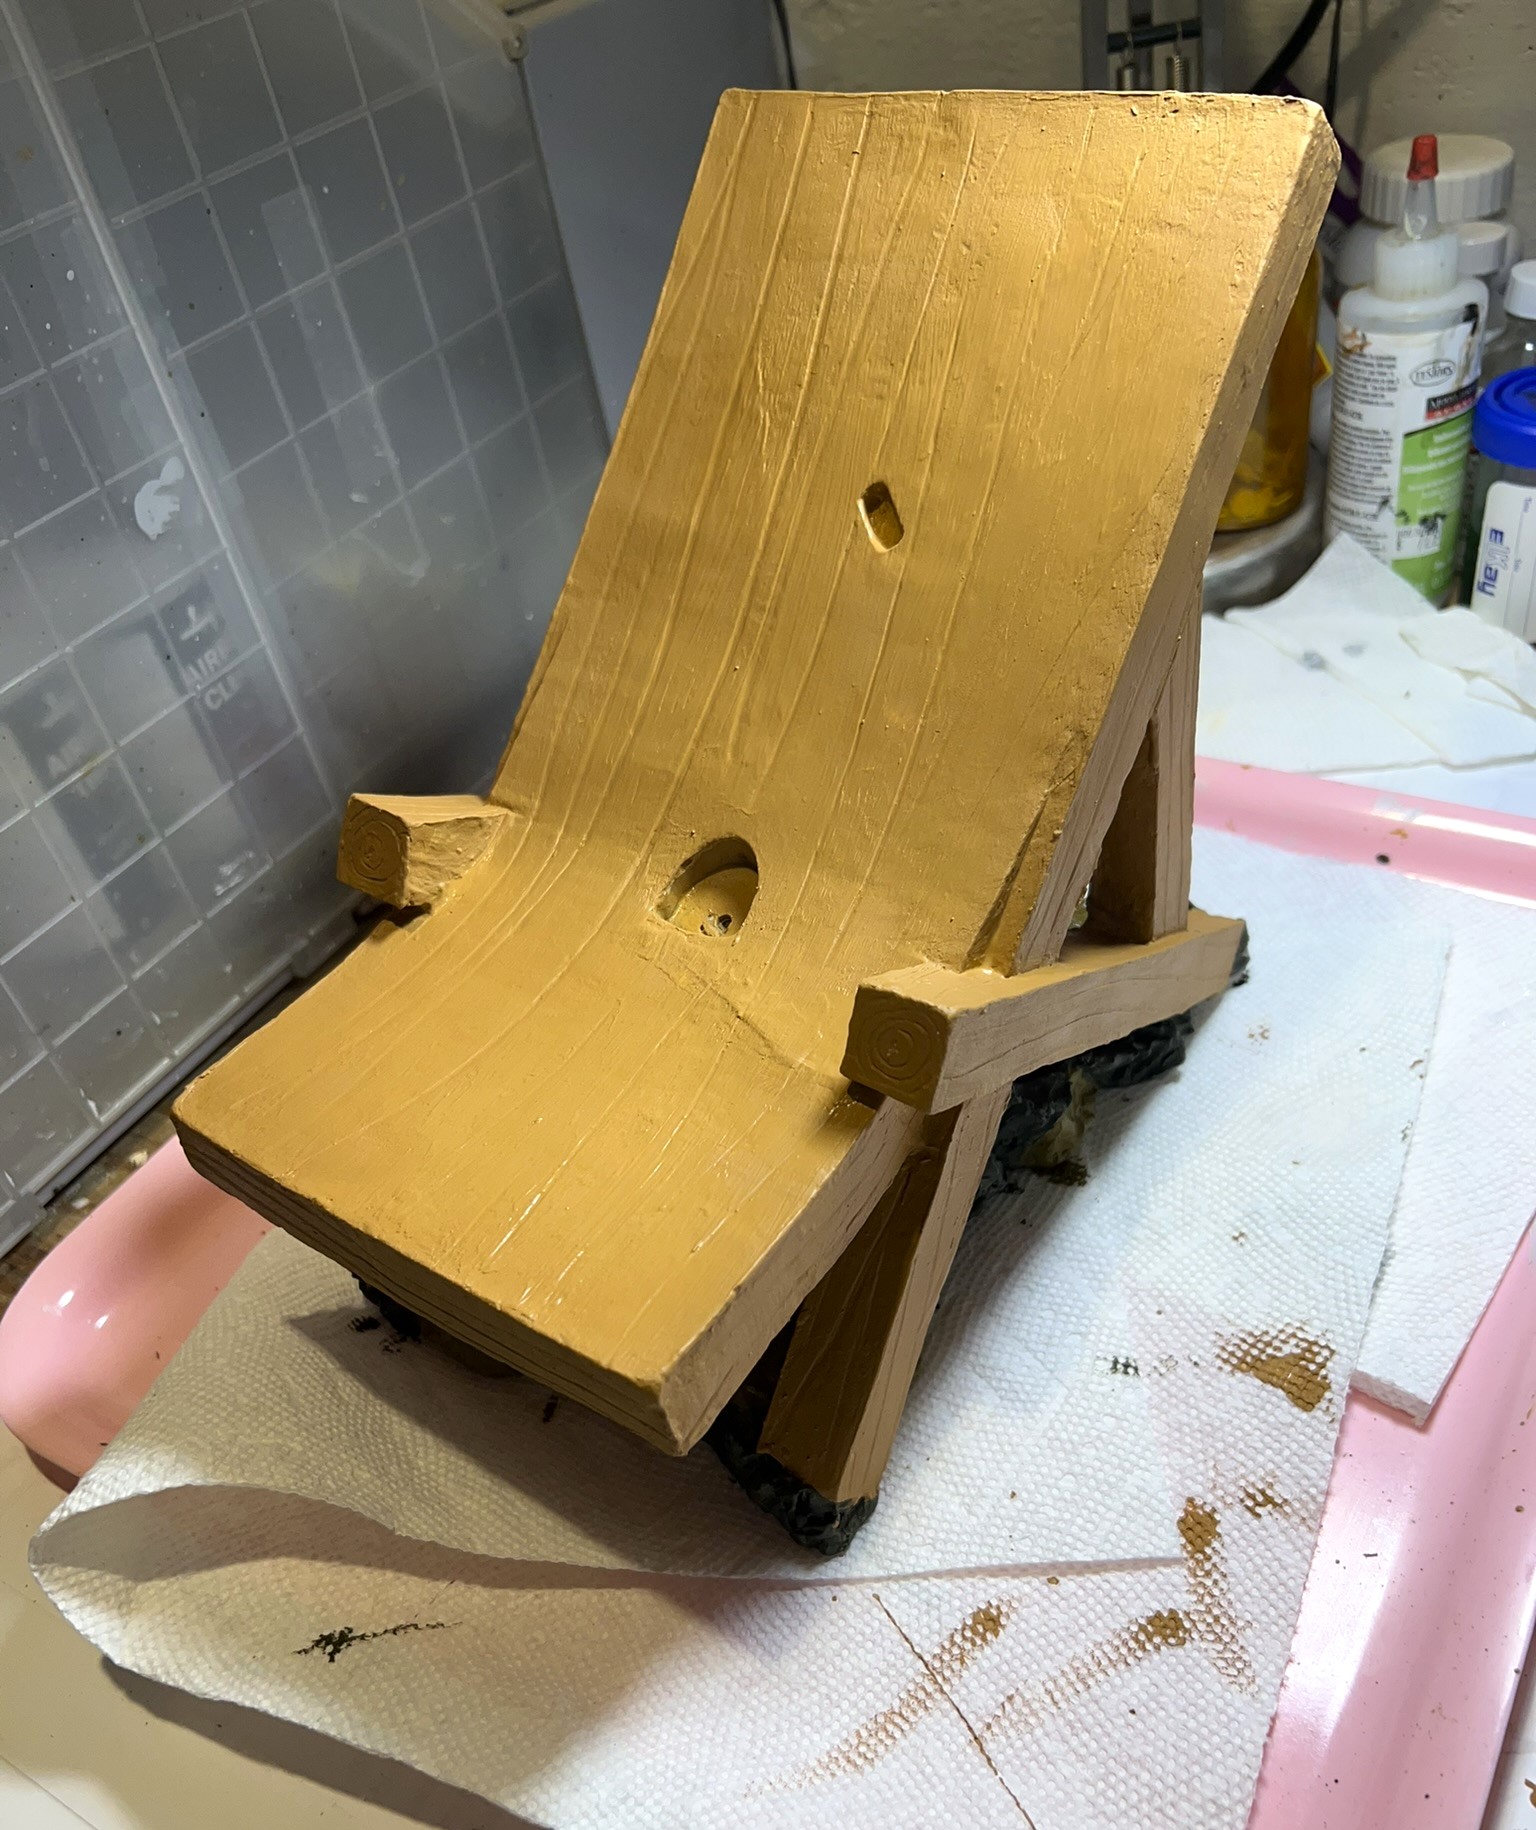

I still wanted more definition in the wood grain. I tried a wash but the result was highly unsatisfactory – it came out horribly blotchy. So I repainted the base chair and decided to dry brush it instead- which worked much better. After all, it should retain a “cartoony” look right? I used an airbrush yellow paint with a brush on Woodstock and painted his eyes, mouth, and sunglasses.
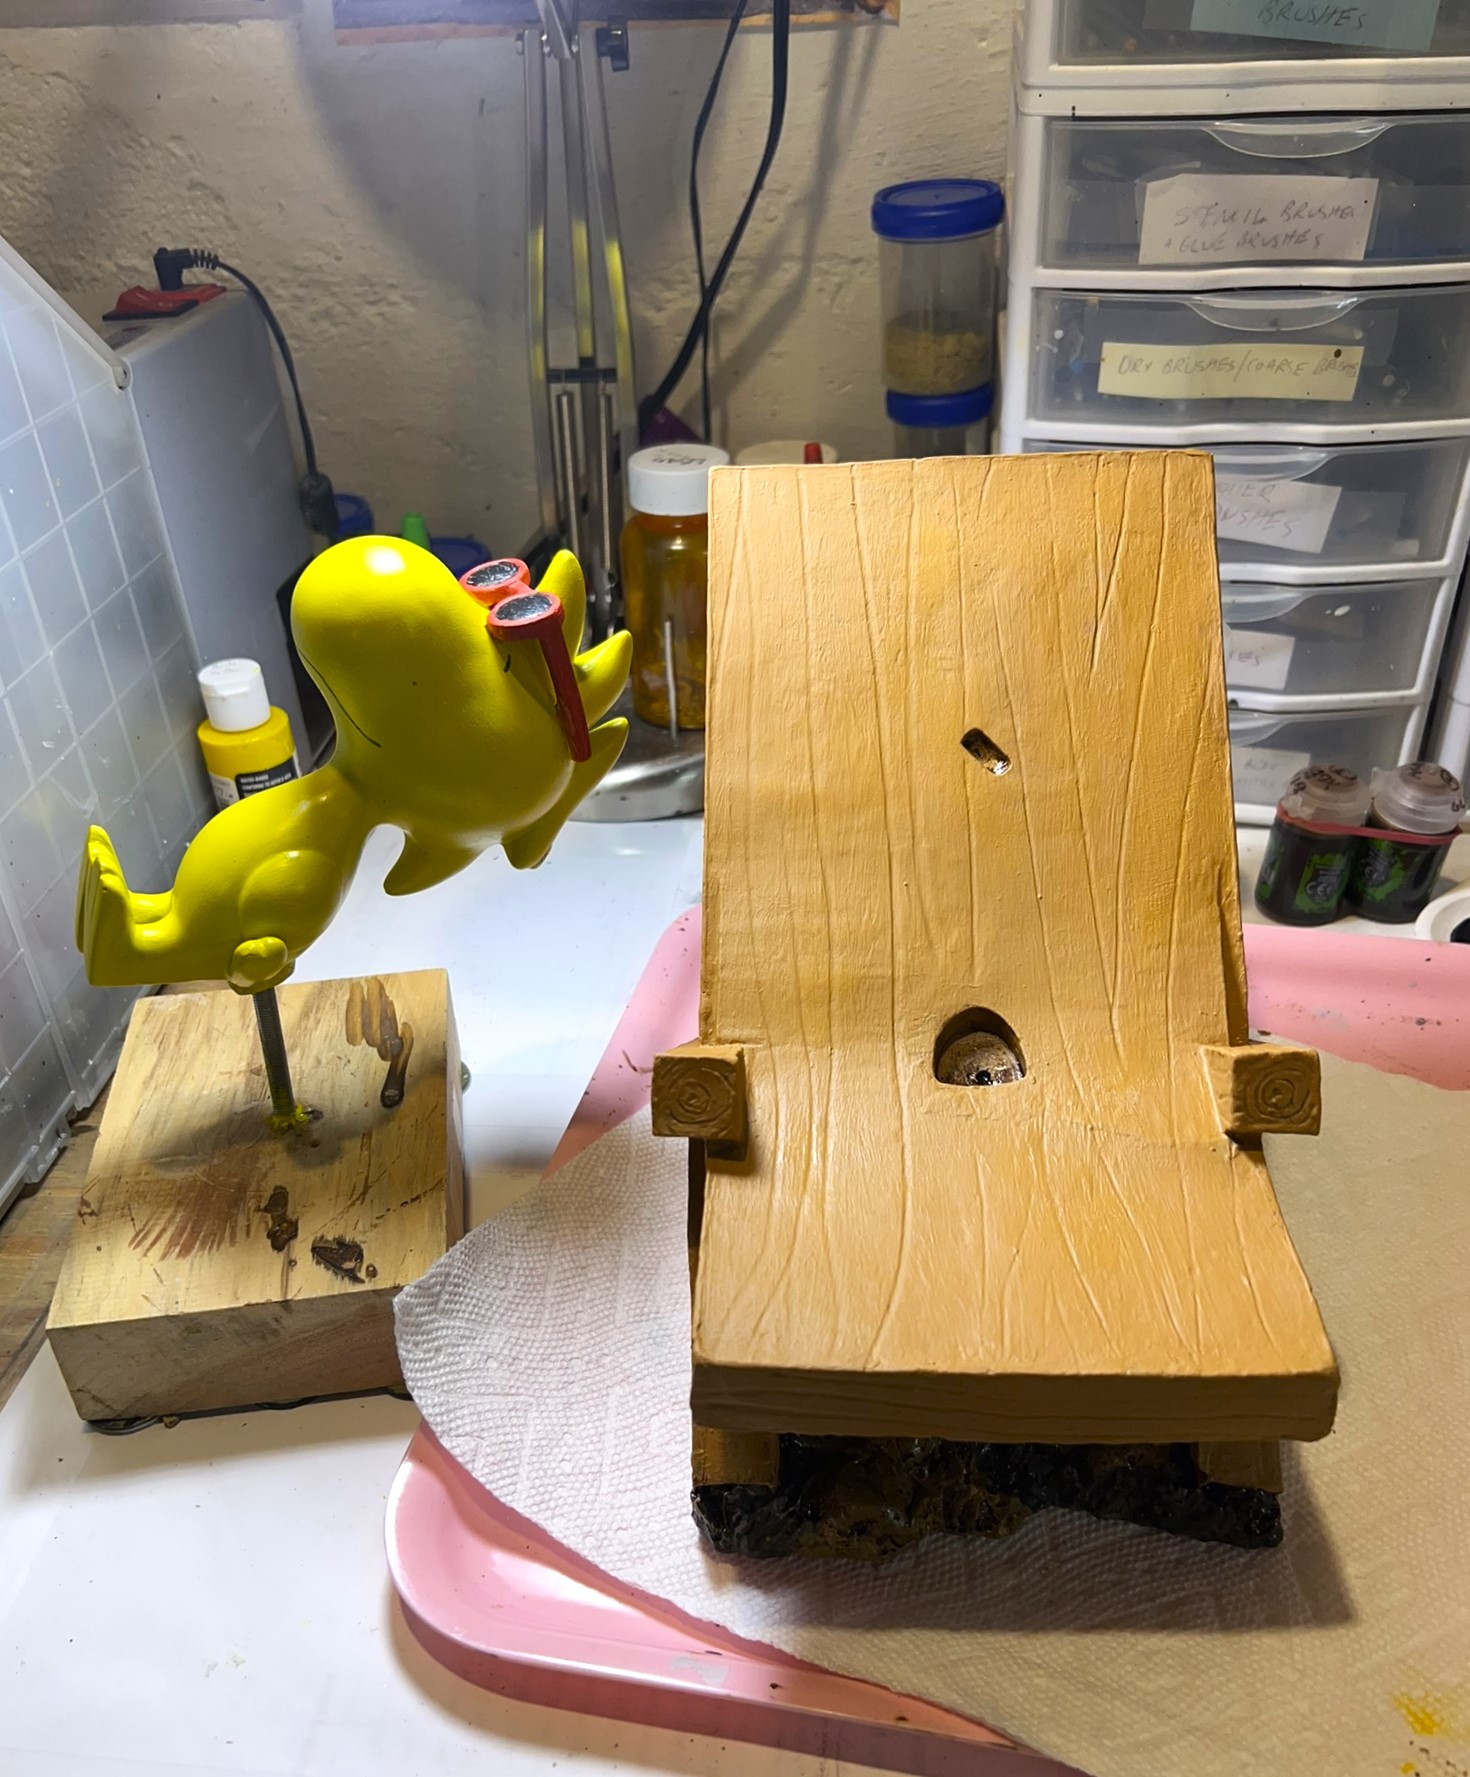

Before I was to varnish, I needed to install Woodstock’s magnet and a washer into the base. Originally I planned to put in a magnet into the base too – but upon drilling it I discovered that the base was more hollow than I knew (hence the ants too). So, I chose to insert a 3/4″ zinc-coated washer and secured the gap with E6000 epoxy.
All that remained was to apply varnish and lacquer. Luckily, I still had some old rattlecans from my pre-airbrush days – and I gave each a couple coats of good coverage.

So how does he look in the yard?
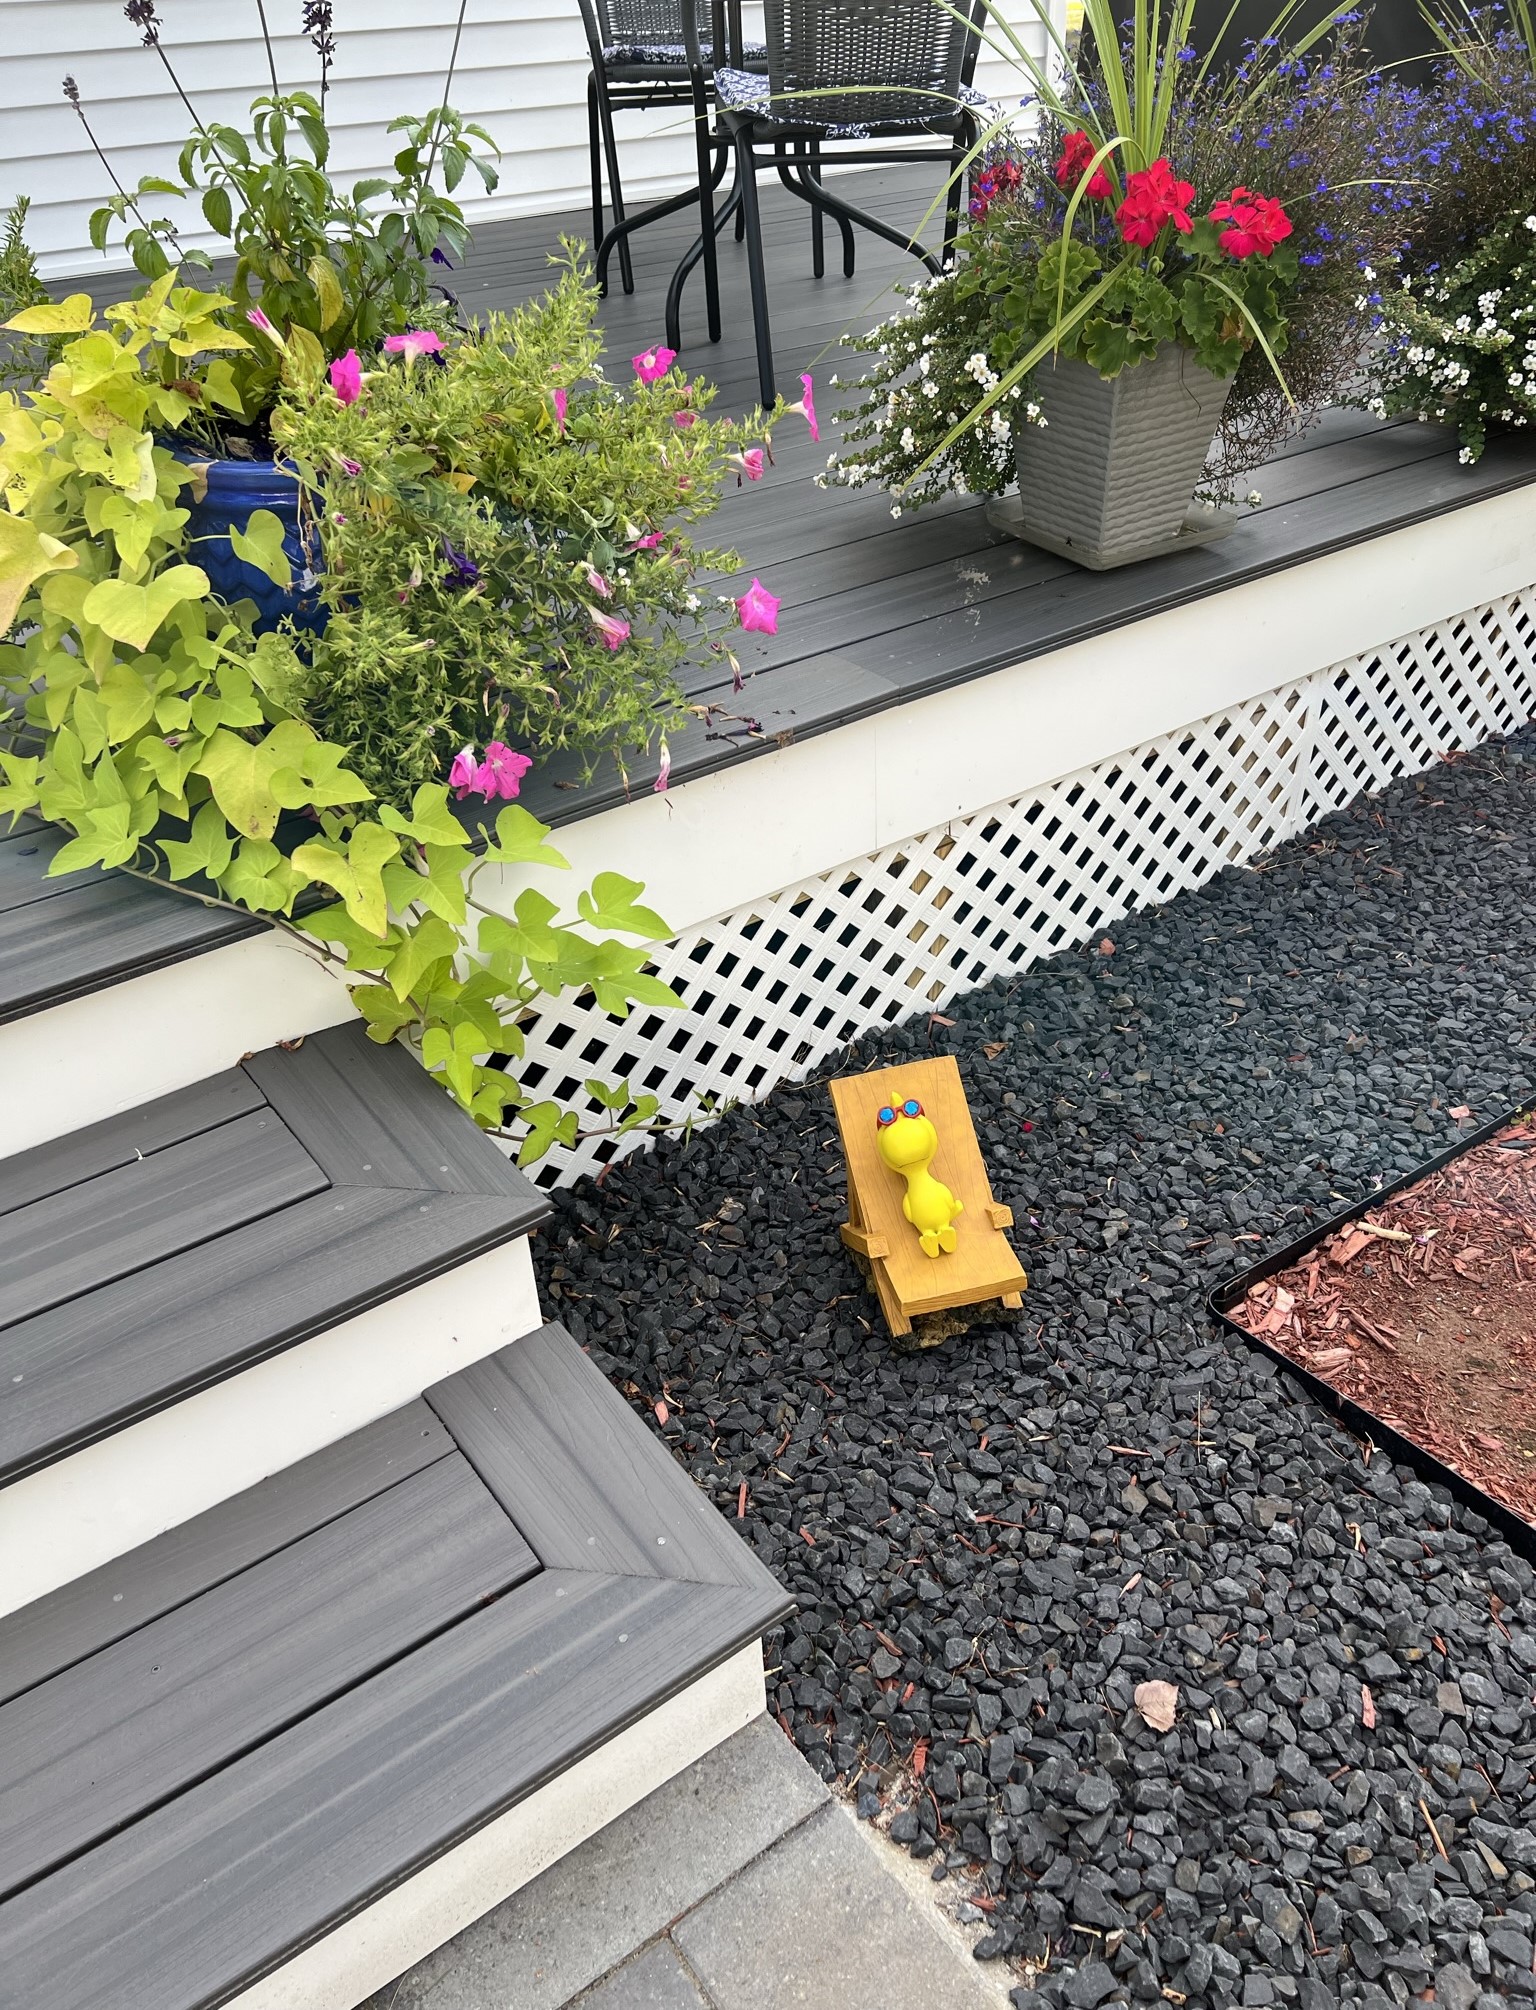

Most importantly, Tabitha approves!

Thanks for looking at this little diversion from my normal pace – hope you found it as fun as I did! Or Tabitha!
PAINTS, INKS, GLAZES, SHADES, WASHES, PIGMENTS, FLOCKING, GLUES AND MORE THAT I USED TO REHAB WOODSTOCK AND HIS CHAISE LOUNGE:
- Kneadatite (green stuff)
- Gorilla Glue
- A block of 2″ X 4″ wood
- Elmer’s Wood Glue
- 1/8″ x 1″ Everbilt Fender Washers
- 4″ bolt
- 1/4″ magnet
- Multiple drill bits of different sizes
- Vallejo Surface Primer “Grey”
- Vallejo Surface Primer “Russian Green”
- Vallejo Surface Primer “German Green Brown”
- DecoArt “Honey Green Brown”
- Citadel “Agrax Earthshade GLOSS (wash)
- Americana “Black Tie Satin”
- Americana “Santa Red”
- Com-Art Colours “Opaque Hansa Yellow”
- FolkArt “Yellow Ochre”
- Craftsmart “Neon Blue”
- Citadel “Contrast Paint – Talassar Blue”
- Krylon “Matte Finish” (varnish in rattlecan)
- Testors “Dullcoat” (lacquer in rattlecan)
- E6000 epoxy

Great entry Mark, and always good to give new life to a treasured ornament. One of the things I love about this challenge, is you never know what people will enter, and adds such a diversity to the wrap up post.
LikeLiked by 3 people
Thanks Dave, happy to contribute and join the party!
LikeLiked by 2 people
Excellent, Mark! 🙂 Looks like Tabitha approves! Nice work with the jig as well!
LikeLiked by 3 people
Yeah she does John. Appreciate the kind words, the jig was actually fun to do as well.
LikeLiked by 2 people
From the title I wasn’t sure if this was going to be about the concert (hopefully not Woodstock 99 for that matter!) but I was glad to see its a really nice and wholesome project instead. Woodstock came out really nicely and you’ve more than restored him/her to their former glory I’d say!
LikeLiked by 4 people
Sad thing is I’m old enough to remember seeing the Woodstock concert in the news back in ‘69, and I had no idea that there was one in ‘99! Glad you like him (as Caesar was a dude we naturally think of him) and thanks!
LikeLiked by 3 people
You got me beat then, haha! I wonder if anyone attending had any idea that concert would be so famous that people would still know of it 53 years later!!? How crazy is that?!
LikeLiked by 3 people
What’s crazy is all those attendees (if still alive) are approaching 80…😅
LikeLiked by 1 person
An excellent bit of restoration work there Mark. The finished Woodstock looks great and I can see why it would have gone down well with Tabitha. 🙂
LikeLiked by 4 people
Cheers Dave, hope you’re hitting them straight
LikeLiked by 3 people
That is great Mark- a top restoration job.
Cheers,
Pete.
LikeLiked by 3 people
Cheers Pete
LikeLiked by 1 person
Smashing bit of restoration work Mark, and all done in your usual methodical and quality fashion!
Great post, it even had “greenstuff” in it!
Cheers Roger.
LikeLiked by 4 people
Anytime I use green stuff I’m channeling my inner Roger! Thanks pal!
LikeLike
Great restoration and lovely that Tabitha approves! I’m sure she will remember Woodstock for a long, long, long time! 😀
LikeLiked by 3 people
Thanks Faust, I hope so.
LikeLiked by 1 person
Wonderful restoration work on Woodstock, Mark! He looks well relaxed on his chair 🙂
LikeLiked by 2 people
Thanks Matt, I like him better now! How long my rehab will endure is another question though. Until then, he’ll relax!
LikeLike
Nicely done. My wife and I approve of your excellent work.
LikeLiked by 1 person
😀!
LikeLike
Aww an excellent post Mark and great work. He looks very at home hehe
LikeLiked by 1 person
Cheers buddy
LikeLike
Woody looks great and Tabitha has a discerning eye!
LikeLiked by 1 person
Excellant work, Mark! Grandchild approved is the best rating. not that I have any yet!
LikeLiked by 1 person
Thanks Harry – hope to see you at Fall In?
LikeLike
Great stuff restoring Woodstock, Mark – he looks brand new and Tabitha looks pretty chuffed with him as well! 😀
LikeLiked by 1 person
It was fun to do – thanks – nice to have a change of pace.
LikeLike
Wow Mark thats a really good make over, I’m sure Woodstock appreciated it as much as I would have, but I feel it would be a bit late to get me back to anything like my original shape!!
LikeLiked by 1 person
Pat! so nice to hear from you as you’ve been harvesting a ton of spuds I see! My guess is that all that labor is keeping you in fighting shape! Merry Christmas!
LikeLiked by 1 person
Cheers mate I have certainly slimmed down but that might change soon as it’s 7.30 am xmas morning 😃and the girls a cooking up a storm already😋.
LikeLiked by 1 person