
Back when I was at West Point, I was introduced to “Roomans” by Buck Surdu. He had a unit of them armed with pikes. He had painted them green and called them “Beaks”. He even had altered one to be armed with a sword and gave it a scratch-made airborne beret – I think that Buck still has them!
Over the years, I looked for them in hobby stores and only managed to find one package of three at Eric Fuch’s hobbies (I think in the mall at Burlington, MA – the shop long ago went out of business I believe). Ral Partha first cast these figures in 1977 as part of their “Personalities and Things That Go Bump in the Night” series as “Rooman War Party”. Originally, they were ES-44, and later 01-044. In fact, they were kangaroos (think beastmen) and did not have “beaks”, and were armed with piano wire pikes. Two of the three figures in the pack were the same with a smooth shield on the side, while the third had a riveted shield that was held in front. With the advent of eBay, occasionally I see some, but very infrequently. Sometimes I’m lucky – and have even found one ES-44 in its original packaging. Other times I find one or two in a lot mislabeled as goblins or just loose in an estate collection that I’d have to strip down. My goal was to get to 36 Roomans , and then paint them up at once.
As part of my search, I contacted Iron Winds Metals and they told me that unfortunately the old molds for the Rooman either no longer exist or cannot be found. I was able to get some of the piano wire pikes from them however which was appreciated!
So, as I cannot get them from the folks who made them, I made the decision to see if I could cast some and make my goal (these are for personal use and I have no plans to sell them although that seems to happen a lot on eBay – I wish that I could buy the originals!).
I have cast figures before with some Prince August molds back in the 1980’s. However, I was not using the right safety equipment back then to say the least (no respirator, no gloves, and heating on the gas stove in the kitchen). I did not have any way of checking the temperature of my metal, which was a mish-mash of old figures, modeling metal, fishing weights, and any lead or tin I could cobble together. My results were less than great, but acceptable – and any bad figures just got recycled into new ones.
I looked at some ways of making a mold and casting again, and some required a spin casting set up (not happening don’t have the space), vulcanizing rubber molds in my kitchen oven (I know enough to not even think to try to get my wife to go for that option), or liquid RTV (room temperature vulcanizing) rubber. The last option was a good possibility, as it came in a can and you added a catalyst. It did seem messy, and there was some discussion I saw about degassing with bubbles and that seemed problematic.
Luckily, I came upon a product called “Quick Sil” by Castaldo at a distributor known as Castings – http://miniaturemolds.com/main.sc. You mix equal amounts of two different putties and in 15 minutes it forms a hard silicone rubber. They sold me a mold-making kit (RTV Quick-Sil Starter Kit) that had the putty, a mold press, and all the items I’d need to make a mold. http://miniaturemolds.com/MAKE-YOUR-OWN-MOLD_c80.htm . They did warn of a learning curve with the product, which was true as you will see – but I do like the product.

The mold press is necessary to drive out bubbles from the rubber as it cures. It has a series of wooden blocks to create the mold shape and size that you want, with wing nuts and a cover to make a press. You can use it to make one or two-piece molds. For this Rooman project, I did need a two piece mold.

My first attempt involved trying to make one mold for three Rooman figures.
The procedure is as follows (more or less). First, you put down a blue sulfur-free clay upon which the figures and mold keys are placed. Then you mix the two parts of the Quick-Sil – which you need to get in the mold within two minutes. The Quick-Sil will be placed over the figure and the blue clay. You compress the mold in the wooden press, and let the Quick-Sil cure. Then you remove the combination from the press. The blue clay is then removed from the new mold half. You apply a releasing cream to the mold half, avoiding the figure. You then prepare a second batch of Quick-Sil, and repeat the process, ending up with a two-piece mold – theoretically.
My first try to make a mold was overly ambitious and failed, wasting a lot of Quick-Sil, but provided key learnings. This failure occurred for a few reasons. I was too concerned with overworking the Quick-Sil putties which have a two-minute working time. I ended up underworking it. Also, my first try was too thick to cure in 15 minutes in a cold mold press. I needed to make a much thinner mold, and work the two putties longer before putting into the mold press. I also needed to warm the press and the figure with a blow dryer before adding the Quick-Sil and warm the mold while it was curing. I also needed to wait 26-28 minutes for the mold to fully cure.

My second try was much better. I used just one figure, and made the mold smaller and thinner. I warmed the mold and the figure with a hand-held blow dryer before and after putting in the Quick-Sil. I also put in the keys correctly this time. These actually act as nice ways to align and shut the mold.

I flipped the mold half, and removed the blue modelling clay.

I then applied the Castaldo mold release cream on the mold avoiding the figure (Quick-Sil sticks to itself so this lets the two halves not stick together). I then repeated the process with the press. I did need to add cardboard shims to get the second mold half to the correct depth. Later on I made a third two-piece mold of the same figure. Using an Exacto knife is critical to getting the pieces out of the press.


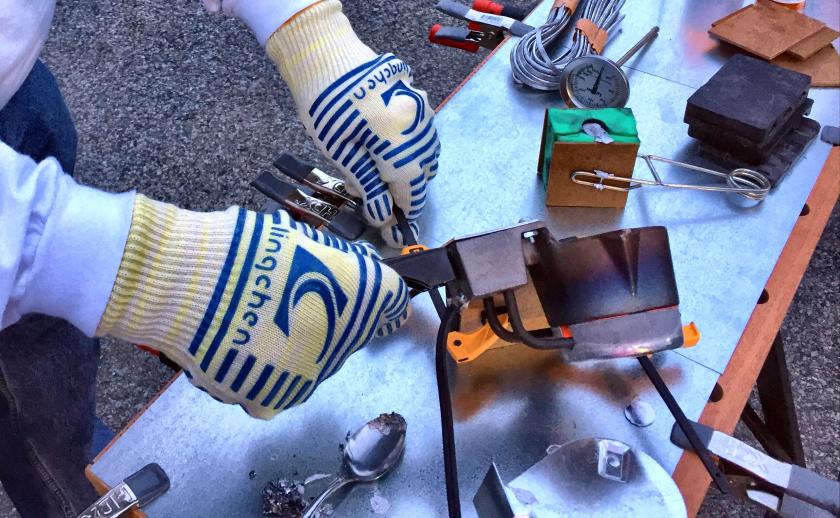
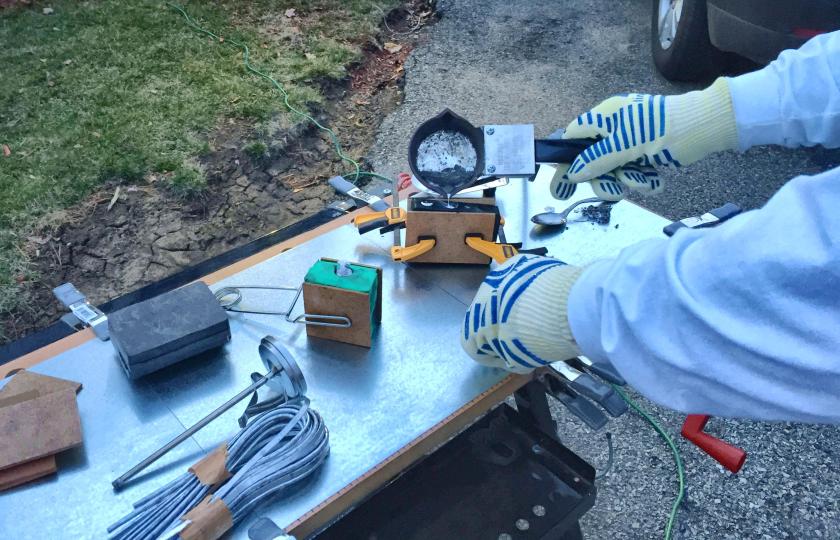
I needed to apply graphite powder to the mold interior so that the hot metal would flow properly. I got this from a locksmith in Worcester. Later on in the casting process, I would learn that its good to tap the mold with the hot metal in it to get all the mold filled. I am glad I had great heat-protective gloves, eye-protection, a respirator, long-sleeves, and pants on when I did that as hot metal flew around! My wife is glad I am outside!
Please note that I had steel sheets from Home Depot clamped to my work bench as well as a working surface. This was a big help when I casted – and a pretty inexpensive way to make a safe place to work with hot metal. I also had a Lyman thermometer to check the molten metal in my crucible as it had no temperature control except being on or off. I’d recommend this and I found that it cast well between 500° and 600° F. My metal was a combination of old broken figures plus any saved lead and tin alloyed metal I had kept since the second Reagan Administration.


I ended up needing to cut some venting gates in the molds as well for better casting. This is easy in the Quick-Sil with an Exacto knife, as the rubber cuts fairly easily. I am fairly certain that I was responsible that day for all the world’s Rooman production!

I ended up with 12 this weekend – 9 from the first mold and 3 from the second. after a while, the castings got better and easier.

I removed the plugs with a pair of cutting pliers, and now I have 12 more Roomans. I need a few more though to complete the total.

My next attempt will be with the other Rooman model, and with some Archive Miniatures Space Ducks that I found on line as well. Stay tuned. I am happy to now have a way of getting out of production miniatures when I need them. I would recommend the RTV Quick-Sil starter kit for anyone wanting to do the same.

Great article, Mark. It reminded me of making molds with my dad when I was a kid. The outcome is quite good.
LikeLiked by 1 person
Thanks Buck! I am going to keep going and I appreciate your motivating me to try making molds!
LikeLike
Looks great – glad you had safety gear this time!
LikeLiked by 1 person
Sometimes I do learn from the past!
LikeLike