

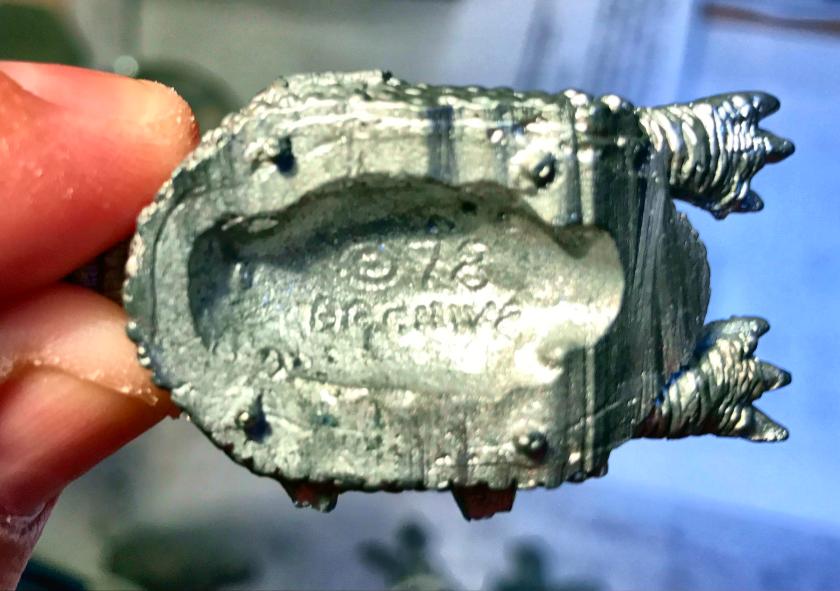
I have long been searching for the Archive Miniatures Frinx on Glyptodon (#2042) from the Star Rovers line. This three-figure kit was made in 1978, and was composed of two power-armored Frinx riding a glyptodon. So what is a glyptodon? A glyptodon is basically a prehistoric armadillo – and the size of a small car. Its a quirky kit, reminiscent of a Tusken Raider riding a Bantha in Star Wars.
At long last, my good friend Buck Surdu acquired one kit at exorbitant price on eBay. The plan was to create some Frinx recon sections for use in retro-sci-fi games using the Combat Patrol™ gaming system by recasting.


The kit itself held two glyptodon halves, two rear feet, two bridle bits, one metal reins set, one forward facing Frinx, and one Frinx facing right. Clearly, I needed to consolidate in order to effectively cast this set via gravity casting. My first decision was to abandon any idea of casting the metal reins. I wanted to use the bridle bits, and use some string or similar material for reins when I paint the kit.
The bridle bits were very small as you see below. I used a small pin vise and drilled out a place for the bits on the glyptodon. I secured the bits with super glue, then filled in around them with green stuff. I also opened the bridle bits up, for if I left them closed they would not been locked in by the Quick-Sil and would not have cast well.

The other challenge was that the original glyptodon figure was not well formed or cast. There were large seam lines and gaps on each side. My concern was that this gap would wreak havoc with molding as the Quick-Sil RTV that I use would easily expand into every crevice. It also would look lousy.


As you can see, because the glyptodon was in two pieces with a hollowed out middle, I needed to address this and the seam issue. Therefore, I decided to fill the middle and the gaps with green stuff. I then affixed the rear feet with super glue, followed by adding green stuff around the gaps there as well.


While I smoothed out the seam lines, I still had unsightly lines that would show up on every cast. I decided to use more green stuff to add a band of tiny armor plates around the base to smooth out the seams – and it worked. I thought that I should keep the figure as original as possible, so the additional plates were left as a lower band, and not over the whole figure.


I then moved on to the riders, and was surprised to see the beginnings of lead rot under their saddles. This discovery made me very happy that I was going to preserve this kit through cleaning and ultimately recasting. I did my best to clean off the oxidation with soap, water, a toothbrush, and an aqueous pewter cleaner.


I made two new mold designs – one for the glyptodon and one basic type for the two riders as shown below. The major concerns that I had with the glyptodon mold were easy flow of alloy, adequate venting, and adequate cooling with so much molten metal. With the smaller molds, I had the same, but I really just wanted great details.


All three molds worked well, with small modifications to ensure good casting. I was able to successfully cast 14 sets (42 total figures).

You can see below a comparison of the recasts and the master figure.


They are officially now in my painting queue (which has grown a bit long so I will wait to cast more figures until I have painted some). Overall, I am pleased with how they came out – please let me know your thoughts in the comments section!

You’re a bloody machine, Mark!
If you ever happen to be running off any more of these down the line, I’d love to grab a trio or perhaps even six of them for …archive purposes. I’d pay all costs of course and would not need the riders – I think I could do something cool with them for my lizardmen army.
LikeLiked by 2 people
Thanks I really appreciate that – and I just updated my blog to include a “shop” button for just that purpose! I’d need to do some calculations on costs and shipping, but that’s not a big thing. Send me an email to MarkAMorin@aol.com and we can start the process.
LikeLiked by 1 person
Will do Mark – probably this weekend. 🙂
LikeLiked by 1 person
Great work, Mark. I can’t wait to see them in person.
LikeLiked by 1 person
Thanks Buck, could not have done it without you!
LikeLike
Great quality casts! It’s very helpful to see how you work your way through the process of the mould making to casting.
I bet they weigh a bit!
LikeLiked by 1 person
Thanks, and yes they are solid! Not as heavy as my Mark 1 Sphere tanks – those are nearly 1 lb (14 ounces). I’ll have to measure these Frinx/glyptodon combos – my guess is maybe 9-10 ounces? You have me thinking so I will check! Thanks for the like and the feedback!
LikeLiked by 1 person
I had to look up the conversion to grams – wow those are heavy! How large are they?
LikeLiked by 1 person
Ok, I guess I won’t win any weight-guessing contests. The set weighs 4.5 ounces, with the glyptodon weighing in at 3.3 ounces.
LikeLiked by 1 person
Ah, not so bad then, but still solid. 🙂
LikeLiked by 1 person
Fantastic work Mark, love the figures and the additions you added to them work really well, one question haw did you mould between the feet in such a way as to make them removable from the mould once cast?
Cheers Roger.
LikeLiked by 1 person
Thanks Roger. The mold line was mid-figure. I used a small nail-removing tool (like a bent screwdriver with a slot in the middle) to bend/pull the top of the figure out and the rubber mold was pliable enough for the feet to pop right out of the mold.
LikeLike
Thanks for the info, I know they always say undercuts are a “no,no” on spin-casting, so was intrigued by this.
Cheers Roger.
LikeLiked by 1 person
Roger, not sure on that – as I gravity cast and that’s of course fraught with other challenges. The biggest is getting flow to work to replace the pressure generated by spin casting. Part of that is fixed by good mold design, and some by casting technique, such as what you do with the mold after you pour in the alloy but before the metal has cooled and hardened. Once the alloy cools, the beauty of the Quick Sil is that it is adequately pliable. I did need to open the bridle bits as they would have been locked in if left in as full rings, given that my mold line was basically along the glyptodon’s spine.
LikeLike
Yes, I see what you mean, interesting to see the differences between the two techniques, I’ve sculpted a few figures for spin-casting (not by me I hasten to add), but have never had any experience of drop casting. So thanks for this.
Cheers Roger.
LikeLiked by 1 person
I did look into spin casting, and when I saw it involved using an oven and industrial strength c-clamps to vulcanize the molds, I knew that was something I would never be able to convince my wife was a good idea! Maybe someday, but I’d need a huge workshop for that!
LikeLike
Very interesting to see your casting process. I am always taken by the weird stuff lost in time you bring back to the gaming table. The modifications you made to the models work well and I think it was a good idea to add additional scales/plating to hide the seams.
LikeLiked by 1 person
Thanks! Not sure why but that seems to be my calling. Or at least my current fixation. It’s cool to see them back on the table, and I’m hoping to try soon to paint these. Likely the seams on the originals are a result of poor QC, but I was happy to get them as they are exceedingly rare.
LikeLiked by 1 person
I can imagine. These sculpts are older than I am. I’d say the seam issue was a chance to enhance the sculpt further, so you will reap the benefits in the long run 😛
LikeLiked by 1 person
I wish I was younger than they are but oh well! I did only start getting into the hobby in 1982, and that was the year Archive went out of business. So I missed out back then, but making up for it now. The listing in Lost Mini wiki shows how great their figures were, probably ahead of their time: http://www.miniatures-workshop.com/lostminiswiki/index.php?title=Star_Rovers_%28Archive%29
LikeLiked by 1 person
Thank you for the link. The bootleg battle with Lucas Arts is very amusing. The not Star Wars stuff looks very cute. Good sculpts for the 70ies :).
LikeLiked by 1 person
Fantastic mate. You’re a very clever artist.
LikeLiked by 1 person
Thanks IRO! It was fun to bring these back.
LikeLiked by 1 person